Installing Theatre Manager
There are three components to the Theatre Manager System
- The Postgresql database server
- The Theatre Manager desktop application used by Box Office, Development, Marketing, Finance, etc for daily activities
- The Web Services (also known as the Director) that can be configured to handle various web related functions including:
- The TM Web Listener service that responds to all online patron requests.
- The Web server that passes web requests from Patrons to the TM Web Listener
 |
The installation of the database server, Theatre Manager and web sales is relatively simple and can be done in a few minutes.
The installation procedures are constantly updated with the latest instructions to implement Theatre Manager in a PCI manner. |
Achieving PCI compliance for your venue comes with how you install it on your network and other protections you put in place. These protections are mandated by PCI standards regardless of whether or not you use software in your operation. We hope that our instructions make it easy for a merchant to meet PCI DSS compliance.
 |
We have placed alerts similar to this throughout the installation documentation to signify areas of particular concern to the PCI standards council. Please pay particular attention to these alerts as they contain valuable information to assist venues meeting PCI compliance. |
The steps that follow indicate how to install and run Theatre Manager in a manner that will help you meet your PCI compliance requirements as outlined in the latest PCI quick reference guide. A venue that chooses to opt out of some of the safety and security measures in this document needs to be aware that they have chosen to bypass some aspects of the compliance required in the merchant agreement with their bank and the PCI Security Standards Council that is operated by the credit card companies.
Venues may opt out of any compliance step by signing the appropriate area. The credit card companies have placed the onus on all point of sale software providers to help merchants meet compliance (instead of the banks) and highlight areas to address.
Theatre Manager assists you in meeting PCI compliance because:
- it is audited and certified per PCI requirements by an accredited third party for your protection
- it provides the following PA-DSS installation instructions designed to help you implement your internal card practices in a safe manner
| Step | Purpose | Optional | Installation instructions or link | Who |
| 1. | Network Setup | Mandatory | Setting up network for PCI compliance | Artsman Venue |
| 2. | Installation of Postgres Server | Mandatory | Platform specific install instructions | ArtsMan |
| 3. | Installation of Theatre Manager | Mandatory | Platform specific install instructions | Venue |
| 4. | Installation of a customer database | Optional | If this is the first time that Theatre Manager is being installed at a venue, an 'empty' venue specific serialized database will be provided. It will only contain the zip code lookup table and sample code tables. | ArtsMan |
| 5. | Credit Card Authorization | Optional | Theatre Manager provides a selection of service providers for credit card authorization.
|
Venue Artsman |
| 6. | Installation of the Nginx Server | Optional | Installation of the Nginx server is platform specific if you are using web sales. | ArtsMan |
| 7. | Setup TLS certificate | Optional | If you are using web sales, you must set up an TLS certificate and configure your firewall to allow web traffic. You will need to set up a DNS record for 'tickets.yourvenue.org' rather than assigning the TLS to a static IP address. | ArtsMan |
| 8. | Upgrade of existing web pages | Optional | This step indicates the general changes to existing web pages that must be made when migrating from any version to any other version.
In addition, a venue must be aware of OWASP and should bookmark it in their browser. This site has a 'top 10' list of ongoing security considerations and standards for web site development. Arts Management reviews and implements each years suggestions annually - see this years top 10. Finally, if you accept credit cards on the internet, you may need an application firewall as per PCI requirement 6.6 and the web pages are significantly changed. We are looking at mod_security and may put that into a future release of the apache server on your behalf. |
Venue |
| 9. | Initial settings in TM | Mandatory | After Theatre Manager and the database have been installed, you will need to review minimum key standards and other security features for PCI compliance. | ArtsMan Venue |
| 10. | Remote Access | Optional | This step is a discussion on remote access and what a venue need to do if they wish to provide that for themselves, for Remote Box Offices.
There are considerations for using RDP within the network and enabling security. Arts Management uses a tool for remote remote support called teamviewer. |
ArtsMan Venue |
| 11. | Policy Manual Additions | mandatory | These are some policies that should be added to the customer service and/or security policy manual at a venue for PCI compliance. | Venue ArtsMan |
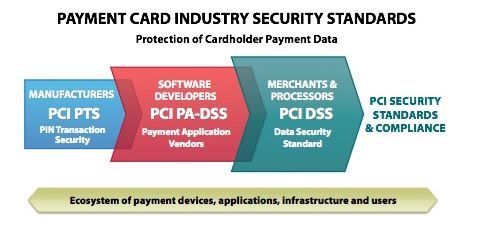
PCI Compliance
The software or hardware provided by any vendor is only a portion of the merchant's ability to meet PCI compliance. Software provided by vendors must meet the prevailing PCI PA-DSS and PCI-SSF standards to assist the merchant to meet overall PCI compliance.
|
Please familiarize yourself with the definitions of key terms used by the PCI DSS, PA-DSS, and key terms used by PCI SSF set by the Security Standards Council. Full documentation can be downloaded from the Official PCI Security Standards Council Site. |
 |
Meeting compliance requires some due diligence and is determined by the PCI compliance level guideline your organization needs to attain.
Depending on how your venue processes transactions, your venue can be Schedule 'A', 'A-EP', 'B','C', or 'D'. |
The life cycle of a standard provided by the PCI Security Standards Council is approximately every 2 to 3 years. Once approved at a standard, it is valid even though future standards are being worked on.
The following table illustrates a brief historical summary of Theatre Manager PCI compliance
| Version | Standard | Status | Action |
| 11.0 | PCI PA/DSS 3.2.1 SSF 1.1 |
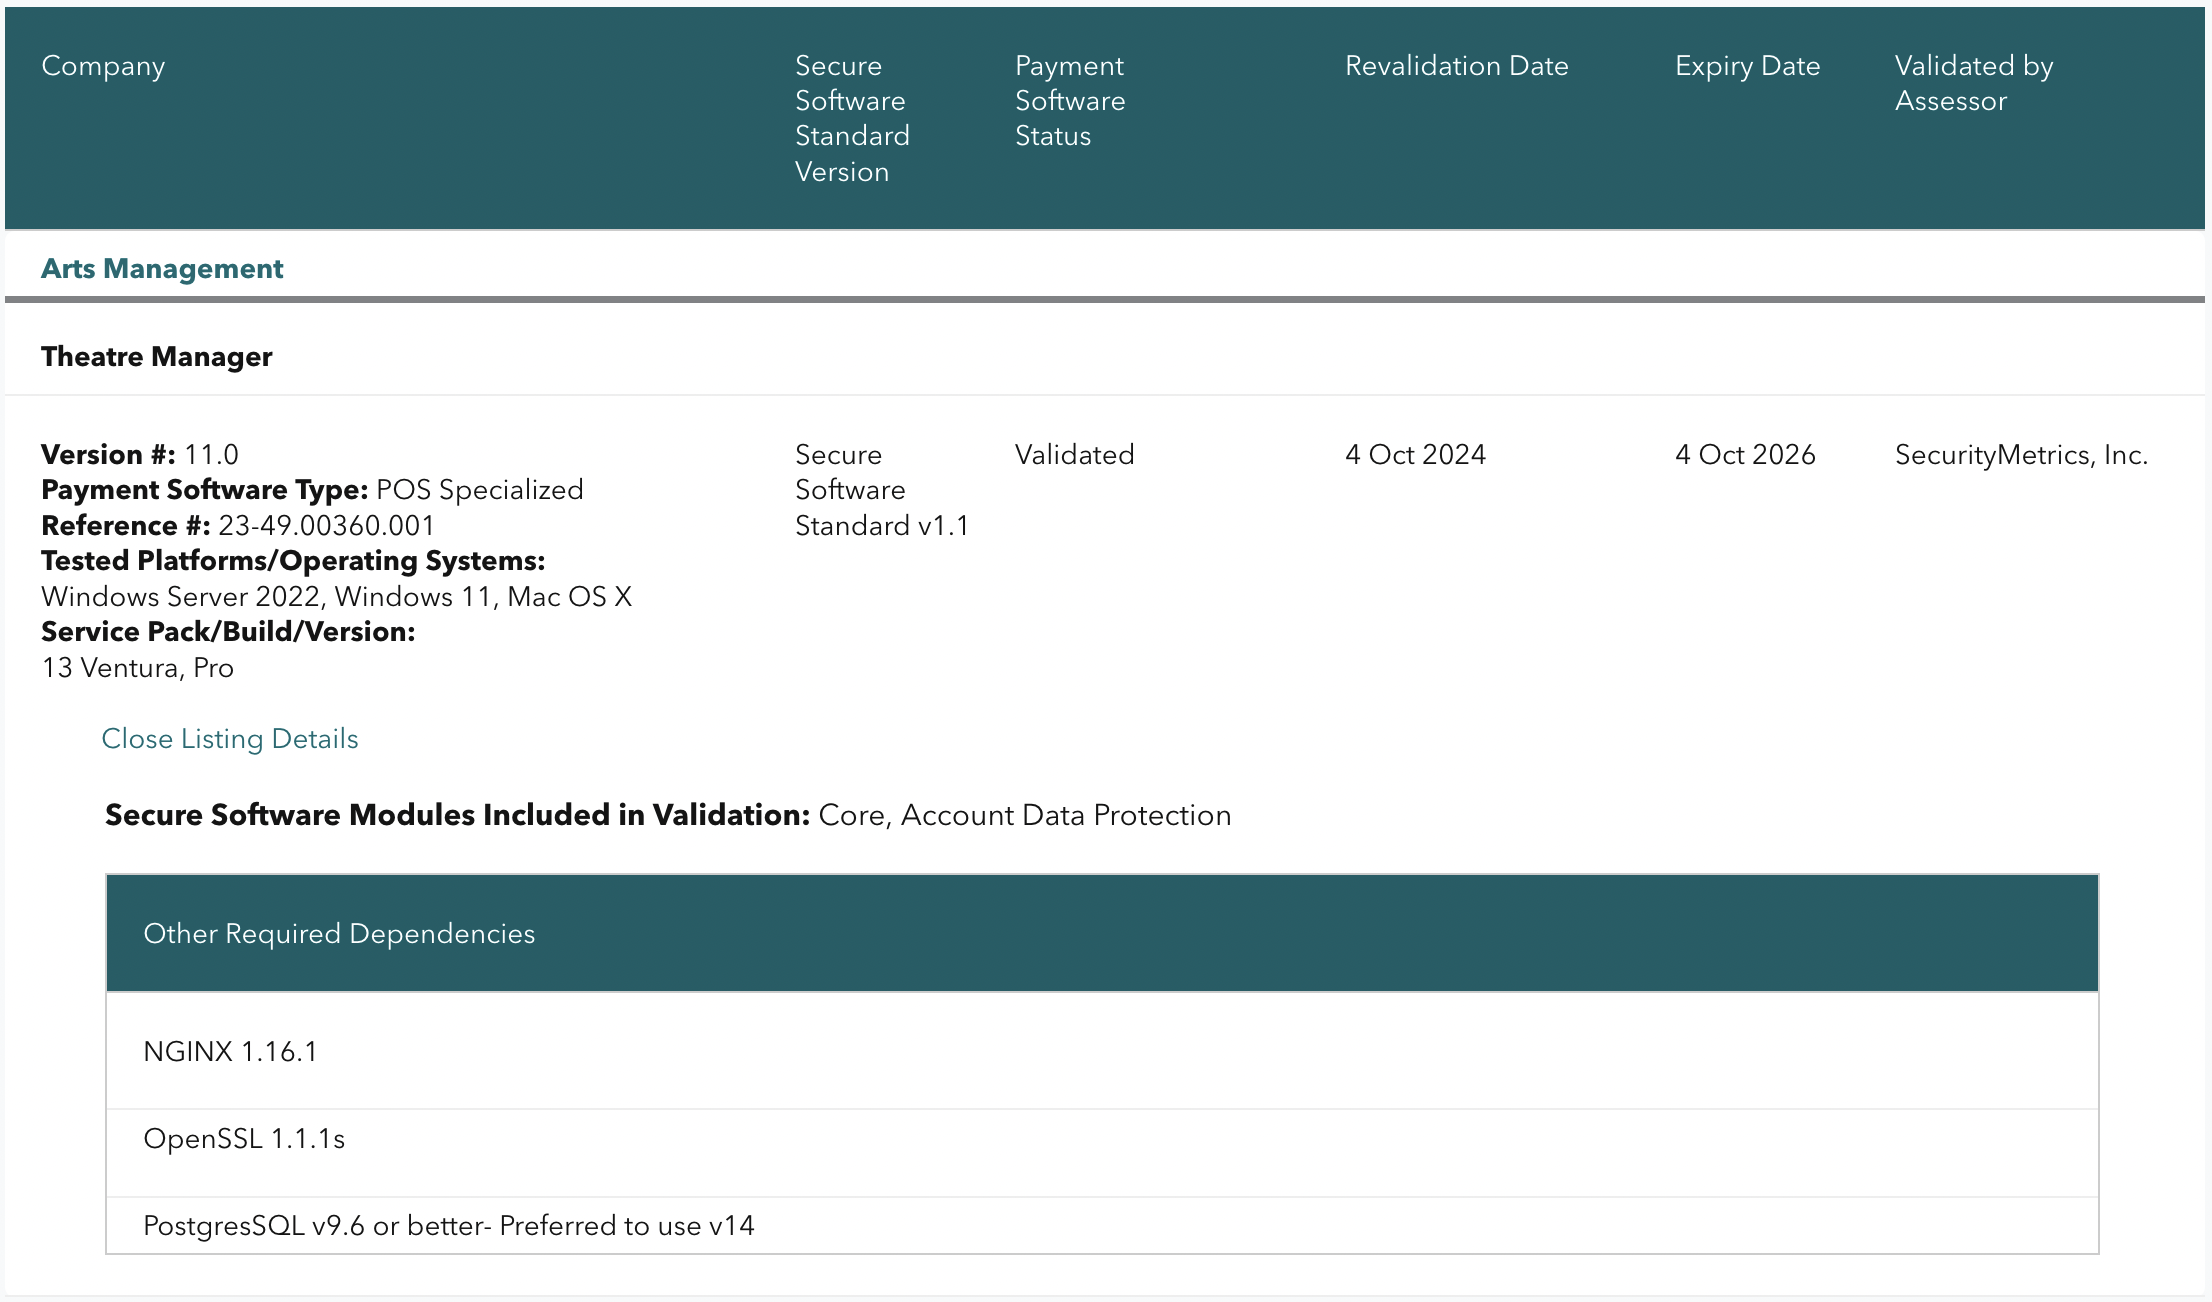
Theatre Manager version 11 has been reviewed for its PCI PA/DSS 3.2.1 audit as part of the 3 year cycle. A new audit for Secure Software Framework (SSF) 1.1 was completed at the same time. The onsite assessment audit took place November 7 - 10, 2022 and the final document was approved by the PCI Security Standard Council with an expiry date of October 4, 2026 for new installations. The image (above) is from the PCI Security Standards Council's website of validated applications. Search for Arts Management. |
All upgrade automatically occurs - no action required by venue |
| 11.0 | PCI PA/DSS 3.2.1 |
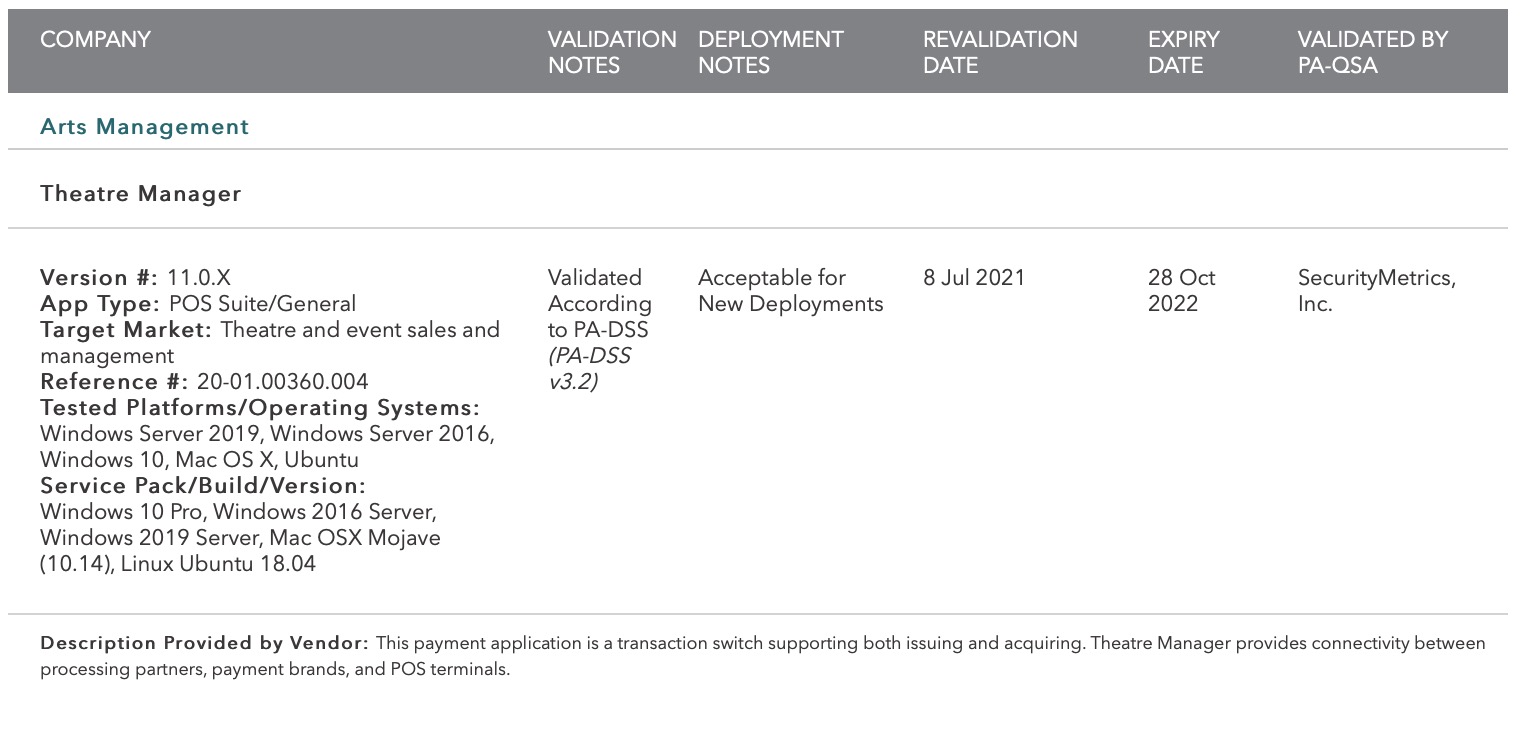 Theatre Manager version 11.0.zz has been reviewed for its PCI PA/DSS 3.2.1 audit as part of the 3 year cycle.
The audit took place in September 16 - 20, 2019 the final document was approved by the PCI Security Standards Council with an expiry date of October 28, 2022 for new installations. The image (above) is from the PCI Security Standards Council's website of validated applications. Search for Arts Management. |
Upgrade automatically occurs July 2020 |
| 10.06 | PCI PA/DSS 3.1 |
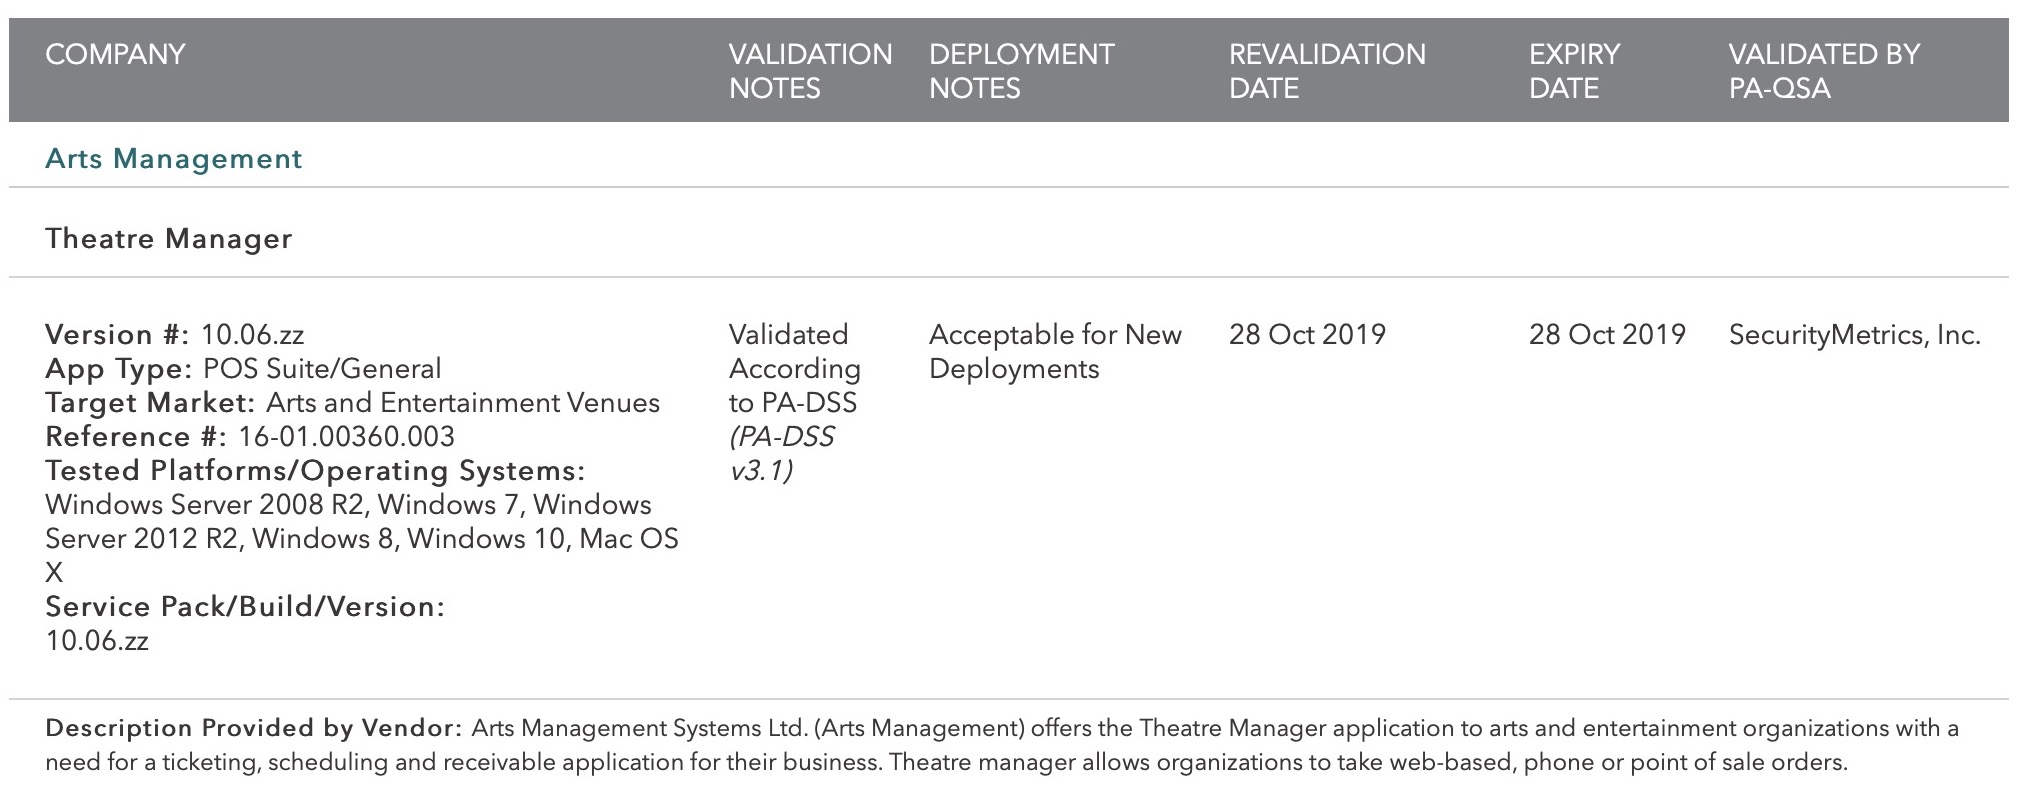 Theatre Manager version 10.06.zz has been reviewed for its PCI PA/DSS 3.1 audit as part of the 3 year cycle.
The audit took place in October 2015 the final document was approved by the PCI Security Standards Council with an expiry date of October 28, 2019 for new installations. The image (above) is from the PCI Security Standards Council's website of validated applications. Search for Arts Management. |
Upgrade October 2015 |
| 10.02 | PCI PA/DSS 2.0 | 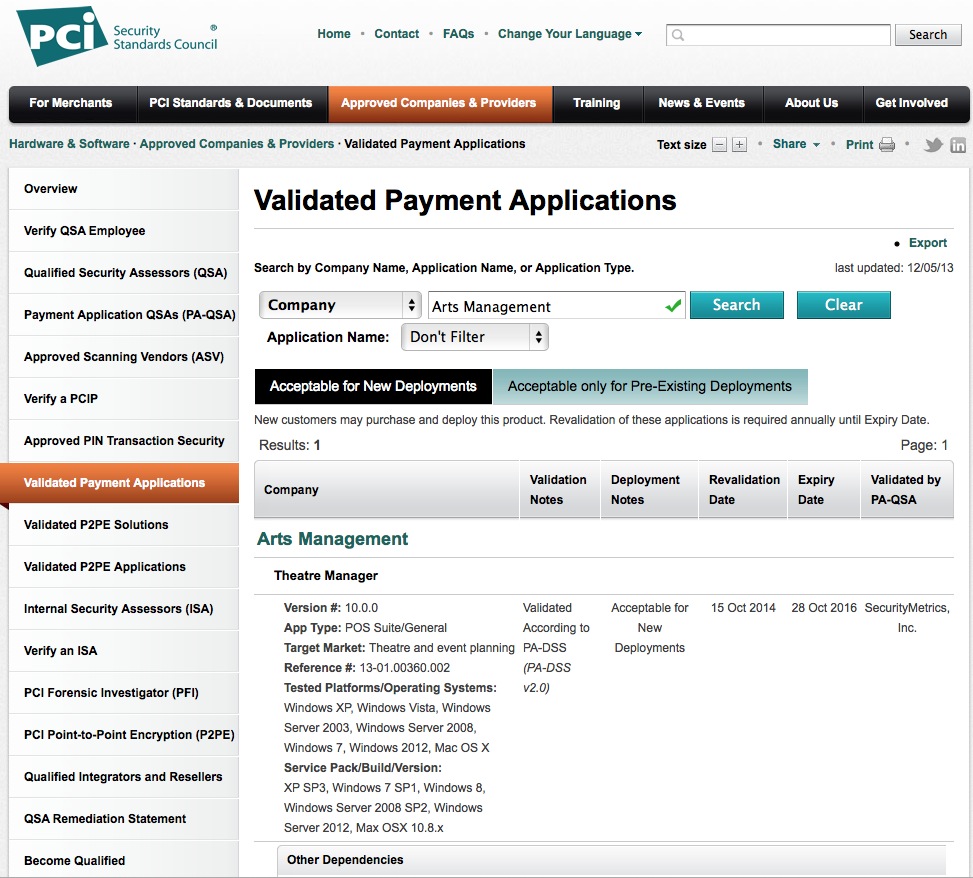 Theatre Manager version 10.02 has been reviewed for its PCI PA/DSS 2.0 audit as part of the annual change cycle.
The audit took place in October 2014 the final document was approved by the PCI Security Standards Council. |
Upgrade October 2014 |
| 10.00 | PCI PA/DSS 2.0 |
Theatre Manager version 10 has been reviewed for its PCI PA/DSS 2.0 audit as part of the 3 year cycle.
The audit took place in July 2013 the final document was approved by the PCI Security Standards Council in October 2013. The image to the left is from the PCI Security Standards Council's website of validated applications. Search for Arts Management. |
Upgrade October 2013 |
| 9 | PCI PA/DSS 1.2 | 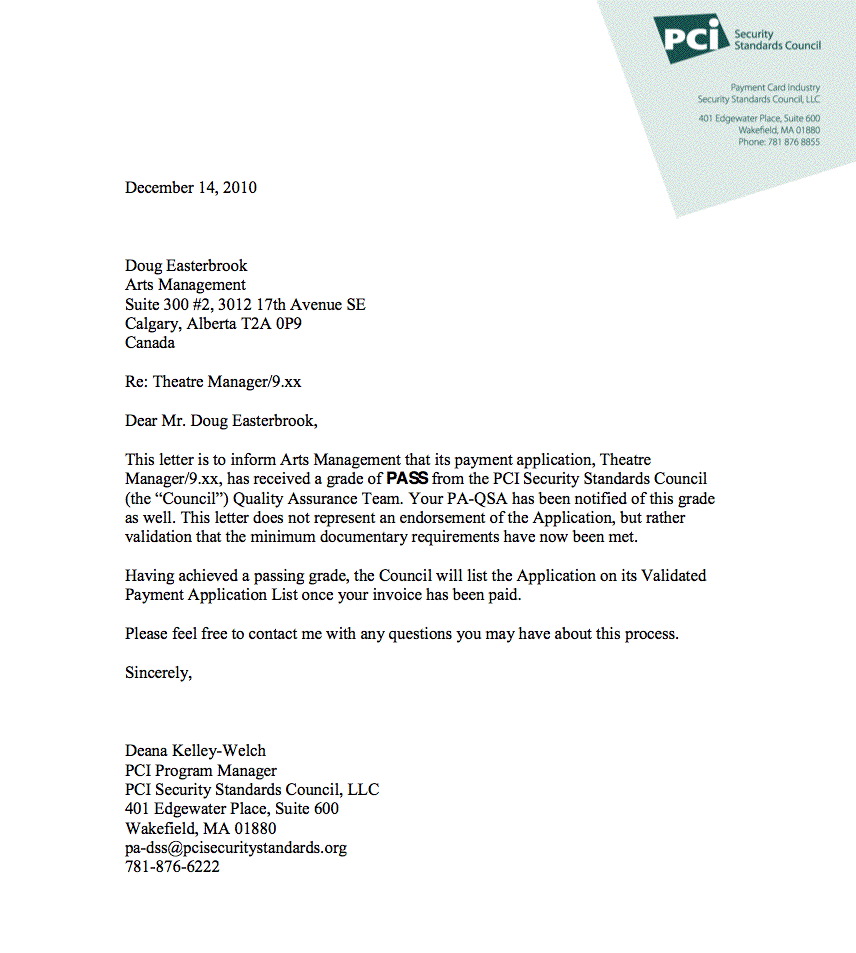 Theatre Manager meets the PCI PA/DSS 1.2 standard and approved by the PCI Security Standards Council in December 2010. Theatre Manager meets the PCI PA/DSS 1.2 standard and approved by the PCI Security Standards Council in December 2010. |
Upgrade to version 9 ASAP |
| 8 | PABP 1.4 | Theatre Manager meets the PABP 1.4 standard and was certified in October 2008. Please refer to our certificate and approval by Visa - page 6. | Install 2008 |
| 7 | **Self Assessed in 2006 | Theatre Manager implements the standards required of PABP 1.4 (as of 2006), including 3DES high encryption of cards, and does not store any track II or CVV2 information. However, this version is neither audited nor certified by an external vendor (not a requirement from the PCI Security Standards Council at the time). Version 7 has the same security measures as version 8 and was simply renamed version 8 as part of the audit. | CD's Sent |
| 6 | **Self Assessed in 2003 | Theatre Manager implements almost all PCI security features in effect at the time (early 2000's). Card encryption is DES and it does not track CVV2 information. Version 6 can be considered PCI compliant. | Diskettes Sent |
** Please note: PCI requirements have changed over the years. At one time, the PCI Security Standards Council required that vendors of software 'self assess' that they have followed the guidelines. At Arts Management, we have always taken card security and privacy of information seriously and implemented many PCI features before there were published rules. That is why we felt able to meet the self assessment criteria in force at the time. However, there is a much greater need for security than ever before and we encourage merchants to fulfill their obligations to merchant agreements and upgrade to the 'certified' versions of Theatre Manager - which have been audited by external companies as meeting all the rules in effect at the time of the audit.
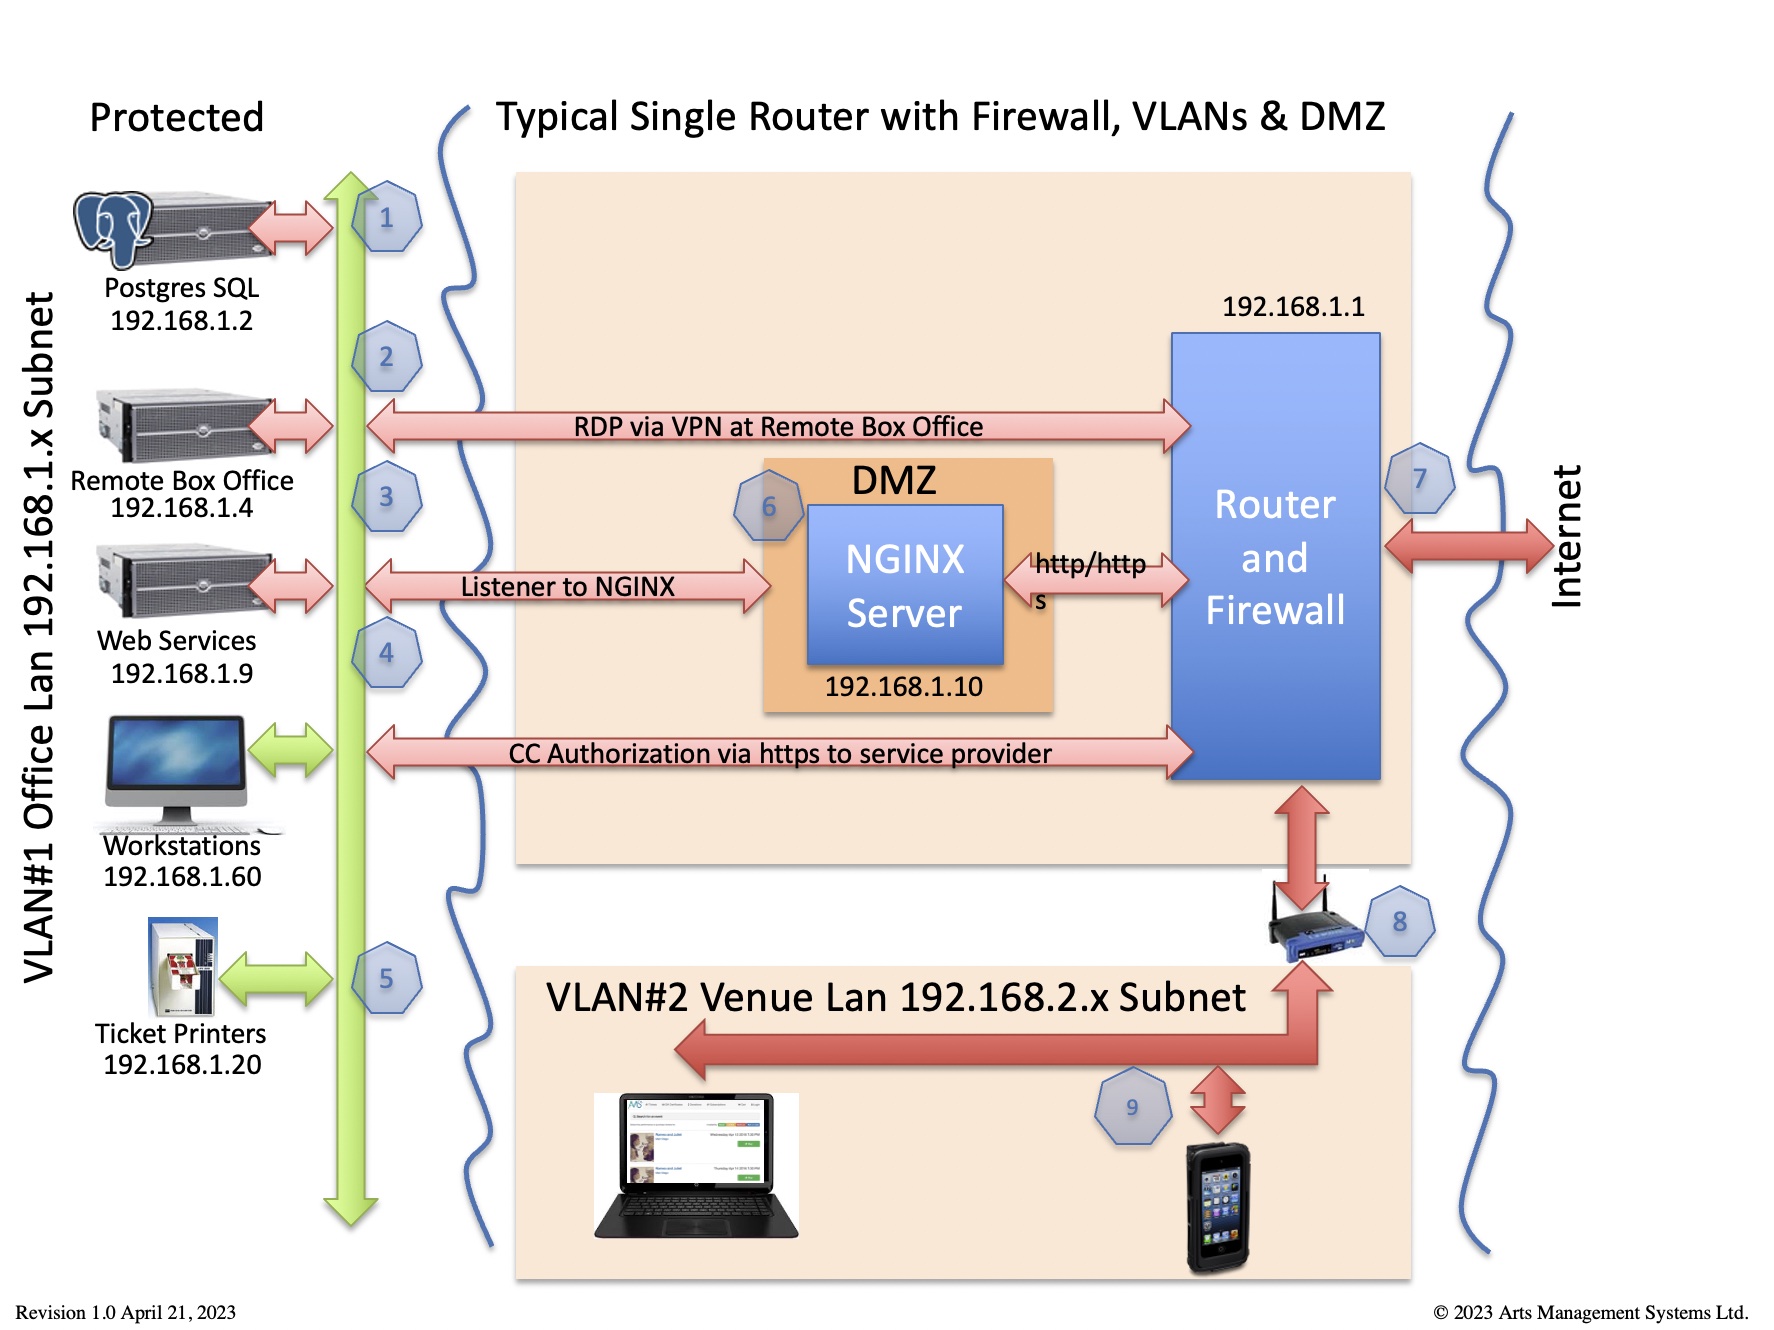
Network Diagram for PCI Compliance
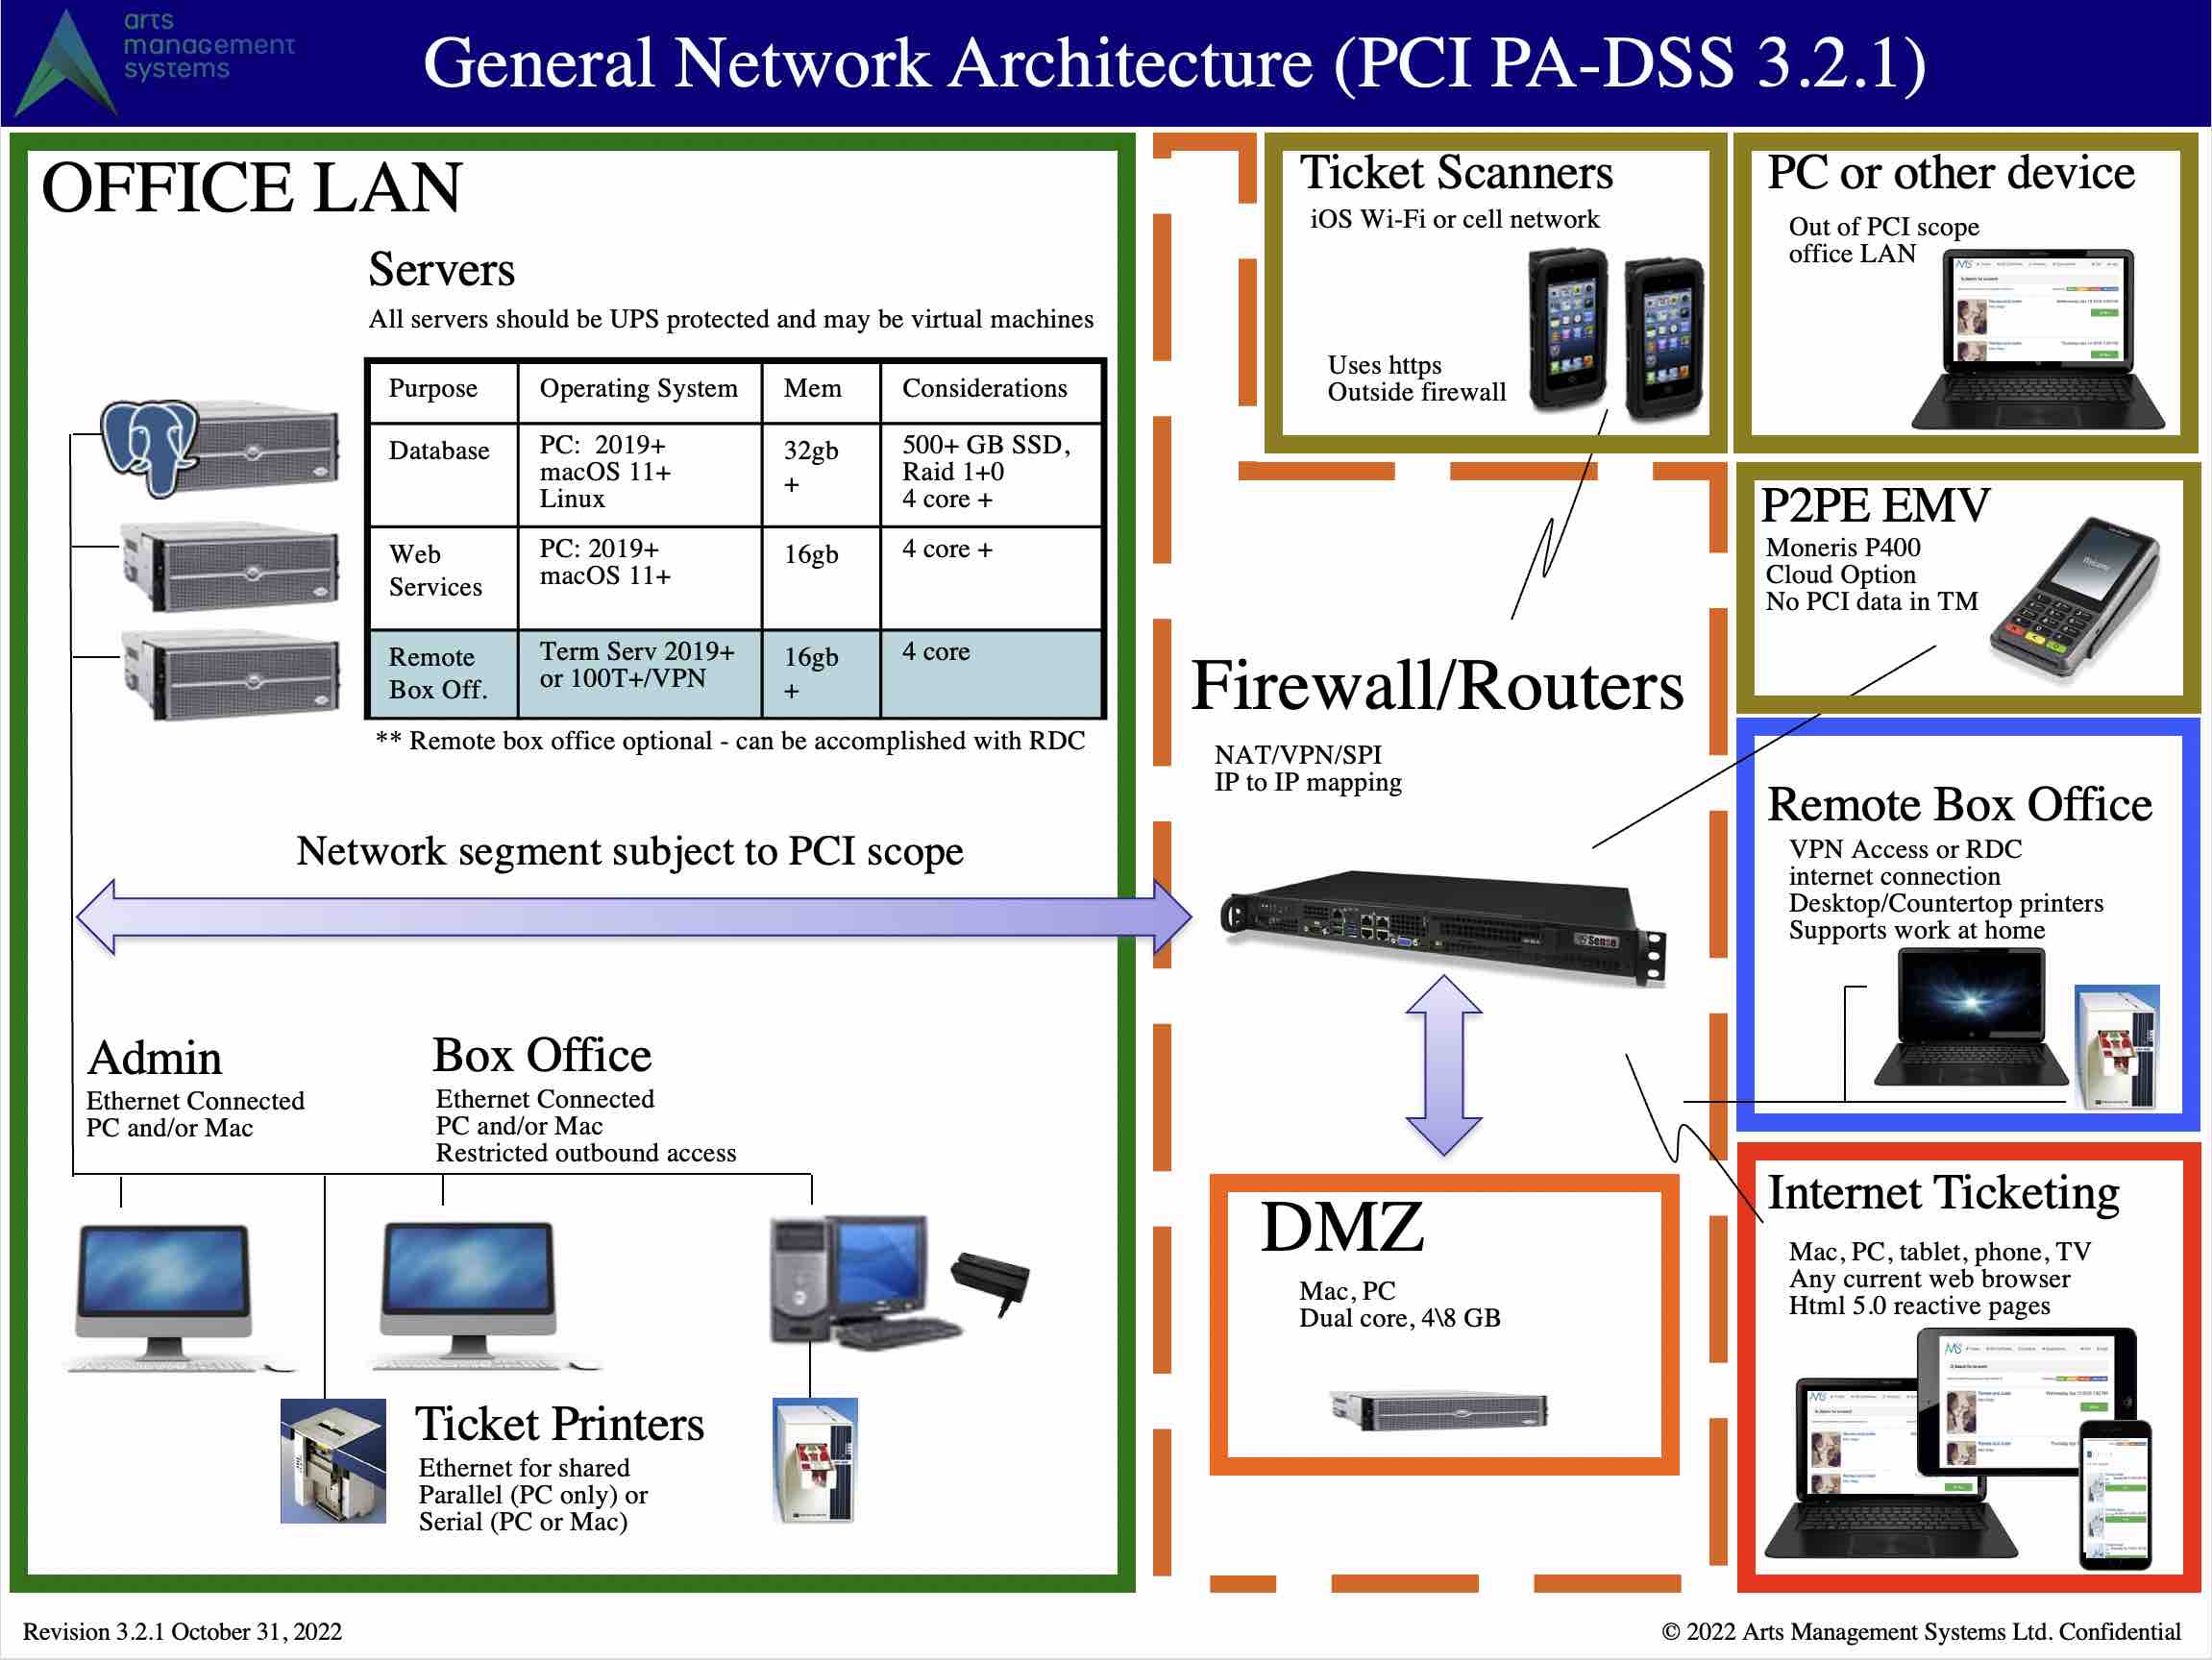
Feel free to print this setup document. If any part of the network setup cannot be made to comply with the diagram, you will need to address that at a later date to become PCI compliant. Some sample machine requirements are in the table in the picture, or you can view descriptive information on sample computer specs (Click to enlarge as a pdf)
PCI compliance requirements for Credit Card authorization
Overview
There are 7 parts to the basic network in the diagram above that are described in more detail in the following sections. The firewall is the glue that connects them all together, yet protects each part from the other (also see firewall rules). Only 4 parts are in PCI scope, the others are simply illustrations of how customers, volunteers, actors and other devices interact with your network.
In PCI Scope (inside the firewall) if they touch credit card info:
- The main firewall
- the DMZ - contains only the Apache server and restricts what can be accessed from the internet.
- OFFICE Lan - all wired devices in the office. Computers that access any Credit Card information should always be hardwired, or access via a secure VPN
- Remote box office
Out of PCI Scope
- You can exclude ranges of workstations if you've told TM that they cannot process cards by creating a subnet mask that focuses on only those that can in the System Preferences->PCI Tab
- You can exclude the database server if you set TM to be PCI Schedule 'C' compliance in the System Preferences->PCI Tab and sue P2PE decides and hosted payments for online.
- Outside the firewall - basically the internet and customers purchasing online
- VENUE Lan - any staff, volunteers, or actors using wired or wireless devices and who are not capable of processing or looking at credit cards.
- Ticket scanners used at the venue
- P2PE devices like Moneris P400 which do not share PCI related data with Theatre Manager. Theatre Manager simply activates the P2PE device, which is outside PCI scope as there is no direct connection to the device from Theatre Manager.
|
If you are attempting to meet Schedule 'C' compliance for Theatre Manager, the database and a number of workstations can be taken out of scope. Credit cards will never pass through the database and most workstations can be denied the ability to process cards. Doing this effectively limits PCI scope to very few machines. |
|
You can also whitelist computers or blacklist a network segment to prevent any computer from taking credit cards -- which also takes it out of scope as credit cards never pass through the user workstation. |
|
The diagram shows servers as separate machines per PCI requirement 2.2.1. This can be implemented either as physical or virtual machines to achieve the goal of one primary function per server to mitigate security level differences in the purpose of the machine. |
AMS Private Cloud Diagram for PCI A, B, or C
AMS cloud allows a merchant to target the possible compliance levels to Schedule 'A', 'B', or 'C'. Since most venues have face-to-face or phone orders, the default is Schedule 'C' but you may wish to reduce the number of machines in scope to the minimum. If can take all machine out of scope in the office environment using dial up or IP pinpads, you may be able to achieve Schedule 'B' (very much dependent on your bank).
Possibilities for PCI compliance
- Schedule A for merchants using only e-commerce transactions and Moneris Hosted Payment Page. All e-commerce authorizations occur at Moneris, and card data never enters the network
- Schedule B Merchants using only: Imprint machines with no electronic cardholder data storage; and/or Standalone, dial-out terminals with no electronic cardholder data storage. Not applicable to e-commerce channels
- Schedule B-IP for Merchants using only standalone, PTS-approved payment terminals with an IP connection to the payment processor, with no electronic cardholder data storage (Moneris P400). Not applicable to e-commerce channels.
- Schedule 'C' Merchants with payment application systems connected to the Internet, no electronic cardholder data storage. Not applicable to e-commerce channels. All Merchant Providers
- Schedule 'A-EP' Merchants using hosted payments for web sales like Moneris
|
Even if you take all machines out of scope and use only dial up or IP terminals, if you are part of a large university or municipality, your Bank may force you to be schedule 'D'. This can happen if the Bank chooses to consider all your other merchant activities outside the venue (eg bookstore, admissions, dog tag sales, etc as part of the overall business). One way around that might be e-commerce and Moneris hosted payment page. |
PCI Scope Diagram - AMS Cloud
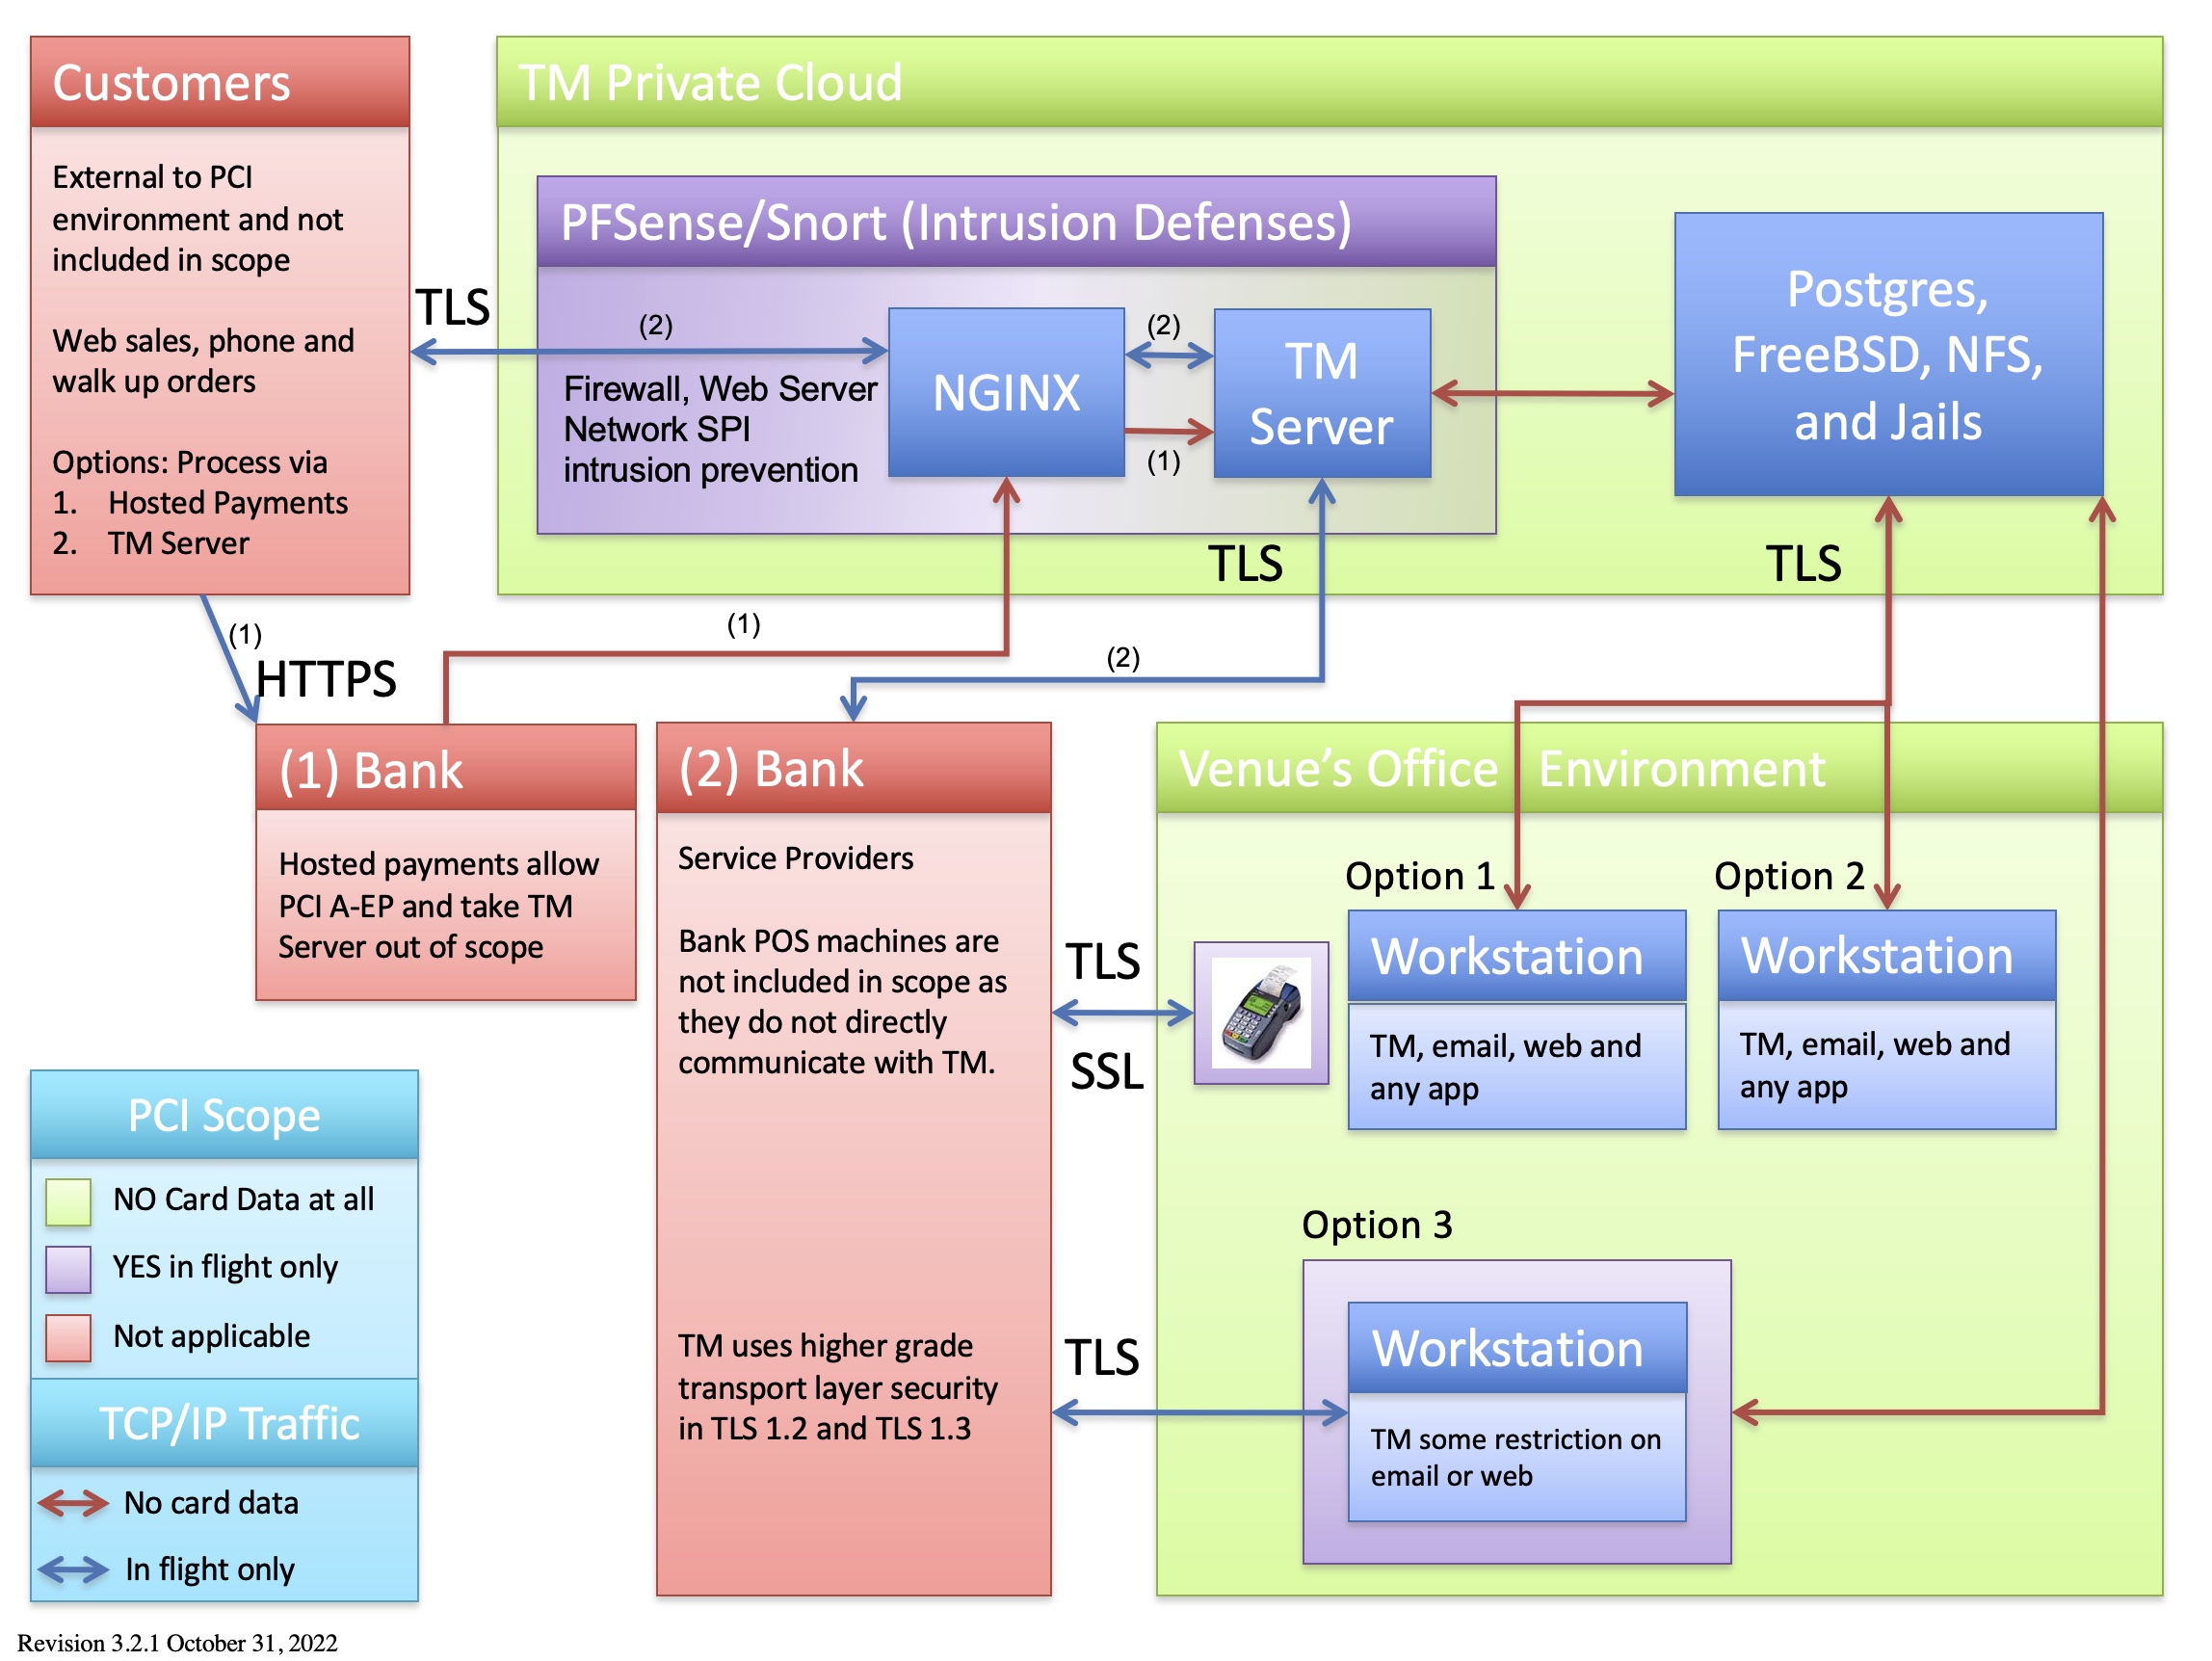
The legend shows machines and network segments:
- Organizational Areas:
- that will never see credit cards (GREEN)
- where a credit card passes through the machine while in flight to the bank during an authorization and is immediately gone (PURPLE). Cards in these zones are:
- transmitted via TLS 1.2 and higher, and
- live for an instant in time, and
- are NEVER stored in a database.
- where the card data is outside the boundaries of the organization. Examples are in the customer's hands (or wallet) or at your bank or service provider (who are required to perform their own PCI compliance) (RED)
- TCP/IP Traffic
- RED ARROWS - traffic where there is absolutely NO card data ever transmitted
- BLUE ARROWS - traffic where card data travels (encrypted and via TLS) while it is IN FLIGHT for an authorization. This means that a message is sent for credit card authorization and the card resides only in memory (and is never stored in any disk file)
Components
Local Workstations
There are three options for workstations within a venue's physical environment.
| Option | Goal | Steps | Pro | Possible PCI Levels |
| 1 | WORKSTATION OUT OF SCOPE and use a POS pin pad device
This takes a workstation out of PCI scope and allows the workstation to use any software on it that can reach the internet (eg email and web browsing). Credit Card authorization is via a P2PE pin-pad using
|
|
|
'B' 'B-IP' 'C' |
| 2 | WORKSTATION OUT OF SCOPE and no credit card authorization at all
This option should definitely be used for all non-box office computers or computers used primarily for setup, reporting, and analysis. |
|
|
'B' |
| 3 | DEFINED WORKSTATIONS IN SCOPE The workstation is defined as one of those that may accept credit cards entered into the system so that it does |
|
|
'C' |
| 4 | TM Servers NGINX and TM Server can be in or out of scope depending on processor choices |
To take the servers out of scope, you will need a merchant provider for Moneris Hosted Payment Page. The advantages are no data enters the network and you can be PCI A compliant. Disadvantages come with the inability to use post dated payments, and perhaps processing refunds. |
Under Moneris hosted payment page processing, TM does not see any card data - just the authorization, allowing for PCI A.
Hosted payments do not support the feature of post dated payments online. |
'C' or 'A' |
AMS Private Cloud
Credit card data can never be stored on the AMS Cloud, taking the database server out of scope.
Credit card data can pass through the firewalls and security appliances on the way to your Service Provider for authorization. It is transferred via TLS 1.2 and is subject to SPI (Stateful Packet Inspection), DOS detection, rate limitation, etc. to ensure security and privacy.
Bank/Service Provider
This is the merchant provider you selected out of those supported by Theatre Manager. The bank is not in scope of your PCI compliance requirements.
Risk Profile
Theatre Manager, the AMS Cloud, and POS terminals offer a very low PCI risk profile (almost negligible) for the following reasons:
- Card data never enters your network - no risk
- Cards are authorized using standalone pin pad terminals sold by the bank. This represents a negligible risk as only the physical device, sold and certified by the bank, could ever be compromised. Even if it were, it is not part of your network and has no communication with TM
- Card data is never stored on disk. Having no card data in the database means no risk and no PCI exposure even if the entire database was given into the wrong hands. There simply is no card data in it.
- Card data is transmitted from the user to the bank via TLS 1.2 (transport layer security) which is the highest form of security for sending data on the web.
- Card data lives on the AMS network only for that instant in time needed to get to the service provider. TLS 1.2 cannot be sniffed by bad guys - very low risk
- The TLS certificate can be reissued as often as you want to ensure that your key strings are secure. Google signaled intent to re-sign certificates every few months as additional cautions for commerce.
Main Firewall
We only recommend a router/firewall that has the ability to isolate the apache computer (i.e. designate an ip address for the DMZ).
|
Your firewall need to restrict connections between untrusted networks and any system components in the card holder environment PCI requirement 1.2.
|
|
When you need to set up firewalls on computers, the built in firewall on windows is very flexible. On macOS, do not manage the built in firewall via System Preferences on servers - instead, consider using a tool like Murus Firewall to unlock the power of the macOS PF Firewall. |
Firewall/Router Rules
|
This diagram identifies which traffic is required for Theatre Manager to work in the card holder environment per PCI requirement 1.2.1
Any traffic not required should be denied - and the router should be set to 'deny all' unless explicit permission is given. | ||||
|
All traffic is TLS 1.2 or better, including to and from:
|
|
|
If you prefer to view the firewall rules from the perspective of specific ports, please refer to ports used by Theatre Manager
| Item | Machine and Purpose | Subject to PCI | Virus S/W | Inbound Port Rules | Outbound Port Rules |
| 1 | PostgreSQL server
database |
depends | no* |
|
|
| 2 | Remote Box Office via VPN (or terminal server) |
yes | yes* |
|
|
| 3 | Web Services (TM Listener) | yes | no* |
|
|
| 4 | Box Office Workstations | yes | yes* |
|
|
| 5 | Ticket Printer | no | n/a |
|
|
| 6 | Web Server (NGINX) | yes | yes* |
|
|
| 7 | Outside of Firewall | no | n/a |
|
|
| 8 | Internal Wireless Router | no | n/a |
|
|
| 9 | Venue Lan
computers not handling credit cards |
no | yes |
|
|
| 10 | wireless ticket scanners | no | n/a |
|
Ports used by Theatre Manager
- ports 80 & 443 externally for web sales.
- Outgoing port 443 for credit card authorizations
- port 37 for a time server
- port 53 for MX record lookup via a DNS server
If you prefer to view the firewall rules from the perspective of specific machines, please refer to ports used by each machine
| Port | Meaning | Use | Security Note | ||
| 25 (or 465 or 587) | SMTP | Outgoing | TM Server uses this for email for web sales, eblasts and meeting scheduling. note: Workstations do not send emails and do not require access to SMTP server.
Alternate SMTP ports can be used as TM supports (startTLS and other security) You may wish to place a small SMTP server (like Exchange) within your network so that TM talks to it and allow it to relay to the internet. This also controls outgoing access. |
||
| 37 | NTP Time Server | Outgoing | OSX and Windows machines use this to syncronize clocks. All machines should be able to synchronize with an NTP server so that transactions and audit logs are accurately recorded when the happen per PCI 10.4 compliance | ||
| 53 | DNS and MX lookup. | Outgoing | This is used to verify email and web domains during the data entry process to improve data quality | ||
| 80 | HTTP | Incoming and Outgoing | Incoming is only required to the Web server.
Outgoing for workstations to communicate to:
|
||
| 443 | HTTPS | Incoming and Outgoing | Incoming is required for web sales.
Outgoing is required for TM Server and TM Workstations for
|
||
| 110 (or 993) | POP3 | Outgoing | Facility Management module only: TM has a scheduling function that lets users set up calendar event and send the invitations to users, patrons and volunteers.
The port is used by TM workstation and Server, and only email with valid outlook or iCal attachements are read. All others are discarded. No user checks this email address. Theatre Manager supports alternate POP3 ports if you prefer. |
||
| 5000 | Web Services | Internal | The Web Server load balancer communicates to Theatre Manager Web Services on port 5000 | ||
| 8111 | Web Template Server | Internal | This internal port on the web server is a Virtual host used by web services to obtain the custom web page templates from the htdocs folder for merging. It is also used by workstations to obtain web page templates used to send double out-in confirmations as per CASL (Canada's Anti Spam Law). | ||
| 8201 | Cache Server | Internal | This internal port is used for caching data shared between web service processes. | ||
| 5432 | Postgres | Internal | This is the standard port for the Postgres database server and is only used within the LAN. Postgres's pg_hba.conf configuration file specifies the IP address ranges (or specfic IP's) that can communicate with the database server. If a machine is not permitted to talk, postgres will does not respond.
Traffic from workstations to Postgres is via TLS 1.2 |
||
| 10001 | Ticket Printer | Internal | Workstations send a string of characters to print a ticket. The printer responds with status requests as need be.
No outside machine needs access to a ticket printer. |
||
| xxxx | Terminal Server & Remote Access | Incoming | A secure connection from the remote box office to the firewall is recommended for security purposes. RDC and Terminal Services establish secure connections. VPN is additional security. |
PostgreSQL Server
Only this port needs to be open on this server. All other inbound ports can be closed in the operating system. The port can be changed by editing the Postgresql.conf file, or during the install.
Misc Recommendations
- File and email services for the network must be placed on a separate machine from the database server.
- Turn off windows auto updater. Instead, perform regular maintenance at a time of your choosing (every second Monday for example, more often if the news reports critical viruses) to download and install updates. For 24/7 web sales service, it is important that the Postgresql server run constantly and only be updated at a time of your choosing.
- On OSX, turn off Software Update and run regular maintenance every second week, similar to Windows Environment. There is far less risk on unix based systems for virus attack vectors.
|
Deploy anti-virus software on all systems commonly affected by malicious software, particularly personal computers and file servers. PCI requirement 5.1 |
|
Since postgres is implemented on a stand alone machine (per PCI requirement 2.2.1), we recommend that you DO NOT install virus software on the PostgreSQL Server. If you must, then do it under very controlled circumstances.. Never allow the virus scanner to scan the actual postgres database directories for traffic because virus scanners severely affect performance when many files are changed rapidly (as in a stand alone database server). If you absolutely must scan all files, scan the database folder at very off peak hours. |
TM Listener - Web Services
In all cases, you specify the ports to talk to listeners within the TM Director interface.
Simple Setup for Load Balancing
In the simple setup situation, you just need to open port 5000 to each TM listener. When any message is received by the second gen listener externally on port 5000, it load balances internally on ports local to the machine (5001-5010, 5111, 5201-5210).
Each second generation listener machine needs to be able to talk to the designated TM Web Listener machine to retrieve web pages.
Custom Setup for Load Balancing
In the custom setup, the web processes can listen on
- Second Generation Listener:
- port 5000 (like the simple setup for load balancing) -or-
- ports 5001-500x where you specify the load balancing on the TM Web server for high performance throughput -or-
|
Deploy anti-virus software on all systems commonly affected by malicious software, particularly personal computers and servers PCI requirement 5.1
You can install anti virus software on the TM Server - but may need to exclude the TheatreManagerServer program directory and all traffic to port 5432 on the postgres server. Since the web services run as a service, there is limited need to log into the machine. It should not be used for any other purpose and listens only to the API's from the TM server, so you may only need periodic file scanning at night if you do not join a domain and/or limit people who can access it. |
Venue LAN
|
Machines in your office that generally do not need access to Theatre Manager can be in a separate VLAN so that they do not accidentally compromise credit card data. Rules should be put in place so that these VLANs cannot talk to the servers in the Office VLAN per PCI requirement 1.2.3
It may be a good practice to have one or more VLANs beside the primary office network, especially if you have wireless access points, public WI-FI in your lobby, green room access for Actors, etc. (per the network diagram). Separating those kinds of users from the office LAN is beneficial from a security and bandwidth management point of view. Network segments not dealing with cardholder information are not subject to PCI rules (although it's a good idea to protect them too!). |
|
Theatre Manager does not require use of wireless networks to operate.
However, if you do require that some computers access cardholder data over a wireless network, you must use strong encryption technology for authentication and transmission of data such as hidden SSID, specified MAC addresses, and WPA2 or better on a separate VLAN than other wireless access points and change vendor supplied passwords per PCI requirement 2.1.1. You must never transmit card information over a network with WEP encryption per PCI requirement 4.1.1. |
Office LAN
|
The office LAN should be set up to isolate computers that may access credit cards from other general purpose machines. These machines should be hardwired to ethernet hubs and routers. Generally, this just means putting it on a different VLAN than the rest of the office to provide maximum cardholder security PCI requirement 1.2.1.
For example, if there is an area that provides free wireless in the lobby or access to the internet for actors in the green room. Those access points should be part of the 'Venue Lan' and not part of the 'Office Lan' (per the network diagram) to separate the segment of the network containing credit cards (office) from wireless part of the network.
|
|
You should not be able to access the internet from the database server or any machine that contains credit card information except as required to authorize the card or update system components. PCI requirement 1.3.2 to 1.3.5
Ports that should be open are defined in the section about firewall rules |
|
When you need to set up firewalls on computers, the built-in firewall on windows is very flexible. On macOS, do not manage the built-in firewall via System Preferences on servers - instead, consider using a tool like Murus Firewall to unlock the power of the macOS PF firewall. |
This section describes the components of the Office LAN.
Box Office Admin Computers
- those where credit card data is typed or entered into the system (with or without credit card swipes)
- and those computer where credit card information is not typed into the machine.
Computers accepting Credit Card Data
These are especially prevalent on PC's and if a computer were to become infected, this type of virus scans keystrokes at the computer and sends those key strokes to the 'bad guys' outside the network. Preventing this involves closing most ports and providing very limited access to the outside world, especially for mail and web browsing.
For this reason, on those computers, you should:
- Close down all outgoing ports except those specified in firewall rules for workstations.
- Disallow general internet access via the web browser to prevent the most common source of infection. You can allow people to access help.theatremanager.com for online help.
- install virus protection software on these machines and regularly run it and update the software. There are a number of good alternatives from freeware like Avast! to Symantec (our least favourite)
|
Deploy anti-virus software on all systems commonly affected by malicious software, particularly personal computers and servers. PCI requirement 5.1
If these computers are using Theatre Manager, you may need to exclude the 'Theatre Manager' program files directory, depending on your virus software. Exclude all network traffic to port 5432 on postgres server. |
Computers that do not accept Credit Card Information
|
Machines that are not entering credit card numbers may have general internet access. You can ensure that these workstations cannot enter cards into Theatre Manager by setting up specific workstations or network segments that can accept payments and excluding these workstations. |
If those computers are on the same network segment as the machines accepting card numbers then they fall into the scope of a PCI assessment for the venue. This means those machines would need all of the anti-virus and anti-malware software as well as file integrity monitoring, log management, access control, etc. just like the machines that accept the cards.
To reduce the scope of the venue's PCI assessment needs, the venue should consider placing those machines (back office or manager machines usually) on a separate network segment with just the necessary ports between them and the cardholder data network open. Refer to the network diagram and firewall rules to separate the computers with card access from those without onto separate VLAN's within your network.
|
Deploy anti-virus software on all systems commonly affected by malicious software (particularly personal computers and servers) PCI requirement 5.1
If these computers are using Theatre Manager, you may need to exclude the 'Theatre Manager' program files directory, depending on your virus software. Exclude all network traffic to port 5432 on postgres server. |
Wireless Access Points
|
Theatre Manager does not require use of any wireless network for operation as all workstations and servers are to be connected via ethernet cabling.
Since many venues use wireless networks in the lobby for customers and green rooms for actor, or volunteer use, it is important to ensure that wireless routers are separated from the cardholder network and are on their own VLAN and all default settings are changed from factory. PCI requirement 1.2.3 and PCI requirement 2.1.1 |
|
The following must also be changed every time somebody with knowledge of the security changes positions or leaves the company. PCI requirement 4.1.1 |
Configuration of these should include:
- Turn off all SSID broadcasting
- Enter the MAC addresses (00:00:xx:xx:xx:xx) of the scanners into the acceptable list of devices at the remote site and only allow those devices to gain access to the network
- Use strong encryption such as WPA2 (also sometimes called IEEE 802.11i) or better for access control.
- Update the router to the latest firmware
- Change the default user ID and password for the router to be different than the manufacturer-supplied defaults.
- Change all wireless default encryption keys and SNMP community strings
Ticket Scanners
- part of a VLAN that is inside your main router/firewall and connected to the other parts of your network. This is known as the Venue LAN according to the network diagram. Scanners using this configuration are subject to PCI regulations to the extent that the firewall must be in place to regulate traffic.
- completely outside the main firewall and directly connected to the internet via the ISP. In this situation, the ticket scanner is considered not part of your network and is out of scope of PCI compliance.
Wireless Scanners in the Venue Lan
|
If the ticket scanners are within your firewall and part of a VLAN connected to the Office LAN, you must implement TLS 1.2 or better security and firewall rules between the venue LAN and the office LAN per the network diagram. Refer to PCI 4.1.1 |
You can use a direct IP in the scanner to access the Apache server directly (e.g. 192.168.1.x), or you can refer to the server via the domain name (like tickets.yourvenue.org).
Wireless Scanners connected to the Internet
If the wireless scanners are connected to a router that is on the internet (and not connected in any way to the internal trusted networks) then you do not need any security on the scanners. Since the scanners simply send HTTP requests to the Apache Server, you can use the external DNS name like tickets.yourvenue.org.
|
The Linea Pro and iPhone/iPod combination support the latest required encryption technologies from end to end |
Wireless Computer Access
The DMZ (NGINX Server)
|
Note that card holder data should never be stored or placed on the NGINX server for any reason. Theatre Manager does not require it. PCI requirement 1.3.7 |
Best Practices for setting up the NGINX Server
- NGINX should be on a standalone machine in the DMZ
- NGINX must be protected by the main firewall rules. You should turn on the built-in firewall on the machine (OS X or Windows) and should only need to open ports 80 and 443
- NGINX is a service so it will automatically start as a service upon reboot.
- This means nobody needs login at all.
- Do not allow anybody to access this machine except under controlled circumstances
- However, configure the screen saver to require a password after it is activated.
- Turn off Windows Update or OS X Software Update
- Instead, perform regular maintenance at a time of your choosing (every second Monday for example, more often if the news reports critical viruses) to download and install updates.
- For 24/7 web sales service, it is important that the NGINX server run constantly and only be maintained at a time of your choosing.
- This machine is only responding to requests from the internet via NGINX, it is not actively accessing anything on the internet using a browser or reading email - so the risk if is acquiring viruses is very minimal.
- If you put a virus scanner on it, set it to scan the hard drive once or twice a day, preferably early morning or at a time of day when online sales is expected to be at its minimum. Some antivirus software applications are CPU-intensive and have the potential to severely slow down the NGINX response time to web requests.
- Don't scan incoming requests from the internet to NGINX on port 80 or 443 - because those are the working ports for NGINX.
|
Deploy anti-virus software on all systems commonly affected by malicious software (particularly personal computers and file servers) PCI requirement 5.1 |
Policy Manual
PCI compliance requires some additions to your policy manuals, some of which are described below and relate to safeguarding your network and the credit card information. We recommend making these additions immediately.
|
Refer to Section 12 in the PCI DSS implementation guide for complete information |
| Policy | Description |
| 1. | Credit Card information must not be stored on any machine that is in the DMZ.
This generally means laptops that connect to the network wirelessly should be examined for files that contain card information and that information must be deleted. |
| 2. | Do not transport credit card information outside the secure firewall without:
|
| 3. | Never email a credit card number to anyone. |
| 4. | Never read back an entire credit card to a patron if they call in asking for one. Always have the patron tell you the card and confirm it only if it right. You can confirm a card number that the patron just told you in entirety. |
Remote Box Office
- On the firewall built into this machine
- On the main firewall protecting the office with forwarding to the appropriate ports on this machine.
Access to the terminal server from outside the main network should include VPN or packet encryption. Windows 2008 Server and later use secure access by default.
If the remote box office solution permits the feature, you should also set it up so that only specific applications can be launched and the user cannot get to the desktop. For example, Citrix provides a web interface under ISA services that allows you to only permit Theatre Manager to run. With Terminal Server, you can also force it to start Theatre Manager automatically. With 2012 Terminal server, you can limit to only Theatre Manager application to run.
|
Always disable outgoing web access within the Citrix or Terminal Server so that people cannot browse the internet on the Terminal Server Machine (this will prevent all viruses). You can enable web access on the local machine. |
|
Deploy anti-virus software on all systems commonly affected by malicious software (particularly personal computers and file servers) PCI requirement 5.1 |
Remote Ticket Selling
In most cases, the best way to do remote box office is to set up a Terminal Services server inside your network and provide a VPN solution from the remote site to the router.
An inexpensive Linksys VPN router will provide adequate router to router VPN services at a good price - or will provide remote VPN software for computer-to-router VPN. More expensive routers like Cisco have VPN software that accompanies the router as well.
In all cases, remote box office or work at home should be set up using a VPN connection.
|
If you are using remote box office and ticket scanning for access control at the same venue, you just need to connect the ticket scanner to your ticketing web site. It can use the VPN, but does not have to. so connecting to any wifi point with external access is fine. |
Remote Ticket Scanners
The setup of the wireless access point should be:
- turn off all SSID broadcasting
- Enter the MAC addresses (00:00:xx:xx:xx:xx) of the scanners into the acceptable list of devices at the remote site
- use WPA2 passwords
The setup and functioning of the Linea Pro wireless device is described in a separate web page.
When you need to enter in the IP address, use [tickets.yourvenue.org]/TheatreManager/1 where [tickets.yourvenue.org] is your ticket website URL.
All data traffic is done over HTTPS using secure sockets and TLS 1.2 or better transport layer encryption.
|
Even if you are scanning tickets at your local venue, it is often a simple matter of setting up a small hub in front of your main router so that the access points are connected to it - and they would be outside the firewall for security. |
Remote Access
|
In all cases of remote access for box office, you should implement either a VPN tunnel and/or SSH access - where the communication and session has strong encryption or is a private connection per PCI DSS 4.1. |
There may be additional setup consideration as described in the following sections based on the software you use. Your IT person should ensure that whichever software is used, that it employs VPN or SSH.
|
PCI compliance requires that remote access have a user ID and password, and an additional authentication factor that includes, but is not limited to, items such as a smart card, token, PIN, biometrics, VPN, etc. |
|
For people with remote access, you must establish passwords according to PCI DSS requirements 8.1, 8.2, 8.4 and any requirements of all sections of 8.5. In other words, the requirements for remote access passwords and authentication are exactly the same as for access to your office LAN. |
Common remote access mechanisms that we use
While there are many vendors of remote access software, the ones that we see used most often are:
- Using a VPN and local copy of TM for full and secure network access - best used when internet connections are fast
- Using Microsoft Remote Access (RDP) and Terminal Server for full managed access to TM - best used when internet is marginal/poor or you need to control internal network access
- Using a remote access tool like TeamViewer, LogMeIn, or similar to simply access your own machine from a remote location. Best when no remote ticket printing is required.
Using a VPN
|
Your office router must be able to support VPN connections. It is generally a feature of a more expensive router, and some low cost routers may have the capability. Check with your IT support if this is an option for you. |
Your routers and using TM over a VPN service
If your venue's routers support a VPN service to your network:
Initial, first time only setup steps
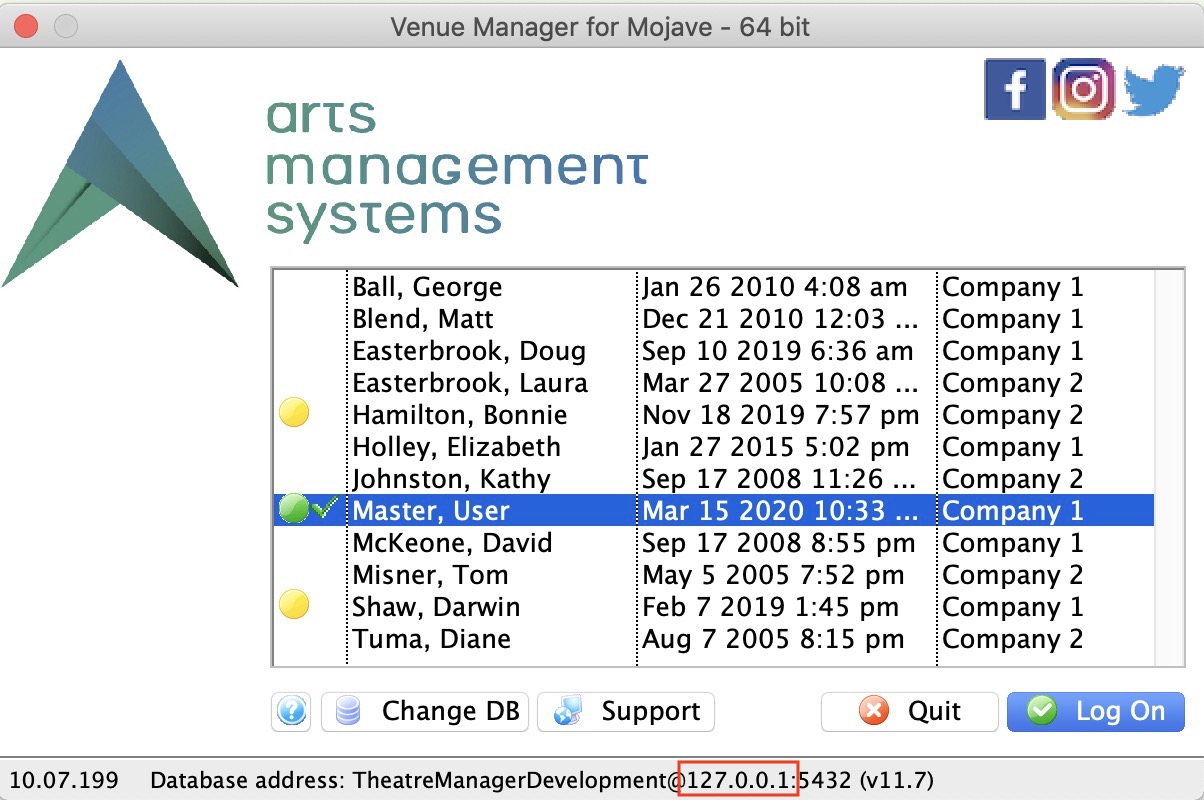 Ask to have the VPN Client software set up on your home computer.
- Find the IP address of your database server It is on the lower part of the login screen while using TM in the office. In the example to the right, the address is circled in red (the sample shows 127.0.0.1)
- Download and run the latest 64 bit version of Theatre Manager for:
- Macintosh (for Sierra or later) or
- Windows (64 bit V7.0 or later) NOTE: VPN connections DO NOT WORK on Windows Home edition.
Each Time you Connect to the Office
- Establish your VPN connection from your laptop to your office first
- Start Theatre Manager and wait for the login screen. Note: the first time you will be asked to find the database. Use the IP address located as outlined in the Initial Setup steps above.
|
If you are using IP based ticket printers at your remote location, you will need to set up a ticket printer device that has an IP address on the remote network. |
|
If you are in a different local time zones from your office, you will need to provide the LocalTimeZone parameter in the Theatre Manager preferences file. This is only needed if your time zone does not match the time zone setting in the company preferences->Report/Misc tab |
Microsoft Remote Access
|
If you are using remote access, you need to set up a terminal server to use high-security access for Remote Desktop and it should be set to disconnect or lock the terminal after a period of inactivity. (PCI requirement 12.3) |
|
This typically needs a copy of Windows STANDARD Server version or better (not the windows OFFICE server version). If you bought a standard server under the Techsoup donated software program, you will likely have two CAL licences for the terminal server and may need to add some additional licences. |
Windows 2012/2016/2019/2022 Terminal Server
Terminal Server is a great way to allow access from any location to your office. It has the benefits of:
- allowing restricted access to your internal LAN by only allowing access to specific services or programs for a user.
- working in conditions where internet connection bandwidth is poor since it is a screen-scraper technology and optimizes only transmission of screen changes
- allows report printing to ticket printers on LPT ports
When connecting from any workstation to the current versions of Terminal Server, the server defaults to high encryption. It is good practice to verify that the setting has not been lowered.
| Step | Purpose | Installation instructions or link |
| 1. | Verify Terminal Server settings | The following links detail the security settings in Windows Server 2003. Server 2003 defaults to High encryption, but it is a good practice to make sure it hasn't been lowered accidentally.
support.microsoft.com/kb/814590 Terminal Server 2008/2012/2016/2019 and 2022 should default to high encryption. |
| 2. | Verify RDP settings | RDP should be set to always prompt for a password. |
TeamViewer Remote Support
|
Artsman uses TeamViewer for remote support. This is designed to only run if the user launches the application, contacts Artsman and permits the support team to have access to their machine for the purpose of diagnosing a problem on a one time basis.
Remote access is to be
|
Outside the Firewall (the internet)
This is where your customers will be.
Customer Access
Web Page Design Considerations
- Your main web site should direct links to the Apache server via HTTPS so that the majority of access to online ticket sales is secure.
- If a customer tries to access tickets.yourvenue.org through port 80, the first thing that the index page does is redirect them to a secure port.
- If a customer does alter the URL and tries to access a page via port 80, the Theatre Manager web listener always responds back with a secure page and the next interaction will be through port 443
- Ultimately, if you only wish secure access through the DMZ, you can turn off port 443 and customers will be forced to access via HTTPS. This is quite an aggressive approach and has some marketing implications - the safeguards above ensure that people are moved to HTTPS after hitting the web site for the first time.
What a customer needs to do (nothing)
A customer has zero configuration to do on their machines, other than to allow cookies from your site if they cannot browse the web pages. The Theatre Manager Web Listener will alert them to turn on cookies as it detects people trying to move through pages without cookies enabled.
PCI Audit Logs
|
PCI DSS sections 10.2 and 10.3 require that Theatre Manager maintain audit logs for certain system events. These primarily deal with who has seen or could have seen credit card information.
The transaction logs in Theatre Manager deal with all these requirements because Theatre Manager has always maintained an 'audit log' of certain system events that tracks the events required in PCI section 10.2 and the minimum required data elements for PCI section 10.3. |
|
PCI DSS section 10.5 requires centralization of all system related logs in a common log management process in a protected manner. The intent from the PCI council is that you could view access to login/out and card data in Theatre Manager along with firewall access changes or admin access to a machine or server in a consolidated view.
You can export the logs from Theatre Manager in Excel or tab delimited format and move them to your centralized logging mechanism. |
Accessing the Audit Log
Access to the audit log is from the Setup Menu.
![]()
This will bring up a screen similar to the one below which is a sample of an audit log that is contained within the transaction records in Theatre Manager.
![]()
Exporting Audit Logs to External Logger
|
PCI DSS compliance section 10.5 requires centralization of logs in a common log management process. The intent from the PCI council is that you could view access to login/out and card data in Theatre Manager along with firewall access changes or admin access to a machine or server in a consolidated view.
You can export the logs from Theatre Manager in Excel or tab delimited format and move them to your centralized logging mechanism. |
|
Audit logs are kept forever as part of the database. You can search for any past history and re-export them if you desire. Database backups will contain the logs in existence at time of backup. |
- Search the logs by transaction date for all new logs since the last export
- Click the Export Button on the top of the screen and select export to Excel or tab format as required
- Provide a file name as a place to save the logs
- Import those into your centralized logging mechanism
![]()
Audit Log Description
| PCI Std. | Requirement | Theatre Manager Implementation | ||
| 10.2 | Implement automated audit trails for all system components to reconstruct the following events: | |||
| 10.2.1 | All individual accesses to cardholder data | Theatre Manager creates an 'AC' transaction to track whenever a user sees the entire credit card number. By default, Theatre Manager displays masked card numbers in all windows and reports. Only in specific places will Theatre Manager display card information to those who have specific authorization to see cards. Therefore, you should expect to see very little information in the audit log if you minimize who has access to see full card data.
None of these transactions can be purged. |
||
| 10.2.2 | All actions taken by any individual with root or administrative privileges | An administrative user is subject to the same rigorous requirements as all other users. | ||
| 10.2.3 | Access to all audit trails | Theatre Manager does not track who views audit trails because they cannot be changed, manipulated or altered by the user in any way. We believe that when users know this information is tracked for PCI compliance, it acts as an additional deterrent. None of the logs ever display sensitive data. | ||
| 10.2.4 | Invalid logical access attempts | Theatre Manager tracks who accesses Theatre Manager and when they log in or out via the 'ALI' and 'ALO' transactions.
'ALX' transactions track invalid login attempts (after 3 mistyped passwords), or when the user account is locked out. These transactions cannot be purged. |
||
| 10.2.5 | Use of identification and authentication mechanisms | Theatre Manager uses login and authentication mechanisms. All users of the application must log in. | ||
| 10.2.6 | Initialization of the audit logs | The audit logs can never be 'initialized' by the user, nor can be they be cleared except under programmatic control. The minimum retention time is 365 days for audit transactions with the default being forever. Payment logs indicating who took the actual payment are retained forever and cannot be deleted. | ||
| 10.2.7 | Creation and deletion of system-level objects | |||
| 10.3 | Record at least the following audit trail entries for all system components for each event:
|
|||
| 10.3.1 | User identification | yes - see log example in the user column. | ||
| 10.3.2 | Type of event | yes - see log example for the specific transaction codes, expanded description and details about the specific activity. | ||
| 10.3.3 | Date and time | yes - see log example | ||
| 10.3.4 | Success or failure indication | yes - see log example. Failure logs show when a user tries to log in and forgot their password. | ||
| 10.3.5 | Origination of event | yes - see log example for the IP address of the machine that created the event and the user | ||
| 10.3.6 | Identity or name of affected data, system component, or resource | yes - see log example - this illustrates an example where a user viewed a specific credit card in full. The patron's name is displayed in the first and last name column. | ||
Compliance Statement required by PCI Council
|
The PCI council represents the credit card companies. They dictate to vendors that products must be assessed, certified, and approved by them in order to appear on the list of 'Accepted Products'. In the fine print that is part of their processes, the PCI council has a specific clause we must relay to you.
It is repeated verbatim below so that there can be no mistaking what we have been instructed to do. |
Vendor shall comply with, and communicate (in a reasonably manner determined by Vendor) to all purchasers and other licensees of Vendor Products that have been Accepted under any of the Programs, the following statement:
“Acceptance and/or listing of a given product by the PCI Security Standards Council, LLC (PCI SSC) only applies to the specific version of that product that was reviewed by an assessor or test laboratory qualified by PCI SSC (Assessor) and subsequently accepted and listed by PCI SSC (the “Accepted Version”), and only while such acceptance and listing are in effect. If any aspect of a product or version thereof is different from that which was reviewed by the applicable Assessor and accepted and listed by PCI SSC – even if the different product or version (the “Alternate Version”) conforms to the basic product description of the Accepted Version – then the Alternate Version should not be considered accepted by PCI SSC, nor promoted as such. The authoritative lists of products currently accepted by PCI SSC can be found on the PCI SSC website at www.pcisecuritystandards.org. Please notify PCI SSC if you believe that any product purportedly accepted by PCI SSC does not appear on these lists.
No vendor or other third party may refer to a product as “PCI Approved” or “PCI SSC Approved”, and no vendor or other third party may otherwise state or imply that PCI SSC has, in whole or part, accepted or approved any aspect of a vendor or its services or products, except to the extent and subject to the terms and restrictions expressly set forth in a written agreement with PCI SSC, or in a corresponding letter of acceptance provided by PCI SSC. All other references to PCI SSC’s approval or acceptance of a product or version thereof are strictly and actively prohibited by PCI SSC, should be reported to PCI SSC, and constitute a breach of applicable PCI SSC program requirements.
When granted, PCI SSC acceptance is provided to signify the Assessor’s determination that the product has demonstrated achievement of certain security and operational characteristics important to the security of payment card data, but such acceptance does not under any circumstances include or imply any endorsement or warranty by PCI SSC regarding the product vendor, the product, or the functionality, quality, or performance of the product or any other product or service. PCI SSC does not warrant any products or services provided by third parties. PCI SSC acceptance does not, under any circumstances, include or imply any product warranties from PCI SSC, including, without limitation, any implied warranties of merchantability, fitness for purpose or noninfringement, all of which are expressly disclaimed by PCI SSC. To the extent any rights or remedies regarding products or services that have received acceptance from PCI SSC are provided, those rights and remedies shall be provided by the party providing such products or services, and not by PCI SSC or any of its payment brand members.”
Misc PCI Requirements
Please use these as ticklers to yourself.
|
If card data is to be transmitted over a public network (i.e. outside your firewall), it must be sent using secure encryption technology like IPSEC, VPN or via TLS per PCI DSS 4.1. |
|
Do not send any credit card data 'in the clear' such as pasting a card number into an email, or into an IM per PCI DSS 4.2 unless you are using secure encryption with these messaging technologies. Do not encourage customers to send card numbers, CVV2 numbers, name, expiry dates, or any other such data to you via the same technologies.
|
|
If you are upgrading from a prior system that might have had unencrypted credit card information, you must throw that data into the trash and secure erase it with a tool like ERASER (free) on the PC or use File Menu -> Secure Erase on Mac. |
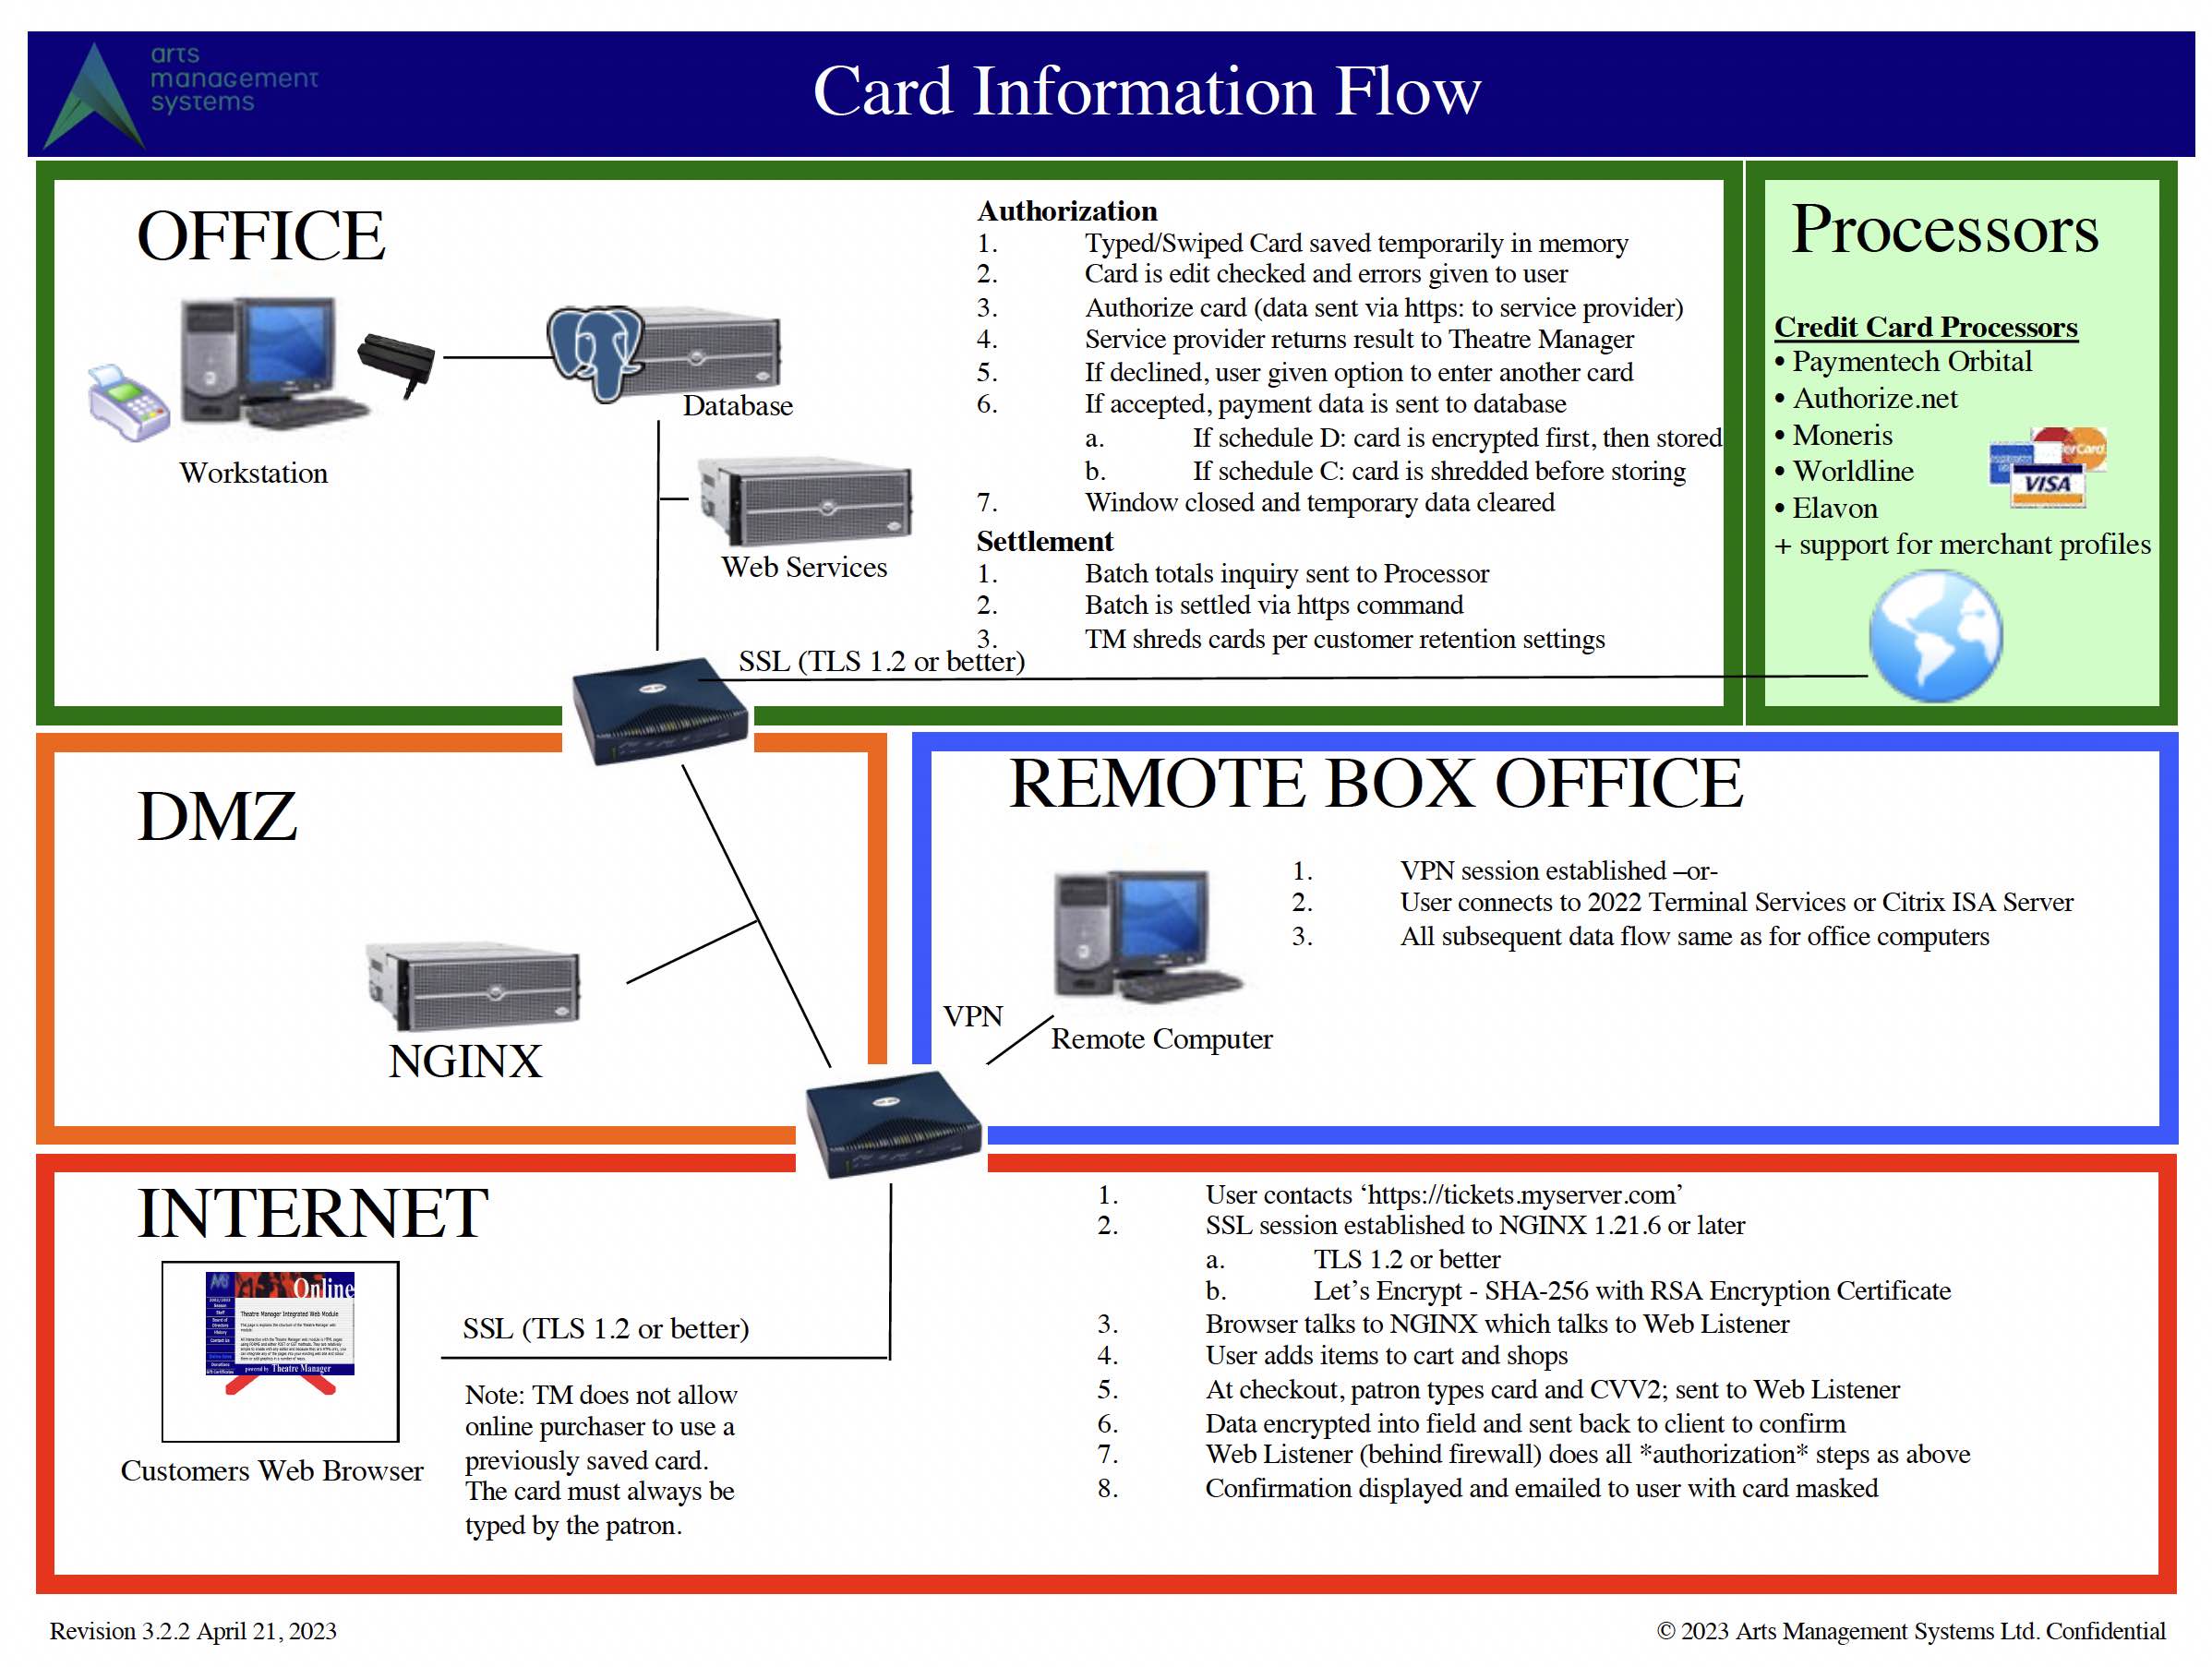
Card Flow Across System
(Click to enlarge as a PDF)
Vulnerability Identification and Assessment
|
PCI requires that a venue establish a listing of security vulnerabilities and track them in a database as well as implement programs to prevent vulnerabilities PCI requirement 6.2.
Common Vulnerabilities and Exposures (CVE) vulnerabilities are reviewed at least monthly. As standard practice, Arts Management considers all CVE's to be a high priority for the software we incorporate. As such, these will be implemented using the auto deployment processes (regardless if they really affect Theatre Manager or not) under the principle of better to be safe than sorry. The release notes may mention any important fixes felt to be applicable. We provide a list of vulnerabilities & patches specific to Theatre Manager and its components and update our installers regularly to address known issues. |
Addressing PCI compliance and preventing most security issues is as simple as:
- Keeping Theatre Manager up to date with the latest version (this occurs automatically via the auto deployment systems)
- Updating all operating systems to current updates from the vendor
- Having current anti-virus software in place
However, this is only one aspect of protecting your network. It is far more likely that vulnerabilities will arise from other programs. Here are some links that might be of interest to you to help maintain the health of your computers and networks.
| Item | Purpose |
| NIST.gov | This web site has a list of recent security issues from the government web site. It is useful for seeing if there is something pertinent to your software suite. This is worth searching on a periodic basis. |
| NIST.org | This web site has a summary of common security fixes and patches distilled from the government web site. |
|
Secunia
PC only |
PC's are vulnerable in a number of ways. Secuia is a free tool (for personal use) that inspects your PC and tells you about any vulnerabilities you may have on your PC that you are unaware of, and will automatically update versions of other software.
Note: Never forget to have anti-virus software on your machine. |
| Software Update Mac Only | macOS has a software update feature for the operating system. For workstations, we recommend automatically applying security patches. |
| OSVDB | This is an open source vulnerabilities database. We look at this periodically to see if there is anything that might affect tools that we supply to you. Apache and Postgres are both open source, so this is of interest to us. You may find other information, especially if you are using many open source tools. |
| QUALYS Labs | Use this to verify if a TLS Certificate is setup right and if system scans are looking for new vulnerabilities |
NGINX Vulnerability List
|
Nginx is auto deployed with each version of TM server. It will always have the latest vulnerabilities mitigated per release notes and all attempts are made to deliver it within the mandated PCI time frame of 30 days of release (subject to testing and evaluation of other fixes). Typical time to deployment is within 15 days. |
Postgres Vulnerability List
|
The Theatre Manager postgres installers are always updated to the most recent version of postgres as soon possible after the postgres version it is released, ensuring any vulnerabilities are addressed by Arts Management as soon as a fix is released by the Postgres foundation. |
Postgres vulnerabilities are monitored on the Postgres Security web site.
Those immediately relevant to Theatre Manager are listed with the release notes for that version of Theatre Manager and may require a forced update to the database server before an update to Theatre Manager will allow connection to the server.
OWASP and Theatre Manager
The OWASP Top 10 for 2021 is interesting reading for application developers, web site builders, and end users. The internet has many good features, but it is not a safe place if you are not aware.
|
Each year, the Arts Management team reviews the top 10 and, for those that are applicable, ensures that the web sales module provides a defence against the top 10 per PCI standard 6.5. Requirements are posted here. Merchants should also be aware of these. |
|
In addition, please be aware that IFRAMES are disabled in NGINX due to possibility of a Click-Jacking attack. An iframe has typically been used by people (like MOGO Interactive) selling marketing pixels to include their code in your web site. PCI council checks for Click Jacking opportunity - so we have disabled this in our standard web Server Setup. |
2021 Top 10 List
| Description | Theatre Manager Implementation | |
2021A01 2017A05 |
Broken Access Control |
Access control enforces policy such that users cannot act outside of their intended permissions. Failures typically lead to unauthorized information disclosure, modification, or destruction of all data or performing a business function outside the user's limits
|
2021A02 2017A03 2015A06 2013A06 |
Cryptographic Failures | Many web applications do not properly protect sensitive data, such as credit cards, tax IDs, and authentication credentials. Attackers may steal or modify such weakly protected data to conduct credit card fraud, identity theft, or other crimes. Sensitive data deserves extra protection such as encryption at rest or in transit, as well as special precautions when exchanged with the browser.
Theatre Manager handles encryption of the key card information and recommends shredding of unused data after a period of time. All credit card information is re-encrypted on a periodic basis per PCI compliance and the only information retained is per PCI standards. Theatre Manager web services use TLS for all traffic, which means using port 443 to the NGINX server, and having a valid TLS certificate. Ensuring the TLS certificate is current is a responsibility of the monthly PCI scan process, and we contact customers when they are ready to expire. Users are encouraged to define a card retention period where TM will automatically shred cards based on their policy. |
2021A03 2017A01 2015A01 2013A01 |
Injection | Injection flaws, such as SQL, OS, and LDAP injection occur when untrusted data is sent to an interpreter as part of a command or query. The attacker’s hostile data can trick the interpreter into executing unintended commands or accessing data without proper authorization.
OWASP's preferred option is to use a safe API which avoids the use of the interpreter entirely or provides a parameterized interface. In Theatre Manager, all web pages access the web listener using a parameterized API (generally html form) and each parameter is scrubbed on the way to the web listener for specific values. Only acceptable parameters are verified. Unacceptable parameters are rejected and ignored. |
2021A04 |
Insecure Design |
Insecure design is a broad category representing different weaknesses, expressed as "missing or ineffective control design."
|
2021A05 2017A06 2015A05 2013A05 |
Security Misconfiguration | Good security requires having a secure configuration defined and deployed for the application, frameworks, application server, web server, database server, and platform. Secure settings should be defined, implemented, and maintained, as defaults are often insecure. Additionally, software should be kept up to date.
The primary preventative measure for this is PCI security scans and upgrading of Theatre Manager components on a regular basis and following any implementation notes. Users are encouraged to install operating system upgrades as they are made available and to turn on automatic checking on all workstations. On servers, the practice is to verify weekly for updates and install on a controlled basis. Theatre Manager regularly offers the latest updates to web servers and TLS security patches when they are made available. Configuration files are hardened as vulnerabilities are detected (example: preventing directory listings is the default browser config). |
2021A06 2017A09 2015A09 2013A09 |
Vulnerable and Outdated Components | Components, such as libraries, frameworks, and other software modules, almost always run with full privileges. If a vulnerable component is exploited, such an attack can facilitate serious data loss or server takeover. Applications using components with known vulnerabilities may undermine application defenses and enable a range of possible attacks and impacts.
Theatre Manager is designed to detect the version of significant components and will not start if the database version, web server version, or other significant components are insufficiently current. Most importantly, TM Web Servers are regularly updated with security patches. |
2021A07 2017A02 2015A02 2013A02 |
Identification and Authentication Failures | Application functions related to authentication and session management are often not implemented correctly, allowing attackers to compromise passwords, keys, or session tokens, or to exploit other implementation flaws to assume other users’ identities.
Theatre Manager uses cookies for session management. All data in the cookie is AES256 encrypted, along with a date and time. If the web listener notices that the cookie comes back and contains an unexpected date and time setting, then it discards the request and resets the user. There are no session IDs in any URL. |
2021A08 |
Software and Data Integrity Failures |
Software and data integrity failures relate to code and infrastructure that does not protect against integrity violations.
|
2021A09 2017A10 |
Security Logging and Monitoring Failures |
Security Logging and Monitoring Failures is to help detect, escalate, and respond to active breaches. Without logging and monitoring, breaches cannot be detected.
|
2021A10 |
Server-Side Request Forgery (SSRF) |
SSRF flaws occur whenever a web application is fetching a remote resource without validating the user-supplied URL. It allows an attacker to coerce the application to send a crafted request to an unexpected destination, even when protected by a firewall, VPN, or another type of network access control list (ACL).
|
| ------- | Historical References |
--------
|
2021MGD 2017A04 |
XML External Entities (XXE) 2021 merged with A05-Security Misconfiguration |
Many older or poorly configured XML processors evaluate external entity references within XML
documents. External entities can be used to disclose internal files using the file URI handler,
internal file shares, internal port scanning, remote code execution, and denial of service attacks.
|
2021MGD 2017A07 2015A03 2013A03 |
Cross-Site Scripting (XSS) 2021 merged into A03-Injection |
XSS flaws occur whenever an application takes untrusted data and sends it to a web browser without proper validation or escaping. XSS allows attackers to execute scripts in the victim’s browser which can hijack user sessions, deface web sites, or redirect the user to malicious sites.
OWASP's preferred option is to properly escape all untrusted data based on the HTML context (body, attribute, JavaScript, CSS, or URL) that the data will be placed into. Theatre Manager looks for any attempt to put Javascript and other characters into a form and simply removes them. We have determined that there is no valid need to have words like <script> in enterable fields like name or address. |
2021MGD 2017A08 |
Insecure Deserialization 2021 merged into A08-Software and Data Integrity Failures |
Insecure deserialization often leads to remote code execution. Even if deserialization flaws do not
result in remote code execution, they can be used to perform attacks, including replay attacks,
injection attacks, and privilege escalation attacks.
|
2017MGD 2015A04 2013A04 |
Insecure Direct Object References 2017 merged into A05-Broken Access Control |
A direct object reference occurs when a developer exposes a reference to an internal implementation object, such as a file, directory, or database key. Without an access control check or other protection, attackers can manipulate these references to access unauthorized data.
Theatre Manage does not allow direct access to any object in the database through the use of an API. Users cannot retrieve data in an unauthorized way as all queries are done via a controlled API. |
2017MGD 2015A07 2013A07 |
Missing Function Level Access Control 2017 merged into A05-Broken Access Control |
Most web applications verify function level access rights before making that functionality visible in the UI. However, applications need to perform the same access control checks on the server when each function is accessed. If requests are not verified, attackers will be able to forge requests in order to access functionality without proper authorization.
This does not directly apply to Theatre Manager's web services due to the APIs used to control access to the system -AND- the very limited number of pages in the WebPages directory which are used exclusively for the singular function of web sales. Accessing the limited number of web pages in the WebPages directory in a direct manner does nothing unless they are processed by a web service. |
2017n/a 2015A08 2013A08 |
Cross-Site Request Forgery (CSRF) | A CSRF attack forces a logged-on victim’s browser to send a forged HTTP request, including the victim’s session cookie and any other automatically included authentication information, to a vulnerable web application. This allows the attacker to force the victim’s browser to generate requests the vulnerable application thinks are legitimate requests from the victim.
Theatre Manager does not allow access to the database except via API. It also forces a timeout for inactivity and injects a unique form token key for each HTTP POST request. The cookie is time sensitive and is unique for each request sent from the server and back from the client. It is encrypted and contains other non-visible data that must be verified upon receipt back at the server. Failure to meet the verification requirements causes rejection of the request and the process to start over. Absence of a properly formatted and encrypted cookie rejects the request and starts over. The form token is a unique encrypted time-sensitive field that is placed into each web page by the server. When a form is submitted, the server checks the form token with what was sent out. If it does not match, the patron is sent to a 'safe' landing page. Currently, Theatre Manager sends patrons who are logged in to the 'home' page and those that are browsing anonymously to the 'event listing' page. No form can be submitted twice. |
2017n/a 2015A10 2013A10 |
Unvalidated Redirects and Forwards |
Web applications frequently redirect and forward users to other pages and websites, and use untrusted data to determine the destination pages. Without proper validation, attackers can redirect victims to phishing or malware sites, or use forwards to access unauthorized pages.
Theatre Manager does not use redirects to any unknown source in any commerce web page. All URLs returned by the server are specific to each API. Requests for APIs that do not exist return a proper 404 HTTP response (not found) |
PostgreSQL Database Server
- Installation on a Macintosh
- Installation on Windows
- Postgres will run on Linux and other Unix variants. You will have to install the server yourself by obtaining it from the PostgreSQL web site and follow much of the Macintosh setup steps for configuration and backups. We do not provide automatic installers or configuration/operational support for Linux servers.
The server only needs to be set up on one machine where you want the database to reside. Theatre Manager can be set up on as many machines as you wish.
|
|
|
Replication is a feature of Postgres and is automatically set up for venues using AMS Cloud. Self service venues may set this up if they wish - the support team is unable to help you. |
|
If you are using PCI schedule 'A", 'B', or 'C' compliance, credit card information will never pass through the database and it can effectively be taken out of PCI scope. |
Refer to Postgres security notices for list of security issues addressed in each version.
Macintosh PostgreSQL Server
The server needs to be set up on one machine and the application can be set up on as many machines as you wish.
Follow these steps if you are using the Theatre Manager TMPostgresSetup installer program; you may want to bookmark this page in your browser in case you want to refer to these installation steps. If you are only installing a demo, refer to the last column for required steps.
| task | Description | Full Install | Demo |
| 1 | download the PostgreSQL installer for Mac | yes | yes |
| 2 | the installation of the PostgreSQL SQL server | yes | yes |
| 3 | configuration of the server parameters for maximizing performance in a production database | yes | no |
| 4 | creating a daily backup job using TM Server | yes | no |
| 5 | Turn off energy saving, airport and other energy saving features | yes | no |
| 6 | (Optional) Implement hot database standby server depending on load and other considerations. | no | no |
Notes and Assumptions:
- This install process will install or update PostgreSQL. If you are updating across versions, you may need to refer to Updating PostgreSQL Instructions
- You MUST turn off all virus protection while running the installer (especially Norton if you are using it). Virus software always interferes with proper software installation.
- If this installer is being used to create a demo installation, then you only really need do steps 1 and 2.
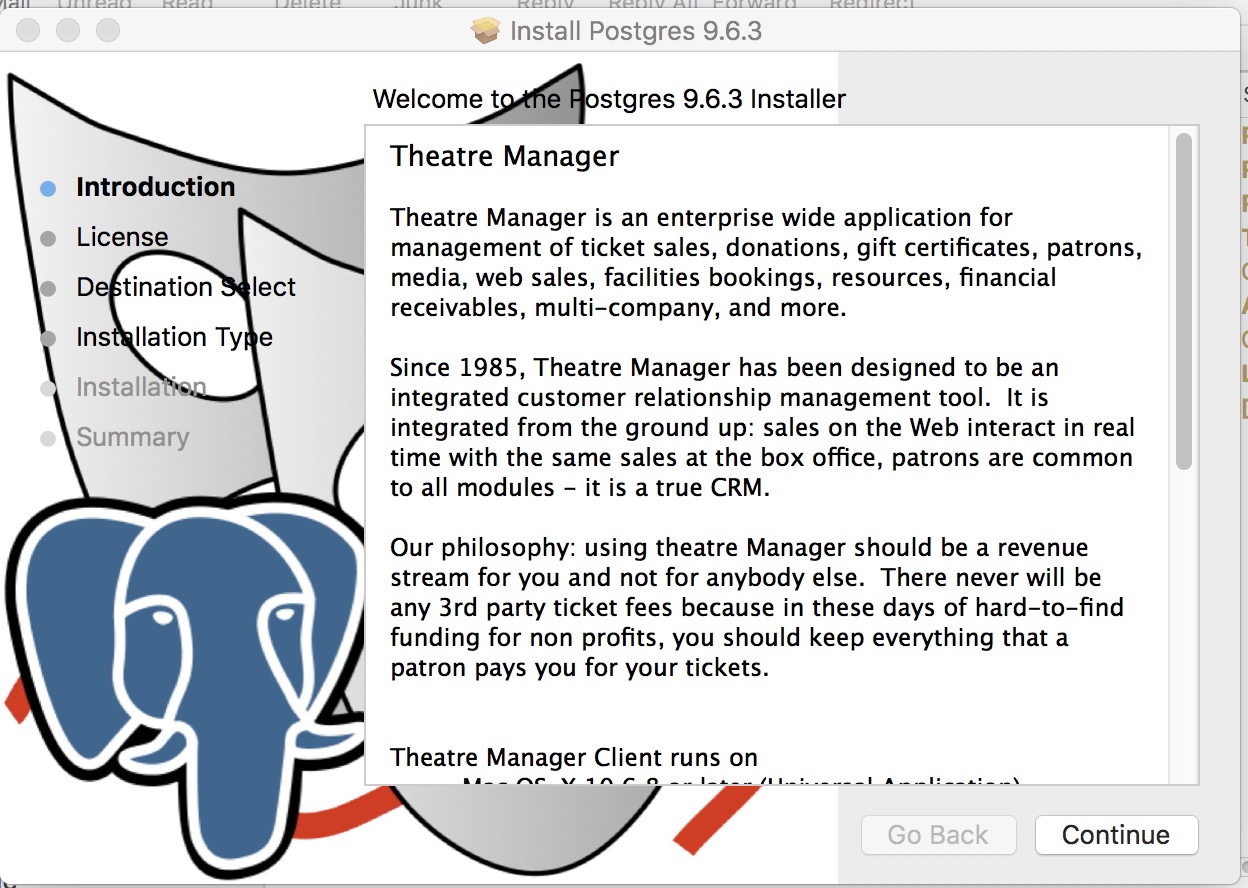
Step 1: Install PostgreSQL database server
The actual Postgres install process is part of the install process. If you cancel the setup of Postgres, you can always start it again by repeating the process from the start.
Installing PostgreSQL on a Macintosh
|
Before starting the install, please check that the computer date and timezone settings are correct. Failure to do so may cause Postgres to think it is in a different timezone. |
|
If you are unable to install, you might need to use the following commands in terminal before running the installer More info is under disable power saving settings - Step 1:
sudo spctl --master-disable
|
| 1. |
|
| 2. |
Click Continue on the Licence Agreement screen after reading it.
|
| 3. |
Click Install to begin the actual install.
|
| 4. |
You will need to enter an administrator user ID and password to continue
|
| 5. |
You will see the installation progress as the Postgres database engine is installed
|
| 5. |
When the isntaller is finished successfully, click the Close button
|
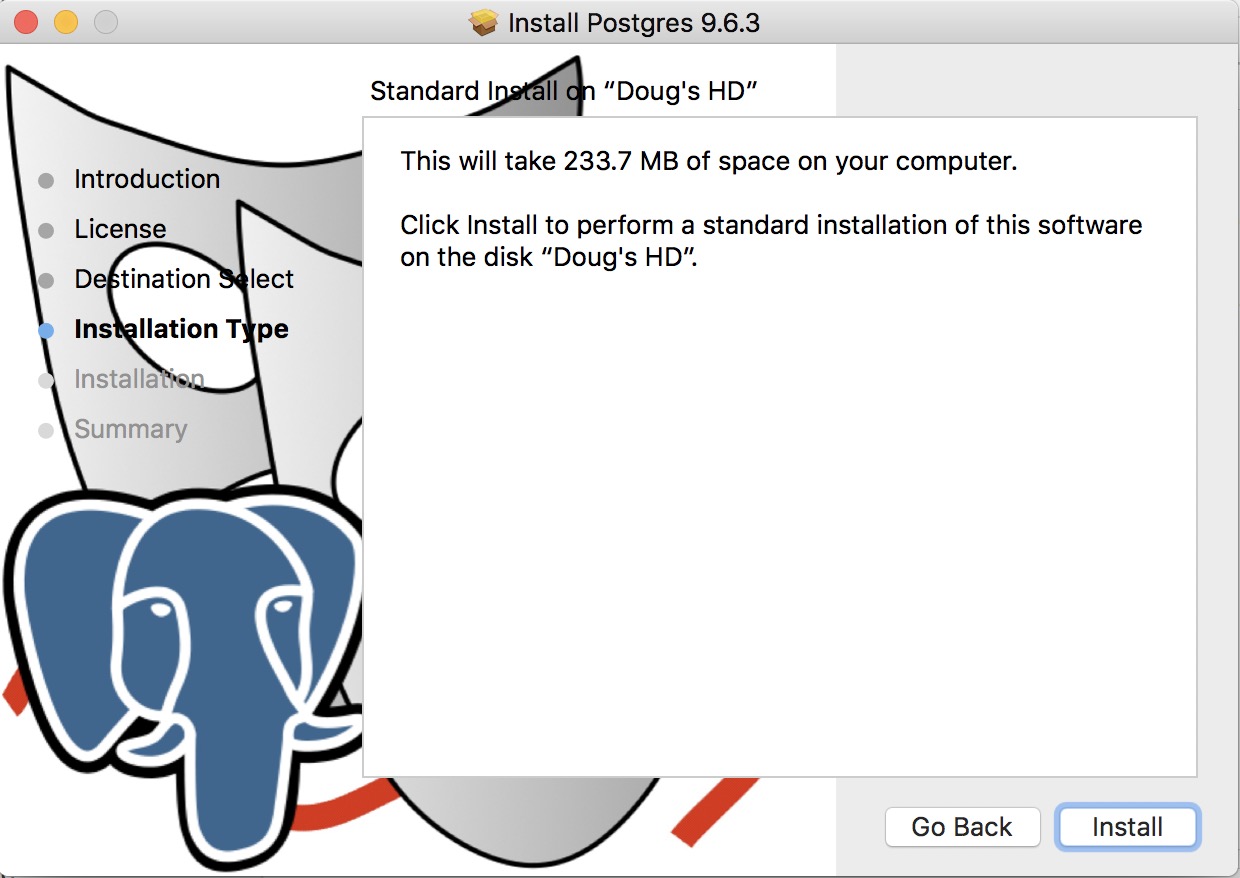
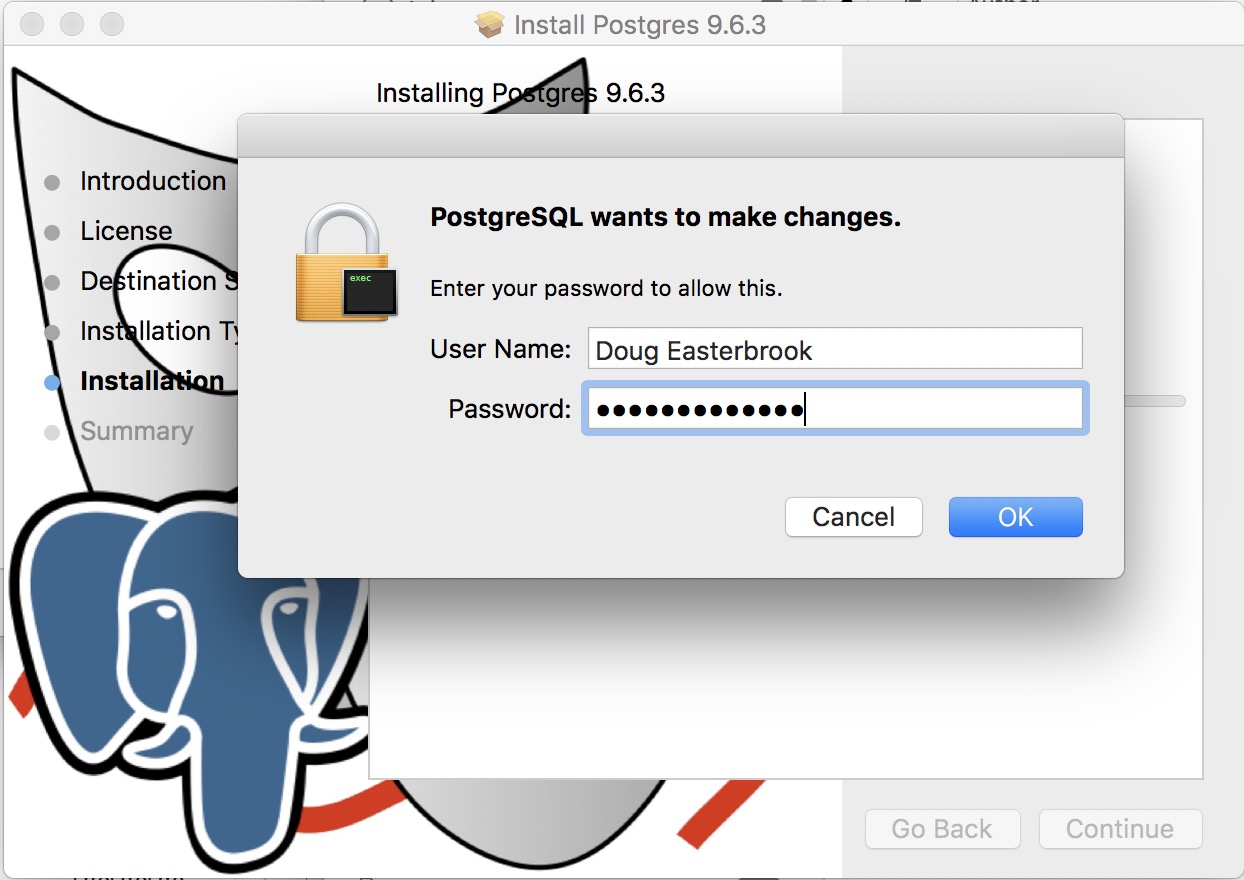
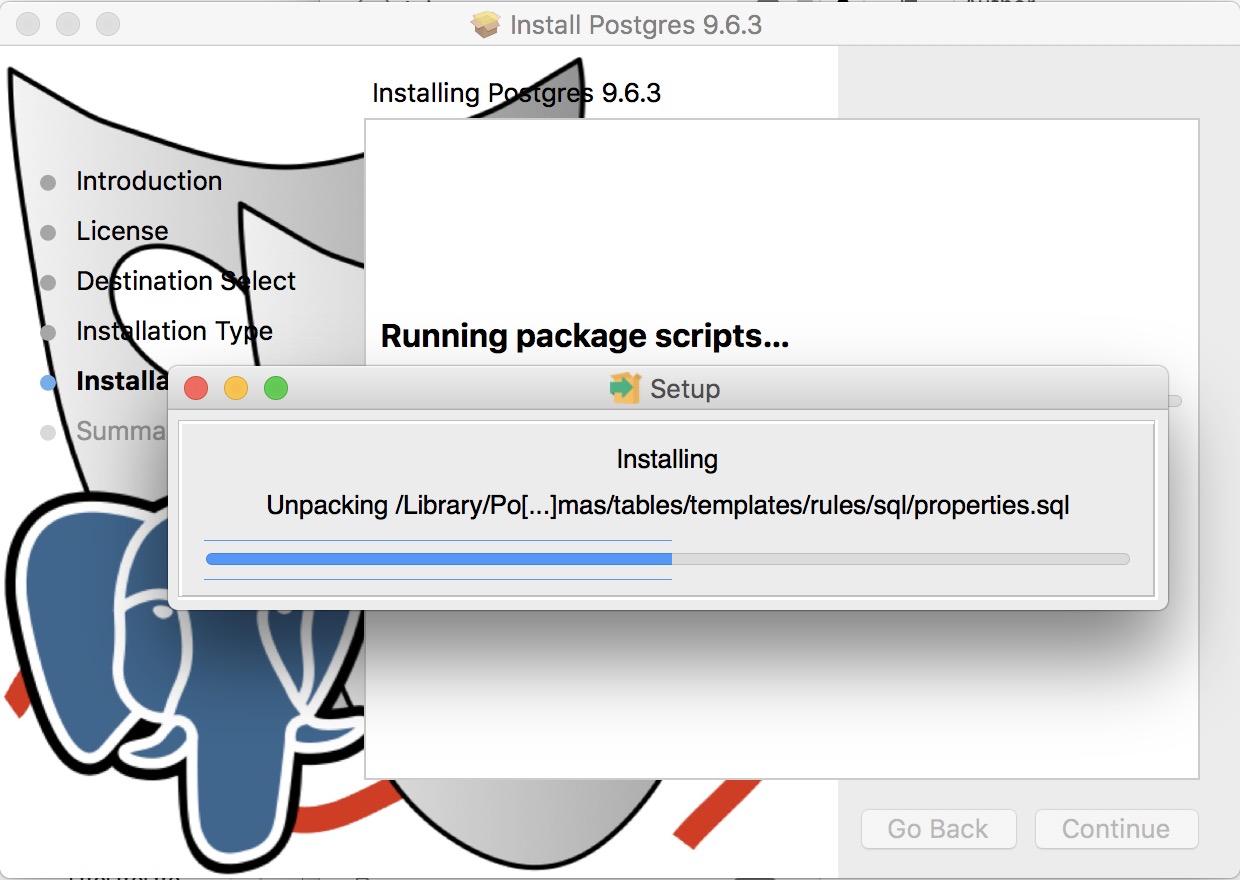
Step 2: Configure the PostgreSQL server parameters
The general steps are:
- Edit the pg_hba.conf file to indicate which IP addresses may talk to the database server
- Edit the postgresql.conf file to adjust some memory settings for performance
|
An easy way to determine key config parameters is to use pgtune and paste the results at the bottom of the postgresql.conf file (don't forget to add ssl=on and Bonjour=on to the results). |
PG_HBA.conf file
In order for clients to connect to the server, their IP address must be in the allowed list of users. The two common authentication methods that you will see being used for Theatre Manager clients are MD5 and trust.
- MD5 does md5 password authentication and should be used for just about all entries to this file.
- Trust allows clients to connect without password authentication; the only 'trust' entry should should be for the local server machine and/or localhost.
| 1. |
The first changes to make involve the pg_hba.conf file and the postgres.conf file. To do so, you'll need to use VI (a text editor) and be the postgres user in Terminal. To do this, start Terminal and type
su - postgres enter the password
|
| 2. | Go to the postgres data directory by typing
cd data
|
| 3. | Edit the postgres pg_hba.conf file that contains the addresses to listen on. Type
VI pg_hba.conf (full pathname is /Library/Postgresql/[version]/data/pg_hba.conf) You should see a page of information. If you do not, then type 'Shift Q' and then just a 'q', after which you can start the process over. If you see the list of text similar to the right, then: Use the down arrow on your keyboard to go to the very end of the file.
|
| 4. | 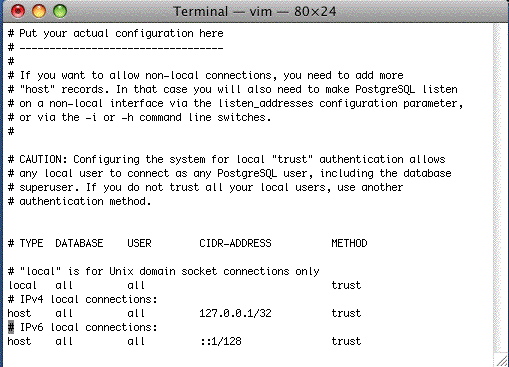
When you are at the end of the file, use the up arrow on your keyboard so that you are right after the first line in the IPv4 settings, where it says 'host all all 127.0.0.1/32 trust'. In the example the cursor is on the '#' on the line after. type the
key and the message at the bottom will change to Insert. |
| 5. |
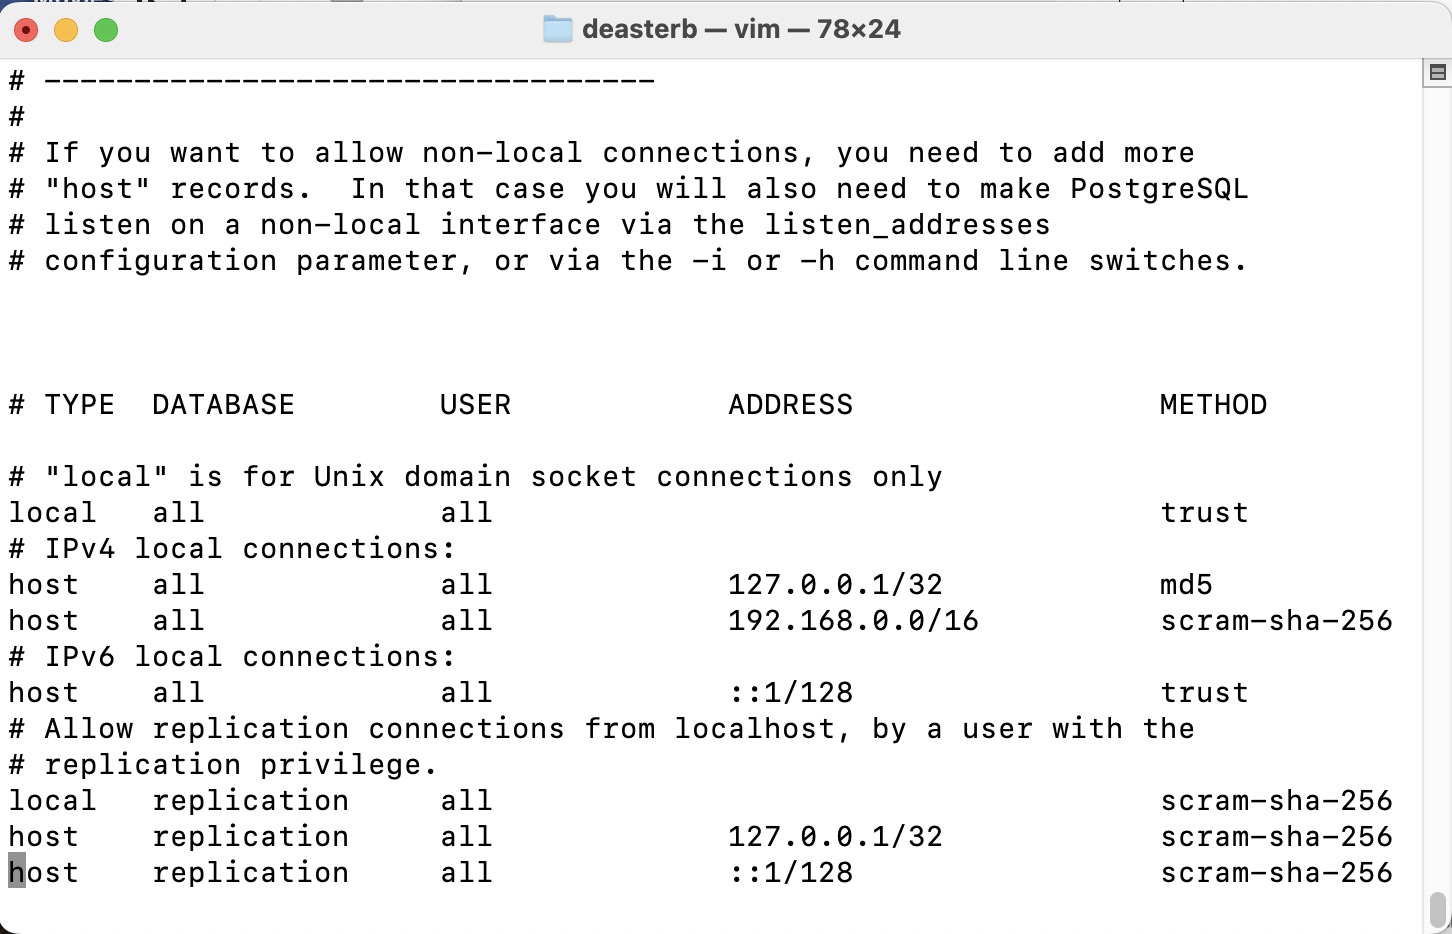
Edit the pg_hba.conf so that its final settings are similar to the window on the right. Type directly into Terminal so the data looks like the window above. Use the Delete key to get rid of characters. You will likely end up typing the following lines where the first one is your subnet. This is the most typical example we've seen at venues NOTE: For the 127.0.0.1/32 option, edit the handshaking to be MD5 at the end of the line to allow backups to run unaided. NOTE: If your machine uses IPv6 (the new internet IP setting standard), you may also need to set ::1/128 to be TRUST instead of md5. If so, edit that line to look like:
NOTE: You may also need to edit the local all all line from md5 to TRUST. This can be determined if the backup script will not run without a password after changing the settings above for 127.0.0.1 and ::1/128. The line you added (or need to add) are for:
At the end of the subnet, the /24 refers to a complete subnet when you want any machine on the subnet to access the database as per CIDR rules. This is what is used most often. The /32 refers to a particular machine. If you use this option, you will need to provide the exact computer IP that you want to allow to access the database. |
| 6. | 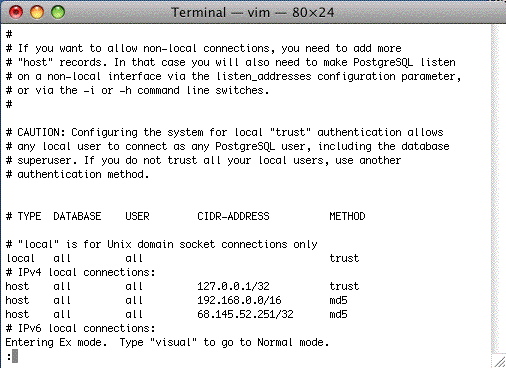
At the end, type, in this order: hit the esc key (the insert mode will dissappear) Shift Q (the window will show the 'Entering Ex mode' message) wq and the window will clear.
Reference for settings in the pg hba.conf file https://www.postgresql.org/docs/current/auth-pg-hba-conf.html |
| 7. |
In the command line, type the following to reload the configuration:
pg_ctl reload Terminal will say 'server signalled' |
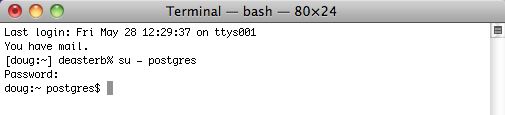
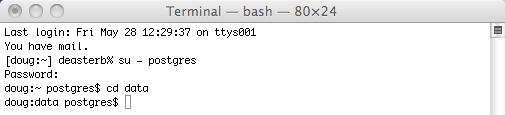
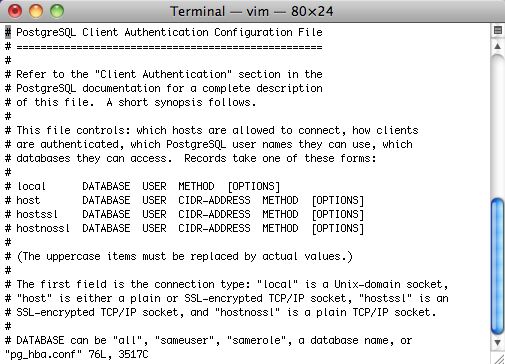
POSTGRESQL.conf file
Note: you can also use pgadmin as described in the Windows setup to make these changes if you prefer.
Another was to get the key config parameters is to use pgtune and paste the results at the bottom of the postgresql.conf file (don't forget to add ssl=on and Bonjour=on to the results).
| 1. |
You will need to start by changing to the postgres user in Terminal. To do this, start Terminal and type
su - postgres enter the password
|
||||||||||||||||||
| 2. | Go to the Postgres data directory by typing
cd data
|
||||||||||||||||||
| 3. |
This will use VI to edit it. Type when the list appears, type to go into insert mode and use the up and down arrows to find the options below
Find and edit the parameters in the list below and change them to the suggested values, if they are not already set to that value.
For any setting that is about disk space or memory, you can type 1GB, 1000MB, or 1000000KB - they are all equivalent. Do not leave a space between the number and the memory amount at the GB, MB or KB; otherwise, Postgres will not start. |
||||||||||||||||||
| 4. |
use pgtune to get some optimized parameters for your machine and replace the values below. It is probably better to append the results from pgtune at the end and filling any missing settings at the bottom.
Reference for postgres.conf file parameters https://www.postgresql.org/docs/current/static/runtime-config.html |
||||||||||||||||||
| 5. | Once the changes are made, type, in this order:
hit the '' key (the insert mode will disappear) (the window will show the 'Entering EX mode' message) and the window will clear and you will be back at terminal |
OSX Self Signed TLS Certificate
Making your own Self Signed TLS Certificate
It is generally best to create your own certificate. It takes about 30 seconds to do, and has the advantage that the certificate is unique to your database.
Start a terminal session, type the following 2 commands, and then follow the instructions as prompted. You can copy/paste the command.
|
cd /Users/Shared openssl req -newkey rsa:4096 -nodes -keyout server.key -x509 -days 365 -out server.crt |
Answer all the questions you are asked and when done, find the files in the /Users/Shared directory called:
- server.crt
- server.key
Using a supplied self Signed TLS Certificate
We have created a 4094 bit TLS certificate and included it with the installer. While it is better to create your own, if you need one fast to get started, you can use ours and create your own later (per the step above).
Go to the /Users/Shared folder and find the files called:
- server.crt
- server.key
Installing the server.crt and server.key Files
You will need to copy the files to the Postgres User directory as the postgres user. Do the following commands in Terminal:
|
su - postgres (and enter the password when asked)
cd data pwd |
|
Make sure the results of the pwd command says that the directory is /Library/PostgreSQL/x/data where 'x' is the version of PostgreSQL you have installed. It if does not, do not go any further. and call for assistance. |
|
cp /Users/Shared/server.crt server.crt cp /Users/Shared/server.key server.key chown postgres:daemon server.* chmod 600 server.* ls -la |
In the listing, the two files should now be in the postgres data directory and all that needs to occur is to stop and restart the database.
|
pg_ctl stop -m fast pg_ctl start |
Step 3: PostgreSQL server backups
|
Venues with databases on the AMS Cloud do not need to set up or manage backups - other than to request a special backup before running year end rollover |
Once the database is set up, you will need to establish a back up frequency that is appropriate for your venue.
There are two steps to configuring the backup:
- Use the System Preferences->Backup to setup the backup frequency within Theatre Manager. The TM Server backup process uses this setup to do the backups
- Configuring a TM Server to do backups and monitor them
From then on, backups occur automatically. If they do not, you will receive a message on login that a backup has not been run for the past 24 hours.
Disable Power Saving Settings on Server
Additional Setup Considerations
|
Update to the latest version of macOS (macOS 12 Monterey or later).
It's free. The highest version you can update to will depend on how old your machine is. |
The following settings should be made on all servers (Postgres, Apache and web listeners) that are installed on Macintosh.
| 1 | If the Security and Privacy System Preference in MacOS does not show 'Anywhere' which allows applications to run from 'Anywhere', open Terminal and copy/paste the following two commands:
You may have to close System Preferences and open it again in order to see the change. If Anywhere is not selected, please select it - as it should allow TM to run when the user is not an administrator. Installers from TM should make this option visible in system preferences per the image below. if not, run the above command.
Big Sur/Sonoma and later
Earlier versions of MacOS
|
| 2 |
 Make sure to
|
| 3 | Make sure to turn Airport OFF if the Mac comes with it. Airport will cause the Mac to temporarily freeze while it looks for a network to connect to - and will lock out sales while it does that.
This is done by opening the control panel, clicking on the Airport interface, and then clicking on the 'gear' at the bottom to select the option 'make service inactive'. Doing this will change the status from 'off' to 'inactive'.
|
| 4 | Make sure to force the Mac Mini to use the built-in Graphics Processor Unit (GPU) when displaying screen shots instead of CPU. This prevents remote access from using up a CPU core to display the screen. You can do one of the following:
Disconnecting a monitor from the Mac will cause the computer to unnecessarily waste CPU cycles on display - when it should use the GPU. |
| 5 | Turn off Spotlight Indexing (mdsworker) using Terminal and typing sudo mdutil -a -i off On Lion and later, also use the following command sudo launchctl unload -w /System/Library/LaunchDaemons/com.apple.metadata.mds.plist This will prevent the operating system from doing unnecessary work while serving web pages. To recognize if Spotlight is running on a server, look for an 'mds' application running. It can use a lot of CPU resources. If you receive Operation not permitted while System Integrity Protection is engaged while doing this, you may wish to disable System Integrity Protection note: If any mdworker messages are in the console logs (or if mdworker pops up in activity logs), then Spotlight is not turned off. |
| 6 | Using Terminal, disable Time Machine for the database folder (optionally, completely disable and local Time Machine files)
Alternatively, you can disable Time Machine through System Preferences. If you must use time machine on the database server, see the next step for options |
| 7 | Do not use Time Machine for the Postgres backups. Use the backup script and move the backups to another machine. If Time Machine must be used on the database server machine:
sudo defaults write /System/Library/LaunchDaemons/com.apple.backupd-auto StartInterval -int 43200
|
| 8 | Completely turn off any automatic Software Updates in the Mac's System Preferences. This is a database machine and should be manually updated on a periodic basis under controlled circumstances.
It may be either under 'Software Update' or 'App Store', depending on the version of macOS you have.
|
| 9 | Completely disable App Nap on the computer running the Classic Listener using the Terminal command below:
defaults write NSGlobalDomain NSAppSleepDisabled -bool YES |
| 10 | Update to the latest version of macOS. It is free. |
| 11 | Disable 'handoff' in general system preferences as well as disconnect from iCloud.
Handoff disabled in same place as airplay receiver (below) in later versions of Mac OS |
| 12 | Disable Air Play Receiver on MacOS 11 Monterey in System Preferences->sharing setup.
Big Sur and more recent versions of Mac OS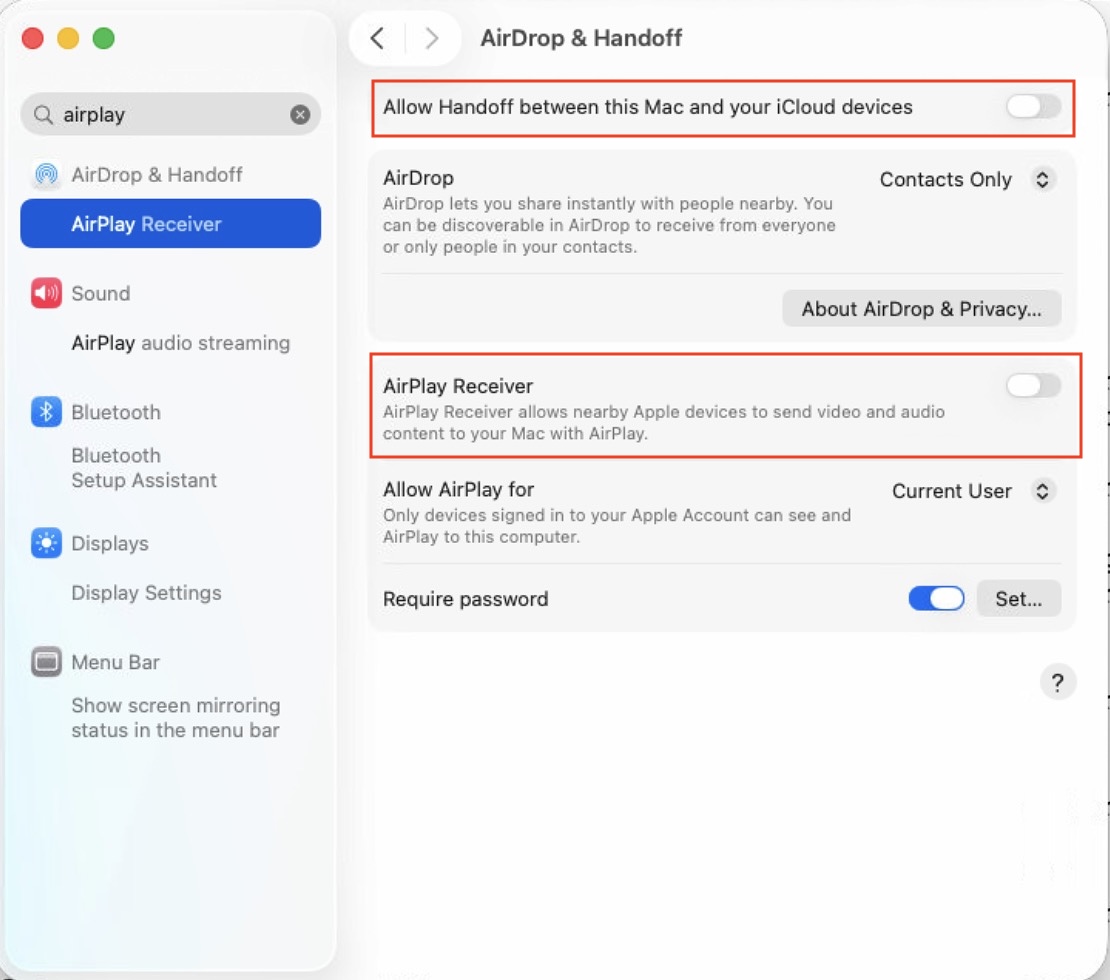
|
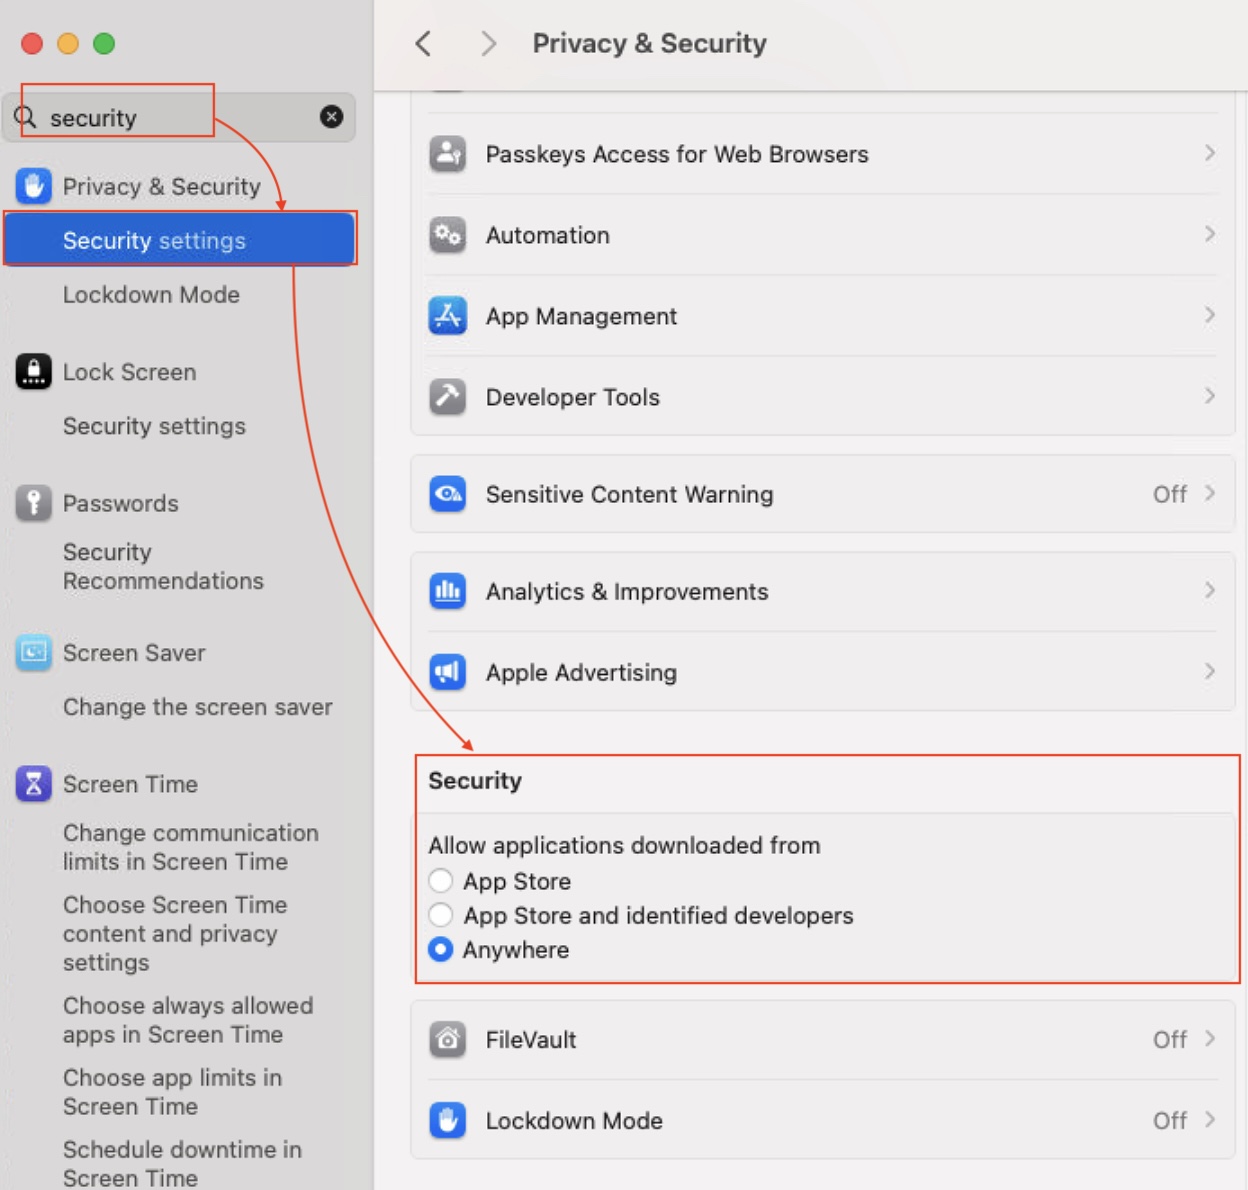
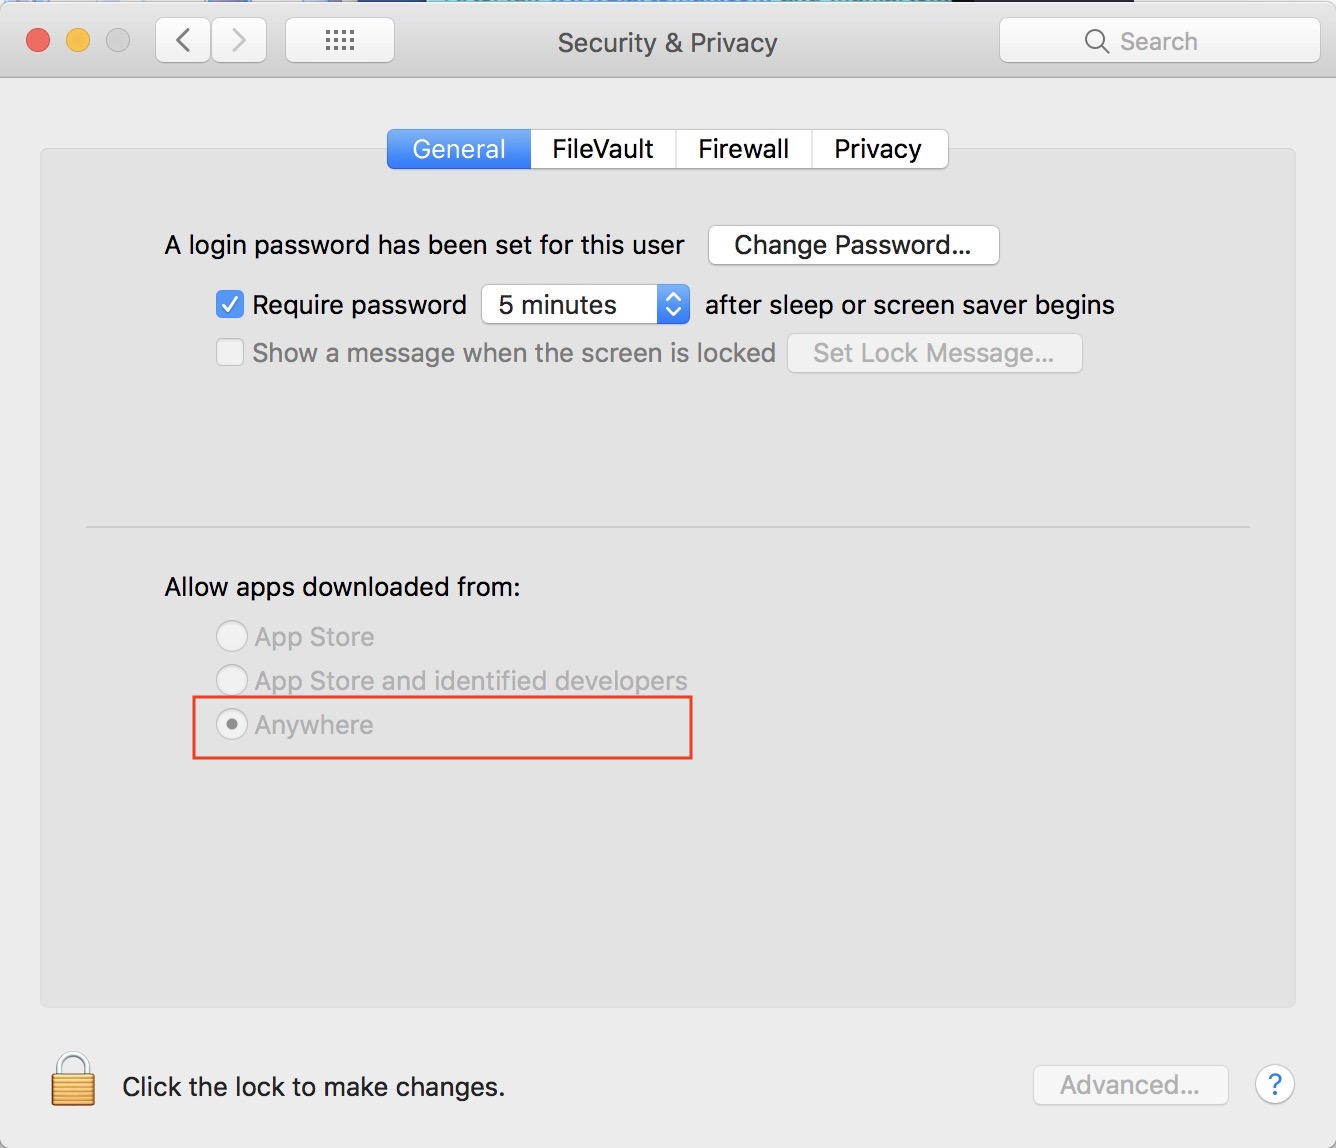
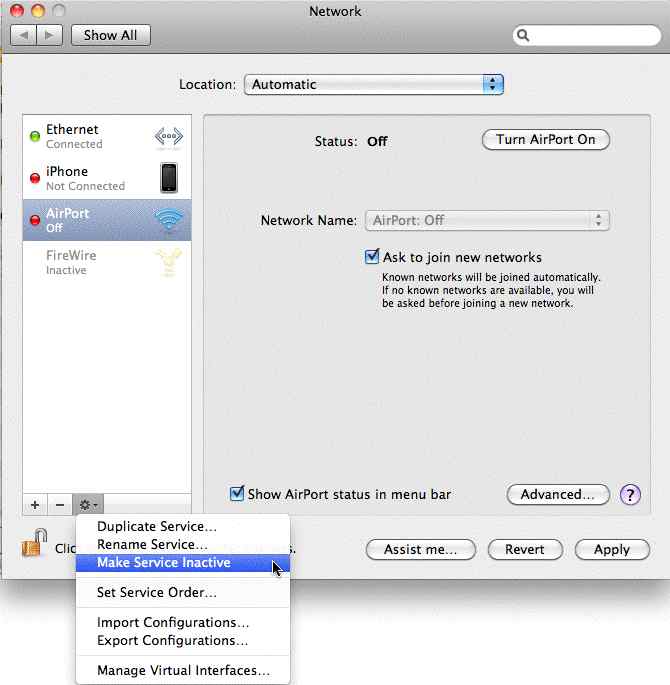
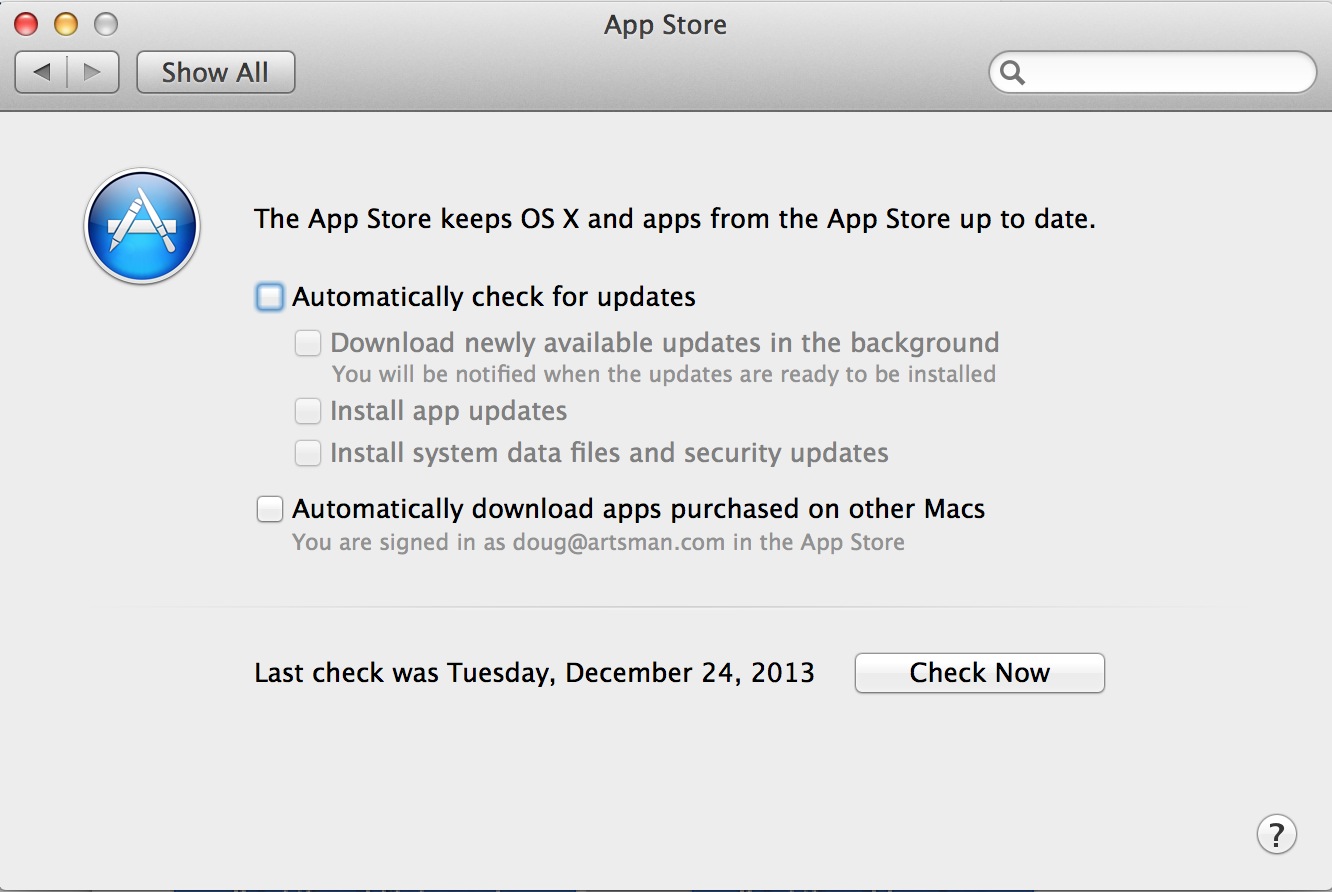
Windows PostgreSQL Server
The server needs to be set up on one machine and the application can be set up on as many machines as you wish.
Follow these steps if you are using the TMPostgresSetup installer program and you may want to bookmark this page in your browser in case you want to refer to these installation steps. If you are only installing a demo, refer to the last column for the required steps.
| task | Description | Full Install | Demo |
| 1 | Download the Postgres installer for Windows | yes | yes |
| 2 | The installation of the PostgreSQL server. Please make sure to read any caveats for the version of Windows you are using. | yes | yes |
| 3 | Installing the demo database and the main Theatre Manager User | optional | yes |
| 4 | Configuration of the server parameters for maximizing performance in a production database | yes | |
| 5 | Creating a daily backup job in TM Server | yes | |
| 6 | Considerations for installing virus protection on the PostgreSQL server - please do not include the Postgres data folder. | yes | |
| 7 | Turn off Microsoft disk indexing on the volume that the database is running on. | yes | |
| 8 | Turn off Microsoft Auto Updates on the database server so that it will not restart in the middle of sales. Applying Microsoft patches and updates should be done on a planned basis -- perhaps bi-weekly or monthly as a practice (or immediately if there is a current threat) | yes |
Notes and Assumptions:
- This install process assumes you have NEVER installed PostgreSQL or Theatre Manager on your computer before. If you have, you may need to refer to Updating PostgreSQL Instructions
- You MUST turn off all virus protection while running the installer (especially Norton if you are using it). Virus software always interferes with proper software installation.
- If this installer is being used to create a demo installation, then you only really need do steps 1, 2 and 3.
- This process assumes that you have never installed Theatre Manager or PostgreSQL on your machine. If you have already installed PostgreSQL:
- you will be asked if you want to un-install PostgreSQL (you may want to do that and then try to re-install after)
- you may need to remove the 'postgres' user from your computer if one exists; unless you know the existing password for the postgres user.
Step 1: Install PostgreSQL Database Server
All Versions of Windows
|
DO NOT set up the Postgres database server to also act as ACTIVE DIRECTORY or as a DOMAIN CONTROLLER.
While it is possible to do so, the reasons not to are:
|
|
We DO NOT recommend that the database server JOIN a windows DOMAIN CONTROLLER either. There is no need for it. If you wish to join a domain controller, please leave the database server login window pointing to the local machine (instead of the domain). It makes a user logging on for support and updates easier. Note that the machine should always be locked so sign-in is required - per PCI compliance. |
|
We DO NOT recommend installing virus software on the Postgres database server. Since access to the server is under very controlled access via port 5432 from the Theatre Manager application only, it should not be required. If you must install virus software on the database machine, set it to scan the machine daily and void the Postgres DB files. The best defence against any virus software is a backup of the database off machine and, even better, off premises. |
Additional Notes for Specific Versions of Windows
| Windows Small Business Server | For Windows Small Business Server, you MUST turn off 'disk quota management' for all users prior to installing Postgres (and leave it off). Otherwise, you may run out of space for the installer and any databases that get installed. |
| Windows 8 and higher | For Windows 8 and higher, you may need to turn off UAC (user access control) if it is acting as a server. You can run Theatre Manager on other workstations with UAC on. |
| Windows 2012 Server and higher | With Windows Server, you will need to be a local administrator to install Postgres. |
Run Main TMPostgresSetup Installer
When you run the installer for the database, accept all the defaults.
| Click OK | Right click on the TMPostgresSetup.exe application and use Run As to begin the install. Select a LOCAL administrator as the user ID to use for the install. If a checkbox that implies "Protect My Computer" or "Run with Restrictions" is available and enabled, uncheck the box to allow the installer to run with full install privileges.
|
| Click Next |  |
| Click Next | 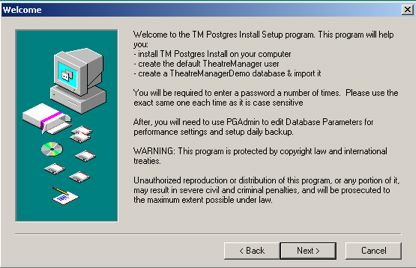 |
| Click Next | 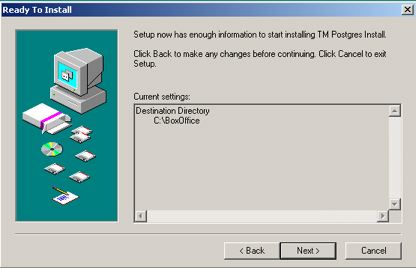 |
| Click Yes | At the end of the TM PostGres installer, you are asked if you want to install the PostGreSQL database in the dialog (as in below).
If you say yes, postgres will install automatically for you and you can SKIP the next section describing how to install it manually and proceed to the step where the installer asks about installing a demo database
Alternatively, you can install them later manually by:
|
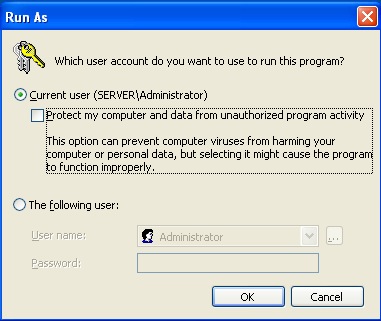

Run Postgres Installer
|
Do not do this step if you elected to let the Theatre Manager Postgres installer automatically install Postgres for you. Only reference these instructions if you are running the actual Postgres installer from the Postgres web site manually. |
Accept all the defaults on the screens that follow except the last one that references 'stackbuilder'.
|
Before starting the install, please check that the computer date and timezone settings are correct. Failure to do so may cause postgres to think it is in a different timezone. | ||||
| Click Next |  |
||||
| Click Next |
|
||||
| Click Next |
Enter a hardened ' Account Password' for the postgres user. If you do not supply one, we will generate one automatically. However, if this is a demo. In that case, please pick a user password that you remember - we suggest 'Master'.
|
||||
| Click Next |
Leave the Port Number as 5432 (if you change the standard port, you will also have to change it in Theatre Manager login window) |
||||
| Click Next |
Leave both these settings as shown. |
||||
| Click Next |  |
||||
| Click Next | You will need to wait for a bit while the database server is installed
|
||||
| Click Finish |
At this time, the database should have installed successfully and should be runnning.  |
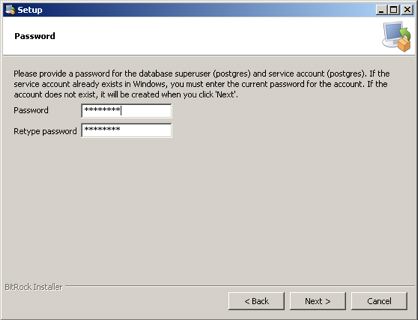
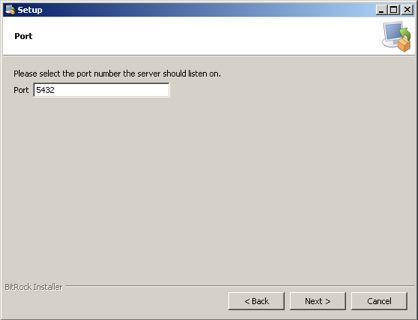
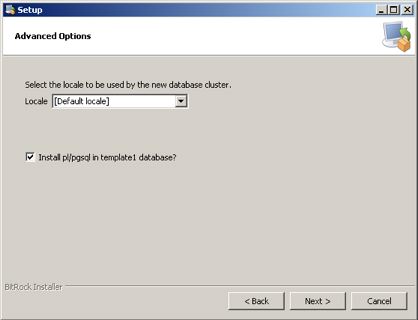

Load Demo Database
| Click Yes |  |
| Wait | Wait while a DOS window pops up and shows the progress of the demo database being imported. Depending on the performance and RAM in your machine, this could take a few minutes to finish.
|
| When the DOS window closes, the database server is installed, and the TheatreManagerDemo database is imported. |
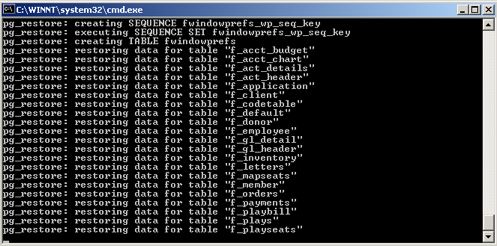
Step 2: Create user and import Database
|
Only perform this step if you did not install the demo database when installing server. |
After the database server is installed, You need to create a specific user called TheatreManager and give them privileges. You also want to import a demo database. This step assumes that you have installed into C:\BoxOffice. If you did not, then you will need to edit the .bat files and do this step manually.
| 1. | Go to C:\BoxOffice directory. You will see some files and folders with names similar to below.
|
||
| 2. | Double click on the 'ImportDemo' bat file. This starts a DOS prompt and start the bat file running.
If you have altered the install directory, you will need to change the path name to point to the location that Postgres was installed in. Often, this is just changing the drive letter. |
||
| 3. | You are asked for the password to create the 'TheatreManager' user. Type the password you used for the installation of the database in the preceding section. If this is a demo database install, this may have been 'master' you used when installing the server.
|
||
| 4. | You are asked for the password to create a 'TheatreManagerDemo' database. Type the same password used above and elsewhere in the install instructions.
|
||
| 5. | You are asked again for the password to import data into the TheatreManagerDemo database. Type the same password again and you will see a lot of lines displayed to you after that point as the demo database is imported.
|
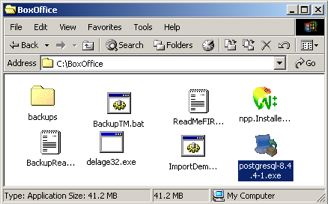
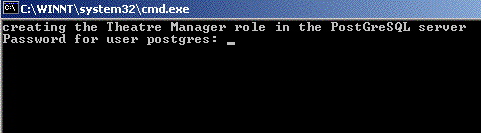
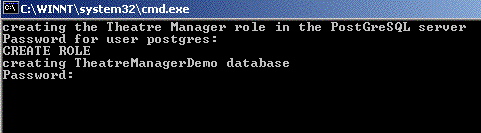
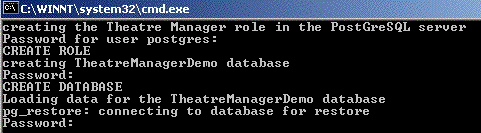
Step 3: Configure PostgreSQL server parameters
Another way to get the key config parameters is to use pgtune and paste the results at the bottom of the postgresql.conf file
| 1. | Configuring postgres entails editing two files in the 'data' folder of the current postgres installation as highlighted below:
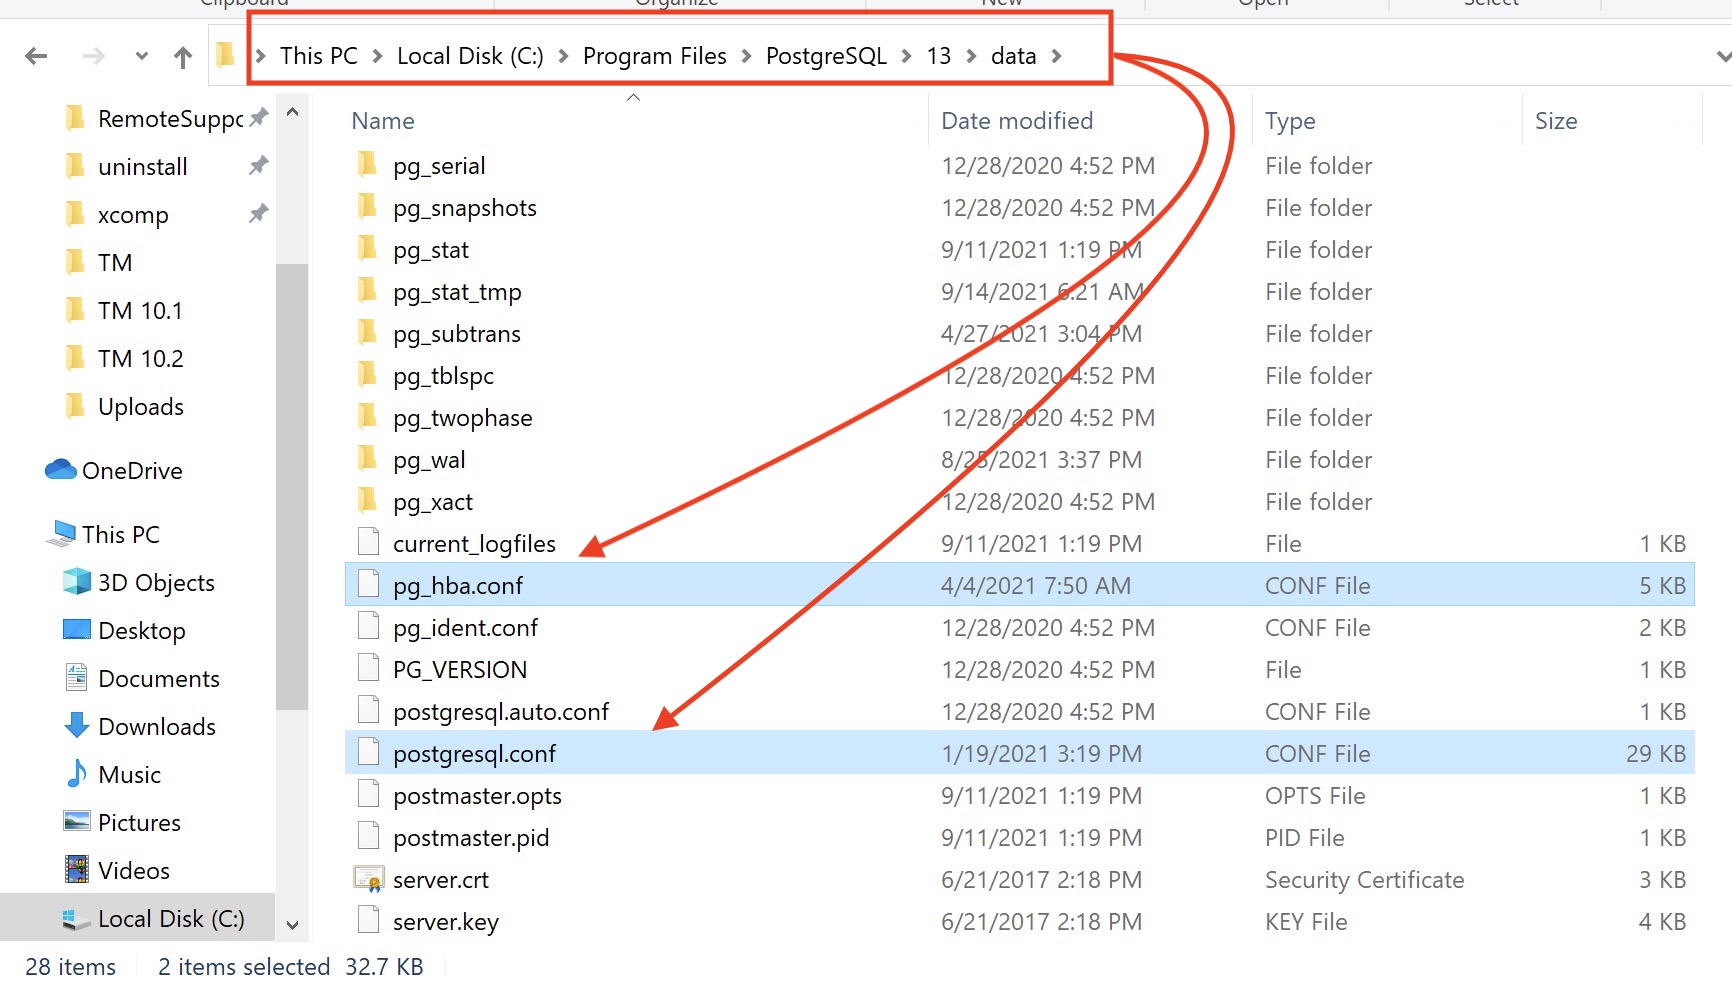
|
||||||||||||||||||||||||||||
| 2. |  edit the pg_hba.conf file using Notepad++
|
||||||||||||||||||||||||||||
| 3. |
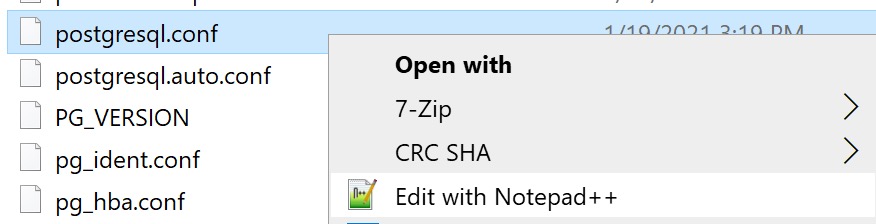 Edit the postgesql.conf file. Some notes about editing:
|
||||||||||||||||||||||||||||
| 4. |
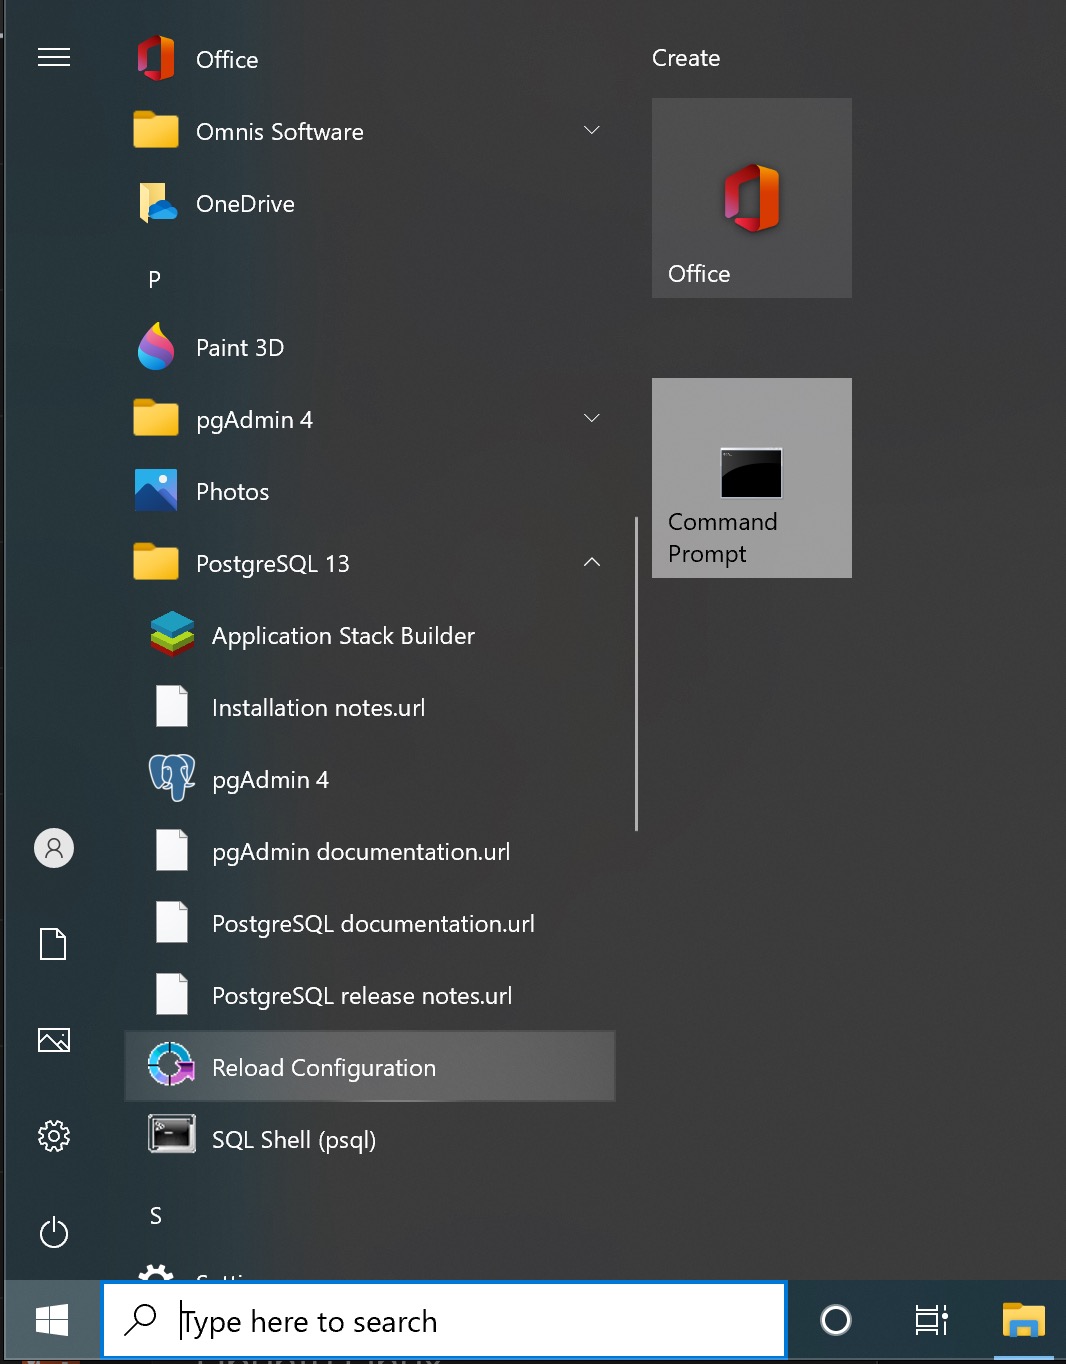 Reload or restart the postgres server to cause the new settings to be used.
All changes to the pg_hba.conf and many changes to postgresql.conf can be reloaded. That put the parameters in place without restarting the server, so any services (like web sales) that are running, continue to run. A reload is done by:
A few changes to the postgresql.conf file will require the postgres server to be completely restarted. This is usually noted in the comments beside the parameter. If this is required, the general steps are below. It is very rare that these parameters are changed after installation - so it might be best to ask support to help you with a complete server restart if you are not familiar:
|
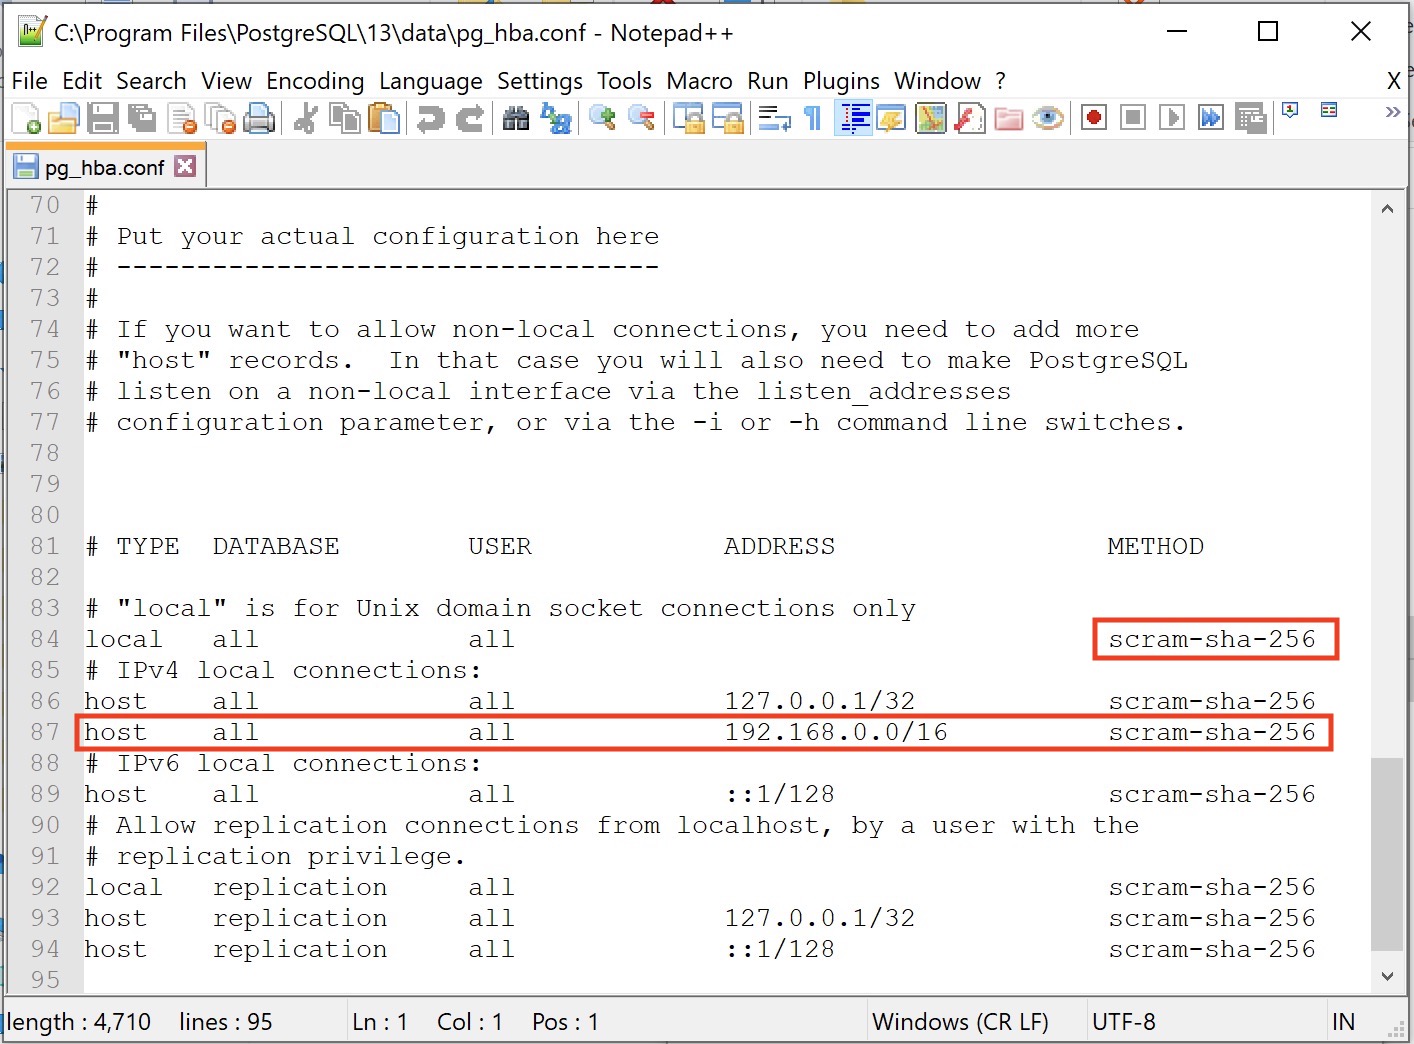
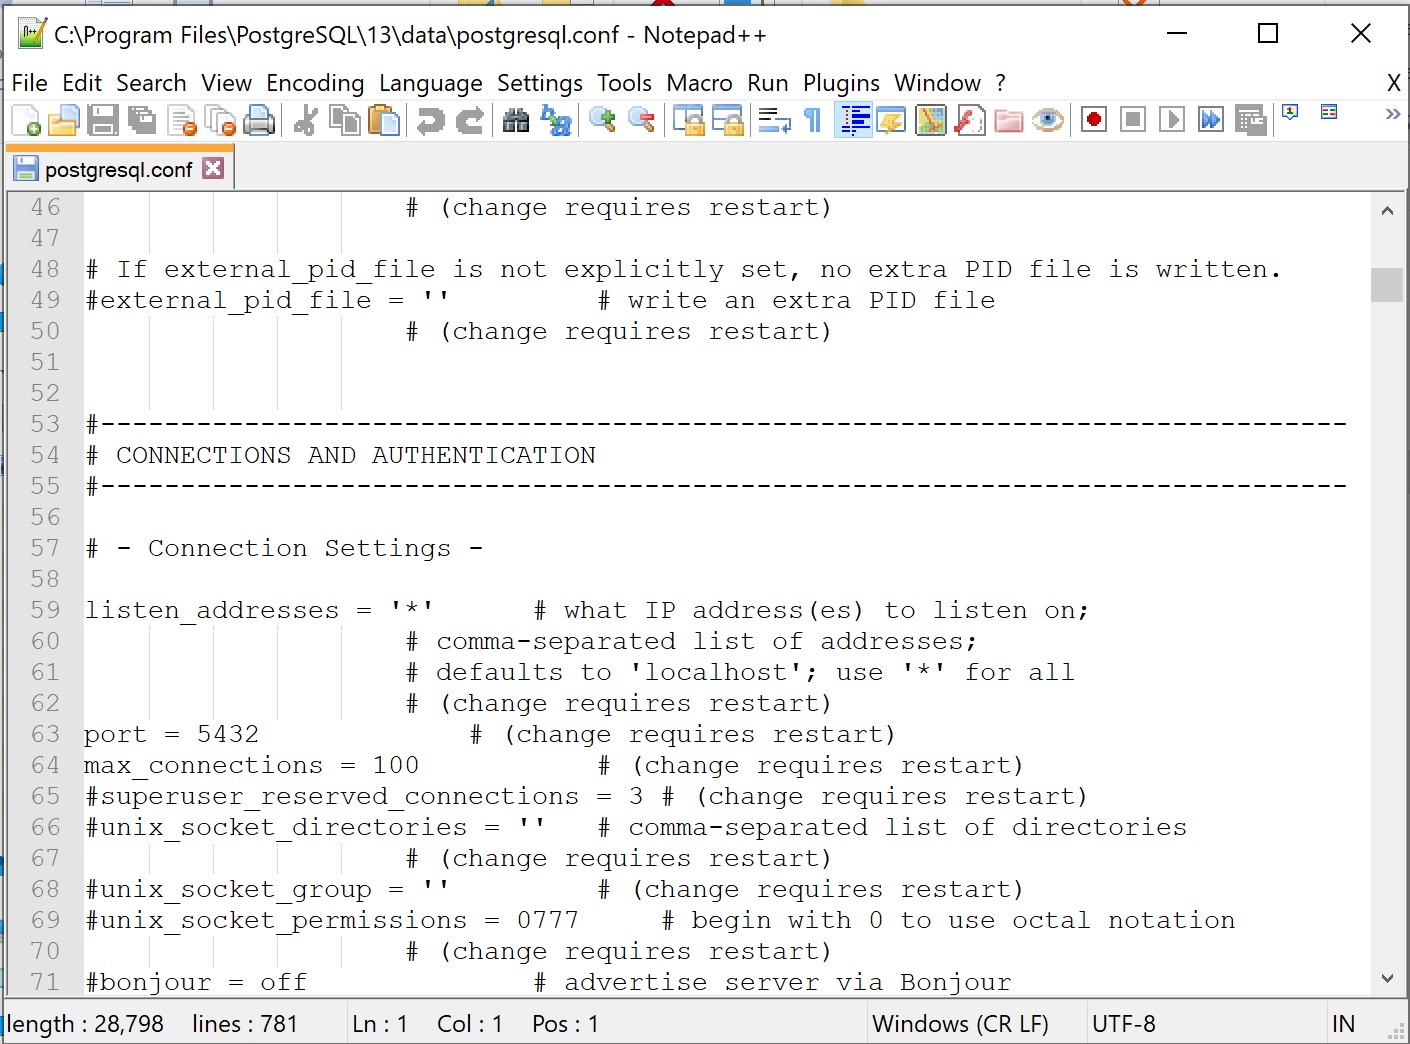
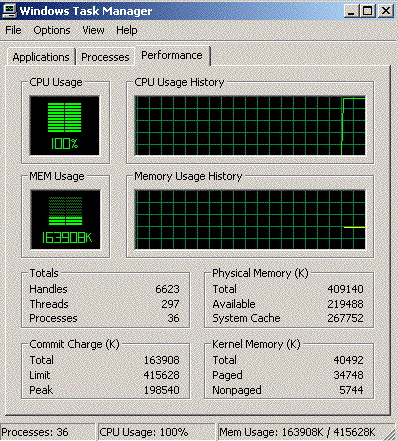
Windows Self Signed TLS Certificate
Making your own Self Signed TLS Certificate
It is generally best to create your own certificate. It takes about 30 seconds to do, and has the advantage that the certificate is unique to your database.
Start a CMD prompt, type the following 3 commands, and then follow the instructions as prompted. You can copy/paste the commands.
|
cd C:\OpenSSL-Win32 cd bin openssl req -newkey rsa:4096 -nodes -keyout server.key -x509 -days 365 -out server.crt |
Answer all the questions you are asked and when done, find the files in the C:\OpenSSL-Win32\bin directory called:
- server.crt
- server.key
Using a supplied self Signed TLS Certificate
We have created a 4094 bit TLS certificate and included it with the installer. While it is better to create your own, if you need one fast to get started, you can use ours and create your own later (per the step above).
Go to the C:\BoxOffice folder and find the files called:
- server.crt
- server.key
Installing the server.crt and server.key Files
- Select both the server.crt and server.key files and right-click to COPY them
- Navigate to the postgres data directory which is C:\Program FIles\Postgres\x\data where 'x' is the version of PostgreSQL you have installed.
- Right-Click and PASTE them into the data directory
- You will need to restart the Postgres server for the changes to take effect
Step 4: Database Backups
|
Venues with databases on the AMS Cloud do not need to set up or manage backups - other than to request a special backup before running year end rollover |
Once the database is set up, you will need to establish a backup frequency that is appropriate for your venue.
There are two steps to configuring the backup:
- Use the System Preferences->Backup to setup the backup frequency within Theatre Manager. The TM Server backup process uses this setup to do the backups
- Configuring a TM Server to do backups and monitor them
From then on, backups occur automatically. If they do not, you will receive a message on login that a backup has not been run for the past 24 hours.
Postgres User Password
- Find the local 'postgres' user on the computer using the Windows Administrative tools an edit the user id. You can change the password the way you would normally change the password for any other user (and is dependant on your version of windows)
- If you change the service password, then you must also open the 'services' control panel and find the postgres service. Change the password there as well. To confirm that you got it right, please stop and start the postgres server. if it stops and starts, its safe to bet that the server will restart on the next reboot of the server.
Increasing Windows Performance
On Windows machines:
- Enable Windows Firewall to allow incoming on port 5432 for the database and turn off other non-essential ports. Alternatively, make sure that your IT personnel have opened the correct ports through the firewall between computers as per these firewall/router rules.
- Turn off auto-updates completely
- Windows Automatic Updates is now found in Services in Windows 10. -and-
- You may have to set the internet connection to metered as per this help page to really tell Microsoft that you don't wan updates, unless you want them.
These are something to be done manually and on a periodic scheduled basis. You do not want servers restarting in the middle of the night, nor do you want downloading to affect performance of your servers.
- Turn off:
- microsoft indexing for all directories and sub directories. by looking at the properties of the drive that database is running on
- And go to Services to find Windows Search and disable that.
- Disable any disk quota management on the disk drive
- turn off any virus scanning for ports and data directories used by postgres
NOTE: if using windows 10 pro, you need to permanently disable windows defender using one of the methods in the link. In win 10 Pro, use gpedit.msc to disable by group policy editor since windows 10 turns it back on later if you only temporarily disable it (Another stupid idea form Microsoft)
- Do not install active directory or join it to a domain. Only local access is required to this machine
- Turn off file sharing or any means that might allow a file to be added to the machine, other than via the postgres engine
- turn off any energy saving options
- do not use the machine for saving snapshots of files by turning off 'use shadow copies' on the appropriate drives. (This is set in the properties of the drive)
- set best performance options to maximize background performances.
Note: turn off any virus scanning against the database directory which is usually
C:\Program Files\PostgreSQL
or
D:\Program Files\PostgreSQL (if there are two drives)
Leaving any of those on will affect performance of the server for the database
Disable Defragmentation
- Click on the drive containing the database server
- Right click to get properties
- Click on the Tools tab
- Click on the 'optimize' button
- Look at the bottom to see if optimization is on (or off)
- The button to turn it on and off is on the lower right
- The current state is on the lower left

Disable Download of Updates and Auto Updating
Windows Automatic Updates is now found in Services in Windows 10.
How to locate:
- Open Control Panel and Administrative Tools
- Select Services
- In the Services window, scroll down to Windows Update and turn off the process.To turn it off, right-click on the process, click on Properties and select Disabled.
- Note: windows 10 sometimes listens to you, most times it does not, despite what you indicate in various settings and you may have to:
- prevent it from downloading updates
- which may involve doing some registry entries which could require you to gain control of some protected registry entries
- Windows 10 isn't pretty - you are better using 2012 R2 or some earlier version of windows like 8.1 if you must
Disable power saving on ethernet
- especially on workstations, and
- especially if you go take an extended coffee break or have a meeting.
We suggest disabling power management on the ethernet card.
- use instructions like this for windows 7 and 8
- Use instructions below for Windows 10 (they are very similar to windows 7)
- Open Control Panel
- select network and Internet
- Pick Network Connections. the screen should look like below
- click the network card
- right click and show properties
- click configure
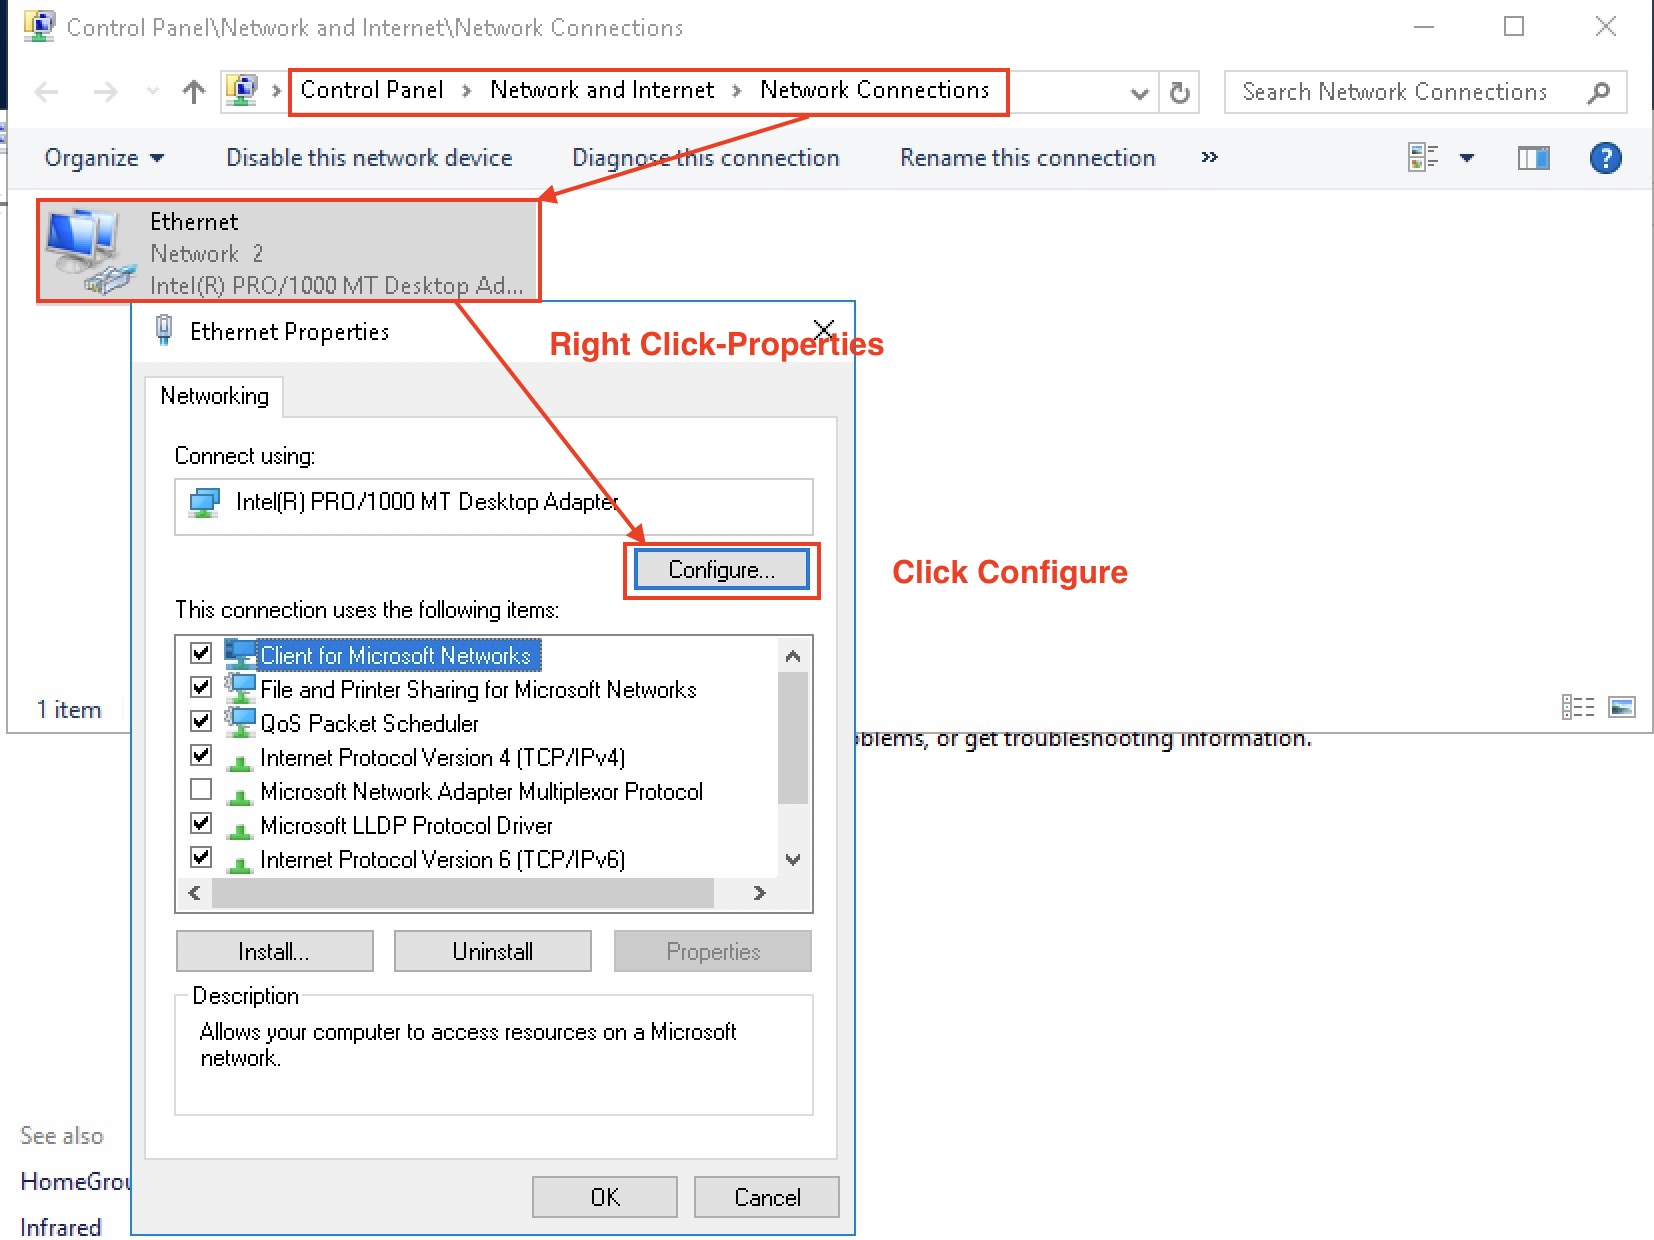
- click power management and uncheck the highlighted item per the image below
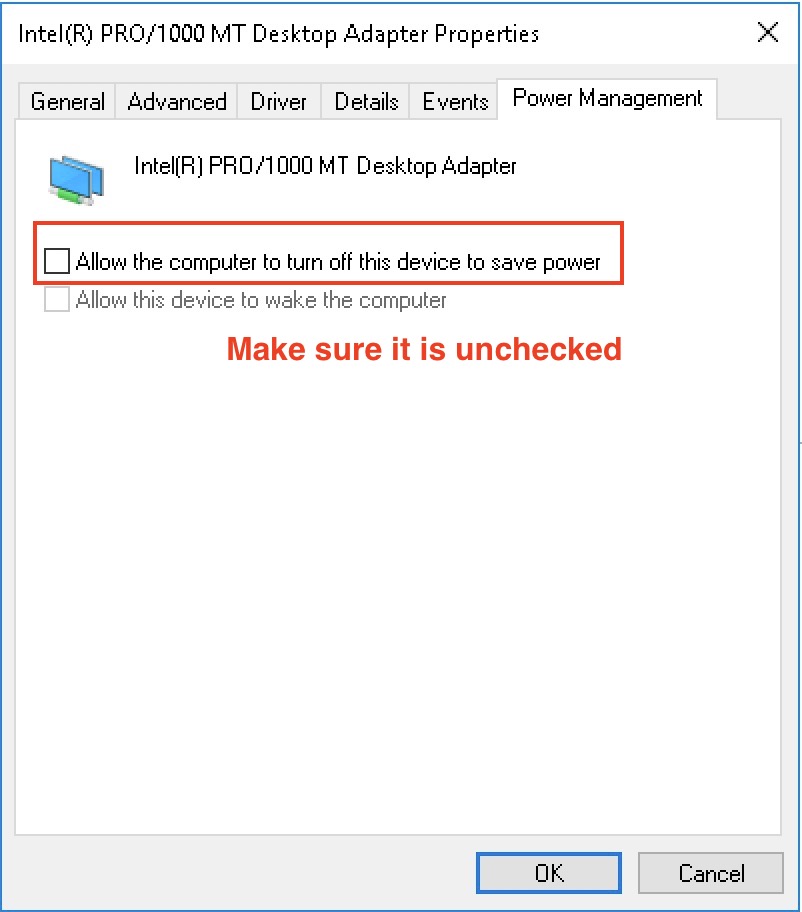
In addition, please make sure to disable power management except for monitors.
Making Windows Defender Manageable
- Using 2012R2 or 2016 server for server processes instead of Windows 10. 2012R2 server does what you tell it with Defender, windows 10 does not - it automatically turns itself back on unless you
- Set windows defender exclusion to all theatre manager folders on that machine -and/or-
- Turning the Defender policy off -or-
- Installing some other AV software that disables Defender and takes over. (we dislike this option - other AV software is much much worse)
- Make sure to turn off DEP on windows 10 for all but essential programs - it might affect TM server from starting on startup
Setting a Custom Power Plan
|
Make sure to also turn off power saving on your ethernet card on all servers and workstations. |
Create a custom Power Plan
- Open the control panel.
- Click Power Options.
- Click the Create a Power Plan option
- Select the bullet next to "High Performance"
- Click Next.
- Change the Display setting to "Never"
- Click Create.
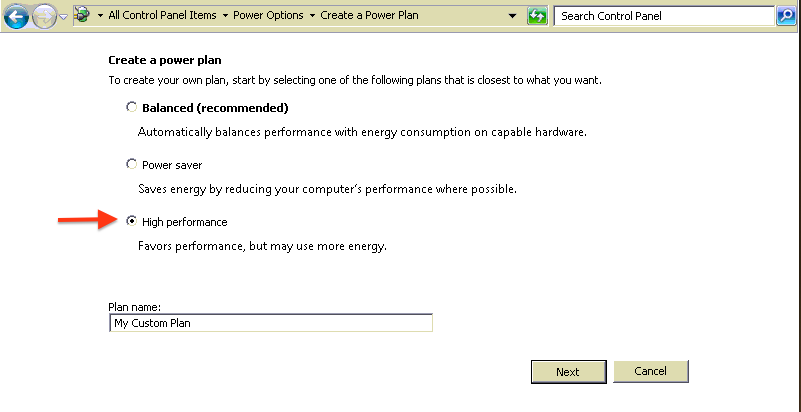
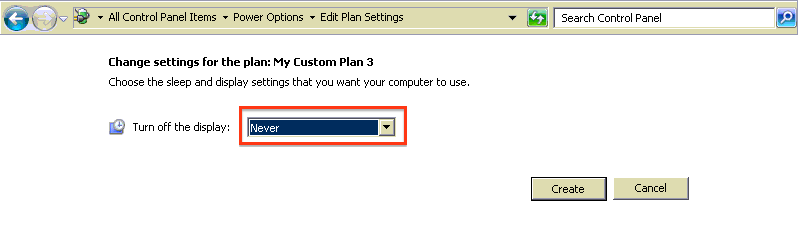
Turning Off Indexing in Windows
Using Control Panel
You can usually turn of most indexing by clicking on the properties of the device. However, it seems windows 10 doesn't fully listen, so it may be best to approach this task via the control panel.
- Open Control Panels
- Look for where things are indexed
- Follow these instructions to disable indexing or something like the intent of the instructions.
Disabling indexing of disk from C drive properties
- Double-click on My Computer (or Computer).
- Right-click on C: drive (or the drive letter that Postgres is installed under).
- Select Properties from the popup context menu.
- Click the General tab.
- Remove the check in the "Allow files on this drive to have contents indexed in addition to file properties" box.
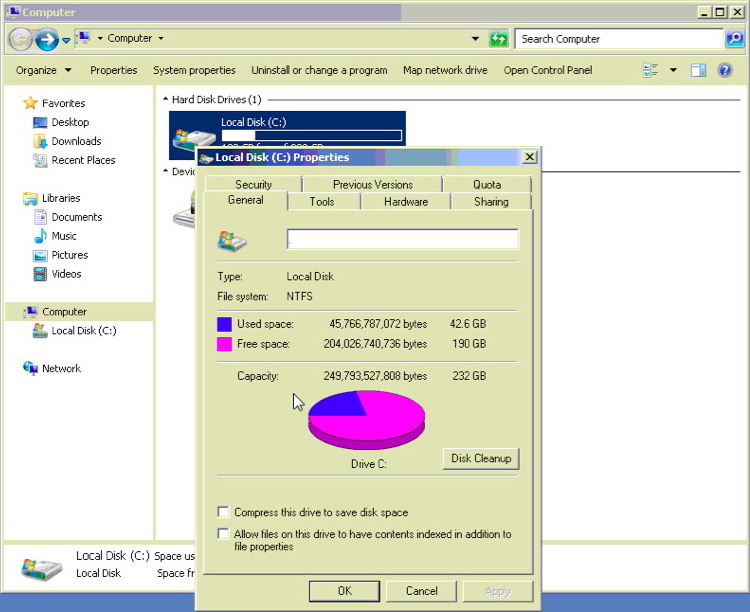
- Click Apply.
It may take several minutes for Indexing to complete. If a message pops up indicating Administrator permissions are required click Ok. If the current user is not the Administrator a prompt for the Administrator password will appear. Enter the password and continue. If a prompt appears indicating select folders cannot be altered it may be they are already open. Click Ignore All and let the process continue.
- Click OK.
- Reboot the computer.
Repeat this setting on the Web Listener computer, and the Apache server as well
Turning Off Disk Quota Management
- Double-click on My Computer (or Computer).
- Right-click on C: drive (or the drive letter that Postgres is installed under).
- Select Properties from the popup context menu.
- Click the Quota tab.
- Remove the check in the "Enable quota management" box.
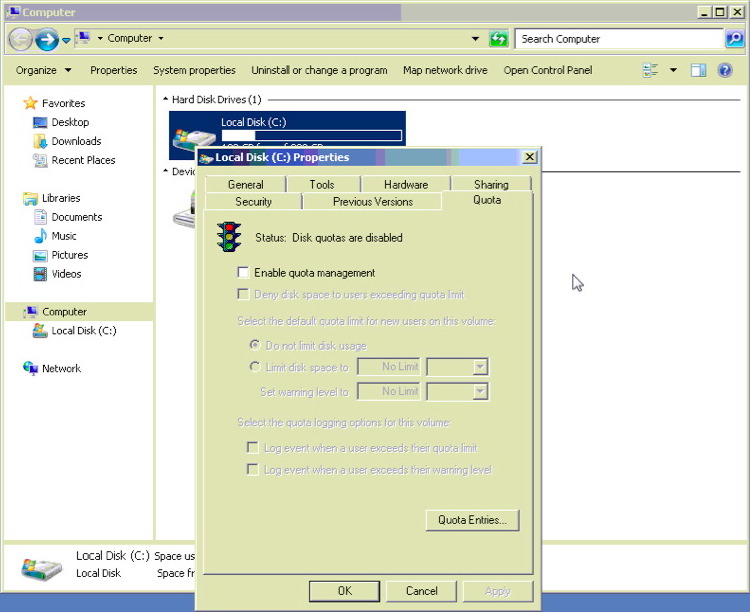
- Click Apply.
- Click OK.
- Reboot the computer.
Turning Off Windows Previous Versions
To check if the setting is turned on:
- Double-click on My Computer (or Computer).
- Right-click on C: drive (or the drive letter that Postgres is installed under).
- Select Properties from the popup context menu.
- Click the Previous Versions tab.
If Folder Versions reads "There are no previous versions available" this option is turned off. However, if backups are listed with date and time stamps, the feature is enabled and needs to be turned off.
- Click Start >> Control Panel.
- Click System in the Control Panel window.
- Click System Protection in the left column.
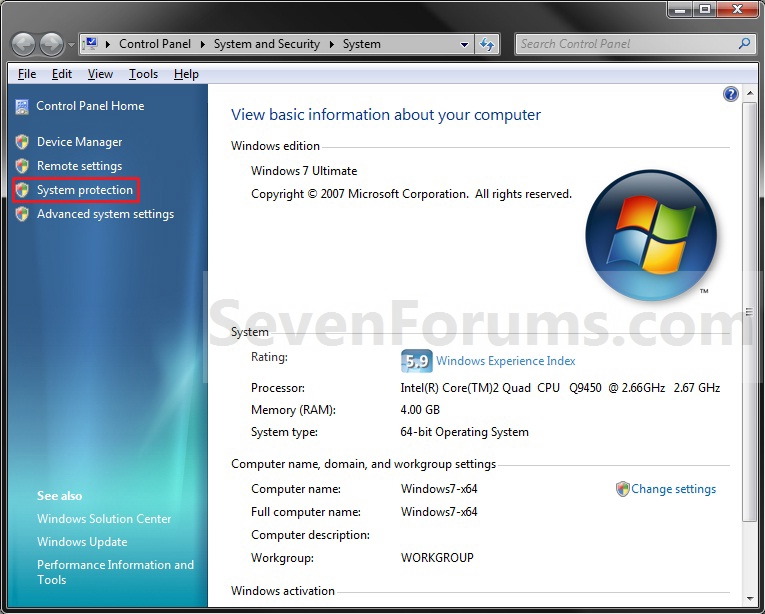
- Select the drive Postgres is installed on.
- Click the Configure button.
- Move the bullet to "Turn off system protection".
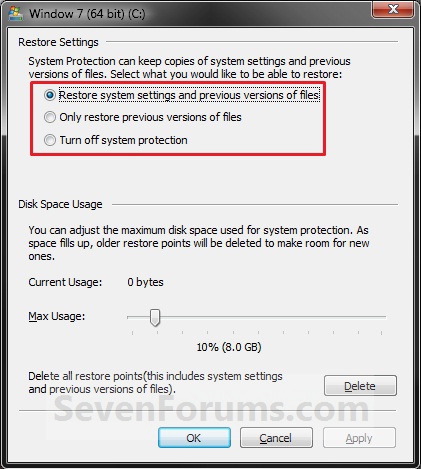
- Click Apply.
- Click OK.
- Reboot the computer.
Setting Best Performance Options
- Right-click on My Computer (or Computer).
- Select Properties from the popup context menu.
- Double-click on System Properties in the left column.
- Select the Advanced tab.
- Move the bullet to "Adjust for best performance".
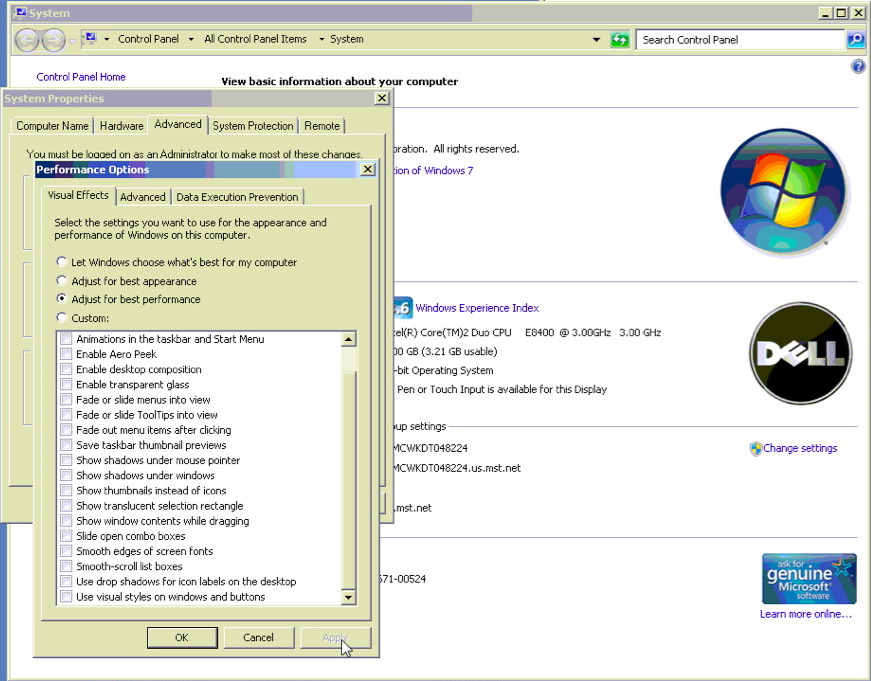
- Click Apply.
- Click OK.
- Reboot the computer.
Turning Off UAC for Windows
- Open the control panel.
- Click User Accounts.
- Click the Change Users Account Control Settings link under Action Center
- Move the slider down to Never notify.
- Click Ok.
Linux PostgreSQL Server
As of July 1, 2018, the most recent version of Postgres is 10.4 (or later) - we recommend the latest production version be installed on new machines.
The server needs to be set up on one machine and the application can be set up on as many machines as you wish.
Follow these steps and you may want to bookmark this page in your browser in case you want to refer to these installation steps. If you are only installing a demo, refer to the last column for required steps.
| task | Description | Full Install | Demo |
| 1 | download the PostGres installer for Linux from Postgresql.org | yes | yes |
| 2 | the installation of the PostGres SQL server | yes | yes |
| 3 | installing the demo database and the main TheatreManager User | optional | yes |
| 4 | configuration of the server parameters for maximizing performance in a production database | yes | |
| 5 | creating a daily backup job in using cronnix to run the backup | yes |
Notes and Assumptions:
- This install process assumes you have NEVER installed PostGres or Theatre Manager on your computer before. If you have, you may need to refer to Updating Postgres Instructions
- You MUST turn all virus protection while running the installer (especially Norton if you are using it). Virus software always interferes with proper software installation.
- If this installer is being used to create a demo installation, then you only really need do steps 1, 2 and 3.
- This process assumes that you have never installed Theatre Manager or Postgres on your machine. If you have already installed Postgres:
- you will be asked if you want to un-install Postgres (you may want to do that and then try to re-install after)
- you may need to remove the 'postgres' user from your computer if one exists, unless you know the password for the use.
Step 1: Install PostgreSQL Database Server
Installing PostgreSQL on Linux
|
Before starting the install, please check that the computer date and timezone settings are correct. Failure to do so may cause postgres to think it is in a different timezone. |
| 1. | Install the latest production version of PostgreSQL application using apt-get or yum as per the flavour of unix you are using. |
Step 2: Create user and import Database
Installing a demo database
The database server needs a specific user called TheatreManager with specific privileges that will be assigned as the owner of each database. We also want to import a demo database. This step assumes that you have installed things into the /Users/Shared directory. If you did not, then you will need to edit the script and do this step manually
| 1. | Go to /Users/Shared directory. You should see some files and folders with names that look like below.
|
| 2. | Start terminal and change the user to 'postgres' by typing: su - postgres Press RETURN and then type the postgres user's password (password will not display anything)
|
| 3. | Drag the script '/Users/Shared/CreateDemoDB.sql onto the terminal window. This shortcut saves typing anything. Click into the terminal window and then press RETURN to start the command. If it does not run, then possible issues are:
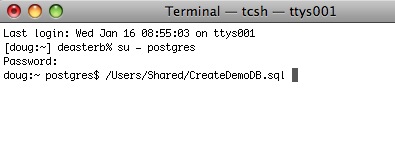
|
| 4. | The script will run and load up the TheatreManagerDemo database. You can modify this script to load up a customer database if necessary by editing it in BBedit or in textedit (make sure to save it as text if you use textedit - its preference, unfortunately, is to save as an rtf document). Note, any WARNING messages from the TheatreManagerDemo database creation can be ignored. These warnings are normal.
|
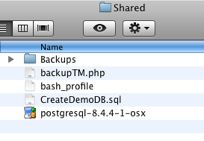
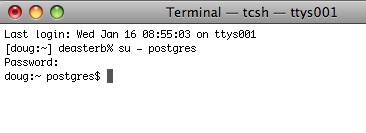
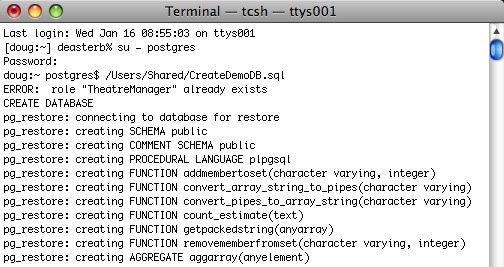
Update or Remove PostgreSQL
Updating Postgres
Download the latest postgres installer from the Artsman web site. Once you have it, make sure you have done the following steps:
- Check the version of postgres you are running. This is in the 'About Theatre Manager' menu. Look at the bottom left of the 'about Theatre Manager' screen. You will see your database name followed by a number such as (9.4.x) or (9.3.x) etc. Record this version for later.
- Log everybody out of Theatre Manager, including
- Any user at the login window and/or
- The second generation TM Server and/or
- Classic web listeners
- Edit the pg_hba.conf file to restrict access and
- Comment out any access that is allowed from any another IP address - and only allow access from 127.0.0.1
- Reload (or restart) the postgres server configuration to make sure no other user would be able to log in and disrupt the upgrade.
- Make sure you have made a backup of the database, using the procedures in the daily backup job process after everybody has been locked out.
- Once you have confirmed the backup exists and have made another copy of that in a different place (just to be safe), then follow the specific instructions for updating the same version or from an older version as required. Refer back to the version of the database that you recorded in the first step above
- If the version is at least 9.4, follow the instructions to update the same version of Postgres.
- If you have a version of postgres that is older than 9.4 (i.e. 9.3), then follow the steps for updating an older version.
- After the database has been restored, edit the pg_hba.conf and
- Un comment any access that you removed previously
- Reload (or restart) the postgres server configuration and make sure others can now log in.
- Restart any web services
Updating the Same Version of PostgreSQL
|
Remember, do not attempt to try this unless you just made a backup of your database. Preferably, you should also have restored that backup on another machine for safety, logged into it using Theatre Manager to prove that you can restore a backup and that it has 100% integrity.
|
- Make sure you are running postgres version 9.2.0 or later.
- Refer to the overall instructions to download the latest TMPostGresSetup installer.
- run the TMPostGresSetup installer.
- This will place all the install files into the C:\BoxOffice folder.
- Do not install the latest version when asked by the installer
- Let the installer complete and quit out of it.
- Go to C:/BoxOffice and find the latest version of postgres.
- It will have a file with a name similar to the one below - with a different version number on it reflecting the latest one.
- As of March 2013, the current shipping version will be 'Postgresql-9.2.3-1' or later.
- Double click on it.
- It will start up the installer and default most of the settings based on the existing installation.
- Follow the instructions and you will generally only need to use the 'next' key to continue (a few times) until the upgrade (or install) begins.
- At the end you will need to restart the server.
- Check that you can log in to Theatre Manager from the serer or any workstation.
- If the Postgres Service did not start, make sure that the Postgres User password (system settings or active directory) is the same as the password for the Postgres Service in the services panel
- If Postgres did startup, you are done.
Updating Older Version of Postges
If you have postgres 9.4.x (or older), the upgrade process involves some extra steps and can be done by Arts Management Support team if you are not comfortable following the steps below.
|
Remember, do not attempt to try this unless you just made a backup of your database. Preferably, you should also have restored that backup on another machine for safety, logged into it using Theatre Manager to prove that you can restore a backup and that it has 100% integrity.
|
Upgrading older Versions of Postgres
- Make sure that nobody is using Theatre Manager and that all second generation servers and classic web listeners are shut down
- Making a manual backup of the database using the DOS bat file C:\BoxOffice\BackupTM.bat and restoring it to a dummy database to make sure the backup will restore.
- Recording the PG_HBA.CONF and POSTGRESQL.CONF settings unique to this server
- stopping the server using the 'services' control panel.
- Un-installing Postgres by:
- going to Control Panel and
- looking for 'Add or Remove Programs' (XP) or 'Programs and Features' (or whatever Microsoft changed it to in the version of windows you have)
- Finding the installed version of Postgres that you have and 'uninstalling it'
- Deleting the old postgres server data directories. These will generally be in C:\Program Files\Postgres or C:\Program Files (X86)\Postgres - depending on if you have 32 or 64 bit versions.
- Use the download steps to obtain the latest version of the Postgres installer from the ArtsMan site.
- Changing the configuration parameters in PG_HBA.CONF and POSTGRESQL.CONF per the standard install instructions or you can match those that your recorded from the prior version's config files if you optimized anything. Note, you cannot simply copy the older versions of both files in the new install of postgres as parameters are sometimes added or removed.
- Restoring the old database by
- Creating a new database on the server that matches its prior name. (eg, if it was called 'MyTheatreDB', call it the same name.)
- Setting the owner to 'TheatreManager' and the Encoding to 'UTF8' (which is the default in all current versions of postgres)
- Importing the backup of the database made at the beginning of the instructions into the new database server.
- Starting Theatre Manager and attempting to log in. (if you cannot, make sure that the pg_hba.conf is correct)
- Setting up the backup job again and verifying that it works. Verifying it works means that you actually run it under the task scheduler and ensure that the backup file sizes are as expected.
Removing Postgres from Windows
- Preferred Method:
- Go to Setup->Settings->Control Panel->Add/Remove Programs
- Find the line that refers to your Postgres installation
- Use the remove option
- Delete the C:\Program Files\PostgreSQL folder to remove your database. (Note: it could be on another drive)
- Secondary Method:
- Run the PostGres installer and 'uninstall' the database first, and then run the install process -and/or-
- Delete the C:\Program Files\PostgreSQL folder, (Note: it could be on another drive) -and/or-
- Remove the 'postgres' user from you list of users using the admin tools -and/or-
- make sure that the PostGres server is not running as a service and has been removed using RegEdit
Theatre Manager Desktop Application
Installing or Updating??
Installing or Updating Theatre Manager is a similar process. If you do not already have the latest TM installer, you can obtain in one of three ways:
- If you have Theatre Manager, you can check to see if an update is available which you can copy to any machine, even one without TM on it.
- If TM notices an out-of-date component, it downloads the latest installer while you work and prompts for an update when you log in.
- If you are new to Theatre Manager, you will have been provided a link in an email
Once you have the latest available version of the Theatre Manager installer/updater, please follow the specific instructions for:
- Macintosh - macOS 11 Monterey and later recommended -or-
- Windows - Windows 11 recommended - Windows 8.1 or later will work for 64-bit
- using the General Upgrade Steps as an overall guide.
|
If you set the PCI setting in Theatre Manager 'C', credit cards are never placed in the database. Thee card information is merely passed to the processor and immediately forgotten. |
|
Running an upgrade will, if appropriate, automatically generate a random new PCI seed key and re-encrypt credit cards using the new key. In the process, this destroys any previous crypto keys per PCI DSS standard 3.6.
Credit cards that have been shredded are not affected by the re-encryption process. Refer to re-encrypting cards if you wish to do this manually. |
|
Theatre Manager has never stored CVV2, Track II or any other non PCI compliant information so removal is not necessary per PCI DSS standard 3.3.
|
Macintosh Theatre Manager
|
During a Full Install you will need to provide the administrator password to your machine. If you do not know this, contact your IT support or Systems Administrator. |
|
You may need to go to Apple Menu >> System Preferences >> Security & Privacy to allow apps that are downloaded from anywhere. |
|
If you are unable to install, you might need to use the following commands in terminal before running the installer More info is under disable power saving settings - Step 1:
sudo spctl --master-disable
|
| 1. | Download the Theatre Manager Mac installer if you have not done so. This link is supplied upon request.
|
||||||
| 2. |
Click continue
Click continue and read the license agreement
Click 'Agree' to accept the agreement and continue
Click Install
Enter your password (or if you have a Mac with Touch ID, use your finger)
Click 'Close' when done. |
||||||
| 3. | After installation, look for Theatre Manager link on the desktop and double-click on it to start it up. There will also be a file called TMPreview.pdf on the desktop that illustrates some key features of TM. | ||||||
| 4. |
If you cannot connect to the database, check the following settings:
|
||||||
| 5. |
 (optional)
If you are running a demonstration copy of Theatre Manager, you will see a first time setup screen asking you for your company information. All fields except the second line of address and the web site are mandatory. After you put this in the first time, you will not see it again.
(optional)
If you are running a demonstration copy of Theatre Manager, you will see a first time setup screen asking you for your company information. All fields except the second line of address and the web site are mandatory. After you put this in the first time, you will not see it again.
These fields are used during the demo to show how Theatre Manager verifies information for you. For example, the city, state and country you enter becomes the default country for new patrons that you may add to the database. The area code for the phone number fields becomes the default for patron entry, etc. Notice how Theatre Manager converts whatever you type into the proper case as it tries to assist in data entry. |
||||||
| 6. |
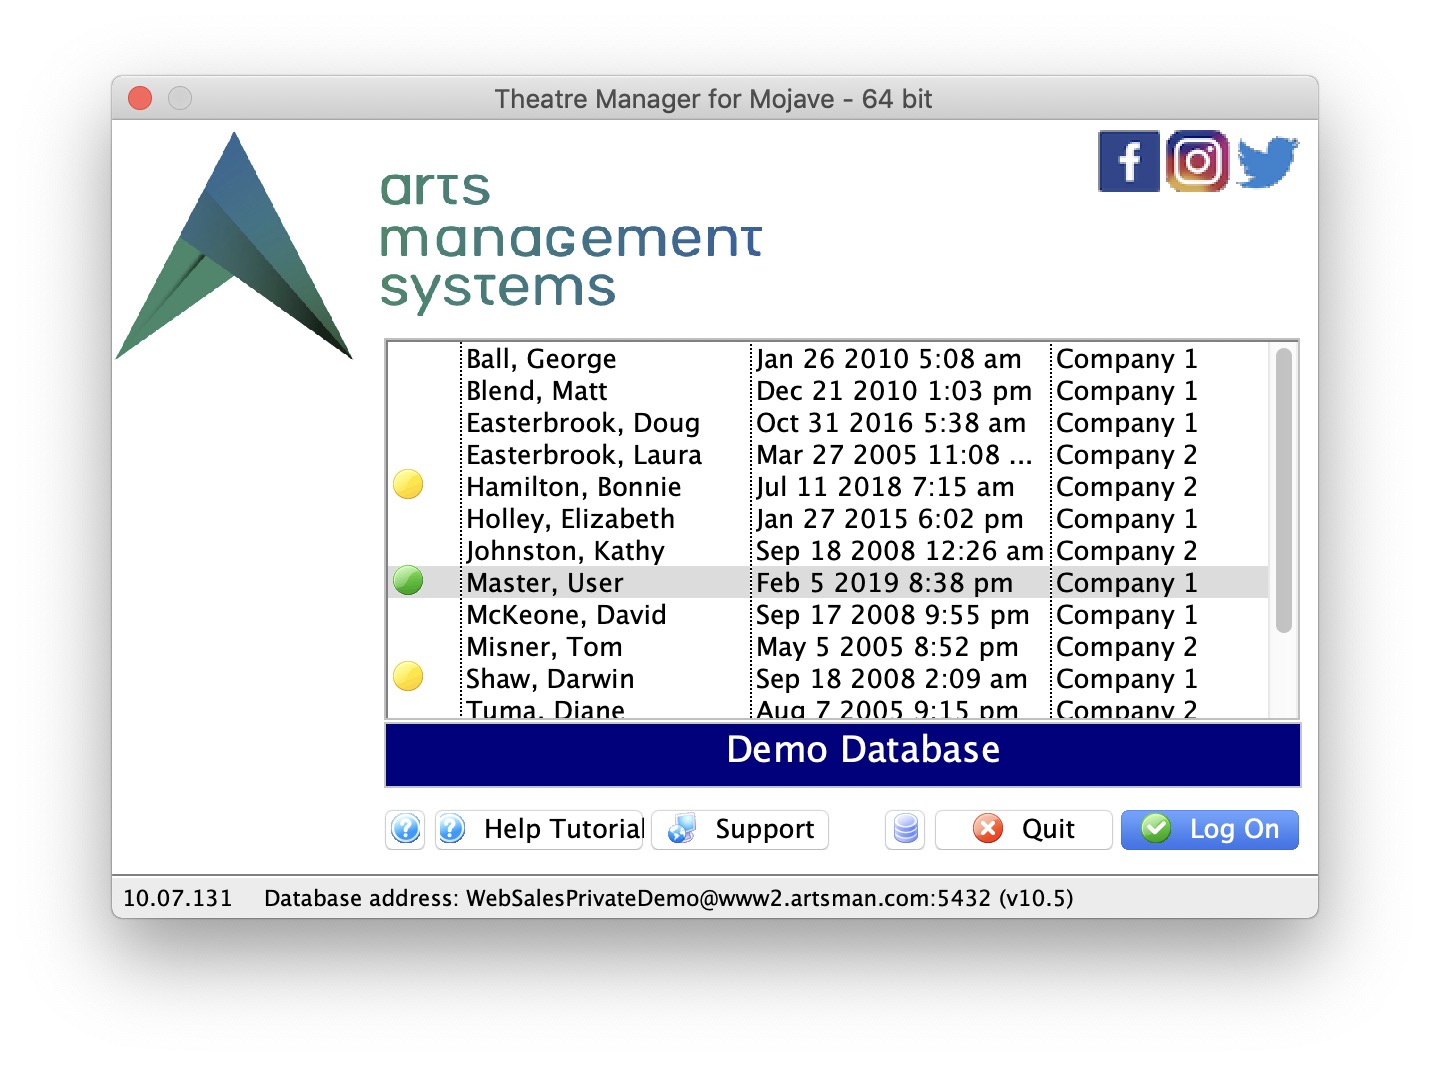 Then, if you are able to connect to the database and enter the company information, you will see the login window below. The password for any of the users in the demo is 'master' (without the single quotes).
|
||||||
| 7. |
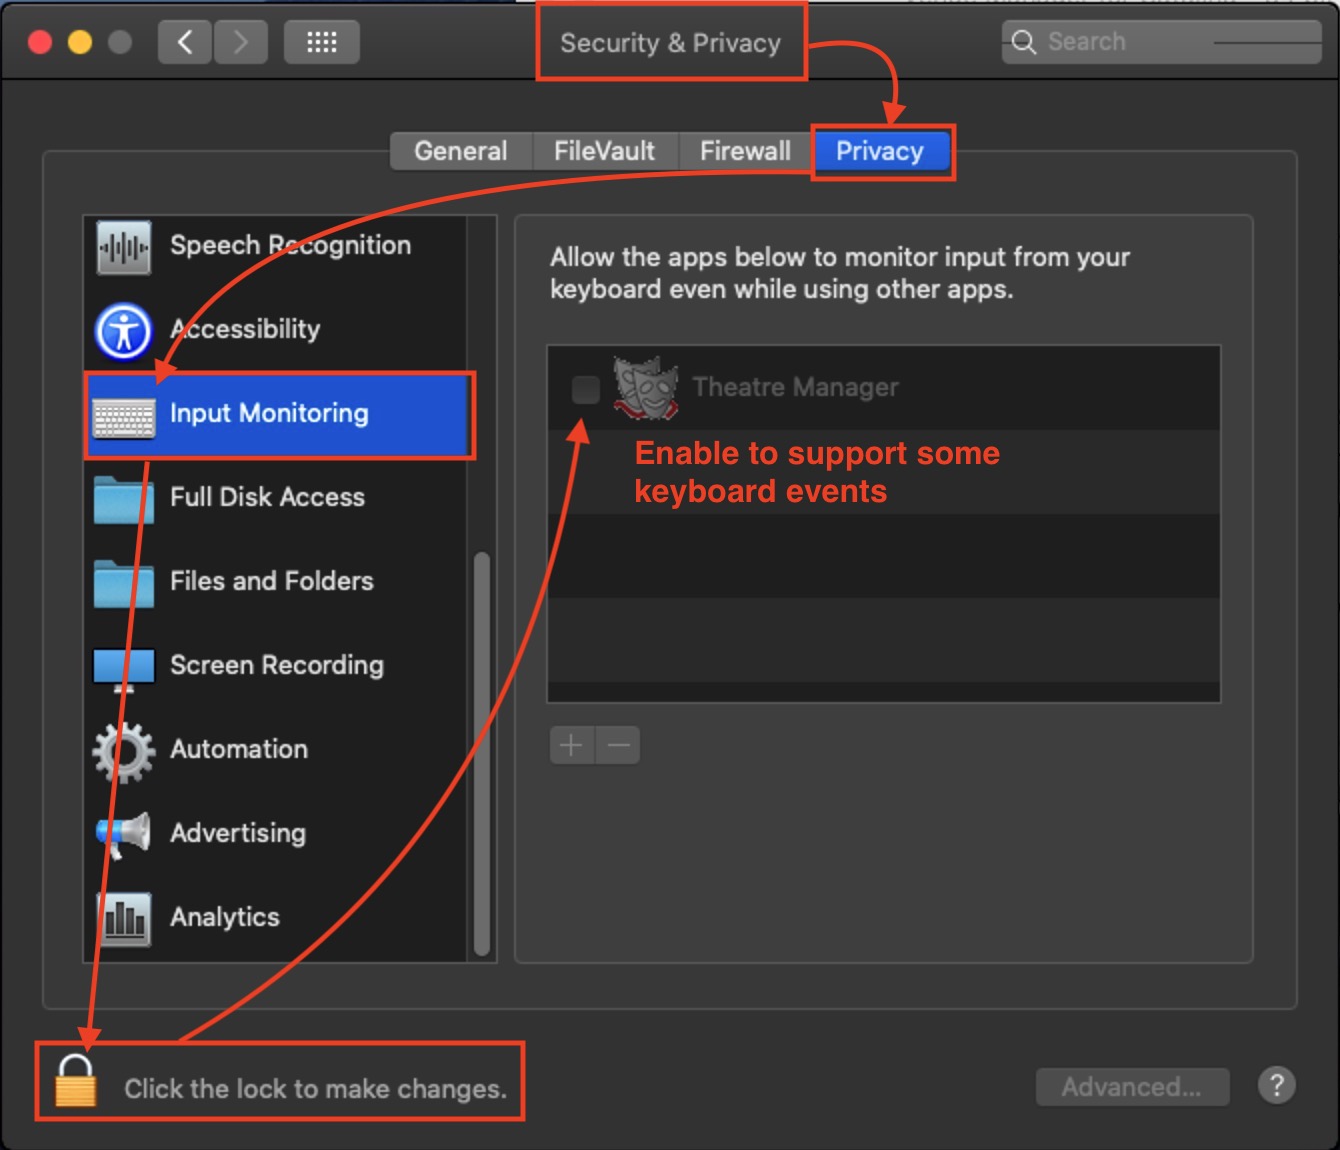 (Optional) if you are running Catalina, you may need to make a change to system preferences to allow permission.
|
||||||
| 8. | In a production environment, once connected to the database in step 5, you can run the TMSetup file on any other machine in the network. After changing the pg_hba.conf file, and by editing the serial.txt file, you should be able to connect to the database.
|
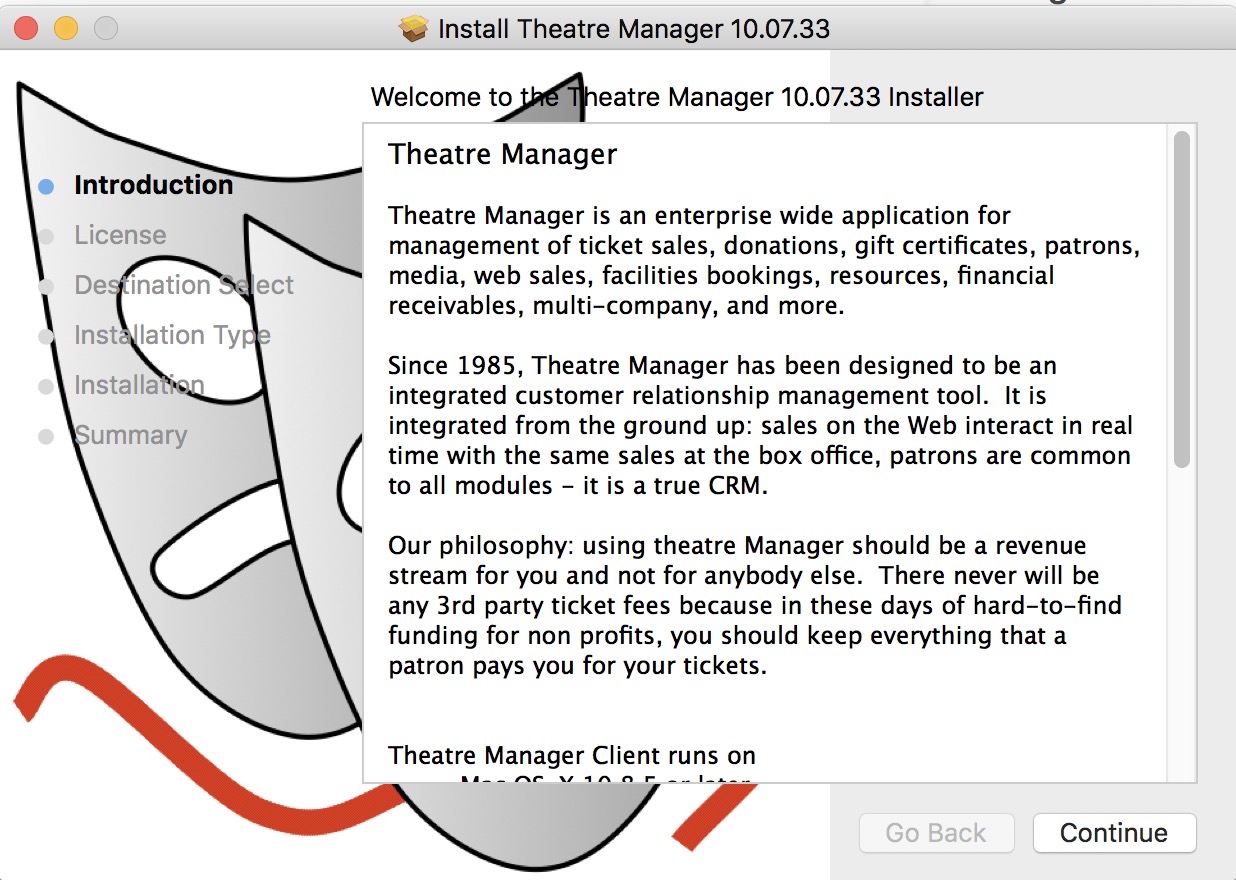
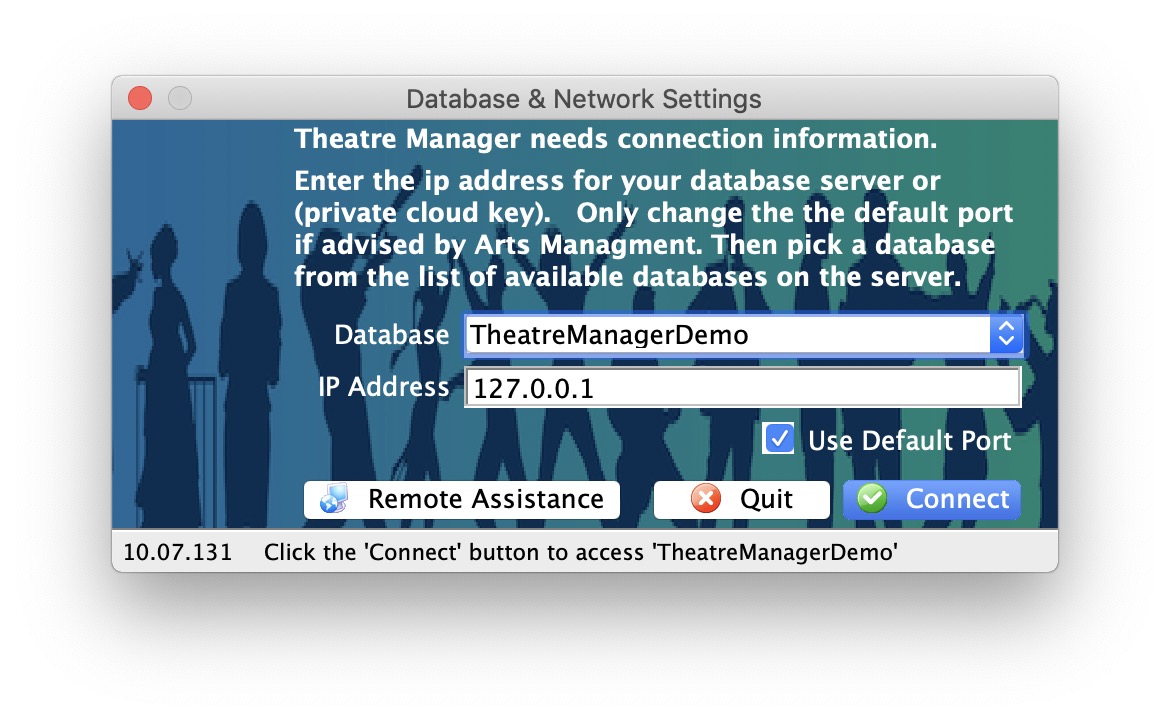
Enabling installation in Security and Preferences
|
Apple requires that users acknowledge that they trust the installer. The exact message you get may vary depending on the version of macOS you are using.
|
|
You can make apple run any installer option-double clicking on an installer and you should see a button that says 'open anyway' |
|
If you are unable to install, you might need to use the following two commands in terminal before running the installer More info is under disable power saving settings - Step 1:
sudo spctl --master-disable
|
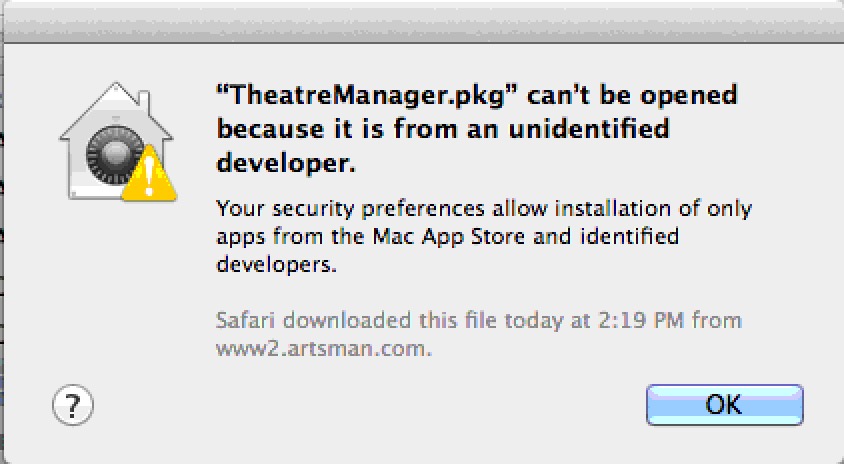
If you run the TM installer and receive a message similar to the one above (implying you have to provide permission). then:
- Select the Apple menu at the upper right of your computer screen
- Select System Preferences
- Select Security & Privacy which is on the top row of the preferences (it may be called Firewall in older versions of macOS).
- Click the General tab
- You will see a screen similar to the one below. Do one of the following
- Click on the third option at the bottom saying Anywhere to allow apps downloaded from 'Anywhere'.
- If that is not visible, then you should see an option to click a button that says Open Anyway to run the installer. If so click Open Anyway
- This will start the installation process
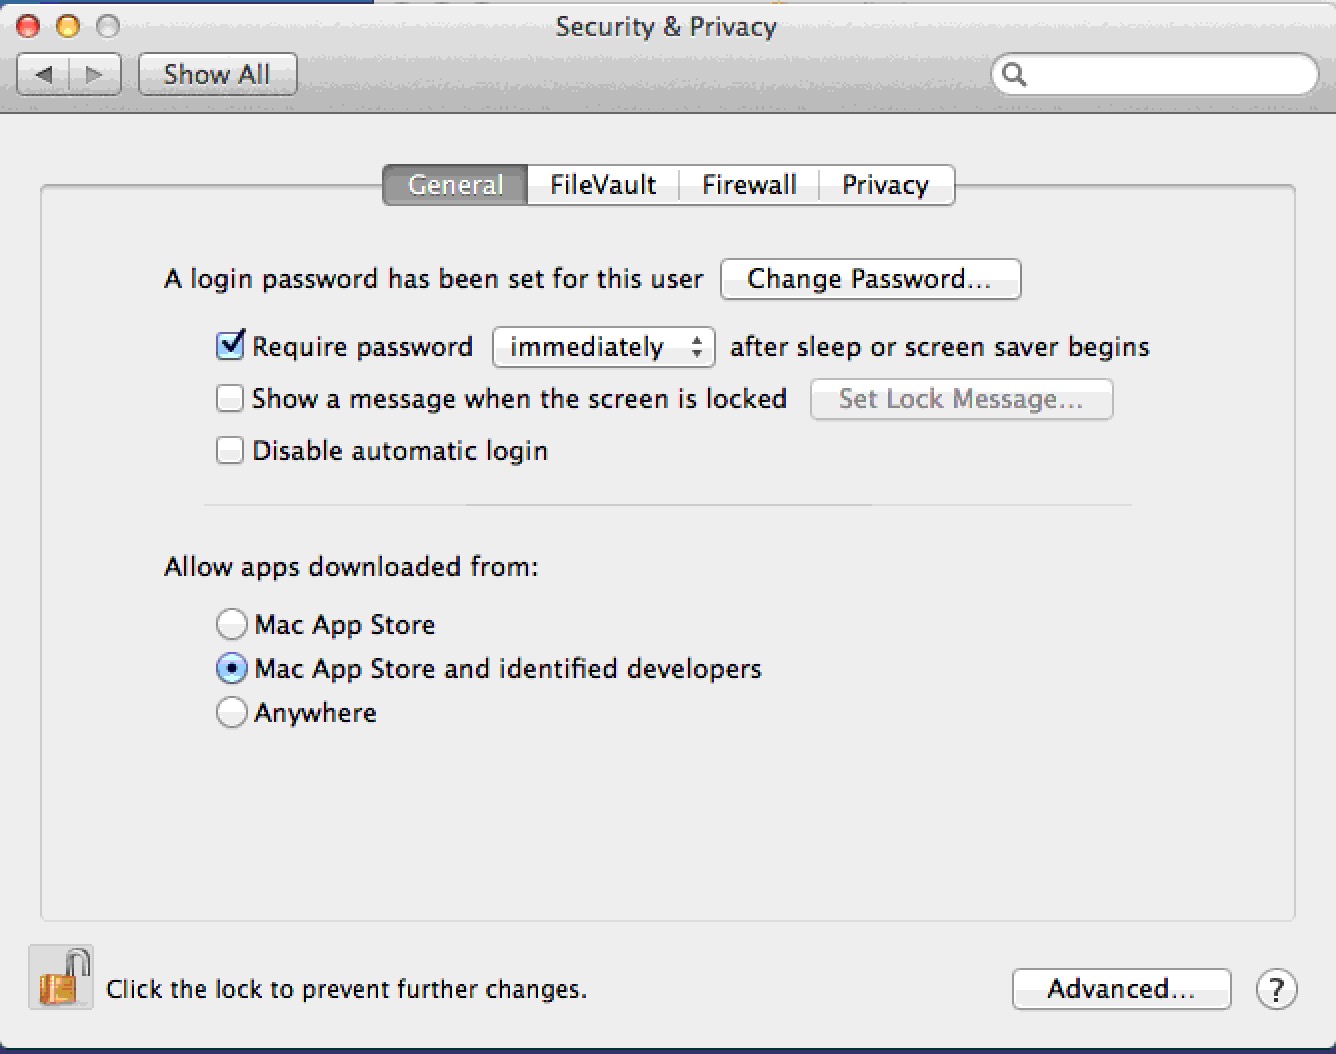
Using Network User Profiles - Mac
|
Follow the steps below if you have Network Users set up and performance of TM seems slow when everything is run across the network. |
Primary Method for Network User Profiles - just install Theatre Manager
In macOS, Theatre Manager is designed to store key application components in the local user's 'Application Support' directory. This allows multiple local users on the same machine to use Theatre Manager.
Network Users have a different 'home' directory setup where the key files are not stored on the local machine. When Theatre Manager is installed, it will save some of its files in the network directory - but you may experience some performance issues if the network or server drives are slow.
Alternate method for running Theatre Manager with Network User Profiles:
If performance seems a little slow with a normal installation that users the network profiles, Theatre Manager can be configured a little differently, as follows.
- Make sure:
- Theatre Manager is already installed on the machine using the TMSetup application -and-
- Nobody is currently using Theatre Manager on the machine
- Go to the Applications Folder
- Right click on the Theatre Manager application and select Show Package Contents from the context menu
- Navigate to Contents --> MacOS --> firstruninstall folder
- Copy the entire contents for the firstruninstall folder.
- Navigate back to the MacOS folder.
- Paste the contents of the firstruninstall folder into the MacOS folder.
- You may be asked to replace the serial.txt file
- Respond 'yes'
- Delete the firstruninstall folder. The contents of the MacOS folder should now be similar to below.
- Test that Theatre Manager starts up and you see the login window.
- Log in as a couple of other network users and try again
|
If you get an error message starting Theatre Manager about permissions writing to a directory, you may need to type the following in Terminal: sudo chmod -R -v 777 /Applications/Theatre Manager |
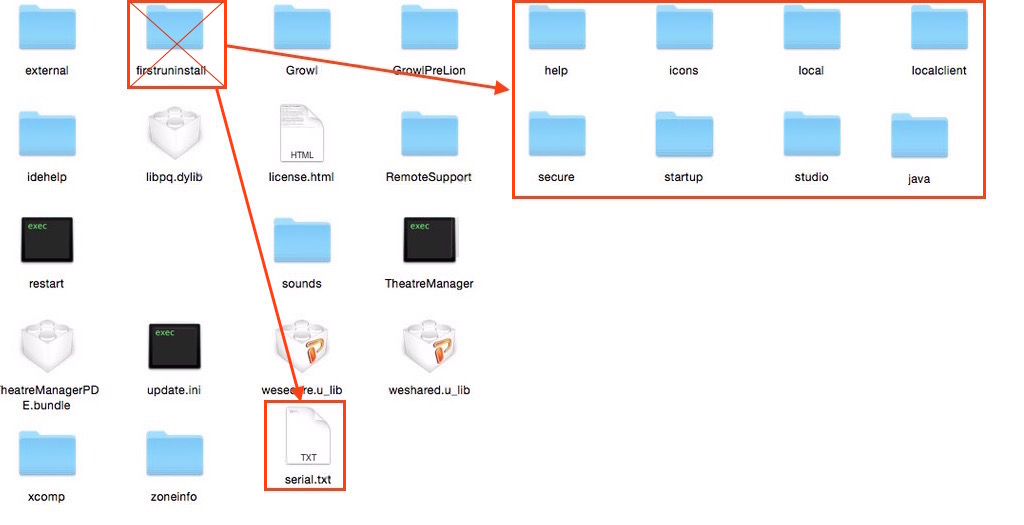
Missing Zip Code or USPSIMBStanda Font
- ZipCode, and
- USPSIMBStanda
To fix the message:
- Open the hard drive on your Mac, or open Finder
- Go to the Applications directory
- Find the TheatreManager application
- RIGHT+click on it and choose Show Package Contents from the menu
- Go into Contents >> MacOS >> Fonts The Fonts folder will have both fonts in it.
- Double click on each font, one at a time
- Click the Install Font button in the lower right corner
- Check the box next to the font name
- Click the Install Checked button in the lower right corner
- Repeat for the other font
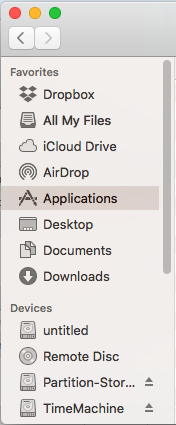
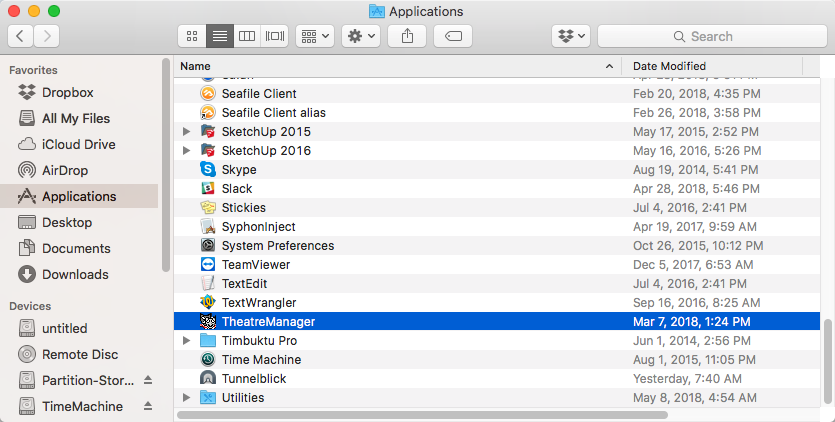
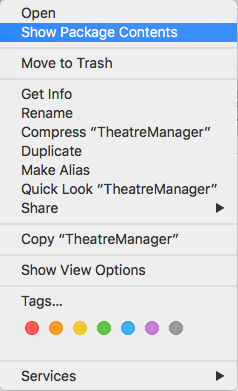
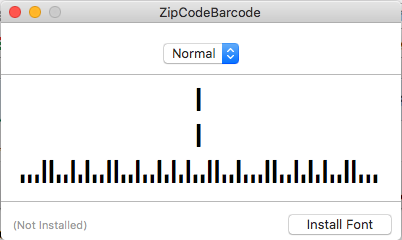
macOS will bring up a Font Validation screen.
|
There will be a message that it has found a problem with the font. Ignore this. |
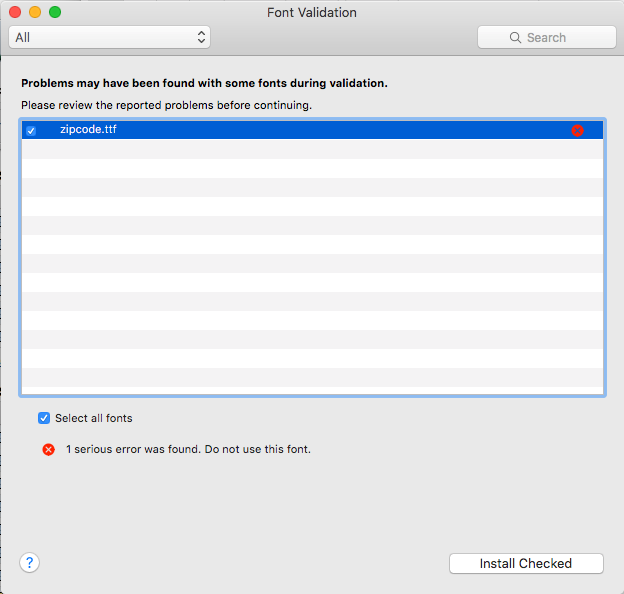
Windows Theatre Manager
|
During a Full Install you may need to:
|
| 1. | Download the TheatreManager PC installer if you have not done so. This link is supplied upon request
|
||
| 2. | Run the TMSetup.exe program and respond to all prompts as follows.
Click 'Next'
Read the licence agreement and click 'Yes' to agree to its terms and conditions
Click 'Next'
The installer will begin putting Theatre Manager into the 'C:\Program Files' folder.
Click 'Close'
|
||
| 3. | After installation, look for a TheatreManager icon on the desktop or in the Start Menu and open Theatre Manager | ||
| 4. | If you get asked to find a database, enter the IP address 127.0.0.1 below and click search. Normally, you should not need to do this as the Demo database is always assumed to be on the local machine.
If you cannot connect to the database, check the following settings:
|
||
| 5. | (Optional) If you are running a demonstration copy of Theatre Manager, you will see a first time setup screen asking you for your company information. All fields except the second line of address and the web site are mandatory. After you put this in the first time, you will not see it again.
These fields are used during the demo to show how Theatre Manager verifies information for you. For example, the city, state, and country you enter becomes the default country for new patrons that you may add to the database. The area code for the phone number fields becomes the default for patron entry, etc. Notice how Theatre Manager converts whatever you type into the proper case as it tries to assist in data entry.
|
||
| 6. | Then, if you are able to connect to the database and enter the company information, you will see the login window below. The password for any of the users in the demo is 'master'
|
||
| 7. | In a production environment, once you are connected to the database in step 5, you can run the TMSetup.exe file on any other machine in the network. After changing the pg_hba.conf file, you should be able to connect to the database.
|
||
|
Make sure to also turn off power saving on your ethernet card on all servers and workstations. |

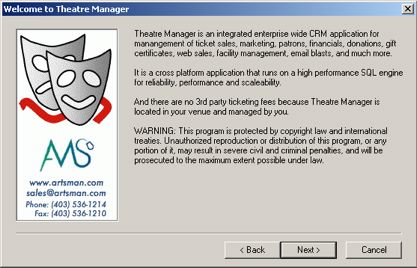
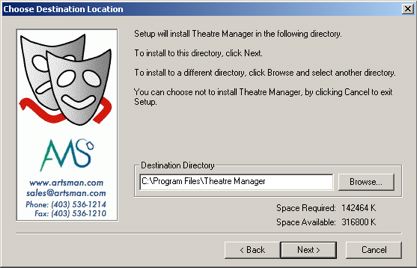
Setting Windows Compatability mode
|
on Windows 10: you must do this step, along with permitting C:/ProgramFiles/Theatre Manager in Windows Defender |
It can be resolved by telling Windows that Theatre Manager may need to run as administrator for all users. You might see an error like below complaining about an invalid format for userpic.df1 and that it needs converting -- this is a sure sign of windows defender and the settings need to be made.
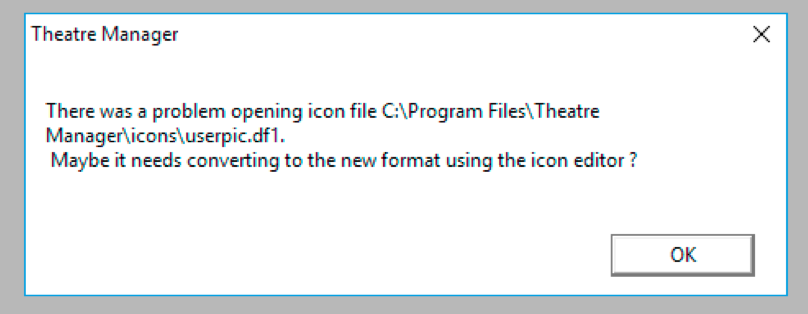
Follow the steps below
- Right Click on the Theatre Manager icon on the desktop
- Click properties and then FIND ORIGINAL"
- When you find TheatreManager on your desktop and choose Properties
- Click on the Compatibility Tab
- Click the button to Change Settings For All Users
- Uncheck: Run this program in compatibility mode for:
- Check: Run this program as administrator
- Click the button Apply
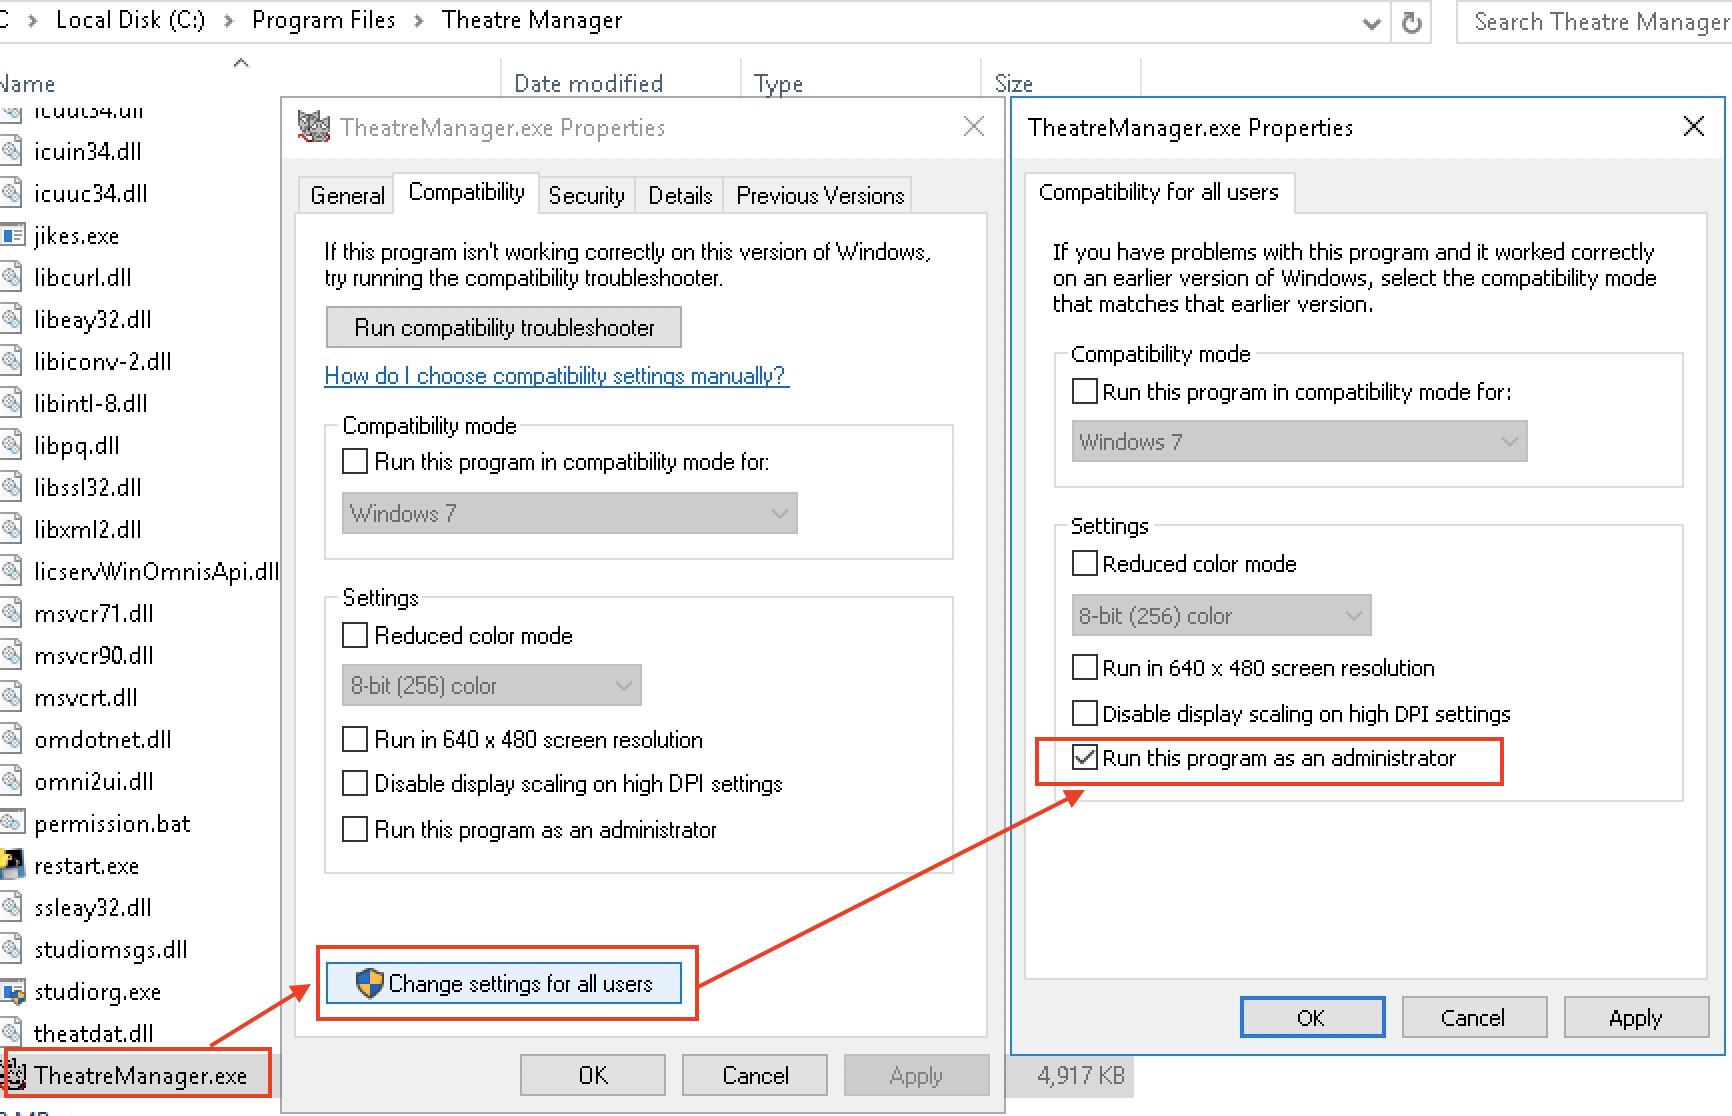
Installing .NET for Windows
|
It is rare that you might need to do the following steps to install .NET Only do so if advised by the Arts Management Systems Support Team |
Windows installs may require you to do one of the following if you get errors starting Theatre Manager, or if Theatre Manager starts, but seems to hang with some menus open, but the login window does not appear.
Older versions of XP and some versions of Windows 7 may not require this step. However, lately, Microsoft has opted to make their flagship .NET tools an optional part of Windows, which causes the error above. Installing .NET will add that part of Windows back into Windows that Microsoft made optional.
Local AppData needs Read/Write permissions

AMS Cloud Setup
|
If your database is not in the cloud, pick Local Database and follow instructions for Changing Database. You may have to unclick/click 'Default Port' to allow you to enter the IP address of the database. |
|
If this is a new machine with a newly installed copy of Theatre Manager and you want to log into the cloud, then just pick <AMS Cloud Server> from the database list. |
- Start Theatre Manager.
- If you have never been connected to a database before, you will immediately see a dialog asking you to select a database. Select <AMS Cloud Server> from the popup list.
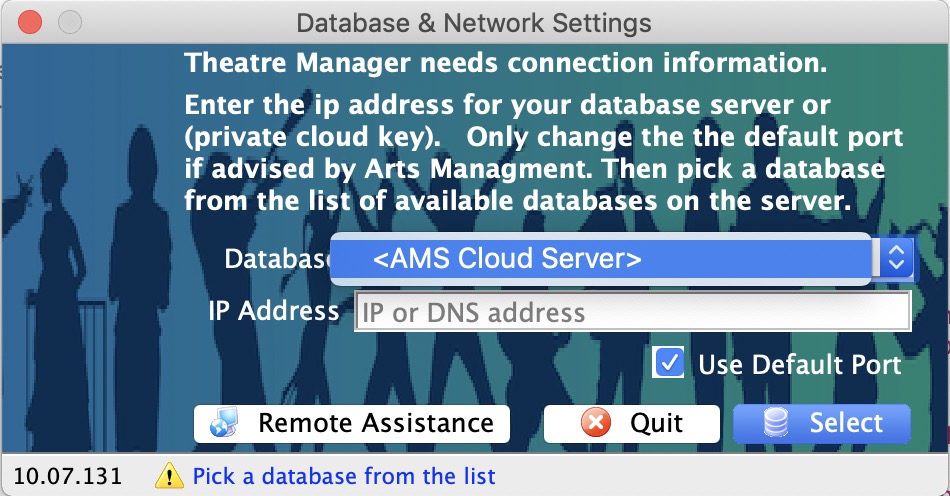
- If you have previously connected to a Theatre Manager database before, you will see the familiar list of users. Click the Change DB button at the bottom left of the screen and then follow the instructions above.
- If you have never been connected to a database before, you will immediately see a dialog asking you to select a database. Select <AMS Cloud Server> from the popup list.
- You will be prompted with a dialog asking you to:
- enter the unique Private Cloud Key that you have been given
- the Private Cloud Password specific to your venue
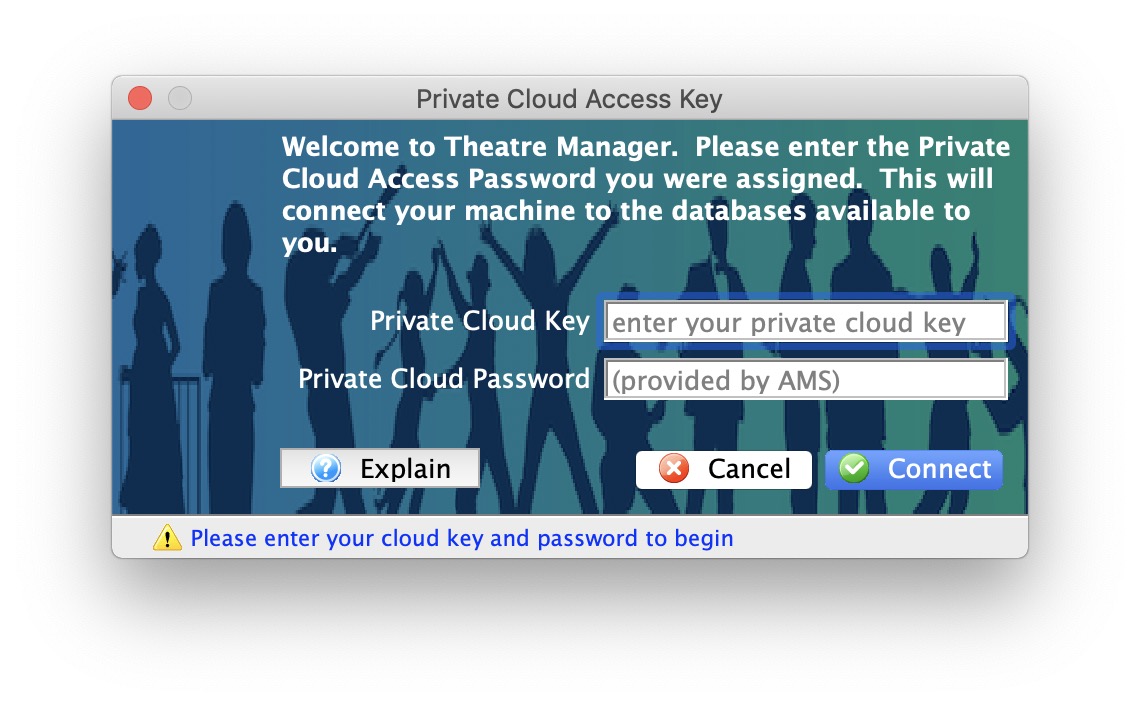
-
If there:
- Are two or more databases in your cloud setup (eg: your main database and a training one), then you will be asked to pick your database.
- Only one database is available in your cloud setup, you will be taken directly to the next step.
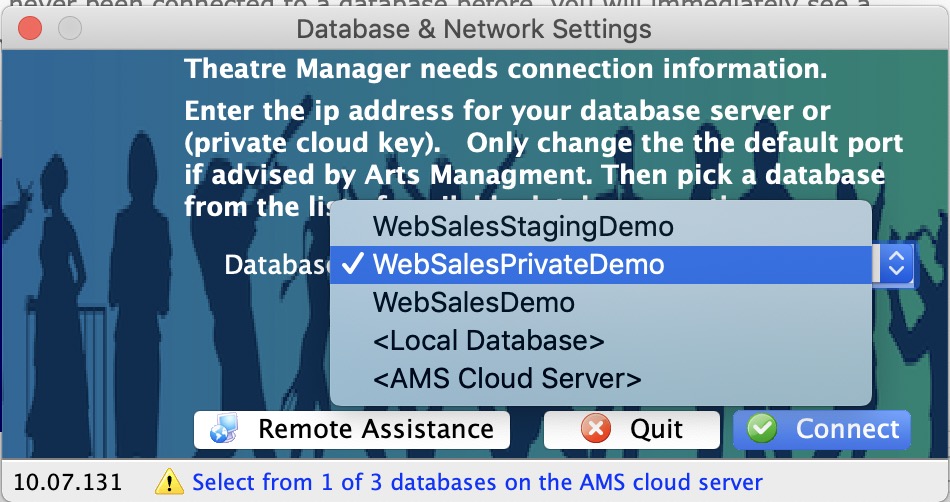
- You will see a list of people who can login
-
Double-click to select one and enter your password
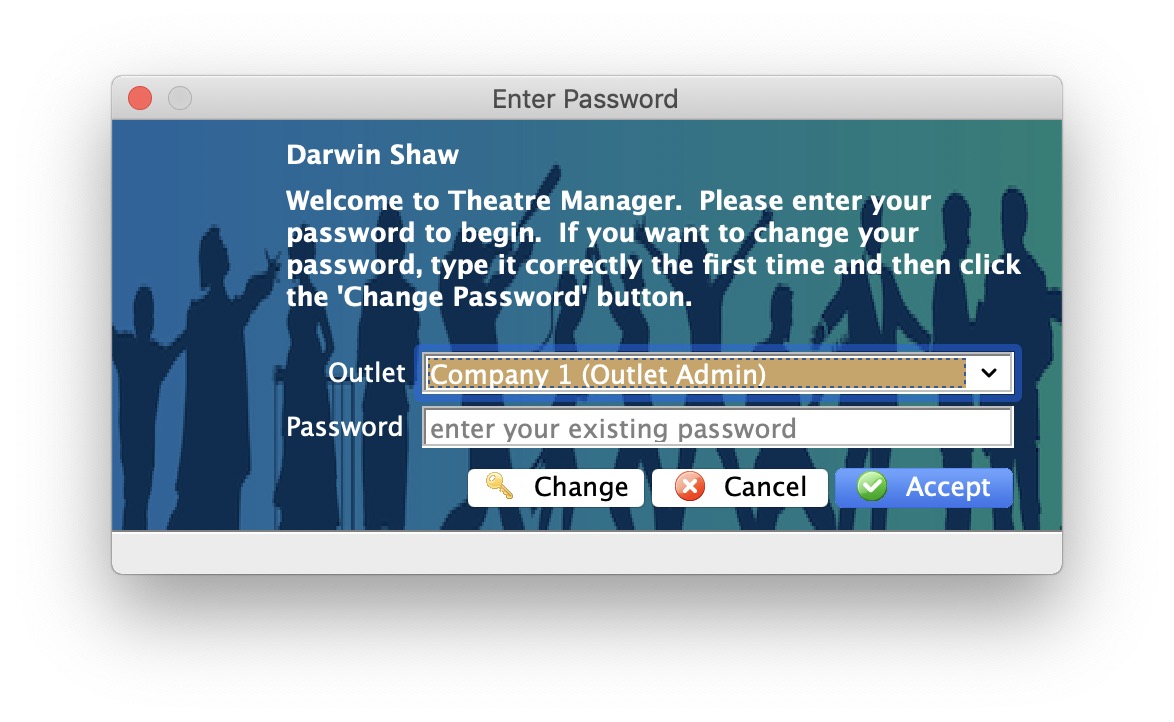
|
Any database in the AMS cloud can be set one of:
You can enhance settings by using Merchant Profiles (available with most providers) to store credit cards for all customers at your merchant service provider. |
|
If there are users at the venue with different local time zones, you may need to provide the LocalTimeZone parameter in the Theatre Manager preferences file. This is only needed if the users time zone does not match the time zone setting in the company preferences->Report/Misc tab |
Theatre Manager Web Services
- A firewall/router which is your connection to the internet (hardware)
- TM Server - configured as a web server. You provide your TLS Certificate to the web server.
- One or more TM Servers configured to provide services, depending on load requirements for sales
|
You can access the Director to configure services at any time using http://127.0.0.1:3012 on a machine containing TM Server.
Since the director uses javascript, please make sure you have the latest version of your browser installed on your machine or mobile device: Safari, Firefox, Chrome, Opera, IE 11 or Edge browsers are known to be compatible. |
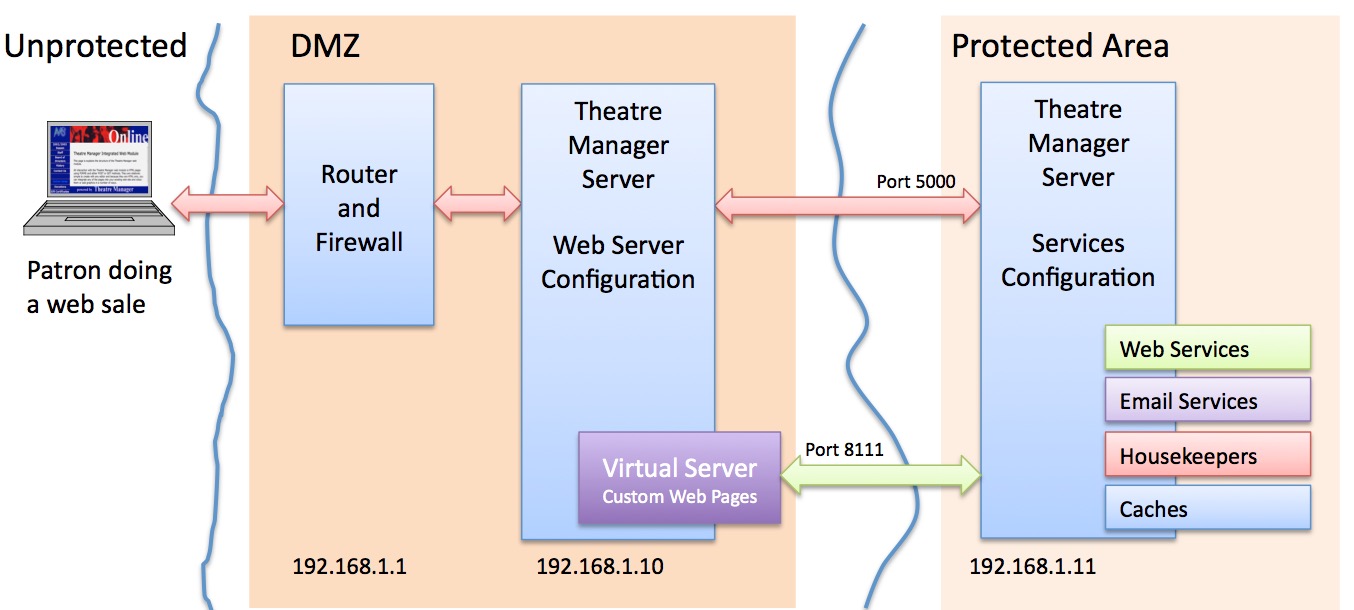
|
For PCI compliance, if TM Server is configured as a web server, it must be installed in a DMZ and separated from the rest of the network so that card holder data would never be on the same part of the lan as the DMZ. |
|
The above diagram illustrates a standard installation. Depending on security and/or performance requirements; other parameters can be altered to affect load balancing across multiple machines. This should only be done under guidance of AMS staff |
- The firewall directs incoming traffic on ports 80 and 443 to the web server from the internet. The web server is configured to elevate all port 80 traffic to use TLS on port 443.
- The web server can be on the same subnet as the firewall (or not, as you wish). This allows:
- web traffic from the internet on ports 80 and 443
- provides dynamic load balancing to a number of Theatre Manager Servers and passes web requests to port 5000 on each of those servers
- A TM Server in Services Configuration receives communication on port 5000 and talks back to the web server on internal port 8111 (a separate virtual server) to retrieve custom web pages for merging
- Some configuration of the services in Company Preferences 'Director Tab'
The actual installation of the is described for Macintosh and Windows. While unsupported by Arts Management, you can use Linux if you know how to use apt-get and install and configure NGINX (we can provide a template nginx.conf file for you.
The diagram refers to 192.168.1.x for the internal network and is used throughout the documentation as a sample lan addresses. Your IP addresses may be different
Install Theatre Manager Server
- downloading and installing TM server for Macintosh or Windows
- starting the second generation Theatre Manager server for with purposes on the appropriate platform. Theatre Manager server can be configured later:
- as a web server -or-
- for providing services for web and email
|
Only install TM Server ONCE on a machine. Once installed, TM Server will auto update itself. |
|
TM Server should be installed on machines with multiple processors.
For best results, if it is to be used as a:
|
TM Server for OSX
|
You normally need only install the Theatre Manager server ONCE on a machine per the instructions below. TM server will auto update itself. | |
|
In recent versions of OSX, you may need to make a temporary change in System Preferences after downloading the installer and before the installer will work. | |
|
Reinstalling TM Server can be done at any time. Only if you are VERY stuck, you may need to type the following command in terminal prior to re-running the installer.
|
| Step | Action |
| Step 1 | Download and extract the installers for Macintosh. |
| Step 2 |
Start the installer and click Continue.
|
| Step 3 |
Click Continue
|
| Step 4 |
Read the licence and click 'Agree'
|
| Step 5 |
Enter your admin password or use your finger if your machine has 'touch id'
|
| Step 6 |
|
| Step 7 |
Click Close
|
| Step 8 | Turn off all power saving and performance degrading features |
| Step 9 | Turn off Airplay Mirroring in since that has a conflict port port 5000 used by Theatre Manager. This problem seems to have begun in Monterey. |
| Step 10 | Proceed to the Steps to configure the server for the purpose you want to use it for |
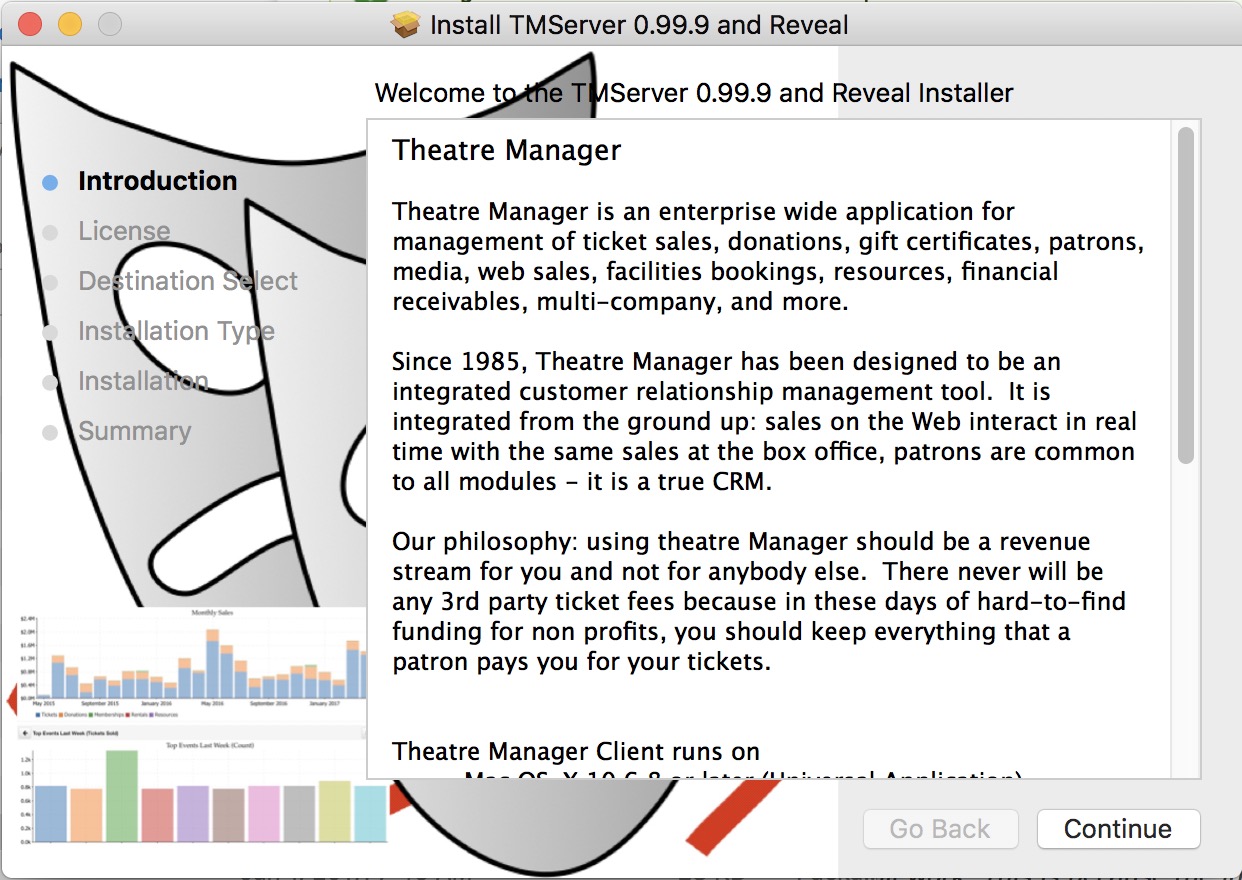

Starting the NGINX server
| Step | Action | ||
| Step 1 | Open Terminal on your computer | ||
| Step 2 |
To completely stop and restart the server (note: it should have already been stopped during the install process), you will need
|
||
| Step 3 | Use the Director to configure the second generation server for the first time. | ||
| Step 4 | Disable all Power Saving options on OSX so that the server doesn't go to sleep - its not a good idea for it to so so for web sales. In addition, please read the note below.
|
~~~ Troubleshooting
|
Make sure you have disabled all power saving settings by reviewing the installation steps on power saving managment. |
Note: if you bring up this web page on the nginx server, the links below should work directly by clicking in them. If not, substitute your web server IP address for 127.0.0.1 in all links below.
| Tool | Action |
| Director | Use the Director web page to verify the second generation server management process is running.
You can use the console log to verify errors on start up.
|
| Activity Monitor | In Activity Monitor, if you view the list of processes, you should see a number that are named 'Theatre Manager Server' if it started properly.
 |
| Virtual Host Test | You can test for a direct response to retrieving a page on the virtual server.. If the Theatre Manager Server is on 127.0.0.1, then the link below should elicit a response that shows a page that has not been merged. If you get Page Not Found or some other error, then the virtual host is not set up correctly. |
| External Probe | If you want to check the general health periodically of the second gen server, then use the following url to ask for the time from the second generation listener. (replace /1/ with your outlet number).
http://127.0.0.1/TheatreManager/1/time If you want to query through the second generation listener to see if a classic listener is running, then add '&force_proxy' to the url. This talks through the second generation to the classic and, in effect, tests both at the same time: |
TM Server for Windows
|
Do not use Windows 10 or Windows 10 Pro for the TM web services. If at all possible use windows 7, 8, 8.1 or any windows server version. At this time, windows 10 interferes with simple file renaming and affects auto-updating of services. |
|
You normally need only install the Theatre Manager server ONCE on a machine per the instructions below. TM server will auto update itself. |
|
make sure to implement the key performance, similar to that of postgres server, especially turning off windows defender on windows 10 pro if you are having issues with auto-updating. |
|
When installing Theatre Manager Server on a Windows machine, log into the computer as the local administrator. This ensures the proper permissions are assigned to the service. |
|
You must not install or enable Microsoft's IIS server on the same machine as TM server configured for web services. |
| Step | Action |
| Step 1 | Download and extract the installers for Windows. The installer will automatically determine wether you have a 32 bit or 64 bit operating system and install the correct version. |
| Step 2 |
Start the installer and click 'Next'
|
| Step 3 |
Click 'Next'
|
| Step 4 |
Make sure that the right version (32 or 64 bit) is being installed and click 'Yes'.
|
| Step 5 |
The installer will place the Theatre Manager Server in 'C:\Program Files' or where ever the standard program files directory is located.
|
| Step 6 | Click Done to complete the installation process. By default the Theatre Manager Service will start. |
| Step 7 | Proceed to the Steps on configuring the server |
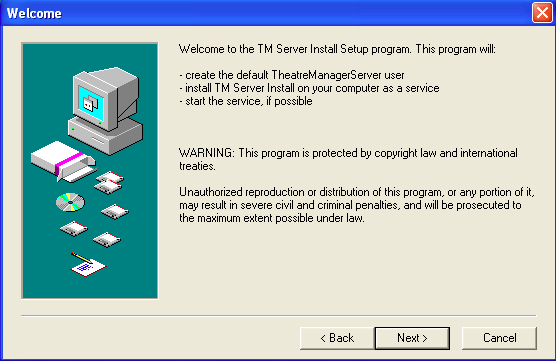
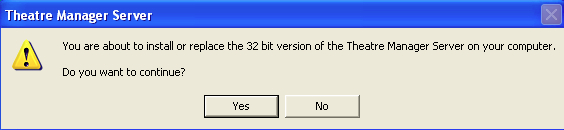
Starting the Server
| Step | Action |
| Step 1 | Open the Services Administrative tool through Start >> Control Panel >> Administrative Tools >> Services. |
| Step 2 | Locate the 'Theatre Manager Server' item in the list.
It should be set as 'Started'. If it is not, please start it.
|
| Step 3 | Double click to edit the service settings to make sure that it will auto-restart. Click on the recovery tab and make it look like the window below. You will need to set the following:
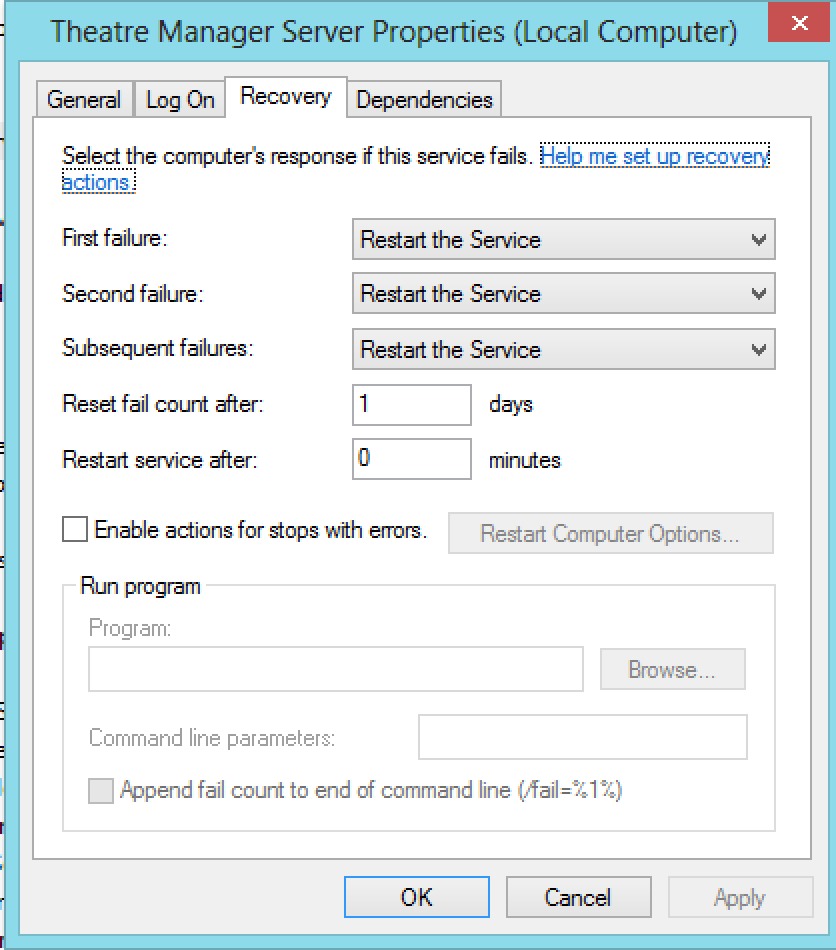
|
| Step 4 |
If the database server and the second generation listener are on the same machine, you will need to delay start of the Second Generation listener until a few system services start. This can be done in one of two ways:
Using Delayed StartupMake the startup settings as per the diagram.
Adding Service DependanciesYou may want to add a dependancy to the second generation server so that it will not start up until after Postgres and the event log starts. To do this, you will need to know the name of the postgres service and type a command in at the command prompt. You can find it by looking at the service and examining the service name. It might look something like one of: postgresql-9.5 -or- postgresql-x64-9.5 depending if you are using 32 bit or 64 bit postgres and which version. An example of the command when running on a 64 bit windows server using postgres 9.5 (note there is a space after the depend= which you must include) sc config tmserver depend= eventlog/postgresql-x64-9.5 An example of the command when running on a 32 bit windows server using postgres 9.5 sc config tmserver depend= eventlog/postgresql-9.5 When done, check the dependancy tab on the tmserver service and it should show two lines: event log and postgres |
| Step 5 |
Also, once everything has been verified to run properly, make sure that the service start up type is changed from 'Manual' to 'Automatic' so that it will start each time the machine is rebooted.
|
| Step 6 | Use the Director to configure the second generation server for the first time. |
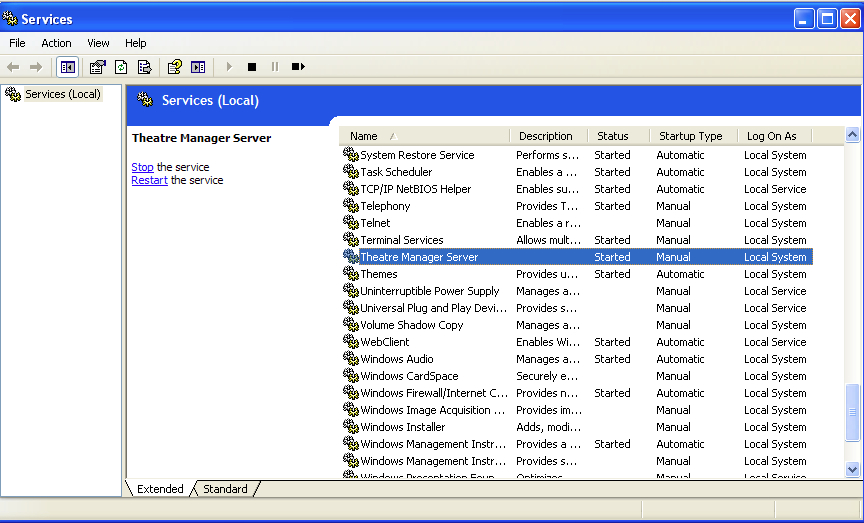
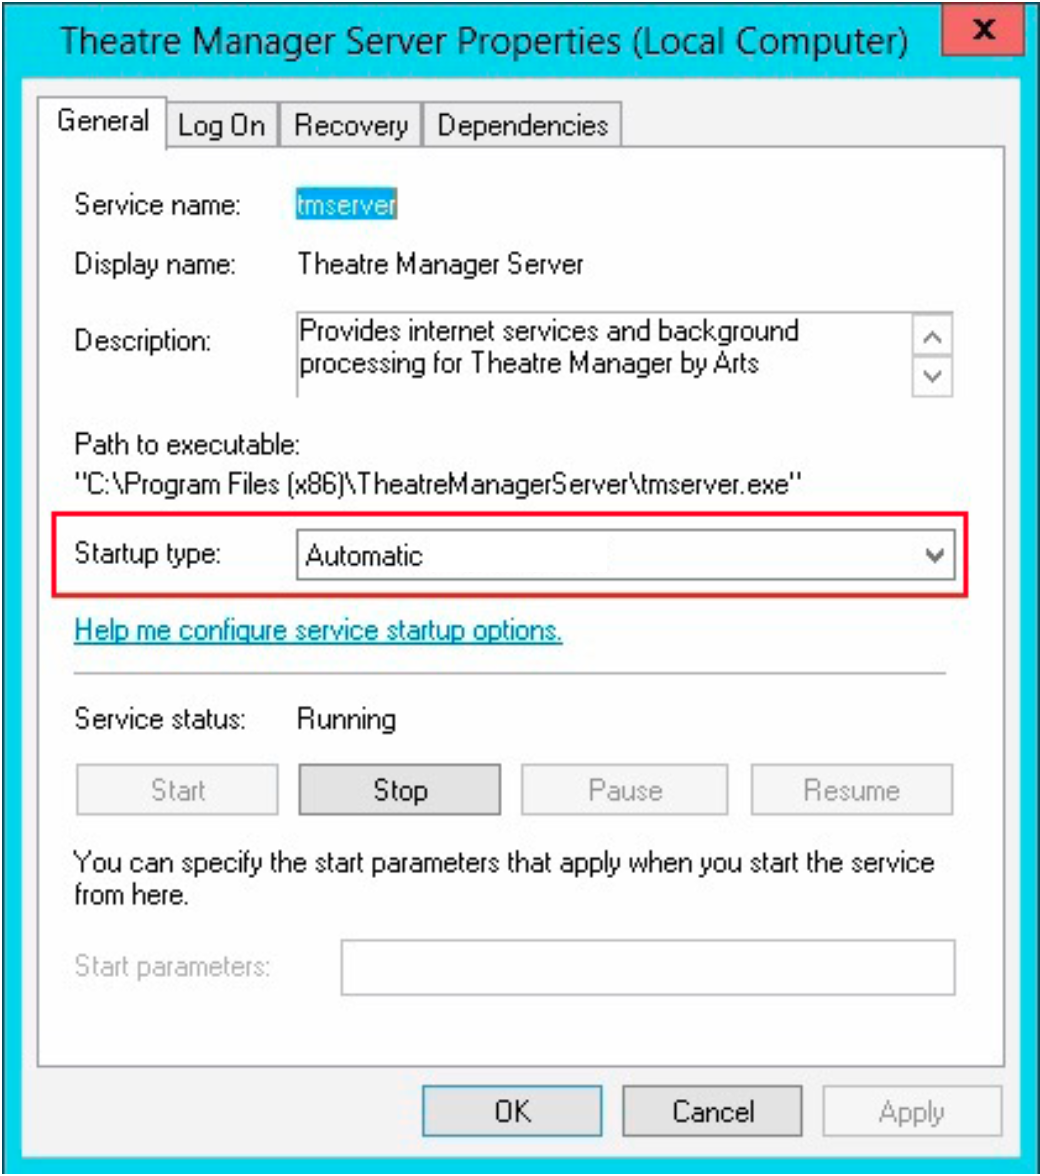
~~~ Troubleshooting
Note: if you bring up this web page on the apache server, the links below should work directly by clicking in them. If not, substitute your web server IP address for 127.0.0.1 in all links below.
| Tool | Action |
| Task Manager | In Task Manager, if you view the list of processes, you should see a number that are named 'Theatre Manager Server' if it started properly. |
| Director | Use the Director to verify the second generation server management process is running. |
| Event Viewer Test | You can look to see if the services start up properly by looking at the event viewer. If you can stop and start the service and you see that it starts listener services on port 5001, then you are likely ok. |
| Virtual Host Test | You can test for a direct response to retrieving a page on the virtual server.. If the Theatre Manager Server is on 127.0.0.1, then the link below should elicit a response that shows a page that has not been merged. If you get Page Not Found or some other error, then the virtual host is not set up correctly. |
| Preferences | If the second generation listener is having trouble starting and/or keeps stopping, you may want to delete the system profile <-> second gen preferences file and start the configuration process over again |
| External Probe | If you want to check the general health periodically of the second gen server, then use the following url to ask for the time from the second generation listener. (replace /1/ with your outlet number).
http://127.0.0.1/TheatreManager/1/time If you want to query through the second generation listener to see if a classic listener is running, then add '&force_proxy' to the url. This talks through the second generation to the classic and, in effect, tests both at the same time: |
TM Server preference file location
Windows
- Navigate to the directory: C:\Windows\system32\config\systemprofile\AppData\Local\Arts Management Systems\Theatre Manager Server
- Delete the config.json
Macintosh
- Open Terminal and type:
- cd ~/Library/Application Support/Theatre Manager Server
- rm -rf config.json
Special note: for classic listeners run and managed by the TM Server on OSX. There is a temporary file created in /var/root/Library/Caches/Theatre\ Manager\ Server/TheatreManagerRunTime/Libraries that tells the classic listener how to startup. It cannot be edited or changed by a user - it is re-created each time the classic listener starts.
For reference, this link has the location of the Theatre Manager desktop preference file.
Web Server Configuration
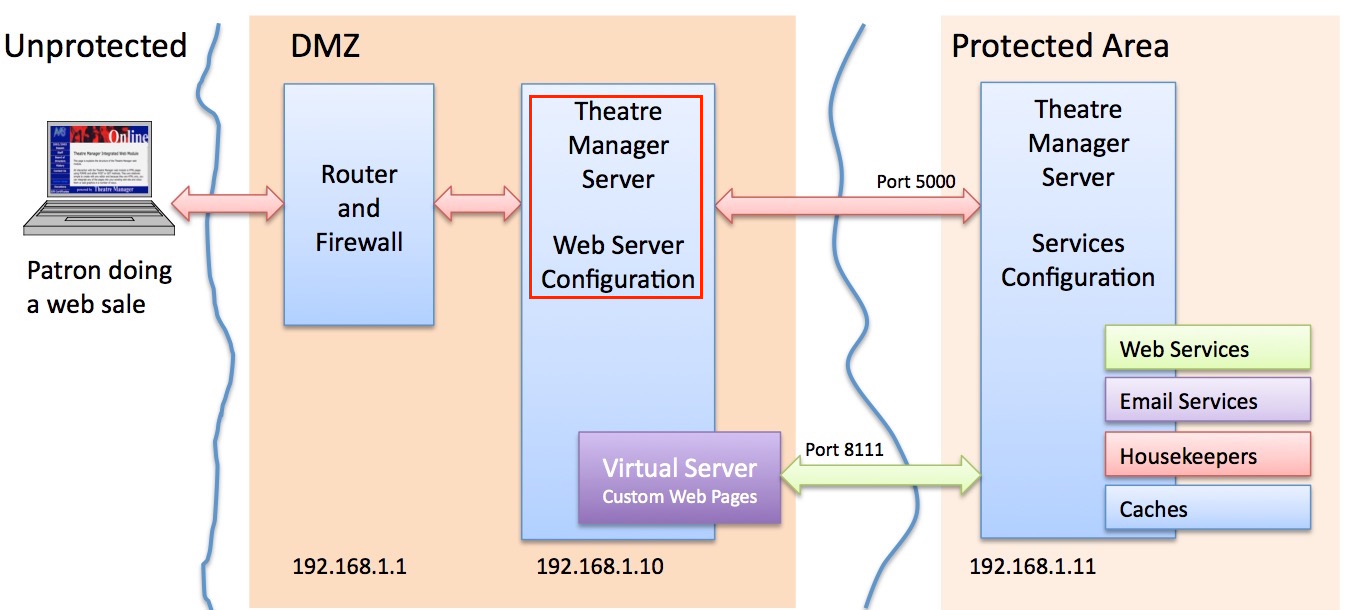
|
For PCI compliance, the web server configuration must be installed in a DMZ and separated from the rest of the network so that card holder data would never be on the same part of the lan as the DMZ. |
The diagram above shows the flow of data for web sales. The general setup involves:
- A firewall that directs incoming traffic on ports 80 and 443 to the web server from the internet. The web server is configured to elevate all port 80 traffic to use TLS on port 443.
- The web server can be on the same subnet as the firewall (or not, as you wish). This allows:
- web traffic from the internet on ports 80 and 443
- provides dynamic load balancing to a number of Theatre Manager Servers and passes web requests to port 5000 on each of those servers
- A TM Server in Services Configuration receives communication on port 5000 and talks back to the web server on internal port 8111 (a separate virtual server) to retrieve custom web pages for merging
- Some configuration of the services in Company Preferences 'Director Tab'
The actual installation of the is described for Macintosh and Windows. While unsupported by Arts Management, you can use Linux if you know how to use apt-get and install and configure NGINX (we can provide a template nginx.conf file for you.
The diagram refers to 192.168.1.x for the internal network and is used throughout the documentation as a sample lan addresses. Your IP addresses may be different
Director Config for Web Server
|
If you enter the URL http://127.0.0.1:3012/configure and do not see the 'Director' screen, you may need to:
|
Configuring as a Web Server
 This section describes how to configure the Theatre Manager server as an NGINX web server on a machine in the DMZ. This computer should have at least 4 gigs of ram and a fast dual core processor.
Connect to Theatre Manager server using your browser and enter the URL http://127.0.0.1:3012/configure. You will see a web page like the one to the right. It will help you configure the machine for its appropriate purpose.
Auto Update
Theatre Manager Server is designed to auto update when a new version is released. If you wish to disable the feature, make sure to disable it on all machines. If it is enabled, make sure it is enabled on all machines. Components auto-updated by the server are:
- TM Server
- NGINX web server
- TLS upgrades
- Default Web Pages (customized changes are never touched)
- Theatre Manager
Data stored by Arts Management as part of auto-update
Checking for auto-updates shares some of your information with Arts Management. Data is transmitted securely and SHA-384 checksummed for safety and the values retained by AMS are:
- Theatre Manager version number
- TM Listener version number
- Postgres version number
- NGINX version number
- Timestamp of last backup
- Timestamp of last check for an update
Data retrieved from AMS and stored in your database is: number of user and scanner licences, latest version of Theatre Manager for auto deployment to workstations.
Enable Web Server
Click the 'Enable Web Server Button' to use this machine as an NGINX web server. When clicked, a panel appears allowing you to enter the configuration parameters for the web server.
Enabling Background Report Generation
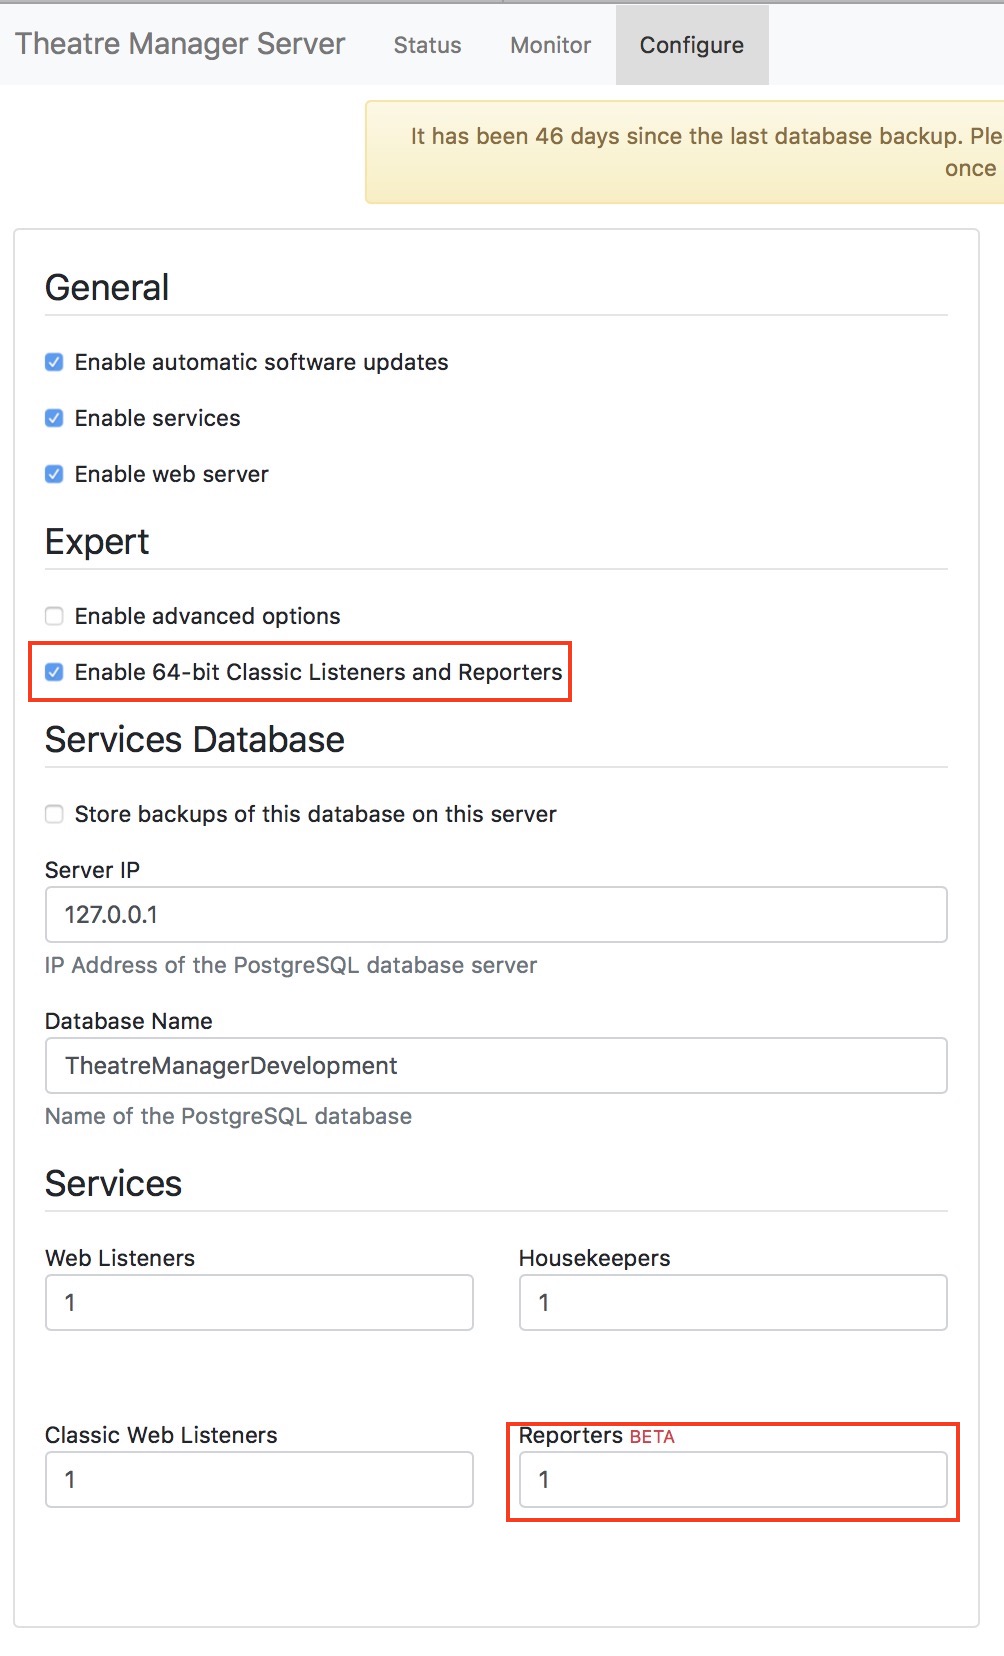
Enabling a TM Server to provide background report generation services requires four steps. You must:
- Be running the TM server on a 64 bit server capable of running the 64 bit version of TM.
- Click the check box Enable 64 bit Classic Listeners and Reporters
- Lower in the page, you must indicate how many reporters you want to run on this machine
- Enable background reporting in System Preferences before the Reporter processes will start up. This last setting enables you to quickly disable background reporting during a large onsales where you'd prefer your listeners to be doing web sales.
Note: if this is not enabled, an employee can still add reports to the queue, they will just need to run them manually when they go for coffee or take an extended break.
- Enabling appropriate employees to use the Report Queue in their employee preferences report tab
Considerations for setting up Reporters
Reporter processes use CPU resources when they are running a report and that may be in conflict with resources required if your venue requires the machines for web sales.
Static Marketing Site
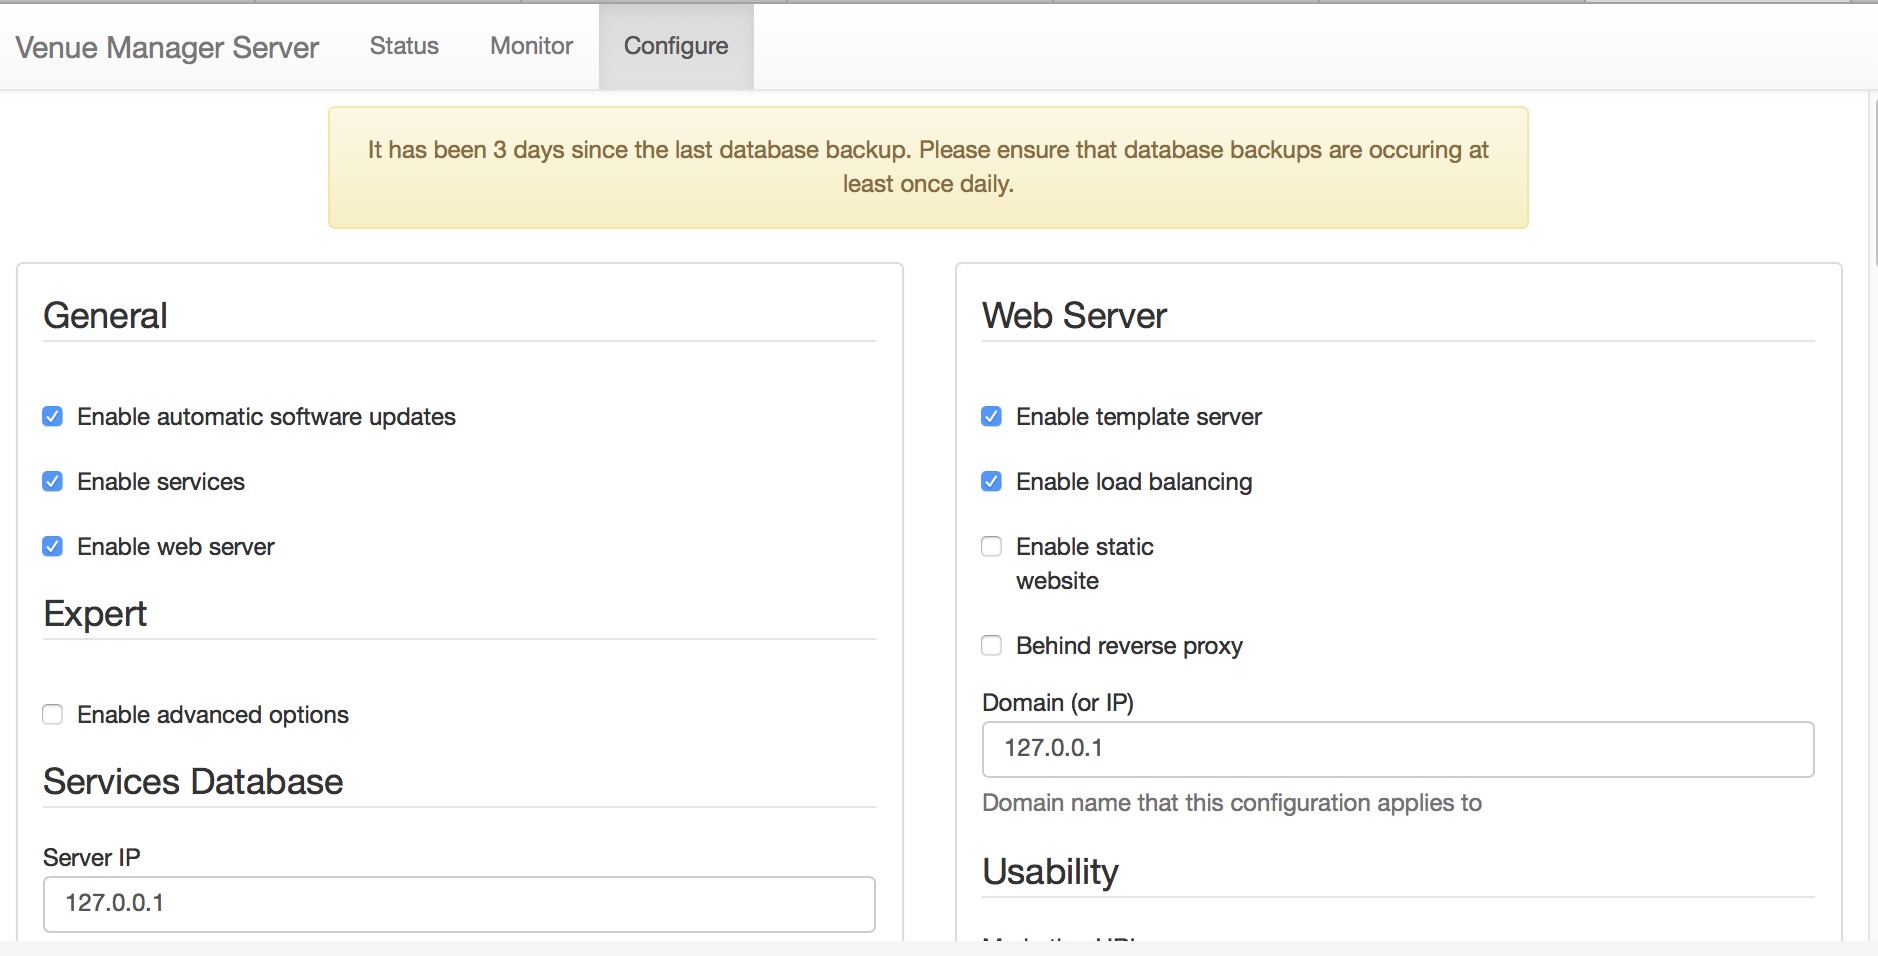 Most venues host their marketing web site at their ISP.
Under some circumstances, you may wish to host your marketing site internally in addition to the ticketing web site. Such circumstances might be when you:
- have lots of internet bandwidth
- are able to write and maintain your marketing web pages yourself
- can manage all traffic related issues and provide hardware as needed for yours sales cycles
- want different kinds of integration between the main web site and the ticketing site
- want your marketing web site under the same TLS certificate as your ticketing web site
- you do not need some additional server processes (like a database and a content management tool like WordPress or Drupal) to deliver the web pages
- you have a domain that you can point to the server such as:
- tickets.yourdomain.org will be the ticketing web site
- www.yourdomain.org, help.yourdomain.org or something like that will be the internal static URL
Or, if you wish, this feature could be used for something other than your marketing site -- to handle volunteer pages, local static calendaring info, help pages for your patrons on how to use your web site or what have you. Remember, anything placed on the static web site is publicly visible.
What are Static Web Pages for the Marketing Web Site
A static HTML web page is one that does not require server processes to build the page. If you can see a fully functioning page when you place the HTML file on a browser, then it is static. However, if you need a server process like PHP (by choice by the way), a database lie postgres, or some server process to be installed to deliver the web pages, then the page is not static (and this feature should not be used)
Enabling a Static Web Site
On the primary (front facing) NGINX machine that has a Director on it, you would need to:
- Go to the Configure tab of the director
- Click the checkbox Enable Static Website
- Scroll down for the parameters for the static website per the picture below
- Type in the directory on the main NGINX machine where you wish to store your static web pages
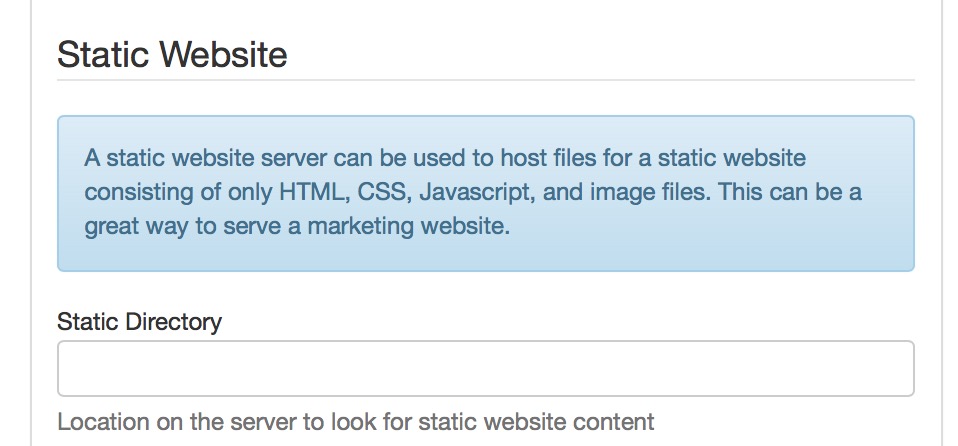
What changes when you do this?
Since you are now hosting two web sites with the single NGINX server the landing path changes.
Currently:
- any reference to tickets.yourvenue.org
- will send you to tickets.yourvenue.org/TheatreManager/1/login
- any reference to tickets.yourvenue.org
- will NOW send you to tickets.yourvenue.org/index.html which is where your additional URL like www.yourvenue.org/index.html will also take you.
- and you will need to make sure external references to the ticketing site explicitly send you to tickets.yourvenue.org/TheatreManager/1/login
What tools to use to make Static web sites
There are a number of tools that let you make static web sites. We do not have any favourites and do not recommend one over the other (not do we provide any support if you play with them). Some popular ones at the current time are:
- Jekyll: https://jekyllrb.com/
- Hugo: https://gohugo.io/
- Lektor: https://www.getlektor.com/
Web Server Parameters
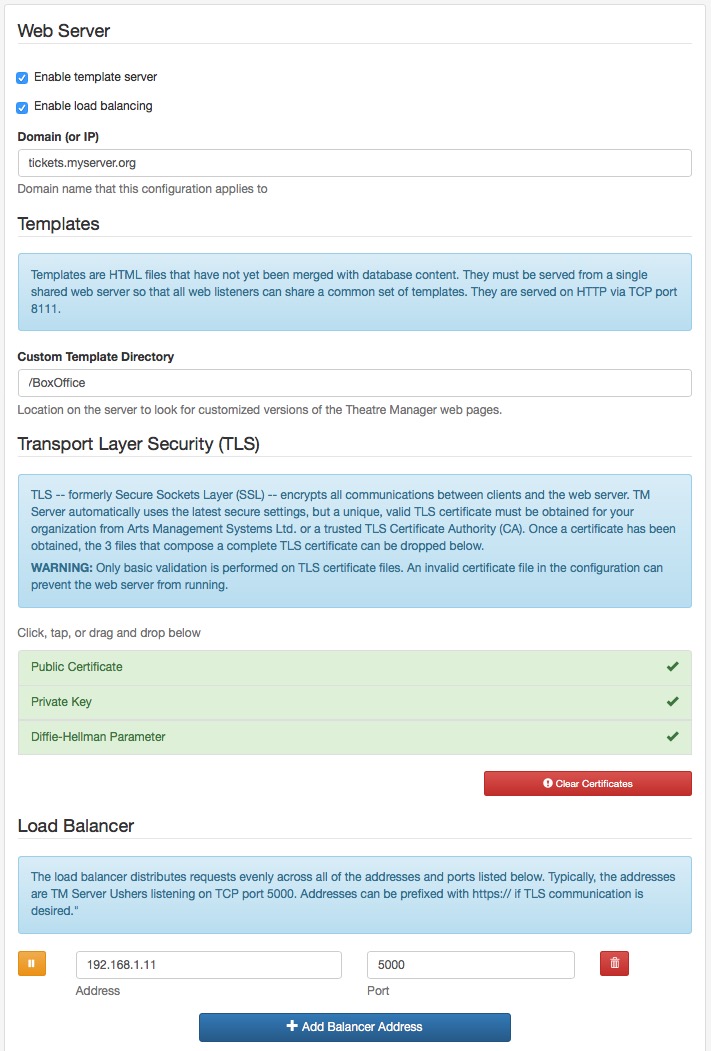
Enable template server
This causes the web server to listen on port 8111 and provide all your custom web pages to all of the web listener services and there should only be one of these enabled for your entire system. The IP address of this machine must match the Custom Template URL specified in the Director Tab in Company Preferences.
On the primary web server, you need to enable this feature. When enabled, you will see the option Custom Template Directory lower on the page. Please fill it in.
Enable Load Balancing
This should always be enabled when you need to tell the web server where each of the web listener machines are (see Load Balancer below)
Domain or IP
Enter the domain name that this web server is for. This will be your tickets.myvenue.org URL that your customers use to access your sales site.
Custom Template Directory
The web services always use the most recent built in web pages to keep your web site current. Since you can customize these web pages, you need to tell the TM server where on the disk that the custom pages are stored so that the web listeners can get those instead of the default pages.
We suggest that they be kept in:
- Macintosh: /BoxOffice/WebPages
- Windows: C:\BoxOffice\WebPages
Transport Layer Security (TLS)
Each domain (eg tickets.myvenue.org) requires what is called a TLS certificate to uniquely encrypt the communication between your customer and your server. It is what turns on the lock in a patrons browser window. TLS certificate has 3 files that are obtained and properly configured for you by Arts Man:
- Your public certificate obtained from your provider
- Your private key which nobody else knows
- The Diffie-Hellman Parameter file used by NGINX as part of the unique cryptographic key generation that is used in the subsequent encryption process.
Installation
To install these files, simply drag them from your desktop on top of the area on your browser. If the area on your browser is green, they are installed. Use the 'Clear Certificates' button to remove any prior certificate files if you do not want them, or simply drag new ones on top to replace them.
Load Balancer
This section is used to indicate the IP addresses where your Web Listeners are located. This will be on a separate machine and in the example setup, the address is 192.168.1.1 and the port is 5000 (which is the load balancer on of the web listeners).
Unless doing an expert setup with the assistance of Arts Management Systems support, the port will always be 5000. Simply add as many IP addresses as you have machines acting as web listeners.
Port 5000 on each web listener acts as a load balancer on the machine to forward requests to port 5001, 5002, etc (one for each second gen listener you have defined.
TLS Certificate
Before you can get an TLS certificate, you will need:
- a static IP address for your router that is obtained from you ISP
- a 'nice' domain name like tickets.yourvenue.org which is set up with an 'A' record on a DNS server and points to your firewall
- to open ports 80 and 443 at the Firewall per PCI requirements
The steps you will need to follow to set up an TLS Certificate and get web pages working are in the following sections.
For Venues hosted on AMS Cloud
|
AMS provides the static IP for you as part of your setup.
AMS can provide a URL like 'yourname.artsman.com' if you wish, and if so, will also provide our group TLS certificate for your use. If you prefer to use your own domain name, you will need your own TLS that we can obtain and set up. |
Static IP for Your Router
- a static address for your router.
- a 'nice' domain name like 'tickets.yourvenue.org' that points to your firewall. These generally cost about $10 to $20 monthly in addition to your connection fees, unless you have a business internet package - in which case you probably get one included.
Obtaining a Static IP
The static IP must be obtained first and is supplied by your ISP. It will be set up in your firewall/router so that it never changes and means that customers will always be able to find you on the internet. These generally cost about $10 to $20 monthly in addition to your connection fees, unless you have a business internet package - in which case you probably get one included.
If you have a static IP and do not recall it, then open up a browser and type 'whatsmyip.org'. This asks a web site to tell you what the IP address of the outside of your router is. Alternately, you can enter the config mode for your router to determine the static IP address.
For Venues hosted on AMS Cloud
|
AMS provides the static IP for you as part of your setup. |
External DNS
You can think of this as a 'nice' name by which customers can find you, or if they see it in the URL area of the browser, they will be confident that they are connecting to the right web site.
Call up your ISP (or web site hosting company) and ask them to create a DNS record for 'tickets.myvenue.com' (where myvenue is replaced by your main web site name). As an example, if your main web site is www.artsman.com, then you would like your ISP to create a DNS record for tickets.artsman.com.
Possible DNS names that you may prefer from a marketing perspective are:- tickets.myvenue.org
- boxoffice.myvenue.org
- sales.myvenue.org
- tm.myvenue.org
- secure.myvenue.org
- and if you have a mail server or other services already in your organization, we could use that as well.
Once the DNS record has been created and is propagated to the internet (this usually happens in a few hours but can take as long as 24 hours), the next step is to purchase and install the TLS certificate.
For Venues hosted on AMS Cloud
|
AMS can provide a URL like 'yourname.artsman.com' if you wish, and if so, will also provide our group TLS certificate for your use. |
Buying the actual TLS Certificate
Purchasing your TLS from Arts Management Systems
Arts Management Systems uses 4096 bit encrypted premium certificates and if you wish to purchase one, please contact the sales office at (888) 536-5244, ext. 2.
When you buy a TLS Certificate from Arts Management Systems, information that we will require from you in order to customize is to your venue are:
- company name (do not abbreviate, provide the full legal company name)
- primary contact's first and last name
- primary contact's title
- primary contact's email address
- primary contact's direct phone number
- venue's legal Address, City, full State/Province name (do not abbreviate the state or province name)
- external DNS that you set up such as tickets.myvenue.org
- the operating system that Apache is running on (OSX, Linux, or Windows)
- we will require an authorized administrator's email address to send the verification to and approve the request. This needs to be an email address you have the ability to check for the incoming emails. Please make sure that the email account has been set up and is available before you provide us the email account to use, or the approval email will not be delivered. With an invalid or non-working email account, the TLS certificate will not be processed. The options for the email address are below: (Select ONE of the following)
- admin @ myvenue.org
- administrator @ myvenue.org
- hostmaster @ myvenue.org
- webmaster @ myvenue.org
- postmaster @ myvenue.org
- An email indicating that a TLS creation request has been started.
- An email requiring you to confirm the information at the specified email address above. Please confirm the email (by clicking on the acceptance link within that email) and accept the TLS request.
- After you have confirmed email #2's acceptance link and the TLS has been processed by GeoTrust, the 3rd final email containing the actual TLS certificate information will be sent to you. Please note that this final email may arrive anywhere from 10 minutes to 12 hours after email #2 was accepted depending upon the next processing cycle.
Self Purchased TLS Certificate
If you purchase your own TLS certificate from another source, you will need to install it yourself following the instructions provided to you during the purchase process and make sure it works. If you have any questions about your Self Purchased TLS certificate, contact the company from whom you purchased it for any and all assistance.
Install and Test the TLS Certificate
Once the firewall rules have been implemented and the TLS certificate installed:
- Open up a browser
- Type 'https://tickets.myvenue.org'
- It should display a web page in the browser and turn on the lock on the browser.
- Use Qualys TLS Certificate Test to test the TLS Certificate.
Make sure to check the option "Don't show the results on the Boards"
This page shows safari with the lock on the upper right turned on
This page shows firefox with the lock on the lower right turned on

Please check for it on your browser as appropriate.
Diffie Hellman Parameter File
What is Diffie-Helman?
Credit: Stack ExchangeDiffie-Helman is a way of generating a shared secret between two people in such a way that the secret can't be seen by observing the communication. That's an important distinction: You're not sharing information during the key exchange, you're creating a key together.
This is particularly useful because you can use this technique to create an encryption key with someone, and then start encrypting your traffic with that key. And even if the traffic is recorded and later analyzed, there's absolutely no way to figure out what the key was, even though the exchanges that created it may have been visible. This is where perfect forward secrecy comes from. Nobody analyzing the traffic at a later date can break in because the key was never saved, never transmitted, and never made visible anywhere.
The way it works is reasonably simple. A lot of the math is the same as you see in public key crypto in that a trapdoor function is used. And while the discrete logarithm problem is traditionally used (the xy mod p business), the general process can be modified to use elliptic curve cryptography as well.
But even though it uses the same underlying principles as public key cryptography, this is not asymmetric cryptography because nothing is ever encrypted or decrypted du ring the exchange. It is, however, an essential building-block, and was in fact the base upon which asymmetric crypto was later built.
How to create your Diffie Helman parameter file
Since the Diffie-Helman parameter file is a way of creating a shared secret at the start of the cryptographic process, you can change it as often as you want, completely independently of the TLS certificate. It is quite easy to do so.
| Macintosh |
This needs to be done using Terminal:
|
| Windows | Please ask Arts Management support to make one for you or find a Macintosh. |
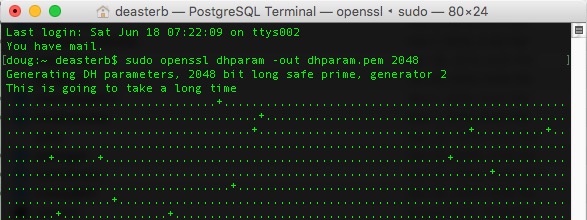
Testing your Web Sales (the Hosts file)
|
If your computer in the office cannot see the ticketing web site, the best way is to set up a DNS server inside the network to help all computers see the server.
Only edit the local machines 'host' file if you cannot set up a DNS server. |
Testing your Web Sales Site
You should be able to access your ticketing web site via the URL you used to create the TLS certificate after the:
- TM server is set up as a web server
- firewall adjusted to open the necessary ports and
- web listeners running
Try accessing the ticketing web site from:
- a location outside the office to confirm it works. A cell phone is the ideal way - using the data plan and not while connected to the wifi network.
- one or more computers inside the office to confirm that it works
Troubleshooting access inside the office
If you are having issues connecting to your ticketing web site while inside the office and are receiving timeouts, this is often resolved by:
- adding an internal DNS entry to your DNS server to point to your ticketing web site via an internal path (preferred approach) -or-
- editing the hosts file on each machine
Mac's are not usually subjected to this issue. PC's inside the office frequently are because they do not always seem to be able to resolve the DNS that goes outside the firewall and back in, so you have to edit the hosts file to tell the PC how to find the web site.
Editing the Host file for Mac
Troubleshooting generally depends on the behavior of the DNS within the firewall and the operating system used. Most Mac's will easily find 'tickets.yourvenue.org' by navigating through the firewall properly. However it may be possible for a machine to not be able to access the online sales domain directly.
The best way of correcting this issue is to put an entry within the internal DNS server to point 'tickets.myserver.org' directly to the IP address of the apache server.
If that is not possible, an entry in the hosts file of each web listener that points to the apache server can be made. This should be done if the DNS does not propagate in the internal network. If the Web Listeners start up and are able to find the 'tickets.myvenue.org', you will not need this step. If they do startup but they seem to be ignored by apache very quickly, then you will need this step.
| # | Description | |
| 1 | Open the 'Terminal' window. | |
| 2 | Type cd /etc. | |
| 3 | Type sudo vi hosts. | |
| 4 | Type the administrator password to the machine. | |
| 5 | Use the arrow keys on the keyboard to scroll down. | |
| 6 | Type 'I' to enter the edit mode. | |
| 7 | Add the IP address of the Apache machine followed by the online sales domain.
| |
| 8 | Click the 'ESC' key on the keyboard. | |
| 9 | Hold the SHIFT key on the keyboard and type Q. | |
| 10 | Type WQ.
This with write the changes to the Host file and close it. |
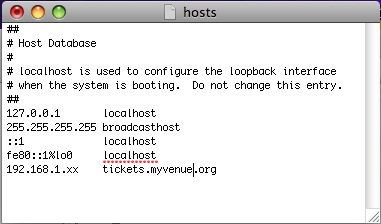
Editing the Host file for Windows
Troubleshooting generally depends on the behaviour of the DNS within the firewall and the operating system you use. Windows machines sometimes need a helping hand.
The best approach is to put an entry within the internal DNS server to point 'tickets.myserver.org' directly to the internal address of the apache server.
If that is not possible, an entry in the hosts file of each web listener that points to the apache server may be needed. If the Web Listeners start up and are able to find the 'tickets.myvenue.org', this step is not needed. If they do startup but they seem to be ignored by apache very quickly, this step will be needed.
| # | Description |
| 1 | Open My Computer. |
| 2 | Navigate to c:/windows/system32/drivers/etc/ (or where the windows system32 directory is located). |
| 3 | Right click on the Hosts file. |
| 4 | Select Open With... WordPad. |
| 5 | Add the IP address of the Apache machine followed by the online sales domain.
|
| 6 | Click File >> Save. |
| 6 | Close the Host file. |
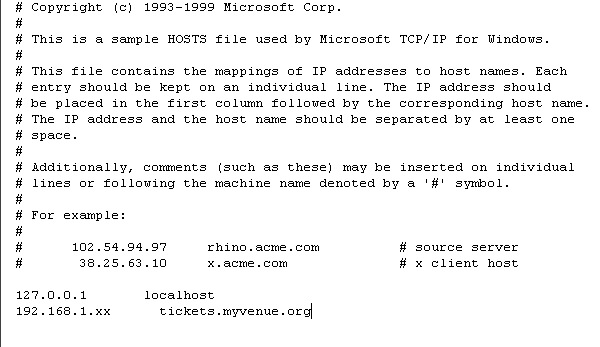
Services Configuration
- Deliver performance by
- Taking advantage of multiple CPU's on current machines by setting up multiple processes
- Providing background worker processes that automatically take care of longer processes such as email or cart cleanup
- Providing support for the standard Apache or Nginx Load Balancer for multiple servers
- Simplify Setup and Management by
- Handling web services for all outlets in one server while preserving branding for each outlet
- Run as a service that will automatically restart in case of failure or machine restart
- Being aware of system updates and automatically intalling them in the background with no outage.
- Increase Deployment Options by
- Running on OSX and Windows (linux possible in future)
- Providing support for other high performance web servers (currently NGINX)
Installer Download Locations
Steps to Configure the Theatre Manager Server
- Theatre Manager Setup:
- Download and Install the Theatre Manager Server
- Configure the Theatre Manager Server by determining the processes you want to run.
- Test your web pages to make sure the server is working. At this time, we suggest a log in, finding an event, adding it to the cart, and going to the checkout window.
Configuring Theatre Manager Server
- Configure the Theatre Manager Server Processes
- Verify the settings in Company Preferences record and save it.
- Turn off an power saving settings for Macintosh (especially APP NAP) or Windows for any machine running classic listeners or the Theatre Manager Server
- Start the Theatre Manager Server
- Start the Classic Listener
- TEST your web site after the changes
Using the Director to configure Theatre Manager Server
|
On OSX, if you enter the URL http://127.0.0.1:3012 and do not see the 'Director' screen to the right, you may need to start the process (or stop/start the process) using terminal commands.
On Windows, you may need to:
|
|
Make sure you have enough permitted connections in postgresql.conf setup for the postgres database to handle the processes you configure. |
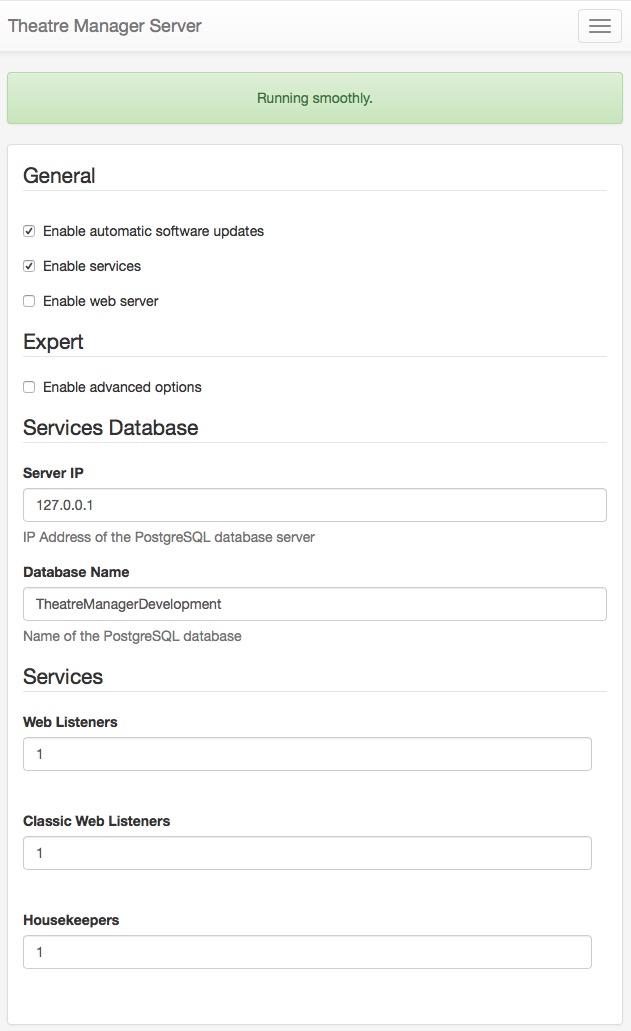
Connect to Theatre Manager server using your browser and entering the URL http://127.0.0.1:3012. You will see a web page like the one to the right. It will help you configure what is best for your machine by making recommendations for number of processes.
General
Enable Automatic Update
Theatre Manager Server is designed to auto update when a new version is released. If you wish to disable the feature, make sure to disable it on all machines. If it is enabled, make sure it is enabled on all machines.
Enable Services
Enable this if you want to set up the online sales and REST api
Enable Web Server
This is enabled if this TM server will be acting as the primary load balancer and/or template server for custom web pages. Normally one of these is enabled - and has extended setup.
Services Database
In the database section, you will need to enter the IP address of the database server and provide the Database Name.
Services
The values that you enter for the processes depend on the number of CPU's, amount of memory and other processes running on the machine. The suggestion provided is for a machine dedicated to Theatre Manager server. It if it also running the database on the same machine, you will need to reduce the number of processes.
Web Listeners
Web Listeners are the actual processes that respond to an online web request from a patron purchasing online or to the REST API.
Typically (assuming a dedicated machine), the second generation server can be set to have one less process than the number of CPU's on the machine. A general rule of thumb is that you need about 1 meg of ram for each process including operating system, so make sure not to start more than you have available memory.. (Note: each process actually only uses about 400Mb, but the operating system and buffers require their own space). For example:
- a 4 core machine with 4 gigs of ram could start 3 processes
- a true 8 core machine could start 7 processes, although you may not need that many.
- a dual 4 core with hyper-threading should only start 3 process. (It is best not to count the hyper-threaded cores as real CPU's)
- a machine with 4 gigs of ram, regardless of the number of cores, should have no more than 3 listeners set up
- a machine with 8 gigs of ram could have 7 processes, if it had enough cores. We would suggest 5 or 6 normally
Classic Listeners
Designate the number of classic listeners that you might need to handle some tasks that the main web listeners cannot do (yet)
- Each Classic process needs about 400 megs of ram for buffers.
- They are used for few processes and for plugins, so generally a ratio of 2 classic listeners for each web listener is reasonable on each machine.
Housekeepers
Housekeepers are used to handle background activity. Typically, this value is always 1. Housekeepers:
- Clean up expired carts on a periodic basis.
- Send out scheduled emails automatically.
- Perform daily database jobs like purging expired web logs, etc
General Note
In general, if you count all your processes, multiply by 500mb each and make sure that is well under the total ram in the computer. It is far better to have two machines for web services than over-commit one machine
TM Server Company Preferences
The key things to note are:
- The web Server URL should have 'https:' and use the URL of your ticketing web site. This is typically 'tickets.xxxx.org'
- The web server port should be blank which means use the standard https: port of 443. This generally never needs changing.
- The template page URL should NOT have 'https:' (it should only be http:) and should refer to the direct internal IP address of the main TM Server containing the web page templates
- The Template Page PORT should be 8111 -- meaning FORWARD any requests for custom pages to the TM Server on port 8111.

TM Server Special URLs
| URL | Purpose |
| http://127.0.0.1:3012 | Director's main web page showing the current status of services |
| http://127.0.0.1:3012/configure | Director's configuration page. This is also available as a link on the Director's status page |
| http://127.0.0.1:3012/nginx.conf | Shows the NGINX configuration file created by the Director for use with NGINX. It may be requested by AMS support for debug purposes on occasion. |
| http://127.0.0.1:3012/access.log | Shows the web pages accessed by users in the past 12 hours. It may be requested by AMS support for debug purposes on occasion. |
| http://127.0.0.1:3012/error.log | Shows the error log generated by the NGINX server in the past 12 hours. It may be requested by AMS support for debug purposes on occasion. |
| http://127.0.0.1:3012/activity.log | Shows the the current day's activity log -- this is all actions done by the server that go to console or event log in that day so you can see what occurred. It may be requested by AMS support for debug purposes on occasion. |
| http://127.0.0.1:3012/backup | Run the backup command on the database. You must have set up the Director for backups and configured the backup process. Results are shown in the backup.log and a blue message appears |
| http://127.0.0.1:3012/backup.log | Shows the the latest backup's activity log -- this shows what the result of the last pg_dump command . |
| http://127.0.0.1:3012/api/v1/users |
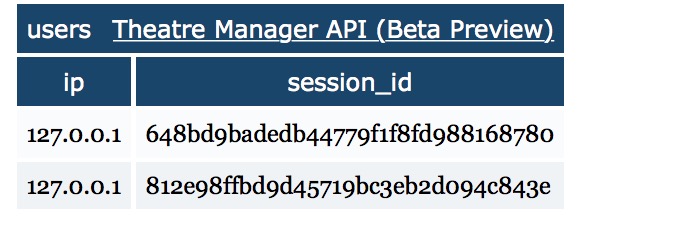 Shows a list of IP addresses and sessions that are monitoring the specific TM server. This lets you know who is observing the status of the server and what they may be watching/monitoring the web activity.
|
| http://127.0.0.1:3012/clear | Clears the setup/config to start over from scratch. None of the configuration is remembered. (remove 'XX' from end of link to actually do it) |
| http://127.0.0.1:5000 | test TM servers to see if they are responding|
| https://127.0.0.1/api/v1 | Access to the REST API internally to the organization - if enabled for the employee |
Monitoring Theatre Manager Services
|
ArtsMan uses open source software called Nagios to check your 'ticketing' web site every 90 seconds via the top link in the table below (Ubuntu install instructions for technically minded).
The monitoring is a free service. Our support team monitors this tool through out the day and if we notice outages during normal support hours (Monday-Friday 8-5 MST, excluding holidays), we will try to let you know. However, it is not substitute for your own monitoring services. |
Monitoring
| Item | Purpose | Monitoring Tool | Expected Results |
| 1 | Verify entire system is up | https://tickets.yourvenue.org/TheatreManager/1/time?force_proxy
This sends a web request asking for the time from the web services. If you get the results expected, then the database, web server, TM listener and classic listener are all working |
Web page with the text TIME=20 somewhere in it |
| 2 | Verify everything but classic listeners running | https://tickets.yourvenue.org/TheatreManager/1/time If the probe in #1 (above) fails, then sending the same command without '?force_proxy' tests to see if all but classic listeners are runing | Web page with the text TIME=20 somewhere in it |
| 3 | Verify Web Server is up | https://tickets.yourvenue.org
If the probes in #1 and 2 fail, his tests to see if NGINX is up |
The url should generally change to https://tickets.yourvenue.org/TheatreManager/1/login?event=0
It means you should get a re-direct. |
| 4 | Verify Domain or Router | in terminal or dos prompt, type:
NSLOOKUP tickets.yourvenue.org |
you should see the static IP address for the outside your router. If you see that but get no other response to the above, then your web site is there, but perhaps your router is down. |
| 5a | Verify Database Server is Running | Start up Theatre Manager on the database server machine. | You should see the login window with the list of users. If so, skip to #6. If not, check that services are running.
Otherwise refer to starting and stopping the service for the appropriate platform. |
| 5b | Verify Database Server Running | If nothing else seems to be running, you can test to see if the database server is working by remoting into the machine with the database server on it. Look for the program called 'pgadmin' and start it up.
It will have a list of connections. Pick the connection that is localhost or 127.0.0.1 and double click on it. You may need to know the password. |
You should see a list of databases. |
| 6 | Verify NGINX server is running | If you cannot see your web services externally from probe #1, you can test the server internally using: | If you see the message on the web page The stage is set! then the TM server is running, but may not be configured for some services. |
| 7a | Verify TM Web Services are running | Access the Director using http://127.0.0.1:3012
If you do this on each machine that is running the Director, it will tell you which components of the TM server are running on the machine and which are down, stopped, or in error |
The Director web page with with a status showing that listeners, housekeepers, etc are up and running. If you do not see this, it is stopped |
| 7b | Verify TM Web Services are running |
WindowsYou can also look to see if the service 'Theatre Manager Server' is running using the services control panel.
OSX
|
After playing with the service and/or restarting it, go back to '5a' to see if the director is running. |
Credit Card Authorization
Our sales team will happily discuss your needs, provide contact information for each option, and help quickly and seamlessly setup credit card processing in Theatre Manager. Ultimately, the final choice of processor is up to the venue and we will certainly assist in the implementation.
|
Service Providers provide the infrastructure to authorize cards under your merchant account and then deposit YOUR funds directly in YOUR bank with minimum delay. |
Definitions used in Credit Card Processing
Definitions
There is often confusion between the purpose of a bank, a processor, and an aggregator, and understanding the difference helps make sense of the authorization options available to you.
- Bank: A bank is where the money ends up at the end of the day. If somebody gives you money in any form (cash, check, credit card), you write up deposit slips and take it to the building at the corner on the main street. Banks are brick-and-mortar companies with charters to write loans, put your money in a safe, etc.
- Merchant Processor: A processor is not a bank. Direct Processors are only in the business of authorizing credit cards on behalf of a bank and hold on to the money while it is electronically in transit to your bank. When you do your daily credit card batch settlement, the money in transit is transferred directly to your bank. In North America, there are about 15 major processors such as Paymentech, Nova, 1st Data, Visanet, FMDS, Vital, TSYS, etc. Some banks prefer working with some processors - but generally most processors can get your money to any bank.
- Merchant Provider/Aggregator: There are numerous (meaning hundreds) of aggregators that will process your card for you. All those aggregators use one of the 15 merchant processing companies. Think of the merchant provider/aggregator as being like an insurance broker... they shop for the best deal with a processor. The processor is the actual company that does the credit card processing for the aggregator.
- Merchant Account: You set up an account with one of the processors or aggregators, who then assigns to you a merchant number. The merchant number accompanies transactions submitted to the processor and identifies:
- who should get the money (i.e. you), and
- which bank account the money gets deposited to.
Direct Credit Card Processing Options
|
Theatre Manager transmits data directly to your processor over a secure HTTPS connection authenticated by a user ID and password unique to your merchant account and supplied only to you by the bank. Refer to each processor to see their additional capabilities. PCI DSS 4.1 |
 |
If you are considering changing merchant provider, be sure to read:
|
These online processors are able to manage multiple authorizations at once, making for a faster and smoother buying experience both for direct Theatre Manager users and for patrons buying online.
The following diagram illustrates the authorization flow.
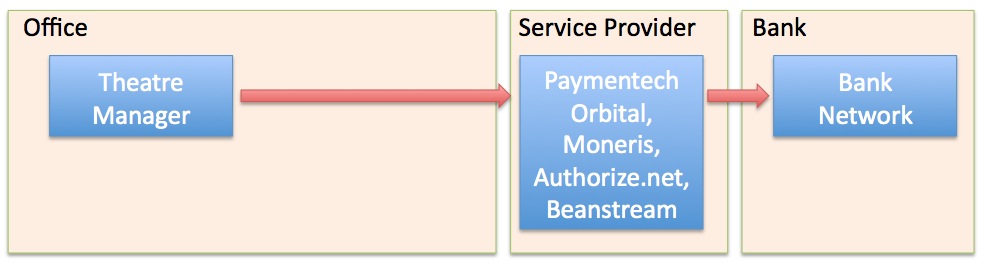
Merchant Processing Service Providers
The merchant providers supported in Theatre Manager and various features of each are:
| Theatre Manager Help Link | Processor Marketing Website | Account Setup Contact Information | Hosted Payments | Merchant Profiles | Linked Refunds | Independent Refunds | PinPad | PCI compliance Options |
| Bambora™ | Bambora™
formerly Beanstream |
click for contact info | No | February 2021 | Yes | No | No | C or D |
| Paymentech Orbital™ | Paymentech Orbital™. | click for contact info | No | Yes | Yes | Yes | No | C or D |
| Elavon™ VirtualMerchant | Elavon™ Virtual Merchant main processor. | click for contact info | No | Yes | Yes | Yes | No | C or D |
| Moneris™ | Moneris eSelect Plus™ direct processing or hosted payments | click for contact info | Yes | Yes** | Yes | Yes | Yes | A-EP, B-IP, C or D |
| Authorize.net™ | Authorize.net™ | No | Yes | Yes | Yes | No | C or D | |
| Elavon™ (private brand) | derivative of Elavon™ and specific to city of Miami | City of Miami only | No | No | No | Yes | No | C or D |
|
Hosted Payments: is a feature where the Theatre Manager web site's payment page will redirect to the service provider's web site. Any card data entered there never enters your network, allowing PCI Schedule 'A-EP' compliance - limiting the amount of PCI compliance documentation you require. |
|
Merchant Profiles is a feature where Theatre Manager obtains a token from your merchant provider to replace the credit card number in your database. Token's mean that you are not storing credit card data that is subject to PCI compliance - all card data could then be shredded. However, you retain the ability to do post dated payments or provide refunds through the saved token that is unique to the patron and your organization.
** Note: Merchant profiles not recommended for Moneris because they charge too much. |
Bambora Installation
|
Bambora implements user id and password authentication over https connections to provide compliance with PCI DSS 4.1 |
|
A unique feature of Bambora allows refunding against an original credit cards purchase, even if the credit card has been shredded. This is useful for venues that do not wish to store credit cards and may need to refund to cancelled events periodically long after the original payment. |
Please contact Arts Management to discuss the process of getting a Merchant Account from Bambora.
After Bambora has provided you with a merchant account, installation is quite straightforward. Once set up, funds gets authorized as 'Card Not Present' and then deposited right to your own bank upon settlement from Theatre Manager. This account information you are provided is all you need in the merchant setup windows (in the pages that follow) to begin secure credit card authorization.
Bambora needs an account setup for authorization and one for online viewing of the account data. You can set up multiple accounts for online access the data so some people can view data and others have more access to transactions and history.
- Bambora - uses the Merchant Portal via a web browser to "view the transactions" that have occurred. This account setup might need to be used during the EOD deposit process to verify transactions as required.
- Merchant User ID and Password - uses Bambora to allow authorizations to occur and be settled but not be viewed. This information is what needs to be entered into Theatre Manager's Merchant account to allow authorizations to occur.
|
The user ids and passwords for both of the above are different and should not be interchanged or confused with each other. Follow the appropriate setup steps for each. |
After following the setup for both accounts, make sure to:
- test the gateway
- Disable requirements for CVV2 and AVS in the online interface and allow those be managed from Theatre Manager merchant setup and set each employee to require CVV2.
Bambora Setup - Contact Information
- Settle any existing credit card batch (run an End of Day)
- Create a new merchant account in Theatre Manager
- Follow the steps to change your merchant provider
Then you can start using Bambora.
If you have any questions directly related to your Bambora merchant account setup, please contact your Bambora Representative directly. Contact Arts Management if you have questions about how to setup Theatre Manager to reference and authorize credit cards using your Bambora account.
Bambora Gateway Account
The User ID and Password setup is arranged by Arts Management from Bambora and is entered into the Setup --> System Tables --> Merchant Accounts window as below:
Software Type
The following values are set on the software type tab per the diagram below:
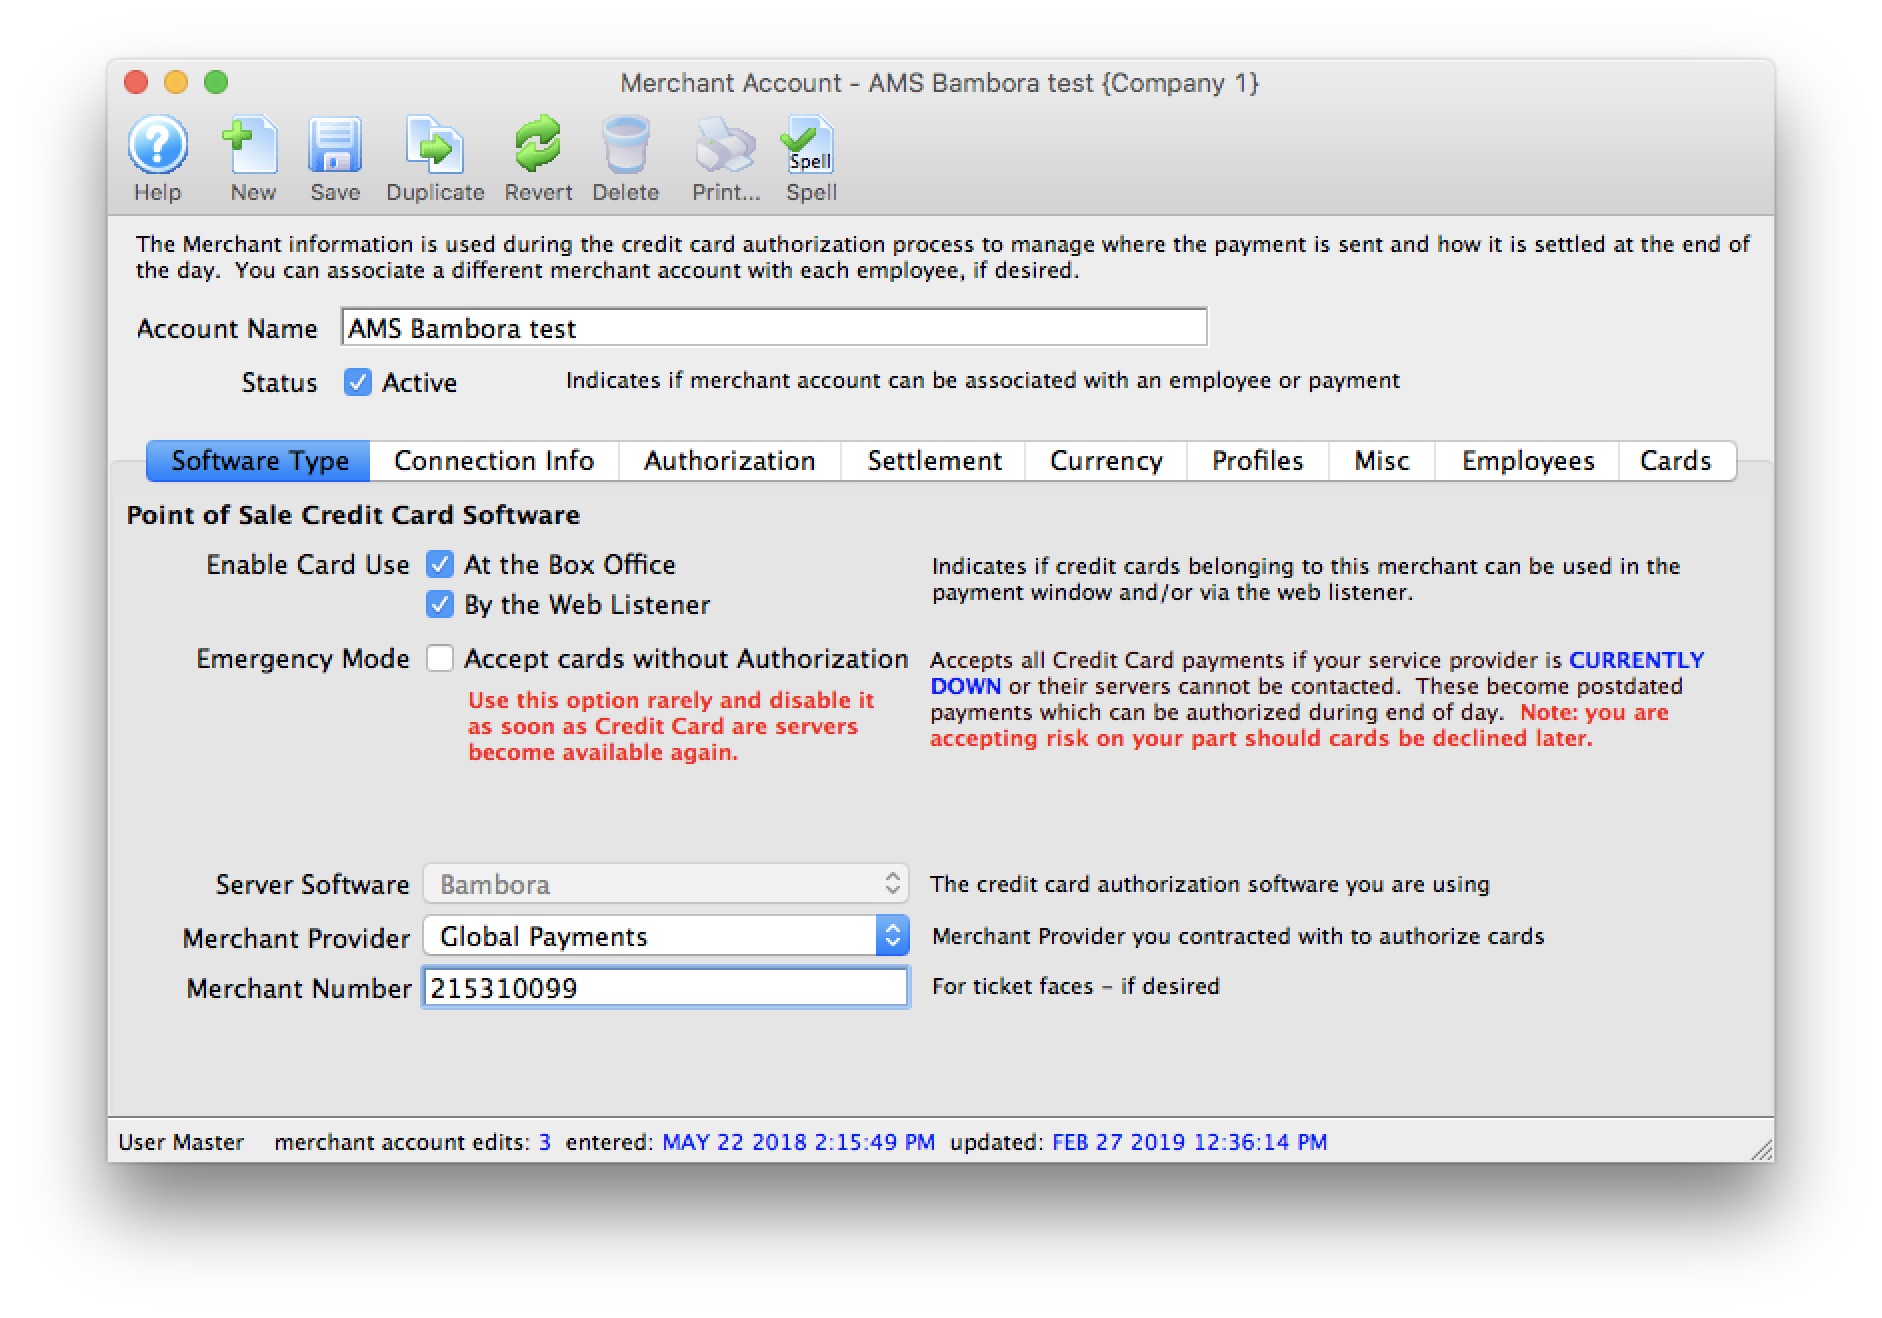
- Set the server software to be Bambora.
- The merchant provider - select the merchant services provider.
- The merchant number is for use on ticket faces and for contacting Bambora support.
Connection Info
The following entries are set on the Connection Info tab per the diagram below:
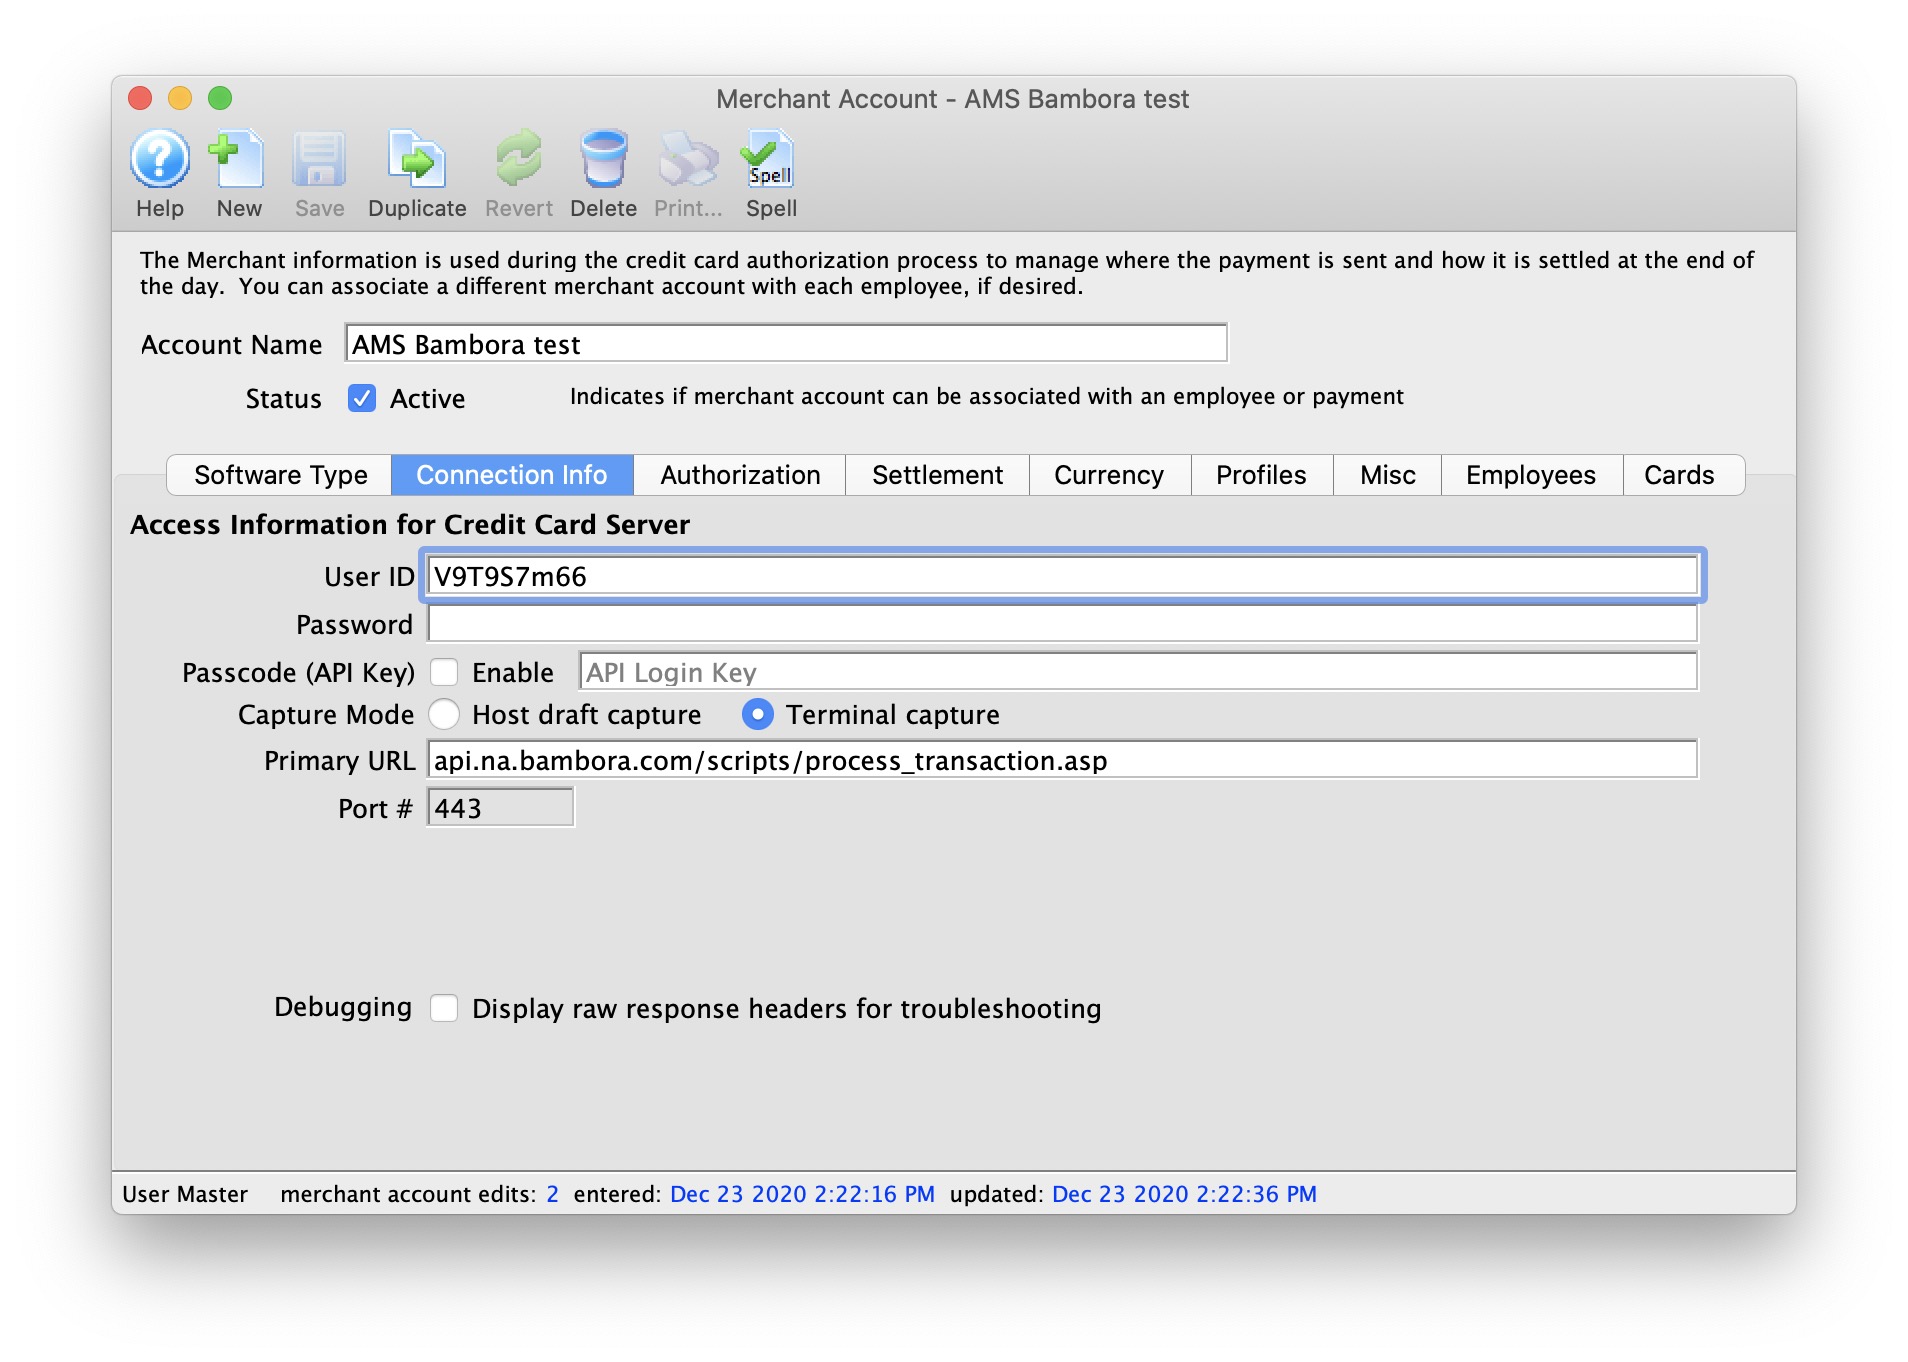
- User ID - provided through Bambora. The user id remains constant for the life of the account.
- Password - the password is auto generated for you. You can change it via the online interface to generate a new 'secret' key. If you do that, you can expire your old password right away or allow both old and new to co-exist for up to 24 hours.
- Passcode (API Key) Enabled - check this box if using the Payment Passcode API feature for connections rather than suppling the User ID/Password combination for each transaction processed.
- Passcode (API Key) - Payment API Passcode. The passcode (different then the User ID Password) assigned to the merchant account via the online Bambora web portal.

If Merchant Profiles are enabled and you get an authentication error, you might be using your Profiles API Key instead of your Payments API Key, so double check!
- Capture Mode - select Host Capture or Terminal Capture for End-Of-Day deposit processing.
- Primary URL - is always api.na.bambora.com/scripts/process_transaction.asp
- Port - is always 443
Merchant Profiles
|
Theatre Manager's interface with Bambora to maintain Merchant Profiles is currently under development. This feature has been disabled for activation until completion of the enhancement. |
The following entries are set on the Profiles tab per the diagram below:

- Enable Profiles - set to Active if Merchant Profiles will be used.
- Profiles API Login Key - Unique Profiles API Key for your Bambora merchant account. This identifier is different than the Merchant ID and User ID on the Connections tab.
Creating and modifying Payment Profiles requires you use your Profiles API Key. If you get an authentication error you might be using your Payments API Key, so double check!
- Profiles API URL - is always api.na.bambora.com/v1/profiles This URL is different than the URL on the Connections tab.
|
Refer to Merchant Profiles for further information on functionality. |
Employee and Card Setup
- To assign employees to this merchant account, click on the 'Employee' tab and find the employees to assign. In a multi merchant setup situation, drag only those employees that will use this merchant account as the default.
While some employees may have permission to use multiple merchant accounts, viewing their name here is the default merchant account assigned to them for charging cards. If the employee wants to use another merchant account, they will need to select it on the payment window.
- Click on the 'card' tab to select which credit card payment methods are associated with this merchant account.
If you need to have multiple merchant accounts and both are to take Visa (for example), you will need two Visa payment methods and assign one of them to each merchant account.
|
if you are switching from one merchant services provider software to another, you can open both merchant accounts and drag the employees from one window to the other. You can do the same for the credit card payment methods - to make the switch easy and fast. |
Any future dated 'post dated payments' associated with the card you drag to another merchant provider will automatically be re-assigned to authorize on the new merchant provider card network.
Testing Bambora
- Search for yourself in the database or create a new patron that is yourself
- Create a new order and buy a ticket
- On the payment window, select the credit card you want to use and do a test authorization
- If you get an authorization with a message indicating AVS match and/or CVV2 match, then the setup is correct
- Log in to your Bambora online account and view the batch to see that your transaction is there
- In Theatre Manager, void the credit card payment. It will appear in Bambora that the charge is still there with as a PA (pre-auth). That means it will be ignored
- Try another authorization and then do an End Of Day (i.e. SETTLEMENT) and make sure the amount makes it to the bank in the next day or so
Trouble Shooting Bambora Issues
- If you get a response that looks like it is HTML or XML and indicates that it was not authorized, then your user id/password is probably wrong (please verify), or something is incorrectly set up in Bambora and you will have to contact their merchant support group.
- If you get a message during end of day that will not allow cards to settle, make sure your provider has set you up to allow BACKEND transactions. These are used to convert 'authorize-only' transactions that are done during to the day to 'PAC' (fully processed) transactions during the end of day process
Bambora Web Terminal
- The Bambora Transaction List which is a filter that can be used to show the transactions of interest in a specific date range.
- You can see the Transaction Detail about any line by clicking on the credit card icon in each row. At the bottom of each transaction detail is a small table listing all other transactions that are related so that you can see a history pertaining to an authorization.
Transaction List
The Bambora transaction list lets you view the transactions that have occurred. Normally, you would only want to see those since the last end of day, but you can decide which data you want to view. To alter the search, the top part of the list contains date search range, the ability to limit the number of transactions per page and more. You may also view more detail about a transaction by clicking the credit card icon that is on the same line as the transaction.
The important thing to note is the types of transactions and how Theatre Manager creates them. Specifically:
- All payments sent for authorization will have a transaction type of 'PA'. This means Pre-Authorization. It is only a hold on the customers credit card. The the end of day is not done, this money will fall off the transaction list and you will not get your money.
- When you do End of Day, Theatre Manager takes all payments that it authorized that day and turns them into 'PAC' - effectively completing them. Transactions that are 'completed' are swept to your bank at 11:59:59 pm. This means a few things
- If you do not do end of day on any specific day, nothing will go to the bank until you compete an end of day.
- If you two multiple end of days in the same day, Theatre Manager sees them as more than one posting. Bambora aggregates all the PAC's into one amount on your bank statement.
- You will see AT LEAST TWO transactions for each customer. You will see a PA transaction and then you will see a corresponding PAC transaction that completes the PA. A successful authorization is a PA with a blue checkmark followed by a transaction some time later that is a PAC with a blue checkmark.
- You may see some 'R' transactions -- or refunds. Those are always swept to your bank each night, even if you do not do an end of day. Sorry, but that's the way Bambora works. We suggest making absolutely sure that you do an end of day in each day that refund occurs. For that reason, you may wish to limit who can do refunds.
Transaction Detail

The Bambora transaction detail contains a lot of information about the payment, most of which is self explanatory. It is accessed by clicking on the 'credit card' icon on the list window.
Theatre Manager currently uses 3 of the reference fields at the bottom of the screen to provide:
- ref1 - contains the Theatre Manager patron number on the account that the ticket was sold under
- ref2 - contains the Theatre Manager order number
- ref3 - contains the name of the user who processed the credit card
At the bottom of the detail window is a table that shows the related transactions.
Related Transactions
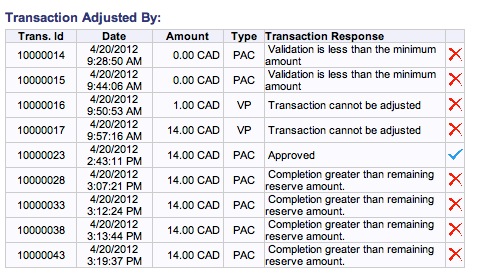
At the bottom of the transaction detail, there is a table that shows all the related transactions in Bambora. This is probably most pertinent to the original 'PA' transaction. If it has been converted to a 'PAC' transaction, you will see multiple lines as part of the Transaction Detail window that shows all the other transactions that affected this transaction.
Ultimately, all that matters is that you see a blue checkmark beside the PAC transaction, which means it was swept to the bank. In the example below, we see one.
Implication from Interrupted End of Day
However, we also see a number of other transactions with a red X that are related to the PA. If you see those, it may be because an error caused the EOD process to stop (without finishing in Theatre Manager) and so you re-ran it. Bambora only allows one PAC for each PA. A second PAC gives an 'error' but does not affect the outcome.
Paymentech Orbital Installation
|
Paymentech Orbital implements either user ID and password authentication; or access from specified IP addresses over HTTPS connections to provide compliance with PCI DSS 4.1 |
Installation is quite straightforward. You would contact Paymentech using information provided by Arts Management, and they create a Merchant Account for you. Money gets authorized by Paymentech as 'Card Not Present' and then deposited right to your own bank upon settlement from Theatre Manager. This account information that you are provided is all you need to set up in the merchant setup window below to provide secure credit card authorization.
Paymentech Orbital will need to provide the following 2 account setups (both are required):
- Orbital Virtual Terminal - uses the Orbital Gateway via a web browser to "view the transactions" that have occurred. This account setup is used during the Een Of Day deposit process to review your transactions prior to the settlement process.
- Certified Connection for User ID and Password - uses the Orbital Gateway to allow authorizations to occur but not be viewed. This information is what needs to be entered into Theatre Manager's merchant account to allow authorizations to occur.
|
The user IDs and passwords for both of the above are completely different and should not be interchanged or confused with each other. Follow the appropriate setup steps for each. |
After following the setup for both accounts, make sure to test the gateway.
Paymentech Orbital - Contact Information
- In Canada, contact:
Amit Dhawan
Chase Merchant Services
100 Consilium Place
17th Floor
Toronto, Ontario M1H 3E3
(647) 500-9872
www.chasepaymentech.ca
amit.dhawan@chase.com - Ask for a Paymentech Orbital account to be set up
Please note you may encounter with Paymentech:
- a need to sign a 3-year contract for this account. Depending on your transaction volumes, you may able to request a 1-year trial if your organization meets the requirements
- if you will be a new client to Paymentech, it will take up to two weeks to establish and setup your merchant account
- Paymentech may request that all transactions flowing through your organization (Box office point of sale business as well as the ecommerce sales) flow through this new account.
Please note you may encounter with your existing merchant privider:
- may require 30 days written notice of cancellation
Once your Orbital account is set up, the following steps will need to happen:
- Settle any existing credit card batch (run an End of Day)
- Create a new merchant account in Theatre Manager
- Follow the steps to change your merchant provider
Then you can start using Paymentech Orbital.
If you have any questions directly related to your Orbital merchant account setup, please contact Orbital Technical Support at 1-866-645-1314. Contact Arts Management if you have questions about how to setup Theatre Manager to reference and authorize credit cards using your Orbital merchant account.
Orbital Gateway Account
The Orbital Gateway Certified Connection for User ID and Password setup is obtained from Paymentech Orbital and is entered into the Setup --> System Tables --> Merchant Accounts window as below:
Software Type
The following values are set on the software type tab per the diagram below:
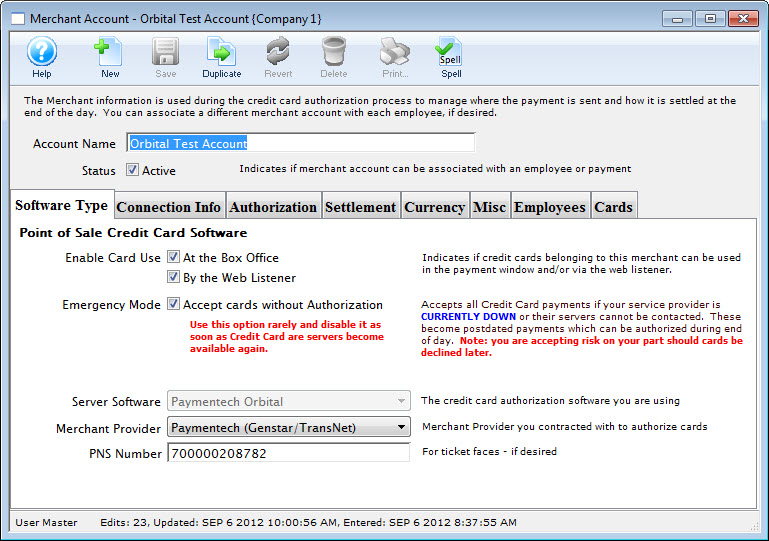
- Set the server software to be Paymentech Orbital
- The merchant provider will automatically be set for you
- The PNS number is provided by Paymentech and will need to go into the PNS/Merchant number field - enter in the PNS# (not the merchant number) for your Orbital account. It is typically 12 digits long and generally starts with 720000
Connection Info
The following entries are set on the Connection Info tab per the diagram below:
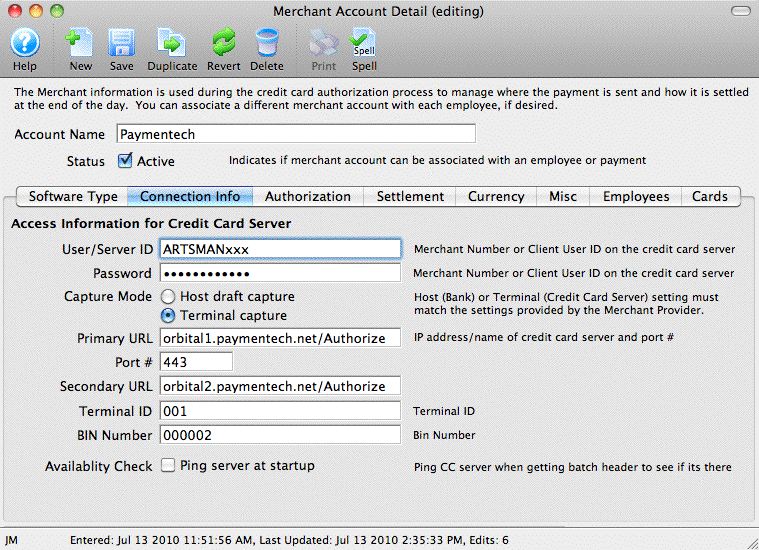
- User/Server ID - provided by Paymentech and is the user ID for the Certified Connection gateway, not to the Orbital Virtual Terminal (they are not the same thing - the Orbital Virtual Terminal is the online interface).
- Password - provided by Paymentech and is the password for the Certified Connection gateway. It is also not the password for the Orbital Virtual Terminal.
- Primary URL - is always orbital1.chasepaymentech.com/Authorize
- Secondary URL - is always orbital2.chasepaymentech.com/Authorize
- Port - is always 443
- Terminal ID - provided by Paymentech and is usually 001
- BIN number - provided by Paymentech and is always 000002 for North American credit card processing.
Merchant Profiles
The following entries are set on the Profiles tab per the diagram below:
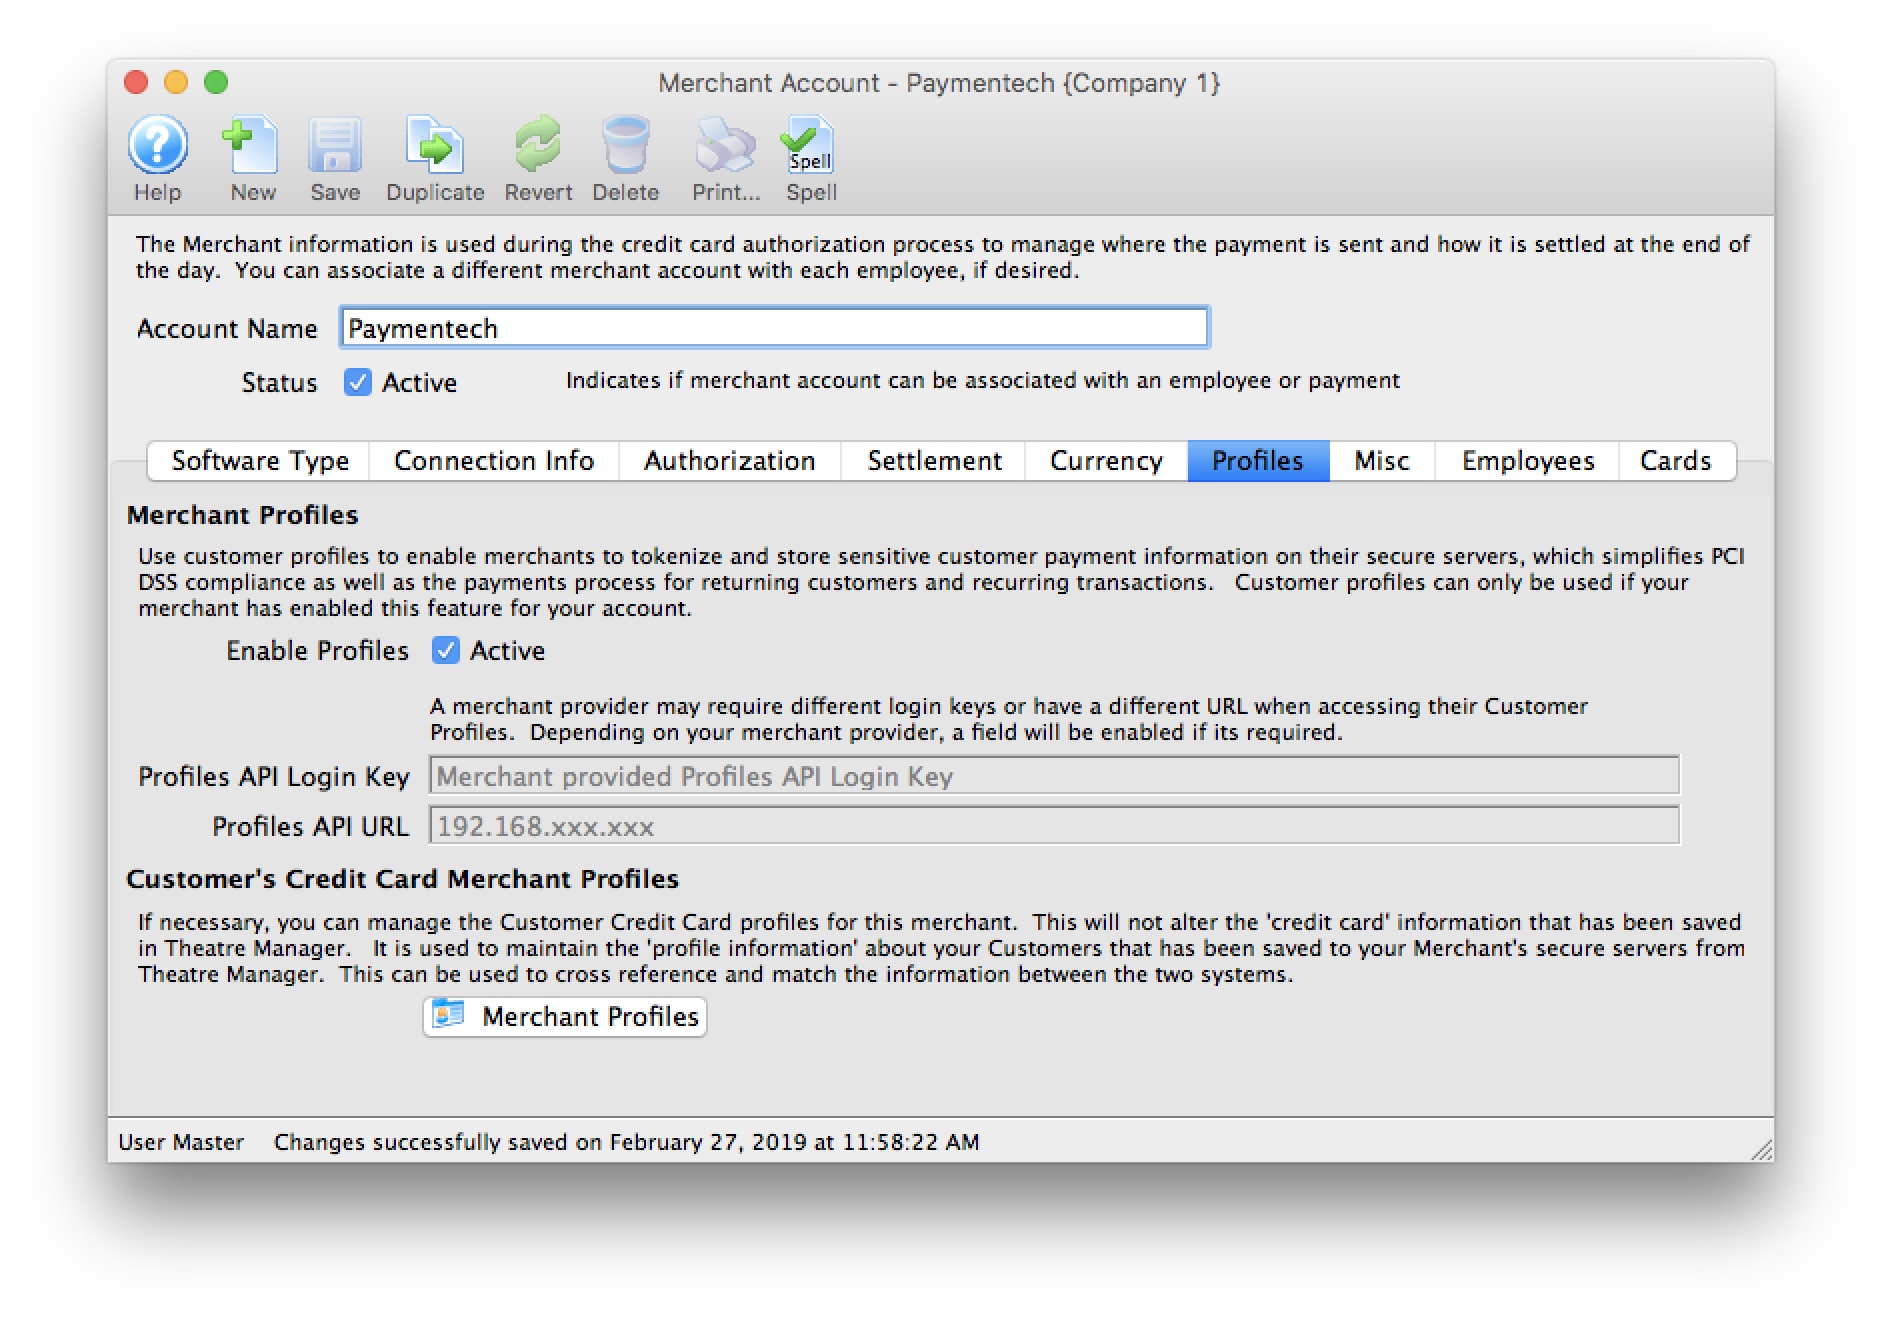
- Enable Profiles - set to Active if Merchant Profiles will be used.
- Profiles API Login Key - not required. Paymentech Orbital uses the same connection information from the Connection Info tab.
- Profiles API URL - not required. Paymentech Orbital uses the same connection information from the Connection Info tab.
|
Refer to Merchant Profiles for further information on functionality. |
Employee and Card Setup
- To assign employees to this merchant account, click on the Employee tab and find the employees to assign. In a multi-merchant setup situation, drag those employees that should use this merchant account by default from the same employee tab in another merchant record. While some employees may have permission to use multiple merchant accounts, viewing their name here shows the default merchant account assigned to them for charging cards. If the employee is able to use another merchant account, they will need to select it on the payment window.
- Click on the Card tab to select which credit card payment methods are associated with this merchant account.
If you need to have multiple merchant accounts and both are to take Visa (for example), you will need two Visa payment methods and assign one of them to each merchant account.
|
If you are switching from one merchant services provider software to another, you can open both merchant accounts and drag the employees from one window to the other. You can do the same for the credit card payment methods - to make the switch easy and fast. |
Any future dated 'post dated payments' associated with the card you drag to another merchant provider will automatically be reassigned to authorize on the new merchant provider card network.
Orbital Virtual Terminal
The Orbital Virtual Terminal requires:
- User ID - provided by Paymentech and is the user ID for the Orbital Virtual Terminal gateway.
- Password - provided by Paymentech and is the password for the Orbital Virtual Terminal gateway
- Orbital Virtual Terminal Gateway - is always accessed via a web browser through https://secure.paymentech.com/manager. This is used to verify current and past batches, look at transactions, generate reports and manage your Orbital Gateway account.
All users of the Orbital Virtual Terminal in conjunction with Theatre Manager are encouraged to download the Virtual Terminal Users Manual directly from Chase Paymentech. There is also a Virtual Terminal Quick Reference Guide available from the same site.
Orbital Virtual Terminal - Account Setting for Manual Settlement
- User ID - provided by Paymentech and is the user ID for the Orbital Virtual Terminal gateway.
- Password - you created after your initial access/activation for the Orbital Virtual Terminal gateway
- Orbital Virtual Terminal Gateway - is always accessed via a web browser through https://secure.paymentech.com/manager.
This is used to verify current and past batches, look at transactions, generate reports and manage your Orbital Gateway account.
- Log into your Virtual Terminal Account and from the Tab selection at the top click on Admin, then General Admin from the drop-down menu as shown in the following image.

- The following setting window will appear.
Note the Auto Settle Section of the settings.
- Make sure the Auto Settle Time is set to NONE.

Testing Orbital Gateway
- Find yourself in the database or create a new patron that is yourself
- Create a new order and attempt to buy a ticket
- On the payment window, select the credit card you want to use and do a test authorization
- If you get an authorization with a message indicating AVS match and/or CVV2 match, then the setup is correct
- Log in to your Orbital Virtual terminal account and view the batch to see that your transaction is there
- In Theatre Manager, void the credit card payment and then confirm in the Orbital Virtual Terminal that the charge is marked as void
Trouble Shooting
If you get a response that looks like it is HTML or XML and indicates that it was not authorized, then your user ID/password is probably wrong (please verify), or Paymentech set up the account to require a specific IP. Contact your Paymentech representative and tell them of the issue so that they can correct it. They may put you in touch with the Gateway people. You can inform the Paymentech Gateway support staff that you need to be able to authorize via user ID and password (per their standard setup instructions for Theatre Manager).
Availability of Settled Batches
Chase Paymentech send out a bulletin in May 2015:
Beginning June 29, 2015, we’re changing the Orbital Batch Data Retention Policy for our Orbital Batch subscribers. This change is intended to increase data security as well as reduce the operational burden of maintaining authorization response files on our redundant servers.
QUICK SUMMARY:
- Effective June 29 2015, Orbital Batch response files will be available for download for seven days
- This change increases security and reduces operational burdens
- After seven days, files can only be retrieved by the Partner Relationship Management team
For More Information: Contact the Partner Relationship Management Team at 888.818.5128, option 4 or via e-mail at IntegratorSupport@ChasePaymentech.com.
Elavon Installation
|
Elavon implements either user ID and password authentication; or access from specified IP addresses over HTTPS connections to provide compliance with PCI DSS 4.1 |
Installation is quite straightforward. You would contact Elavon using information provided by Arts Management, and they create a Merchant Account for you. Money gets authorized by Elavon as 'Card Not Present' or as 'Swiped Card' and then deposited right to your own bank upon settlement from Theatre Manager. This account information that you are provided is all you need to set up in the merchant setup window below to provide secure credit card authorization.
Elavon will need to provide the following 2 account setups (both are required):
- Elavon Virtual Terminal - uses the Elavon VirtualMerchant Gateway via a web browser to "view the transactions" that have occurred. This account setup is used during the EOD deposit process to review your transactions prior to the settlement process.
- Certified Connection for User ID and Password - uses the Elavon Gateway to allow authorizations to occur but not be viewed. This information is what needs to be entered into Theatre Manager's Merchant account to allow authorizations to occur.
|
The user IDs and passwords for both of the above are completely different and should not be interchanged or confused with each other. Follow the appropriate setup steps for each. |
After following the setup for both accounts, make sure to test the gateway.
Elavon - Contact Information
US Clients:
1-855-770-0526
Canadian Clients:
1-844-352-8661
Ask for an Elavon Virtual Terminal account to be set up
Once your Merchant Account information is provided to you, the following steps will need to happen:
- Settle any existing credit card batch (run an End of Day)
- Create a new merchant account in Theatre Manager
- Follow the steps to change your merchant provider
Then you can start using Elavon Virtual Merchant.
If you have any questions directly related to your Elavon merchant account setup, please contact them directly. Contact Arts Management if you have questions about how to setup Theatre Manager to reference and authorize credit cards using your Elavon merchant account.
Elavon Gateway Account
The Elavon Gateway Setup for User ID and Password setup is obtained from Elavon and is entered into the Setup --> System Tables --> Merchant Accounts window as below:
Software Type
The following values are set on the software type tab per the diagram below:
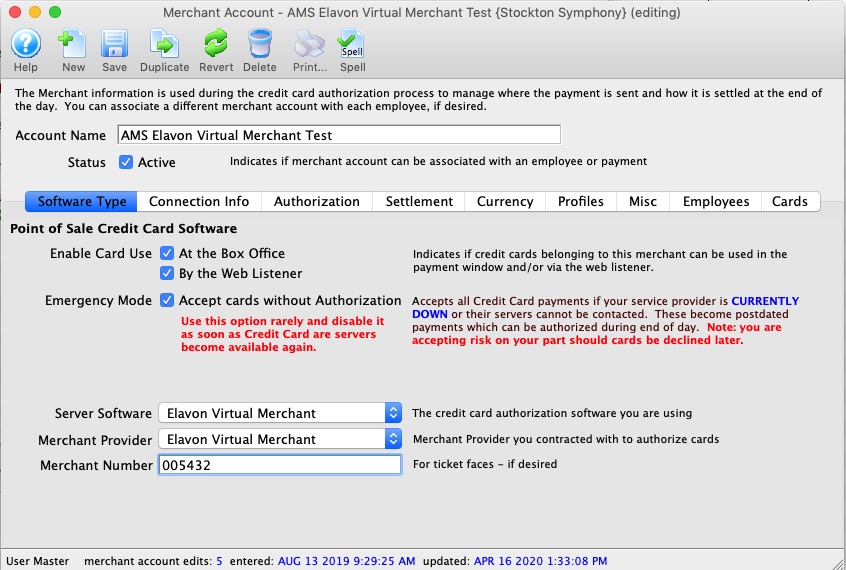
- Set the server software to be Elavon Virtual Merchant
- The merchant provider will automatically be set for you
- The merchant number is provided by Elavon and will need to go into the Merchant number field. It is typically 6 or 7 digits.
This number may be referred to by Elavon Support as the Virtual Merchant Account ID or Converge Account ID. The Elavon Developer guide calls the the Virtual Terminal Merchant ID. Look for the Account ID: on the Welcome to the VirtualMerchant Application form.
Elavon will provide both a Merchant Account ID and a Converge Account ID when setting up the account. Enter the Converge Account ID into the Merchant number field.
Connection Info
The following entries are set on the Connection Info tab per the diagram below:
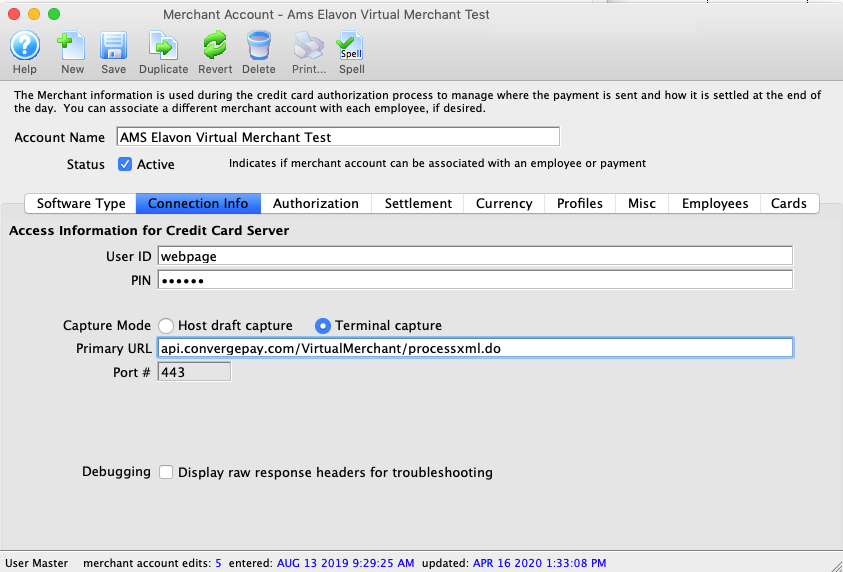
- User id - provided by Elavon and is the user id for the gateway, not to the Elavon VirtualMerchant Account (they are not the same thing - the latter is the online interface).
- Password - provided by Elavon and is the password for the gateway. It is not the password for the Elavon VirtualMerchant Account.
- Primary URL - is always api.convergepay.com/VirtualMerchant/processxml.do
- Port - is always 443
Merchant Profiles
The following entries are set on the Profiles tab per the diagram below:
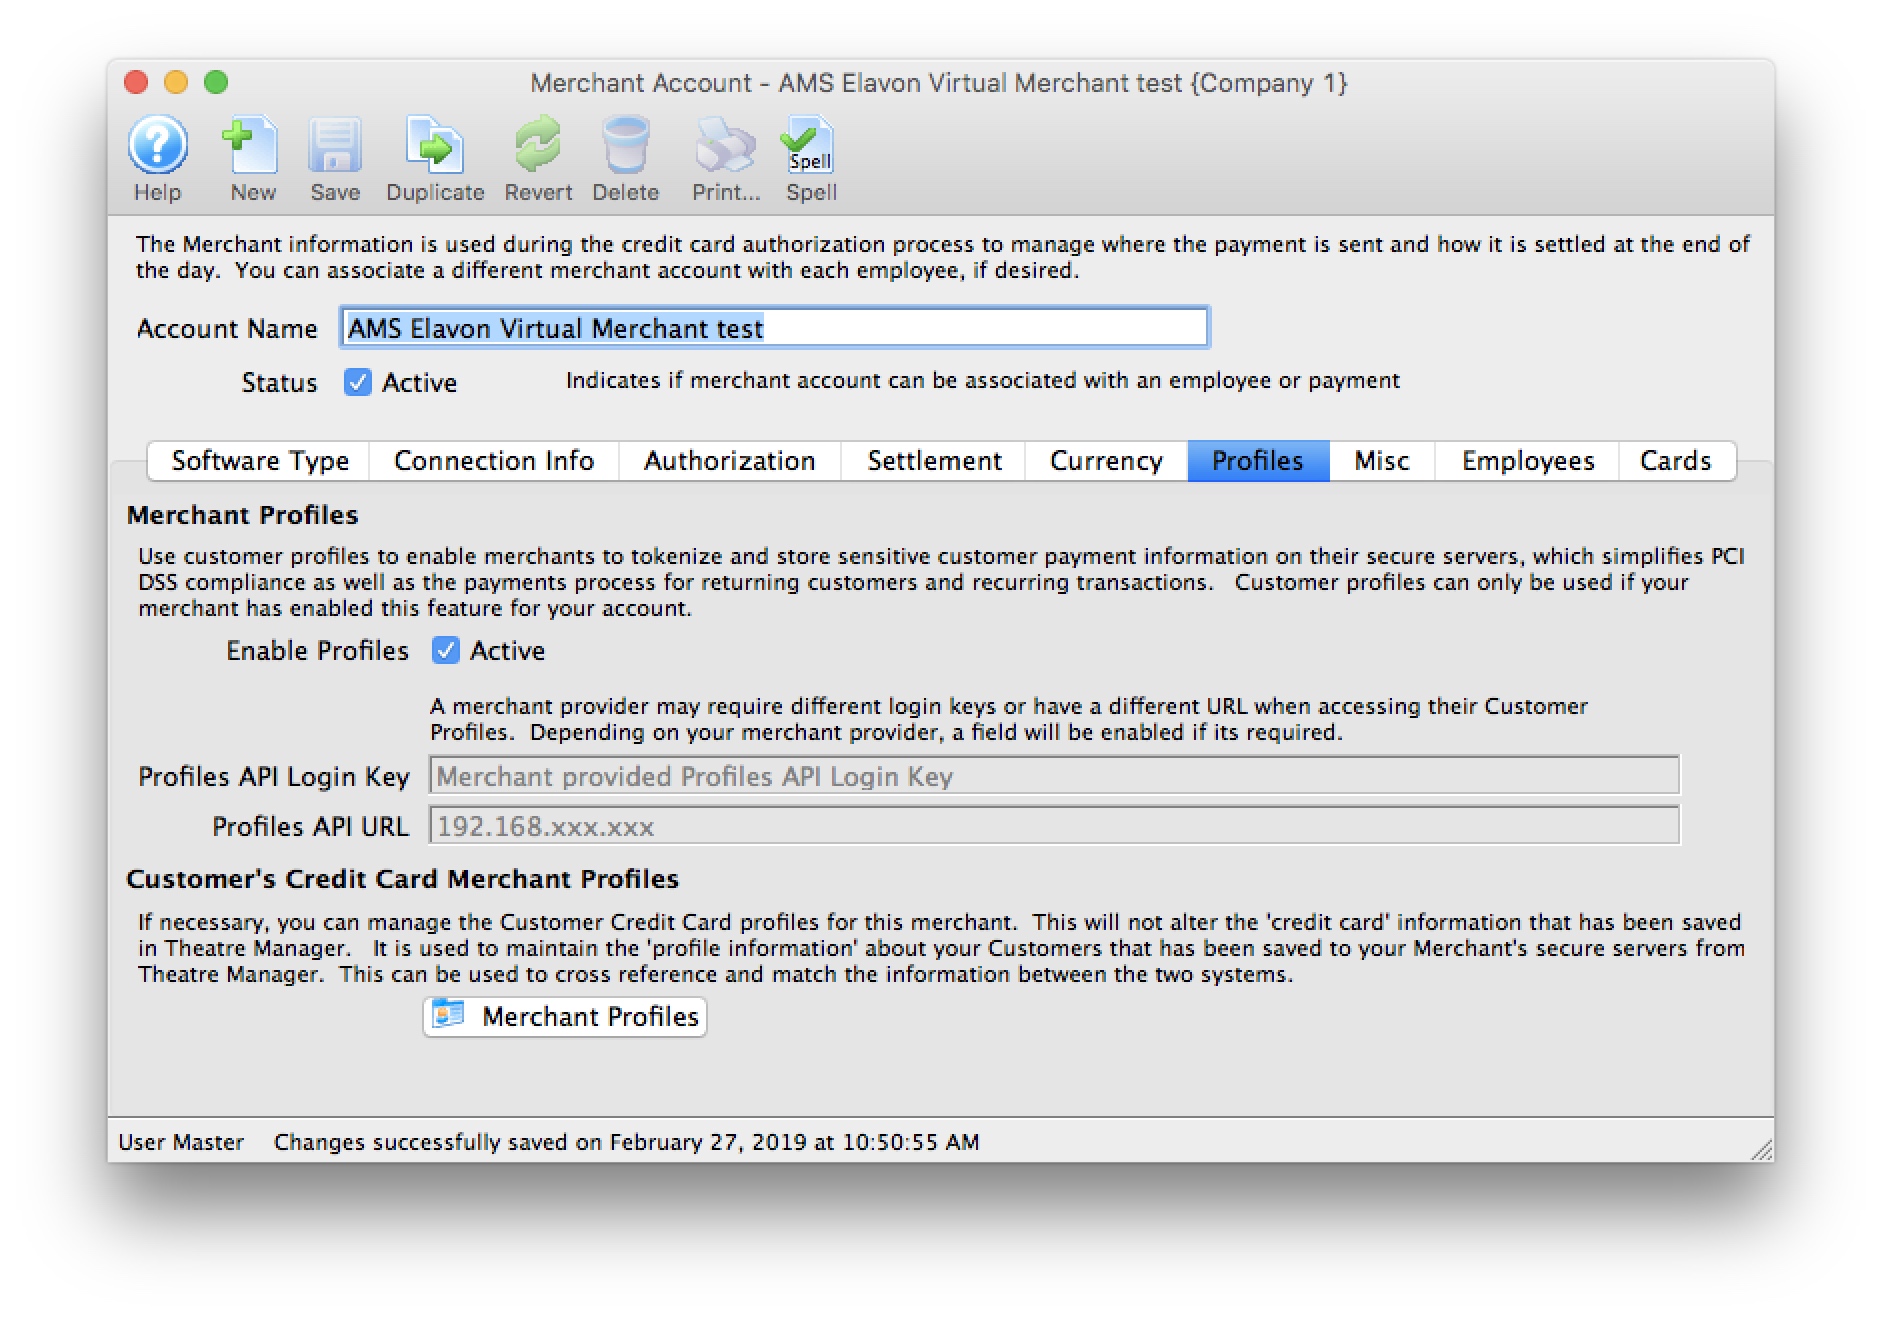
- Enable Profiles - set to Active if Merchant Profiles will be used.
- Profiles API Login Key - not required. Elavon uses the same connection information from the Connection Info tab.
- Profiles API URL - not required. Elavon uses the same the connection information from the Connection Info tab.
|
Refer to Merchant Profiles for further information on functionality. |
Employee and Card Setup
- To assign employees to this merchant account, click on the Employee tab and find the employees to assign. In a multi-merchant setup situation, drag those employees that should use this merchant account by default from the same employee tab in another merchant record. While some employees may have permission to use multiple merchant accounts, viewing their name here means this is the default merchant account assigned to them for charging cards. If the employee is able to use another merchant account, they will need to select it on the payment window.
- Click on the Card tab to select which credit card payment methods are associated with this merchant account.
If you need to have multiple merchant accounts and both are to take Visa (for example), you will need two Visa payment methods and assign one of them to each merchant account.
|
if you are switching from one merchant services provider software to another, you can open both merchant accounts and drag the employees from one window to the other. You can do the same for the credit card payment methods - to make the switch easy and fast. |
Any future dated 'post dated payments' associated with the card you drag to another merchant provider will automatically be reassigned to authorize on the new merchant provider card network.
Elavon Virtual Merchant - Account Setting for Manual Settlement
- Account ID - provided by Elavon and is the Virtual Merchant Account ID.
- Password - you created after your initial access/activation for the Virtual Merchant
- Log into your Virtual Merchant Account and from the Tab selection at the top click on Terminal >> Advanced >> System Setup from the drop-down menu as shown in the following image.
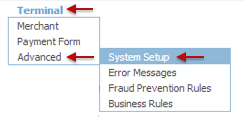
- The following setting window will appear.
Note the Auto Settle Section of the settings.
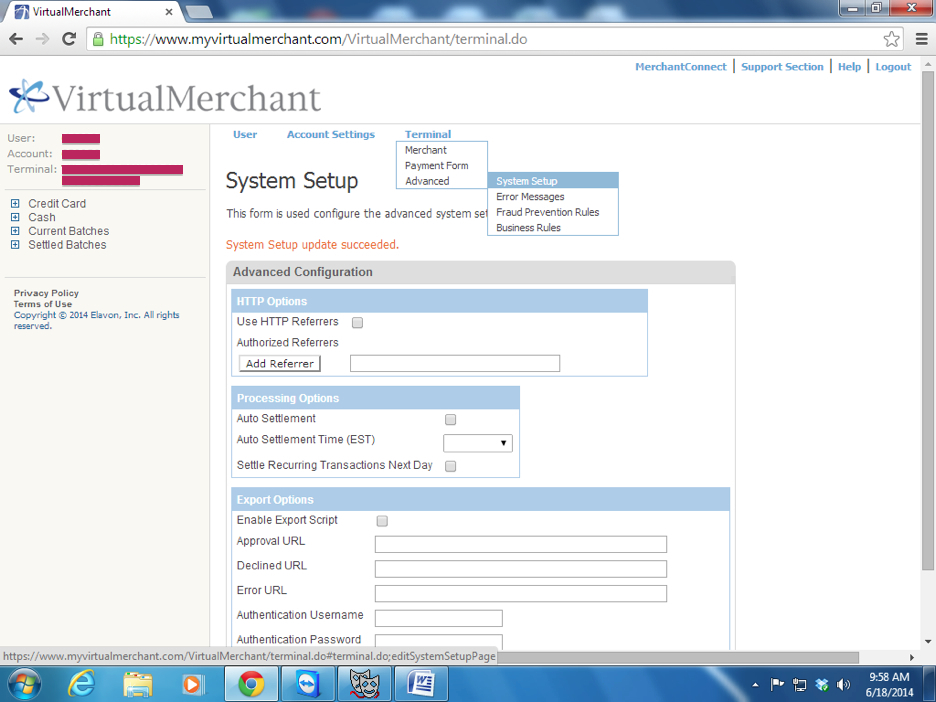
- Make sure the Auto Settlement box is not checked.
- Save your changes by clicking the save button at the bottom of the settings window
Elavon Virtual Merchant Web Portal Login
- User ID - provided by Elavon and is the user ID for the Elavon VirtualMerchant gateway.
- Password - provided by Elavon and is the password for the Elavon VirtualMerchant gateway
- Elavon VirtualMerchant 'Converge' Gateway - is always accessed via a web browser through https://www.convergepay.com/converge-webapp/#!/login. This is used to verify current and past batches, look at transactions, generate reports and manage your Elavon account.
All users of the Elavon VirtualMerchant in conjunction with Theatre Manager are encouraged to download the VirtualMerchant Users Manual directly from Elavon.
Testing Elavon Gateway
- Find yourself in the database or create a new patron that is yourself
- Create a new order and attempt to by a ticket
- On the payment window, select the credit card you want to use and do a test authorization
- If you get an authorization with a message indicating AVS match and/or CVV2 match, then the setup is correct
- Log in to your Elavon VirtualMerchant account and view the batch to see that your transaction is there
- In Theatre Manager, void the credit card payment and then confirm in the orbital Virtual Terminal that the charge is marked as void
Trouble Shooting
If you get a response that looks like it is HTML or XML and indicates that it was not authorized, then your user ID/password is probably wrong (please verify), or Paymentech set up the account to require a specific IP. Contact your Elavon representative and tell them of the issue so that they can correct it. They may put you in touch with the Gateway people. You can inform Elavon Gateway support staff that you need to be able to authorize via user ID and password (per their standard setup instructions for Theatre Manager).
Moneris Installation
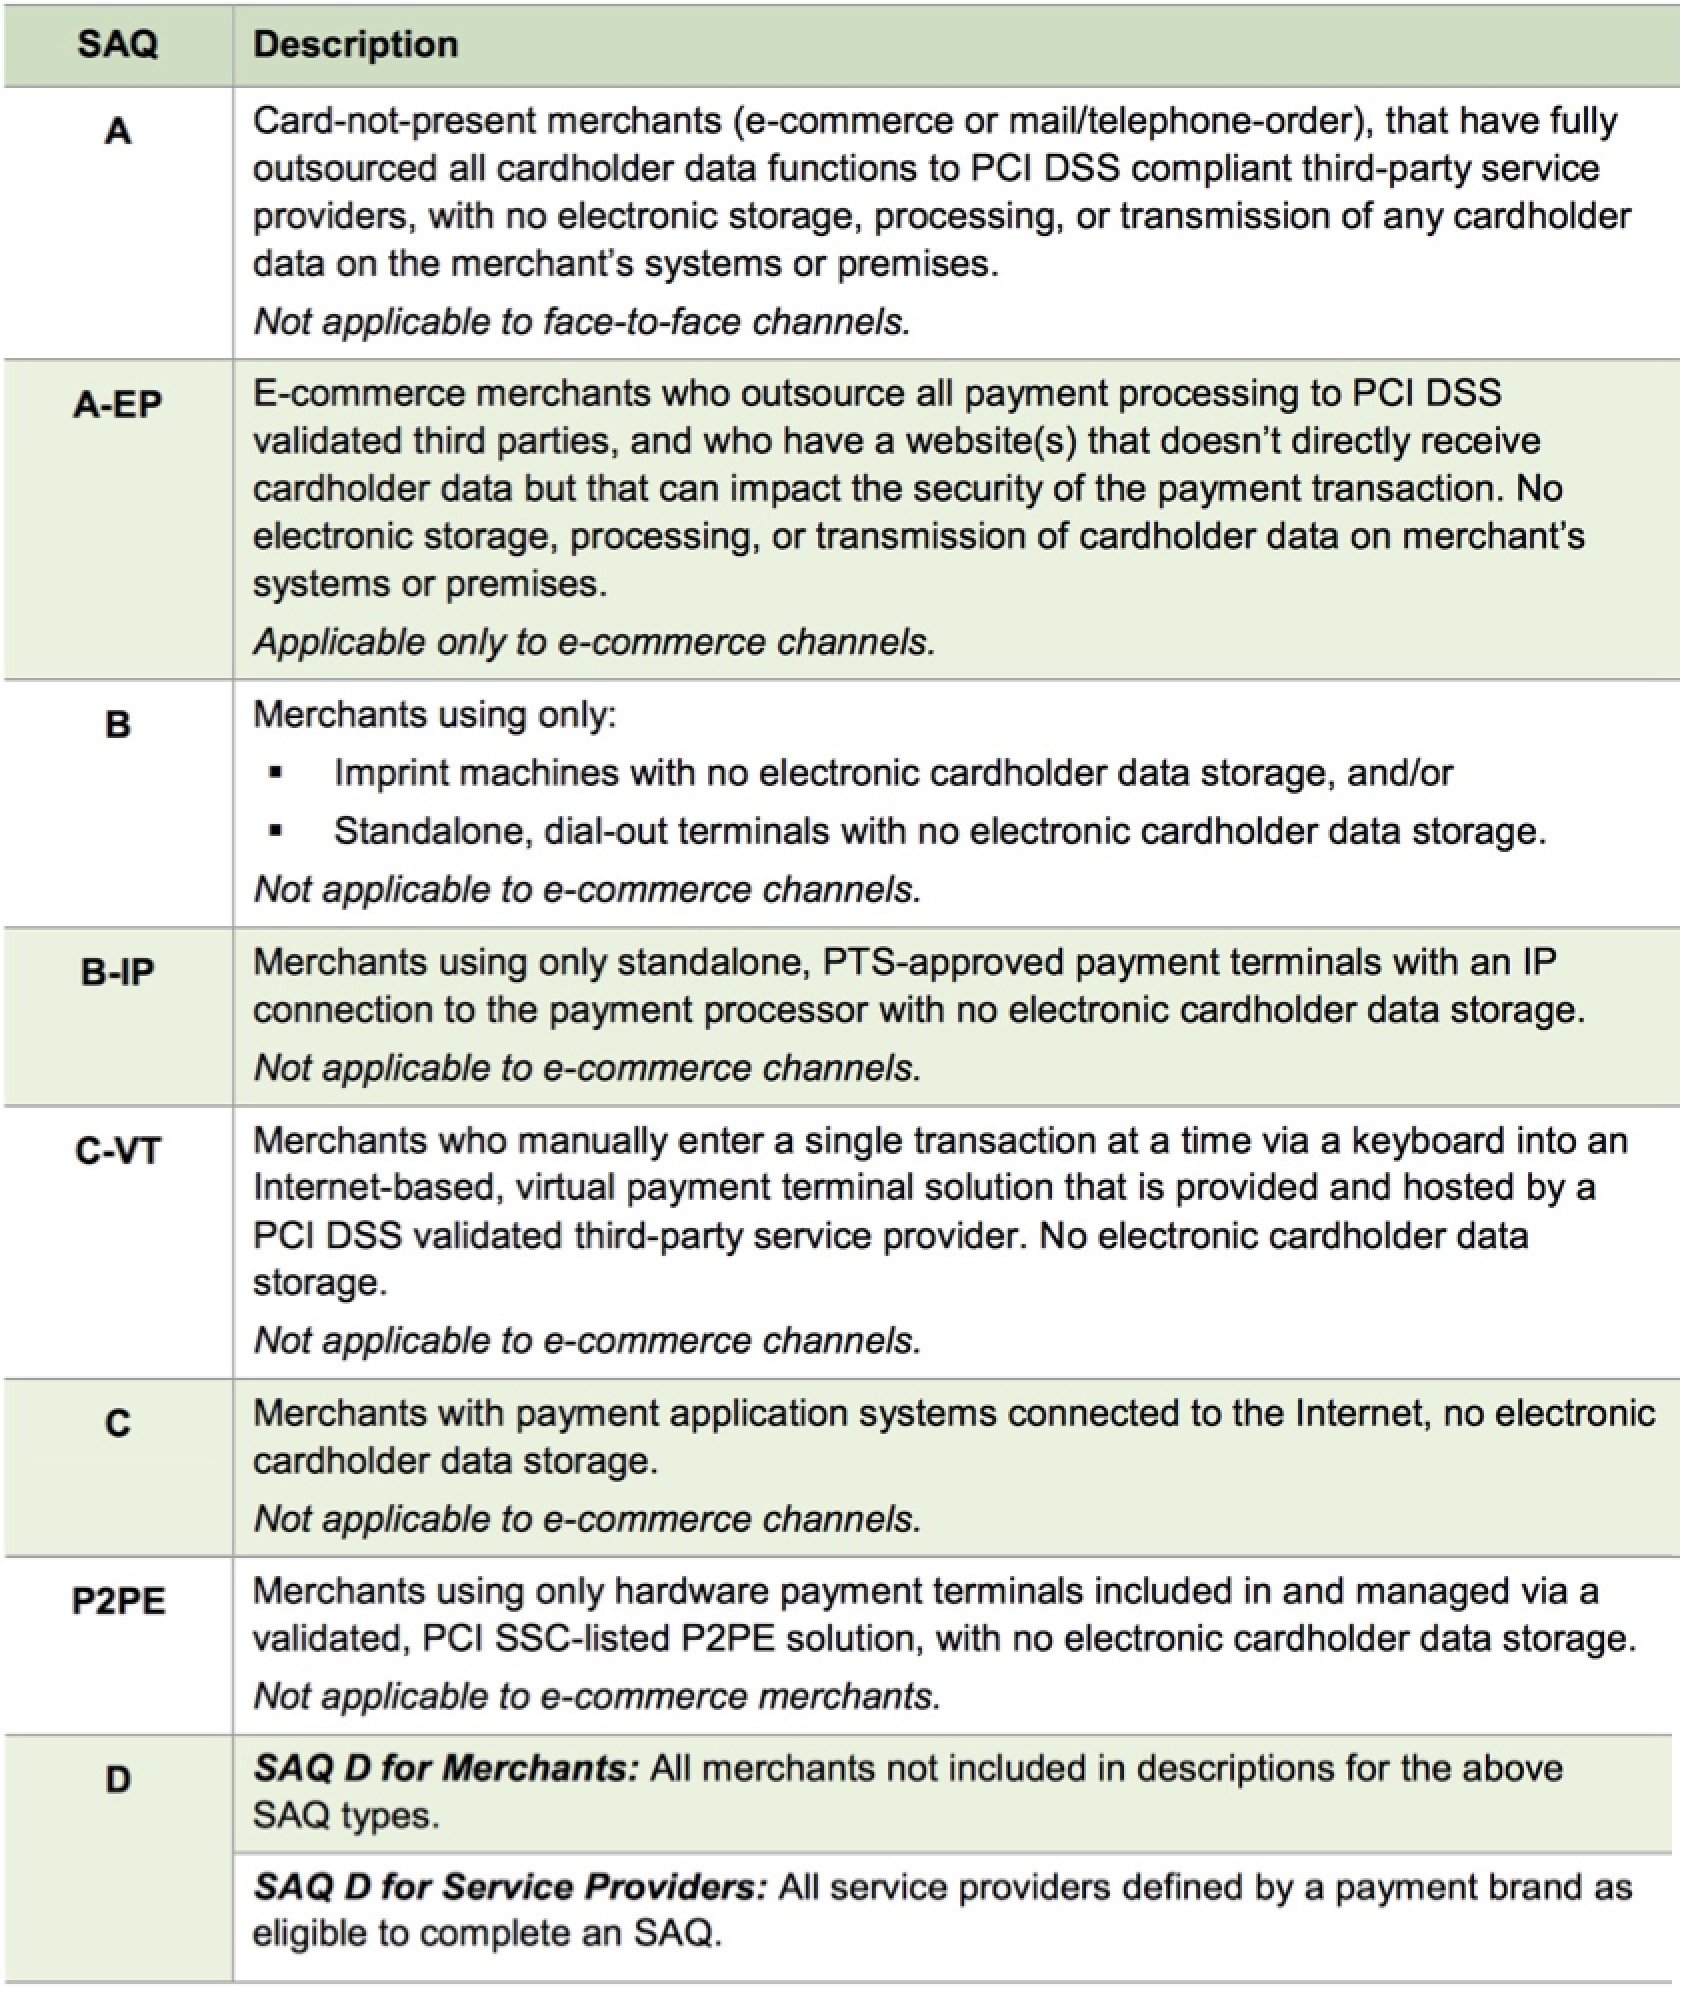
Moneris eSelectplus Payment Gateway
Theatre Manager supports two Moneris processing options:
- Moneris Gateway Account - where Theatre Manager sends a credit card provided to Moneris, receives the approval and is able to store the encrypted card (depends on PCI settings in company preferences). This option is used for box office credit card authorizations -and- for web sales with the benefit of supporting post dated credit card payments is using PCI schedule C.
- Hosted Payment Page - this option can be only be used for web sales. Instead of accepting credit cards, the web interface passes control to the Moneris Hosted Payment Page, meaning that the customer is actually typing the card information directly into Moneris and Theatre Manager never sees it. This enables much less stringent PCI reporting.
- Schedule A-EP - if the venue only uses hosted payments for e-commerce and no cards at box office
- Schedule C - if the venue still enters card data into Theatre Manager at the box office
- EMV devices - this option can be used for box office. Instead of typing cards into Theatre Manager, or using stand alone EMV devices, Moneris offers a 'cloud' connection to some pin pad devices - like the Verifone P400. If set up through Moneris eSelect and cloud connection, Theatre Manager will tell the device to start the authorization process, along with the amount and record the resulting acceptance or decline. This enables much less stringent PCI reporting.
- Schedule A-EP - if the venue only uses hosted payments for e-commerce and no cards at box office
- Schedule B-IP - if the venue uses EMV pin pads like the P400 through the Moneris cloud connection
|
You may also want to have Moneris add two features to your account at time of your merchant account setup:
|
|
By default, your eSelectplus account will be set to automatically settle each night between 10 and 11PM Eastern time. You MUST CHANGE this option to settle manually which simplifies your end of day processing and makes it easier to reconcile bank statements to your accounting system |
The merchant account number, Store ID and ECR Terminal ID will be sent to you in a document from Moneris. That document will also contain instructions for you to log in to the eSelectplus gateway to activate your account. Once you do that, you can obtain the API Token that will be required by the Theatre Manager merchant account setup.
Some sample test accounts are available, if needed.
Also, visit Misc Moneris Support for additional daily status information.
Moneris Setup - Contact Information
|
Contact our Moneris support representative: Nandini @ 1 (877) 825-0361 X 4117 to have your account setup. You want to request the eSelectplus product/account. |
Direct Processing vs Hosted Payment
- Moneris Gateway Account - where Theatre Manager sends a credit card provided to Moneris, receives the approval and is able to store the encrypted card (depends on PCI settings in company preferences). This option is used for box office credit card authorizations -and- for web sales with the benefit of supporting post dated credit card payments is using PCI schedule C.
- Hosted Payment Page - this option can be used for web sales. Instead of accepting credit cards, the web interface passes control to the Moneris Hosted Payment Page, meaning that the customer is actually typing the card information directly into Moneris and Theatre Manager never sees it.
Note that this same account needs e-select plus setup for settlement. It means box office can use the one merchant account for hosted payment online and normal credit card authorization at the box office. This helps support PCI Schedule 'A-EP' compliance for internet sales.
- Moneris EMV - Moneris supports cloud based connection to some EMV pin-pad devices. Those can be set up as a pin pad device and associated with a workstation using Theatre Manager. This helps support PCI Schedule 'B-IP' compliance for box office.
|
Moneris charges far too much money for their merchant profile feature. For this reason it is not recommended for use with Theatre Manager. |
Activate Moneris Account and Common Setup
 To activate your eSelectplus account and obtain your API Token:
- Navigate to theMoneris Activation page. You will need:
- Moneris Merchant ID:
- Moneris Store ID
- Follow the prompts to verify and setup the account
- Navigate to the Moneris online Merchant Resource Centre
- You will need the previously setup:
- Username
- Store ID
- Password:
- Proceed to generate your API Token
|
Future log-ins will require the Username, Store ID, and permanent password that you will set up using the one-use password. Make sure that information is stored somewhere safe in your office and shared among the appropriate staff. Arts Management will not have access to that information if it is lost. |
Obtain Moneris E-Select Plus API Token
This is used when you want Theatre Manager to retain card information within the system (encrypted) for box office sales, or web sales or for settlement for hosted payment page.
- Once logged into the account online, you should plainly see the API Token. Copy and paste that into a document to store/send to Arts Management along with the info sent you by Moneris so that we may assist setting up the merchant account in Theatre Manager.
- If you do not see the API Token, in the Moneris Virtual Terminal go to Admin > Store Settings and the API Token will be displayed at the top of the page
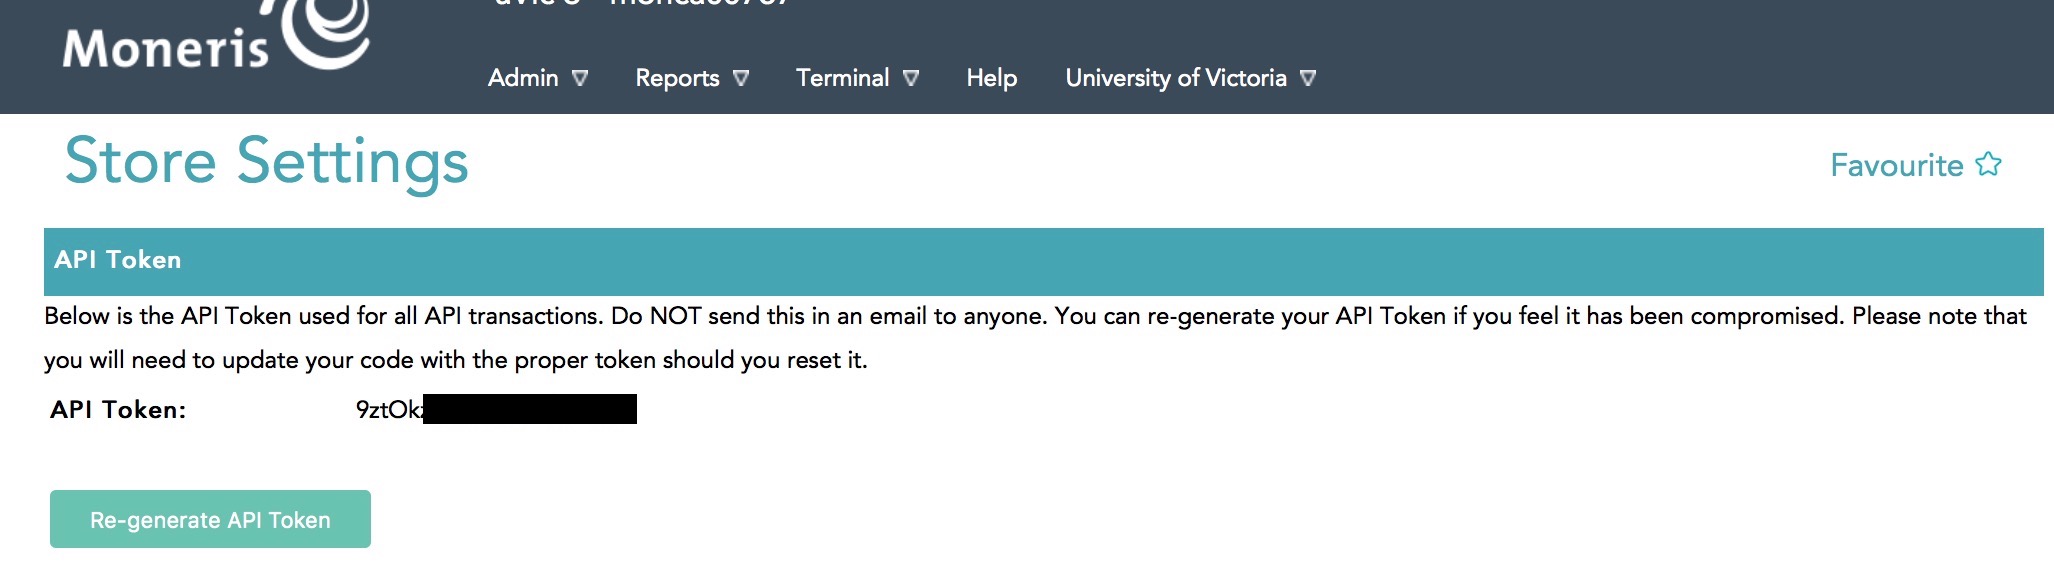
|
Note:The API Token above has been removed for security. Where the black square appears, a combination of upper-case and lower-case letters and numbers will comprise your store's API Token. |
Regenerate the API Token
|
This process should only be undertaken in consultation with both Moneris Support and Arts Management Support. The API Token must match the Theatre Manager merchant account setup in order for credit card processing to work. |
Moneris Support may advise you to re-generate the API Token for your store in certain circumstances or for security reasons. It is done on the Admin->Store Settings page as shown below. You will be asked to click the Re-Generate API Token. If you are advised to do so, you will need to put that new token into the merchant account settings.
Please contact support@artsman.com if you are unsure where to make this change within the Theatre Manager merchant account.
Set eSelectplus to Manual Settlement
|
By default, your eSelectplus account will be set to automatically settle each night between 10 and 11PM Eastern time. You MUST CHANGE this option to settle manually which simplifies your end of day processing and makes it easier to reconcile bank statements to your accounting system. |
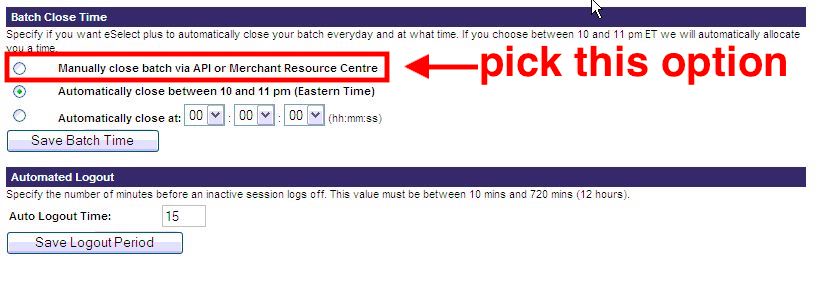
To alter this setting:
- Log into the eSelectplus Virtual Terminal
- Go to Admin > Store Settings
- Scroll down the page until you see the Batch Close selections
- Change the radio button to the Manually Close option

Moneris Gateway Account
Once the Moneris account has been activated and all the information in the following list has been obtained, the Merchant Account in Theatre Manager can be set up on each of the tabs that follow:
- Server Software - Moneris (setting selected in TM)
- Merchant Provider - Moneris (setting selected in TM)
- Merchant Account Number - xxxxxxxxxx (from Moneris merchant services)
- Store ID - xxxxxx (from Moneris merchant services)
- API Token/Password - xxxxxxxxxx (from Moneris Online Portal store settings)
- Primary URL for LIVE authorizations: - www3.moneris.com/gateway2/servlet/MpgRequest (typed into TM)
- ECR Terminal ID - 66xxxx (from Moneris merchant services)
Tabs with specific setup info are described in the following help pages. Other tabs like the Employees and Cards tabs are populated the same as described here.
Moneris Gateway Account Software Tab
- Server software - set to Moneris
- Merchant Provider - set to Moneris
- Merchant Number - is the Merchant Number from the document sent by Moneris
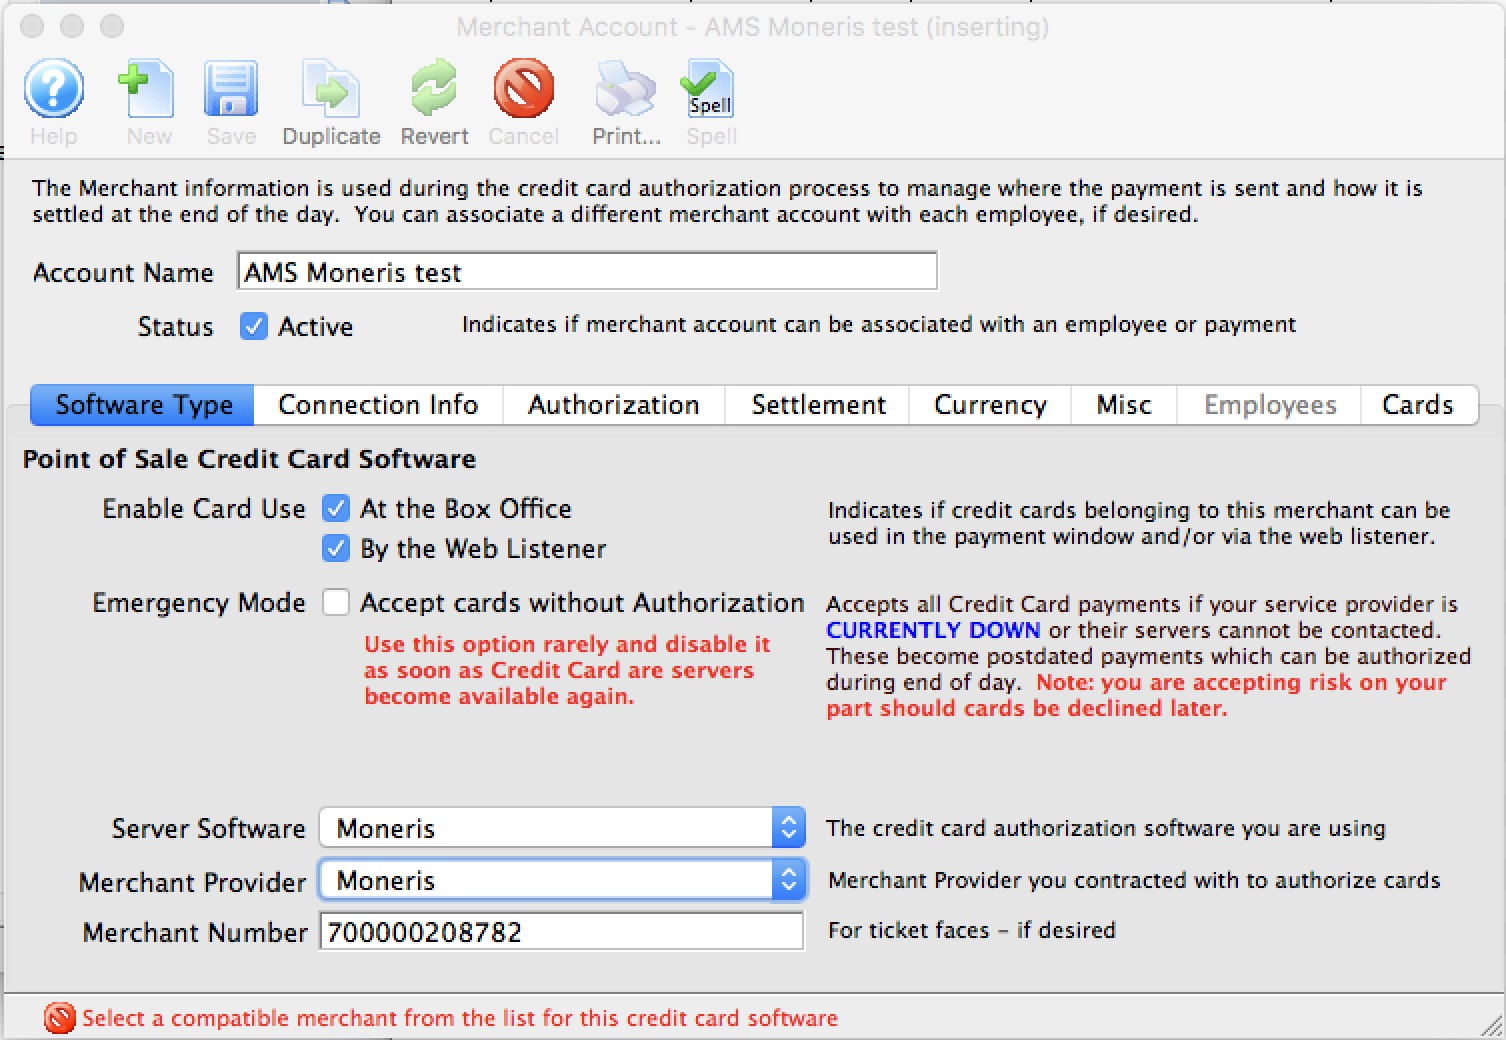
Moneris Gateway Account Connection Info
- Store ID - provided by Moneris on the setup information
- API Token - obtained from the online Moneris portal
- ECR Terminal ID - provided by Moneris on the setup information
- Primary URL (Canada) - should be www3.moneris.com/gateway2/servlet/MpgRequest
- Primary URL (USA) - should be esplus.moneris.com/gateway_us/servlet/MpgRequest
- Port - should be 443
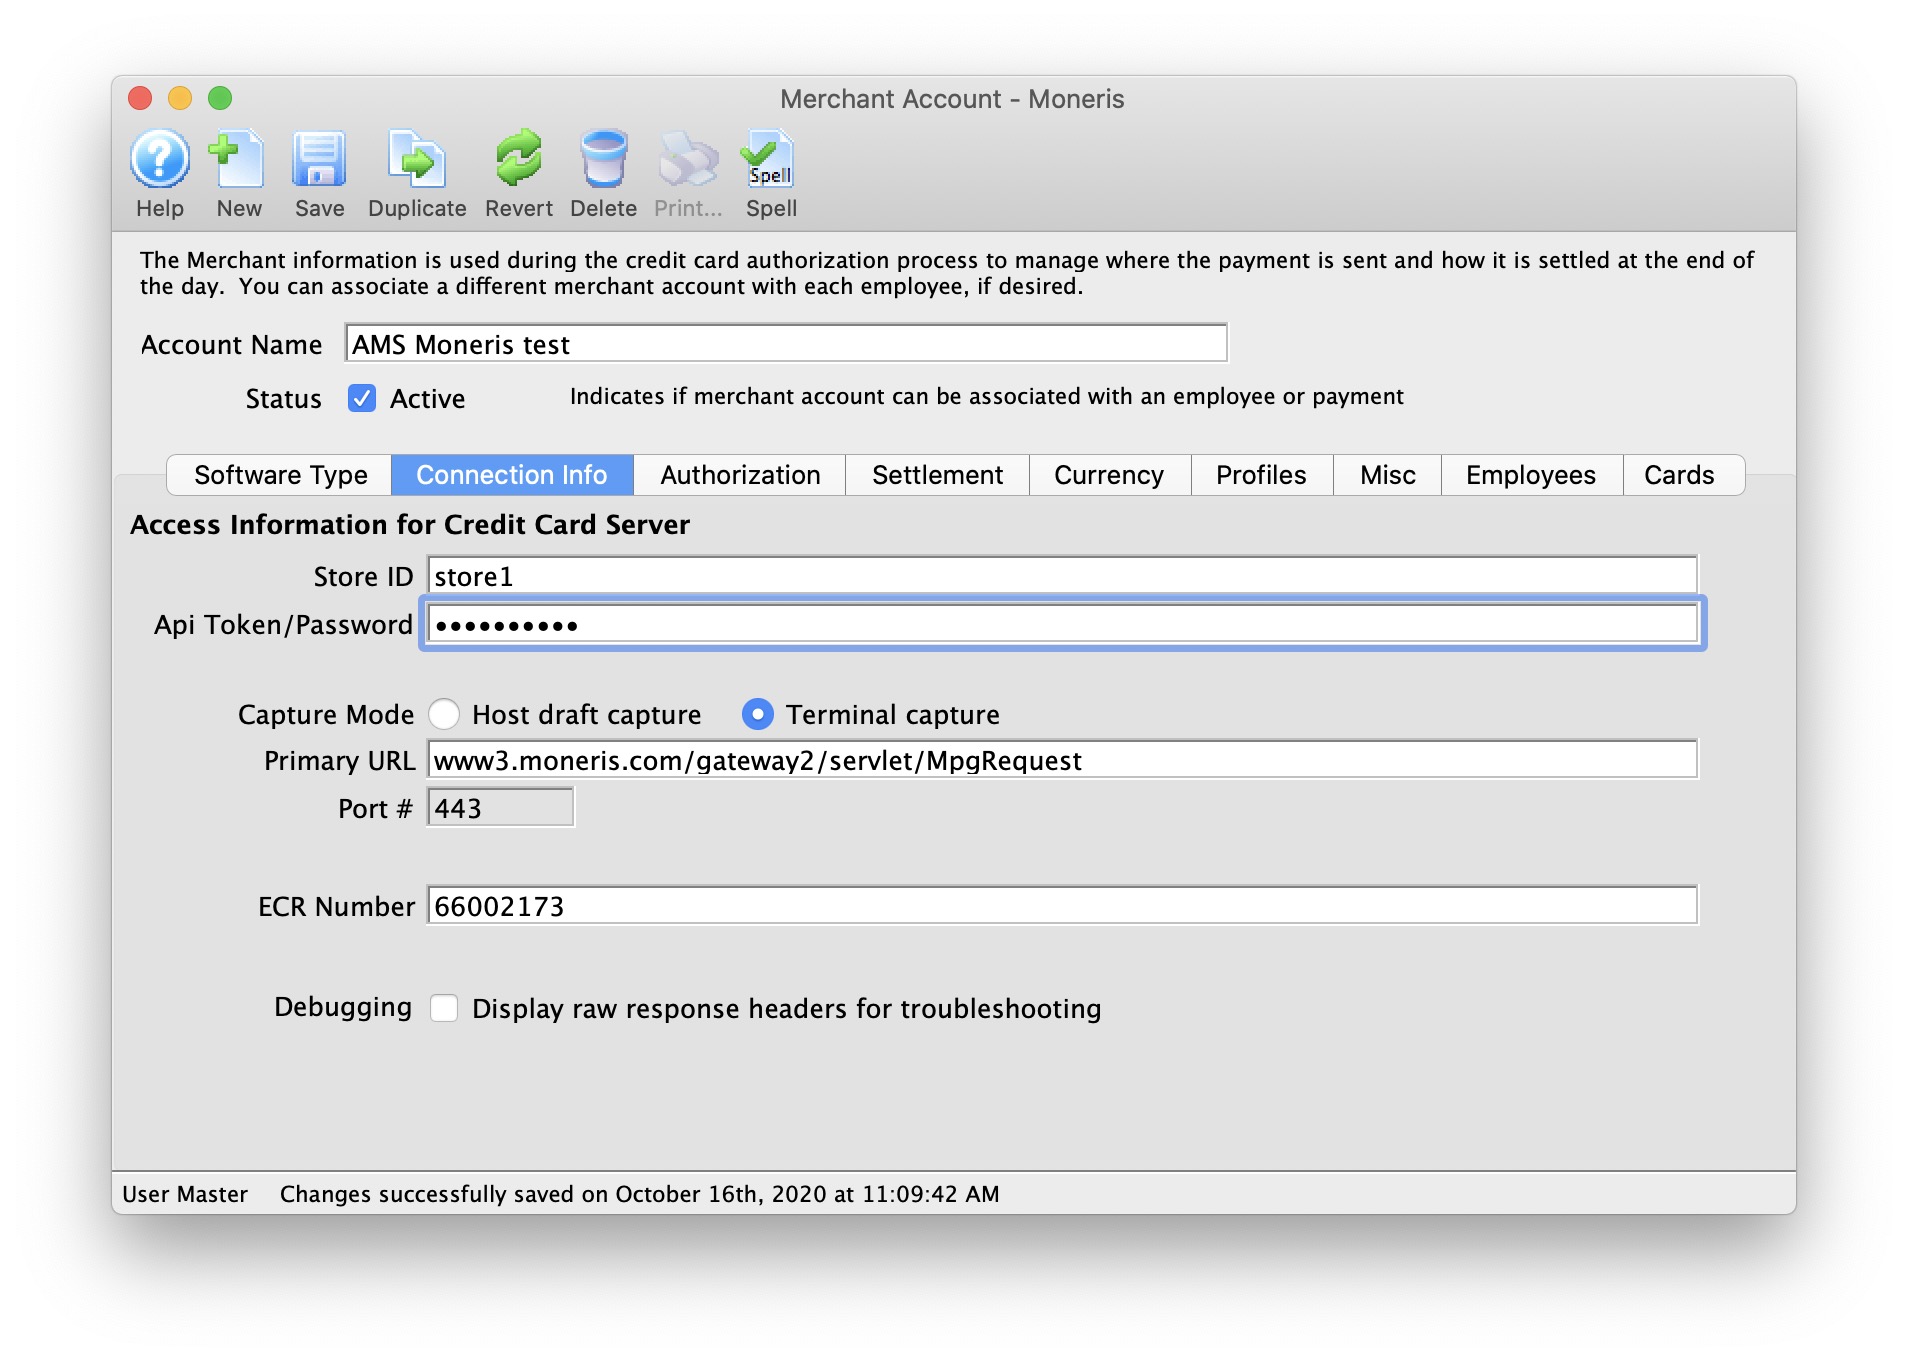
Moneris Gateway Account Authorization
- Send address/zip - verify the setting for this feature. At one time, Moneris does not provide AVS by default and it an account add-on. If a test authorization results in a no permissions for avs_info error, unchecking this box will eliminate the error since TM will no longer send AVS info.
- Pin Pad store info, if using the P400's
|
Refer to general help page for more info. |
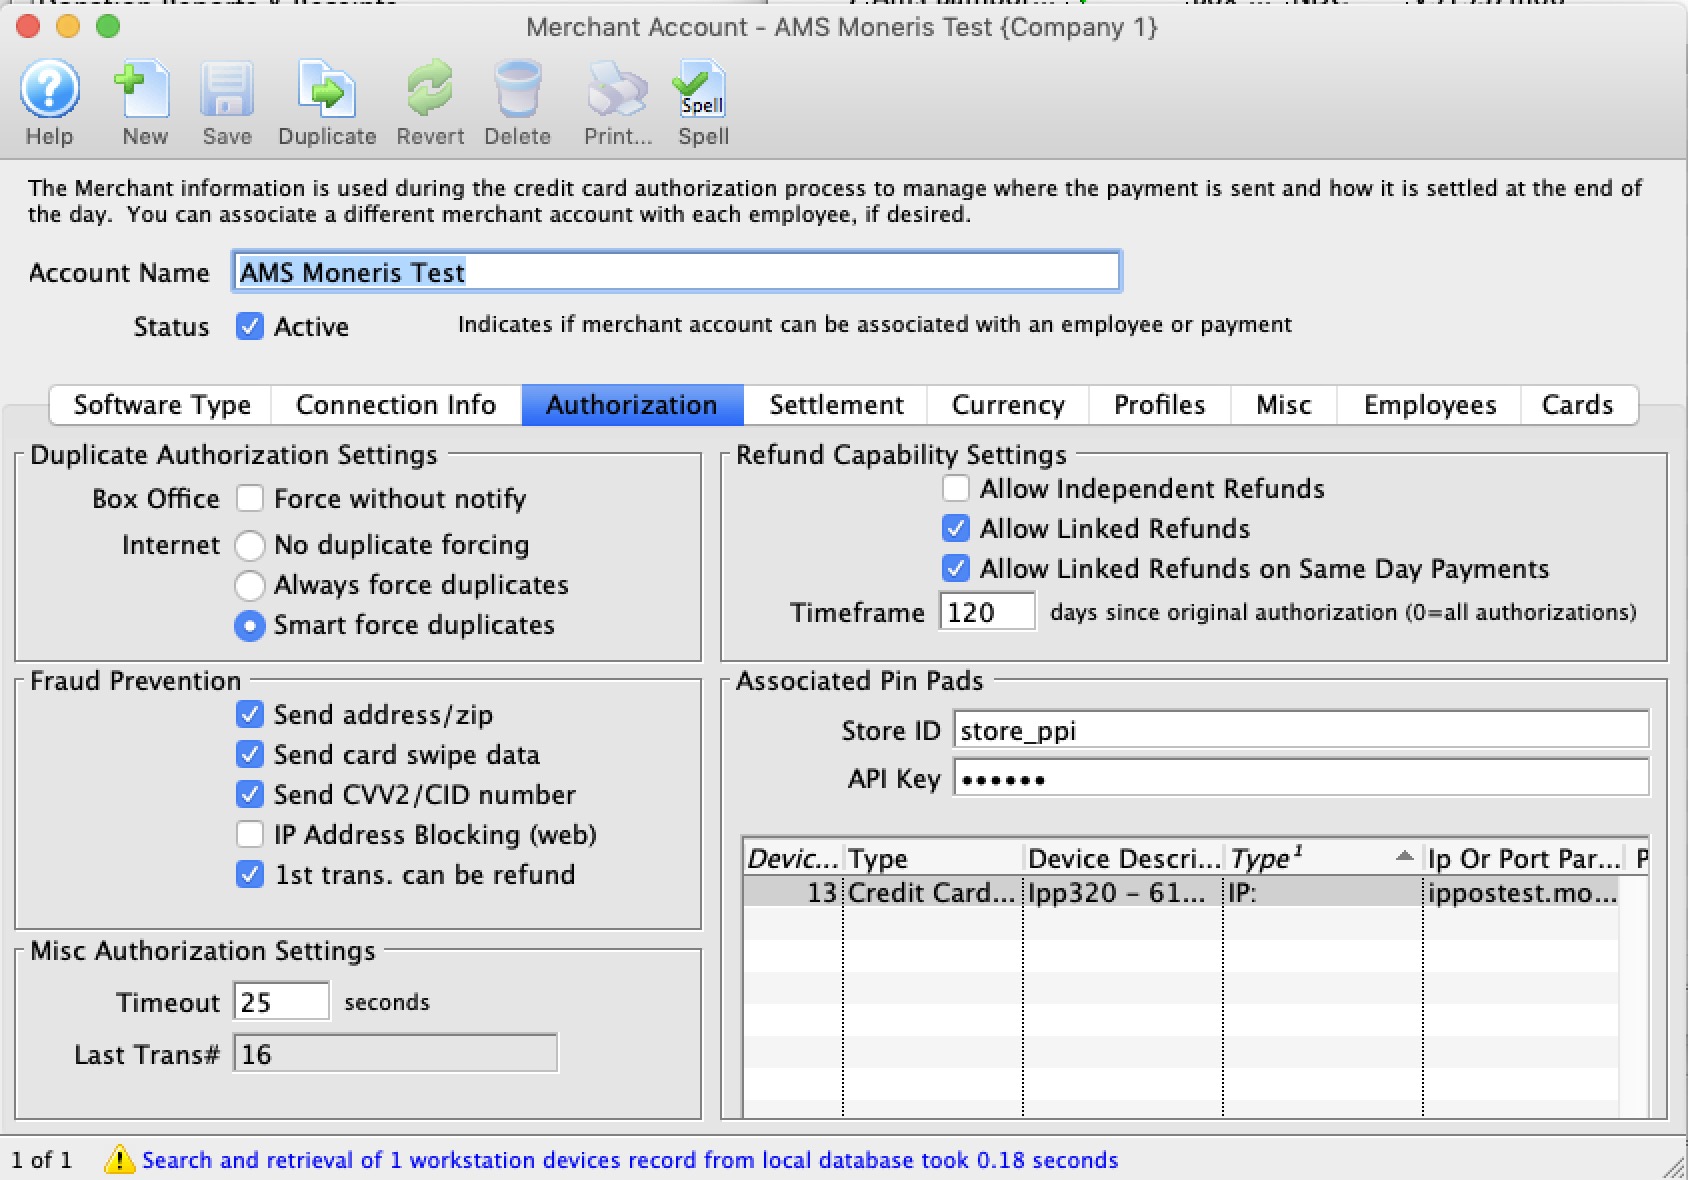
Moneris Gateway Account Profiles Tab
- Enable Profiles - set to Active if Merchant Profiles will be used.
- Profiles API Login Key - not required. Moneris uses the same connection information from the Connection Info tab.
- Profiles API URL - not required. Moneris uses the same the connection information from the Connection Info tab.
|
Refer to Merchant Profiles for further information on functionality. In general, using Moneris Merchant Profiles are not recommended because they charge for this feature, unlike other merchant providers. |
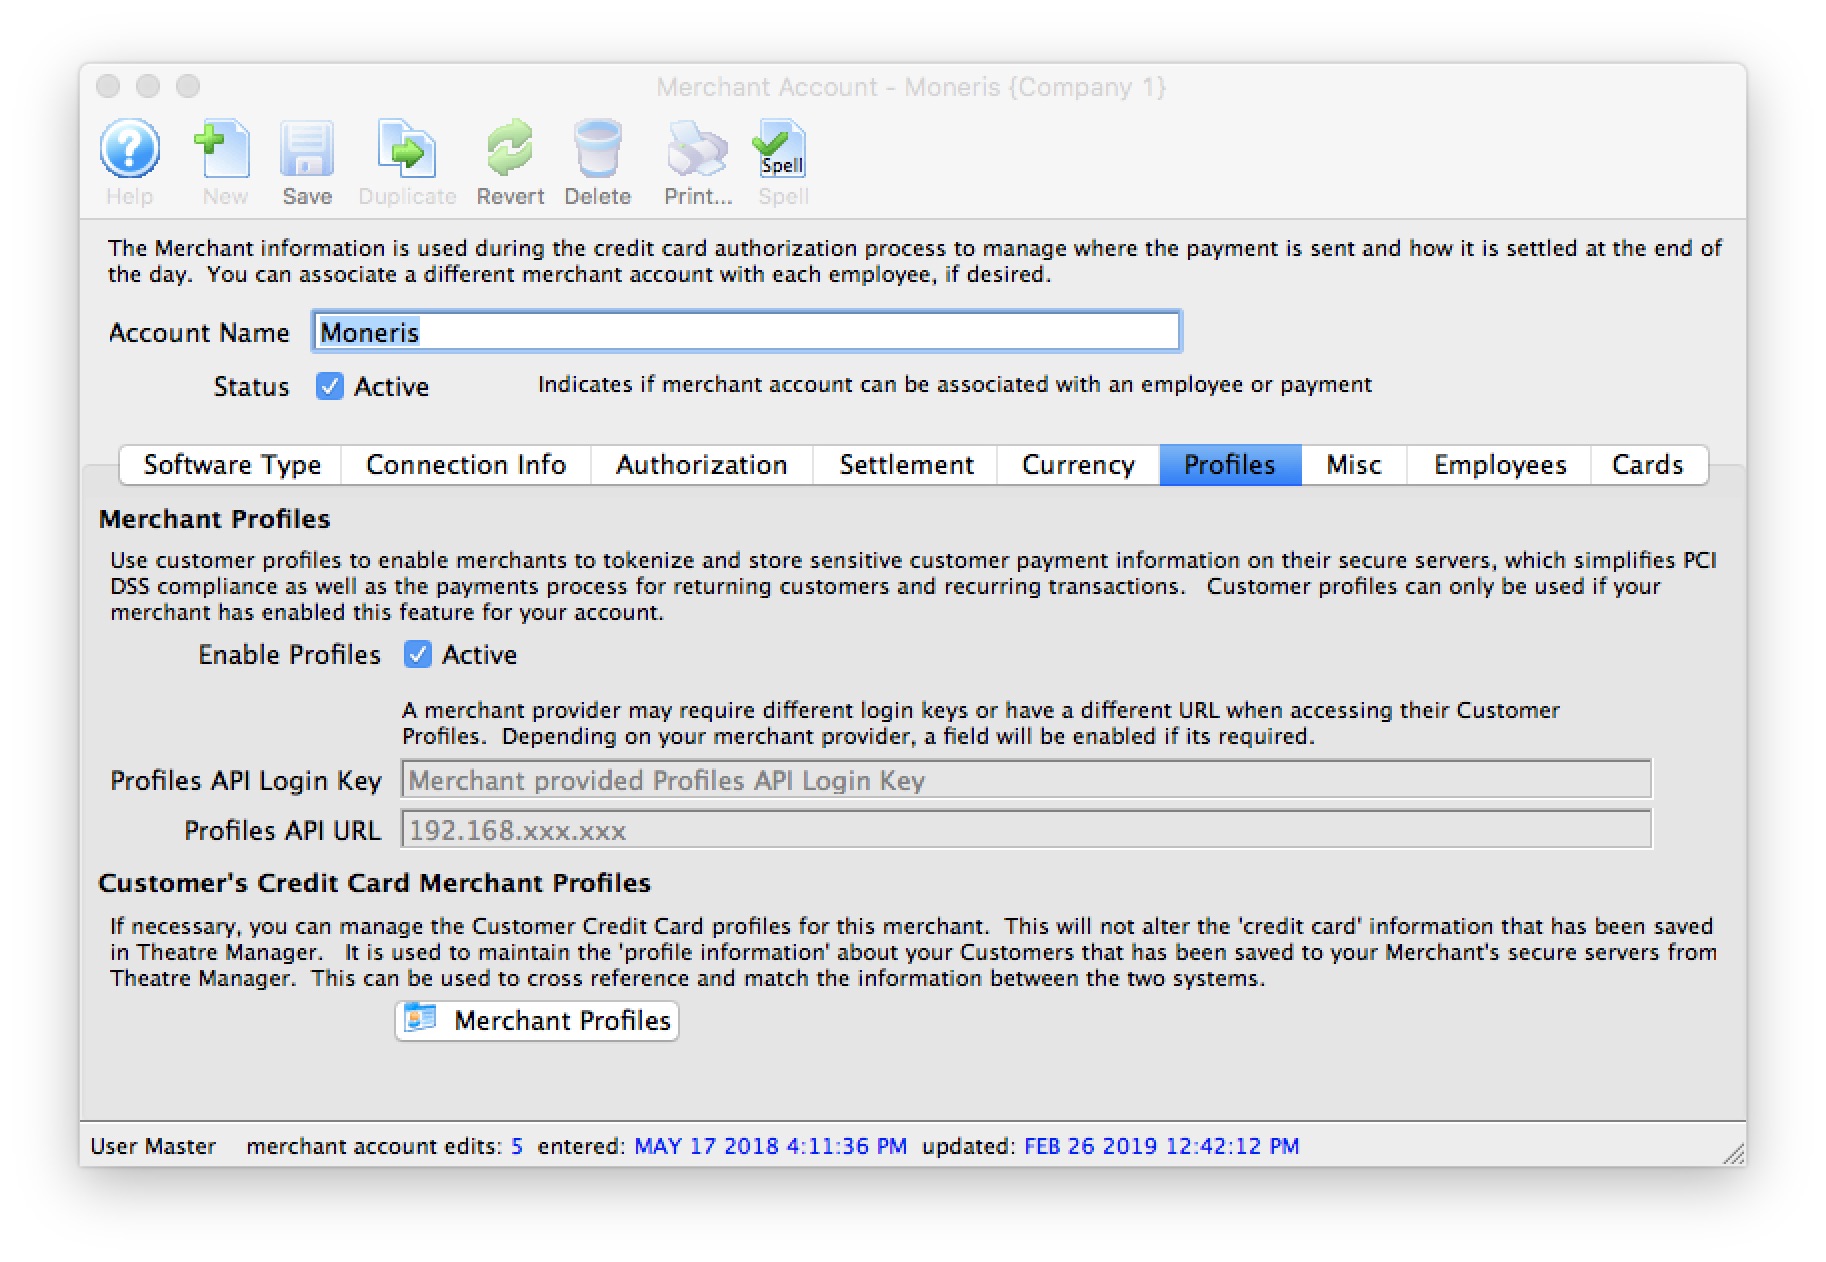
Moneris Hosted Checkout Page
|
Hosted Checkout option is used if you want Theatre Manager to use Moneris for online credit card payments with an embedded web page. It is possible to be SAQ A compliant for your web sales since Moneris takes the credit card within an iframe and card data does not enter your network. |
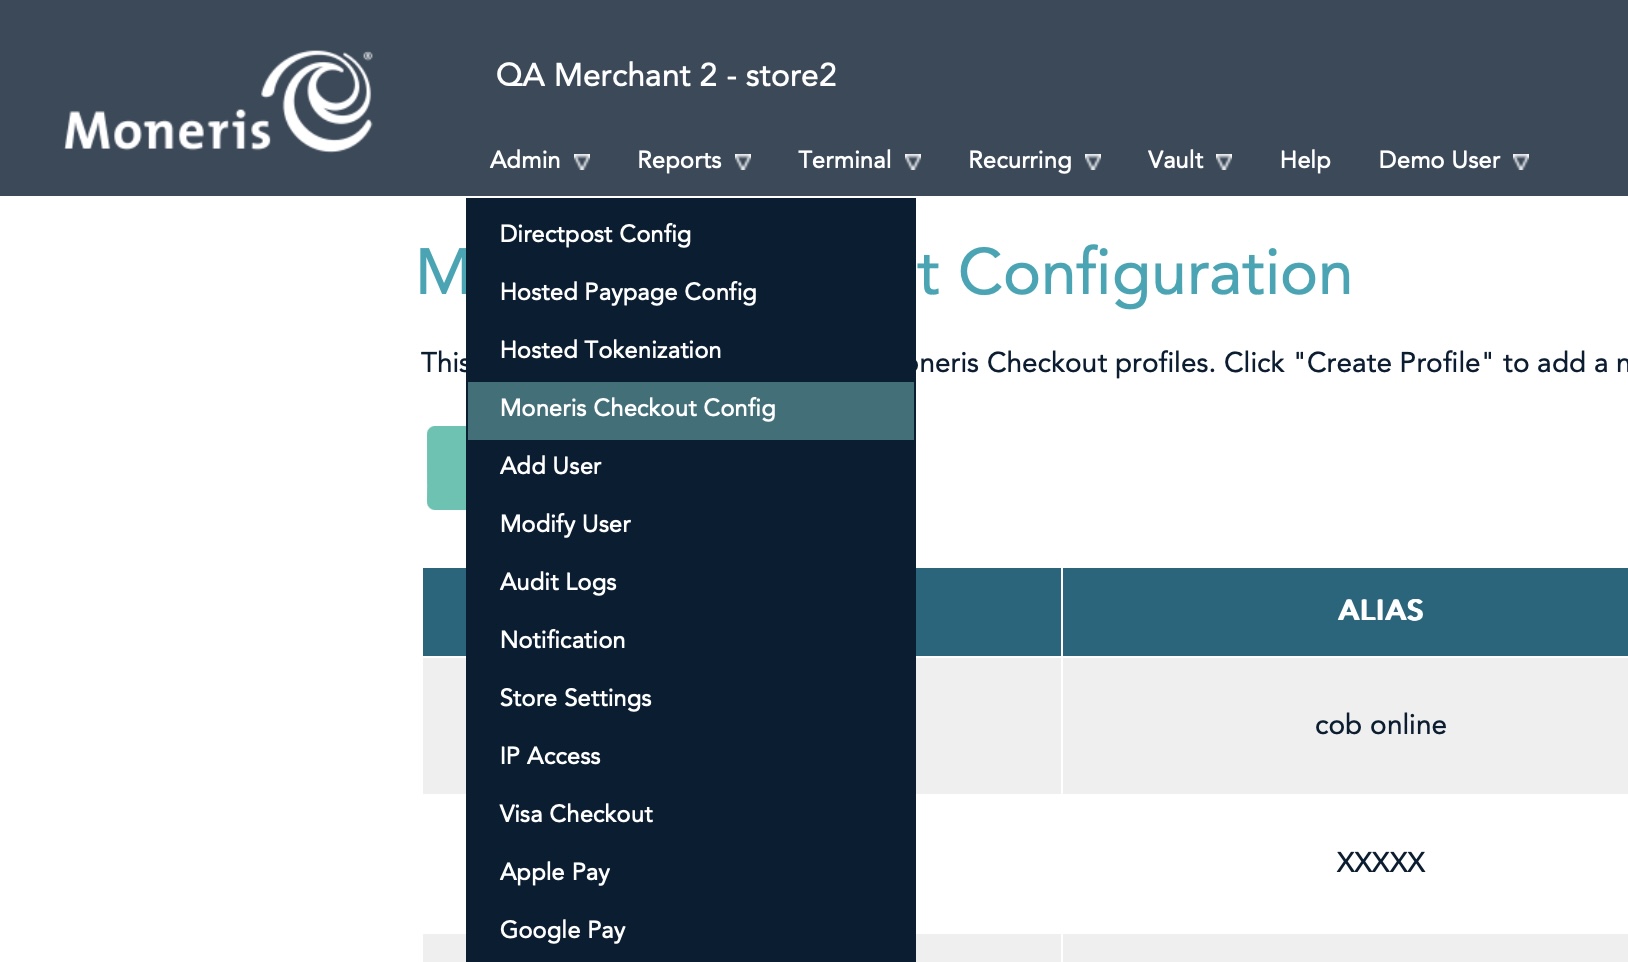
|
|
If you use hosted payments for web sales, you will also need an E-Select plus account for settlement. Box office sales can use this same merchant account and will automatically authorize against the e-select plus account. This means that you only need one merchant account set up even though it is processing via different pathways, one for web and one for box office. | |
|
You may also be able to accept payments like apple-pay online, digital wallets, online interac, verified by visa, multi currency, etc. Make sure to talk to Moneris about what is possible and what you want to accept. | |
|
If you are already using Moneris Hosted Payment Page, refer to the conversion process to Moneris Checkout to see what is involved. | |
|
Note: using Moneris Checkout disables use of online post dated payments since card data is not provided by Moneris and, therefore, cannot be saved. Recurring Payments initiated by the box office will still work. | |
Setup Process
The best process to configure this option is:
- Obtain your online portal connection information from Moneris
- Configure all the settings within the online portal
- Use the Theatre Manager Merchant Account Setup for Moneris Hosted Checkout Page
- Verify all credit card types you want to take in payment method code tables
- If you are already using Moneris hosted payments or box office payments, you may not need to do anything
- If you plan on taking advantage of other credit card types online (that you may not want to accept in the box office), you will need to add them to the payment types.
- It is very important that card types you set up online are in the payment code tables.
- Test:
- Authorizations through the TM Web services
- Attempted Authorizations but Cancel through the TM Web services by going online to buy something (use test cards)
- Verify the display on the web to see that it matches what ou picked in the online portal setup and shows your name and settings you wish
- Voids from Theatre Manager
- End of Day Settlement
Online Portal Setup
You will need to log into your Moneris Resource Center online account
Once you are logged into the online account setup, select Admin->Hosted Checkout config option per the image to the right.
You will see a screen similar to the bottom of the web page that lists all the configurations you have made. You can have many of them, and all you need to do is enter the Checkout_ID in Theatre Manager merchant setup to use the one you prefer.
Creating a New Profile
- If you see no lines in the list, click the Create Profile to make the following for Theatre Manager:
- CHECKOUT_ID
- ALIAS
- You will be asked to confirm that you want to create a new profile.
Click OK
- Click the Edit Name on the upper left and you will see the window below
Enter in an alias like 'Theatre Manager'
.

Edit an existing Configuration
If you see the Checkout_id that you want to change in the list below, you can Edit by clicking the edit button. Then process to the next pages for more information about the setup.
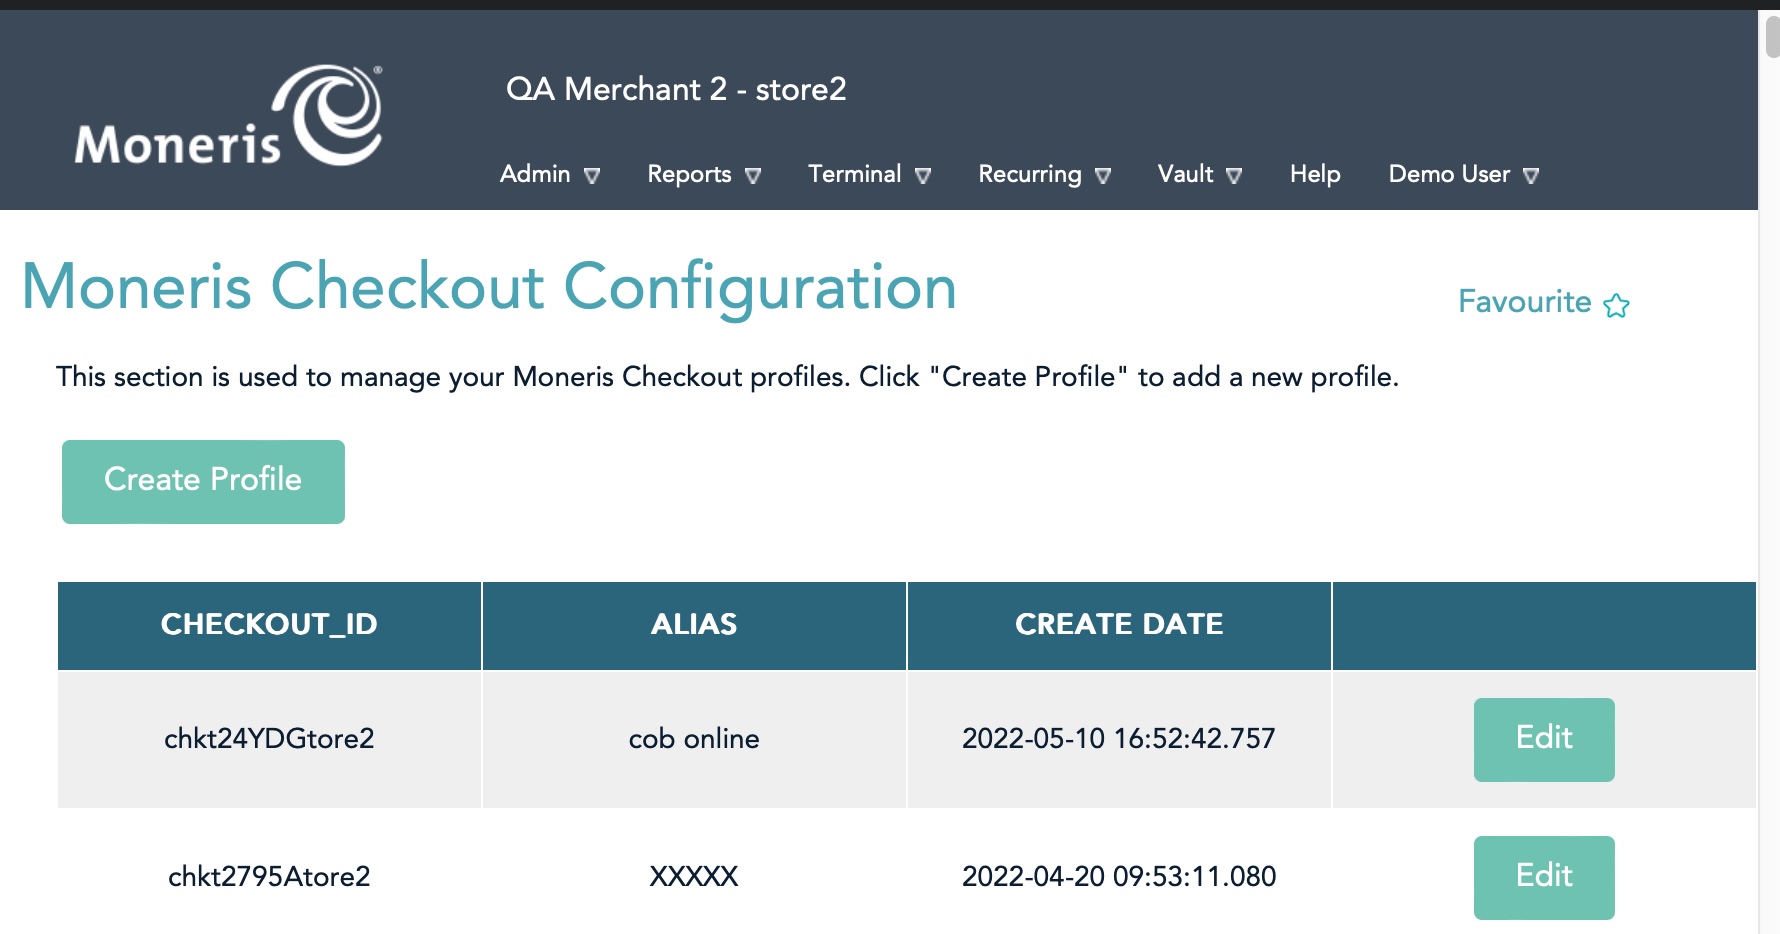
Checkout Type
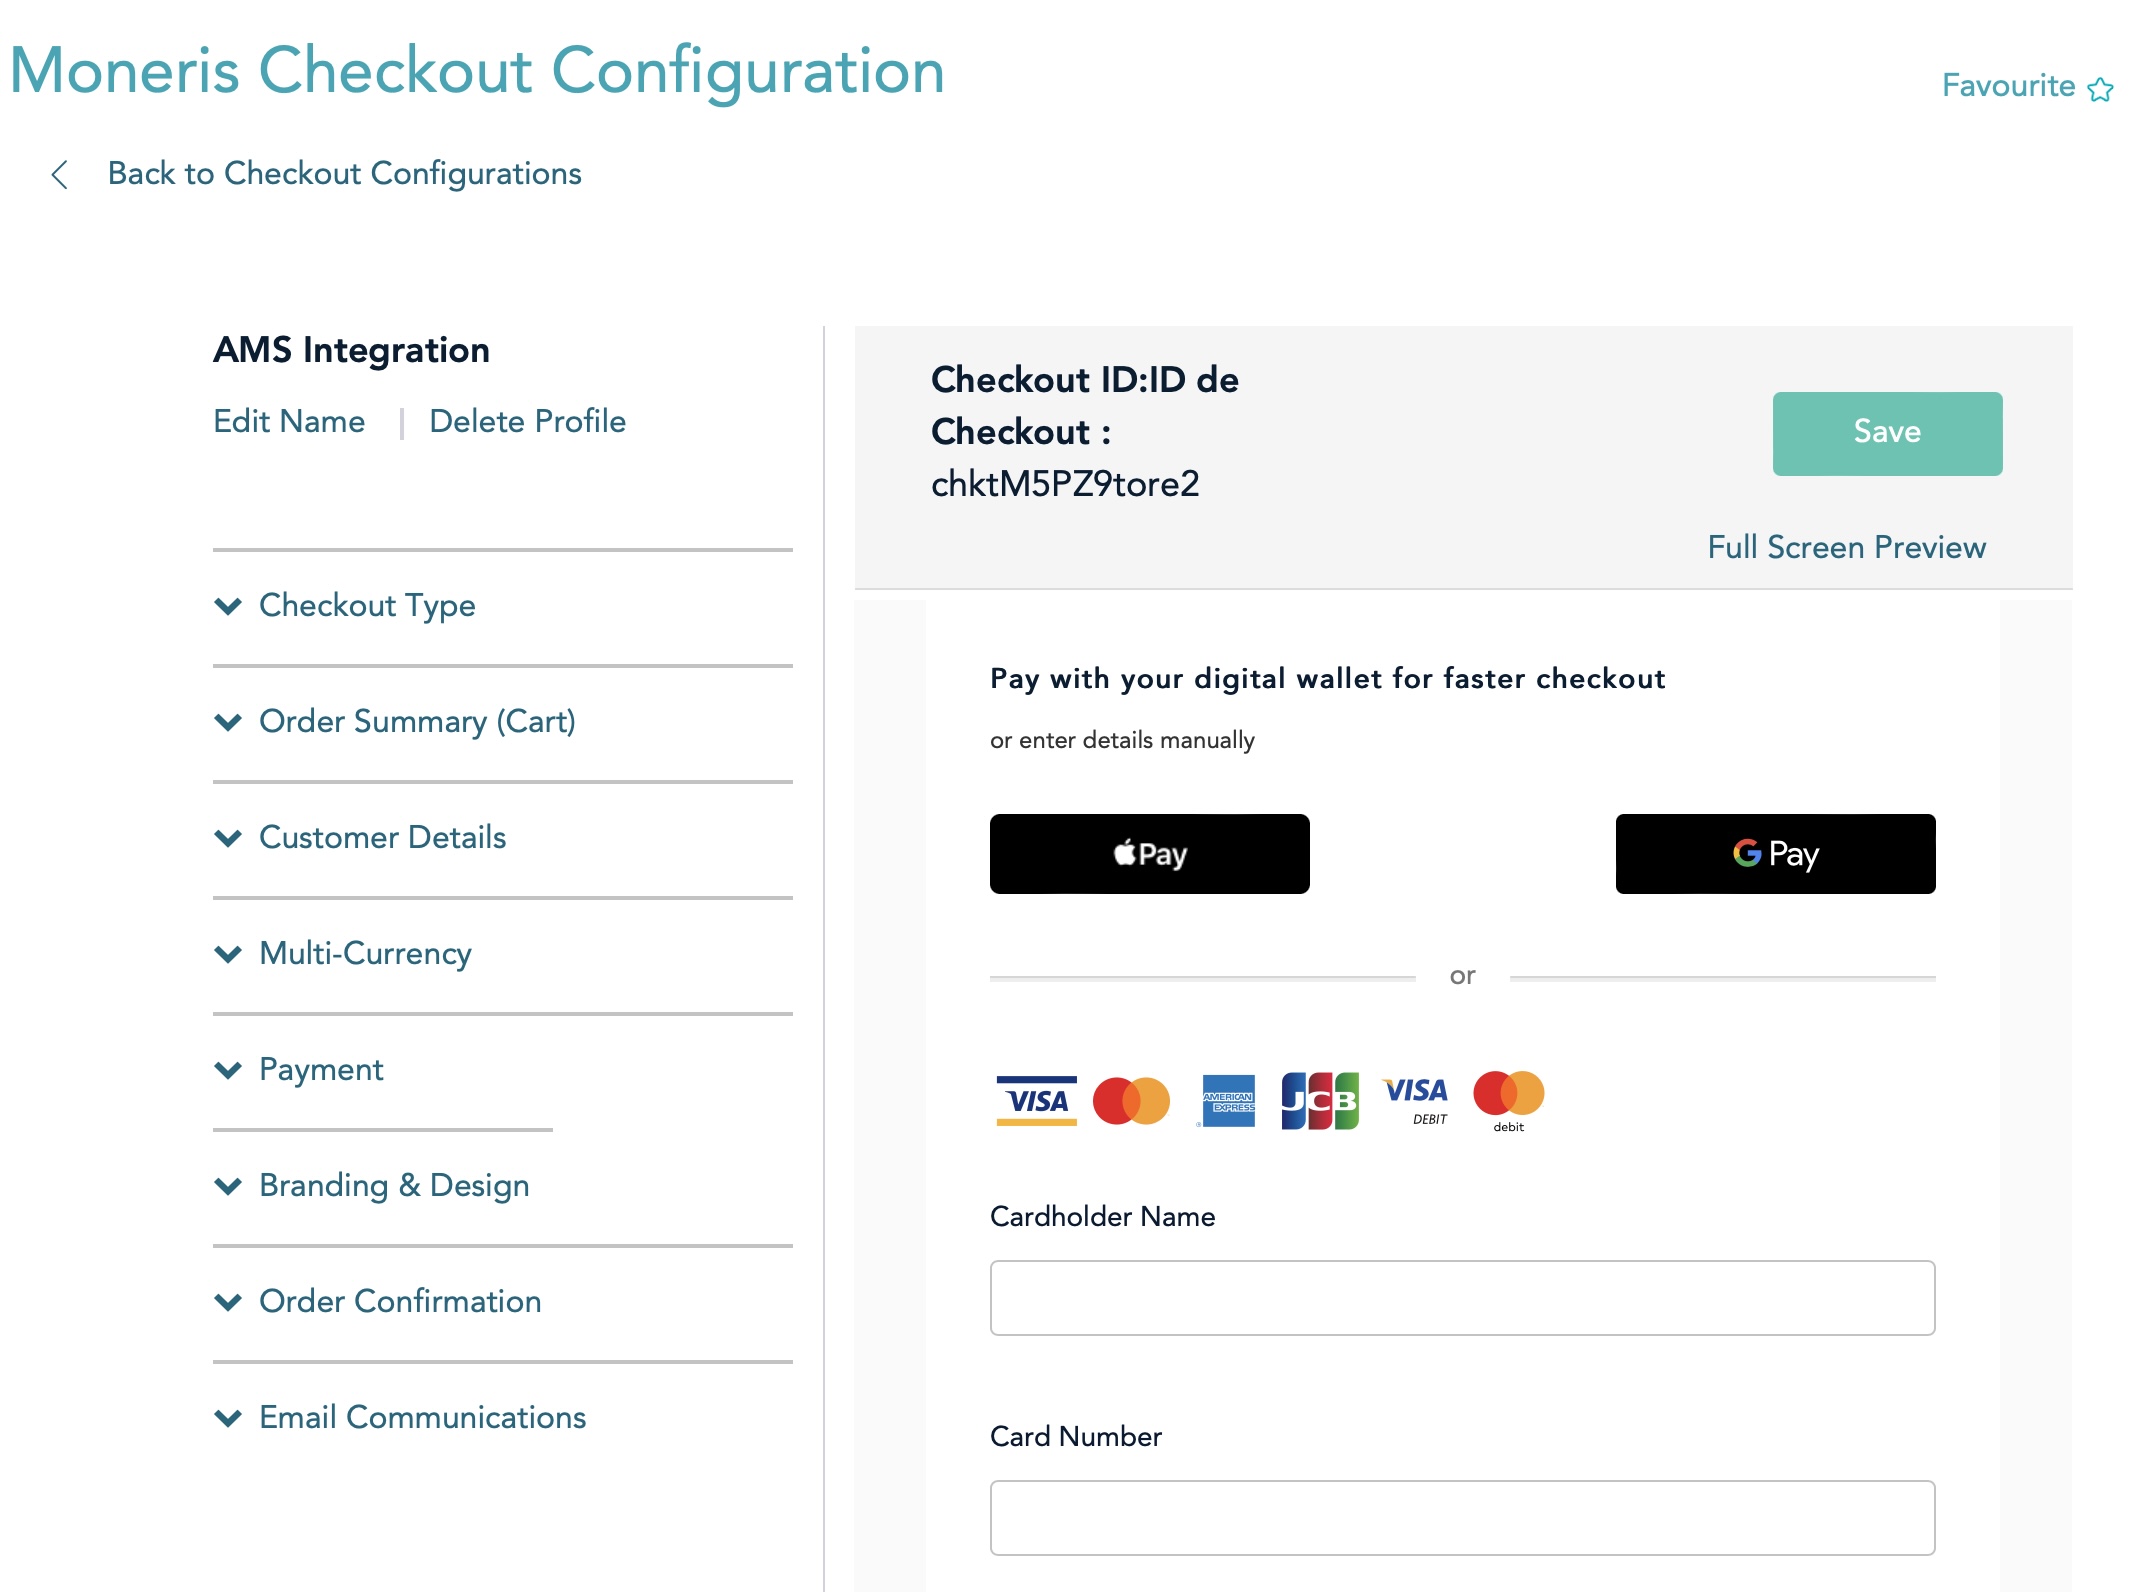
Set the checkout Type
- Click the section that says Checkout Type
- Click the option I have my custom order form and want to use Moneris simply for payment processing.
- Click 'Checkout Type' to collapse it
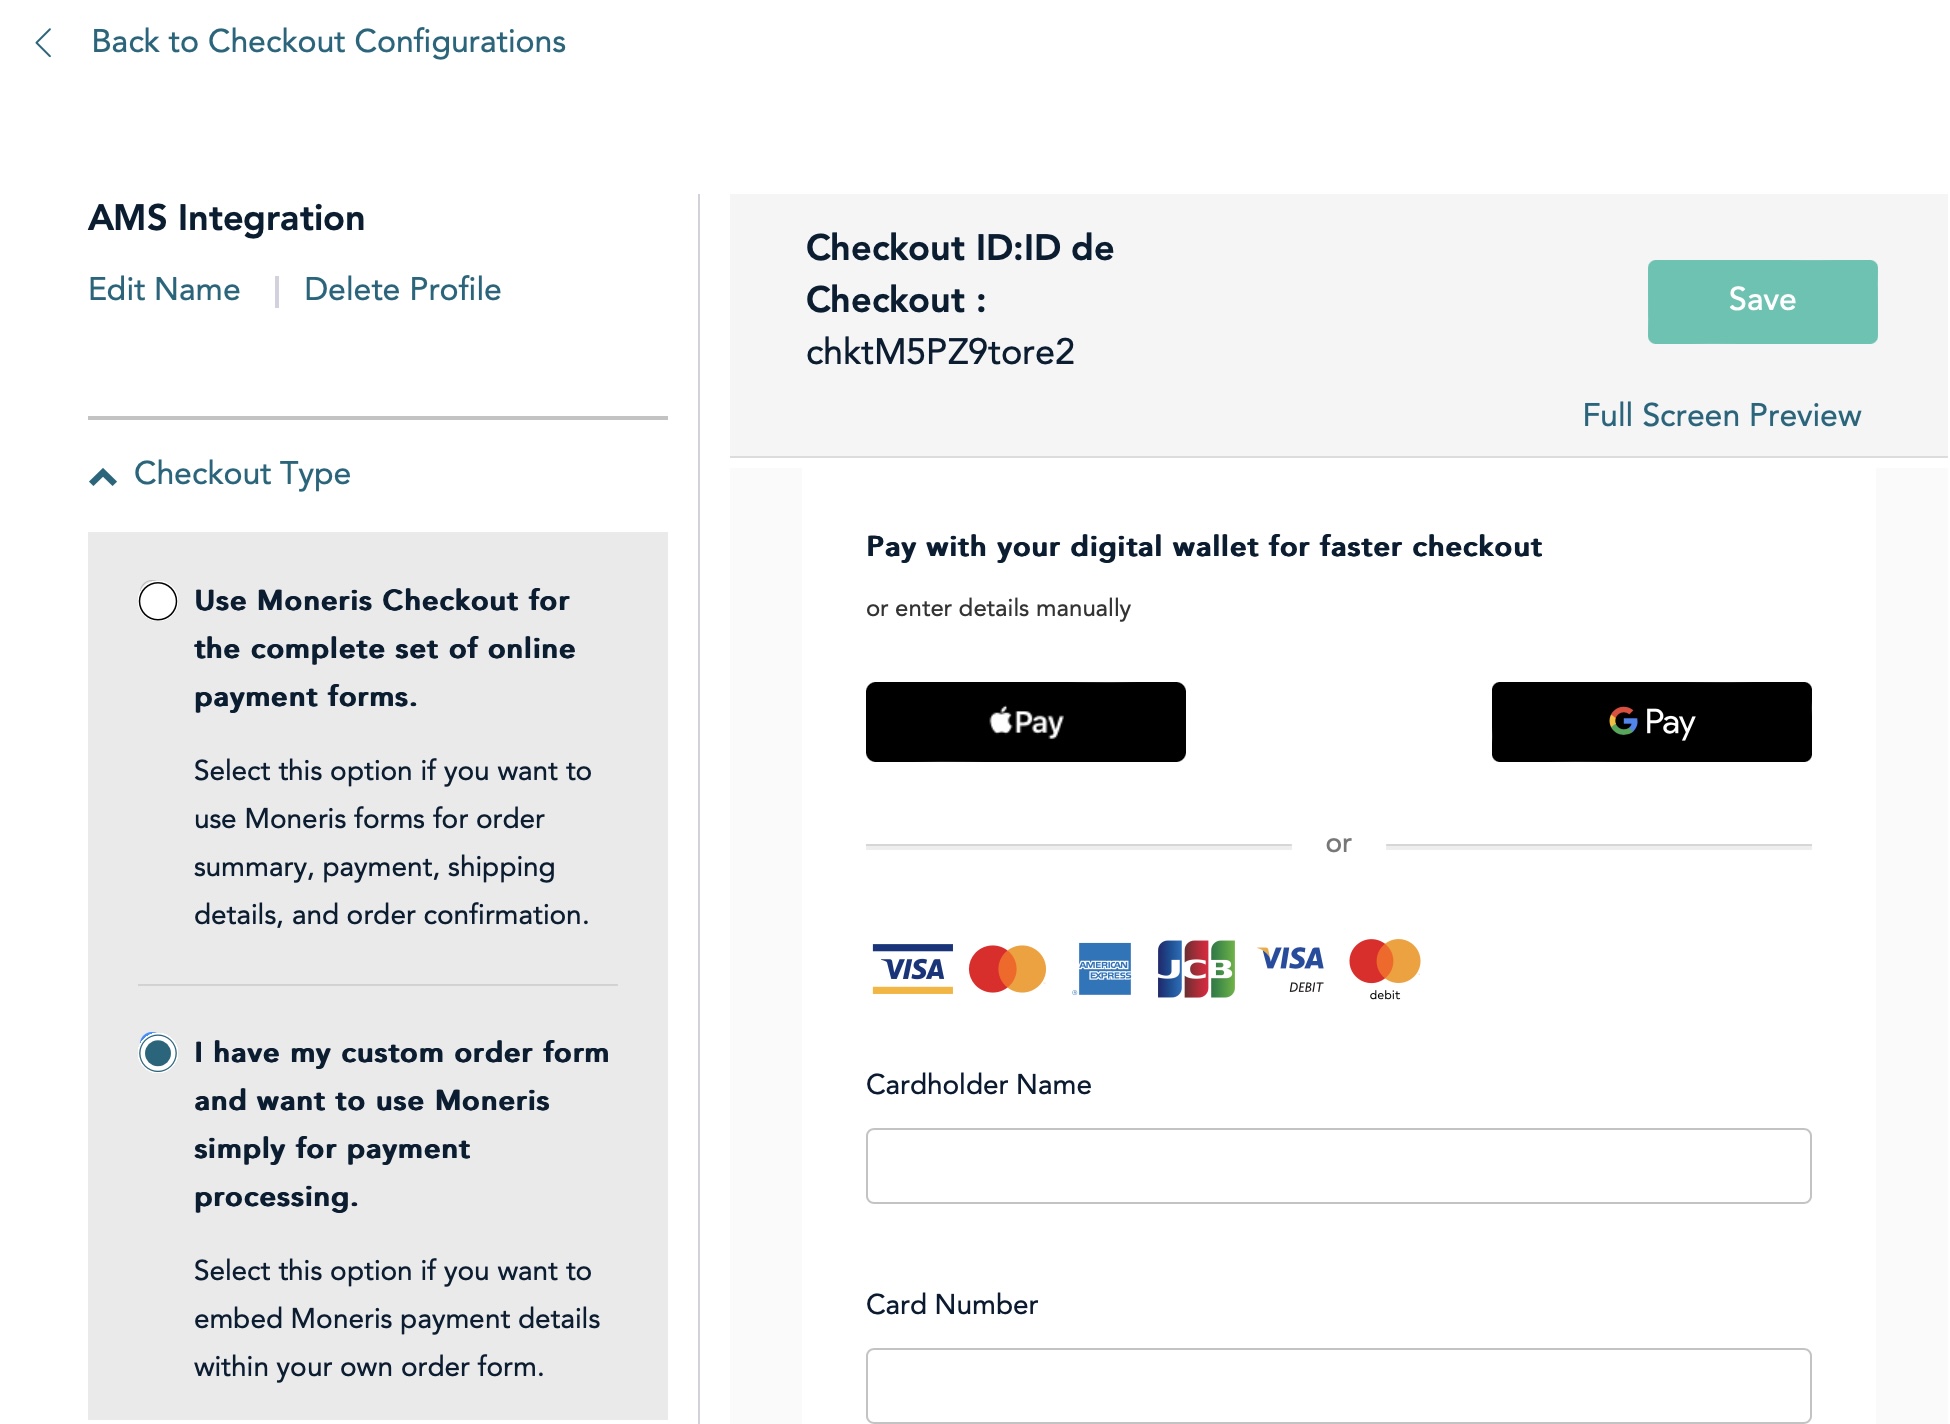
Order Summary (cart)
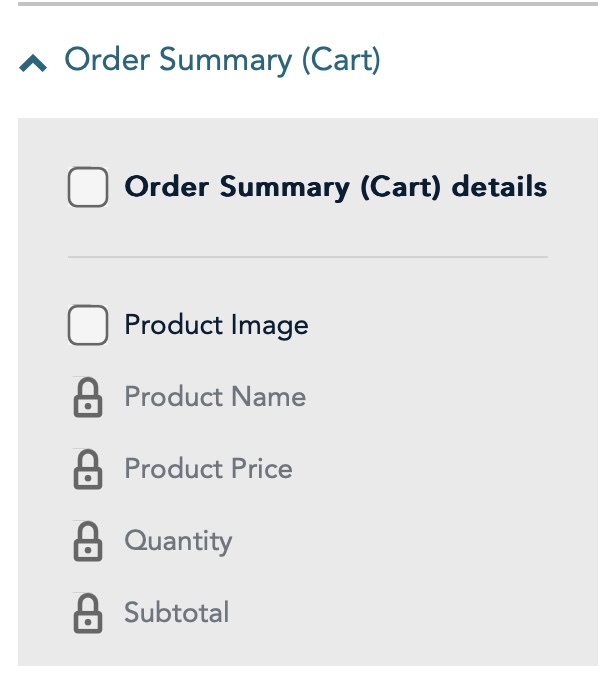 There is nothing to select on the Order Summary Cart since you have your own custom form as part of Theatre Manager.
Make sure the options look like the image to the right.
Customer Details
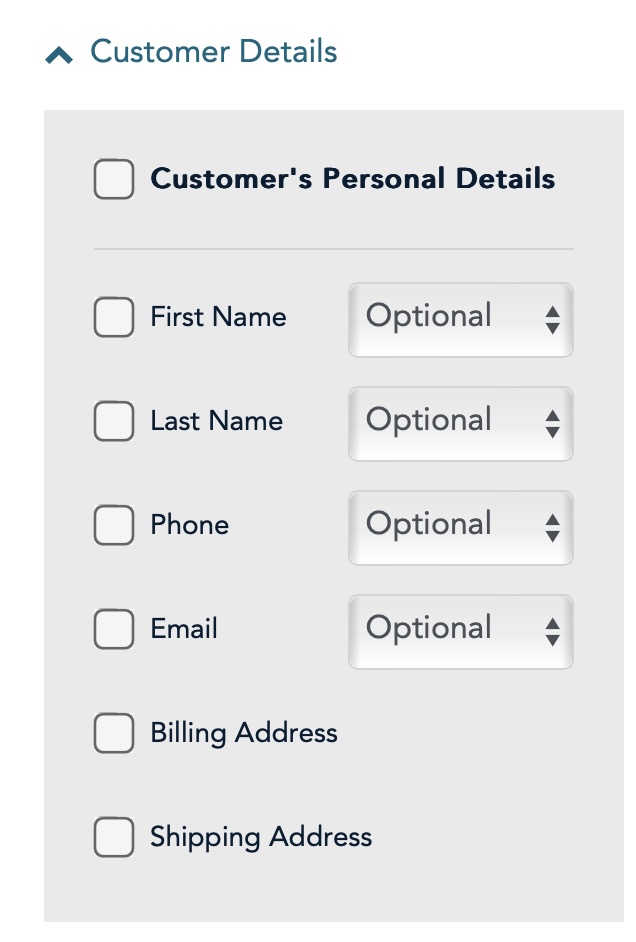 There is nothing to select on the Customer Details since you have your own custom web site as part of Theatre Manager.
Make sure the options look like the image to the right.
Multi Currency
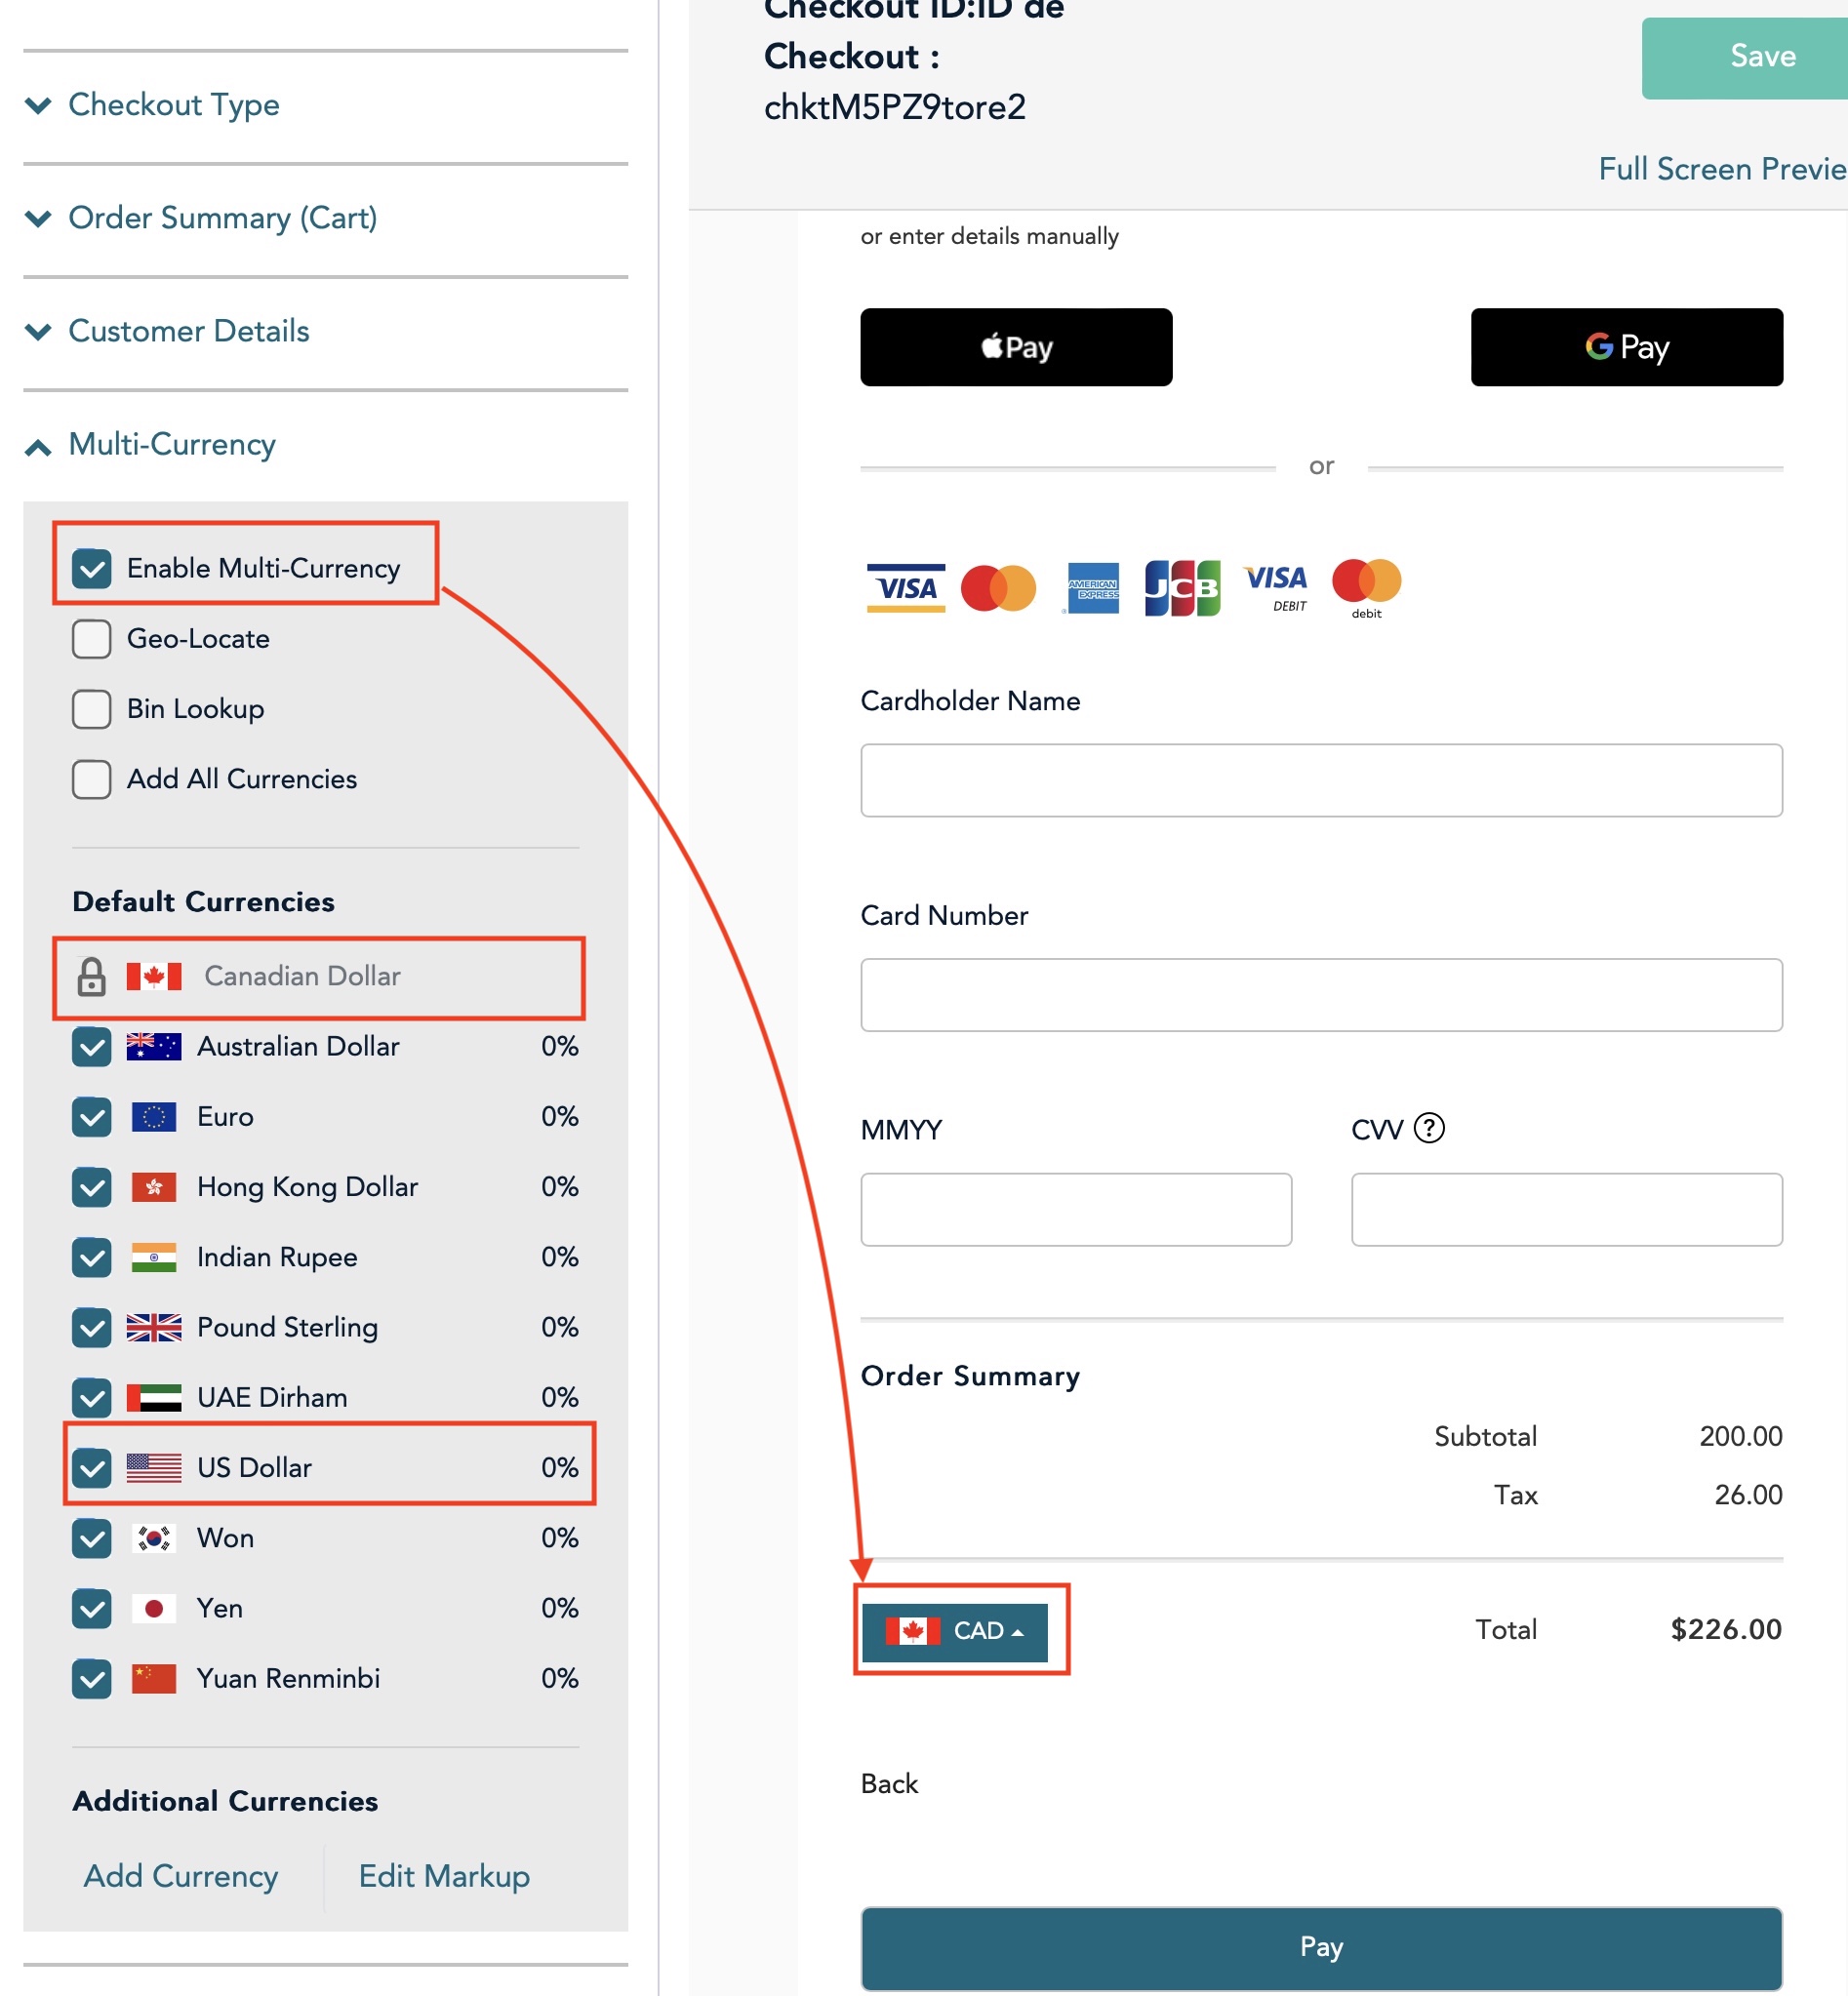 Most likely, you will NOT need to accept multiple currencies.
Since that is the case, UNCHECK the enable multi-currency button. that will cause the currency choices to disappear from the the area indicated on the checkout form
If, however, you do want to take some selected currencies (such as USD, or where ever your main customers come from, then CHECK the enable multi-currency button.
If you do that, you will also need to check and uncheck the currencies that you wish to accept.
We understand that all currencies are converted to CAD and so you will receive CAD in your bank account.
Payment Options
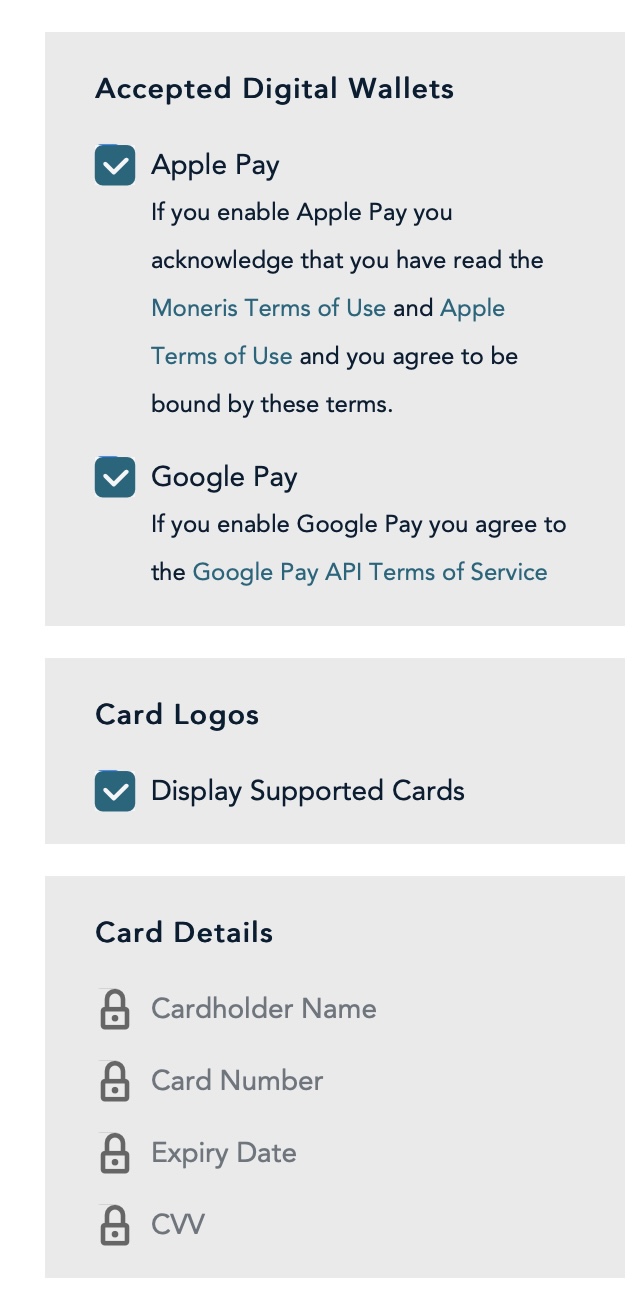 Indicate what digital wallets you want to accept. There are two main ones at time of writing
- Apple Pay
- Google Pay
Click the Display Supported Cards checkbox to show miniature logos of the cards you accept on your web site.
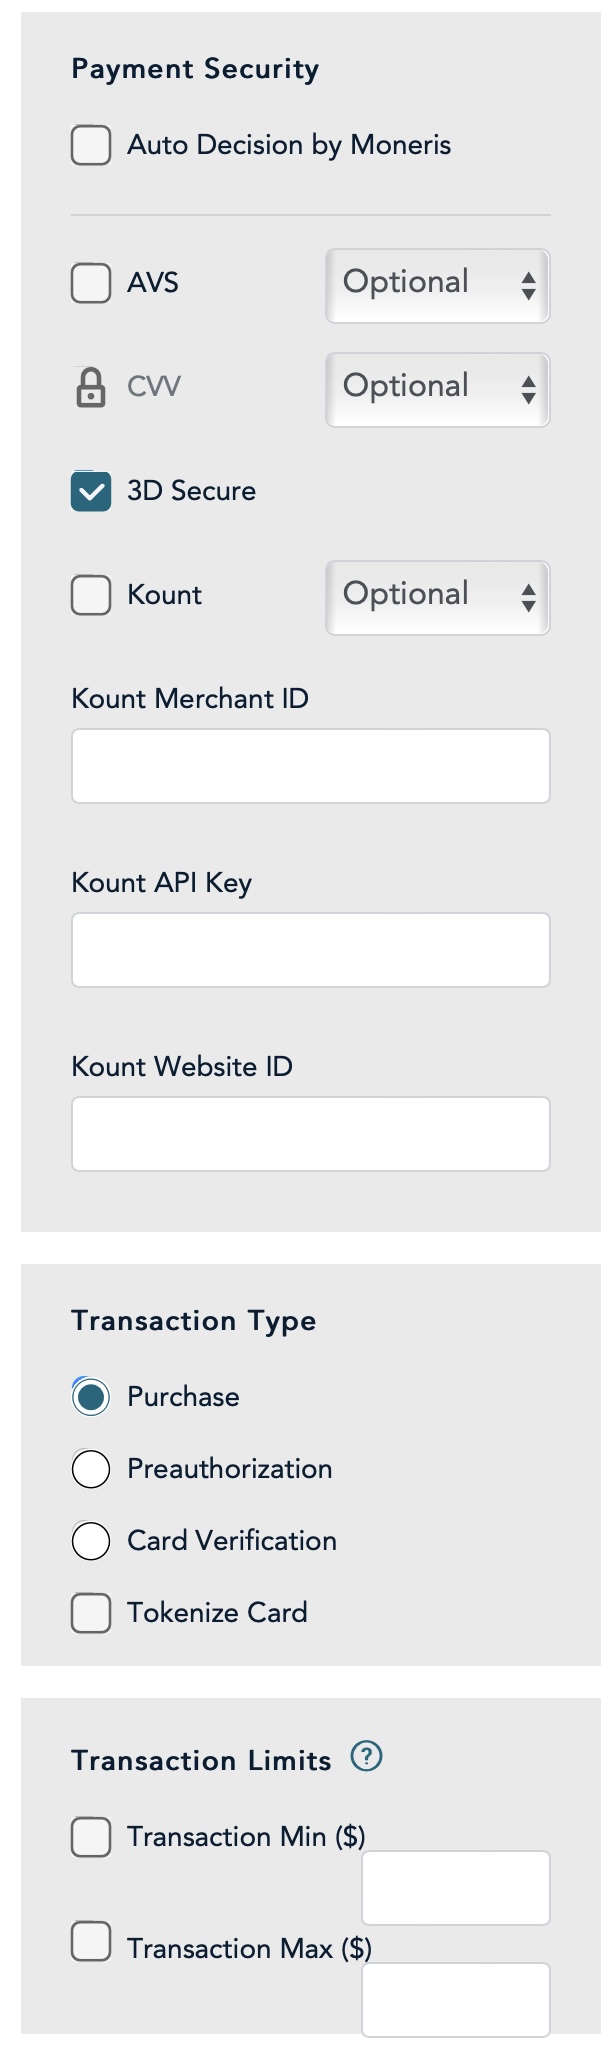
There are more options that you should make the same as the image to the right.
You MUST select Transaction Type as Purchase
Branding and Design
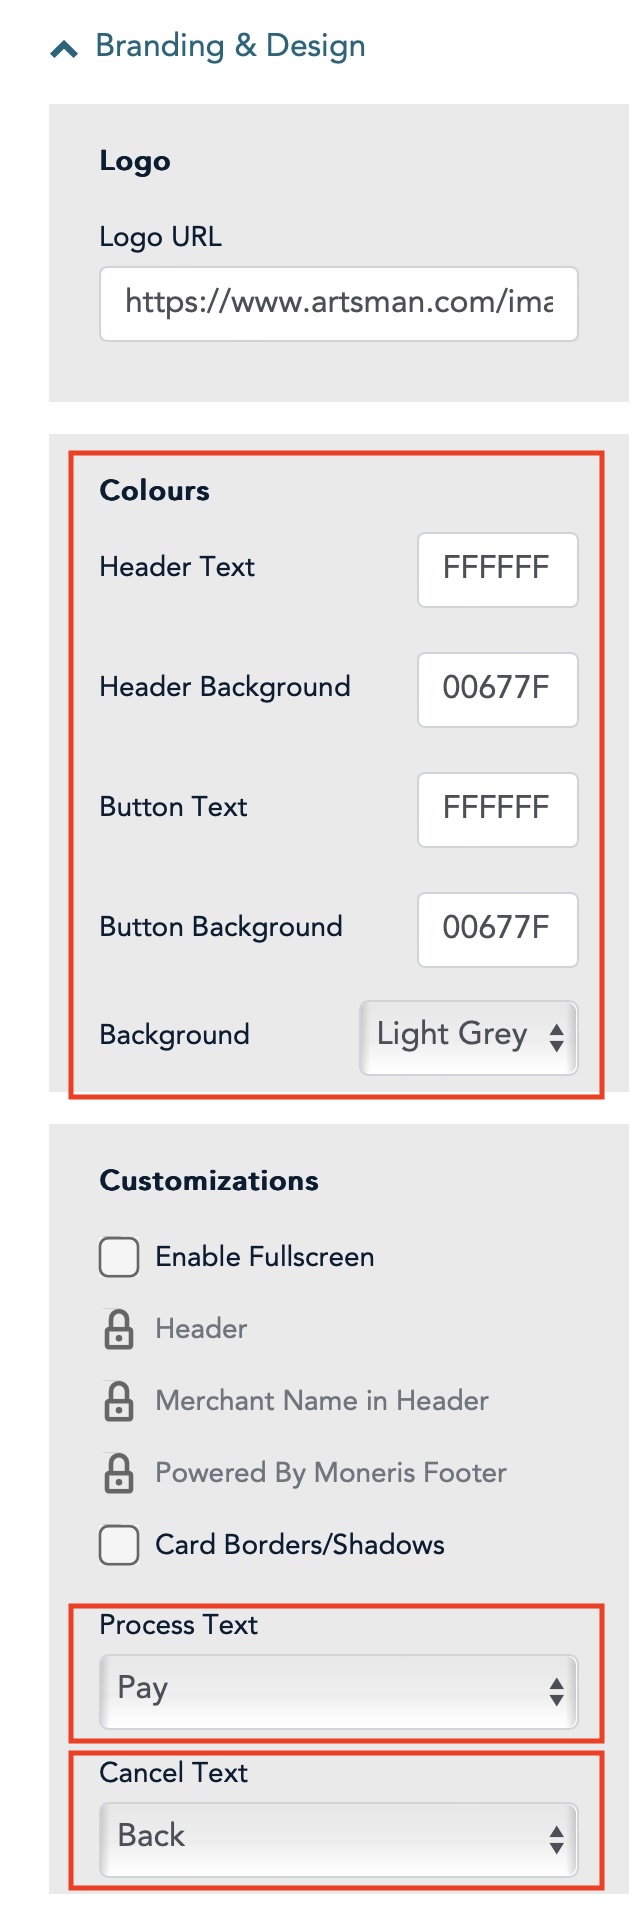 There are three areas that are highlighted that we think you may want to change:
- Colours -these are colours that the web page will be displayed in. They use the internet RGB hex colours and you can change these to suit your web site theme.
- Process Text - this is the text that will display on the button to accept the patrons credit card and to process it. You may select what you wish. We suggest Pay
- Cancel Text - this is the text that will display on he screen to allow the use to use the 'Back' button. You may select what you wish. We suggest Back
Order Confirmation
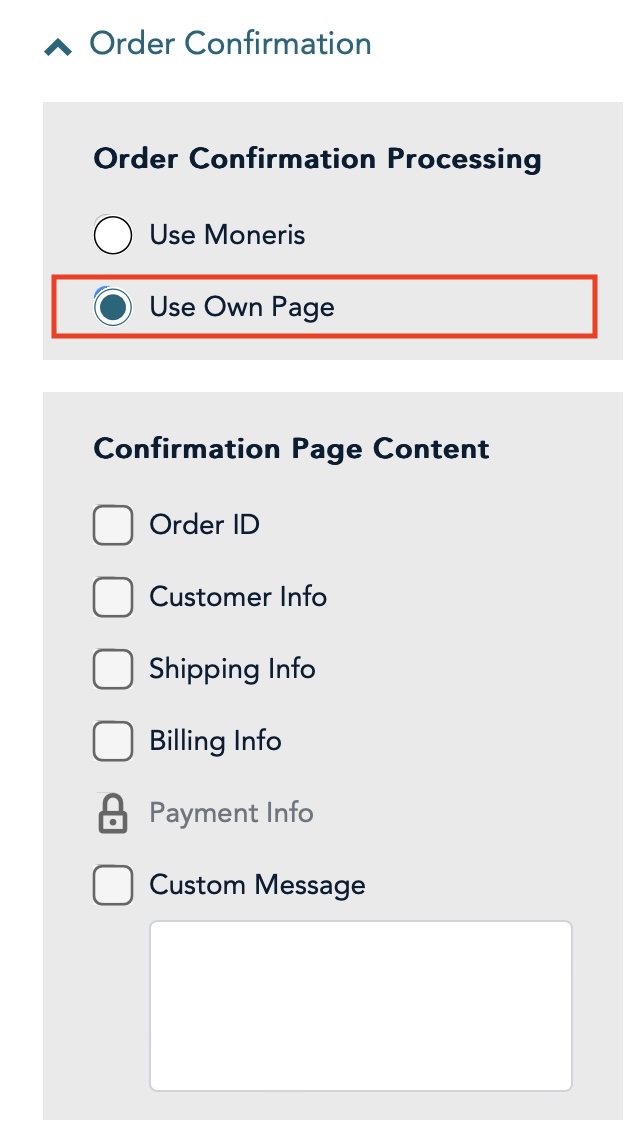 For this section, you must select Use Own Page and nothing else. This is because Theatre Manager must receive the confirmation Moneris that the card was accepted or rejected before it will process the shopping carts.
Email Communications
 Uncheck all of the options to the right, if any are checked
Theatre Manager Setup
Once the Moneris account has been activated and all the information in the following list has been obtained, the Merchant Account in Theatre Manager can be set up on each of the tabs that follow:
- Server Software - Moneris (setting selected in TM)
- Merchant Provider - Moneris Checkout Page (setting selected in TM)
- Main Store Id - xxxxxxxxxx (provided by Moneris merchant services and used to login to Moneris online portal)
- Hosted Store ID - xxxxxx (generated in Moneris online portal)
- Checkout ID - xxxxxx (generated in Moneris online portal)
- Primary URL for LIVE authorizations - set automatically
- ECR Number - 66xxxx (provided by Moneris on the setup information)
- api_token - obtained from the Moneris online portal
Tabs with specific setup info are described in the following help pages. Other tabs like the Employees and Cards tabs are populated the same as described here.
Moneris Hosted Checkout Software Type
- Account Name - enter a description indicating that the purpose of this account is for Hosted Payments
- Status - click to make it active, if not already
- Enable Card Use by Web Listener - click to make it active, if not already. Hosted Checkout Page can be used for online sales to try to be PCI Schedule A compliant
- Server Software - Moneris (setting selected in TM)
- Merchant Provider - Moneris Checkout (setting selected in TM)
- Main Store Id - xxxxxxxxxx (This is your Moneris Store # provided by Moneris. It should be a combination of letters and numbers. This is NOT your Merchant # OR ps_store_id. If the Moneris Store # is incorrect, Theatre Manager will NOT be able to close the credit card batch on the gateway server.)
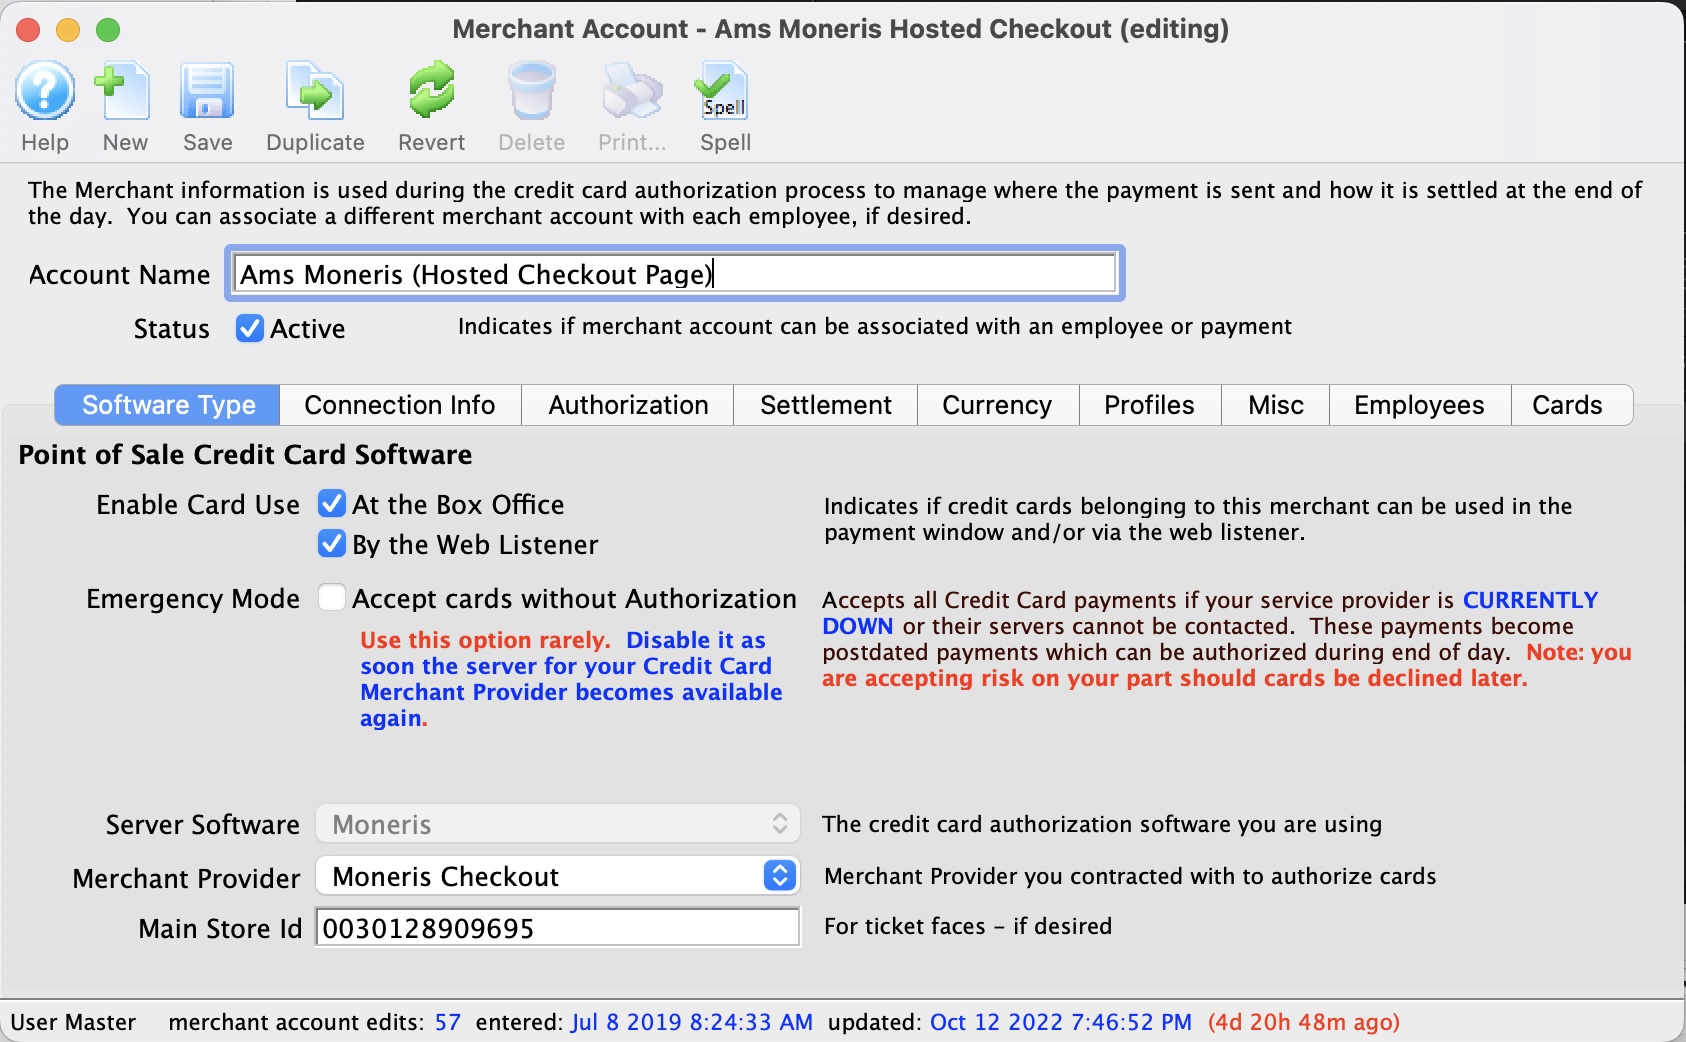
Hosted Checkout Connection Info
- ps_store_id - xxxxxx (generated in Moneris online portal)
- Hosted Checkout ID - xxxxxx (generated in Moneris online portal)
- Authorization URL - automatically set for you
- Settlement URL - automatically set for you
- Port - must be 443
- ECR Number - 66xxxx (provided by Moneris on the setup information)
- api_token - obtained from the Moneris online portal
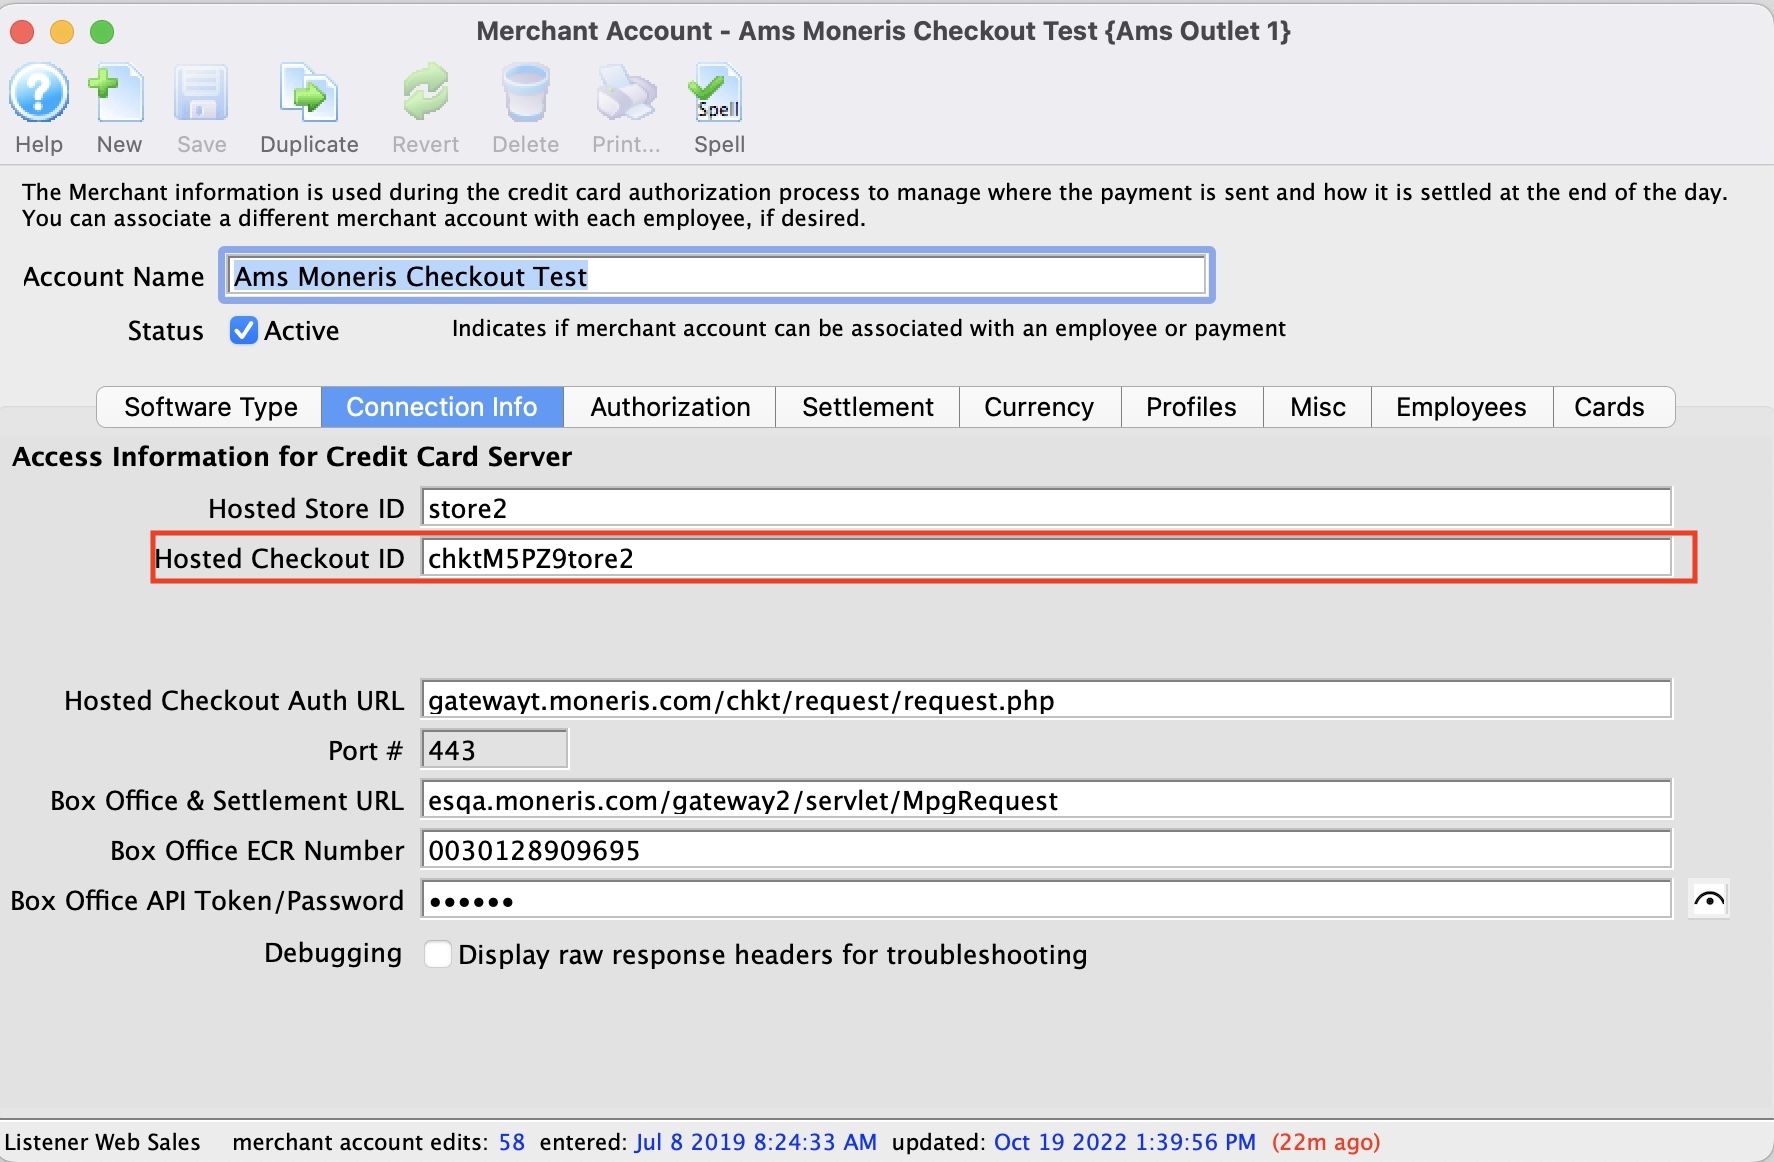
The Web Experience
|
It is very important to note that the credit card is being entered from the user's browser directly into the Moneris web site. This allows a venue to have:
|
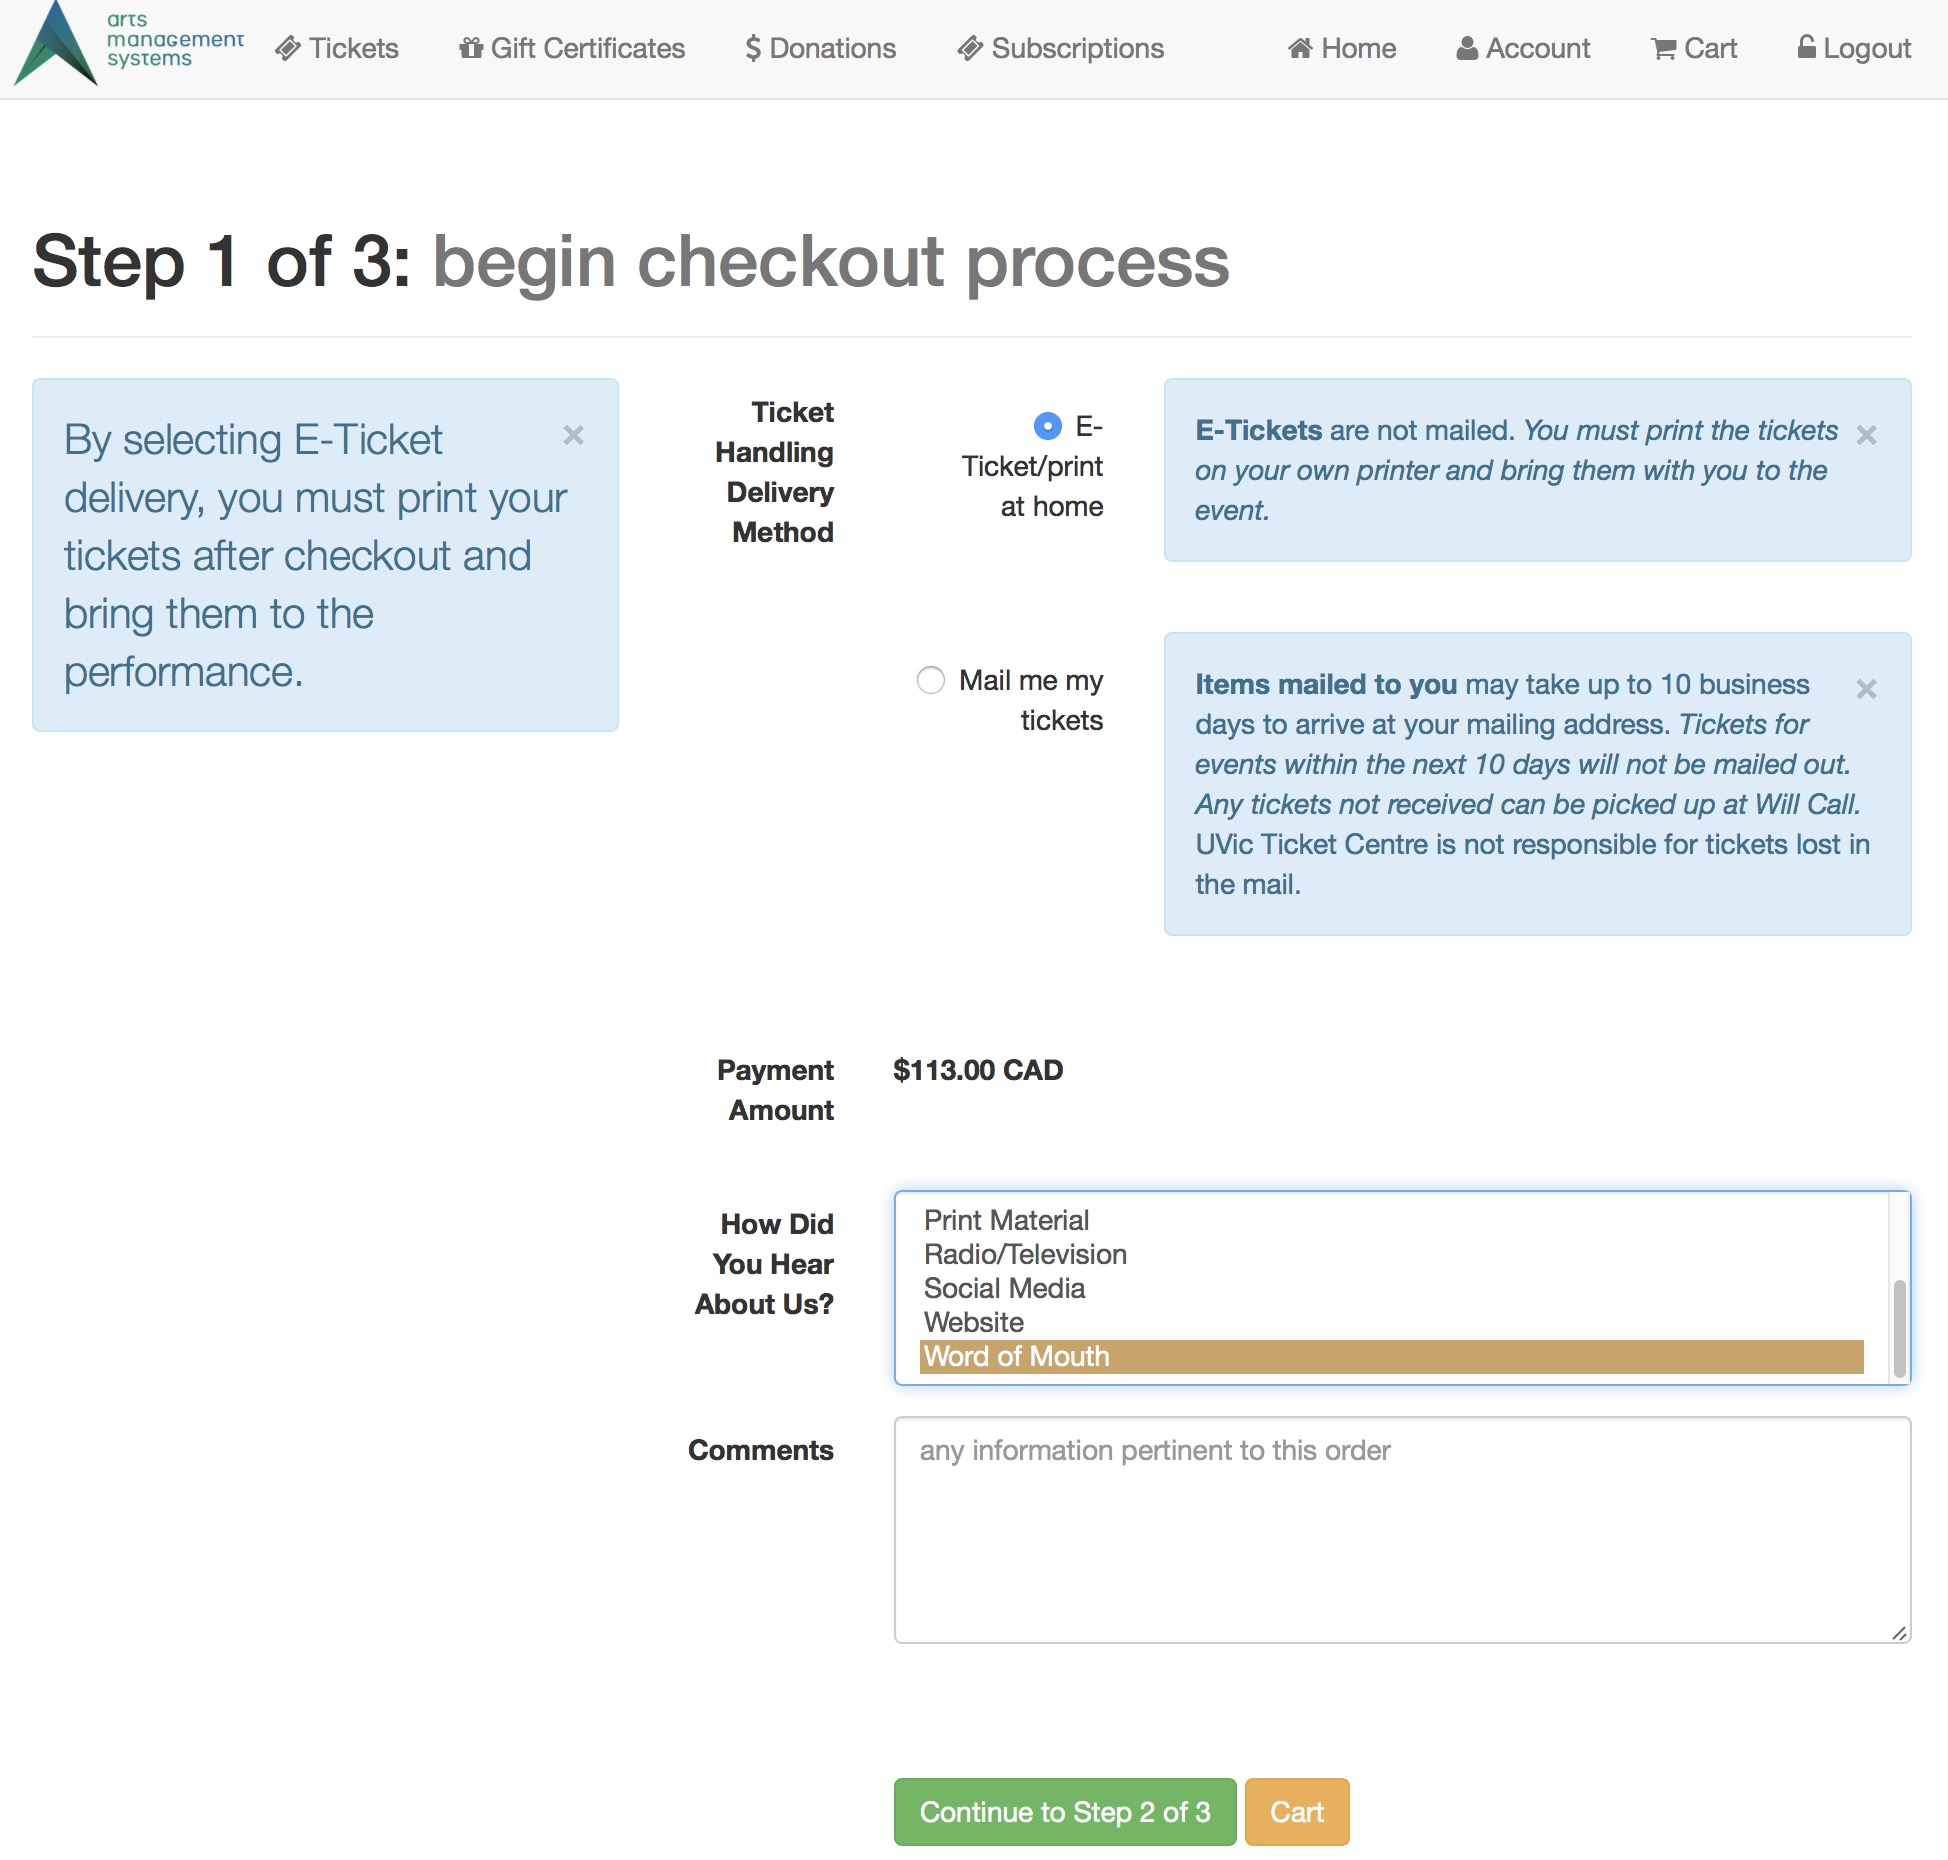 Step 1 of the checkout process illustrates that most of the checkout window appears the same.
The singular difference is that the credit card entry data is missing. Card entry shows up on step 3. |
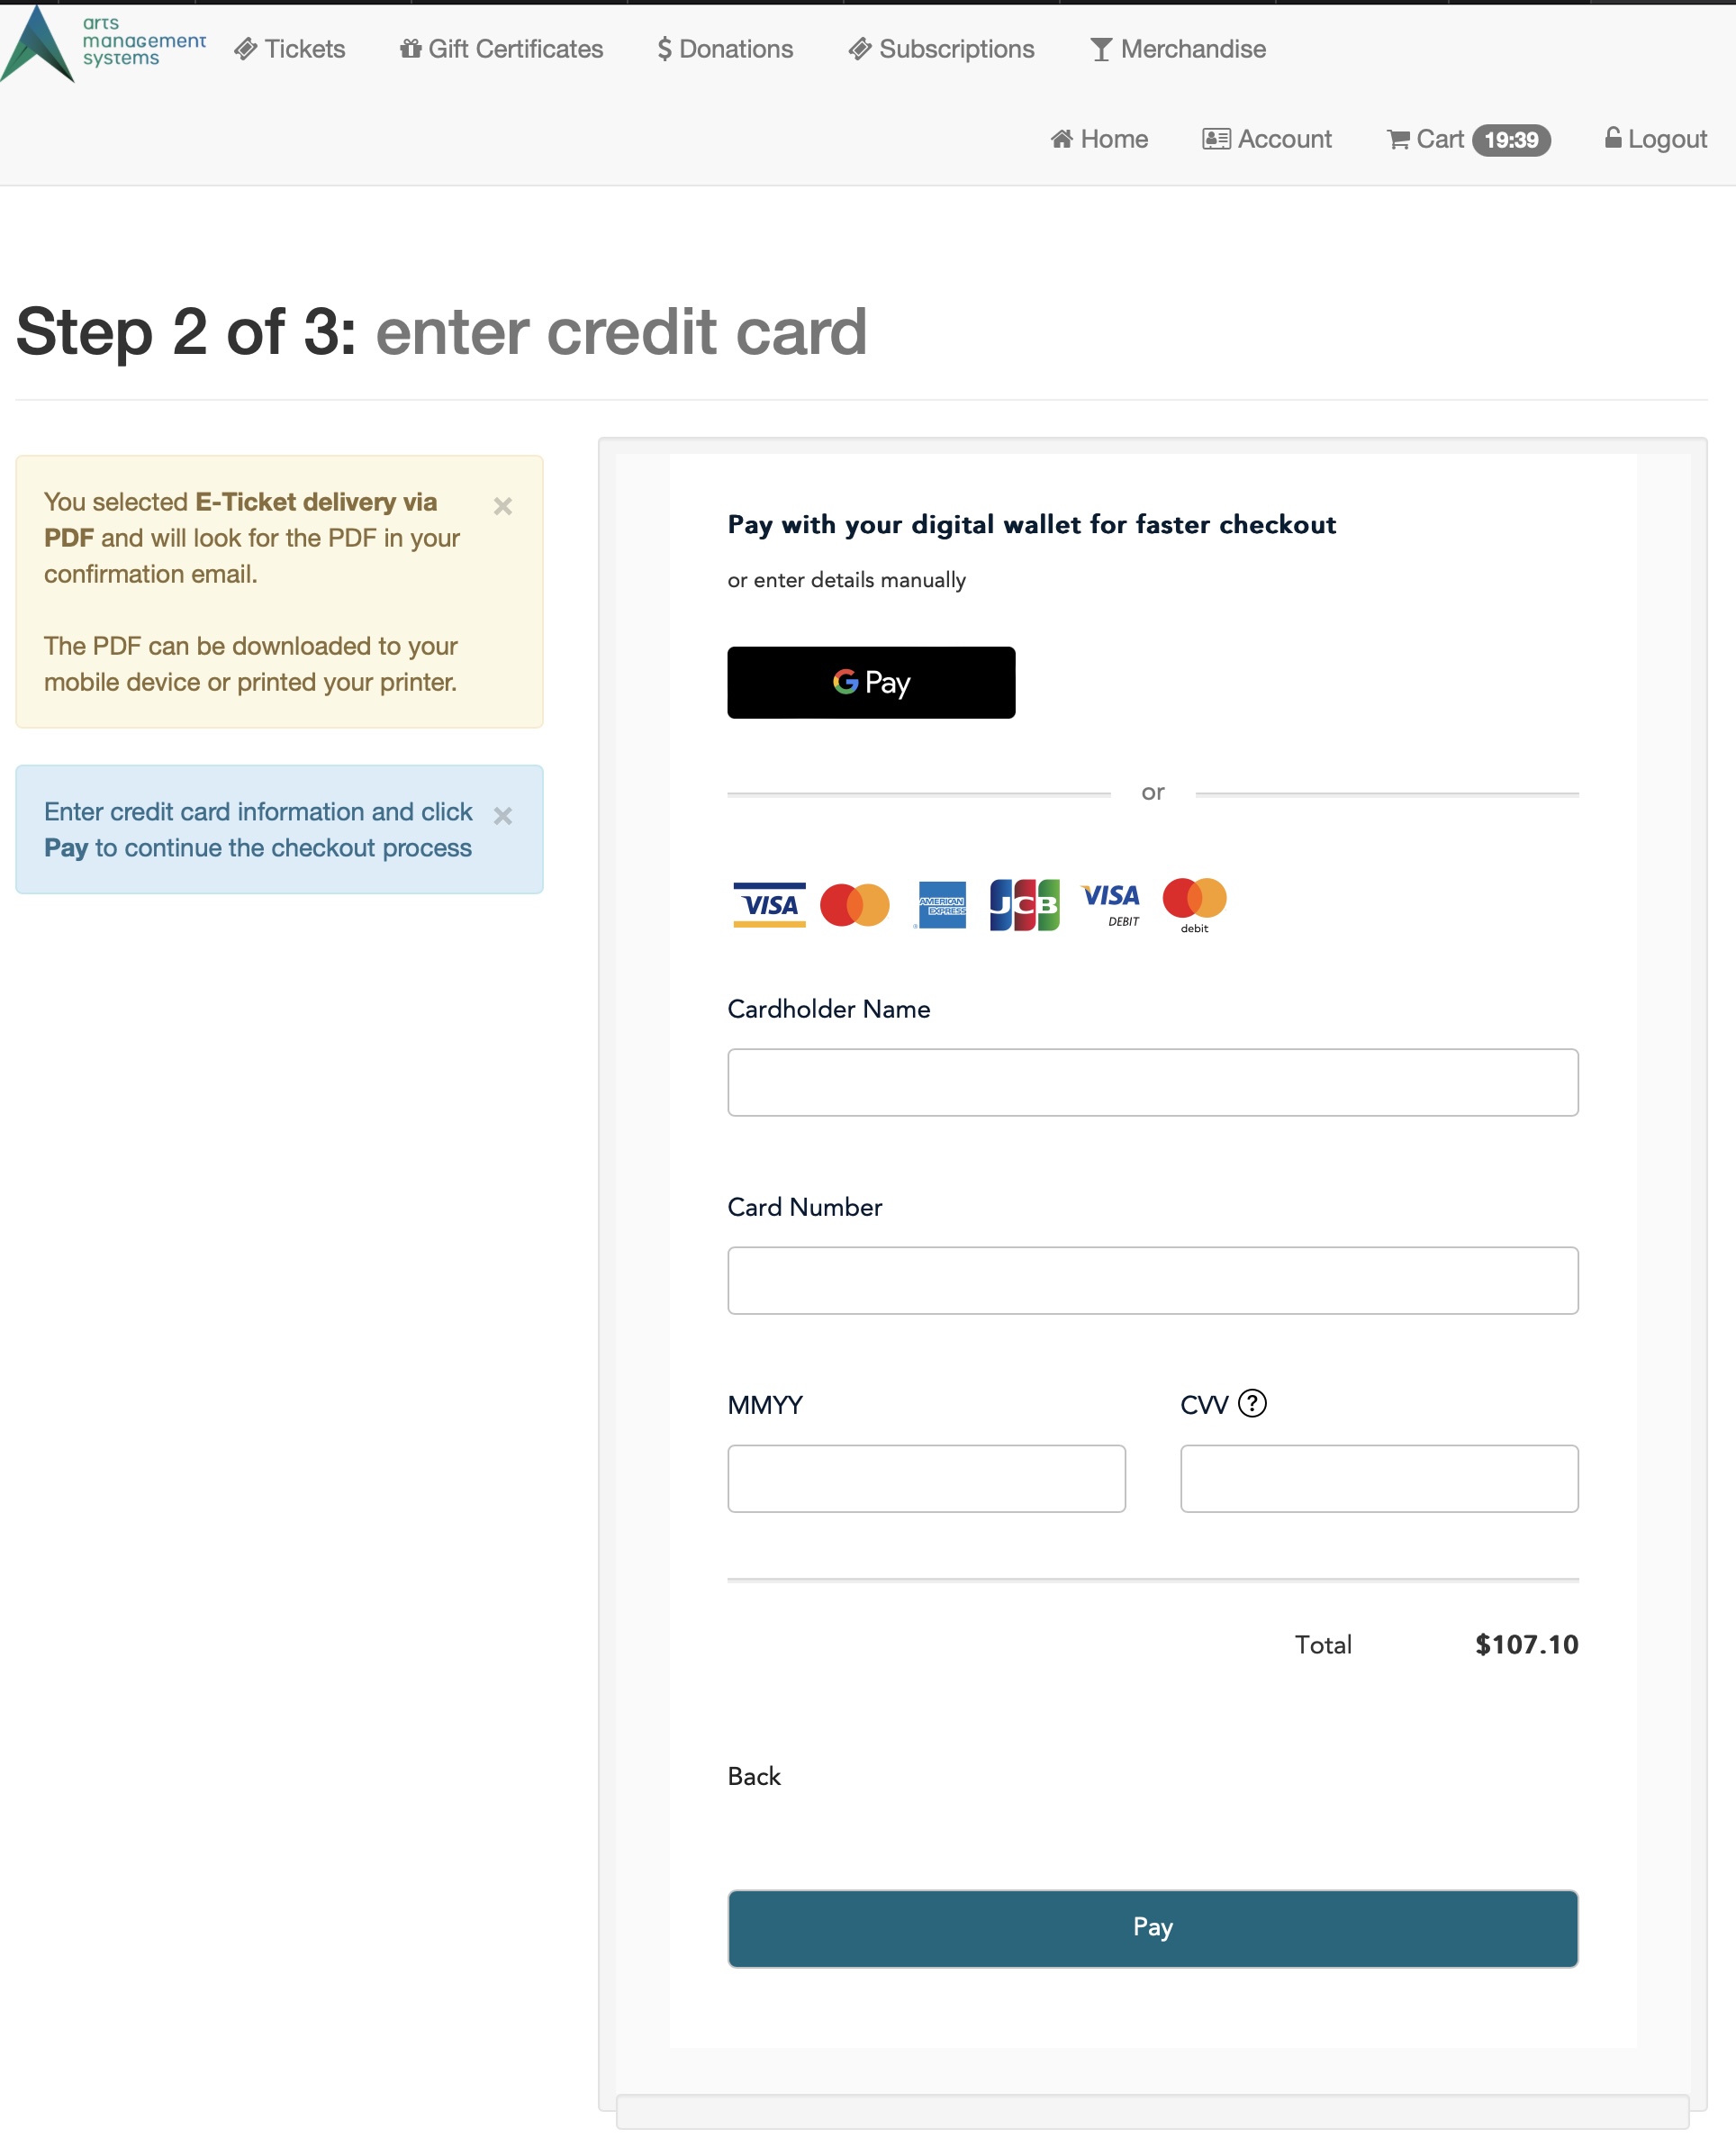 Step 2 shows an example of the actual hosted payment page.
From step 1, the user's browser is directed to the Moneris web site where they enter:
|
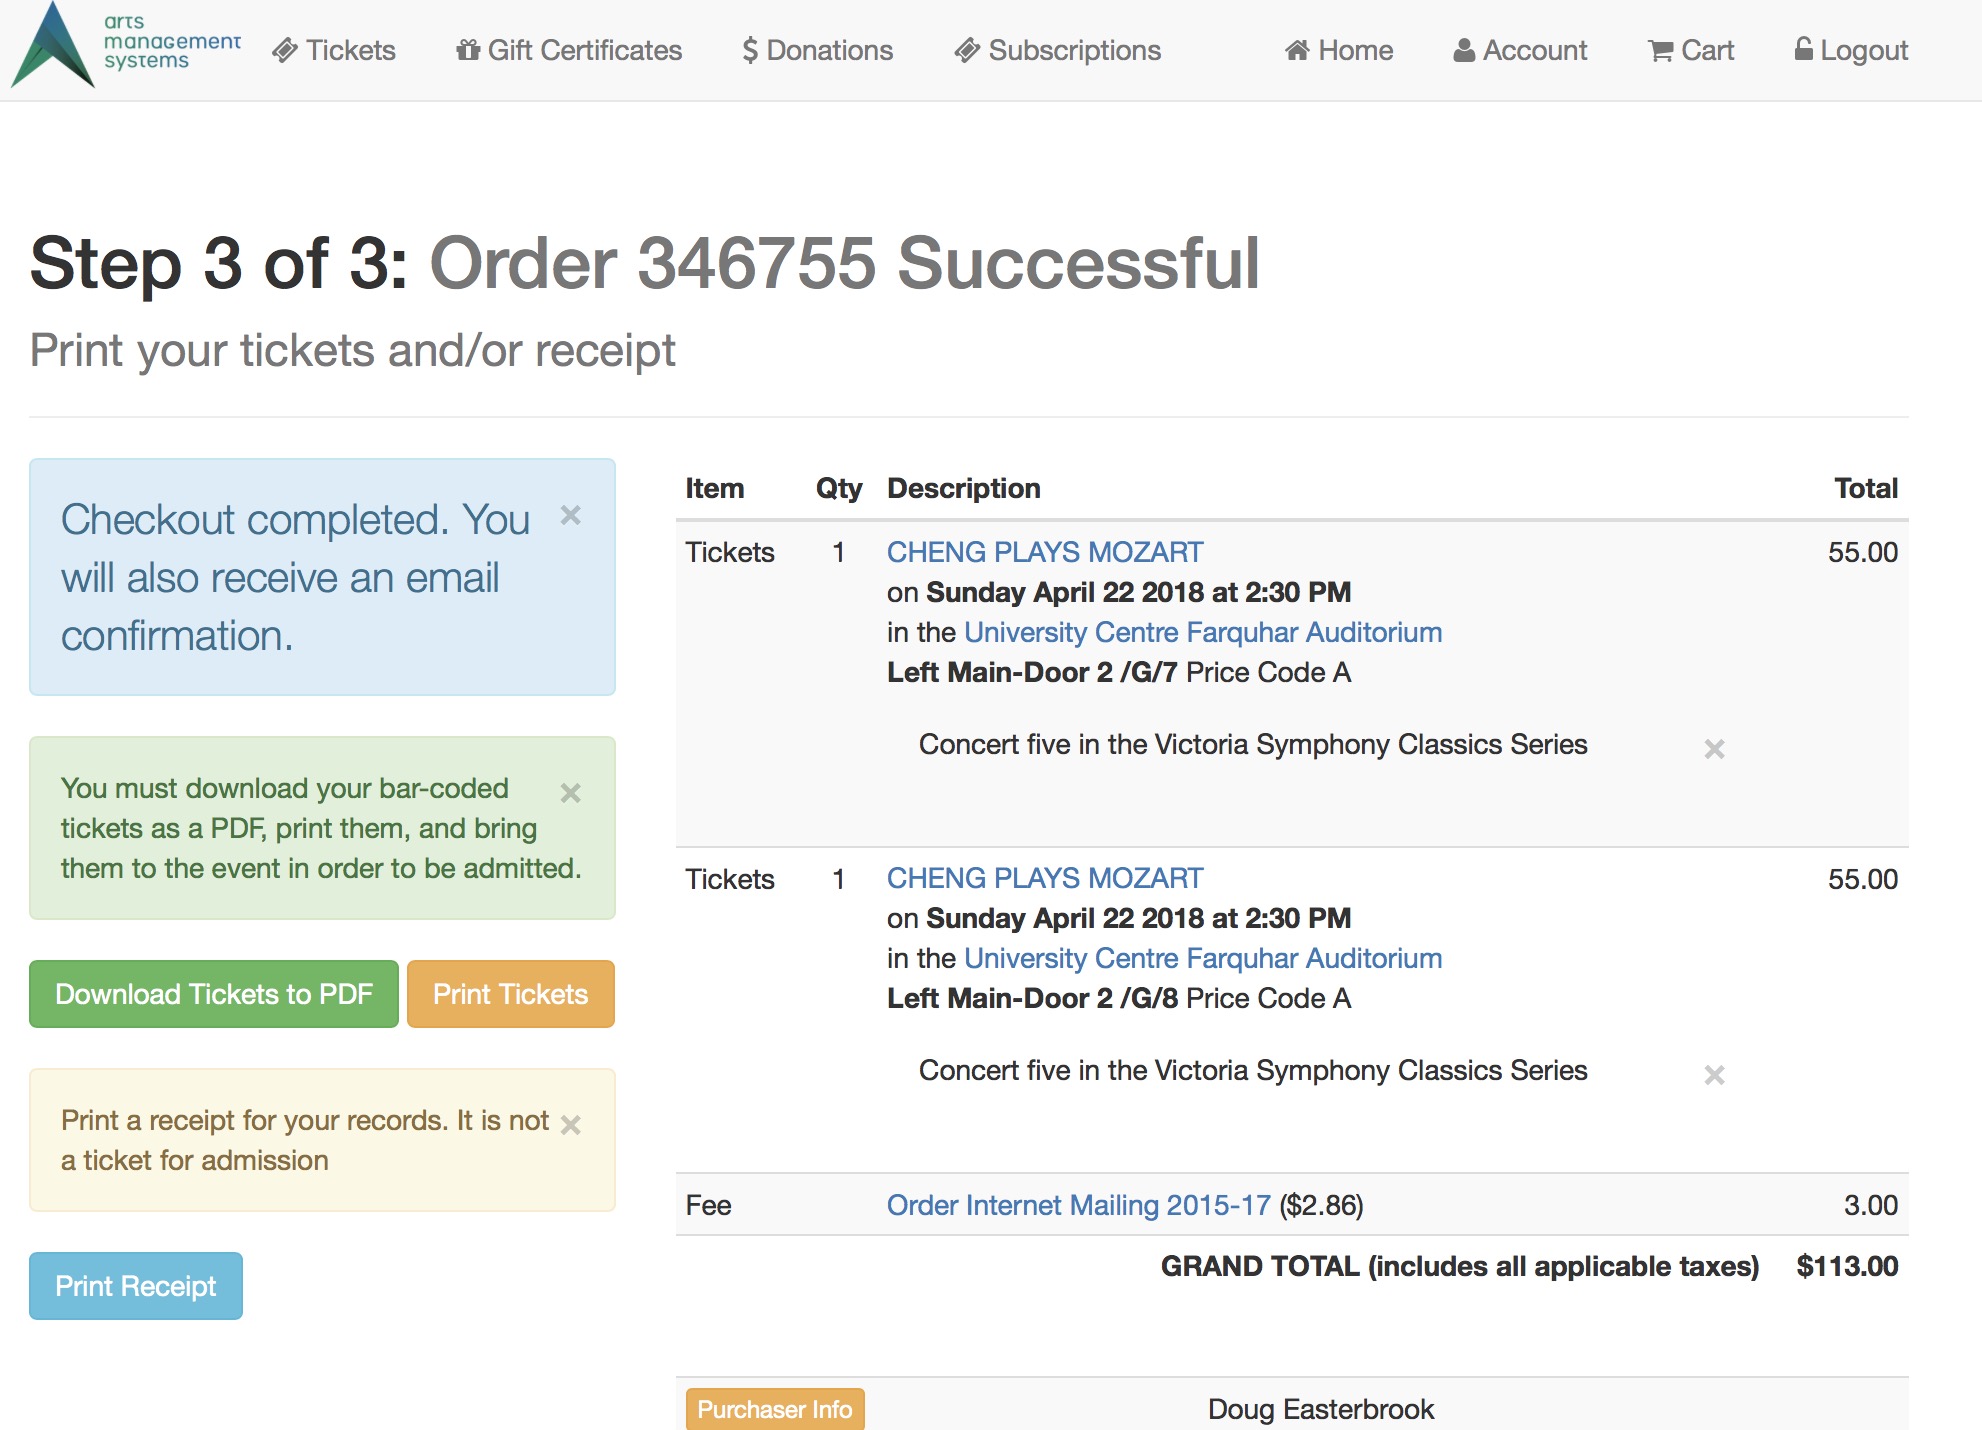 Step 3 remains the same.
This shows the confirmation page where the user can use the print at home feature if enabled. |
Converting HPP to Moneris Checkout
- Log on to your online Moneris E-Select Plus account
- Follow the instructions to make a Moneris Checkout Page and copy the Checkout ID
- Change your merchant settings in Theatre Manager from Hosted Payments to Moneris Checkout (see below)
- Put the Checkout ID into the right place in Theatre Managaer
- tmCheckout.html
- You will have to update the web page if you have altered it in the past.
- If you have not changed it (i.e. it is not in your web page directory), then you are done
- You may need to add some credit card types like JCB, UPAY into code tables
- If you have implemented restrictive outgoing firewall rules, you may need to review those to allow the Moneris checkout page to render in your organization's internal networks. It should not affect any patrons at home
Converting Moneris Hosted Payment to Moneris Checkout
Once you have your Checkout ID, all you need to do is change two things in your merchant setup:
- Complete your current end of day and settle all your credit cards
- Open the Setup->System Tables-> Merchant Account list
- Find the current/active Moneris Hosted Payment Page account in the list and double click on it
- On the Software Type tab
click on the Merchant Provider popup. Change it:
- From Moneris Hosted Pay Page - Deprecated
- To Moneris Checkout

-
On the Connection Info Tab:
- Locate the field called Hosted Checkout ID
- Save the contents of the field from the HPP setup, in case you need to put it back in later to reverse the process back to HPP
- Paste in the checkout ID you created on the Moneris web site
- Save the merchant record
- Go to your online sales and try it out. The checkout process should be similar to the example. If it is not similar, please contact us.
- Go to your online Moneris Portal and make sure that it indicates that the card is authorized
- Try to void the credit card payment in Theatre Manager you just put through online
- Go to your online Moneris Portal and make sure that it indicates that the card is now voided
Moneris Hosted Payment Page (deprecated)
|
In late 2022, Moneris is replacing the Hosted Payment Page option with the Hosted Checkout Page option. It should require a little change to your merchant account setup in order to switch over.
Refer to the conversion process from HPP to Moneris Checkout |
A Moneris Hosted Payment Page is part of the Admin->Hosted PayPage config option.
|
Hosted Payment Page option is used if you want Theatre Manager to switch over to the Moneris site for online credit card payments. It is possible to be SAQ A compliant for your web sales since the web site no longer takes credit cards (Moneris does). |

|
|
If you use hosted payments for web sales, you will also need an E-Select plus account for settlement. Box office sales can use this same merchant account and will automatically authorize against the e-select plus account. This means that you only need one merchant account set up even though it is processing via different pathways, one for web and one for box office. | |
|
Moneris Hosted Payments requires that your web page timeout is 60 minutes in company preferences - it cannot be less. This is because Moneris payment acceptance is 60 minutes and we cannot close carts until their payment page has timed out. | |
|
You may also be able to accept payments like apple-pay online, online interac, verified by visa, etc. Make sure to talk to Moneris about what is possible and what you want to accept. |
Setup Process
The best process to configure this option is:
- Obtain your online portal connection information from Moneris
- Configure all the settings within the online portal
- Use the Theatre Manager Merchant Account Setup for Moneris Hosted Payment Page
- Test:
- Authorizations through the TM Web services
- Attempted Authorizations but Cancel through the TM Web services by going online to buy something (use test cards)
- Verify the display on the web to see that it matches what ou picked in the online portal setup and shows your name and settings you wish
- Voids from Theatre Manager
- End of Day Settlement
Online Portal Setup
Once you are logged into the online account setup, select Admin->Hosted PayPage config option.
You will see a screen similar to below.
- If you see no lines in the list, click the Generate a New Configuration to make the following for Theatre Manager:
- ps_store_id
- hpp_key
- If you see your ps_store_id in the list below, you can edit or verify information by proceeding to the next pages.
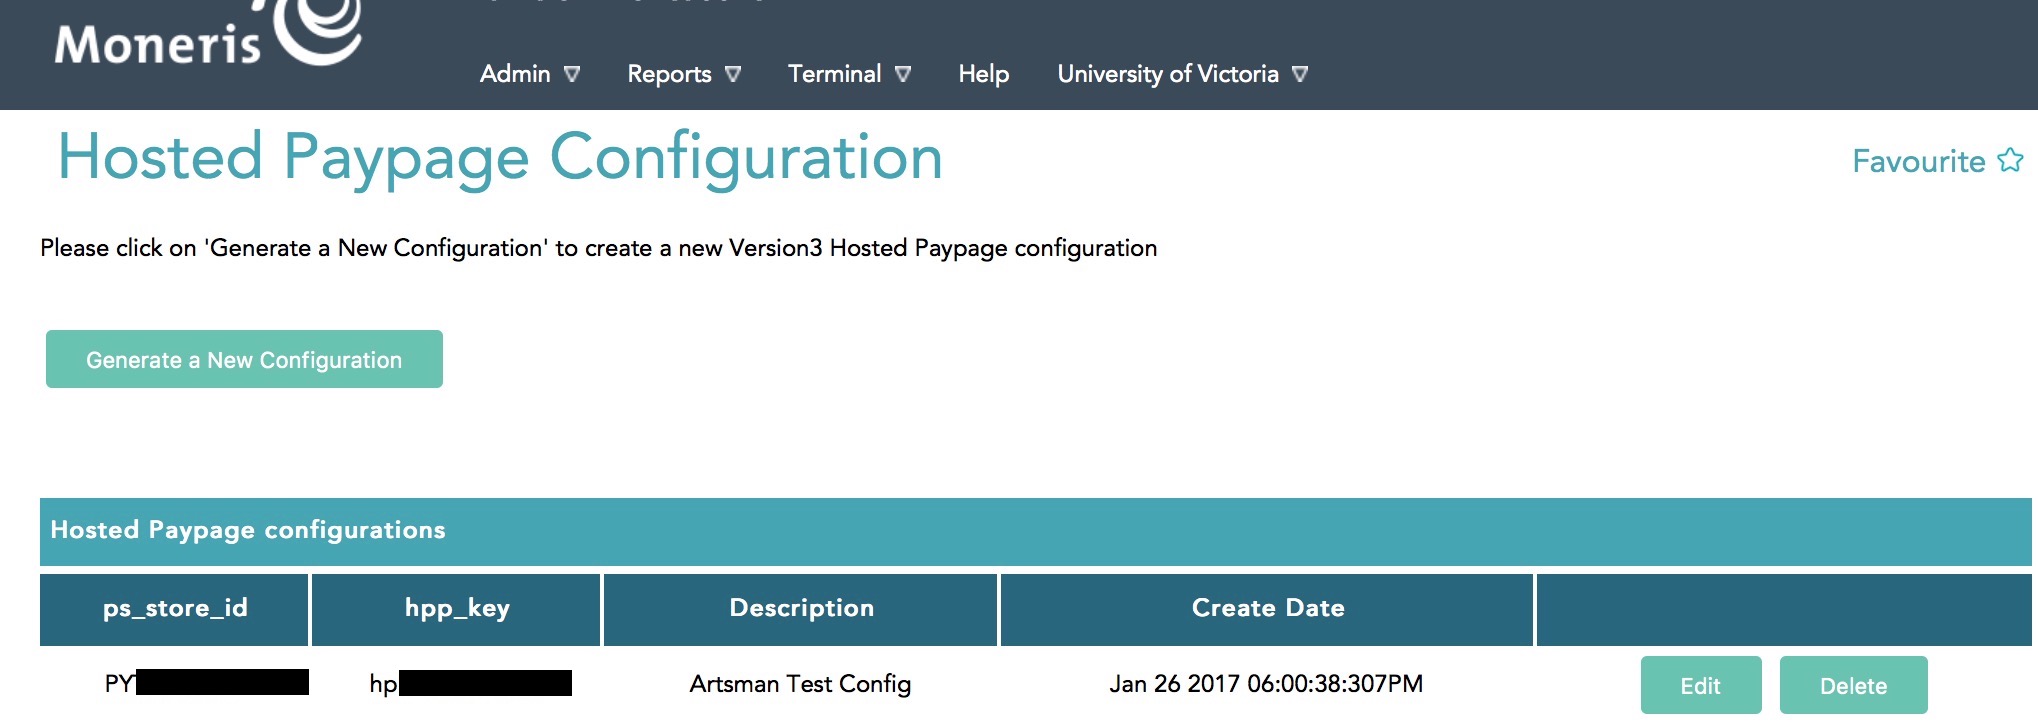
Hosted Paypage Basic Configuration
Once you are logged into the online account setup, select Admin->Hosted PayPage config option.
Once you see your ps_store_id, click the 'Edit Button and you will see a screen similar to below.
Data Setup
Enter data into the window above per the instructions:
- Description - enter a description of the hosted payment page - it could be your venue's name or bank.
- Transaction Type - must be set to Purchase
- Payment Methods - must be Credit Cards
- Response Method - must be Sent to your server as a POST
- Approved URL - must be https://tickets.yourvenue.org/TheatreManager/payment/moneris/approved
- Declined URL - must be https://tickets.yourvenue.org/TheatreManager/payment/moneris/declined
- Use "Enhanced Cancel" - should NOT be checked
- Enable "Response Fallback" - should NOT be checked.
If you change anything on this page, be sure to click Save Changes under this section.
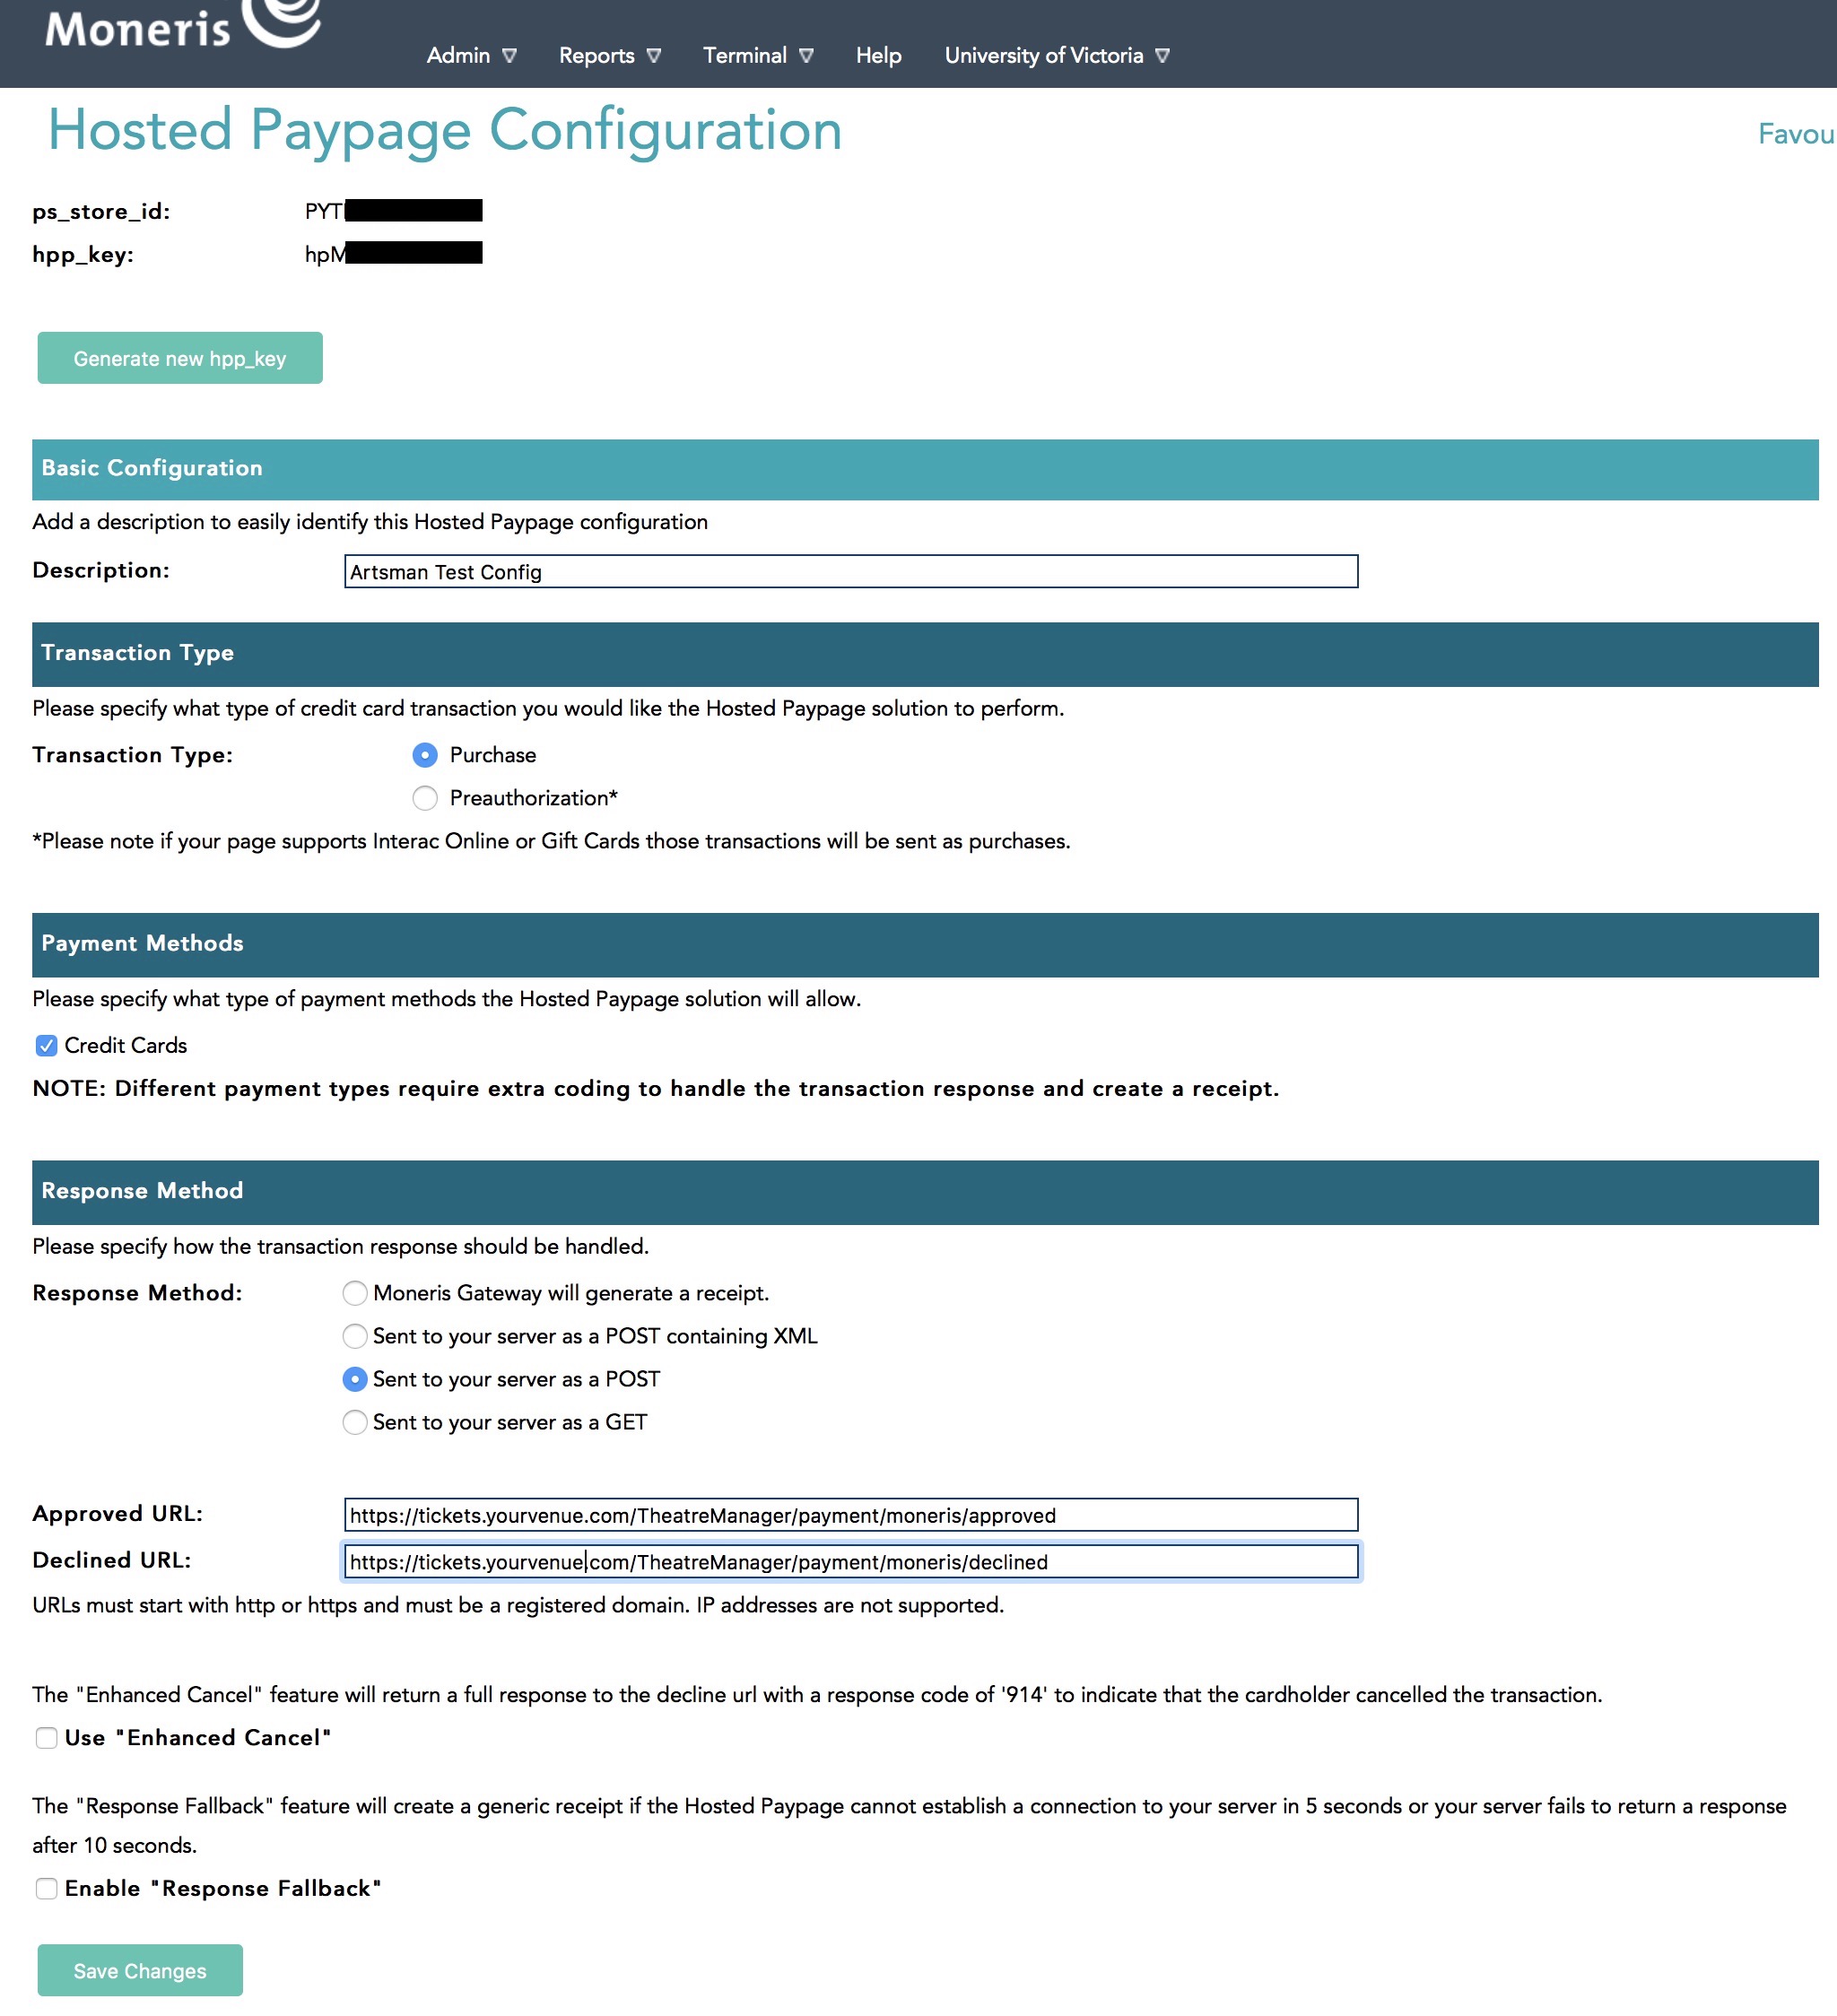
Hosted Paypage Appearance Configuration
Once you are logged into the online account setup, select Admin->Hosted PayPage config option.
Scroll down until you see a section that says Paypage Appearance and click Configure Appearance.

 A new window will open similar to below and the settings you place here control how the hosted payment page will appear to the patron.
Appearance Configuration
At the top are 3 buttons that are helpers for you:
- Hex Colour Chart - which shows colours that can be placed into the 'Colours and styles' area. They are samples in a numeric format with examples. If you are familiar with setting colours of items on web pages, you can use any colour you wish.
- Layout Sample - shows a picture of the various parts of the payment page that can be displayed
- View Preview - will show what your payment page will look like after altering the settings. Our sample is to the right based on settings below
Colours and Styles
In this section, enter the colours for various parts of the payment page window. Use this to set colours as indicated.
Hosted Paypage Data Fields
Make settings as follows:
- Display Item Details - uncheck. Theatre Manager does not send this information to Moneris
- Display Customer Details - uncheck. Theatre Manager does not send this information to Moneris
- Display Shipping Address Details - uncheck. Theatre Manager does not send this information to Moneris
- Display Billing Address Details - uncheck. Theatre Manager does not send this information to Moneris
- Enable input of Billing, Shipping, and extra fields - uncheck. Theatre Manager does not respond to this data if enabled
- Display Merchant Name - Check this if you wish - it will display your merchant name from elsewhere in the Moneris config
Buttons
There should only be two things to set here:
- Cancel Button Text - enter the words that you want to show to the user should they decide that they do not want to continue with authorization. Could be word like 'Cancel', 'Cancel Transaction','I Give up', 'Go Back to Cart', etc. Make sure and try an authorization so that you like what it says and that it is consistent with the behaviour of the window
- Cancel Button URL - must be https://tickets.yourvenue.org/TheatreManager/payment/moneris/cancelled where tickets.yourvenue.org is the URL to your ticketing web site
Hosted Paypage Input Fields
The settings are:
- Display CVD Input (Credit Card Only) - we suggest checking this to allow input of the number on the back of the card
- Display AVS Input (Credit Card Only) - (optional) check this to allow input of address info for address verification if you wish customers to provide it. It does not go to Theatre Manager
- Postal Code Input Only) - (optional) if you want address verification, this restricts address input to the postal code only. its probably the preferred option for AVS checking
Logos
If you wish, you can click on the credit card logos that you accept. It simply displays the logo on the payment page.
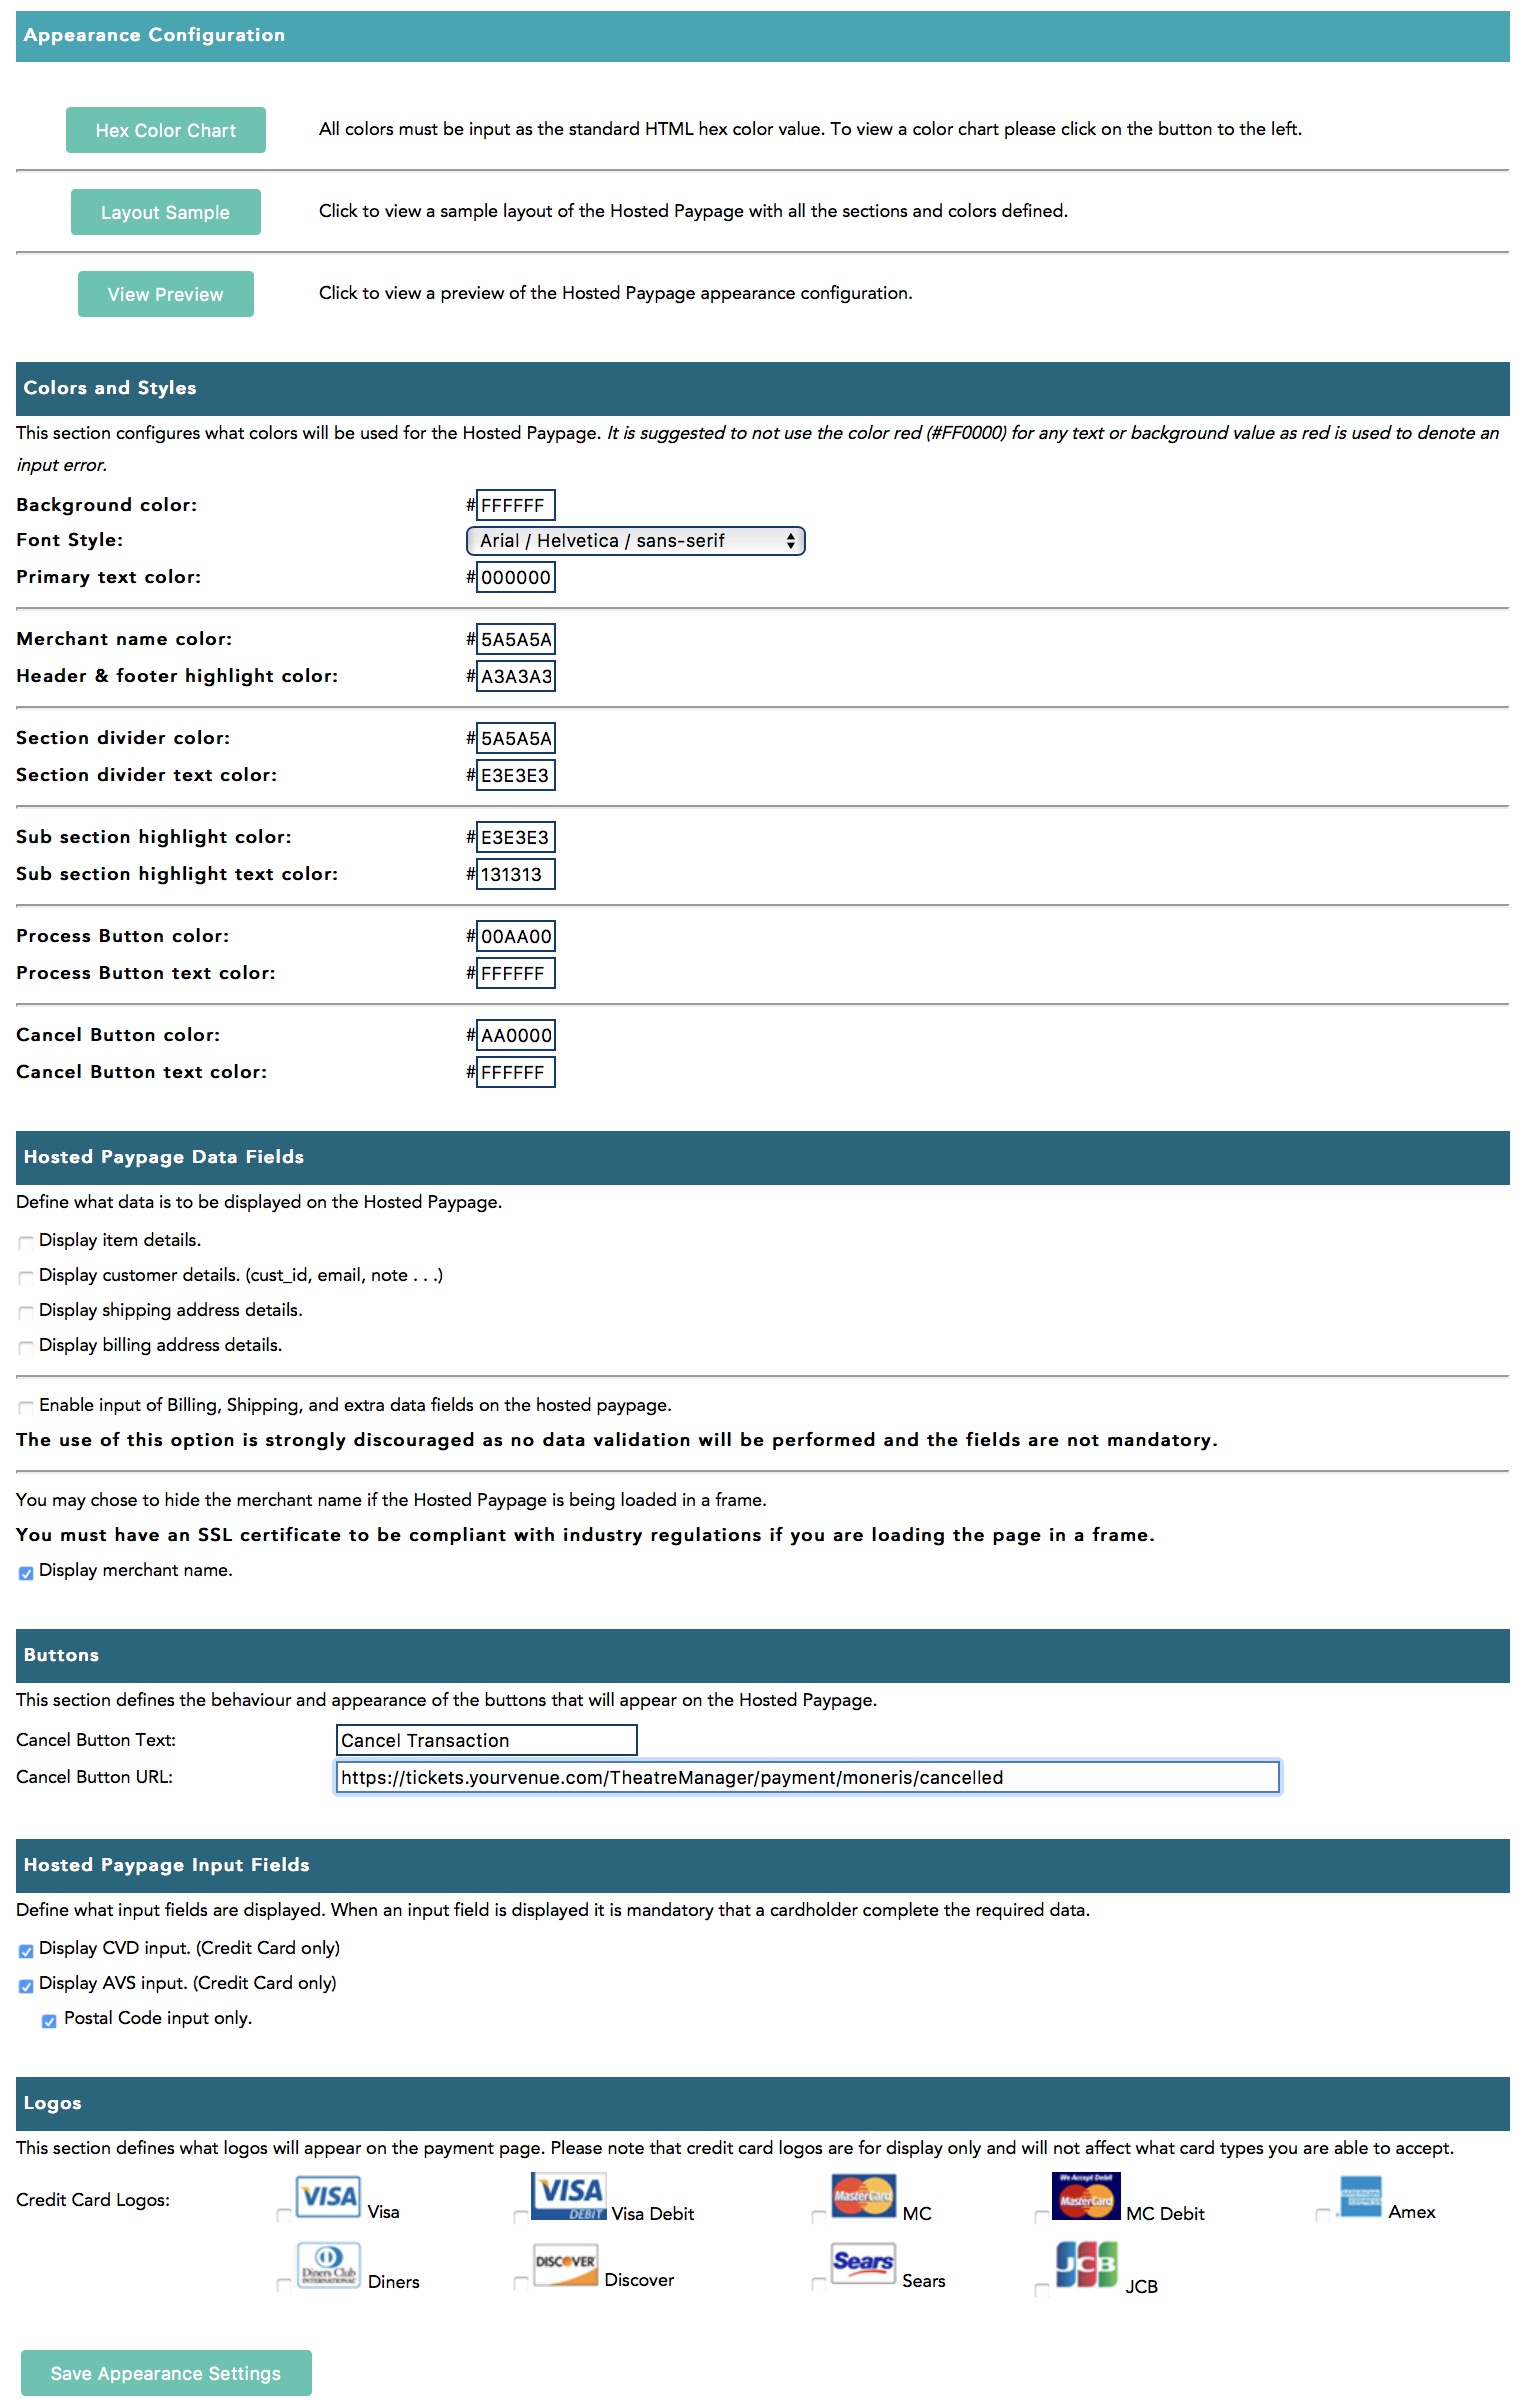
Hosted Paypage Response/Receipt Data
Once you are logged into the online account setup, select Admin->Hosted PayPage config option.
Scroll down until you see a section that says Response/Receipt Data and click Configure Response Fields.

Response/Receipt Field Configuration
Set the options as follows:
- Return line item details - uncheck this, it is not used by Theatre Manager
- Return shipping details - uncheck this, it is not used by Theatre Manager
- Return billing details - uncheck this, it is not used by Theatre Manager
- Return other customer fields - uncheck this, it is not used by Theatre Manager
- Return ECI value - uncheck this, it is not used by Theatre Manager
- Return the txn_number. - you MUST CHECK THIS as it can be used in Theatre Manager to void transactions
- Return the VBV value - uncheck this, Verified by Visa is not used by Theatre Manager
- Return Visa Debit card indicator - uncheck this, it is not used by Theatre Manager
- Return AVS data - only CHECK THIS if you are wanting Moneris to check the postal code and you've allowed it as input on this screen
- Encode carholder name - allows multi byte characters - you MUST CHECK THIS since Theate Manager understands unicode characters - allows customers to put accents in their names.
- Automatically promptcardholder for a new card after a decline - check or uncheck this you wish
Asynchronous Transaction Response
Set the options as follows:
- Perform asynchronous data post - you MUST CHECK THIS as Theatre Manager relies on this feature to tell it what is going on during the credit card authorization
- Async Response URL - this must be https://tickets.yourvenue.org/TheatreManager/payment/moneris/verification where tickets.yourvenue.org is the URL to your ticketing web site
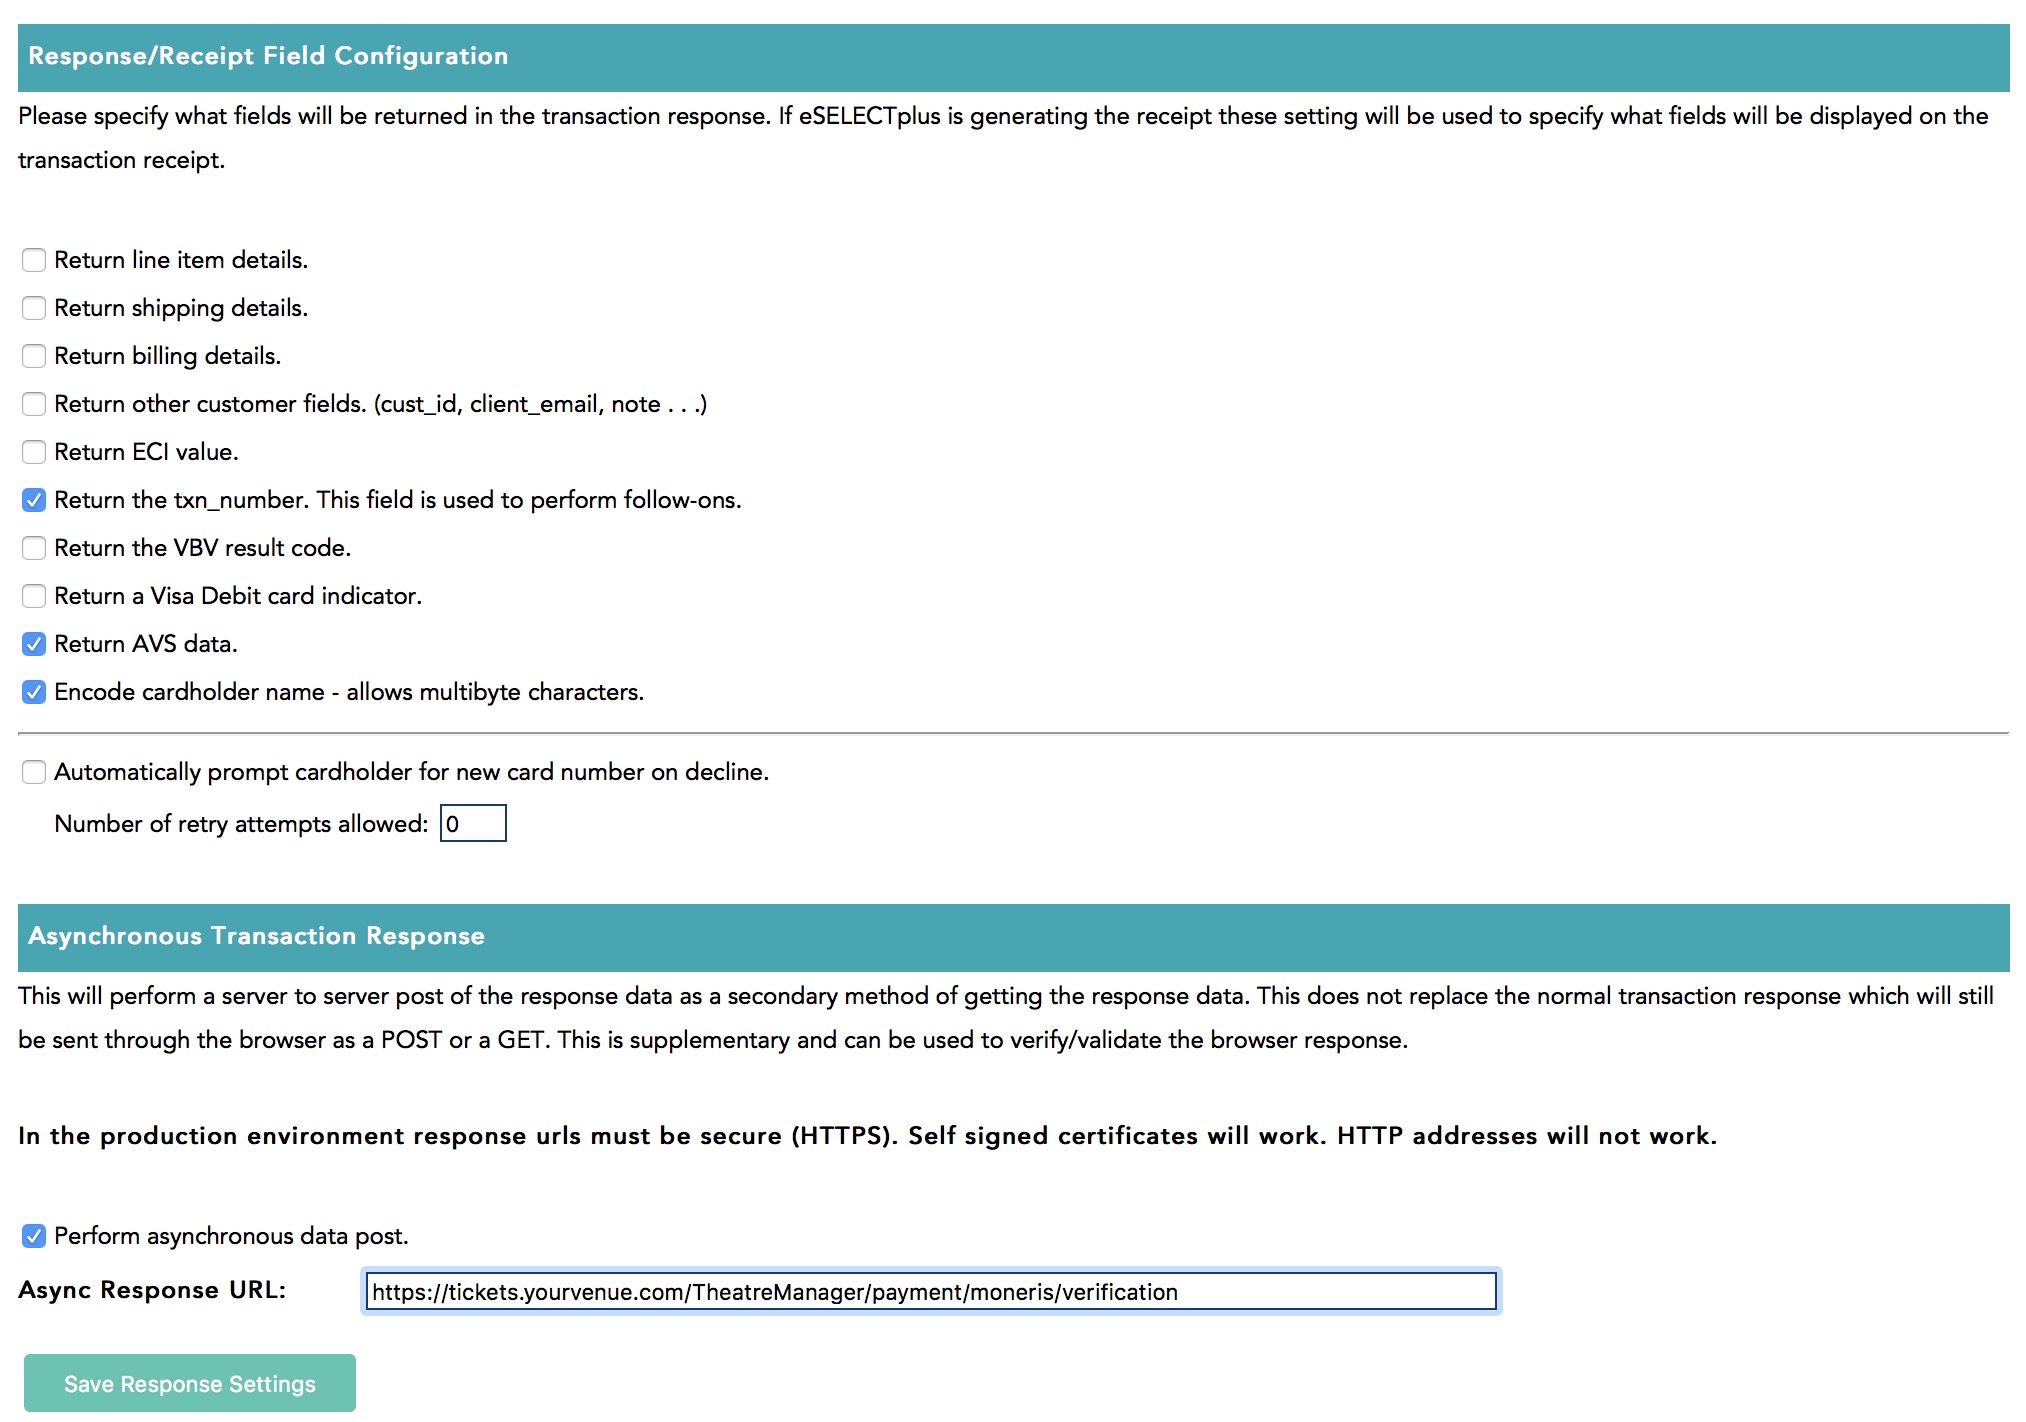
Hosted Paypage Security Features
Once you are logged into the online account setup, select Admin->Hosted PayPage config option.
Scroll down until you see a section that says Response/Receipt Data and click Configure Response Fields.

Referring URL
- Leave all data blank
Transaction Verification
- Non of the fields are required for processing. The can be left blank or unchecked
- The Referring URL section contains an Add URL: field. The ticketing site, https://tickets.yourvenue.org, can be added to this field to ensure it's the only source for processing.
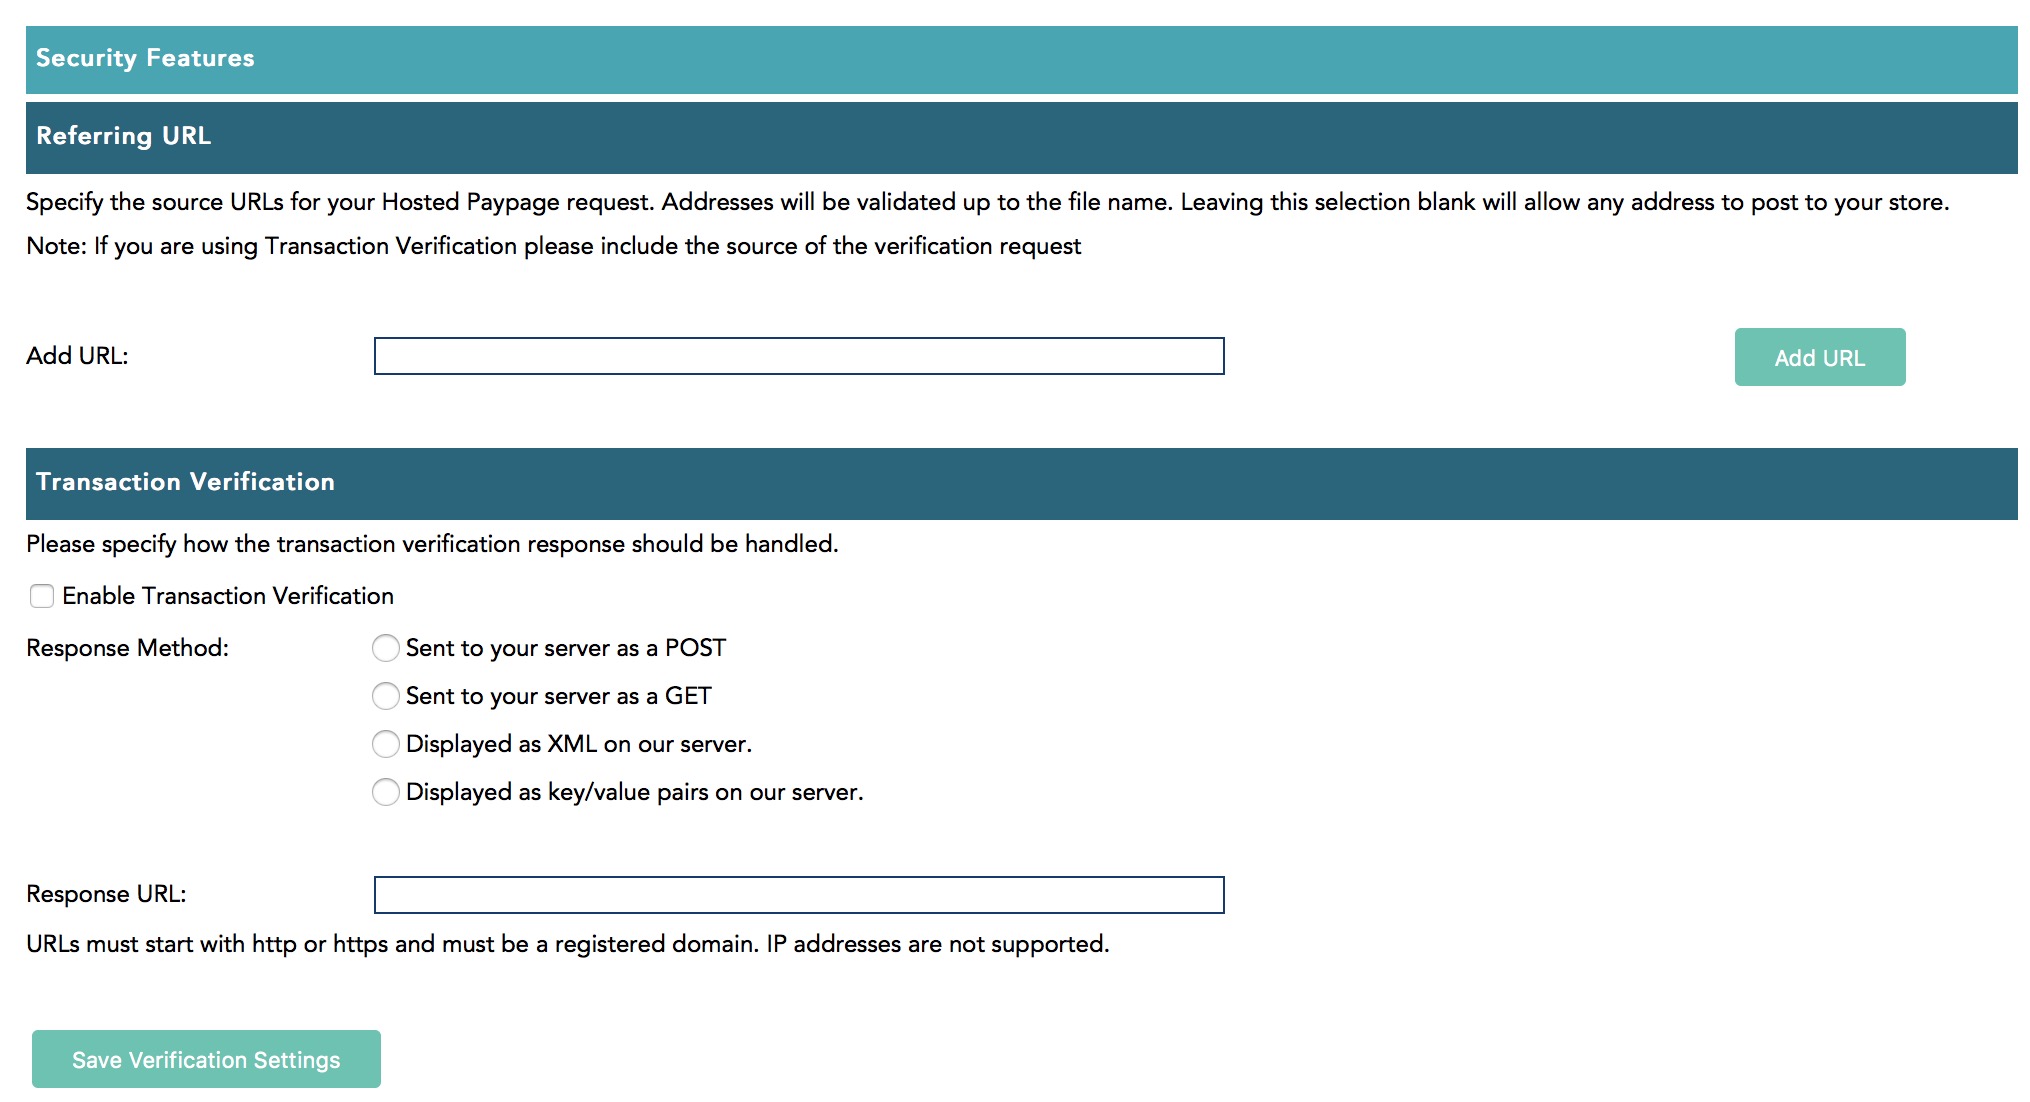
Moneris Hosted Payment Email Receipts
Once you are logged into the online account setup, select Admin->Hosted PayPage config option.
Scroll down until you see a section that says Email Receipts and click Configure Email Receipts.

Receipt Conditions
Theatre Manager handles all confirmation of purchases to the patron. This section is not used, although, if you wish, you might want to send emails to the MERCHANT' for audit purposes.
- Leave all data blank or unchecked.
Receipt Appearance
Theatre Manager handles the receipt to the patron.
- Leave all data blank or unchecked
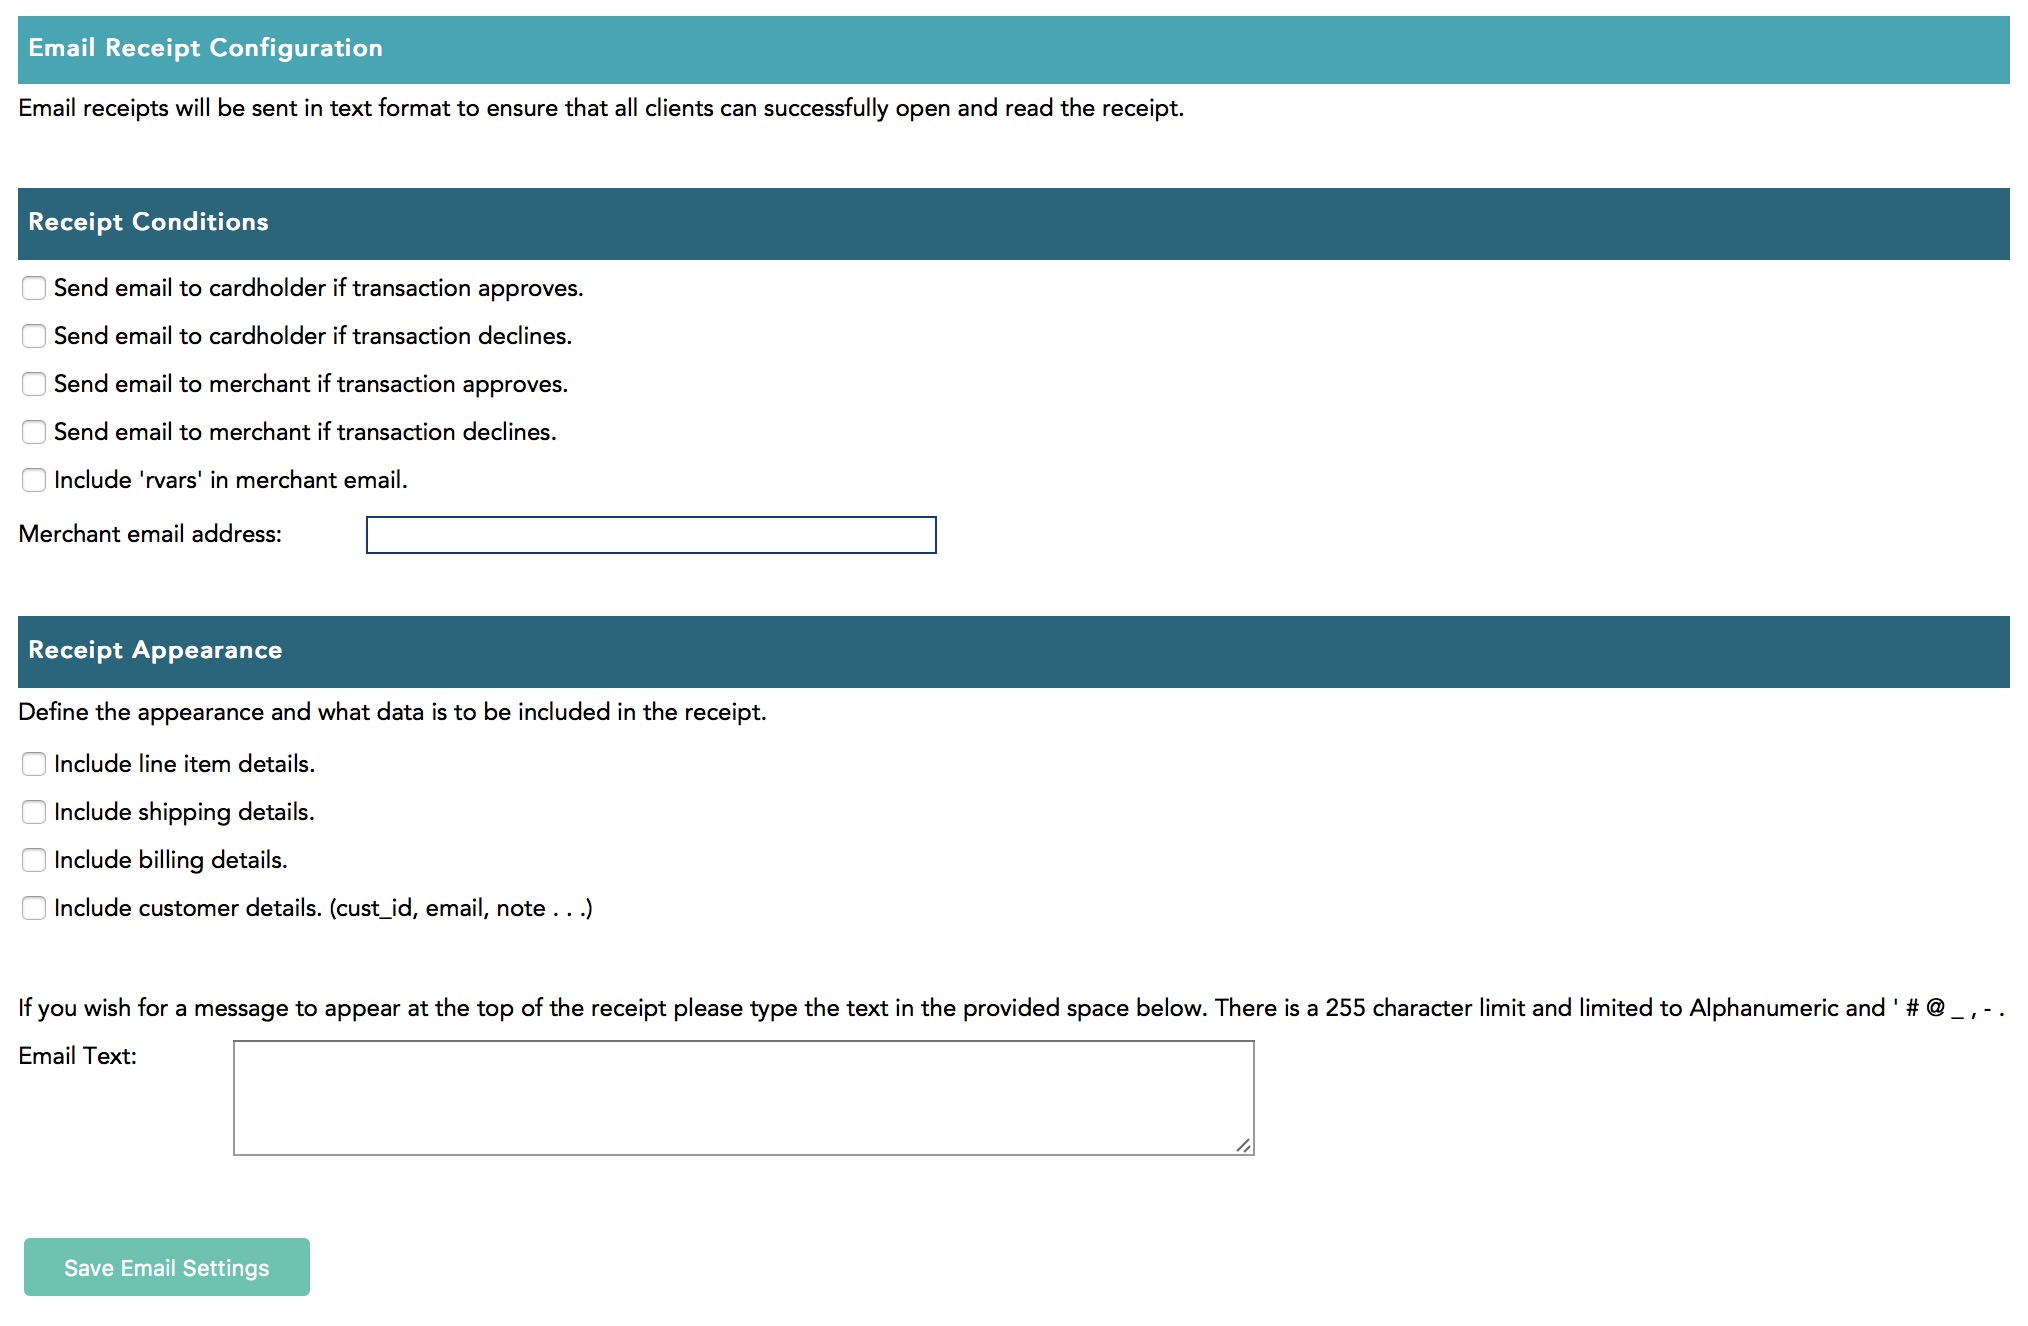
Theatre Manager Setup
Once the Moneris account has been activated and all the information in the following list has been obtained, the Merchant Account in Theatre Manager can be set up on each of the tabs that follow:
- Server Software - Moneris (setting selected in TM)
- Merchant Provider - Moneris (Hosted Pay Page) (setting selected in TM)
- Main Store Id - xxxxxxxxxx (provided by Moneris merchant services and used to login to Moneris online portal)
- ps_store_id - xxxxxx (generated in Moneris online portal)
- hpp_key - xxxxxx (generated in Moneris online portal)
- Primary URL for LIVE authorizations - www3.moneris.com/gateway2/servlet/MpgRequest
- ECR Number - 66xxxx (provided by Moneris on the setup information)
- api_token - obtained from the Moneris online portal
Tabs with specific setup info are described in the following help pages. Other tabs like the Employees and Cards tabs are populated the same as described here.
Moneris Hosted Payment Software Type
- Account Name - enter a description indicating that the purpose of this account is for Hosted Payments
- Status - click to make it active, if not already
- Enable Card Use by Web Listener - click to make it active, if not already. Hosted Payment Page can be used for online sales to try to be PCI Schedule A compliant
- Server Software - Moneris (setting selected in TM)
- Merchant Provider - Moneris (Hosted Pay Page) (setting selected in TM)
- Main Store Id - xxxxxxxxxx (This is your Moneris Store # provided by Moneris. It should be a combination of letters and numbers. This is NOT your Merchant # OR ps_store_id. If the Moneris Store # is incorrect, Theatre Manager will NOT be able to close the credit card batch on the gateway server.)
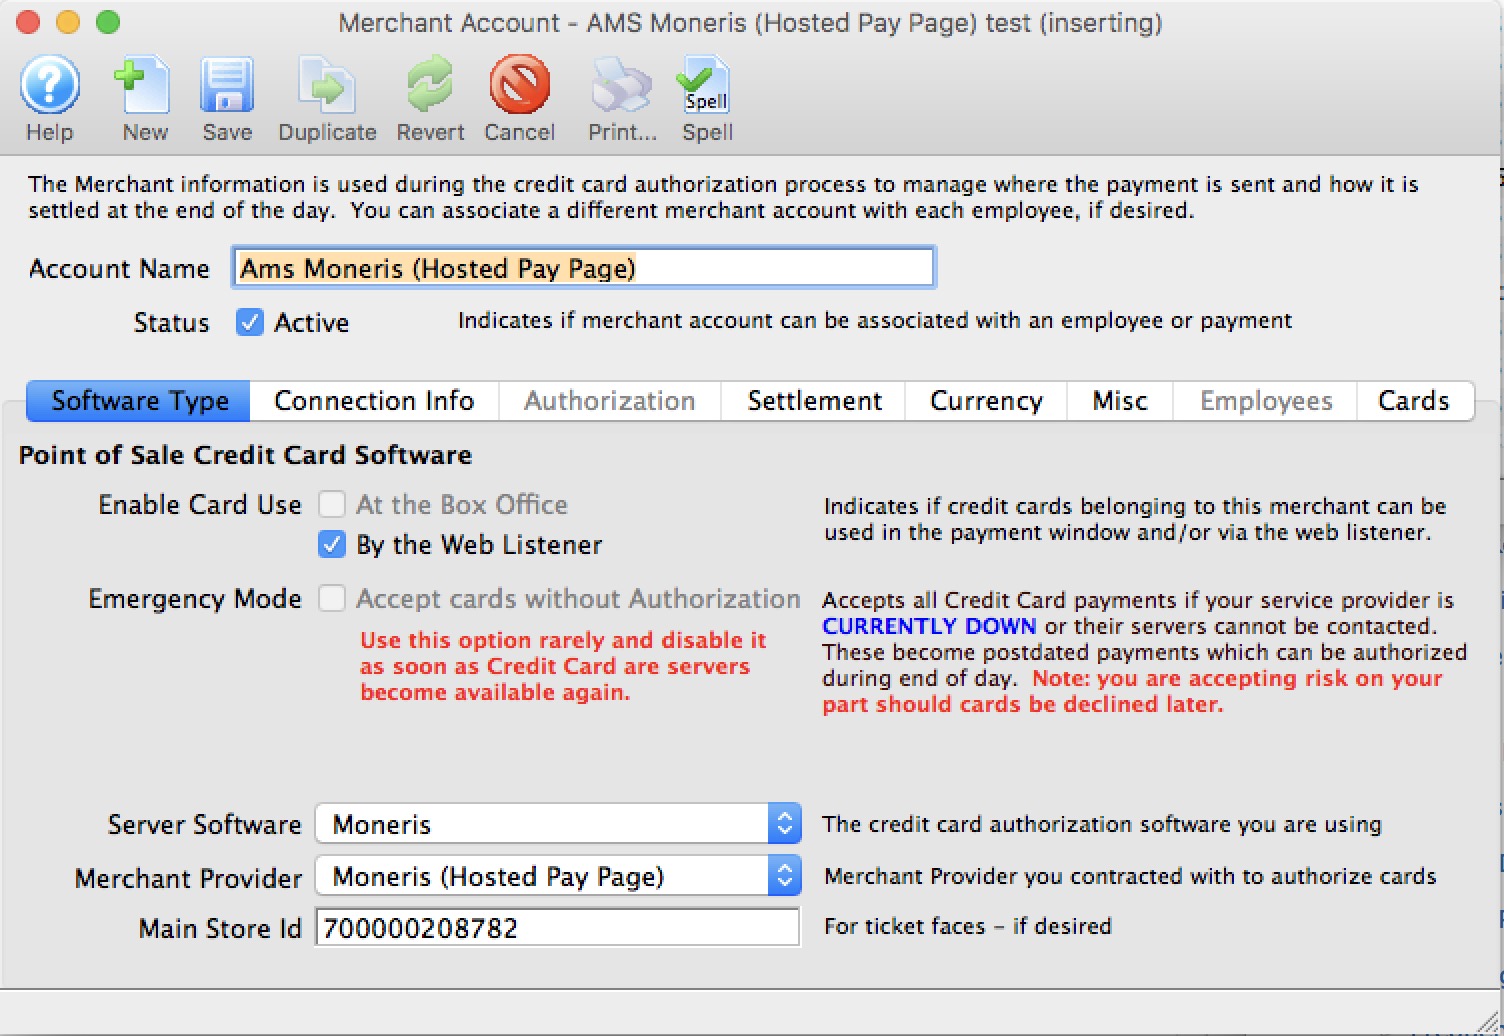
Moneris Hosted Payment Connection Info
- ps_store_id - xxxxxx (generated in Moneris online portal)
- hpp_key - xxxxxx (generated in Moneris online portal)
- Authorization URL - automatically set for you
- Settlement URL - automatically set for you
- Authorization URL - must be esplus.moneris.com/DPHPP/index.php
- Settlement URL - must be esplus.moneris.com/gateway_us/servlet/MpgRequest
- Port - must be 443
- ECR Number - 66xxxx (provided by Moneris on the setup information)
- api_token - obtained from the Moneris online portal
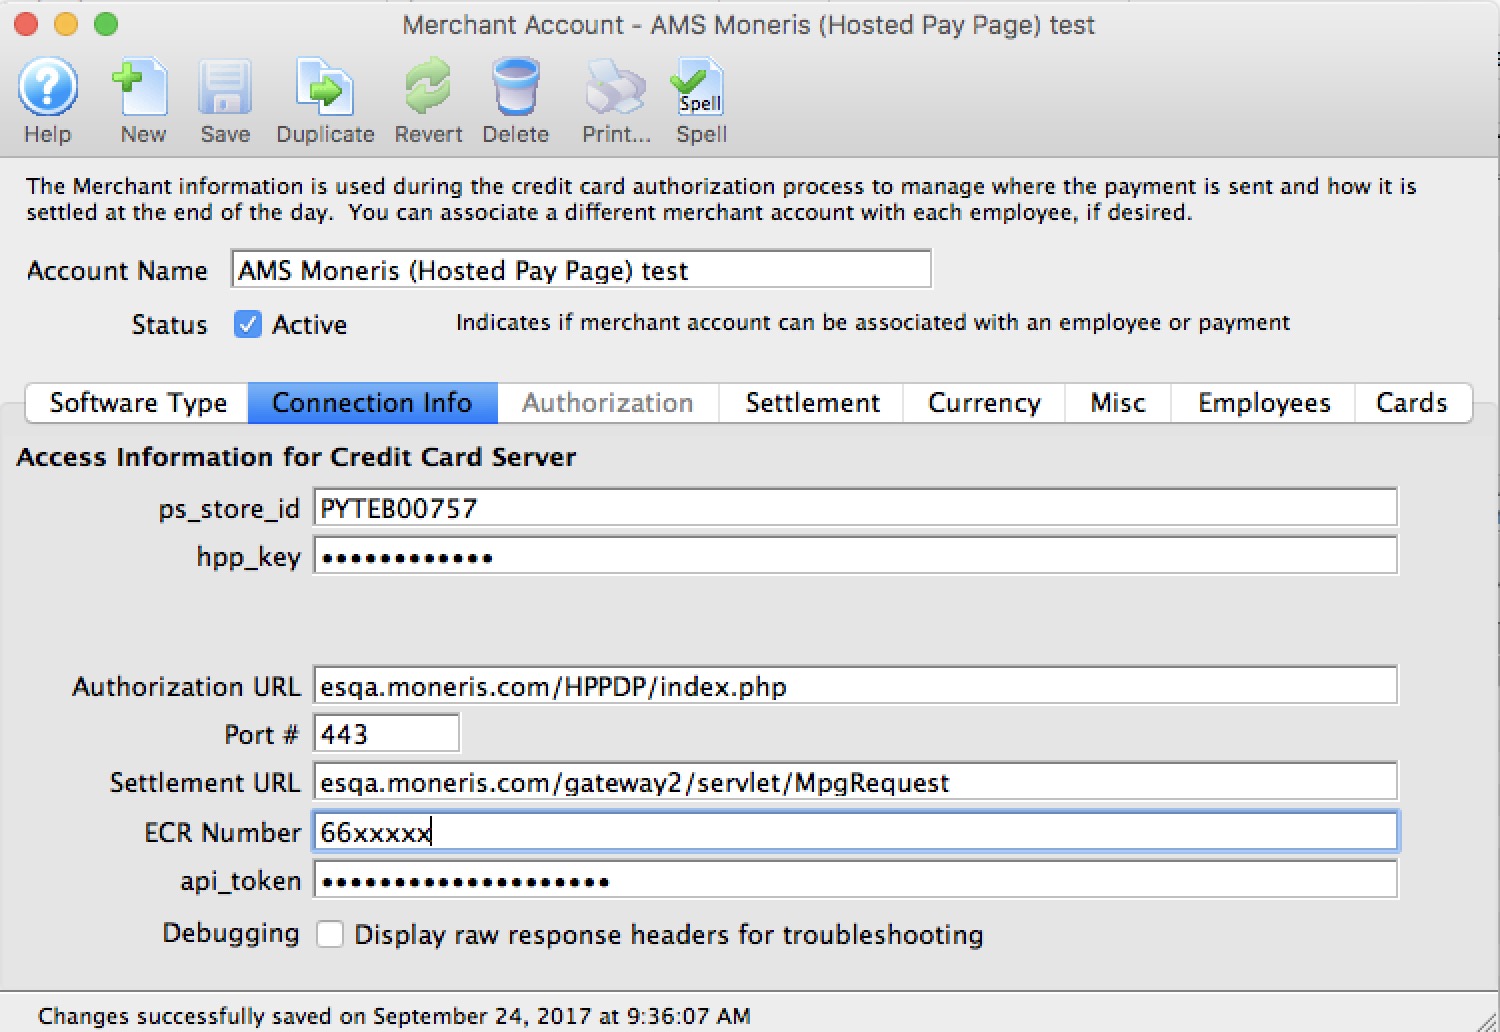
The Web Experience
|
It is very important to note that the credit card is being entered from the user's browser directly into the Moneris web site. This allows a venue to have:
|
|
Step 1 of the checkout process illustrates that most of the checkout window appears the same.
The singular difference is that the credit card entry data is missing. Card entry shows up un step 3. |
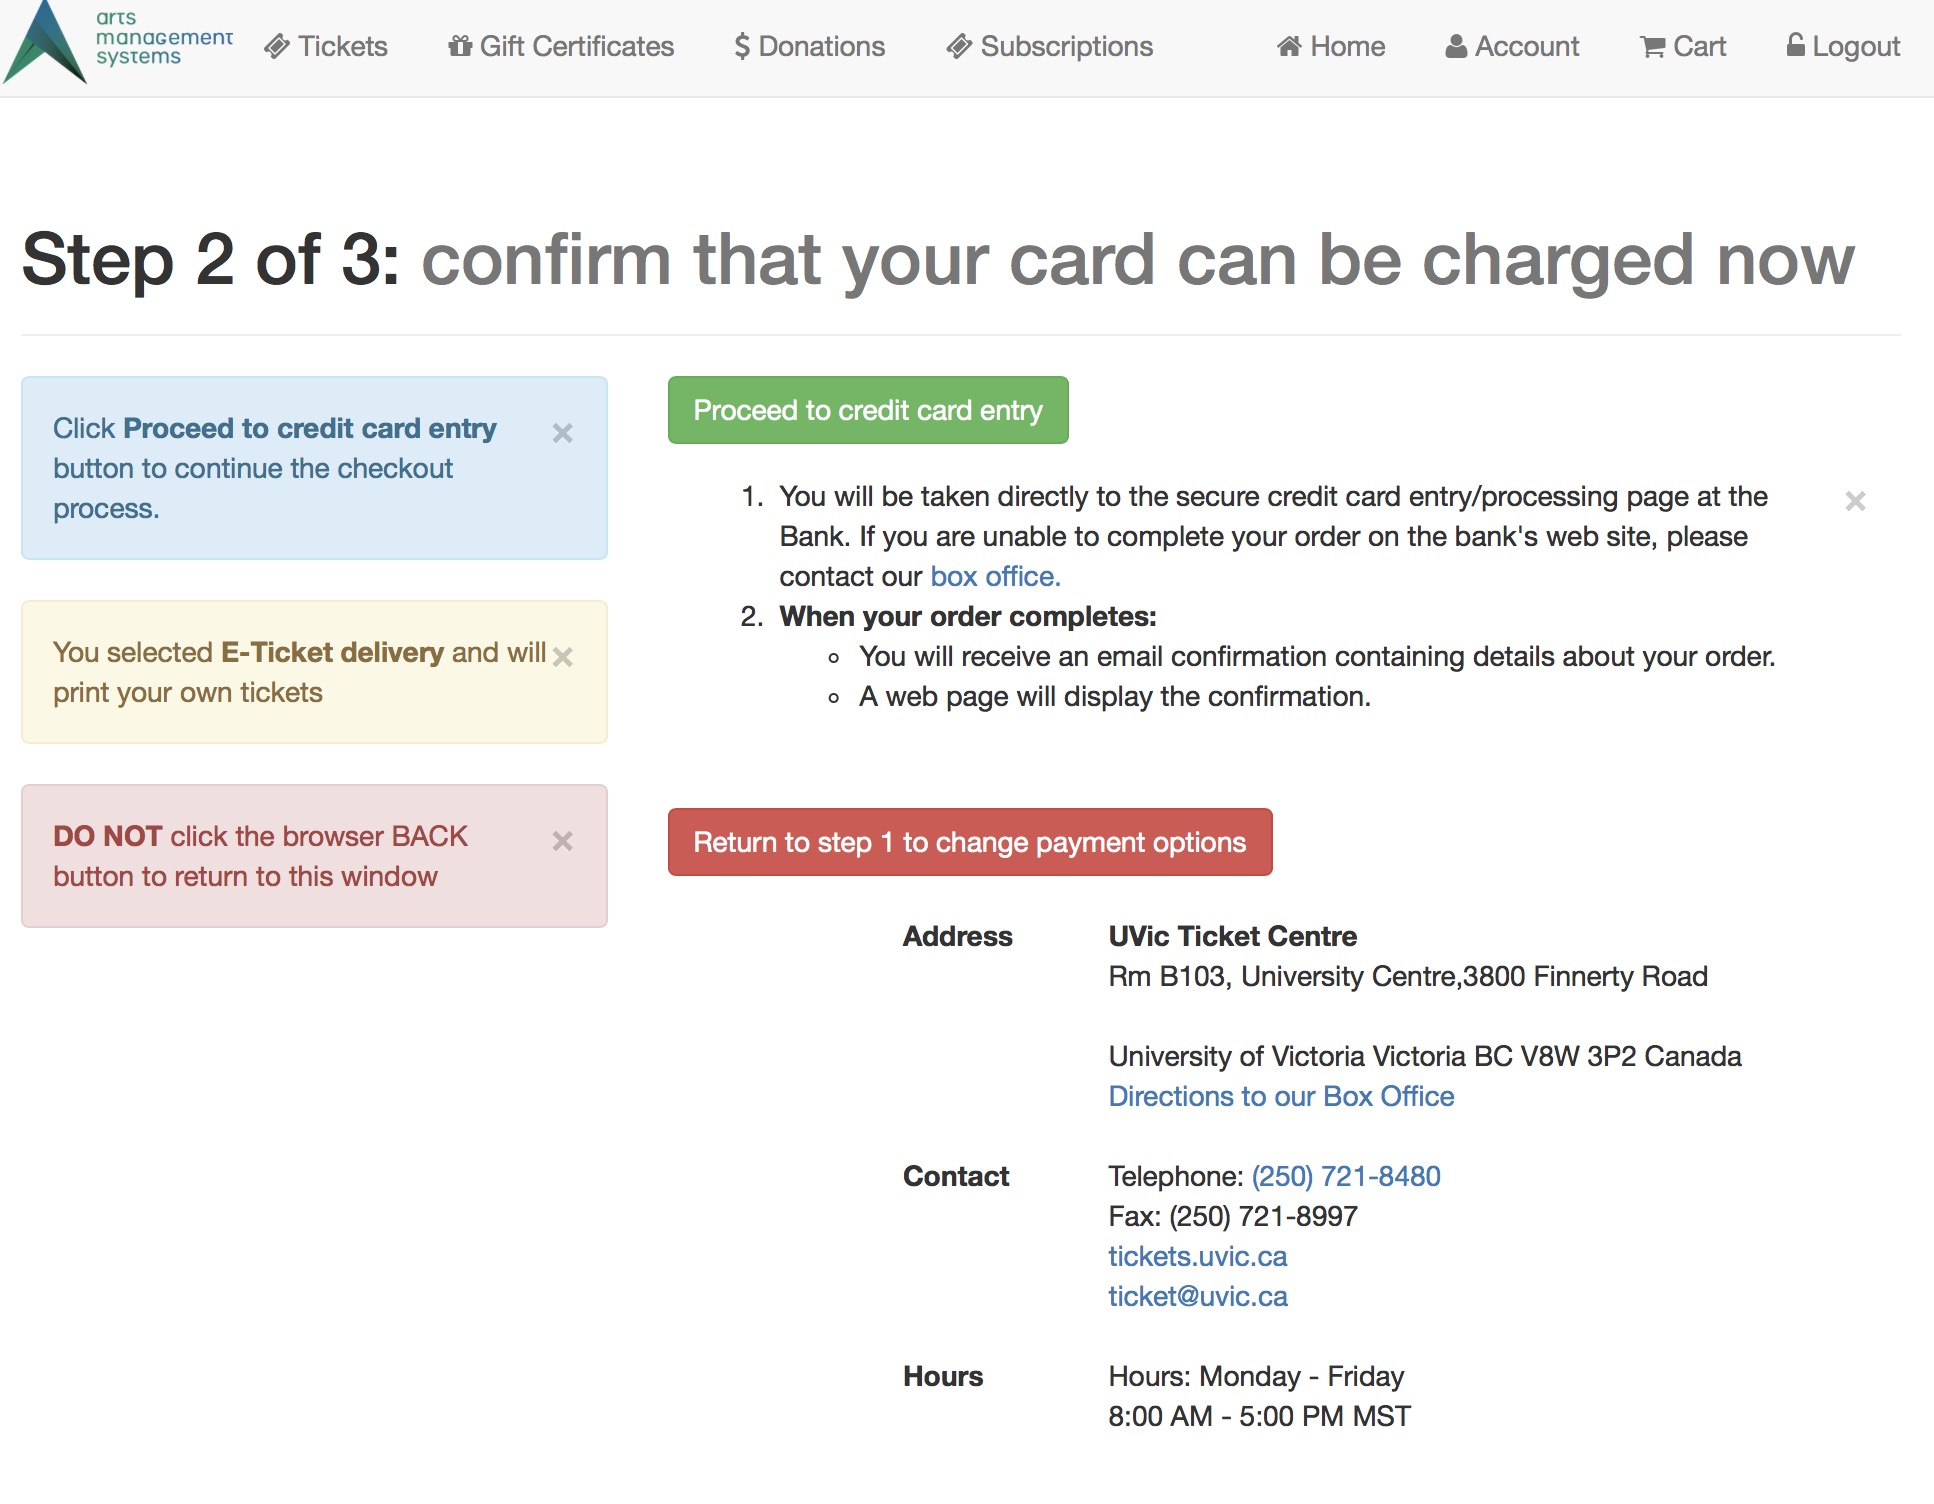 Step 2 remains the same. The user can continue or go back.
|
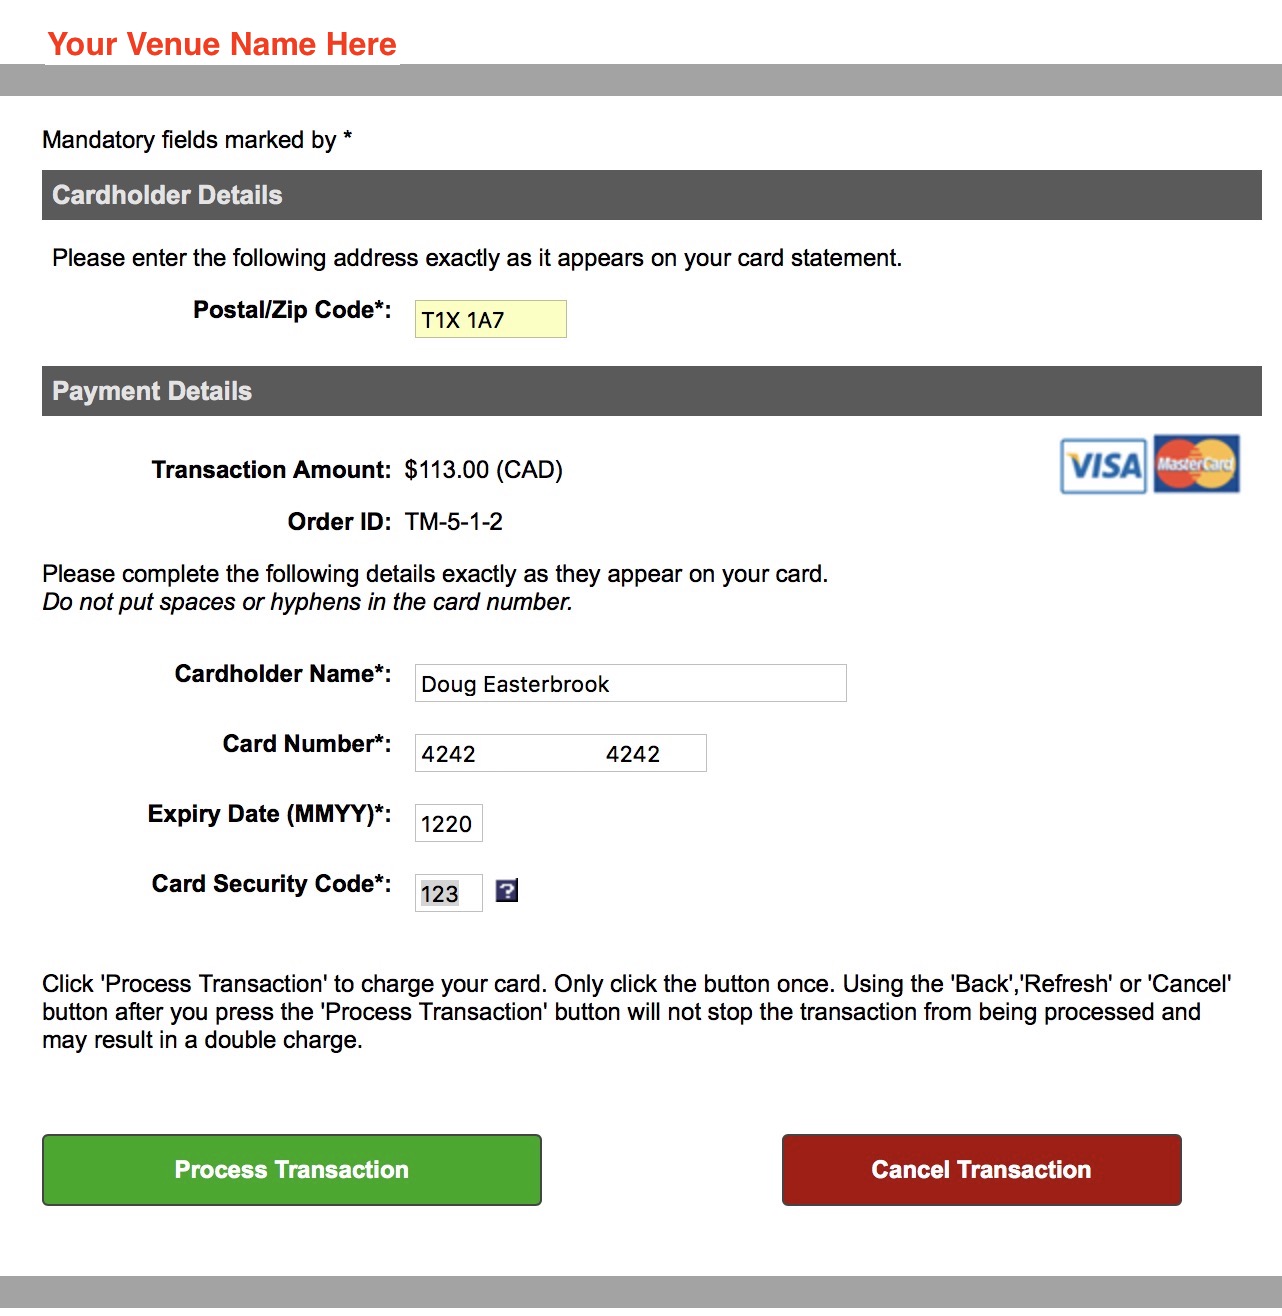 Step 3 shows an example of the actual hosted payment page.
From step 2, the user's browser is directed to the Moneris web site where they enter:
|
|
Step 4 remains the same.
This shows the confirmation page where the user can use the print at home feature if enabled. |
Moneris EMV Devices for Box office
- Verifone P400 (the only recommended device - no others work)
|
Be sure to READ THE PRO's AND CON's of using the P400 before deciding to use them and ordering them from Moneris. |
Refer to accepting a payment on the payment window for EMV Pin Pad credit cards to see how the process works and how similar it is to other payment methods. When using pinpads, you do not receive the credit card data for TM - so you cannot use this method for post dated payments and recurring sales.
Please refer to Moneris EMV PinPad Setup Steps to see how to integrate with Theatre Manager.
|
EMV devices must be set up as a pin pad device and then must be associated with a workstation using Theatre Manager. Multiple workstations can use the same EMV device is you wish. |
|
Pin Pads are settled during end of day. if you receive any message about an imbalance on a pin pad, please refer to the Moneris Pin Pad End Of Day troubleshooting tips. |
|
If an EMV device is assigned to the workstation, the user simply selects any one of the credit card types as payment during the payment process, and Theatre Manager will activate the EMV device. |
|
You may need to import a new ticket face for payments to satisfy Moneris signature & receipt requirements. |
|
You CANNOT VOID a pin pad authorization. You must add a payment to the order and make it a REFUND (Moneris' rules) |
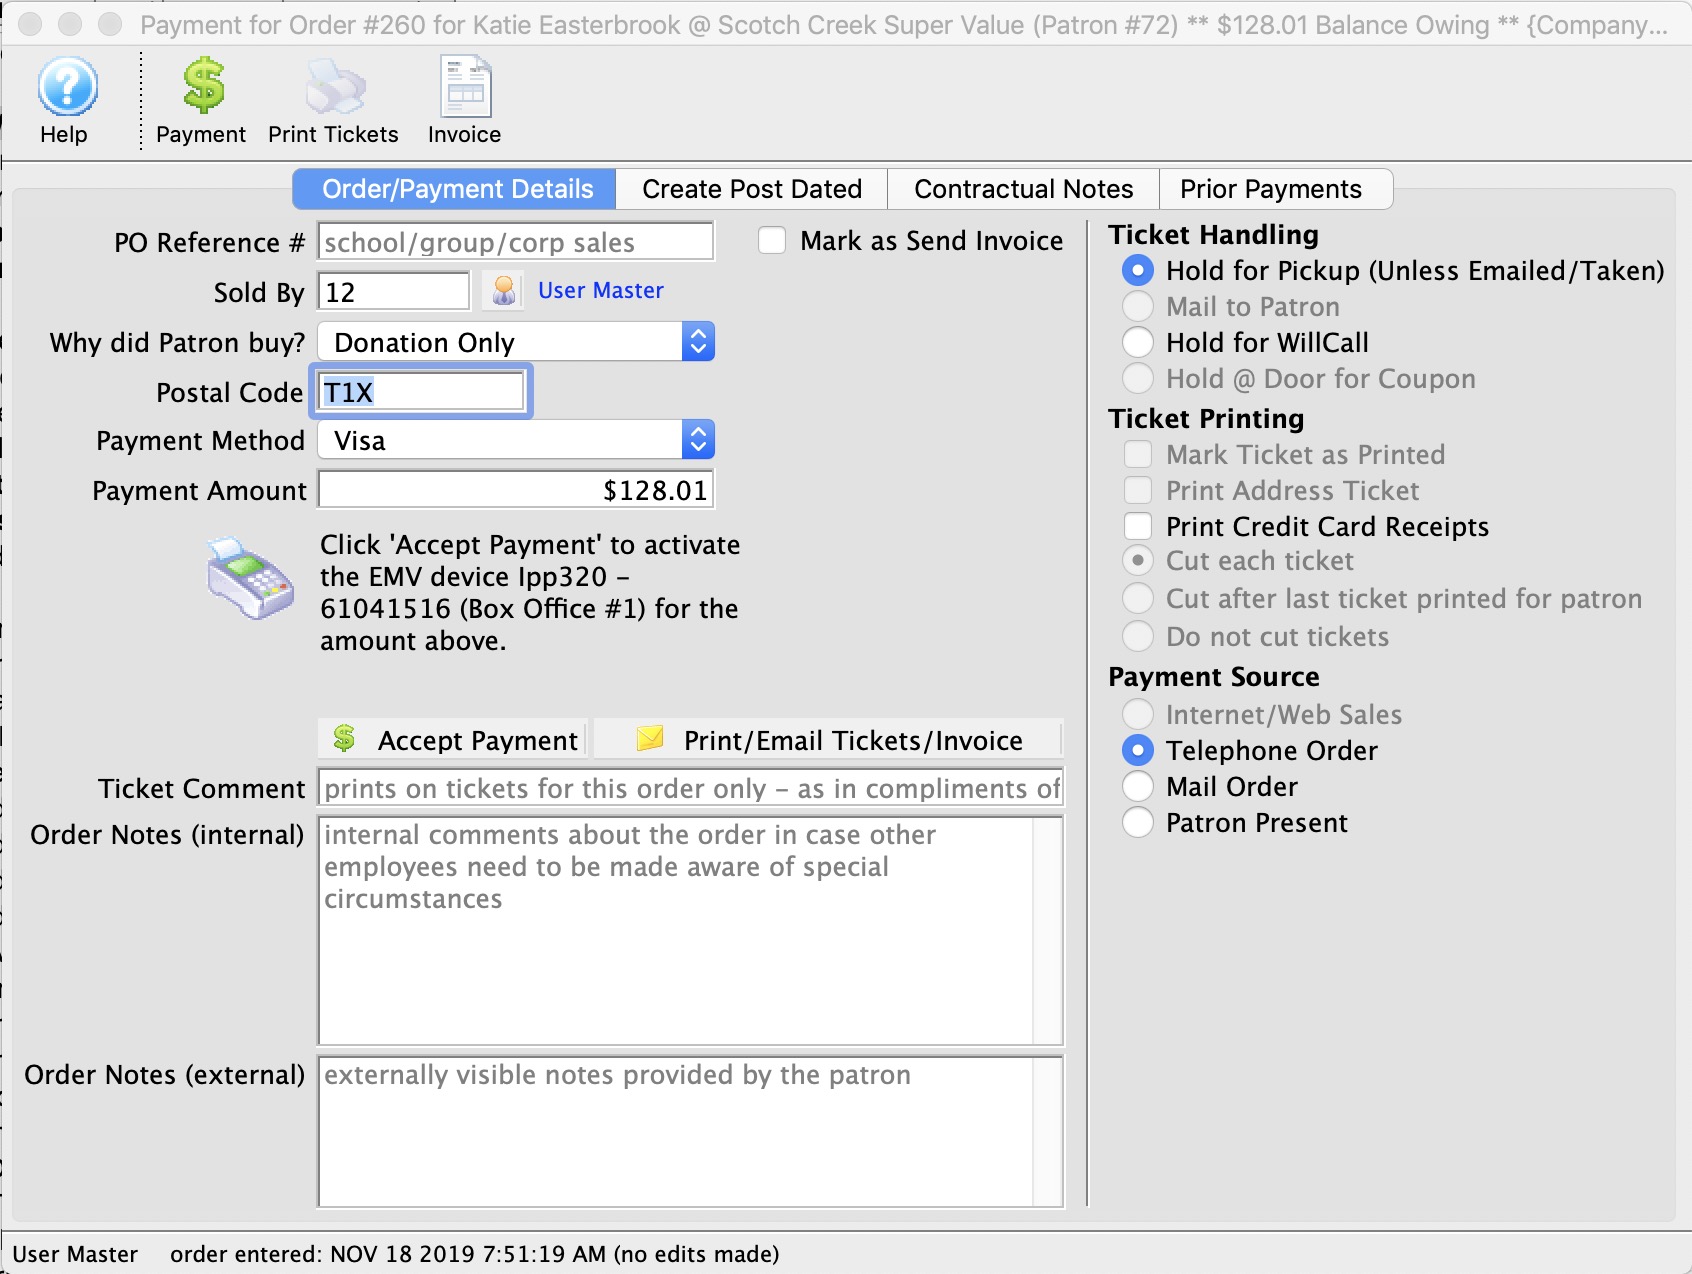
Pro & Con of using Moneris Pin Pads
On the whole, the P400 helps for new sales, INTERAC and tapping for payment. It slows the mass refund process when a show is cancelled because it requires calling each person who bought at the box office to get their card and enter it manually.
| Pro | Con | ||
|
|
Moneris Pin Pad Setup Steps
 The following is the general list of steps you have to follow to get the Moneris EMV pin pad to work with Theatre Manager at the box office or for other departments.
Theatre Manager is designed that the EMV devices can be shared between workstations. However, you probably want one for each box office window and one for the rest of the office to manually enter cards.
|
You can use Moneris EMV devices, even if you still want to use your existing provider. You just need to set up an EMV only merchant account in Theatre Manager. |
|
Note: check the firmware version of your pinpad. Version 19.05 works. 19.06 is known to be broken. Contact Moneris if you need to ask them to fix it. |
Pre-Preparation Steps (with Moneris) for CLOUD EMV DEVICES (P400)
You will need a Moneris E-Select+ account. You need to contact Moneris for this - Arts Management cannot arrange one.
- If you DO NOT HAVE an E-Select+ account, contact Moneris. It might involve changing you merchant provider - and you might want to talk to the support team about:
- pro's/con's of changing completely to Moneris and/or
- feature comparison of Moneris to other providers and/or
- OR (if you want), you can keep your existing merchant provider and only use Moneris for EMV pin pad authorizations.
- If you have an E-select+ Account
- Contact your Moneris representative to arrange for the number of P400 cloud connected device you think you need.
- You must tell Moneris that you are using it with Theatre Manger
- Moneris must provision it with their software, so get them to confirm they will do that to work with Theatre Manager
- Theatre Manager can share EMV devices amongst workstations. However, you probably want:
- one for each box office window and
- maybe also one for the rest of the office to manually enter cards.
|
Very Important: DO NOT allow Moneris to settle the EMV devices automatically at a preset time each day. Theatre Manager will settle the devices during end of day to make accounting far more straightforward. |
Theatre Manager Setup Steps (after you have your EMV devices)
Once you have your Moneris information and pin pads, follow these steps in Theatre Manager:
| Step | Item | General Instructions | ||
| 1 | Turn off Power saving |
The pin pad requires a constant connection to the database while the authorization is occurring. there are two things to do:
|
||
| 2 | Plug in the Pin Pad |
Download this abridged version of the Moneris P400 installation instructions and follow it until the steps say come back to this web page to do the remainder of the steps
|
||
| 3 | Moneris Merchant Account |
Make sure you have a Moneris Merchant Account set up in Theatre Manager. I you already have a moneris account for hosted payments or web sales, you likely should use the same one.
On the authorization tab in the pin-pad area of the Theatre Manager merchant setup, please:
|
||
| 4 | Plug in EMV Devices |
Physically plug the EMV devices in, power them up and connect them to your ethernet network.
Place the devices where you think they will be best used for your box office and administration areas. The EMV devices will go through a startup process and should eventually show a screen with a pairing number on them. |
||
| 5 | Create Device Records |
In Theatre Manager, open the Device List. For each pin pad that you have:
If pairing does not occur:
|
||
| 6 | Edit Hardware Preferences |
After pairing all devices in as above, you will need to go to each workstation and decide which EMV device is associated with the workstation.
| ||
| 7 | Payment Receipts | You will need to import a new payment receipt ticket face designed specifically to satisfy Moneris signature & receipt requirements | ||
| 8 | Setting up Payment Methods |
|
||
| 9 | Restart Theatre Manager |
|
||
| 10 | Optional tests |
|
||
| 11 | Debugging |
If you are having trouble with getting pinpad authorization to work, there are some troubleshooting tips:
|
Moneris Receipt Ticket Faces
|
Payment receipts are optional and can be printed on demand. However, if you have customers who request a receipt, Moneris has specific requirements if the payment was made using EMV devices.
We have created one you can download and import that meets Moneris requirements and is designed specifically for the P400. |
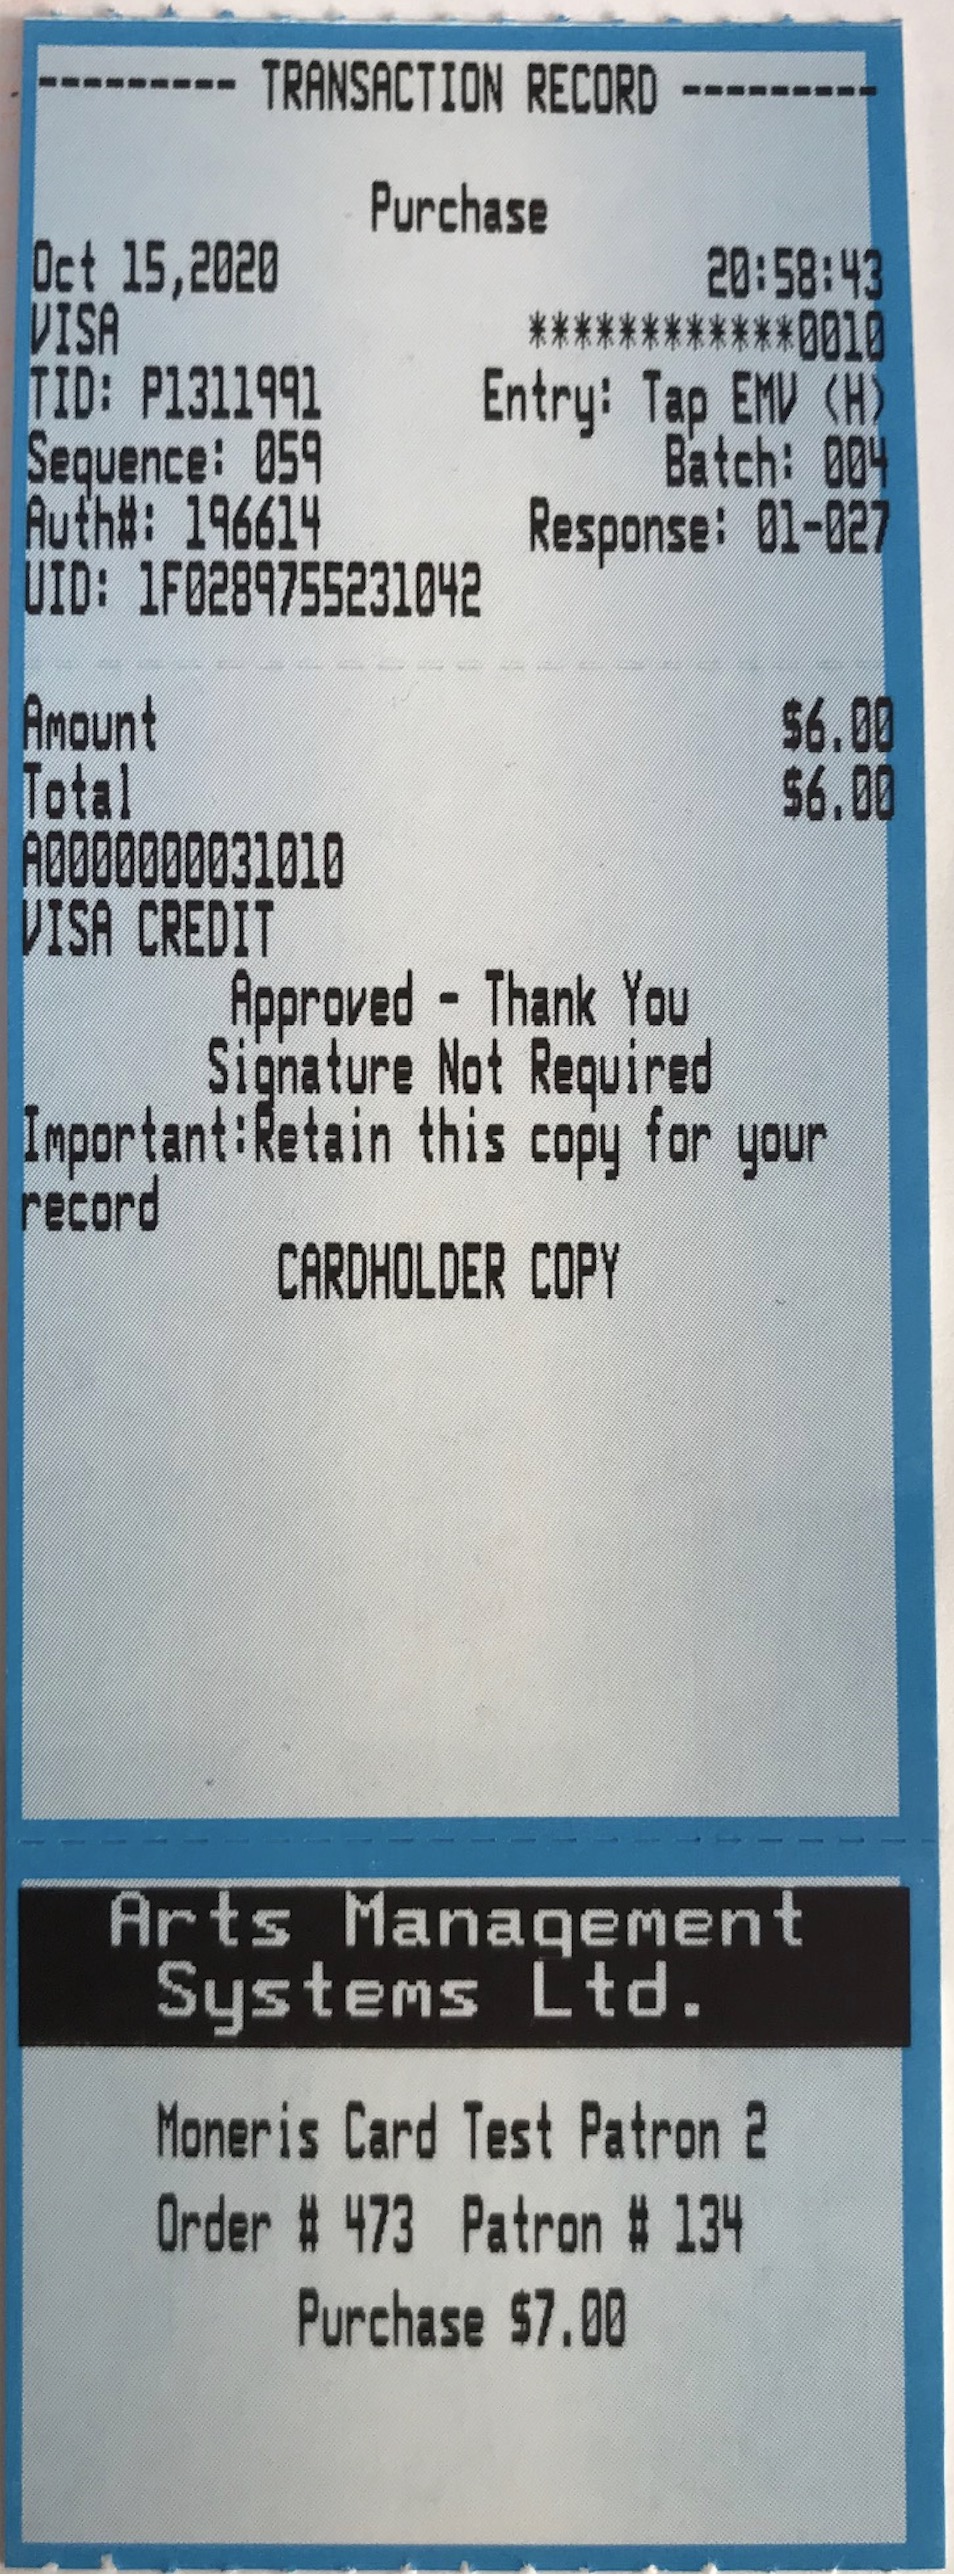 If you need to print receipts for Moneris Pin Pad authorizations, you will need to set up your ticket faces as follows:
- Download a template Moneris EMV ticket face from the ArtsMan web site
- Unzip the file so that you see the MonerisEMVTicketFace.tmf file on your desktop
- Open the list of Ticket Faces window which should look similar to the image to the right.
- Click the Import button at the top of the window
- look for the file called MonerisEMVTicketFace.tmf on your desktop and import it
- after importing the new ticket face, it will appear in the list of ticket faces. Look for the ticket face number of this Moneris EMV ticket face in the list. It will be used in the next step
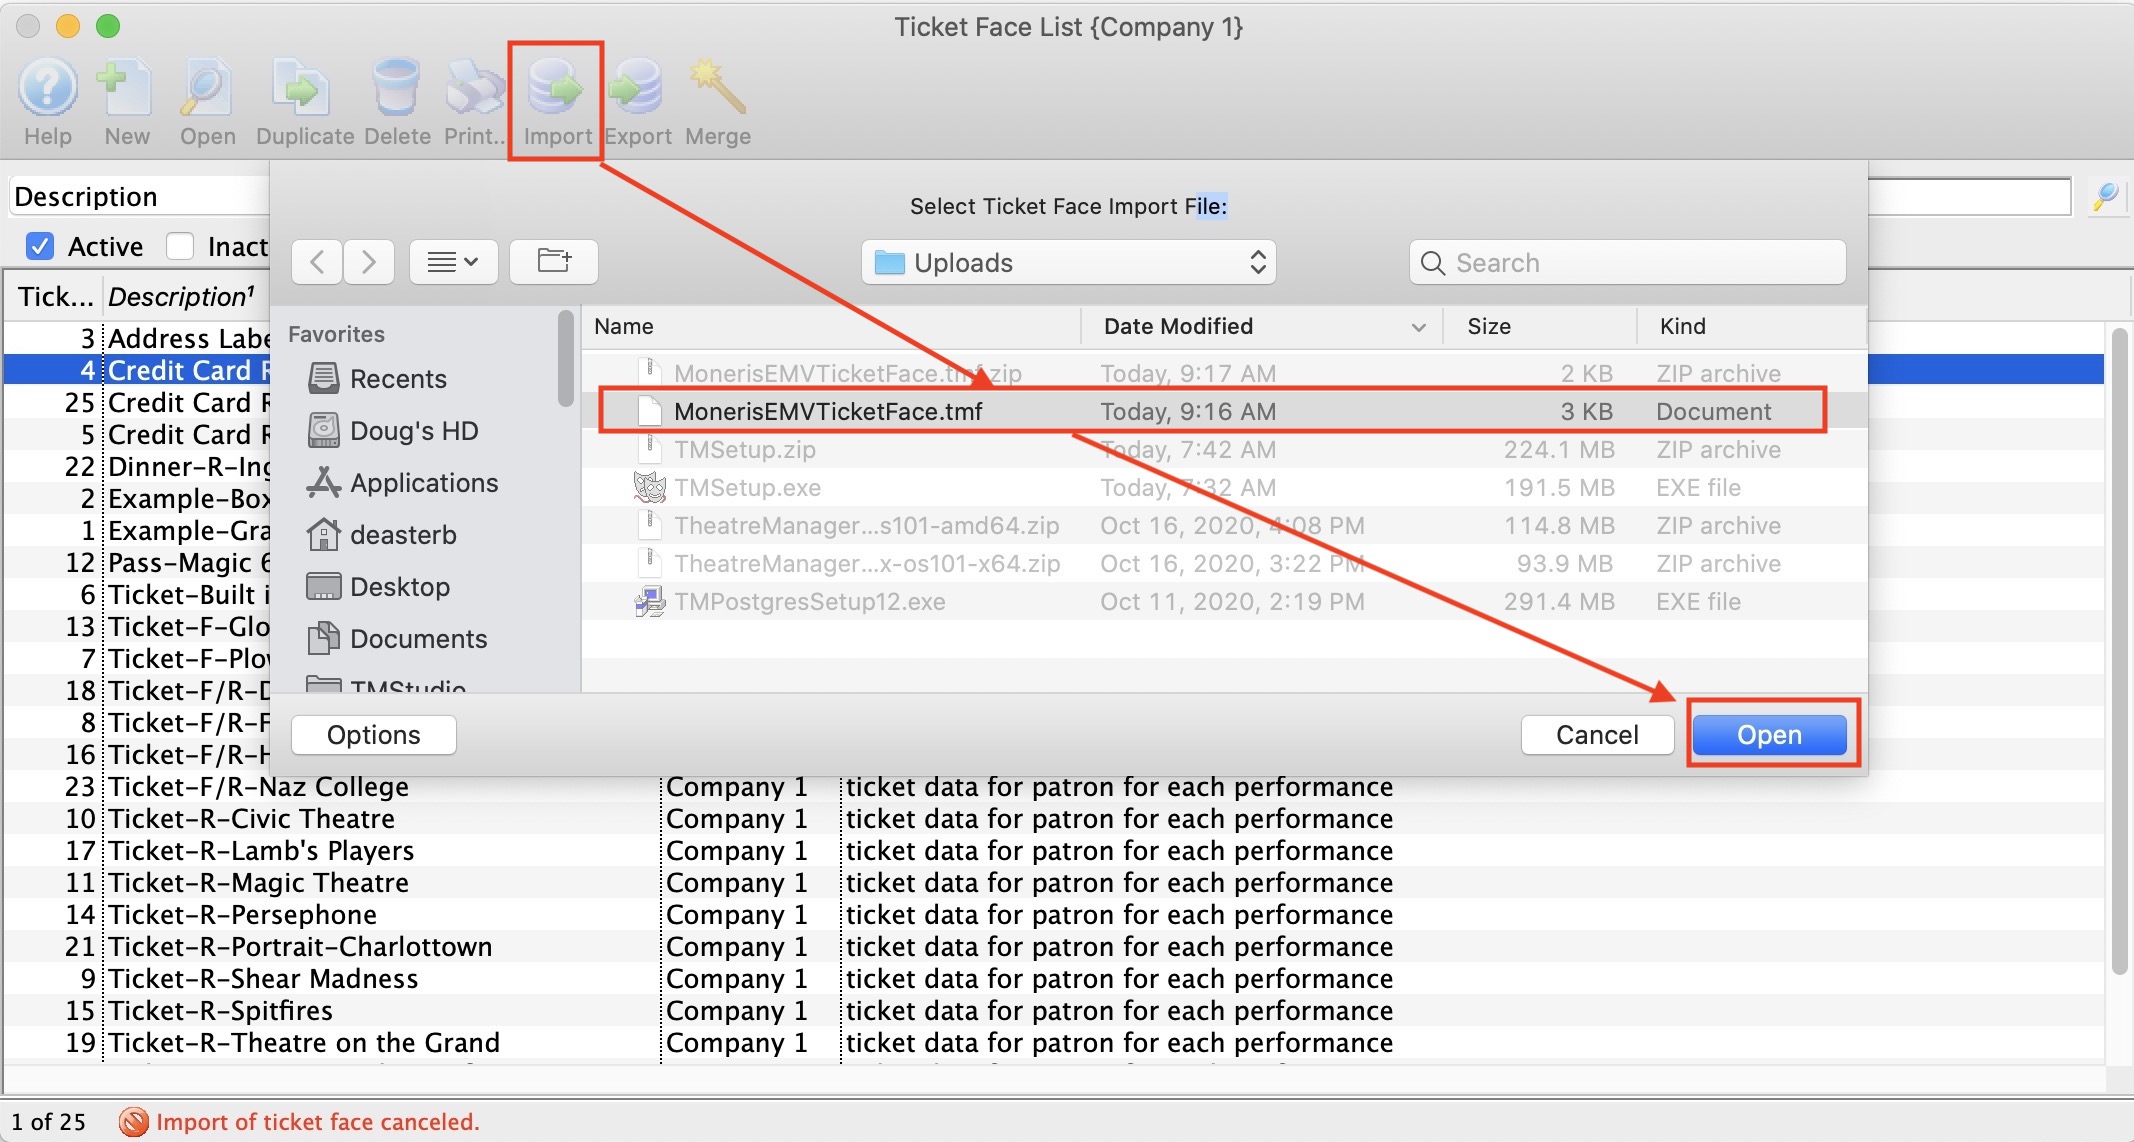
You have now imported a ticket face file. You can now edit this ticket face if you want to make any additional customized changes to the receipt layout based on any possible ticket face background images you may have preprinted on the ticket stock.
Additional Steps to implement the ticket face
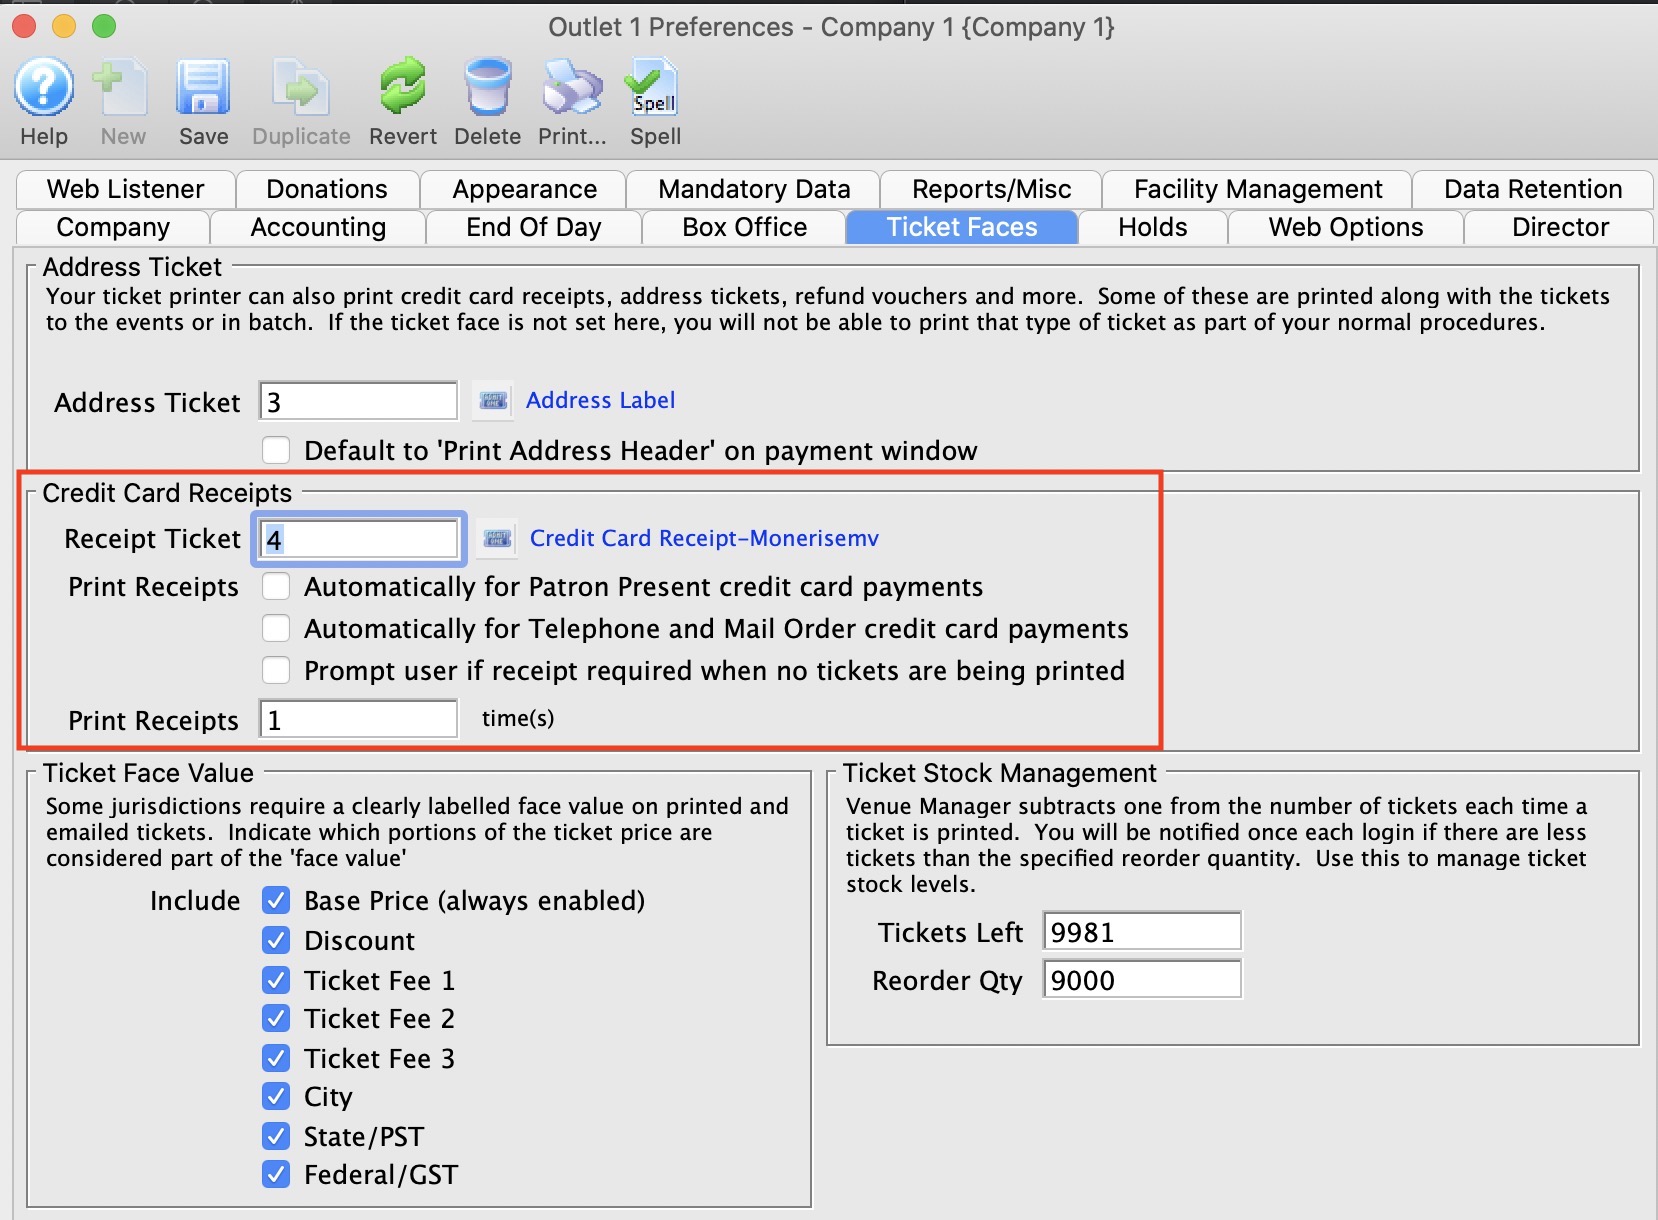 After importing the ticket face, you will have to decide a few things on the company preferences Ticket Faces Tab under the section Credit Card Receipts. All the fields/options in this area may need adjustment.
- Receipt Ticket - Change the ticket face number there to be the one you recorded above
- Print Receipts - has 3 options to consider:
- Automatically for Patron Present. Moneris give you the option of always printing a receipt, or only printing a receipt on demand. We recommend only printing a receipt on demand. Uncheck this option unless you always want to print are receipt of the ticket printer for any credit card payment.
- Automatically for Telephone and Mail Order. Moneris may require a signature for card numbers typed into the EMV machine for payments taken over the phone since the card is not present. Check this option if you wish, although we recommend not. The better alternative is to batch print the receipt along with tickets if emailing or holding at will call. The receipt should automatically include a signature line.
- Prompt User if receipt required If you are unsure if you want to print receipts for tapped in chip/pin authorizations, but you want to give the patron the choice, you can check this option.
- We recommend not to since this adds an extra prompt you have to agree to when selling payments at the box office.
- If you don't print the receipt you can go to the payment window and print a receipt if asked.
- For years, most people have neither asked for nor requireda reeipt. This is even more true these days of social distancing.
- again, receipts can always be batch printed for will call or mail to patron tickets.
- Print Receipts xx times. This is designed for situations where you, the merchant, want a receipt copy as well as the customer. It you always, print for the customer, enter 1. If you want one for yourself as well, enter 2.
Moneris does not require you to print one for yourself if they are stored electronically and can be reprinted. Theatre Manager stores all payments and Moneris EMV responses precisely for this purpose so you can reprint later if need be. We suggest not printing a merchant copy in this electronic age.
Moneris Test Accounts
|
These values are open for general testing from all sources - so you may see more than just your test transactions in the virtual gateway. |
|
They only work for the Moneris Gateway Account and will not work for Hosted Payment Page testing |
The following values will enable you to enter the test environment for the gateway:
- Merchant Account Number 700000208782
- Store ID store1
- API Token/Password yesguy
- Primary URL for TEST authorizations esqa.moneris.com/gateway2/servlet/MpgRequest
- Port # 443
- ECR Terminal ID 66002173
Where TM Data goes in Moneris
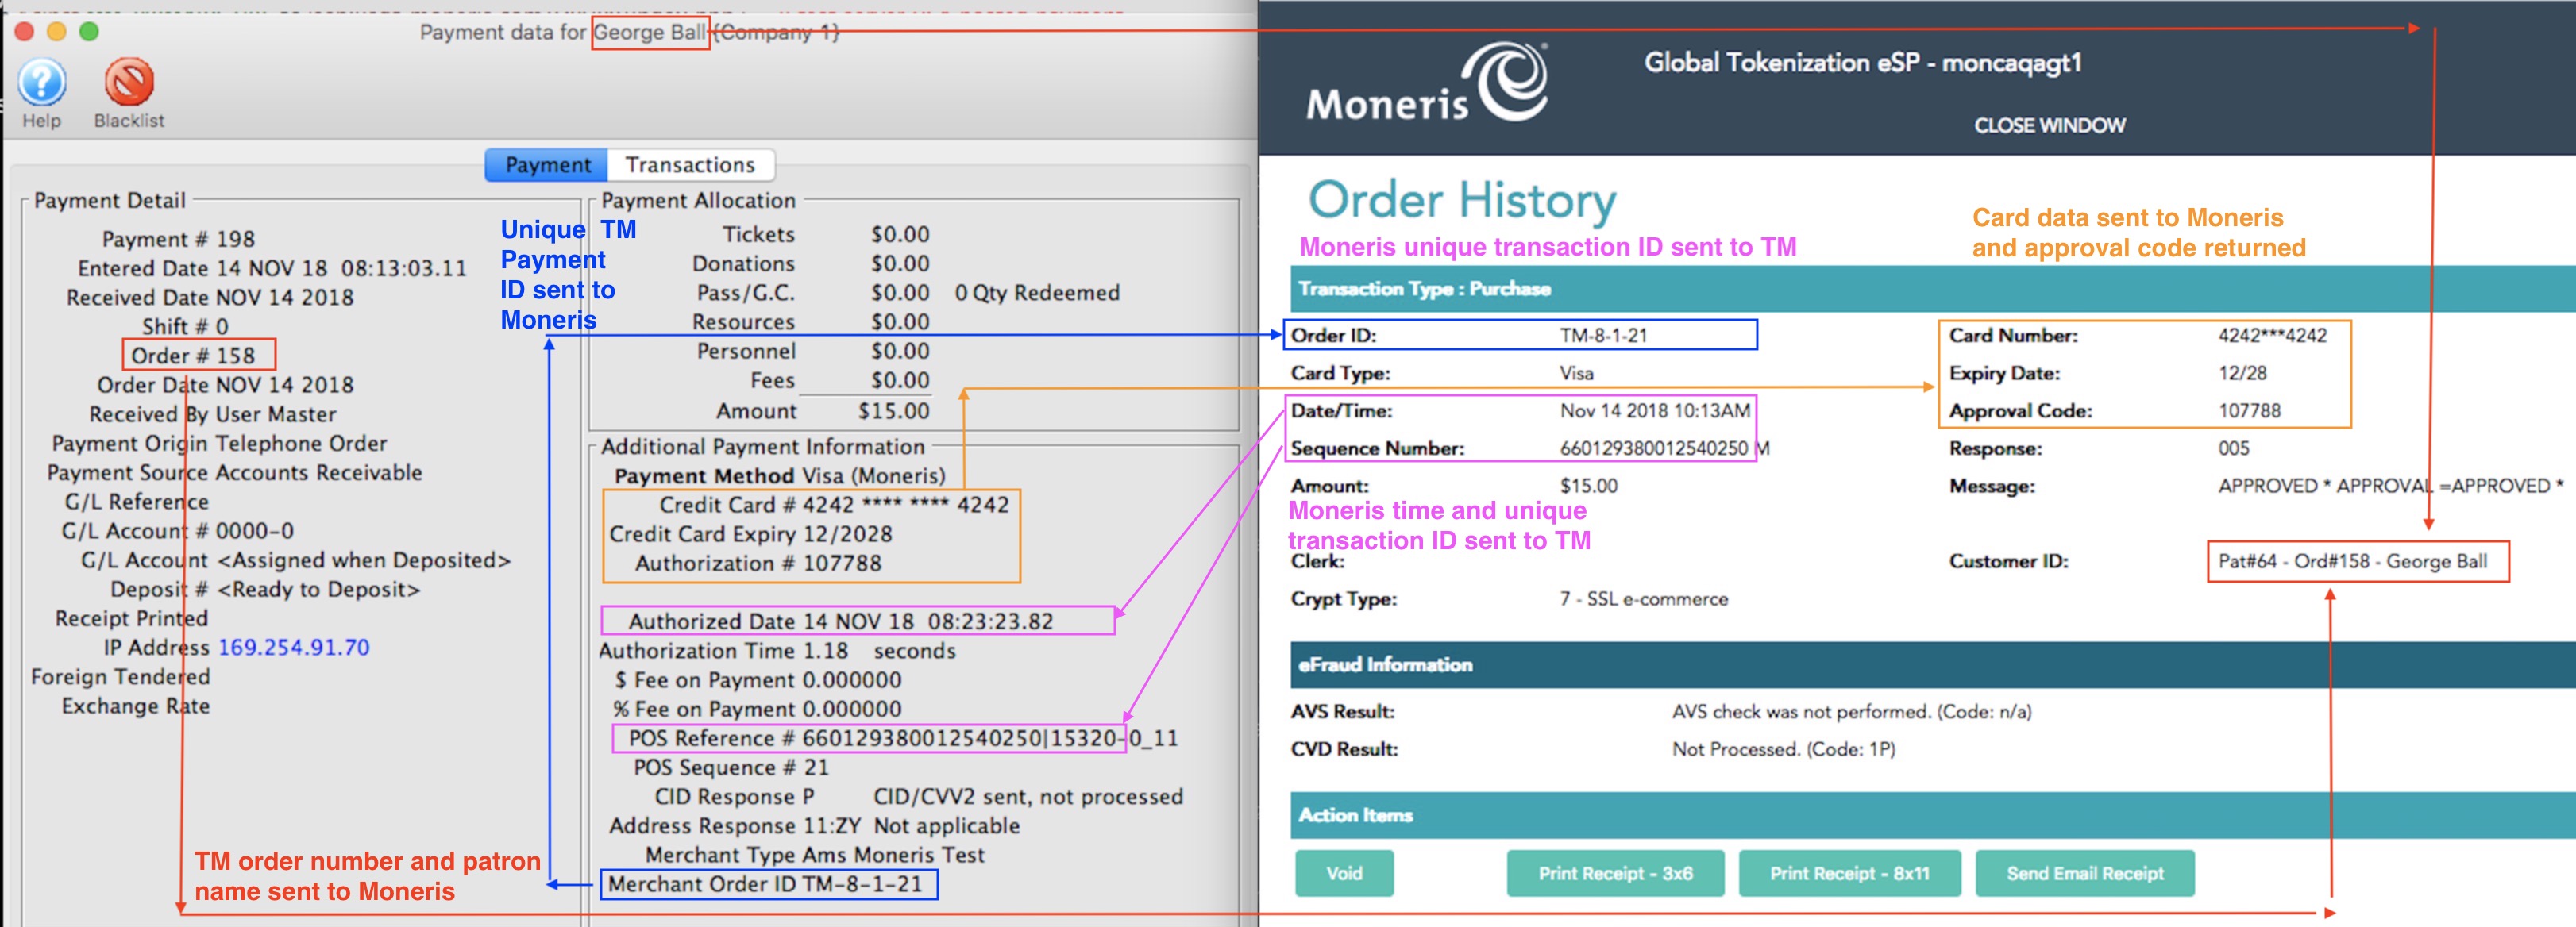
It is sometimes helpful to know where card data goes in the merchant portal to troubleshooting and cross reference purposes. The above diagram shows how to cross reference date on the payment window in Theatre Manager and Moneris' online portal.
Data Sent by Theatre Manager to Moneris
- Patron number, order number (that the payment is associated with) and current patron name is put into the Moneris Customer ID field. If you see this data in Theatre Manager, it should help you find the patron or order in TM, either by order number, patron number, or patron name. Note that since patron names can be changed at any time and patrons can be merged, order number(red lines)
- Card and expiry date are sent to Moneris, which returns the authorization code. (orange lines)
- Theatre Manager makes up a system wide unique number for Moneris to refer to thus specific payment authorization attempt (blue lines). They always look like TM-X-Y-ZZZZZZ where:
- TM- means the authorization came from Theatre Manager. If it doesn't start with TM, somebody did it manually or via some other method.
- X- is the unique number of the merchant record in Theatre Manager. This is in case you have set up multiple Moneris merchant accounts for different reasons. (eg one for box office and one for development - which is not really recommended
- Y- is the TM outlet number that sent the authorization to Moneris
- ZZZZZZ is a unique number generated by TM for each authorization attempt. If an attempt is made and fails, it will consume a number and the next attempt at authorization will use a new value for ZZZZZZ
Data returned to TM by Moneris
TM tracks the
- Moneris Sequence number - which is a unique number generated by Moneris for successful authorizations.
- Moneris Authorization Time - which is the date/time of day that the authorization occurred. If the dates are different, it will be because Theatre Manager has stored them in time zone adjusted time. (pink lines)
Troubleshooting Moneris Account Setup
Below are a list of some of the errors that may be encountered during processing using Moneris as a merchant provider:
P400 - Reversing Pin Pad Authorizations (cannot void or delete)
|
If you are using a Moneris P400 connected to your workstation, you cannot void or delete a credit card entered using the pin pad.
Moneris does not support voiding in the pin pad because they require a log for each interaction. So you must refund. |
|
You many see a button on the lower left that says Linked. IF you click on it and the original payment was taken online, you will be able to refund against that payment without needing the card. |
Refunding a payment with the P400
Instead, you will need to
- Add a payment to the order. Refer to the general process for more information.
- Select a credit card payment method when it becomes time in the process from the first step.
You will see a window like below:
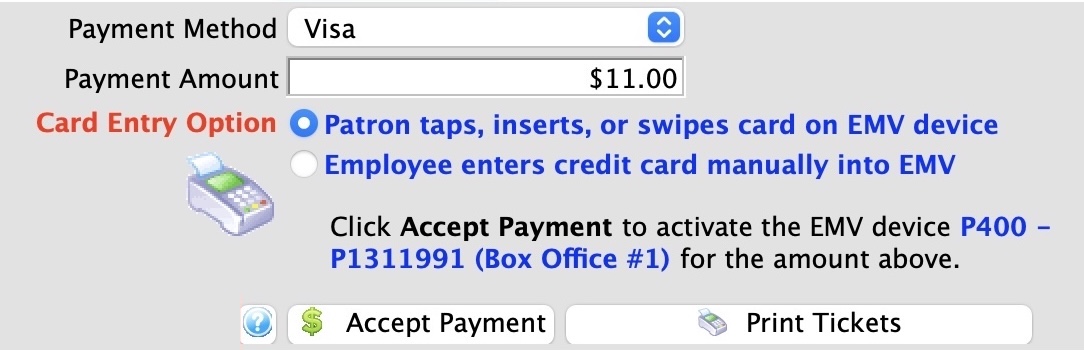
- Enter a NEGATIVE AMOUNT for the payment to indicate a refund.
- (optionally), click the button to enter the card data manually if the customer gave you their card over the phone
- Click the Refund Payment button. The customer's action change depending if you selected
- Patron taps, inserts, or swipes card on EMV device:
- the customer will need to tap or insert their card on the pin pad
- The customer must be present at the box office with their credit card for them to do this.
- Employee enters credit card manually into EMV
- you will need to enter the full card number and expiry date on the pin pad since card data is never entered into TM.
- This is useful for refunds when the customer is not present and they gave you their card over the phone.
- Patron taps, inserts, or swipes card on EMV device:
No Permissions For AVS_Info
No Permissions For AVS_Info
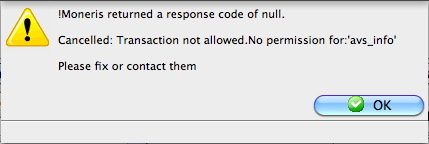
When the merchant account is setup in Theatre Manager and a test transaction is processed the error message above may appear. This error message is the result of missing options in the setup of the Merchant Account by Moneris. To correct the issue:
- the Moneris representative will need to be contacted.
- A request will need to be submitted to enable AVG and CID/CVV2 processing. This process can take up to 5 business days.
- Additional Moneris account setup charges will apply for implementing these charges.
Moneris Returned A Response Code of NULL
Mandatory Address in Patron Records
- Login to Theatre Manager as the Master User.
- Click Setup >> System Preferences.
- Select the Mandatory Data tab.
- Check the boxes in Full Profile Patron Data for:
- Patron Address
- Patron Postal Code (Zip Code)
- Click Save.
An address and postal code (zip code) will now be required for all patron records added or updated in Theatre Manager.
Turning Off Credit Card Address Verification
- Click Setup >> System Tables >> Merchant Accounts.
- Double click on the current Merchant Account to open it.
- Select the Authorization tab.
- Remove the check from Fraud Prevention >> Send address/zip.
- Click Save.
The Address and Postal Code (Zip Code) will no longer be sent with the credit card number for authorization.
Transaction Not Allowed: ind_refund -5
|
Independent Refunds is a Moneris add-on feature. You must contact them if you receive the message below and you want to issue refunds to patron's credit cards. |
 Your Moneris merchant account and/or your Store ID may need to be setup to process Independent Refunds if you want to allow credit card refunds in Theatre Manager. Since this is entirely a dependant on Moneris and how they setup your merchant account, enabling independent refunds requires that you:
- Contact your MONERIS REPRESENTATIVE
- Tell them that you want to issue refunds to credit cards
- MONERIS may ask you for additional banking information
- Test out a refund for a small amount to ensure it works, other wise you'll get the message above
Even if the merchant account is enabled for refunds and refunds can be performed through the web portal, Independent Refunds must be enabled for the Store ID before a refund will be accepted by Moneris from Theatre Manager.
Should Moneris detect suspicious activity on the account they could remove the option to process Independent Refunds to protect the account from fraud. To enable this feature once more the person who setup the Moneris account will need to contact them directly. A verbal request to enable Independent Refunds will need to be made and the following information well be required throughout the call:
- Merchant Account Number & Store ID
- Full Business Address
- Deposit Bank Name
- Deposit Bank Account Number
Authorize.net Installation
|
Authorize.net implements either user ID and password authentication over HTTPS connections to provide compliance with PCI DSS 4.1 |
Please contact Arts Management to discuss the process of getting a Merchant Account from Authorize.net or use the merchant provider contact info and inform them that you will be using Theatre Manager as they are aware of the proper setup.
After Authorize.net has provided you with a merchant account, installation is quite straightforward. Once set up, funds gets authorized as 'Card Not Present' and then deposited right to your own bank upon settlement from Theatre Manager. This account information you are provided is all you need in the merchant setup windows (in the pages that follow) to begin secure credit card authorization.
Authorize.net needs one account set up for authorization and one for online viewing of the account data. You can set up multiple accounts for online access of the data, so some people can view data and others have more access to transactions and history.
- Authorize.net - uses the Merchant Portal via a web browser to "view the transactions" that have occurred. This account setup might need to be used during the End Of Day deposit process to verify transactions if you have more than 1000 authorizations between each End of Day.
- Merchant User ID and Password - uses Authorize.net to allow authorizations to occur and be settled but not be viewed. This information is what needs to be entered into Theatre Manager's Merchant account to allow authorizations to occur.
|
The user IDs and passwords for both of the above are different and should not be interchanged or confused with each other. Follow the appropriate setup steps for each. |
|
After following the setup for both accounts, make sure to:
|
Authorize.net contact information
Shannon Maher, Sr.
Sales Manager
National Merchant Alliance
7415 West 130th Street, Suite #270
Overland Park, KS 66213
(913) 906-9595
smaher@nmainfo.com
Authorize.Net Gateway Account
The User ID and Password setup is arranged by Arts Management from Authorize.Net and is entered into the Setup --> System Tables --> Merchant Accounts window as below:
Software Type
The following values are set on the software type tab per the diagram below:
- Set the server software to be Authorize.net
- The merchant provider will automatically be set for you
- The merchant number is for use on ticket faces and for contacting Authorize.Net support.
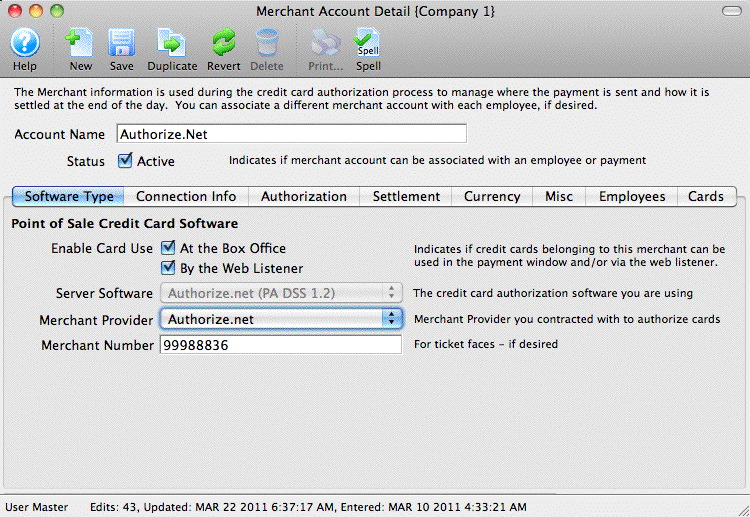
Connection Info
The following entries are set on the Connection Info tab per the diagram below:
- User/Server ID - provided through Authorize.net. The user ID remains constant for the life of the account and is generally an MD5 version of your main account UserID
- Password - the password is auto generated for you. You can change it via the online interface to generate a new 'secret' key. If you do that, you can expire your old password right away or allow both old and new to co-exist for up to 24 hours.
- Primary URL - is always secure.authorize.net/gateway/transact.dll and is used for authorization only
- Secondary URL - is always api.authorize.net/xml/v1/request.api and is used during the settlement process.
- Port - is always 443
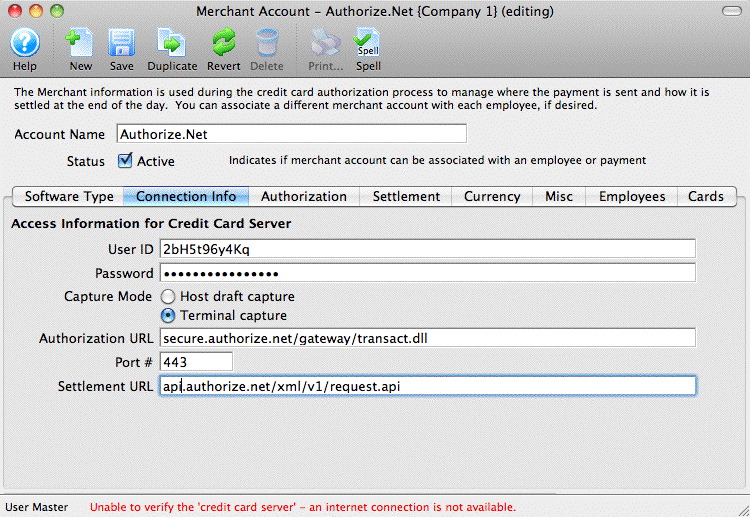
Merchant Profiles
The following entries are set on the Profiles tab per the diagram below if you are going to use merchant profiles and have an agreement with your merchant provider:
- Enable Profiles - set to Active if Merchant Profiles will be used.
- Profiles API Login Key - not required. Authorize.Net uses the same connection information from the Connection Info tab.
- Profiles API URL - is always api.authorize.net/xml/v1/request.api
|
Refer to Merchant Profiles for further information on functionality. |
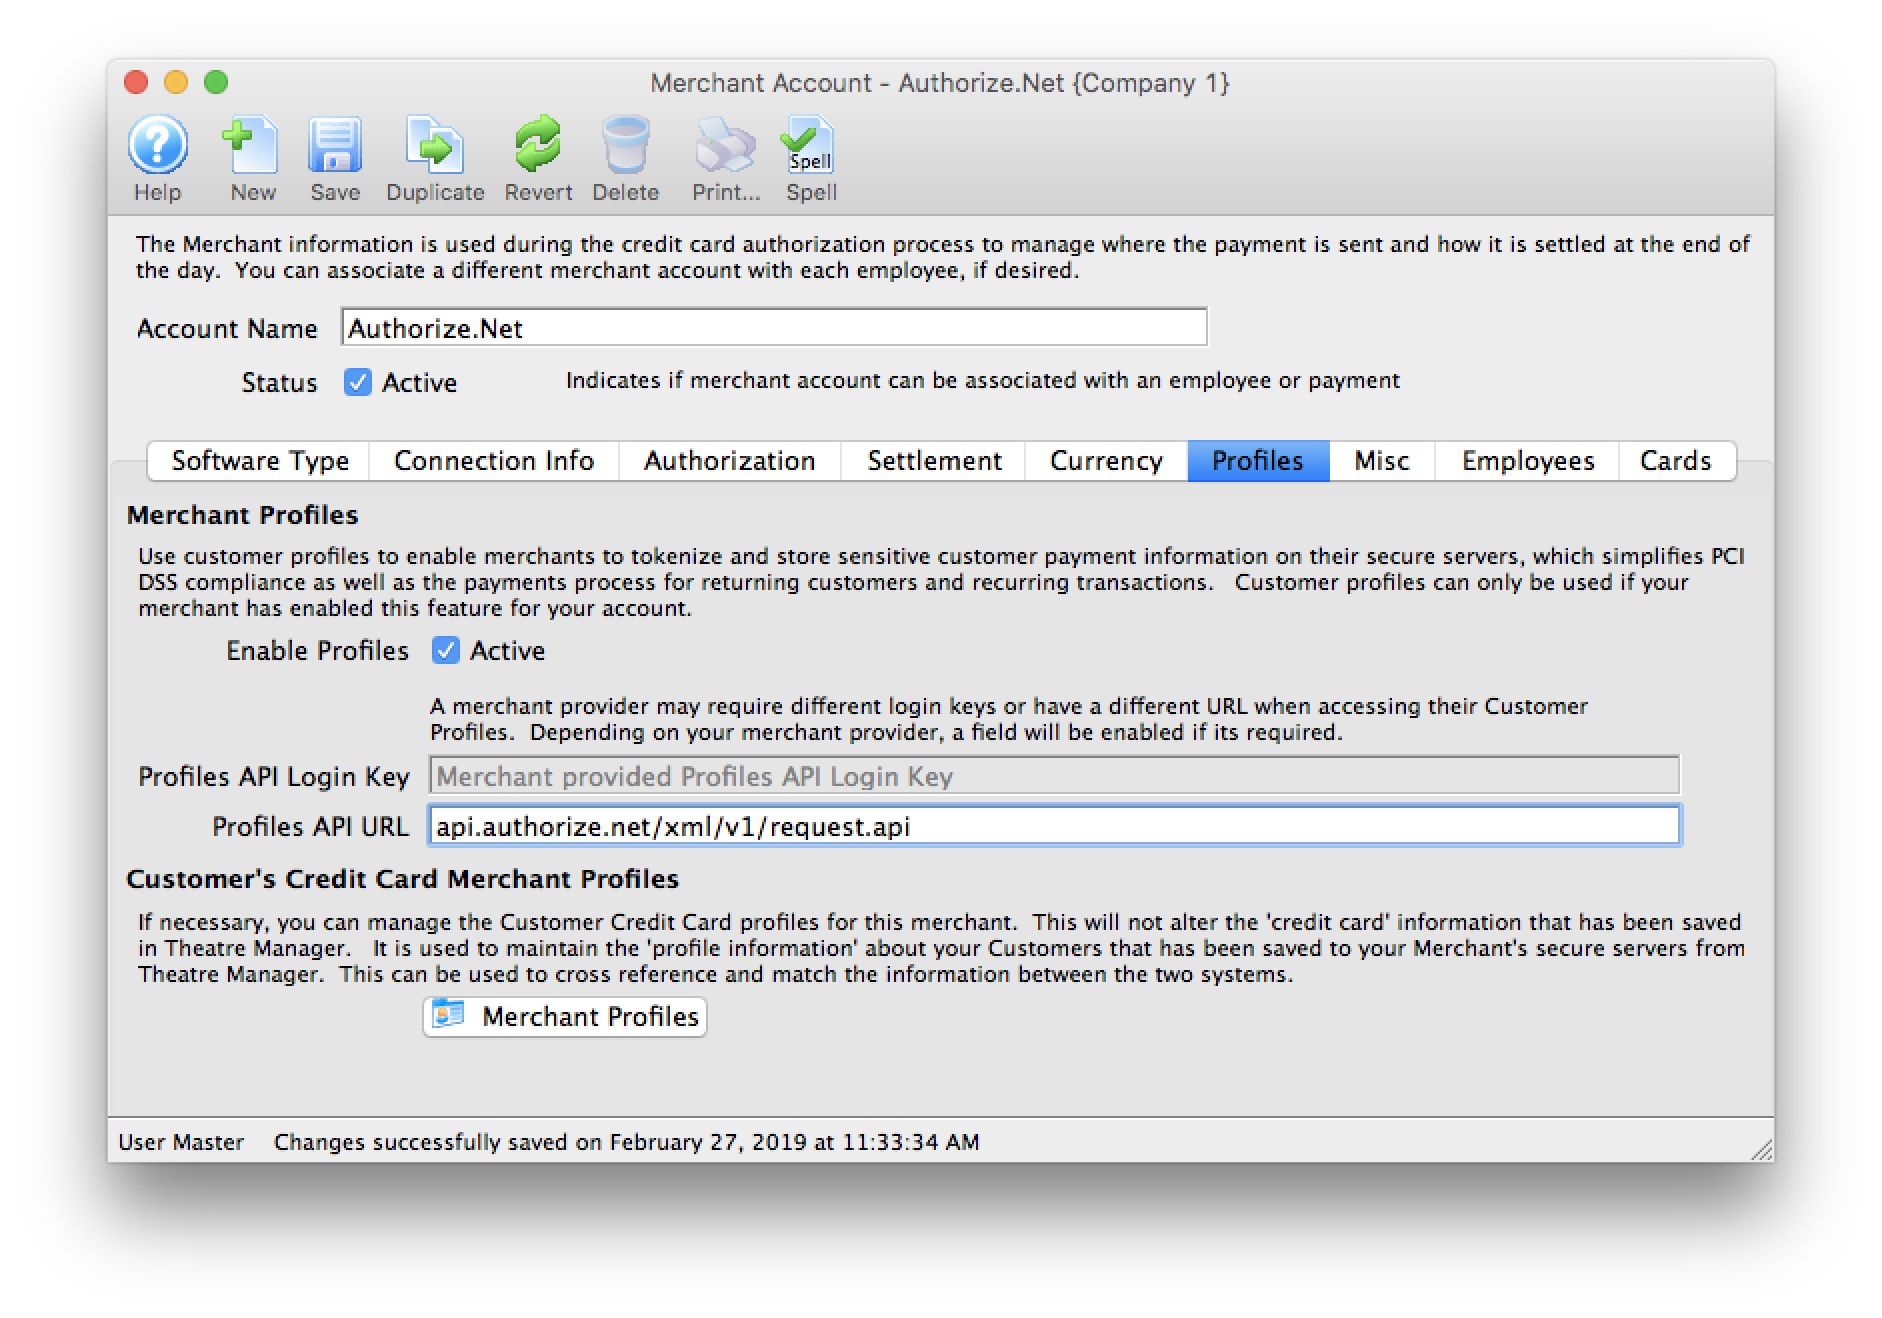
Testing Authorize.net
- Find yourself in the database or create a new patron for yourself
- Create a new order and attempt to buy a ticket or Gift Certificate
- On the payment window, select the credit card you want to use and do a test authorization
- If you get an authorization with a message indicating AVS match and/or CVV2 match, then the setup is correct
- Log in to your Authorize.net Online Merchant Account and view the batch to see that your transaction is there
- In Theatre Manager, void the credit card payment and then confirm in the Online Merchant Account that the charge is marked as void
Trouble Shooting
Authorization Response looks like HTML or XML
 If you get an authorization response that:
- looks like it is HTML or XML and indicates that it was not authorized:
- specifically indicates that the API key is wrong
If you merchant account still doesn't authorize after verifying it, log in to the Authorize.net Online Merchant Account and
- Click on 'Account' button at the top.
- Click on the MD5 hash at the middle of the screen
- Get a new MD5 hash key (API Key) for your account and put it into the merchant setup screen - connection info tab under the password
- Try to authorize a card again
Error on Settlement
If an error occurs during the initial part of settlement, you may not have the 'Transaction Details API' enabled. If this occurs, log in to the Online Merchant account and then
- Click on 'Account' button at the top.
- Click on the Transaction Details API link
- Enter the answer to your 'secret question'
- Click Enable Transaction Details API button if it is not already enabled
If issues persist, contact Arts Management and let us know so that we can help get it corrected.
Authorization Number: 000000
When processing a test charge, if you get an Authorization Number: 000000, this means the account is still in TEST mode at Authorize.net. Log into your Authorize.net account, and change the setting from TEST mode to LIVE mode.
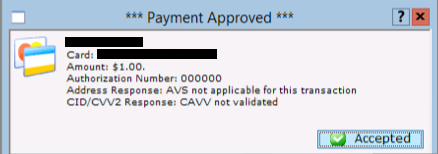
Specific Authorize.net Account Settings
- Apply to Authorize.net to allow unrestricted refunds for your venue.
- Enable transaction details so that Theatre Manager can obtain batch information and allow End of Day settlement.
- Specify the sweep time where Authorize.net takes completed End of Day transactions and moves them to the bank.
Setting Transaction IP Velocity Filter
Authorize.net allows you to define the number of transactions received from the same IP address within the course of an hour. The default value in the gateway is set to 10 transactions per hour. This setting, while helpful for fraud detection, does not take into account the number of transactions processed at the box office and needs to be increased.
- Open your online gateway to Authorize.net and select Fraud Detection Suites in the right column.
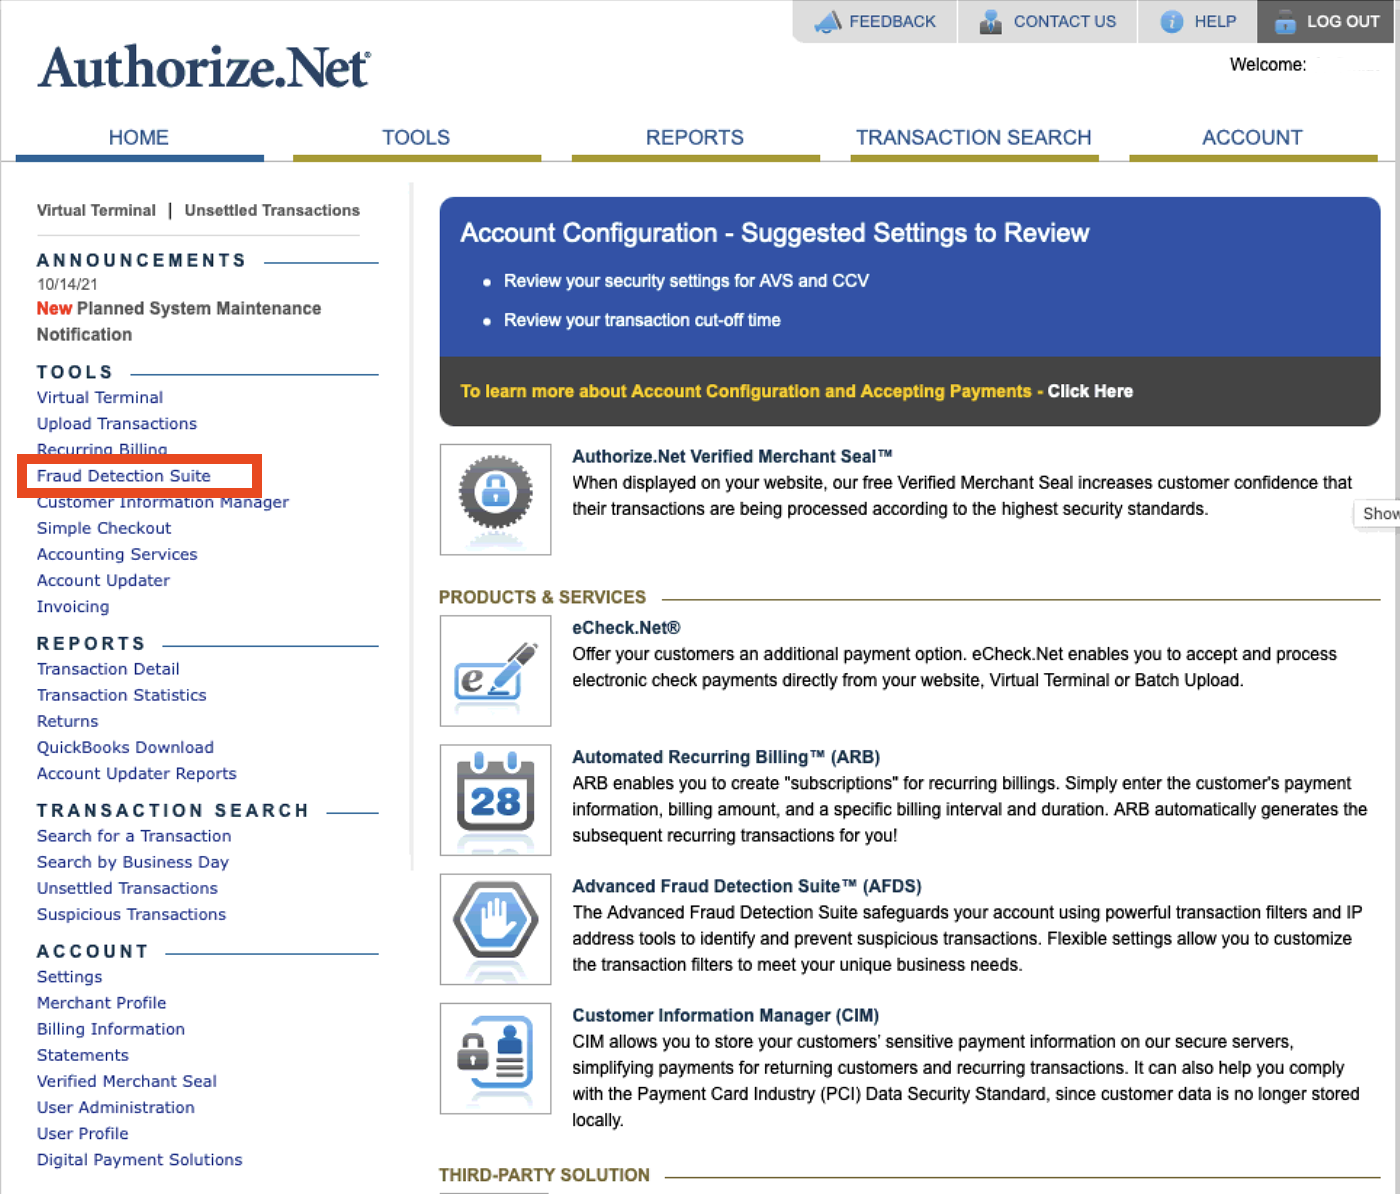
- Under Card Testing Settings select Transaciton IP Velocity Filter
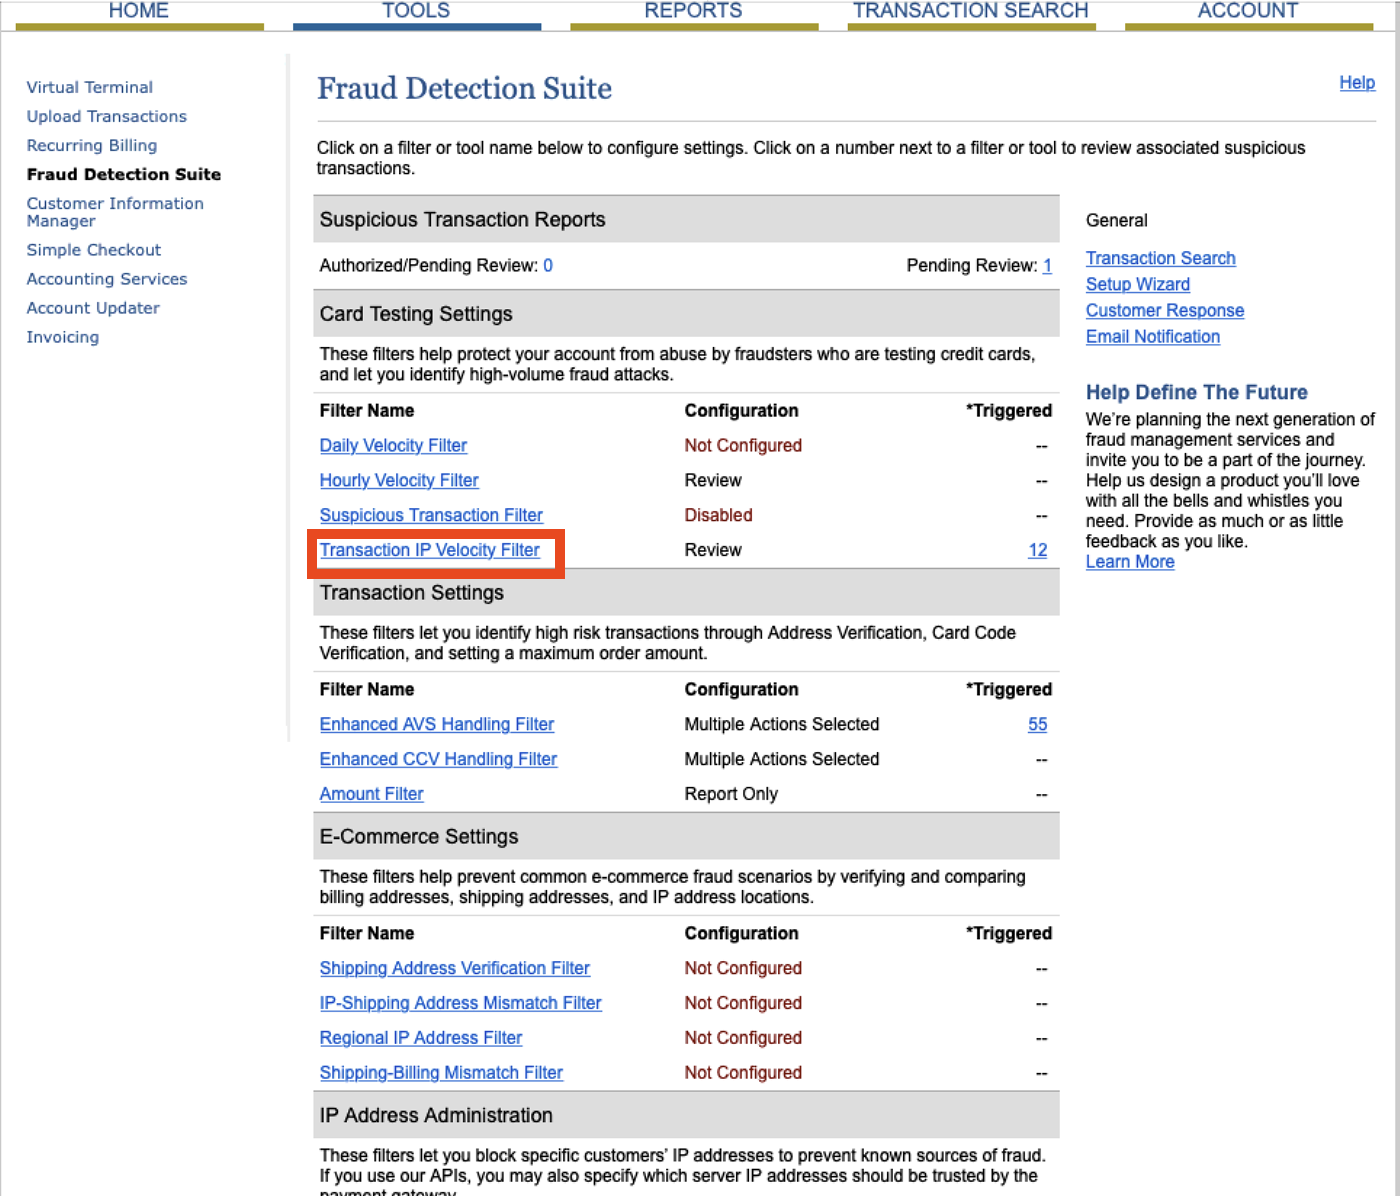
- In the Transaction IP Velocity Threshold section of the page increase the Allow transactions from the same IP address per hour value.
This value should be set based on the number of transactions your organizations processes in the office per hour during peak sales times. Depending on the size of your organization this may mean 50, 100, or possible 500.
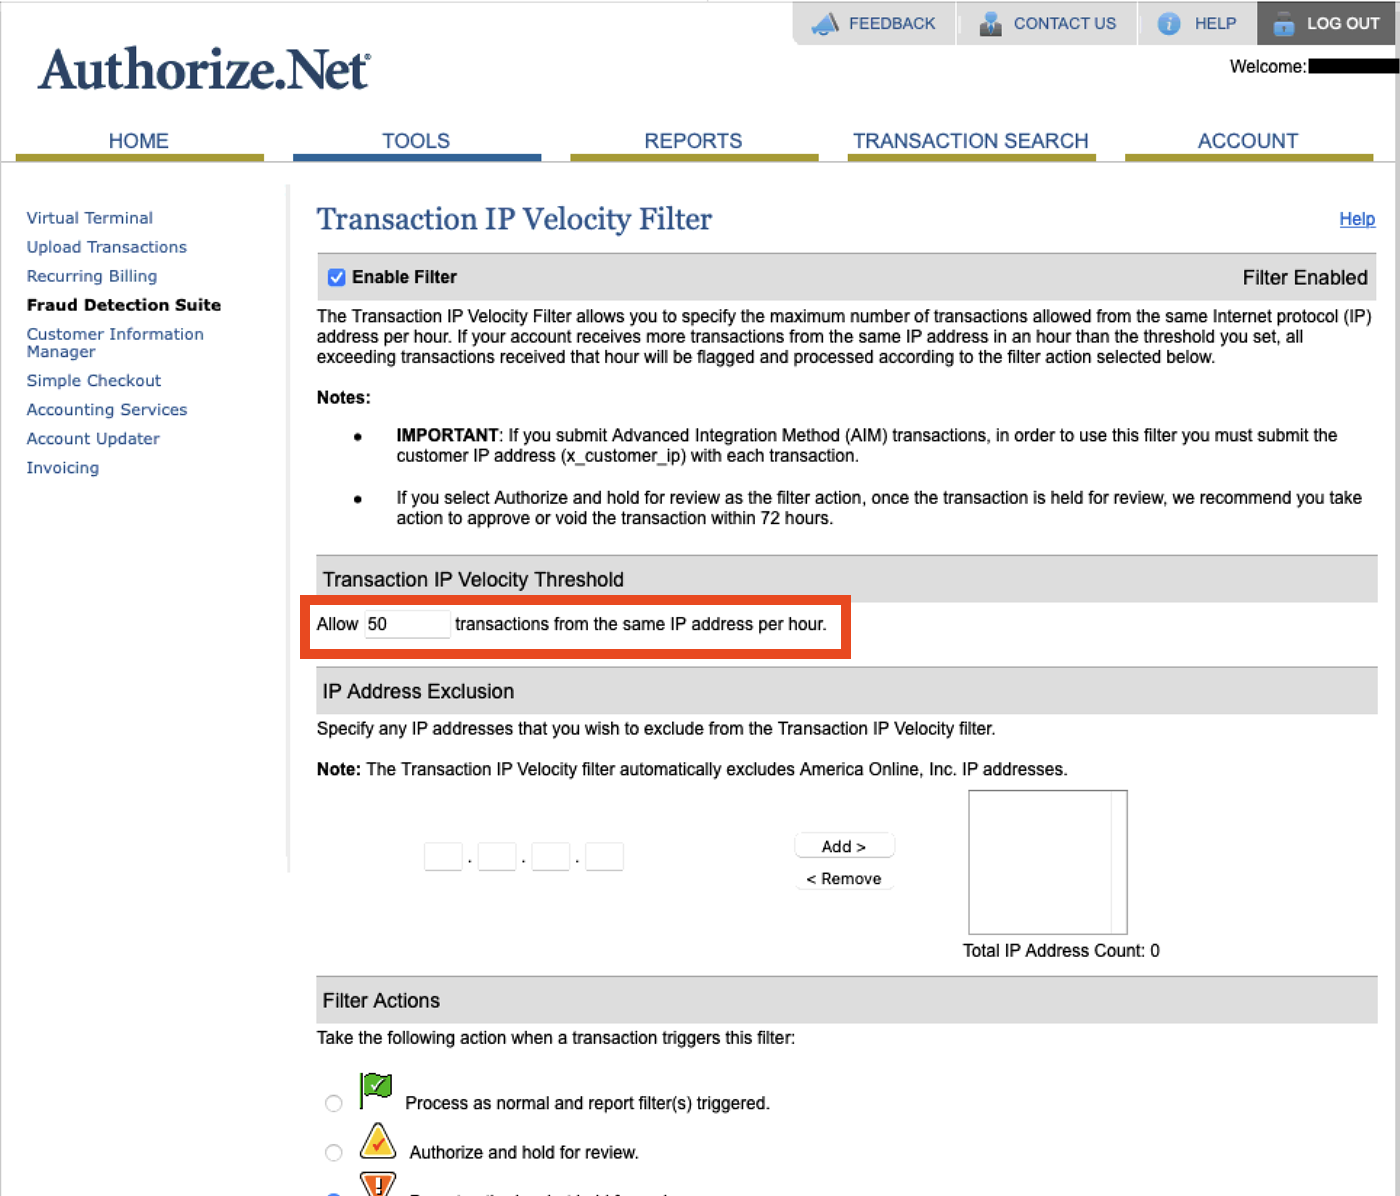
- Click the Save button at the bottom of the window.
Transaction Receipt Email
Authorize.net sends an email to the Gateway user for each payment processed through the account. This feature can be disabled using the steps below. You will be required to
- In the Authorize.net Gateway select Account at the top of the window.
- Select User Profile in the left column and click the Edit Profile Information button under Profile and Security Settings.
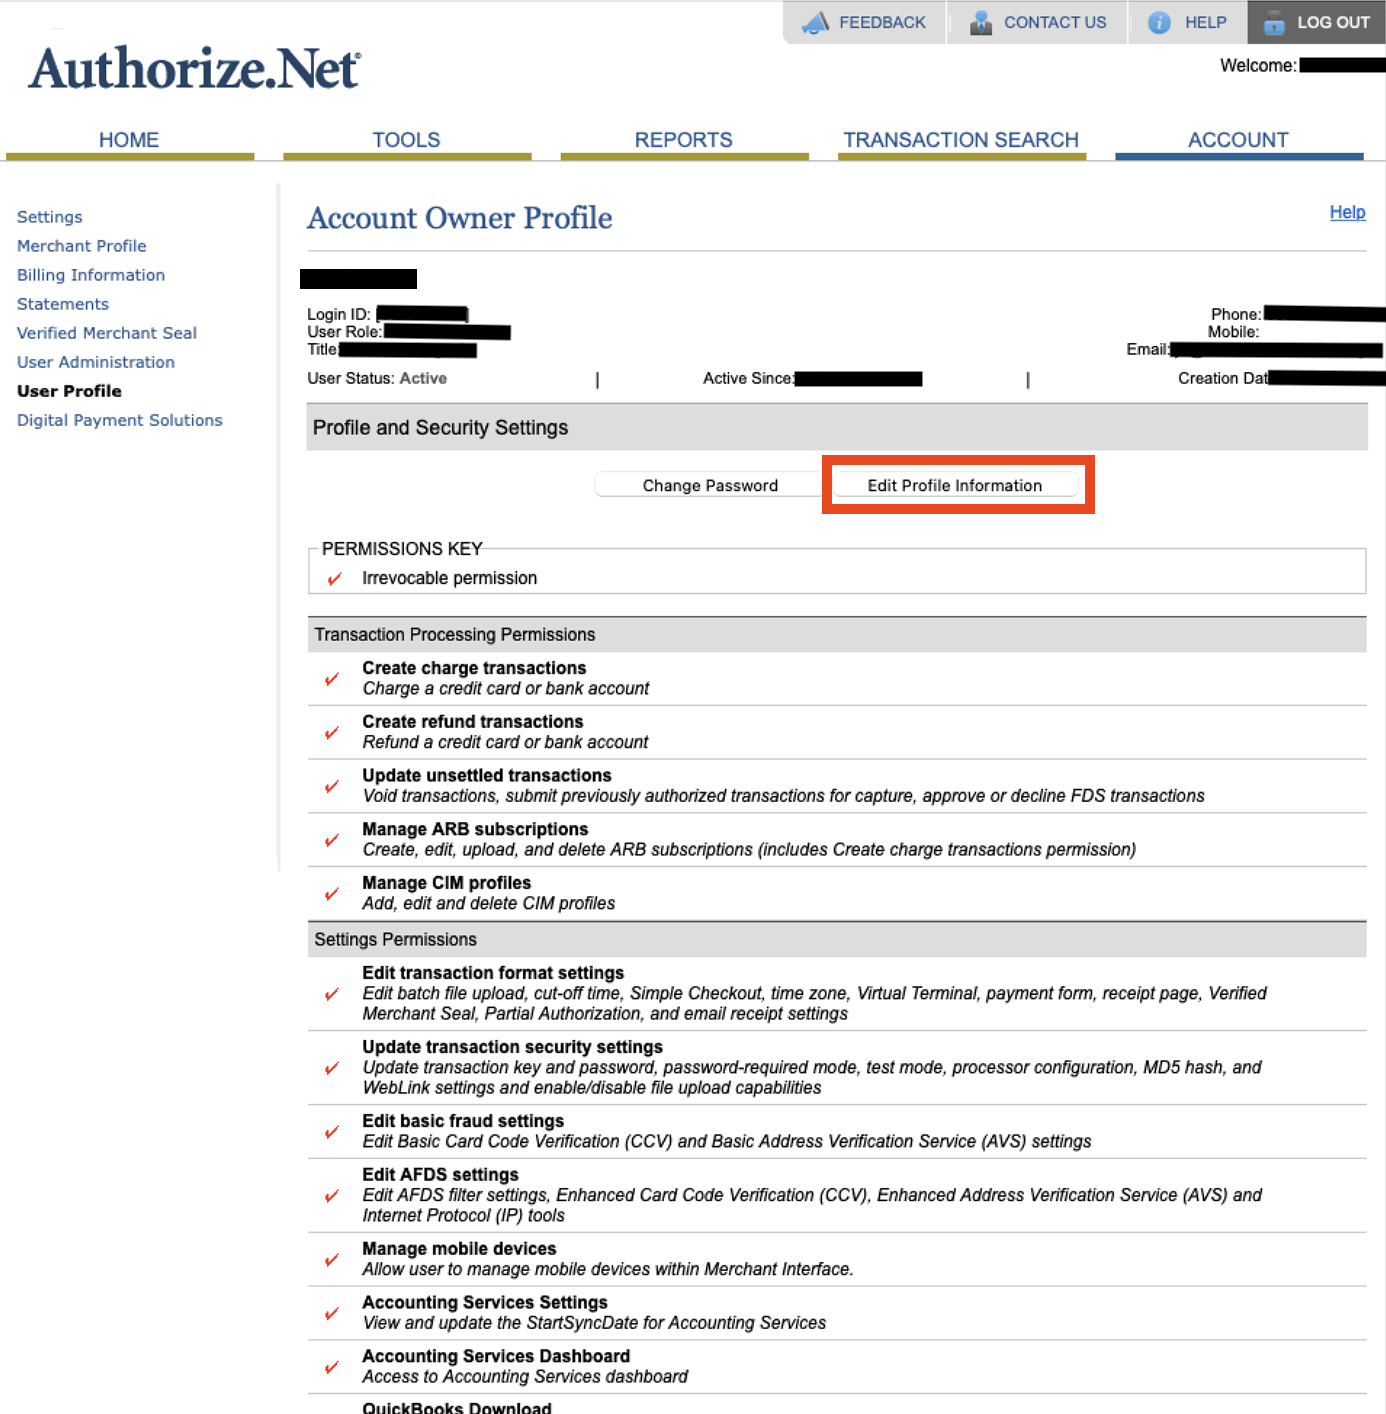
- Under Transaction Emails remove the check next to Transaction Receipt.
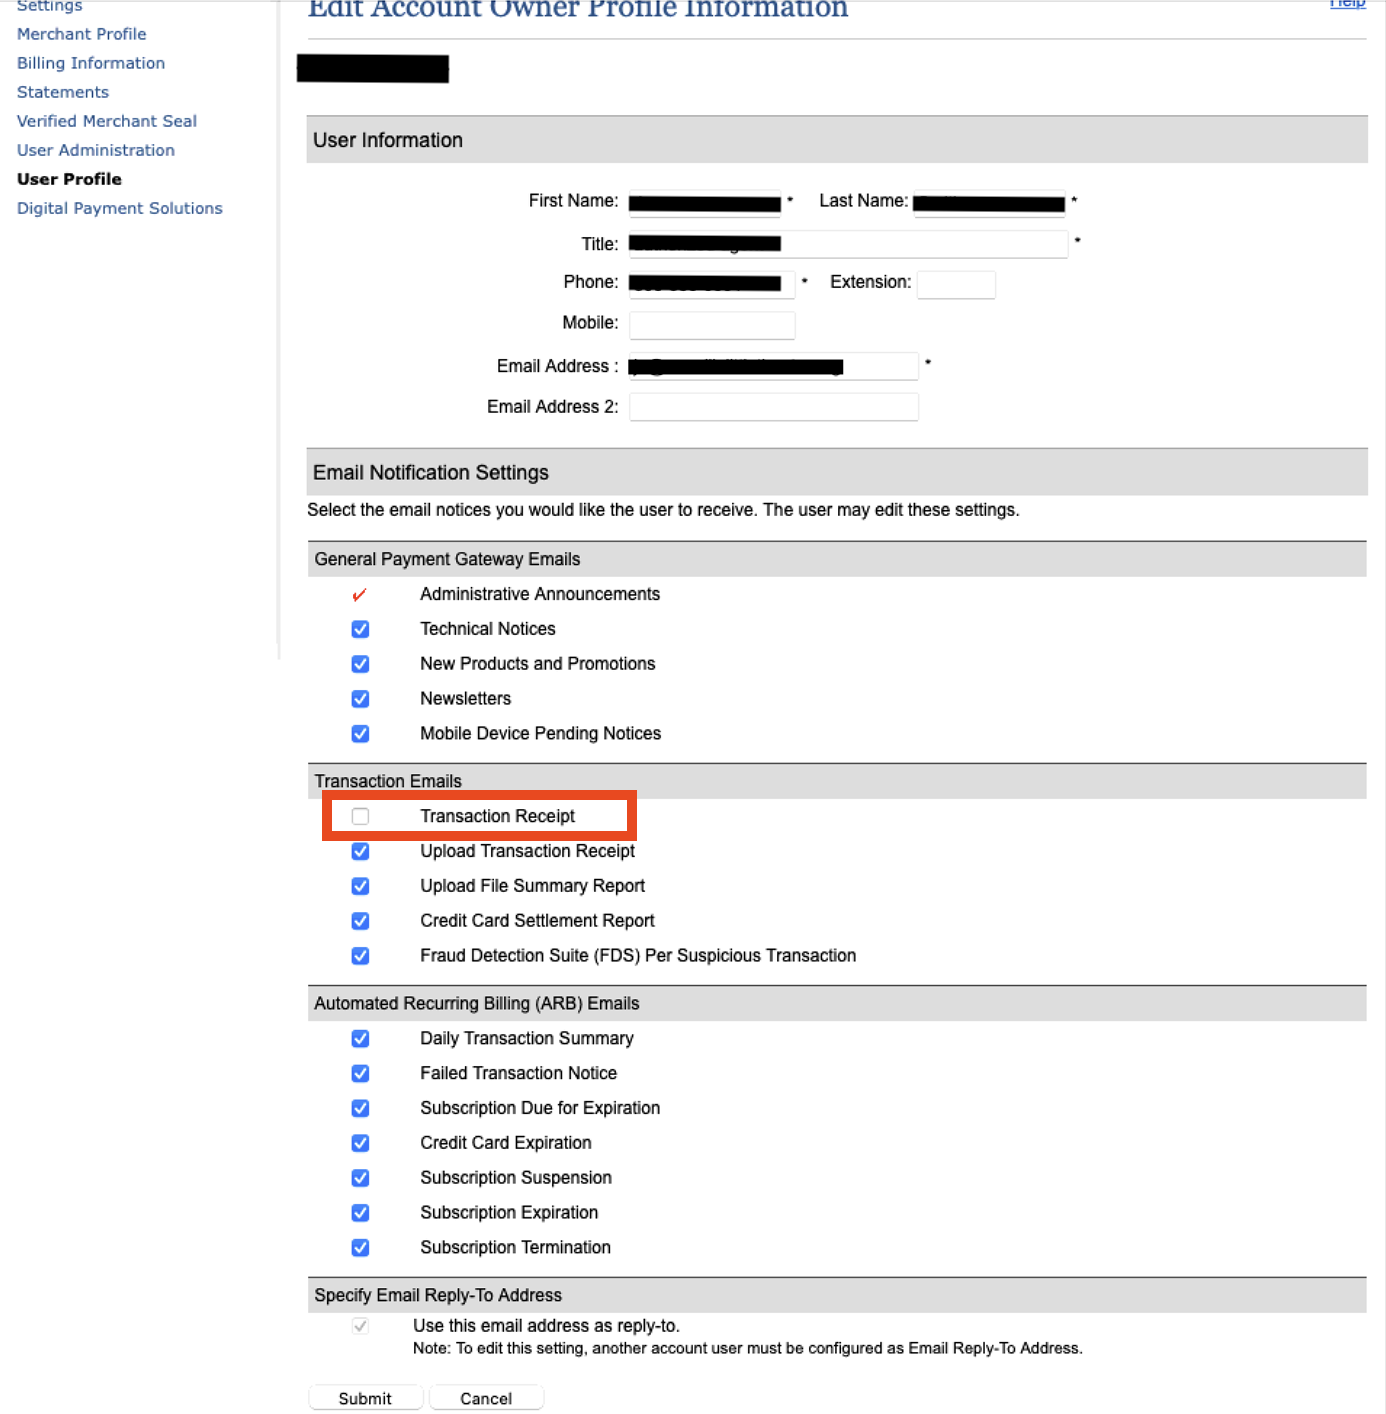
- Scroll to the bottom of the page and click the Save button.
Clicking Save will generate a pop-up window asking to send a verification pin to the email address on the account. Follow the steps and add the pin to complete the process.
Authorize.net Address Verification Settings
To set these parameters, you perform the following steps:
- Open your online gateway to Authorize.net and choose Account >> Settings.
The main Settings window opens.
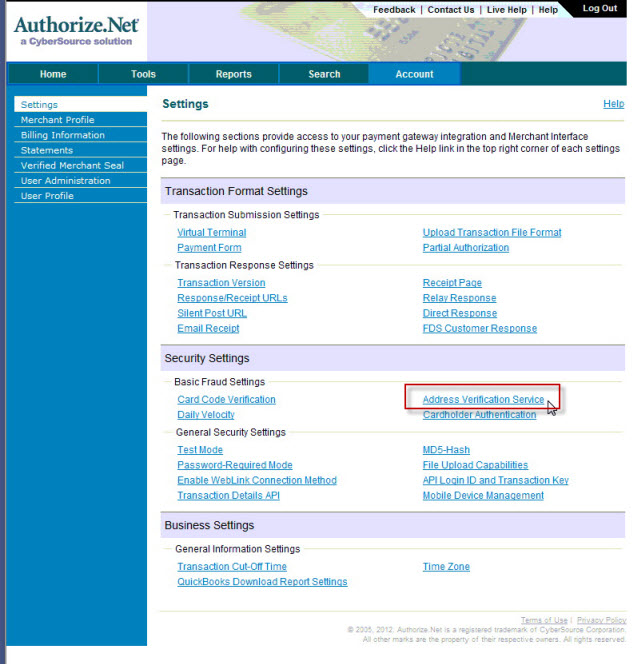
- In the Security Settings section, click on Address Verification Service.
The following window displays.
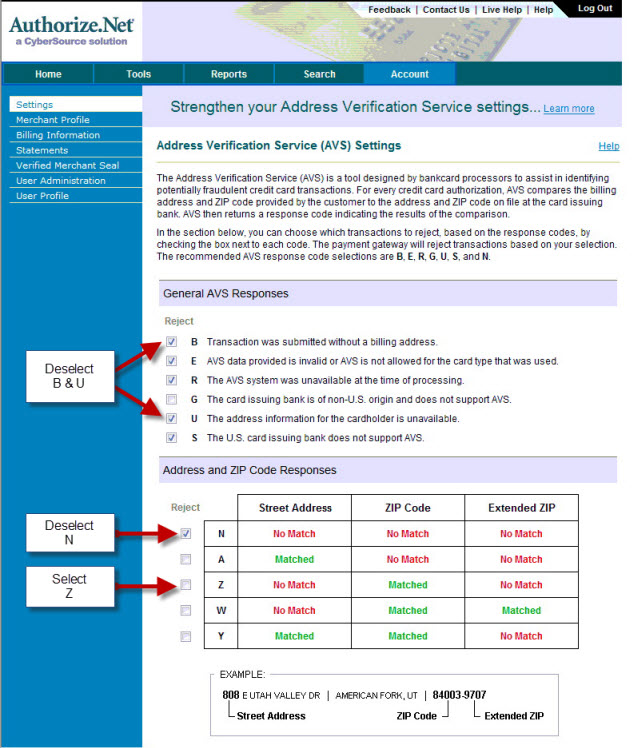
- Ensure the following settings are enabled:
General AVS Responses
B - Transaction was submitted without a billing address √ E - AVS Data provided is invalid or AVS is not allowed for the card type used √ R - The AVS system was unavailable at the time of processing G - The card issuing bank is of non-US origin and does not support AVS. U - The address information for the cardholder is unavailable √ S - the US card bank does not support AVS Address and Zip Code Resources
N A √ Z W Y
When complete, your page will look like the following:
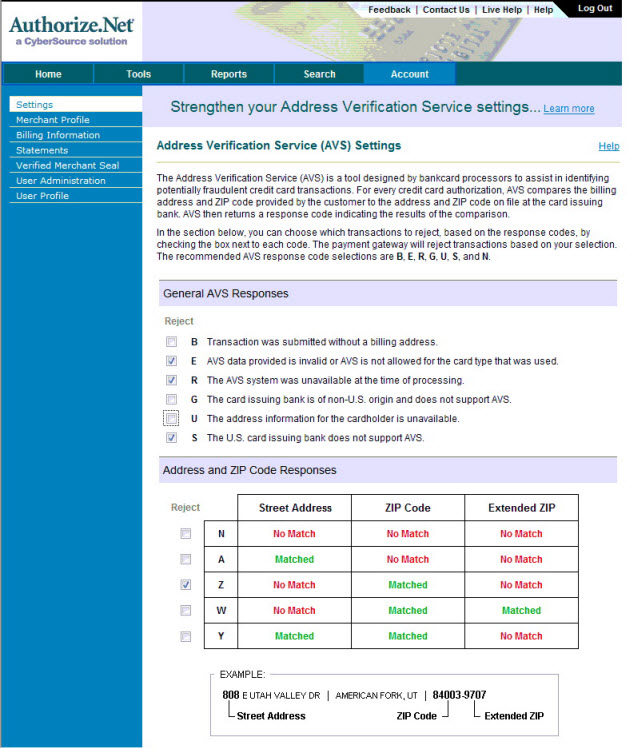
Allowing refunds with Authorize.net
http://www.authorize.net/files/ecc.pdf
|
NOTE: You do not need this feature if you typically refund money against the original order within 120 days of purchase and up to the original authorized amount.
An occasional refund needed that is past 120 days can be accomplished via the Authorize.net web interface. Only apply for this feature if you constantly need to refund money outside the original order and/or outside 120 days (and don't wish to refund to a gift certificate for store credit. |
Once the form is filled out, faxed back to Authorize.net, and processed by Authorize.net's customer support team, clients will be able to process refunds through Theatre Manager - sometimes within hours, sometimes up to 2 days later. The sure way to know is to check the status of your Expanded Credit Capabilities.
To check the status of your Expanded Credit Capabilities, you can look directly within the gateway for your Authorize.net account.
- Go to the home page
- Click on the Merchant Profile link on the left hand side
A series of settings will appear, including 'Additional Services.' The Expanded Credit Capabilities should read 'Enabled."
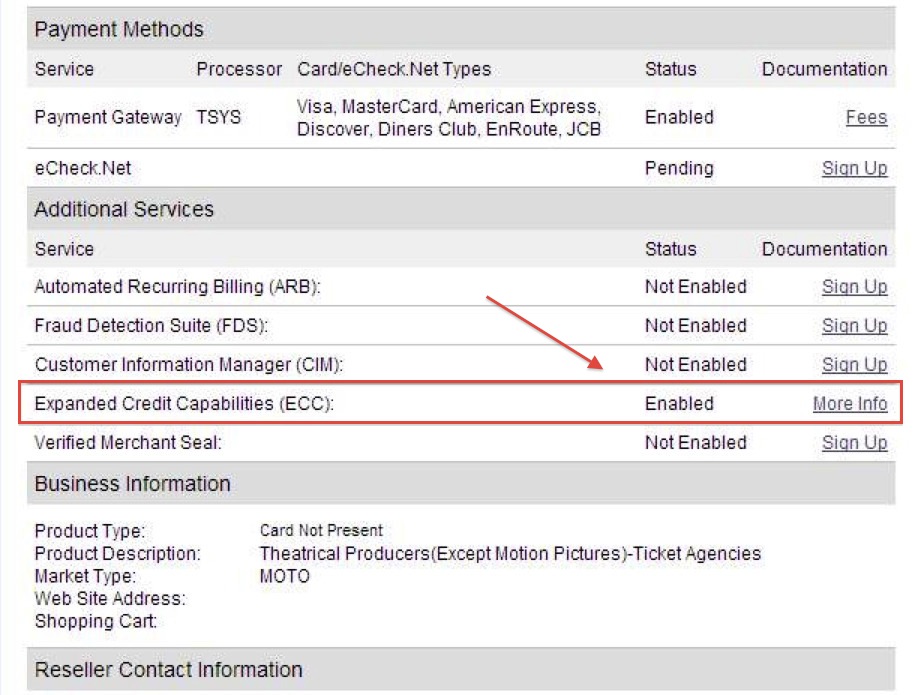
|
This is only for processing refunds in a separate batch, after the End of Day deposit has been done for the original charge. In cases where the card is to be refunded before settlement, users should instead Void and Delete the payment in Theatre Manager. Then the tickets can be refunded to clear the order balance that will be created when the payment is voided. There is no additional setup required through Authorize.net in order to process voids. |
|
Refunds are processed immediately by Authorize.net. YOU CANNOT VOID A REFUND
If you fail to settle a batch containing a refund before the Authorize.net sweep time, you will receive a warning during the End of Day that the batch may be out of balance (even if it is not). |
|
It is also important to note that the ECC form will allow users to run a refund in any amount to a card without matching up the refund amount to the original charge. Because of this, there are a couple of important considerations:
|
Enabling Transaction Details API in order to settle during End of Day
- Log into your Authorize.net account
- Select the Account button at the top right of the toolbar
- Choose Settings from the Menu at the left
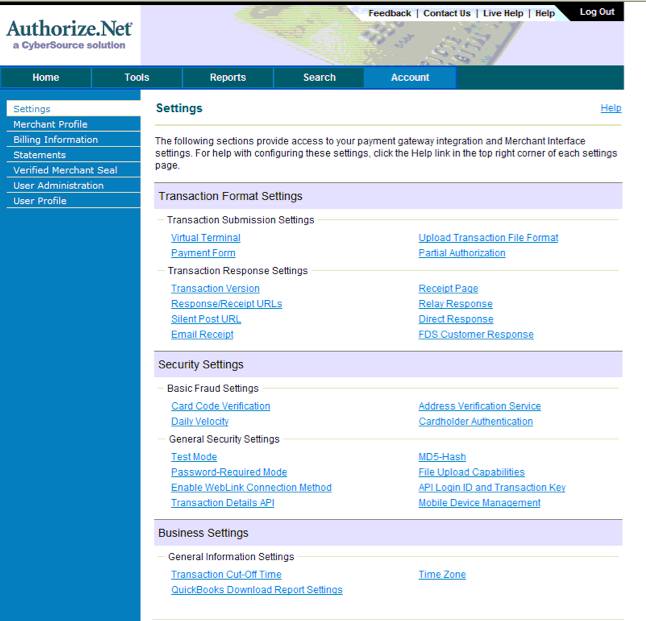
- Select the Transaction Details API option under Security Settings
- You will be prompted to enter your secret question/answer that you set up when you created your account. Then click the Enable Transaction Details API button
- You will be taken back to the main Settings screen. To check that the settings have taken effect, go back to Transaction Details API
- When enabled, your screen shows you an option to Disable as below (do not do this).
- You will now be able to settle through the Theatre Manager End of Day Wizard. For more information about the Wizard, click here.
Setting the Sweep Time for Settlement
- Sign in to the Authorize.net interface
- Choose the Virtual Terminal option at the left
- Choose the Transaction Cut-Off Time option under Business Settings.
- You'll see the current sweep or settlement time in the middle of the page (3:00 PM PDT in the example). Change the time using the drop down choices at the bottom of the page and click Submit. Our recommendation is to set this time sometime between 12AM and 4AM local time.
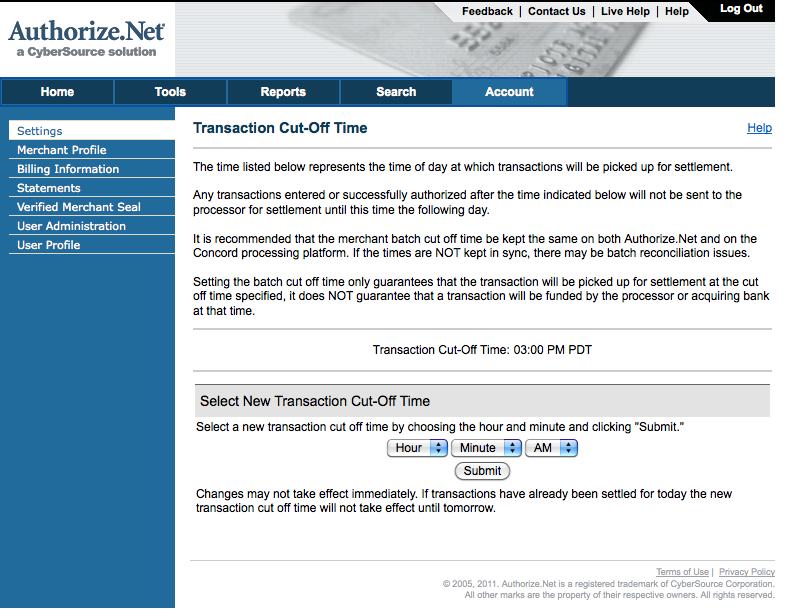
Authorize.Net Troubleshooting
- The official status for Authorize.net web site
- The developer web site which may indicate some troubles before the official status site
- The debug option in the merchant set up which can be used to show the raw data for the request sent to authorize.net and the response received from their servers.
- Make sure your Authorize.net API key is correct in Theatre Manager - you may want to test your account again and/or follow the setup procedures to verify your account info is entered properly
Elavon (private) Installation
The Elavon-Private Merchant account was written to process payments using Elavon as the processor and working in conjunction with an existing customized interface. This is only available to certain municipal organizations in Florida.
This section of the online help contains details on how to configure a Merchant Account in Theatre Manager to process payments, refunds and settle a batch using this interface.
The information that Theatre Manager requires from Elavon setup will be:
- Agency ID: xxxxxxxxxx
- Admin ID: xxxxxx
- Password: xxxxxxxxxx
- Primary URL for authorizations:
- Port #: 443
The Agency ID, Admin ID and password will be sent in a document from Elavon. That document will also contain instructions for you to log in to the Elavon online gateway to activate your account. The Primary URL should be obtained from the IT company that setup the customized interface.
Elavon Gateway Setup
The Elavon Merchant Account information is obtained from Elavon. The Primary URL will be provided by the IT company that created the custom interface. This information is entered into Theatre Manager under Setup >> System Tables >> Merchant Accounts.
Software Type
The following values are set on the Software Type tab per the diagram below:
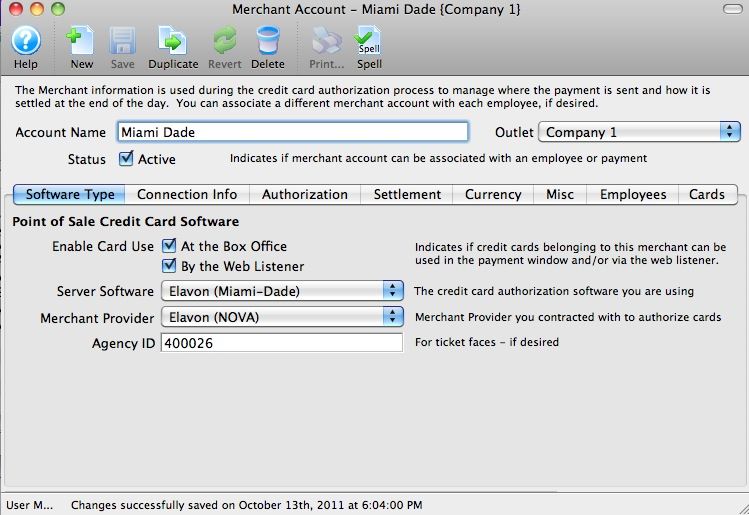
- Enter an Account Name for the Merchant Account.
- The Status Active, At the Box Office and By the Web Listener boxes should both be checked.
- Set the server software to be Elavon-Private.
- The merchant provider will automatically be set to Elavon (NOVA).
- The Agency ID is provided by Elavon and will need to go into the Agency ID field - enter in the Agency ID (not the merchant number) for the Elavon account which is typically 6 digits.
Connection Info
The following entries are set on the Connection Info tab per the diagram below:
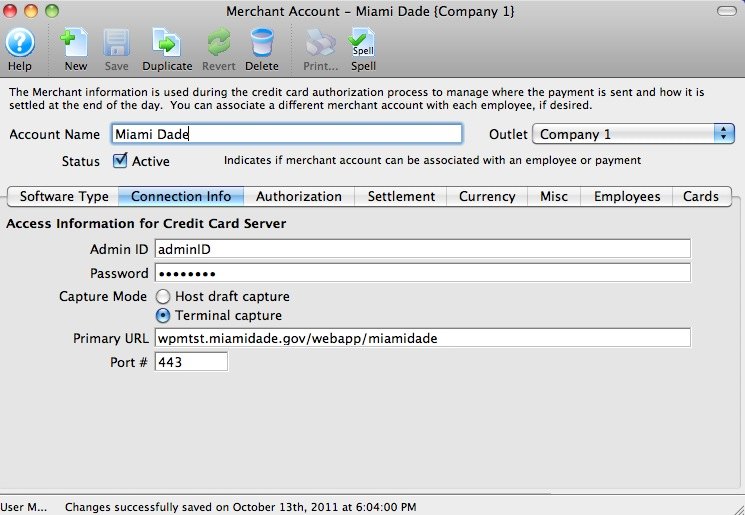
- An Admin ID will be provided by Elavon and is required to process refunds using this merchant account. This is a mandatory field in the Merchant Account Setup.
- The Password is also provided by Elavon and is required to process refunds. This is a mandatory field in the Merchant Account Setup.
- The IT company that created the customized interface will proved the Primary URL.
- The Port will always be 443. Payments, refunds and batch settlement will all be processed using this port. Local work stations that need to process payments will need this port open for communication.
Authorization
For fraud prevention, Elavon accounts in Theatre Manager will be automatically set up to send address info and Track II data. Verify the Authorization tab matches the image below.
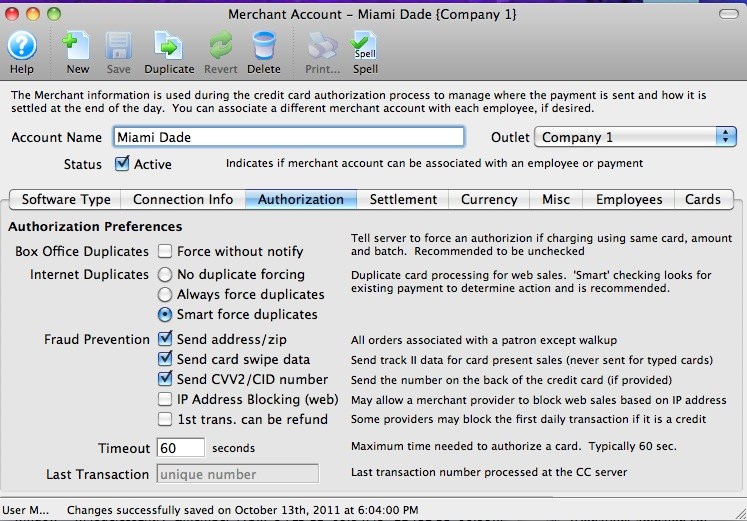
Merchant Profiles
|
Due to custom interface limitations that may exist in a Private Installation, Merchant Profiles are unavailable for Elavon (Private Installations). |
The following entries are set on the Profiles tab per the diagram below:
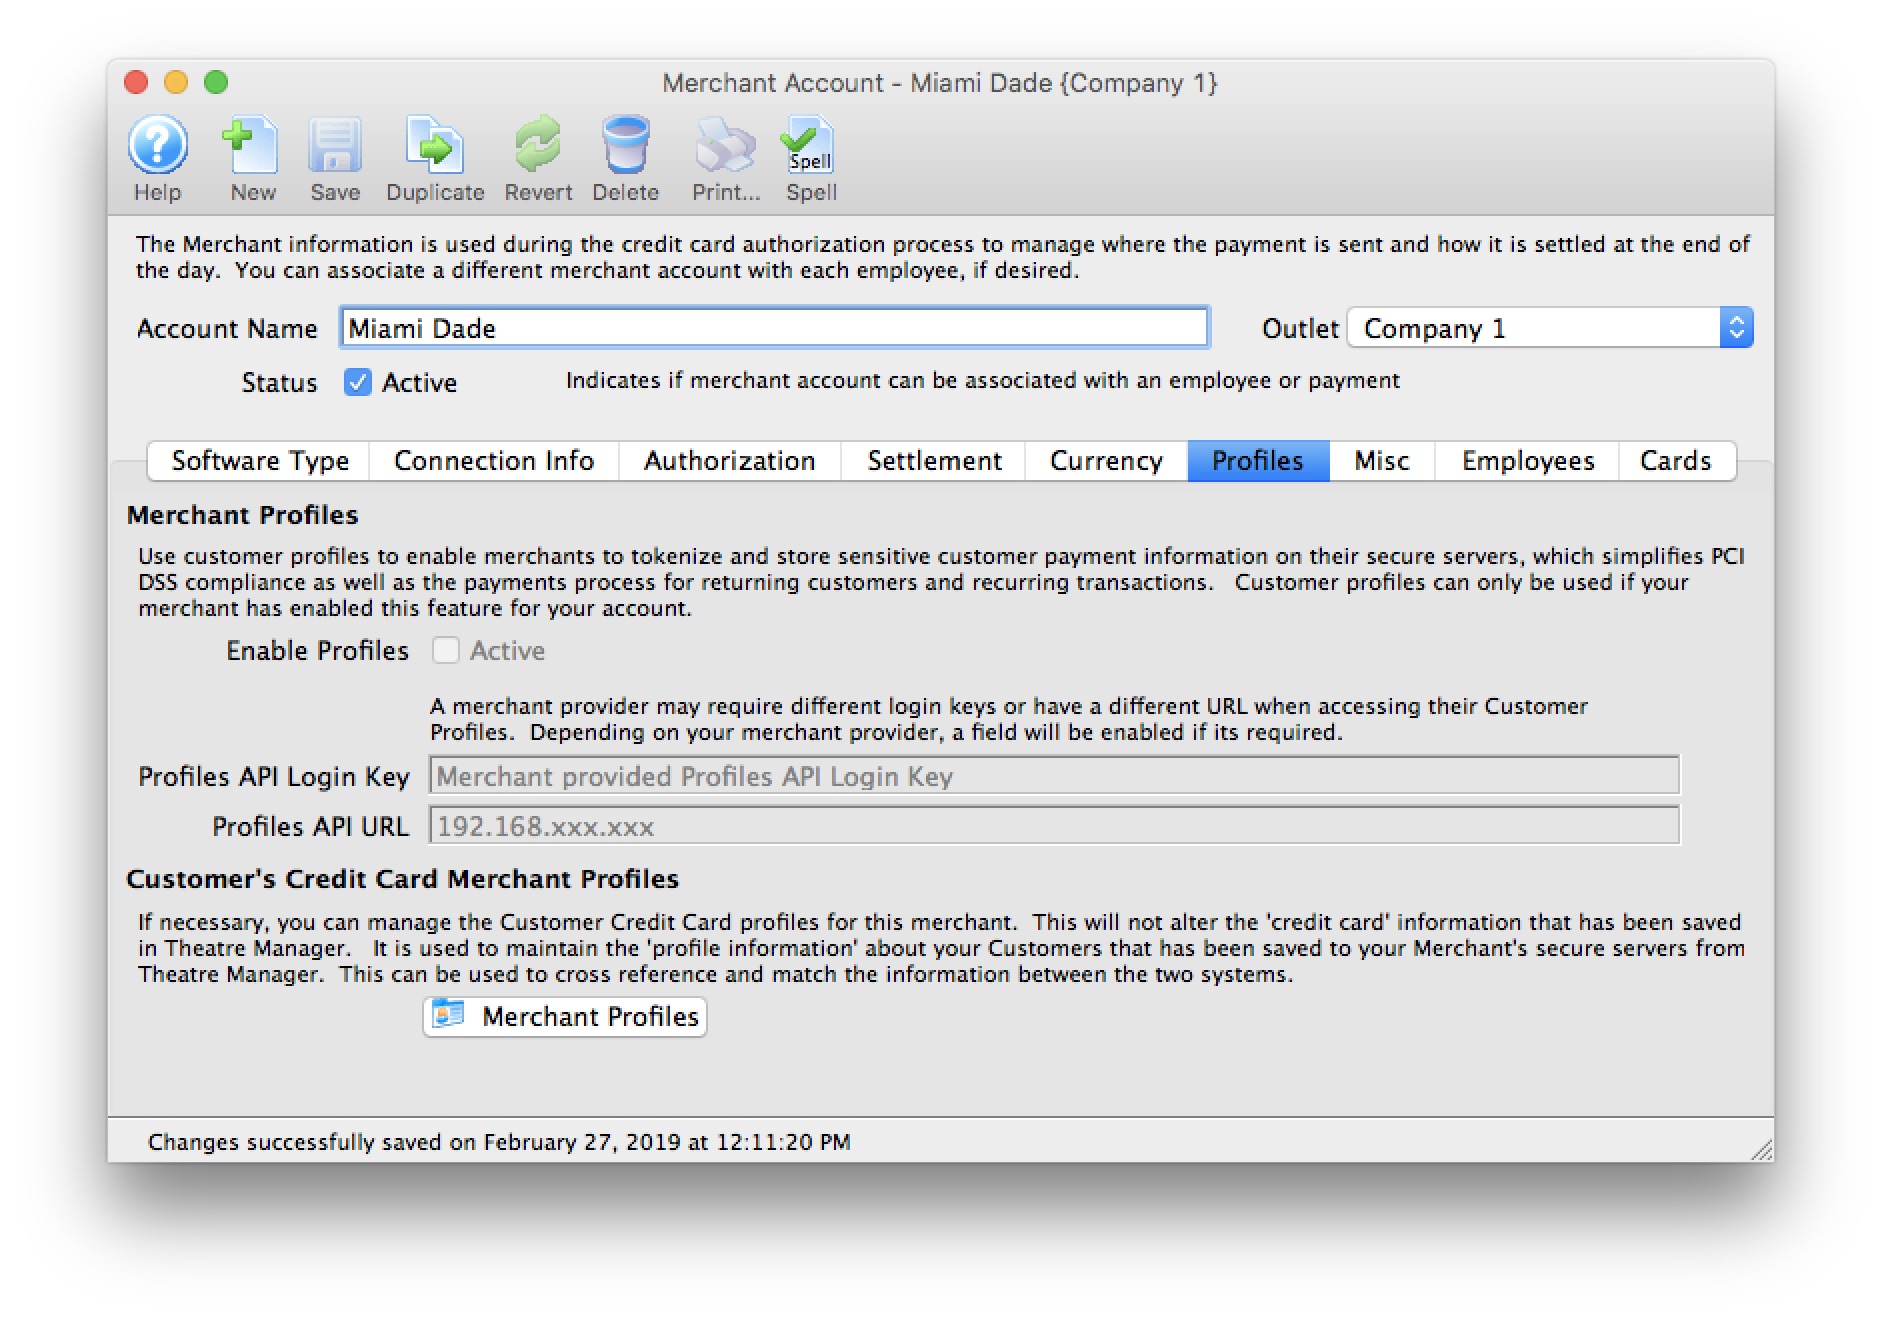
- Enable Profiles - disabled feature. Merchant Profiles are unable for Elavon (Private Installations).
- Profiles API Login Key - not required. Elavon uses the same connection information from the Connection Info tab.
- Profiles API URL - not required. Elavon uses the same the connection information from the Connection Info tab.
|
Refer to Merchant Profiles for further information on functionality. |
Activating your Elavon Payment Gateway
Switching Merchant Accounts: Employee and Card Setup
Switching from One Merchant Provider to Another
On the Merchant Setup window (see Merchant Account Setup), the final bit of setup is to determine which employees and which payment methods are associated with this merchant account.
- To assign employees to this merchant account, click on the Employee tab and find the employees to assign. In a multi-merchant setup situation, drag only those employees that will use this merchant account as the default.
While some employees may have permission to use multiple merchant accounts, viewing their name here means this is the default merchant account assigned to them for charging cards. If the employee wants to use another merchant account, they will need to select it on the payment window.
- Click on the Card tab to select which credit card payment methods are associated with this merchant account.
If you need to have multiple merchant accounts and both are to take Visa (for example), you will need two Visa payment methods and assign one of them to each merchant account.
Any future dated 'post dated payments' associated with the card you drag to another merchant provider will automatically be reassigned to authorize on the new merchant provider card network.
|
When switching, you can open both merchant accounts and drag the employees from one window to the other. You can do the same for the credit card payment methods - to make the switch easy and fast. |
|
Linked Refunds authorized under your old merchant account are only possible if you keep your old merchant account open. This is because the tokens used by the credit card companies are specific to card #, order, patron and merchant.
It may be wise to keep the old merchant account aroudn/inactive for 3 months or so. This is a non-issue if your merchant provided the ability to do Independent Refunds |
Credit Card Refund Rules
|
VERY IMPORTANT: BEFORE REFUNDING PAYMENTS TO CREDIT CARDS...
Your merchant provider dictates all rules regarding refunds to credit cards Theatre Manager does its best to determine which refund rule might apply, based on how the card was originally authorized. If you have difficulty with some refunds, your merchant provider is the key to unlocking the door - you can set their rules in Merchant Setup An HISTORICAL UNDERSTANDING of the credit card refund process and CARD FRAUD might help guide you solving some issues (along with some workarounds) |
|
When doing MASS REFUNDS, we recommend:
|
Refunds and Fraud Prevention
How did credit card refunds originally work?
For a long long time, the rules were simple. You needed the entire card in front of you. When sending in a request for a refund, you provided the entire card number, expiry and amount.
About the Refund Rules (as we understand them today)
Credit card providers felt that the simple rule had too much potential for fraud. And it did: bad guys with cards figured out how to create a lot of refunds and steal a lot of money.
Each credit card merchant provider instituted one or more out of a number of rules to thwart fraud, making the refund process difficult. This generally works fine for one off refunds, but hampers the process when trying to do mass refunds to an entire event meaning it may need a lot of manual intervention.
What a Mixture of Rules means for Refunds
Some of the techniques credit card providers implemented that make the refund process difficult to navigate are below. Since the rules have been implemented over time, you may find that mass refunds might encounter one or more of these scenarios:
- Independent Refunds: payment refunds not linked to any order
- Linked Refunds: payment refunds must be the same order as original authorization
- Refunds using Merchant Profiles: payment refunds use an existing profile for the customer without needing card data
- Refunding when card data is shredded or non existent in the database
- Refunds accepted up to a certain amount of money and then stop being accepted
- Refunds Prevented for the first transaction in the day
- Refunds causing End of Day Imbalances due to some timing issues at the bank
|
NOTE: you can set which type of refund(s) your merchant provider allows in merchant setup
If you are allowed both, Theatre Manager tries Linked refunds. If that fails, you can chose to do an independent refund on the payment window |
Independent Refunds, Payments Not Linked To An Order
- the amount refunded is more that the original authorization
- the card number is different than the one used for original authorization
|
An independent refund means you must supply the full credit card number and expiry. You either have this (because it is encrypted on the database) or you ask the customer for it.
If you have shredded old cards and do not have it encrypted on the database, then you cannot do an independent refund. It will need to be a linked refund (which is generally preferable for the credit card companies) |
|
Bambora and Elavon (Miami-Dade) do not support this feature and only allows linked refunds
To our knowledge, all other merchant providers support independent refunds and some require this permission to be specifically requested. |
| Conditions | Action or Workaround |
You must have:
|
Verify that your PCI Settings in Default Data is PCI Schedule D, with many days of retention since last use of card.
|
| Some merchant providers require you to sign up for INDEPENDENT REFUNDS. | Contact your merchant provider to ensure that you have this feature enabled if you need to do mass refunds. You can call your merchant provider after and disable it when done.
eg: |
| End of day may appear out of balance for Authorize.net | Authorize.net processes refunds right away. If you do a lot of refunds before the sweep time and settle end of day after the sweep time, you may be told that you are out of balance by what seems to be the total amount of your refunds. |
| Refund rejected because card is shredded | If you see a message saying that the card was rejected because no encrypted card is on file, then you are trying to do an independent refund.
Instead, change the setting in your merchant profile to allow linked refunds first. |
Linked Refund: Merchant Provider limits refunds to xx days to same order using tokens
|
A linked refund does not require the full credit card number. Instead, it uses a token representing a particular authorization that the merchant processor gave Theatre Manager at time of authorization.
This is the only method of refund that can be used if you are shredding credit cards for PCI compliance. |
Linked Refund Rules
Typical rules that merchant providers implemented for linked refunds
- within xxx days since the original authorization. The default we've seen is 120 days.
- by referencing the same order as the original authorization
- using the saved transaction token from the original authorization (instead of the credit card data)
- for no more than the amount of the original authorization (less any other refunds to the card already)
| Conditions | Action or Workaround | ||||
| Refund rejected because card is shredded | If you see a message saying that the card was rejected because no encrypted card is on file, then you are trying to do an independent refund.
Instead, change the setting in your merchant profile to allow linked refunds first. |
||||
| Refund gets rejected because of age |
|
||||
| Refund Rejected because it is too much | In a LINKED REFUND, you can only refund the a maximum amount of the original credit card payment.
If the patron paid with two different payments methods (eg: part in cash and part in credit card), then you will need to:
NOTE: If the message below indicates your merchant setup supports Independent Refunds, AND you know the entire card number, CVV2 and expiry date, you might be able try an independent refund instead.
|
||||
| Refund gets rejected because it is not connected to order | If there are multiple credit card payments for the order and you get this message, you may be affected by the timing of when the payment was authorized. You could have:
Theatre Manager presents a list of credit cards to refund to - pick the one you want, If you try to refund too much, you'll see an error like the image below. IF this is the case, then break the refund up into smaller amounts.
|
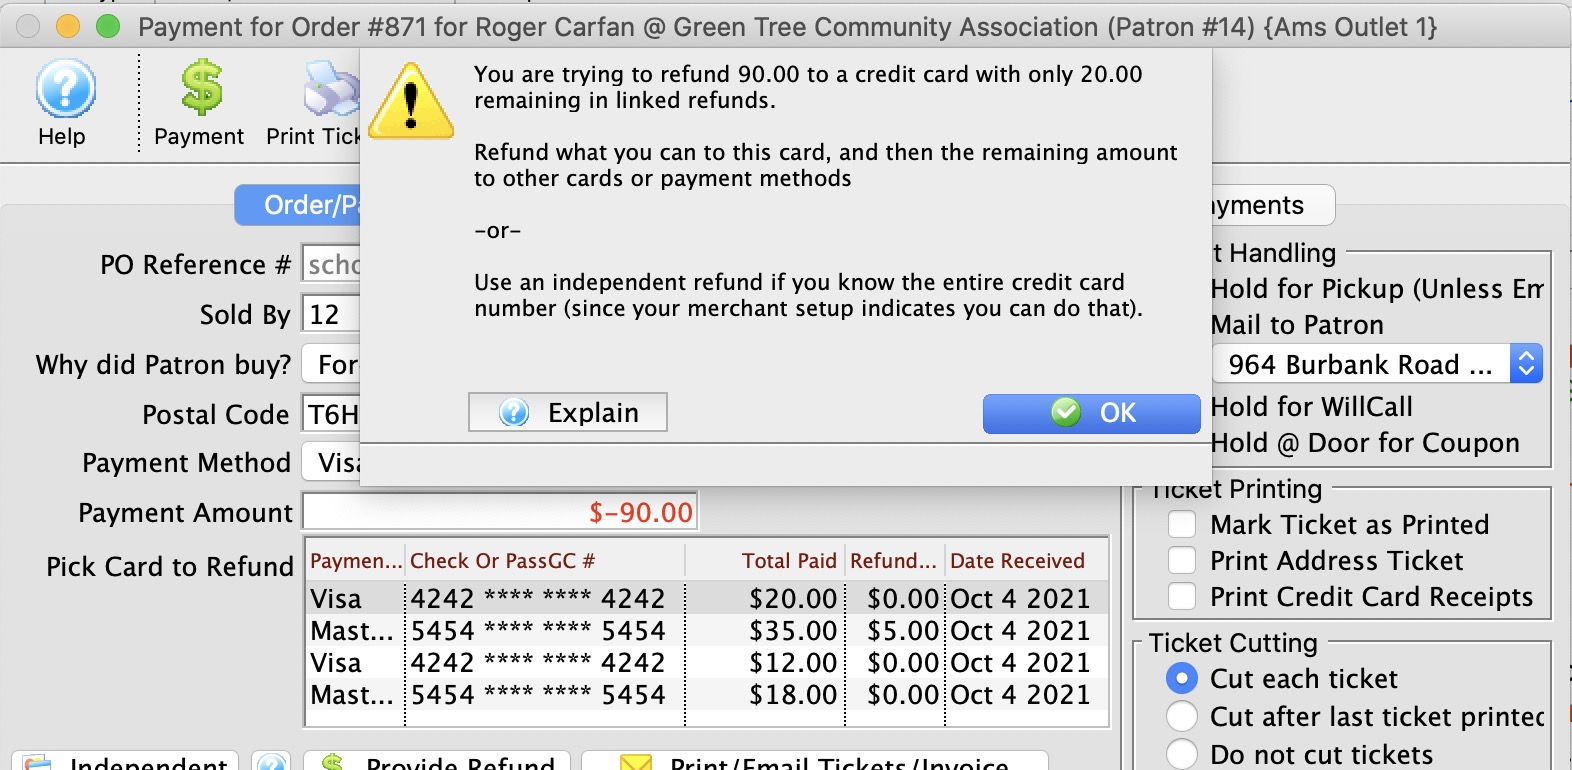
Refunding against Shredded Credit Cards
| Conditions | Action or Workaround |
| Payments without full card data will be rejected with invalid PAN numbers
or that card number has been shredded |
If your
PCI Settings in Default Data is Schedule C, or D and the retention period for the card has expired, you might see this error.
It means that you attempted to refund to a shredded credit card. The way to refund in this situations is:
|
Refunds accepted to a certain amount and start getting rejected
| Conditions | Action or Workaround |
| You may have daily or weekly limits to the amount that can be refunded | Verify with your merchant provider if there are limits. If so, then when doing a mass refund to an event:
|
| You may have limits based on bank balance | Verify with your merchant provider and bank if there are limits based on balance. If so, then when doing a mass refund to an event:
|
Refunds with merchant profiles enabled
- The patron provides the card data to Theatre Manager during an authorization
- Theatre Manager sends the data to the bank and receives a UNIQUE TOKEN back
- and the unique token can be used for all subsequent authorizations or refunds, without ever needing the card data again, making it suited for post dated payments for schedule 'C' compliance.
| Conditions | Action or Workaround |
| Some cards are accepted and some rejected |
If you have merchant profiles enabled and cards are being rejected:
You cannot create a profile for previously shredded card data. |
First Transaction Cannot be a Refund
| Conditions | Action or Workaround |
| Cannot send a refund after completing an end of day | Some merchant providers instituted a policy that the first transaction after settling batches or the fraud transaction in any calendar day could not be a refund, since that might be considered the first step to fraud.
If Theatre Manager gives you a message that it cannot process a refund as the first transaction, it may be as simple as turning ON setting that first transaction can be a refund in your merchant setup to seeing if your merchant provider still enforces this rule. If they still do, then contact your merchant provider to get that rule waived. |
End of Day Imbalance due to Sweep Time
| Conditions | Action or Workaround | ||
| Refunds appear in Theatre Manager and not in Authorize.net |
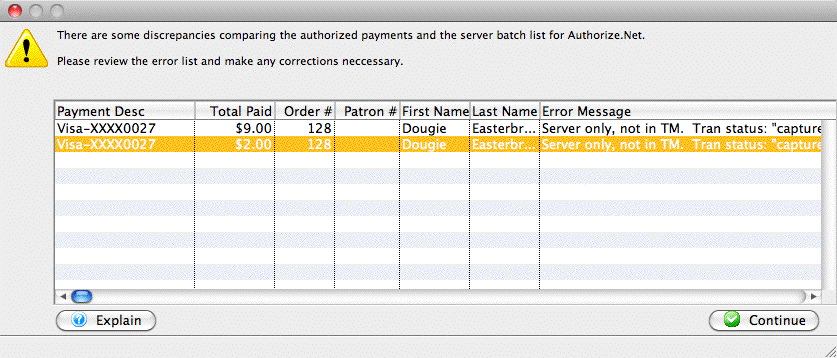
|
||
| Transactions in Authorize.net but not in Theatre Manager |
|
Refunds using Full Card Data (stored)
Individual Refunds
Individual refunds are easiest when you can refund to a credit card on file. This is possible if
- You keep encrypted data in the database for all patrons by using Schedule D with a reasonable retention period -or-
- You are using merchant profiles and a profile has been created for the patron because they used the credit card to buy something -and-
- You are allowed to do independent refunds by your merchant provider.
Mass Refunds of tickets to Events
You can do mass refunds if you have card data stored in the database if the patrons card data meets the individual criteria above.
Possible Errors doing Refunds with Full Card Data
We recommend doing the refunds first, then authorizing during end of day. This gives you more control over the authorization process. Typical issues that can arise are:
- Credit card rejected - you will need to call the patron
- Independent Refunds - you might see these if they are enabled by your merchant provider.
- Linked Refunds - you might see some of these errors if independent refunds are not enabled.
- Shredded Card Errors - the system might create a payment for a shredded credit card. Naturally, this will be declined. The card can be entered manually during end of day.
Independent Refunds using Full Card Data (entered)
Individual Refunds
Refunding using full card data means that you are able to enter the patron's credit card in full and ask for a refund. You should receive an authorization.
Refunding with no previous card on file requires:
- You are allowed to do independent refunds by your merchant provider.
Mass Refunds of tickets to Events
You cannot do mass refunds unless you have card data (or a merchant profile) stored in the database. If you find that you need to refund a lot of people and have neither, you can still use the mechanisms described in refunding to an entire performance
- The best way is by:
- opening the performance attendance tab
- selecting tickets to an order
- and refund on a case by case basis (described in the above link)
- You can refund all tickets and then create refund payments later -or-
Possible Errors doing Refunds with Full Card Data entered by you
Since you have to be talking to a patron to refund money when typing in the full card data, you are able to ask them for their card data.
Typical issues that can arise are:
- Credit card rejected - you will need to call the patron
- Independent Refunds - you might see these if they are enabled.
- First transaction is a Refund - You might be prevented from refunding as the first transaction of the day - which might need a flag changed.
Linked Refunds using tokens within xx days
Individual Refunds
Refunding using tokens is like refunding using merchant profiles. It means that you can select a prior card owned by the patron on the payment window based on the last 4 digits. The payment window will appear to show a masked credit card number.
Then submitting the refund for authorization, you are restricted to the rules of Linked Refunds. You must pick a card that belongs to the order, otherwise you will not receive an authorization.
|
 IF YOU RECEIVE A MESSAGE THAT THERE ARE NO PRIOR PAYMENTS...
if you receive a message from Theatre Manager there are NO PRIOR PAYMENTS when doing a refund, the root cause is because merchant providers have been forcing venues to use linked refunds, meaning they imposed a typical time limit of having to refund within 120 days of purchase. In these times of crisis, each venue seems to have a different time limit and you can set it in Theatre Manager's Merchant Setup. It may work if you increase the time frame. If not, you may need to talk to the bank to have them raise the timeframe on their end as well. |
Mass Refunds of tickets to Events
Mass refunds of tickets and creating payment at time of refund using tokens is currently not supported.
You can open the attendance window and refund patrons orders one by one, selecting card as the refund method. This will invoke refund by token for that order.
Possible Errors doing Refunds with Merchant Profiles
Typical issues that can arise are:
- Credit card rejected - you will need to call the patron
- Linked Refunds - you might see some of these errors.
Refunds using Merchant Profiles
Individual Refunds
Refunding using merchant profiles means that you can select a prior card owned by the patron on the payment window based on the last 4 digits. The payment window will appear to show a masked credit card number.
Then submitting the refund for authorization, your merchant provider subjects you to the same rules depending on whether you can do:
- Independent Refunds: the only difference is you are not typing the credit card and do not need to talk to the patron to get it
- Linked Refunds: if you pick a card that doesn't belong to the order, you will not receive an authorization
Mass Refunds of tickets to Events
You can do mass refunds of tickets using merchant profiles. TM will attempt to use the merchant profile and apply an independent refund. Linked refunds are currently not supported for mass refund of tickets.
Possible Errors doing Refunds with Merchant Profiles
We recommend doing the refunds first, then authorizing during end of day. This gives you more control over the authorization process. Typical issues that can arise are:
- Credit card rejected - you will need to call the patron
- Independent Refunds - you might see these if they are enabled.
- Linked Refunds - you might see some of these errors if independent refunds are not enabled.
- Shredded Card Errors - the system might create a payment for a shredded credit card. Naturally, this will be declined. The card can be entered manually during end of day.
USB Credit Card Swipes
Installation is easy - just plug it into your computer.
It works by reading the card information, including the track II information into Theatre Manager. Theatre Manager encrypts the credit card. It forwards the track II information to the credit card company and then promptly forgets about it - Track II data is never retained in Theatre Manager per PCI DSS requirements. A number of credit card companies use Track II information as proof that the cardholder is present and may adjust discount rates. Note also that they adjust rates for full address verification, CVV2 verification and other factors - making it equivalent to Track II authorization.
|
All Service Providers operate as card not present. That means Track II information is never send to them, even if the credit card is swiped using a USB reader. The card #, plus address and CVV2 are more important and will provide competitive discount rates. In this case, a USB swipe becomes only an efficiency tool for data entry rather than a need for proving card present. |
|
Moneris has an additional option: sending card information using and external pin pad, if you wish to have those as part of your account. It allows Schedule B-IP compliance and is considered Card Present, allowing tab, chip and pin, swipe, apple-pay, etc. |
|
Any computer that has a USB credit card reader OR a keyboard attached to should have limited ability to connect to the internet with direct access for browsing and/or strong virus protection
This protection is to detect any 'bad actors' in viruses which are keystroke loggers. If your machine is infected, it will send every keystroke to the 'bad guys' and this is one easy way for them to compromise credit card information, one card at a time when they are entered. |
Programming a Credit Card Swipe
You may NOT have to program your swipe if:
- it only has track II programed for it, you do not need to change it (these are generally swpes that are older than 2 or 3 years). You will know this if TM never shows you the swiped name in the card name field when you swipe it.
- you try it and there is no issues
- it is made by a vendor other than IDTech
- it is made by IDtech and the model number is IDT3331-02U
Historically, the credit card swipes from Arts Management would work out of the box. On the PC, we have found that there are timing issues with the delimiters between tracks and how Theatre Manager accepts them. So, the object of reprogramming the swipes is simply to change the delimiter between the tracks from a 'CR'.
To program a credit card swipe, you will need:
- A PC and the following installation software (the swipes cannot be reprogrammed on a Mac)
- The following reference manual for the swipes (optional)
Steps for IDtech models
- IDMB3331-02UB
- IDMB-334112B
- Download the installation software to a PC
- When you get it on your desktop, you will need to run the executable program and it will create a folder on your desktop.
- Look in that folder and run the 'Setup.exe' program that you see in the picture to the right.
- After you have installed the program, go to:
- Start Menu
- Program Files
- Mag Swipe Configuration Utility folder
- pick the Mag Swipe Configuration Utility application as per the side picture.
Before starting, plug in the Credit Card reader into the computer.
When you start the application, you will see some choices down the left side. The first step is to click the 'Select Reader Interface'
The screen will change. Pick the interface for the swipe you have by clicking the little 'blue' dot until it turns into a checkmark.
For most, this will the the USB interface
For some, it will be the serial interface.
Then click 'Continue'
After clicking done, click the 'Change Basic Reader Settings' Swipe Setup
The window will change an there are a number of tabs across the top in this option. Do not change anything else unless advised by Arts Management Systems.
Click on the 'Track Settings' tab at the top and the screen should look similar to the left.
Click on the 'Track Separator' field.
Type a '~' into that field. On most keyboards, this will be on the upper left area and you likely will have to hold the shift key to get it.
When the screen looks like that on the right, click 'Send to MSR'. The credit card swipe should beep.
When that is done, click 'close' on this screen.
Click Exit.
If you have more than one swipe, unplug the first one from this machine and then plug the second one in.
Repeat the steps above until all are programmed.
Test the swipes with theatre manager on the patron payment window.
Schedule A/B/C/D Compliance - Self Assessment Questionnaire
The Self Assessment Questionnaire (SAQ) is a self-validation tool for merchants who, because of transaction volume or other criteria, are not required to do on-site assessments for PCI DSS compliance. The SAQ includes a series of yes-or-no questions for compliance. If an answer is no, the organization must state the future remediation date and associated actions. In order to align more closely with merchants and their compliance validation process, the SAQ was revised and now allows for flexibility based on the complexity of a particular merchant’s or service provider’s business situation (see chart below). The SAQ validation type does not correlate to the merchant classification or risk level. Source: PCI 3.0 quick reference guide
The PCI council has established 4 main levels for merchant compliance; schedules 'A', 'B','C' or 'D' with some variations at each level. You can use the table to the right to help determine the level that applies to your organization below.
Compliance Summary
|
Theatre Manager can achieve compliance for
|
Compliance Levels
The inherent nature of the ticketing business with a combination of walk up, phone and/or internet sales means that Theatre Manager (or any other ticketing system for that matter - hosted or non-hosted) probably results in Schedule 'C' or 'D' compliance when card data is stored. Per the table above, Schedule 'A' may be possible for venues using Moneris Hosted Payment Page and e-commerce only. Schedule 'B' may be possible if using point of sale terminals and no card holder data storage.
- Schedule "A": means that credit card information is never touched, stored or processed within an organization. This is possible for organizations doing web sales using a hosted payment page (eg Moneris Hosted Payment Page. If phone or walk up ticket sales by credit card are entered to a pin pad terminal, it may allow you to stay at Schedule 'A' or move you to Schedule 'B' - please talk to your PCI assessor.
- Schedule "B": could apply to merchants who only use point of sales terminals at box office and do not store any card data:
- Schedule 'B' Those who do not use electronic processing and write credit card slips by hand apply to this level. Those that use stand alone DIAL UP terminals to process credit cards may also apply. DIAL UP means that the standalone POS terminal is not connected to a processor until an authorization is required. Not applicable to e-commerce channels.
- Schedule 'B-IP' Merchants using only standalone, PTS-approved payment terminals with an IP connection to the payment processor, with no electronic cardholder data storage. Not applicable to e-commerce channels.
-
Schedule "C": means that Theatre Manager will render the cards useless by shredding them after use and never storing the data in the database (voids are done by sending a token, refunds may need the card entered again). If you do not want credit card information onsite, please select this option and select a merchant provider from one of the Direct Credit Card Processors.
This also changes the scope of which part of the system is needs to be included for PCI reasons.
- Schedule "D": means that you wish to store some or all credit card data using strong encryption for a period of time. Possible uses are for recurring credit card transaction for monthly donations, or the need to refund to a patron if they are displeased with the show. If you chose this option, you can also chose how long to store data for previously authorized cards. After this 'Retention Period', all credit cards are shredded doing a deposit (end of day process) unless still required for a future post dated payment, or it has been specifically marked as retain permanently under the patron record.
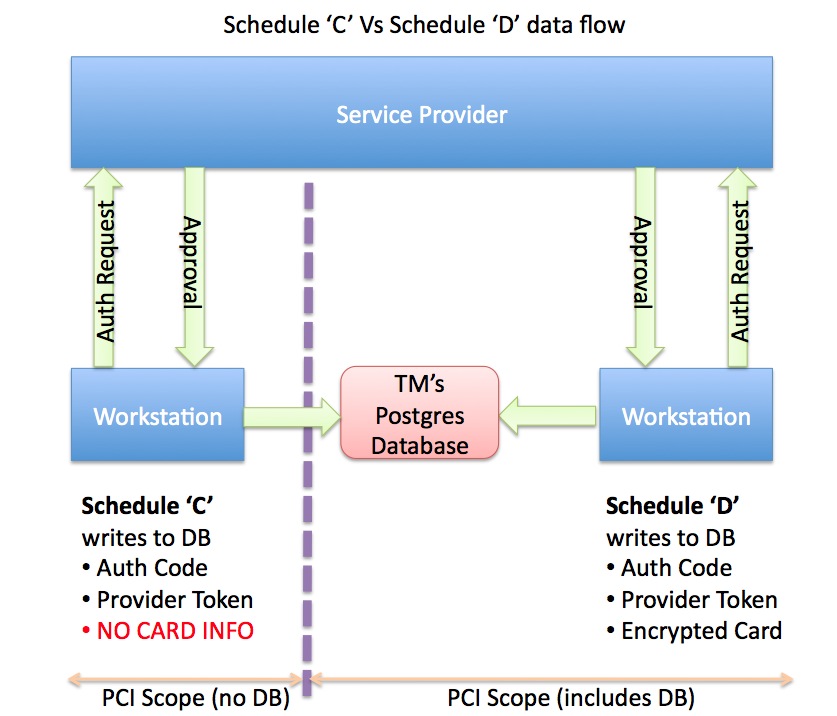
Shredding Credit Cards
|
Theatre Manager can implement either Schedule "C" or "D" for the SAQ - the choice is yours. You can define a retention period for credit card information in Theatre Manager on the System Preferences on the PCI Security Screen before it is 'shredded' per PCI DSS standard 3.1 |
|
A card is stored in the database is only contained in one table/field called fCreditCards.CD_CARD_NO. There are no other permanent or temporary locations where it is stored. The card number can be removed using the shred feature. PCI DSS standard 3.1 |
Notes:
- A shredded card is stored in the database as '#### **** **** ####'. This renders the PAN useless for all purposes. However, if given the first 4 and last 4 digits of any card, you can still search for and find the patron who used a card starting and ending with those digits (the card, of course, will not exist in the database).
- Schedule "D" compliance with about 120 days of retention is sufficient for most venues, especially if you are using post dated payments or may have to deal with refunds for cancelled events
- Schedule "C" compliance means that no card information will every be stored in the database. It means cancellation of an event will need the customer service team to call a patron to get the card to process a refund, or to convert any refund to patrons to store credit such as a gift certificate.
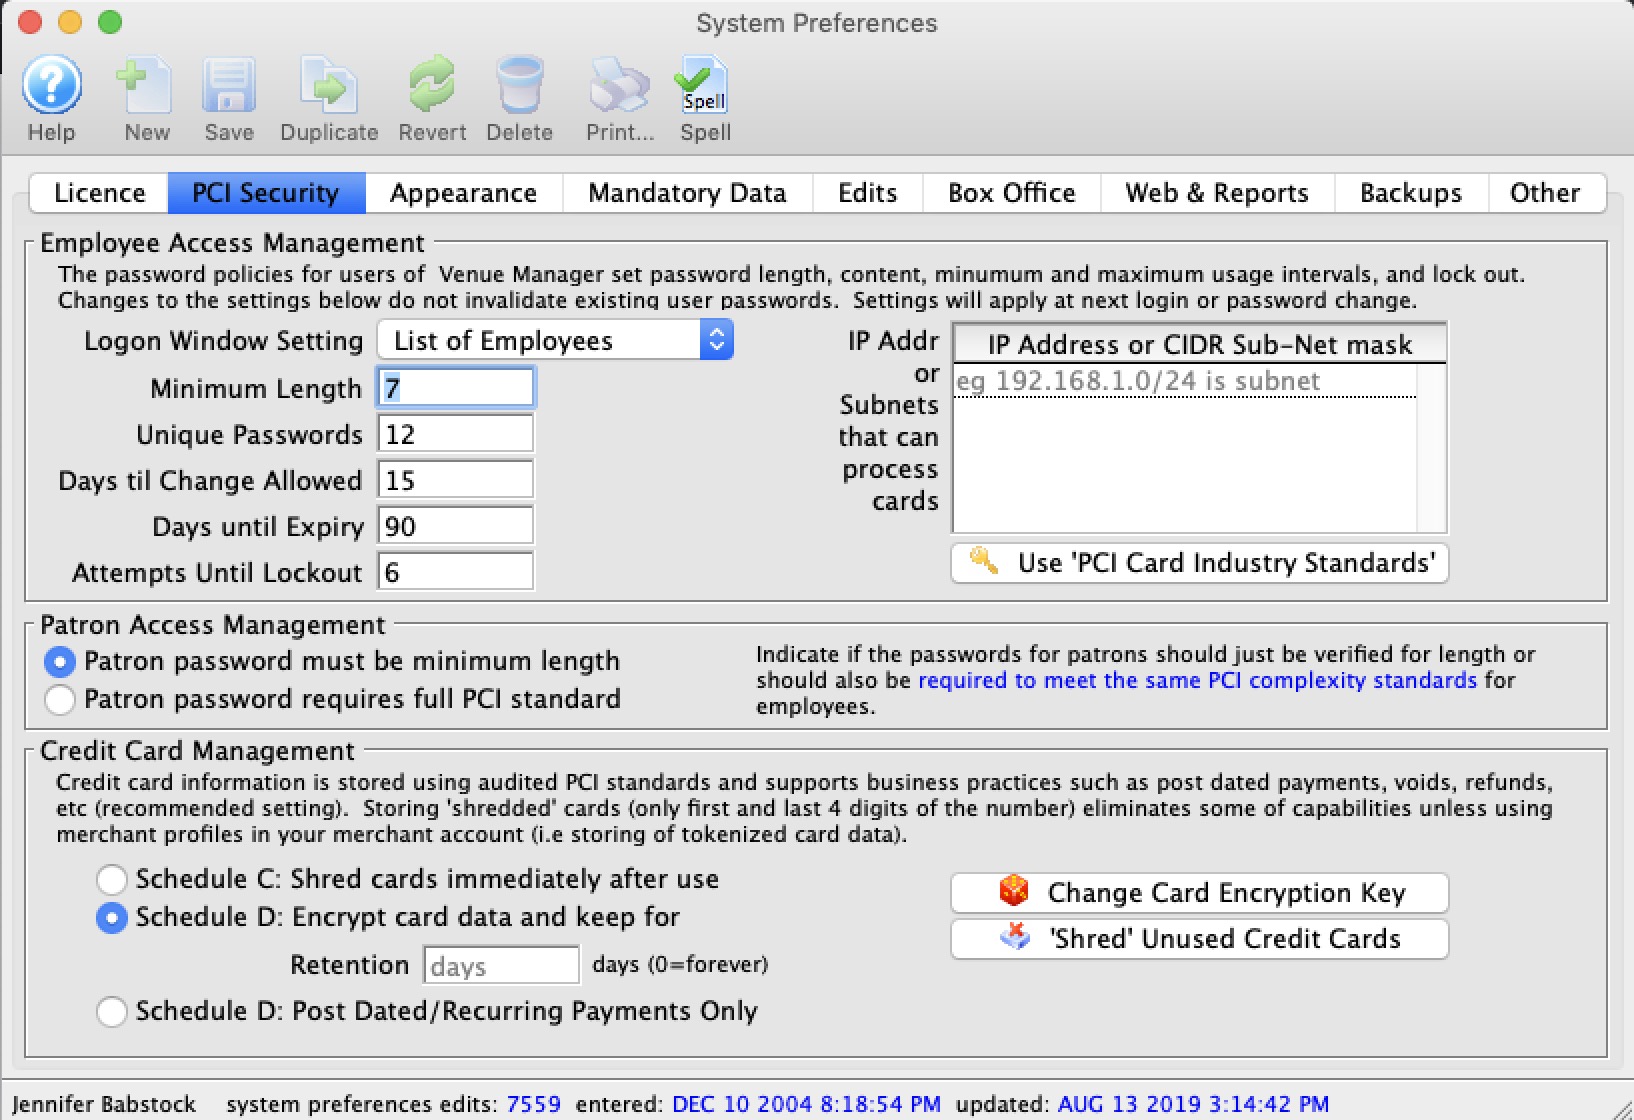
Reencrypting Credit Cards
|
Credit cards stored in a database must be encrypted using a key that is distinct to the venue per PCI DSS standard 3.6. This must occur:
|
CVV2 requirement and possible effect on post dated payments
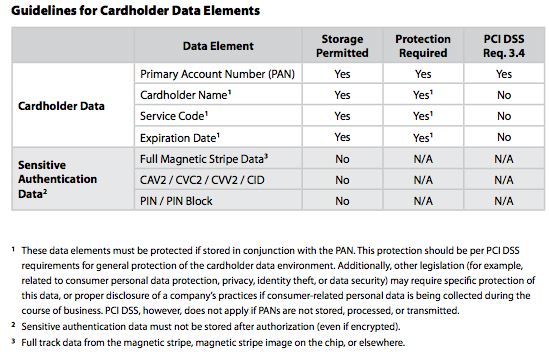 Your merchant processor may be set up to require use of CVV2 - which is a setting you may wish to turn off in their online portal, if you follow the steps below.
Theatre manager cannot store the CVV2 data per the PCI council.
The chart on the right indicates which data can be stored and it is explained further in PCI Requirement 3 rules.
|
Since the vast majority of credit card transactions are real time with a CVV2, most venues will see limited effect for 99% of credit card authorizations:
It will affect:
|
Set your MERCHANT SETUP to NOT require CVV2 in their ONLINE PORTAL
Theatre Manager does not store CVV2 data (per PCI compliance). It cannot send CVV2 for post dated payments. You have two ways to address this:
- Turn OFF CVV2 requirements for your merchant account AT THE BANK
- Log in to your ONLINE merchant profile and
- Turn off CVV2 requirements at your merchant
- Leave CVV2 as a requirement in TM's merchant setup
- Authorize the post dated payment in end of day.
- This means TM will send one if it has one (for first time authorizations), and the bank will accept a charge if it does not (post dated payments)
- Use Theatre Manager's Merchant Profiles feature. (note: do not use this feature for Moneris)
- This is a feature where you initially send all the credit card data to the bank
- The bank returns a token to Theatre Manager, which is stored in the database
- From that point on, Theatre Manager will use the token for post dated payments, eliminating the need to store the credit card
- This works because the token uniquely identifies the merchant (you), the patron, and a specific card.
Setting Theatre Manager to Require CVV2
Please confirm the following three settings for your venue:
- 'Send CVV2'/CID number is checked in the merchant profile->Authorization Tab.
- Require Credit Card CID/CCV2 is checked for all credit cards payment methods
- Each employee's security setting in the Employee Access->Function tab is unchecked so that CVV2 is no longer optional for that employee.

Effect of CVV2 on Emergency Mode
Theatre Manager's Emergency Mode was designed for situations where the credit card company's processing was down or not available. This requirement for CVV2 (plus the inability to store it) means that the Credit Card companies prefer Real Time Authorizations.
|
Note: if a card is declined for lack of CVV2 after emergency mode is tuirned off, it likely would have been declined anyway. you'll need to call the patron to get the CVV2 # when your services come back. |
Effect of CVV2 on Post Dated Payments
If you can make one post dated payment work (without CVV2), then they will likely all work. Theatre Manager does not store CVV2 data (per PCI requirement 3.3).
A alternative is to explore merchant profiles as mentioned above (do not do this for Moneris)
How will Theatre Manager respond to Post Dated Payments?
We have felt for a long time that the unstated direction of the bank industry was elimination of card data storage at a merchant. It is fortunate that we anticipated this as have a project underway to migrate patron card information to the bank and use tokenization instead. Effectively, this means:
- When a patron use a card for the first time, TM will direct your merchant processor to store the card data and provide Theatre Manager a unique token for that card
- If you are setting up post dated payments, TM will then refer to the patrons token at the bank for future authorizations - which is consistent with the Bambora statement
How will switching merchant providers affect Tokenized Post Dated Payments?
If the post dated payment token is stored at the merchant processor and is unique to your merchant account, it adds a step when switching from one merchant provider to another. You will need to keep your old merchant account active until all future post dated payments set up for your original merchant provider are completed and authorized.
Adjusting Security Settings
|
There are some settings in Theatre Manager that a venue must examine during installation and may need to be changed for PCI standard 8.5 compliance.
If you are upgrading from a demo version of TM, some of these settings were optional to facilitate the purposes of a demo and need implemented for a production system. |
Minimum Password Settings for All Users
- be required to enter a password to access Theatre Manager -and-
- have their own user id and password to track access within the database -and-
- ALSO have a unique logon to access the computer prior to accessing Theatre Manager that is PCI/DSS compliant.
Ensure that the minimum recommended settings are met and increase the security as you see fit. If the minimum recommended settings change, Theatre Manager will automatically update the current settings to any more current minimum during any upgrade.
The steps to increase security strength are:
- Log in as Master User (this System Administrator account is only person with access to System Preferences)
- go to 'Setup->System Preferences'
- click on the 'Security' Tab. The minimum recommended settings are below.
- Click on the 'Use PCI Card Industry Standards' to reset all password settings to the minimum acceptable standards.
- Make any adjustments you wish to the policies such as requiring longer passwords, or increasing the minimum number of unique passwords before a repeat password can be used.
- Close the window to save the changes.
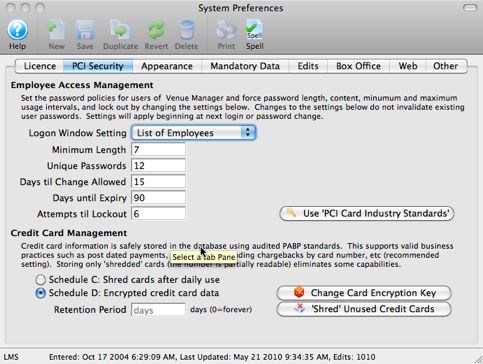
Changing User ID's
If you wish to implement login by user id in addition to password, the change all the user id's in the system to a scheme that is suited to your network security needs. Since you will be logging in with a User Id and Password, it can be a good idea to make user names more difficult to determine.
To change user names and password settings, repeat the following steps for all users EXCEPT the Master User:
- go to Setup->Users & Access->Employee List
- Click the 'search' icon (the magnifying glass) or hit enter to see a list of users
- Double click on the name in the list to change
- Click on the 'Access' Tab
- Click on the 'Access Id' field and change that to something suitable for the employee
- Make sure the Logon Level selection is either 'No Access' if they are not allowed to use the system -or- 'Normal' if they are allowed to access the system.
- If the user can log in, click the 'Set Password' button and assign them an initial random password (or have the user type in their own). It is not necessary to know or record each users password - in fact we recommend that you do not write those down. If a user forgets their password, you can always re-assign a new one here.
- If user's access to parts of the system is similar to another users, you can use the 'Copy Access' button to make them like each other. You may wish to create a template for some of the important job functions that make copying easier.
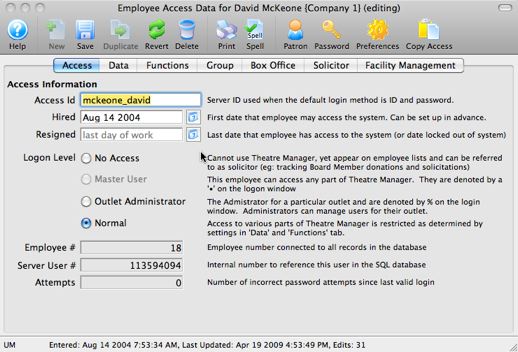
Verify Credit Card Access
|
You must at least visit the 'Functions' tab and make sure that any of the privileges that say 'Credit Card' in the second column are all unchecked to start with. Then enable those that you wish the user to have. Creating any new normal user will default to a 'deny-all' setting per PCI DSS 7.2
All existing users can be easily reset to the 'deny-all' at one button click (see below) |
- 'Allow empty CID even if required for credit card payments'. If this is unchecked, the user must ask the customer for a CID/CVV2 number on the back of the credit card if it is required for the credit card type or by the processor. If your service provider does not accept or check CVV2 data, you may need to check this. You may also want to check this for at least one of the box office supervisory personnel who can then provide an operator over-ride to any other user if need be.
- 'Able to Search for Patron using a card number'. This should be checked for a finance position or a box office supervisor so that a patron can be found when all we are given is the credit card number - such as in the case of charge backs. When searching for a patron by credit card, only the first 4 and last 4 digits in the care are required for a search.
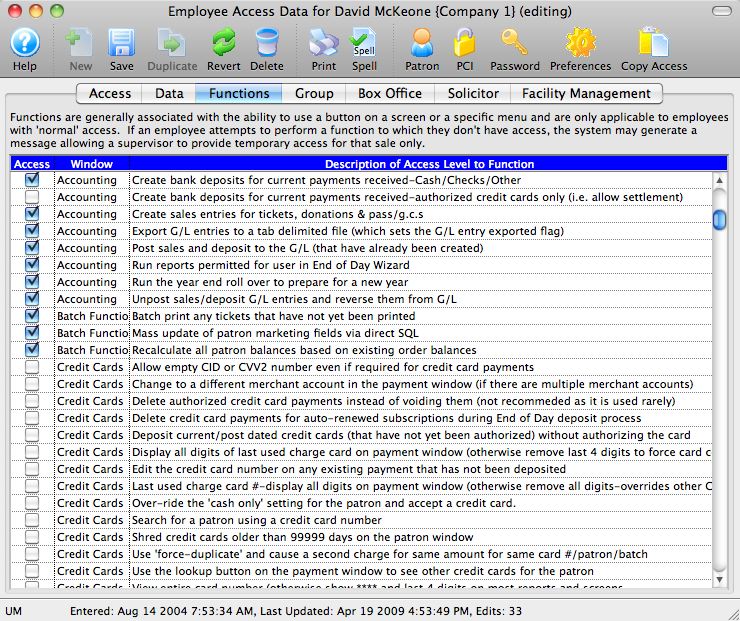
You can do reset all employees with non-administrative access at one time by selecting them all on the list of employees and clicking the 'PCI' button.
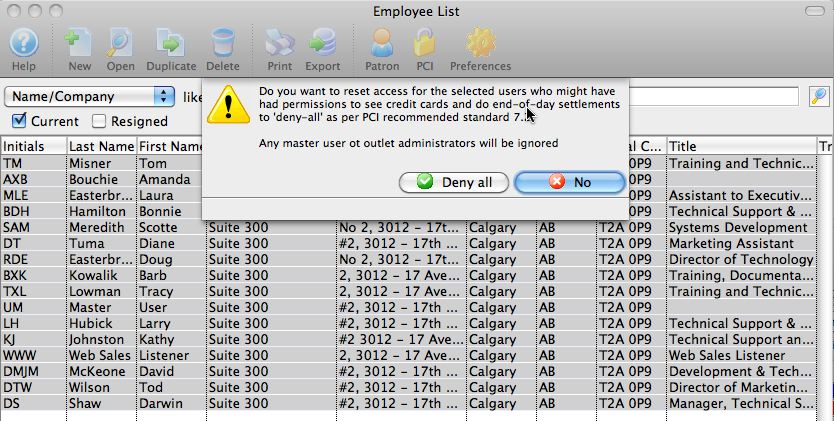
Change the Master User Password
Per PCI requirements, this password for this account must be changed at the initial installation of Theatre Manager by the venue so that it is something unique to the venue.
No user of Theatre Manager is required to have these privileges in order to use the system - except to create another user account. If any user is set as a Master User for the duration of the installation process, those privileges should be revoked per PCI compliance.
- Find any user with Master User access using Setup->Employees and Access->Employee List
- Click on the 'Access' tab
- Make sure that the 'Logon Level' is 'Master User' for only one administrative account. Change all others to normal users.
- Click 'Set Password' and give this special user a unique password. You will be asked to confirm the current password before you are allowed to change the password.
- You may want to log out of theatre manager and then log back in as the special 'Master User' account before continuing - just to make sure you have the user id and password set.
- This is one user id and password combination that you do wish to record on a paper and put in a sealed envelope in your safe with instructions to open under emergency only.
PCI DSS Cross Reference/Index
The PCI Security Council supplies a document to merchants that provides a Prioritized Approach to PCI compliance. This document is quite good because it breaks down the standards into 6 milestones - what to do first, what to do second, etc. according to what will have the biggest impact in safeguarding your customer data.
Following the document and this index should help you address that most important PCI implementation standards quickly.
Source: PCI Prioritized Approach
Build and Maintain a Secure Network
Requirement 1: Install and maintain a firewall
Firewalls are devices that control computer traffic allowed between an entity’s networks (internal) and untrusted networks (external), as well as traffic into and out of more sensitive areas within an entity’s internal trusted networks. The cardholder data environment is an example of a more sensitive area within an entity’s trusted network.
A firewall examines all network traffic and blocks those transmissions that do not meet the specified security criteria.
All systems must be protected from unauthorized access from untrusted networks, whether entering the system via the Internet as e-commerce, employee Internet access through desktop browsers, employee e-mail access, dedicated connections such as business-to-business connections, via wireless networks, or via other sources. Often, seemingly insignificant paths to and from untrusted networks can provide unprotected pathways into key systems. Firewalls are a key protection mechanism for any computer network.
Other system components may provide firewall functionality, provided they meet the minimum requirements for firewalls as provided in Requirement 1. Where other system components are used within the cardholder data environment to provide firewall functionality, these devices must be included within the scope and assessment of Requirement 1.
| Section | PCI Requirement | Comments | Provided by Artsman Cloud |
| 1.1 | Establish firewall and router configuration standards that formalize testing whenever configurations change; that identify all connections to cardholder data (including wireless); that use various technical settings for each implementation; and stipulate a review of configuration rule sets at least every six months. | You will need a hardware router to protect your network.
However, if you need to set up firewalls on computers themselves, the built in firewall on windows is very flexible. On OSX, do not manage the built in firewall via System Preferences on servers - instead, consider using a tool like Murus Firewall to unlock the power of the OSX PF firewall. |
YES |
| 1.1.1 |
A formal process for approving and testing all network connections and changes to the firewall and router configurations |
YES | |
| 1.1.2 | Current network diagram with all connections to cardholder data, including any wireless networks | Refer to Recommended Network Diagram and adapt as neccessary | N/A |
| 1.1.3 | Current diagram that shows all cardholder data flows across systems and networks | Refer to cardholder flow | N/A |
| 1.1.4 | Requirements for a firewall at each Internet connection and between any demilitarized zone (DMZ) and the internal network zone | Refer to NGINX Server setup to describe DMZ with one or two router situation. |
SPLIT
|
| 1.1.5 | Description of groups, roles, and responsibilities for logical management of network components | YES | |
| 1.1.6 | Documentation and business justification for use of all services, protocols, and ports allowed, including documentation of security features implemented for those protocols considered to be insecure
Examples of insecure services, protocols, or ports include but are not limited to FTP, Telnet, POP3, IMAP, and SNMP v1 and v2. |
Refer to Firewall rules for purpose of ports that are open. | YES |
| 1.1.7 | Requirement to review firewall and router rule sets at least every six months | YES | |
| 1.2 | Build a firewall configuration that denies all traffic from "untrusted" networks and hosts, except for protocols necessary for the cardholder data environment.
Note: An "untrusted network" is any network that is external to the networks belonging to the entity under review, and/or which is out of the entity's ability to control or manage. |
Refer to Firewall rules to see the ports to open. | YES |
| 1.2.1 | Restrict inbound and outbound traffic to that which is necessary for the cardholder data environment. | YES | |
| 1.2.2 | Secure and synchronize router configuration files. | YES | |
| 1.2.3 | Install perimeter firewalls between any wireless networks and the cardholder data environment, and configure these firewalls to deny or control (if such traffic is necessary for business purposes) any traffic from the wireless environment into the cardholder data environment. | refer to venue lan setup. Wireless is not to be used in the Theatre Manager LAN segment and should be setup carefully on another separate, isolated VLAN |
SPLIT
|
| 1.3 | Prohibit direct public access between the Internet and any system component in the cardholder data environment. | YES | |
| 1.3.1 | Implement a DMZ to limit inbound traffic to only system components that provide authorized publicly accessible services, protocols and ports | YES | |
| 1.3.2 | Limit inbound Internet traffic to IP addresses within the DMZ. | YES | |
| 1.3.3 | Do not allow any direct connections inbound or outbound for traffic between the Internet and the cardholder data environment. |
SPLIT
|
|
| 1.3.4 | Implement anti-spoofing measures to detect and block forged source IP address from entering the network.
(For example, block traffic originating from the internet with internal source addresses). |
Use commercial grade firewall | YES |
| 1.3.5 | Do not allow unauthorized outbound traffic from the cardholder data environment to the Internet. | Implement specific permissions as per the firewall rules |
SPLIT
|
| 1.3.6 | Implement stateful inspection, also known as dynamic packet filtering. (That is, only "established" connections are allowed into the network.) | Use commercial grade firewall | YES |
| 1.3.7 | Place the components that store cardholder data (such as a database) in an internal network zone, segregated from the DMZ and other untrusted networks. | This is generally interpreted to mean:
|
YES |
| 1.3.8 | Do not disclose private IP addresses and routing information to unauthorized parties.
Note: Methods to obscure IP addressing may include, but are not limited to:
|
YES | |
| 1.4 | Install personal firewall software on any mobile and/or employee-owned computers that connect to the Internet when outside the network (for example, laptops used by employees), and which are also used to access the organization's network.
Firewall configurations include:
|
These days, alll computers have one - it just needs enabled. |
SPLIT
|
| 1.5 | Ensure that security policies and operational procedures for managing firewalls are documented, in use, and known to all affected parties. | YES |
Requirement 2: Change Vendor Passwords
The easiest way for hackers to access your internal network is to try default passwords or exploits based on default system software settings in your payment card infrastructure. Far too often, merchants do not change default passwords or settings when they deploy the software. This is the same as leaving your store physically unlocked when you go home for the night. Default passwords and settings for most network devices are widely known. This information, combined with hacker tools showing them what devices are on your network, can make unauthorized entry a simple task – if you have failed to change the defaults.
| Section | PCI Requirement | Comments | Provided by Artsman Cloud |
| 2.1 | Always change vendor-supplied defaults and remove or disable unneccessary default accounts before installing a system on the network
This applies to ALL default passwords, including but not limited to those used by operating systems, software that provides security services, application and system accounts, point-of-sale (POS) terminals, Simple Network Management Protocl (SNMP), community strings, etc. |
Change the Master User password when setting up the system. |
NO |
| 2.1.1 | For wireless environments connected to the cardholder data environment or transmitting cardholder data, change ALL wireless vendor defaults at installation, including but not limited to default wireless encryption keys, passwords, and SNMP community strings. | Theatre Manager does NOT needs wifi for operation. Refer to venue lan setup for network diagram and what to do when placing wireless devices is a separate VLAN | NO |
| 2.2 | Develop configuration standards for all system components. Assure that these standards address all known security vulnerabilities and are consistent with industry-accepted hardening standards.
Sources of industry-accepted system hardening standards may include, but are not limited to: |
Arts Management regularly reviews industry information and implements the latest components and security patches in installers as soon as possible. |
SPLIT
|
| 2.2.1 | Implement only one primary function per server to prevent functions that require different security levels from co-existing on the same server. For example, web servers, database servers and DNS servers should be on separate servers. Note: Where virtualization technologies are in use, implement only one primary function per virtual system component. |
Refer to Network Diagram for components. Also, refer to postgres setup on windows servers | YES |
| 2.2.2 | Enable only necessary and secure services, protocols, daemons, etc., as required for the function of the system. | refer to Disable SNMP service on Practical Automation Ticket Printers |
SPLIT
|
| 2.2.3 |
Implement additional security features for any required services, protocols, or daemons that are considered to be insecure—for example, use secured technologies such as SSH, S-FTP, TLS, or IPSec VPN to protect insecure services such as NetBIOS, file-sharing, Telnet, FTP, etc. Note: SSL, TLS 1.0 and TLS 1.1 are not considered strong cryptography and cannot be used as a security control after June 30, 2016. Effective immediately, new implementations must use TLS 1.2 or later. POS POI terminals (and the SSL/TLS termination points to which they connect) that can be verified as not being susceptible to any known exploits for SSL and early TLS may continue using these as a security control after June 30, 2016. |
The NGINX Server config disables all SSL protocols and enables only TLS 1.2 Theatre Manager will connect to service providers using the latest TLS that they support and have been verified to connect via TLS 1.2 when available. |
YES |
| 2.2.4 | Configure system security parameters to prevent misuse |
SPLIT
|
|
| 2.2.5 | Remove all unnecessary functionality, such as scripts, drivers, features, subsystems, file systems, and unnecessary web servers. |
SPLIT
|
|
| 2.3 | Encrypt all non-console administrative access such as browser/web-based management tools. Use technologies such as SSH, VPN, or TLS for web-based management and other non-console administrative access. | Theatre manager does not provide or require web based management tools
We suggest that customer use RDC, Teamviewer or equivalent internally for remote access management. and that strong security be implemented similar to the password requirements for PCI compliance and use of SSH or VPN's for conection |
N/A |
| 2.4 | Maintain an inventory of system components that are in scope for PCI DSS | For Theatre Manager, this includes
|
N/A |
| 2.5 | Ensure that security policies and operational procedures for managing vendor defaults and other security parameters are documented, in use, and known to all affected parties. | NO | |
| 2.6 | Shared hosting providers must protect each entity's hosted environment and cardholder data. These providers must meed specific requirements as detailed in Appendix A: "Additional PCI DSS Requirements for Shared Hosting Providers." | Not Applicable. Theatre Manager is not typically installed in a shared environment. | N/A |
Protect Cardholder Data
Requirement 3: Protect stored cardholder data
Protection methods such as encryption, truncation, masking, and hashing are critical components of cardholder data protection. If an intruder circumvents other security controls and gains access to encrypted data, without the proper cryptographic keys, the data is unreadable and unusable to that person. Other effective methods of protecting stored data should also be considered as potential risk mitigation opportunities. For example, methods for minimizing risk include not storing cardholder data unless absolutely necessary, truncating cardholder data if full PAN is not needed, and not sending unprotected PANs using end-user messaging technologies, such as e-mail and instant messaging.
Please refer to the PCI DSS and PA-DSS Glossary of Terms, Abbreviations, and Acronyms for definitions of “strong cryptography” and other PCI DSS terms.
| Section | PCI Requirement | Comments | Provided by Artsman Cloud |
| 3.1 | Keep cardholder data storage to a minimum by implementing data retention and disposal policies, procedures and processes that include at least the following for all card holder data (CHD) storage:
|
Theatre Manager provides automatic retention and shredding capability which removes stale card information based on a retention period and/or usage for recurring transactions.
We generally recommend a maximum of 30 days for card retention, and this is only for future authorizations to supplement the original sales in case of changes. See below for post dated payments and/or which do not factor into the retention period. There is an option to never store card information allowing a venue to implement either Schedule C or D compliance. For web Sales you can even implement Schedule A if using Moneris hosted payment. Venues that occasionally refund to cancelled concerts do not need to store credit card data specifically for that purpose. All providers currently support linked refunds - meaning they refund to the same order and card using tokens, without needing card data stored in the database. Post dated payments cause a card to be retained until the last automatic payment is processed, after which it is deleted. |
Cloud only permits
|
| 3.2 | Do not store sensitive authentication data after authorization (even if it is encrypted). If sensitive authentication data is received, render all data unrecoverable upon completion of the authorization process
Sensitive authentication data includes the data as cited in the following requirements 3.2.1 through 3.2.3 |
Refer to PCI compliance statement on PAN etc.
Should the end user put credit card data into any text field (against recommended practice), Theatre Manager offers an option to search the database for possible entry of credit card numbers in non-payment text fields. |
NO - Customer must occasionally search for end user entry errors |
| 3.2.1 | Do not store the full contents of any track (from the magnetic stripe located on the back of a card, contained in a chip, or elsewhere). This data is alternatively called full track, track, track 1, track 2, and magnetic-stripe data.
Note: in the normal course of business, the following data elements fro mthe magnetic stripe may need to be retained:
|
If a card is swiped, the only information retained from the swipe are the following
|
N/A |
| 3.2.2 | Do not store the card-verification code or value (three-digit or four- digit number printed on the front or back of a payment card used to verify card-not-present transactions) after authorization | Theatre Manager does not store this data to disk under any circumstances - it is merely passed through to the credit card authorizer. | N/A |
| 3.2.3 | Do not store the personal identification number (PIN) or the encrypted PIN block. | Theatre Manager does not support entry or storage of PIN. | N/A |
| 3.3 | Mask PAN when displayed (the first six and last four digits are the maximum number of digits to be displayed), such that only personell with a legitimate busines need can see the full PAN. Note: this requirement does not supercede stricter requirements in place for displays of cardholder data - for example, legal or payment card rand requirements for point-of-sale (POS) receipts |
Theatre Manager follows these rules. Card numbers are displayed as last four digits only and is only revealed if employee has permission - in which case it is logged. All reports and most windows mask PAN External receipt printing or web interface uses a common routine to mask the PAN immediately upon retrieval from the database so that last 4 digits only are displayed per law in most states. |
N/A |
| 3.4 | Render PAN, at minimum, unreadable anywhere it is stored (including on portable digital media, backup media, in logs) by using any of the following approaches:
|
Theatre Manager uses secure high encryption for all keys and card data. | N/A |
| 3.4.1 | If disk encryption is used (rather than file- or column-level database encryption), logical access must be managed independently of native operating system authentication and access control mechanisms (for example, by not using local user account databases or general network login credentials). Decryption keys must not be associated with user accounts. | Theatre Manager does not use Disk Encryption.
It uses field level encryption for PAN. |
N/A |
| 3.5 | Document and implement procedures to protect keys used to secure stored cardholder data against disclosure and misuse.
Note: this requirement applies to keys used to encrypt stored cardholder data, and also applies to key-encrypting keys used to protect data encrypting keys. Such key encrypting keys must be at least as strong as the data-encrypting key. |
Theatre Manager handles creation and hiding of keys automatically. The user never sees them and cannot input them.
Mechanisms exist for re-encryption of any currently encrypted cards in one of two ways:
Key encryption keys use same cryptographic specification as the encryption keys. |
NO - Customer must protect user account passwords |
| 3.5.1 | Restrict access to cryptographic keys to the fewest number of custodians necessary | ||
| 3.5.2 |
Store secret and private keys used to encrypt/decrypt cardholder data in one (or more) of the following forms at all times:
|
||
| 3.5.3 | Store crpytographic keys in the fewest possible locations |
||
| 3.6 | Fully document and implement all key management processes and procedures for cryptographic keys used for encryption of cardholder data including the following: |
refer to re-encryption of credit cards for discussion on keys, generation and re-encryption. Any upgrade will automatically perform this process if more than 300 days have elapsed since last re-encrption. Split 'knowledge' of the keys is achieved by bringing together a key generated programmatically and another portion generated by the customers interfacing with the key creation screen in system preferences. Both keys are required to generate the final encryption key. Arts Management never has knowledge of the customers portion of the key. The customer never knows the value of any key. A key valid for one database for a period of time will not work on any other database. Old keys are securely deleted from the database by writing over the key value and then deleting it immediately after a new seed key is generated. |
NO - Customer must protect user account passwords |
| 3.6.1 | Generation of strong cryptographic keys | ||
| 3.6.2 | Secure cryptographic key distribution | ||
| 3.6.3 | Secure cryptographic key storage | ||
| 3.6.4 |
Cryptographic key changes for keys that have reached the end of their cryptoperiod (for example, after a defined period of time has passed and/or after a certain amount of cipher- text has been produced by a given key), as defined by the associated application vendor or key owner, and based on industry best practices and guidelines (for example, NIST Special Publication 800-57). |
||
| 3.6.5 |
Retirement or replacement (for example, archiving, destruction, and/or revocation) of keys as deemed necessary when the integrity of the key has been weakened (for example, departure of an employee with knowledge of a clear-text key component), or keys are suspected of being compromised. |
||
| 3.6.6 | If manual clear-text cryptographic key management operations are used, these operations must be managed using split knowledge and dual control for example, requiring two or three people, each knowing only their own key component, to reconstruct the whole key. |
||
| 3.6.7 | Prevention of unauthorized substitution of cryptographic keys | ||
| 3.6.8 | Requirement for cryptographic key custodians to sign a form stating that they understand and accept their key-custodian responsibilities | Venues do not know the cryptographic key. However, they should have a form signed by the people/person responsible for key management that they reset the key once a year at a minimum or when suspected compromise occurs. Note it will be changed automatically on you during an upgrade if Theatre Manager detects it hasn't been changed for 300 days. |
|
| 3.7 |
Ensure that security policies and operational procedures for protecting stored cardholder data are documented, in use, and known to all affected parties. |
SPLIT
|
Requirement 4: Encrypt transmission of cardholder data
Sensitive information must be encrypted during transmission over networks that are easily accessed by malicious individuals. Misconfigured wireless networks and vulnerabilities in legacy encryption and authentication protocols continue to be targets of malicious individuals who exploit these vulnerabilities to gain privileged access to cardholder data environments.
| Section | PCI Requirement | Comments | Provided by Artsman Cloud |
| 4.1 | Use strong cryptography and security protocols (for example, TLS, IPSEC, SSH, etc.) to safeguard sensitive cardholder data during transmission over open, public networks, including the following:
Examples of open, public networks that are in scope of the PCI DSS include but are not limited to:
|
See Direct Card Processing which all use HTTPS.
Theatre Manager uses TLS 1.2 wherever possible to connect to credit card authorization servers for one time authorization and only allows TLS 1.2 or later for incomming web sales. Theatre Manager does not use any wireless communication methodologies of any form. Theatre Manager does not transmit any credit card information across public networks for any reason except in the process of authorization |
SPLIT
|
| 4.1.1 | Ensure wireless networks transmitting cardholder data or connected to the cardholder data environment, use industry best practices (for example, IEEE 802.11i - aka WPA2) to implement strong encryption for authentication and transmission.
Note: The use of WEP as a security control is prohibited. |
Theatre Manager does not use or require wireless capability when transmitting any card data. Refer to venue lan setup and considerations for separate wireless access points | NO - If customer is using wireless networks to access cloud services, then they must secure them appropriately |
| 4.2 | Never send unprotected PANs by end-user messaging technologies (for example, e-mail, instant messaging, chat, etc.). | see misc PCI requirements | N/A - authorization of cards is only supported in Theatre Manager |
| 4.3 | Ensure that security policies and operational procedures for encrypting transmissions of cardholder data are documented, in use, and known to all affected parties. | Venues are advised during installation about this requirement including not saving CVV2 and protecting card data in a safe if written down.
You will need write a policy on how you manually save CC data, how you track who has access to it, how you store it in a safe and/or behind locked doors. Make sure the policy also includes that you never email card data in entirety and card data on paper is only kept as long as you need it. Theatre Manager handles all transmission of data via TLS 1.2 or better (it only users the latest transmission security protocols as mandated by PCI.) |
NO - Customer must educate own staff on card handling policies |
Maintain a vulnerability Management Program
Requirement 5: Use and regularly update anti-virus software
Malicious software, commonly referred to as “malware”—including viruses, worms, and Trojans—enters the network during many business- approved activities including employee e-mail and use of the Internet, mobile computers, and storage devices, resulting in the exploitation of system vulnerabilities. Anti-virus software must be used on all systems commonly affected by malware to protect systems from current and evolving malicious software threats. Additional anti-malware solutions may be considered as a supplement to the anti-virus software; however, such additional solutions do not replace the need for anti-virus software to be in place.
| Section | PCI Requirement | Comments | Provided by Artsman Cloud |
| 5.1 | Deploy anti-virus software on all systems commonly affected by malicious software (particularly personal computers and file servers). | See specifics for |
SPLIT
|
| 5.1.1 | Ensure that all anti-virus programs are capable of detecting, removing, and protecting against all known types of malicious software. | You must keep your anti-virus software up to date with latest definitions |
SPLIT
|
5.1.2 | For systems considered to be not commonly affected by malicious software, perform periodic evaluations to identify and evaluate evolving malware threats in order to confirm whether such systems continue to not require anti-virus software. | For Theatre Manager database and TM server, ensure those processes are the only thing running on the machine. Keep them separate from a domain server to limit who can actually log in to the server. Check with the vendor of other systems in use. |
SPLIT
|
| 5.2 | Ensure that all anti-virus mechanisms are maintained as follows:
|
SPLIT
|
|
| 5.3 | Ensure that anti-virus mechanisms are actively running and cannot be disabled or altered by users, unless specifically authorized by management on a case-by-case basis for a limited time period.
Note: Anti-virus solutions may be temporarily disabled only if there is a legitimate technical need, as authorized by management on a case-by-case basis. If anti-virus protection needs to be disabled for a specific purpose, it must be formally authorized. Additional security measures may also need to be implemented for the period of time during which anti-virus protection is not active. |
SPLIT
|
|
| 5.4 | Ensure that security policies and operational procedures for protecting systems against malware are documented, in use, and known to all affected parties. |
SPLIT
|
Requirement 6: Develop and maintain secure systems and applications
Unscrupulous individuals use security vulnerabilities to gain privileged access to systems. Many of these vulnerabilities are fixed by vendor-provided security patches, which must be installed by the entities that manage the systems. All systems must have all appropriate software patches to protect against the exploitation and compromise of cardholder data by malicious individuals and malicious software.
Note: Appropriate software patches are those patches that have been evaluated and tested sufficiently to determine that the patches do not conflict with existing security configurations. For in-house developed applications, numerous vulnerabilities can be avoided by using standard system development processes and secure coding techniques.
| Section | PCI Requirement | Comments | Provided by Artsman Cloud |
| 6.1 |
Establish a process to identify security vulnerabilities, using reputable outside sources for security vulnerability information, and assign a risk ranking (for example, as 'high', 'medium', or 'low') to newly discovered security vulnerabilities.
Note: Risk rankings should be based on industry best practices as well as consideration of potential impact. For example, criteria for ranking vulnerabilities may include consideration of the CVSS base score, and/or the classification by the vendor, and/or type of systems affected. Methods for evaluating vulnerabilities and assigning risk ratings will vary based on an organization's environment and risk- assessment strategy. Risk rankings should, at a minimum, identify all vulnerabilities considered to be a "high risk" to the environment. In addition to the risk ranking, vulnerabilities may be considered "critical" if they pose an imminent threat to the environment, impact critical systems, and/or would result in a potential compromise if not addressed. Examples of critical systems may include security systems, public-facing devices and systems, databases, and other systems that store, process, or transmit cardholder data. |
SPLIT
|
|
| 6.2 | Ensure that all system components and software are protected from known vulnerabilities by installing applicable vendor supplied security patches. Install critical security patches within one month of release.
Note: Critical security patches should be identifies according to the risk ranking process defined in requirement 6.1 |
There are two settings in Company Preferences Other Tab that enable:
Refer to the list of past and present issues to assist you updating your own vulnerability assessment. We regularly review Postgres, NGINX & OpenSSL to provide the latest patches in each version our installers. |
SPLIT
|
| 6.3 | Develop internal and external software application (including web-based administrative access to applications) securely, as follows:
Note: this applies to all software developed internally as well as bespoke or custom software developed by a third party. |
SPLIT
|
|
| 6.3.1 | Remove development, test and/or custom application accounts, user IDs, and passwords before applications become active or are released to customers. | N/A | |
| 6.3.2 | Review of custom code prior to release to production or customers in order to identify any potential coding vulnerability (using either manual or automated processes) to include at least the following:
|
N/A | |
| 6.4 | Follow change control procedures for all changes to system components. The procedures must include the following: |
SPLIT
|
|
| 6.4.1 | Separate development/test and production environments and enforce the separation with access controls | ||
| 6.4.2 | Separation of duties between development/test and production environments | ||
| 6.4.3 | Production data (live PANs) are not used for testing or development | Only specified test cards are used | |
| 6.4.4 | Removal of test data and accounts before production systems become active | ||
| 6.4.5 | Change control procedures for the implementation of security patches and software modifications. Procedures must include the following: | ||
| 6.4.5.1 | Documentation of impact | ||
| 6.4.5.2 | Documented change approval by authorized parties. | ||
| 6.4.5.3 | Functionality testing to verify that the change does not adversely impact the security of the system. | ||
| 6.4.5.4 | Back-out procedures. | Development uses git and branches so that changes can be reverted. | |
| 6.5 | Address common coding vulnerabilities in software development process as follows:
Note: The vulnerabilities listed at 6.5.1 through 6.5.10 were current with industry best practices when this version of PCI DSS was published. However, as industry best practices for vulnerability management are updated (for example, the OWASP Guide, SANS CWE Top 25, CERT Secure Coding, etc.), the current best practices must be used for these requirements. |
Refer to Current OWASP Top 10 |
SPLIT
|
| 6.5.1 | Injection flaws, particularly SQL injection. Also consider OS Command Injection, LDAP and XPath injection flaws as well as other injection flaws | ||
| 6.5.2 | Buffer overflow | ||
| 6.5.3 | Insecure cryptographic storage | ||
| 6.5.4 | Insecure communications | ||
| 6.5.5 | Improper error handling | ||
| 6.5.6 | All 'high risk' vulnerabilities identified in the vulnerability identification process (as defined in PCI DSS Requirement 6.1). | ||
| 6.5.7 | Cross-site scripting (XSS) | ||
| 6.5.8 | Improper Access Control (such as insecure direct object references, failure to restrict URL access, directory traversal, and failure to restrict user access to functions) | ||
| 6.5.9 | Cross-site request forgery (CSRF) | TM server ensures all <form> have CSRF token for prevention. | |
| 6.5.10 | Broken authentication and session management | Theatre Manager web services uses encrypted secure cookies that are httpd-only. | |
| 6.6 | For public-facing Web applications, address new threats and vulnerabilities on an ongoing basis and ensure these applications are protected against known attacks by either of the following methods:
|
AMS updates NGINX builds as needed (and config settings) to respond to newly reported threats. AMS uses SPI for all web traffic internally. |
YES |
| 6.7 | Ensure that security policies and operational procedures for developing and maintaining secure systems and applications are documented, in use, and known to all affected parties. |
SPLIT
|
Implement Strong Access Control Measures
Requirement 7: Restrict access to cardholder data
To ensure critical data can only be accessed by authorized personnel, systems and processes must be in place to limit access based on need-to-know and according to job responsibilities.
Need-to-know is when access rights are granted to only the least amount of data and privileges needed to perform a job.
| Section | PCI Requirement | Comments | Responsibilities on Artsman Cloud |
| 7.1 | Limit access to system components and cardholder data to only those individuals whose job requires such access. |
Artsman: web sales and database
Customers: user access setup/permissions |
|
| 7.1.1 | Define access needs for each role, including:
|
Access to various data can be set on a per user basis in Employee Access | Customers: user access setup/permissions |
| 7.1.2 | Restrict access to privileged user IDs to least privileges necessary to perform job responsibilities. | Creating a user in Theatre Manger defaults to minimal access to card data/ and/or functions. Users are advised to only use the administrator account on a rare-need to administer the system basis. | Customers: user access setup/permissions |
| 7.1.3 | Assign access based on individual personnel's job classification and functions | Customers: user access setup/permissions | |
| 7.1.4 | Require documented approval by authorized parties specifying required privileges | Customers: user access setup/permissions | |
| 7.2 | Establish an access control system for systems components that restricts access based on a user's need to know, and is set to "deny all" unless specifically allowed.
This access control system must include the following: |
||
| 7.2.1 | Coverage of all system components | Refer to employee settings and function access for credit cards | Customers: user access setup/permissions |
| 7.2.2 | Assignment of privileges to individuals based on job classification and function | Customers: user access setup/permissions | |
| 7.2.3 | Default "deny-all" setting | Customers: user access setup/permissions | |
| 7.3 | Ensure that security policies and operational procedures for restricting access to cardholder data are documented, in use, and known to all affected parties. | Customers: user access setup/permissions |
Requirement 8: Assign a unique ID to each person
Assigning a unique identification (ID) to each person with access ensures that each individual is uniquely accountable for their actions. When such accountability is in place, actions taken on critical data and systems are performed by, and can be traced to, known and authorized users and processes.
The effectiveness of a password is largely determined by the design and implementation of the authentication system—particularly, how frequently password attempts can be made by an attacker, and the security methods to protect user passwords at the point of entry, during transmission, and while in storage.
Note:
- These requirements are applicable for all accounts, including point-of-sale accounts, with administrative capabilities and all accounts used to view or access cardholder data or to access systems with cardholder data. This includes accounts used by vendors and other third parties (for example, for support or maintenance).
- However, Requirements 8.1.1, 8.2, 8.5, 8.2.3 through 8.2.5, and 8.1.6 through 8.1.8 are not intended to apply to user accounts within a point-of-sale payment application that only have access to one card number at a time in order to facilitate a single transaction (such as cashier accounts).
| Section | PCI Requirement | Comments | Responsibilities on Artsman Cloud |
| 8.1 | Define and implement policies and procedures to ensure proper user identification management for non- consumer users and administrators on all system components as follows: | Theatre Manager implements PCI standards. You may need a manual process for other applications or hardware. | Customer: via Theatre Manager |
| 8.1.1 | Assign all users a unique ID before allowing them to access system components or cardholder data. | ||
| 8.1.2 | Control addition, deletion, and modification of user IDs, credentials, and other identifier objects. | ||
| 8.1.3 | Immediately revoke access for any terminated users. | ||
| 8.1.4 | Remove/disable inactive user accounts within 90 days. | Refer to the PCI Security Tab in System Preferences for settings. Theatre Manager enforces stronger password policies than the minimum PCI standards. | |
| 8.1.5 | Manage IDs used by vendors to access, support, or maintain system components via remote access as follows:
|
Theatre Manager uses Teamviewer for one-time access, granted as needed. | |
| 8.1.6 | Limit repeated access attempts by locking out the user ID after not more than six attempts. | Theatre Manager limits incorrect password attempts to a total of 6 since the last successful attempt and locks out the account on failure. | |
| 8.1.7 | Set the lockout duration to a minimum of 30 minutes or until an administrator enables the user ID. | Lockout duration in Theatre Manager is permanent. Locked out employee must be re-instated by administrator. | |
| 8.1.8 | If a session has been idle for more than 15 minutes, require the user to re-authenticate to re-activate the terminal or session. |
Theatre Manager has two timeouts. After 15 minutes of inactivity, the user will see a lock screen and need only put in their password again to continue.
There is a longer timeout in Company Preferences->Reports where you can specify when an idle user will be forced log off the system. The process is:
|
|
| 8.2 | In addition to assigning a unique ID, ensure proper user-authentication management for non-consumer users and administrators on all system components by employing at least one of the following methods to authenticate all users:
|
Customer: password via Theatre Manager, tokens and biometrics for Operating System login | |
| 8.2.1 | Using strong cryptography, render all authentication credentials (such as passwords/phrases) unreadable during transmission and storage on all system components. |
Passwords are never transmitted in clear text when logging on to the database.
User Passwords are stored in the database in encrypted format and established in PostgreSQL as a hash of that encrypted value. When a user logs in, the password is converted to the salted hash and that is used to login. All communication to the PostgreSQL Database is over a secure connection, currently TLS 1.2 or better. |
automatic via Theatre Manager |
| 8.2.2 | Verify user identity before modifying any authentication credential—for example, performing password resets, provisioning new tokens, or generating new keys. | Only administrators are able to reset a password, reinstate an employee and/or regenerate credit card encryption keys. | automatic via Theatre Manager |
| 8.2.3 | Passwords/phrases must meet the following:
|
Theatre Manager enforces
|
automatic via Theatre Manager |
| 8.2.4 | Change user passwords/passphrases at least once every 90 days. | Theatre Manager enforces this | Customer: follow Theatre Manager prompts to change password |
| 8.2.5 | Do not allow an individual to submit a new password/phrase that is the same as any of the last four passwords/phrases he or she has used. | Theatre Manager enforces 12 and that can be raised | automatic via Theatre Manager |
| 8.2.6 | Set passwords/phrases for first- time use and upon reset to a unique value for each user, and change immediately after the first use. | Theatre Manager enforces change of password at time of login for first time users | automatic via Theatre Manager |
| 8.3 | Incorporate two-factor authentication for remote network access originating from outside the network by personnel (including users and administrators) and all third parties, (including vendor access for support or maintenance).
Note: Two-factor authentication requires that two of the three authentication methods (see Requirement 8.2 for descriptions of authentication methods) be used for authentication. Using one factor twice (for example, using two separate passwords) is not considered two-factor authentication. Examples of two-factor tehcnologies include remote authentication and dial-in service (RADIUS) with tokens; terminal access controller access control system (TACACS) with tokens, and other technologies that facilitate two-factor authentication. |
Two factor authentication means something you know and something you are given. Our QSA (the auditor who assesses Theatre Manager's ability to meet PCI compliance) has indicated that Teamviewer meets that requirement when used per the instructions. The multiple factors include:
|
automatic via Theatre Manager |
| 8.4 | Document and communicate authentication policies and procedures to all users including:
|
All Theatre Manager user passwords are encrypted in the database. MD5 authentication is recommended at a minimum for accessing the database (this is the default standard in the pg_hba.conf file) | automatic via Theatre Manager |
| 8.5 | Do not use group, shared, or generic IDs, passwords, or other authentication methods as follows:
|
There are no generic passwords. User ID's and Passwords are created by the user on installation. | automatic as part of Theatre Manager installation practices |
| 8.5.1 | Additional requirement for service providers only: Service providers with remote access to customer premises (for example, for support of POS systems or servers) must use a unique authentication credential (such as a password/phrase) for each customer.
Note: This requirement is not intended to apply to shared hosting providers accessing their own hosting environment, where multiple customer environments are hosted. |
Arts Management does not require permanent remote access to your servers. Temporary access is always initiated by the customer as described in the teamviewer remote support help page. | Customer: provides Local access via Teamviewed if required |
| 8.6 | Where other authentication mechanisms are used (for example, physical or logical security tokens, smart cards, certificates, etc.), use of these mechanisms must be assigned as follows:
|
Artsman: cloud
Customer: workstation |
|
| 8.7 | All access to any database containing cardholder data (including access by applications, administrators, and all other users) is restricted as follows:
|
Access to the db is controlled by the pg_hba.conf file and it is set so that all users must log in to read data. The user's id for the database is set by the application and not known. The password in postgres is set by the application and stored encrypted. Thus, the user cannot access the database even knowing their user ID and password because it is not the same as plain-text. Cloud database access for users is managed through an access broker system (with revokable tokens) followed by customer user id/password |
Artsman: cloud
Customer: workstation |
| 8.8 | Ensure that security policies and operational procedures for identification and authentication are documented, in use, and known to all affected parties. |
Artsman: cloud
Customer: workstation |
PCI UserId and Password Requirements
|
Theatre Manager implements fully PCI DSS compliant AES256 encrypted passwords per PCI DSS standard 8.1 and this feature cannot be changed or overridden.
In addition, Merchants must use PCI DSS compliant passwords to access to all system components (i.e. any computer, firewall, router, etc. on the network) and these passwords must be changed from any vendor supplied initial values per PCI standard 2.1. Note: Do not reduce the level of authentication complexity or compliance in these other system components if it will result in PCI non-compliance. |
This means all login passwords must be:
- reviewed and changed every 90 days. Theatre Manager will enforce password changes automatically. This must be manually done on those devices that do not force change of passwords like routers and firewalls. (PCI DSS 8.1.4)
- 7 characters or more (PCI DSS 8.2.3)
- mixed case consisting of at least uppercase and one lowercase letter (PCI DSS 8.2.3)
- contain at least one number and special character (PCI DSS 8.2.3)
- cannot be the same as an previous 12 passwords (PCI DSS 8.2.5)
- cannot have characters or numbers repeated together
|
Change all passwords from any vendor default password that might be used for installation per PCI DSS 2.1. For example, you must:
|
|
Each user that has access to any systems in your network must have a unique user id and password per PCI-DSS standard 8.1.1 |
|
Never use the Master User account for daily operations.
It should only be used when creating other accounts or for other very specialized needs as directed by Arts Management Systems. |
If your network has 'master' domain server (or open directory on OSX) available that could control password authentication for all machines, please ensure that the security policies on the domain/directory server is set to enforce PCI/DSS passwords and that all machines in the network log in using authentication from the server.
If a domain/open directory server is not available to enforce password settings, then each machine/user must use PCI/DSS compliant passwords.
|
If a user tries more than 6 times to gain access to the system, Theatre Manager automatically resigns the user - which means that they are locked out permanently until manually re-instated per PCI-DSS standard 8.1.6 and 8.1.8 |
Teamviewer: ArtsMan Technical Support

Theatre Manager staff should not required permanent access to your machines, except under very specific circumstances. The remote access feature in Theatre Manager is designed for one time, permitted access.
Remote Access/Support
The process for actual access to the remote machine is as follows:
- The customer must initiate a support request that involves a phone conversation
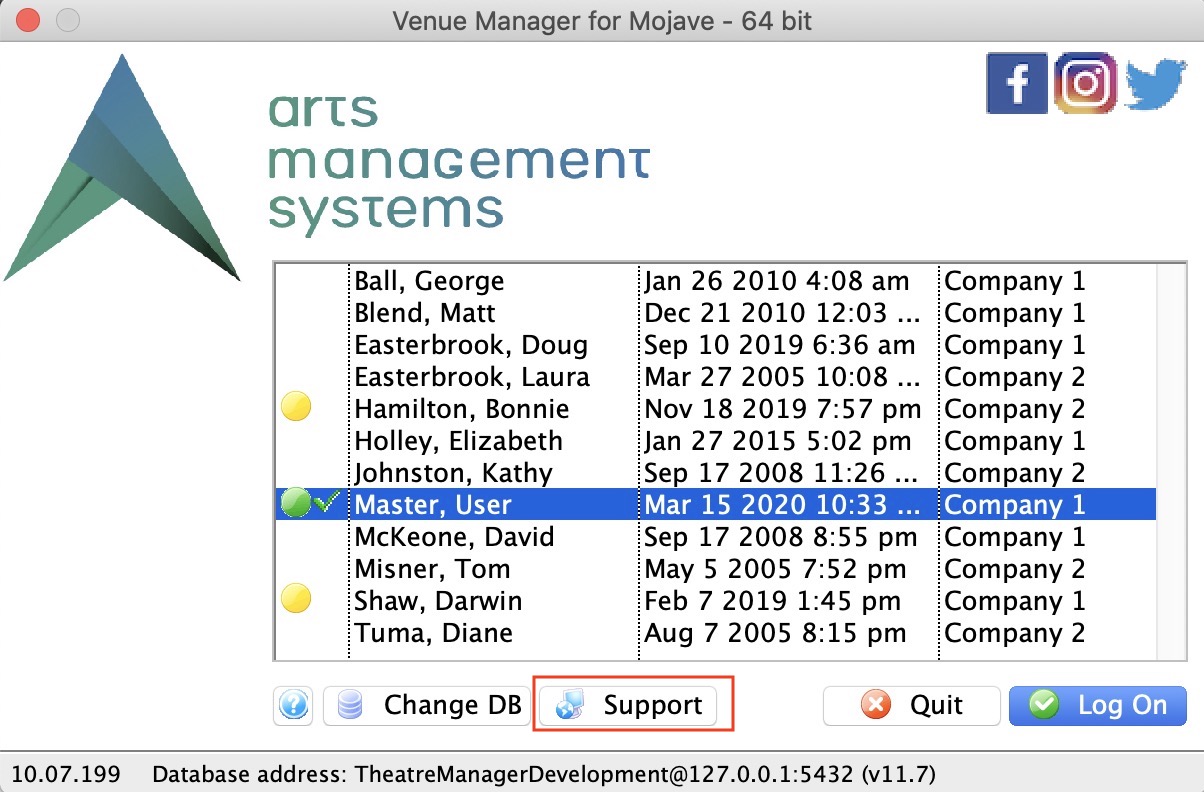 In that phone conversation, it is determined that a timely resolution involves connecting remotely to provide assistance
- Arts Management confirms the identity to the customer by providing the customer with the case number they created to continue with support (PCI requirement for second authentication).
-
The customer then starts the remote assistance software by either:
- clicking the Remote Assistance button on the toolbar after logging into Theatre Manager. It is on the right side of the toolbar as per the above image. Since you must have logged into Theatre Manager to activate remote support, It is not active by default. -OR-
- By starting Theatre Manager and clicking the Support button on the login page as per the diagram to the right. This is useful if you are unable to log in for any purpose
- The customer provides two keys created by Teamviewer: an ID and a random generated 8 character password (containing numbers and letters and, unique to the session) as per the image below. Both of these are conveyed to the AMS support representative.
- Arts Management Support activates remote assistance manager and enters both keys to gain remote access
How does it work?
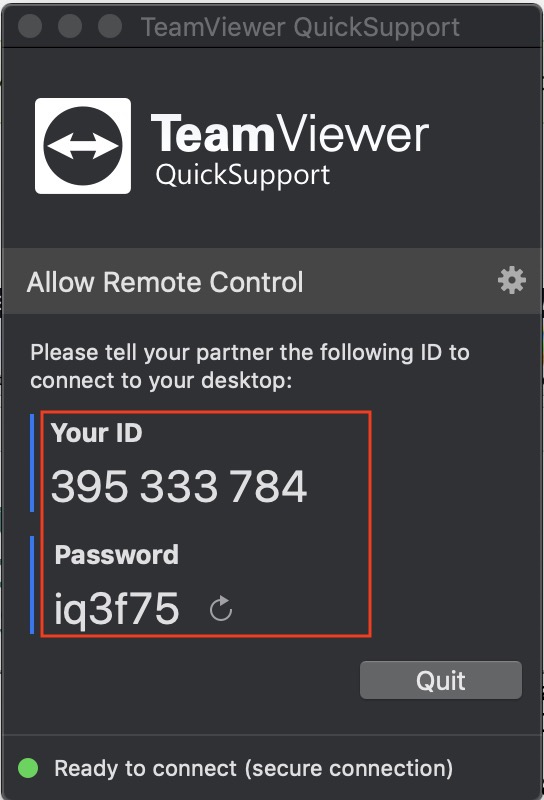 TeamViewer uses SSH for authentication and brokering of session keys. It communicates with the master cluster through DNS names, which delegates the brokering of the session to the TeamViewer servers. Connection to the routing server and KeepAlive server is done directly via IP addresses.
The servers are spread across the globe and located at large data centers; their IP addresses are not organized in common subnets or IP ranges. TeamViewer continuously top scales the server network as the number of TeamViewer users grows, so it is not possible to have a fixed set of IP addresses, because this list would very soon be outdated.
Communication is done to URLs of the format:
- *.teamviewer.com
- *.dyngate.com
Requirement 9: Restrict physical access to cardholder data
Any physical access to data or systems that house cardholder data provides the opportunity for individuals to access devices or data and to remove systems or hardcopies, and should be appropriately restricted. For the purposes of Requirement 9, “onsite personnel” refers to full-time and part-time employees, temporary employees, contractors and consultants who are physically present on the entity’s premises. A “visitor” refers to a vendor, guest of any onsite personnel, service workers, or anyone who needs to enter the facility for a short duration, usually not more than one day. “Media” refers to all paper and electronic media containing cardholder data.
| Section | PCI Requirement | Comments | Responsibilities on Artsman Cloud |
| 9.1 | Use appropriate facility entry controls to limit and monitor physical access to systems in the cardholder data environment. | This means locks on a computer room door or places (like box office) where people can access machines that can access card holder data. |
Artsman: cloud
Customer: workstation |
| 9.1.1 | Use video cameras or other access control mechanisms to monitor individual physical access to sensitive areas. Review collected data and correlate with other entries. Store for at least three months, unless otherwise restricted by law. Note: "Sensitive areas" refers to any data center, server room or any area trefers to any data center, server room or any area that houses systems that store, process, or transmit cardholder data. This excludes public-facing areas where only point-of- sale terminals are present, such as the cashier areas in a retail store. |
Artsman: cloud - SOC 2 compliant data centres | |
| 9.1.2 | Implement physical and/or logical controls to restrict access to publicly accessible network jacks.
For example, network jacks located in public areas and areas accessible to visitors could be disabled and only enabled when network access is explicitly authorized. Alternatively, processes could be implemented to ensure that visitors are escorted at all times in areas with active network jacks. |
Artsman: cloud - SOC 2 compliant data centres
Customer: internal network |
|
| 9.1.3 | Restrict physical access to wireless access points, gateways, handheld devices, networking/communications hardware, and telecommunication lines. |
Artsman: cloud - SOC 2 compliant data centres
Customer: internal network |
|
| 9.2 | Develop procedures to easily distinguish between onsite personnel and visitors, to include:
|
Artsman: cloud - SOC 2 compliant data centres
Customer: internal network |
|
| 9.3 | Control physical access for onsite personnel to sensitive areas as follows:
|
Artsman: cloud - SOC 2 compliant data centres
Customer: internal procedures |
|
| 9.4 | Implement procedures to identify and authorize visitors.
Procedures should include the following: |
Artsman: cloud - SOC 2 compliant data centres
Customer: internal procedures |
|
| 9.4.1 | Visitors are authorized before entering, and escorted at all times within, areas where cardholder data is processed or maintained. | ||
| 9.4.2 | Visitors are identified and given a badge or other identification that expires and that visibly distinguishes the visitors from onsite personnel. | ||
| 9.4.3 | Visitors are asked to surrender the badge or identification before leaving the facility or at the date of expiration. | ||
| 9.4.4 | A visitor log is used to maintain a physical audit trail of visitor activity to the facility as well as computer rooms and data centers where cardholder data is stored or transmitted.
Document the visitor's name, the firm represented, and the onsite personnel authorizing physical access on the log. Retain this log for a minimum of three months, unless otherwise restricted by law. |
||
| 9.5 | Physically secure all media |
Artsman: cloud - SOC 2 compliant data centres
Customer: internal procedures |
|
| 9.5.1 | Store media backups in a secure location, preferably an off-site facility, such as an alternate or backup site, or a commercial storage facility. Review the location's security at least annually. | Artsman: cloud - SOC 2 compliant data centres | |
| 9.6 | Maintain strict control over the internal or external distribution of any kind of media, including the following: |
Artsman: cloud - SOC 2 compliant data centres
Customer: internal procedures |
|
| 9.6.1 | Classify media so the sensitivity of the data can be determined. | ||
| 9.6.2 | Send the media by secured courier or other delivery method that can be accurately tracked. | ||
| 9.6.3 | Ensure management approves any and all media that is moved from a secured area (including when media is distributed to individuals). | ||
| 9.7 | Maintain strict control over the storage and accessibility of media. | ||
| 9.7.1 | Properly maintain inventory logs of all media and conduct media inventories at least annually. | Artsman: automated backups, recycle and deletion policies | |
| 9.8 | Destroy media when it is no longer needed for business or legal reasons as follows: | ||
| 9.8.1 | Shred, incinerate, or pulp hard- copy materials so that cardholder data cannot be reconstructed. Secure storage containers used for materials that are to be destroyed. | Artsman: automated secure deletion | |
| 9.8.2 | Render cardholder data on electronic media unrecoverable so that cardholder data cannot be reconstructed. | There is a tool on windows called Eraser that will handle this for you. On the Mac, use Secure-Empty Trash. Refer to this link for more information about using them. | Artsman: automated secure deletion Customer: should ensure no local cardholder storage in spreadsheets etc |
| 9.9 | Protect devices that capture payment card data via direct physical interaction with the card from tampering and substitution.
Note: These requirements apply to card- reading devices used in card-present transactions (that is, card swipe or dip) at the point of sale. This requirement is not intended to apply to manual key-entry components such as computer keyboards and POS keypads. |
This does not apply to Theatre Manager as it does not use card reading devices for card present transactions. | Customer: protect any pin pad devices accordingly |
| 9.9.1 | Maintain an up-to-date list of devices. The list should include the following:
|
For point of sale devices | Customer: wokstation inventory |
| 9.9.2 | Periodically inspect device surfaces to detect tampering (for example, addition of card skimmers to devices), or substitution (for example, by checking the serial number or other device characteristics to verify it has not been swapped with a fraudulent device).
Note: Examples of signs that a device might have been tampered with or substituted include unexpected attachments or cables plugged into the device, missing or changed security labels, broken or differently colored casing, or changes to the serial number or other external markings. |
For point of sale devices | Customer: wokstations and /or pinpad |
| 9.9.3 | Provide training for personnel to be aware of attempted tampering or replacement of devices. Training should include the following:
|
For point of sale devices | Customer: wokstations and/or pinpad |
| 9.10 | Ensure that security policies and operational procedures for restricting physical access to cardholder data are documented, in use, and known to all affected parties. |
Artsman: Cloud
Customer: wokstations and devices |
Regularly Monitor and Test Networks
Requirement 10: Track and monitor all access to network
Logging mechanisms and the ability to track user activities are critical in preventing, detecting, or minimizing the impact of a data compromise. The presence of logs in all environments allows thorough tracking, alerting, and analysis when something does go wrong. Determining the cause of a compromise is very difficult, if not impossible, without system activity logs.
| Section | PCI Requirement | Comments | Responsibilities on Artsman Cloud |
| 10.1 | Implement audit trails to link all access to system components to each individual user. |
Artsman: via Theatre Manager
Customer: workstation |
|
| 10.2 | Implement automated audit trails for all system components to reconstruct the following events: | ||
| 10.2.1 | All individual accesses to cardholder data | Refer to PCI Audit Logs. Theatre Manager tracks every time a user views the entire credit card data for any patron.
The Theatre Manager logs can be exported to your common logging tools. Refer to exporting logs to see how to accomplish this. |
Theatre Manager tracks access to card data for Customers |
| 10.2.2 | All actions taken by any individual with root or administrative privileges | Not applicable to Theatre Manager - it is applicable to your operating system. | Only access to CC data is via Theatre Manager |
| 10.2.3 | Access to all audit trails | via Theatre Manager | |
| 10.2.4 | Invalid logical access attempts | Incorrect login attempts to Theatre Manager are tracked in the audit logs. | via Theatre Manager |
| 10.2.5 | Use of and changes to identification and authentication mechanisms—including but not limited to creation of new accounts and elevation of privileges—and all changes, additions, or deletions to accounts with root or administrative privileges | Theatre Manager tracks each log in and log out, user creations and when people are given a temporary priviledge. These transaction are of type 'A' in the database (for Audit) | via Theatre Manager |
| 10.2.6 | Initialization, stopping, or pausing of the audit logs | Theatre Manager access audit logs cannot be stopped or deleted | via Theatre Manager |
| 10.2.7 | Creation and deletion of system-level objects | This is not possible in Theatre Manager | Theatre Manager does not allow entity deletion |
| 10.3 | Record at least the following audit trail entries for all system components for each event: | refer to PCI audit Log description | via Theatre Manager |
| 10.3.1 | User identification | ||
| 10.3.2 | Type of event | ||
| 10.3.3 | Date and time | ||
| 10.3.4 | Success or failure indication | ||
| 10.3.5 | Origination of event | ||
| 10.3.6 | Identity or name of affected data, system component, or resource | ||
| 10.4 | Using time-synchronization technology, synchronize all critical system clocks and times and ensure that the following is implemented for acquiring, distributing, and storing time.
Note: One example of time synchronization technology is Network Time Protocol (NTP). |
You must allow each computer to access a respected NTP Server (network time protocol). This is typically built into the operating system and firewall rules should automatically enable this feature.
Theatre Manager uses the time at the postgres server as the single time source for transactions across all workstations. All data istimestamped with now(), making time diferences on workstations irrelevant. Regardless, an alert is given to a user if their workstation does not match the server to within 30 seconds. Effectively, if the postgres server is set according to an NTP server; all workstations transactions are synced with the postgres server to create a unified approach to time. |
via Theatre Manager |
| 10.4.1 | Critical systems have the correct and consistent time | ||
| 10.4.2 | Time data is protected | ||
| 10.4.3 | Time settings are received from industry-accepted time sources | ||
| 10.5 | Secure audit trails so they cannot be altered |
Artsman: SOC 2 compliant data centres with real time monitoring and logging
Customer: Workstation controls |
|
| 10.5.1 | Limit viewing of audit trails to those with a job-related need | Theatre Manager logs are not sensitive in themselves due to what they track. However, after exporting them and storing them in your centralized logging facility, you will need to limit access because of the other systems you may be logging. | |
| 10.5.2 | Protect audit trail files from unauthorized modifications. | You cannot modify or delete Theatre Manager logs | |
| 10.5.3 | Promptly back up audit trail files to a centralized log server or media that is difficult to alter. | In addition to exporting logs, the multiple daily database backups create redundancy in the storage of the TM audit logs. | |
| 10.5.4 | Write logs for external-facing technologies onto a log server on the internal LAN. | This means things like router logs need to be stored internally. | |
| 10.5.5 | Use file integrity monitoring or change detection software on logs to ensure that existing log data cannot be changed without generating alerts (although new data being added should not cause an alert). | ||
| 10.6 | Review logs and security events for all system components to identify anomalies or suspicious activity | Refer to exporting logs to see how to export TM access logs in excel format so that you can import to your common log server. |
Artsman: SOC 2 compliant data centres with real time monitoring and logging
Customer: Workstation controls |
| 10.6.1 | Review the following at least daily:
|
PCI Audit Logs | |
| 10.6.2 | Review logs of all other system components periodically based on the organization's policies and risk management strategy, as determined by the organization's annual risk assessment. | ||
| 10.6.3 | Follow up exceptions and anomalies identified during the review process. | ||
| 10.7 | Retain audit trail history for at least one year, with a minimum of three months immediately available for analysis (for example, online, archived, or restorable from backup). | PCI logs are permanent in the database | via Theatre Manager |
| 10.8 | Ensure that security policies and operational procedures for monitoring all access to network resources and cardholder data are documented, in use, and known to all affected parties. |
Artsman: web sales and database
Customer: workstation |
Requirement 11: Regularly test security systems and processes
Vulnerabilities are being discovered continually by malicious individuals and researchers, and being introduced by new software. System components, processes, and custom software should be tested frequently to ensure security controls continue to reflect a changing environment.
| Section | PCI Requirement | Comments | Responsibilities on Artsman Cloud |
| 11.1 | Implement processes to test for the presence of wireless access points (802.11), and detect and identify all authorized and unauthorized wireless access points on a quarterly basis.
Note: Methods that may be used in the process include but are not limited to wireless network scans, physical/logical inspections of system components and infrastructure, network access control (NAC), or wireless IDS/IPS. Whichever methods are used, they must be sufficient to detect and identify both authorized and unauthorized devices. |
iStumbler is a great little tool on the mac that is donation ware - it can find a lot of items that are broadcasting signals.
Alternately, inspect each device that is within the card portion of the network and make sure wireless is off. Note: on AMS cloud servers, all network connections are physical wiring - there are no possible WIFI access points. |
Artsman: N/A - no access points
Customer: workstations |
| 11.1.1 | Maintain an inventory of authorized wireless access points including a documented business justification. |
Artsman: N/A - no access points
Customer: workstations |
|
| 11.1.2 | Implement incident response procedures in the event unauthorized wireless access points are detected. |
Artsman: N/A - no access points
Customer: workstations |
|
| 11.2 | Run internal and external network vulnerability scans at least quarterly and after any significant change in the network (such as new system component installations, changes in network topology, firewall rule modifications, product upgrades).
Note: Multiple scan reports can be combined for the quarterly scan process to show that all systems were scanned and all applicable vulnerabilities have been addressed. Additional documentation may be required to verify non-remediated vulnerabilities are in the process of being addressed. For initial PCI DSS compliance, it is not required that four quarters of passing scans be completed if the assessor verifies
|
Artsman: web sales and database scans
Customer: workstation scans |
|
| 11.2.1 | Perform quarterly internal vulnerability scans and rescans as needed, until all "high-risk" vulnerabilities (as identified in Requirement 6.1) are resolved. Scans must be performed by qualified personnel. |
Artsman: web sales and database
Customer: workstations |
|
| 11.2.2 | Perform quarterly external vulnerability scans, via an Approved Scanning Vendor (ASV) approved by the Payment Card Industry Security Standards Council (PCI SSC). Perform rescans as needed, until passing scans are achieved. Note: Quarterly external vulnerability scans must be performed by an Approved Scanning Vendor (ASV), approved by the Payment Card Industry Security Standards Council (PCI SSC). Refer to the ASV Program Guide published on the PCI SSC website for scan customer responsibilities, scan preparation, etc. |
Artsman: web sales and database
Customer: workstations |
|
| 11.2.3 | Perform internal and external scans, and rescans as needed, after any significant change.
Scans must be performed by qualified personnel. |
Artsman: web sales and database
Customer: workstations |
|
| 11.3 | Implement a methodology for penetration testing that includes the following:
|
Artsman: web sales and database tests
Customer: workstation tests |
|
| 11.3.1 | Perform external penetration testing at least annually and after any significant infrastructure or application upgrade or modification (such as an operating system upgrade, a sub-network added to the environment, or a web server added to the environment). |
Artsman: web sales and database
Customer: workstations |
|
| 11.3.2 | Perform internal penetration testing at least annually and after any significant infrastructure or application upgrade or modification (such as an operating system upgrade, a sub-network added to the environment, or a web server added to the environment). |
Artsman: web sales and database
Customer: workstations |
|
| 11.3.3 | Exploitable vulnerabilities found during penetration testing are corrected and testing is repeated to verify the corrections. |
Artsman: web sales and database
Customer: workstations |
|
| 11.3.4 | If segmentation is used to isolate the CDE from other networks, perform penetration tests at least annually and after any changes to segmentation controls/methods to verify that the segmentation methods are operational and effective, and isolate all out-of-scope systems from systems in the CDE. |
Artsman: web sales and database
Customer: workstations |
|
| 11.4 | Use intrusion-detection and/or intrusion-prevention techniques to detect and/or prevent intrusions into the network. Monitor all traffic at the perimeter of the cardholder data environment as well as at critical points in the cardholder data environment, and alert personnel to suspected compromises.
Keep all intrusion-detection and prevention engines, baselines, and signatures up to date. |
Artsman: web sales and database
Customer: workstations |
|
| 11.5 | Deploy a change-detection mechanism (for example, file-integrity monitoring tools) to alert personnel to unauthorized modification (including changes, additions, and deletions) of critical system files, configuration files, or content files; and configure the software to perform critical file comparisons at least weekly.
Note: For change-detection purposes, critical files are usually those that do not regularly change, but the modification of which could indicate a system compromise or risk of compromise. Change-detection mechanisms such as file-integrity monitoring products usually come pre-configured with critical files for the related operating system. Other critical files, such as those for custom applications, must be evaluated and defined by the entity (that is, the merchant or service provider). |
Artsman: web sales and database
Customer: workstations |
|
| 11.5.1 | Implement a process to respond to any alerts generated by the change- detection solution. |
Artsman: web sales and database
Customer: workstations |
|
| 11.6 | Ensure that security policies and operational procedures for security monitoring and testing are documented, in use, and known to all affected parties |
Artsman: web sales and database
Customer: workstations |
Maintain an Information Security Policy
Requirement 12: Maintain a policy that addresses information security for employees and contractors
As part of Theatre Manager's PA-DSS implementation process, creating a policy guide will be brought to the attention of venues desiring to be PCI compliant
| Section | PCI Requirement | Comments | Responsibilities on Artsman Cloud |
| 12.1 | Establish, publish, maintain, and disseminate a security policy. | This relates to practices surrounding PCI Card data | Artsman: Network Security Policy for Employees/cloud (ams/network-security) Customer: employees & workstations |
| 12.1.1 | Review the security policy at least annually and update the policy when the environment changes. |
Artsman: cloud
Customer: workstations |
|
| 12.2 | Implement a risk-assessment process that:
|
Artsman: cloud
Customer: Review own document |
|
| 12.3 | Develop usage policies for critical technologies and define proper use of these technologies.
Note: Examples of critical technologies include, but are not limited to, remote access and wireless technologies, laptops, tablets, removable electronic media, e-mail usage and Internet usage. Ensure these usage policies require the following: |
Artsman: cloud
Customer: workstations |
|
| 12.3.1 | Explicit approval by authorized parties |
Artsman: cloud
Customer: workstations |
|
| 12.3.2 | Authentication for use of the technology |
Artsman: cloud
Customer: workstations |
|
| 12.3.3 | A list of all such devices and personnel with access | Arts Management allows only tools approved for use by Management on workstations. The customer is responsible for tools on their machines. |
Artsman: cloud
Customer: workstations |
| 12.3.4 | A method to accurately and readily determine owner, contact information, and purpose (for example, labeling, coding, and/or inventorying of devices) |
Artsman: cloud
Customer: workstations |
|
| 12.3.5 | Acceptable uses of the technology |
Artsman: cloud
Customer: workstations |
|
| 12.3.6 | Acceptable network locations for the technologies |
Artsman: cloud
Customer: workstations |
|
| 12.3.7 | List of company-approved products |
Artsman: cloud
Customer: workstations |
|
| 12.3.8 | Automatic disconnect of sessions for remote access technologies after a specific period of inactivity |
Artsman: cloud
Customer: Workstations have limited login time per System Preferences. |
|
| 12.3.9 | Activation of remote access technologies for vendors only when needed by vendors, with immediate deactivation after use | Team Viewer is designed in exactly this manner.
| Customer: workstations |
| 12.3.10 | For personnel accessing cardholder data via remote-access technologies, prohibit the copying, moving, and storage of cardholder data onto local hard drives and removable electronic media, unless explicitly authorized for a defined business need.
Where there is an authorized business need, the usage policies must require the data be protected in accordance with all applicable PCI DSS Requirements. |
All card data in the database at rest is encrypted or shredded. All card data in motion is encrypted via TLS 1.2 between machines and enforced by database connection. Reports do not show complete PAN, per PCI compliance
|
Customer: responsible for local policies secure storage of paper copies of PAN data and not transmitting to patrons via email. |
| 12.4 | Ensure that the security policy and procedures clearly define information security responsibilities for all personnel. |
Artsman: cloud
Customer: workstations |
|
| 12.5 | Assign to an individual or team the following information security management responsibilities |
Artsman: cloud
Customer: workstations |
|
| 12.5.1 | Establish, document, and distribute security policies and procedures. | ||
| 12.5.2 | Monitor and analyze security alerts and information, and distribute to appropriate personnel. | ||
| 12.5.3 | Establish, document, and distribute security incident response and escalation procedures to ensure timely and effective handling of all situations. | ||
| 12.5.4 | Administer user accounts, including additions, deletions, and modifications | ||
| 12.5.5 | Monitor and control all access to data. | ||
| 12.6 | Implement a formal security awareness program to make all employees aware of the importance of cardholder data security. |
Artsman: this document and staff training
Customer: own staff training |
|
| 12.6.1 | Educate employees upon hire and at least annually.
Note: Methods can vary depending on the role of the personnel and their level of access to the cardholder data. |
Artsman: cloud
Customer: workstations |
|
| 12.6.2 | Require personnel to acknowledge at least annually that they have read and understood the security policy and procedures. | This can be a signed document that they have reviewed the security policy |
Artsman: cloud
Customer: workstations |
| 12.7 | Screen potential personnel prior to hire to minimize the risk of attacks from internal sources. (Examples of background checks include previous employment history, criminal record, credit history, and reference checks.)
Note: For those potential personnel to be hired for certain positions such as store cashiers who only have access to one card number at a time when facilitating a transaction, this requirement is a recommendation only. |
Artsman: cloud
Customer: workstations |
|
| 12.8 | Maintain and implement policies and procedures to manage service providers with whom cardholder data is shared, or that could affect the security of cardholder data, as follows: | Theatre Manager is designed so that cardholder data cannot be shared with any body. Staff do not have access to card data. | Customer: workstations- inform staff not to share card data |
| 12.8.1 | Maintain a list of service providers. | We suggest placing them in Theatre Manager and adding them to a mail list called PCI Compliance contacts |
Artsman: cloud
Customer: workstations |
| 12.8.2 | Maintain a written agreement that includes an acknowledgement that the service providers are responsible for the security of cardholder data the service providers possess or otherwise store, process or transmit on behalf of the customer, or to the extent that they could impact the security of the customer's cardholder data environment.
Note: The exact wording of an acknowledgement will depend on the agreement between the two parties, the details of the service being provided, and the responsibilities assigned to each party. The acknowledgement does not have to include the exact wording provided in this requirement. |
Artsman: cloud
Customer: workstations |
|
| 12.8.3 | Ensure there is an established process for engaging service providers including proper due diligence prior to engagement. |
Artsman: cloud
Customer: workstations |
|
| 12.8.4 | Maintain a program to monitor service providers' PCI DSS compliance status at least annually. | Arts Management is responsible to ensure Theatre Manager is audited for PCI-DSS and approved by the PCI council. |
Artsman: vendor PCI DSS annually
Customer: merchant responsibilities |
| 12.8.5 | Maintain information about which PCI DSS requirements are managed by each service provider, and which are managed by the entity. | Customer: this document describes areas which Artsman is responsible | |
| 12.9 | Additional requirement for service providers only: Service providers acknowledge in writing to customers that they are responsible for the security of cardholder data the service provider possesses or otherwise stores, processes, or transmits on behalf of the customer, or to the extent that they could impact the security of the customer's cardholder data environment.
Note: The exact wording of an acknowledgement will depend on the agreement between the two parties, the details of the service being provided, and the responsibilities assigned to each party. The acknowledgement does not have to include th |
|
Customer |
| 12.10 | Implement an incident response plan. Be prepared to respond immediately to a system breach. |
Artsman: cloud
Customer: workstation |
|
| 12.10.1 | Create the incident response plan to be implemented in the event of system breach. Ensure the plan addresses the following, at a minimum:
|
||
| 12.10.2 | Test the plan at least annually. | ||
| 12.10.3 | Designate specific personnel to be available on a 24/7 basis to respond to alerts. | ||
| 12.10.4 | Provide appropriate training to staff with security breach response responsibilities. | ||
| 12.10.5 | Include alerts from security monitoring systems, including but not limited to intrusion-detection, intrusion- prevention, firewalls, and file-integrity monitoring systems. | ||
| 12.10.6 | Develop a process to modify and evolve the incident response plan according to lessons learned and to incorporate industry developments. |
License Agreement
Copyright
1988 - 2023 All rights reserved.
All software developed by Arts Management Systems Ltd. is furnished under a license agreement and is not sold to the end user. The software may be used or copied only in accordance with the terms of the agreement. Names of persons, corporations or products used in the tutorials and examples of this manual are fictitious.
No part of this web site (hereinafter referred to as a manual) may be reproduced, transmitted, stored in a retrieval system or translated into any language in any form by any means without the written permission of ARTS MANAGEMENT SYSTEMS LIMITED. The information in this manual is subject to change without notice and does not represent a commitment on the part of ARTS MANAGEMENT SYSTEMS LIMITED to the functionality described herein. You may develop your own web pages and custom documentation that refer to (or hyper-link with) web pages within the manual with the understanding that links could be changed or removed in the future and content within each page of this manual may also change as functionality within the software changes. The manual is not guaranteed to match your version of the software as it will be amended constantly to reflect the current state of any software.
This licence agreement may change without notice. Any changes and amendments to the licence agreement are also binding.
Trademarks
Trademarks
- IBM, IBM PC and AT are registered trademarks of International Business Machines Corporation.
- Windows, Microsoft and MS-DOS are registered trademarks, and Microsoft Windows are trademarks of Microsoft Corporation.
- Apple, the Apple logo, Apple Talk, LaserWriter, OSX and Macintosh are registered trademarks and Finder is a trademarks of Apple Computer, Inc.
- PostScript is a registered trademark of Adobe Systems, Inc.
- oWrite, oGantt, oSpell are a registered trademarks of Brainy Data Ltd.
- Other products mentioned are trademarks or registered trademarks of their respective corporations.
Warranties
Warranties
ARTS MANAGEMENT SYSTEMS LIMITED makes no warranties, either expressed or implied, regarding the described computer software package of its fitness for any particular purpose.
Agreement
Agreement
DO NOT DOWNLOAD, INSTALL OR USE THE SOFTWARE UNTIL YOU HAVE CAREFULLY READ AND AGREED TO THE FOLLOWING TERMS AND CONDITIONS WHICH SET OUT THE TERMS OF THE LICENSE AGREEMENT BETWEEN YOU AND ARTS MANAGEMENT SYSTEMS LIMITED. IF YOU INSTALL THE SOFTWARE AND CLICK 'I AGREE' DURING THE INSTALLATION, YOU EXPLICITLY AGREE TO ALL TERMS AND CONDITIONS OF THE SOFTWARE LICENCE. YOU MAY NOT USE THE ENCLOSED SOFTWARE, RECEIVE SUPPORT OR BENEFIT FROM THE WARRANTY SET FORTH BELOW UNLESS YOU AGREE TO THE TERMS OF THE LICENCE WITH ARTS MANAGEMENT SYSTEMS LIMITED. IF YOU DO NOT AGREE WITH THE LICENSE TERMS AND CONDITIONS, PROMPTLY DESTROY THE INSTALLER AND YOUR MONEY WILL BE REFUNDED.
- Ownership. Arts Management Systems Limited retains
ownership of all software and programs provided to you. This software is licensed
to you for use under the following conditions:
- Software License. Subject to the terms and conditions
set forth below and upon receipt by Arts Management Systems
Limited of a contract that has been
signed by you, you (the "Licensee") are hereby granted a
non-exclusive, non-transferable, limited license (the "License")
to use the Arts Management Systems Limited programs
described below (the "Program") and the associated documentation
(the "Documentation") (the Program and the Documentation are
collectively referred to herein as the "Software") on any number of
compatible computers within your organizations as specified explicitly in the contract.
Access to the use of the Software by Licensee
shall be limited to no more than the designated number of Licensed
Users as set out in the contract. The designated number of License Users may be altered by the Licensee at any time upon receipt of a
supplemental signed contract by Arts
Management Systems Limited's with pricing and additional licence
arrangements stated in the contract.
Number of Licensed Users: Refer to original Contract and supplemental Contracts or amendments
Program (includes but is not limited to): Theatre Manager, scanner software, web servers, and any software that may be provided by Arts Management Systems Ltd. or downloaded electronically from our web sites or App Stores (such as Apple's App store). Download of any software created by Arts Management Systems from any source automatically makes that software subject to this licence agreement.
- Copies. This license allows you to make any number of copies of the
software provided in the Contract in machine-readable form for deployment within your organization or backup purposes only. You
must reproduce on each copy the Arts Management Systems Limited
copy right notice and any other proprietary legends that were on
the original copy of the Arts Management Systems Limited
software.
- Property Rights. The software contains copyrighted
material, trade secrets and other proprietary materials, all of
which are owned by Arts Management Systems Limited or its
suppliers who retain title to the Software and all copies thereof,
and Licensee shall not sell, transfer, rent, lease, loan,
distribute, disclose, display or otherwise make available any
portion of the Software to others. Licensee may not engage in, or
permit third parties to engage in any activities which would have
the effect of infringing on or derogating from Arts Management
Systems Limited's ownership in the software. Without limiting the
foregoing and except as provided in paragraph 2 above, Licensee
may not engage or permit third parties to engage in any of the
following: (A) the provision or permitted use or disclosure of the
Software to third parties; (B) provision of the Software for use
in a computer service business, network, timesharing, multiple CPU
or multiple user arrangement, or by telecommunications to users
who are not individually licensed by Arts Management Systems
Limited; (C) removal or obscuring of the copyright and other
proprietary notices from any of the programs, screens, media, installers, or
any of the Documentation; (D) reverse engineering or attempting to
disassemble or decompile the Software; (E) granting sublicenses,
leases or other rights in the Software to others; and (F) making
copies or verbal or media transmissions, of the Documentation.
Licensee may physically transfer the Programs from one computer to
another provided the programs are used by no more that the designated Number of
Licensed Users at the same time.
Licensee agrees to secure and protect the Software in a manner consistent with the maintenance of Arts Management Systems Limited ownership and proprietary rights therein and to take appropriate action by instruction or agreement with the Licensed Users to satisfy its obligations hereunder.
- Limited Warranty. Arts Management Systems Limited
warrants that the Software will substantially conform to published
specifications and the Documentation, provided that the Software
is used on computer hardware and with the operating system for
which it was designed. Arts Management Systems Limited warrants
that the installer will be free from
defects in material and workmanship, under normal use, for ninety
(90) days after the date of the original purchase. If a defect
occurs during such ninety (90) day period, the Licensee may download
a replacement without charge or, at Arts Management Systems
Limited's option, a refund of the purchase price. This is
Licensee's sole remedy and Arts Management Systems Limited entire
liability in the event of a defect in the media, installer, or software. Further, Arts
Management Systems Limited hereby limits the duration on any
implied warranty(ies) on the media or installers to the period stated above.
EXCEPT AS PROVIDED ABOVE, LICENSEE ACKNOWLEDGES AND AGREES THAT THE SOFTWARE IS USED BY LICENSEE AT LICENSEE'S SOLE RISK AND IS PROVIDED "AS IS" WITHOUT WARRANT OF ANY KIND, EITHER EXPRESS OR IMPLIED, INCLUDING, BUT NOT LIMITED TO, THE IMPLIED WARRANTIES OF MERCHANTABILITY AND FITNESS FOR A PARTICULAR PURPOSE, QUALITY, NON-INFRINGEMENT, TITLE, RESULTS, EFFORT OR QUIET ENJOYMENT. ARTS MANAGEMENT SYSTEMS LIMITED DOES NOT GUARANTEE, WARRANT OR MAKE ANY REPRESENTATION THAT THE FUNCTIONS CONTAINED IN THE SOFTWARE WILL MEET LICENSEE'S REQUIREMENTS, OR THAT THE OPERATION OF THE SOFTWARE WILL BE UNINTERRUPTED OR ERROR-FREE, OR THAT THE DEFECTS IN THE SOFTWARE WILL BE CORRECTED. FURTHERMORE, ARTS MANAGEMENT SYSTEMS LIMITED DOES NOT GUARANTEE, WARRANT OR MAKE ANY REPRESENTATION REGARDING THE USE OF THE RESULTS OF THE USE OF THE SOFTWARE IN TERMS OF THEIR CORRECTNESS, ACCURACY, RELIABILITY, CURRENTNESS, OR OTHERWISE. NO ORAL OR WRITTEN INFORMATION OR ADVICE GIVEN BY ARTS MANAGEMENT SYSTEMS LIMITED, OR ANY AUTHORIZED REPRESENTATIVE OF ARTS MANAGEMENT SYSTEMS LIMITED, SHALL CREATE A WARRANTY OR IN ANY WAY INCREASE THE SCOPE OF THIS WARRANTY. SHOULD THE SOFTWARE PROVE DEFECTIVE, YOU (AND NOT ARTS MANAGEMENT SYSTEMS LIMITED OR ITS AUTHORIZED REPRESENTATIVES) ASSUME THE ENTIRE COST OF ALL NECESSARY SERVICING, REPAIR OR CORRECTION. SOME STATES OF THE UNITED STATES OF AMERICA DO NOT ALLOW THE EXCLUSION OF IMPLIED WARRANTIES, SO THE ABOVE EXCLUSION MAY NOT APPLY TO YOU. THIS WARRANTY GIVES LICENSEE LIMITED, SPECIFIC RIGHTS. LICENSE MAY HAVE OTHER RIGHTS, WHICH VARY FROM STATE TO STATE.
- Limitation Of Liability. In no event, including
negligence, will Arts Management Systems Limited or its directors,
officers or agents be liable to licensee for indirect, special,
incidental or consequential damages, including, but not limited to
any loss of data or business information or loss of profits,
arising out of the use or inability to use the software, even if
Arts Management Systems Limited or an authorized representative
thereof has been advised of the possibility of such damages.
Because some states do not allow the exclusion or limitation of
liability for consequential or incidental damages, the above
limitation may not apply to licensee. In no event shall Arts
Management Systems Limited total liability hereunder for all
damages, losses, and causes of action whether in contract, tort
(including negligence) exceed the amount paid by licensee for the
software.
- Termination. This license is effective until
terminated. This License will terminate automatically without
notice from Arts Management Systems Limited upon breach of
Licensee or any of the Licensed Users of any provision of this
license relating to the confidentiality and protection of Arts
Management Systems Limited proprietary rights in the Software, use
of the Software by more than the designated number of Licensed
Users, or the termination of Licensee's business or the filing of
a petition in bankruptcy or insolvency with respect to Licensee.
In the event of termination to this License, Licensee shall
immediately return the Software to Arts Management Systems Limited
and destroy all copies thereof. All provisions of this License
relating to disclaimers of warranties, limitations of liability,
remedies or damages and Arts Management Systems Limited
proprietary rights shall survive termination.
- Export Law Assurances. Licensee agrees and certifies
that the Software, and the direct product thereof, will not be
exported outside Canada and The United States except as permitted
by the laws and regulations of either country or exported or used
outside the country in which originally licensed.
This License shall be governed by and construed in accordance with the laws of Canada and the Province of Alberta, as applied to agreements entered into and to be performed entirely within Alberta between Alberta residents and the parties hereto irrevocably attorn to the jurisdiction of the Courts of the Province of Alberta. If for any reason a court of competent jurisdiction finds any provision of this License, or portion thereof, to be unenforceable, that provision of the License shall be enforced to the maximum extent permissible so as to effect the intent of the parties, and the remainder of this License shall continue in full force and effect.
ARTS MANAGEMENT SYSTEMS LIMITED, 1110 Maggie St. SE, Calgary, Alberta, Canada T2G 4M1
LICENSEE ACKNOWLEDGES THAT IT HAS READ AND UNDERSTANDS THIS AGREEMENT AND AGREES TO BE BOUND BY ITS TERMS. LICENSEE FURTHER AGREES THAT THIS AGREEMENT IS THE COMPLETE AND EXCLUSIVE STATEMENT OF THE AGREEMENT BETWEEN LICENSEE AND ARTS MANAGEMENT SYSTEMS LIMITED AND SUPERSEDES ANY PROPOSAL OR PRIOR AGREEMENT, ORAL OR WRITTEN, AND ANY OTHER COMMUNICATION RELATING TO THE SUBJECT MATTER OF THIS AGREEMENT AND MAY NOT BE MODIFIED EXCEPT IN A WRITTEN AGREEMENT SIGNED BY AN AUTHORIZED REPRESENTATIVE OF LICENSEE AND ARTS MANAGEMENT SYSTEMS LIMITED.