Web Page Documentation
The Web pages are Bootstrap 3. The general principles are:
- A venue can customize the pages as they wish. Generally, this turns out to only be a few.
- Pages that are not modified are automatically 'the most recent' for each new release of Theatre Manager Server
- Customized web pages may need periodic comparisons if features are added within the page. Refer to update Web Pages
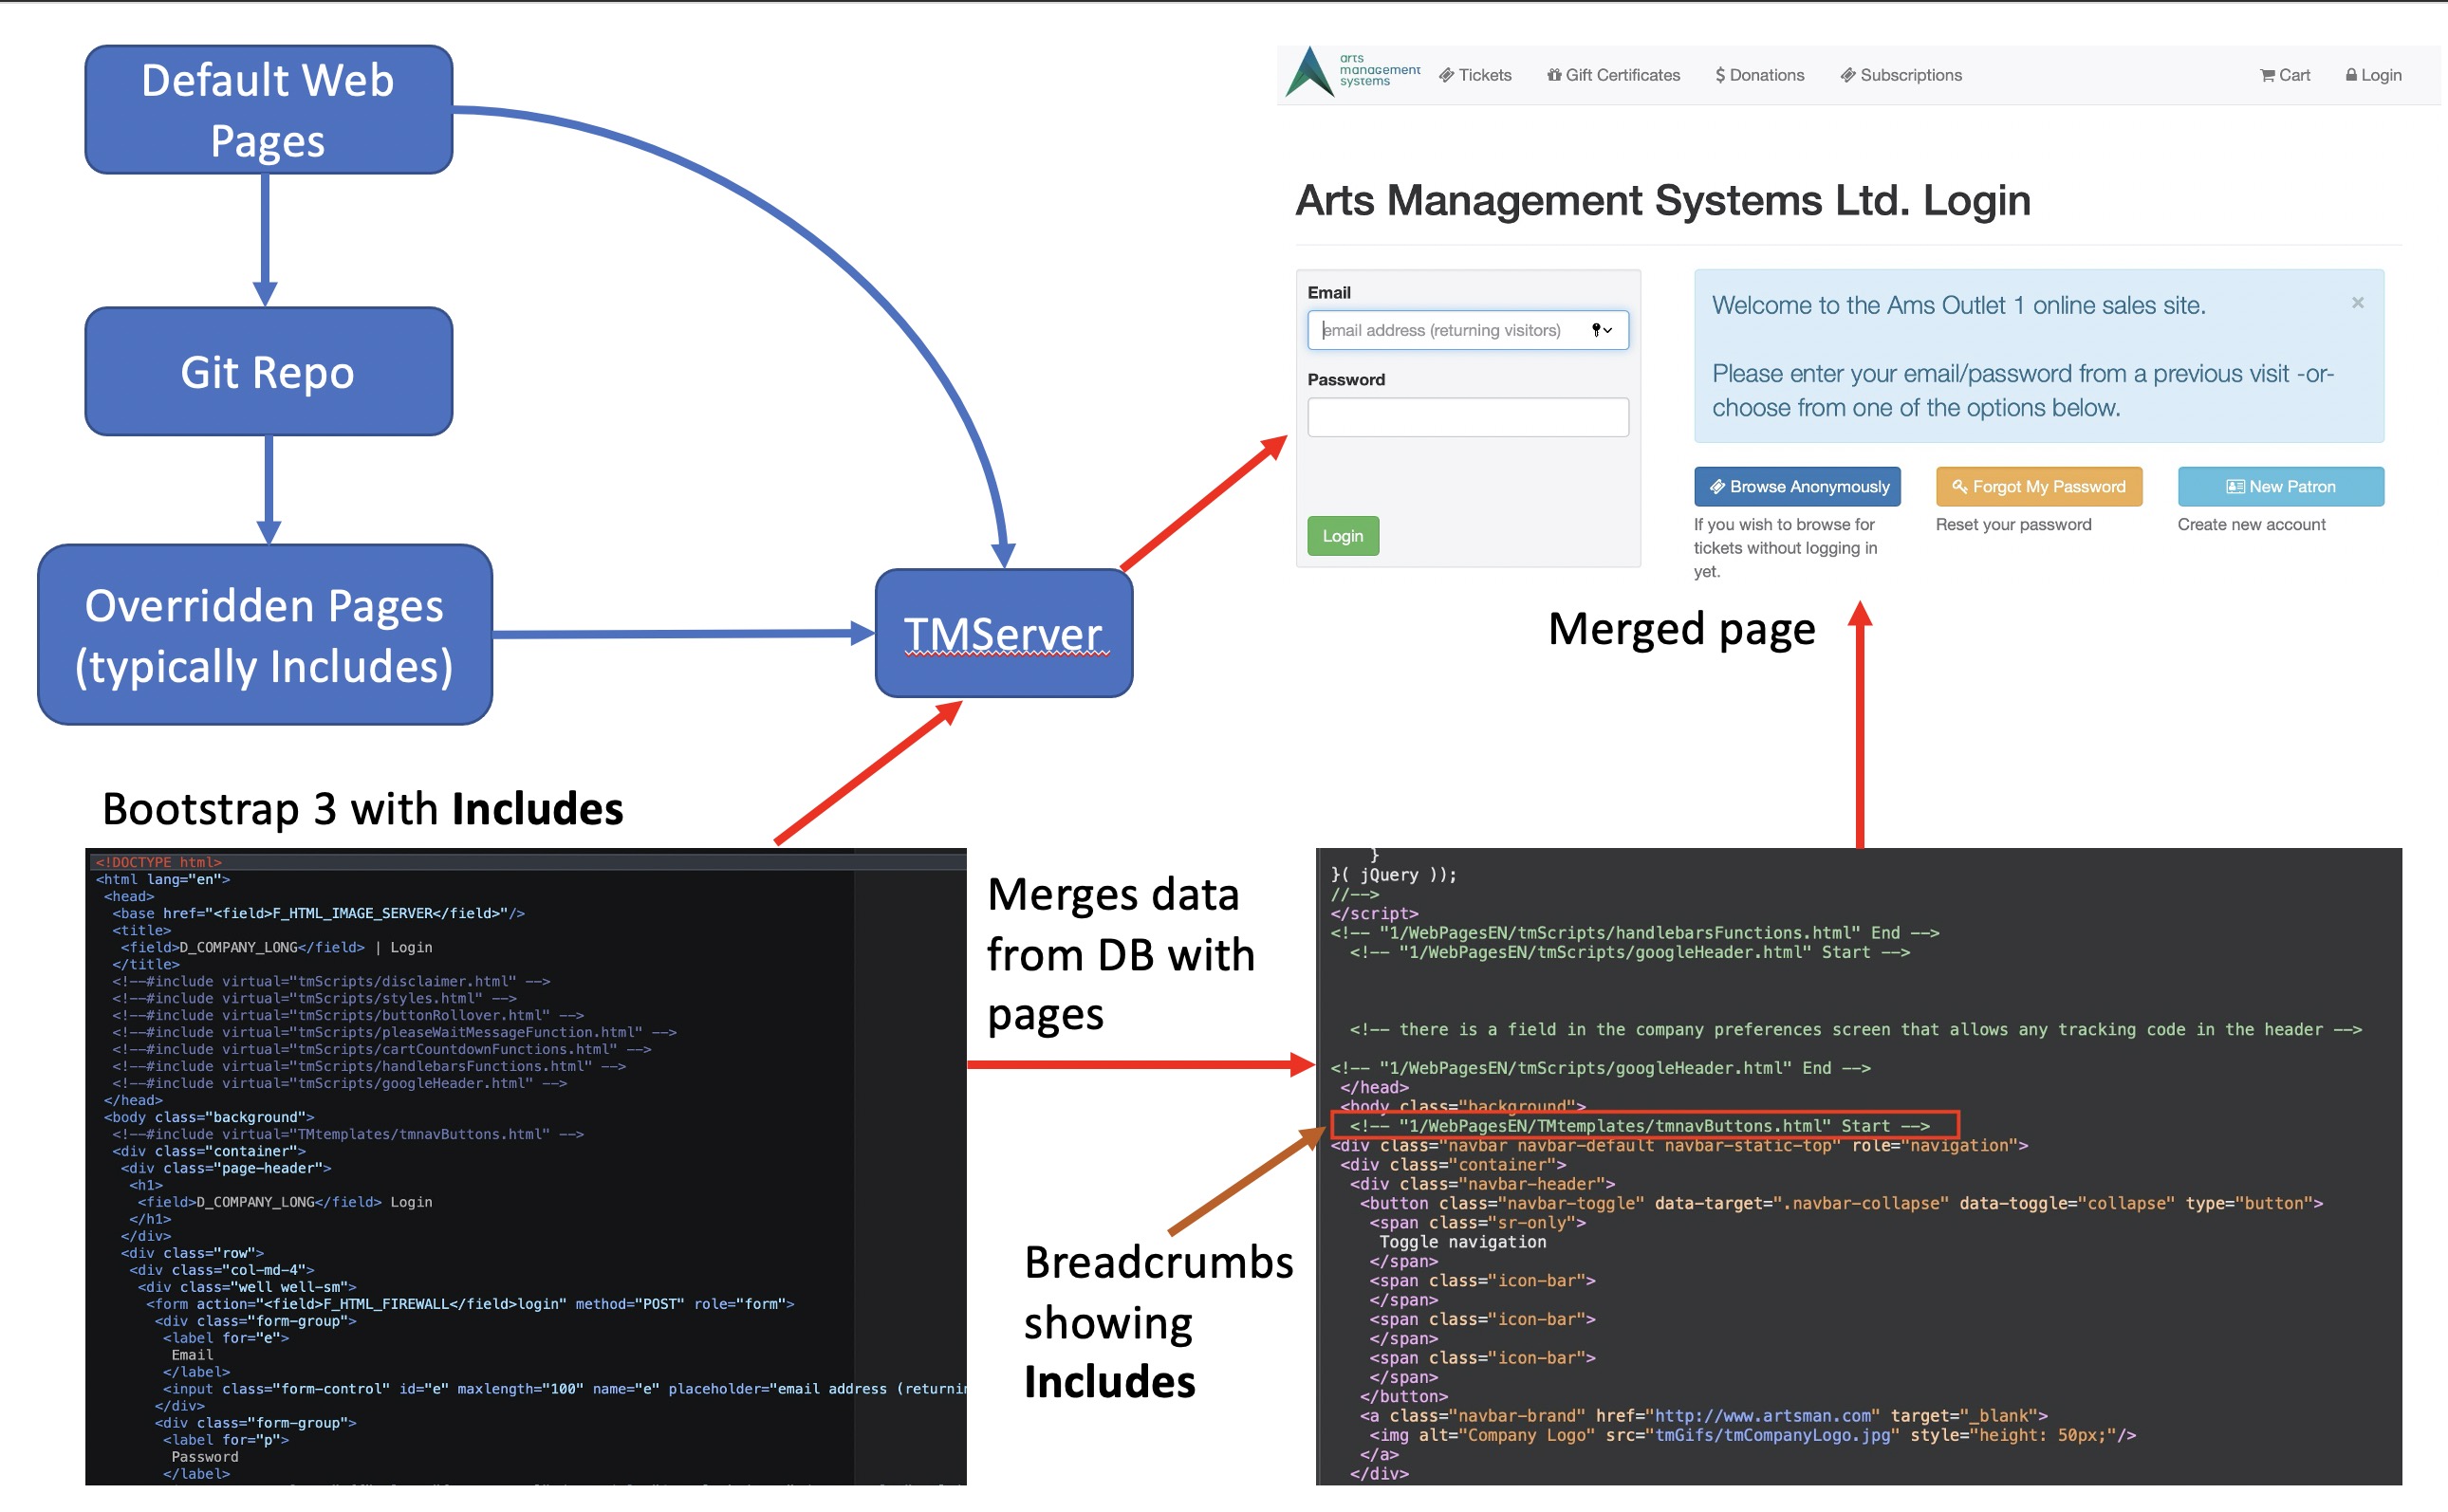
Web Page Infrastructure Schematic
The image below is a brief introduction to how the TMServers merge web pages with data from the database and present it to the patron. To change a web page, a web developer needs to:
- Download a complete set of web pages from the AMS Web page Git repository (and keep this current)
- Identify which web page needs changing by inspecting the completed pages, find the appropriate breadcrumb, looking for the:
- Include to change -or-
- Main page to change -or-
- Identifying if the text change was merge from data in Theatre Manager, in which case the user only need change the text.
- If a page change is required, copying the identified include or main page to your venue's Git Repository
- Making changes as appropriate to the page
- Pushing it into the git repo, which causes theatre Manager to start using the over-ridden page. NOTE: we suggest that any page changes to main pages be added as includes, if possible. It helping if future editing is required
Main Marketing site
You can integrate the main marketing site or social media sites in a few ways:
- You can use links on the main marketing site to redirect the user into almost any area of the web sales, including adding tracking tags that can be seen in Theatre Manager's shopping cart list
- You can use the REST API to pull data and images from theatre manager into word press calendars to create single source of data and more dynamic content on your main marketing site. Note: always cache data from TM's REST API
Sample Web Sites
 The following are examples of what a few of our many venues using Theatre Manager web sales have done to the sample web pages. It gives you an idea that the sky can be the limit and a fair degree of personal branding is very possible very easily.
When visiting these sites, make sure and click on the 'tickets' or 'Buy' or 'Buy Now' buttons on these sites. You can also look at the our responsive web page demo web site if you prefer (the page shows a sample image and lets you play).
Responsive Web Pages using Bootstrap
Twitter Bootstrap is the industry leading go-to technology used for web sites that respond automatically to the type of device that the web page is displayed on. Web Pages using Bootstrap look great on mobile devices, tablets, computers and Smart TVs.
- Arts Management Demo web pages (English)
- Arts Management Demo web pages (French)
- Proctors Theatre (Schenectady, NY)
- SLOC musical theatre (Schenectady, NY)
- Tarragon Theatre (Toronto, ON)
- Reno Little Theatre (Reno, NV)
- American Stage (St. Petersburg, FL)
- StoryBook Theatre (Calgary, AB)
Samples of Web Sites using Course
- Prairie Theatre Exchange (Winnipeg, MB)
- Florida Repertory Theatre (Fort Myers, FL)
- GrandStreet Theatre (Helena, MT)
Samples of Web Sites using Custom Donations
- Creative Kids (Regina, SK)
- Midwest Theater (Scottsbluff, NB)
|
Refer to editing web pages for the general process of customization. |
Page Naming Conventions
All Web Pages are stored within the WebPages directory found in the folder number equal to that of your Theatre Manager database. There can be several versions of the WebPages folders each customized based on language.
The naming convention for the default web pages is:
- If the page name includes an upper case TM, you cannot rename the page.
Theatre Manager requires it to have that name. An example would be 'TMhome.html'.
- If the page name includes a lower case tm, you can rename the file to suit your needs.
When you are altering page names, ensure that the page name fits the content of the page, and does not too closely resemble another page name. This will prevent future confusion.
If you are using a Linux Apache Server please note the Operating System is case sensitive. You MUST take this into consideration when modifying page names.
|
Programmer's Note: Changing page names will mean that you will have to check and make sure that other pages are linked to the new name. |

Useful HTML editing tools
You can change any of the web pages.
While you are testing your web site, or your customers are using web sales, you may see text you think could be worded more suitably for your venue. The best way to find the page to change is doing a multi-file text search to find the text.
You can search within all the files in the HTDOCS folder on the NGINX server. Good options for multi-file text searching are:
- BBEdit editor and directory compare tool (OS-X)
- Notepad++ file editor (Windows)
- WinMerge directory compare tool (Windows)
- Adobe's Dreamweaver wysiwig html editor (Windows and OS-X)
We recommend:
- BBedit has a free edition. The full version costs about $40 and is a programmer type tool - but we really like it.
- Notepad++ is free.
- Dreamweaver as it is WYSIWYG HTML editing tool. It can be purchased for about $25.00 for non-profits through http://www.techsoup.org
Comparing HTML Pages with BBedit (Free Edition)
On a Macintosh, you can use a tool like BBedit - Free Edition to compare two sets of web pages and move changes from one page to another. (Text Wrangler can do this comparison and its free, BBedit is a paid product from the same company).
 |
If you don't know which file to edit or compare, you can use various methods to find the file |
You can do a comparison on either:
- A subset of pages provided with each upgrade to identify the key differences, or
- you can compare your entire WebPages folder on the WebPages folder with the most recent folder supplied by Arts Management.
In either case, the approach is:
- Make a copy of your current WebPages folder on your TM web server and copy it to your computer.
By copying the pages, you can make changes to the web pages and test them in a test environment.
- Obtain the full set of web pages, or the subset that is part of the current release.
If you are jumping a few versions, you will need the web pages changes between the current version you are running and the latest release, or you can simply download a full copy of the latest web pages.
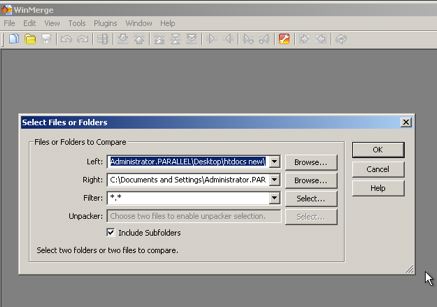
Use BBedit - free edition (or similar file comparison tool) to compare all files in a folder.
- Start BBedit and then go to Search->Find Differences.
In the find differences window that opens, put the names of the old and new WebPages folders as per the picture below and click Compare.
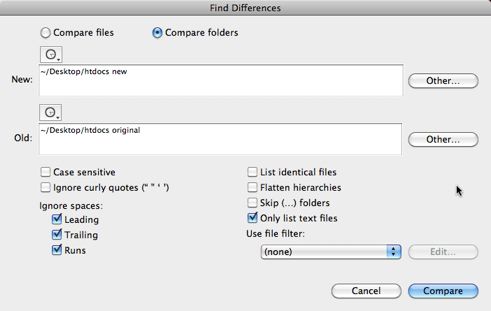
- Choose which changes should be merged into your web pages.
This shows you the list of files that are different (bottom left) and under that, the actual differences in the files. Clicking on any one difference will show you where in the file the differences are and you can apply them (or not) in either direction. Repeat this decision making for all files that are different.
- If there are new files, copy them into the corresponding folders.
- Finally test the changes by purchase online using the live web pages.
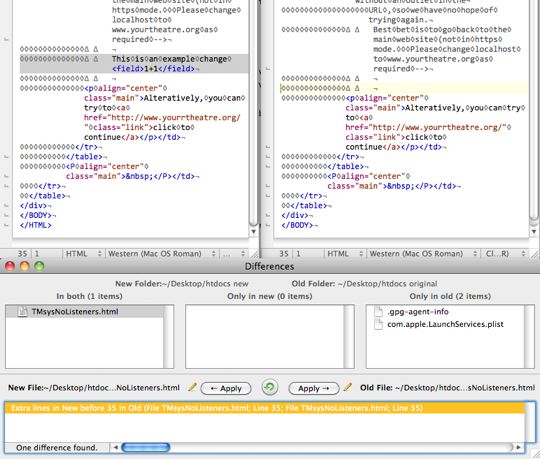
Comparing HTML Pages with WinMerge
You can do a comparison on either:
- A subset of pages provided with each upgrade to identify the key differences, or
- you can compare your entire WebPages folder on the TM web server with the most recent WebPages folder supplied by Arts Management.
In either case, the approach is:
- Make a copy of your current WebPages folder on your TM web server and copy it to your computer.
This is so you edit the web pages and test them in a test environment.
- Make a copy of your current WebPages folder on your TM web server and copy it to your computer.
By copying the pages, you can make changes to the web pages and test them in a test environment.
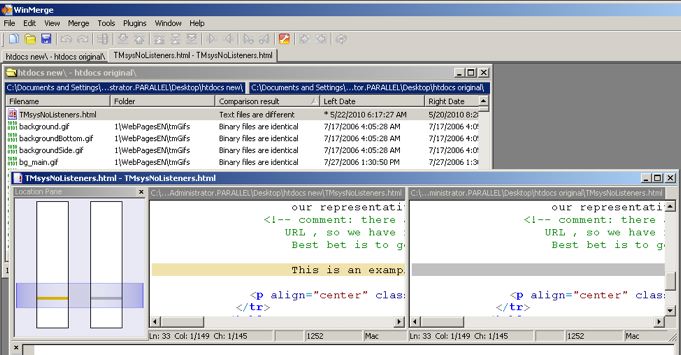
Use WinMerge (or similar file comparison tool) to compare all files in a folder.
- Start WinMerge and pick the File->Open menu. You will be asked to pick the folder for the left side (pick the old WebPages directory) and the folder for the right side (pick the new WebPages directory).
The list window opens. It tells you which files are in only one folder and which files have a difference.
- Double click on a file with a difference and a second window opens with a visual indicator of where the difference is. Click on the difference to see it (see top window in the picture below).
- Choose which changes to merge into your web pages.
Winmerge shows you the actual differences in the files highlighted in orange. Repeat this decision making for all files that are different.
- If there are new files, copy them into the right place.
- Test the web pages before moving them into the live web site.
- Upgrade Theatre Manager to match the version of the web pages.
- Start the web listeners.
- Do a final test purchase using the live web pages.
Which Web Page to edit and WebPages folder
- how to find the web page that you want to edit
- the structure of the WebPages directory
- the general outline of the content of a web page
- and the meaning of some internal variables found on most web pages
Finding the web page to Edit
There are a few techniques to use such as:
- To identify the Web Page that needs changed
- Inspecting the actual page source
- Using a tool like BBedit or Notepad++ to search for text within an entire folder of files
- or taking a guess based on file names - they are somewhat 'english'.
- Searching the source files for the web pages
Web pages exist in two states: Those that have been overridden and those that have never been changed. This means you need to search in two locations
- For overridden web pages: look in the web page folder on the main TM Listener. This is usually /Boxoffice/WebPages on a Mac, or C:\BoxOffice\WebPages\ on windows.
-
If a page has never been changed, you can find the most recent template in one of two places:
- it will be found in the 'hidden' template folder downloaded with each new TM Server release - which is how we keep the templates updated.
when the main template server is a Mac, you'll typically find them in /tmp/TMWebPages/0.100.94. On windows, the files are typically in c:\windows\temp\TMWebPages\0.100.94
NOTE: the 0.100.94 folder name changed to reflect the version of the TM server you are running, since each new TM server creates a new template folder and deletes the old one.
- You can also download the most recent web pages in entirety.
- it will be found in the 'hidden' template folder downloaded with each new TM Server release - which is how we keep the templates updated.
- Overriding a web page is done by copying the page you want to change from the template folder into the same 'place' inside the overridden web pages. I.e. if its in a folder like 'tmTemplates', make sure the folder structure is maintained and the file names and folder names are the same.
 |
Note, once you find the file to edit, you might want to compare old and new versions. |

Inspect the Page Source
If you use the web site and test it out, you may run across a page that you want to change. If you right click and 'view the source' for the page, you should see some words near the top of the HTML that indicate which page you are viewing. Refer to the image below for a sample:
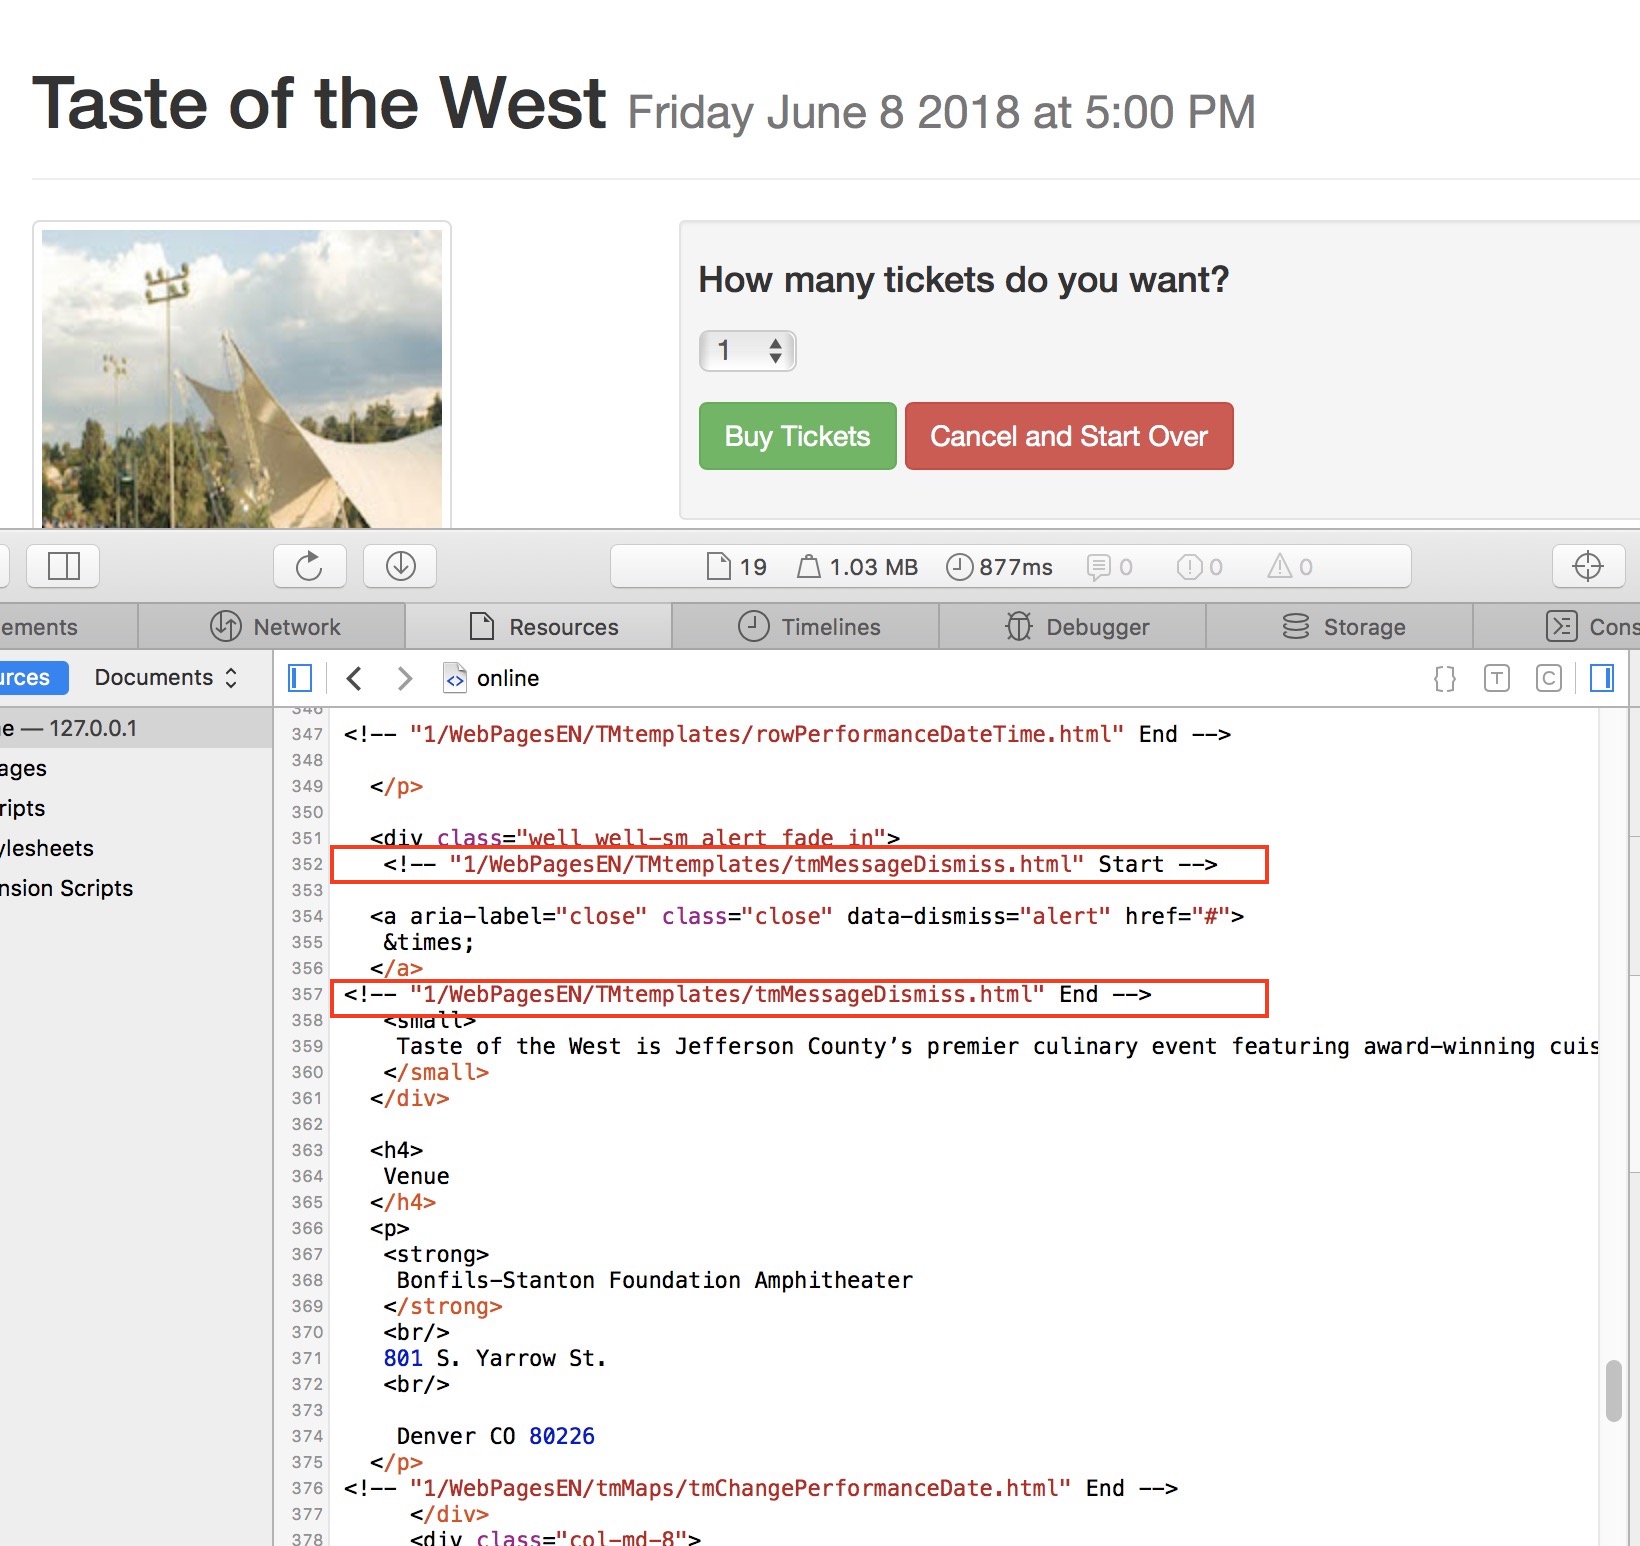 Some web pages include other web pages, so you can scroll down through the page looking for the text or object you want to change and you might see a comment with a Start and End that has a file name in front of it. It means that you only need to change the template to change that small bit of information.
Multi File Search
When you are looking at a web page, there is often distinguishing text on the web page that might give a hint. For example, the checkout page typically has words like 'Credit Card' on it. To find out which file that could be, use one of the useful text editing tools and search for that text within the WebPagesEN folder. That will often indicate which page has what you desire to change. Then just edit it.
Searching the source files for the web pages
Web pages exist in two states: Those that have been overridden and those that have never been changed. This means you need to search in two locations
- For overridden web pages: look in the web page folder on the main TM Listener. This is usually /Boxoffice/WebPages on a Mac, or C:\BoxOffice\WebPages\ on windows.
- If a page has never been changed, it will be found in the 'hidden' template folder downloaded with each new TM Server release - which is how we keep the templates updated.
when the man template server is a Mac, you'll typically find them in /tmp/TMWebPages/0.100.25. On windows, the files are typically in c:\windows\temp\TMWebPages\0.100.25
NOTE: the 0.100.25 folder will need to be replaced with the version of the TM server you are running, since each new TM server creates a new template folder and deletes the old one.
File Names
In the main directory, the file names often refer to the usage of the file. If you cannot find a file based on searching for its contents, then the names often give a clue. 'TMCart', for example is the shopping cart page. TMTickets is the list of ticketed events. TMHome is the 'home' page. Most of these can be found by searching based on content (the first strategy).
However there are a number of helper folders as follows:
- TMTemplates - contains all the row definitions for any html file that includes a table. We've tried to name them according to what they do. For example: rowticketevent is for rows in the TMticket web page.
- TMGifs - contains all images and style sheets
- TMMaps - contains all files that show the maps during the sales processes
- TMVenues -contain all files that describe what a venue is
- TMEvent - contains all files that describe what the event is about
- TMPass - contains all files that describe the purpose of a pass/gift certificate/membership
- TMSubscripition - contains descriptions about season packages
- TMCampaign - contain descriptions about donation campaigns
- TMFee - contain descriptions about ticket fees
General Web Page Content
The Web Pages used by the Web Sales Module contain tags and strings required by Theatre Manager to send and receive the correct data to and from the database. The Pages themselves are provided by Arts Management Systems upon purchase of the Web Sales Module, and the source code remains the property of Arts Management Systems.
All pages can be edited to fit within the overall scheme of the pre-existing website and the web sales component will fit seamlessly.
However, there are many different strings and types of tags required to be kept as they are provided, so that the site will operate as it was designed.
|
You can edit the Web Pages provided, but Arts Management Systems is not responsible for supporting or debugging errors that may occur. |
Hidden Text/Comments
There are several types of texts within the code of each page that use the comment tags (i.e. <!-- BLANK -->).
- The Disclaimer
- <!-- comment: Created by: Arts Management Systems Limited - Calgary Alberta Canada (888) 536-5244 http://www.artsman.com This web page integrates with Theatre Manager to support online ticket sales and donations and provide a single intregrated database for online and inhouse sales for arts and entertainment venues. If you see this and want to use for your own venue, please check us out at http://www.artsman.com Alter this source code as you see fit to suit your needs, but if you do, Arts Management Systems is not responsible for supporting or debugging errors that may occur -->
- This string must be kept in each page. Removing this string will remove responsibility for supporting or debugging errors.
- Sets of <include> tags throughout the pages. For example:
<!--#include virtual="TMtemplates/tmnavButtons.html" -->
- These tags allow you to include the code from an outside file into any given page. In this case, the <include> tag is set in each page to insert the navigation buttons contained within the tmnavButtons.html file.
Although the <include> tag looks like a comment tag, it is read in by the page.
- Each page will include the TMtemplates/tmnavButtons.html page listed above as well as the TMtemplates/pleaseWaitMessage.html and the TMtemplates/tmFooter.html.
- The TMtemplates/pleaseWaitMessage.html displays warning messages regarding actions taken on the pages. The TMtemplates/tmFooter.html will pull the footer information directly from Theatre Manager.
- There are also two other pages in the TMtemplates folders that are called using the <include> tag: tmContact.html and tmContactHours.html.
- these pages contain the venue's contact information with the latter also containing the hours of operation. These pages are included on any webpage that would display the venue's contact information, such as on the TMsys404 page.
Messages
If a mistake is made, or a user needs to be prompted to do something, a message appears at the top of the pages. By default this message appears in red. Within the code of the pages you these messages are pulled in by the <field>F_HTML_PAGE_MESSAGE</field>.
If you want to change the wording of these messages, you can edit the TMError.txt page in the WebPages directory. We recommend using Microsoft Excel to open the document. You may then edit the Error Text column. Change the wording of the messages to whatever you like.
|
Any message that has the double dollar signs ($$) in it indicates that a database field inside Theatre Manager is being pulled into the message. For example, if you look at error number 10021, the message is "Welcome $$". The dollar signs in this case represents the first name of the patron that will be pulled into the message. |
Javascript
Almost every page uses Javascript. The Javascripts are called in at the beginning of each page using <include> tags. these should remain in the page through any changes, unless the developer is sure that the function of the javascript is not needed. If the javascript is removed, and the site is no longer able to function as it was intended, Arts Management Systems will not be responsible for recovering the code.
Click here for more detailed information about the different functions javascript plays in the web pages.
Variable Theatre Manager Fields
When viewing the web page code, there are strings that appear as <field>XXXXXXXXX</field>.
These fields are internal Theatre Manager fields, and should never be altered. In most cases, they reference information entered within Theatre Manager. If these values need to be changed, you should change them in Theatre Manager, not in the web page code. Any text within the
- <FORM ACTION="<field>F_HTML_FIREWALL</field>online" METHOD=POST>
- This string is linked to the F_HTML_FIREWALL, which is the URL found in Web Server URL field of Setup >> Company Preferences under the Apache tab.
The Web Server URL field will contain the sub-domain or A record for the online ticketing site and will looks something like https://tickets.myvenue.org. The setup of the A record should point to the external IP address of the organization for routing purposes. The external IP can be determined by going to http://www.whatismyip.com. The internal network will then redirect the communication to the Apache machine.
- <base href="<field>F_HTML_IMAGE_SERVER</field>">
- This string is linked to the F_HTML_IMAGE_SERVER, which indicates the location of the images to be referenced within the pages. The string adds to the F_HTML_FIREWALL listed above. When the source code for the pages is viewed it appears as:
<base href="https://tickets.yourvenue.org/1/WebPagesEN">
Where tickets.yourvenue.org is pulled from the F_HTML_FIREWALL reference and the F_HTML_IMAGE_SERVER adds the /1/WebPagesEN indicating the path of where the images will be referenced.
- <field>F_HTML_PAGE_MESSAGE</field>
- This string is the page message sent by Theatre Manager to update any information relative to the current web page.
- <field>F_HTML_MONTH_LIST</field>
- <field>F_HTML_YEAR_LIST</field>
- <field>F_HTML_EVENT_LIST</field>
- <field>F_HTML_PERFORMANCE_LIST</field>
- These strings extract information relative to the month, year, event, etc. of the current information for the web page.
Click here for Internal Variable Theatre Manager Fields.
Button Names
The buttons used by Theatre Manager for navigation within each Web Page (not tmnavSide.html) are regular form input buttons. They have been altered using Cascading Style Sheets and javascript so that they are customizable in colour and style.
- <input name="btnGetEventRange" type=submit value="Update Performance List">
- The names of each button name="btnGetEventRange" must be kept as they were when the pages were provided. The values of the buttons value="Update Performance List" may be changed as needed.
Click here for information about Navigation Buttons.
Cascading Style Sheets
The style sheets are used with the Web Pages are: stylePages.css and styleButtons.css. They are linked to each page with strings.
href="/installing-theatre-manager/stylebuttons">Click here for details on the different styles for the buttons.
href="/installing-theatre-manager/stylepages">Click here for details on the different styles for the pages.
Key Internal Variable Fields
These are the different types of internal Variable Theatre Manager Fields that can be used in almost all pages. There are some fields:
- which are commonly requested by MOGO, Facebook or Google for completion pixels
- that can be placed in the Company Preferences->Web Options tab as appropriate to your tracking needs.
| F_HTML_FIREWALL | The A record of the Web Server URL as set in the Apache tab of Company Preferences |
| F_HTML_IMAGE_SERVER | Web Pages path of the Image/Gif server as set in Web Listener tab of Company Preferences in conjunction with the Outlet Number of the database. |
| F_HTML_IMAGE_EBLAST_SERVER | path for images that are part of an e-blast to pull them from the second generation listener |
| F_HTML_PAGE_IDENTIFIER | the Page Identifier which maintains the patron's connectivity during a session |
| F_HTML_PAGE_MESSAGE | The Theatre Manager message relative to each page |
| F_HTML_PARAMETER | an internal connectivity number that follows pages (should not be removed from the page) |
| F_HTML_SELECTED | the selected line in the shown list |
| F_HTML_CART_STATUS | Status of the shopping cart |
| F_HTML_REMOVE_CART_ITEM_YN | Removing cart items (Yes or No) |
| F_HTML_NEXT_BEST_SEAT | A field put in the confirm reserved seat page used for the 'find next best seat' function. This works in conjunction with 'btnBestAvail' and the value is filled in by Theatre Manager |
| F_HTML_NEXT_BEST_AREA | Also put in the reserved seating confirmation page. This field pulls from the Best Seat Setting tab of the Map in Theatre Manager. It carries forward the section that the user was searching. |
| F_HTML_EMAIL_ADDRESS | The current logged in user's Email Address |
| F_HTML_LOGGED_IN | This is a boolean flag indicating if the user is logged in (0=not logged in, 1=logged in). It can be used to display state on the left navigation bar |
| F_HTML_SOLD_PERCENT | This is a number (0-100) that indicates the percentage that a performance is sold. Can be used in rowTicketEvent.html to create a visual indicator of seat availability. |
| F_HTML_MAIN_TEMPLATE | Indicates the name of the main page that is being loaded. Very useful for identifying the page in the googleheader.html file for google analytics or for debugging if you simply put that in the header file. |
| F_HTML_CURRENT_TEMPLATE | indicates the name of the row template page being loaded - can be used for debugging |
| F_HTML_CURRENT_OUTLET | shows the outlet that the page is for |
| F_HTML_CURRENT_LANGUAGE | shows the language that the page was loaded for |
| F_HTML_CURRENT_DATETIME | the current date and time which can be used in dat functions for comparison to now |
| F_HTML_CURRENT_DATE | the current date which can be used in dat functions for comparison to today |
| F_HTML_CURRENT_TIME | the current time which can be used in dat functions for comparison to the time |
| F_HTML_DATETIME_FORMAT | the format of the date and time fields |
| F_HTML_DATE_FORMAT | the format of the date fields |
| F_HTML_TIME_FORMAT | the format of the time fields |
All of the list variables pull their information from the rowXXX.html and setXXX.html files that are in the TMtemplates folder of the WebPages folder.
F_HTML_BEST_SEATS_LIST - List of available best seats
F_HTML_CAMPAIGN_LIST - List of available Campaigns
F_HTML_COUNTRY_LIST - List of the active countries
F_HTML_CURRENT_CART_LIST - List of any current Shopping Carts
F_HTML_EVENT_LIST - List of any current Events
F_HTML_HISTORICAL_CART_DETAIL_LIST - List of details of past shopping carts
F_HTML_HISTORICAL_CART_LIST - List of past shopping carts
F_HTML_MONTH_LIST - List of months for event selection
F_HTML_PASS_LIST - List of available Passes/ Memberships
F_HTML_PAYMENT_LIST - List of available payment methods
F_HTML_PERFORMANCE_LIST - List of available performances
F_HTML_PREFER_HTML_LIST - List of patrons who prefer html emails to text
F_HTML_PROMOTIONS_LIST - List of available Sales Promotions
F_HTML_PROVINCE_LIST - list of available Provinces/ States
F_HTML_SUBSCRIBE_LIST - List of patrons who are subscribed to a specific mail list
F_HTML_TICKET_QTY_LIST - List of available quantities of tickets for the event
F_HTML_UNSUBSCRIBE_LIST - List of patrons who have Unsubscribed to a mail list
F_HTML_YEAR_LIST - List of years
Database Fields
For an up to date list of the merge fields and their meanings, from Theatre Manager, print the Utility Functions and Database Analysis report - Database Dictionary and Layout.
C_SEQ - Patron number
C_COMPANY - Patron's Company
C_TITLE - Patron's title at the company
C_FIRST_NAME - Patron's First Name
C_INITIAL - Patrons Middle Initial or name
C_LAST_NAME - Patron's Last Name
C_SEQ - patron gender (in code tables)
AD_ADDRESS1 - Patron's primary Address Line 1
AD_ADDRESS2 - Patron's primary Address Line 2
AD_CITY - Patron's City
AD_PROVINCE - Patron's province
AD_POSTAL_CODE - Patron's Postal Code
AD_COUNTRY - Patron's country
SPR_BACKUP_ELAPSED_TIME - Elapsed time into backup
SPR_FORCE_LOGOFF_DAILY_AT - Time at which users are forced off for backup
SPR_TAX1_DESC - Description of Tax Code #1
SPR_TAX2_DESC - Description of Tax Code #2
SPR_TAX3_DESC - Description of Tax Code #3
DD_CORPORATE - flag indicating a corporate gift (true or 1), or not (false or zero)
DD_AMOUNT_PLEDGE - Amount of gift given on the internet
DD_NAME_OF - Donor's name
DD_PROGRAM_YEAR - the program year in which the donor is to be recognized
DD_FLD1_FC_SEQ - key indicating the value of the donor popup field #1 - must be in code tables to be valid
DD_FLD2_FC_SEQ - key indicating the value of the donor popup field #2 - must be in code tables to be valid
DD_FLD3_FC_SEQ - key indicating the value of the donor popup field #3 - must be in code tables to be valid
DD_FLD4 - text field indicating a value for donor field 4 (can be used for a short comment if desired)
DD_NOTES - large text field for a description of the donation
D_DONATION_DESC - Description of this donation
D_DONOR1_DESC - Description of custom field 1 for donations
D_DONOR2_DESC - Description of custom field 2 for donations
D_DONOR3_DESC - Description of custom field 3 for donations
D_DONOR4_DESC - Description of custom field 4 for donations
D_FESTIVAL_DESC - Description of a Festival or General Admission event
D_MAIL_FEE_AMOUNT - Amount of mail Fee
D_MEMBER_DESC - Description of this Membership/Pass/Gift Certificate
D_SECTION_DESC - Site description for 'Section'
D_ROW_DESC - Site description of the 'Row'
D_SEAT_DESC - Site description for 'seat'
D_WEB_FEE_DESC - Description of this Web Fee
D_WEB_LISTENER_IP_PORT - the port that the web listener is listening on
D_WEB_REMOTE_IP_ADDR -
D_WEB_REMOTE_IP_PORT -
DC_CAMPAIGN - Donation Campaign name
DC_SEQ - Donation Campaign number
F_WEBPAGE_PASSWORD - Password for patron
FC_SEQ - Internal number on this Code Table
FC_RESULT1_NAME - Code Table value
FC_RESULT2_NAME - Code Table value
I_LOCAL_IP_ADDR -
M_PURCHASE_AMOUNT - Amount for which the membership/pass/gift certificate will be purchased for
MS_SECTION - Section the seats are in
MS_ROW_NUMBER - Row the seats are in
MS_SEAT_NUMBER - Seat numbers
MT_SEQ - Membership/ Pass type number (not control number)
MT_DESCRIPTION - Membership/Pass Description
ORD_SEQ -
ORD_TIX_PRINT_STATUS -
ORD_NOTES - Any notes on an order
ORD_DATE_ENTERED - Date that an order was entered
P_SEQ - Event number (not event code)
P_PLAY_TITLE - Event title
PAY_AUTH_REF_NO - Authorization number on card payments
PAY_CARD_NO - Credit card number
PAY_CARD_EXPIRY - Credit card Expiry Date
PAY_METHOD_FC_SEQ -
PAY_TOTAL_PAID - Amount of the payment
PB_PERFORM_DATE - Performance Date
PB_PERFORM_TIME - Performance Time
PC_DESCRIPTION -Description of the Price Code
PM_SHORT_NAME - Mail List name
PS_QUANTITY - Quantity of tickets for Festival Seating
SC_DESCRIPTION - The description of the promotion code
SCD_DON_AMOUNT - If non-zero, the donation amount applied to a campaign
SCD_MAIL_FEE - The mailing fee for the shopping cart
SCD_MT_AMOUNT - The amount of the membership that the patron wishes to purchase
SCD_PROGRAM_NAME - The name that the patron wishes to use for this donation in the sponsor program
SCD_QUANTITY - This value is 1 for reserved seating and could be more for festival seating tickets and membership
SCD_SEQ - The shopping cart number that this purchase belongs to
SCH_DATE_CHECKOUT - The date that the patron proceeded to check out the purchased (i.e. completed it). if blank, it was never completed
SCH_DATE_ENTERED - The date that the patron began the internet purchase using his shopping cart
SCH_DATE_UPDATED - The latest date that the patron made a change to the shopping cart
SCH_TAX1 - The total of this tax type for all items in this shopping cart
SCH_TAX2 - The total of this tax type for all items in this shopping cart
SCH_TAX3 - The total of this tax type for all items in this shopping cart
SCH_TIX_QUANTITY - The total number of tickets in this shopping cart
SCH_TOTAL_COST - The total cost of the items in the shopping cart, including taxes
Web Pages to be Edited - Responsive Pages
There are approximately 350 web pages contained in the web module. Below is a list of the basic pages to be need to be edited. Additional pages can be altered as needed.
Pages altered within the WebPagesEN folder should be Copied, Pasted and Edited.
- Copy the page from the default web pages for TM
- Paste the page in the corresponding folder within the WebPagesEN folder
- Edit the copied page, leaving the original as a default
| Files in the WebPages directory | ||
| favicon.ico |
| |
| index.html |
| |
| Files in the WebpagesXX folder (/1/WebPagesXX) | ||
| TMcart.html |
| |
| Files in the tmGifs folder (/1/WebPagesXX/tmGifs) | ||
| favicon.ico |
| |
| tmCompanyLogo.jpg |
| |
| ticketAd.png |
| |
| custom.css |
| |
| Files in the tmTemplates folder (/1/WebPagesXX/tmScripts) | ||
| styles.html |
Can be used to update the default bootswatch theme.

| |
| Files in the tmTemplates folder (/1/WebPagesXX/tmTemplates) | ||
| tmCheckoutDonationReasonToBuy.html |
| |
| tmContactHours.html |
| |
| tmnavButtons.html |
| |
| tmSocialMedia.html |
| |

Web Pages to be Edited - Standard HTML
There are approximately 150 web pages contained in the web module. Below is a list of the primary pages that need to be edited:
| Files in the WebPages directory | ||
| favicon.ico | - Create a favicon.ico file to reflect the organizations branding. This is used for pages not processed by the TM Server. You should copy this to the tmGifs folder (or you can make a different one for each outlet). | |
| index.html | - Replace "localhost" with the name of the web server to be accessed (tickets.yourtheatre.org).
- Replace '1' with the Company number found in Company tab of Company Preferences. | |
| TMsysNoListeners.html | - Replace "www.yourtheatre.org" with the organization's main URL. | |
| Files in the Outlet folder (WebPages/1) | ||
| TMsysBusyListeners.html | - Replace "www.yourvenue.org" with the name of the web server to be accessed (tickets.yourtheatre.org). | |
| TMsysBusyListenersNorefresh.html | - Replace "www.yourtheatre.org" with the name of the web server to be accessed (tickets.yourtheatre.org). | |
| TMsysErrorListeners.html | - Replace "www.yourtheatre.org" with the name of the web server to be accessed (tickets.yourtheatre.org). | |
| TMsysNoListeners.html | - Replace "www.yourvenue.org" with the organization's main URL. | |
| Files in the WebpagesXX folder (/1/WebPagesXX) | ||
| TMcart.html | - Alter the D_MEMBER_DESC field to accurately reflect the name of membership items sold online.
- Once changes have been made, this page should be saved to the /1/WebPagesXX folder | |
| Files in the tmFee folder (/1/WebPagesXX/tmFee) | ||
| tmBoxOfficePolicy.html | - Update the Box Office policies to accurately reflect those of the organization.
- Once changes have been made, this page should be saved to the /1/WebPagesXX/tmFee folder. | |
| tmMailFee.html | - Alter the mail fee page to reflect the reason or purpose of the mailing fee.
- Once changes have been made, this page should be saved to the /1/WebPagesXX/tmFee folder. | |
| tmMailDefault.html | - Edit the default mail fee page to reflect the reason for any additional mailing fees.
- Once changes have been made, this page should be saved to the /1/WebPagesXX/tmFee folder. | |
| tmOrderFee.html | - Update the order fee page to reflect the reason or purpose of the order fee.
- Once changes have been made, this page should be saved to the /1/WebPagesXX/tmFee folder. | |
| tmOrderFeeDefault.html | - Alter the order fee default page to describe the reason for any additional order fees.
- Once changes have been made, this page should be saved to the /1/WebPagesXX/tmFee folder. | |
| Files in the tmGifs folder (/1/WebPagesXX/tmGifs) | ||
| favicon.ico | - Copy the overall favicon so that there is one for each language or outlet, or create a custom one for this language/outlet in a multi company setup | |
| pageHeader.gif | - Replace the existing pageHeader.gif with an image that reflects the organization's branding.
- If the image dimentions are larger then the original image the stylePages.css file will need to be updated accordingly. | |
| styleButtons.css | - .Button - background-color, color, border
- .Buttonover - background-color, color, border - .New - background-color, color, border - .Newover - background-color, color, border | |
| stylePages.css | - .Background - background-color, margin-top
- .Title - color - .Message - color - .Tablerowheader - background-color - .Tablerowdetail - background-color | |
| Files in the tmTemplates folder (/1/WebPagesXX/tmTemplates) | ||
| tmContactHours.html | - Update the contact hours to reflect those of the box office or organization.
- Once changes have been made this page should be saved to the /1/WebPagesXX/tmTemplates folder. | |
| tmnavButtons.html | - Move any button references that are not used by the organization to the commented out section of the page.
- Change the names of the buttons as needed. - Once changes have been made, this page should be saved to the /1/WebPagesXX/tmTemplates folder. | |
| tmtermsandcondiations.html | - Update the terms and conditions page to accurately reflect those of the organization.
- Once changes have been made, this page should be saved to the /1/WebPagesXX/tmTemplates folder. | |
| tmTicketHandling.html | - Edit to include the ticket handling specifics of the organization.
- The options available will depend on the E-Ticket printing options within the database. - Once changes have been made, this page should be saved to the /1/WebPagesXX/tmTemplates folder. | |
Standard 'WebPages' Structure
The following pages, when customized, are contained directly within the htdocs folder most commonly located on the TM Web server on a PC at:
C:\BoxOffice\WebPages
and on a Mac at:
/BoxOffice/WebPages
It is worth noting that at minimum, the pages linked here will need edits in order to customize the site for an organization.
A full set of the default pages can be downloaded from the Artsman Git Repository.
The "1" Folder
Clients using the Enterprise Edition of Theatre Manager generally only have a "1" folder. The "1" is the Outlet Number as defined in Company Preferences.
Those clients who have Outlet Edition will have a "1", "2", "3" (and so on) folder assigned to each outlet based on the number assigned to each in Company Preferences. This way, each company can have its own set of web pages customized however they'd like and selling their own merchandise.
|
The second generation listener is designed handle traffic for multiple outlets. At this time, however, each outlet still needs its own "classic" web listener (until they are retired). |
The pages beyond this folder mark the true beginning of the custom look of a client's online store.
TMsysBusyListeners.html
Description:
- This page is referenced by Apache when the web listeners are too busy with requests to respond with the desired page in the online sale.
- The page counts down and attempts to access the online sales site again once it reaches zero. page.
- If the patron does not wish to wait for the page to finish counting down they can click a link that will reload the page they were previously accessing.
- This page can be avoided by starting Theatre Manager on a machine within the network and logging is at the web listener. This will start another listener to respond to requests the existing Web Listener(s) are too busy to handle.
Location:
htdocs/1
Able to Call Page(s):
- Will reload the last page visited within the online ticketing site.
Called By Page(s):
- The httpd.conf file within Apache
Page(s) Referenced:
TMsysBusyListenersNorefresh.html
Description:
- This page is referenced by Apache when the web listeners are too busy with requests to respond with the desired page in the online sale.
- The patron can click a link that will call the page referenced in the index.html page.
- This page can be used as an alternative to the TMsysBusyListener.html page. It is recommended this page be renamed to TMsysBusyListener.html and the existing page with the same name be renamed. This will avoid having to edit the httpd.conf file.
- This page can be avoided by starting Theatre Manager on a machine within the network and logging is at the web listener. This will start another listener to respond to requests the existing Web Listener(s) are too busy to handle.
Location:
htdocs/1
Able to Call Page(s):
- The ticketing site as referenced in index.html
Called By Page(s):
- The httpd.conf file within Apache
Page(s) Referenced:
TMsysErrorListeners.html
Description:
- This page is displayed when a response takes longer then indicated acceptable in the httd.conf file of Apache.
- A longer then recommended response time could be caused by several things. Ultimately a request was sent to the Web Listener and a response was not made within the allocate time frame.
- Contains a reference line at the bottom of the page that should be edited to include the companies ticketing domain.
- This page can be avoided by ensuring communication between the Web Listener and Apache has not been blocked/interrupted or by restoring the default web page for any pages recently changed.
Location:
htdocs/1
Able to Call Page(s):
- The ticketing site as referenced in index.html
Called By Page(s):
- The httpd.conf file within Apache
TMsysNoListeners.html
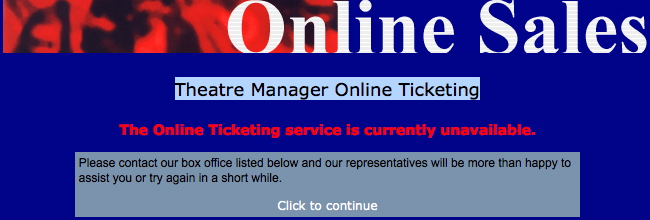
Description:
- This page is displayed when Apache and the Web Listener had been communicating and there are now no active Web Listeners or Apache can not communicate with the Web Listener over the network.
- Contains a reference line at the bottom of the page that should point to the companies main web page once edited.
- If the online sales is scheduled to be down for a period of time due to network issues this page should be edited to reflect the information the patron will see during the outage.For example: Our online ticketing is currently unavailable, please contact the box office for assistance.
- This page can be avoided by logging in to Theatre Manager as a web listener within the network or by correcting any network issues that may be preventing communication between Apache and the Web Listener.
Location:
htdocs/1
Able to Call Page(s):
- The companies main web page when configured correctly.
Called By Page(s):
- The httpd.conf file within Apache
WebPagesEN Folder
MultiLanguage Considerations
Clients who wish to have multilingual pages will need to do four things:
- You will need to duplicate the WebPagesEN folder for each language you want to support and change the ending to be a two character language code. For example, WebPagesFR for French or WebPagesES for Spanish, WebPagesDE for German (we suggest using the ISO two character language code).
- Translate all the web pages within the new WebPagesXX folder as required
- edit the TMTemplates/tmnavLanguages.html to add a language and a flag to the navigation for each language you with to support.
- In Company Preferences on the WebListener tab, add in the language codes that you want TheatreManager to look for in the htdocs folder. That means you can put the languages in place using the WebPagesXX folder, but TM will not recognize them until you edit the company preferences.
- Where appropriate, on the main corporate web site, you might wish to edit the links to direct to a specific page by adding the &lang=XX to the direct links.
|
After a patron picks their language, the next time they log in, Theatre Manager will recall and use their personal language preference. |
TMattendance.html
Description:
- This page is designed to check patrons in and out of the venue through a web browser as opposed to directly through Theatre Manager or by hand held scanner.
- The Used status of the ticket is updated within the Patron's record in Theatre Manager.
- An example of how this page functions can be found by clicking here.
Questions and Answers:
Q: What needs to be done to setup the TMattendance.html page for tracking attendance in Theatre Manager?
A: The page only needs to be accessed in order to use the attendance tracking feature. For additional details on setting up the scanning process please click here.
____________________________________________________________
Location:
htdocs/1/WebPagesEN
Able to Call Page(s):
- Not Applicable
Called By Page(s):
- Not Applicable
Page(s) Referenced:
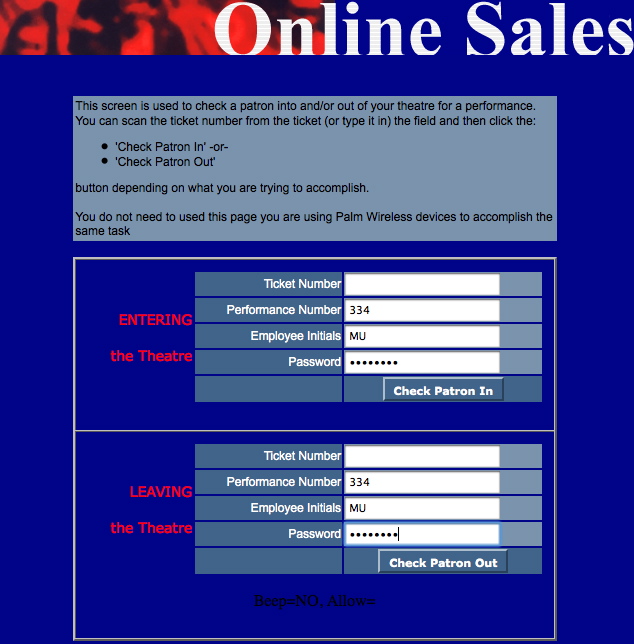
TMattendancePalm.html
Description:
- Contains two links designed to communicate with the Theatre Manager database for testing the web interface of the checkin and checkout process.
- This page determines if a connectivity issue is between the hand held scanners or the network.
- The page will need to be edited to reflect the internal IP address of the apache machine.
- It will also need to be edited to reflect Performance sequence number(s) and Ticket number(s) that are currently setup within the database. The numbers currently listed within the page were selected from the Demo Database for Theatre Manager.
- If the page fails after the edits are complete it indicates an issue within the network communication that will need to be addressed prior to troubleshooting hand held scanner related issues.
- If the page is successful in it's communication and the hand held scanners do not connect it means the issue lies with the scanners and either their connectivity to the network or their setup.
Questions and Answers:
Q:
A:
____________________________________________________________
Location:
htdocs/1/WebPagesEN
Able to Call Page(s):
- Not Applicable
Called By Page(s):
- Not Applicable
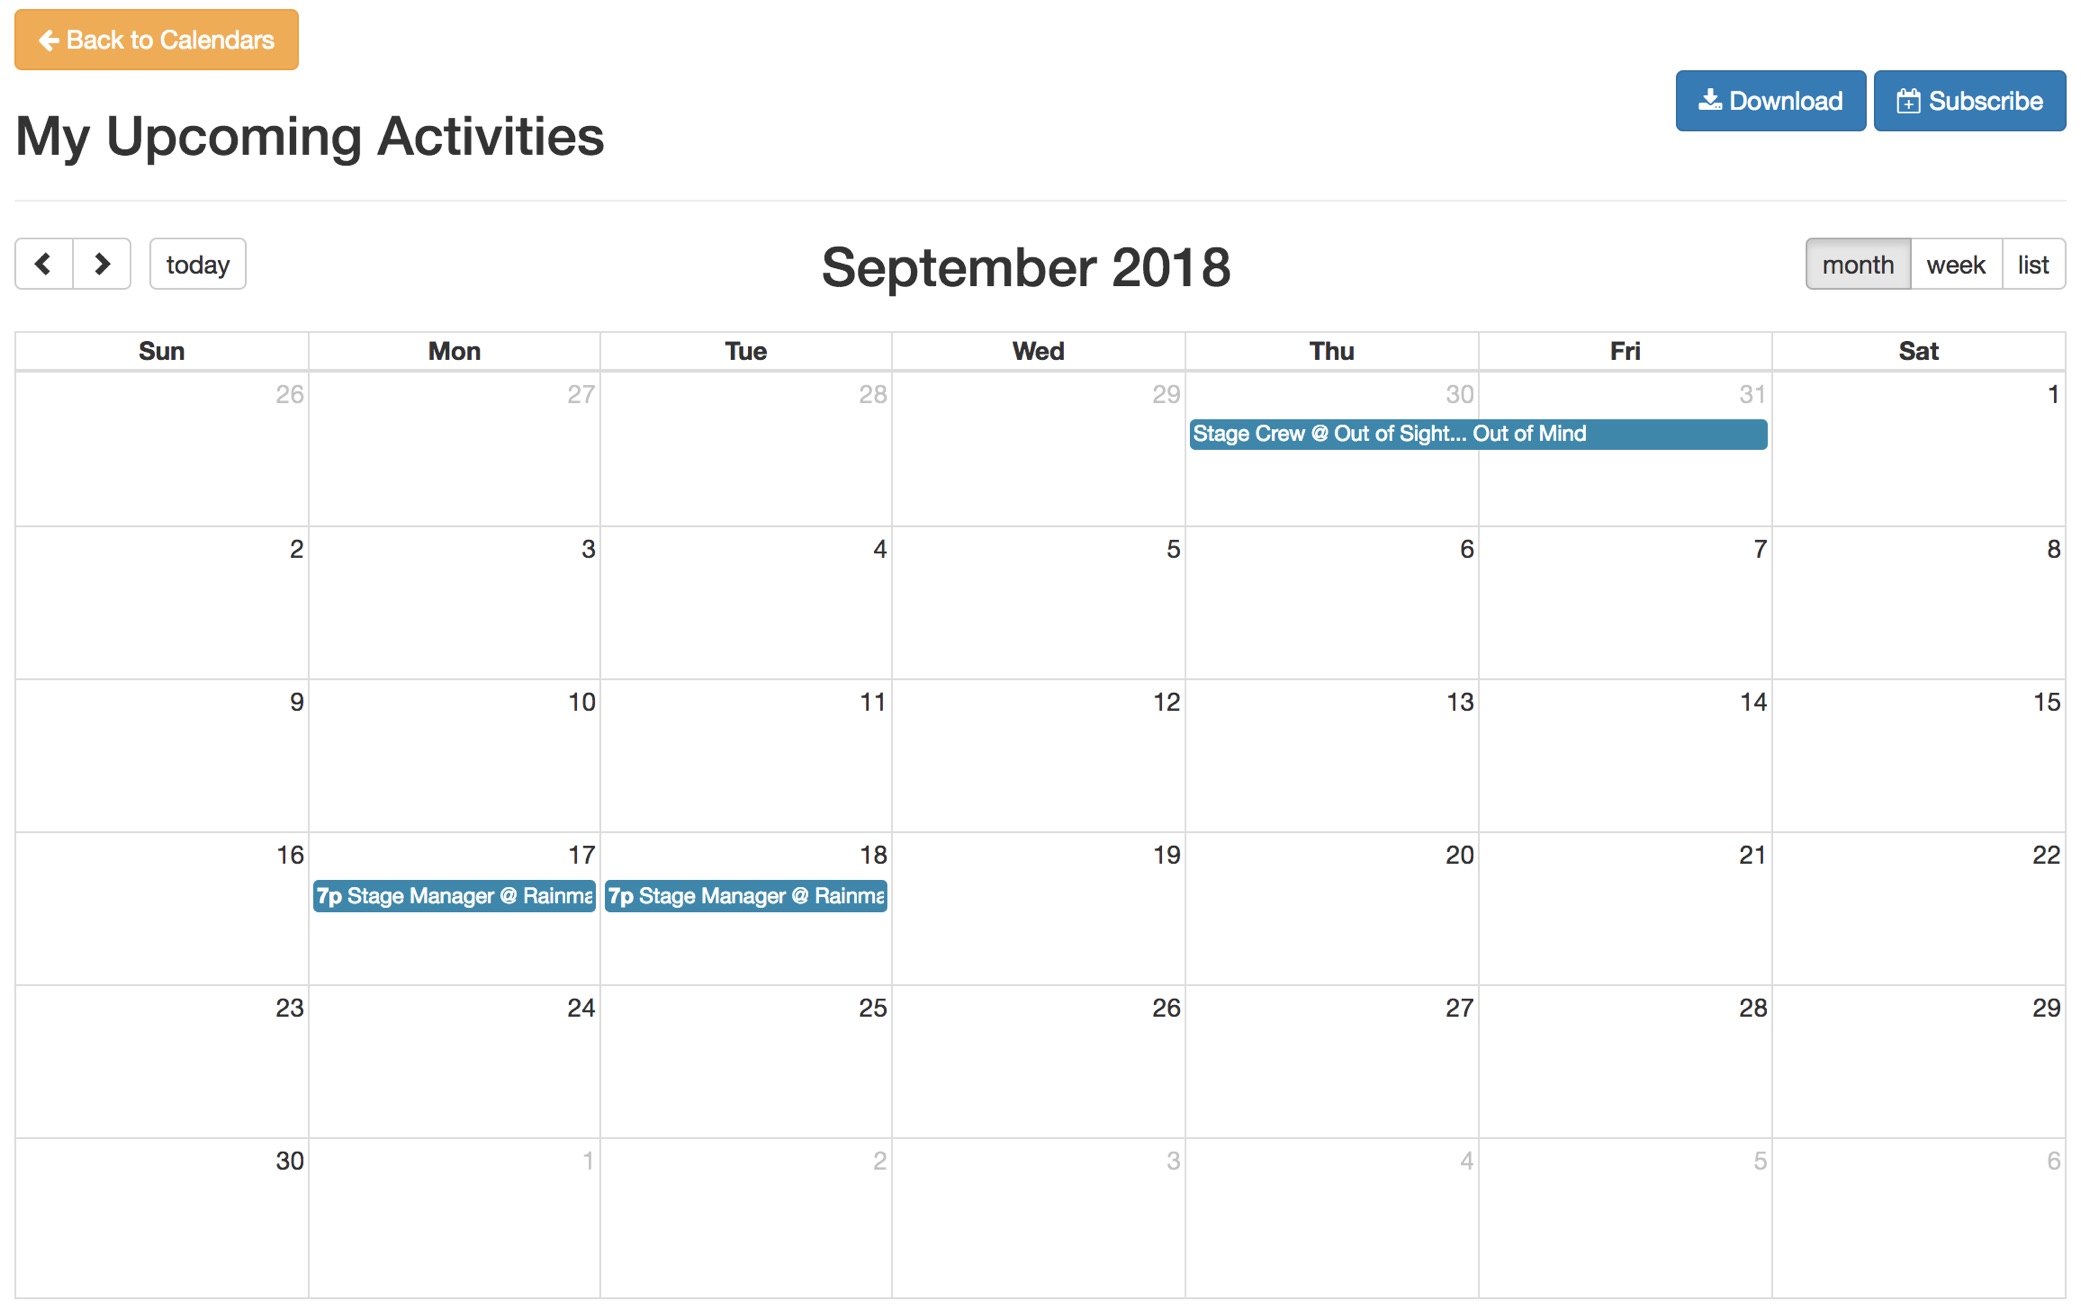
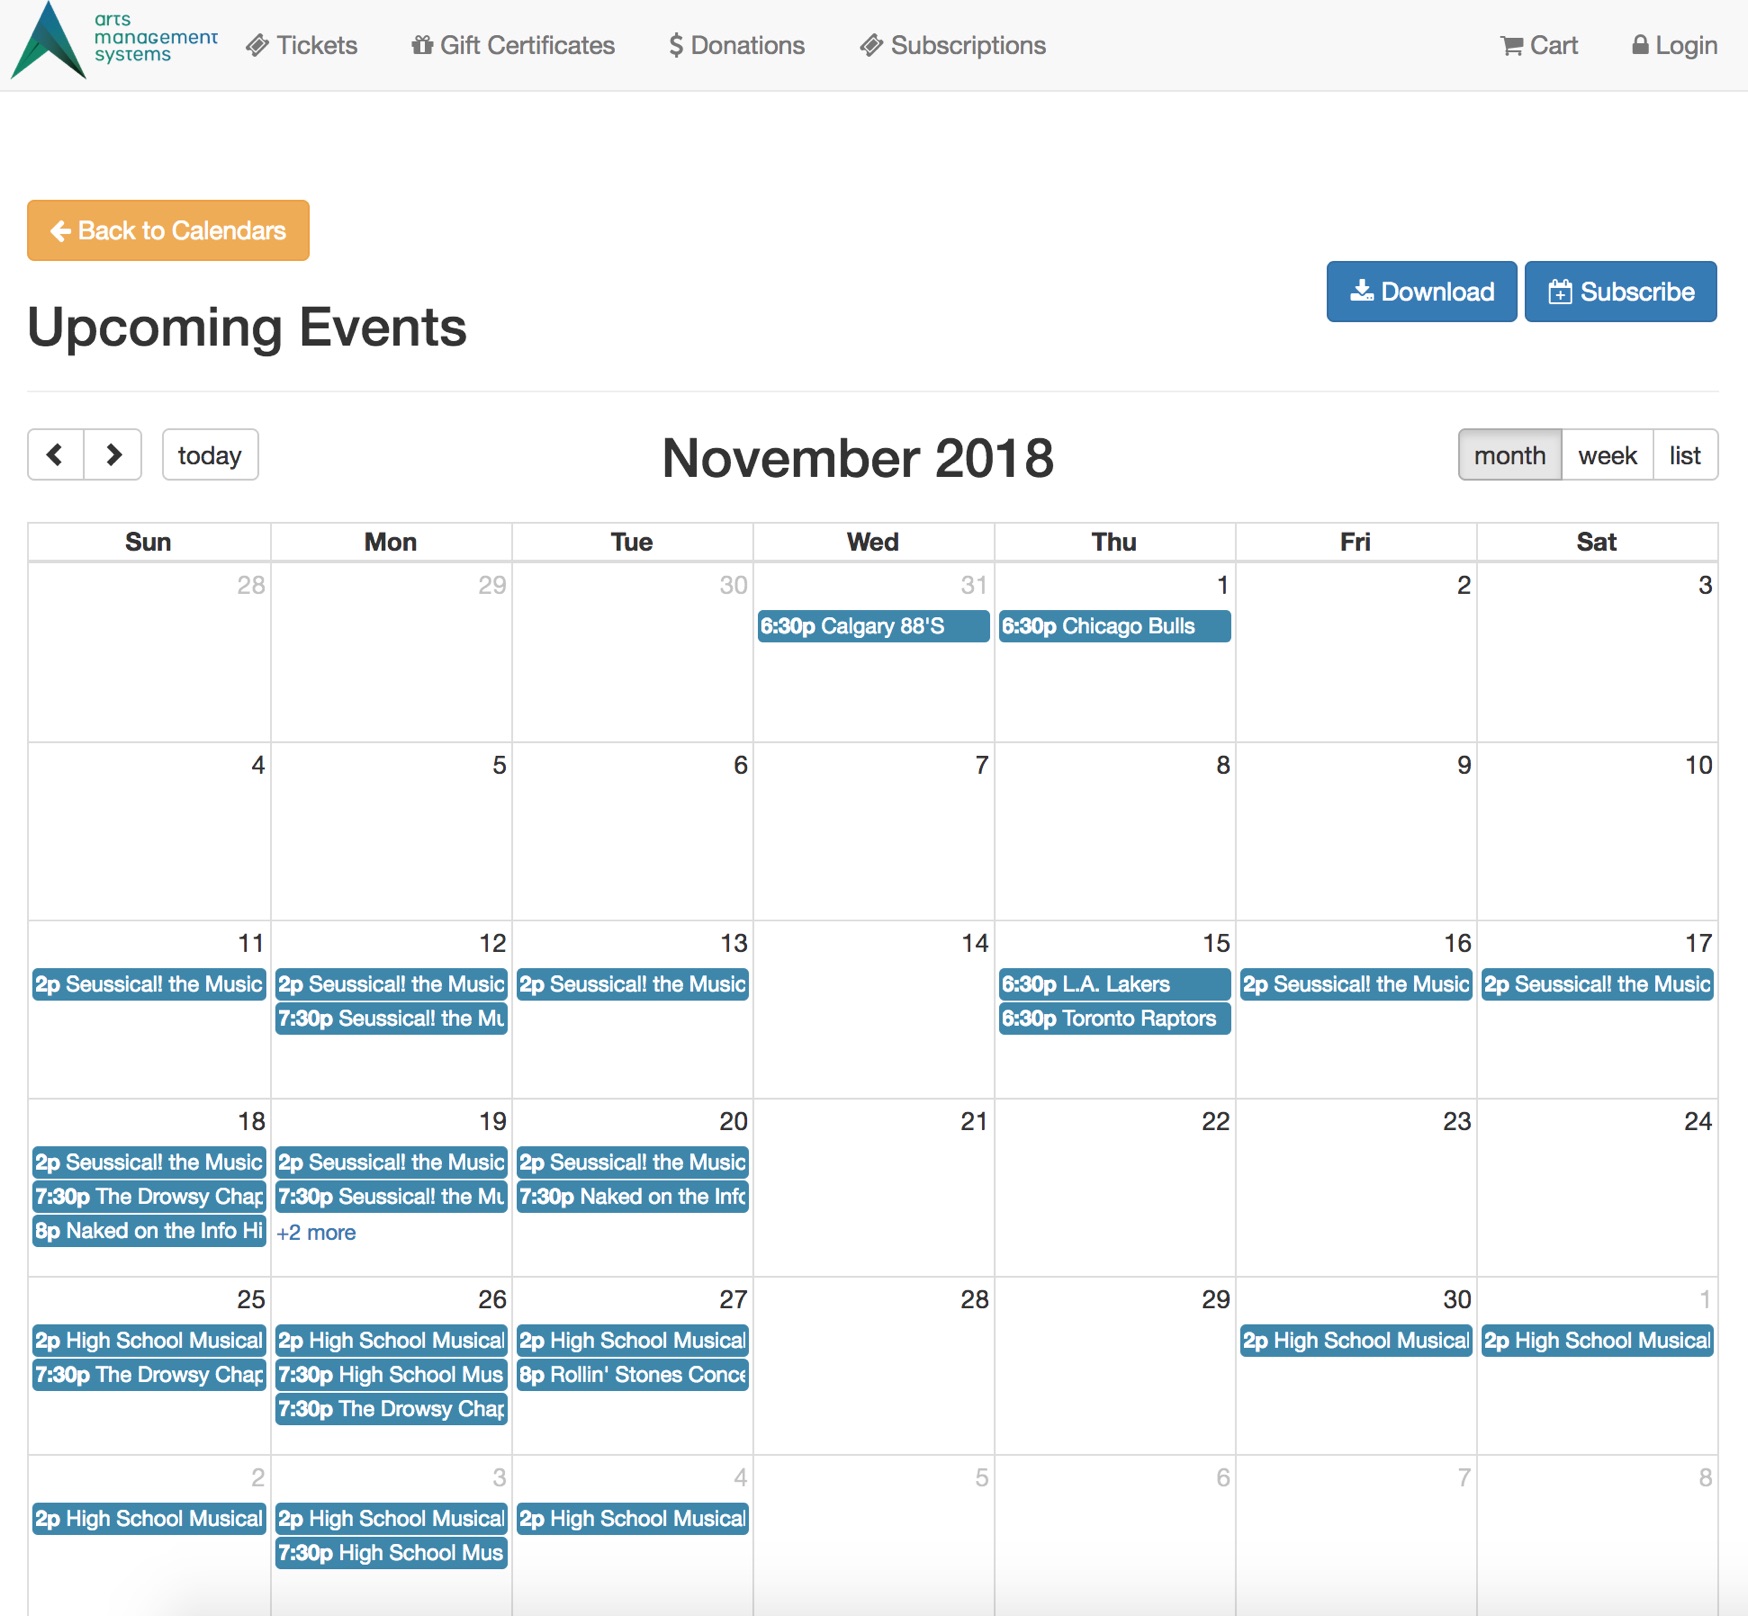
TMcalendars.html
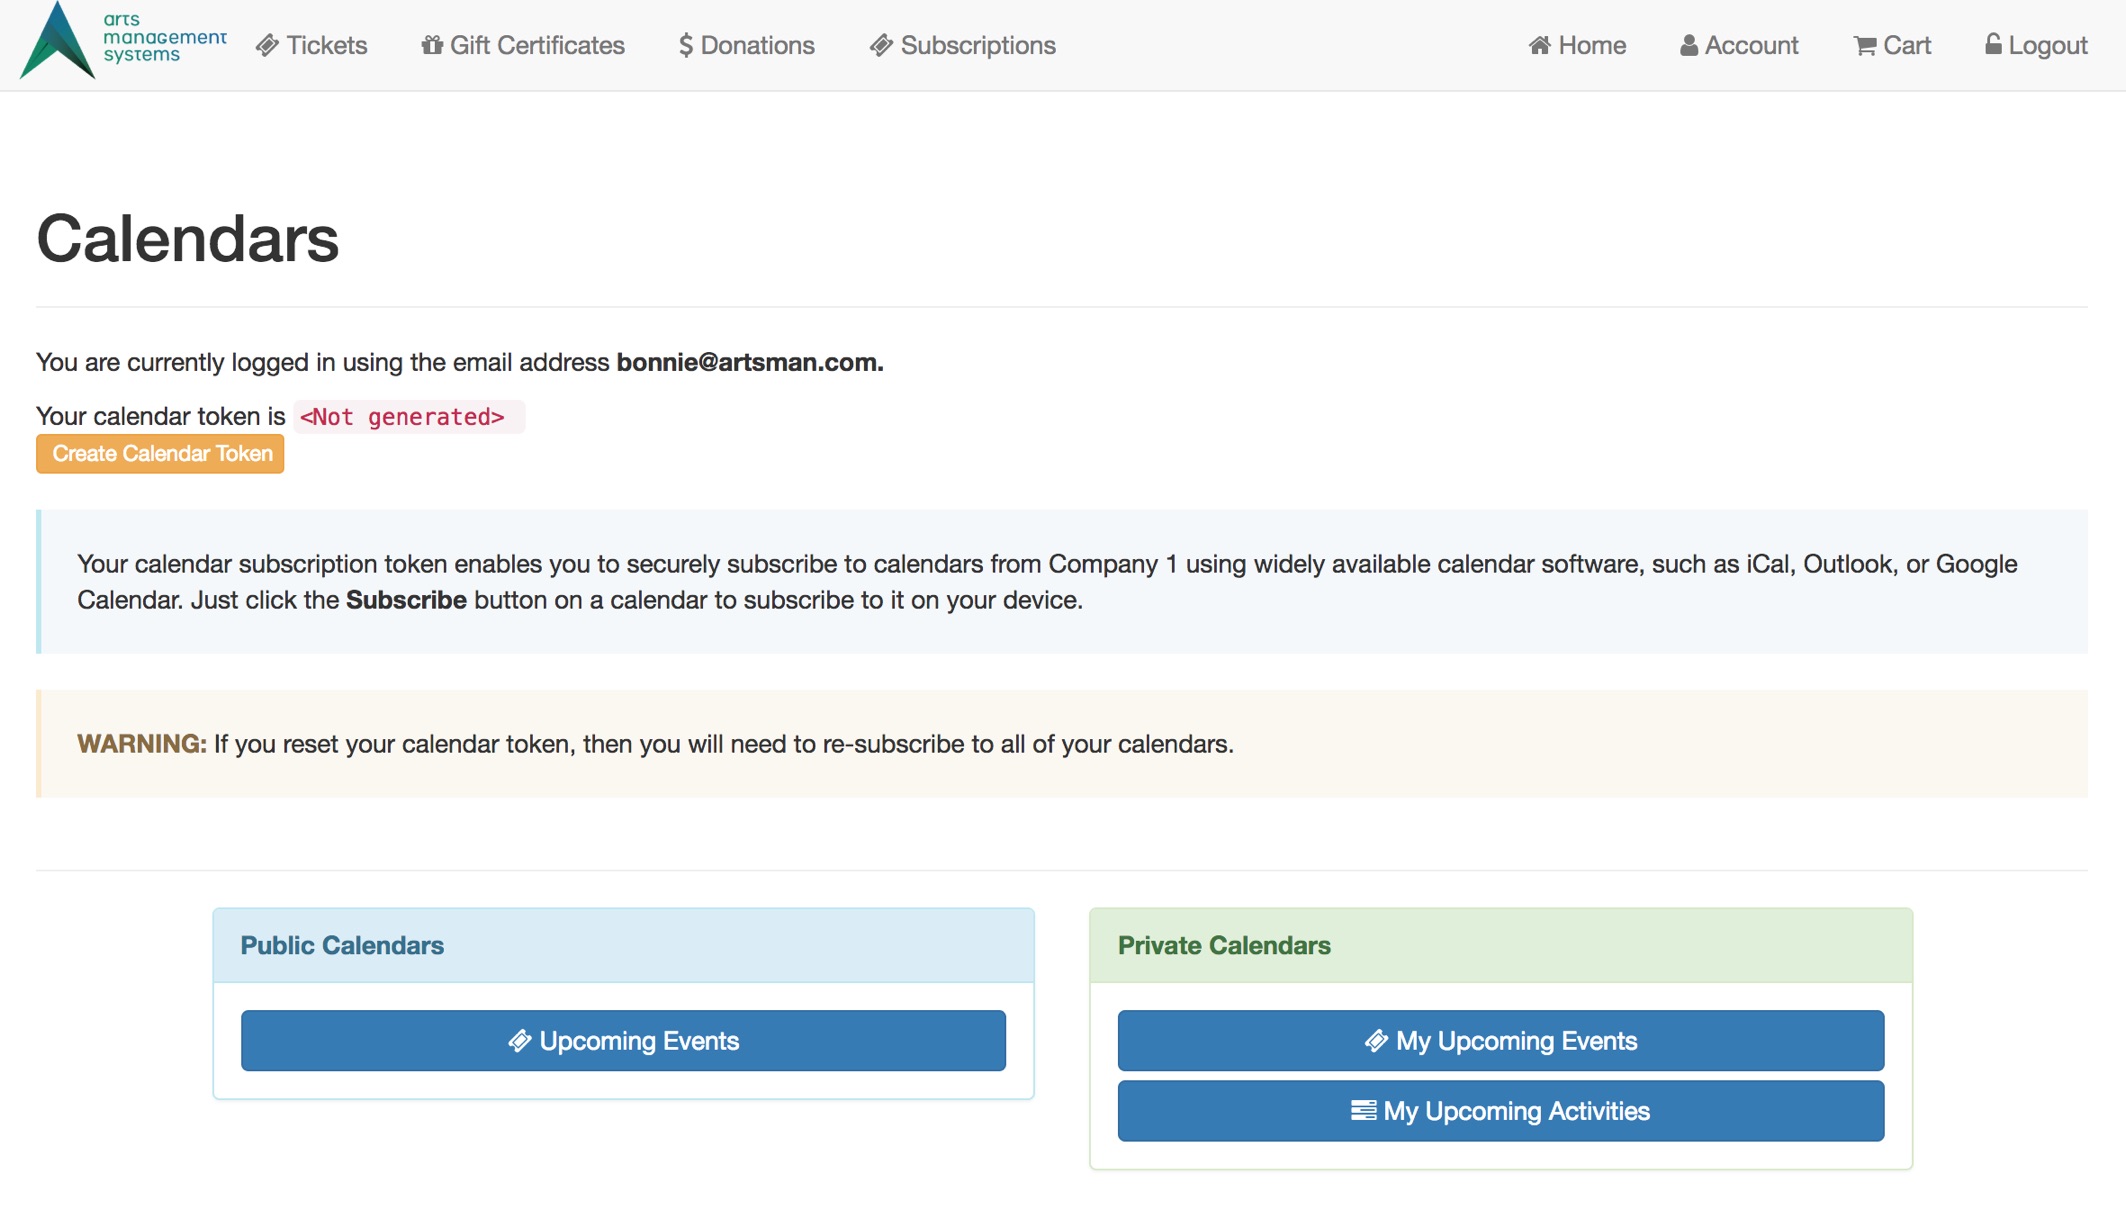
Description:
- This page contains the button links to the Upcoming Events, My Upcoming Events and My Upcoming Activities calendars.
- The Upcoming Events calendar displays a list of upcoming Performances and Courses available for purchase online.
- The My Upcoming Events calendar contains a calendar of performances and coursed the patron has purchased admission to.
- The My Upcoming Activities calendar shows a list of upcoming activities the patrons has been scheduled to perform through Theatre Manager.
- The page also contains the token needed for subscribing to the calendars listed above.
Questions and Answers:
Q: What is the Calendar Token for?
A: The Token is used for subscribing to a calendar. It is a unique value that allows for syncing with outside applications such as iCal, Outlook or Google Calendars.
____________________________________________________________
Q: Why would you reset a Calendar Token?
A: Reseting the token makes the previous token invalid. It prevents any previously subscribed calendar applications from accessing the calendar until the token has been updated in that program.
____________________________________________________________
Q: Is the Calendar Token needed to download the calendar?
A: The token is only needed when subscribing to a calendar.
____________________________________________________________
Q: What is the difference between Downloading and Subscribing to a Calendar?
A: When a calendar is downloaded the ICS file contains all Performances and Classes as of the download date. By subscribing to a calendar the details in the third party application will update as the information in the Theatre Manager database updates. If new Events are made available online the Performances or Classes will appear in the subscribed Upcoming Events calendar. When the patron purchases, exchanges or refunds tickets the details will automatically update in the subscribed My Upcoming Events calendar.
____________________________________________________________
Location:
htdocs/1/WebPagesEN
Able to Call Page(s):
Called By Page(s):
Page(s) Referenced:
tmCalendar Folder
tmMyUpcomingActivities.html
tmMyUpcomingEvents.html

tmUpcomingEvents.html
tmCampaign Folder
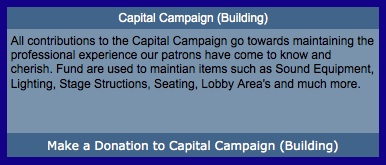
Custom pages can be created for an event by duplicating the existing default page. The word Default in the page name is then replaced with the donation campaign number. The donation campaign number is located in the Seq # column under Setup >> System Tables >> Donation Campaigns in Theatre Manager. If this column is not visible simply right click on any of the column headers and select it. The column with then display in the list.
tmCampaign1.html
Description:
- This page provides a description of the donation campaign.
- The campaign name is pulled from the External Name of the campaign from within Theatre Manager.
- The default page pulls the description information directly from the Notes tab for the Donation Campaign setup inside Theatre Manager.
- The title of the page includes a number that references the campaign sequence number from within Theatre Manager.
- This is a custom page that can be edited to reflect the details of this specific campaign.
Location:
htdocs/1/WebPagesEN/tmCampaign
Able to Call Page(s):
Called By Page(s):
Page(s) Referenced:
tmCampaign2.html
Description:
- This page provides a description of the donation campaign.
- The campaign name is pulled from the External Name of the campaign from within Theatre Manager.
- The default page pulls the description information directly from the Notes tab for the Donation Campaign setup inside Theatre Manager.
- The title of the page includes a number that references the campaign sequence number from within Theatre Manager.
- This is a custom page that can be edited to reflect the details of this specific campaign.
Location:
htdocs/1/WebPagesEN/tmCampaign
Able to Call Page(s):
Called By Page(s):
Page(s) Referenced:
tmCampaignDefault.html
Description:
- This page provides a description of the donation campaign.
- The campaign name is pulled from the External Name of the campaign from within Theatre Manager.
- The default page pulls the description information directly from the Notes tab for the Donation Campaign setup inside Theatre Manager.
Location:
htdocs/1/WebPagesEN/tmCampaign
Able to Call Page(s):
Called By Page(s):
Page(s) Referenced:
TMcart.html

Description:
- Lists all items currently within the patrons online shopping cart. This includes any fees or coupons associated with the purchase.
- This page is presented after each new tickets, subscription, donation or member type is added to an order.
- If the item is checked in Setup >> Company Preferences of Theatre Manager, the option to have tickets Mailed will appear within this window.
- If the item is checked in Setup >> Company Preferences of Theatre Manager, the patron is asked if they would like to add a donation to their ticket purchase.
- If the item is checked in Setup >> Company Preferences of Theatre Manager, the option to enter a coupon appears.
Questions and Answers:
Q:
A:
____________________________________________________________
Location:
htdocs/1/WebPagesEN
Able to Call Page(s):
- tmCampaignDefault.html (optional)
- TMcheckout.html
- TMcoupon.html
- TMdonation.html (optional)
- TMError.txt
- tmEventDefault.html (optional purchase)
- tmMailFeeDefault.html (optional)
- tmOrderFeeDefault.html (optional)
- tmPassDefault.html (optional purchase)
- tmSubscriptionDefault.html (optional purchase)
- tmtermsandconditions.html
- TMtickets.html
- tmVenueDefault.html (optional purchase)
Called By Page(s):
- TMdonation.html
- tmPackageDefault.html
- TMpatronLimitedProfile.html
- TMpassAskAmount.html
- TMsubscriptionsPriceMapDefault.html
- TMticketsPrice_MapDefault.html
- Any page containing the navigation buttons.
Page(s) Referenced:
- buttonRollover.html
- dropDownMenuFunction.html
- pleaseWaitMessage.html
- pleaseWaitMessageFunction.html
- rowCartCoupon.html
- rowCartCourse.html
- rowCartCourseNewGroup.html
- rowCartDonation.html
- rowCartFestival.html
- rowCartFestivalNewGroup.html
- rowCartMailFee.html
- rowCartOrderCouponFee.html
- rowCartOrderFee.html
- rowCartPass.html
- rowCartPassRedemption.html
- rowCartReserve.html
- rowCartReserveNewGroup.html
- rowCartSub.html
- rowCartSubNewGroup.html
- setHOUSEHOLD_PATRON_SELECTION_LIST.html
- setHOUSEHOLD_PATRON_SELECTION_LISTempty.html
- styleButtons.css
- stylePages.css
- TMError.txt
- tmFooter.html
- tmnavButtons.html
- tmTicketHandling.html
- rowcartdonationroundup.html
TMcheckout.html
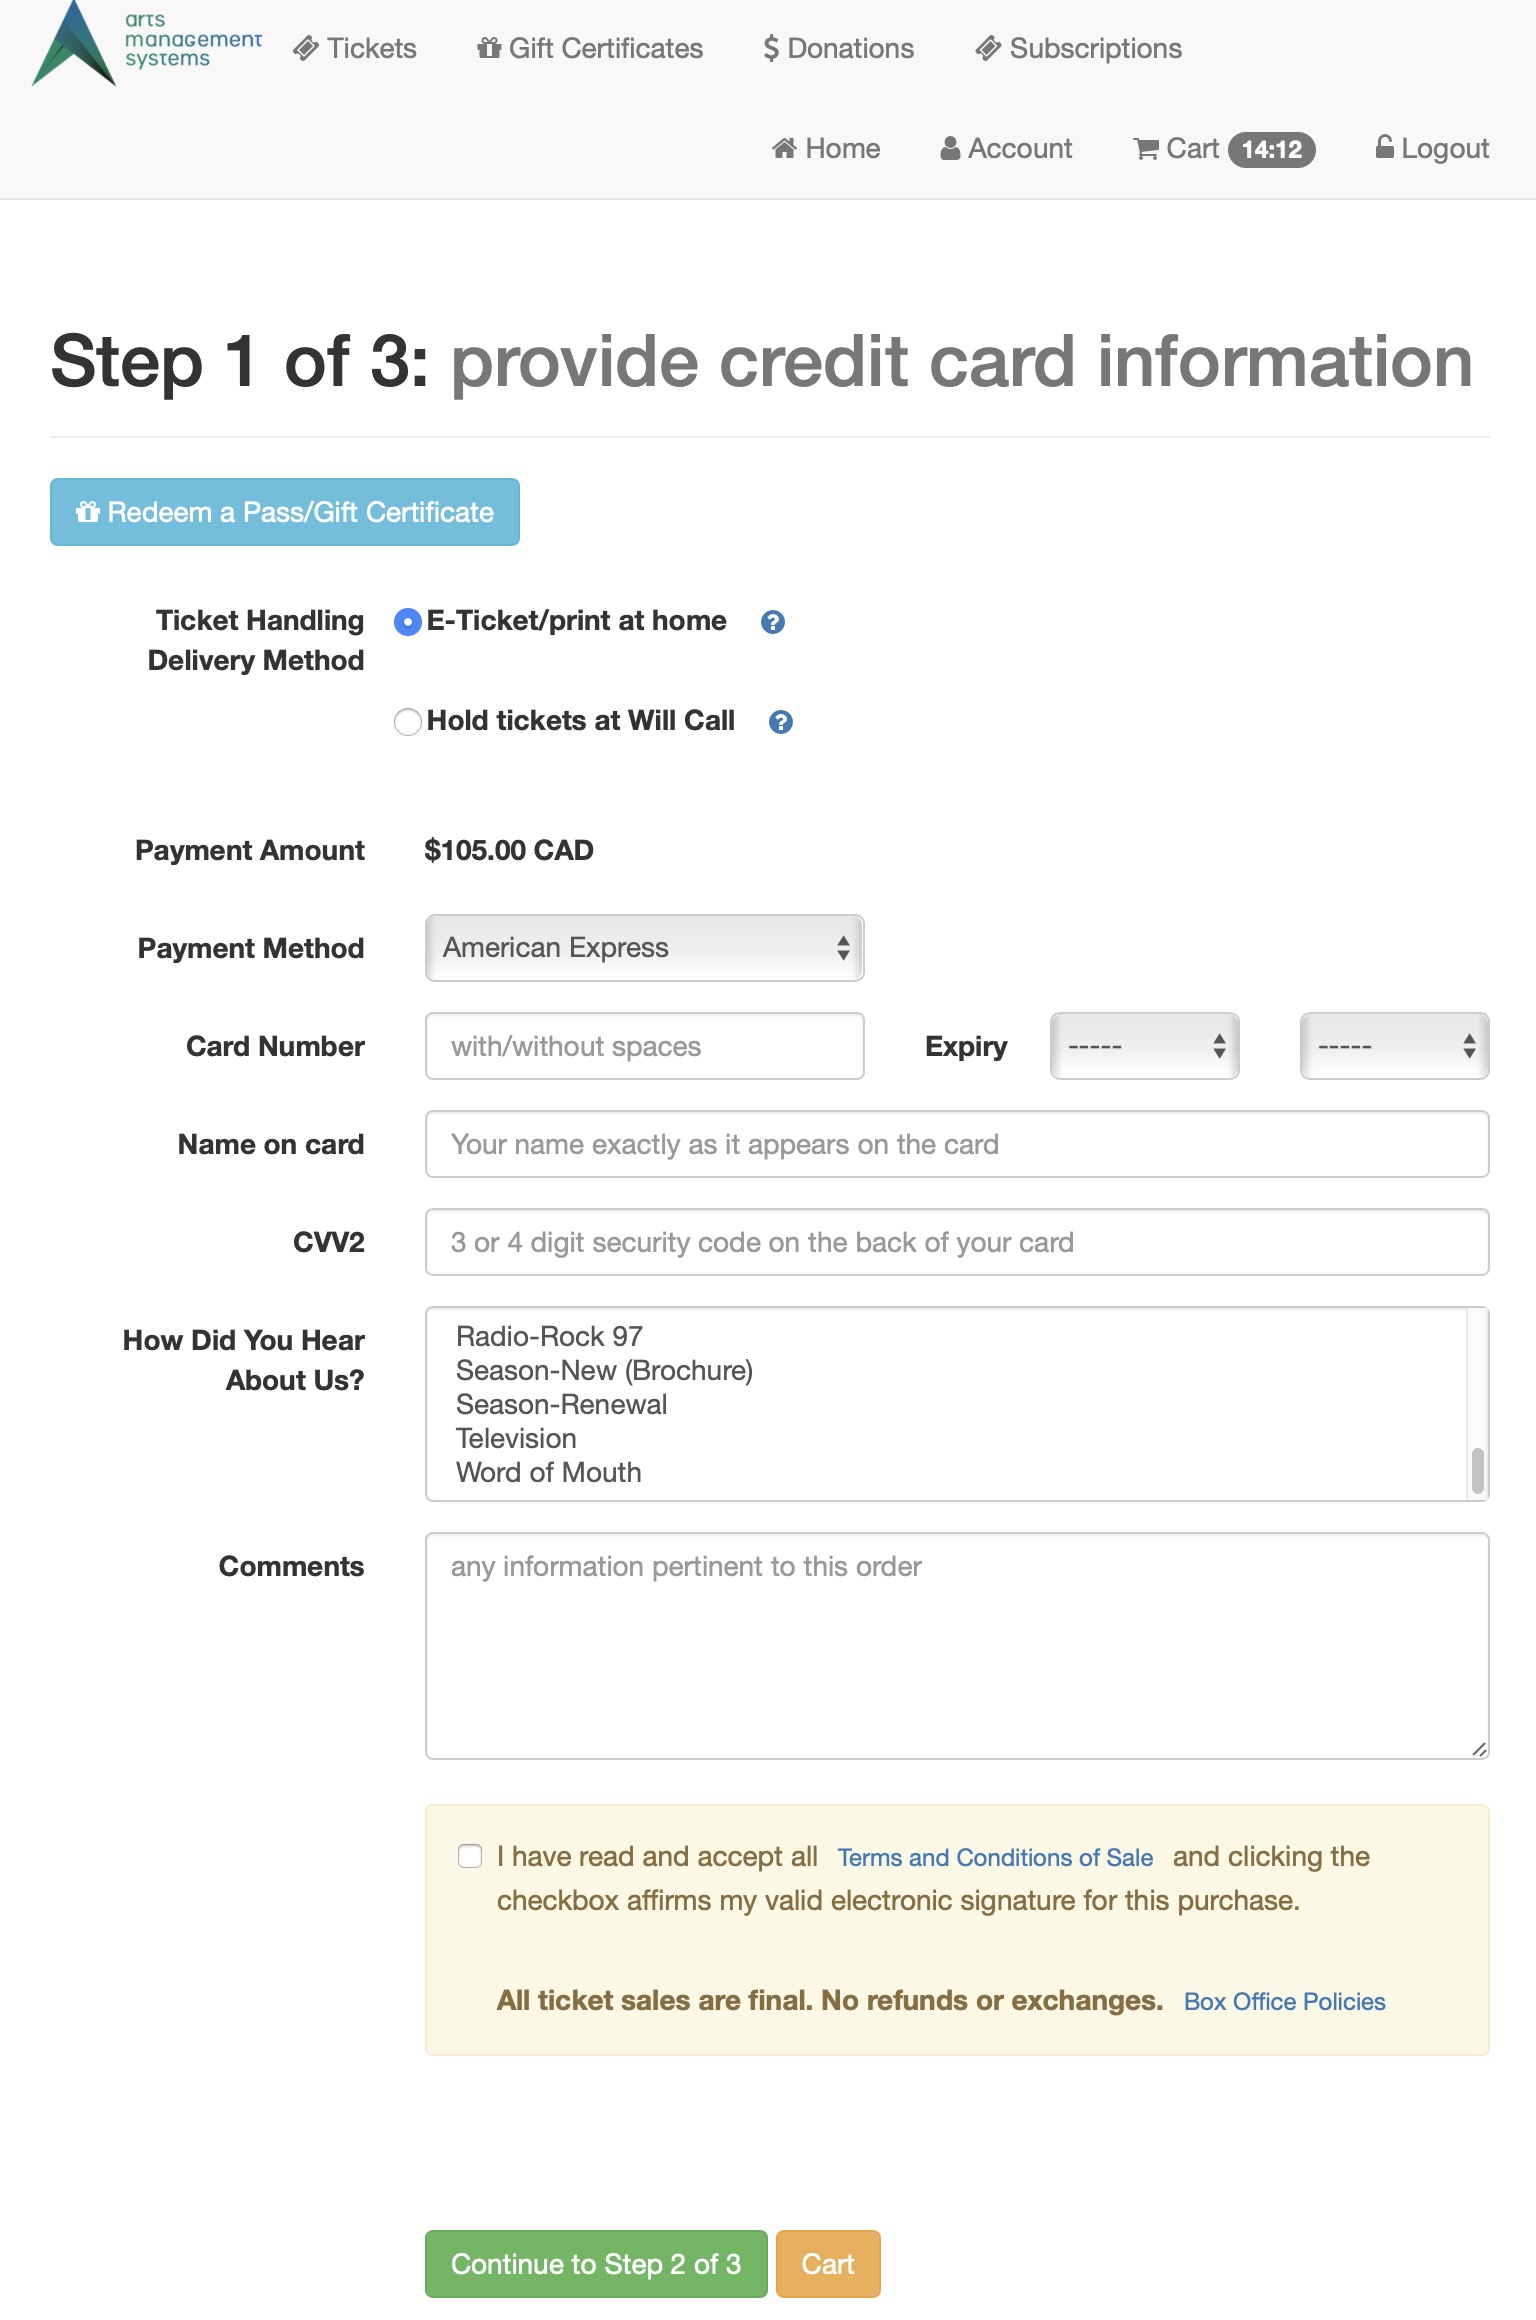
Description:
- This page is the final page before payment for the Order it processed.
- The ticket handling at the top of the pages reflects the setup of E-Ticket handling within company preferences.
- The the wording for E-Ticket handling may need to be altered to more accurately reflect the policies of the organization.
- The Payment Method, Card Number, Name as it Appears, CID, Card Expiry Date fields are all mandatory fields for credit card processing.
- If the How Did You Hear field may be set as a mandatory field within the Theatre Manager database it will also need to be entered before processing a payment.
- If their are no Payment Method listed in the drop down click here.
- To learn how to create options for multiple currency payment methods click here.
- The terms and conditions checkbox only appears if enabled in company preferences
Questions and Answers:
Q: Why are there no payment methods in the drop down list?
A: If your credit card payment methods do not appear in the drop down it may be the Merchant Account is not setup to be used online. In Theatre Manager go to Setup >> System Tables >> Merchant Accounts. Double click on the merchant account and ensure the By the Web Listener box is checked. Under the Cards tab in the merchant account double click on each card and ensure the Available At Internet box is checked. The card will also need a bullet in the Yes column for Authorize Via Credit Card Server.
Location:
htdocs/1/WebPagesEN
Able to Call Page(s):
- tmBoxOfficePolicy.html
- TMcheckoutCardError.html
- TMcheckoutNoItems.html
- TMcheckoutNoPayment.html
- TMcheckoutProcessing.html
- TMlogin.html
Called By Page(s):
- TMcart.html
- Any page listing the navigation buttons after the patron has logged into the online sales.
Page(s) Referenced:
- buttonRollover.html
- dropDownMenuFunction.html
- pleaseWaitMessage.html
- pleaseWaitMessageFunction.html
- setCCMONTH_LIST.html
- setCCMONTH_LISTempty.html
- setMERCHANT_LIST.html
- setMERCHANT_LISTempty.html
- setPAYMENT_LIST.html
- setPAYMENT_LISTempty.html
- setREASON_TO_BUY_LIST.html
- setREASON_TO_BUY_LISTempty.html
- setYEAR_LIST.html
- setYEAR_LISTempty.html
- styleButtons.css
- stylePages.css
- ,tmCheckoutPostDatedPayments.html
- TMError.txt
- tmtermsandconditions.html
- tmTicketHandling.html
- tmFooter.html
- tmnavButtons.html
- rowcartdonationroundup.html
TMcheckoutCardError.html
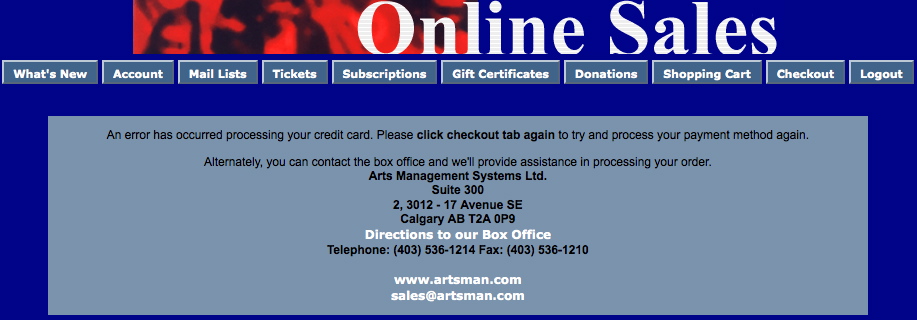
Description:
- This page is displayed when the connection between apache and the web listener is interrupted during the processing of a payment.
- The contact information within this page is pulled directly from the Company tab in Setup >> Company Preferences of Theatre Manager.
Location:
htdocs/1/WebPagesEN
Able to Call Page(s):
- maps.google.com
- The companies web site as it appears in the Company tab of Setup >> Company Preferences within Theatre Manager.
Called By Page(s):
Page(s) Referenced:
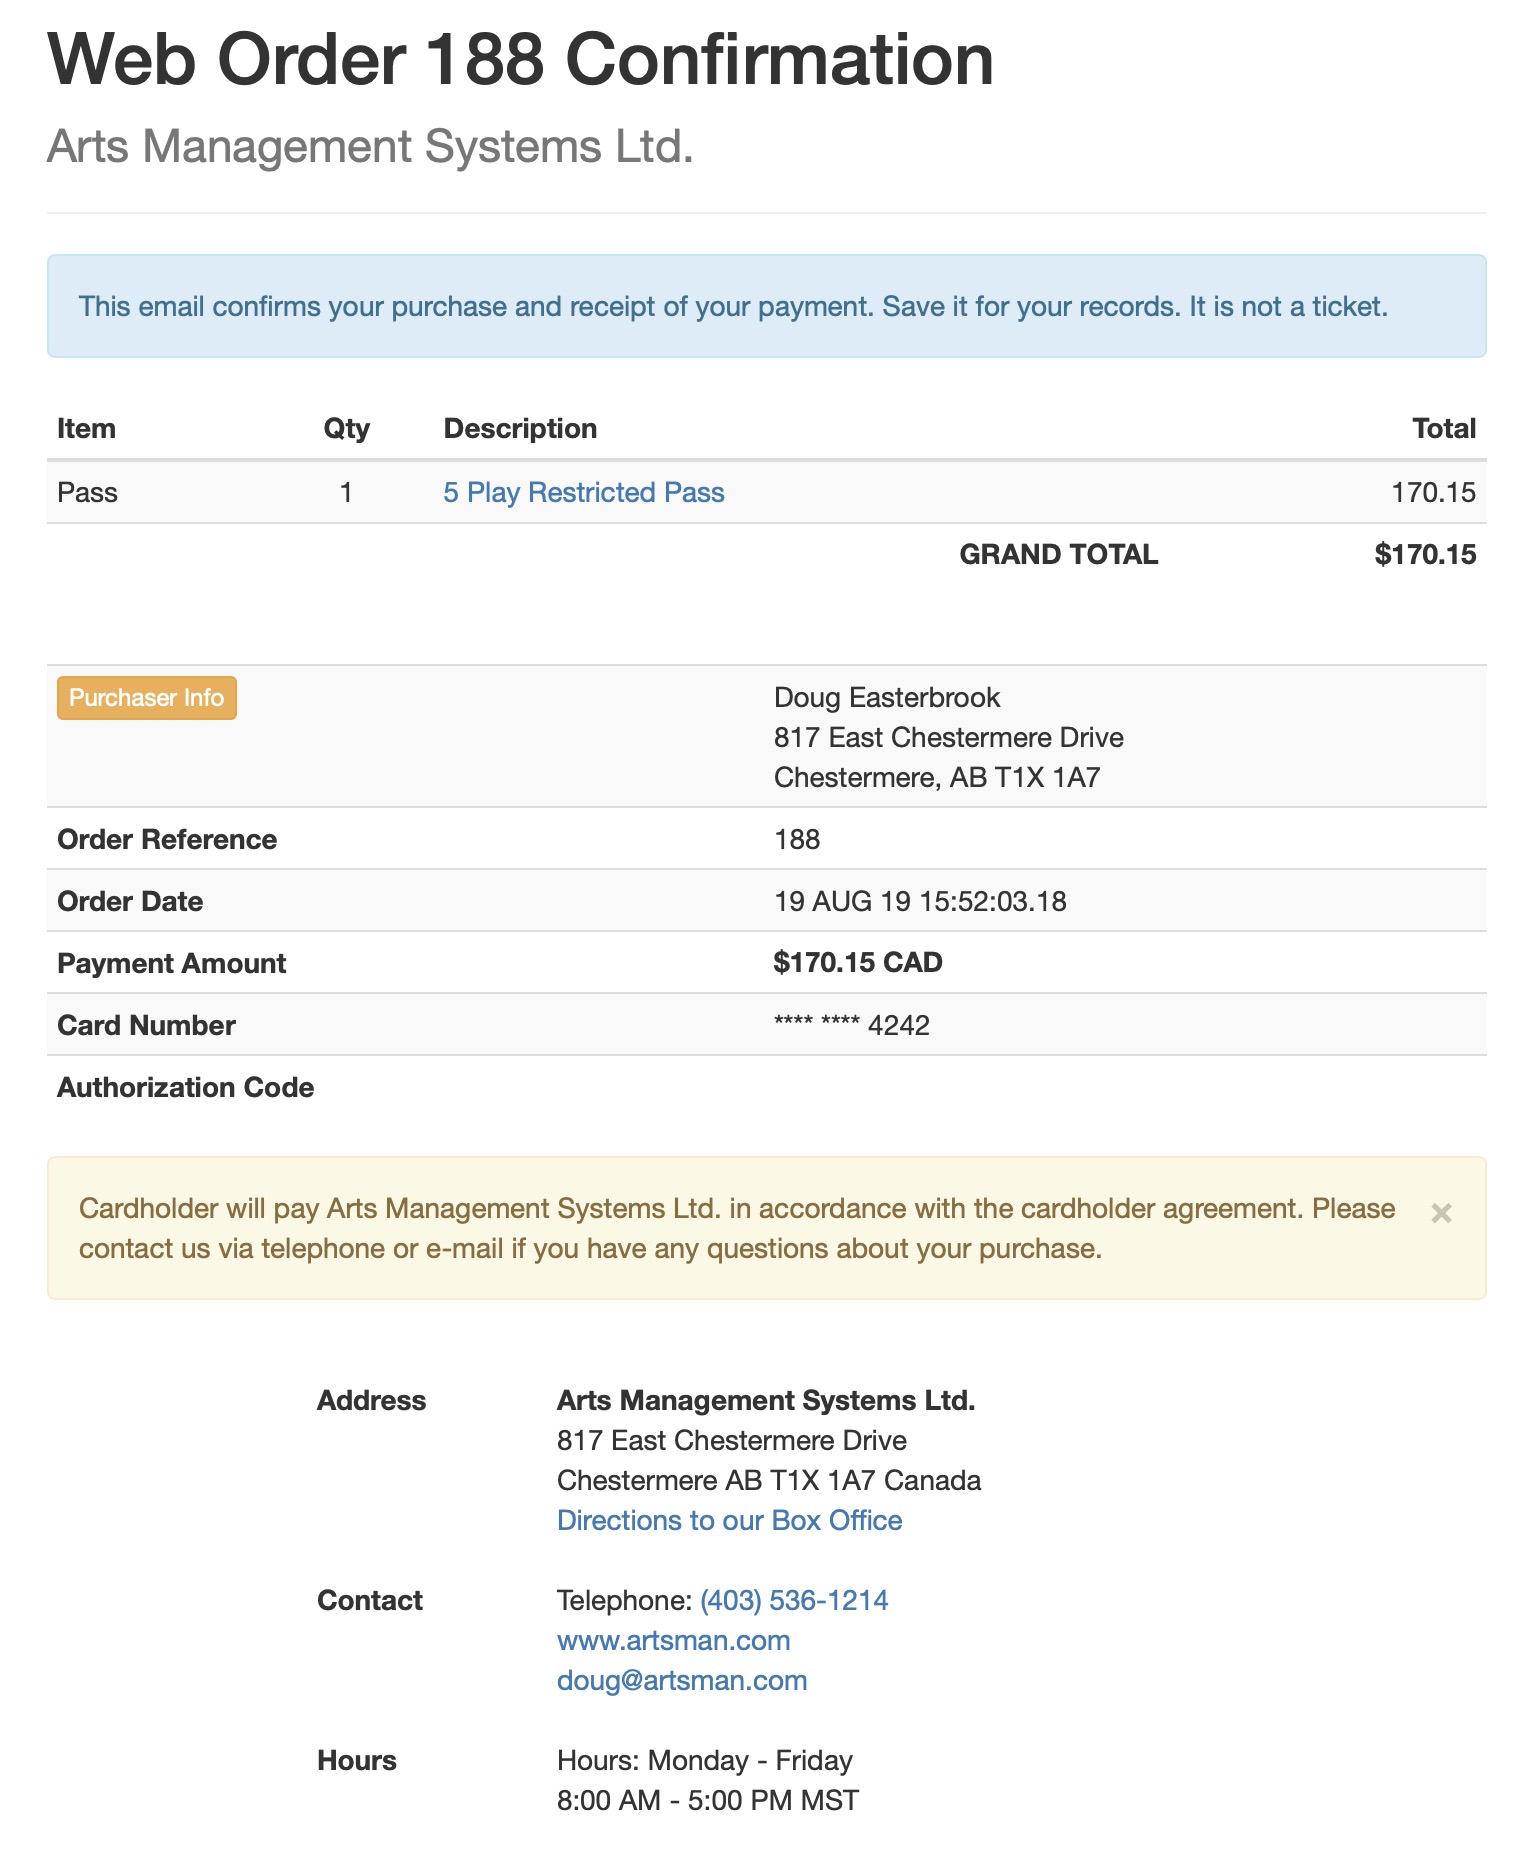
TMcheckoutConfirmation.html

Description:
- This is the confirmation page listing a break down of the items within the Patron's Order.
- This page allows the patron to print a copy of their purchase much like a receipt. Theatre Manager will also email the patron a confirmation receipt as a part of the purchase process.
- Many of the fields within this page are pulled directly from Theatre Manager based on the patrons purchase.
- If the Print At Home Tickets option is checked in the Web Options tab of Setup >> System Tables in Theatre Manager a third button will appear toward the top of this window. The button reads Print Tickets and is designed to print out a paper copy of tickets (complete with bar code) to be presented at the venue for admittance.
Location:
htdocs/1/WebPagesEN
Able to Call Page(s):
- TMoldCartHeaders.html
- maps.google.com
- The companies web site as it appears in the Company tab of Setup >> Company Preferences within Theatre Manager.
Called By Page(s):
Page(s) Referenced:
- buttonRollover.html
- rowCheckoutCoupon.html
- rowCheckoutCourse.html
- rowCheckoutDonation.html
- rowCheckoutFestival.html
- rowCheckoutMailFee.html
- rowCheckoutOrderCouponFee.html
- rowCheckoutOrderFee.html
- rowCheckoutPass.html
- rowCheckoutPaymentPlan.html
- rowCheckoutReserve.html
- rowCheckoutSub.html
- rowCheckoutSubNewGroup.html
- styleButtons.css
- stylePages.css
- rowCheckoutPassRedemption.html
- tmContact.html
- tmContactHours.html
- tmFooter.html
- tmnavButtons.html
TMcheckoutInvoiceEmail.html
Description:
- This is the email confirmation page listing a break down of the items within the Patron's Order.
- This page is emailed after each payment is complete as a receipt of the purchase.
- Many of the fields within this page are pulled directly from Theatre Manager based on the patrons purchase.
Location:
htdocs/1/WebPagesEN
Able to Call Page(s):
- TMoldCartHeaders.html
- maps.google.com
- The companies web site as it appears in the Company tab of Setup >> Company Preferences within Theatre Manager.
Called By Page(s):
- Not Appicable
Page(s) Referenced:
- buttonRollover.html
- rowCartCoupon.html
- rowCartCourse.html
- rowCartCourseNewGroup.html
- rowCartDonation.html
- rowCartFestival.html
- rowCartFestivalNewGroup.html
- rowCartMailFee.html
- rowCartOrderCouponFee.html
- rowCartOrderFee.html
- rowCartPass.html
- rowCartReserve.html
- rowCartReserveNewGroup.html
- rowCartSub.html
- rowCartSubNewGroup.html
- rowCheckoutCoupon.html
- rowCheckoutCourse.html
- rowCheckoutDonation.html
- rowCheckoutFestival.html
- rowCheckoutMailFee.html
- rowCheckoutOrderCouponFee.html
- rowCheckoutOrderFee.html
- rowCheckoutPass.html
- rowCheckoutPaymentPlan.html
- rowCheckoutReserve.html
- rowCheckoutSub.html
- rowCheckoutSubNewGroup.html
- styleButtons.css
- stylePages.css
- tmContact.html
- tmContactHours.html
- tmFooter.html
TMcheckoutNoItems.html

Description:
- This page is presented when a patron attempts to process an empty cart.
Location:
htdocs/1/WebPagesEN
Able to Call Page(s):
Called By Page(s):
Page(s) Referenced:
TMcheckoutNoPayment.html
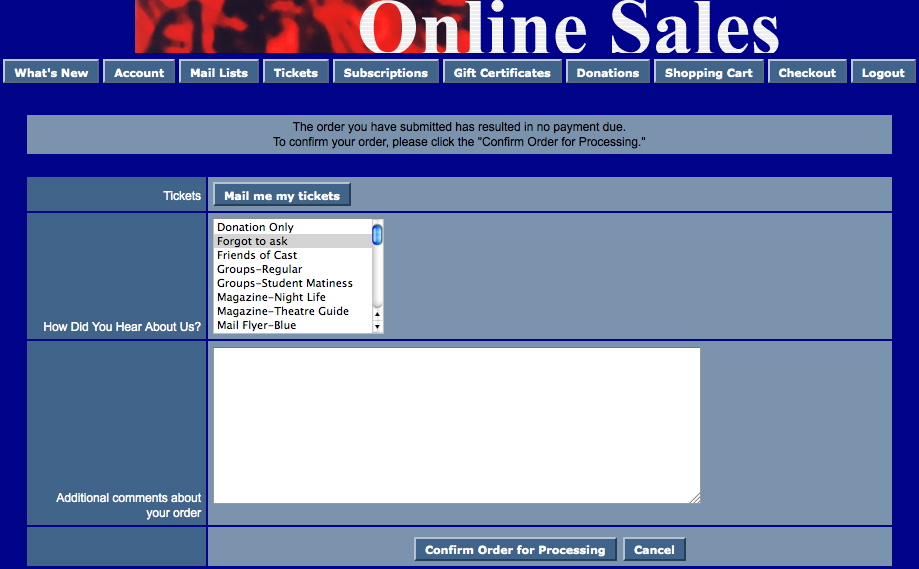
Description:
- This page is presented when the total value of the items added to the web sales cart is zero. No payment is required for the Order.
- When the Confirm Order for Processing button is clicked the Order is completed in Theatre Manager.
- The ticket handling at the top of the pages reflects the setup of E-Ticket handling within the database. For more information on this setup click here
Location:
htdocs/1/WebPagesEN
Able to Call Page(s):
Called By Page(s):
- TMcart.html
- Any page listing the navigation buttons.
Page(s) Referenced:
TMcheckoutProcessing.html
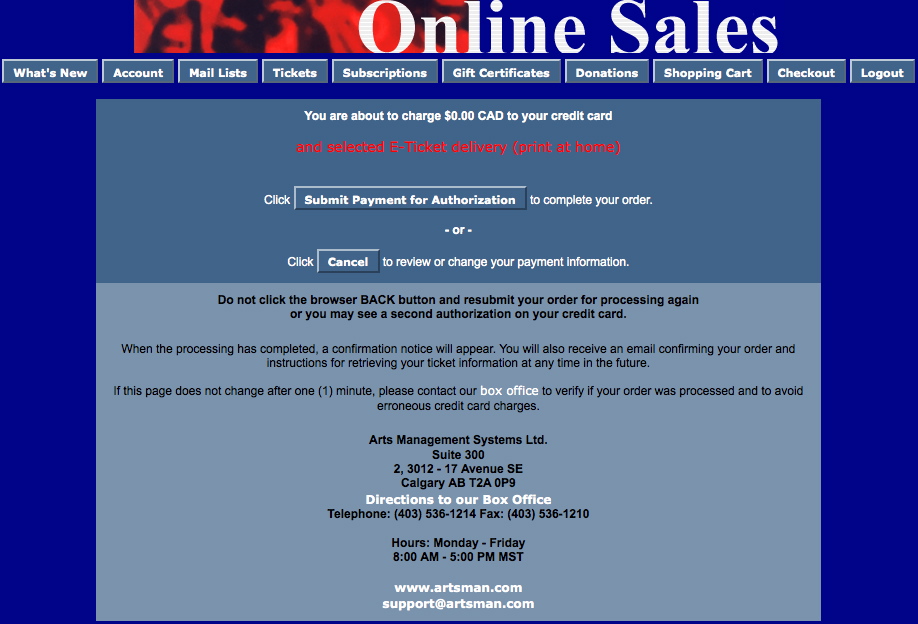
Description:
- The final confirmation page before the payment is processed against the patrons credit card.
- This age will automatically refresh when the payment is finished processing within Theatre Manager.
Location:
htdocs/1/WebPagesEN
Able to Call Page(s):
- TMcheckout.html
- TMcheckoutConfirmation.html
- maps.google.com
- The companies web site as it appears in the Company tab of Setup >> Company Preferences within Theatre Manager.
Called By Page(s):
Page(s) Referenced:
tmContent Folder
contentBoard.html
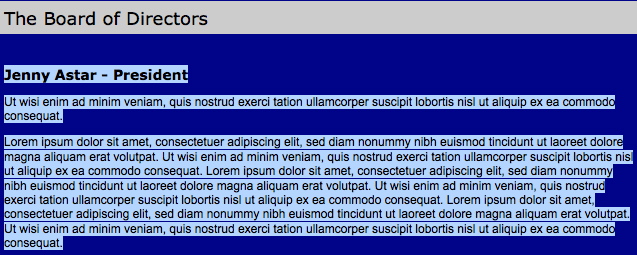
Description:
- A sample page for Board of Directors information.
Location:
htdocs/1/WebPagesEN/tmContent
Able to Call Page(s):
- Not Applicable
Called By Page(s):
Page(s) Referenced:
contentClass.html
Description:
- A sample list of upcoming Courses or Classes the organization is offering.
- The course description information is hard coded onto the page.
- The Enroll in Class buttons are coded to reference the course in the TMtickets.html using the Event # from within Theatre Manager for the course.
Location:
htdocs/1/WebPagesEN/tmContent
Able to Call Page(s):
Called By Page(s):
Page(s) Referenced:
contentContact.html
Description:
- Contact information for the Organization.
- The Company information is pulled directly from the Setup >> Company Preferences tab of Theatre Manager.
Location:
htdocs/1/WebPagesEN/tmContent
Able to Call Page(s):
- maps.google.com
- The companies web site as it appears in the Company tab of Setup >> Company Preferences within Theatre Manager.
Called By Page(s):
Page(s) Referenced:
contentDonation.html
Description:
- A sample page describing the organizations donation campaigns.
- The donation description information is hard coded onto the page.
Location:
htdocs/1/WebPagesEN/tmContent
Able to Call Page(s):
Called By Page(s):
Page(s) Referenced:
contentEvents.html

Description:
- A sample page describing the organizations upcoming special events.
- The event description information is hard coded onto the page.
- The link behind the event title references the tmEvent1.html where the number 1 is replaced with the Event # from within Theatre Manager.
- The Click Here to Purchase Tickets link and the Purchase Tickets buttons both reference the TMtickets.html page where the Event # has been added to the button to present just the performances for this event. See the Redirecting a link to a specific page in the Web Listener page for more information on creating links within Theatre Manager.
Location:
htdocs/1/WebPagesEN/tmContent
Able to Call Page(s):
Called By Page(s):
Page(s) Referenced:
contentMailList.html

Description:
- A sample page describing the options to subscribe to Mail Lists.
- The mail list description information is hard coded onto the page.
- The Click Here to Subscribe to Mail List link and the Subscribe to Mail List button both reference the TMmaillist.html page
Location:
htdocs/1/WebPagesEN/tmContent
Able to Call Page(s):
Called By Page(s):
Page(s) Referenced:
contentPass.html

Description:
- A sample page describing the Pass Type items available for sale.
- The pass description information is hard coded onto the page.
- The Click Here to Purchase a Pass link and the Purchase Pass button both reference the TMpass.html page
Location:
htdocs/1/WebPagesEN/tmContent
Able to Call Page(s):
Called By Page(s):
Page(s) Referenced:
contentSeason.html
Description:
- A sample page of the upcoming season for the organizations.
- The event description information is hard coded onto the page.
- The link behind the event title references the tmEvent1.html where the number 1 is replaced with the Event # from within Theatre Manager. The Event # has been added to the link to present just the performances for this event. See the Redirecting a link to a specific page in the Web Listener page for more information on creating links within Theatre Manager.
Location:
htdocs/1/WebPagesEN/tmContent
Able to Call Page(s):
Called By Page(s):
Page(s) Referenced:
contentSeason2002.html
Description:
- A sample page of a past seasons individual performances.
- The event description information is hard coded onto the page.
- The link behind the event title references the tmEvent1.html where the number 1 is replaced with the Event # from within Theatre Manager. The Event # has been added to the link to present just the performances for this event. See the Redirecting a link to a specific page in the Web Listener page for more information on creating links within Theatre Manager.
Location:
htdocs/1/WebPagesEN/tmContent
Able to Call Page(s):
Called By Page(s):
Page(s) Referenced:
contentSeason2003.html
Description:
- A sample page of a past seasons individual performances.
- The event description information is hard coded onto the page.
- The link behind the event title references the tmEvent1.html where the number 1 is replaced with the Event # from within Theatre Manager. The Event # has been added to the link to present just the performances for this event. See the Redirecting a link to a specific page in the Web Listener page for more information on creating links within Theatre Manager.
Location:
htdocs/1/WebPagesEN/tmContent
Able to Call Page(s):
Called By Page(s):
Page(s) Referenced:
contentStaff.html
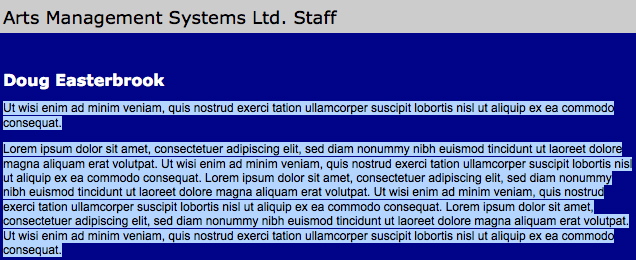
Description:
- A sample page of Staff information for the organization.
Location:
htdocs/1/WebPagesEN/tmContent
Able to Call Page(s):
- Not Applicable
Called By Page(s):
Page(s) Referenced:
contentVolunteer.html

Description:
- A sample page for Volunteer information.
- The company name and telephone number are pulled from Setup >> Company Preferences within Theatre Manager.
Location:
htdocs/1/WebPagesEN/tmContent
Able to Call Page(s):
- Not Applicable
Called By Page(s):
Page(s) Referenced:
TMcoupon.html
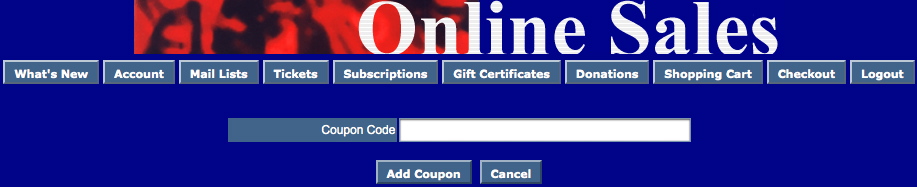
Description:
- When an invalid coupon code is entered this page is displayed offering the patron an opportunity to reenter the code.
Location:
htdocs/1/WebPagesEN
Able to Call Page(s):
Called By Page(s):
tmCustom Folder
This folder will contain a copy of each web page customized for an organizations online tickets site that does not pertain to the tmGifs folder. Online sales will review the tmCustom folder prior to the default web pages. If a custom page is located the online sales will display the custom page over the default page. For more information please click here.
This folder contains customized copies of the default pages from within the WebPagesEN folder. These pages have been edited to meet the design and desired look for the organizations online sales. Each page contained within a sub-folder should be saved to the corresponding folder within the tmCustom folder. For details on the default WebPagesEN folder click here.
tmCampaign Folder (Custom)
This folder contains customized copies of the default pages from within the tmCampaign folder. These pages have been edited to meet the design and desired look for the organizations online sales. For details on the default tmCampaign folder click here.
tmContent Folder (Custom)
This folder contains customized copies of the default pages from within the tmContent folder. These pages have been edited to meet the design and desired look for the organizations online sales. For details on the default tmContent folder click here.
tmEvent Folder Custom
This folder contains customized copies of the default pages from within the tmEvent folder. These pages have been edited to meet the design and desired look for the organizations online sales.
For details on the default tmEvent folder click here.
tmFee Folder (Custom)
This folder contains customized copies of the default pages from within the tmFee folder. These pages have been edited to meet the design and desired look for the organizations online sales. For details on the default tmFee folder click here.
tmMaps Folder (Custom)
This folder contains customized copies of the default pages from within the tmMaps folder. These pages have been edited to meet the design and desired look for the organizations online sales. For details on the default tmMaps folder click here.
tmPass Folder (Custom)
This folder contains customized copies of the default pages from within the tmPass folder. These pages have been edited to meet the design and desired look for the organizations online sales. For details on the default tmPass folder click here.
tmScripts Folder (Custom)
This folder contains customized copies of the default pages from within the tmScripts folder. These pages have been edited to meet the design and desired look for the organizations online sales. For details on the default tmScripts folder click here.
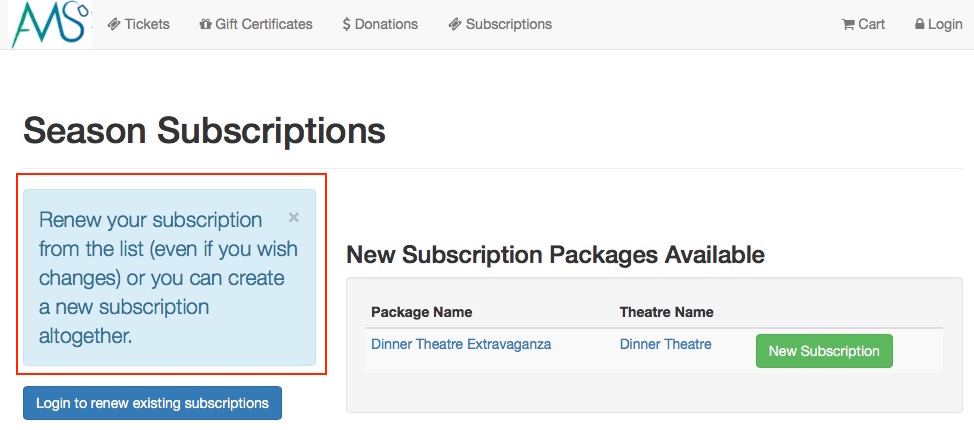
tmSubscription Folder (Custom)
This folder contains customized copies of the default pages from within the tmSubscription folder. These pages have been edited to meet the design and desired look for the organizations online sales. For details on the default tmSubscription folder click here.
TMtemplates Folder (Custom)
This folder contains customized copies of the default pages from within the TMtemplates folder. These pages have been edited to meet the design and desired look for the organizations online sales.
For details on the default TMtemplates folder click here.
tmVenue Folder (Custom)
This folder contains customized copies of the default pages from within the tmVenue folder. These pages have been edited to meet the design and desired look for the organizations online sales. For details on the default tmVenue folder click here.
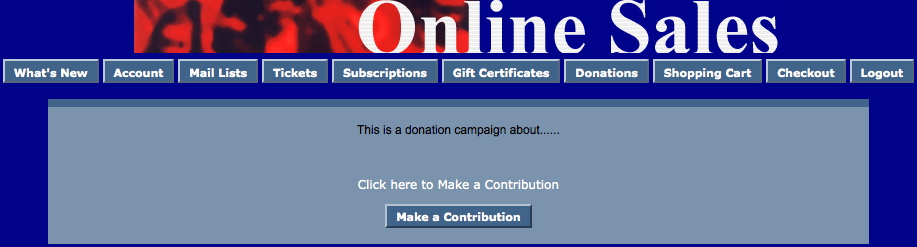
TMdonation.html
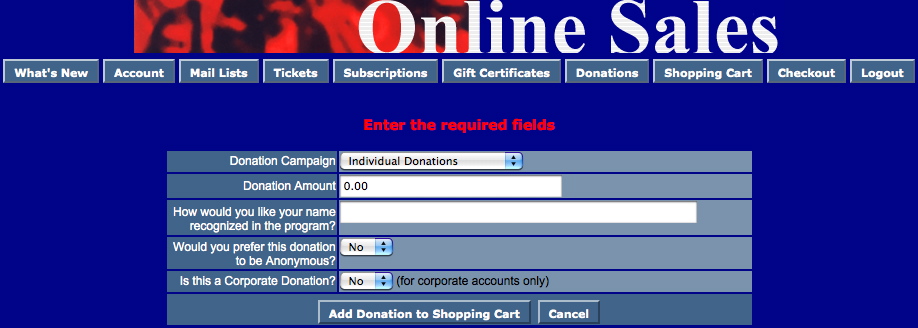
Description:
- The page for entering Donation purchases.
- This page can be linked on the main web page using the steps as outlined in the ReadeMe About Configuring Index.html.txt page. Links can be to the generic Donation page or to specific campaigns.
- The mandatory fields within this pages are Donation Campaign and Donation Amount.
Customizations if donation fields madatory
There are 3 fields on that are donor popup fields on the notes tab of the donation window. For the fields have been made mandatory, then you will need to have a code table value for custom donation field1, donation field2 and/or donation field3 in order for donations donations to be accepted online.
There is an include file for tmTemplates/tmDonationHiddenFields.html that may need revised if any of the donation fields have been made mandatory. If so, then you will need to look at that file and uncomment the appropriate fields below.
Change the value of xxx, yyy, or zzz in the input strings below to be the internal record number of the appropriate popup. Also, move the mandatory input field so that it is not uncommented
<INPUT NAME="DD_FLD1_FC_SEQ" TYPE=hidden id="DD_FLD1_FC_SEQ" value="xxx">
<INPUT NAME="DD_FLD2_FC_SEQ" TYPE=hidden id="DD_FLD2_FC_SEQ" value="yyy">
<INPUT NAME="DD_FLD3_FC_SEQ" TYPE=hidden id="DD_FLD3_FC_SEQ" value="zzz">
Location:
htdocs/1/WebPagesEN
Able to Call Page(s):
Called By Page(s):
- contentDonation.html
- TMCart.html
- Any page containing the navigation buttons.
Page(s) Referenced:
TMdonationmonthly.html
Note that this feature that will be coming but has not yet been implemented.
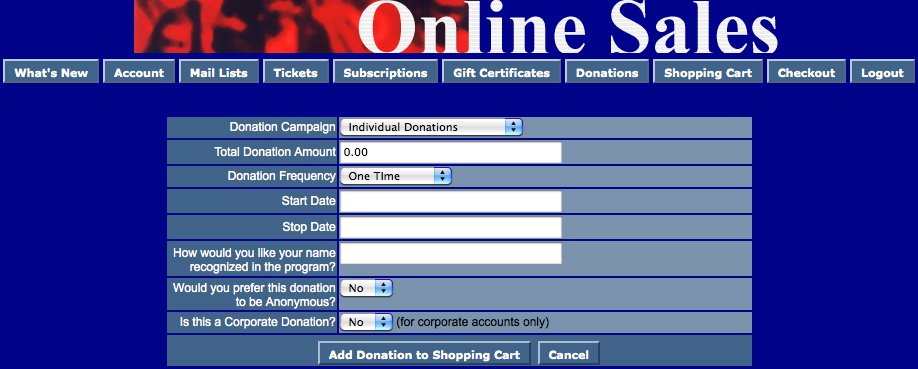
Description:
- This page allows patrons to setup a donate using a post dated payment schedule.
- The manditory fields are Donation Campaign, Total Donation Amount, Donation Frequency, Start Date and End Date.
- Theatre Manager will create a Donation for the amount indicated in the Total Donation Amount field. It will then setup multiply payments for the Donation based on the Donation Frequency in combination with the Start/End Date.
Location:
htdocs/1/WebPagesEN
Able to Call Page(s):
Called By Page(s):
- Not Applicable
Page(s) Referenced:
TMError.txt
 Description:
- The TMError.txt page feeds the messages located at the top of many pages.
- The TMError.txt page is referenced as F_HTML_PAGE_MESSAGE.
Location:
htdocs/1/WebPagesEN
Caveat changing some error messages
|
You may change any error message that you wish to suit the needs of your venue. However, a few pertain to the sign-in process and may indicate that an email address cannot be used which you may not want to change.
During our Oct 2016 PCI audit, we were required to them generic because it is against PCI rules to divulge information or conditions that could make it easier for a hacker to gain access to a patrons account. Visa/Master Card's reasoning is simple: If you say the email exists, then a hacker would likely cross reference that with other information stolen or bought on the internet. Since people tend to use the same passwords across web sites, they would cross reference and might gain access. For your safety and the safety of your patrons, we ensure Theatre Manager passes the PCI Audit- to give you less to worry about. The PCI council places 100% web site security over empathy to make any commerce web site easier for patrons to use. |
| Message # | Purpose of error message that could occur during login process | Message before being genericized for PCI Audit |
|---|---|---|
| 10012 | error message if email address could not be found in the database during the login process. | Error - Please enter a valid email address and password combination. |
| 10013 | error message if email does exist in the database, but password is incorrect during login. Should be same message as 10012 to limit ability to delineate this condition | Error - invalid email address and password combination{br}(note: password is case sensitive). |
| 10032 | the response if email address found and message sent to patron. it is now generc to say that if the email address was found, then an email would be sent, which does not give away the fact that the email adddress does exist | A password reset has been sent to your email address at {email}.{br}Please look for the email and follow the instructions on it. |
| 10034 | response for email address not in the database. The message is set to be same as 10032 for PCI/OWASP compliance so that no information is conveyed back to the user as to success or failure of the request - it helps prevent finding information in the system for brute force attacks. | We're sorry, there are no accounts associated with the email address {email}. Please verify it. |
| 10255 | response indicating email address appears invalid because we are unable to lookup the mail exchange server for that email address. Again, according to PCI/OWASP, it is more secure to simply say the email address is invalid (and we suggest to contact the box office) | {contents} appears invalid. Unable to lookup the mail exchange server for that email address. |
| 10256 | response indicating email address appears invalid because we are unable to lookup the DNS server for that email address. Again, according to PCI/OWASP, it is more secure to simply say the email address is invalid (and we suggest to contact the box office) so this message is set to the same as 10255. | {contents} appears invalid. Unable to lookup the DNS server for that email address. |
| 10257 | response indicating email address is already on file and to use 'forgot password' instead. Again, according to PCI/OWASP, it is more secure to simply say the email address is invalid (and we suggest to contact the box office) so this message is set to the same as 10255. | {contents} is currently in use and cannot be used for the creation of a new account.{br}If this is your email address, please request your password instead. |
Able to Call Page(s):
- Not Applicable
Called By Page(s):
- palmCheckin.html
- palmCheckout.html
- palmTime.html
- TMattendance.html
- TMcart.html
- TMcheckout.html
- TMcheckoutCardError.html
- TMcheckoutNoItems.html
- TMcheckoutNoPayment.html
- TMcheckoutProcessing.html
- TMcoupon.html
- TMdonation.html
- TMdonationmonthly.html
- TMfutureTickets.html
- TMfutureTicketsPrint.html
- TMhome.html
- TMlogin.html
- TMloginSelectPatron.html
- TMlogoff.html
- TMlogoffOpenCart.html
- TMmaillist.html
- TMmaillistDisallow.html
- TMmaillistQuickAdd.html
- TMmaillistVerify.html
- TMoldCartDetails.html
- TMoldCartDetailsPrint.html
- TMoldCartDetailsPrint.html
- TMoldCartHeaders.html
- tmPackageDefault.html
- TMpass.html
- TMpassAskAmount.html
- TMpasswordChange.html
- TMpasswordForgot.html
- TMpasswordResetChange.html
- TMpatronLimitedProfile.html
- TMpatronNew.html
- TMpatronUpdate.html
- TMsubscriptionMapDefault.html
- TMsubscriptionMapDefaultf.html
- TMsubscriptionPriceMapDefault.html
- TMsubscriptions.html
- TMsubscriptionsMapDefaultf.html
- TMsubscriptionsPriceMapDefault.html
- TMsubscriptionsRenew.html
- TMsys404.html
- TMsysBackupInProgress.html
- TMsysCookiesDisabled.html
- TMsysInvalidCall.html
- TMsysInvalidCallDirect.html
- TMsysInvalidCallNoAccess.html
- TMsysInvalidFunction.html
- TMsysWebSalesDisabled.html
- TMtickets.html
- TMticketscalendar.html
- TMticketsMaxPurchased.html
- TMticketsPrice_MapDefault.html
- TMticketsSection_MapDefault.html
- TMticketsSection_MapDefaultc.html
- TMticketsSection_MapDefaultf.html
- TMticketsSoldOut.html
- TMvolcalendar.html
- TMvolunteer.html
Page(s) Referenced:
- Not Applicable
tmEvent Folder
Custom pages can be created for an event by duplicating the existing default page. The word Default in the page name is then replaced with the event number. The event number is located in the Event # column under Setup >> Events in Theatre Manager.
tmEvent1.html
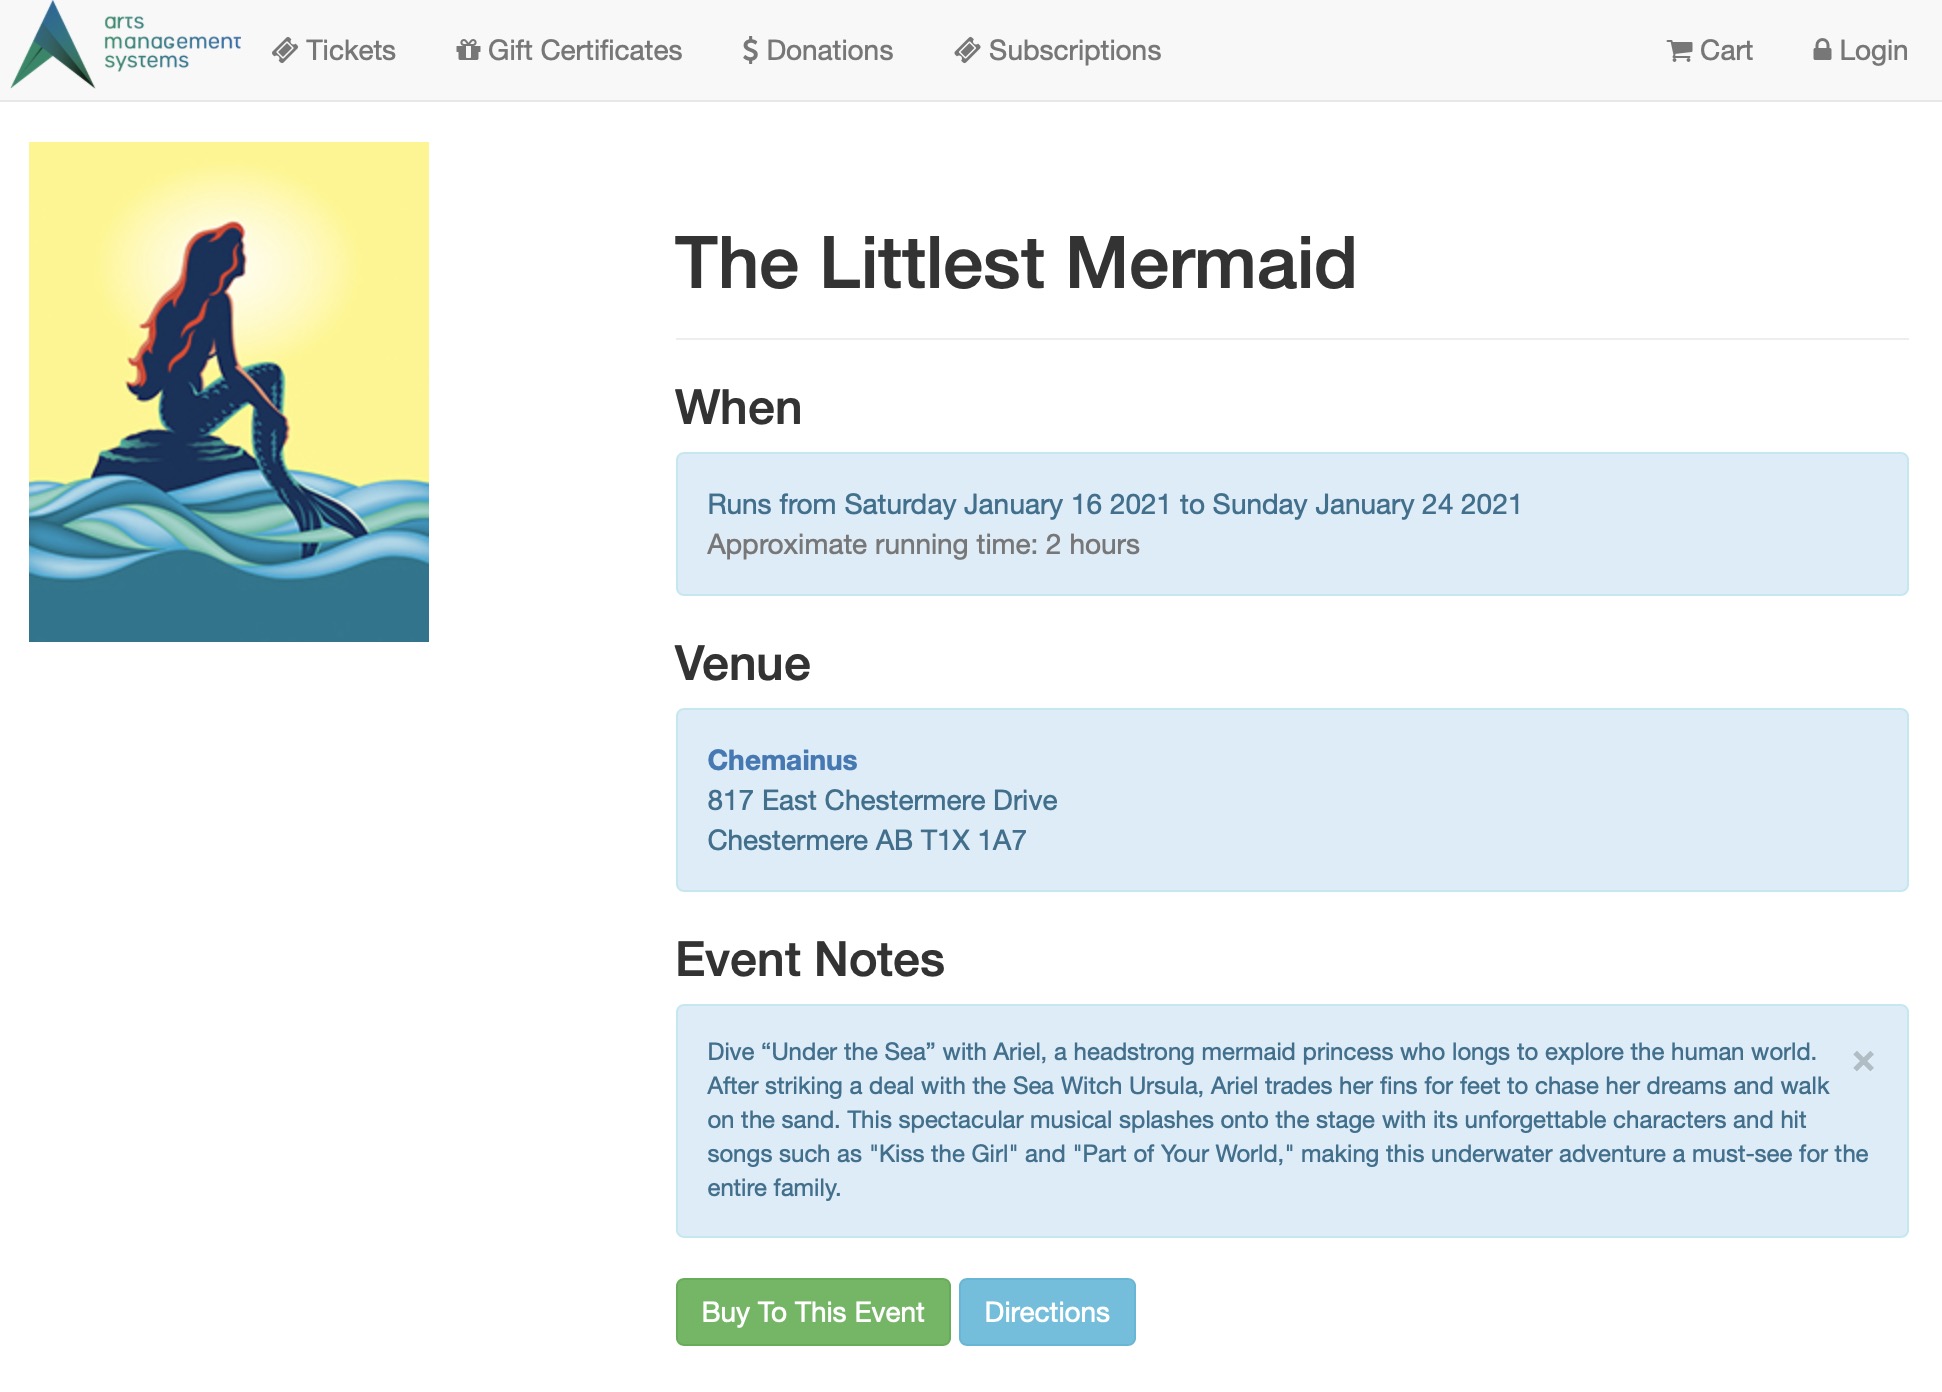 Description:
- This page provides a description of the over all event and it's details.
- This is a custom page that can be edited to reflect the details of this specific event.
- The name of the page includes a number that references the event sequence number from within Theatre Manager.
- The event name is pulled from the external name of the event from within Theatre Manager.
- The run start and end date are pulled from the performance tab within the event setup of Theatre Manager.
- The venue and it's address are pulled from the map the event was built on within Theatre Manager.
- The run time, description information and image are directly from the marketing tab of the event from within Theatre Manager.
Location:
htdocs/1/WebPagesEN/tmEvent
Able to Call Page(s):
Called By Page(s):
Page(s) Referenced:
tmEventDefault.html
Description:
- This page provides a description of the over all event and it's details.
- The event name is pulled from the external name of the event from within Theatre Manager.
- The run start and end date are pulled from the performance tab within the event setup of Theatre Manager.
- The venue and it's address are pulled from the map the event was built on within Theatre Manager.
- The run time, description information and image are directly from the marketing tab of the event from within Theatre Manager.
Location:
htdocs/1/WebPagesEN/tmEvent
Able to Call Page(s):
Called By Page(s):
- NextEventNormal.html
- PrevEventNormal.html
- rowCartCourseNewGroup.html
- rowCartFestivalNewGroup.html
- rowCartReserveNewGroup.html
- rowCartSub.html
- rowCartSubNewGroup.html
- rowCheckoutCourse.html
- rowCheckoutFestival.html
- rowCheckoutReserve.html
- rowFutureTicketHeader.html
- rowFutureTicketPrintHeader.html
- rowOldCartCourse.html
- rowOldCartFestival.html
- rowOldCartReserve.html
- rowOldCartSub.html
- rowOldCartPrintCourse.html
- rowOldCartPrintFestival.html
- rowOldCartPrintReserve.html
- rowOldCartPrintSub.html
- rowPkgTicketFestival.html
- rowPerfDetailCal.html
- rowTicketEvent.html
- rowTicketEventImage.html
- rowTicketEventName.html
- rowTicketEventNotOnSaleYet.html
- TMcart.html
- TMtickets.html
Page(s) Referenced:
tmLiveEventReminderEmailDefault.html
|
An example of the default email reminder page tmLiveEventReminderEmailDefault.html for live events is below. This can be customized for each live event if you would like. |
|
Email reminders must be enabled for the performances that you wish to send an automatic reminder for. |
tmFee Folder
Custom pages can be created for a fee by duplicating the existing default page. The word Default in the page name is then replaced with the fee sequence number. The fee number is located in the Fee # column under Setup >> System Tables >> Fee Types in Theatre Manager. If this column is not visible simply right click on any of the column headers and select Fee #. The column with then display in the list.
tmBoxOfficePolicy.html
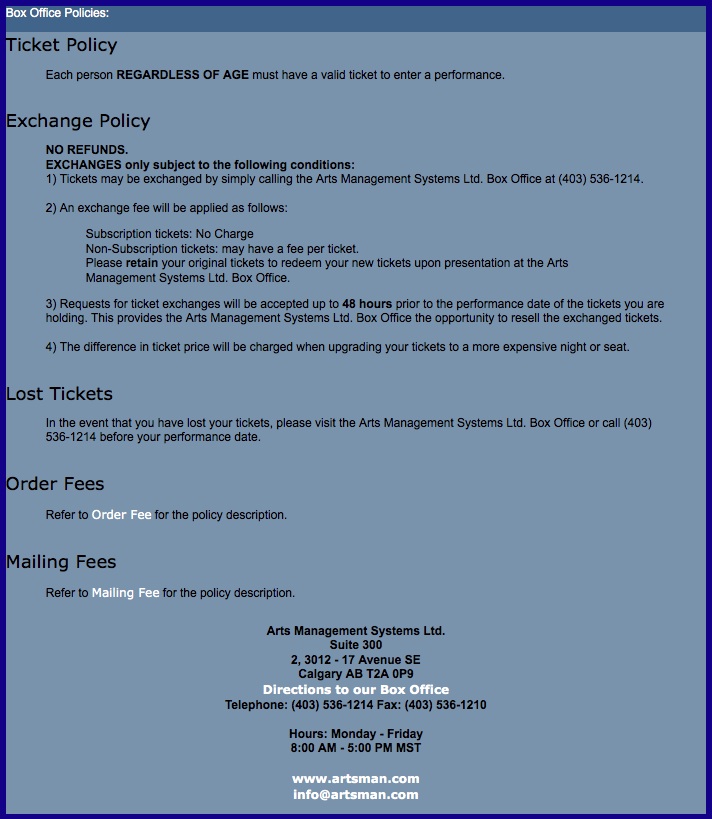
Description:
- A list of box office policies as they apply to the organization.
- This page should be edited to accurately reflect the policies of the organization.
Location:
htdocs/1/WebPagesEN/tmFee
Able to Call Page(s):
- maps.google.com
- tmOrderFeeDefault.html
- tmMailFeeDefault.html
- The companies web site as it appears in the Company tab of Setup >> Company Preferences within Theatre Manager.
Called By Page(s):
- TMcheckout.html
- TMfutureTickets.html
- TMfutureTicketsPrint.html
- tmnavButtonsFooter.html
- tmtermsandconditions.html
Page(s) Referenced:
tmFeeDefault.html
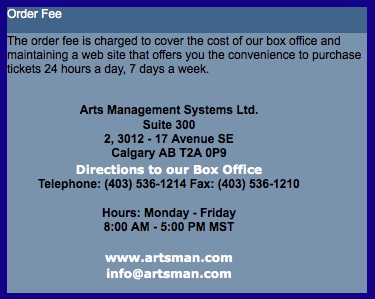
Description:
- This is the default web page called for online fees.
- The name of the fee and the description are pulled from the Fee Type from within Theatre Manager.
- Any fee created for online sales will present this page with the fee title is clicked on. This excludes mailing fees and order fees as they have their own default pages.
Location:
htdocs/1/WebPagesEN/tmFee
Able to Call Page(s):
- maps.google.com
- The companies web site as it appears in the Company tab of Setup >> Company Preferences within Theatre Manager.
Called By Page(s):
Page(s) Referenced:
tmMailFee.html
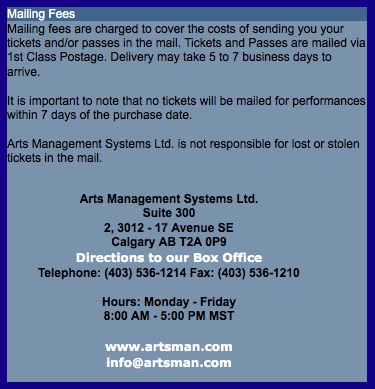
Description:
- This is the web page called for online mailing fees.
- The name of the fee and the description are hard coded into the web page.
Location:
htdocs/1/WebPagesEN/tmFee
Able to Call Page(s):
- maps.google.com
- The companies web site as it appears in the Company tab of Setup >> Company Preferences within Theatre Manager.
Called By Page(s):
Page(s) Referenced:
tmMailFeeDefault.html

Description:
- This is the default web page called for online mailing fees.
- The name of the fee and the description are hard coded into the web page.
Location:
htdocs/1/WebPagesEN/tmFee
Able to Call Page(s):
- maps.google.com
- The companies web site as it appears in the Company tab of Setup >> Company Preferences within Theatre Manager.
Called By Page(s):
Page(s) Referenced:
tmOrderFee.html

Description:
- This is the web page called for online order fees.
- The page pulls the name of the fee from within Theatre Manager.
- The description of the fee is hard coded in the web page.
Location:
htdocs/1/WebPagesEN/tmFee
Able to Call Page(s):
- maps.google.com
- The companies web site as it appears in the Company tab of Setup >> Company Preferences within Theatre Manager.
Called By Page(s):
Page(s) Referenced:
tmOrderFeeDefault.html
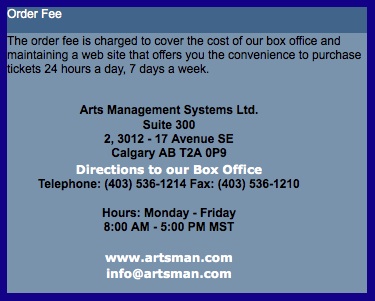
Description:
- This is the default web page called for online order fees.
- The page pulls the name of the fee from within Theatre Manager.
- The description of the fee is hard coded in the web page.
- If the existing online order fee were duplicated within Theatre Manager and a custom fee page not created, this would be the page pulled to describe the fee.
Location:
htdocs/1/WebPagesEN/tmFee
Able to Call Page(s):
- maps.google.com
- The companies web site as it appears in the Company tab of Setup >> Company Preferences within Theatre Manager.
Called By Page(s):
Page(s) Referenced:
tmPrivacyPolicy.html
Description:
- Outlines the Privacy Policy of the organization including management and handling of data.
- Used in conjunction with Limited Profiles to encourage patrons to provide full login information.
Location:
htdocs/1/WebPagesEN/tmFee/
Able to Call Page(s):
- Not Applicable
Called By Page(s):
Page(s) Referenced:
- Not Applicable
TMfutureTickets.html

Description:
- Presents a list of tickets to future events purchased online.
- Patrons can review their upcoming events
- Patrons can print their tickets or generate a PDF of the ticket if these features are enabled for the Event.
Special Variables:
- F_HTML_HISTORICAL_CART_LIST - the list of future tickets belonging to the patron
- F_HTML_HISTORICAL_CART_LIST_PRINTABLE_COUNT - the number of tickets in the list that can be printed at home
- F_HTML_HISTORICAL_CART_LIST_COUNT - the number of tickets in the list
Location:
htdocs/1/WebPagesEN
Able to Call Page(s):
- contentContact.html
- maps.google.com
- tmBoxOfficePolicy.html
- TMfutureTicketsPrint.html
- TMhome.html
- The companies web site as it appears in the Company tab of Setup >> Company Preferences within Theatre Manager.
Called By Page(s):
Page(s) Referenced:
TMfutureTicketsPrint.html

Description:
- Presents and prints a page listing tickets to future events.
- This page is printer friendly in that it does not contain the default banner or buttons and is largely black and white.
- When the "Print at home tickets" box is checked in Setup > Company Preferences > Web Options Tab, this page is the ticket that patrons can print with the bar code for admission to events. If the box is not checked, then the bar code will not present. For more information on the Web Options Tab, click here.
- The buttons which call this page (when activated in Web Options) are located on TMfutureTickets.html and TMcheckoutConfirmation.html.
Questions and Answers:
Q: Can this page be updated such that the print at home tickets will contain organization-specific or other information?
A: Yes, it can. The page itself can be updated to contain whatever text a client wishes to include. Please note that this same page is used for all events, so event-specific information or similar will print on all tickets generated from this page.
____________________________________________________________
Q: Can I add a logo to the print at home tickets?
A: Yes, you can. Simplest way is to put the logo image file inside tmGifs and then include a link on this page. The link should contain the full path to the image as appose to just a "img src="httpstmGifs/sponsorLogo.jpg" reference.. Please note that any logo included here will print on every ticket, regardless of event. So a sponsor logo for one show only would print on every show's tickets.
____________________________________________________________
Q: Can I add colour or a background colour to the tickets?
A: Yes, you can. We originally chose to have the page print in black and white to make things easier on the end user (and their toner cartridge) but if you'd like the tickets to have colour, you can edit the stylePages.css file. The areas to edit are those that end in "print," ie, backgroundprint or tablerowdetailprint.
____________________________________________________________
Q: Can I print one ticket per page?
A: Yes, you can. This page pulls ticket details from the rowFutureTicketPrintCourse.html, rowFutureTicketPrintFestival.html, rowFutureTicketPrintHeader.html and rowFutureTicketPrintReserved.html pages. These pages can be altered to fill one full page. The following web page gives examples on how to create page breaks http://www.w3.org/TR/css-print/#s.8.2.
____________________________________________________________
Q: The number under the bar code contains leading zeros, how important are these extra zeros?
A: The leading zeros are added to standardize the length of the ticket number. They are largely for esthetics. When the bar code is scanned Theatre Manager removes the leading zeros.
____________________________________________________________
Location:
htdocs/1/WebPagesEN
Able to Call Page(s):
Called By Page(s):
Page(s) Referenced:
TMattendanceCourse.html
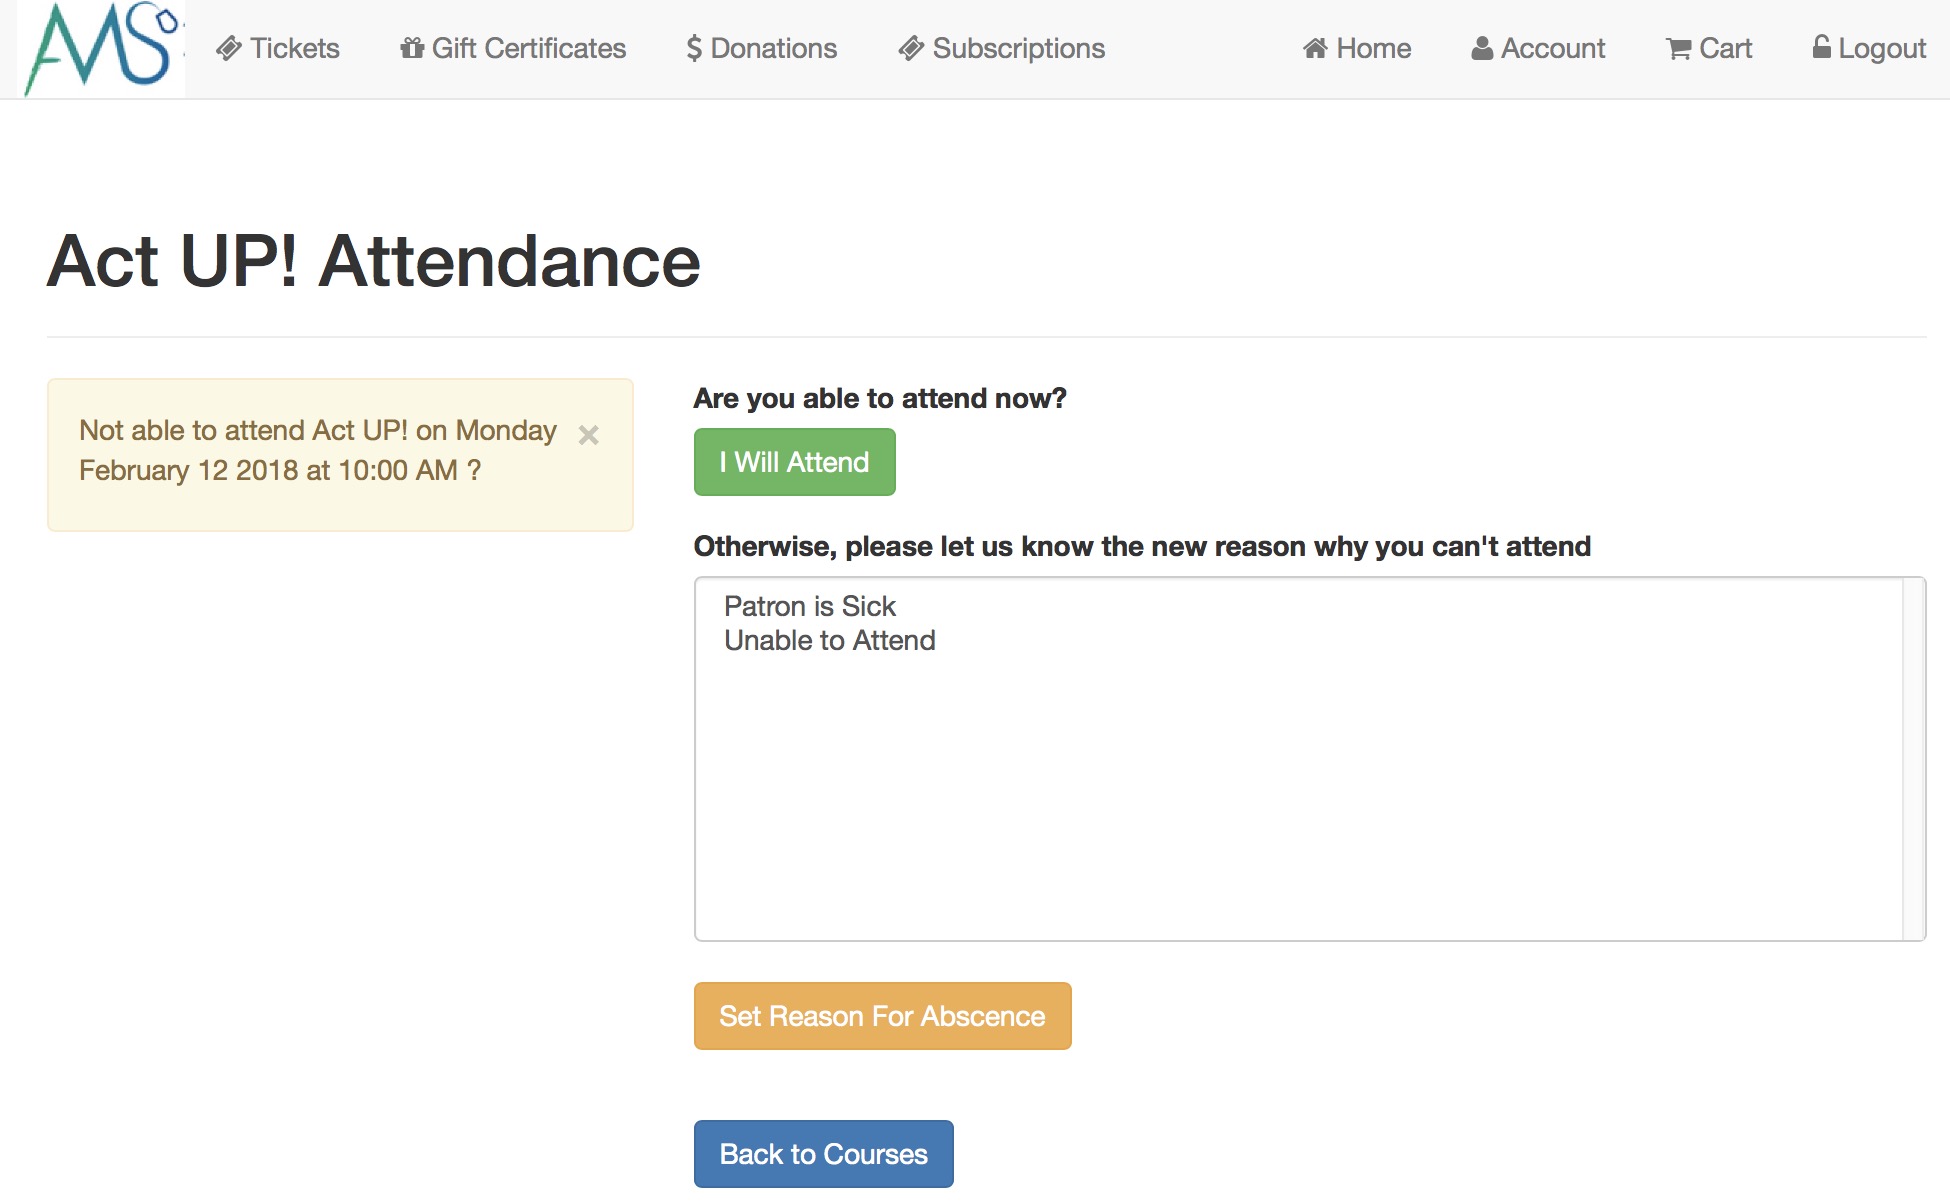
This lets the patron set their own reason for not attending a class online. The process is:
- Log in to the online sales
- Select Upcoming Courses button from the Home Page
- Find the date of the class and then click on the absent icon associated with the particular class
TMeventManagement.html
- cancelling a class
- rescheduling a class (i.e change the date)
- taking attendance
- adding a new participant to a class
- cancelling participation in the class
Permission to do these functions is determined by:
- A volunteer/staff activity is enabled for online management on code tables
- That activity is assigned to an entire event or s single performance for the staff/volunteer from one of:
- the volunteer/staff event activities window
- the volunteer detail window
- The personnel tab on the task window
- That performance or event that they are managing is in the in future
You can have a direct link to the manage events page

TMfutureCourses.html
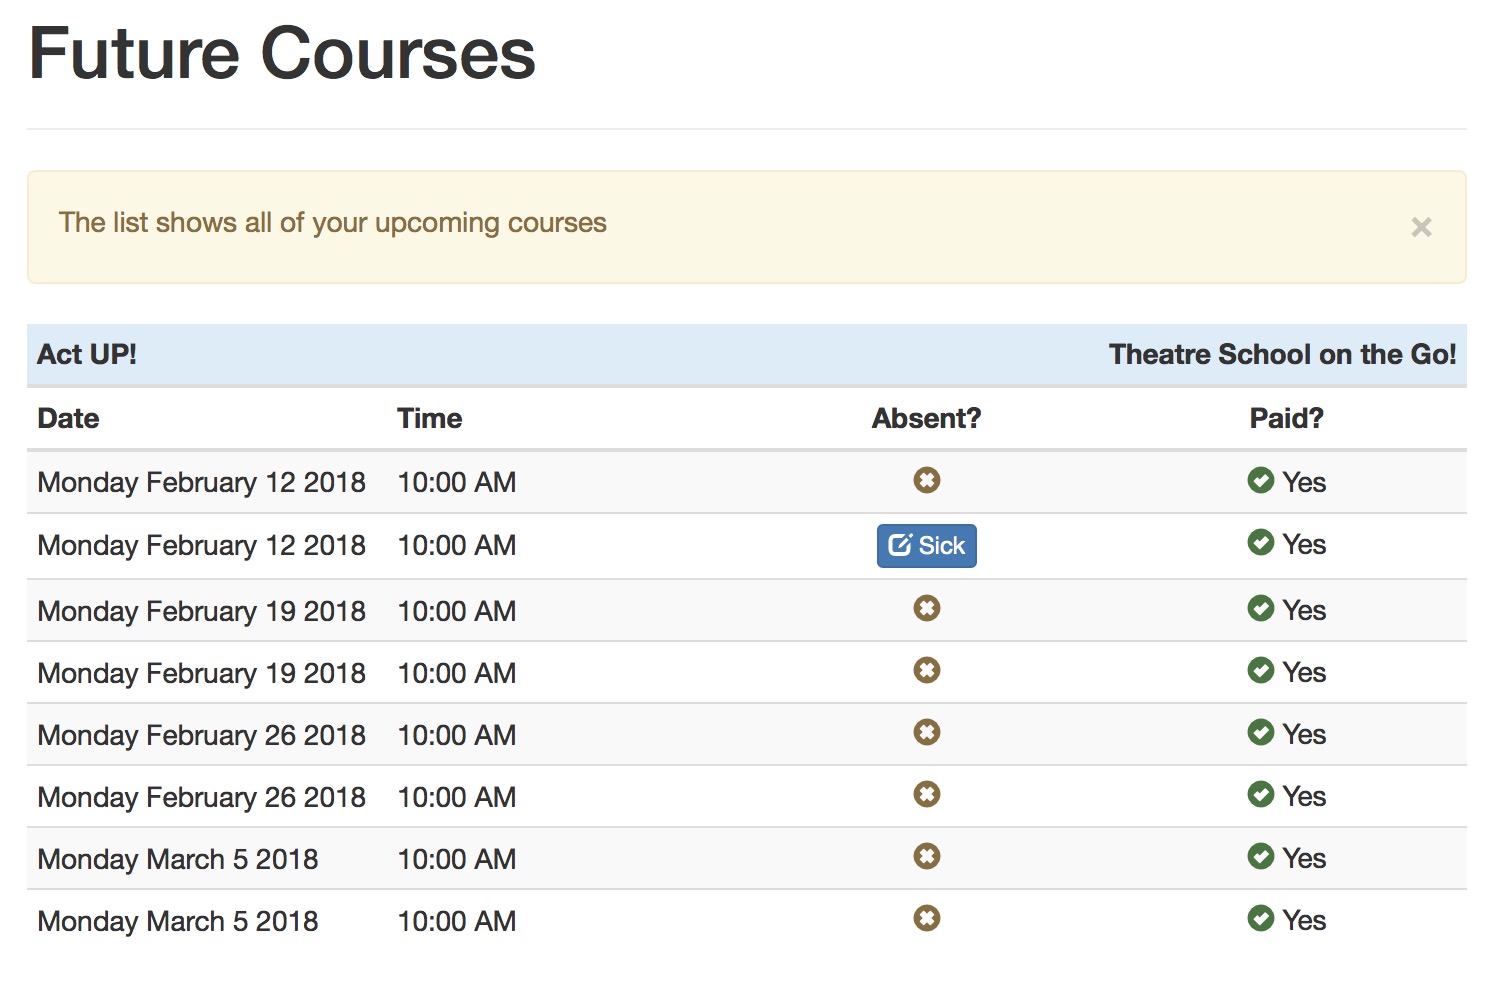
On this window, patrons can indicate if they cannot make a class (in a course). The are allowed to select an attendance reason from a limited list set up in code tables.
If the user clicks on any of the absent icons as part of the list, they can add, change or clear the attendance reason on another web page.
tmGifs Folder
background.gif

Description:
- This image is references as the background of the invoice emailed to patrons upon the completion of a sale.
Location:
htdocs/1/WebPagesEN/tmGifs
Able to Call Page(s):
- Not Applicable
Called By Page(s):
Page(s) Referenced:
- Not Applicable
backgroundBottom.gif

Description:
- This image is called as a part of the .backgroundBottom reference in the default style sheets.
Location:
htdocs/1/WebPagesEN/tmGifs
Able to Call Page(s):
- Not Applicable
Called By Page(s):
Page(s) Referenced:
- Not Applicable
backgroundSide.gif

Description:
- This image is called as a part of the .backgroundSide reference in the default style sheets.
Location:
htdocs/1/WebPagesEN/tmGifs
Able to Call Page(s):
- Not Applicable
Called By Page(s):
Page(s) Referenced:
- Not Applicable
bg_main.gif

Description:
- Can be added to the style sheets as the background image.
Location:
htdocs/1/WebPagesEN/tmGifs
Able to Call Page(s):
- Not Applicable
Called By Page(s):
- Currently Not Applicable
Page(s) Referenced:
- Not Applicable
custom.css
Individual bootstrap elements can be formatted in the custom.css page to create a unique design for the ticketing site.
____________________________________________________________
Location:
htdocs/1/WebPagesEN/tmGifs/
Able to Call Page(s):
- Not Applicable
Called By Page(s):
Page(s) Referenced:
- none
cvv2.gif
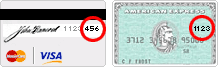
Description:
- This image contains examples of the location for the CVV, CVV2 or CID number on a credit card.
- The purpose of this image is to assist patrons during the purchase process in locating the number to complete their online sale.
- CVV, CVV2 or CID numbers are not stored within the Theatre Manager database.
Location:
htdocs/1/WebPagesEN/tmGifs
Able to Call Page(s):
- Not Applicable
Called By Page(s):
Page(s) Referenced:
- Not Applicable
handicapped.gif

Description:
- This is an image of the handicap stencil.
- The image is used to draw attention to important information for patron requiring accessibility information.
Location:
htdocs/1/WebPagesEN/tmGifs
Able to Call Page(s):
- Not Applicable
Called By Page(s):
Page(s) Referenced:
- Not Applicable
normalize.css
Description:
- Defines the standard page layout for the online sales and normalizes differences between various web browsers.
Location:
htdocs/1/WebPagesEN/tmGifs/
Able to Call Page(s):
- Not Applicable
Called By Page(s):
Page(s) Referenced:
Language Flag gifs


Description:
- There are several different Language Flags in the tmGifs folder.
- If a desired flag is current not available, additional images can be added to the folder.
- The images are used, in conjunction with buttons, to navigate back and forth between the multilingual WebPages folders.
- An organization would need to translate the WebPages folder to the desired languages before implementing this feature.
- Please see the WebPagesEN folder for additional information on setting up multilingual pages.
Location:
htdocs/1/WebPagesEN/tmGifs
Able to Call Page(s):
- Not Applicable
Called By Page(s):
Page(s) Referenced:
- Not Applicable
nav_space.gif

Description:
- This image represents a line.
Location:
htdocs/1/WebPagesEN/tmGifs
Able to Call Page(s):
- Not Applicable
Called By Page(s):
- Currently Not Applicable
Page(s) Referenced:
- Not Applicable
pageHeader.gif

Description:
- This image is the default online sales page header.
- It's pulled by the stylePages.css onto almost every page within the online sales.
- This image is often replaced with a page header that more accurately resembles the organizations main web pages.
Location:
htdocs/1/WebPagesEN/tmGifs
Able to Call Page(s):
- Not Applicable
Called By Page(s):
Page(s) Referenced:
- Not Applicable
spacer.gif
Description:
- This image represents a blank space.
- It is most often used to place a space between images on a page. An example would be the flags on the Language Flags Gif page.
Location:
htdocs/1/WebPagesEN/tmGifs
Able to Call Page(s):
- Not Applicable
Called By Page(s):
- Currently Not Applicable.
Page(s) Referenced:
- Not Applicable
step1.gif

Description:
- This image is used to indicate a first step.
- The images is designed to draw notice to fields that require the patrons attention.
Location:
htdocs/1/WebPagesEN/tmGifs
Able to Call Page(s):
- Not Applicable
Called By Page(s):
- TMsubscriptionMapDefault.html
- TMsubscriptionMapDefaultf.html
- TMsubscriptionsMapDefaultf.html
- TMticketsSection_MapDefault.html
- TMticketsSection_MapDefaultc.html
- TMticketsSection_MapDefaultf.html
Page(s) Referenced:
- Not Applicable
step2.gif

Description:
- This image is used to indicate a second step.
- The images is designed to draw notice to fields that require the patrons attention.
Location:
htdocs/1/WebPagesEN/tmGifs
Able to Call Page(s):
- Not Applicable
Called By Page(s):
- TMsubscriptionMapDefault.html
- TMsubscriptionMapDefaultf.html
- TMsubscriptionsMapDefaultf.html
- TMticketsSection_MapDefault.html
- TMticketsSection_MapDefaultc.html
- TMticketsSection_MapDefaultf.html
Page(s) Referenced:
- Not Applicable
step3.gif

Description:
- This image is used to indicate the third step.
- The images is designed to draw notice to fields that require the patrons attention.
Location:
htdocs/1/WebPagesEN/tmGifs
Able to Call Page(s):
- Not Applicable
Called By Page(s):
- TMsubscriptionMapDefault.html
- TMsubscriptionMapDefaultf.html
- TMsubscriptionsMapDefaultf.html
- TMticketsSection_MapDefault.html
Page(s) Referenced:
- Not Applicable
step4.gif

Description:
- This image is used to indicate the fourth step.
- The images is designed to draw notice to fields that require the patrons attention.
Location:
htdocs/1/WebPagesEN/tmGifs
Able to Call Page(s):
- Not Applicable
Called By Page(s):
Page(s) Referenced:
- Not Applicable
stop.html

Description:
- This image represents a stop sign.
- The image is used to draw attention to important information that should be read prior to navigating away from the current page.
Location:
htdocs/1/WebPagesEN/tmGifs
Able to Call Page(s):
- Not Applicable
Called By Page(s):
Page(s) Referenced:
- Not Applicable
styleButtons.css
NOTE: NO LONGER USED WITH THE RESPONSIVE PAGE DESIGN -- refer to custom.css instead.
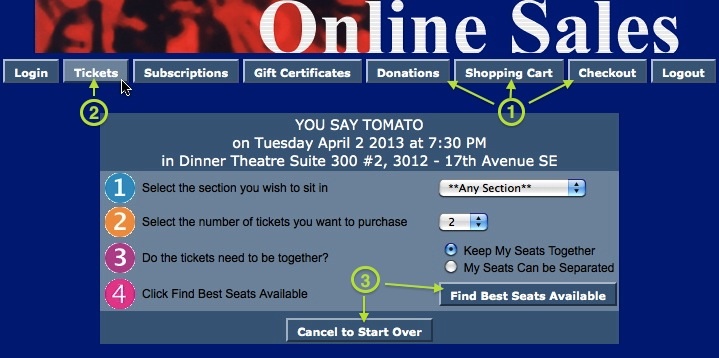
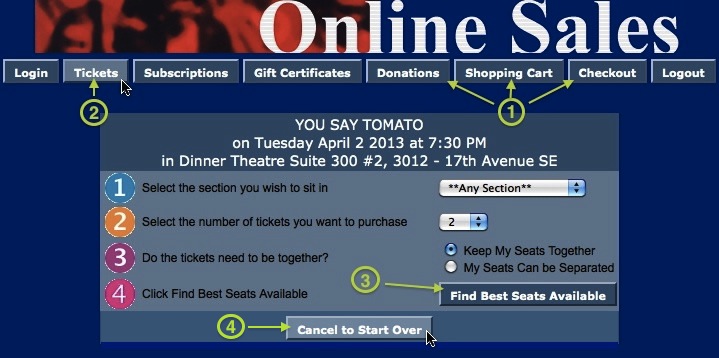
Description:
- This stylesheet contains the styles that are used for the buttons on the various web pages within the Web Sales Module that have buttons.
- Stylesheets (also called Cascading Style Sheets hence "css") are used to change the look of web pages. By having them you can set text, buttons, hyperlinks and so forth to different colors, size, etc. They are called in with a <link rel="stylesheet" href="" type="text/css"> where within the double quotes would be the path of the stylesheet.
- The different styles are called from source code an changes to the text, hyperlinks, etc of a web page can be made simply by editing the stylesheet instead of manually changing each page individually.
- The look of the buttons can be changed by editing the fields within the style sheet. For example, if you don't like the light blue halo around the navigation buttons across the top of the page you can change the colour by editing the board color in the .button style.
- Not Applicable
| # | Item | Description |
| 1 | .button | References the buttons across the top of the online sales window. |
| 2 | .buttonover | The result of a mouse hovers over the buttons across the top of the online sales window. |
| 3 | .new | The buttons within the tables in the online sales window. |
| 4 | newover | The change in a button within the the tables when an mouse if hovered over it. |
Questions and Answers:
Q: Why are the navigation buttons appearing in deep red on Internet Explorer, but are normal on other browsers?
A: When the line below is uncommented in the style sheets the buttons appear a graded red in an Internet Explorer browser.
filter:progid:DXiMageTransform.microsoft.Gradient(GradientType=0,StartColorStr='#ff800000',EndColorStr='#ff800000');
For details on commenting out the crimson filter click here.
____________________________________________________________
Q: I do most of my web development testing with Safari or Chrome as a web browser, and eventually I get around to checking things with Internet Explorer. What I am seeing with our ticketing site is two vastly different color schemes. Is there a separate set of .css files or something that pertains specifically to Internet Explorer, or are they just different from the Mac browsers?
A: In part, this has to do with the color calibration of the monitor the patron is using to view your site. You can change the color calibration for your monitors - which is especially easy on a Mac. While Mac has color correction set up for your monitor, your browser may or may not use color correction for web content/images depending on its setup. Your color picker reports what your Operating System thinks it is rendering. Another browser may report something else.
Most Mac browsers (Safari, Firefox) use color management to display what is theoretically True Color. This means that it will read the colors that are embedded in original web page or image, match them to the color calibration of your monitor and display them appropriately. Unmanaged browsers (such as Internet Explorer) do not read the embedded color coding and apply colors according to a default set in a color palette - which may or may not match what the original web page designer intended.
So while this is not a solution, it is an explanation. The images and web page elements are being sent identically to all browsers. The various browsers, however, are interpreting the color palette differently. Safari and Firefox offer color calibration to your monitor. Other browsers may not.
____________________________________________________________
Location:
htdocs/1/WebPagesEN/tmGifs/
Able to Call Page(s):
Called By Page(s):
Page(s) Referenced:
stylePages.css
NOTE: NO LONGER USED WITH THE RESPONSIVE PAGE DESIGN -- refer to custom.css instead.

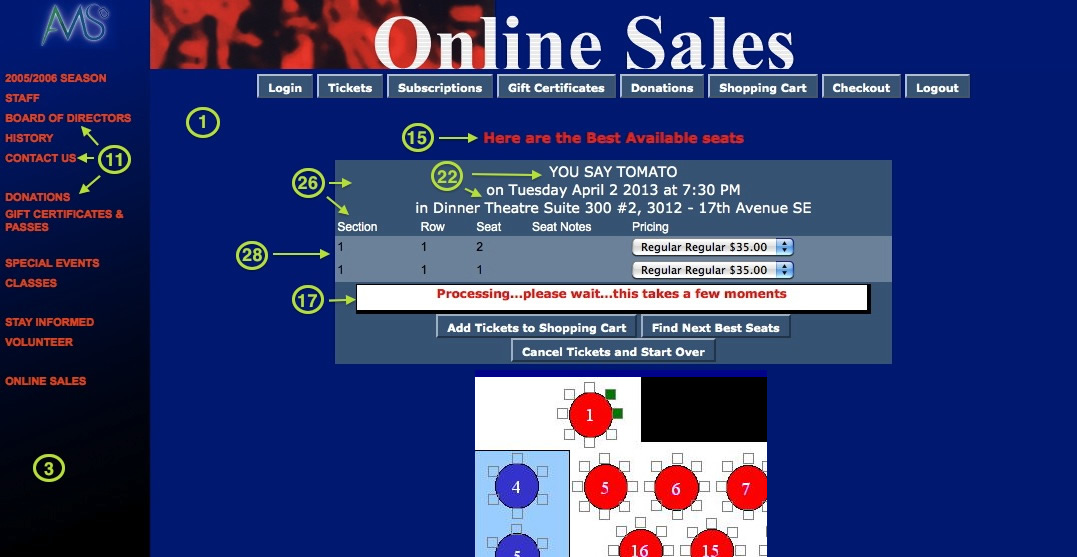
Description:
- Stylesheets (also called Cascading Style Sheets hence "css") are used to change the look of web pages. They can set text, buttons, hyperlinks and so forth to different colors, size, etc. The usefulness is that they are called in with a <link rel="stylesheet" href="" type="text/css"> where within the double quotes would be the path of the stylesheet. The different styles are called using source code and you can change the text, hyperlinks, etc of a web page simply by editing the stylesheet instead of manually changing each page individually.
- This stylesheet contains the design for all pages within the Web Sales module. The styles in this css page changes the properties of text and hyperlinks to different font sizes, colors, etc.
- You can change how items look by changing the fields within this page. For example, if you don't like a text color simple change the color field within the appropriate style.
- To comment out information within the style sheet add a /* at the beginning of the text and */ at the end of the text.
- The references below containing the word Print belong to web pages where the page name ends in the word Print. These pages are designed to be printer friendly versions of the original page. The references are also used when any page is printed. Some organizations customize their web pages with colours schemes that are not printer friendly. These references allows for a colour combination that will be visible when pages is printed.
- Not Applicable
| # | Item | Description |
| 1 | .background | Indicates the colour, image and attributes to be used for the background in most web pages within the online sales. |
| 2 | .backgroundPrint | The colour to be used as the background for print pages from within the web sales. |
| 3 | .backgroundSide | The colour used for the tmnavSide.htmlpage. When using frames, this attribute can be edited to meet the design requirements for the side panels. |
| 4 | .backgroundSidePrint | The colour of the side panels, when printed, while using frames within the web pages. |
| 5 | .limitedprofilelogin | Allows for the over all customization of the TMpatronLimitedProfile.html page. |
| 6 | .limitedprofileentry | The customization of the entry fields within the TMpatronLimitedProfile.html page. |
| 7 | .main | A text style mainly included within <P> tags in the web pages. Sets the font size and colour of text within a web page. |
| 8 | .mainPrint | The text colour for print pages from within the web sales. |
| 9 | .missingfield | The font used for fields where information must be entered to meet the mandatory data requirements within the Theatre Manager database. |
| 10 | .title | The header of the page that often appears at the top of the browser window. |
| 11 | .titlePrint | Header for print pages from within the web sales. |
| 12 | a.navlink | Attributes for the navigation links within the tmnavSide.html pages. It is also used in the TMattendancePalm.htmlpage. |
| 13 | a.navlinkPrint | The attributes of a.navlink when printed. |
| 14 | a.navlink:hover | The result of a mouse moving over a hyperlink in the tmnavSide.html page. |
| 15 | a.navlinkPrint:hover | The attributes of a.navlink:hover when a mouse is on top of it at the time the page is printed. |
| 16 | .message | The text pulled from the TMError.txt page. This text is found across the top of the web page. |
| 17 | .messagePrint | The attributes of .message when printed. |
| 18 | .waitmessage | This message appears on web pages where it make take a moment for the request to return with information from the database. |
| 19 | a.link | An <A HREF> style for links within the web pages. |
| 20 | a.linkPrint | The attributes of a.link when printed. |
| 21 | a.link:hover | The result of a mouse moving over the a.link hyperlink in the web pages. |
| 22 | a.linkPrint:hover | The attributes of a.link:hover when a mouse is on top of it at the time the page is printed. |
| 23 | .playinfo | The text within the season or ticket sales process that describes the performance details. |
| 24 | .playinfoPrint | The attributes of a.playinfo when printed. |
| 25 | .backgroundBottom | The colour used for the tmnavBottom.htmlpage. When using frames, this attribute can be edited to meet the design requirements for the bottom panels. |
| 26 | .backgroundBottomPrint | The colour of the bottom panels, when printed, while using frames within the web pages. |
| 27 | .tablerowheader | Descriptive information within the tables of the web pages. |
| 28 | .tablerowheaderprint | The attributes of .tablerowheader when printed. |
| 29 | .tablerowdetail | Active information within the tables of the web pages. |
| 30 | .tablerowdetailprint | The attributes of .tablerowdetail when printed. |
| # | Item | Description |
| 31 | .calendarheader | For Future Implementation. |
| 32 | .calendarcellheadercurrentmonth | For Future Implementation. |
| 33 | .calendcellheadercurrentdate | For Future Implementation. |
| 34 | .calendarcellheaderothermonth | For Future Implementation. |
| 35 | .calendarcellheaderotherdate | For Future Implementation. |
| 36 | table.inner | For Future Implementation. |
| 37 | table.outer | For Future Implementation. |
| 38 | table.calendar | For Future Implementation. |
| 39 | table.calendar a.link | For Future Implementation. |
| 40 | table.calendar a.link:hover | For Future Implementation. |
| 41 | .calendar2 | For Future Implementation. |
| 42 | table.calendar tr | For Future Implementation. |
| 43 | table.calendar td | For Future Implementation. |
| 44 | .calendar2 | For Future Implementation. |
| 45 | .table.calendarother | For Future Implementation. |
| 46 | table.calendarother a.link | For Future Implementation. |
| 47 | table.calendarother a.link:hover | For Future Implementation. |
| 48 | .calendar2 | For Future Implementation. |
| 49 | table.calendarother td | For Future Implementation. |
| 50 | table.datenumber | For Future Implementation. |
| 51 | table.datenumber tr | For Future Implementation. |
| 52 | table.datenumber td | For Future Implementation. |
| 53 | table.datenumber td#green | For Future Implementation. |
| 54 | table.datenumberother | For Future Implementation. |
| 55 | table.datenumberother tr | For Future Implementation. |
| 56 | table.datenumberother td | For Future Implementation. |
| 57 | table.datenumberother td#noborder | For Future Implementation. |
Location:
WebPagesEN/tmGifs/
Able to Call Page(s):
Called By Page(s):
Page(s) Referenced:
tickettrove.jpg

Description:
- This image is the Arts Management Systems TicketTrove application logo.
Location:
htdocs/1/WebPagesEN/tmGifs
Able to Call Page(s):
- Not Applicable
Called By Page(s):
Page(s) Referenced:
- Not Applicable
tmCompanyLogo.gif

Description:
- This image is of the Arts Management Systems company logo.
Location:
htdocs/1/WebPagesEN/tmGifs
Able to Call Page(s):
- Not Applicable
Called By Page(s):
Page(s) Referenced:
- Not Applicable
tmName.gif

Description:
- This image contains the words "Theatre Manager".
- It's designed to be used in conjunction with the tmPoweredBy.gif.
- The Letter of Confirmation agreement states "As part of the license, you agree to place on a static web page on your main site, the phrase "Powered By Theatre Manager" and that the phrase be linked back to the ArtsMan home page at http://www.artsman.com.".
Location:
htdocs/1/WebPagesEN/tmGifs
Able to Call Page(s):
- Not Applicable
Called By Page(s):
Page(s) Referenced:
- Not Applicable
tmPoweredBy.gif

Description:
- This image contains the words "powered by".
- It's designed to be used in conjunction with the tmName.gif.
- The Letter of Confirmation agreement states "As part of the license, you agree to place on a static web page on your main site, the phrase "Powered By Theatre Manager" and that the phrase be linked back to the ArtsMan home page at http://www.artsman.com.".
Location:
htdocs/1/WebPagesEN/tmGifs
Able to Call Page(s):
- Not Applicable
Called By Page(s):
Page(s) Referenced:
- Not Applicable
TMhome.html
Description:
This is the home page to the online sales. It can be the first page patrons see after the login to the online sales. It is designed to provide all options available to the patron for managing their online account, such as:
- My Patron Services
- Tickets for upcoming performances - which is a list of all tickets that the patron has purchased for events in the future
- Account Management
-
Contact Us
Location:
htdocs/1/WebPagesEN
Able to Call Page(s):
Called By Page(s):
- TMcoupon.html
- TMdonation.html
- TMdonationmonthly.html
- TMlogin.html
- TMoldCartDetails.html
- TMpatronUpdate.html
- TMpass.html
- Any page containing the navigation buttons after the Patron has logged into the online sales.
Page(s) Referenced:
tmindex.html
Description:
- This page integrates frames with the online web sales.
- The Index.html page needs to be edited in order to reference the online sales using frames.
Location:
htdocs/1/WebPagesEN
Able to Call Page(s):
- Not Applicable.
Called By Page(s):
Page(s) Referenced:
TMlogin.html
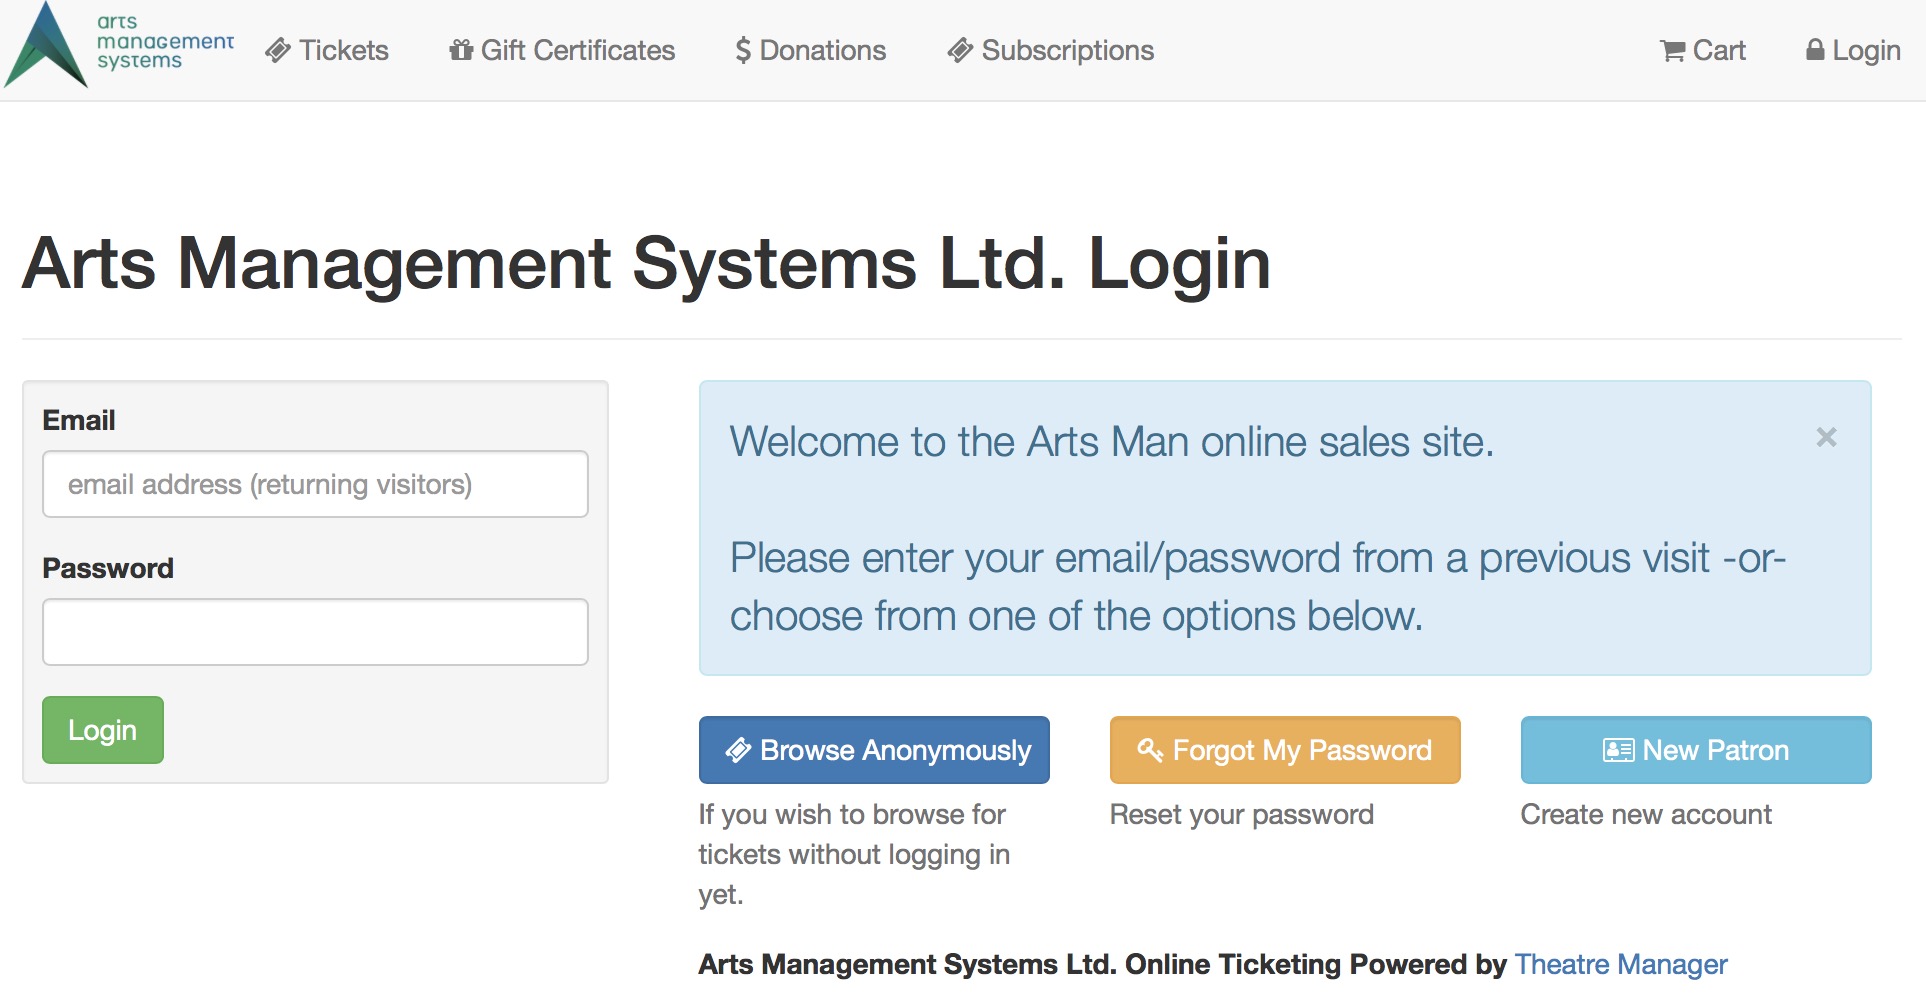
Description:
- This page allows patrons to login to the online sales in order to complete a transaction within Theatre Manager.
- By logging in to the online sales Theatre Manager can attach the patrons purchase to their patron record within the database.
- This is the mandatory initial page for all online sales when Allow Anonymous Login is not selected in the Company Preferences Web Options tab
- The Allow Anonymous Login, when selected in the Company Preferences Web Options tab
- causes the Browse Anonymously button to appear on the login page, which the patron uses to search for events without identifying themselves -and-
- allows a web developer to redirect the patron using specific URLs to almost any starting page.
|
The Forgot my password button takes the patron to a web page where they can request their password to be re-sent to them.
Alternatively, if the patron is unable to do this for any reason, the box office can initiate a password reset from the patron window |
Location:
htdocs/1/WebPagesEN
Able to Call Page(s):
Called By Page(s):
- tmLoginForm.html
- TMloginSelectPatron.html
- TMpatronLimitedProfile.html
- TMpatronNew.html
- TMpatronUpdate.html
- TMsysCookiesDisabled.html
- Any page containing the navigation buttons.
Page(s) Referenced:
TMloginSelectPatron.html
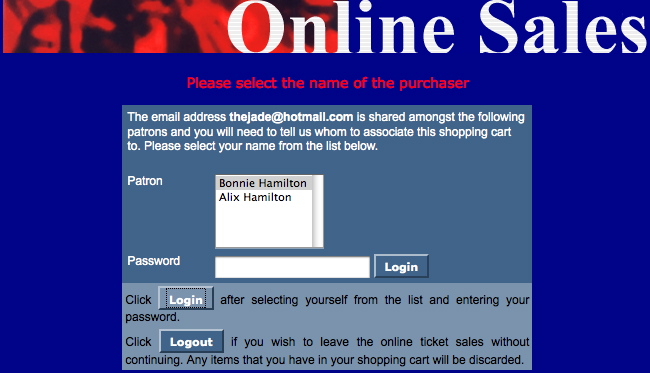
Description:
- Allows the patron the option to choose which member in the household this ticket order should belong to.
Location:
htdocs/1/WebPagesEN
Able to Call Page(s):
Called By Page(s):
Page(s) Referenced:
TMlogoff.html
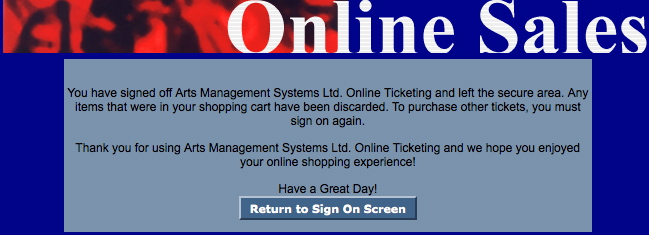
Description:
- The page presenting when a patron click the logout button in Theatre Manager.
- This page acts as a confirmation the patron has been logged out of the online sales.
Location:
htdocs/1/WebPagesEN
Able to Call Page(s):
Called By Page(s):
- tmPackageDefault.html
- TMlogoffOpenCart.html
- Any page containing the navigation buttons.
Page(s) Referenced:
TMlogoffOpenCart.html
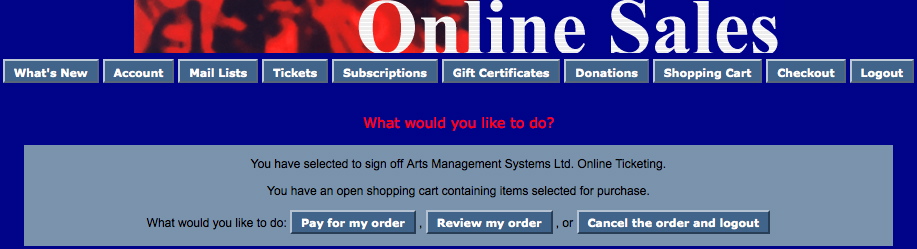
Description:
- This page acts as a warning to a patron logging out of the online sales when they currently have items within their online shopping cart.
Location:
htdocs/1/WebPagesEN
Able to Call Page(s):
Called By Page(s):
- Any page containing the navigation buttons but only when the patron attempts to log out and their online cart has unreleased items.
Page(s) Referenced:
TMmaillist.html
- Allows patrons who have logged into the online sales to subscribe and unsubscripe to their desired mail lists and provide explicit opt-in and opt-out for correspondence from the venue (per CRTC anti spam legislation)
- Only those Mail Lists that have the Allow Patrons to subscribe/unsubscribe via the internet box checked within the Mail List setup will be available in the lists.
- The Patron can select a Mail Lists from the Subscribe to a Mail List column and use the "Subscribe to selected Mail List" button to move their name onto the Mail List within the Theatre Manager database.
- The patron can select a Mail List in the Unsubscribe from a Mail List column and click the "Remove from selected Mail List" button to remove their name from the Mail list with the Theatre Manager database.
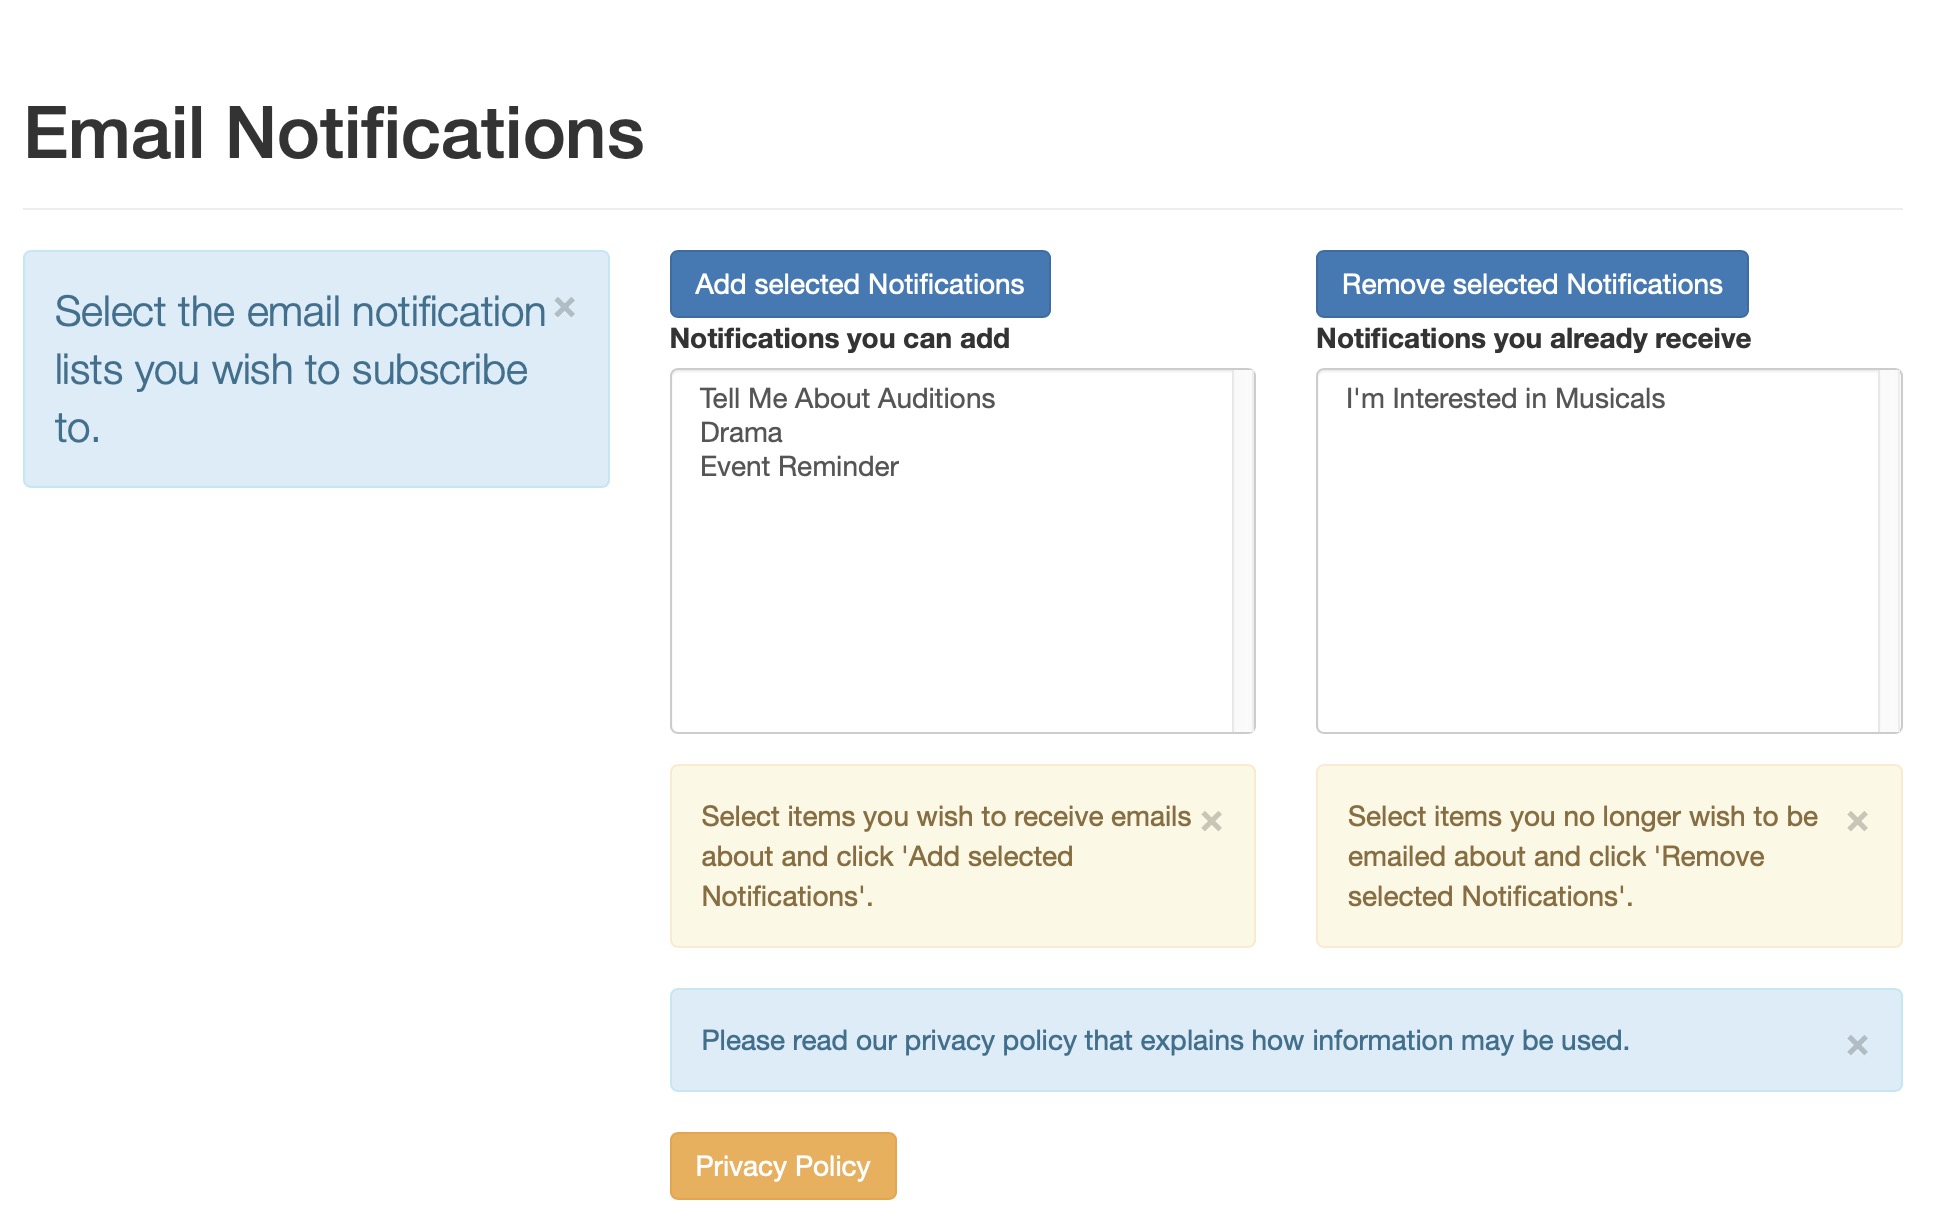
Location:
htdocs/1/WebPagesEN
Able to Call Page(s):
- Not Applicable.
Called By Page(s):
- Any page containing the navigation buttons after the Patron has logged into the online sales.
- The Home page
- The patron insert and patron update pages
- contentMailList.html
- tmnavButtonsFooter.html
Page(s) Referenced:
TMmaillistDisallow.html
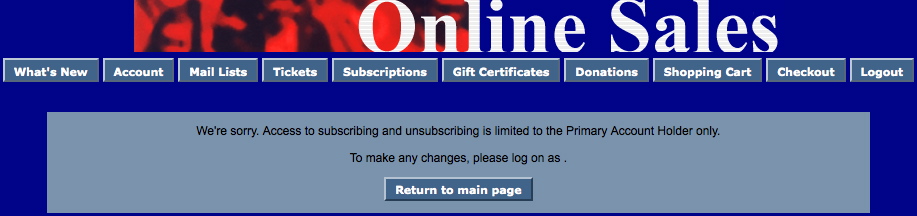
Description:
- This page is presented when a secondary member of a household attempts to remove a Mail List that is set to only select primary members of the household in the Theatre Manager database.
- The Patron needs to login to the online sales as the primary patron in the household in order to remove the Mail List.
Location:
htdocs/1/WebPagesEN
Able to Call Page(s):
Called By Page(s):
Page(s) Referenced:
TMmaillistQuickAdd.html
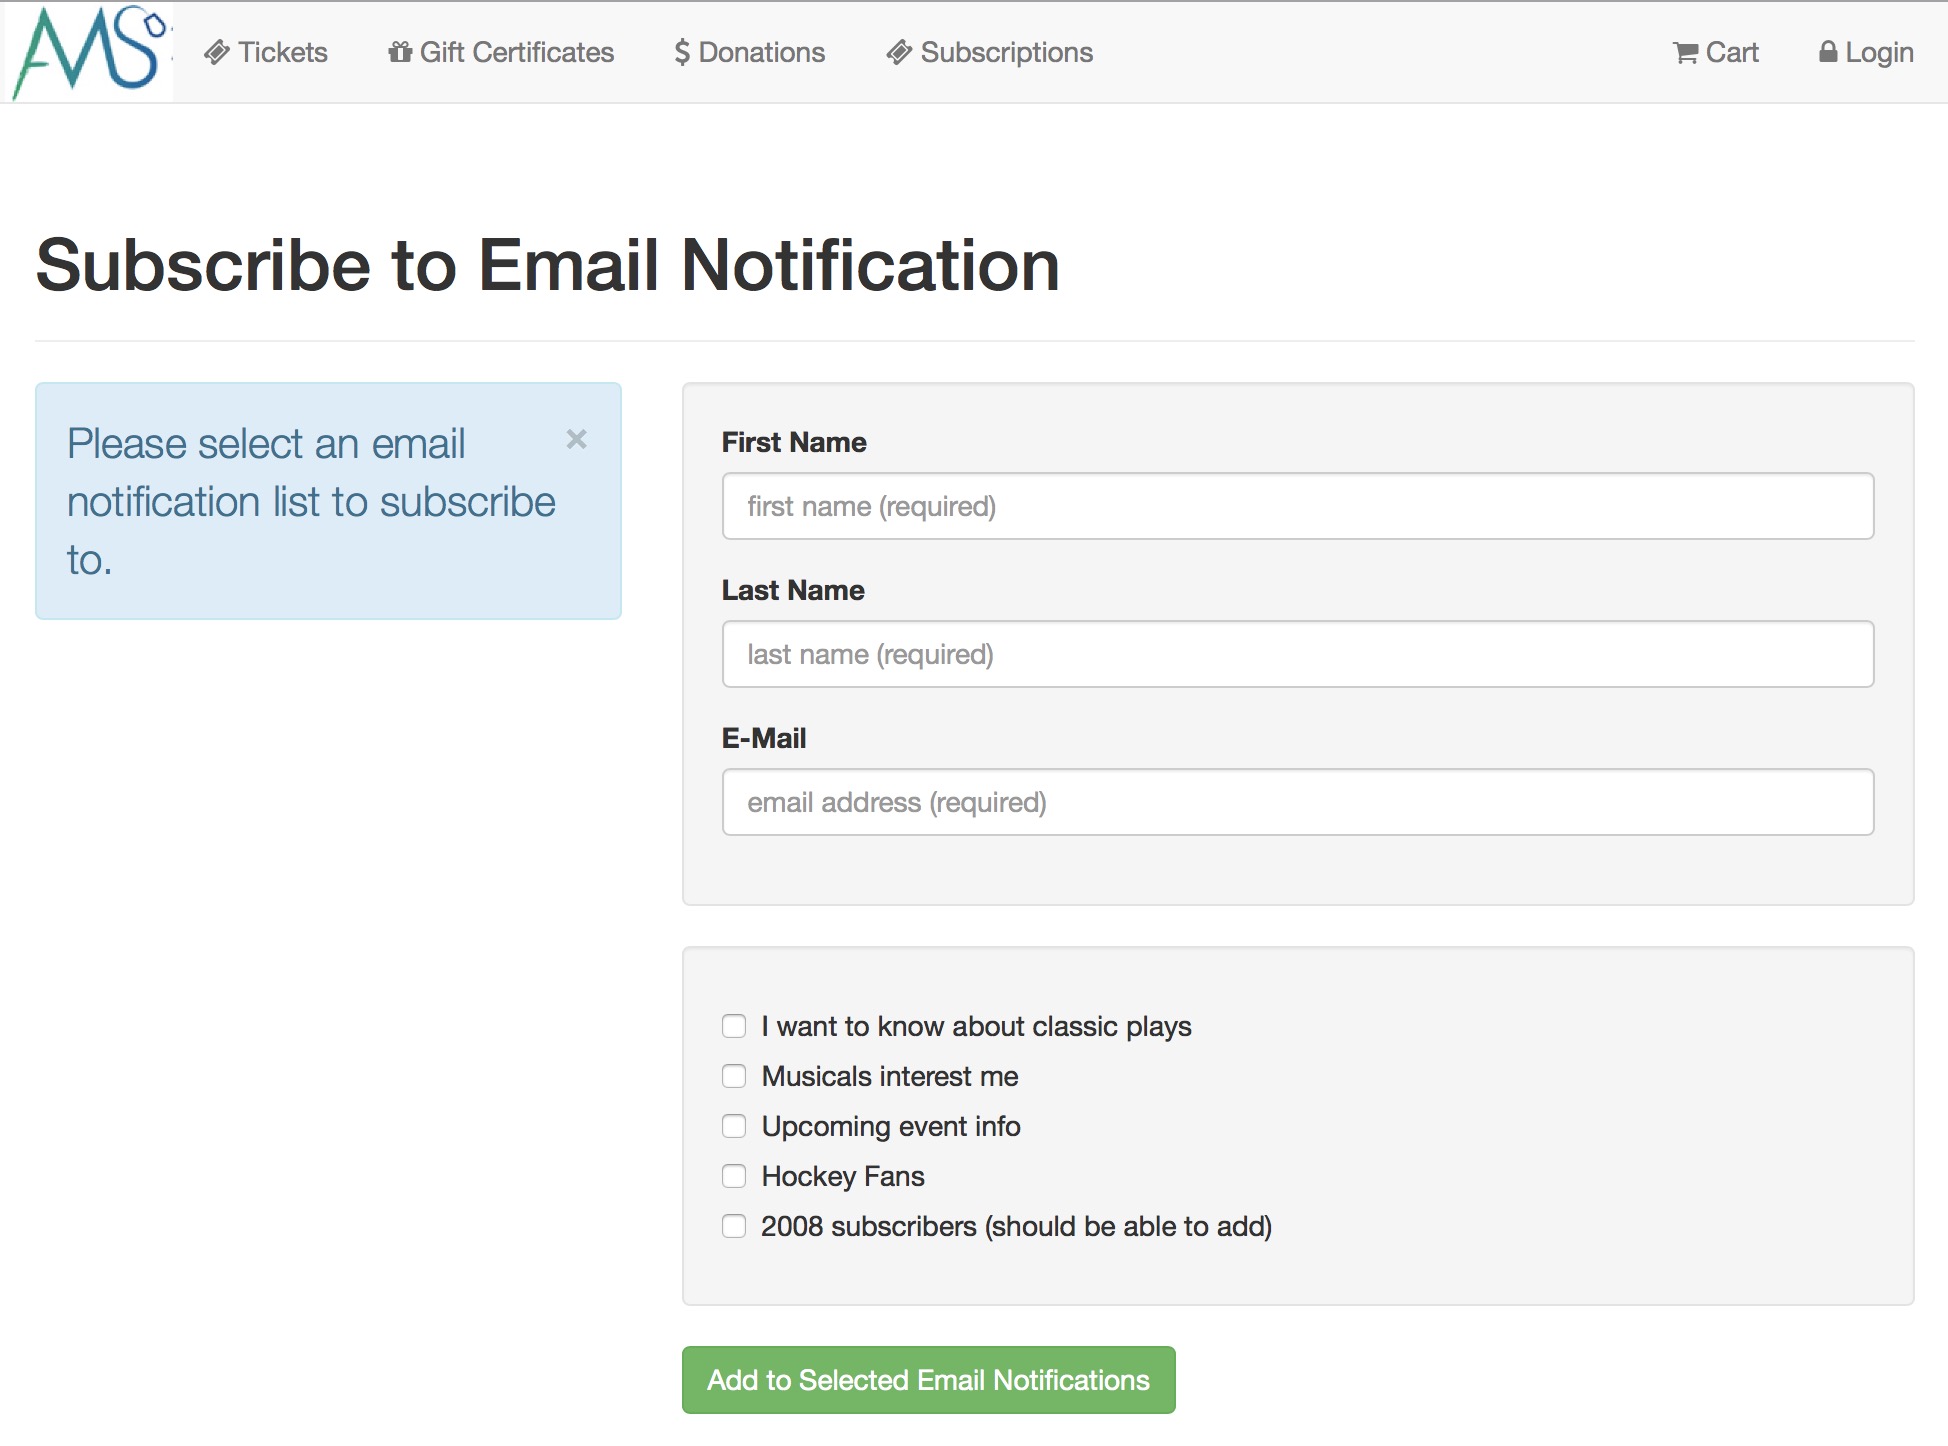
Description:
- Populates a list with check boxes of Mail Lists for the patron to indicate those they wish to sign up for.
- If the patron is not signed in to the online sale, fields will be available for the patrons first name, last name and email address.
Questions and Answers:
Q: How can the mail lists that appear be altered.
A: The mail lists that display in the TMmaillistQuickAdd.html page are hard coded onto the page. The page can be edited to include as many mail list are are needed. In order to add a mail list the mail list sequence number is required. Please see the following link on how to find the mail list sequence number.
____________________________________________________________
Location:
htdocs/1/WebPagesEN
Able to Call Page(s):
- Not Applicable.
Called By Page(s):
Page(s) Referenced:
TMmaillistUnverifiedEmail.html
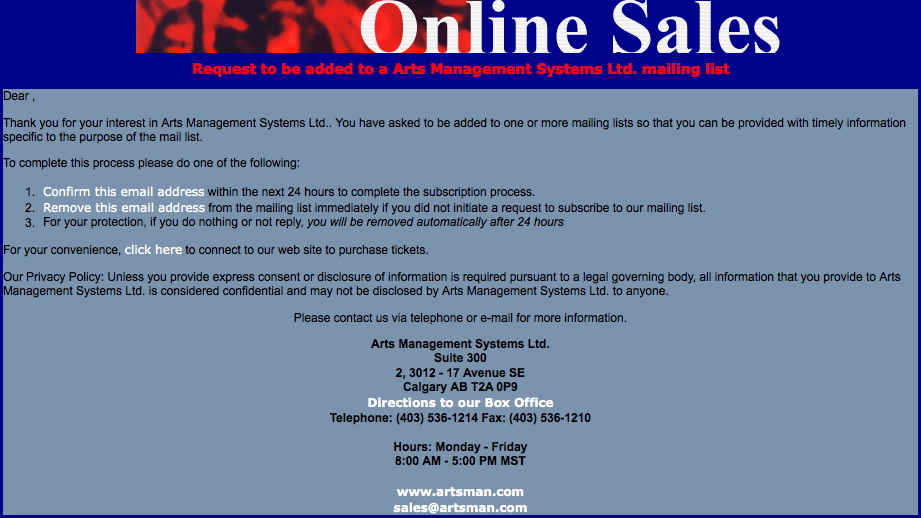
Description:
- The confirmation page that appears after a patron adds themselves to a Mail List using the Quick Add feature.
Location:
htdocs/1/WebPagesEN
Able to Call Page(s):
- maps.google.com
- TMhome.html
- TMmaillistVerify.html
- TMtickets.html
- The companies web site as it appears in the Company tab of Setup >> Company Preferences within Theatre Manager.
Called By Page(s):
Page(s) Referenced:
TMmaillistVerify.html
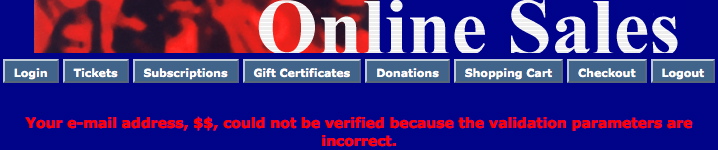
Description:
- This page is displayed when the Confirm This Email Address link from the TMmaillistUnverifiedEmail.html page is clicked and the patron has not entered an email address.
Location:
htdocs/1/WebPagesEN
Able to Call Page(s):
- Not Applicable
Called By Page(s):
Page(s) Referenced:
tmMaps Folder
Custom pages can be created based on the venue by duplicating the existing default page. The word Default in the page name is then replaced with the map number. The map number is located in the Map # column under Setup >> Venue Maps in Theatre Manager.
There are three TMticketSection_MapDefault pages that look very similar. The page ending in a C is for courses. The page ending in a F is for festival seating or general admission performances. The page without an additional letter is for reserved seating performances. A custom page can be created for these three types of ticket sale and made specific to the venue.
TMsubscriptionMapDefault.html
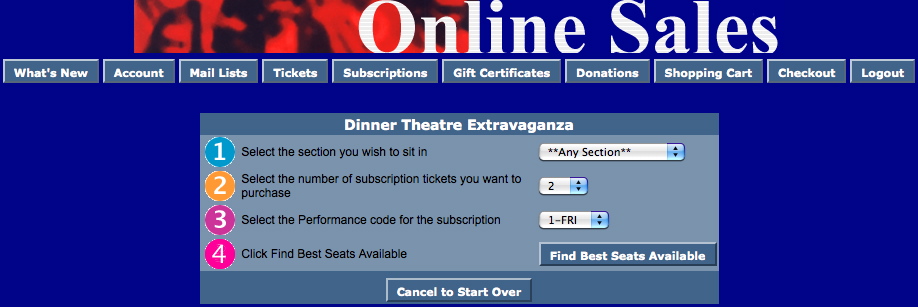
Description:
- This page allows the patron to choose the subscription details they would prefer for Reserved seating events.
- Step 1 is a drop down of seating sections pulled from the Best Seat Settings tab from within the Map in Theatre Manager. Depending on the seat configuration of your venue (in particular dinner theatre seating), your Seat Name file may have been setup for a two-pass approach to Best Available seating. For more information on the two-pass system click here.
- Step 2 allows the patron to choose the number of subscriptions they wish to purchase. The quantity is limited to the number of tickets allowed to be sold per Order within Theatre Manager.
- Step 3 indicates the day of the week the patron wishes to attend. This drop down is populated when there is more then one performance date within the season package.
- Step 4 confirms the options as they are indicated about and takes the patron to the TMsubscriptionPriceMapDefault.html page.
Location:
htdocs/1/WebPagesEN/tmMaps
Able to Call Page(s):
Called By Page(s):
Page(s) Referenced:
TMsubscriptionMapDefaultf.html

Description:
- For Future Implementation
- This page allows the patron to choose the subscription details they would prefer for Festival Seating/General Admission events.
- Step 1 allows the patron to choose the number of subscriptions they wish to purchase. The quantity is limited to the number of tickets allowed to be sold per Order within Theatre Manager.
- Step 2 indicates the day of the week the patron wishes to attend. This drop down is populated when there is more then one performance date within the season package.
- Step 3 confirms the options as they are indicated about and takes the patron to the TMsubscriptionPriceMapDefault.html page.
Location:
htdocs/1/WebPagesEN/tmMaps
Able to Call Page(s):
Called By Page(s):
Page(s) Referenced:
TMsubscriptionPriceMapDefault.html

Description:
- Allows the patron to review the best available seating option within the section they choose from the TMsubscriptionMapDefault.html page. The best available seats are indicated in the Seat Names tab of the Map within Theatre Manager. The Best Avail Area and Best Seat # columns determine the order of the seats. Depending on the seat configuration of your venue (in particular dinner theatre seating), your Seat Name file may have been setup for a two-pass approach to Best Available seating. For more information on the two-pass system click here.
- The drop down next to the seat location allows the patron to choose the appropriate price for the seat. The pricing options in the list are pulled from the event within Theatre Manager. Only prices that are indicated as Season pricing will be available in the drop down.
- The patron can click the Next Best Available button and they will be presented with the next option for available seats within the section.
Questions and Answers:
Q:How can the Pricing drop down order be altered?
A: The pricing drop down is sorted in descending order based on highest price to lowest price. The promotion external description will determine the sort if there are two or more price points of the same value. Promotions sort in ascending order. For steps on how to access the sales promotion click here. Please note not all Promotions or Price Codes are available online and altering promotions will only need to be done for those options that appear online.
____________________________________________________________
Q: How do you remove the price code name from the Pricing drop down?
A: Select the Web Options tab under Setup >> Company Preferences in Theatre Manager. Remove the check from the Show Price Code option in the Permitted Ticket Printing Options section of the page. Clear the cache on the web listener for the change to take effect. For detailed steps on how to clear the cache in Theatre Manager click here.
____________________________________________________________
Q: How do you remove the Promotion from the Pricing drop down?
A: Select the Web Options tab under Setup >> Company Preferences in Theatre Manager. Remove the check from the Show Sales Promotion option in the Permitted Ticket Printing Options section of the page. Clear the cache on the web listener for the change to take effect. For detailed steps on how to clear the cache in Theatre Manager click here.
____________________________________________________________
Location:
htdocs/1/WebPagesEN/tmMaps
Able to Call Page(s):
Called By Page(s):
Page(s) Referenced:
TMsubscriptionsMapDefaultf.html
Description:
- For Future Implementation
Location:
htdocs/1/WebPagesEN/tmMaps
Able to Call Page(s):
Called By Page(s):
Page(s) Referenced:
TMsubscriptionsPriceMapDefault.html
Description:
- WEB PAGE CURRENTLY UNDER CONSTRUCTION
Location:
htdocs/1/WebPagesEN/tmMaps
Able to Call Page(s):
Called By Page(s):
Page(s) Referenced:
TMticketsPrice_MapDefault.html
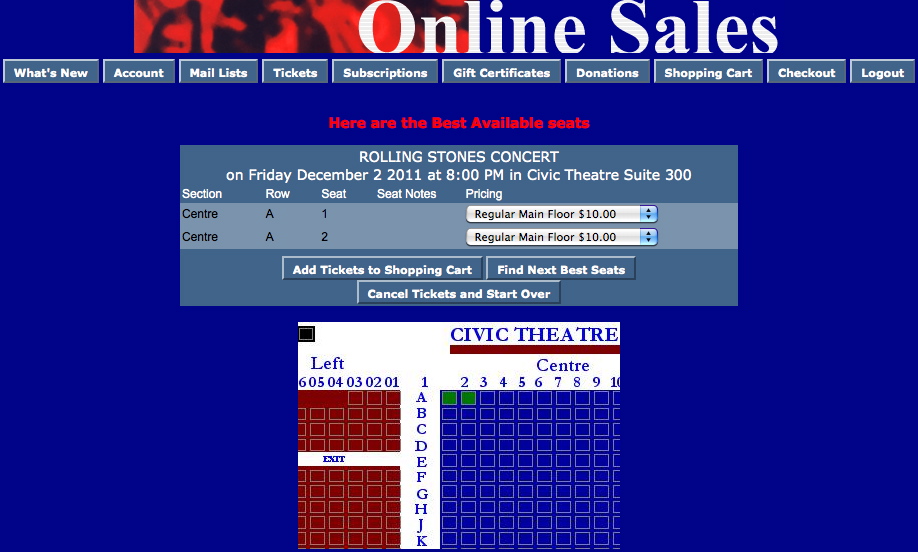
Description:
- Displays the best available seating option within the section the patron chose from the TMticketsSection_MapDefault.html page. The best available seats are indicated in the Seat Names tab of the Map within Theatre Manager. The Best Avail Area and Best Seat # columns determine the order of the seats. Depending on the seat configuration of your venue (in particular dinner theatre seating), your Seat Name file may have been setup for a two-pass approach to Best Available seating. For more information on the two-pass system click here.
- The patron can click the Next Best Available button and they will be presented with the next option for available seats within the section.
- The drop down next to the seat location allows the patron to choose the appropriate price for the seat. The pricing options in the list are pulled from the event within Theatre Manager. Only prices available online will be displayed in the drop down. Season Subscription online pricing does not appear in the drop down.
Questions and Answers:
Q: How can the Pricing drop down order be altered?
A: The pricing drop down is sorted in descending order based on highest price to lowest price. The promotion external description will determine the sort if there are two or more price points of the same value. Promotions sort in ascending order. For steps on how to access the sales promotion click here. Please note not all Promotions or Price Codes are available online and altering promotions will only need to be done for those options that appear online.
____________________________________________________________
Q: How do you remove the price code name from the Pricing drop down?
A: Select the Web Options tab under Setup >> Company Preferences in Theatre Manager. Remove the check from the Show Price Code option in the Permitted Ticket Printing Options section of the page. Clear the cache on the web listener for the change to take effect. For detailed steps on how to clear the cache in Theatre Manager click here.
____________________________________________________________
Q: How do you remove the Promotion from the Pricing drop down?
A: Select the Web Options tab under Setup >> Company Preferences in Theatre Manager. Remove the check from the Show Sales Promotion option in the Permitted Ticket Printing Options section of the page. Clear the cache on the web listener for the change to take effect. For detailed steps on how to clear the cache in Theatre Manager click here.
____________________________________________________________
Q: How can I make the entire map display?
A: Change the selected_border value in the image reference near the bottom of the page to be 999.
____________________________________________________________
Q: How can I change the color the seats appear as on the map?
A: Change the selected_color in the image reference near the bottom of the page to the desired hex color value.
____________________________________________________________
Q: How do you change the map image at the bottom of the page so it does not display the image from within Theatre Manager?
A:Add the desired image to the tmGifs folder with the WebPages. Comment out the existing image reference line at the bottom of the page. Add a new image reference for the desired image. The full path name is not required. /tmGifs/image.jpg can be used ad this page is already referencing the WebPages through the base reference.
____________________________________________________________
Location:
WebPages/1/WebPagesEN/tmMaps
Able to Call Page(s):
- TMcart.html
- TMticketsMaxPurchased.html
- TMticketsPrice_MapDefault.html
- TMticketsSection_MapDefault.html
- TMticketsSection_MapDefaultc.html
- TMticketsSection_MapDefaultf.html
Called By Page(s):
- TMticketsSection_MapDefault.html
- TMticketsSection_MapDefaultc.html
- TMticketsSection_MapDefaultf.html
Page(s) Referenced:
TMticketsSection_MapDefault.html
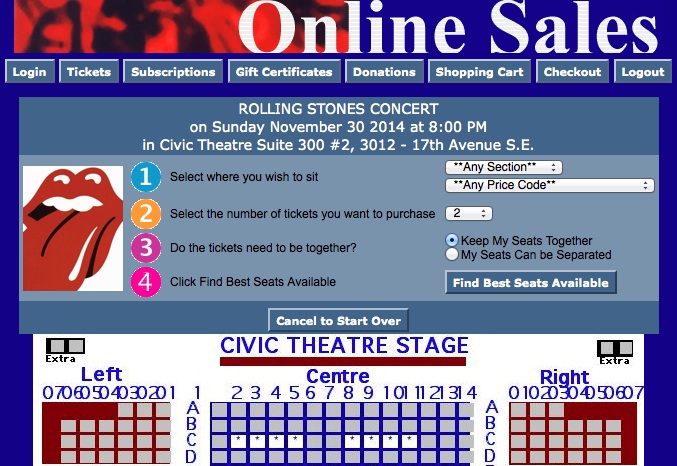
Description:
- This pages is specific to reserved seating performances.
- The patron can choose the ticket options they would prefer to add to their cart.
- The event title, date and time are pulled from Theatre Manager based on the selection from the previous window.
- Step 1 is a drop down of seating sections pulled from the Best Seat Settings tab from within the Map in Theatre Manager.
- Step 2 allows the patron to indicate the number of tickets they wish to purchase. The quantity is limited to the number of tickets allowed to be sold per Order within Theatre Manager.
- Step 3 searches the database for the preferences from the above steps. It loads the TMticketsPrice_MapDefault.html page.
- The map is pulled directly from the Theatre Manager database. The page can be duplicated and the word Default changed to the map number from within Theatre Manager. The page can then be edited to display an image specific to the venue.
- Web sales produces seats using the Best Seat settings within each venue map. For more information on the Best Seat settings, click here. Depending on the seat configuration of your venue (in particular dinner theatre seating), your Seat Name file may have been setup for a two-pass approach to Best Available seating. For more information on the two-pass system click here.
Questions and Answers:
Q: Can I replace the map image with an image of my own?
A: Yes, the image can be replaced. Place the desired image in the tmGifs folder. Locate the line containing the F_HTML_SEATMAP references towards the bottom of the page. Comment out the line. Add an image reference to the page calling the desired image from the tmGifs folder. Please note the reference should only require the folder name (tmGifs) and the full image name.
____________________________________________________________
Q: Can I change the default value in the drop down for number of seats to purchase?
A: Yes, you can. The default value is controlled in the Performance details. It can be altered by going to Setup >> Events and searching for the desired event. Double click on the event and select the Performance tab. Double click on the desired performance to open the Performance Detail window. Select the Web Settings tab. The Suggested Purchase Qty field determines the default value in the drop down within the online sales.
____________________________________________________________
Q: Can I increase/decrease the value in the drop down for number of seats to purchase?
A: Yes, you can. This value is controlled by the over all cart limit, event limit and performance limits.
- The cart limit is located in Setup >> System Preferences under the Web tab. It's controlled by the Maximum Tickets field. This value determines the total number of tickets that are allowed per cart. If the patron has already added tickets to their cart the drop down will decrease by the number of tickets in the cart.
- The Event limit is in the Eventtab of the Event Setup. The Web Purchase Limit defaults to the cart limit from above. However, a value can be entered into the field to alter the total number of tickets that can be purchased over all for the Event. This means if there are several performances this is the total tickets for all performances. If an event has a maximum of 8 tickets regardless of performances this is where the value would be set.
- Finally, the Performance limit is controlled in the Web Settings tab. This is located by selecting the Performance tab in the Event and double clicking on the performance. The Web Purchase Limit field controls the maximum tickets per performance that can be purchased. If an event has a limit of four tickets per performance this is where the value would be set.
Location:
htdocs/1/WebPagesEN/tmMaps
Able to Call Page(s):
Called By Page(s):
Page(s) Referenced:
- buttonRollover.html
- constantALLPRICECODES.txt
- constantANYSECTIONS.txt
- pleaseWaitMessage.html
- pleaseWaitMessageFunction.html
- setBEST_AREA_SEARCH_LIST.html
- setBEST_AREA_SEARCH_LISTempty.html
- setBEST_PRICE_CODE_SEARCH_LIST.html
- setBEST_PRICE_CODE_SEARCH_LISTempty.html
- setTICKET_QTY_LIST.html
- setTICKET_QTY_LISTempty.html
- step1.gif
- step2.gif
- step3.gif
- styleButtons.css
- stylePages.css
- TMError.txt
- tmFooter.html
- tmnavButtons.html
TMticketsSection_MapDefaultc.html
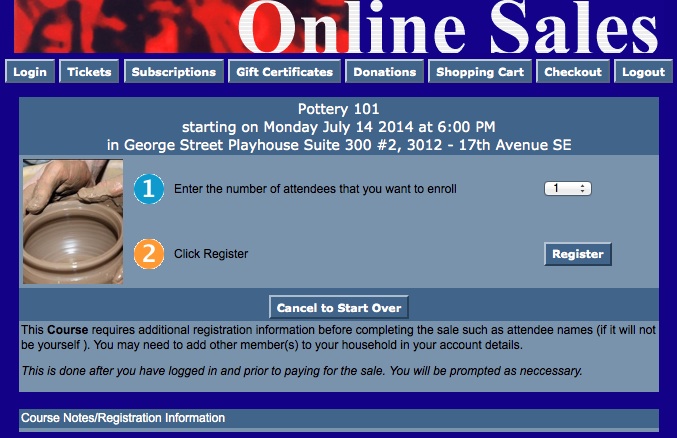
Description:
- This pages is specific to Courses. Note the c at the end of the page name.
- The patron can choose the ticket options they would prefer to add to their cart.
- The event title, date and time are pulled from Theatre Manager based on the selection from the previous window.
- Step 1 allows the patron to choose the number of admissions to the course they wish to purchase. The quantity is limited to the number of tickets allowed to be sold per Order within Theatre Manager.
- Step 2 searches the database for the preferences from the above steps. It loads the TMticketsPrice_MapDefault.html page.
- For details on how to setup a course click here.
Questions and Answers:
Q: Can I replace the map image with an image of my own?
A: Yes, the image can be replaced. Place the desired image in the tmGifs folder. Locate the line containing the F_HTML_SEATMAP references towards the bottom of the page. Comment out the line. Add an image reference to the page calling the desired image from the tmGifs folder. Please note the reference should only require the folder name (tmGifs) and the full image name.
____________________________________________________________
Q: Can I change the default value in the drop down for number of seats to purchase?
A: Yes, you can. The default value is controlled in the Performance details. It can be altered by going to Setup >> Events and searching for the desired event. Double click on the event and select the Performance tab. Double click on the desired performance to open the Performance Detail window. Select the Web Settings tab. The Suggested Purchase Qty field determines the default value in the drop down within the online sales.
____________________________________________________________
Q: Can I increase/decrease the value in the drop down for number of seats to purchase?
A: Yes, you can. This value is controlled by the over all cart limit, event limit and performance limits.
- The cart limit is located in Setup >> System Preferences under the Web tab. It's controlled by the Maximum Tickets field. This value determines the total number of tickets that are allowed per cart. If the patron has already added tickets to their cart the drop down will decrease by the number of tickets in the cart.
- The Event limit is in the Eventtab of the Event Setup. The Web Purchase Limit defaults to the cart limit from above. However, a value can be entered into the field to alter the total number of tickets that can be purchased over all for the Event. This means if there are several performances this is the total tickets for all performances. If an event has a maximum of 8 tickets regardless of performances this is where the value would be set.
- Finally, the Performance limit is controlled in the Web Settings tab. This is located by selecting the Performance tab in the Event and double clicking on the performance. The Web Purchase Limit field controls the maximum tickets per performance that can be purchased. If an event has a limit of four tickets per performance this is where the value would be set.
Location:
htdocs/1/WebPagesEN/tmMaps
Able to Call Page(s):
Called By Page(s):
Page(s) Referenced:
TMticketsSection_MapDefaultf.html
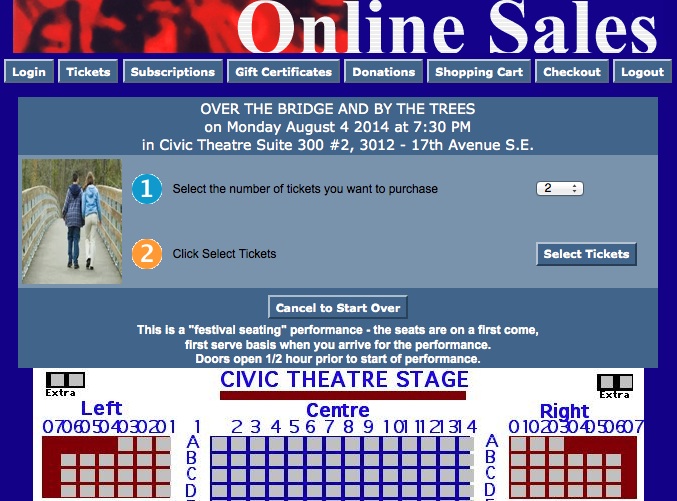
Description:
- This pages is specific to Festival Seating/General Admission seating performances. Note the f at the end of the page name.
- The patron can choose the ticket options they would prefer to add to their cart.
- The event title, date and time are pulled from Theatre Manager based on the selection from the previous window.
- Step 1 allows the patron to indicate the number of tickets they wish to purchase. The quantity is limited to the number of tickets allowed to be sold per Order within Theatre Manager.
- Step 2 searches the database for the preferences from the above steps. It loads the TMticketsPrice_MapDefault.html page.
- The map is pulled directly from the Theatre Manager database. The page can be duplicated and the word Default changed to the Pricing Map number from within Theatre Manager. The page can then be edited to display an image specific to the venue.
Questions and Answers:
Q: Can I replace the map image with an image of my own?
A: Yes, the image can be replaced. Place the desired image in the tmGifs folder. Locate the line containing the F_HTML_SEATMAP references towards the bottom of the page. Comment out the line. Add an image reference to the page calling the desired image from the tmGifs folder. Please note the reference should only require the folder name (tmGifs) and the full image name.
____________________________________________________________
Q: Can I change the default value in the drop down for number of seats to purchase?
A: Yes, you can. The default value is controlled in the Performance details. It can be altered by going to Setup >> Events and searching for the desired event. Double click on the event and select the Performance tab. Double click on the desired performance to open the Performance Detail window. Select the Web Settings tab. The Suggested Purchase Qty field determines the default value in the drop down within the online sales.
____________________________________________________________
Q: Can I increase/decrease the value in the drop down for number of seats to purchase?
A: Yes, you can. This value is controlled by the over all cart limit, event limit and performance limits.
- The cart limit is located in Setup >> System Preferences under the Web tab. It's controlled by the Maximum Tickets field. This value determines the total number of tickets that are allowed per cart. If the patron has already added tickets to their cart the drop down will decrease by the number of tickets in the cart.
- The Event limit is in the Eventtab of the Event Setup. The Web Purchase Limit defaults to the cart limit from above. However, a value can be entered into the field to alter the total number of tickets that can be purchased over all for the Event. This means if there are several performances this is the total tickets for all performances. If an event has a maximum of 8 tickets regardless of performances this is where the value would be set.
- Finally, the Performance limit is controlled in the Web Settings tab. This is located by selecting the Performance tab in the Event and double clicking on the performance. The Web Purchase Limit field controls the maximum tickets per performance that can be purchased. If an event has a limit of four tickets per performance this is where the value would be set.
Location:
htdocs/1/WebPagesEN/tmMaps
Able to Call Page(s):
Called By Page(s):
Page(s) Referenced:
tmPickYourSeatMapDisplay.html
at the bottom of the page is an <img> tag that shows the actual map:
<img src="<field>F_HTML_SEATMAP"</field>&reserved_colour=007700&reserved_boundary=true&reserved_seat_border=5&format=svg" width="80%"/>
- Pick your seat formats with interactivity
- pick - Special Case. If you have pick your own seats turned on, this is the preferred format. It will give you an svg graphic that is interactive and the patron can use to pick their seats is on. It forces always show sold seats on the map, regardless if it is turned off in Theatre Manager.
- svg - will also display in svg format. However, this format respects the show sold seats option for the performance. It may not be useful for pick your own as somebody wouldn't know which other seats are taken, but it could be useful to show people where their seats are.
- Static Formats with no interactivity
- png - you will only get a png image in a static map. You cannot pick your owns seat and the map has no interactivity
- jpeg - similar to png, except the image is in jpeg format
- pdf - similar to png, except it is a pdf
- use true, yes,y, or 1 for a zoomed in area around the reserved seats
- false, no,n, or 0 for a full sized map (or do not specify the parameter)
- If true, the map displayed to the user will contain a rectangle outlining the viewable area that would be shown if reserved_only was specified. This encircles the offered seats and clearly indicates where in the venue the user will sit.
- If the reserved_only parameter is not specified at the same time as this parameters, then the map is shown at full size, with the rectangle around the seats.
|
See also tmpickYourSeatScripts.html for some options that can be made regarding zoom controls on scripts that handle the maps. |
| format=xxx | specifies the graphic format in which to display your seat maps on a web page.
|
||
| reserved_only=false |
specifies that the map image to be drawn contains only a zoomed in sub-set of the entire map, centred around the seats that are offered to the patron. It the parameter is ignored if the map is in pick-your-own-seat mode. Values are:
|
||
| reserved_boundary=true |
Indicates that a boundary is to be drawn around the seats that are offered to the user (not avaliable when map is in pick-your-own mode)
|
||
| reserved_seat_border=## | Specifies the distance (in seats) from the offered seats where the reserved_boundary will be placed. Reasonable values are 2 seats around the reserved seats or 4 seats around the reserved seats | ||
| reserved_boundary_color=FF0000 | Specifies the colour of the boundary drawn around the seats that are offered (if not using pick your own) | ||
| reserved_boundary_width=xx | Specifies the width of the boundary drawn around the offered seats (if not using pick your own). The default size is 3/4 of the average width of seats on the map. You can make it more or less. | ||
| seat_color=FF0000 |
Specifies the colour of the unsold (available) seats on the map as a RGB hex string.
i.e. FF0000 means bright red and 007700 is green |
||
| selected_color=000000 | Specifies the stroke (border) color of the selected seats as a RGB hex string. These seats that a patron is picking on the reserve your seat map. | ||
| reserved_color=FF0000 | Specifies the fill color of the temporarily held best seats as a RGB hex string | ||
| unavailable_color=00FF00 | Specifies the fill color of the unavailable seats as a RGB hex string. Seats are unavailable if they are already sold to another patron or held for any reason. | ||
| unavailable_text=X | Specifies the single character that will be used to put in seats that are not available. This over-rides the '*' that TM will put in unavailable seats. You can use any ascii character you want such as 'X'. You may even use %20 (space), which if used in conjunction with unavailable_color will provide a solid square for unavailable seats. | ||
| seat_font=X | The font to use for seat labels when using mouseover to show the door/section/row/seat and seat description (depends on what the description setup is in the SCG map on the pricing map setup) | ||
| seat_size=X | The size of the fonts on the seat labels | ||
| seat_font_scale=X | SVG scaling factor to apply to the font size (depends on the scale used when constructing the SVG map) | ||
| seat_font_load=X | "embed": base64 embedded font, "local": locally loaded font from tmVendor, "cdn": remotely loaded font from Content Delivery Network (CDN) |
tmPickYourSeatScripts.html
There is a comment in the file about halfway down (on/around line 41-42) that looks like:
// Initialize the widget with new pan and zoom values

 widget.init();
- pan_step_distance: default is 800 pixels -- and that is the incremental step distance that the image goes left/right or up/down when the left/right up/down buttons are clicked. SVG maps can be very large (as far as pixels go, so 800 is not really much movement -- and it is dependant on the overall size of the map
- zoom_multiple: default is 0.1 (10%) percent and that is the percentage of zoom in/out when using the zoom buttons on the map.
To add the parameters to the web page code and create different settings, you would edit the two lines above so that they look like:
// Initialize the widget with new pan and zoom values

widget.init( {

“pan_step_distance”: 800,

“zoom_multiple”: 0.1

} )
|
These values do not apply when the patron is using a touch device because the hand gestures of pinch and swipe take over and the 'controls' are hidden from the user. They only work for the controls when they are visible on a computer web page. |
|
See also tmPickYourSeatMapDisplay.html for some options that can be made regarding colouring and fonts on the actual SVG map as the user interacts with the pick your seats process. |
tmnavBottom.html

Description:
- The footer page attached to tmindex.html.
- The page pulls images from the tmGifs folder. The page can be edited to meet the organizations needs.
Location:
htdocs/1/WebPagesEN
Able to Call Page(s):
- Not Applicable
Called By Page(s):
Page(s) Referenced:
tmnavMain.html
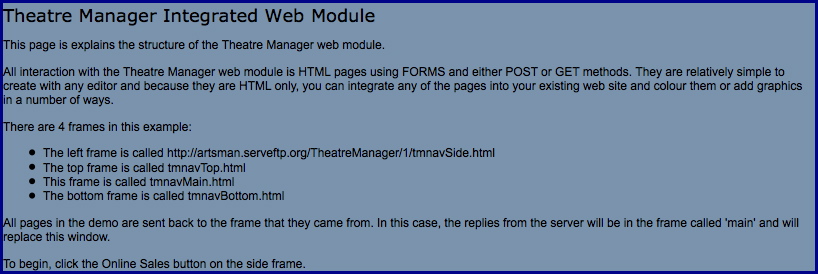
Description:
- This is the main body of the page when using tmindex.html.
- As links or buttons are clicked within the frames the information in this page is replaced with the page referenced by the link or button.
Location:
htdocs/1/WebPagesEN
Able to Call Page(s):
- Not Applicable
Called By Page(s):
Page(s) Referenced:
tmnavSide.html
Description:
- The left side column of the tmindex.html page.
- References the pages in the tmContent folder.
Location:
htdocs/1/WebPagesEN
Able to Call Page(s):
- contentBoard.html
- contentClass.html
- contentContact.html
- contentDonation.html
- contentEvents.html
- contentHistory.html
- contentMailList.html
- contentPass.html
- contentSeason.html
- contentSeason2002.html
- contentSeason2003.html
- contentStaff.html
- contentVolunteer.html
Called By Page(s):
Page(s) Referenced:
tmnavTop.html

Description:
- The header page attached to tmindex.html.
- The page pulls the pageHeader.gif. The page can be edited to meed the organizations needs.
Location:
htdocs/1/WebPagesEN
Able to Call Page(s):
- Not Applicable
Called By Page(s):
Page(s) Referenced:
TMoldCartDetails.html
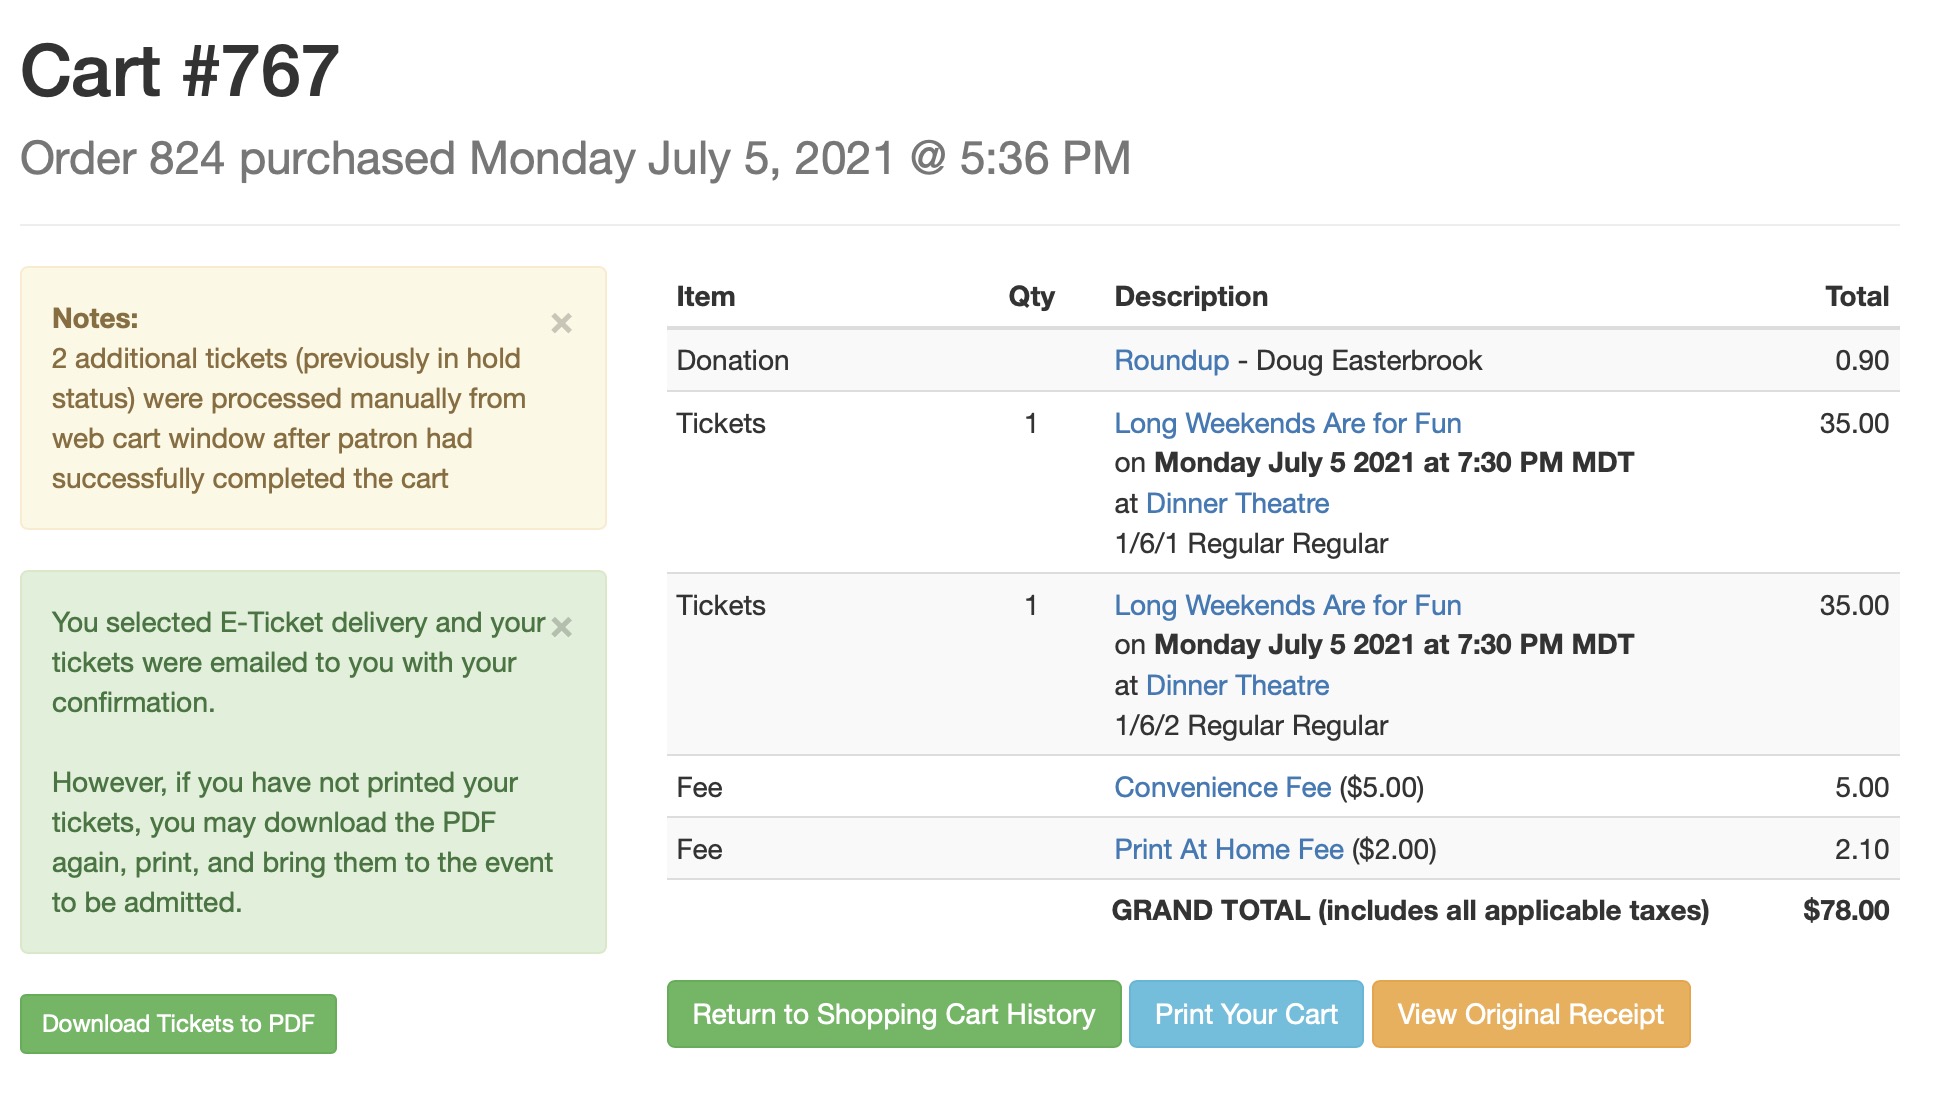
Description:
- Lists the items that were a past of a completed historical cart.
- The details of the cart are pulled directly from the Theatre Manager database.
Location:
htdocs/1/WebPagesEN
Able to Call Page(s):
- TMcart.html
- tmCampaignDefault.html
- tmEventDefault.html
- tmFeeDefault.html
- TMoldCartDetailsPrint.html
- tmPassDefault.html
- tmSubscriptionDefault.html
Called By Page(s):
Page(s) Referenced:
- buttonRollover.html
- rowOldCartCoupon.html
- rowOldCartCourse.html
- rowOldCartDonation.html
- rowOldCartFestival.html
- rowOldCartMailFee.html
- rowOldCartOrderCouponFee.html
- rowOldCartOrderFee.html
- rowOldCartPass.html
- rowOldCartReserve.html
- rowOldCartSub.html
- styleButtons.css
- stylePages.css
- TMError.txt
- tmFooter.html
- tmnavButtons.html
TMoldCartDetailsPrint.html
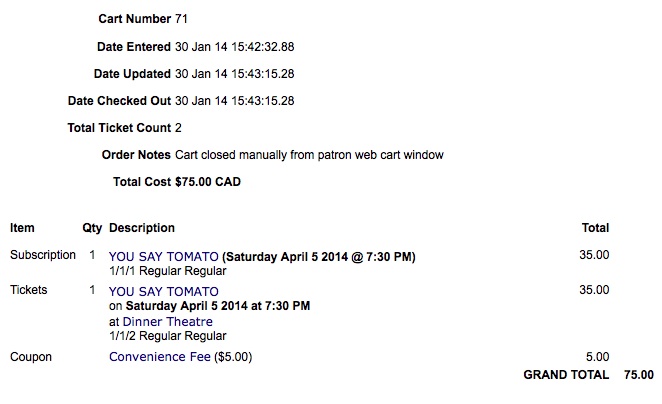
Description:
- A printer friendly copy of the Old Cart Detail page.
- The page will present as a preview behind the machines default printer page setup.
Location:
htdocs/1/WebPagesEN
Able to Call Page(s):
- Not Applicable
Called By Page(s):
Page(s) Referenced:
- buttonRollover.html
- rowOldCartPrintCourse.html
- rowOldCartPrintDonation.html
- rowOldCartPrintFestival.html
- rowOldCartPrintOrderCoupondFee.html
- rowOldCartPrintOrderFee.html
- rowOldCartPrintPass.html
- rowOldCartPrintReserve.html
- rowOldCartPrintSub.html
- styleButtons.css
- stylePages.css
- TMError.txt
- tmFooter.html
TMoldCartHeaders.html
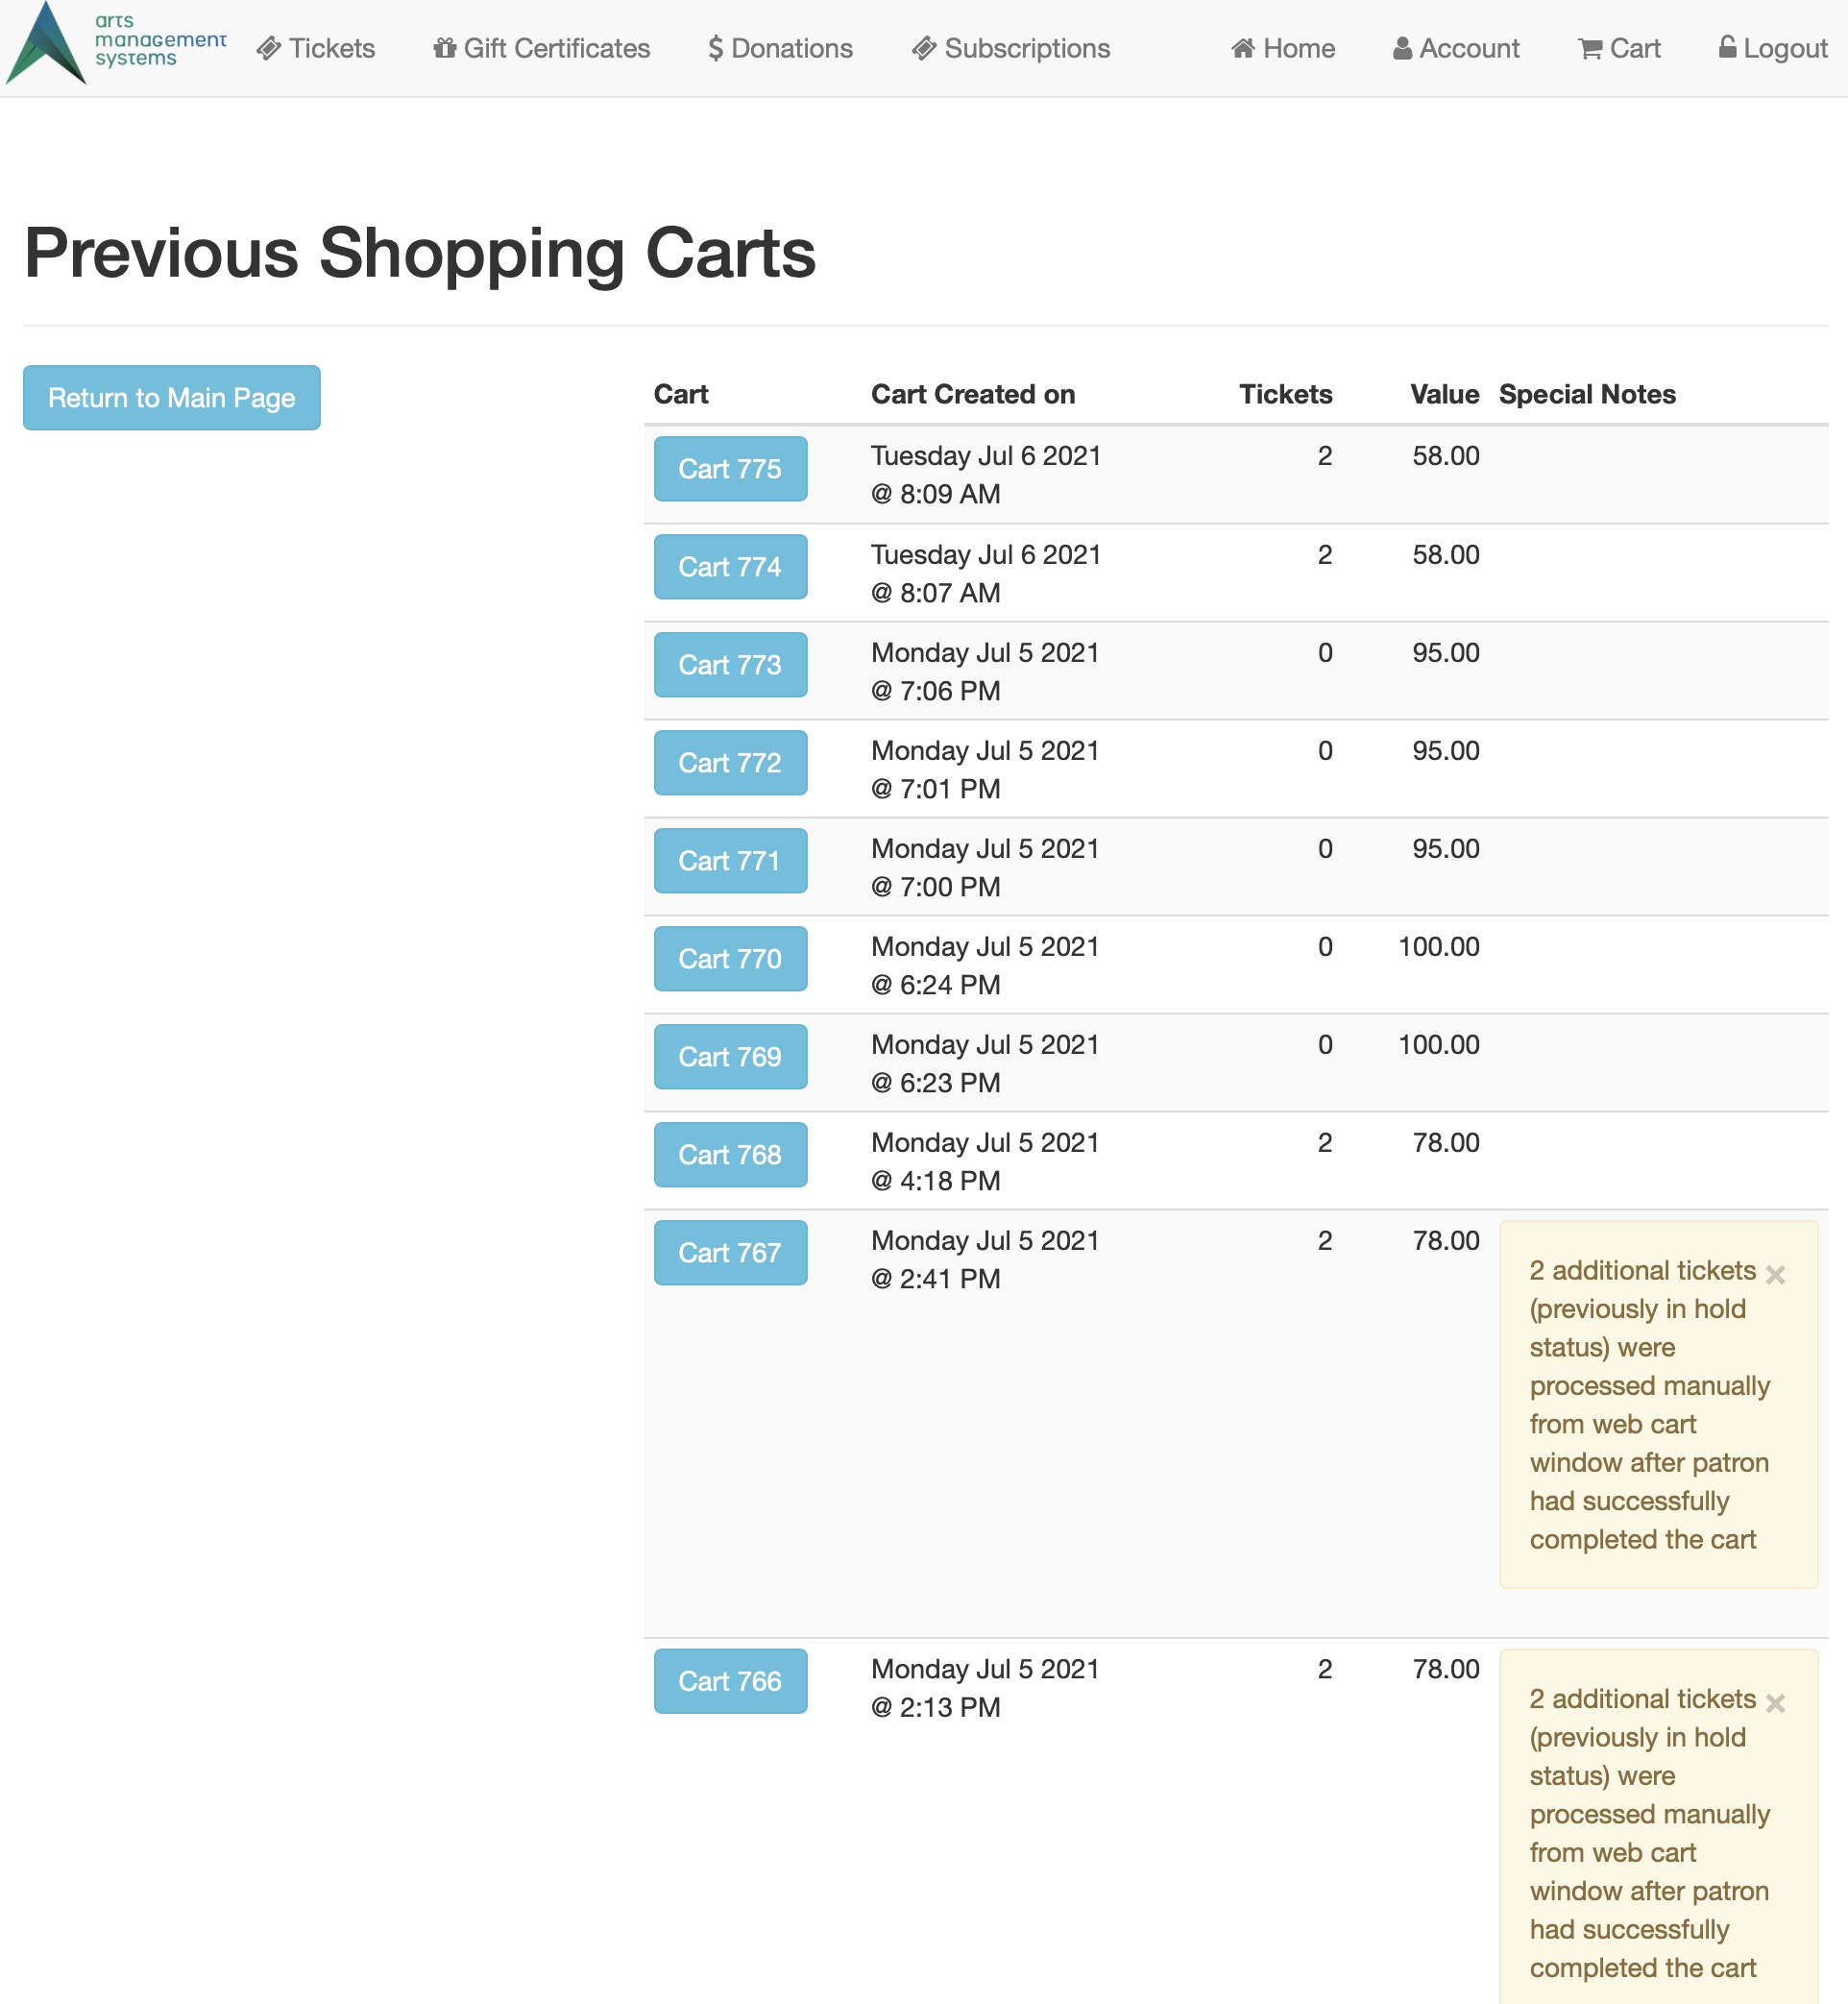 Description:
- A list of past shopping carts for events that have already happened.
Location:
htdocs/1/WebPagesEN
Able to Call Page(s):
Called By Page(s):
Page(s) Referenced:
tmPackages Folder
Custom pages can be created for a package by duplicating the existing default page. The word Default in the page name is then replaced with the package number. The package number is located in the Package # column under Setup >> System Tables >> Packages in Theatre Manager. If this column is not visible simply right click on any of the column headers and select it. The column with then display in the list.
tmPackageDefault.html
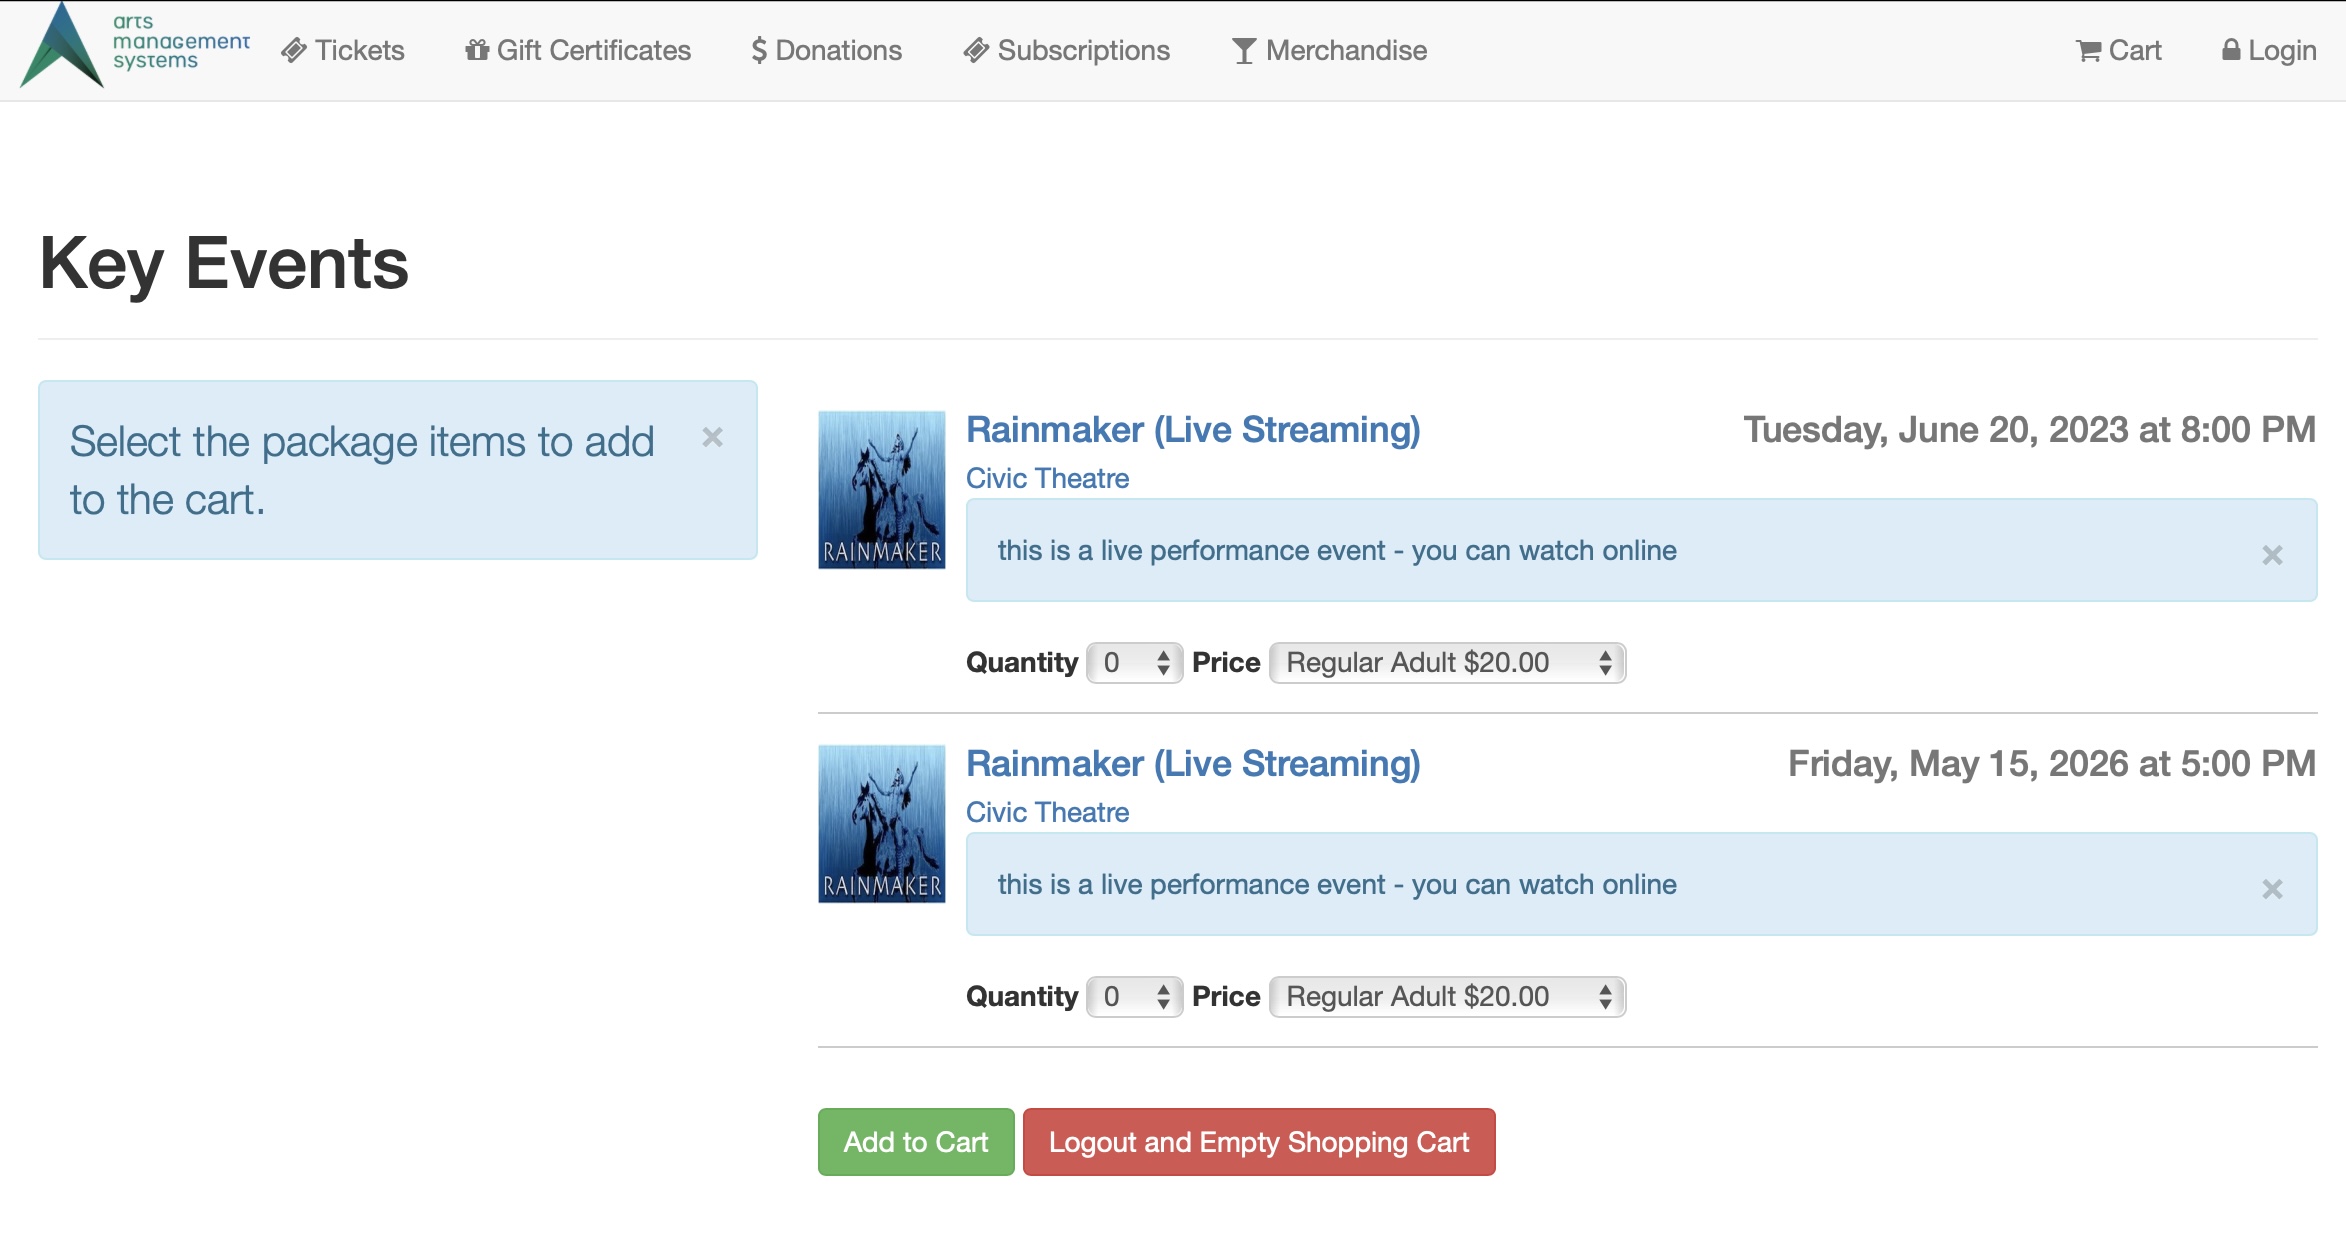
Description:
- Lists available items within a package for purchase online.
- Packages are a collection of items that have been grouped together within the Theatre Manager database and can be sold together within the online sales.
Questions and Answers:
Q: How do I setup a Package for online sales?
A Please see Package Setup in our online help for details on creating a new package:
____________________________________________________________
Q: How can the Availability options column be changed?
A: The text in the Availability column is located in the rowPkgTicketFestival.html page. By accessing this template the percentage level for availability can be altered. In addition the colour of the text and the wording can be altered as desired.
____________________________________________________________
Location:
htdocs/1/WebPagesEN/tmPackages
Able to Call Page(s):
Called By Page(s):
- Not Applicable
Page(s) Referenced:
tmPass Folder
Custom pages can be created for a pass by duplicating the existing default page. The word Default in the page name is then replaced with the pass type number. The pass type number is located in the Type # column under Setup >> System Tables >> Member Types in Theatre Manager. If this column is not visible simply right click on any of the column headers and select it. The column with then display in the list. Please note the word Member may have been altered in the database base for the organization.
tmPass1.html
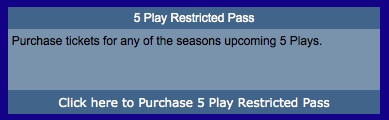
Description:
- Provides a description of the pass type with a sequence number of 1.
- This is an example of how to create a custom pass page.
Location:
htdocs/1/WebPagesEN/tmPass
Able to Call Page(s):
Called By Page(s):
Page(s) Referenced:
tmPassDefault.html
Description:
- Provides a description of the pass selected.
- The details of the description are pulled from the Notes tab in the Member Type setup within Theatre Manager. For more information on the Notes tab in Theatre Manager, click here.
Location:
htdocs/1/WebPagesEN/tmPass
Able to Call Page(s):
Called By Page(s):
- cellPassLookupDescription.html
- cellPassLookupValue.html
- rowCartPass.html
- rowCartPassRedemption.html
- rowCheckoutPass.html
- rowPassRemainingValue.html
Page(s) Referenced:
TMpass.html
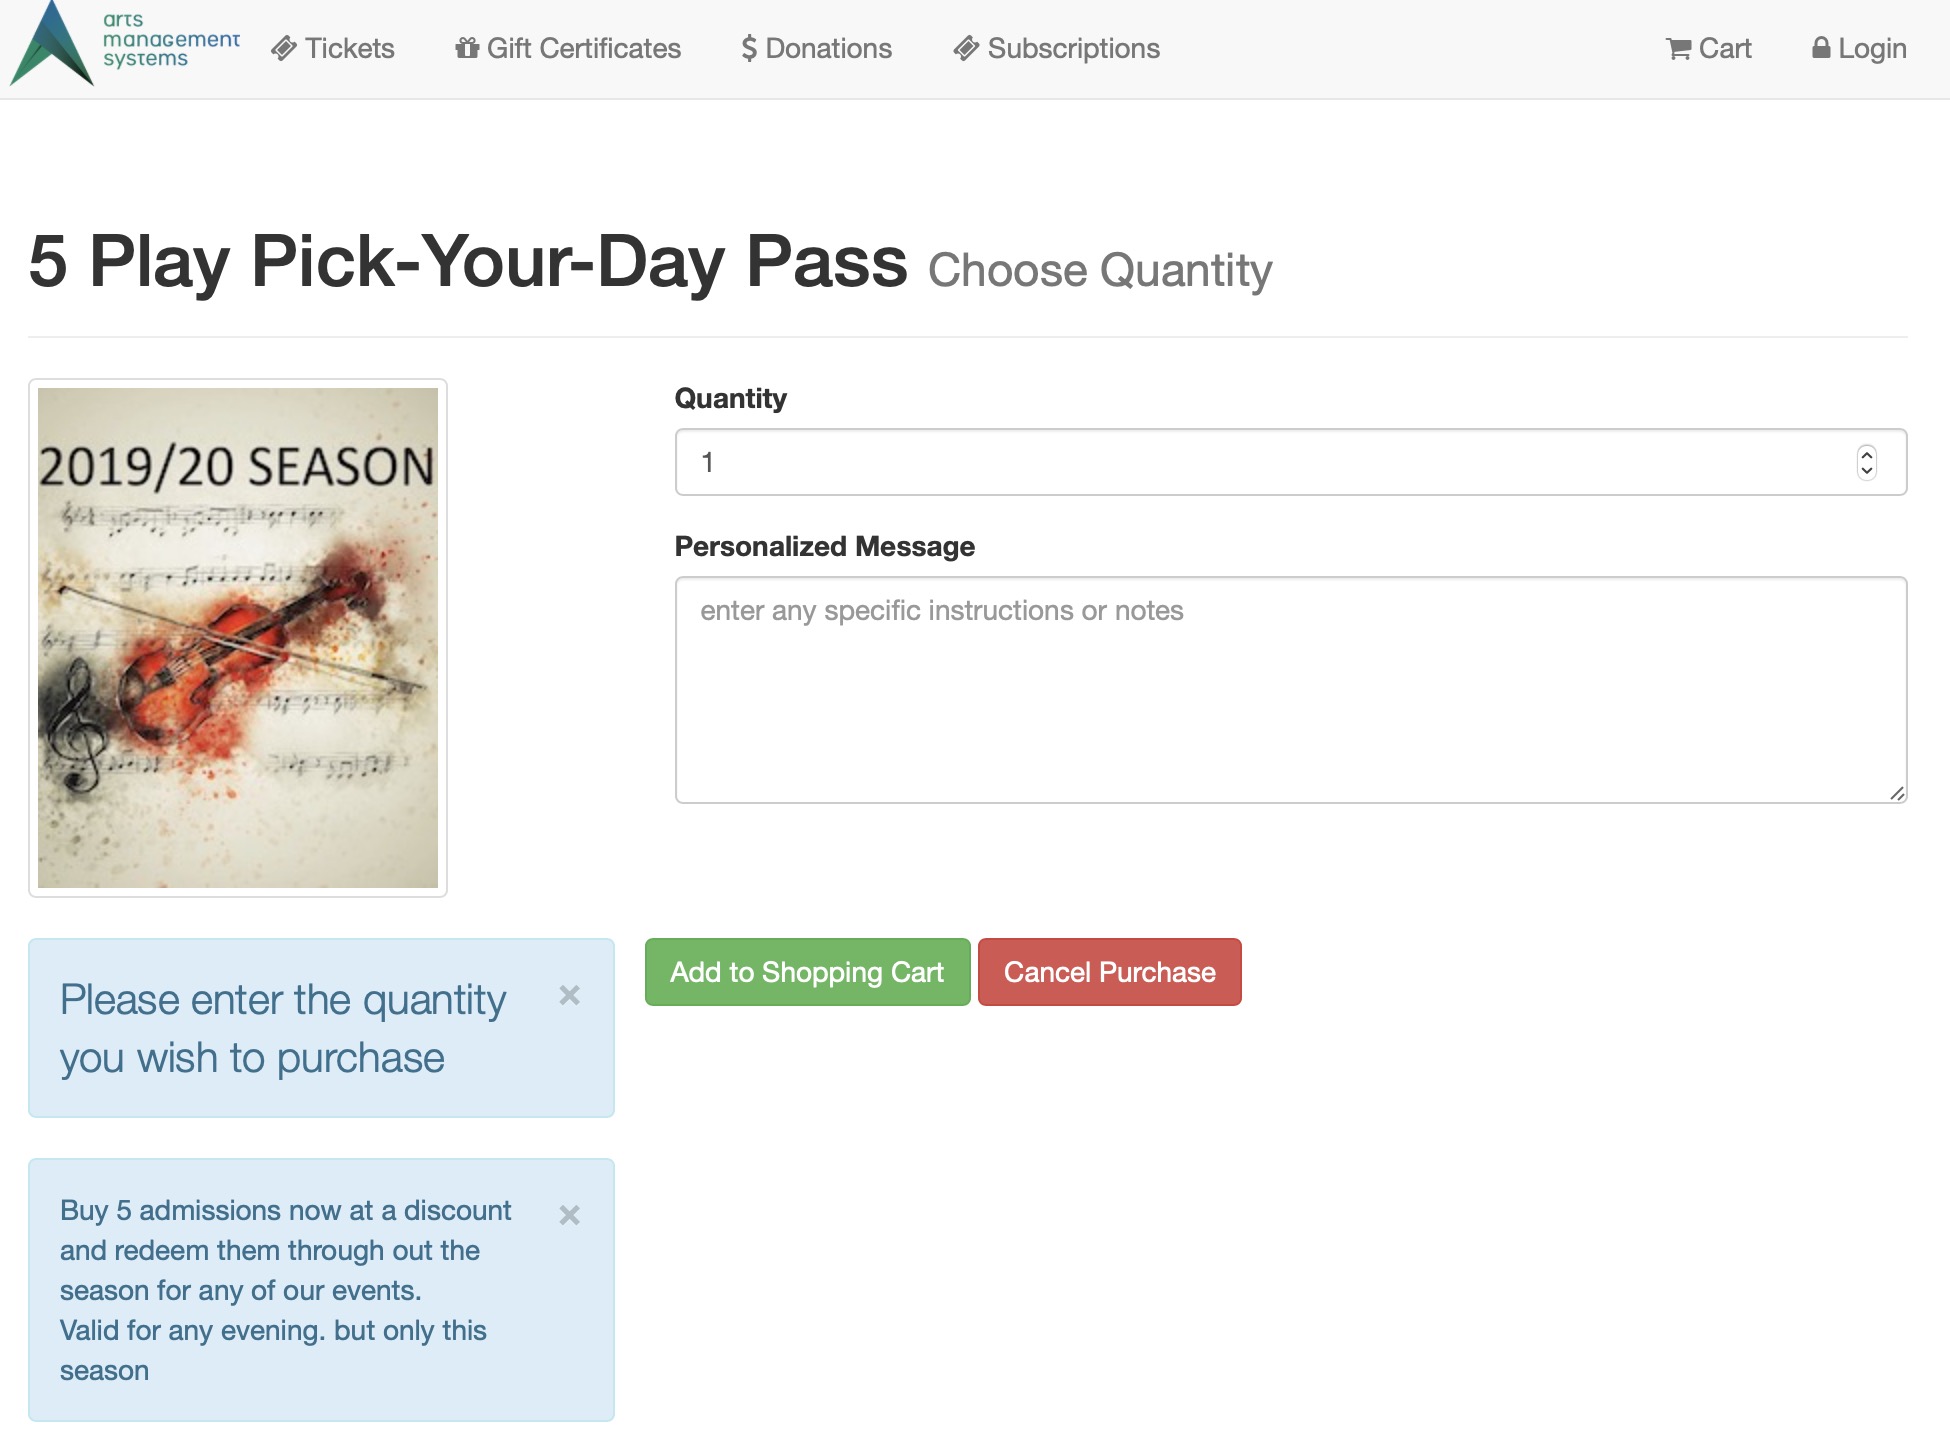
Description:
- The TMpass.html page lists all items currently available for sale in Member Type area of Theatre Manager.
- This page is accessed by the button that is titles Gift Certificate in the default web pages.
- Often the button and this area of Theatre Manager are renamed to something like Pass, Gift Certificate, Sales Items or another option chosen by the organization.
Location:
htdocs/1/WebPagesEN
Able to Call Page(s):
Called By Page(s):
- contentPass.html
- TMcart.html
- tmPassDefault.html
- Any page containing the navigation buttons.
Page(s) Referenced:
TMpassAskAmount.html
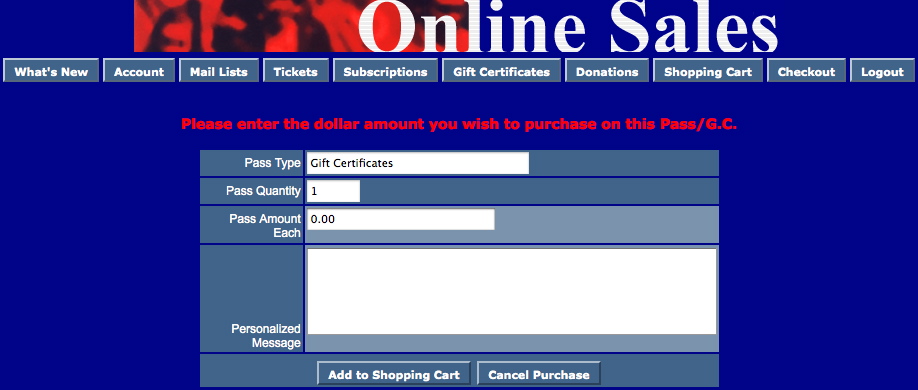
Description:
- This page is designed to enter the details of the Membership/Pass/Gift Certificate being purchased.
- Member Type are created in Setup >> System Tables Member Types of Theatre Manager.
- Depending on the setup of the Member Type, the value of the item may need to be entered in this window.
- Information entered in the Personalized Notes field will appear in the Notes tab of the Membership Detail window within Theatre Manager.
Location:
htdocs/1/WebPagesEN
Able to Call Page(s):
Called By Page(s):
Page(s) Referenced:
TMpassAvailable.html
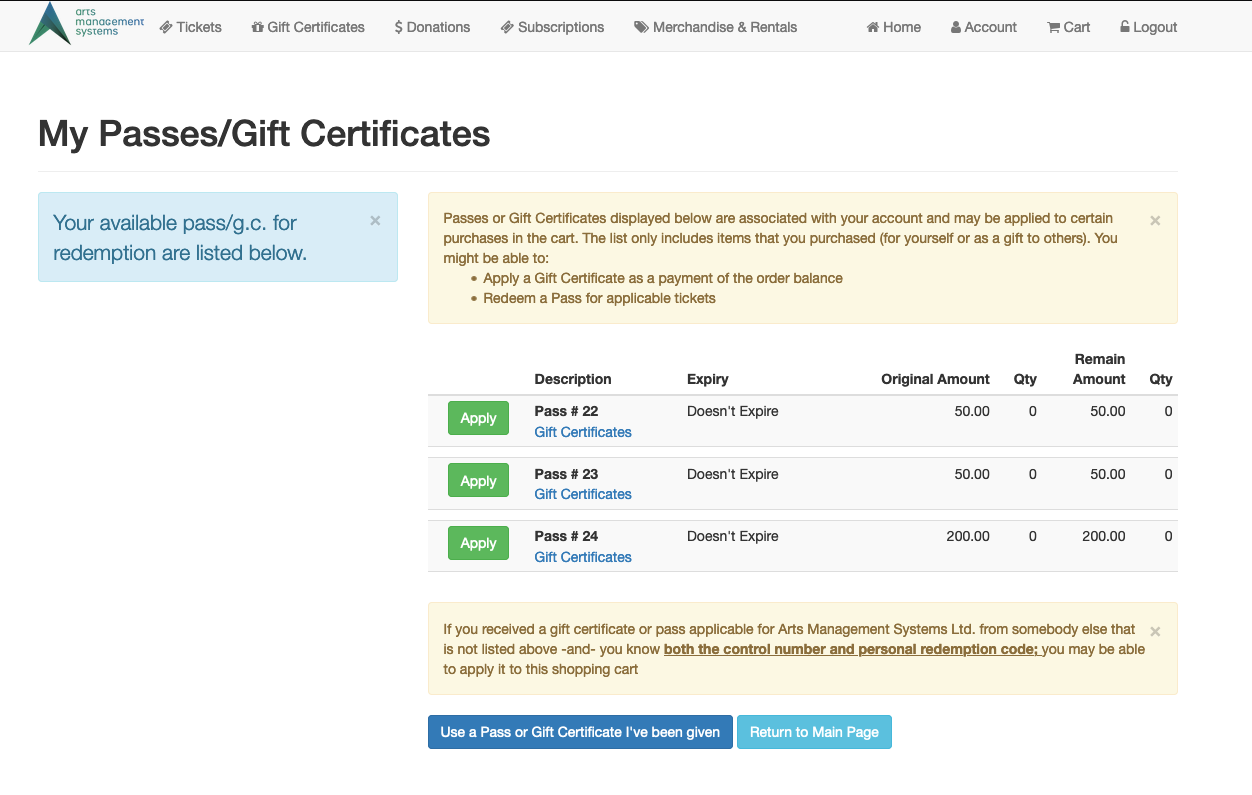
Description:
- This page displays all Passes currently available on the patrons record.
- Passes with available balances can be applied to balances on the current Order.
Location:
htdocs/1/WebPagesEN
Able to Call Page(s):
Called By Page(s):
Page(s) Referenced:
TMpassCheckBalance.html
Description:
- This page allows a patrons to check the outstanding balance on passes.
- The patron must know the Control Number for the Pass and the Password associated with the Control Number. .
- The password is only obtainable through printing a ticket for the Pass directly from Theatre Manager.
Location:
htdocs/1/WebPagesEN
Able to Call Page(s):
Called By Page(s):
Page(s) Referenced:
TMpasswordChange.html
Description:
- This page allows a patron to change their existing online password to a new password.
- When an email address is entered into Theatre Manager the application generates a random password for the patron. The first time the patron attempts to login to the online sales using the Password they will be redirected to this page. The Patron can then set their password to something they choose.
Location:
htdocs/1/WebPagesEN
Able to Call Page(s):
Called By Page(s):
Page(s) Referenced:
TMpasswordChangeEmail.html
Description:
- This email is automatically sent when a patron changes their password using the TMpasswordChange.html page.
Location:
htdocs/1/WebPagesEN
Able to Call Page(s):
- maps.google.com
- The companies web site as it appears in the Company tab of Setup >> Company Preferences within Theatre Manager.
- The ticketing site as referenced in index.html
Called By Page(s):
Page(s) Referenced:
TMpasswordEmptyEmail.html
Description:
- This email is sent to a patron when their email address is selected in their patron window and the Send Password button is clicked from within Theatre Manager.
- The most common reason for this email to be sent would be the patrons email address is not the primary email for their patron record but rather a secondary email. Secondary email addresses cannot be used to login to the online sales module therefore Theatre Manager does not assign a password to them.
Location:
htdocs/1/WebPagesEN
Able to Call Page(s):
- maps.google.com
- The companies web site as it appears in the Company tab of Setup >> Company Preferences within Theatre Manager.
Called By Page(s):
- Not Applicable.
Page(s) Referenced:
TMpasswordForgot.html
Description:
- The patron enters their email address in this page and an email will be sent to the address entered. This email will ask them to reset their password within 48 hours. In the interim, their existing account will be rendered inaccessible until they do reset their password.
- A message states that if the email address does not exist, the patron will receive nothing. This is intentional, is required by the PCI council, and is good internet safety so that attackers cannot determine if an email exists through credential stuffing (meaning they got an email password from another comproized server and are attempting to see if your database also has it).
If the email address exists under two patrons, the same message/process occurs and the box office will need to de-duplicate the email address in Theatre Manager before they can get an email reset.
|
If the patron is unable to do reset their password for any reason, the box office can initiate a password reset from the patron window. A box office reset should only be used if the patron has requested it explicitly - it sends the same email as above. |
Location:
htdocs/1/WebPagesEN
Able to Call Page(s):
Called By Page(s):
Page(s) Referenced:
TMpasswordForgotEmail.html

Description:
- This is a sample of the email sent when a patron clicks the Forgot My Password button.
- The link allows the patron to reset their password.
- Only patrons with access to the email address can receive the link and reset the password.
Location:
htdocs/1/WebPagesEN
Able to Call Page(s):
Called By Page(s):
- Not Applicable
Page(s) Referenced:
TMpasswordForgotEmailReset.html
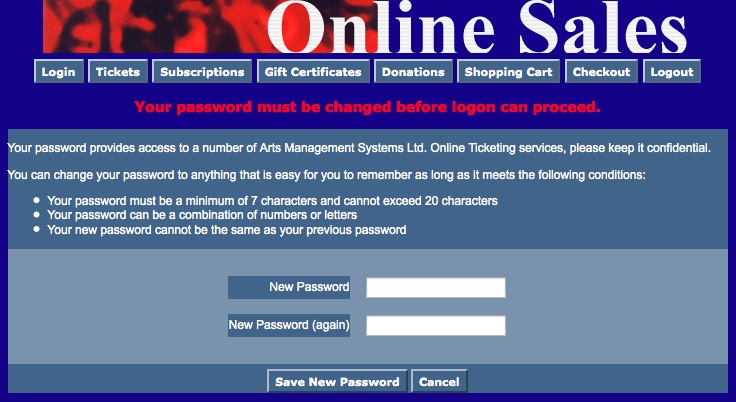
Description:
- Patron can reset their password using the link from the email.
Location:
htdocs/1/WebPagesEN
Able to Call Page(s):
Called By Page(s):
Page(s) Referenced:
TMpasswordResetChange.html
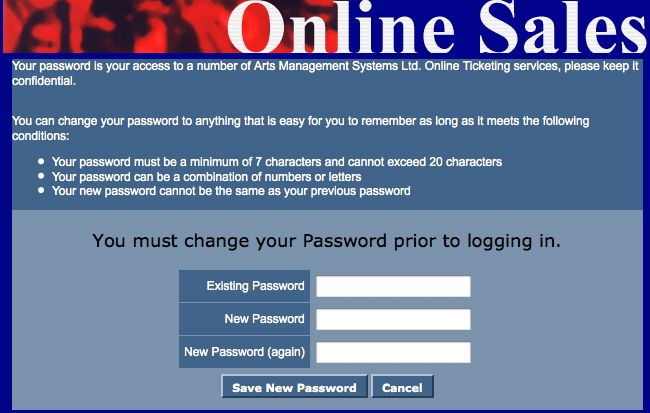
Description:
- This page allows patrons to change their passwords.
- If this is the first time a patron has logged into Theatre Manager using a password generated within the database they will be directed to this page. The patron is encouraged to change their password to something easier to remember then the Theatre Manager generated password.
- The new password must be at least 7 characters long
- The new password cannot contain special characters such as exclamation marks or ampersands.
Location:
htdocs/1/WebPagesEN
Able to Call Page(s):
Called By Page(s):
Page(s) Referenced:
TMpasswordResetEmail.html

Description:
- The email that is sent when a patrons click the Save New Email button in the TMpasswordResetChange.html
- The Password is populated using the online sales password for the email address within the Theatre Manager database.
Location:
htdocs/1/WebPagesEN
Able to Call Page(s):
Called By Page(s):
- Not Applicable
Page(s) Referenced:
TMpatronLimitedProfile.html
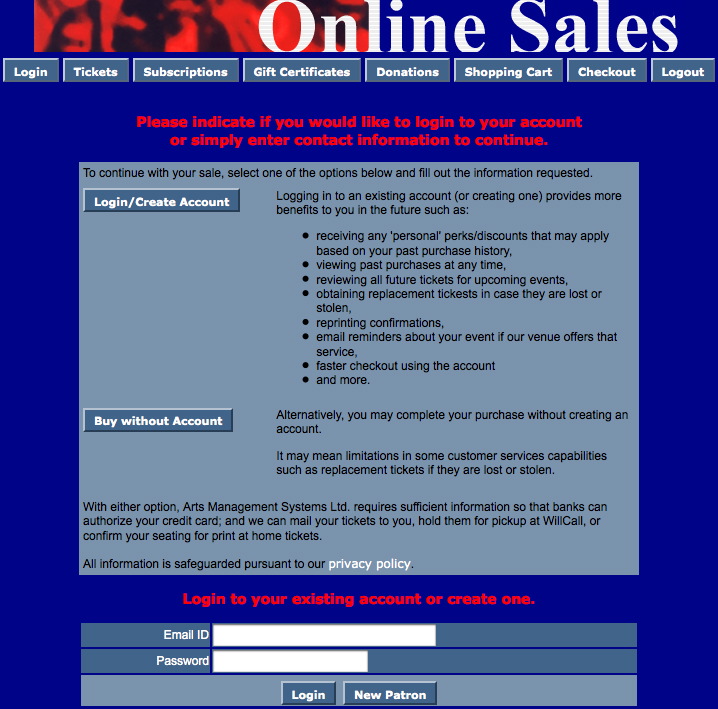
Description:
- Allows for patrons to login to the online sales without creating a full patron profile.
- This page is only accessible is a patron is not logged in and click the checkout button in the online sales window.
- Only those options with an asterisk next to them are mandatory fields.
Questions and Answers:
Q: Where is the limited profile option enabled?
A: In Theatre Manager click Setup >> System Preferences. Select the Mandatory Data tab. Check the desired locations in the Allow Limited Profile Patron On section.
____________________________________________________________
Q: Where are the limited profile account settings in Theatre Manager?
A: In Theatre Manager click Setup >> System Preferences. Select the Mandatory Data tab. Place a check mark next to the desired fields for limited profile in the Limited Profile Web Sales Checkout Patron Data section.
____________________________________________________________
Q: How can I hid fields that are not mandatory?
A: Fields that are not mandatory can be commented out in the tmLoginLimitedPatron.html page.
____________________________________________________________
Location:
htdocs/1/WebPagesEN
Able to Call Page(s):
Called By Page(s):
Page(s) Referenced:
- buttonRollover.html
- pleaseWaitMessage.html
- pleaseWaitMessageFunction.html
- rowPatronAddress.html
- rowPatronContact.html
- rowPatronEmail.html
- rowPatronEmailLimitedProfile.html
- setSALUTATION_LIST.html
- setSALUTATION_LISTempty.html
- showhidediv.html
- styleButtons.css
- stylePages.css
- TMError.txt
- tmFooter.html
- tmLoginForm.html
- tmLoginLimitedPatron.html
- tmnavButtons.html
TMpatronNew.html
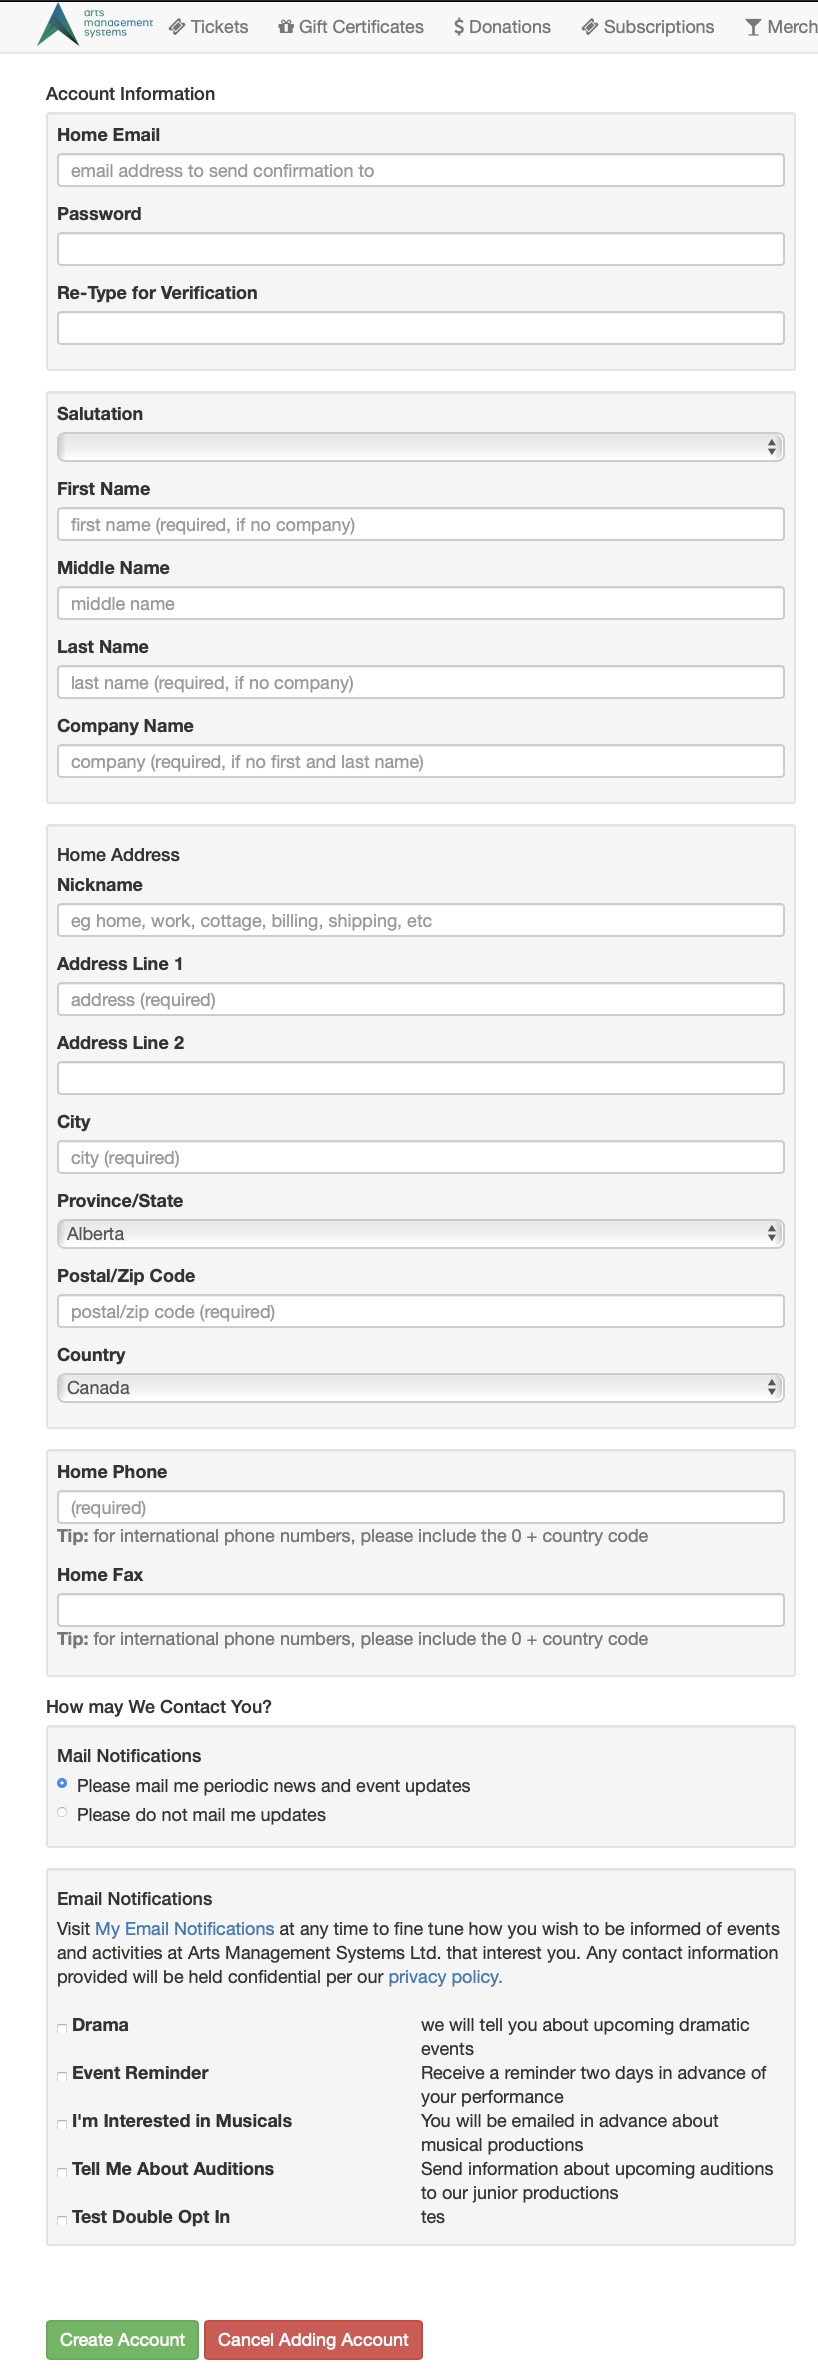
Description:
- This pages creates an account in the Theatre Manager database for a new patron.
- The mandatory fields are set within the Theatre Manager database in Setup >> System Preferences under the Mandatory Data tab.
- All fields indicated within this window update specific database fields within Theatre Manager.
Location:
htdocs/1/WebPagesEN
Able to Call Page(s):
Called By Page(s):
Page(s) Referenced:
- buttonRollover.html
- constantPATRONCONTACTNEW.txt
- pleaseWaitMessage.html
- pleaseWaitMessageFunction.html
- rowPatronAddress.html
- rowPatronContact.html
- rowPatronEmail.html
- setCOUNTRY_LIST.html
- setCOUNTRY_LISTempty.html
- setPROVINCE_LIST.html
- setPROVINCE_LISTempty.html
- setSALUTATION_LIST.html
- setSALUTATION_LISTempty.html
- styleButtons.css
- stylePages.css
- TMError.txt
- tmFooter.html
- tmnavButtons.html
TMpatronNewEmail.html

Description:
- This page is sent in the form of an email every time a new Patron Account is setup in the TMpatronNew.html page.
Location:
htdocs/1/WebPagesEN
Able to Call Page(s):
- maps.google.com
- The companies web site as it appears in the Company tab of Setup >> Company Preferences within Theatre Manager.
- The ticketing site as referenced in index.html
Called By Page(s):
Page(s) Referenced:
TMpatronUpdate.html
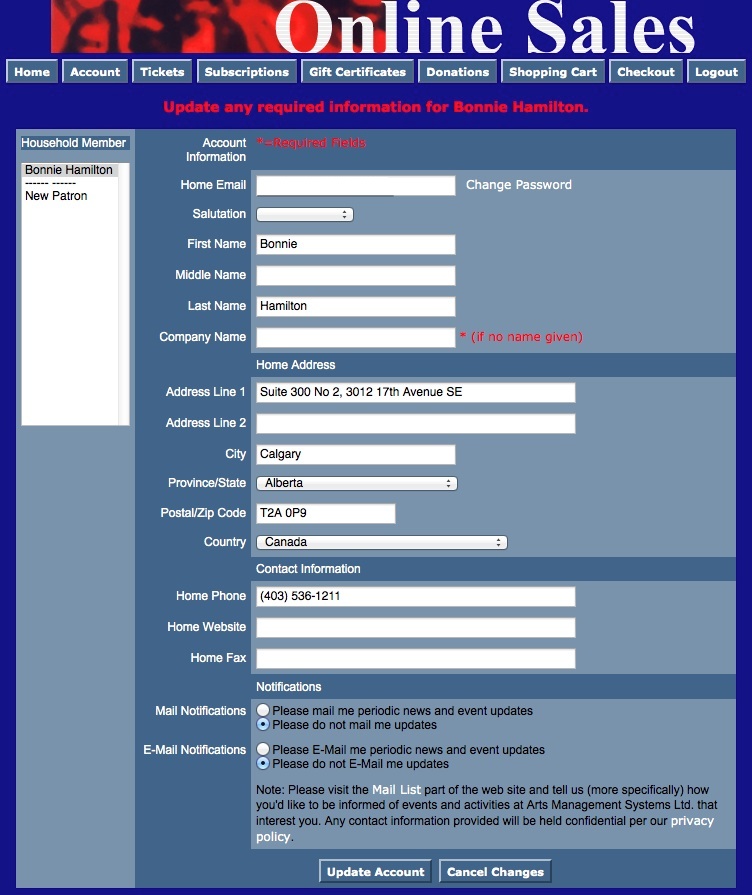 Description:
- This window displays the patrons primary information as it appear in their patron record within the database.
- When a patron updates their record the changes are made directly to the database. If the patron record is altered at the box office the changes will appear to the patron the next time they login.
Location:
htdocs/1/WebPagesEN
Able to Call Page(s):
Called By Page(s):
- Any page containing the navigation buttons.
- tmnavButtonsFooter.html
Page(s) Referenced:
- buttonRollover.html
- constantNEWPATRON.txt
- constantPATRONCONTACTEXISTING.txt
- dropDownMenuFunction.html
- pleaseWaitMessage.html
- pleaseWaitMessageFunction.html
- setCOUNTRY_LIST.html
- setCOUNTRY_LISTempty.html
- rowPatronAddress.html
- rowPatronContact.html
- rowPatronEmail.html
- setPROVINCE_LIST.html
- setPROVINCE_LISTempty.html
- setSALUTATION_LIST.html
- setSALUTATION_LISTempty.html
- pleaseWaitMessage.html
- setHOUSEHOLD_PATRON_LIST.html
- setHOUSEHOLD_PATRON_LISTempty.html
- styleButtons.css
- stylePages.css
- TMError.txt
- tmFooter.html
- tmnavButtons.html
TMpatronUpdateEmail.html
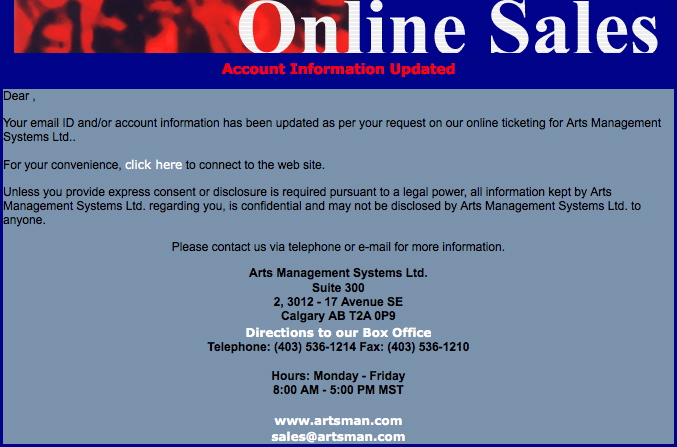
Description:
- This email is automatically sent when a patron changes their patron record using the TMpatonUpdate.html page.
Location:
htdocs/1/WebPagesEN
Able to Call Page(s):
Called By Page(s):
- Not Applicable
Page(s) Referenced:
tmScripts Folder
Javascript
Location:
/WebPagesEN/tmScripts
buttonRollover.html
Description:
<SCRIPT LANGUAGE="JavaScript">
<!--
function pviiClassNew(obj, new_style) {
obj.className = new_style;
}
//-->
</SCRIPT>
Since the buttons that are contained within the tmnavButtons.html page are form inputs, they require Cascading Style Sheets in order to customize their colours and styles. This script allows the buttons to roll from one style to another.
The variables onMouseOver="pviiClassNew(this,'buttonover')" onMouseOut="pviiClassNew(this,'button')" are included in each tag for each button.
dropDownMenuFuctions.html
Description:
<script language="Javascript">
<!--
function submitForm(form, action){
//Change the name of the hidden input, hiddenSubmit, to be the name of the action we need to perform
document.getElementById(form).hiddenSubmit.name = action;
document.getElementById(form).submit();
}
//-->
</script>
This function is used to submit a form when a <!select /> list is used. The page must include this function as well as a hidden parameter within the form, TMForm. <!input type=hidden name=hiddenSubmit value="">
navSideRollover.html
Description:
<SCRIPT language="JavaScript">
<!--
function NavRollOver(oTd) {if (!oTd.contains(event.fromElement)) {oTd.bgColor="";}}
function NavRollOut(oTd) {if (!oTd.contains(event.toElement)) {oTd.bgColor="";}}
//-->
</SCRIPT>
This script allows the cells within the navSide table to roll from one colour to another, creating dynamic buttons out of table data. The variables onmouseover="NavRollOver(this)" onmouseout="NavRollOut(this)" are contained within the
pleaseWaitMessageFuction.html
Description:
<script language="JavaScript">
<!--
function process() {
var processingMessage = 'Processing...please wait...this takes a few moments';
var messageHeight = '25px';
if (navigator.appName=="Microsoft Internet Explorer") {
pleaseWait.innerHTML = processingMessage;
document.all.pleaseWait.style.height = messageHeight;
document.all.pleaseWait.style.visibility = 'visible';
}
if (navigator.appName=="Netscape") {
document.getElementById("pleaseWait").innerHTML = processingMessage;
document.getElementById("pleaseWait").style.height = messageHeight;
document.getElementById("pleaseWait").style.visibility = 'visible';
}
if (navigator.appName=="Safari") {
document.getElementById("pleaseWait").innerHTML = processingMessage;
document.getElementById("pleaseWait").style.height = messageHeight;
document.getElementById("pleaseWait").style.visibility = 'visible';
}
}
//-->
</script>
showhidediv.html
Description:
<script language="javascript">
<!--
function divdisplay(layer_ref,state) {
if (document.all) { //IS IE 4 or 5 (or 6 beta)
eval( "document.all." + layer_ref + ".style.display = " + state);
}
if (document.layers) { //IS NETSCAPE 4 or below
document.layers[layer_ref].display = state;
}
if (document.getElementById &&!document.all) {
hza = document.getElementById(layer_ref);
hza.style.display = state;
}
}
//-->
</script>
This will show or hide a div statement by name on the screen state= 'none' if you want to see it on the screen state= 'block' if you want it to be disabled from the user.
<script language="javascript">
<!--
function divvisibility(layer_ref,state) {
if (document.all) { //IS IE 4 or 5 (or 6 beta)
eval( "document.all." + layer_ref + ".style.visibility = " + state);
}
if (document.layers) { //IS NETSCAPE 4 or below
document.layers[layer_ref].visibility = state;
}
if (document.getElementById &&!document.all) {
hza = document.getElementById(layer_ref);
hza.style.visibility = state;
}
}
</script>
this will change the visibility of a div by name on the screen state= 'visible' if you want to see it on the screen state= 'hidden' if you want it to be hidden off the screen from the user
buttonRollover.html
Description:
- Changed the look of a button in the online sales web page when a mouse is hovered over it.
- Accesses the styleButtons.css to change the attributes of the button.
Location:
htdocs/1/WebPagesEN
Able to Call Page(s):
- Not Applicable
Called By Page(s):
- contentClass.html
- contentDonation.html
- contentEvents.html
- contentMailList.html
- contentPass.html
- TMattendance.html
- tmBoxOfficePolicy.html
- tmCampaign1.html
- tmCampaign2.html
- tmCampaignDefault.html
- TMcart.html
- TMcheckout.html
- TMcheckoutCardError.html
- TMcheckoutConfirmation.html
- TMcheckoutInvoiceEmail.html
- TMcheckoutNoItems.html
- TMcheckoutNoPayment.html
- TMcheckoutProcessing.html
- TMcoupon.html
- TMdonation.html
- TMdonationMonthly.html
- tmEvent1.html
- tmEventDefault.html
- tmFeeDefault.html
- TMfutureTickets.html
- TMfutureTicketsPrint.html
- TMhome.html
- TMlogin.html
- TMloginSelectPatron.html
- TMlogoff.html
- TMlogoffOpenCart.html
- tmMailFee.html
- tmMailFeeDefault.html
- TMmaillist.html
- TMmaillistDisallow.html
- TMmaillistQuickAdd.html
- TMmaillistVerify.html
- tmnavSide.html
- TMoldCartDetails.html
- TMoldCartDetailsPrint.html
- tmOrderFee.html
- TMoldCartHeaders.html
- tmOrderFeeDefault.html
- tmPackageDefault.html
- tmPass1.html
- tmPassDefault.html
- TMpass.html
- TMpassAskAmount.html
- TMpasswordChange.html
- TMpasswordForgot.html
- TMpasswordResetChange.html
- TMpatronLimitedProfile.html
- TMpatronNew.html
- TMpatronUpdate.html
- TMsubscriptionMapDefault.html
- TMsubscriptionMapDefaultf.html
- TMsubscriptionPriceMapDefault.html
- TMsubscriptionsMapDefaultf.html
- TMsubscriptionsPriceMapDefault.html
- TMticketsPrice_MapDefault.html
- TMticketsSection_MapDefault.html
- TMticketsSection_MapDefaultc.html
- TMticketsSection_MapDefaultf.html
- tmSubscriptionDefault.html
- TMsubscriptions.html
- TMsubscriptionsRenew.html
- TMsysBackupInProgress.html
- TMsysBusyListeners.html
- TMsysBusyListenersNorefresh.html
- TMsysInvalidCall.html
- TMsysInvalidCallDirect.html
- TMsysInvalidCallNoAccess.html
- TMsysInvalidFunction.html
- TMsysWebSalesDisabled.html
- TMtickets.html
- TMticketscalendar.html
- TMticketsMaxPurchased.html
- TMticketsSoldOut.html
- tmVenueDefault.html
- TMvolcalendar.html
- TMvolunteer.html
Page(s) Referenced:
cartCountdownFunctions.html
disclaimer.html
Description:
- This pages contains the Arts Management Systems disclaimer.
Location:
htdocs/1/WebPagesEN/TMtemplates/
Able to Call Page(s):
- Not Applicable
Called By Page(s):
- TMattendance.html
- tmBoxOfficePolicy.html
- tmCampaignDefault.html
- TMcart.html
- TMcheckout.html
- TMcheckoutCardError.html
- TMcheckoutConfirmation.html
- TMcheckoutInvoiceEmail.html
- TMcheckoutNoItems.html
- TMcheckoutNoPayment.html
- TMcheckoutProcessing.html
- tmContactPopup.html
- TMcontentBoard.html
- TMcontentClass.html
- TMcontentContact.html
- TMcontentDonation.html
- TMcontentEvent.html
- TMcontentHistory.html
- TMcontentMailList.html
- TMcontentPass.html
- TMcontentSeason.html
- TMcontentSeason2002.html
- TMcontentSeason2003.html
- TMcontentStaff.html
- TMcontentVolunteer.html
- TMcoupon.html
- TMdonation.html
- TMdonationmonthly.html
- tmEventDefault.html
- tmFeeDefault.html
- tmFutureTicketsPrint.html
- TMhome.html
- TMfutureTickets.html
- TMlogin.html
- TMloginSelectPatron.html
- TMlogoff.html
- TMlogoffOpenCart.html
- tmMailFee.html
- tmMailFeeDefault.html
- TMmaillist.html
- TMmaillistDisallow.html
- TMmaillistQuickAdd.html
- TMmaillistVerify.html
- TMmaillistVerifyEmail.html
- tmnavBottom.html
- tmnavMain.html
- tmnavSide.html
- tmnavTop.html
- TMoldCartDetails.html
- TMoldCartDetailsPrint.html
- TMoldCartheaders.html
- tmOrderFee.html
- tmOrderFeeDefault.html
- tmPackageDefault.html
- TMpass.html
- TMpassAskAmount.html
- TMpassAvailable.html
- TMpassCheckBalance.html
- TMpassDefault.html
- TMpasswordChange.html
- TMpasswordChangeEmail.html
- TMpasswordEmptyEmail.html
- TMpasswordForgot.html
- TMpasswordForgotEmail.html
- TMpasswordForgotEmailReset.html
- TMpasswordResetChange.html
- TMpasswordResetEmail.html
- TMpatronLimitedProfile.html
- TMpatronNew.html
- TMpatronNewEmail.html
- TMpatronUpdate.html
- TMpatronUpdateEmail.html
- tmPrivacyPolicy.html
- tmSubscriptionDefault.html
- TMsubscriptions.html
- TMsubscriptionsRenew.html
- TMsubscriptionMapDefault.html
- TMsubscriptionMapDefaultf.html
- TMsubscriptionPriceMapDefault.html
- TMsubcriptionsMapDefaultf.html
- TMsubscriptionsPriceMapDefault.html
- TMsys404.html
- TMsysBackupInProgress.html
- TMsysCookiesDisabled.html
- TMsysInvalidCall.html
- TMsysInvalidCallDirect.html
- TMsysInvalidCallNoAccess.html
- TMsysInvalidFunction.html
- TMsysWebSalesDisabled.html
- tmtermsanconditions.html
- TMtickets.html
- TMticketsCalendar.html
- TMticketsMaxPurchased.html
- TMticketsPrice_MapDefault.html
- TMticketsSection_MapDefault.html
- TMticketsSection_MapDefaultc.html
- TMticketsSection_MapDefaultf.html
- TMticketsSoldOut.html
- tmVenueDefault.html
- TMvolcalendar.html
- TMvolunteerActivity.html
Page(s) Referenced:
- Not Applicable
dropDownMenuFunction.html
Description:
- Submits a form when a <select> reference is in place.
Location:
htdocs/1/WebPagesEN
Able to Call Page(s):
- Not Applicable
Called By Page(s):
Page(s) Referenced:
- Not Applicable
googleHeader.html
Description:
- Can be edited to add the Asynchronous Snippet to the top of each web page for Google Analytics.
- UA-xxxxxxx-1 with your personal google analytics account number
- .yourvenue.org with the trailing part of your tickets.yourvenue.org web site name
_gaq.push(['_setAccount', 'UA-xxxxxxx-1']);
_gaq.push(['_setDomainName', '.yourvenue.org']);
Location:
htdocs/1/WebPagesEN/tmScripts
Able to Call Page(s):
- Not Applicable
Called By Page(s):
- TMattendance.html
- tmCampaignDefault.html
- TMcart.html
- TMcheckout.html
- TMcheckoutCardError.html
- TMcheckoutConfirmation.html
- TMcheckoutNoItems.html
- TMcheckoutNoPayment.html
- TMcheckoutProcessing.html
- TMcoupon.html
- TMdonation.html
- TMdonationmonthly.html
- tmPrivacyPolicy.html
- TMfutureTickets.html
- TMfutureTicketsPrint.html
- TMhome.html
- TMlogin.html
- TMloginSelectPatron.html
- TMlogoff.html
- TMlogoffOpenCart.html
- TMmaillist.html
- TMmaillistDisallow.html
- TMmaillistQuickAdd.html
- TMmaillistVerify.html
- TMsubscriptionMapDefault.html
- TMsubscriptionMapDefaultf.html
- TMsubscriptionPriceMapDefault.html
- TMsubscriptionMapDefaultf.html
- TMsubscriptionsPriceMapDefault.html
- TMticketsPrice_MapDefault.html
- TMticketsSection_MapDefault.html
- TMticketsSection_MapDefaultc.html
- TMticketsSection_MapDefaultf.html
- TMoldCartDetails.html
- TMoldCardDetailsPrint.html
- TMoldCartHeaders.html
- tmPackageDefault.html
- TMcart.html
- tmPassDefault.html
- TMpass.html
- TMpassAskAmount.html
- TMpasswordChange.html
- TMpasswordForgot.html
- TMpasswordResetChange.html
- TMpatronLimitedProfile.html
- TMpatronNew.html
- TMpatronUpdate.html
- tmSubscriptionDefault.html
- TMsubscriptions.html
- TMsubscriptionsRenewal.html
- TMsys404.html
- TMsysBackupInProgress.html
- TMsysCookiesDisabled.html
- TMsysInvalidCall.html
- TMsysInvalidCallDirect.html
- TMsysInvalidCallNoAccess.html
- TMsysInvalidFunction.html
- TMsysWebSalesDisabled.html
- tmtermsandconditions.html
- TMtickets.html
- TMticketsCalendar.html
- TMticketsMaxPurchased.html
- TMticketsSoldOut.html
- tmVenueDefault.html
- TMvolcalendar.html
- TMvolunteer.html
Page(s) Referenced:
- Not Applicable
navSideRollover.html
Description:
- Changed the look of a link in the online sales web page when a mouse is hovered over it.
- Accesses the stylePages.css to change the attributes of the link..
Location:
htdocs/1/WebPagesEN/tmScripts
Able to Call Page(s):
- Not Applicable
Called By Page(s):
Page(s) Referenced:
pleaseWaitMessageFunction.html

Description:
- Displays the previously hidden field containing the Please Wait message.
- This message is displayed while the online sales accesses the database to present new information.
Location:
htdocs/1/WebPagesEN/tmScripts
Able to Call Page(s):
- Not Applicable
Called By Page(s):
- TMcart.html
- TMcheckout.html
- TMcheckoutNoPayment.html
- TMcheckoutProcessing.html
- TMdonation.html
- TMdonationmonthly.html
- TMhome.html
- tmPackageDefault.html
- TMsubscriptionMapDefault.html
- TMsusbscriptionMapDefaultf.html
- TMsusbcriptionPriceMapDefault.html
- TMsubscriptionsMapDefaultf.html
- TMsubscriptionsPriceMapDefault.html
- TMticketsPrice_MapDefault.html
- TMticketsSection_MapDefault.html
- TMticketsSection_MapDefaultc.html
- TMticketsSection_MapDefaultf.html
- TMpass.html
- TMpassAskAmount.html
- TMpasswordChange.html
- TMpasswordResetChange.html
- TMpatronLimitedProfile.html
- TMpatronNew.html
- TMpatronUpdate.html
- TMsubscription.html
- TMsubscriptionsRenew.html
- TMtickets.html
Page(s) Referenced:
- Not Applicable
showhidediv.html
Description:
- Displays additional information on the TMpatronLimitedProfile.html page when the correct button is selected.
Location:
htdocs/1/WebPagesEN/tmScripts
Able to Call Page(s):
- Not Applicable
Called By Page(s):
Page(s) Referenced:
- Not applicable
styles.html
Description:
- This pages is designed to pull the stylesheets into each page within the online sales.
- Any edits to the look of the pages should be made within the stylesheets.
Location:
htdocs/1/WebPagesEN/tmScripts/
Able to Call Page(s):
- Not Applicable
Called By Page(s):
- TMattendance.html
- tmBoxOfficePolicy.html
- tmCampaignDefault.html
- TMcart.html
- TMcheckout.html
- TMcheckoutCardError.html
- TMcheckoutConfirmation.html
- TMcheckoutInvoiceEmail.html
- TMcheckoutNoItems.html
- TMcheckoutNoPayment.html
- TMcheckoutProcessing.html
- tmContactPopup.html
- TMcontentBoard.html
- TMcontentClass.html
- TMcontentContact.html
- TMcontentDonation.html
- TMcontentEvent.html
- TMcontentHistory.html
- TMcontentMailList.html
- TMcontentPass.html
- TMcontentSeason.html
- TMcontentSeason2002.html
- TMcontentSeason2003.html
- TMcontentStaff.html
- TMcontentVolunteer.html
- TMcoupon.html
- TMdonation.html
- TMdonationmonthly.html
- tmEventDefault.html
- tmFeeDefault.html
- tmFutureTicketsPrint.html
- TMhome.html
- TMfutureTickets.html
- TMlogin.html
- TMloginSelectPatron.html
- TMlogoff.html
- TMlogoffOpenCart.html
- tmMailFee.html
- tmMailFeeDefault.html
- TMmaillist.html
- TMmaillistDisallow.html
- TMmaillistQuickAdd.html
- TMmaillistVerify.html
- TMmaillistVerifyEmail.html
- tmnavBottom.html
- tmnavMain.html
- tmnavSide.html
- tmnavTop.html
- TMoldCartDetails.html
- TMoldCartDetailsPrint.html
- TMoldCartheaders.html
- tmOrderFee.html
- tmOrderFeeDefault.html
- tmPackageDefault.html
- TMpass.html
- TMpassAskAmount.html
- TMpassAvailable.html
- TMpassCheckBalance.html
- TMpassDefault.html
- TMpasswordChange.html
- TMpasswordChangeEmail.html
- TMpasswordEmptyEmail.html
- TMpasswordForgot.html
- TMpasswordForgotEmail.html
- TMpasswordForgotEmailReset.html
- TMpasswordResetChange.html
- TMpasswordResetEmail.html
- TMpatronLimitedProfile.html
- TMpatronNew.html
- TMpatronNewEmail.html
- TMpatronUpdate.html
- TMpatronUpdateEmail.html
- tmPrivacyPolicy.html
- tmSubscriptionDefault.html
- TMsubscriptions.html
- TMsubscriptionsRenew.html
- TMsubscriptionMapDefault.html
- TMsubscriptionMapDefaultf.html
- TMsubscriptionPriceMapDefault.html
- TMsubcriptionsMapDefaultf.html
- TMsubscriptionsPriceMapDefault.html
- TMsys404.html
- TMsysBackupInProgress.html
- TMsysCookiesDisabled.html
- TMsysInvalidCall.html
- TMsysInvalidCallDirect.html
- TMsysInvalidCallNoAccess.html
- TMsysInvalidFunction.html
- TMsysWebSalesDisabled.html
- tmtermsanconditions.html
- TMtickets.html
- TMticketsCalendar.html
- TMticketsMaxPurchased.html
- TMticketsPrice_MapDefault.html
- TMticketsSection_MapDefault.html
- TMticketsSection_MapDefaultc.html
- TMticketsSection_MapDefaultf.html
- TMticketsSoldOut.html
- tmVenueDefault.html
- TMvolcalendar.html
- TMvolunteerActivity.html
Page(s) Referenced:
tmSubscription Folder
Custom pages can be created for a season package by duplicating the existing default page. The word Default in the page name is then replaced with the season package number. The season package number is located in the Seq # column under Patron Sales >> Season Reservations >> Setup Season Packages in Theatre Manager.
tmSubscriptionDefault.html
Description:
- This page displays the description and note information from the season package. This information is pulled directly from the Theatre Manager database.
- Customized pages can be created for season packages by duplicating this page and changing the word Default at the end of the title to the season package sequence number from within Theatre Manager. The season package number is located in the Seq # column under Patron Sales >> Season Reservations >> Setup Season Packages.
Location:
htdocs/1/WebPagesEN
Able to Call Page(s):
Called By Page(s):
- rowCheckoutSub.html
- rowCheckoutSubNewGroup.html
- rowSubBookedHeader.html
- rowSubNewDetail.html
- rowSubRenewHeader.html
Page(s) Referenced:
TMsubscriptions.html
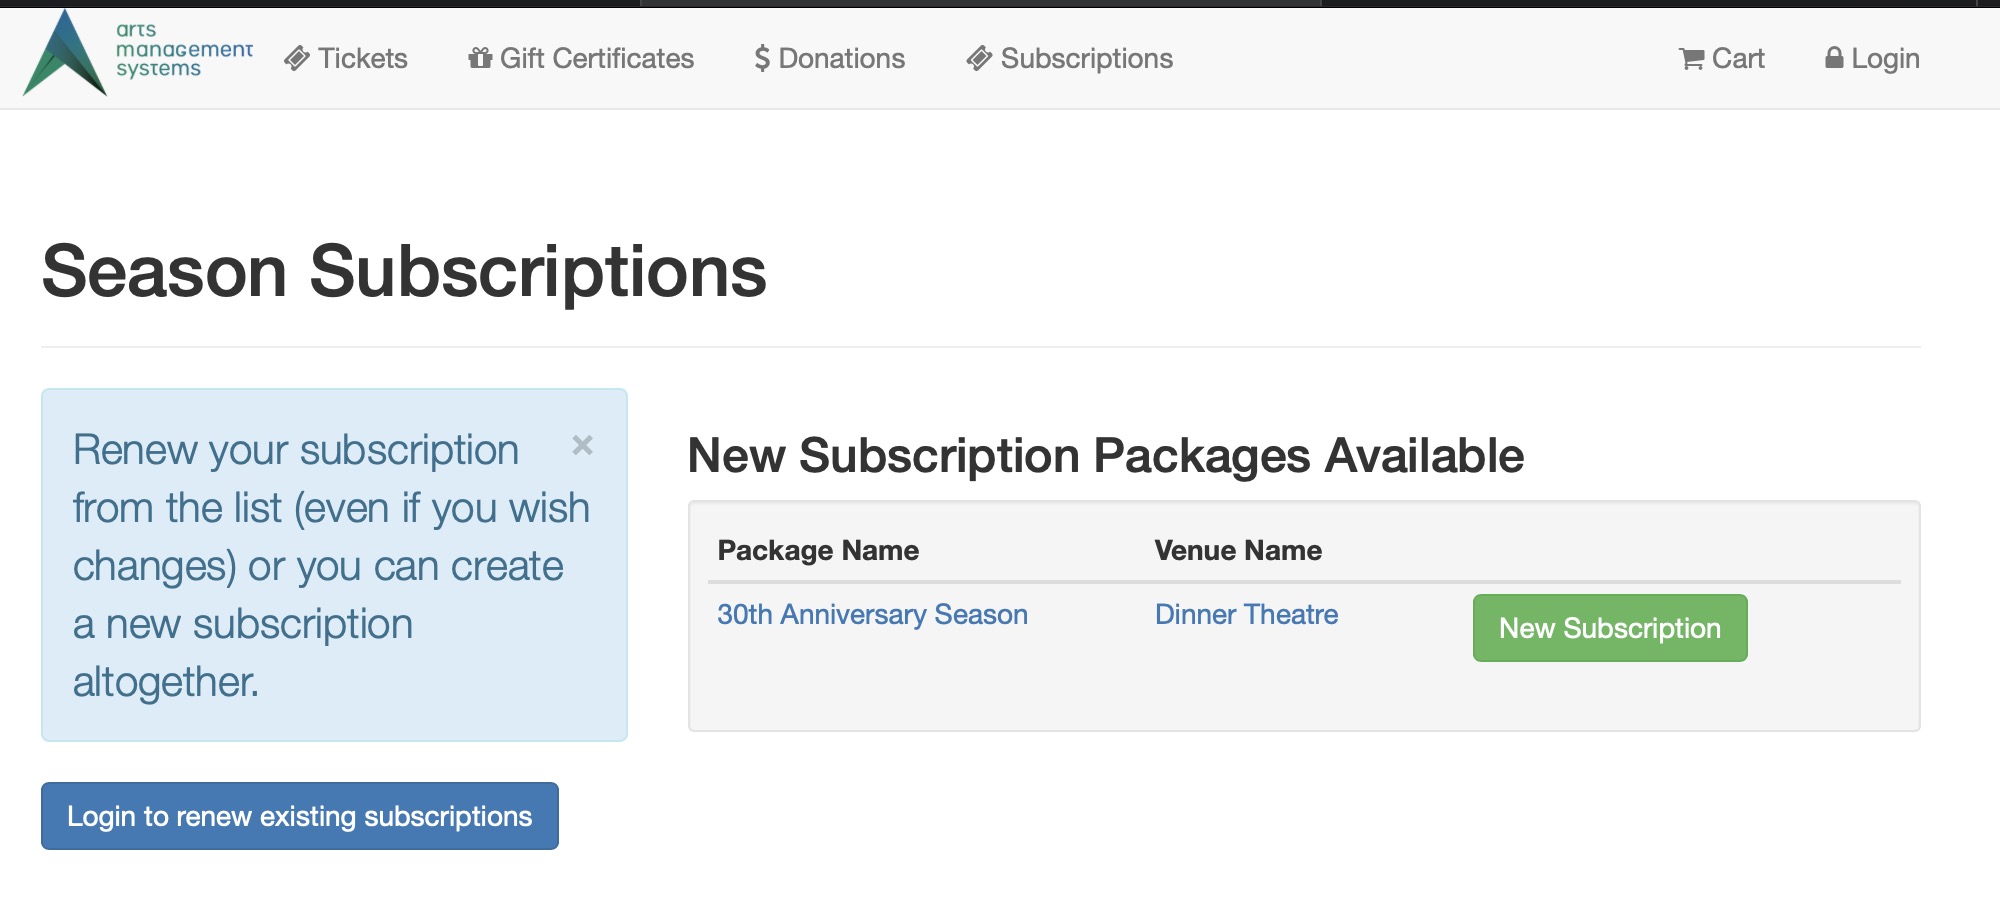
Description:
- Lists the Season Packages that are available to purchace.
- Packages are made available for sale in the Setup Season Package by opening the desired page with Theatre Manager.
- Packages available to the patron depend on availability and the patrons season package history.
Questions and Answers:
Q: How can I edit the text at the top of the window that says "You are not currently logged in. Subscriptions can be renewed here after login." ?
A: This text is located in the rowSubRenewAnonymous.html page. Open this page and edit the text as desired.
____________________________________________________________
Location:
htdocs/1/WebPagesEN
Able to Call Page(s):
- tmSubBookedHeader.html
- tmSubRenewHeader.html
- tmSubscriptionDefault.html
- TMsubscriptionMapDefault.html
- TMsubscriptionMapDefaultf.html
- TMsubscriptionsRenew.html
- rowSubRenewAnonymouse.html
- tmVenueDefault.html
Called By Page(s):
- Any page containing the navigation buttons.
Page(s) Referenced:
TMsubscriptionsRenew.html
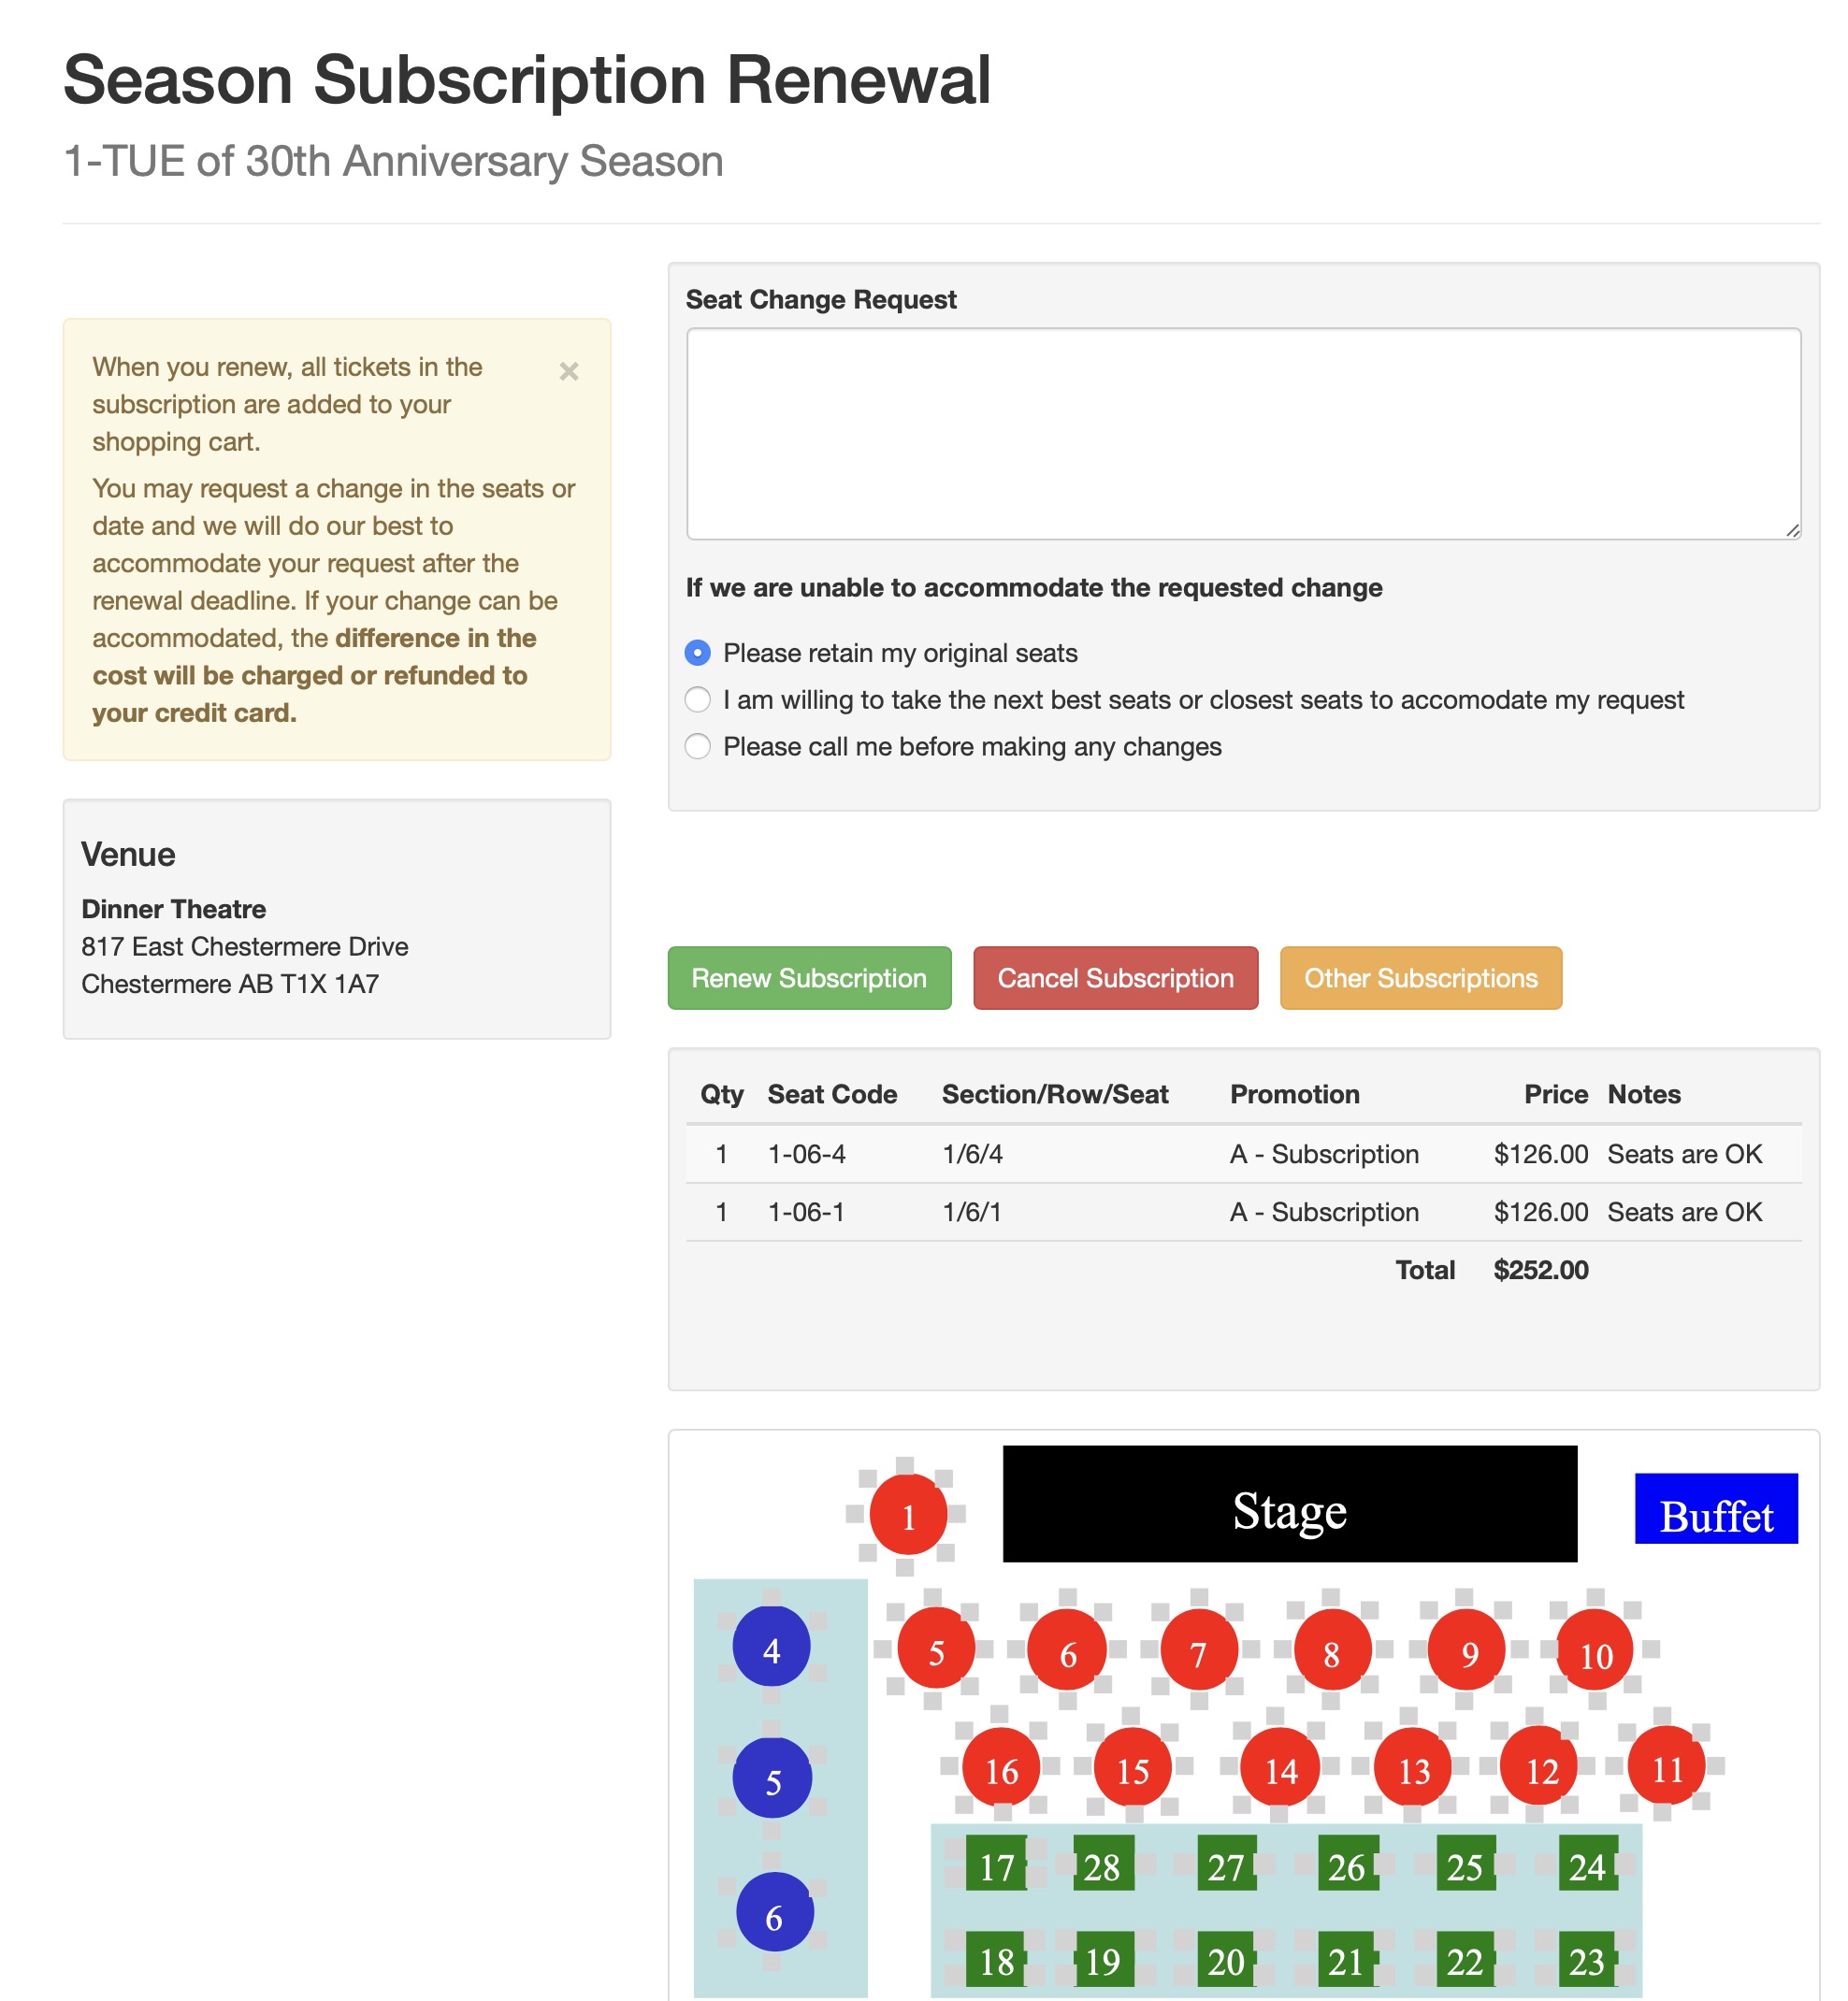
Description:
- The Renewal page for season subscription packages.
- If a patron has a package for the selected season already in their patron record they will be presented with this page.
- This option is only available for season packages where the Renew Online option is selected in the Setup Season Package by opening the desired page with Theatre Manager.
Location:
htdocs/1/WebPagesEN
Able to Call Page(s):
- tmSubscriptionDefault.html
- TMsubscriptionMapDefault.html
- TMsubscriptionMapDefaultf.html
- tmVenueDefault.html
Called By Page(s):
Page(s) Referenced:
TMsys404.html
Description:
- This page is displayed when a patron attempts to access a page that does not exist. This can often be caused by bookmarking a page within the online sales as the titles of the pages are static.
Location:
htdocs/1/WebPagesEN
Able to Call Page(s):
- maps.google.com
- The companies web site as it appears in the Company tab of Setup >> Company Preferences within Theatre Manager.
Called By Page(s):
- Not Applicable.
Page(s) Referenced:
TMsysBackupInProgress.html
Description:
- This page is displayed when Theatre Manager is paused for a backup.
- Most backups are run while the system is in use rather then paused.
- For more information on how to backup the database click here.
Location:
htdocs/1/WebPagesEN
Able to Call Page(s):
- maps.google.com
- The company web site as it appears in the Setup >> Company Preferences of Theatre Manager.
Called By Page(s):
- Not Applicable
Page(s) Referenced:
TMsysCookiesDisabled.html

Description:
- This page is displayed when a patron has disabled cookies on their internet browser.
- Cookies from the online sales are encrypted and contain only sufficient information to assist the ticket buying process.
- The cookie expires in 24 hours and is removed from the web browser at that time.
Location:
htdocs/1/WebPagesEN
Able to Call Page(s):
Called By Page(s):
Page(s) Referenced:
TMsysInvalidCall.html
Description:
- The page the patron is attempting to access does not exist.
- This can be caused by the patron bookmarking a page or attempting to access a page incorrectly referenced on the organizations main web site.
Location:
htdocs/1/WebPagesEN
Able to Call Page(s):
- maps.google.com
- The companies web site as it appears in the Company tab of Setup >> Company Preferences within Theatre Manager.
Called By Page(s):
- Not Applicable
Page(s) Referenced:
TMsysInvalidCallDirect.html
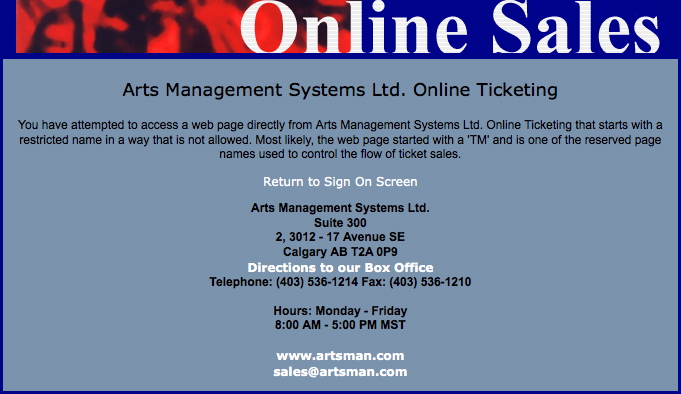
Description:
- This page indicates the patron attempted to access a page they do not have privileges to access.
Location:
htdocs/1/WebPagesEN
Able to Call Page(s):
- maps.google.com
- tmindex.html
- The companies web site as it appears in the Company tab of Setup >> Company Preferences within Theatre Manager.
Called By Page(s):
- Not Applicable
Page(s) Referenced:
TMsysInvalidCallNoAccess.html
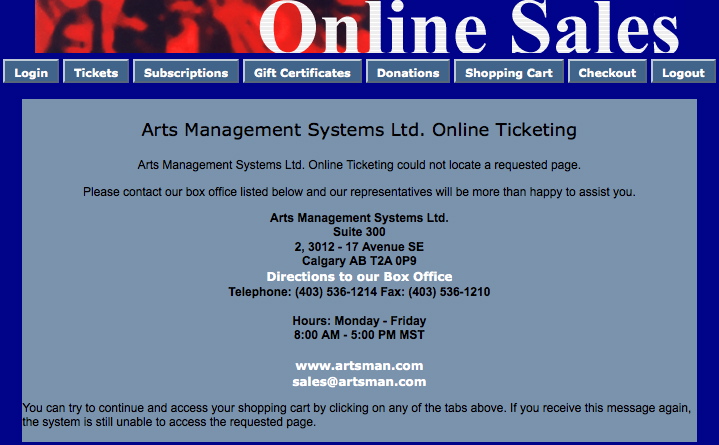
Description:
- The page the patron is attempting to access does not exist.
Location:
htdocs/1/WebPagesEN
Able to Call Page(s):
- maps.google.com
- The companies web site as it appears in the Company tab of Setup >> Company Preferences within Theatre Manager.
Called By Page(s):
- Not Applicable
Page(s) Referenced:
TMsysInvalidFunction.html
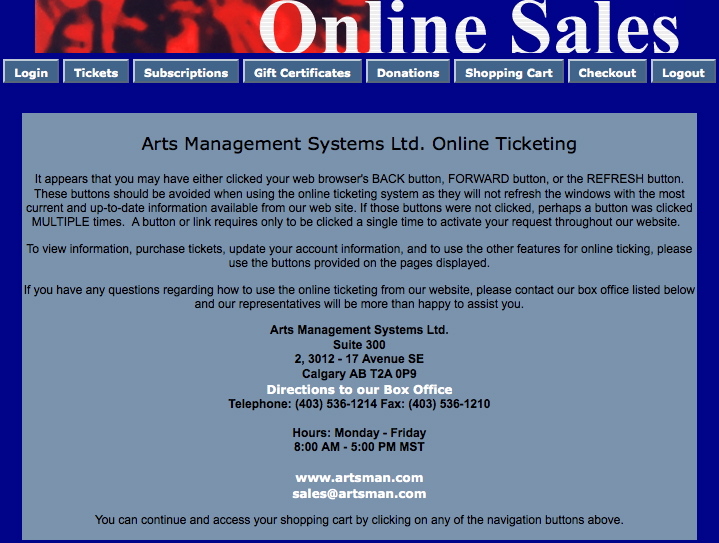
Description:
- This page is displayed when a patron uses the browser navigation buttons or clicks a button within the online sales multiple times.
- Patrons are asked to refrain from using the back button in the TMhome.html page.
Location:
htdocs/1/WebPagesEN
Able to Call Page(s):
- maps.google.com
- The companies web site as it appears in the Company tab of Setup >> Company Preferences within Theatre Manager.
Called By Page(s):
- Not Applicable
Page(s) Referenced:
TMsysWebSalesDisabled.html
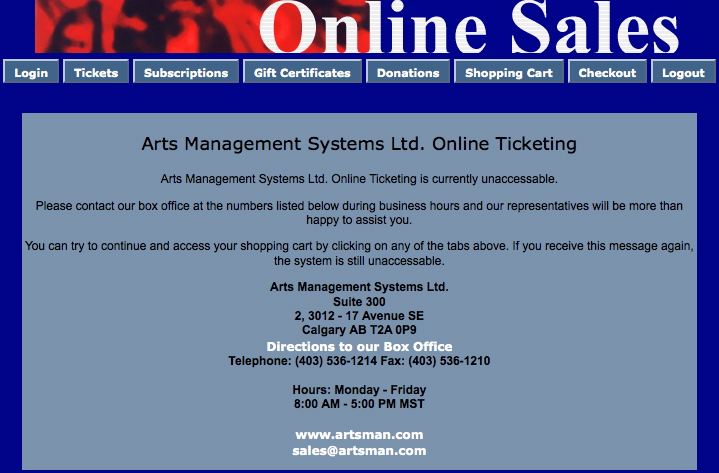
Description:
Location:
htdocs/1/WebPagesEN
Able to Call Page(s):
- maps.google.com
- The companies web site as it appears in the Company tab of Setup >> Company Preferences within Theatre Manager.
Called By Page(s):
- Not Applicable
Page(s) Referenced:
TMtemplates Folder
cellCartPassMaxRedemptionExceeded.html

Description:
- Displays a breakdown of the pass redemption for passes where a maximum redeemable amount has be set in the setup of the pass within Theatre Manager.
Location:
htdocs/1/WebPagesEN/TMtemplates/
Able to Call Page(s):
- Not Applicable.
Called By Page(s):
- rowCartCourse.html
- rowCartCourseNewGroup.html
- rowCartFestival.html
- rowCartFestivalNewGroup.html
- rowCartReserve.html
- rowCartReserveNewGroup.html
Page(s) Referenced:
- Not Applicable.
cellPassLookupDescription.html

Description:
- Displays the external description for the pass and any sales notes from within Theatre Manager.
Location:
htdocs/1/WebPagesEN/TMtemplates/
Able to Call Page(s):
Called By Page(s):
Page(s) Referenced:
- Not Applicable.
cellPassLookupValue.html

Description:
- Displays the remaining value on the pass and the expiry date if applicable.
Location:
htdocs/1/WebPagesEN/TMtemplates/
Able to Call Page(s):
Called By Page(s):
Page(s) Referenced:
- Not Applicable.
cellPerfDetailCalCurrent.html
Description:
- Pulls the current months performance dates directly from Theatre Manager for the volunteer calendar.
Location:
htdocs/1/WebPagesEN/TMtemplates/
Able to Call Page(s):
- Not Applicable
Called By Page(s):
Page(s) Referenced:
- Not Applicable
cellPerfDetailCalOther.html
Description:
- Pulls the prior and future months performance dates directly from Theatre Manager for the volunteer calendar.
Location:
htdocs/1/WebPagesEN/TMtemplates/
Able to Call Page(s):
- Not Applicable
Called By Page(s):
Page(s) Referenced:
- Not Applicable
cellPerfDetailCalTextProperty.html
Description:
- Pulls the performance time and title from Theatre Manager for the volunteer calendar.
Location:
htdocs/1/WebPagesEN/TMtemplates/
Able to Call Page(s):
- Not Applicable
Called By Page(s):
Page(s) Referenced:
- Not Applicable
cellPerfDetailCalTitleProperty.html
Description:
- Pulls the performance notes and sales notes for a performance from Theatre Manager for the volunteer calendar.
Location:
htdocs/1/WebPagesEN/TMtemplates/
Able to Call Page(s):
- Not Applicable
Called By Page(s):
Page(s) Referenced:
- Not Applicable
cellVolDetailCalCurrent.html
Description:
- Pulls the date and activity the volunteer will be performing from Theatre Manager for the volunteer calendar.
Location:
htdocs/1/WebPagesEN/TMtemplates/
Able to Call Page(s):
- Not Applicable
Called By Page(s):
Page(s) Referenced:
- Not Applicable
cellVolDetailCalOther.html
Description:
- Pulls the historical date and activities the volunteer is scheduled to perform from Theatre Manager for the volunteer calendar.
Location:
htdocs/1/WebPagesEN/TMtemplates/
Able to Call Page(s):
- Not Applicable
Called By Page(s):
Page(s) Referenced:
- Not Applicable
constantALLEVENTS.txt

Description:
- The default text for the event drop down at the top of the TMtickets.html page.
- Allows for the customization of the text and accommodates change of language
Location:
htdocs/1/WebPagesEN/TMtemplates/
Able to Call Page(s):
- Not Applicable
Called By Page(s):
Page(s) Referenced:
- Not Applicable
constantALLGENRES.txt

Description:
- The default text for the genre drop down at the top of the TMtickets.html page.
- Allows for the customization of the text and accommodates change of language.
Location:
htdocs/1/WebPagesEN/TMtemplates/
Able to Call Page(s):
- Not Applicable
Called By Page(s):
Page(s) Referenced:
- Not Applicable
constantALLPRICECODES.txt
Description:
- The text displayed for "Any Price Code" in the Best Area Search .
Location:
htdocs/1/WebPagesEN/TMtemplates/
Able to Call Page(s):
- Not Applicable
Called By Page(s):
Page(s) Referenced:
- Not Applicable
constantALLSECTIONS.txt
Description:
- The text displayed for "All Section" in the Best Section Search .
Location:
htdocs/1/WebPagesEN/TMtemplates/
Able to Call Page(s):
- Not Applicable
Called By Page(s):
Page(s) Referenced:
- Not Applicable
constantALLVENUES.txt

Description:
- The default text for the venue drop down at the top of the TMtickets.html page.
- Allows for the customization of the text and accommodates change of language
Location:
htdocs/1/WebPagesEN/TMtemplates/
Able to Call Page(s):
- Not Applicable
Called By Page(s):
Page(s) Referenced:
- Not Applicable
constantALLYEARS.txt

Description:
- The default text for the year drop down.
- Allows for the customization of the text to accommodate change of language.
Location:
htdocs/1/WebPagesEN/TMtemplates/
Able to Call Page(s):
- Not Applicable
Called By Page(s):
Page(s) Referenced:
- Not Applicable
constantMONTHS.txt

Description:
- The default text for month drop downs.
- Allows for the customization of the text to accommodate change of language
Location:
htdocs/1/WebPagesEN/TMtemplates/
Able to Call Page(s):
- Not Applicable
Called By Page(s):
Page(s) Referenced:
- Not Applicable
constantNEWPATRON.txt
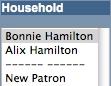
Description:
- The default text for adding a new patron in the left column of the TMpatronUpdate.html page.
- Allows for the customization of the text and accommodates change of language
Location:
htdocs/1/WebPagesEN/TMtemplates/
Able to Call Page(s):
- Not Applicable
Called By Page(s):
Page(s) Referenced:
- Not Applicable
constantPATRONCONTACTEXISTING.txt

Description:
- The default text for contact information within the TMpatronUpdate.html page.
- The contact type is coded into Theatre Manager. The sequence numbers are listed within this page and should not be altered.
- The location options are based on the default selection for Patron Location within Setup >> System Tables >> Code Tables of Theatre Manager.
- In this page the number 2 appears twice. It the value is undefined in the Theatre Manager database the online sales will leave the text in this location blank.
- Allows for the customization of the text and accommodates change of language
Location:
htdocs/1/WebPagesEN/TMtemplates/
Able to Call Page(s):
- Not Applicable
Called By Page(s):
Page(s) Referenced:
- Not Applicable
constantPATRONCONTACTLIMITED.txt

Description:
- Limits the data required for limited patron profiles and indicates the 'mandatory' fields.
Location:
htdocs/1/WebPagesEN/TMtemplates/
Able to Call Page(s):
- Not Applicable
Called By Page(s):
Page(s) Referenced:
- Not Applicable
constantPATRONCONTACTNEW.txt

Description:
- The default text for contact information within the TMpatronNew.html page.
- The contact type is coded into Theatre Manager. The sequence numbers are listed within this page and should not be altered.
- The location options are based on the default selection for Patron Location within Setup >> System Tables >> Code Tables of Theatre Manager.
- In this page the number 2 appears twice. It the value is undefined in the Theatre Manager database the online sales will leave the text in this location blank.
- Allows for the customization of the text and accommodates change of language
Example
An example of the file and how it affects the new patron window is shown below. In the default file, all items are commented out (with a '#' in the first column). In the sample, 5 entries were made:
- 4 <tab> Work - means there will be an email address area at the top of the screen called Work
- 1 <tab> Home - means there will be an address block called Home
- 1 <tab> Work - means there will be a second address block called Work
- 2 <tab> Home - means there will be an phone field called Home
- 2 <tab> Work - means there will be an phone field called Work
some notes:
- Home or Work must be valid entries in the location code table. If you leave them blank, then TM will take the defaults for each block type.
- You can have as many of each block type as you wish -- for example you could have 10 home phone number prompts just by having 10 entries in the file.
- There must be a <tab> after the block type and the name of the block.
- You must have a block specified that meets your minimum data requirements. For example: if you require any address entries, then you must have at least one address block. You must also have an email block, as that is the patron's identifier
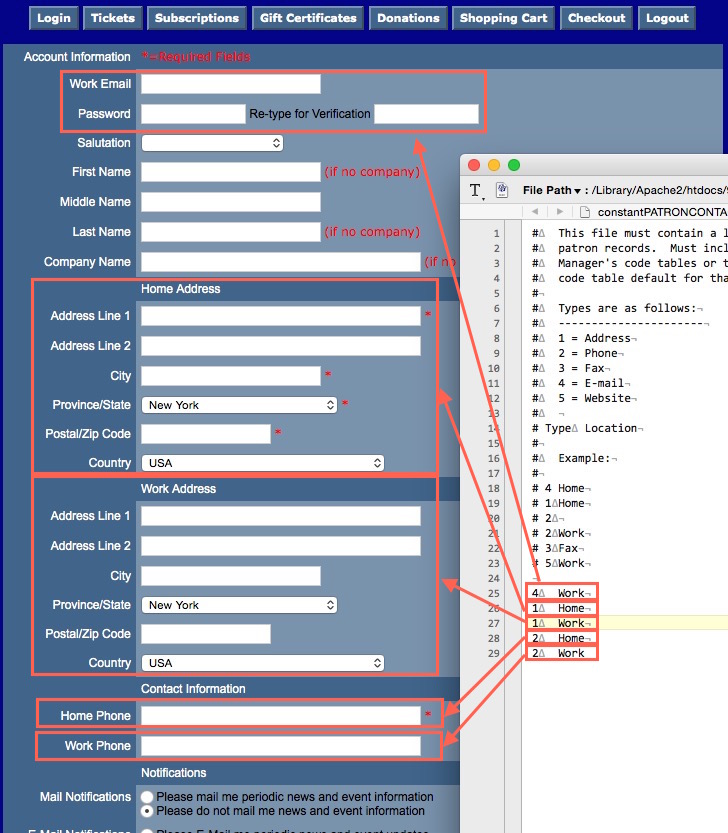
Location:
htdocs/1/WebPagesEN/TMtemplates/
Able to Call Page(s):
- Not Applicable
Called By Page(s):
Page(s) Referenced:
- Not Applicable
constantYESNO.txt

Description:
- The default text for the anonymous and corporate drop down at the top of the TMdonation.html page.
- Allows for the customization of the text and accommodates change of language
Location:
htdocs/1/WebPagesEN/TMtemplates/
Able to Call Page(s):
- Not Applicable
Called By Page(s):
Page(s) Referenced:
- Not Applicable
rowCartDonationRoundup.html
Enable Round up to the Nearest $x.xx
You can enable rounding up the cart to an even amount of your choice with a donation. The feature must first be enabled in Company Preferences -> Web Options. After that, the web page defaults to prompt the user to round up the purchase:
- The nearest $10.00
- The nearest $5.00
- The nearest $1.00
- BUT, only if the current cart total is not an even $1.00 amount.. The default round up amount can be changed in the web page.
|
Note: There is a difference between:
|
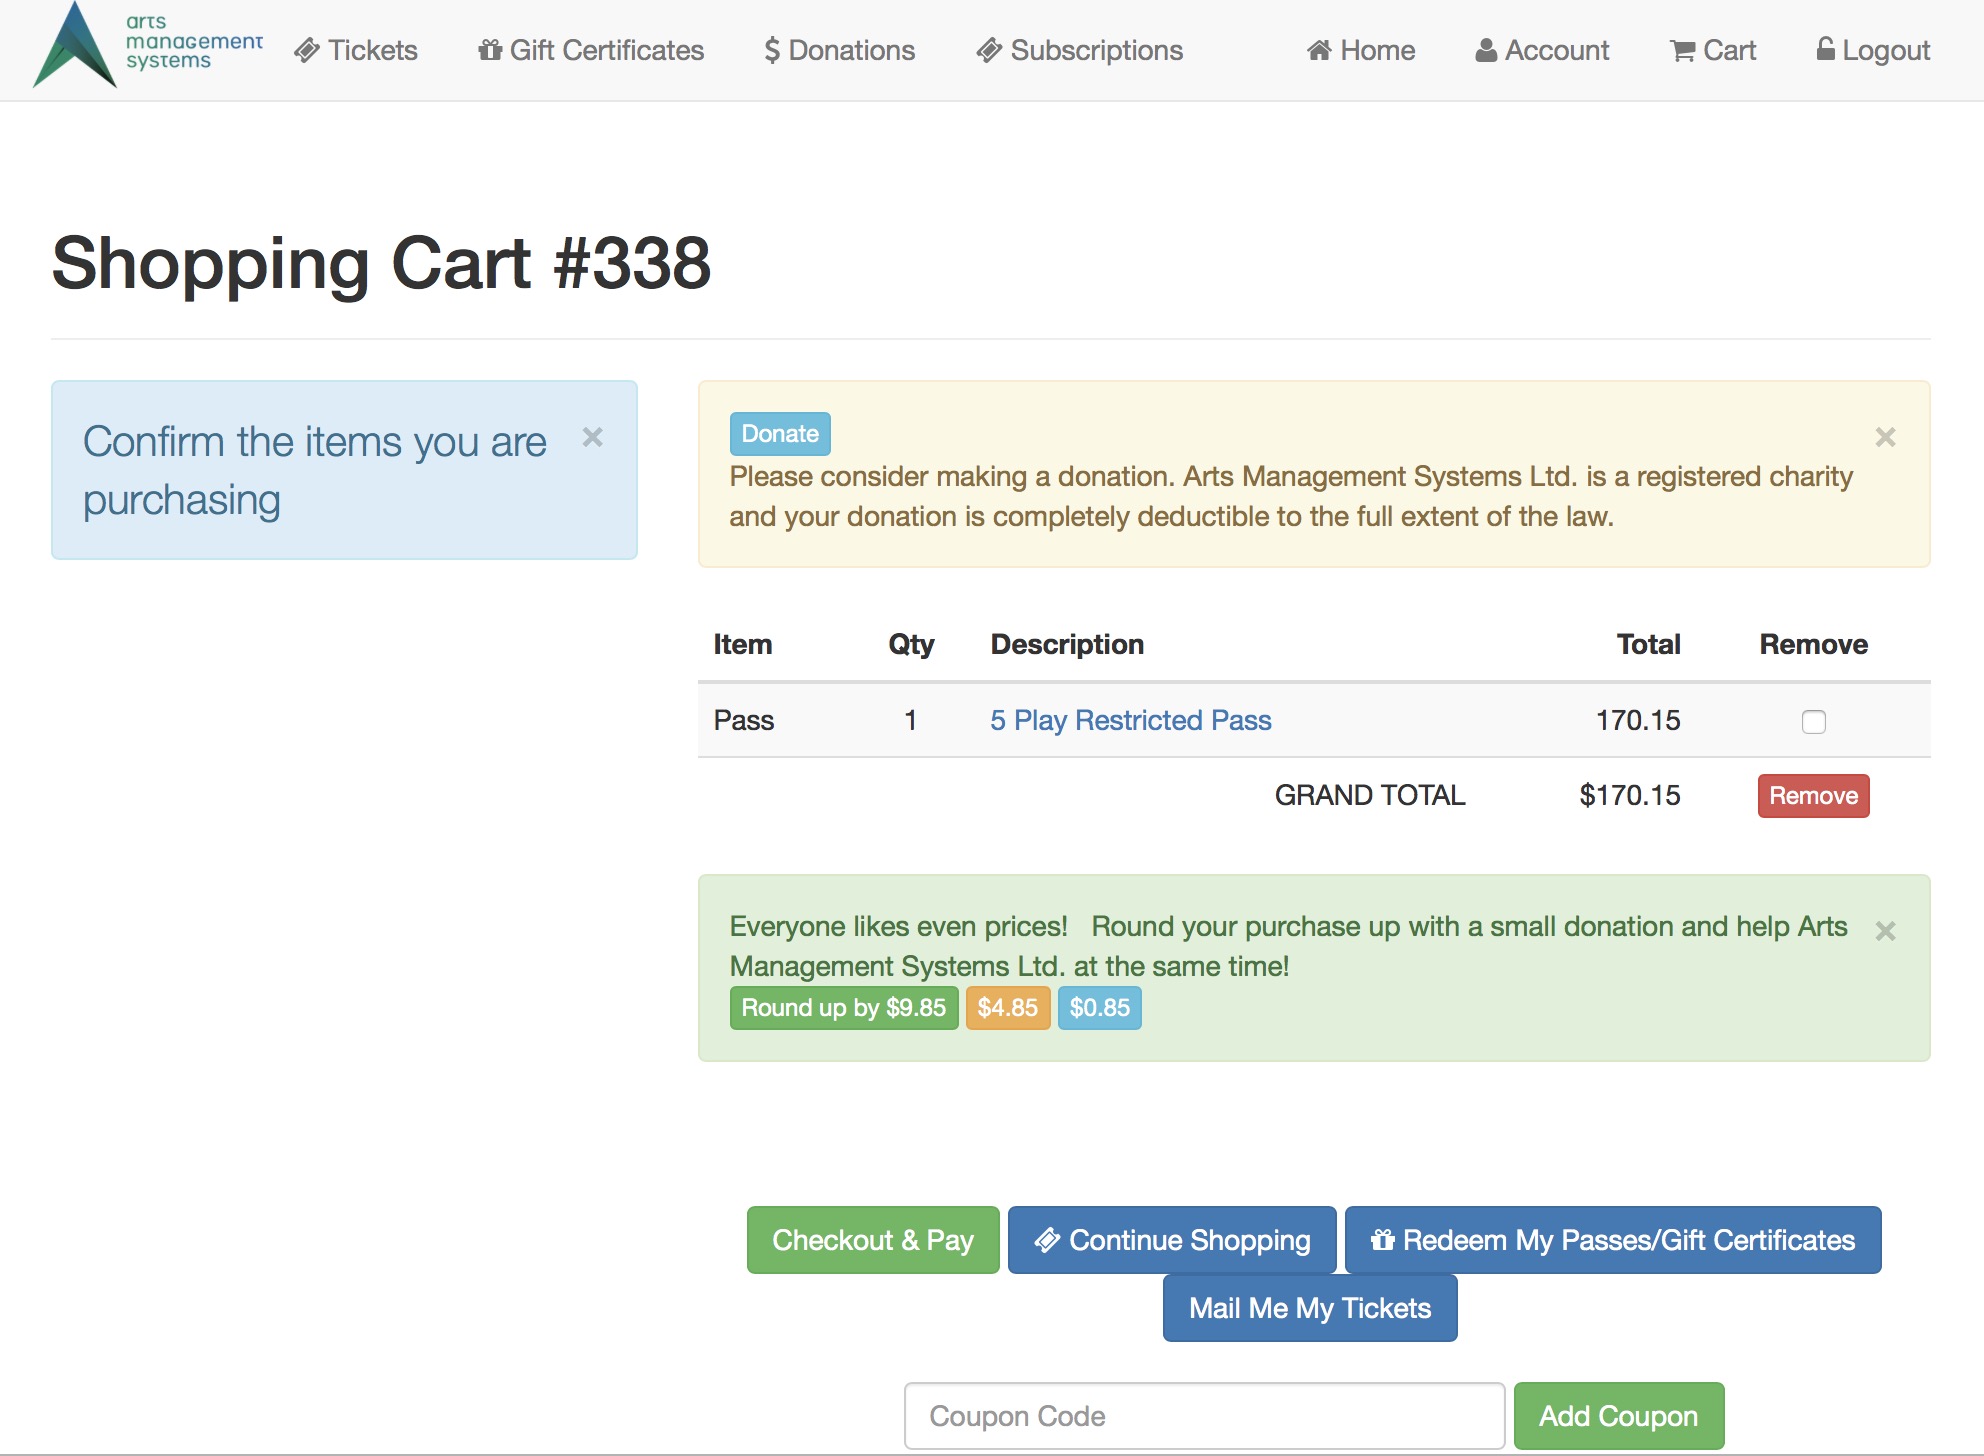
Changing the amount at which the cart asks
In the web page text below, there is a 1 that points to an opening condition at the top of the page and the bottom of the page. That indicates to only include the round up code if the cart does not round to an even dollar. You can change that number to $5.00, $7.50, $9.33 - any number you want. If the cart balance is NOT an even multiple of that amount, then the round up option will show in the web page.
The other Round-Up amounts can only be - EVEN MULTIPLES of the main amount
The number you pick for this value be an even multiple of the round up suggestions. Examples: Make this number
- $2.00 if your round up values are $2.00, $6.00 and $20 (all divisible by $2.00)
- $2.50 if your round up values are $2.50, $5.00 and $25 (all divisible by $2.50)
- $10.00 if your round up values are $10.00, $20.00 and $30 (all divisible by $10.00)
Changing the amount to round up by
The page suggests 3 values for rounding up (you can add more). However, if you want to change them, you can see the number 2 which points to a pair of dollar amounts. You must change both, since one is the input value and the other is the button description. Those 3 values are in smaller squares:
- round up to 1.00 (the default)
- round up to 5.00 the middle choice
- round up to 10.00, the first button
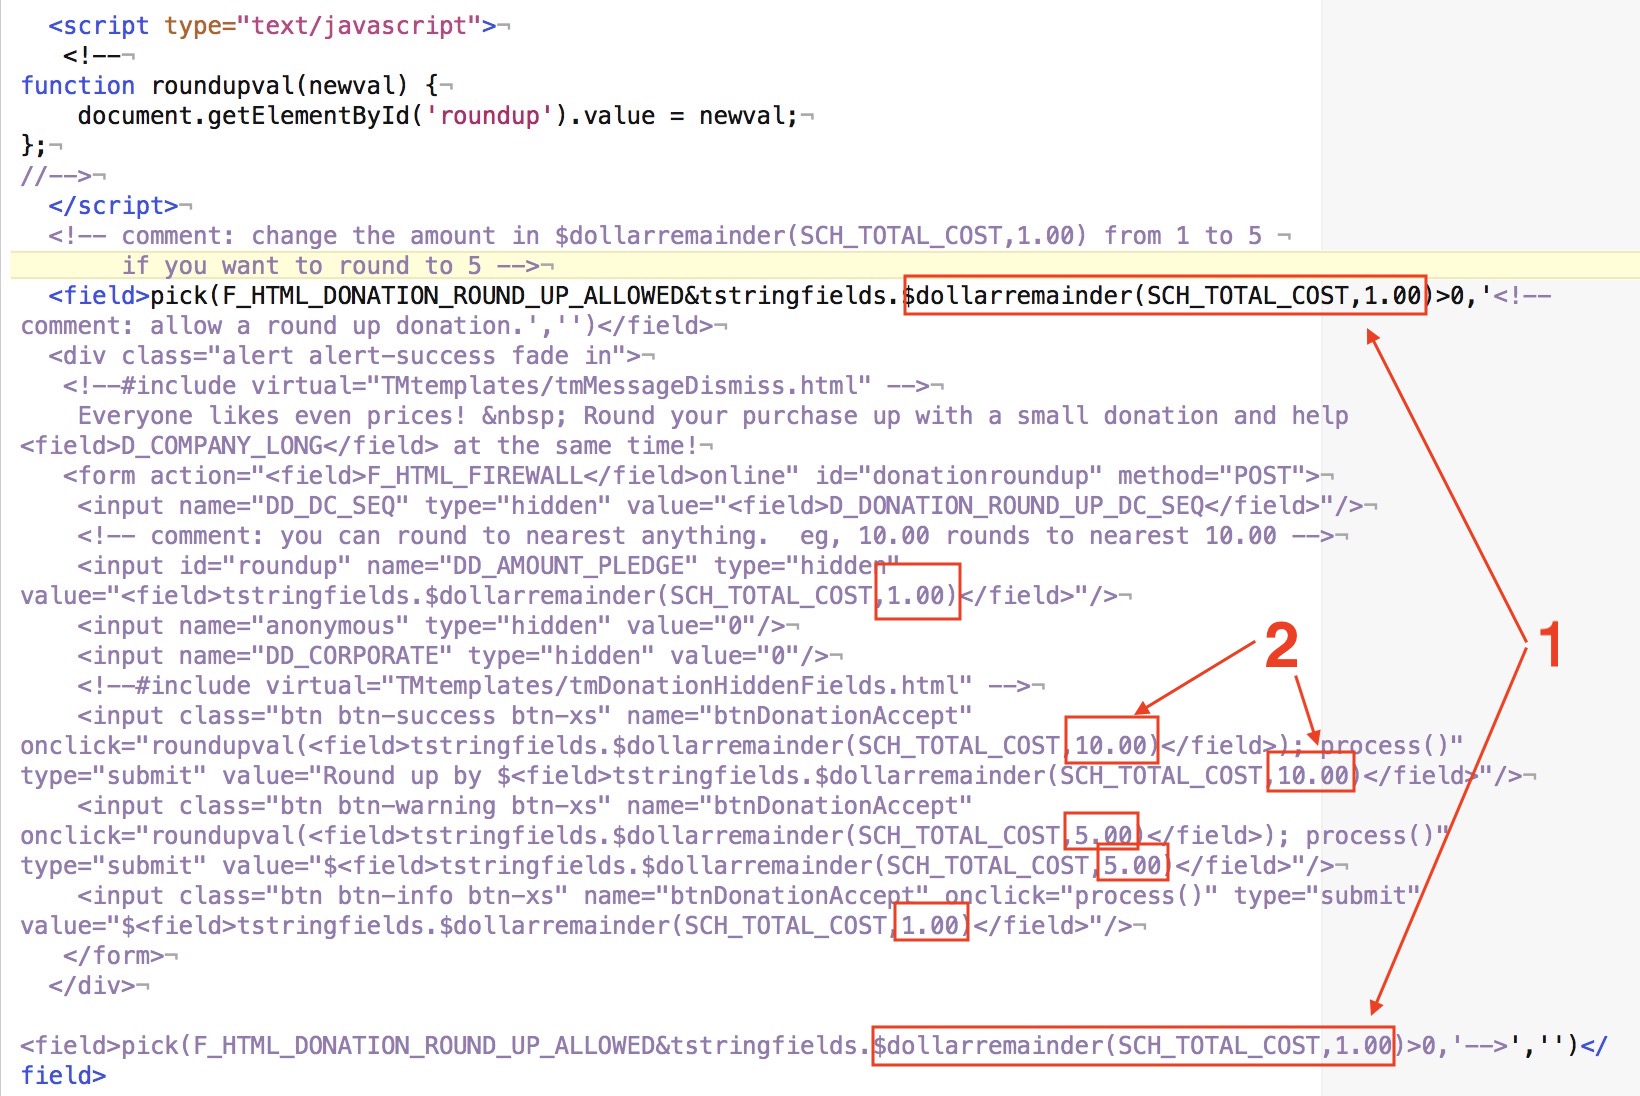
Location:
htdocs/1/WebPagesEN/TMtemplates/
Able to Call Page(s):
- Not Applicable
Called By Page(s):
Page(s) Referenced:
- Not Applicable
tmCheckoutDonationReasonToBuy.html
- This web page include file is only used when patrons check out with only a donation in their cart
- It much be changed if you have made reason to buy mandatory for all orders, which also means those orders taken on your web site. In the case of orders containing only donations, you want the donation process to be speedy - and so you must then pick the value you prefer as the mandatory Donation reason to buy. This is placed in the hidden field on this web page
What to Change:

- Find the sequence number that you want to use as the donation reason to buy for any online donations. This is found in Setup >> System Tables >> Code Tables under Order Reason to Buy.
- Update the ORD_REASON_BUY_FC_SEQ numeric Value in the web page
- Once changes have been made, this page should be saved to the /1/WebPagesXX/tmTemplates folder.
Location:
htdocs/1/WebPagesEN/tmTemplates
Able to Call Page(s):
- none
Called By Page(s):
tmErrorMessageInfo.html
The tmErrorMessageInfo.html is widely included throughout web sales to display error messages to the user. It is often shown on the left side of the screen (or top of the screen in mobile views)
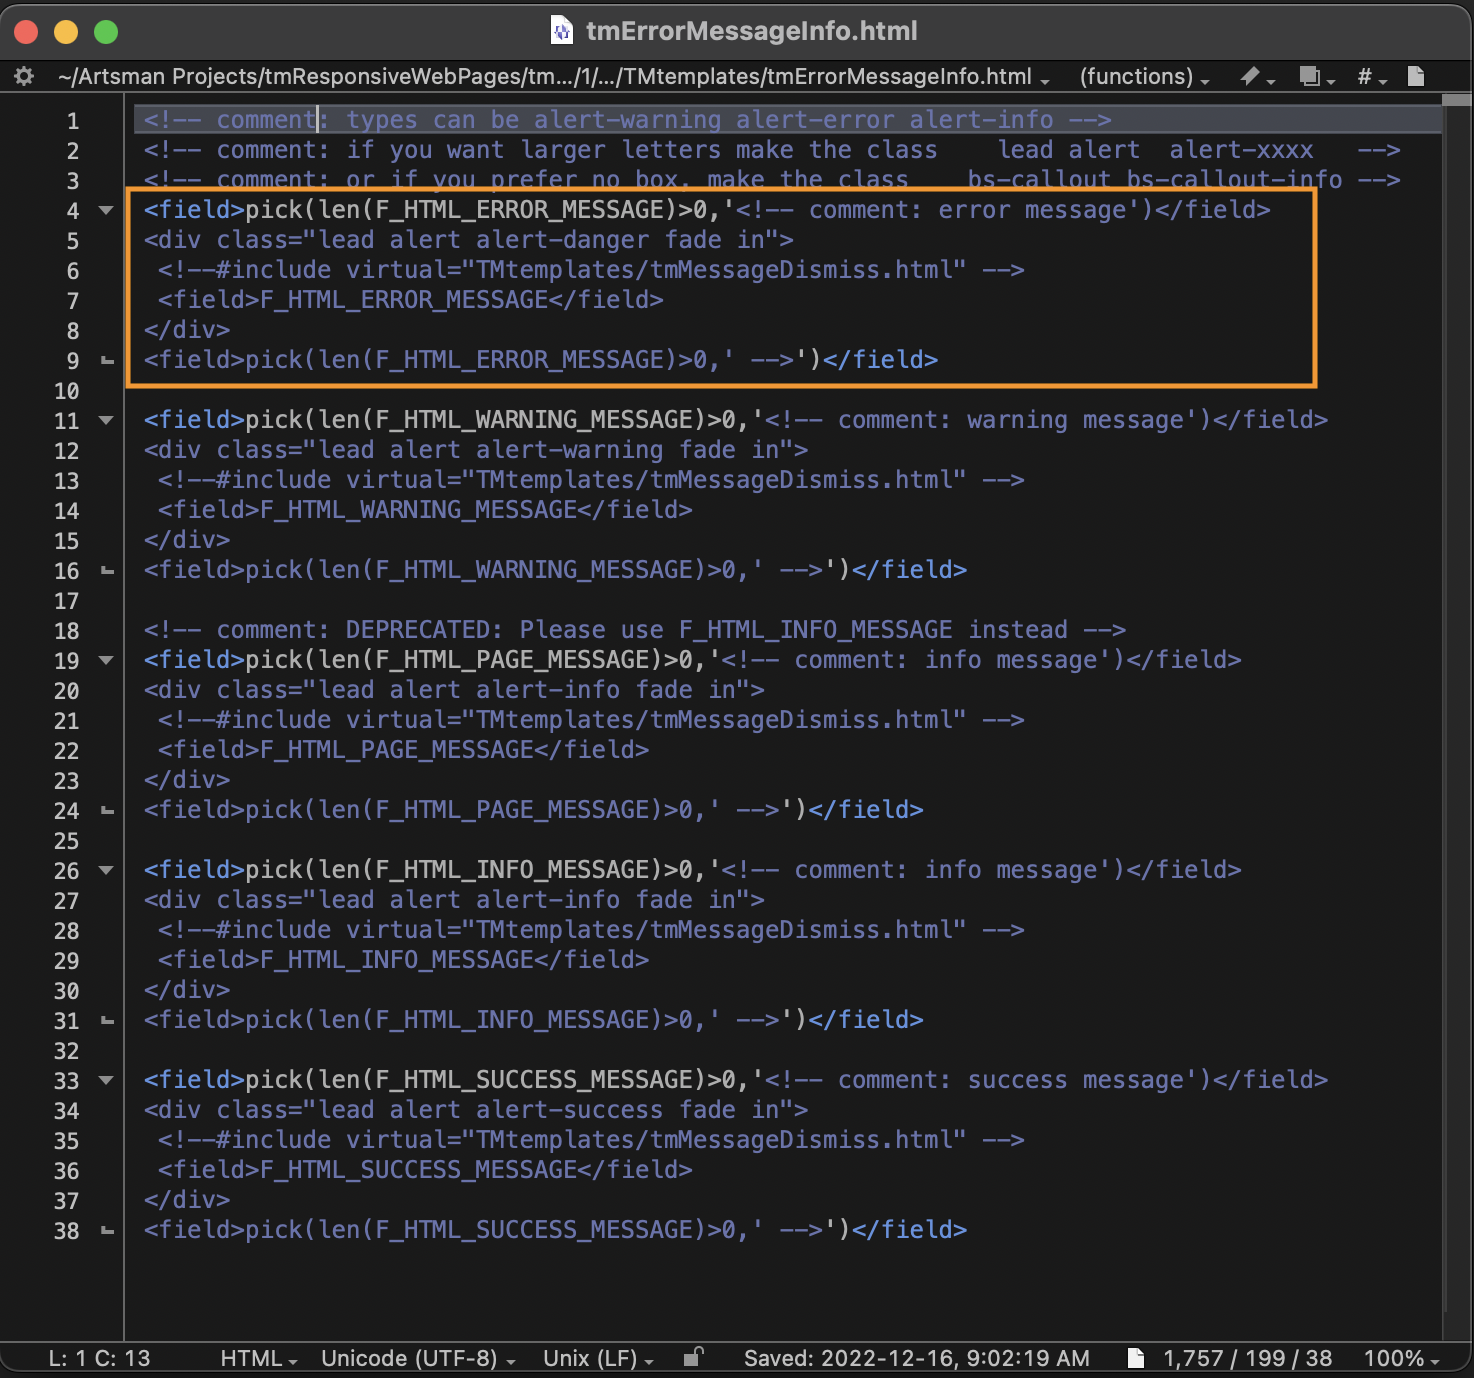
In the example below, a donation amount was not entered, but the "Add Donation" button was clicked. You can see how the blue alert box was generated, ultimately telling the online shopper to "Enter The Required Fields".
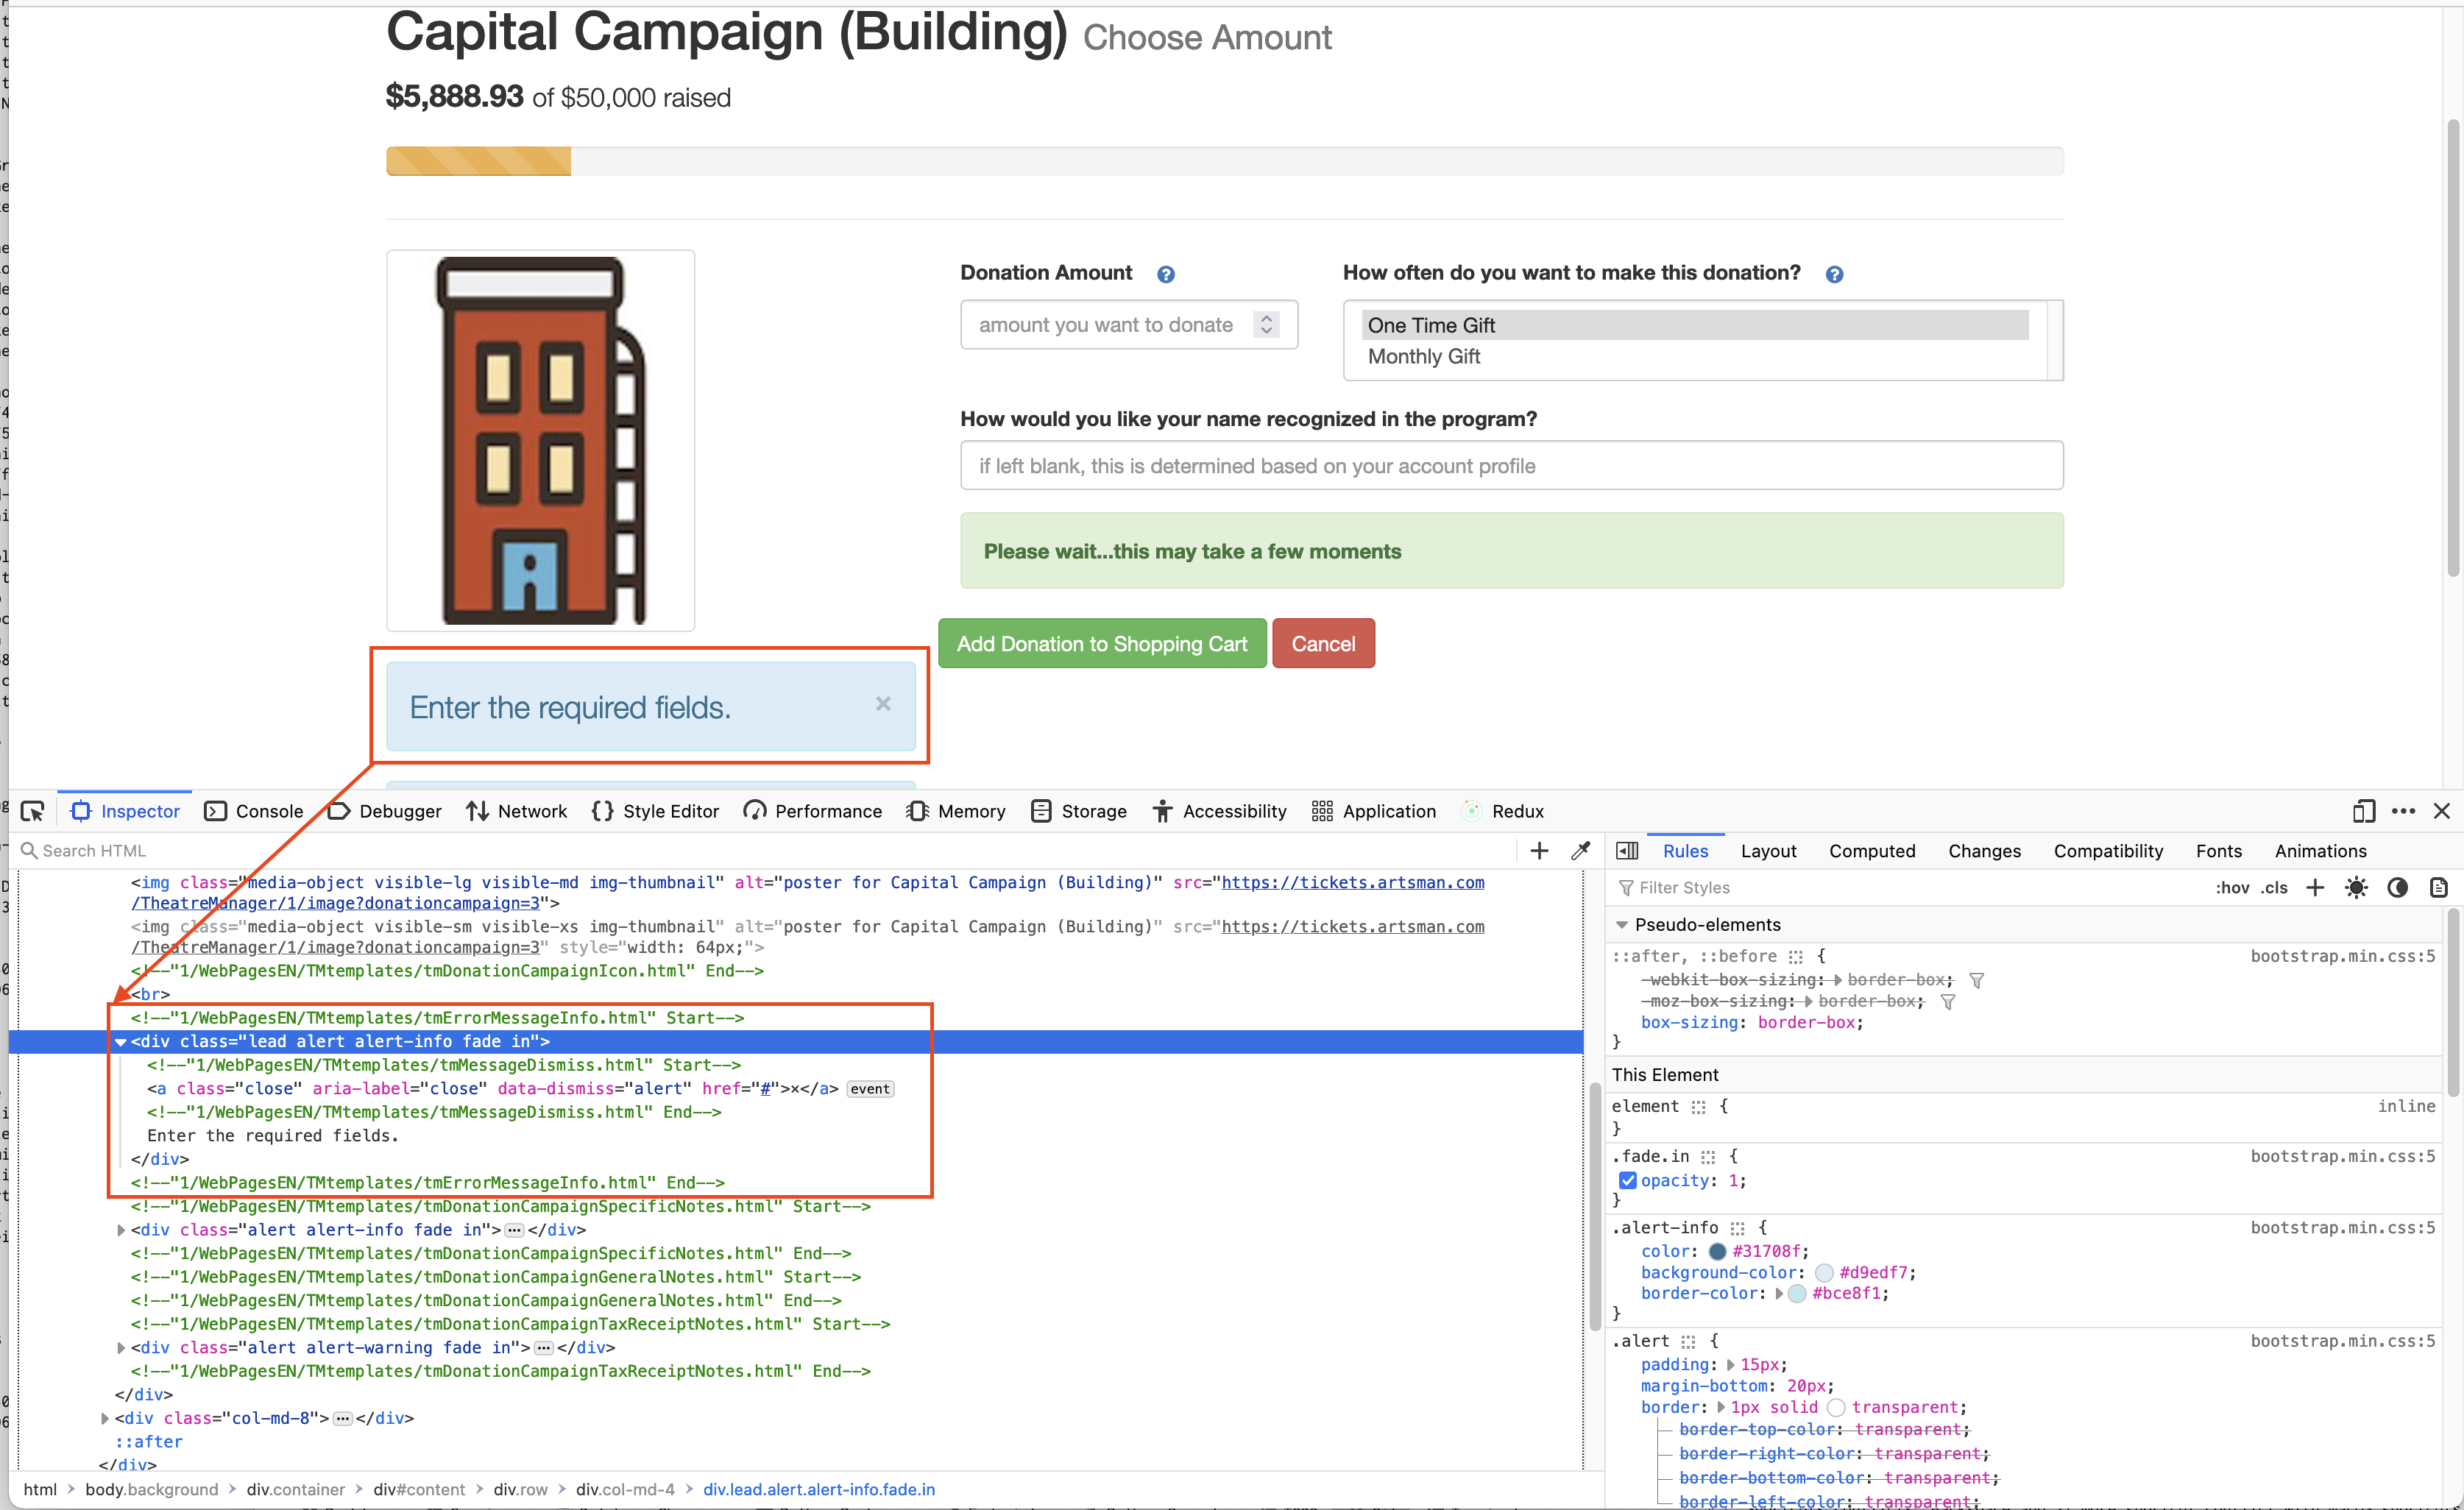
tmdonationhiddenfields.html
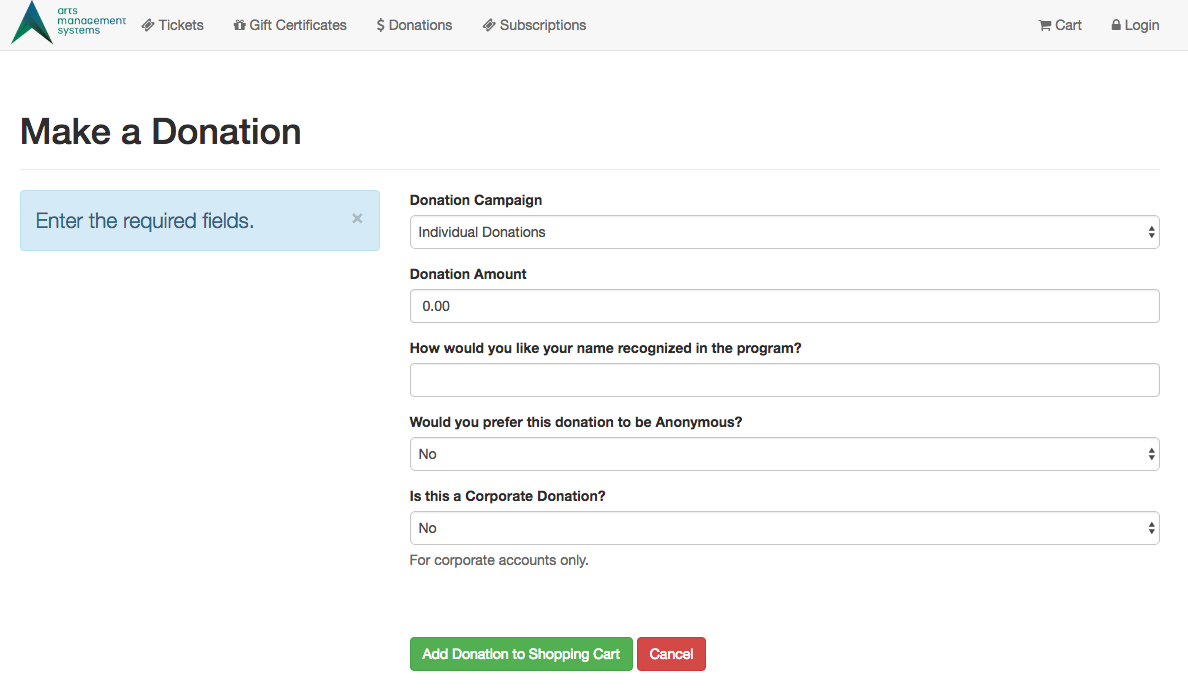
Description:
Customizations if donation fields have been made madatory
There are 3 fields on that are donor popup fields on the notes tab of the donation window. If these fields have been made mandatory, then you will need to find the code table value for these custom fields:
- donation field1 which refers to DD_FLD1_FC_SEQ, and/or
- donation field2 which refers to DD_FLD2_FC_SEQ, and/or
- donation field3 which refers to DD_FLD3_FC_SEQ
Change the value of xxx, yyy, or zzz in the input strings below to be the internal record number (Seq #) of the appropriate popup. Also, move the mandatory input field above the <!-- comment: in the file so that it becomes uncommented and active in the web page.
<INPUT NAME="DD_FLD1_FC_SEQ" TYPE=hidden id="DD_FLD1_FC_SEQ" value="xxx">
<INPUT NAME="DD_FLD2_FC_SEQ" TYPE=hidden id="DD_FLD2_FC_SEQ" value="yyy">
<INPUT NAME="DD_FLD3_FC_SEQ" TYPE=hidden id="DD_FLD3_FC_SEQ" value="zzz">
Location:
htdocs/1/WebPagesEN/TMtemplates
Able to Call Page(s):
-
None
Called By Page(s):
Page(s) Referenced:
-
None
NextEventEmpty.html
Description:
- Displays an empty field in place of the date where there isn't a performance on that date or the performance for that date is not listed as available for sale online.
Location:
htdocs/1/WebPagesEN/TMtemplates/
Able to Call Page(s):
- Not Applicable
Called By Page(s):
Page(s) Referenced:
- Not Applicable
NextEventNormal.html

Description:
- Displays the performance information on the performance date within the calendar.
- This information is pulled directly from the Theatre Manager database.
- Only performances indicated as available for sale via the web under the Performance tab of Setup >> Events in the Theatre Manager database will appear.
Location:
htdocs/1/WebPagesEN/TMtemplates/
Able to Call Page(s):
Called By Page(s):
Page(s) Referenced:
- Not Applicable
NextVolEmpty.html
Description:
- Displays an empty field under a date where there is no scheduled volunteer activity for that day.
Location:
htdocs/1/WebPagesEN/TMtemplates/
Able to Call Page(s):
- Not Applicable
Called By Page(s):
Page(s) Referenced:
- Not Applicable
NextVolNormal.html

Description:
- Displays the volunteer information on the calendar for the date when the volunteer is scheduled to perform an activity.
- The volunteer activity is pulled directly from the Theatre Manager database.
Location:
htdocs/1/WebPagesEN/TMtemplates/
Able to Call Page(s):
- Not Applicable
Called By Page(s):
Page(s) Referenced:
- Not Applicable
palmCheckin.html

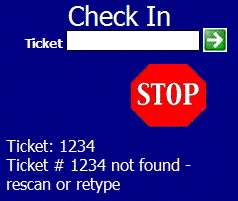
Description:
- This pages is sent as a response to hand held scanners during the Check In process.
- The page provides the status of the admission, the beep associated with the status and the reason for the message.
- The scanner needs to be set to the check in option prior to scanning tickets.
- If the ticket status is set to Not Used within Theatre Manager scanning the ticket will change the status and indicate the ticket is a "GO" for admission.
- If the ticket status is set to Used within Theatre Manager the result will be the "STOP" screen. This is due to a ticket previously being scanned as checked in but not being scanned as checked out. Thus the status is still Used within Theatre Manager.
Location:
htdocs/1/WebPagesEN/TMtemplates/
Able to Call Page(s):
- Not Applicable
Called By Page(s):
- This page is called by a hand held scanner.
Page(s) Referenced:
- Not Applicable
palmCheckout.html
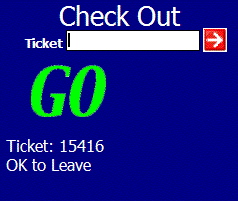
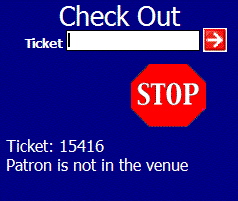
Description:
- This pages is sent as a response to hand held scanners during the check out process.
- The page provides the status of the admission, the beep associated with the status and the reason for the message.
- The scanner needs to be set to the check out option prior to scanning tickets.
- If the ticket status is set to Used within Theatre Manager scanning the ticket will change the status and indicate the ticket is a "GO" for check out.
- If the ticket status is set to Not Used within Theatre Manager the result will be the "STOP" screen. This is caused by a ticket that has not previously been scanned into the venue. Thus the status is still Not Used within Theatre Manager.
Location:
htdocs/1/WebPagesEN/TMtemplates/
Able to Call Page(s):
- Not Applicable
Called By Page(s):
- This page is called by a hand held scanner.
Page(s) Referenced:
- Not Applicable
palmTime.html

Description:
- This page displays the current date and time for the web listener it reaches.
- The page is designed for testing to ensure Apache and at least one web listener are up and running.
- Arts Management Systems uses a tool called InterMapperwhen testing client sites where online sales are experiencing frequent outages. InterMapper is set to request the palmTime.html page. When the page is not available, a message is sent by email to the indicated recipients.
- If another tool is used for monitoring online sales, it is recommended that this be the page it checks for activity. This will ensure tools, such as google analytics, do not present false statistics for online activity due to monitoring.
Location:
htdocs/1/WebPagesEN/TMtemplates/
Able to Call Page(s):
- Not Applicable.
Called By Page(s):
- Not Applicable.
Page(s) Referenced:
- Not Applicable.
pleaseWaitMessage.html

Description:
- Acts as a place saver for the pleaseWaitMessgeFuction.html message.
- Each page containing the pleaseWaitMessage.html reference also contains a reference to the pleaseWaitMessageFunction.html. When a button within the page references the OnClick-process() function the Please Wait message is pulled from the script within the pleaseWaitMessgeFuction.html page. The text is displayed on the page in the location of the pleaseWaitMessage.html place saver.
Location:
htdocs/1/WebPagesEN/TMtemplates/
Able to Call Page(s):
- Not Applicable
Called By Page(s):
- TMcart.html
- TMcheckout.html
- TMcheckoutNoPayment.html
- TMcheckoutProcessing.html
- TMdonation.html
- TMdonationmonthly.html
- TMhome.html
- tmPackageDefault.html
- TMsubscriptionMapDefault.html
- TMsubscriptionMapDafaultf.html
- TMsubscriptionPriceMapDefault.html
- TMsubscriptionsMapDefaultf.html
- TMsubscriptionsPriceMapDefault.html
- TMticketsPrice_MapDefault.html
- TMticketsSection_MapDefault.html
- TMticketsSection_MapDefaultc.html
- TMticketsSection_MapDefaultf.html
- TMpass.html
- TMpassAskAmount.html
- TMpasswordChange.html
- TMpasswordResetChange.html
- TMpatronLimitedProfile.html
- TMpatronNew.html
- TMpatronUpdate.html
- TMsubscriptions.html
- TMsubscriptionsRenew.html
- tmLoginForm.html
- TMtickets.html
Page(s) Referenced:
- Not Applicable
PrevEventEmpty.html
Description:
- Displays an empty field in place of the date where there isn't a performance on that date or the performance for that date is not listed as available for sale online.
Location:
htdocs/1/WebPagesEN/TMtemplates/
Able to Call Page(s):
- Not Applicable
Called By Page(s):
Page(s) Referenced:
- Not Applicable
PrevEventNormal.html

Description:
- Displays the performance information on the performance date within the calendar.
- This information is pulled directly from the Theatre Manager database.
- Only performances indicated as available for sale via the web under the Performance tab of Setup >> Events in the Theatre Manager database will appear.
Location:
htdocs/1/WebPagesEN/TMtemplates/
Able to Call Page(s):
Called By Page(s):
Page(s) Referenced:
- Not Applicable
PrevVolEmpty.html
Description:
- Displays an empty field under a date where there is no scheduled volunteer activity for that day.
Location:
htdocs/1/WebPagesEN/TMtemplates/
Able to Call Page(s):
- Not Applicable
Called By Page(s):
Page(s) Referenced:
- Not Applicable
PrevVolNormal.html

Description:
- Displays the volunteer information on the calendar for the date when the volunteer is scheduled to perform an activity.
- The volunteer activity is pulled directly from the Theatre Manager database.
Location:
htdocs/1/WebPagesEN/TMtemplates/
Able to Call Page(s):
- Not Applicable
Called By Page(s):
Page(s) Referenced:
- Not Applicable
TMoldCartDetailsPrint.html
Description:
Location:
htdocs/1/WebPagesEN/TMtemplates/
Able to Call Page(s):
Called By Page(s):
Page(s) Referenced:
rowCartCoupon.html

Description:
- Displays the details of the Coupon Code applied to the cart within the online sales.
- The coupon code is setup in Theatre Manager under Setup >> System Tables >> Coupons and Pre-Access Codes. For more information on setting up coupon codes click here.
- A coupon code can be entered in the TMcart.html or TMtickets.html page.
- Once the code is added it will appear in the TMcart.html page.
- The details of the coupon are pulled directly from Theatre Manager.
- To remove a coupon check the box to the far right of the coupon in the cart and click the Remove button at the bottom of the window. The patron can add the coupon to the cart again if desired while available redemption exist.
Location:
htdocs/1/WebPagesEN/TMtemplates/
Able to Call Page(s):
- Not Applicable
Called By Page(s):
Page(s) Referenced:
- Not Applicable
rowCartCourse.html

Description:
- Displays the quantity and price of the course when more then one admission to the course is purchased in the online sales.
- The information is pulled directly from Theatre Manager.
- If only one admission to the course is purchased this line will not appear.
- For details on how to setup a course click here.
- To alter the price of a course admission or remove a course when too many are added to the cart the entire course purchase must be removed. Check the box to the far right of the first registration for the course and click the Remove button at the bottom of the window. The course can then be purchased again selecting the desired price and or quantity.
Questions and Answers:
Q: How does Theatre Manager assign a ticket when someone other then the person logged in is selected from the drop down as the course participant?
A: Theatre Manager will gift the course to the member of the household the ticket is purchased for. This means the ticket will appear in both the purchaser and the attendees patron records. This allows for reporting one who attended a course and who purchased a course based on criteria.
____________________________________________________________
Location:
htdocs/1/WebPagesEN/TMtemplates/
Able to Call Page(s):
- Not Applicable
Called By Page(s):
Page(s) Referenced:
rowCartCourseNewGroup.html

Description:
- Displays the course details, quantity, course location and price added to the online cart.
- The information is pulled directly from Theatre Manager.
- For details on how to setup a course click here.
- To alter the price of a course admission or remove a course when too many are added to the cart the entire course purchase must be removed. Check the box to the far right of the first registration for the course and click the Remove button at the bottom of the window. The course can then be purchased again selecting the desired price and or quantity.
Location:
htdocs/1/WebPagesEN/TMtemplates/
Able to Call Page(s):
Called By Page(s):
Page(s) Referenced:
rowCartDonation.html

Description:
- Displays the details of the Donation(s) added to the cart within the online sales.
- Donations can be added to a cart on the TMcart.html or TMdonation.html page.
- For steps on how to enable a donation campaign for online sales click here.
- To remove a donation check the box to the far right of the donation in the cart and click the Remove button at the bottom of the window.
Location:
htdocs/1/WebPagesEN/TMtemplates/
Able to Call Page(s):
Called By Page(s):
Page(s) Referenced:
- Not Applicable
rowCartFestival.html

Description:
- Displays the quantity and price of a festival seating or general admission ticket when more then one admission to the performance is purchased in the online sales.
- The information is pulled directly from Theatre Manager.
- If only one admission to the performance is purchased this line will not appear.
- For details on how to setup a new festival seating performance click here.
- To change the price of a festival seating ticket or remove a ticket when too many are added to the cart the entire performance purchase must be removed. Check the box to the far right of the first ticket for the performance and click the Remove button at the bottom of the window. The patron can purchase tickets for the performance again selecting the desired price or quantity.
Location:
htdocs/1/WebPagesEN/TMtemplates/
Able to Call Page(s):
- Not Applicable
Called By Page(s):
Page(s) Referenced:
rowCartFestivalNewGroup.html

Description:
- Displays the performance details, quantity, performance location, seating location and price of the festival seating or general admission ticket added to the online cart.
- The information is pulled directly from Theatre Manager.
- For details on how to setup a new festival seating or general admission performance click here.
- To change the price of a festival seating ticket or remove a ticket when too many are added to the cart the entire performance purchase must be removed. Check the box to the far right of the first ticket for the performance and click the Remove button at the bottom of the window. The patron can purchase tickets for the performance again selecting the desired price or quantity.
Location:
htdocs/1/WebPagesEN/TMtemplates/
Able to Call Page(s):
Called By Page(s):
Page(s) Referenced:
rowCartMailFee.html

Description:
- Displays the details of the Mailing Fee added to the cart within the online sales.
- It's recommended the fee be turned off with Theatre Manager rather then removed from the source code in the event the fee may be used in the future.
- A Mailing Fee can be turned off and on using the Mail To Patron option under the Web Options tab in Setup >> Company Preferences in Theatre Manager. Uncheck the box to remove the Mail Me My Tickets button from the online sales.
- The value of the Mailing Fee is determined by the fee selected in the Mail Fee box under the Web Options tab of Setup >> Company Preferences with Theatre Manager.
- The TMcart.html and TMcheckout.html pages both allow the patron to request the items in their cart to be mailed.
- To remove the mail fee check the box to the far right of the fee in the cart and click the Remove button at the bottom of the window. The order will no longer be flagged with a patron wants tickets mailed status within Theatre Manager.
Location:
htdocs/1/WebPagesEN/TMtemplates/
Able to Call Page(s):
Called By Page(s):
Page(s) Referenced:
- Not Applicable
rowCartOrderCouponFee.html

Description:
- Displays the name and value of the fee associated with a Coupon. This fee is only added to the Order when the subsequent Coupon is added to the cart.
Location:
htdocs/1/WebPagesEN/TMtemplates/
Able to Call Page(s):
- Not Applicable.
Called By Page(s):
Page(s) Referenced:
- Not Applicable.
rowCartOrderFee.html

Description:
- Displays the details of the Internet Order Fee added to the cart within the online sales.
- This Fee can be edited by double clicking on the Order Internet fee in Setup >> System Tables >> Fee Tables.
- Often the external description for the fee is titled Convenience Fee. The name of the fee can be altered by editing the External Name field in the setup of the fee within Theatre Manager.
- The fee is automatically added to the order based on the fee setup. Removing the Check from the Automatically Add To Order box within Theatre Manager will remove the fee from online sales.
- The value of the fee can be altered under the Calculation tab of the fee setup within Theatre Manager. There are options to charge a per ticket fee, per order fee and to add tax to the fee within the setup.
Location:
htdocs/1/WebPagesEN/TMtemplates/
Able to Call Page(s):
Called By Page(s):
Page(s) Referenced:
- Not Applicable
rowCartPass.html

Description:
- Displays the details of the Pass(s), Gift Certificates(s) or Membership(s) added to the cart within the online sales.
- A Pass in the Theatre Manager database is called a Member Type by default. Often an organization will change the default name to pass, gift certificate, gc or other such options.
- Member types can be added to a cart from the TMpass.html page.
- For steps on how to enable a member type for online sales click here.
- To remove a member type check the box to the far right of the type in the cart and click the Remove button at the bottom of the window.
Location:
htdocs/1/WebPagesEN/TMtemplates/
Able to Call Page(s):
Called By Page(s):
Page(s) Referenced:
- Not Applicable
rowCartPassRedemption.html

Description:
- Displays the details of the Pass(s), Gift Certificates(s) or Membership(s) redeemed in the cart.
Location:
htdocs/1/WebPagesEN/TMtemplates/
Able to Call Page(s):
Called By Page(s):
Page(s) Referenced:
- Not Applicable
rowCartReserve.html

Description:
- Displays the quantity and price of the reserved seating ticket when more then one admission to the reserved performance is purchased in the online sales.
- The information is pulled directly from Theatre Manager.
- If only one admission to the performance is purchased this line will not appear.
- For details on how to setup a new reserved seating performance click here.
- To change the price of a reserved seating ticket, change the seating location or remove a ticket when too many are added to the cart the entire performance purchase must be removed. Check the box to the far right of the first ticket for the performance and click the Remove button at the bottom of the window. The patron can purchase tickets again for the performance selecting the desired section, quantity and price.
Location:
htdocs/1/WebPagesEN/TMtemplates/
Able to Call Page(s):
- Not Applicable
Called By Page(s):
Page(s) Referenced:
rowCartReserveNewGroup.html

Description:
- Displays the performance details, quantity, performance location, seating location and price of a reserved seating ticket added to the online cart.
- The information is pulled directly from Theatre Manager.
- For details on how to setup a new reserved seating performance click here.
- To change the price of a reserved seating ticket, change the seating location or remove a ticket when too many are added to the cart the entire performance purchase must be removed. Check the box to the far right of the first ticket for the performance and click the Remove button at the bottom of the window. The patron can purchase tickets again for the performance selecting the desired section, quantity and price.
Location:
htdocs/1/WebPagesEN/TMtemplates/
Able to Call Page(s):
Called By Page(s):
Page(s) Referenced:
rowCartSub.html

Description:
- Displays the details of the performance, price and seating location within the season package in the online cart.
- The information is pulled directly from Theatre Manager.
- For details on how to setup a season subscription package click here.
- To change the price of a subscription package, change the seating location or remove a ticket when too many are added to the package the entire package must be removed. Check the box to the far right of the first line of the ticket for the package and click the Remove button at the bottom of the window. The patron can purchase the package again selecting the desired section, quantity and price.
Location:
htdocs/1/WebPagesEN/TMtemplates/
Able to Call Page(s):
Called By Page(s):
Page(s) Referenced:
- Not Applicable
rowCartSubNewGroup.html

Description:
- Displays the details of the season package, the first performance, the seat price and the seating location added to the online cart.
- The information is pulled directly from Theatre Manager.
- For details on how to setup a season subscription package click here.
- To change the price of a subscription package, change the seating location or remove a ticket when too many are added to the package the entire package must be removed. Check the box to the far right of the first line of the ticket for the package and click the Remove button at the bottom of the window. The patron can purchase the package again selecting the desired section, quantity and price.
Location:
htdocs/1/WebPagesEN/TMtemplates/
Able to Call Page(s):
Called By Page(s):
Page(s) Referenced:
- Not Applicable
rowCheckoutCoupon.html

Description:
- Displays the name of the fee and it's value in the checkout confirmation when it's been added to an online sale.
Location:
htdocs/1/WebPagesEN/TMtemplates/
Able to Call Page(s):
- Not Applicable.
Called By Page(s):
Page(s) Referenced:
- Not Applicable.
rowCheckoutCourse.html

Description:
- Displays the name and location of the course as well as the price in the checkout confirmation when it's been added to an online sale.
Location:
htdocs/1/WebPagesEN/TMtemplates/
Able to Call Page(s):
Called By Page(s):
Page(s) Referenced:
- Not Applicable.
rowCheckoutDonation.html

Description:
- Displays the name of the donation campaign, the publication name and value of the donation in the checkout confirmation when it's been added to an online sale.
Location:
htdocs/1/WebPagesEN/TMtemplates/
Able to Call Page(s):
Called By Page(s):
Page(s) Referenced:
- Not Applicable.
rowCheckoutFestival.html

Description:
- Displays the name, location and price of a festival seating performance in the checkout confirmation when it's been added to an online sale.
Location:
htdocs/1/WebPagesEN/TMtemplates/
Able to Call Page(s):
Called By Page(s):
Page(s) Referenced:
- Not Applicable.
rowCheckoutMailFee.html

Description:
- Displays the mailing fee and it's value in the checkout confirmation when it's been added to an online sale.
Location:
htdocs/1/WebPagesEN/TMtemplates/
Able to Call Page(s):
Called By Page(s):
Page(s) Referenced:
- Not Applicable.
rowCheckoutOrderCouponFee.html

Description:
- Displays the name of the fee and it's value in the checkout confirmation when it's been added to an online sale.
Location:
htdocs/1/WebPagesEN/TMtemplates/
Able to Call Page(s):
Called By Page(s):
Page(s) Referenced:
- Not Applicable.
rowCheckoutOrderFee.html

Description:
- Displays the name name and value of an order fee when it's been added to an online sale.
Location:
htdocs/1/WebPagesEN/TMtemplates/
Able to Call Page(s):
Called By Page(s):
Page(s) Referenced:
- Not Applicable.
rowCheckoutPass.html

Description:
- Displays the name and value of the member type/pass in the checkout confirmation when it's been added to an online sale.
Location:
htdocs/1/WebPagesEN/TMtemplates/
Able to Call Page(s):
Called By Page(s):
Page(s) Referenced:
- Not Applicable.
rowCheckoutPassRedemption.html

Description:
- Displays the date and amount for each post dated payment.
Location:
htdocs/1/WebPagesEN/TMtemplates/
Able to Call Page(s):
- Not Applicable.
Called By Page(s):
Page(s) Referenced:
- Not Applicable.
rowCheckoutPaymentPlan.html

Description:
- Displays the date and amount for each post dated payment.
Location:
htdocs/1/WebPagesEN/TMtemplates/
Able to Call Page(s):
- Not Applicable.
Called By Page(s):
Page(s) Referenced:
- Not Applicable.
rowCheckoutReserve.html

Description:
- Displays the name, location, seat and price of a reserved seating performance in the checkout confirmation when it's been added to an online sale.
Location:
htdocs/1/WebPagesEN/TMtemplates/
Able to Call Page(s):
Called By Page(s):
Page(s) Referenced:
- Not Applicable.
rowCheckoutSub.html

Description:
- Displays the name of the subscription, seating location and price in the checkout confirmation when it's been added to an online sale.
Location:
htdocs/1/WebPagesEN/TMtemplates/
Able to Call Page(s):
Called By Page(s):
Page(s) Referenced:
- Not Applicable.
rowCheckoutSubNewGroup.html

Description:
- Displays the name of the subscription, seating location, venue and price in the checkout confirmation when it's been added to an online sale.
Location:
htdocs/1/WebPagesEN/TMtemplates/
Able to Call Page(s):
Called By Page(s):
Page(s) Referenced:
- Not Applicable.
rowFutureTicketCourse.html

Description:
- Displays the course detail including the promotion, price, order number and date/time purchased for future courses. This information is pulled of the Theatre Manager database.
Location:
htdocs/1/WebPagesEN/TMtemplates/
Able to Call Page(s):
- Not Applicable.
Called By Page(s):
Page(s) Referenced:
- Not Applicable.
rowFutureTicketFestival.html

Description:
- Displays the detail for festival seating tickets including the promotion, price, order number and date/time purchased for future courses. This information is pulled of the Theatre Manager database.
Location:
htdocs/1/WebPagesEN/TMtemplates/
Able to Call Page(s):
- Not Applicable.
Called By Page(s):
Page(s) Referenced:
- Not Applicable.
rowFutureTicketHeader.html

Description:
- Displays the date, time, name of the event and the location for future courses, general admission or reserved seating events. This information is pulled of the Theatre Manager database.
- If the Print At Home option is turned on in Company Preferences and for the Performance a Print Tickets button will also appear. This allows patron to print their ticket for admission to the Performance.
Location:
htdocs/1/WebPagesEN/TMtemplates/
Able to Call Page(s):
Called By Page(s):
Page(s) Referenced:
- Not Applicable.
rowFutureTicketPrintCourse.html

Description:
- Displays the course detail including the promotion, price, order number and date/time purchased for future courses. This information is pulled from the Theatre Manager database.
- If the Print At Home option is turned on in Company Preferences and for the Course a bar code will appear before the course text. This allows patron to print this page and present it as admission to the Course.
Location:
htdocs/1/WebPagesEN/TMtemplates/
Able to Call Page(s):
- Not Applicable.
Called By Page(s):
Page(s) Referenced:
- Not Applicable.
rowFutureTicketPrintFestival.html

Description:
- Displays the detail for festival seating tickets including the promotion, price, order number and date/time purchased for future courses. This information is pulled of the Theatre Manager database.
- If the Print At Home option is turned on in Company Preferences and enabled for the Performance, a bar code will appear. This allows patron to print this page and present it as admission to the Performance.
Location:
htdocs/1/WebPagesEN/TMtemplates/
Able to Call Page(s):
- Not Applicable.
Called By Page(s):
Page(s) Referenced:
- Not Applicable.
rowFutureTicketPrintHeader.html

Description:
- Displays the date, time, name of the event and the location for future courses, general admission or reserved seating events. This information is pulled of the Theatre Manager database.
- Also contains the column headers for the bar code, seating location, price, order and purchase date displayed on the TMfutureTicketsPrint.html page.
Location:
htdocs/1/WebPagesEN/TMtemplates/
Able to Call Page(s):
Called By Page(s):
Page(s) Referenced:
- Not Applicable.
rowFutureTicketPrintReserved.html

Description:
- Displays the detail for reserved seating tickets including the section/row/seat, promotion, price, order number and date/time purchased for future courses. This information is pulled of the Theatre Manager database.
- If the Print At Home option is turned on in Company Preferences and for the Performance a bar code will appear before the seating location. This allows patron to print this page and present it as admission to the Performance.
Location:
htdocs/1/WebPagesEN/TMtemplates/
Able to Call Page(s):
- Not Applicable.
Called By Page(s):
Page(s) Referenced:
- Not Applicable.
rowFutureTicketReserved.html

Description:
- Displays the detail for reserved seating tickets including the section/row/seat, promotion, price, order number and date/time purchased for future courses. This information is pulled of the Theatre Manager database.
Location:
htdocs/1/WebPagesEN/TMtemplates/
Able to Call Page(s):
- Not Applicable.
Called By Page(s):
Page(s) Referenced:
- Not Applicable.
rowOldCartCoupon.html

Description:
- Displays the coupon details for coupon added to a historical cart within the online sales.
Location:
htdocs/1/WebPagesEN/TMtemplates
Able to Call Page(s):
- Not Applicable.
Called By Page(s):
Page(s) Referenced:
- Not Applicable.
rowOldCartCourse.html

Description:
- Displays the course detail of a course added to a historical cart within the online sales.
Location:
htdocs/1/WebPagesEN/TMtemplates
Able to Call Page(s):
Called By Page(s):
Page(s) Referenced:
- Not Applicable
rowOldCartDonation.html

Description:
- Displays the donation details for donations added to a historical cart within the online sales.
Location:
htdocs/1/WebPagesEN/TMtemplates
Able to Call Page(s):
Called By Page(s):
Page(s) Referenced:
rowOldCartFestival.html

Description:
- Displays the detail for festival seating tickets including the promotion, price, order number and date/time purchased for future courses. This information is pulled of the Theatre Manager database.
Location:
htdocs/1/WebPagesEN/TMtemplates
Able to Call Page(s):
Called By Page(s):
Page(s) Referenced:
- Not Applicable.
rowOldCartHeader.html

Description:
- Displays the column headers at the top of the table in the TMoldCartDetails.html page.
Location:
htdocs/1/WebPagesEN/TMtemplates
Able to Call Page(s):
- Not Applicable.
Called By Page(s):
Page(s) Referenced:
- Not Applicable.
rowOldCartMailFee.html

Description:
- Displays the details of the mail fee added to a historical online cart.
Location:
htdocs/1/WebPagesEN/TMtemplates/
Able to Call Page(s):
Called By Page(s):
Page(s) Referenced:
- Not Applicable.
rowOldCartOrderCouponFee.html

Description:
- Displays the details of the fee associated with a coupon from a history online cart.
Location:
htdocs/1/WebPagesEN/TMtemplates/
Able to Call Page(s):
Called By Page(s):
Page(s) Referenced:
- Not Applicable.
rowOldCartOrderFee.html

Description:
- Displays the name of the fee added to a historical cart within the online sales.
Location:
htdocs/1/WebPagesEN/TMtemplates
Able to Call Page(s):
Called By Page(s):
Page(s) Referenced:
- Not Applicable.
rowOldCartPass.html

Description:
- Displays the member type or pass details for pass added to a historical cart within the online sales.
Location:
htdocs/1/WebPagesEN/TMtemplates
Able to Call Page(s):
Called By Page(s):
Page(s) Referenced:
- Not Applicable.
rowOldCartPrintCoupon.html

Description:
- Displays the coupon details for coupon added to a historical cart within the online sales.
Location:
htdocs/1/WebPagesEN/TMtemplates
Able to Call Page(s):
- Not Applicable.
Called By Page(s):
Page(s) Referenced:
- Not Applicable.
rowOldCartPrintCourse.html

Description:
- Displays the course detail of a course added to a historical cart within the online sales.
- If the Print At Home option is turned on in Company Preferences and for the Course a bar code will appear before the text Course. This allows patron to print this page and present it as admission to the Course.
Location:
htdocs/1/WebPagesEN/TMtemplates
Able to Call Page(s):
Called By Page(s):
Page(s) Referenced:
- Not Applicable.
rowOldCartPrintDonation.html

Description:
- Displays the donation details for donations added to a historical cart within the online sales.
Location:
htdocs/1/WebPagesEN/TMtemplates
Able to Call Page(s):
Called By Page(s):
Page(s) Referenced:
- Not Applicable.
rowOldCartPrintFestival.html

Description:
- Displays the detail for festival seating tickets including the promotion, price, order number and date/time purchased for future courses. This information is pulled of the Theatre Manager database.
- If the Print At Home option is turned on in Company Preferences and for the Performance a bar code will appear before the text Festival Seating. This allows patron to print this page and present it as admission to the Performance.
Location:
htdocs/1/WebPagesEN/TMtemplates
Able to Call Page(s):
Called By Page(s):
Page(s) Referenced:
- Not Applicable.
rowOldCartPrintOrderCouponFee.html

Description:
- Displays the details of the fee associated with a coupon from a history online cart.
Location:
htdocs/1/WebPagesEN/TMtemplates
Able to Call Page(s):
Called By Page(s):
Page(s) Referenced:
- Not Applicable.
rowOldCartPrintOrderFee.html

Description:
- Displays the name of the fee added to a historical cart within the online sales.
Location:
htdocs/1/WebPagesEN/TMtemplates
Able to Call Page(s):
Called By Page(s):
Page(s) Referenced:
- Not Applicable.
rowOldCartPrintPass.html

Description:
- Displays the member type or pass details for pass added to a historical cart within the online sales.
Location:
htdocs/1/WebPagesEN/TMtemplates
Able to Call Page(s):
Called By Page(s):
Page(s) Referenced:
- Not Applicable.
rowOldCartPrintReserve.html

Description:
- Displays the detail for reserved seating tickets including the section/row/seat, promotion, price, order number and date/time purchased for future courses. This information is pulled of the Theatre Manager database.
- If the Print At Home option is turned on in Company Preferences and for the Performance a bar code will appear before the text Festival Seating. This allows patron to print this page and present it as admission to the Performance.
Location:
htdocs/1/WebPagesEN/TMtemplates
Able to Call Page(s):
Called By Page(s):
Page(s) Referenced:
- Not Applicable.
rowOldCartPrintSub.html

Description:
- Displays the details of a subscription ticket added to a historical cart within the online sales.
Location:
htdocs/1/WebPagesEN/TMtemplates
Able to Call Page(s):
Called By Page(s):
Page(s) Referenced:
- Not Applicable.
rowOldCartReserve.html

Description:
- Displays the detail for reserved seating tickets including the section/row/seat, promotion, price, order number and date/time purchased for future courses. This information is pulled of the Theatre Manager database.
Location:
htdocs/1/WebPagesEN/TMtemplates
Able to Call Page(s):
Called By Page(s):
Page(s) Referenced:
- Not Applicable.
rowOldCartSub.html

Description:
- Displays the details of a subscription ticket added to a historical cart within the online sales.
Location:
htdocs/1/WebPagesEN/TMtemplates
Able to Call Page(s):
Called By Page(s):
Page(s) Referenced:
- Not Applicable.
rowPassRemainingValues.html

Description:
- Displays the details of the values remaining on a Pass(s), Gift Certificates(s) or Membership(s).
Location:
htdocs/1/WebPagesEN/TMtemplates/
Able to Call Page(s):
Called By Page(s):
Page(s) Referenced:
- Not Applicable
rowPatronAddress.html
Description:
- Displays address lines, City, Province/State, Postal/Zip Code and a Country drop down fields to enter patrons address information. This information is added to the Theatre Manager database.
- Asterisk next to fields indicate mandatory data that must be entered for the Theatre Manager database.
Questions and Answers:
Q: How can the mandatory fields be changed?
A: There are two steps. The first is the Asterisk can be removed from the field within this page. The second within Theatre Manager. Click Setup >> System Preferences. Select the Mandatory Data tab. Remove the checks from the Full Profile Patron Data fields as desired.
____________________________________________________________
Location:
htdocs/1/WebPagesEN/TMtemplates/
Able to Call Page(s):
- Not Applicable
Called By Page(s):
Page(s) Referenced:
rowPatronContact.html

Description:
- Displays contact fields for entering a patrons fax number, phone number or web site into the Theatre Manager database.
Questions and Answers:
Q:
A:
____________________________________________________________
Location:
htdocs/1/WebPagesEN/TMtemplates/
Able to Call Page(s):
- Not Applicable
Called By Page(s):
Page(s) Referenced:
rowPatronEmail.html

Description:
- Displays a field for entering the patrons email address.
- If the patron is inserting their email address into the database to create a new record fields for entering their password also appears.
- If the patron is reviewing their account information, Theatre Manager will display the type of email address as it is listed in the Theatre Manager database.
Questions and Answers:
Q: How can a patron change they type of email address displayed in their account window?
A: This information is controlled in the database. If a patron wished to change an email from home to work or other they will need to contact the box office to update their patron record.
____________________________________________________________
Location:
htdocs/1/WebPagesEN/TMtemplates/
Able to Call Page(s):
- Not Applicable
Called By Page(s):
Page(s) Referenced:
rowPatronEmailLimitedProfile.html

Description:
- Displays a field where a patron can enter their email address for a limited profile.
- If the patron is not logged in to the online sales a password field will also appear to create a limited profile account in the Theatre Manager database.
Questions and Answers:
Q: Where is the limited profile option enabled?
A: In Theatre Manager click Setup >> System Preferences. Select the Mandatory Data tab. Check the desired locations in the Allow Limited Profile Patron On section.
____________________________________________________________
Q: Where are the limited profile account settings in Theatre Manager?
A: In Theatre Manager click Setup >> System Preferences. Select the Mandatory Data tab. Place a check mark next to the desired fields for limited profile in the Limited Profile Web Sales Checkout Patron Data section.
____________________________________________________________
Location:
htdocs/1/WebPagesEN/TMtemplates/
Able to Call Page(s):
- Not Applicable
Called By Page(s):
Page(s) Referenced:
- Not Applicable.
rowPerfDetailCal.html

Description:
- Displays the Performance details in a calendar view.
Location:
htdocs/1/WebPagesEN/TMtemplates
Able to Call Page(s):
Called By Page(s):
Page(s) Referenced:
- Not Applicable.
rowPerfHeaderCal.html

Description:
- Displays the month at the top of the calendar and the days of the week for each column within the calendar.
Location:
htdocs/1/WebPagesEN/TMtemplates
Able to Call Page(s):
- Not Applicable.
Called By Page(s):
Page(s) Referenced:
- Not Applicable.
rowPkgTicketFestival.html

Description:
- Displays the performance detail for each performance item within the package.
Questions and Answers:
Q: How can items be added to a package?
A: For details on how to add items to a package see the following online help page:
http://help.theatremanager.com/theatre-manager-online-help/adding-items-package
____________________________________________________________
Location:
htdocs/1/WebPagesEN/TMtemplates
Able to Call Page(s):
Called By Page(s):
Page(s) Referenced:
- Not Applicable.
rowSubBookedFestival.html

Description:
- Displays the details of a festival seating ticket for the season package.
Location:
htdocs/1/WebPagesEN/TMtemplates
Able to Call Page(s):
- Not Applicable.
Called By Page(s):
Page(s) Referenced:
- Not Applicable.
rowSubBookedHeader.html

Description:
- Displays the details of a season packages purchased for the first time this year.
- In contains the name and information for the package as well as the status of the package.
- This page pulls the details of the package from the Theatre Manager database and references additional pages for the seat information.
Location:
htdocs/1/WebPagesEN/TMtemplates
Able to Call Page(s):
Called By Page(s):
Page(s) Referenced:
rowSubBookedReserved.html

Description:
- Displays the details of a reserved seating ticket for the season package.
- When multiple seats are booked a line will appear for each seat within the package.
Location:
htdocs/1/WebPagesEN/TMtemplates
Able to Call Page(s):
- Not Applicable.
Called By Page(s):
Page(s) Referenced:
- Not Applicable.
rowSubNewDetail.html

Description:
- Displays the name of the season package and the venue it takes place in. This information is pulled from the season package setup within Theatre Manager.
Questions and Answers:
Q: How can the name of the package be changed?
A: In Theatre Manager go to Patron Sales >> Season Subscriptions >> Setup Season Packages. Double click on the desires season package. Alter the External Description field to display the name of the package as it should appear online.
____________________________________________________________
Location:
htdocs/1/WebPagesEN/TMtemplates
Able to Call Page(s):
Called By Page(s):
Page(s) Referenced:
- Not Applicable.
rowSubNewHeader.html

Description:
- Displays the column heads for new season subscriptions and the button to purchase a new subscription.
Location:
htdocs/1/WebPagesEN/TMtemplates
Able to Call Page(s):
Called By Page(s):
Page(s) Referenced:
rowSubNewNone.html

Description:
- Displays a message when there are no new subscriptions available for sale online.
Questions and Answers:
Q: Where can I edit the telephone number pulled in this message?
A: The telephone number is pulled from the Theatre Manager database. It's located in the Company tab of Setup >> Company Preferences.
____________________________________________________________
Location:
htdocs/1/WebPagesEN/TMtemplates
Able to Call Page(s):
- Not Applicable.
Called By Page(s):
Page(s) Referenced:
- Not Applicable.
rowSubNoSeat.html

Description:
- Displays text indicating there are no season subscription seats available in the desired seating section. This can happen when all seats in the section are sold/held or when there is no online pricing available for the seats.
Location:
htdocs/1/WebPagesEN/TMtemplates
Able to Call Page(s):
- Not Applicable.
Called By Page(s):
Page(s) Referenced:
- Not Applicable.
rowSubRenewAnonymous.html

Description:
- The text explaining why a patron cannot see their existing subscriptions when they are not currently logged into the online sales.
Location:
htdocs/1/WebPagesEN/TMtemplates
Able to Call Page(s):
- Not Applicable.
Called By Page(s):
Page(s) Referenced:
- Not Applicable
rowSubRenewFestival.html

Description:
- Displays the details of a festival seating ticket for a renewed season package.
Location:
htdocs/1/WebPagesEN/TMtemplates
Able to Call Page(s):
- Not Applicable.
Called By Page(s):
Page(s) Referenced:
- Not Applicable.
rowSubRenewHeader.html

Description:
- Displays the details of a season packages renewed for the coming year.
- In contains the name and information for the package as well as the status of the package.
- This page pulls the details of the package from the Theatre Manager database and references additional pages for the seat information.
Location:
htdocs/1/WebPagesEN/TMtemplates
Able to Call Page(s):
Called By Page(s):
Page(s) Referenced:
rowSubRenewReserved.html

Description:
- Displays the details of a reserved seating tickets for a renewed season package.
- When multiple seats are booked a line will appear for each seat within the package.
Location:
htdocs/1/WebPagesEN/TMtemplates
Able to Call Page(s):
- Not Applicable.
Called By Page(s):
Page(s) Referenced:
- Not Applicable.
rowSubReserve.html

Description:
Location:
htdocs/1/WebPagesEN/TMtemplates
Able to Call Page(s):
- Not Applicable
Called By Page(s):
Page(s) Referenced:
- Not Applicable
rowTicketCourse.html

Description:
- Displays "Course" and lists the available online pricing options. This information is pulled from within the Theatre Manager database.
- The pricing available online is determined by the price and promotion setup within the course in Theatre Manager.
Location:
htdocs/1/WebPagesEN/TMtemplates
Able to Call Page(s):
- Not Applicable.
Called By Page(s):
Page(s) Referenced:
- Not Applicable.
rowTicketEvent.html

Description:
- Displays the details the Performance from within the Theatre Manager database.
Questions and Answers:
Q: How can the Availability percentages be altered?
A: The Availability options are located in the rowTicketEventAvailability.html page.
____________________________________________________________
Location:
htdocs/1/WebPagesEN/TMtemplates/
Able to Call Page(s):
- tmEventDefault.html
- TMticketsSection_MapDefault.html
- TMticketsSection_MapDefaultc.html
- TMticketsSection_MapDefaultf.html
- tmVenueDefault.html
Called By Page(s):
Page(s) Referenced:
rowTicketEventAvailability.html

Description:
- Displays the availability of the Performance based on details from the Theatre Manager database.
Questions and Answers:
Q: How can the Availability percentages be altered?
A: Each option (Good, Limited, Very Limited, Sold Out) are indicated based on the percentage of seats sold within the Theatre Manager database compared to the Reporting Capacity listed for the individual performance. The percent values are listed on the page in the F_SOLD_PERCENT statements and can be altered to meet the organizations needs.
____________________________________________________________
Q:How are the colors used in the Availability column altered?
A: Each option is listed following a font color. Altering the hex code associated with the font color will change the color of the text.
____________________________________________________________
- different colours, change them
- different ranges for the levels, then adjust the ranges as appropriate.
- more (or fewer) distinct levels, then duplicate (or remove) some lines and adjust ranges, as appropriate
<field>pick(F_SOLD_PERCENT<80,'','Good')</field>
<field>pick(F_SOLD_PERCENT>=80&F_SOLD_PERCENT<90,'','<font color="#FF00FF">Limited</font>')</field>
<field>pick(F_SOLD_PERCENT>=90&F_SOLD_PERCENT<100,'','<font color="#FF00FF">Very Limited</font>')</field>
<field>pick(F_SOLD_PERCENT>=100,'','<font color="#FF0000">Sold Out</font>')</field></td>
Location:
htdocs/1/WebPagesEN/TMtemplates/
Able to Call Page(s):
- Not Applicable
Called By Page(s):
Page(s) Referenced:
- Not Applicable
Calculation of F_SOLD_PERCENT
Calculating the initial number available
Avail = SeatsInHouse - Total Sold - Box Office Holds - Internet Holds
Calculating the number 'sold'
First, the total seats considered sold or taken includes all holds. So the base number sold is.Sold = number sold for event + tickets held at box office _ tickets held in shopping carts
Calculating the percent available
The percent of tickets available is dependant on the values of seats available and reporting quantities. The percentage is dewtermined as follows.
- If Avail <= 0 then F_SOLD_PERCENT = 100
- if SeatsReport < SeatsInHouse then
- if SeatsReport = SeatsInHouse then
rowTicketEventCallBoxOffice.html

Description:
- Displays the date a Performance will be available for sale online based on details from the Theatre Manager database as well as a link to the Box Office contact information should the patron require more information.
- If the Performance does not have a set on sale date the patron will only see a link to Call Box Office.
Questions and Answers:
Q: How can the On Sale date be altered?
A: The On Sale date is pulled from the Web Settings tab inside the Performance Detail window.
____________________________________________________________
Location:
htdocs/1/WebPagesEN/TMtemplates/
Able to Call Page(s):
Called By Page(s):
Page(s) Referenced:
- Not Applicable
rowTicketEventExport.html
Description:
- Do Not Alter This Page.
- This pages is used in conjunction with the TicketTrove mobile device application. The application will soon be available for iPhone and iPad interfaces.
- The information within the page is pulled directly from Theatre Manager.
Location:
htdocs/1/WebPagesEN/TMtemplates
Able to Call Page(s):
- Not Applicable.
Called By Page(s):
Page(s) Referenced:
- Not Applicable.
rowTicketEventExportCustom.html
Description:
- Pull Event information for Performance available for sale online directly from Theatre Manager.
- This page can be customized to pull the desired Event information for external viewing in the TMticketsExportCustom.html page.
Location:
htdocs/1/WebPagesEN/TMtemplates
Able to Call Page(s):
- Not Applicable.
Called By Page(s):
Page(s) Referenced:
- Not Applicable.
rowTicketEventImage.html

Description:
- Displays the TicketTrove/Web image for the Performance based on details from the Theatre Manager database.
Questions and Answers:
Q: How can the Event Image be altered?
A: The Event Image is taken from the TicketTrove/Web field in the Marketing tab of the Event setup. A new image can be dragged and dropped onto the field to update it.
____________________________________________________________
Location:
htdocs/1/WebPagesEN/TMtemplates/
Able to Call Page(s):
Called By Page(s):
Page(s) Referenced:
- Not Applicable
rowTicketEventName.html

Description:
- Displays the name, location and notes for the Performance based on details from the Theatre Manager database.
Questions and Answers:
Q: Where can the details on this page be altered?
A: The Performance name, location and notes are all pulled from within the Event Setup and can be edited in their respective fields.
____________________________________________________________
Location:
htdocs/1/WebPagesEN/TMtemplates/
Able to Call Page(s):
Called By Page(s):
Page(s) Referenced:
- Not Applicable
rowTicketEventNotOnSaleYet.html
Description:
- Displays information about the Performance if the Performance is set to be displayed online
- There are three status options that can be set for performances (when not onsale). These affect which message will be displayed as per the example above.
- It will be onsale - just not yet.
- It has been postponed to a future date
- It has been CANCELLED - and likely there will be refunds
Questions and Answers:
Q: Can the On Sale date be altered?
A: Yes, the date can be altered. See the rowTicketEventCallBoxOffice.html for more details.
____________________________________________________________
Location:
htdocs/1/WebPagesEN/TMtemplates/
Able to Call Page(s):
Called By Page(s):
Page(s) Referenced:
rowTicketFestival.html

Description:
- Displays the description for a festival seating ticket and lists the available online pricing options. This information is pulled from within the Theatre Manager database.
- The term Festival Seating can be altered in Setup >> Company Preferences under the Appearance tab within Theatre Manager.
- The pricing available online is determined by the price and promotion setup within the event in Theatre Manager.
Questions and Answers:
Q: Can the pricing drop down be displayed as a list?
A: Yes, the drop down can be displayed as a list. For more details please visit the Creating A Price Code List page in the online help.
____________________________________________________________
Location:
htdocs/1/WebPagesEN/TMtemplates/
Able to Call Page(s):
- Not Applicable
Called By Page(s):
Page(s) Referenced:
rowTicketNoSeat.html

Description:
- Displays text indicating there are no seats available in the desired seating section. This can happen when all seats in the section are sold/held or when there is no online pricing available for the seats.
Location:
htdocs/1/WebPagesEN/TMtemplates
Able to Call Page(s):
- Not Applicable.
Called By Page(s):
Page(s) Referenced:
- Not Applicable.
rowTicketPageHeader.html

Description:
- Page header at the top of the TMtickets.html page.
- Allows for the option to view additional pages of upcoming performances.
Location:
htdocs/1/WebPagesEN/TMtemplates/
Able to Call Page(s):
Called By Page(s):
Page(s) Referenced:
- Not Applicable
rowTicketPageList.html

Description:
- Provides numeric page numbers in hyperlink form at the bottom of the TMtickets.html page for navigating to additional pages of performances not visible on the current page.
- The number of performances listed on the page is directly related to Max Events settings under the Web Options tab in Setup >> Company Preferences of Theatre Manager.
Location:
htdocs/1/WebPagesEN/TMtemplates
Able to Call Page(s):
Called By Page(s):
Page(s) Referenced:
- Not Applicable.
rowTicketReserve.html

Description:
- Displays the section, row, seat number, sales notes and lists the available online pricing options. This information is pulled from within the Theatre Manager database.
- The name of the seat (section, row, seat number) as well as the sales notes are pulled directly from the Map for the venue within the online sales.
- The pricing available online is determined by the price and promotion setup within the event in Theatre Manager.
Questions and Answers:
Q: Can the pricing drop down be displayed as a list?
A: Yes, the drop down can be displayed as a list. For more details please visit the Creating A Price Code List page in the online help.
____________________________________________________________
Location:
htdocs/1/WebPagesEN/TMtemplates/
Able to Call Page(s):
- Not Applicable
Called By Page(s):
Page(s) Referenced:
rowVolDetailCal.html

Description:
- A volunteers scheduled activities are pulled from within the Theatre Manager database to populate the calendar view on the TMvolunteer.html page.
Location:
htdocs/1/WebPagesEN/TMtemplates
Able to Call Page(s):
- Not Applicable.
Called By Page(s):
Page(s) Referenced:
- Not Applicable.
rowVolHeaderCal.html

Description:
- The column headers in the calendar view on the TMvolunteer.html page.
Location:
htdocs/1/WebPagesEN/TMtemplates
Able to Call Page(s):
- Not Applicable.
Called By Page(s):
Page(s) Referenced:
- Not Applicable.
rowVolHistoryDetail.html

Description:
- A volunteers scheduled activities are pulled from within the Theatre Manager database to populate the list view on the TMvolunteer.html page.
Location:
htdocs/1/WebPagesEN/TMtemplates
Able to Call Page(s):
- Not Applicable.
Called By Page(s):
Page(s) Referenced:
- Not Applicable.
rowVolHistoryHeader.html

Description:
- The column headers in the list view on the TMvolunteer.html page.
Location:
htdocs/1/WebPagesEN/TMtemplates
Able to Call Page(s):
- Not Applicable.
Called By Page(s):
Page(s) Referenced:
- Not Applicable.
setACTIVITY_LIST.html

Description:
- Displays the personnel/volunteer activity the patron is scheduled to performed.
- If the patron is not currently scheduled to perform an activity there will be nothing to list.
- To access the personnel module open the desired patrons record and click the Personnel button at the top of the window within Theatre Manager. To learn more about scheduling an activity for a patron after the Personnel window is open click here.
- Please note the word Personnel may have been customized within Theatre Manager. Often it is replace with Volunteer.
Location:
htdocs/1/WebPagesEN/TMtemplates/
Able to Call Page(s):
- Not Applicable
Called By Page(s):
Page(s) Referenced:
- Not Applicable
setACTIVITY_LISTempty.html
Description:
- Displays the text **Nothing available to select** under the Activity column when there patron is not scheduled for an activity within Theatre Manager.
- To avoid this message the patron can be scheduled for a position in the Personnel/Volunteer module within Theatre Manager. To access this module open the patrons record within Theatre Manager and click the Personnel button at the top of the window. Steps on how to schedule an activity for a patron can be found by clicking here.
- Please note the word Personnel may have been customized within Theatre Manager. Often it is replaced with Volunteer.
Location:
htdocs/1/WebPagesEN/TMtemplates/
Able to Call Page(s):
- Not Applicable
Called By Page(s):
Page(s) Referenced:
- Not Applicable
setBEST_AREA_SEARCH_LIST.html
Description:
- The options provided in the Best Area Search as defined in Best Seat Search tab on the Pricing Map.
Location:
htdocs/1/WebPagesEN/TMtemplates/
Able to Call Page(s):
- Not Applicable
Called By Page(s):
Page(s) Referenced:
- Not Applicable
setBEST_AREA_SEARCH_LISTempty.html
Description:
- The options provided in the Best Area Search when the Best Seat Search has not been defined.
Location:
htdocs/1/WebPagesEN/TMtemplates/
Able to Call Page(s):
- Not Applicable
Called By Page(s):
Page(s) Referenced:
- Not Applicable
setBEST_PRICE_CODE_SEARCH_LIST.html
Description:
- The options provided in the Price Code Search as defined in Price Code Search tab on the Pricing Map.
Location:
htdocs/1/WebPagesEN/TMtemplates/
Able to Call Page(s):
- Not Applicable
Called By Page(s):
Page(s) Referenced:
- Not Applicable
setBEST_PRICE_CODE_SEARCH_LISTempty.html
Description:
- The options provided in the Best Area Search when the Price Code Search has not been defined.
Location:
htdocs/1/WebPagesEN/TMtemplates/
Able to Call Page(s):
- Not Applicable
Called By Page(s):
Page(s) Referenced:
- Not Applicable
setCAMPAIGN_LIST.html

Description:
- The drop down list of donation campaigns available for online sales as indicated within Theatre Manager.
- To add campaigns to the list click Setup >> System Tables >> Donation Campaigns inside Theatre Manager. Double click on the desired campaign and select the Edits tab. Check the box for Accepted on the Internet. Close the window to save the changes.
Location:
htdocs/1/WebPagesEN/TMtemplates/
Able to Call Page(s):
- Not Applicable
Called By Page(s):
Page(s) Referenced:
- Not Applicable
setCAMPAIGN_LISTempty.html
Description:
- Displays the text **Nothing available to select** in the Donation Campaign drop down when there is no donation campaigns indicated as available online within Theatre Manager.
- To avoid this message go to Setup >> System Tables >> Donation Campaigns. Double click on the desired campaign and select the Edits tab. Check the box for Accepted on the Internet. Close the window to save the changes.
Location:
htdocs/1/WebPagesEN/TMtemplates/
Able to Call Page(s):
- Not Applicable
Called By Page(s):
Page(s) Referenced:
- Not Applicable
setCCMONTH_LIST.html
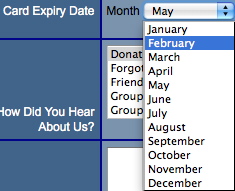
Description:
- Presents a list of Months in the credit card expiry month drop down that the patron can choose from in order to enter the expiry date of their credit card for payment.
Location:
htdocs/1/WebPagesEN/TMtemplates/
Able to Call Page(s):
- Not Applicable
Called By Page(s):
Page(s) Referenced:
- Not Applicable
setCCMONTH_LISTempty.html
Description:
- Displays the text **Nothing available to select** in the credit card expiry month field when there is are no active merchant accounts within Theatre Manager.
- The merchant account must be available for online sales in order to process credit cards. Go to Setup >> System Tables >> Merchant Accounts. Double click on the merchant account to open it. Check the box for Enable Card Use By The Web Listener. Close the window to save the changes.
Location:
htdocs/1/WebPagesEN/TMtemplates/
Able to Call Page(s):
- Not Applicable
Called By Page(s):
Page(s) Referenced:
- Not Applicable
setCOUNTRY_LIST.html

Description:
- Displays a list of Countries from within the database.
- The options in the list can be edited in the Theatre Manager database by going to Setup >> System Tables >> Code Tables and selecting Country in the left column. Double click on any of the listings to make changes.
Location:
htdocs/1/WebPagesEN/TMtemplates/
Able to Call Page(s):
- Not Applicable
Called By Page(s):
Page(s) Referenced:
- Not Applicable
setCOUNTRY_LISTempty.html
Description:
- Displays the text **Nothing available to select** in the Country drop down when there is no online Countries within Theatre Manager.
- The most common reason for this messages is there are not Country options available online. To avoid this message go to Setup >> System Tables >> Code Tables. Select Country in the left column and double click on the desired Country in the right column. Check the box for Available At Internet. Close the window to save the changes.
Location:
htdocs/1/WebPagesEN/TMtemplates/
Able to Call Page(s):
- Not Applicable
Called By Page(s):
Page(s) Referenced:
- Not Applicable
setEMAIL_LOCATION_LIST.html

Description:
- Displays the name of the email location based on the data from the patron record within Theatre Manager.
- The location can only be changed in the patron contact card from within Theatre Manager.
Location:
htdocs/1/WebPagesEN/TMtemplates
Able to Call Page(s):
- Not Applicable.
Called By Page(s):
Page(s) Referenced:
- Not Applicable.
setEMAIL_LOCATION_LISTempty.html
Description:
- Displays the text **Nothing available to select** in the email location drop down when there are no locations type marked as available for sale online within Theatre Manager.
- This drop down allows for patrons to select the location of their email address.
- To avoid this message click Setup >> System Tables >> Code Tables within Theatre Manager. Select Paton Location from the left column. Double click on the type that should be available online. Check the box for Available at Website. Close the window to save the changes.
Location:
htdocs/1/WebPagesEN/TMtemplates
Able to Call Page(s):
- Not Applicable.
Called By Page(s):
Page(s) Referenced:
- Not Applicable.
setEVENT_LIST.html
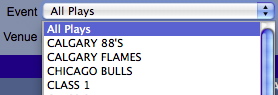
Description:
- Presents the future Events in a drop down list based on their available for sale via the web status within Theatre Manager.
- Events made active by the use of a Pre-Access Code will not appear in the drop down.
- This drop down allows for patrons to search by event title to locate their desired performance.
Location:
htdocs/1/WebPagesEN/TMtemplates/
Able to Call Page(s):
- Not Applicable
Called By Page(s):
Page(s) Referenced:
- Not Applicable
setEVENT_LISTempty.html
Description:
- Displays the text **Nothing available to select** in the event drop down when there are no performances marked as available for sale online within Theatre Manager.
- To avoid this message click the Events icon at the top of the window in Theatre Manager. Open an Event and select the Performance tab. Select one performance and check the box at the top of the window for Allow Selling Via The Internet. Close the window to save the changes.
Location:
htdocs/1/WebPagesEN/TMtemplates/
Able to Call Page(s):
- Not Applicable
Called By Page(s):
Page(s) Referenced:
- Not Applicable
setFAX_LOCATION_LIST.html

Description:
- Displays the name of the fax location based on the data from the patron record within Theatre Manager.
- The location can only be changed in the patron contact card from within Theatre Manager.
Location:
htdocs/1/WebPagesEN/TMtemplates
Able to Call Page(s):
- Not Applicable.
Called By Page(s):
Page(s) Referenced:
- Not Applicable.
setFAX_LOCATION_LISTempty.html
Description:
- Displays the text **Nothing available to select** in the fax number location drop down when there are no locations type marked as available for sale online within Theatre Manager.
- This drop down allows for patrons to select the location of their fax number.
- To avoid this message click Setup >> System Tables >> Code Tables within Theatre Manager. Select Paton Location from the left column. Double click on the type that should be available online. Check the box for Available at Website. Close the window to save the changes.
Location:
htdocs/1/WebPagesEN/TMtemplates
Able to Call Page(s):
- Not Applicable.
Called By Page(s):
Page(s) Referenced:
- Not Applicable.
setGENRE_LIST.html

Description:
- Displays a drop down of Genre's for the performances available for sale within the online sales. The options in the drop down are populated based on the genre selected in the Marketing tab of the Event within Theatre Manager.
Location:
htdocs/1/WebPagesEN/TMtemplates
Able to Call Page(s):
Called By Page(s):
Page(s) Referenced:
- Not Applicable
setGENRE_LISTempty.html
Description:
- Displays All Genres when there are no performances listed or genres have not been indicated for the performances listed in the online sales the drop down will state All Genres.
Location:
htdocs/1/WebPagesEN/TMtemplates
Able to Call Page(s):
- Not Applicable
Called By Page(s):
Page(s) Referenced:
- Not Applicable
setHOUSEHOLD_PATRON_LIST.html
Description:
- Displays a list of names associated with the email address on the TMpatronUpdate.html page.
- This list of names is pulled directly from the Theatre Manager database. It is a list of names from the household that use the same email address. Only patrons within the same household can share an email address.
- The patron can choose the name of the record they wish to update within Theatre Manager. Clicking the Update Account button at the bottom of the window will updated the database.
Location:
htdocs/1/WebPagesEN/TMtemplates/
Able to Call Page(s):
- Not Applicable
Called By Page(s):
Page(s) Referenced:
- Not Applicable
setHOUSEHOLD_PATRON_LISTempty.html
Description:
- Displays the text **Nothing available to select** when the patron access the
- TMpatronUpdate.html and is not logged in.
- To avoid this message the patron can log into the online sales.
Location:
htdocs/1/WebPagesEN/TMtemplates/
Able to Call Page(s):
- Not Applicable
Called By Page(s):
Page(s) Referenced:
- Not Applicable
setHOUSEHOLD_PATRON_SELECTION_LIST.html
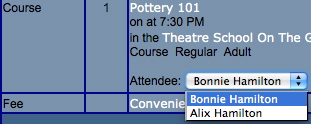
Description:
- Displays a list of names associated with the email address on the TMCart.html page.
- This list of names is pulled directly from the Theatre Manager database. It is a list of names from the household that use the same email address. Only patrons within the same household can share an email address.
- The patron can choose the name of the patron they wish to assign the course to within Theatre Manager.
- This drop down will only appear if there is more then one member of the household within Theatre Manager.
- If the patron would like to assign a course to another person they will need to add that patron to their household. This is done by clicking Account at the top of the window, choose the New Patron option in the list on the left and add the patron information to their household.
Location:
htdocs/1/WebPagesEN/TMtemplates/
Able to Call Page(s):
- Not Applicable
Called By Page(s):
Page(s) Referenced:
- Not Applicable
setHOUSEHOLD_PATRON_SELECTION_LISTempty.html
Description:
- Displays the text **will be selected after logging in** in the Attendee drop down when the patron is not currently signed in to online sales.
- To avoid this message the patron can login to online sales before adding a course to their online cart or they can sign in after adding the course and return to the cart.
- If the patron would like to assign a course to another person they will need to add that patron to their household. This is done by logging into the online sales, clicking Account at the top of the window, choose the New Patron option in the list on the left and add the patron information to their household.
Location:
htdocs/1/WebPagesEN/TMtemplates/
Able to Call Page(s):
- Not Applicable
Called By Page(s):
Page(s) Referenced:
- Not Applicable
setLOGIN_PATRON_LIST.html
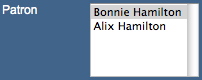
Description:
- Displays a list of names associated with the email address entered at the time of login.
- This list of names is pulled directly from the Theatre Manager database. It is a list of names from the household that use the same email address. Only patrons within the same household can share an email address.
- The patron must choose a name from the list and this will be the record the cart is added to within Theatre Manager.
Location:
htdocs/1/WebPagesEN/TMtemplates/
Able to Call Page(s):
- Not Applicable
Called By Page(s):
Page(s) Referenced:
- Not Applicable
setMERCHANT_LIST.html

Description:
- Displays the payment methods available for completing the order when there is more then one currency.
- This option requires a second merchant account to be created under Setup >> System Tables >> Merchant Types within Theatre Manager. For details on how to create a merchant account click here.
- The Enable Card Use By The Web Listener box should be checked under the Software Type of the Merchant Account.
- In the setup of the new merchant account select the Currency tab. Select the desired country from the Currency Country drop down and enter a G/L Account to allocate the difference from the exchange rate.
- The Exchange Rate should be entered under Setup >> System Tables >> Currency Exchange within Theatre Manager. For more information on setting up a Currency Exchange rate click here.
- Select the Cards tab and add the credit cards that should be processed using this currency rate. If a card can be used for more then one rate a second payment method should be setup for the card type. For more information on setting up payment methods click here.
Location:
htdocs/1/WebPagesEN/TMtemplates/
Able to Call Page(s):
- Not Applicable
Called By Page(s):
Page(s) Referenced:
- Not Applicable
setMERCHANT_LISTempty.html
Description:
- Hides the option to select a currency.
- To avoid a single currency a second merchant account needs to be setup in Setup >> System Tables >> Merchant Accounts within Theatre Manager. The Currency Country field under the Currency tab needs to be set to something other then the same Country as the existing merchant account.
Location:
htdocs/1/WebPagesEN/TMtemplates/
Able to Call Page(s):
- Not Applicable
Called By Page(s):
Page(s) Referenced:
- Not Applicable
setMONTH_LIST.html
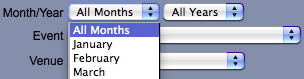
Description:
- Presents the twelve months of the year in a drop down list.
- This allows for patrons to search by month to find their desired date faster.
Location:
htdocs/1/WebPagesEN/TMtemplates/
Able to Call Page(s):
- Not Applicable
Called By Page(s):
Page(s) Referenced:
- Not Applicable
setMONTH_LISTempty.html
Description:
- Displays the text **Nothing available to select** in the month drop down when there are no performances marked as available for sale online within Theatre Manager.
- To avoid this message click the Events icon at the top of the window in Theatre Manager. Open an Event and select the Performance tab. Select one performance and check the box at the top of the window for Allow Selling Via The Internet. Close the window to save the changes.
Location:
htdocs/1/WebPagesEN/TMtemplates/
Able to Call Page(s):
- Not Applicable
Called By Page(s):
Page(s) Referenced:
- Not Applicable
setPASS_LIST.html
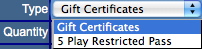
Description:
- Presents the memberships or passes in a drop down list based on their available for sale via the web status within Theatre Manager.
- This drop down allows for patrons to select the member type they wish to purchase.
- Member types are made available for sale by checking the Via The Internet box under the Edits tab of Setup >> System Tables >> Member Types within Theatre Manager.
- Many organizations choose to rename Memberships to Passes, Gift Certificates, or Other Sales Items. The name of this area within Theatre Manager is at the discretion of the organization.
Location:
htdocs/1/WebPagesEN/TMtemplates/
Able to Call Page(s):
- Not Applicable
Called By Page(s):
Page(s) Referenced:
- Not Applicable
setPASS_LISTempty.html
Description:
- Displays the text **Nothing available to select** in the event drop down when there are no member types marked as available for sale online within Theatre Manager.
- This drop down allows for patrons to select the pass type they wish to purchase.
- To avoid this message click Setup >> System Tables >> Member Types within Theatre Manager. Open a member type that should be offered online. Select the Edits tab and check the box for Via The Internet under the Allow Membership To Be Purchased. Close the window to save the changes.
- Many organizations choose to rename Memberships to Passes, Gift Certificates, or Other Sales Items. The name of this area within Theatre Manager is at the discretion of the organization.
Location:
htdocs/1/WebPagesEN/TMtemplates/
Able to Call Page(s):
- Not Applicable
Called By Page(s):
Page(s) Referenced:
- Not Applicable
setPAYMENT_LIST.html

Description:
- Presents the payment methods in a drop down list based on their settings within Theatre Manager.
- This drop down allows for patrons to select the credit card type they wish to use in order to complete their purchase.
- To make a payment method available online go to Setup >> System Tables >> Code Tables. Select Payment Methods in the left column and double click on the desired method. Check the Available At Internet box and close the window to save changes.
- Only credit card payment methods can be made available online at this time.
Location:
htdocs/1/WebPagesEN/TMtemplates/
Able to Call Page(s):
- Not Applicable
Called By Page(s):
Page(s) Referenced:
- Not Applicable
setPAYMENT_LISTempty.html
Description:
- Displays the text **Nothing available to select** in the payment drop down when there are no payment methods available for online within Theatre Manager.
- This drop down allows for patrons to select the credit card type they wish to use in order to complete their purchase.
- This message can appear if there are no payment methods enabled for online sales. To correct this go to Setup >> System Tables >> Code Tables. Select the Payment Methods in the left column. Double click on the payment method and check the box for Available At Internet. Close the window to save the changes.
- The merchant account for the payment method must also be available for online sales. Go to Setup >> System Tables >> Merchant Accounts. Double click on the merchant account to open it. Check the box for Enable Card Use By The Web Listener. Close the window to save the changes.
- Only credit card payment methods can be made available online at this time.
Location:
htdocs/1/WebPagesEN/TMtemplates/
Able to Call Page(s):
- Not Applicable
Called By Page(s):
Page(s) Referenced:
- Not Applicable
setPHONE_LOCATION_LIST.html

Description:
- Displays the name of the phone location based on the data from the patron record within Theatre Manager.
- The location can only be changed in the patron contact card from within Theatre Manager.
Location:
htdocs/1/WebPagesEN/TMtemplates
Able to Call Page(s):
- Not Applicable.
Called By Page(s):
Page(s) Referenced:
- Not Applicable.
setPHONE_LOCATION_LISTempty.html
Description:
- Displays the text **Nothing available to select** in the phone number location drop down when there are no locations type marked as available for sale online within Theatre Manager.
- This drop down allows for patrons to select the location of their phone number.
- To avoid this message click Setup >> System Tables >> Code Tables within Theatre Manager. Select Paton Location from the left column. Double click on the type that should be available online. Check the box for Available at Website. Close the window to save the changes.
Location:
htdocs/1/WebPagesEN/TMtemplates
Able to Call Page(s):
- Not Applicable.
Called By Page(s):
Page(s) Referenced:
- Not Applicable.
setPROMOTIONSSUB_LIST.html
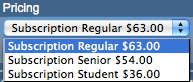
Description:
- Provides a drop down of available season pricing for the displayed seats.
- The availability of a price depends on the setup of the pricing structure for an event and sales promotion.
- The desired price needs to be available for use within the performance that are a part of the package. This is adjusted by opening the event, selecting the Pricing tab, single clicking on the performance in the left column, double clicking on the price code and placing a check mark in the Allow Price Code To Be Used box within Theatre Manager.
- At least one season promotion enabled for online sales needs to be active for the performance in the package. In Theatre Manager open the Event, select the Promotions tab and change the Promotions Shown drop down in the lower right corner to All. Locate the desired season sales promotion, select it and click the Allow Use button at the bottom of the window.
- At least one of the price points that are active for the season performances can not be listed in the Excludes Price Code field of sales promotion. The Excludes Price Code field is found in the Description tab of the promotion. The promotion can be found in Setup >> System Tables >> Sales Promotions within Theatre Manager.
- The Season Promotion must be a Season Ticket Type for G/L Posting under the Description tab of Setup >> System Tables >> Sales Promotions within Theatre Manager.
- The Season Promotion needs to be available for online sales. The Via The Internet box needs to be checked in the Edits tab of the promotion found in Setup >> System Tables >> Sales Promotions within Theatre Manager.
Location:
htdocs/1/WebPagesEN/TMtemplates/
Able to Call Page(s):
- Not Applicable
Called By Page(s):
Page(s) Referenced:
- Not Applicable
setPROMOTIONSSUB_LISTempty.html
Description:
- Displays the text **Nothing available to select** in the price drop down when there are is no available season pricing for a package within Theatre Manager.
- This drop down allows for patrons to select price at which they will purchase their tickets.
- To prevent this message the desired price needs to be available for use within the performances that are a part of the package. This is adjusted by opening the event, selecting the Pricing tab, single clicking on the performance in the left column, double clicking on the price code and placing a check mark in the Allow Price Code To Be Used box within Theatre Manager.
- To prevent this message at least one season promotion enabled for online sales needs to be active for the performance in the package. In Theatre Manager open the Event, select the Promotions tab and change the Promotions Shown drop down in the lower right corner to All. Locate the desired season sales promotion, select it and click the Allow Use button at the bottom of the window.
- To prevent this message at least one of the price points that are active for the season performances can not be listed in the Excludes Price Code field of sales promotion. The Excludes Price Code field is found in the Description tab of the promotion. The promotion can be found in Setup >> System Tables >> Sales Promotions within Theatre Manager.
- To prevent this message the Season Promotion must be a Season Ticket Type for G/L Posting under the Description tab of Setup >> System Tables >> Sales Promotions within Theatre Manager.
- To prevent this message the Season Promotion needs to be available for online sales. The Via The Internet box needs to be checked in the Edits tab of the promotion found in Setup >> System Tables >> Sales Promotions within Theatre Manager.
Location:
htdocs/1/WebPagesEN/TMtemplates/
Able to Call Page(s):
- Not Applicable
Called By Page(s):
Page(s) Referenced:
- Not Applicable
setPROMOTIONS_LIST.html
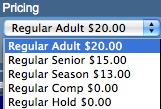
Description:
- Provides a drop down of available pricing for the displayed seats.
- The availability of a price depends on the setup of the pricing structure for an event and the sales promotion.
- The desired price needs to be available for use within the performance. This is adjusted by opening the event, selecting the Pricing tab, single clicking on the performance in the left column, double clicking on the price code and placing a check mark in the Allow Price Code To Be Used box within Theatre Manager.
- At least one promotion enabled for online sales needs to be active for the performance. In Theatre Manager open the Event, select the Promotions tab and change the Promotions Shown drop down in the lower right corner to All. Locate the desired Internet sales promotion, select it and click the Allow Use button at the bottom of the window.
- At least one of the price points that are active for the performance can not be listed in the Excludes Price Code field of sales promotion. The Excludes Price Code field is found in the Description tab of the promotion. The promotion can be found in Setup >> System Tables >> Sales Promotions within Theatre Manager.
- The Sales Promotion needs to be available for online sales. The Via The Internet box needs to be checked in the Edits tab of the promotion found in Setup >> System Tables >> Sales Promotions within Theatre Manager.
Location:
htdocs/1/WebPagesEN/TMtemplates/
Able to Call Page(s):
- Not Applicable
Called By Page(s):
Page(s) Referenced:
- Not Applicable
setPROMOTIONS_LISTempty.html
Description:
- Displays the text **Nothing available to select** in the price drop down when there is no available online pricing for the performance within Theatre Manager.
- This drop down allows for patrons to select price at which they will purchase their tickets.
- The availability of a price depends on the setup of the pricing structure for an event and sales promotion.
- To prevent this message the desired price needs to be available for use within the performance. This is adjusted by opening the event, selecting the Pricing tab, single clicking on the performance in the left column, double clicking on the price code and placing a check mark in the Allow Price Code To Be Used box within Theatre Manager.
- To prevent this message at least one promotion enabled for online sales needs to be active for the performance. In Theatre Manager open the Event, select the Promotions tab and change the Promotions Shown drop down in the lower right corner to All. Locate the desired Internet sales promotion, select it and click the Allow Use button at the bottom of the window.
- To prevent this message at least one of the price points that are active for the performance can not be listed in the Excludes Price Code field of sales promotion. The Excludes Price Code field is found in the Description tab of the promotion. The promotion can be found in Setup >> System Tables >> Sales Promotions within Theatre Manager.
- To prevent this message the Sales Promotion needs to be available for online sales. The Via The Internet box needs to be checked in the Edits tab of the promotion found in Setup >> System Tables >> Sales Promotions within Theatre Manager.
Location:
htdocs/1/WebPagesEN/TMtemplates
Able to Call Page(s):
- Not Applicable
Called By Page(s):
Page(s) Referenced:
- Not Applicable
setPROVINCE_LIST.html
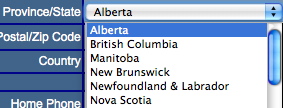
Description:
- Displays a list of Provinces or States available online depending on the Country the patron chooses in the drop down window.
- The options in the list can be edited in the Theatre Manager database by going to Setup >> System Tables >> Code Tables and selecting Province in the left column. Double click on any of the listings to make changes.
- Please note the word province may be changed to State within the Theatre Manager database.
Location:
htdocs/1/WebPagesEN/TMtemplates/
Able to Call Page(s):
- Not Applicable
Called By Page(s):
Page(s) Referenced:
- Not Applicable
setPROVINCE_LISTempty.html
Description:
- Displays the text **Nothing available to select** in the Province/State drop down when there is no online Provinces/States within Theatre Manager.
- The most common reason for this messages is there are not provinces for the region available online. To avoid this message go to Setup >> System Tables >> Code Tables. Select Provinces in the left column and double click on the desired province in the right column. Check the box for Available At Internet. Close the window to save the changes.
- Please note the word province may be changed to State within the Theatre Manager database.
Location:
htdocs/1/WebPagesEN/TMtemplates/
Able to Call Page(s):
- Not Applicable
Called By Page(s):
Page(s) Referenced:
- Not Applicable
setREASON_TO_BUY_LIST.html

Description:
- Presents a drop down of options for the patron to choose from indicating how they heard about the performances they purchased. This information is used for marketing purposes.
- Additional options can be added to the Theatre Manager database by going to Setup >> System Tables >> Code Tables, clicking Order Reason to Buy in the left column and using the New button at the top of the window.
Location:
htdocs/1/WebPagesEN/TMtemplates/
Able to Call Page(s):
- Not Applicable
Called By Page(s):
Page(s) Referenced:
- Not Applicable
setREASON_TO_BUY_LISTempty.html
Description:
- Displays the text **Nothing available to select** in the how did you hear list when there is no available online reasons within Theatre Manager.
- To avoid this message go to Setup >> System Tables >> Code Tables and select Order Reason To Buy in the left column within Theatre Manager. Double click on one of the option in the right column and check the box for Available At Internet. Close the window to save the changes.
Location:
htdocs/1/WebPagesEN/TMtemplates/
Able to Call Page(s):
- Not Applicable
Called By Page(s):
Page(s) Referenced:
- Not Applicable
setSALUTATION_LIST.html
Description:
- Displays the a drop down box of the available online salutations from within Theatre Manager.
- Only those salutations that have been indicated as Available At Internet within their setup in Theatre Manager will be displayed.
- To change the visibility of a status online go to Setup >> System Tables >> Code Tables within Theatre Manager. Select Patron Salutations in the left column. Double click on a salutation in the right column that should be available online. Alter the check box for Available At Internet accordingly. Close the window to save the changes.
Location:
htdocs/1/WebPagesEN/TMtemplates/
Able to Call Page(s):
- Not Applicable
Called By Page(s):
Page(s) Referenced:
- Not Applicable
setSALUTATION_LISTempty.html
Description:
- Displays the text **Nothing available to select** in the salutation drop down when there is no available salutations within Theatre Manager.
- To prevent this message go to Setup >> System Tables >> Code Tables within Theatre Manager. Select Patron Salutations in the left column. Double click on a salutation in the right column that should be available online. Check the box for Available At Internet. Close the window to save the changes.
Location:
htdocs/1/WebPagesEN/TMtemplates/
Able to Call Page(s):
- Not Applicable
Called By Page(s):
Page(s) Referenced:
- Not Applicable
setSUBSCRIBE_LIST.html
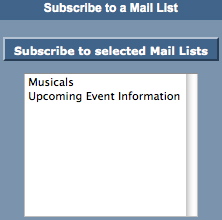
Description:
- Displays a list of available mail lists the patron can subscribe to online.
- To add a mail list the Allow Patron To Subscribe/Unsubscribe Via The Internet box needs to be checked for the list within Theatre Manager. To access this option click the Mail List button at the top of the window in Theatre Manager. Double click on the desired mail list and select the Description tab. Check the Allow Patron To Subscribe/Unsubscribe Via The Internet box. Close the window to save the changes.
Location:
htdocs/1/WebPagesEN/TMtemplates/
Able to Call Page(s):
- Not Applicable
Called By Page(s):
Page(s) Referenced:
- Not Applicable
setSUBSCRIBE_LISTempty.html
Description:
- Displays the text **Nothing available to select** when there are no available mail lists for the patron to subscribe to.
- This can be caused by the lack of available mail lists online or if the patron has subscribed to all available mail lists.
- To add a mail list the Allow Patron To Subscribe/Unsubscribe Via The Internet box needs to be checked for the list within Theatre Manager. To access this option click the Mail List button at the top of the window in Theatre Manager. Double click on the desired mail list and select the Description tab. Check the Allow Patron To Subscribe/Unsubscribe Via The Internet box. Close the window to save the changes.
Location:
htdocs/1/WebPagesEN/TMtemplates/
Able to Call Page(s):
- Not Applicable
Called By Page(s):
Page(s) Referenced:
- Not Applicable
setSUBS_SERIES_LIST.html

Questions and Answers:
Q: How can the series list be customized to display something other then what is pulled from the Theatre Manager database?
A: To make the events in the subscription display as "First Sun in Run @8:00pm" the following would be used:
<field>pick(mid(PB_SERIES_CODE,1,1),'','First','Second','Third','Fourth','Fifth')</field>
The following example displays the series code on the screen in the popup box:
<field>mid(PB_SERIES_CODE,3,3)</field> in run @ <field>pick(pos(mid(PB_SERIES_CODE,7,1),'ME'),'8:00','2:00','8:00')</field>pm
____________________________________________________________
Description:
- Presents a list of available series options to choose from in a drop down format.
- Some organizations have more then one performance within their season package. Each performance is indicated by a series code. This allows Theatre Manager to book the patron into the same night for each event within the season package.
- Only performances marked as Season Control Performance within the Control House in Theatre Manager will appear in the drop down.
Location:
htdocs/1/WebPagesEN/TMtemplates/
Able to Call Page(s):
- Not Applicable
Called By Page(s):
Page(s) Referenced:
- Not Applicable
setSUBS_SERIES_LISTempty.html
Description:
- Displays the text **Nothing available to select** in the series drop down when there is no season control performances within the control house in Theatre Manager.
- Some organizations have more then one performance within their season package. Each performance is indicated by a series code. This allows Theatre Manager to book the patron into the same night for each event within the season package.
- To avoid this messaged ensure at least on performance has the Season Control Performance box checked within it's setup. This is accessed by clicking the Event button at the top of Theatre Manager, double clicking on the event and selecting the Performance tab.
Location:
htdocs/1/WebPagesEN/TMtemplates/
Able to Call Page(s):
- Not Applicable
Called By Page(s):
Page(s) Referenced:
- Not Applicable
setTICKET_QTY_LIST.html

Description:
- Displays a drop down of the quantity of tickets the patron can purchase for the Performance.
- This number is determined by the number of tickets in the patrons current cart, the system default per order and the performance per order limit.
Location:
htdocs/1/WebPagesEN/TMtemplates/
Able to Call Page(s):
- Not Applicable
Called By Page(s):
- TMsubscriptionMapDefault.html
- TMsubscriptionMapDefaultf.html
- TMsubscriptionsMapDefaultf.html
- TMticketsSection_MapDefault.html
- TMticketsSection_MapDefaultc.html
- TMticketsSection_MapDefaultf.html
Page(s) Referenced:
- Not Applicable
setTICKET_QTY_LISTempty.html
Description:
- Displays the text **Maximum tickets per order has been reached** in the quantity drop down when the maximum tickets per order has been met.
- If the maximum quantity of tickets is being meet too soon it's possible to increase the number of tickets per order in the Maximum Tickets field of the Web tab in Setup >> System Preferences within Theatre Manager.
- The event purchase limit can also impact the maximum tickets a patron can purchase. This limit can be adjusted in the Patron Purchase Limit field located in the Event tab. To access this event click the Events tab at the top of the window and double click on the event to open it within Theatre Manager.
Location:
htdocs/1/WebPagesEN/TMtemplates/
Able to Call Page(s):
- Not Applicable
Called By Page(s):
- TMsubscriptionMapDefault.html
- TMsubscriptionMapDefaultf.html
- TMsubscriptionsMapDefaultf.html
- TMticketsSection_MapDefault.html
- TMticketsSection_MapDefaultc.html
- TMticketsSection_MapDefaultf.html
Page(s) Referenced:
- Not Applicable
setUNSUBSCRIBE_LIST.html
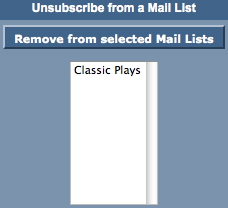
Description:
- Displays a list of mail lists the patron can unsubscribe from.
- This list is populated based on the mail lists the patron has previously subscribed to.
Location:
htdocs/1/WebPagesEN/TMtemplates/
Able to Call Page(s):
- Not Applicable
Called By Page(s):
Page(s) Referenced:
- Not Applicable
setUNSUBSCRIBE_LISTempty.html
Description:
- Displays the text **Nothing available to select** when there are no available mail lists for the patron to unsubscribe from.
- This can be caused by the lack of available mail lists online or if the patron has not subscribed to any of the available mail lists.
- To add a mail list the Allow Patron To Subscribe/Unsubscribe Via The Internet box needs to be checked for the list within Theatre Manager. To access this option click the Mail List button at the top of the window in Theatre Manager. Double click on the desired mail list and select the Description tab. Check the Allow Patron To Subscribe/Unsubscribe Via The Internet box. Close the window to save the changes.
Location:
htdocs/1/WebPagesEN/TMtemplates/
Able to Call Page(s):
- Not Applicable
Called By Page(s):
Page(s) Referenced:
- Not Applicable
setVENUE_LIST.html
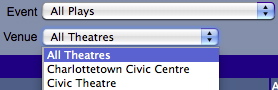
Description:
- Presents a list of Venues, where upcoming events will take place, in a drop down list. The venue is a part of the event setup and the list is based on the events available for sale via the web status within Theatre Manager.
- This drop down allows for patrons to search for their desired performance by venue.
Location:
htdocs/1/WebPagesEN/TMtemplates/
Able to Call Page(s):
- Not Applicable
Called By Page(s):
Page(s) Referenced:
- Not Applicable
setVENUE_LISTempty.html
Description:
- Displays the text **Nothing available to select** in the venue drop down when there are no performances marked as available for sale online within Theatre Manager.
- To avoid this message click the Events icon at the top of the window in Theatre Manager. Open an Event and select the Performance tab. Select one performance and check the box at the top of the window for Allow Selling Via The Internet. Close the window to save the changes.
Location:
htdocs/1/WebPagesEN/TMtemplates/
Able to Call Page(s):
- Not Applicable
Called By Page(s):
Page(s) Referenced:
- Not Applicable
setWEBSITE_LOCATION_LIST.html

Description:
- Displays the name of the website location based on the data from the patron record within Theatre Manager.
- The location can only be changed in the patron contact card from within Theatre Manager.
Location:
htdocs/1/WebPagesEN/TMtemplates
Able to Call Page(s):
- Not Applicable.
Called By Page(s):
Page(s) Referenced:
- Not Applicable.
setWEBSITE_LOCATION_LISTempty.html
Description:
- Displays the text **Nothing available to select** in the website location drop down when there are no locations type marked as available for sale online within Theatre Manager.
- This drop down allows for patrons to select the location type for their website.
- To avoid this message click Setup >> System Tables >> Code Tables within Theatre Manager. Select Paton Location from the left column. Double click on the type that should be available online. Check the box for Available at Website. Close the window to save the changes.
Location:
htdocs/1/WebPagesEN/TMtemplates
Able to Call Page(s):
- Not Applicable.
Called By Page(s):
Page(s) Referenced:
- Not Applicable.
setYEAR_LIST.html
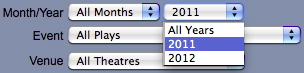
Description:
- In the calendar view this presents the year(s) in a drop down based on the Season Year for the performances marked as available for sale online within Theatre Manager.
- For credit card processing the year is programed to display the current year and ten years in advance of the current date.
- This drop down allows for patrons to search by year to find their desired date faster.
Location:
htdocs/1/WebPagesEN/TMtemplates/
Able to Call Page(s):
- Not Applicable
Called By Page(s):
Page(s) Referenced:
- Not Applicable
setYEAR_LISTempty.html
Description:
- Displays the text **Nothing available to select** in the year drop down when there are no performances marked as available for sale online within Theatre Manager.
- To avoid this message click the Events icon at the top of the window in Theatre Manager. Open an Event and select the Performance tab. Select one performance and check the box at the top of the window for Allow Selling Via The Internet. Close the window to save the changes.
Location:
htdocs/1/WebPagesEN/TMtemplates/
Able to Call Page(s):
- Not Applicable
Called By Page(s):
Page(s) Referenced:
- Not Applicable
tmCheckoutPostDatedPaymentRules.html
Description:
- Displays the rules surrounding the use of Post Dated Payments for billing.
Location:
htdocs/1/WebPagesEN/TMtemplates/
Able to Call Page(s):
- Not Applicable
Called By Page(s):
Page(s) Referenced:
- Not Applicable
tmCheckoutPostDatedPayments.html
Description:
- Displays the rules Post Dated Payment options for billing.
Location:
htdocs/1/WebPagesEN/TMtemplates/
Able to Call Page(s):
- Not Applicable
Called By Page(s):
Page(s) Referenced:
tmContact.html
Description:
- Pulls the company name, address, telephone number, fax, web site and email address as it appears in the Company tab of Setup >> Company Preferences within Theatre Manager
- The Google Map link draws on the address for Company tab of Setup >> Company Preferences within Theatre Manager
- The main web site address is pulled from the Company tab of Setup >> Company Preferences within Theatre Manager
Location:
htdocs/1/WebPagesEN/TMtemplates/
Able to Call Page(s):
- maps.google.com
- The companies web site as it appears in the Company tab of Setup >> Company Preferences within Theatre Manager.
Called By Page(s):
- tmBoxOfficePolicy.html
- TMcheckoutCardError.html
- TMcheckoutConfirmation.html
- TMcheckoutInvoiceEmail.html
- TMcheckoutProcessing.html
- contentContact.html
- tmFeeDefault.html
- TMfutureTickets.html
- tmMailFee.html
- tmMailFeeDefault.html
- tmindex.html
- TMmaillistUnverifiedEmail.html
- tmOrderFee.html
- tmOrderFeeDefault.html
- tmPasswordChangeEmail.html
- TMpasswordEmptyEmail.html
- TMpasswordForgotEmail.html
- TMpasswordResetEmail.html
- TMpatronNewEmail.html
- TMpatronUpdateEmail.html
- TMsys404.html
- TMsysBackupInProgress.html
- TMsysInvalidCall.html
- TMsysInvalidCallDirect.html
- TMsysInvalidCallNoAccess.html
- TMsysInvalidFunction.html
- TMsysWebSalesDisabled.html
- TMticketsMaxPurchased.html
- TMticketsSoldOut.html
Page(s) Referenced:
- Not Applicable
tmContactHours.html
Description:
- Pulls the company name, address, telephone number, fax, web site and email address as it appears in the Company tab of Setup >> Company Preferences within Theatre Manager
- The hours of operation are hard coded into this page and may need to be edited to reflect the accurate information for the organization
Location:
htdocs/1/WebPagesEN/TMtemplates/
Able to Call Page(s):
- maps.google.com
- The companies web site as it appears in the Company tab of Setup >> Company Preferences within Theatre Manager.
- The companies email address as it appears in the Web Server setup of Company Preferences within Theatre Manager.
Called By Page(s):
- contentContact.html
- tmBoxOfficePolicy.html
- TMcheckoutConfirmation.html
- TMcheckoutInvoiceEmail.html
- TMcheckoutProcessing.html
- tmContactPopup.html
- tmFeeDefault.html
- TMfutureTickets.html
- tmindex.html
- tmMailFee.html
- tmMailFeeDefault.html
- TMmaillistUnverifiedEmail.html
- tmOrderFee.html
- tmOrderFeeDefault.html
- TMpasswordChangeEmail.html
- TMpasswordEmptyEmail.html
- TMpasswordForgotEmail.html
- TMpasswordResetEmail.html
- TMpatronNewEmail.html
- TMpatronUpdateEmail.html
- TMsys404.html
- TMsysBackupInProgress.html
- TMsysInvalidCall.html
- TMsysInvalidCallDirect.html
- TMsysInvalidCallNoAccess.html
- TMsysInvalidFuncation.html
- TMsysWebSalesDisabled.html
- TMtickesMaxPurchased.html
- TMticketsSoldOut.html
Page(s) Referenced:
- Not Applicable
tmContactPopup.html
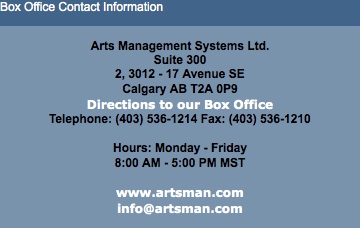
Description:
- Displays the Box Office contact information.
Questions and Answers:
Q: The location in Directions to our Box Office link is incorrect, how can it be fixed?
A: The location is based on the address in the Company tab of Company Preferences within Theatre Manager. If the address appears correctly in Theatre Manager it means Google has the location wrong. Contact Google to make the necessary changes.
____________________________________________________________
Location:
htdocs/1/WebPagesEN/TMtemplates/
Able to Call Page(s):
- Not Applicable
Called By Page(s):
Page(s) Referenced:
tmFooter.html
Description:
- Pulls the Footer details from the Web Listener tab found in Setup >> Company Preferences of Theatre Manager
Location:
htdocs/1/WebPagesEN/TMtemplates/
Able to Call Page(s):
- Not Applicable
Called By Page(s):
- tmBoxOfficePolicy.html
- TMcart.html
- TMcheckout.html
- TMcheckoutCardError.html
- TMcheckoutConfirmation.html
- TMcheckoutInvoiceEmail.html
- TMcheckoutNoItems.html
- TMcheckoutNoPayment.html
- TMcheckoutProcessing.html
- TMcoupon.html
- TMdonation.html
- TMdonationmonthly.html
- tmEventDefault.html
- tmFeeDefault.html
- TMfutureTickets.html
- TMfutureTicketsPrint.html
- TMhome.html
- TMlogin.html
- TMloginSelectPatron.html
- TMlogoff.html
- TMlogoffOpenCart.html
- tmMailFee.html
- tmMailFeeDefault.html
- TMmaillist.html
- TMmaillistDisallow.html
- TMmaillistQuickAdd.html
- TMmaillistUnverifiedEmail.html
- TMmaillistVerify.thml
- TMoldCartDetails.html
- TMoldCartDetailsPrint.html
- TMoldCartHeaders.html
- tmOrderFee.html
- tmOrderFeeDefault.html
- tmPackageDefault.html
- tmPassDefault.html
- TMpass.html
- TMpassAskAmount.html
- TMpasswordChange.html
- TMpasswordChangeEmail.html
- TMpasswordEmptyEmail.html
- TMpasswordForgot.html
- TMpasswordForgotEmail.html
- TMpasswordResetChange.html
- TMpwasswordResetEmail.html
- TMpatronLimtedProfile.html
- TMpatronNew.html
- TMpatronNewEmail.html
- TMpatronUpdate.html
- TMpatronUpdateEmail.html
- TMsubscriptionMapDefault.html
- TMsubscriptionMapDefaultf.html
- TMsubscriptionPriceMapDefaulthtml
- TMsubscriptionsMapDefaultf.html
- TMsubscriptionsPriceMapDefault.html
- tmSubscriptionDefault.html
- TMsubscriptions.html
- TMsubscriptionsRenew.html
- TMsys404.html
- TMsysBackupInProgress.html
- TMsysCookiesDisabled.html
- TMsysInvalidCall.html
- TMsysInvalidCallDirect.html
- TMsysInvalidCallNoAccess.html
- TMsysInvalidFunction.html
- TMsysWebSalesDisabled.html
- TMtickets.html
- TMticketscalendar.html
- TMticketsMaxPurchased.html
- TMticketsPrice_MapDefault.html
- TMticketsSection_MapDefault.html
- TMticketsSection_MapDefaultc.html
- TMticketsSection_MapDeafultf.html
- TMticketsSoldOut.html
- tmVenueDefault.html
- TMvolcalendar.html
- TMvolunteer.html
Page(s) Referenced:
- Not Applicable
tmLoginForm.html
Description:
- Displays the mandatory fields from the database and their names, need to login to a limited user profile for online sales
- The mandatory fields are located in the Allow Limited Profile Patrons On section of the Mandatory
Location:
htdocs/1/WebPagesEN/TMtemplates/
Able to Call Page(s):
Called By Page(s):
Page(s) Referenced:
tmLoginLimitedPatron.html

Description:
- Displays the fields to be filled in for limited profile accounts.
Questions and Answers:
Q: How can the mandatory fields be changed?
A: In Theatre Manager click Setup >> System Preferences. Select the Mandatory Data tab. Remove the check from the options in the Limited Profile Web Sales Checkout Patron Data section for the fields that should not be mandatory.
____________________________________________________________
Q: How can I hid fields that are not mandatory?
A: Fields that are not mandatory can be commented out in this page.
____________________________________________________________
Location:
htdocs/1/WebPagesEN/TMtemplates/
Able to Call Page(s):
- Not Applicable
Called By Page(s):
Page(s) Referenced:
tmMailListQuickAddInsert.html
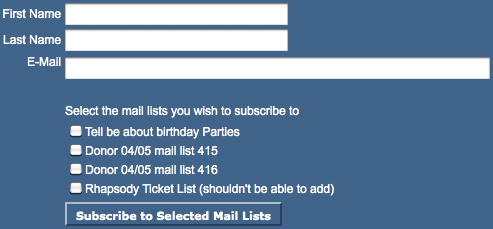
Description:
- Populates a list of Mail Lists with check boxes for the patron to indicate the Mail Lists they wish to sign up for.
- The list can be customized using the Mail List Sequence number from within Theatre Manager
- Allows for the ability to add subscribing and unsubscribing to a Mail List to any online page
Location:
htdocs/1/WebPagesEN/TMtemplates/
Able to Call Page(s):
- Not Applicable
Called By Page(s):
Page(s) Referenced:
tmnavButtons.html

Description:
- This web page include file is designed to show the buttons listed at the top of most pages within the online sales. Since all pages are responsive, on smaller screens like smartphones, the menus will collapse until there is only a logo and the hamburger menu (per the image to the right). clicking on the hamburger will expand or collapse the hidden actual menu items.
- The name seen on the button can be altered by editing the text within the double quotes
- in some cases, you only need to change the value in Company Preferences - Appearance Tab.
- For example changing the work Gift Certificate in value="Gift Certificates" to be Passes or Memberships.
- The icon can be changed by picking a different icon name from any of those supported by font awsome
- The cart countdown feature (beside the cart link) can be enabled and disabled in Company Preferences->Web Options tab
- It is recommended buttons are commented out within the file if not needed (rather then deleted) in the event they are needed at a later date.
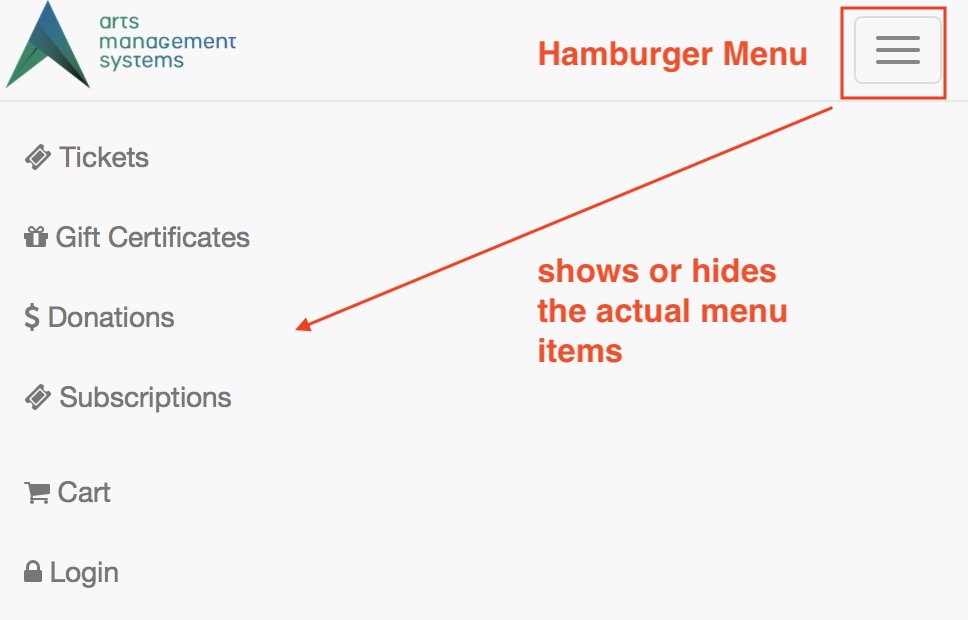
Location:
htdocs/1/WebPagesEN/TMtemplates/
Able to Call Page(s):
- TMcart.html
- TMcheckout.html
- TMdonation.html
- TMhome.html
- TMlogin.htm
- TMlogoff.html
- TMmaillist.html
- tmnavLanguages.html
- TMpass.html
- TMpatronUpdate.html
- TMsubscriptions.html
Called By Page(s):
- tmBoxOfficePolicy.html
- tmCampaignDefault.html
- TMcart.html
- TMcheckout.html
- TMcheckoutCardError.html
- TMcheckoutConfirmation.html
- TMcheckoutNoItems.html
- TMcheckoutNoPayment.html
- TMcheckoutProcessing.html
- TMcoupon.html
- TMdonation.html
- TMdonationmonthly.html
- tmEventDefault.html
- tmFeeDefault.html
- TMhome.html
- TMfutureTickets.html
- TMlogoffOpenCart.html
- tmMailFee.html
- tmMailFeeDefault.html
- TMmaillist.html
- TMmaillistDisallow.html
- TMmaillistQuickAdd.html
- TMmaillistVerify.html
- TMoldCartDetails.html
- TMoldCartheaders.html
- tmOrderFee.html
- tmOrderFeeDefault.html
- tmPackageDefault.html
- TMpass.html
- TMpassAskAmount.html
- TMpasswordChange.html
- TMpatronLimitedProfile.html
- TMpatronUpdate.html
- tmSubscriptionDefault.html
- TMsubscriptions.html
- TMsubscriptionsRenew.html
- TMsubscriptionMapDefault.html
- TMsubscriptionMapDefaultf.html
- TMsubscriptionPriceMapDefault.html
- TMsubcriptionsMapDefaultf.html
- TMsubscriptionsPriceMapDefault.html
- TMsysBackupInProgress.html
- TMsysInvalidCall.html
- TMsysInvalidCallNoAccess.html
- TMsysInvalidFunction.html
- TMsysWebSalesDisabled.html
- TMtickets.html
- TMticketsCalendar.html
- TMticketsMaxPurchased.html
- TMticketsPrice_MapDefault.html
- TMticketsSection_MapDefault.html
- TMticketsSection_MapDefaultc.html
- TMticketsSection_MapDefaultf.html
- TMticketsSoldOut.html
- tmVenueDefault.html
- TMvolcalendar.html
- TMvolunteer.html
Page(s) Referenced:
tmnavLanguages.html
Description:
- The language flags only appear when multiple languages are setup. This included uncommenting the lines within this page and adding details under the Web Listener tab of Setup >> Company Preference within Theatre Manager.
- A line can be added to this file for each desired language.
- The Language codes for &lang=XX where XX must have a WebPagesXX folder and be found in Theatre Manager under Setup >> Company Preferences in the Web Listener tab.
- Currently this reference is tied to the tmnavButtons.html page and will appear to the left of the buttons at the top of the window when the references is not commented out.
- Sample Flag images can be found in the tmGifs folder for referencing.
Location:
htdocs/1/WebPagesEN/TMtemplates/
Able to Call Page(s):
- Not Applicable
Called By Page(s):
Page(s) Referenced:
- Not Applicable
tmtermsandconditionsMODAL.html
Description:
Location: htdocs/1/WebPagesEN/TMtemplates/ Able to Call Page(s): Called By Page(s): Page(s) Referenced: |
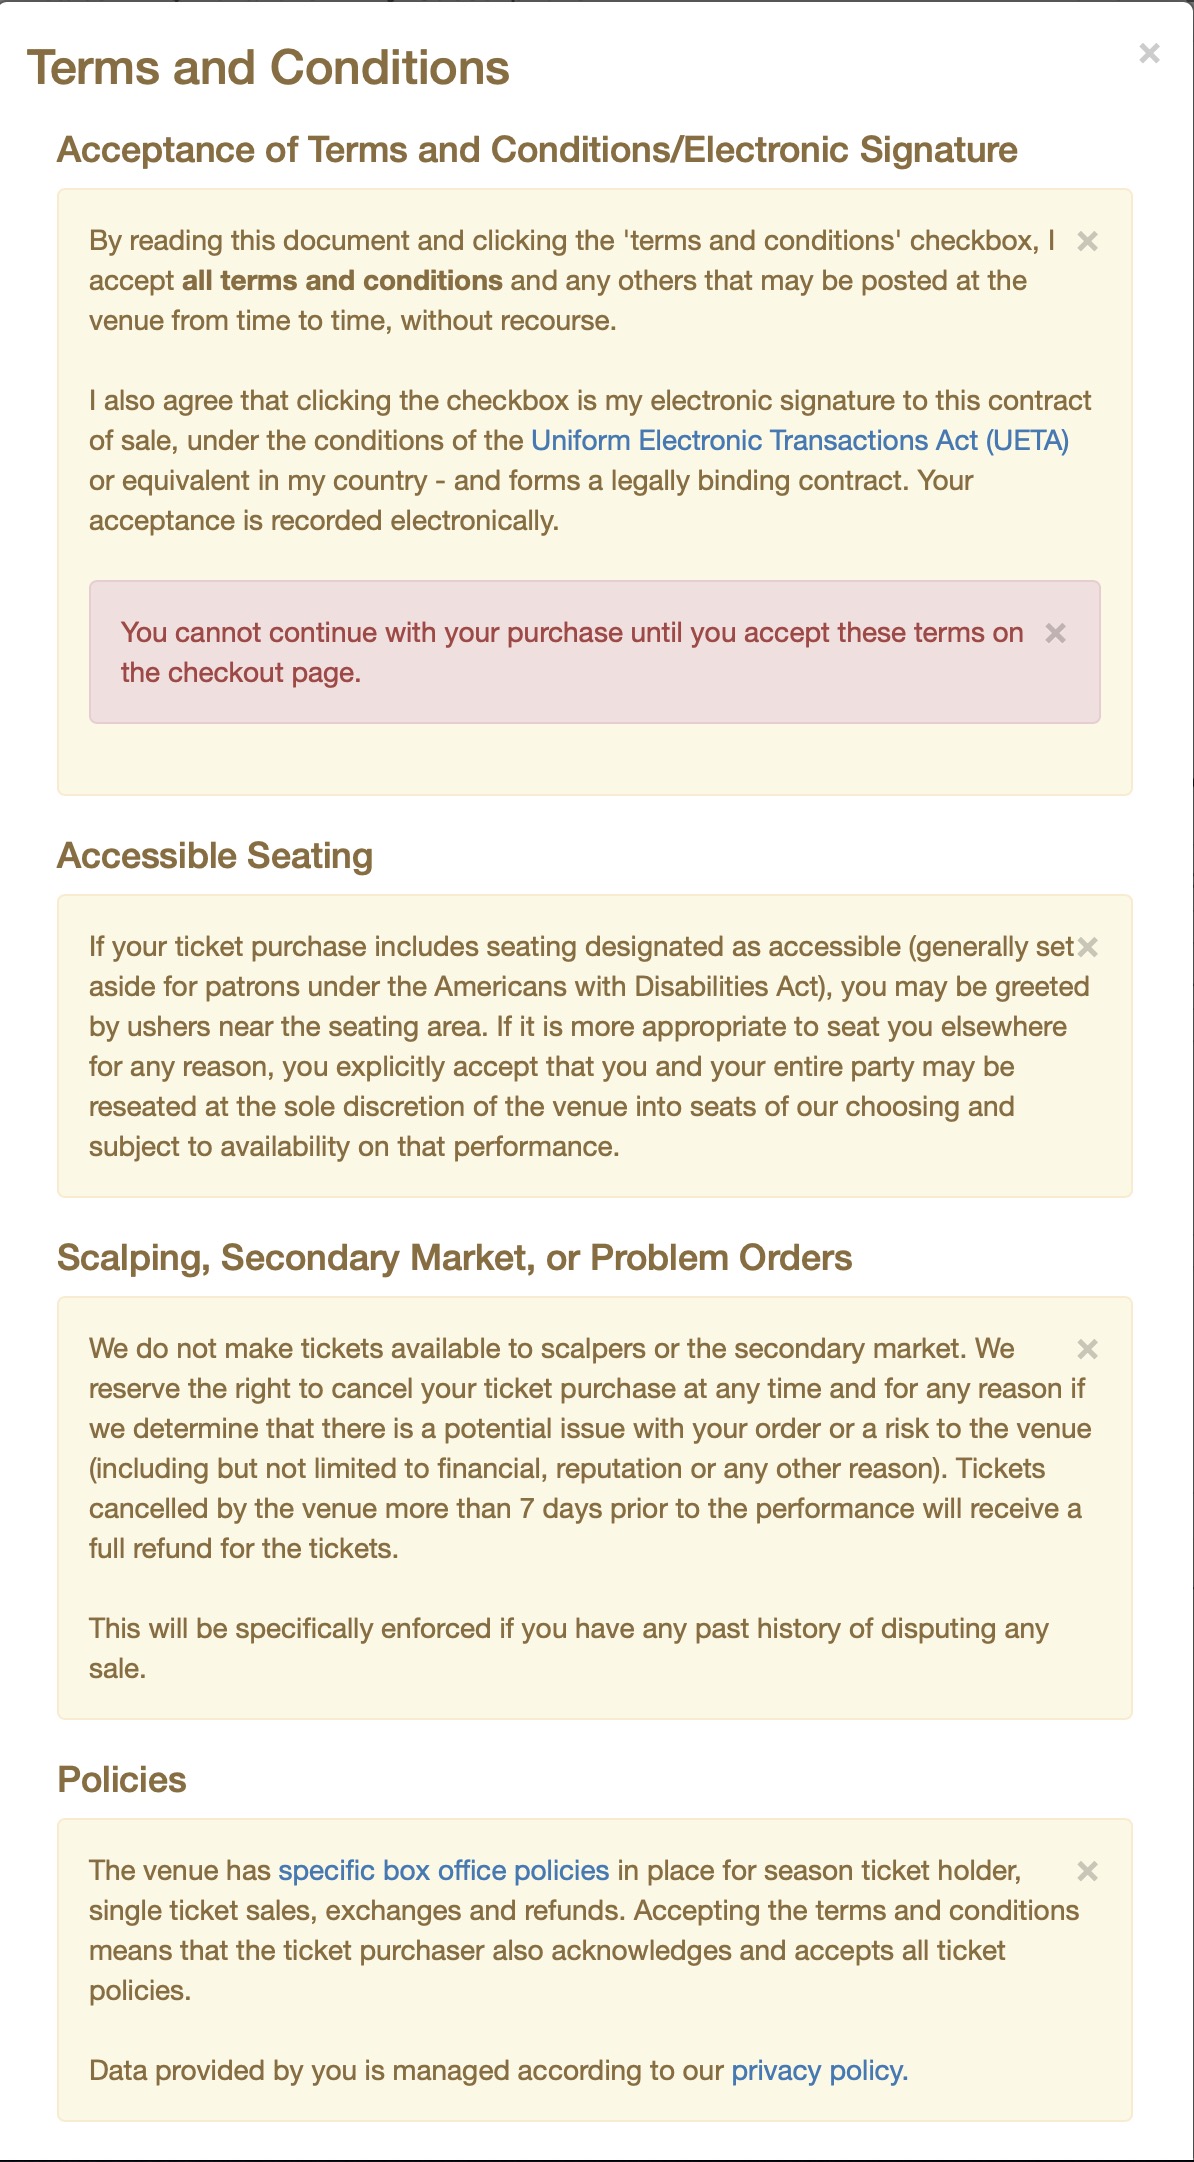
|
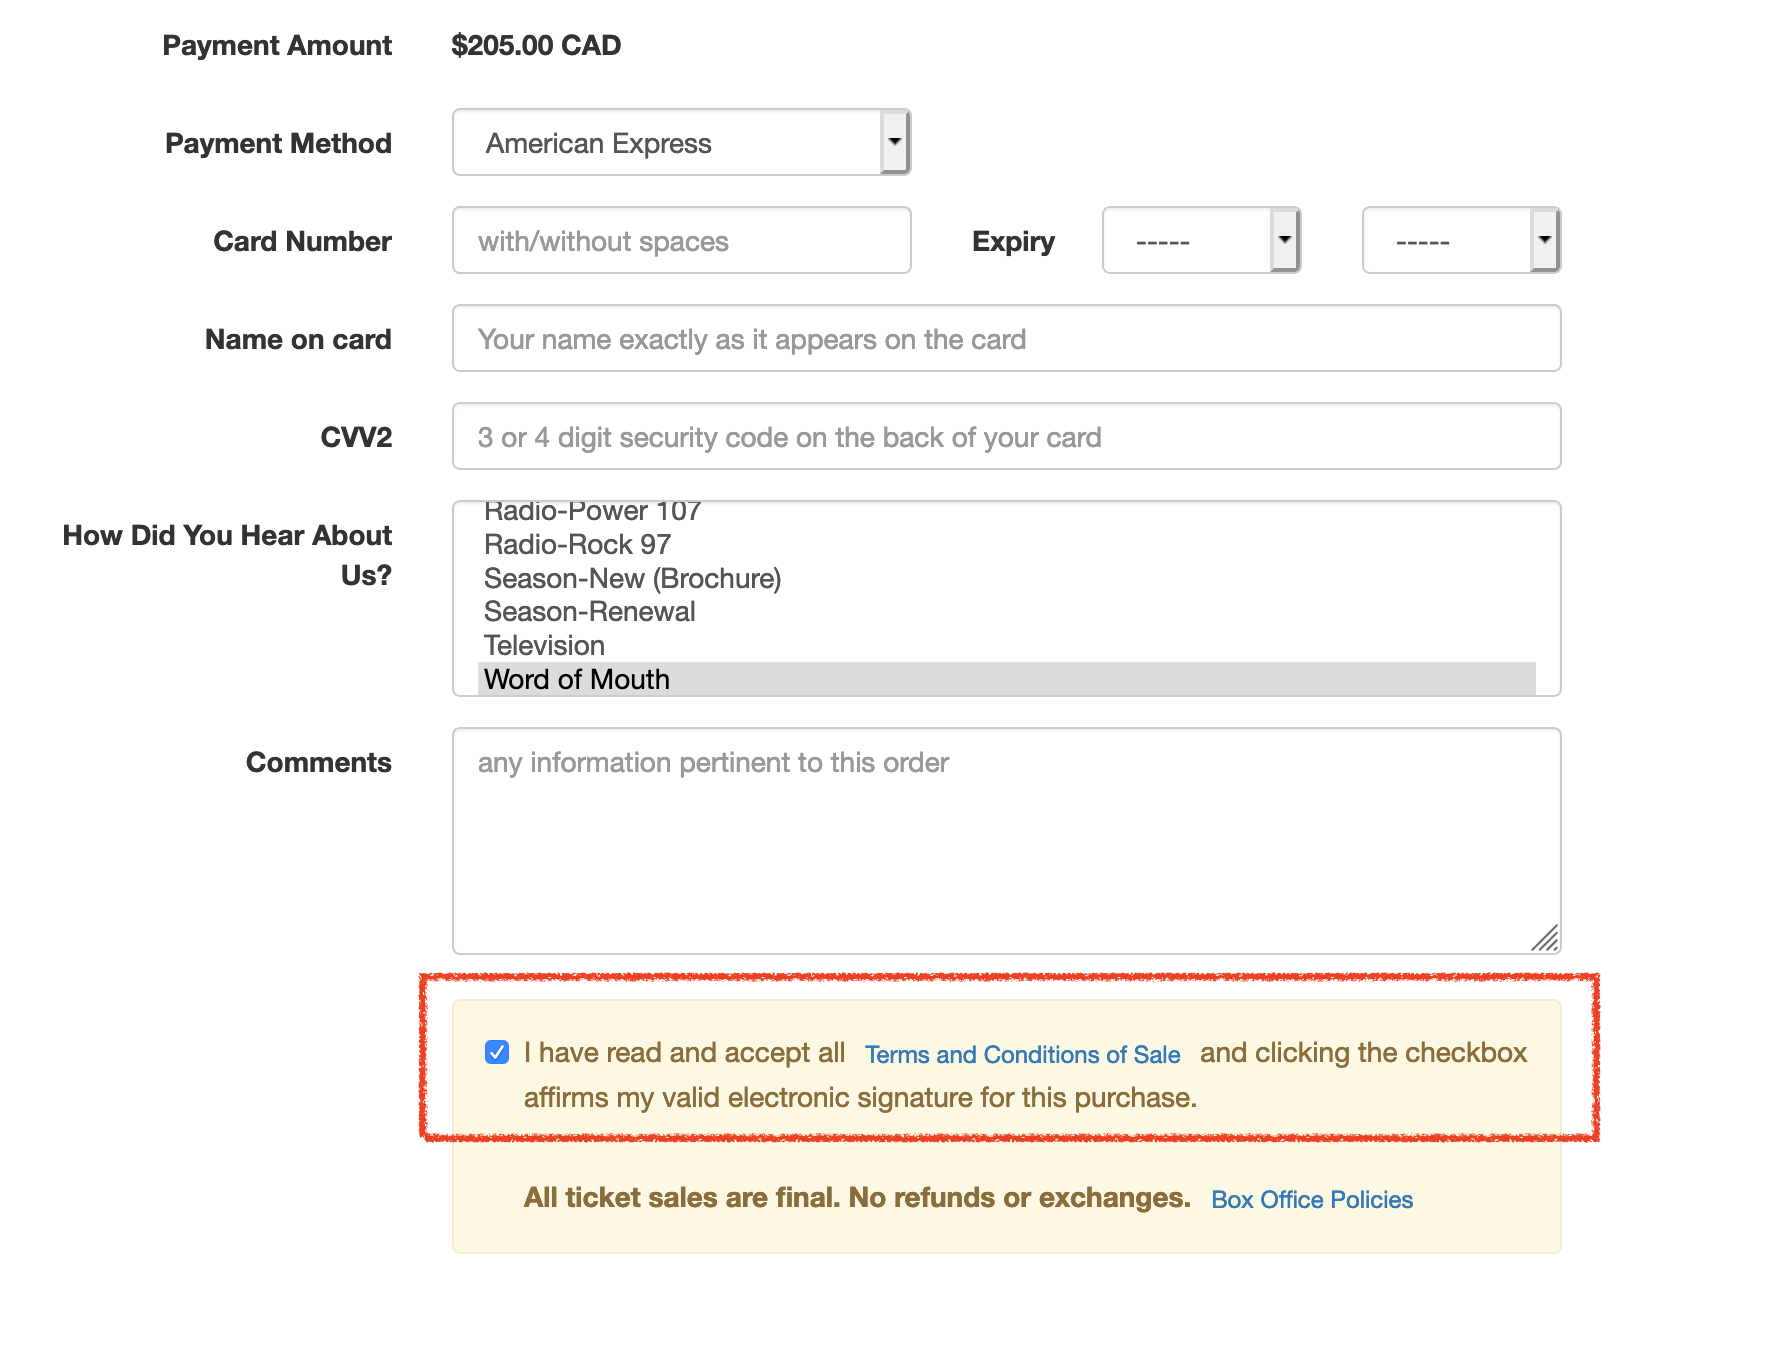
tmPoweredBy.html

Description:
- The Theatre Manager powered by slogan.
Location:
htdocs/1/WebPagesEN/TMtemplates/
Able to Call Page(s):
- Main web site
- www.artsman.com
Called By Page(s):
Page(s) Referenced:
- Not Applicable.
tmSocialMedia.html

Description:
- Social Media links displayed on theTMhome.html page
Location:
htdocs/1/WebPagesEN/TMtemplates/
Able to Call Page(s):
- Main web site
Called By Page(s):
Page(s) Referenced:
- Not Applicable
tmTicketHandling.html

Description:
- Displays the available E-Ticket printing options based on the setup in the Theatre Manager database. For more details on online printing options click here.
Location:
htdocs/1/WebPagesEN/TMtemplates/
Able to Call Page(s):
- Not Applicable.
Called By Page(s):
Page(s) Referenced:
- Not Applicable.
tmnavButtonsFooter.html
Description:
- Patron Services, Account Management and Contact Us links from the TMhome.html page
Location:
htdocs/1/WebPagesEN/TMtemplates/
Able to Call Page(s):
- Main web site
- tmBoxOfficePolicy.html
- TMcalendar.html
- TMfutureTickets.html
- TMmaillists.html
- TMoldCartHeaders.html
- TMpatronUpdate.html
- TMpassAvailable.html
- tmPrivacyPolicy.html
- tmtermsandconditions.html
- TMvolunteerActivity.html
Called By Page(s):
Page(s) Referenced:
TMtickets.html
Description:
- This is traditionally the first pages patrons see when accessing the online sales process. It's the default reference in the page
- This page contains a list of all performances that have been made available for sale via the web within Theatre Manager.
- Additional performances may be added to the list when a presales access coupon is in use.
- The rowTicketEventAvailability.html template can be edited to change the percentage and font colour in the Availability column.
- To edit the column widths this page, the rowTicketEvent.html and the rowTicketEventNotOnSaleYet.html pages need to be updated. The later will ensure the content of the page displays correctly.
Questions and Answers:
Q: How can the Availability options column be changed?
A: The text in the Availability column is located in the rowTicketsEventAvailability.html page. By accessing this template the percentage level for availability can be altered. In addition the colour of the text and the wording can be altered as desired.
____________________________________________________________
Location:
htdocs/1/WebPagesEN
Able to Call Page(s):
- TicketTrove Application Page
- TMcoupon.html
- tmEventDefault.html
- TMticketsSection_MapDefault.html
- TMticketsSection_MapDefaultc.html
- TMticketsSection_MapDefaultf.html
- tmVenueDefault.html
Called By Page(s):
- contentEvents.html
- index.html
- TMcart.html
- TMlogin.html
- TMmaillistUnverifiedEmail.html
- TMpassAskAmount.html
- Any page containing the navigation buttons.
Page(s) Referenced:
- buttonRollover.html
- constantALLEVENTS.txt
- constantALLVENUES.txt
- constantALLYEARS.txt
- constantMONTHS.txt
- disclaimer.html
- googleHeader.html
- pleaseWaitMessage.html
- pleaseWaitMessageFunction.html
- rowTicketEvent.html
- rowTicketEventNotOnSaleYet.html
- rowTicketPageHeader.html
- rowTicketPageList.html
- setEVENT_LIST.html
- setEVENT_LISTempty.html
- setGERNE_LIST.html
- setGENRE_LISTempty.html
- setMONTH_LIST.html
- setMONTH_LISTempty.html
- setVENUE_LIST.html
- setYEAR_LIST.html
- setVENUE_LISTempty.html
- setYEAR_LISTempty.html
- styles.html
- TMError.txt
- tmFooter.html
- tmnavButtons.html
TMticketscalendar.html
Description:
- THIS PAGE IS CURRENTLY UNDER CONSTRUCTION
Location:
htdocs/1/WebPagesEN
Able to Call Page(s):
- tmEventDefault.html
- TMticketsSection_MapDefault.html
- TMticketsSection_MapDefaultc.html
- TMticketsSection_MapDefaultf.html
- tmVenueDefault.html
Called By Page(s):
Page(s) Referenced:
- buttonRollover.html
- cellPerfDetailCalCurrent.html
- cellPerfDetailCalOther.html
- cellPerfDetailCalTextProperty.html
- cellPerfDetailCalTitleProperty.html
- NextEventEmpty.html
- NextEventNormal.html
- rowPerfDetailCal.html
- rowPerfHeaderCal.html
- setEVENT_LIST.html
- setEVENT_LISTempty.html
- setMONTH_LIST.html
- setMONTH_LISTempty.html
- setVENUE_LIST.html
- setVENUE_LISTempty.html
- setYEAR_LIST.html
- setYEAR_LISTempty.html
- styleButtons.css
- stylePages.css
- TMError.txt
- tmFooter.html
- tmnavButtons.html
TMticketsExport.html

Description:
- Do Not Alter This Page.
- This pages is used in conjunction with the TicketTrove mobile device application. The application is currently available for iPhone and iPad interfaces.
Questions and Answers:
Q: How can I export event details from this page?
A: Please click here for details on how to export event data.
____________________________________________________________
Q: What if I want to change the information to be exported from this page?
A: To details on how to alter information in an export please click here.
____________________________________________________________
Location:
htdocs/1/WebPagesEN
Able to Call Page(s):
- Not Applicable.
Called By Page(s):
- Not Applicable.
Page(s) Referenced:
TMticketsExportCustom.html
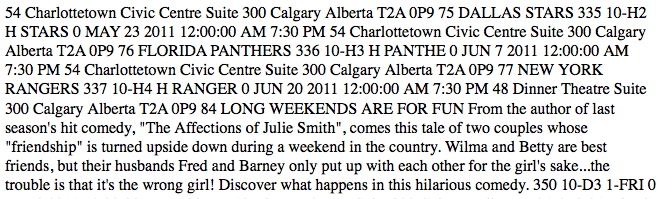
Description:
- Provides a list of Events in a drupal like CMS/front end style in an XML format.
- This information can be viewed through the web rather then needing direct access to Theatre Manager.
- The page will provide details of the Event that can be used as an import to other application or for creating customized links on an organizations main website.
- Viewing the source code of the page will display the field reference details.
- Only Performances that are indicates as available for sale online will be visible.
- The rowTicketEventExportCustom.html page can be altered to display the desired Event information for this page.
Questions and Answers:
Q: How can I export event details from this page?
A: Please click here for details on how to export event data.
____________________________________________________________
Location:
htdocs/1/WebPagesEN
Able to Call Page(s):
- Not Applicable.
Called By Page(s):
- Not Applicable.
Page(s) Referenced:
TMticketsMaxPurchased.html
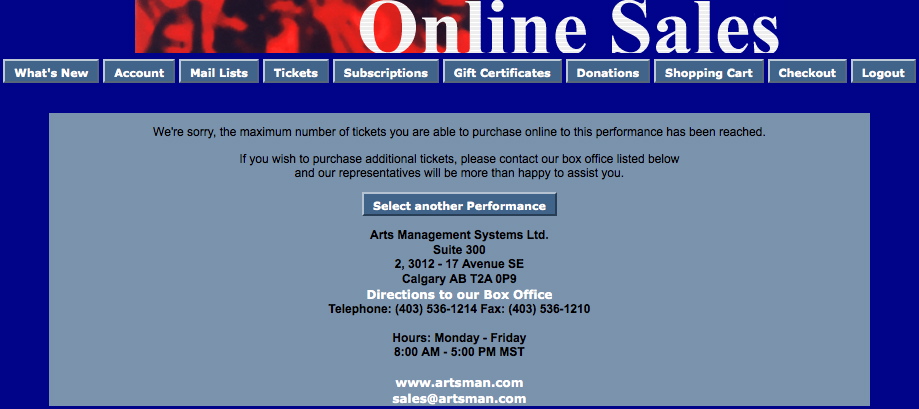
Description:
- The online sales has a defined maximum number of tickets that can be purchases per order, per event and per performance. When any of these limits have been reached this page is displayed.
- The Maximum Tickets in an Order is set under the Web tab in Setup >> System Preferences within Theatre Manager.
- The Patron Purchase Limit for an event is indicated in the Event tab of Setup >> Events within Theatre Manager.
- The Web Purchase Limit for a performance setting can be found by clicking Setup >> Events, selecting the Performance tab, double clicking in the desired performances and selecting the Web Settings tab.
Location:
htdocs/1/WebPagesEN
Able to Call Page(s):
- maps.google.com
- TMtickets.html
- The companies web site as it appears in the Company tab of Setup >> Company Preferences within Theatre Manager.
Called By Page(s):
Page(s) Referenced:
TMticketsSoldOut.html
- sold out, or
- no longer can be sold online (see reasons below)

Description:
- Tickets for an event area available to purchase online until the event is sold out, it is manually removed from online sales or the performance has reached the minutes prior to start remove time.
- If a performance sells out while a patron is in the middle of the sales process they will receive this page. However, if the performance is already sold out prior to their attempt to purchase tickets it will be indicated in the Availability column of the TMtickets.html page.
- The Remove Minutes Before It Starts is set under the Web tab in Setup >> System Preferences within Theatre Manager.
- The Stop Sales in Advance for an event is indicated in the Event tab of Setup >> Events within Theatre Manager.
- The Stop Sales in Advance for a performance setting can be found by clicking Setup >> Events, selecting the Performance tab, double clicking in the desired performances and selecting the Web Settings tab.
Location:
htdocs/1/WebPagesEN
Able to Call Page(s):
- maps.google.com
- TMtickets.html
- The companies web site as it appears in the Company tab of Setup >> Company Preferences within Theatre Manager.
Called By Page(s):
Page(s) Referenced:
tmVenue Folder
Custom pages can be created for a venue by duplicating the existing default page. The word Default in the page name is then replaced with the Pricing Map number. The Pricing Map number is located in the Map # column under Setup >> Theatre Maps in Theatre Manager.
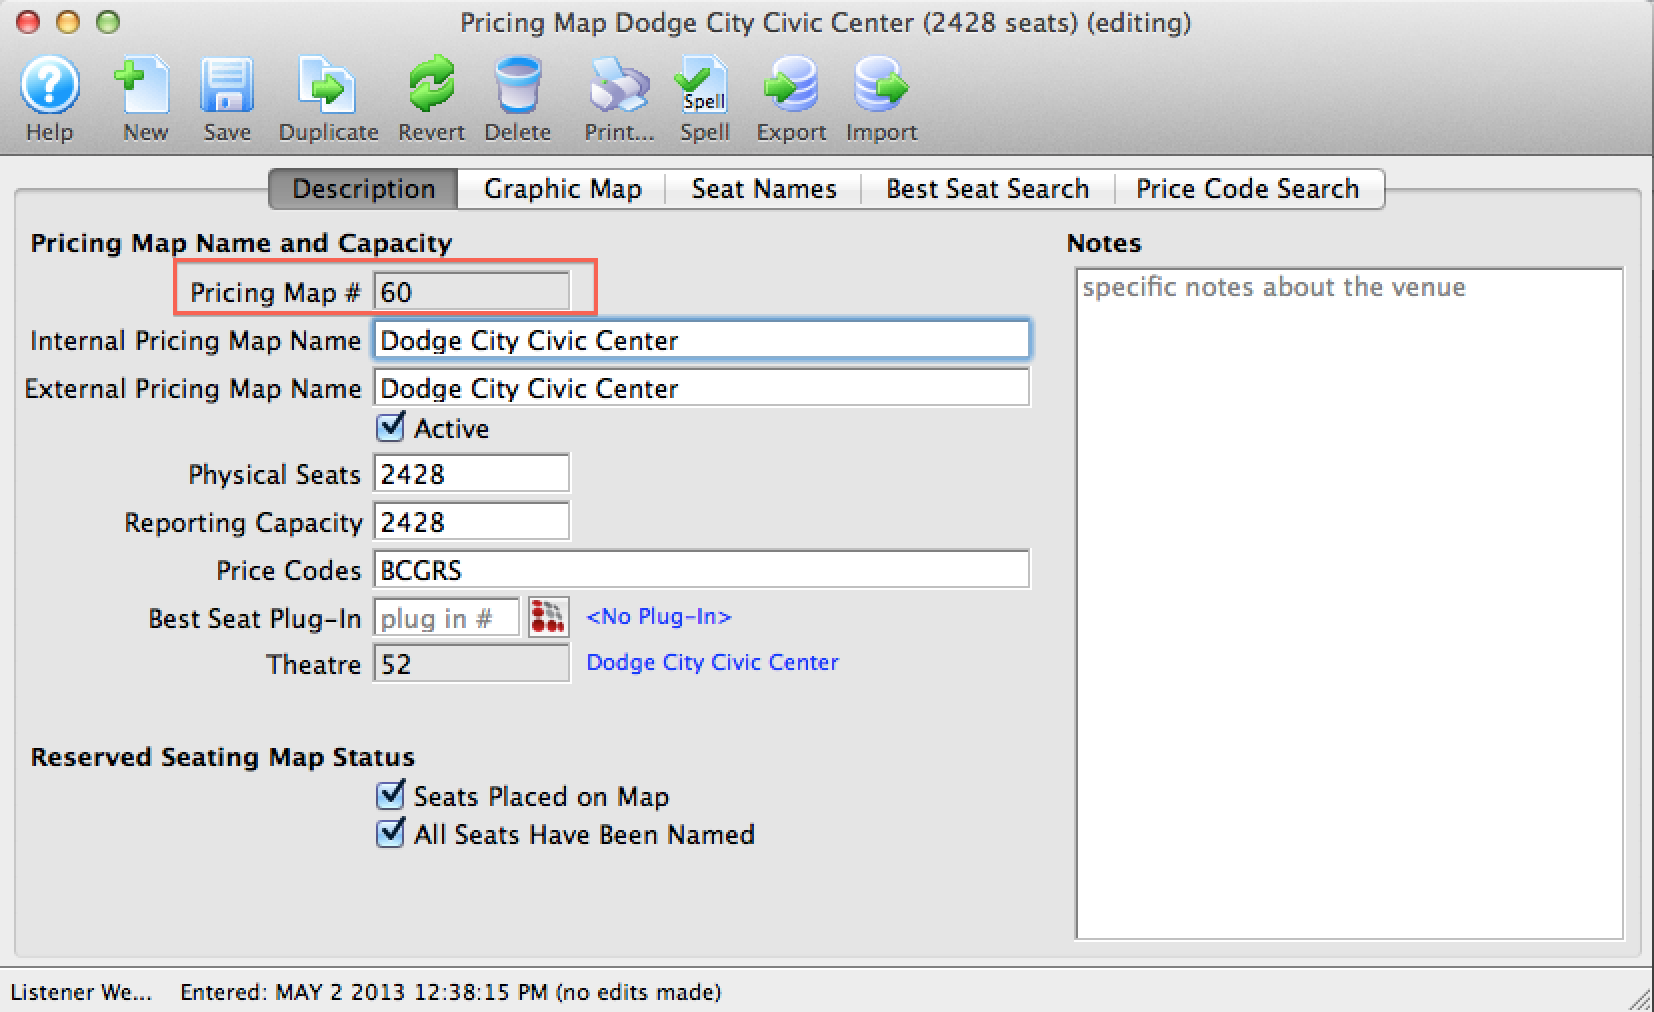
tmVenueDefault.html

Description:
- A descriptive page of a Venue tickets are sold for.
- The Default page pulls the venue information directly from the Map setup with Theatre Manager.
- This page can be duplicated and the word Default changed to the map number from within Theatre Manager. The page can then be customized for the specific venue.
Location:
htdocs/1/WebPagesEN/tmVenue
Able to Call Page(s):
Called By Page(s):
- rowCartCourseNewGroup.html
- rowCartFestivalNewGroup.html
- rowCartReserveNewGroup.html
- rowCheckoutCourse.html
- rowCheckoutFestival.html
- rowCheckoutReserve.html
- rowCheckoutSubNewGroup.html
- rowFutureTicketHeader.html
- rowFutureTicketPrintHeader.html
- rowOldCartCourse.html
- rowOldCartFestival.html
- rowOldCartReserve.html
- rowOldCartPrintCourse.html
- rowOldCartPrintFestival.html
- rowOldCartPrintReserve.html
- rowPkgTicketFestival.html
- rowSubBookedHeader.html
- rowSubNewDetail.html
- rowSubRenewHeader.html
- rowTicketEvent.html
- rowTicketEventName.html
- rowTicketEventNotOnSaleYet.html
Page(s) Referenced:
TMvolcalendar.html
Description:
- THIS PAGE IS CURRENTLY UNDER CONSTRUCTION
Location:
htdocs/1/WebPagesEN
Able to Call Page(s):
- Not Applicable At This Time
Called By Page(s):
- Not Applicable At This Time
Page(s) Referenced:
- buttonRollover.html
- cellVolDetailCalCurrent.html
- cellVolDetailCalOther.html
- constantMONTHS.txt
- constantALLYEARS.txt
- NextVolEmpty.html
- NextVolNormal.html
- PrevVolEmpty.html
- PrevVolNormal.html
- rowVolDetailCal.html
- setACTIVITY_LIST.html
- setACTIVITY_LISTempty.html
- setMONTH_LIST.html
- setMONTH_LISTempty.html
- setYEAR_LIST.html
- setYEAR_LISTempty.html
- styleButtons.css
- stylePages.css
- TMError.txt
- tmFooter.html
- tmnavButtons.html
TMvolunteerActivity.html
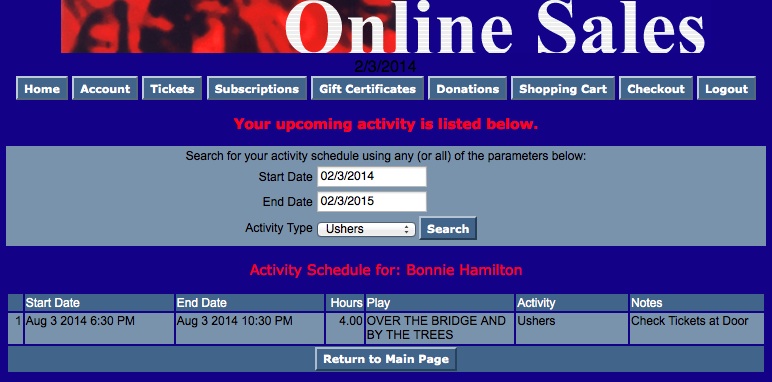
Description:
- Displays a list of future events, dates and times the patrons is scheduled to volunteer.
- This information is pulled directly from the Theatre Manager database.
Location:
htdocs/1/WebPagesEN
Able to Call Page(s):
Called By Page(s):
Page(s) Referenced:
test.html
Description:
- This page is designed to be used during the setup of TMServer to test if NGINX is working correctly from outside the router.
- It could be used by https://tickets.yourserver.org/text.html
Location:
htdocs
Able to Call Page(s):
- Not Applicable
Called By Page(s):
- Not Applicable
favicon.ico
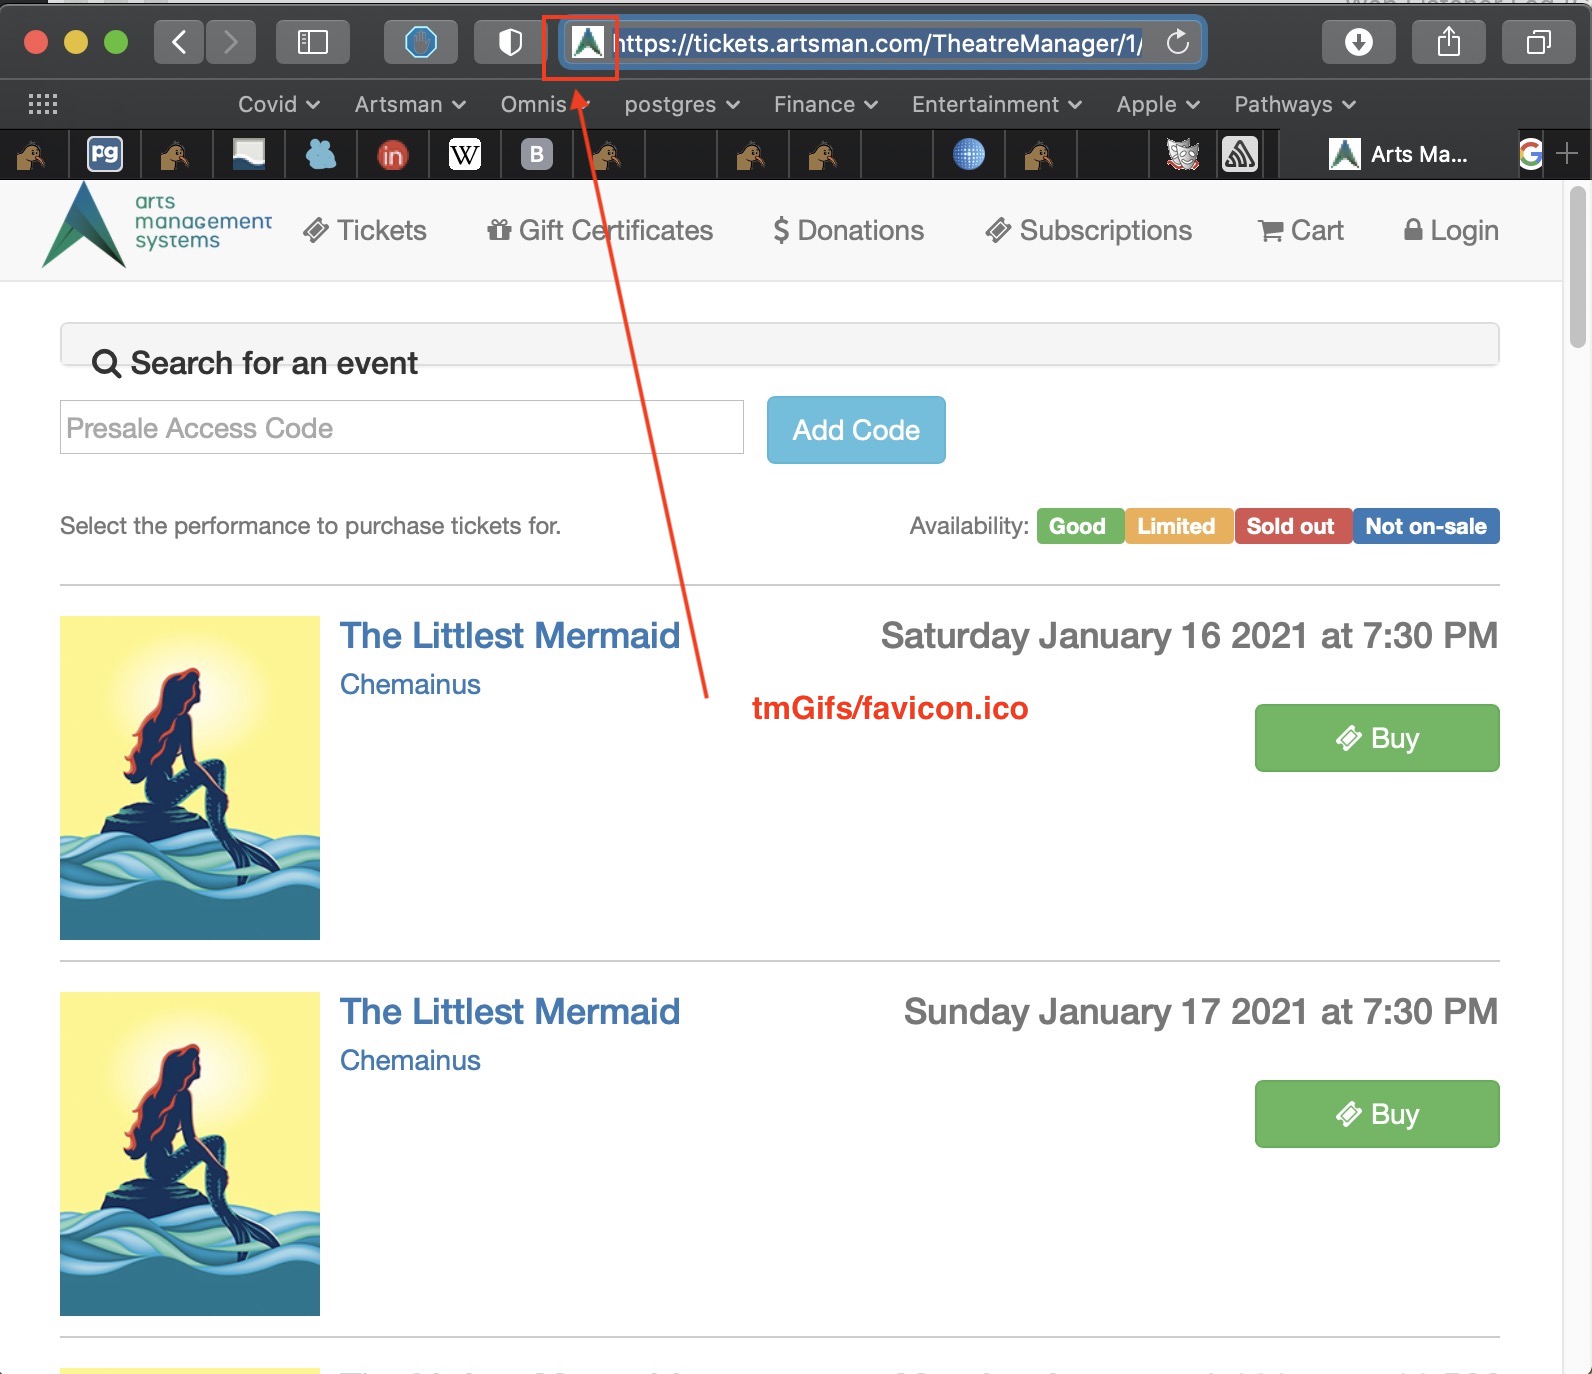
Description:
A favicon (short for favorite icon) is an icon associated with a particular website or webpage. A web designer can create such an icon and install it into a website (or webpage) by several means, and most graphical web browsers will then make use of it.
Browsers that provide favicon support typically display a page's favicon in the browser's address bar and next to the page's name in a list of bookmarks. Browsers that support a tabbed document interface typically show a page's favicon next to the page's title on the tab.
There are a few ways to make the icon that we know of. Two of them are:
- Using Preview (OSX)
- Open any jpeg or png containing a logo
- Change the pixel size of the logo to 48 by 48 pixels, 8 or 24 bit colour or B&W
- Save the file
- Rename it to favicon.ico
- Place it in the WebPages and 1/WebPagesEN/tmGifs folders
- Add to /tmScripts/styles.html link rel="icon" type="image/png" href="tmGifs/favicon.ico" - it tells the browser where to go to get the favorite icon. In this case, it says inside /tmGifs for the outlet
- Using a web page tool like favicon.cc
- Using any other tool you know of
|
Make sure to verify the favicon.ico on al browsers (chrome, firefox, safari, edge, opera, and mobile safari)
Google Chrome, for example, will not display the favicon unless it is minimum of 48x48 pixels. |
Location(s):
WebPages and 1/WebPagesEN/tmGifs
The favicon.ico file is one of the standard pages that should be changed
Able to Call Page(s):
- Not Applicable
Called By Page(s):
- The default favicon.ico file in WebPages appears in the address bar next to the title when supported for all pages as standard browser behaviour.
- The copy should be placed in the in the 1/WebPagesEN/tmGifs which overrides the global favicon.ico file. This particular location is defined within the 1/WebPagesEN/tmScripts/styles.html file
index.html
Description:
- This is the first page accessed when Apache is running.
- This page redirects to the page listed in the window.location.href reference.
- The address referenced by the windows.location.href should be altered so localhost replaced by the sub domain for the ticketing site.
- The title of the online pages when quick referenced is found within the title references of this page.
- The cached preferences for this page and how long they are stored are also listed on this page.
Location:
htdocs
Able to Call Page(s):
- The page listed in the window.location.href reference.
Called By Page(s):
- This is the first page accessed in Apache when it's running.
ReadMe About Configuring Index.html.txt
Description:
- Contains information on how to accurately edit the index.html file to work in conjunction with Theatre Managers online web pages.
- Provided details on how to create links from the main web site to various different areas of the online sales. This includes direct links to Donation Campaigns, Gift Certificates, Passes or Season Subscriptions Packages.
Location:
htdocs
Able to Call Page(s):
- Not Applicable
Called By Page(s):
- Not Applicable
robots.txt
Description:
- Robots.txt is a text (not html) file you put on your site to tell search robots which pages you would like them not to visit. Robots.txt is by no means mandatory for search engines but generally search engines obey what they are asked not to do. It is important to clarify that robots.txt is not a way from preventing search engines from crawling your site (i.e. it is not a firewall, or a kind of password protection) and the fact that you put a robots.txt file is something like putting a note “Please, do not enter” on an unlocked door – e.g. you cannot prevent thieves from coming in but the good guys will not open to door and enter. That is why we say that if you have really sensitive data, it is too naive to rely on robots.txt to protect it from being indexed and displayed in search results.
Location:
htdocs
Able to Call Page(s):
- Not Applicable
Called By Page(s):
- Not Applicable
showmap.html
Description:
- Displays the Apache statistics.
- The page is written to refresh automatically every few seconds.
Location:
htdocs
Able to Call Page(s):
- Not Applicable
Called By Page(s):
- Not Applicable
Page(s) Referenced:
- Not Applicable
ticketstats.html
Description:
- Displays the online sales statistics.
- The page is written to refresh automatically every 3 seconds.
- This page can be viewed within the network or by select IP addresses entered into the httpd.conf file in the Apache setup.
Location:
htdocs
Able to Call Page(s):
- Not Applicable
Called By Page(s):
- Not Applicable
Page(s) Referenced:
- Not Applicable
TMsysBusyListenershtml
Description:
- This page is referenced by Apache when the Second Generation Listener is unavailable to present the desired web page.
- The page counts down and attempts to access the online sales site again once it reaches zero.
- If the patron does not wish to wait for the page to finish counting down they can click a link that will reload the page they were previously accessing.
- This page can be avoided by starting the Second Generation Listener.
Location:
htdocs
Able to Call Page(s):
- Will reload the last page visited within the online ticketing site.
Called By Page(s):
- The httpd.conf file within Apache
Page(s) Referenced:
TMsysError.html
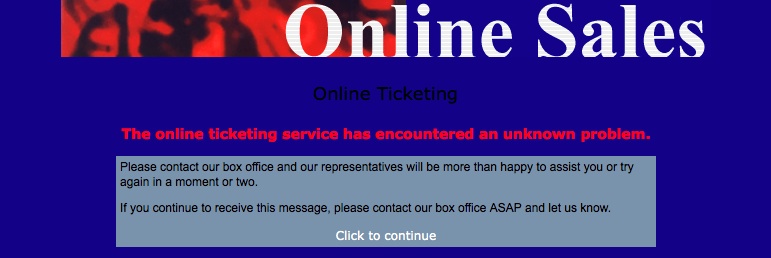
Description:
- This page is referenced by Apache when the web page cannot be accessed This may be due to a missing page or incorrect html.
- A link in the page will take the patron back to the online sales.
Location:
htdocs
Able to Call Page(s):
Called By Page(s):
- The httpd.conf file within Apache
Page(s) Referenced:
TMsysNoListeners.html
Description:
- This page is most commonly referenced when the TM Listener has recently been restarted and there is no communication between it and the Web Listener.
- If the TM Listener machine has been restarted and online sales is scheduled to be down for a period of time this page should be edited to reflect the information the patron will see during the outage. For example: Our online ticketing is currently unavailable, please contact the box office for assistance.
- Contains a reference line at the bottom of the page that should point to the companies main web page once edited.
- This page can be avoided by logging in to Theatre Manager as a web listener within the network or by correcting any network issues that may be preventing communication between TM Listener and the TM Web Server.
Location:
htdocs
Able to Call Page(s):
- The Companies main web site.
Called By Page(s):
- None
Redirecting a link to a specific sales page in the Web Services
https:// tickets. yourvenue. org [/TheatreManager/1/login[?action=0|number][&lang=XX][&tmsource=YYY]]
The meaning of the parts of the above syntax is:
- https:// tickets. yourserver. com is the direct link to the Theatre Manager web server. It is the only part that is mandatory.
- /TheatreManager/1/login - if supplied, is used by the apache server to direct the user to the theatre manager web listeners and begin the sales process. The '1' is replaced by your outlet number in a multi-outlet site. In most cases, it is '1' corresponding to the '1' folder within the standard 'WebPages' web page structure.
- ?action=0|number - 'action=' is replaced by one of the specific words as shown in the sections that follow (eg action might be 'event' or 'pass' or 'donation'). If you use 0 as the parameter, the user will be able to start at the selection process for 'action'. If you use a specific number as the parameter, then the user will be placed directly at the start of the sales process for the 'action'. For ticket sales web page access, there are some other options as described below.
- &lang=XX - if you build a multi language web site, you can direct the user to begin using a language you specify. &lang=EN is the default. There must be a WebPagesXX folder for each language you want to support
- &tmsource=yyy - which is an optional parameter that can be used to detect the web site referrer and attach it to a shopping cart. The idea with this is that you might tie the source to an eblast, another web site, your own site, some tourism source, etc. The value 'yyy' is attached to a shopping cart and once a value is in the cart, it cannot be changed. This means that the first source (or referrer) is used. Note: the source can also be set using a cookie if you want instead of a command line argument. For additional steps on setting up source references, click here.
|
Note that parameters in a URL are case sensitive. Most keyword parameters are lower case unless they refer to an actual database variable. The documentation attempts to show examples in the appropriate case. |
|
It is possible to write an interface to extract the event information and upload it your main marketing web site. For example: you can use the extracted information to publish data from TM into a custom calendar object and create 'buy now' links using the patterns above. |
 |
You can only use 'GET' style links on web pages in normal format or behind pictures of buttons.
You cannot simulate these links with 'posts' due to PCI compliance requirements to use form-tokens in each post per OWASP requirements to prevent cross-site scripting |
|
We recommend always adding a [&tmsource=YYY] to external links to identify where the patron first entered the web sales process. Carts are tagged with the source code and it provides the most direct correlation between:
|
Standard Access to Web Sales
https://tickets.yourvenue.org/TheatreManager/1/login?event=0
The general starting place for all sales is usally a link like the one above which is placed on the main web site. This link directs the patron to the Event List within the online sales. It allows them to start their online shopping experience by selecting the first performance they are interested in purchasing.
Direct Link to Login
https://tickets.yourvenue.org/TheatreManager/1/login[?tmsource=yyyyy]
Each direct link contains a reference to login. This allows the link to bypass the login window and access the desired location. When a link to only the login window is desired, leave out any additional parameters on the URL.
Parameters are:
- tmsource=yyyyyy (optional) where yyyyyy is a tracking code that is placed on any cart for tracking the source of the referral.
Direct Links - Ticket Related
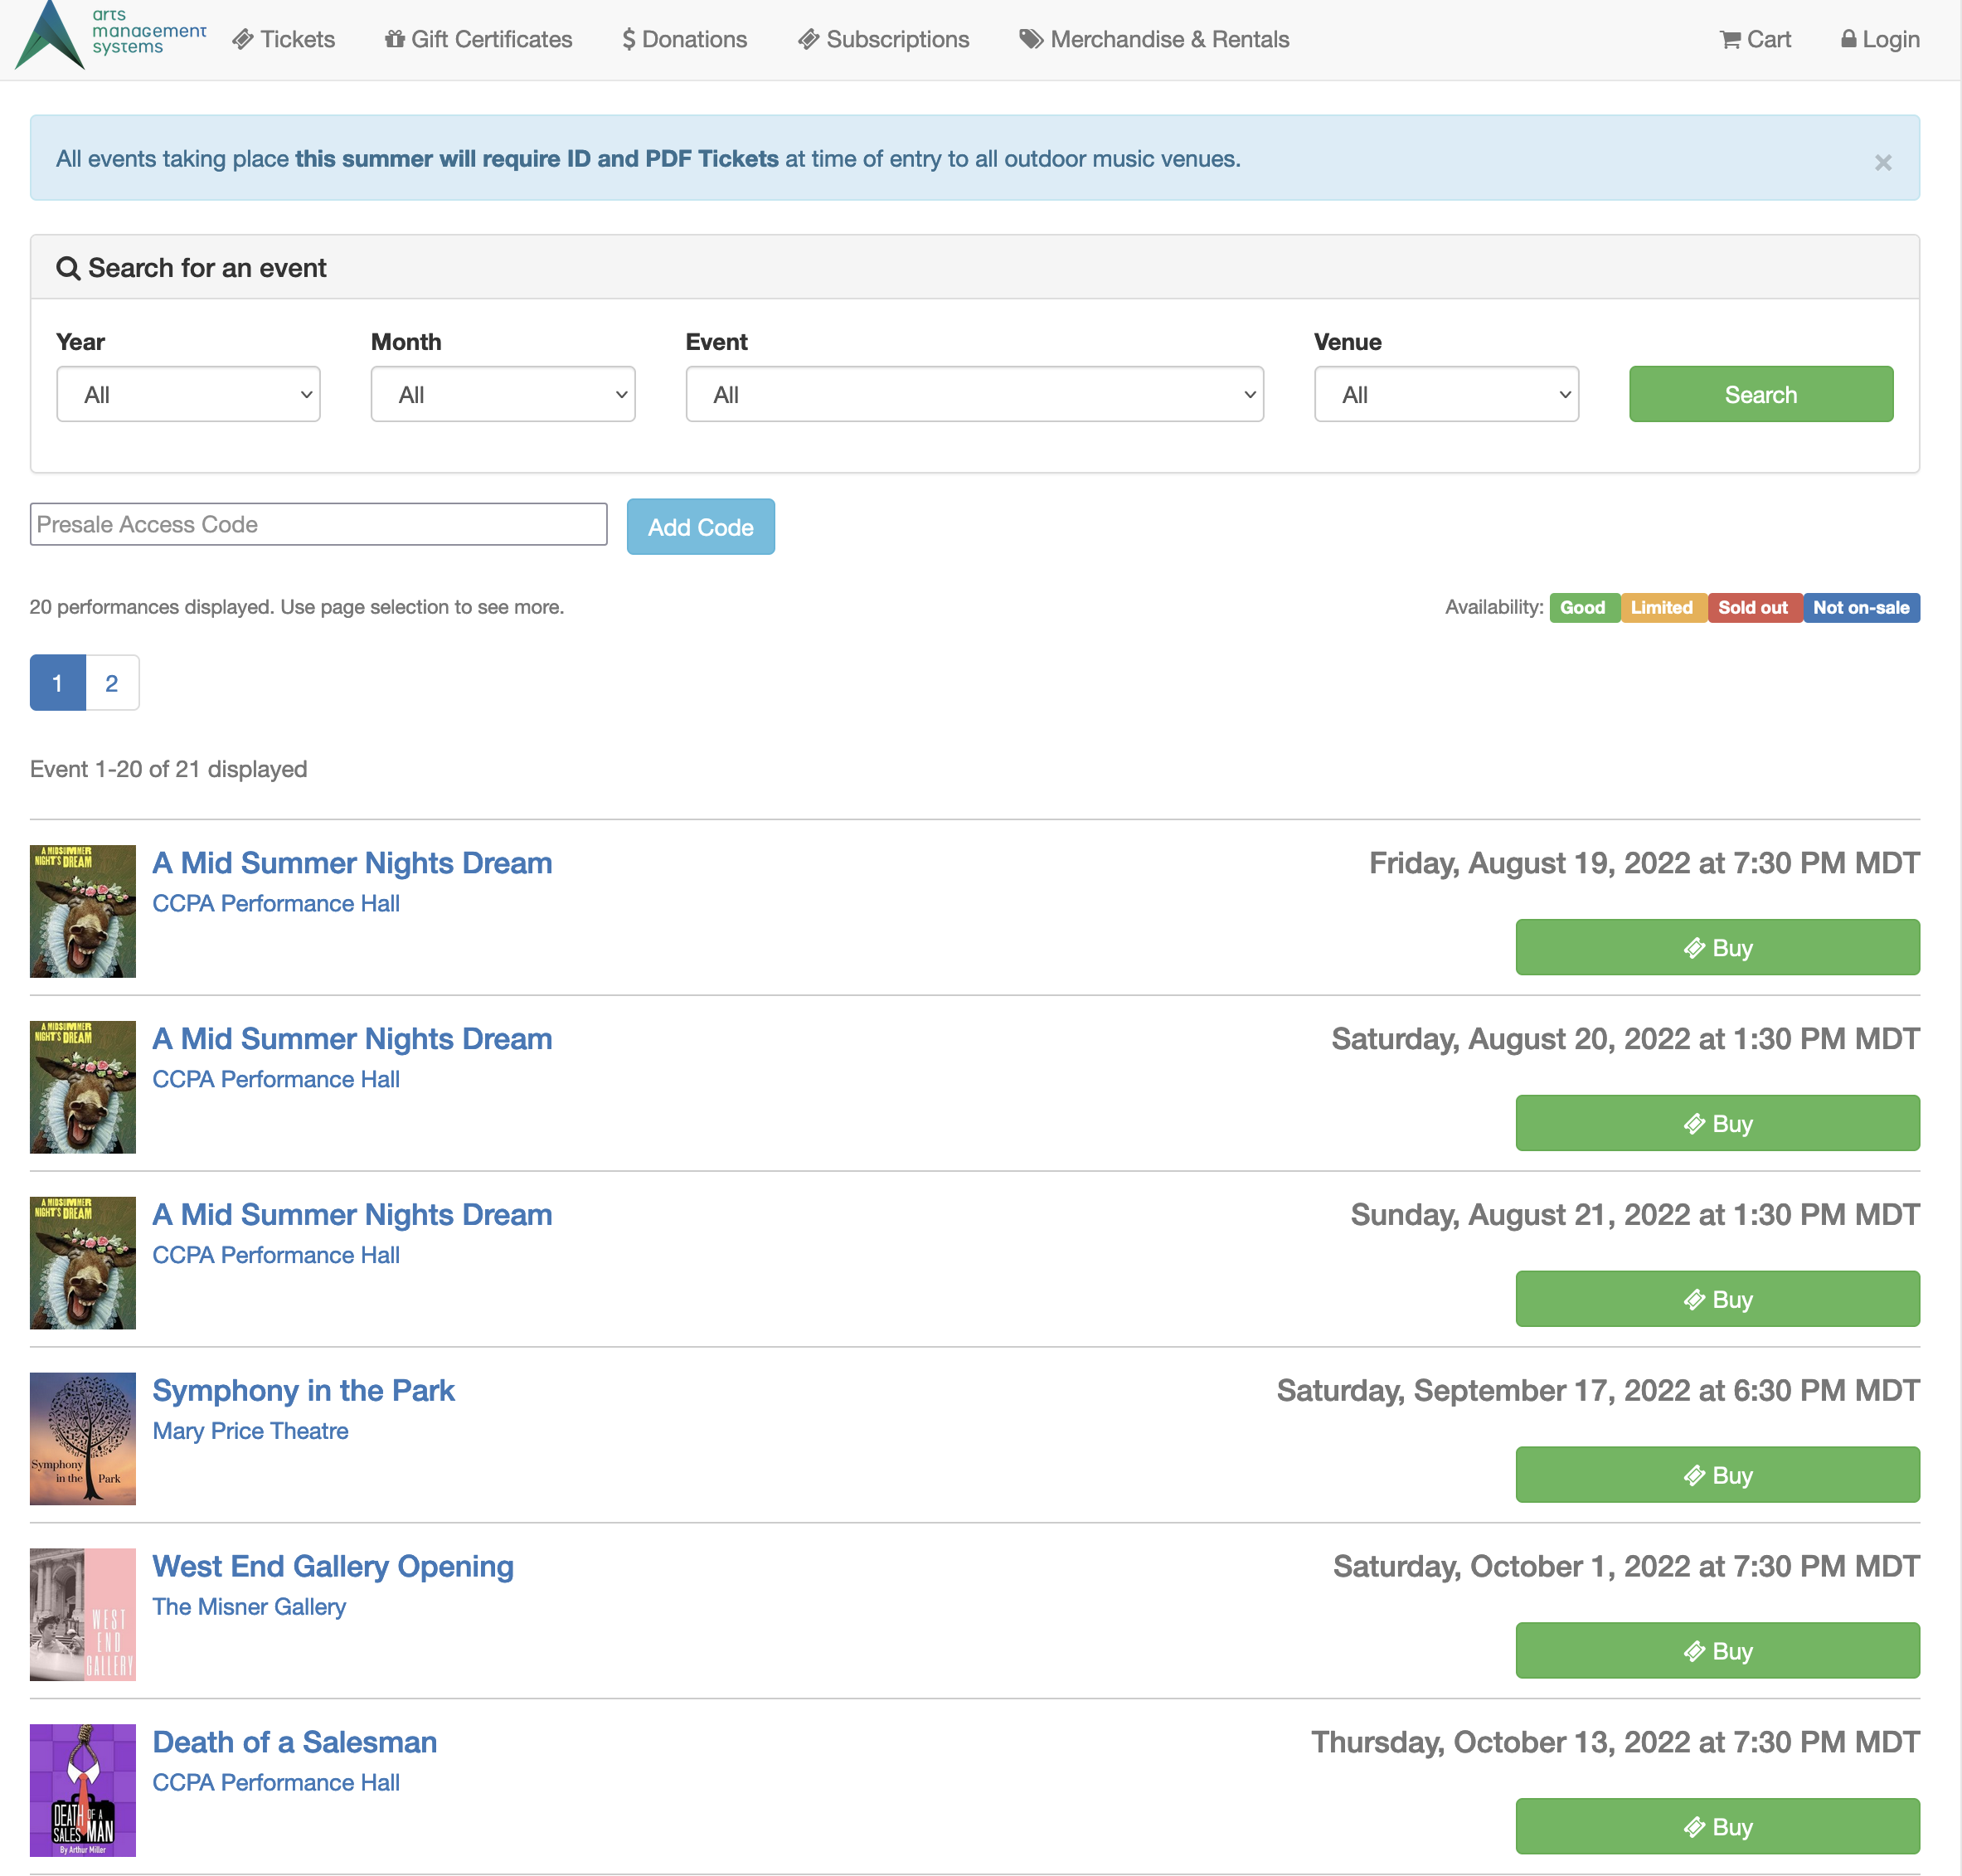 The following show examples of direct links that get you to events or performances.
They are displayed on the tmTickets.html web page
Direct Link to Event
https://tickets.yourvenue.org/TheatreManager/1/login?event=xx[&tmsource=yyyyyy]
To create links beside each event advertise on your web site:
Click here to purchase tickets to Event #1 - https://tickets.yourvenue.org/TheatreManager/1/login&event=51
Click here to purchase tickets to Event #2 - https://tickets.yourvenue.org/TheatreManager/1/login&event=52
Click here to purchase tickets to Event #3 - https://tickets.yourvenue.org/TheatreManager/1/login&event=58
Click here to purchase tickets to Event #4 - https://tickets.yourvenue.org/TheatreManager/1/login&event=62
In the above examples the event value is defined by Theatre Manager as the unique event number for each different event. The event number is found by:
|
You can add other parameters to the event list such as:
Note: years are in yyyy format, Months are 0 to 12, genre # is from code tables, venue # is from list of venues. eg:
https://tickets.yourvenue.org/TheatreManager/1/login&event=51&year=2016&month&9&venue=5 |
- Click Setup >> Events.
- Click the
 button to populate the Event List.
 - Locate the Event # column to the far left.
This column in the Event List shows the unique sequence number for each item in the list. Use the Event # to replace the "xx" in the link above.

Direct Link to Performance
https://tickets.yourvenue.org/TheatreManager/1/login?performance=xx[&tmsource=yyyyyy]
Parameters are:
- tmsource=yyyyyy (optional) where yyyyyy is a tracking code that is placed on any cart for tracking the source of the referral.
-
performance=xx - The link above will go directly to selling a performance (bypassing the event selection - per the example below). The unique performance number will replace the "xx" in the link. To find the performance number:
- Click Setup >> Events.
- Click the button to populate the Event List.
- Double-click an Event to open it.
- In the Event Setup Window, select the Performance Tab to see the list of Performances for that Event.
- Locate the second left column, labeled Perf #
This column displays the unique performance number for each performance of the Event. Replace the "xx" in the link above with the desired performance number to create a direct link to the performance.
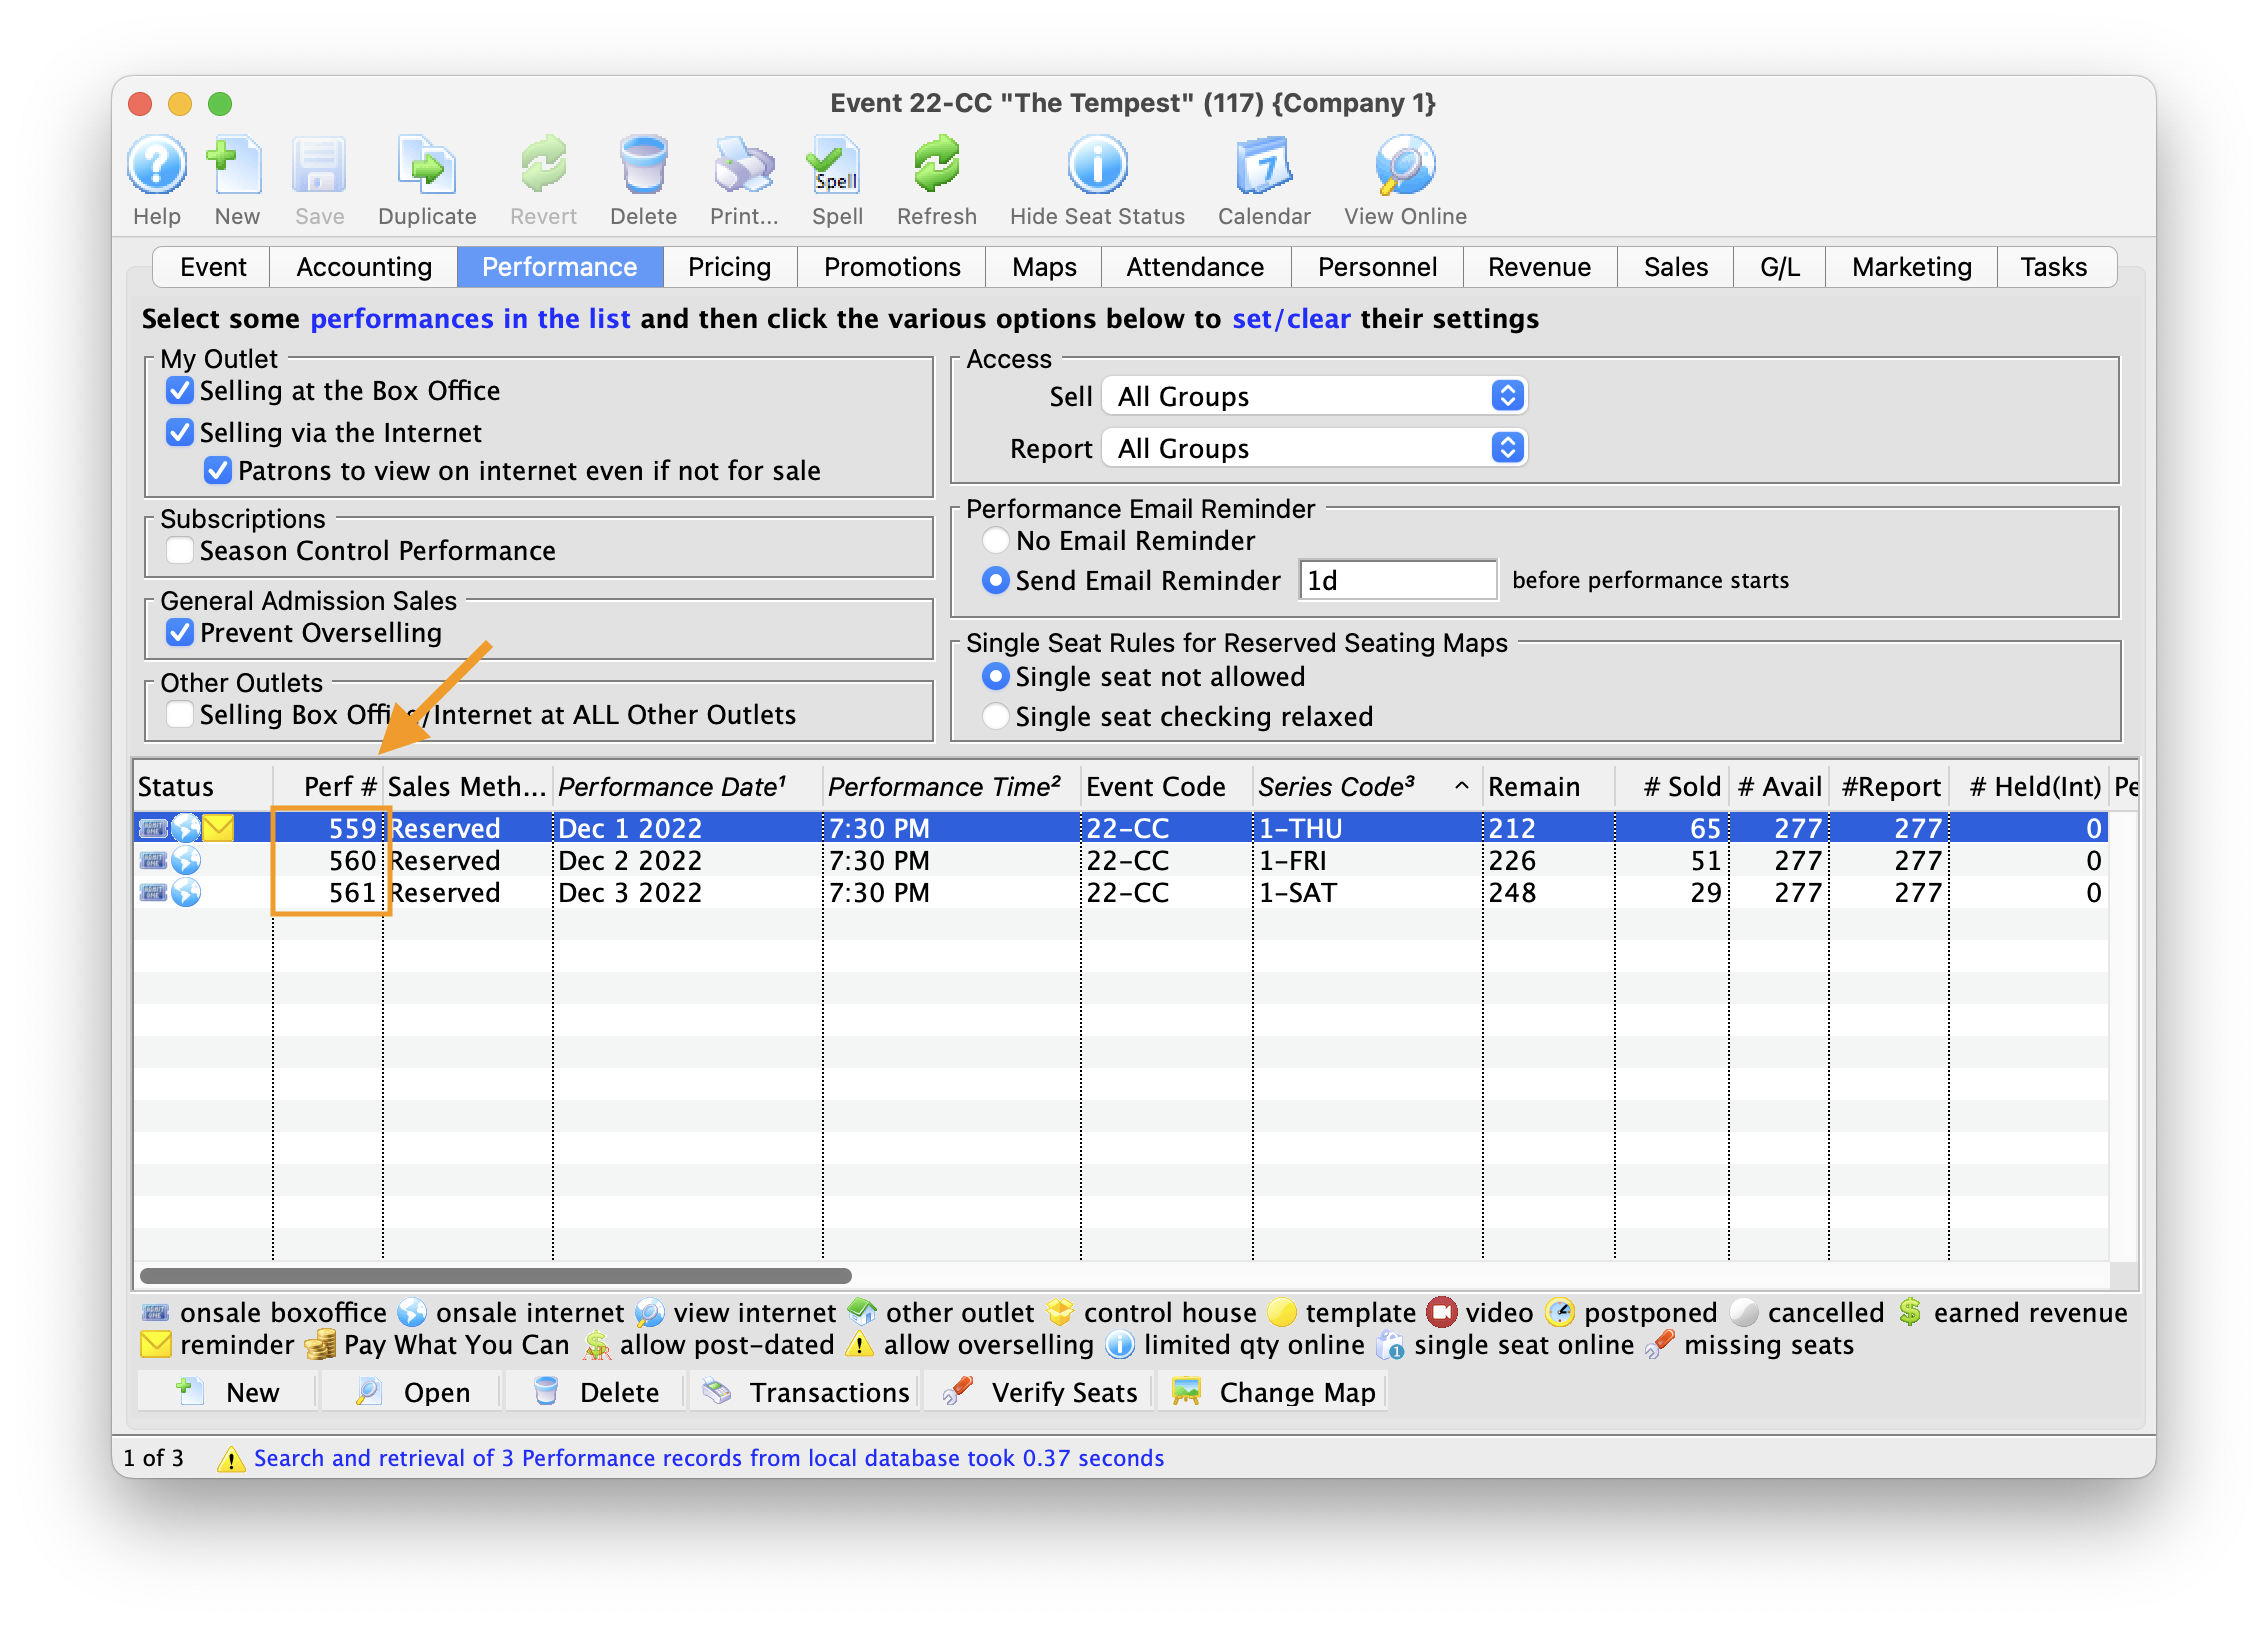
Example of page for Direct Link To Performance
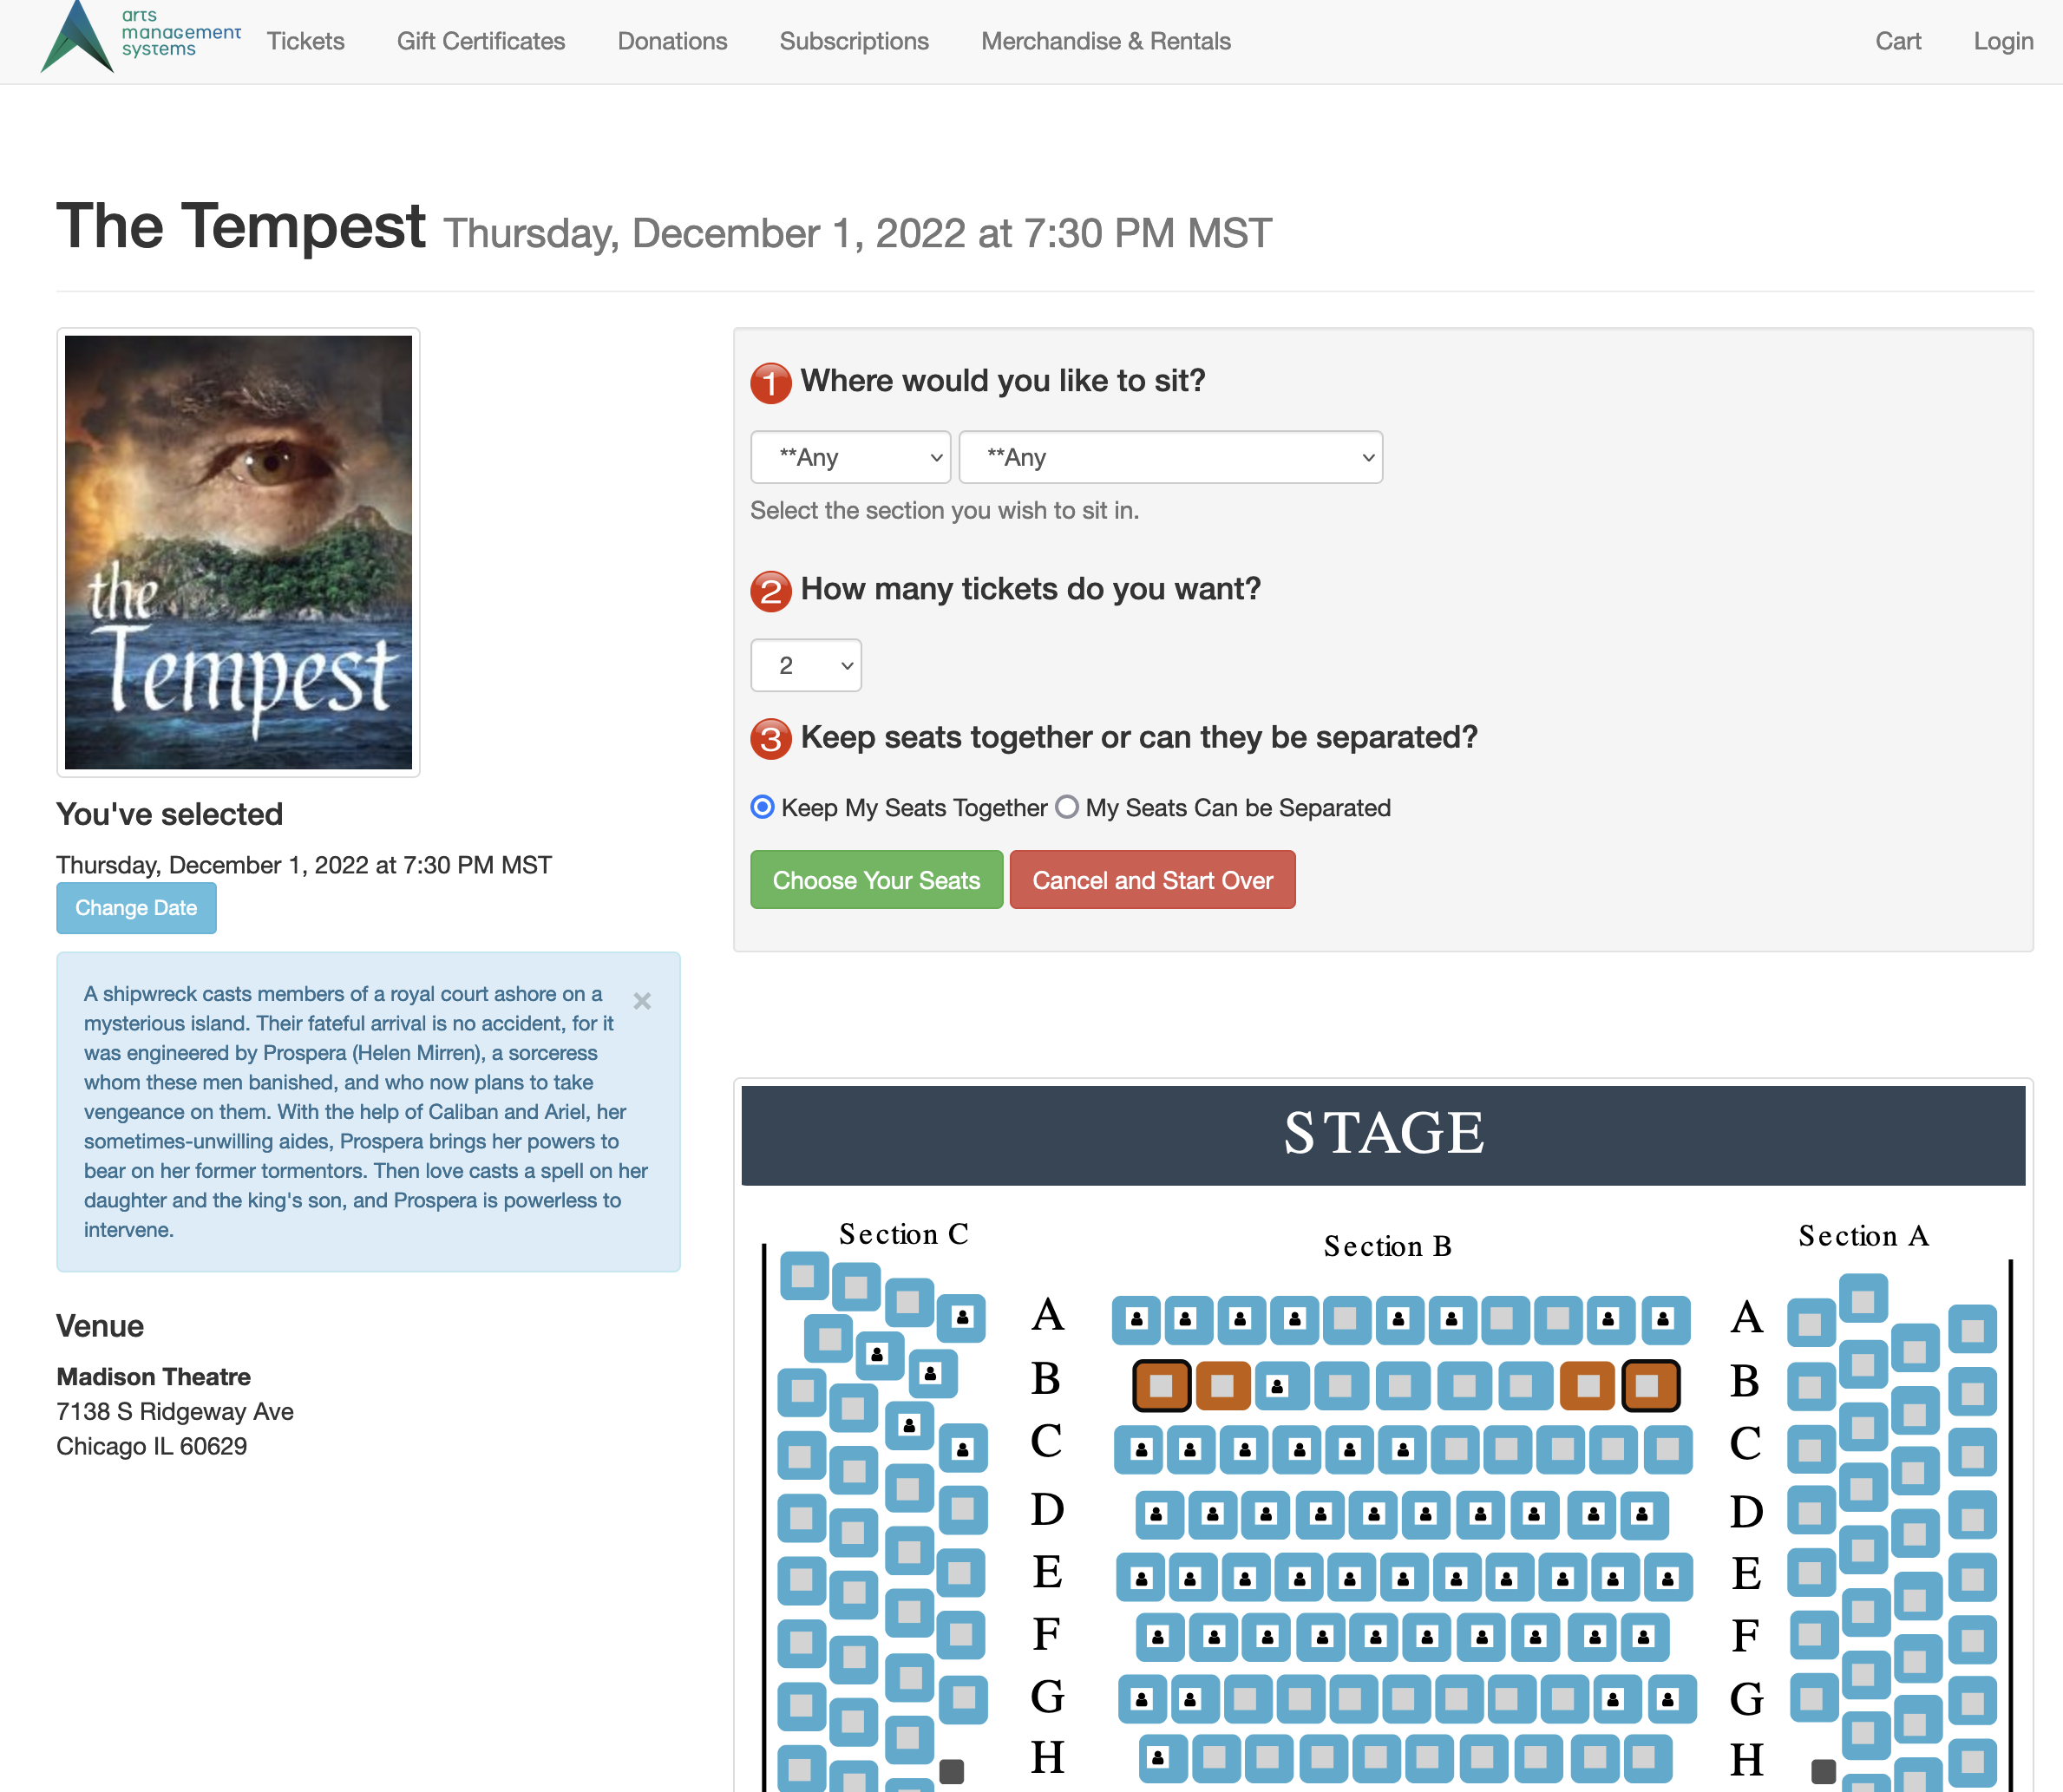
Direct Link to Genre
https://tickets.yourvenue.org/TheatreManager/1/login?event=0&genre=xx&[tmsource=yyyyyy]
Parameters:
- &event=0 is required prior to the &genre=xx parameter to create a link for genre's of events
- &genre=xx - he genre options are the same as those defined for ticket trove and cannot be changed by the venue. The values for xx can be found in the 'event genre' code table:
- Click Setup >> System Tables >> Code Tables.
- Select the Event Genre option in the left column.
- Locate the Seq # column.
This is the unique number representing the genera. It can be used to replace the "xx" in the link above.
- tmsource=yyyyyy (optional) where yyyyyy is a tracking code that is placed on any cart for tracking the source of the referral.
Direct Link to Pick-Your-Seat
https://tickets.yourvenue.org/TheatreManager/1/login?bestavail=xx§ion=yy&pricecode=Z&qty=qq&separate=1&seats=123,124,125[&tmsource=yyyyyy]
The link above will go directly to the best available seats to the performance named by bestavail (by passing the event and performance selection).
|
Each of the items in the link (except bestavail) are optional |
|
You can also use this to quickly select a number of general admission tickets for purchase |
- bestavail=xx xx=the unique performance number. This parameter is mandatory
- section=yy causes seats to be suggested in the best available section which is set up for the pricing map used for that performance. Leave blank to search the entire venue.
- pricecode=Z causes seats to be suggested that matches a price code enabled for the performance. If the price code is not valid or not enabled for the performance, nothing will be shown on the best seat map.
- qty=qq causes the system to look for 'qq' seats.
- If not specified, this will default to the suggested purchase quantity for a performance in the Web tab. This is usually it is 2 for tickets and 1 for courses.
- If specified, it overrides the default in the suggested purchase quantity
- Specifying qty=0 has a special meaning. It will take the patron from directly the select your seats without pre-selecting anything. This means the option is select your seat with no fallback choices for the patron
- separate=1 allows the system to suggest seats that are separate from each other, which is useful as the performance sells out. separate=0 is the default, meaning that seats offered to the patron must be together
- seats=123,124,125 allow you to specify which logical seats you want to select on the the 'choose your own seats' map. It is not guaranteed that the patron will get those seats, only that they will be highlighted on the map and then the patron will have to choose them and have Theatre Manager confirm that it is ok to choose them. The seat numbers are the left column in the pricing map
- tmsource=yyyyyy (optional) where yyyyyy is a tracking code that is placed on any cart for tracking the source of the referral.
You can put any combination of the parameters together that you wish. if the system cannot find seats based on your combination of selections, you'll be told.
The simplest form of the url to get any seats anywhere in the venue is
- together: https://tickets.yourvenue.org/TheatreManager/1/login?bestavail=347
- apart if need be: https://tickets.yourvenue.org/TheatreManager/1/login?bestavail=347&separate=1
An example to allow pick your own without reserving seats first
- reserve no seats: https://tickets.yourvenue.org/TheatreManager/1/login?bestavail=347&qty=0
To find the performance number:
- Click Setup >> Events.
- Click the button to populate the Event List.
- Double-click an Event to open it.
- In the Event Setup Window, select the Performance Tab to see the list of Performances for that Event.
- Locate the far left column, labeled Perf #
This column displays the unique performance number for each performance of the Event. Replace the "xx" in the link above with the desired performance number to create a direct link to the performance.
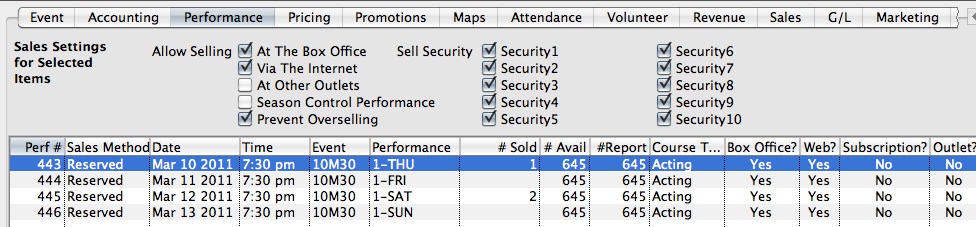
Direct Link to Future Tickets or Streaming Performances
https://tickets.yourvenue.org/TheatreManager/1/login?futuretickets
This link will take the patron to your web site and, after they log in, will show them your future tickets. At that time, they can print those which allow print at home.
Example of future tickets and/or streaming content web page on web site
The example below shows that the future tickets web page looks like when a customer logs in online. They can see their events with:
- the new dates, along with the ability to print tickets at home. If you change many tickets for many events, this might be the best thing to direct customers to with an email, so that they can view and print their own.
- or upcoming streaming live events that they have purchased - may require and edit to TMcheckoutinvoiceEmail.html to indicate how to see the performances online.
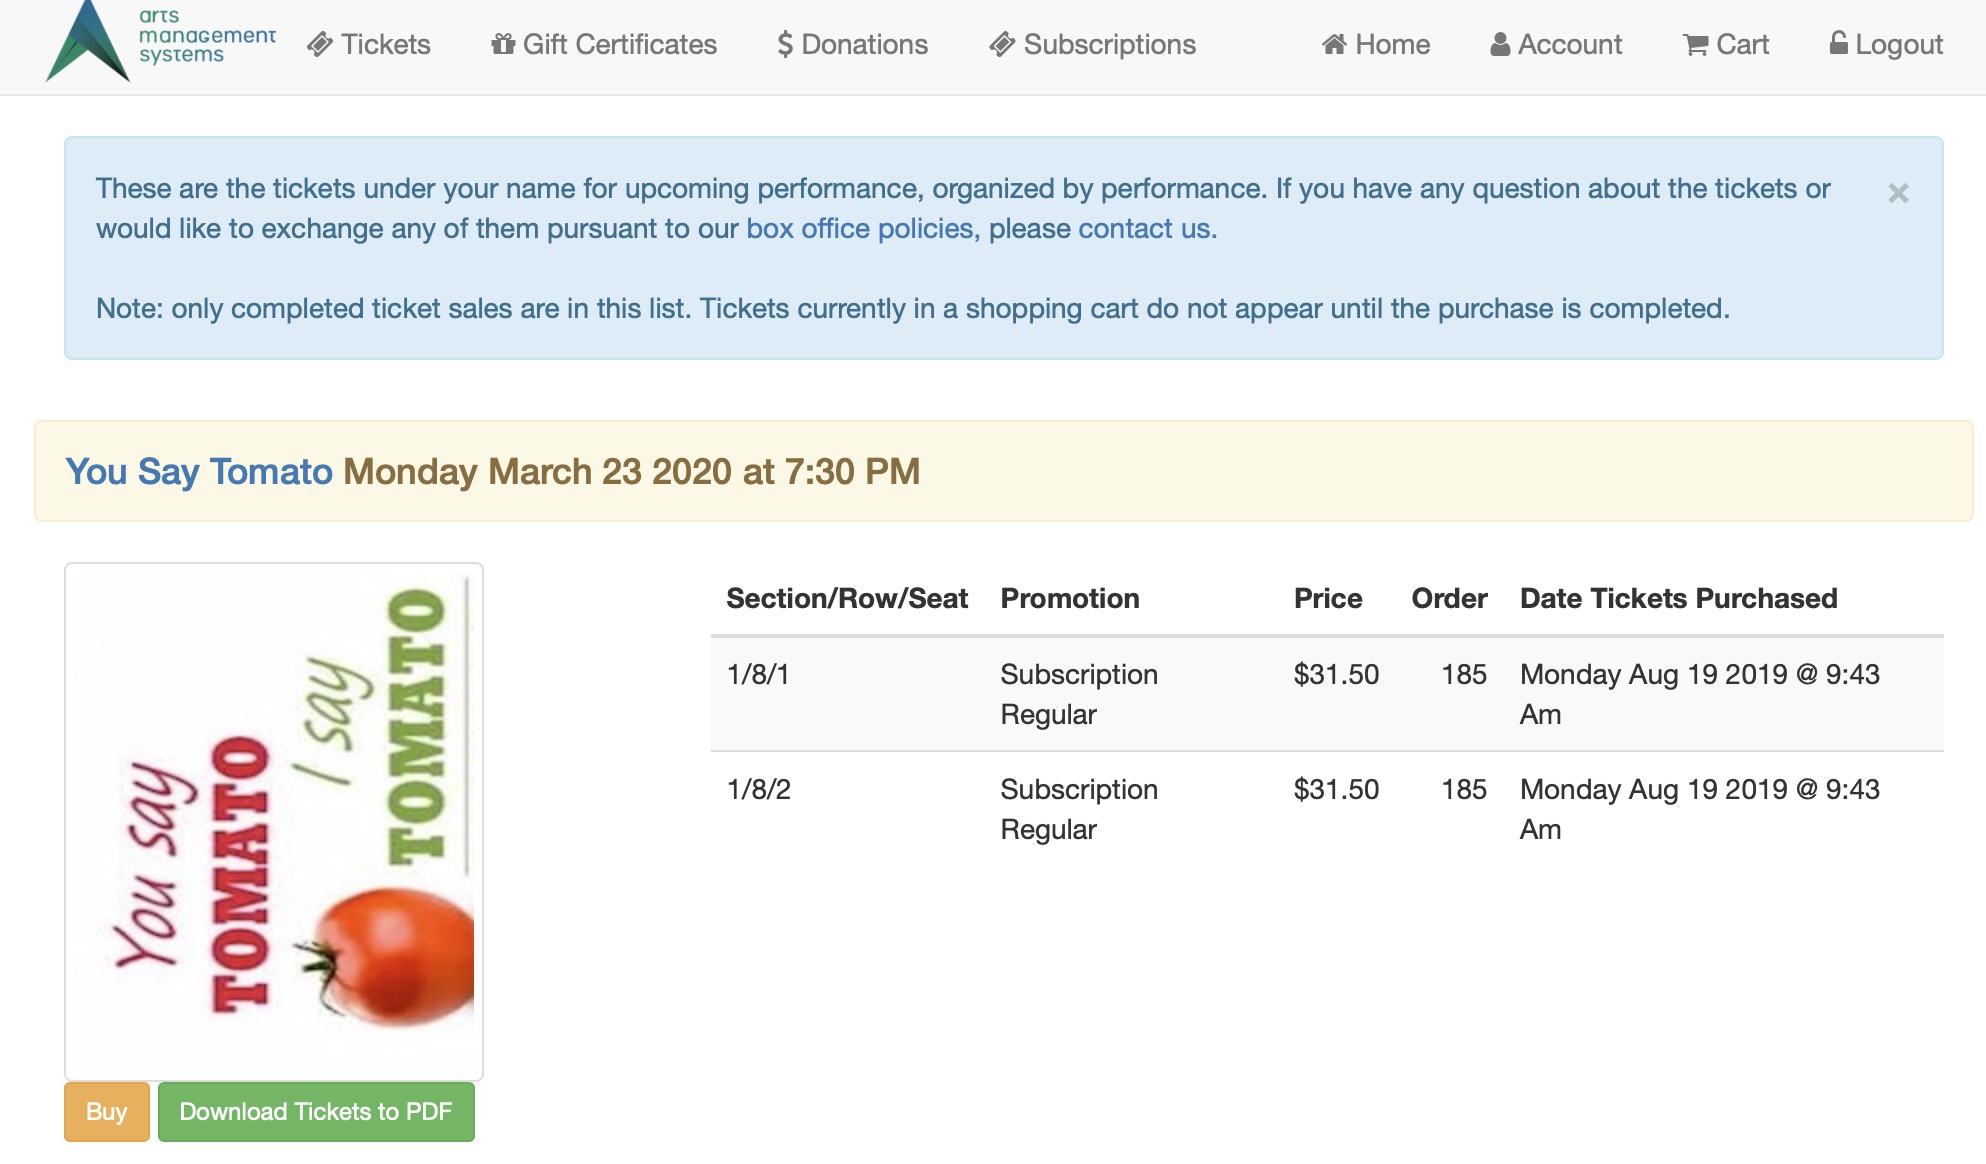
Direct Link to Print-at-Home Tickets
Printable HTML: https://tickets.yourvenue.org/TheatreManager/1/login?futureticketsprint&[ cart=xxx] | [&order=yyyy]
PDF: https://tickets.yourvenue.org/TheatreManager/1/login?futureticketspdf&[ cart=xxx] | [&order=yyyy]
Logged In Options
Theatre Manager supports print at home tickets in either bar or QR code format which means you can send URL's to the user via email to get ticket printed. Theatre Manager does the one for the cart automatically on the confirmation letter during the sales process
By adding options to the URL above, you can print tickets for
- All future tickets - leave out any additions to the URL blank
- A specific order - add &order=xxxx to the URL where xxxx is the order number
- A specific shopping cart - add &cart=yyyy to the URL where yyyy is the shopping cart number
Note: if the patron owning the tickets is:
- currently logged in to the online sales web site, the ticket print dialog will open.
- not logged in, then the web site will require a log in before taking the patron to the print tickets window
Testing Options
If you want to print a test PDF ticket to see what it looks like, use the URL(s) below
Printable HTML: https://tickets.yourvenue.org/TheatreManager/1/login?futureticketsprint&test=1
PDF content as HTML: https://tickets.yourvenue.org/TheatreManager/1/login?futureticketspdf&test=1&html=1
|
IF you are trying to make tickets that print on ticket printers, please see the documentation about ticket faces for ticket printers. |
Direct Link to event from an advertisement
https://tickets.yourvenue.org/TheatreManager/1/login?event=0[&tmsource=yyyyyy]
To create links to show only events relating to a pre advertise on your web site:
Click here to purchase tickets to Event #1 - https://tickets.yourvenue.org/TheatreManager/1/login?event=51
Click here to purchase tickets to Event #2 - https://tickets.yourvenue.org/TheatreManager/1/login?event=52
Click here to purchase tickets to Event #3 - https://tickets.yourvenue.org/TheatreManager/1/login?event=58
Click here to purchase tickets to Event #4 - https://tickets.yourvenue.org/TheatreManager/1/login?event=62
In the above examples the event value is defined by Theatre Manager as the unique event number for each different event. The event number is found by:
- Click Setup >> Events.
- Click the button to populate the Event List.
- Locate the Event # column to the left.
This column in the Event List shows the unique sequence number for each item in the list. Use the Event # to replace the "xx" in the link above.
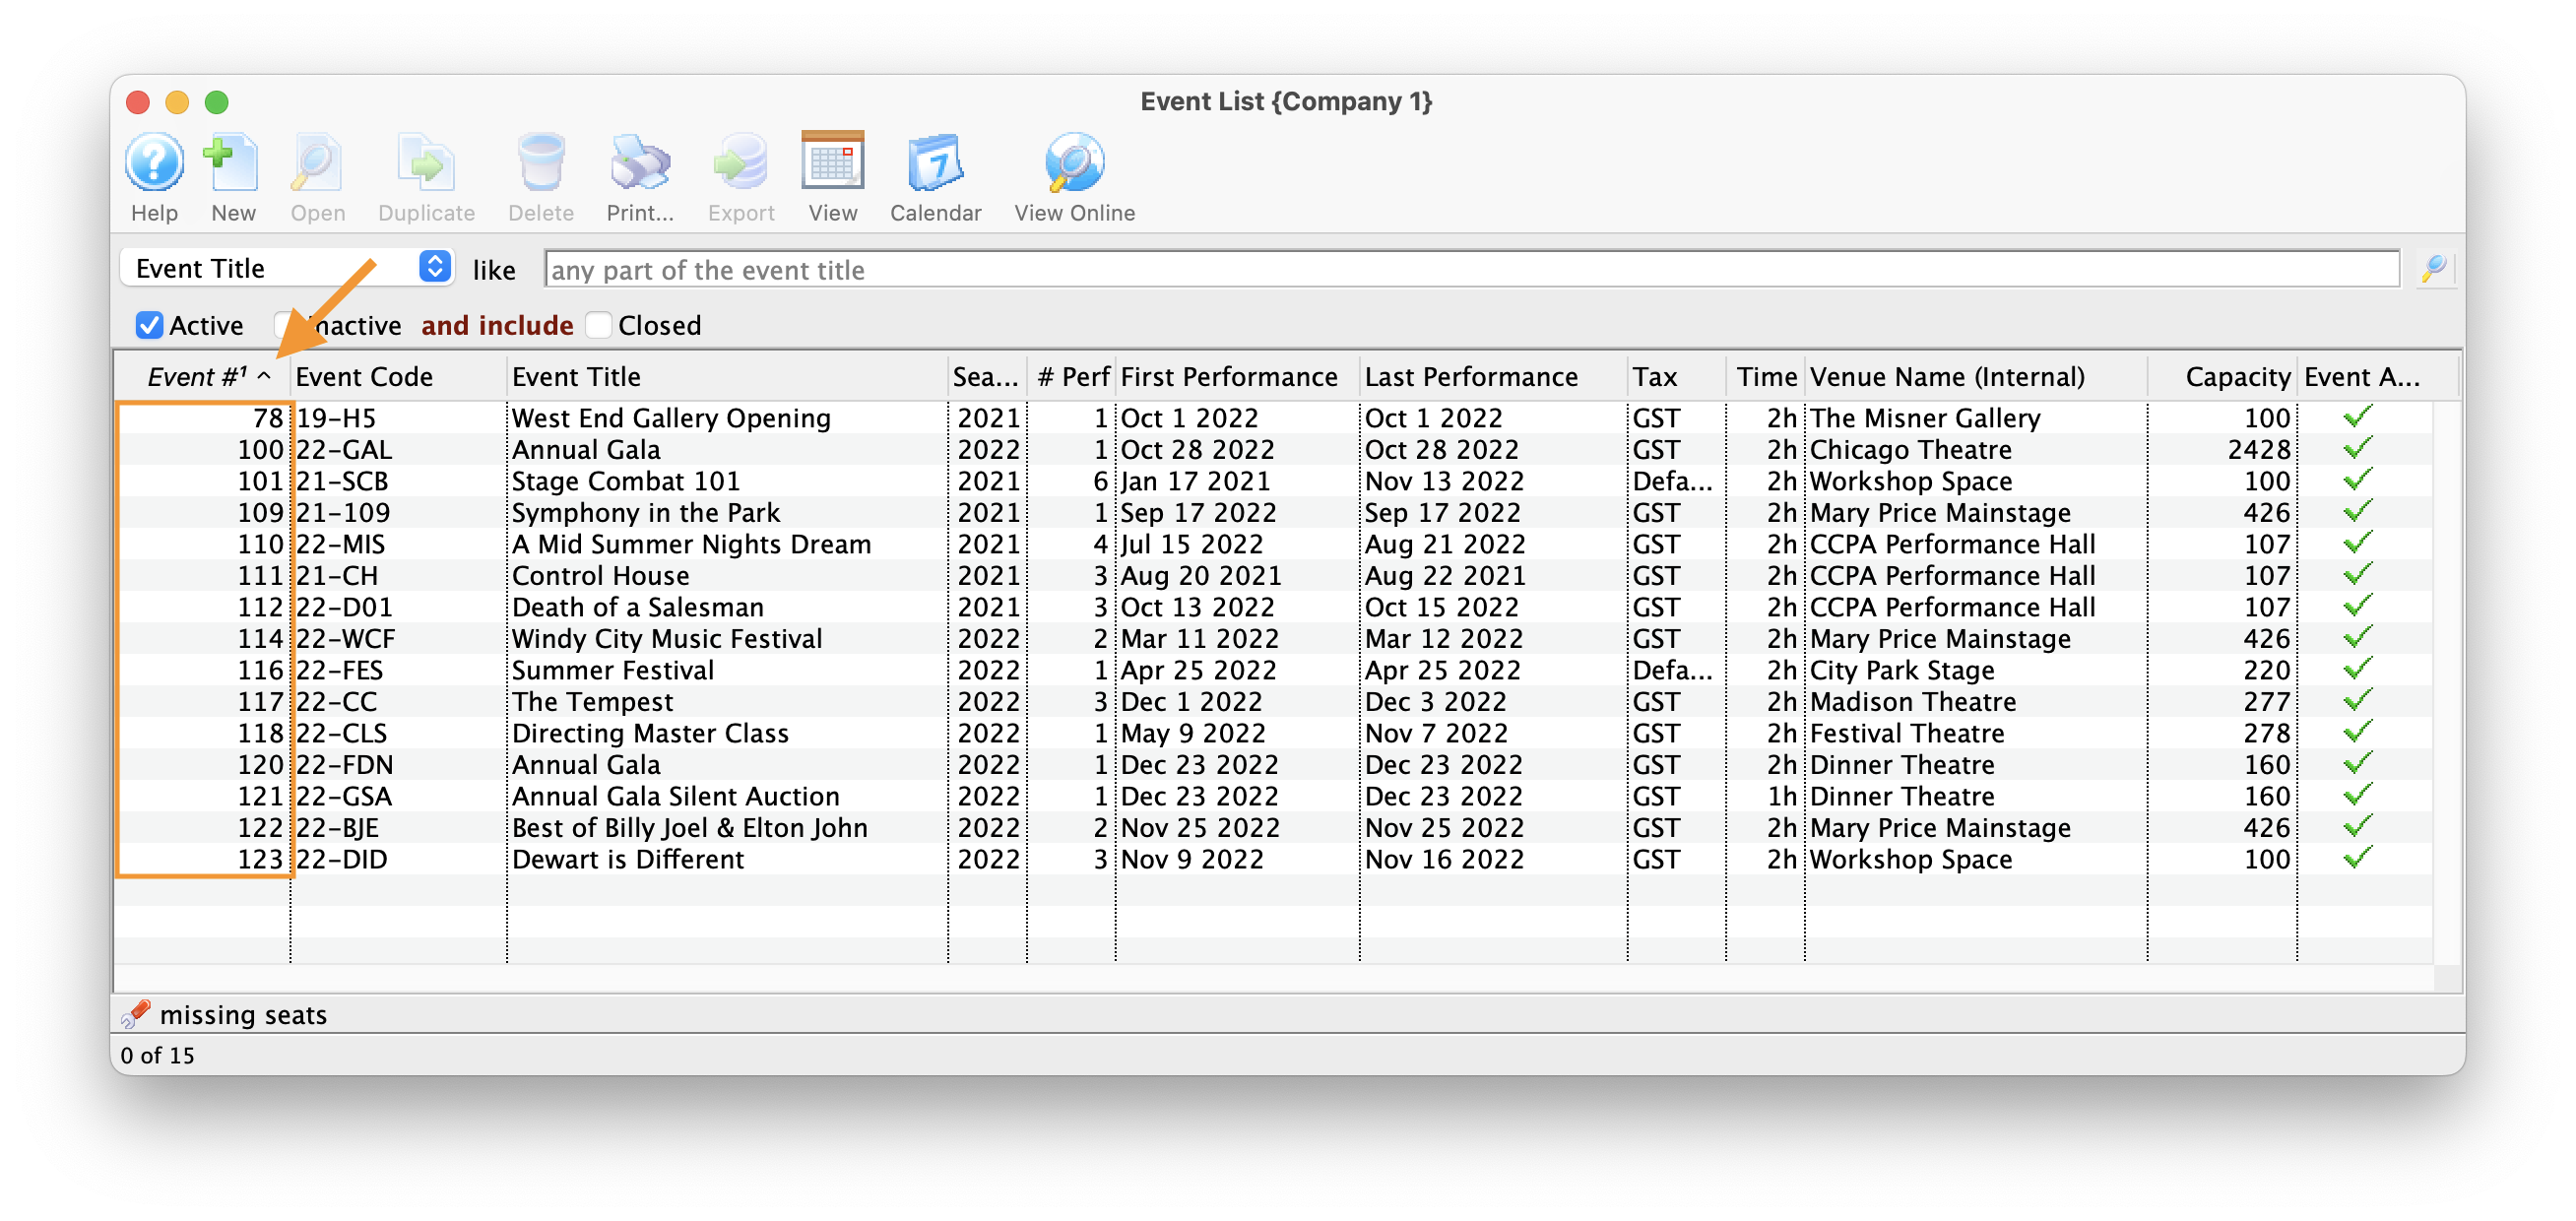
Other Parameters
- tmsource=yyyyyy (optional) where yyyyyy is a tracking code that is placed on any cart for tracking the source of the referral.
Direct Link to Special List of Events
https://tickets.yourvenue.org/TheatreManager/1/login?event=0&search=XXXXXX[& tmsource=yyyyyy]
The above can be used to create a direct link to a specific list of events (or date range of events) where a customized search is required. The options below are examples of search strings that can be used to replace the "XXXXXX" in the link above. Do NOT place quotes around the entire search parameter. Example:
- P_SEQ IN (x,y,z,...) where x, y, z are valid P_SEQ (event) numbers - find these 3 specific events
- PB_SEQ IN (x,y,z,...) where x, y, z are valid PB_SEQ (performance) numbers - find these 3 specific performances.
- VE_SEQ=a where a is a valid VE_SEQ (venue) number - find all performances in venue 'a'
- VE_SEQ IN (a,b,c) where a, b and c are valid VE_SEQ (venue) numbers - find all performances in venues 'a', 'b', and 'c'
- TM_SEQ IN (a,b,c) where a, b and c are valid TM_SEQ (pricing map) numbers - find all performances using pricing maps 'a', 'b', and 'c'
- P_SEQ IN(x,y) or TM_SEQ=a this will give you the 2 events 'x' and 'y', along with ANY performance in venue 'a'
- PB_PERFORM_DATE between date '2017-09-15' and date '2017-10-31' This will give you all performances between Sep 15 2017 and Oct 31 2017
- PB_PERFORM_DATE=current_date will be a list of today's events
- PB_PERFORM_DATE<=now()+%2B+interval+'7+days' is a list of everything in the next 7 days. The %2B is an encoded 'plus' sign since plus has special meaning of a space
- PB_PERF_FLAG in ('A','C') This will give you all performances having either of those two letters in the Theatre Manager performance flag field
- P_GENRE_FC_SEQ not in (100,101,102) can be used to pick all events that do not have a specific genre that is in the code tables.
An Example link directing patrons to TWO (2) specific events would appear like:
- https://tickets.yourvenue.org/TheatreManager/1/login?event=0&search=P_SEQ IN(1,2)
- this takes patrons directly to the event list display only event #1 and event #2.
Refer to comments within WebPages/1/WebPages/TMTickets.html for more examples on searching for performances within the Ticketing Page.
To find the Event Sequence #:
- Click Setup >> Events.
The Event List window will open.

- Click the button to populate the Event List.
- The Event # will be listed in the far left column
This is the unique sequence number for the event and can be used when creating a P_SEQ link.
To find the Performance Sequence #:
- Click Setup >> Events.
- Click the button to populate the Event List.
- Double-click an Event to open it.
- Select the Performance tab.
- The far left column, labeled Perf #, shows the unique performance number for each performance of the Event.
This number can be used with creating a link that references PB_SEQ.
To find the Venue Sequence #:
- Click Setup >> Venue Maps.
- The far left column, labeled Venue #, is the Venue Sequence #.
The Venue # can be used to create a link with a TM_SEQ reference.
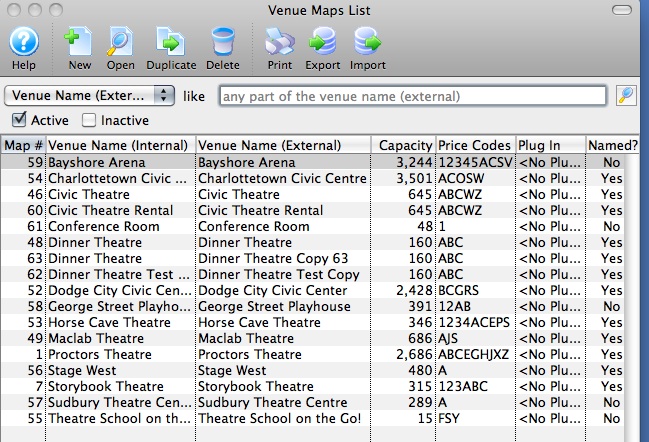
Direct Link Using Performance Flag
https://tickets.yourvenue.org/TheatreManager/1/login?event=0&search=PB_PERF_FLAG='A'[&tmsource=yyyyyy]
The link above allow a reference to the Performance Flag within the Performance and will only display the Performances with the matching results within the field. The reference within the Performance Flag field will replace the A in the link. To locate or alter the Performance Flag follow the steps below:
- Click Setup >> Events.
- Click the button to populate the Event List.
- Double-click an Event to open it.
- In the Event Setup Window, select the Performance tab.
- Double click on the Performance to be included by the link.
- Select the Web Settings tab.
- Locate the Performance Flag field.
This field will contain the value to replace the A from the link above. If a value is not present one can be added. Multiple values can be referenced at one time by separating the references with commas and using the 'in' clause.
For example: PB_PERF_FLAG in('A','B','C','D')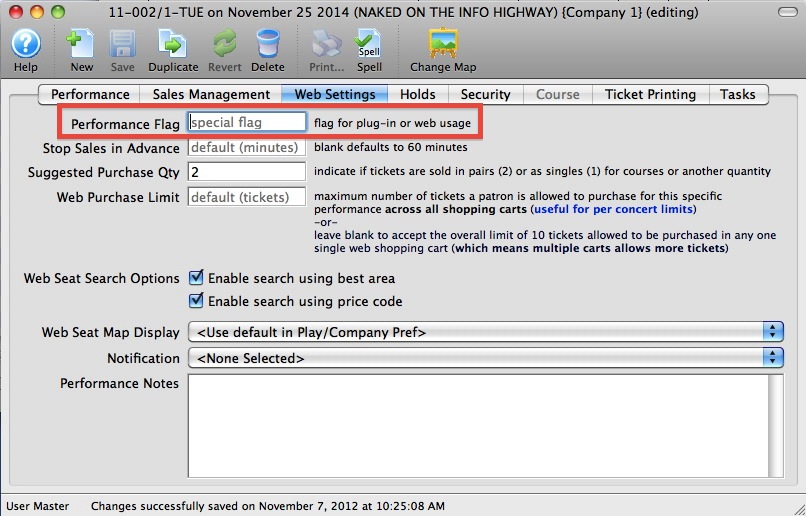
Direct Link Using Performance Type
https://tickets.yourvenue.org/TheatreManager/1/login?event=0&search=PB_TYPE1_FC_SEQ=27785[&tmsource=yyyyyy]
The above link uses the Sequence number associated with the Performance Type to create a direct link to select Performances. By using this link a defined list of performances can be grouped together and displayed for purchased. To locate the Sequence number references in the link follow the steps below:
- Click Setup >> System Tables >> Code Tables.
- Select the Perf Type option in the left column.
- Locate the Seq # column.
This column will contain the value to replace the XX in the link above. Multiple values can be referenced at one time by separating multiple XX references with commas and defining the XX with each unique sequence number.
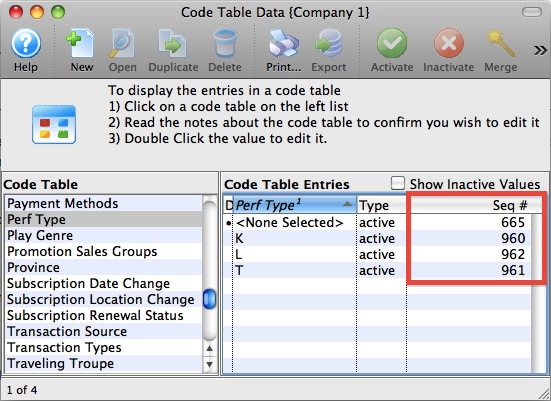
To locate or alter the Performance Type for a select Performance follow the steps below:
- Click Setup >> Events.
- Click the button to populate the Event List.
- Double-click an Event to open it.
- In the Event Setup Window, select the Performance tab.
- Double click on the Performance to be included by the link.
- Locate the Perf Type field.
This field will contain the value referenced by the Performance. The value can be changed using the drop down. The link above will reference all performances where the value within this field matches the sequence number from the link.
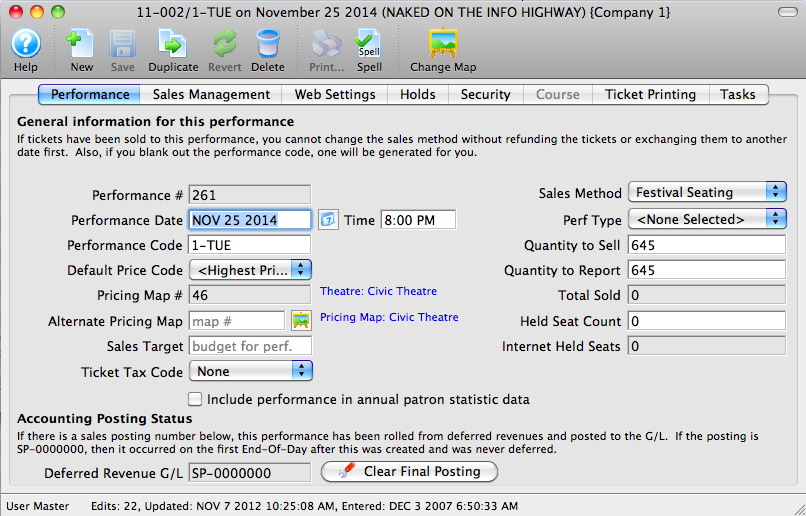
Direct Link - Course Related
You can also use many of the link that are ticket related if you provide the event # for the course
Direct Link to Courses
https://tickets.yourvenue.org/TheatreManager/1/login?event=0&search=PB_SALES_METHOD=xx[&tmsource=yyyyyy]
This link will take the patron to a select list of Performances based on the Sales Method for the Performance. The "xx" represents the Performance Sales Method sequence value from within Theatre Manager.
| Sequence # | Performance Sales Method |
| 1 | Reserved Performances |
| 2 | Festival Seating Performances |
| 3 | Inventory |
| 6 | Courses |
- tmsource=yyyyyy (optional) where yyyyyy is a tracking code that is placed on any cart for tracking the source of the referral.
Direct link to Manage Performances
https://tickets.yourvenue.org/TheatreManager/1/login?manageperf=xx
This link will take the a staff member or volunteer with permission to manage events online to the 'manage event' page in the online sales. The "xx" represents the event # from within Theatre Manager. If the event number is zero, then the employee/volunteer will see a list of all events that they can manage.
Permission to manage an event online is occurs when three things are true:
- A volunteer/staff activity is enabled for online management on code tables
- That activity is assigned to an entire event or a single performance for the staff/volunteer from one of:
- the volunteer/staff event activities window
- the volunteer detail window
- The personnel tab on the task window
- That performance or event that they are managing is in the in future
This link displays the tmEventManagement.html web page. Once the Instructor is on this page, they can:
Direct Link - Donation Related
Direct link to Donation Campaign List
https://tickets.yourvenue.org/TheatreManager/1/login?donationcampaigns[&category=xxxx][&tmsource=zzzzz]
This URL takes a user to a list of all the campaigns that are available online as per the image below.
If no category is used, the above link will direct a patron to the Donation Campaign Page and show all donation campaigns in all categories, like the HTML page below, from which they can pick.
A sample is shown at the bottom of the help page.
General Parameters
- category=xxxxxx (optional) where xxxxx is the code table value from the Donation Campaign Code Table. You can repeat this parameter in the URL for each category you want to show.
- tmsource=yyyyyy (optional) where yyyyyy is a tracking code that is placed on any cart for tracking the source of the referral.
Showing selected Categories of Donation Campaigns
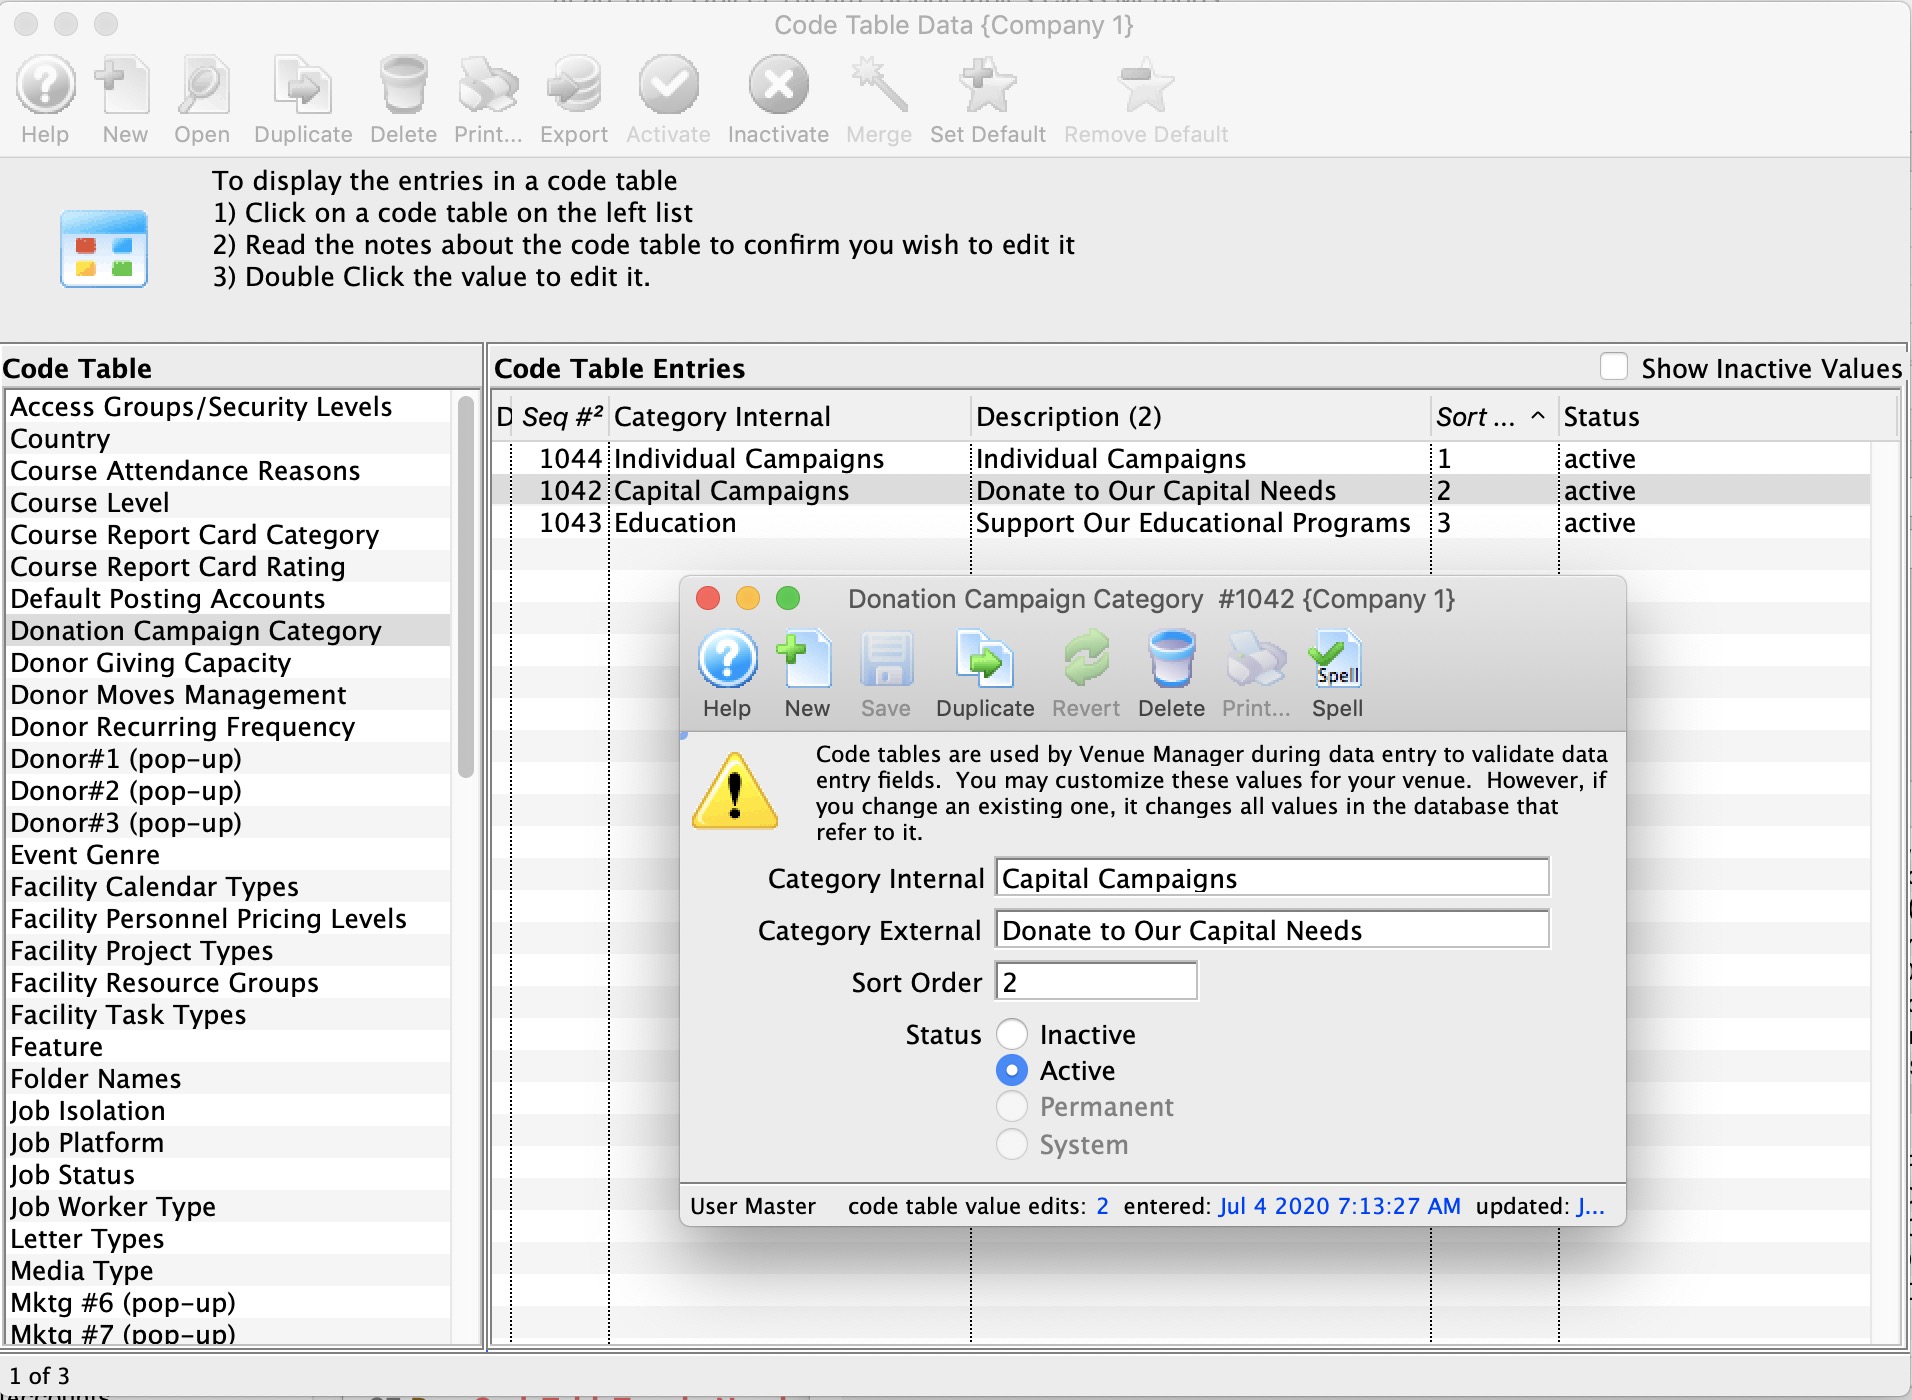
https://tickets.yourvenue.com/TheatreManager/1/login? donationcampaigns&category=1042&category=1043[&tmsource=yyyyyy]
You can specify one or more categories in the URL and only those categories will be shown. In this case, the category numbers must be the same as the code table entry number in the Donation Campaign Code Table shown above. Icons are entered on the Description Tab in Donation Campaign setup.
You might use this to show capital campaign or individual gifts on a separate web page.
You can also Link to specific donations if you wish.
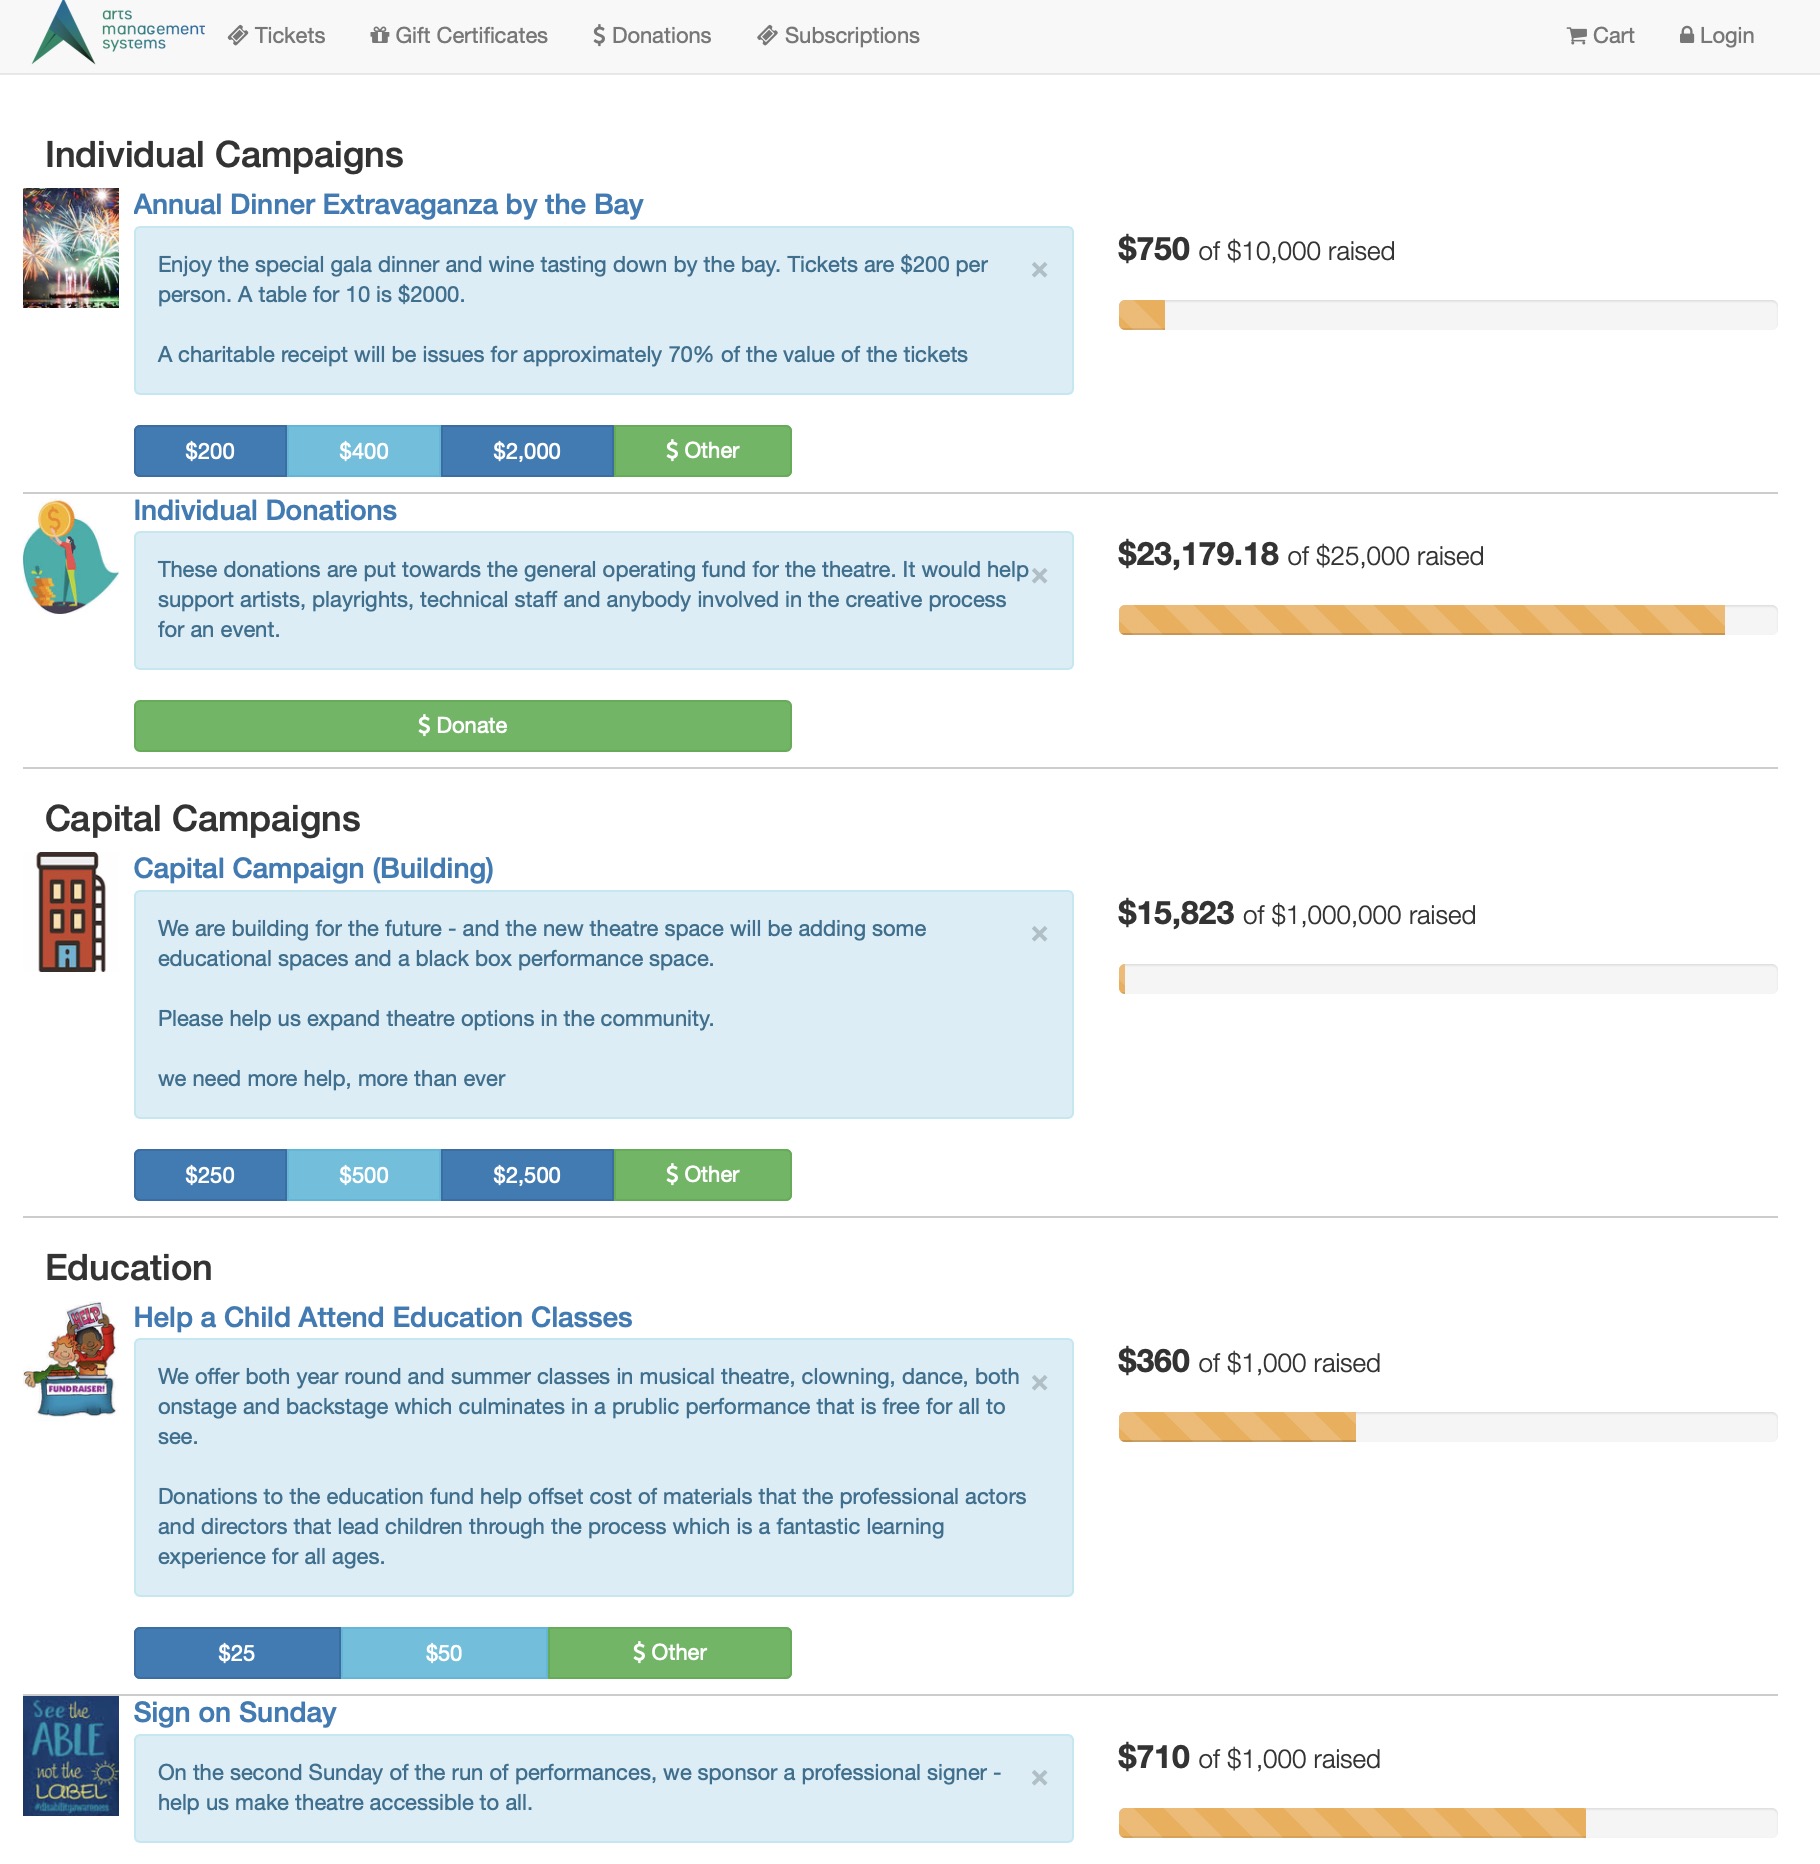
Direct Link to a Donation (use fillable form)
https://tickets.yourvenue.org/TheatreManager/1/login?donationcampaign=xx&amount=100.00 [&frequency=0][&tmsource=yyyyyy]
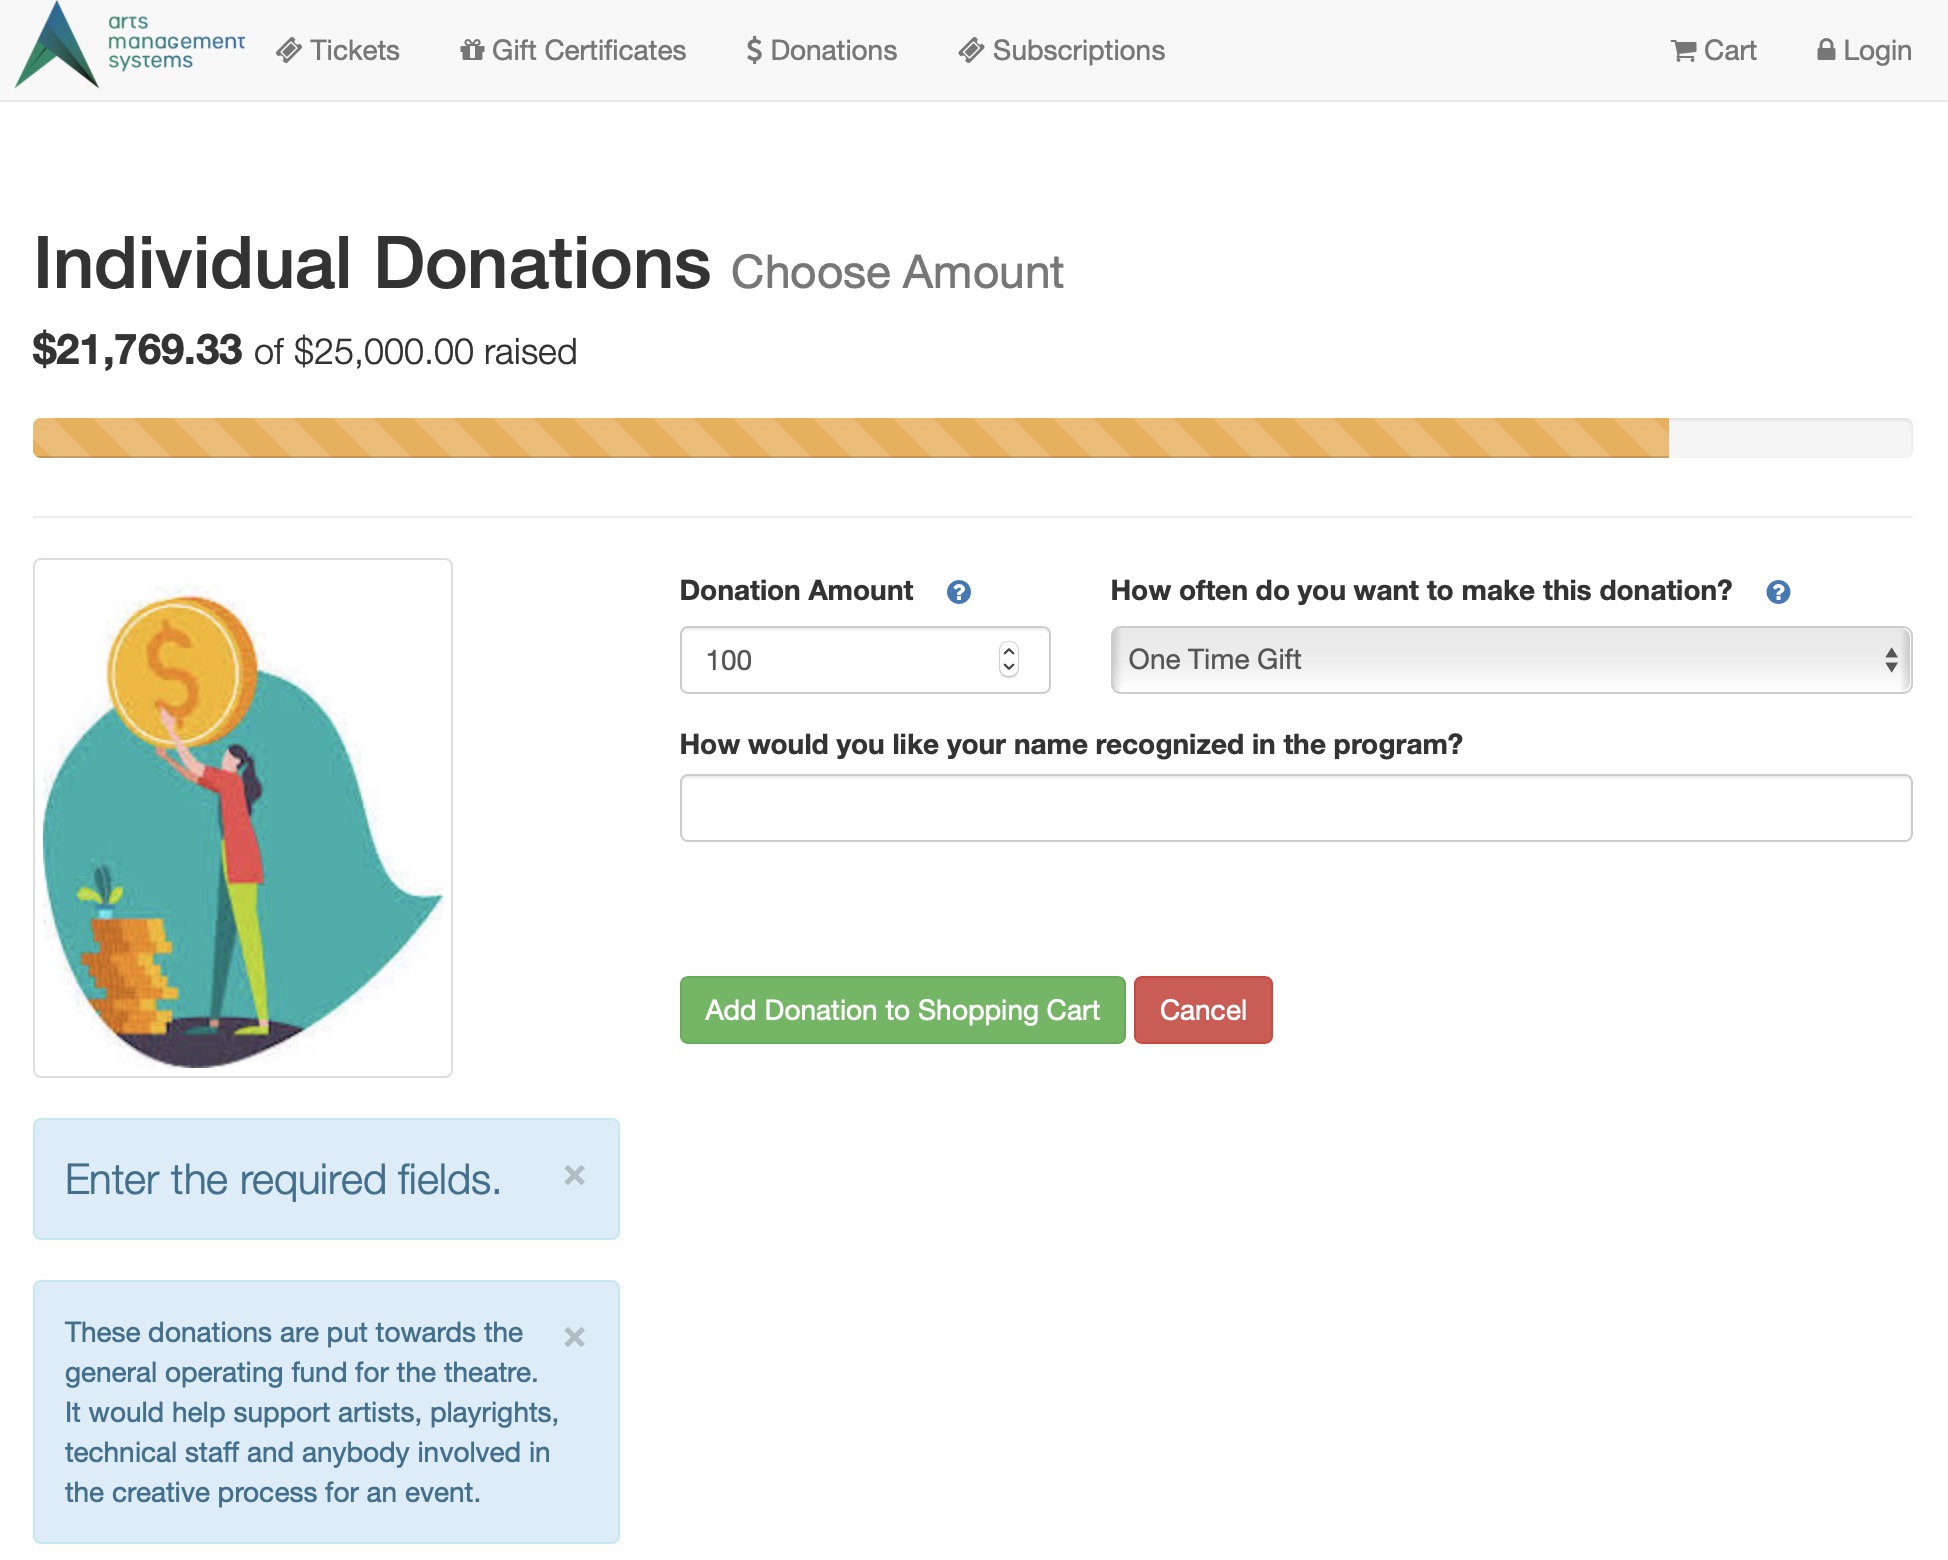
This link will take the patron to the donation page in the online sales. It will show a fillable form where he patron can make changes to their choices, change amounts and then add the donation to their shopping cart.
- donationcampaign=xx represents the Campaign # from within Theatre Manager. This link will ensure that indicated Campaign appears as the default in the drop down. Any additional Campaigns available via the internet will also appear in the drop down. This is a unique sequence number assigned to the Campaign by Theatre Manager.
- amount=100.00 is optional and allows you to set a default amount for the donation if you send people here from an external web site.
- frequency=1 is optional and suggests the frequency for recurring donations. Values of frequency are:
- 0 - one time gift (the default)
- 1 - monthly recurring gift
- 2 - A Gift Every 2 Weeks
- 3 - A Gift Every 3 Months (each Quarter)
- 4 - Annual Gift
- 5 - Daily Gift
- 6 - Weekly Gift
- 7 - A Gift Every 2nd Month
- tmsource=yyyyyy (optional) where yyyyyy is a tracking code that is placed on any cart for tracking the source of the referral.
|
NOTE: the normal route taken by the web server after adding the donation is to go to the shopping cart window. You can alter that destination in a form by using the hidden param below within your form
<input type="hidden" name="param" value="altbtn=btnCheckout" /> altbtn=btnCheckout can be substituted for other web pages, so you could, for example, take the patron to the gift certificate page. |
|
If you would like to show progress to a target, then edit the Statistics Tab on the donation campaign window and click the show on internet (meaning show the progress on internet) |
Finding Donation Campaign Number
- Click Setup >> System Tables >> Donation Campaigns.
- Right-click on the column header in the Donation Campaigns List window.
- Select Preferences >> Change Columns.
- Single click the Seq # option only if it's not already highlighted or checked.
- Click the button in the Campaign List window.
The Donation List window will populate with Donation Campaigns. Replace the "xx" in the link above with the appropriate donation sequence number to create a direct link to the donation.
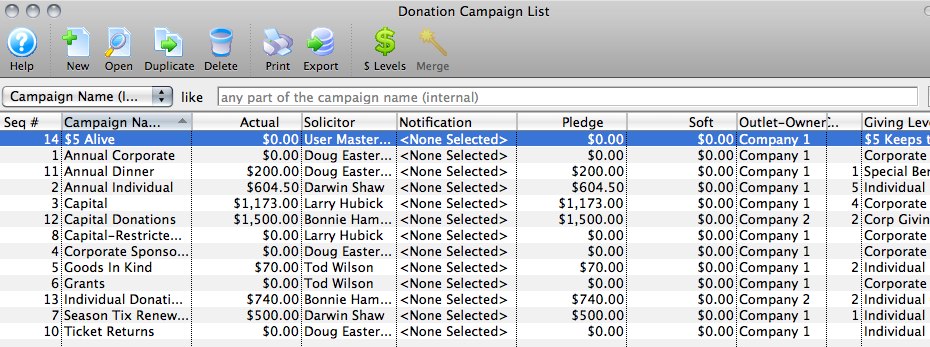
For more information on the Donation List widow click here.
Direct Donation Add Link (quick add)
https://tickets.yourvenue.org/TheatreManager/1/login?donationquick=xx&amount=100.00
[&DD_FLD1_FC_SEQ=pp][& DD_FLD2_FC_SEQ=qq][& DD_FLD3_FC_SEQ =rr][&frequency=0][¶m=altbtn=btnCheckout][&tmsource=zzzzz]
This link allows you to add a donation to the shopping cart with minimal interaction. It means you can put it anywhere on any web page. The user does not get any choices. If you wish choices like Donate $10 or Donate $50, you will need to put multiple buttons on the page.
|
This URL supports quickly adding a donation to a cart from ANY web page including:
|
Sample web flow using this link

In the image above, the URL to quickly add a donation can be on any page. If it contains the minimum data needed, the diagram shows the flow that occurs for regular patron checkout and for guest checkout.
Parameters on the URL
The following parameters can be added after the tickets.yourvenue.org/TheatreManager/1/login?
- donationquick=xx where xx represents the Campaign # from within Theatre Manager.
- amount=100.00 is required and sets the amount of the donation.
-
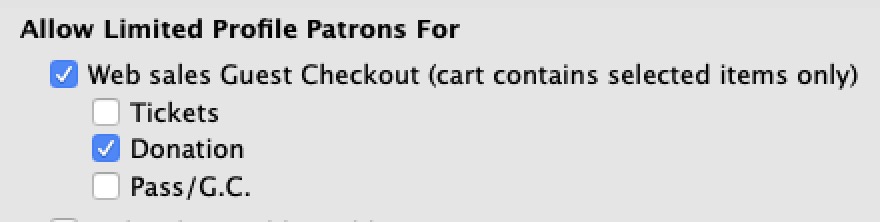 param=altbtn=btnCheckout (optional). After the donation is added, the user is typically taken to the shopping cart.
Use the param features if you want the patron to go directly to the checkout page. Patrons will:
- need to log in to their account, -or-
- if you allow use of the limited profile patron feature (AKA guest checkout) for donations, the patron can make an account that meets minimum data required for a patron.
- DD_FLD1_FC_SEQ=pp (optional). If specified, pp must be a valid, active value from the Donor#1 Popup code table. Invalid values will result in rejection.
Note: If any donor popup is mandatory in company preferences, you must specify this parameter and a value for it in the URL. - DD_FLD2_FC_SEQ=qq (optional). If specified, qq must be a valid, active value from the Donor#2 Popup code table
- DD_FLD3_FC_SEQ =rr (optional). If specified, rr must be a valid, active value from the Donor#3 Popup code table
- frequency=0 (optional) and suggests the frequency for recurring donations. The default is 0, for a single, one-time donation.
Values of frequency are:
- 0 - one time gift (the default)
- 1 - monthly recurring gift
- 2 - A Gift Every 2 Weeks
- 3 - A Gift Every 3 Months (each Quarter)
- 4 - Annual Gift
- 5 - Daily Gift
- 6 - Weekly Gift
- 7 - A Gift Every 2nd Month
- tmsource=yyyyyy (optional) where yyyyyy is a tracking code that is placed on any cart for tracking the source of the referral.
Example donation quicklink in form letters
In this example, there are 4 actual links:
- one behind the youtube button to take the user to listen to Bing Cosby's version of Brother Can you spare a dime? from the 1932 musical revuew New Americana
- a traditional text link behind NPR (National Public Radio) to give background on Ron Kapilow's notes on the song
- A button to give $50 one time with a donation quicklink to our sample web site
- A button to give $10 a month - I'd like to give a little for a little longer as a quicklink to a monthly recurring donation.
Making the sample form letter
The links (above) are part of this sample fundraising form letter created in Theatre Manager with the purpose of emailing to ask people to donate. It is based on patrons so that I could use a mail list to determine the people to send to - meaning it could be volunteers plus donors in past year, plus ticket buyers with cancelled shows, etc.
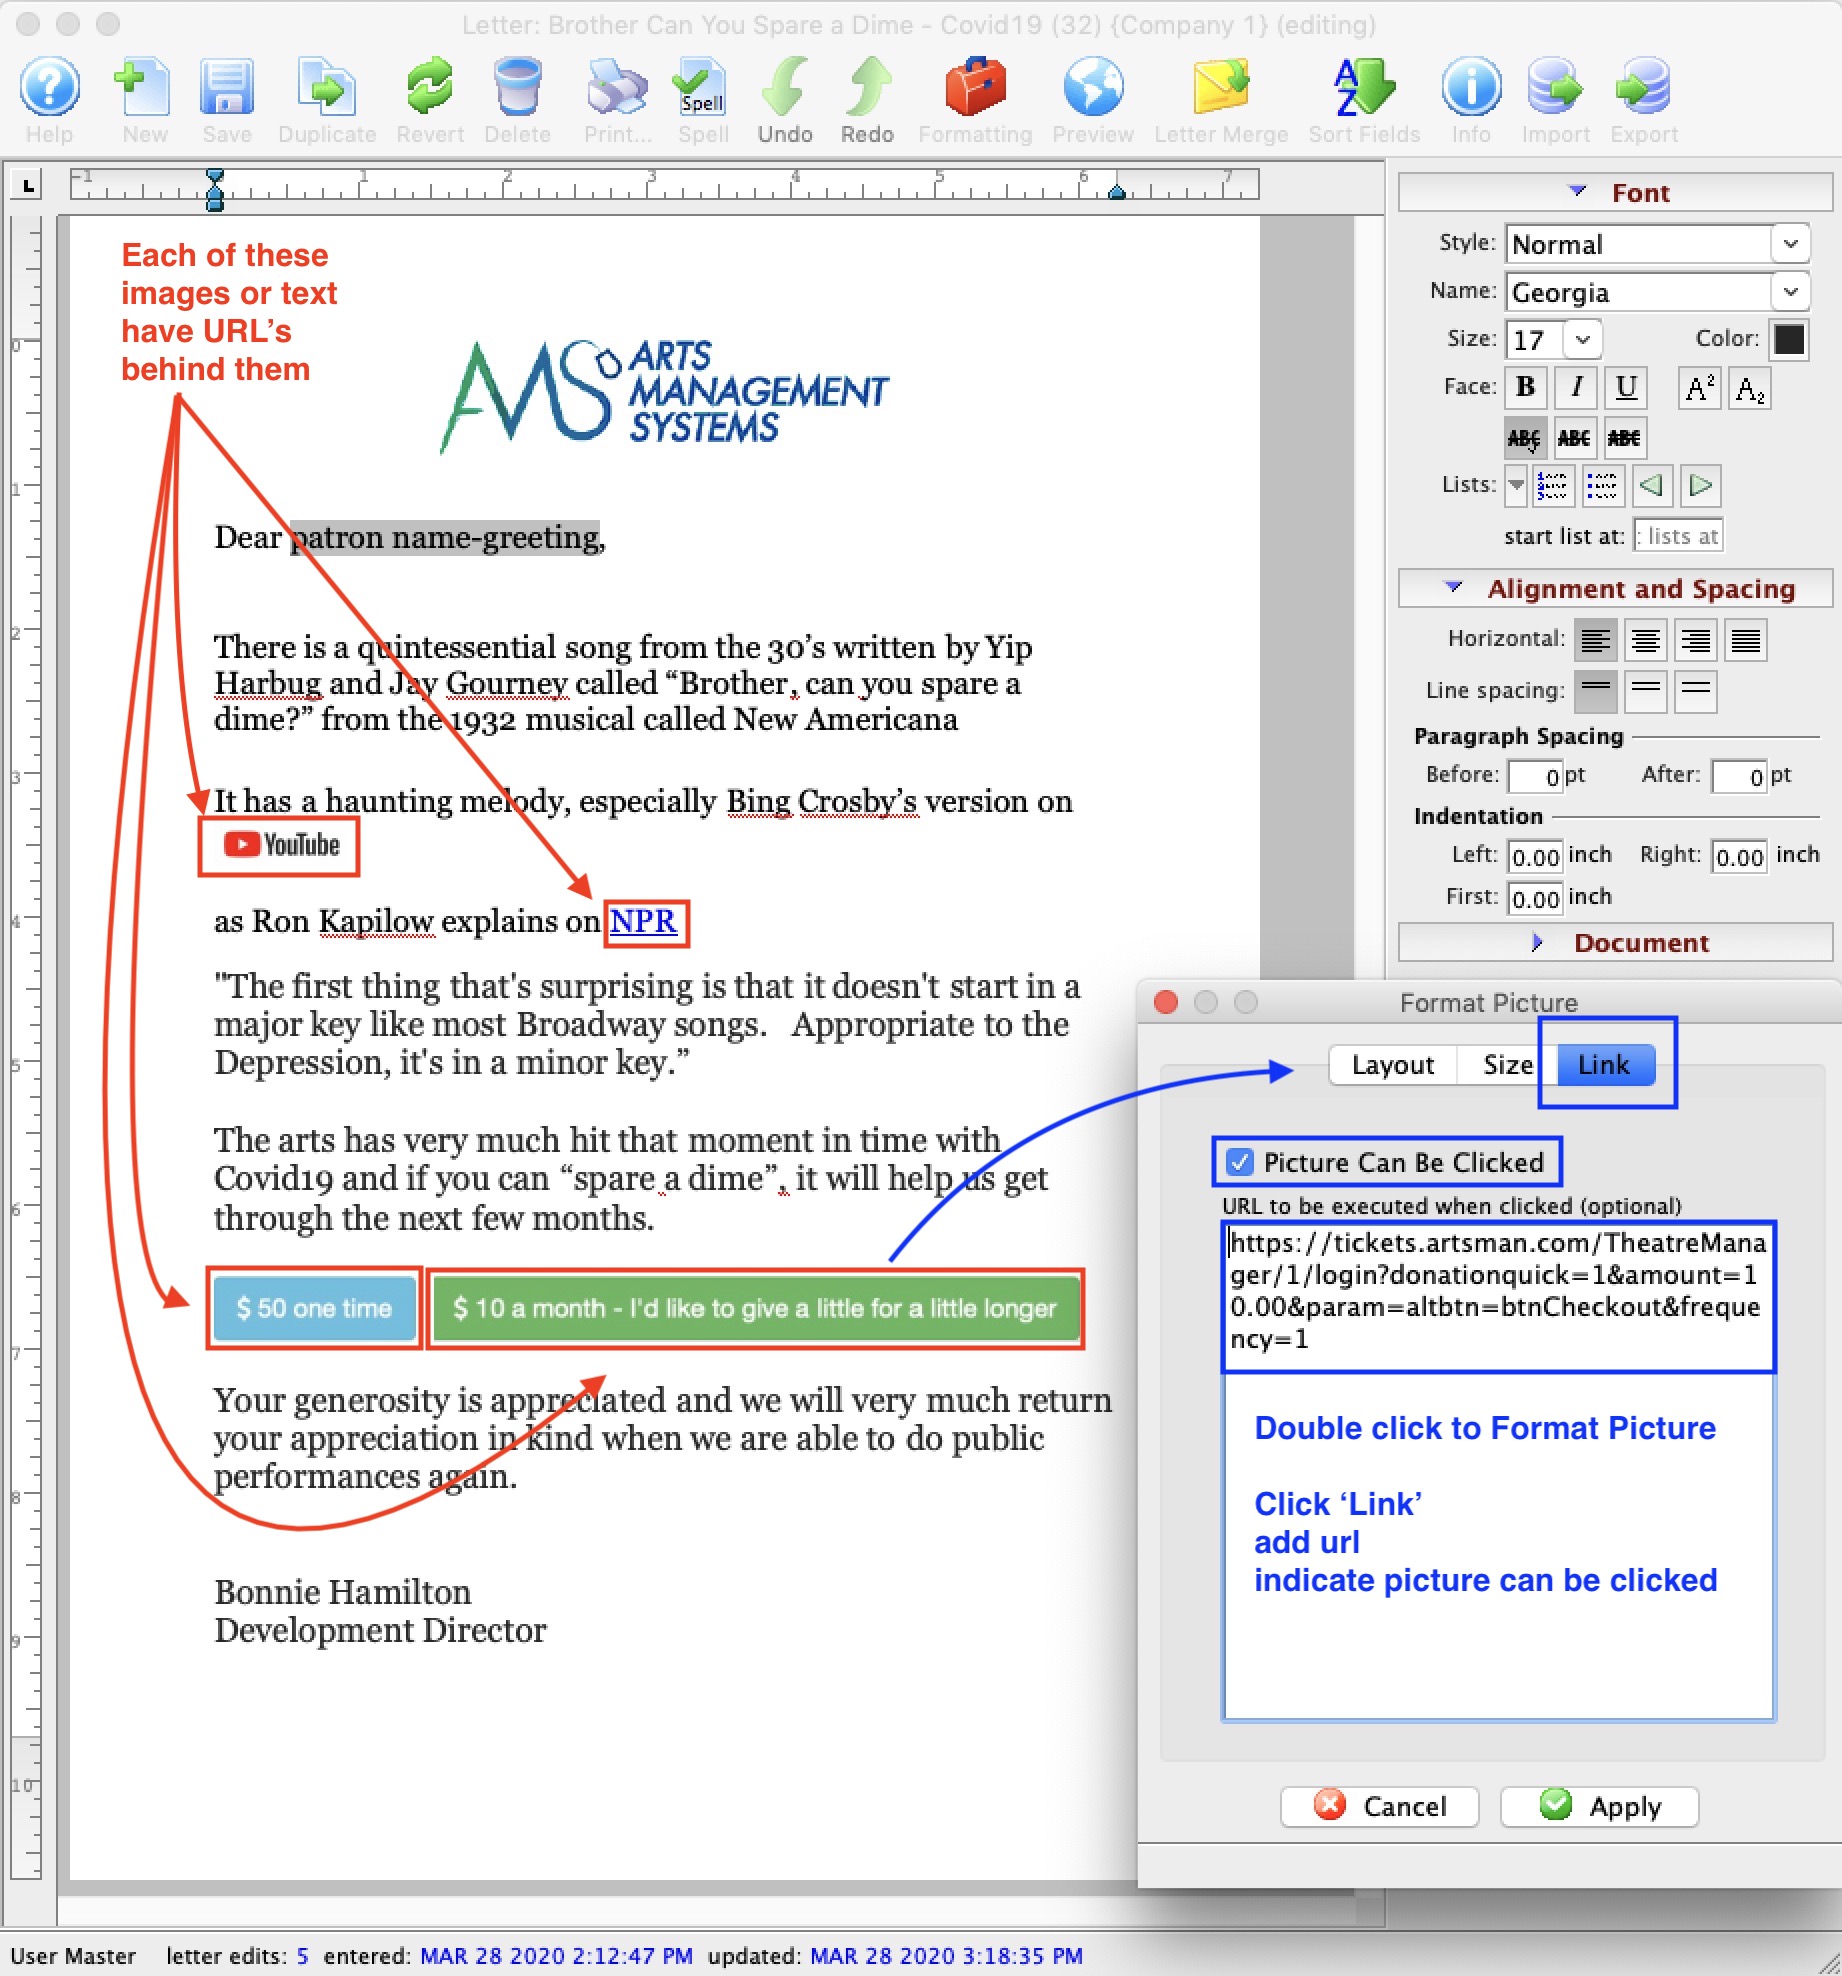
 The general steps to create the letter were:
- Type the content
- Add merge field for the patron's name to make it feel personal
-
Add the images by:
- Clicking the cursor where I wanted an image to be placed
- Drag the images onto the document from the desktop (company logo, youtube logo, $50 one time, $10 a month)
- If you get the image in thr wrong spot, you can cut/paste it, or drag it.
- If the image is too big, DOUBLE CLICK on it, click the size tab and indicate how you want it scaled (refer to the image to the right)
- once you have the document looking like you want it, you add a URL one of two ways:
- for images (see sample instructions in the full document above)
- double click on the image again
- click on the link tab
- Click on picture can be clicked - if you don't do this, then the image will not respond top clicks in the users mail client when sent as an email
- Paste the URL into the area for the URL. NOTE: make sure you try the URL in a browser before pasting it here
-
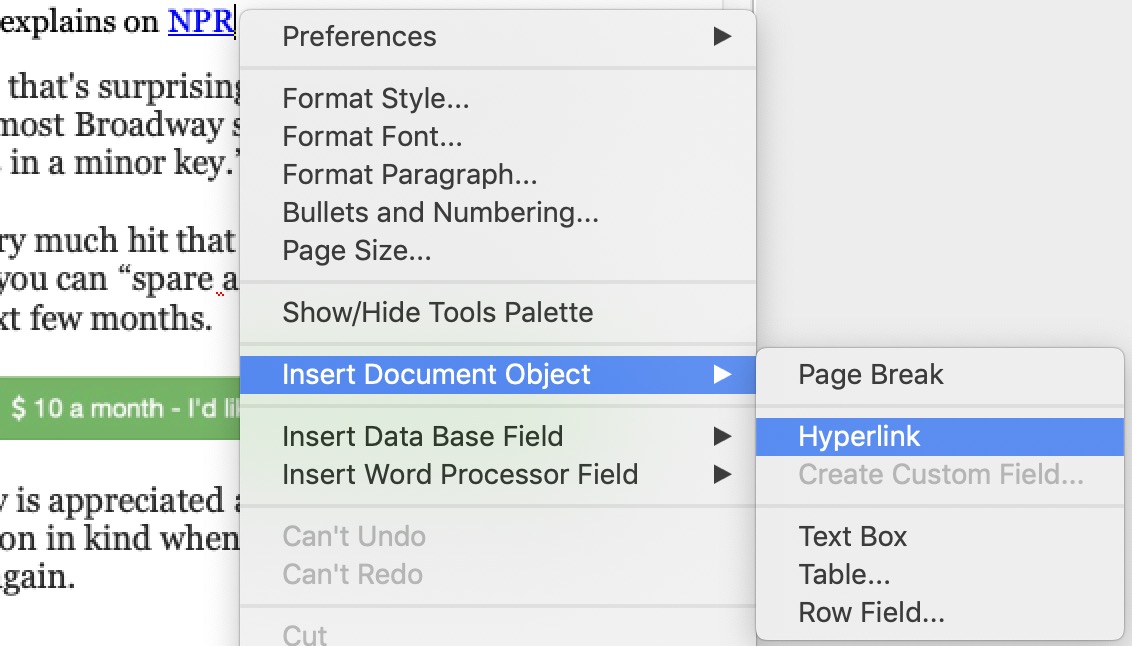 for text links:
- Highlight the text that you want the link to be behind
- Right click to get the context menu
- Select Insert Document Object
- Select Hyperlink from the sub menu
- The text hyperlink window opens
NOTE: make sure to put the URL into the right field
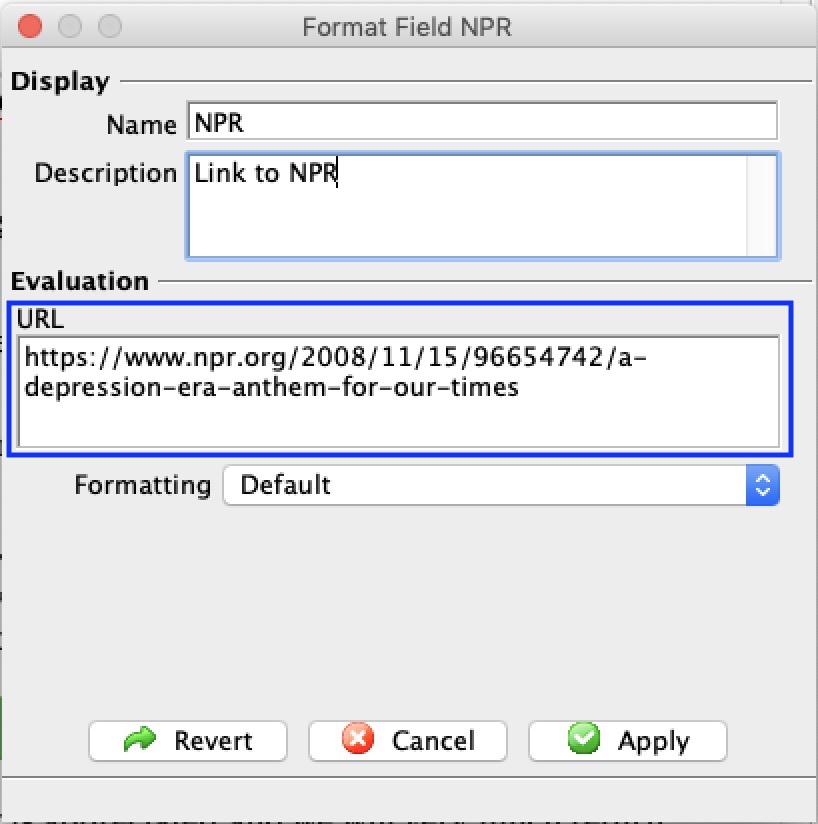
- for images (see sample instructions in the full document above)
What does the eblast look like?
It looks like a regular email sent to people. Theatre Manager tracks
- who you sent the email to
- and if they opened it or not
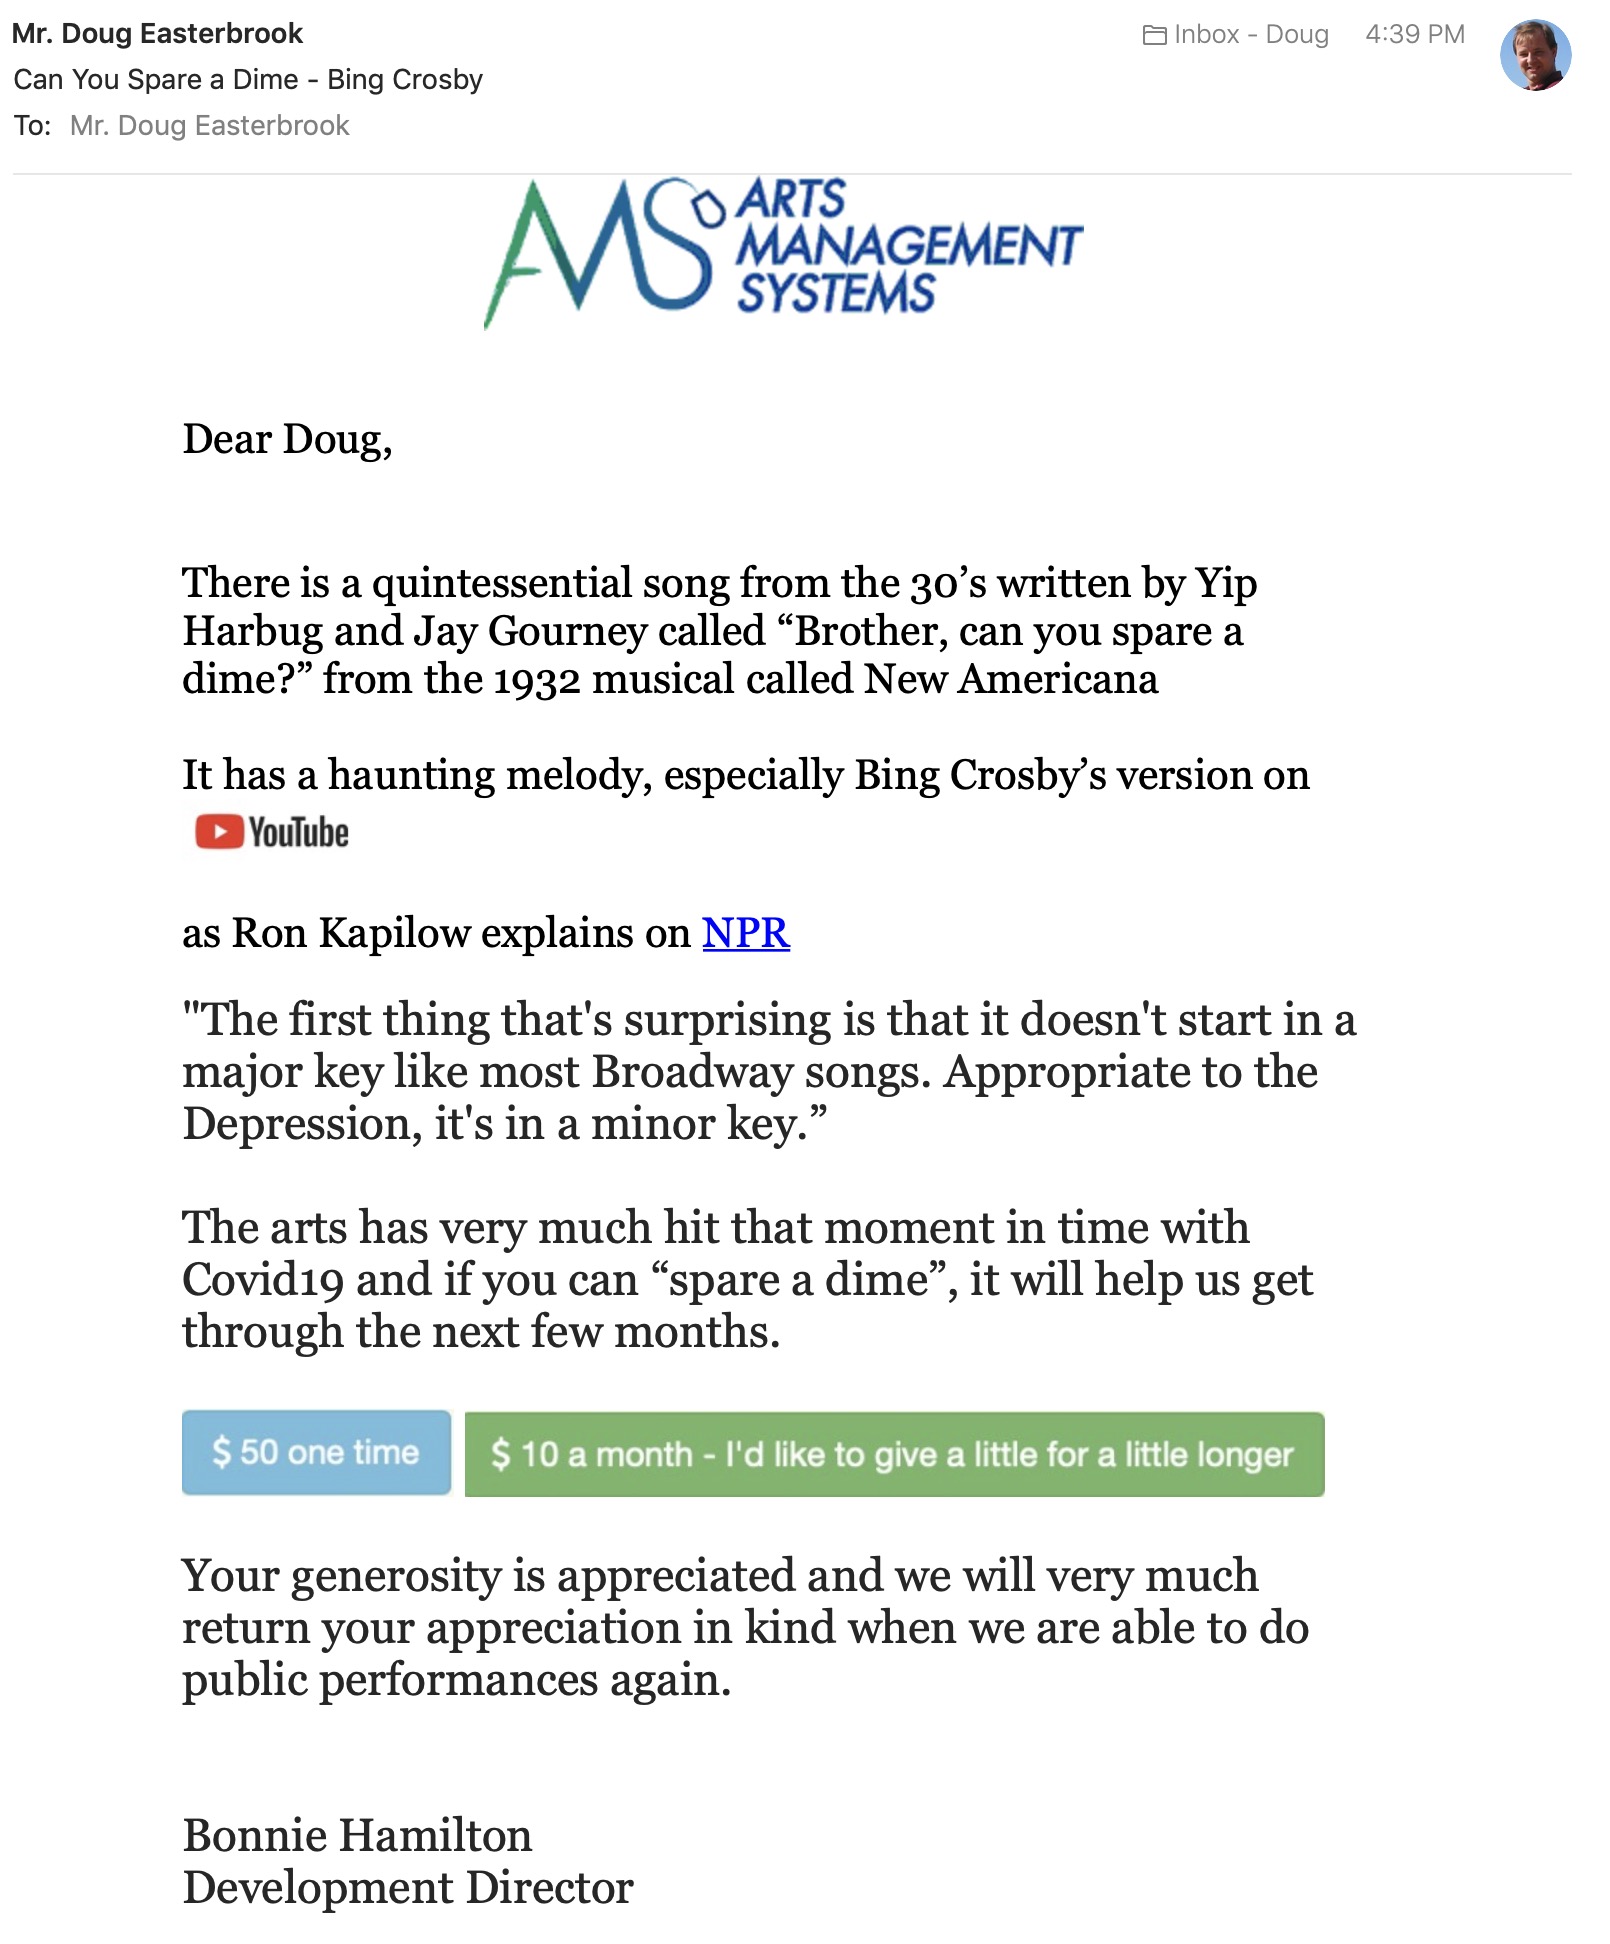
What does clicking on the donation buttons do
In the sample letter, I clicked on both buttons to show the effect and logged in. Because I clicked on them one at a time, both donations got added to a shopping cart as per the image below. The buttons below are included and active in case you want to try them.


This illustrates an e-blast with a one button donation ask for specific amounts. All the user would need to do is log in (or create an anonymous profile that you can merge later) and pay. A donation can be done in 3 button clicks.
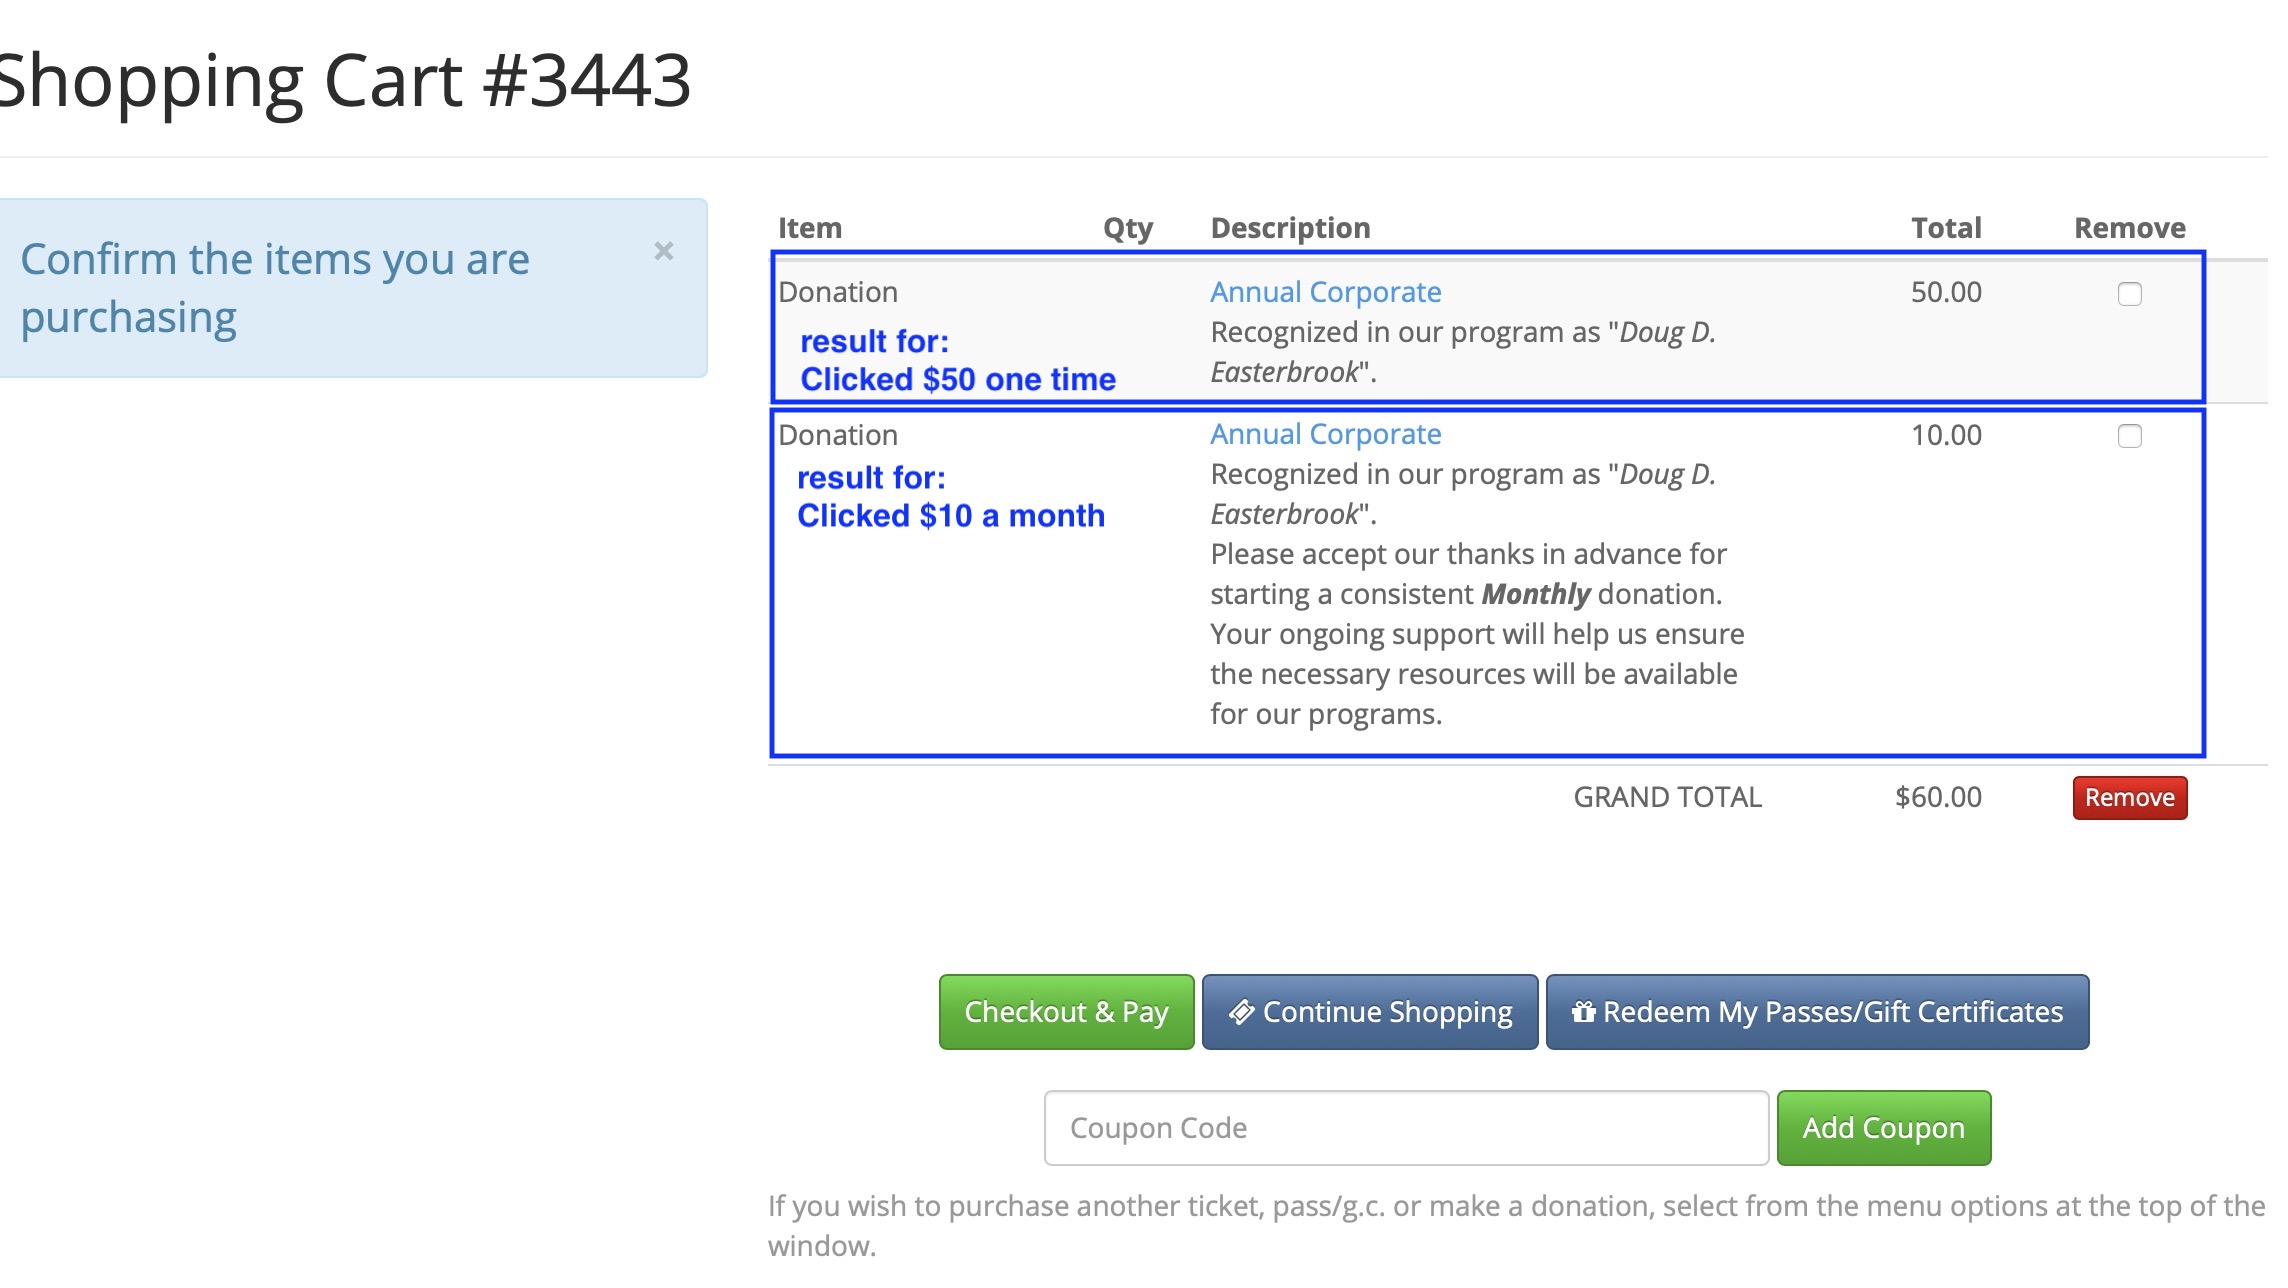
Example donation quicklink within TM
The example code is below the image
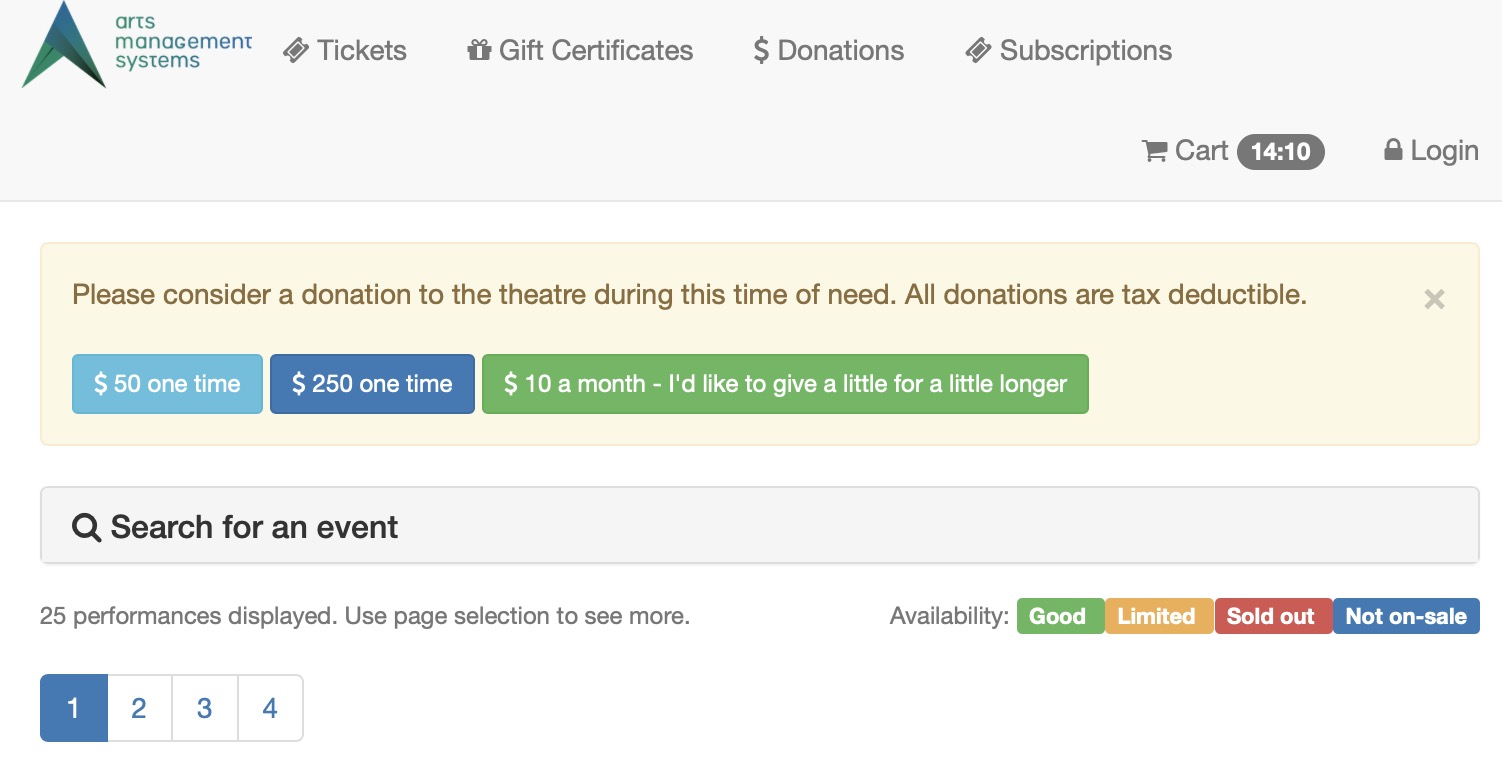
Sample code placed in tmTicketCustomPatronInstructions.html
While the code below could be placed anywhere in an appropriate web page file in Theatre Managers 'WePages' folder, the following was added to TMtemplates/tmTicketCustomPatronInstructions.html as an existing convenient way to place buttons at the top of the event list. Other good places to add donation buttons are:
- TMtemplates/tmCheckoutExtraMessagesEmail.html which is used by the confirmation email and typically has nothing in it.
- TMtemplates/tmCartEmpty.html which is displayed when the shopping cart is empty. For this situation, we'd suggest leaving the destination page as the cart.
- TMtemplates/rowCartDonationSuggestion.html which is displayed on the cart window suggesting that people make a donation - and in this case, you could add some 'quickdonation' options to make it easier for the patron. For this situation, we'd suggest leaving the destination page as the cart.
The TMtemplates/tmTicketCustomPatronInstructions.html file is used in all event lists and normally has nothing in it.
|
<div class="alert alert-warning fade in"> <!--#include virtual="TMtemplates/tmMessageDismiss.html" --> Please consider a donation to the theatre during this time of need. All donations are tax deductible. <br/> <br/> <a class="btn btn-info btn-sm" href="<field>F_HTML_FIREWALL</field>login?donationquick=1&amount=50.00¶m=altbtn=btnCheckout&tmsource=sometag"> <i class="fa fa-usd"> </i> 50 one time </a> <a class="btn btn-primary btn-sm" href="<field>F_HTML_FIREWALL</field>login?donationquick=1&amount=250.00¶m=altbtn=btnCheckout&tmsource=sometag"> <i class="fa fa-usd"> </i> 250 one time </a> <a class="btn btn-success btn-sm" href="<field>F_HTML_FIREWALL</field>login?donationquick=1&amount=10.00¶m=altbtn=btnCheckout&frequency=1&has tmsource=sometag"> <i class="fa fa-usd"> </i> 10 a month - I'd like to give a little for a little longer </a> </div> |
Example donation quicklink outside TM commerce pages
Three sample links are shown below that you can click on followed by the example web page in yellow.
|
Note: the web page looks very plain because all stylesheet information has been removed for clarity. You may need to add your own style sheets to create buttons like the example code within Theatre Managers event list |
Sample code placed a web page
The code below is a complete web page - including the head and body tags. You would only want to copy the links to place them into any of your existing web code such as facebook or wordpess sites
|
<!DOCTYPE html> <html lang="en"> <head> <title> Asking for a donation on a simple web page </title> </head> <body> Sample web page snippet asking for a donation. The links below have not been enhanced with any stylesheet themes <br/> <a href="https:∕∕tickets.artsman.com/TheatreManager/1/login?donationquick=1&amount=50.00¶m=altbtn=btnCheckout&morning&tmsource=mysourcetag" target="_blank"> Donate $50 one time </a> <br/> <a href="https:∕∕tickets.artsman.com/TheatreManager/1/login?donationquick=1&amount=250.00¶m=altbtn=btnCheckout&tmsource=mysourcetag" target="_blank"> Donate $250 one time </a> <br/> <a href="https:∕∕tickets.artsman.com/TheatreManager/1/login?donationquick=1&amount=10.00¶m=altbtn=btnCheckout&frequency=1&tmsource=mysourcetag" target="_blank"> Donate $10 a month - a little for a lot </a> </body> </html> |
Direct Link - Packages
https://tickets.yourvenue.org/TheatreManager/1/online?package=xx[&tmsource=yyyyyy]
The link above will take the patron directly to the package purchase window in the online sales.
Parameters:
- tmsource=yyyyyy (optional) where yyyyyy is a tracking code that is placed on any cart for tracking the source of the referral.
- package=xx - yhe "xx" represents the Package # from within Theatre Manager. This is a unique sequence number assigned to the package by Theatre Manager. To find the Package # for the Package:
- Click Setup >> System Tables >> Packages.
The Package List window will open.
For more information on the Package List window, click here.
- Click the button to populate the list.
The Package # column will be the first column in the list. Replace the "xx" in the link above with the appropriate package number to create a link to the package.
- Click Setup >> System Tables >> Packages.
Direct Link - Subscriptions
https://tickets.yourvenue.org/TheatreManager/1/login?subscription=xx[&tmsource=yyyyyy]
Parameters
- subscription=xx - the link above will take the patron directly to a Season Subscription. The "xx" represents the unique subscription number for that subscription package value as it is defined by Theatre Manager. To find the subscription number:
- Click Patron Sales >> Season Reservations >> Setup Season Packages.
- Click the button to populate the list.
- Location the subscription number for each package.
The Subscription number is in the far left column labeled Seq #. It can be used to replace the "xx" in the link above.
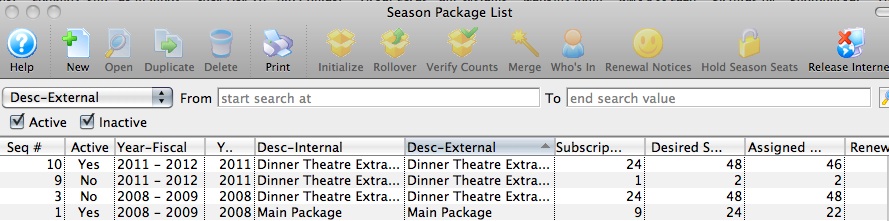
- tmsource=yyyyyy (optional) where yyyyyy is a tracking code that is placed on any cart for tracking the source of the referral.
Direct Link - Pass/GC Related
The links that follow are related to passes and gift certificates.
They are displayed on the tmpass.html web page
Direct Link to Pass Categories
Showing all Passes and Gift Certificates by Category
https://tickets.yourvenue.com/TheatreManager/1/login?membershiptypes[&category=xxxxxx][&tmsource=yyyyyy]
If no category is used, the above link will direct a patron to the Pass/Gift Certificate merchandise page and show all passes in all categories. The patron will see a list of all passes, like the HTML page below, from which they can pick.
A sample is shown at the bottom of the help page.
General Parameters
- category=xxxxxx (optional) where xxxxx is the code table value from the Gift Certificate Categories Code Table. You can repeat this parameter in the URL for each category you want to show.
- tmsource=yyyyyy (optional) where yyyyyy is a tracking code that is placed on any cart for tracking the source of the referral.
Showing selected Categories of Passes/Gift Certificates
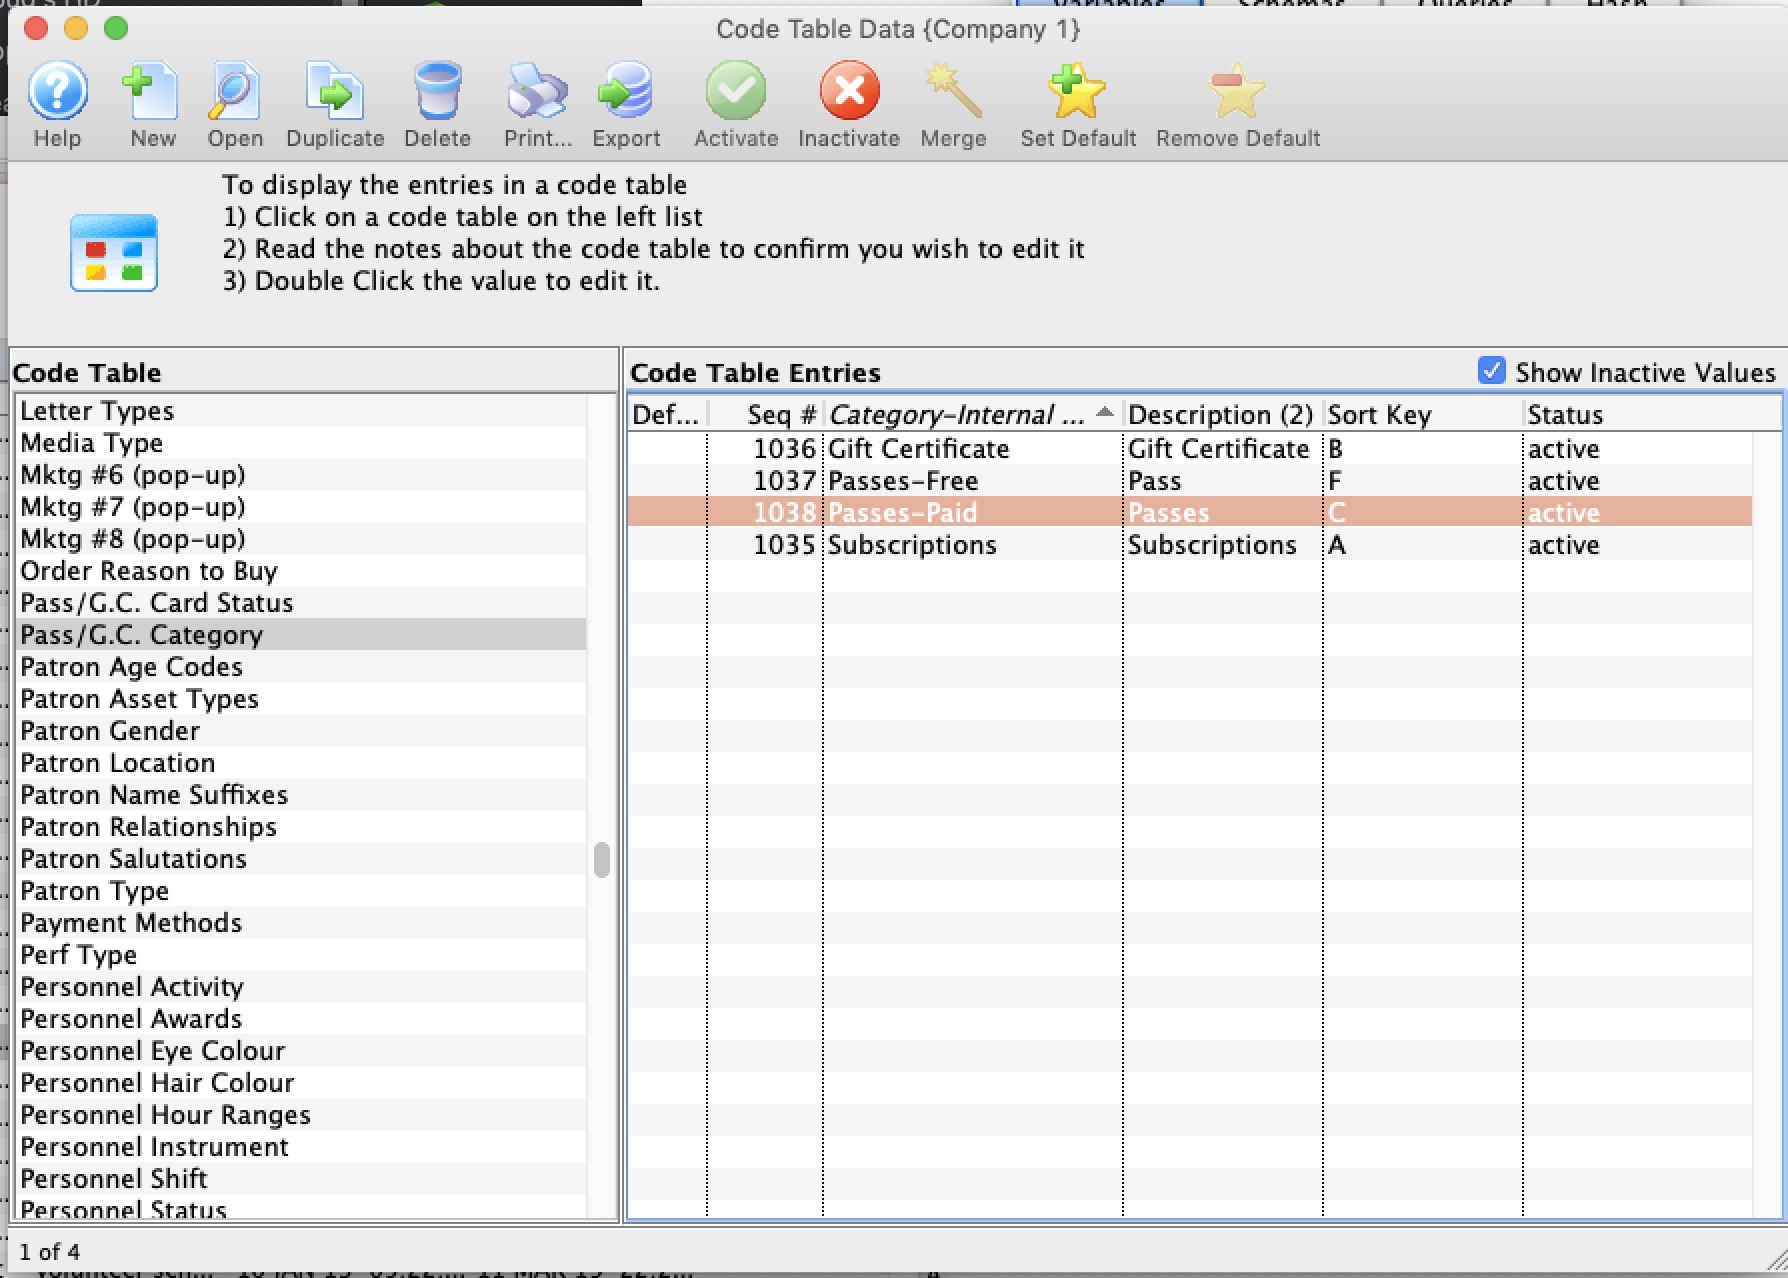
https://tickets.yourvenue.com/TheatreManager/1/login?membershiptypes&category=1035&category=1037[&tmsource=yyyyyy]
You can specify one or more categories in the URL and only those categories will be shown. In this case, the category numbers must be the same as the code table entry number in the Gift Certificate Categories Code Table shown to the right. Icons are entered on the Marketing Tab in Gift Certificate setup.
You might use this to show upcoming subscription passes for next year on a separate page, or gift certificates on a separate page.
You can also Link to specific pass if you wish.
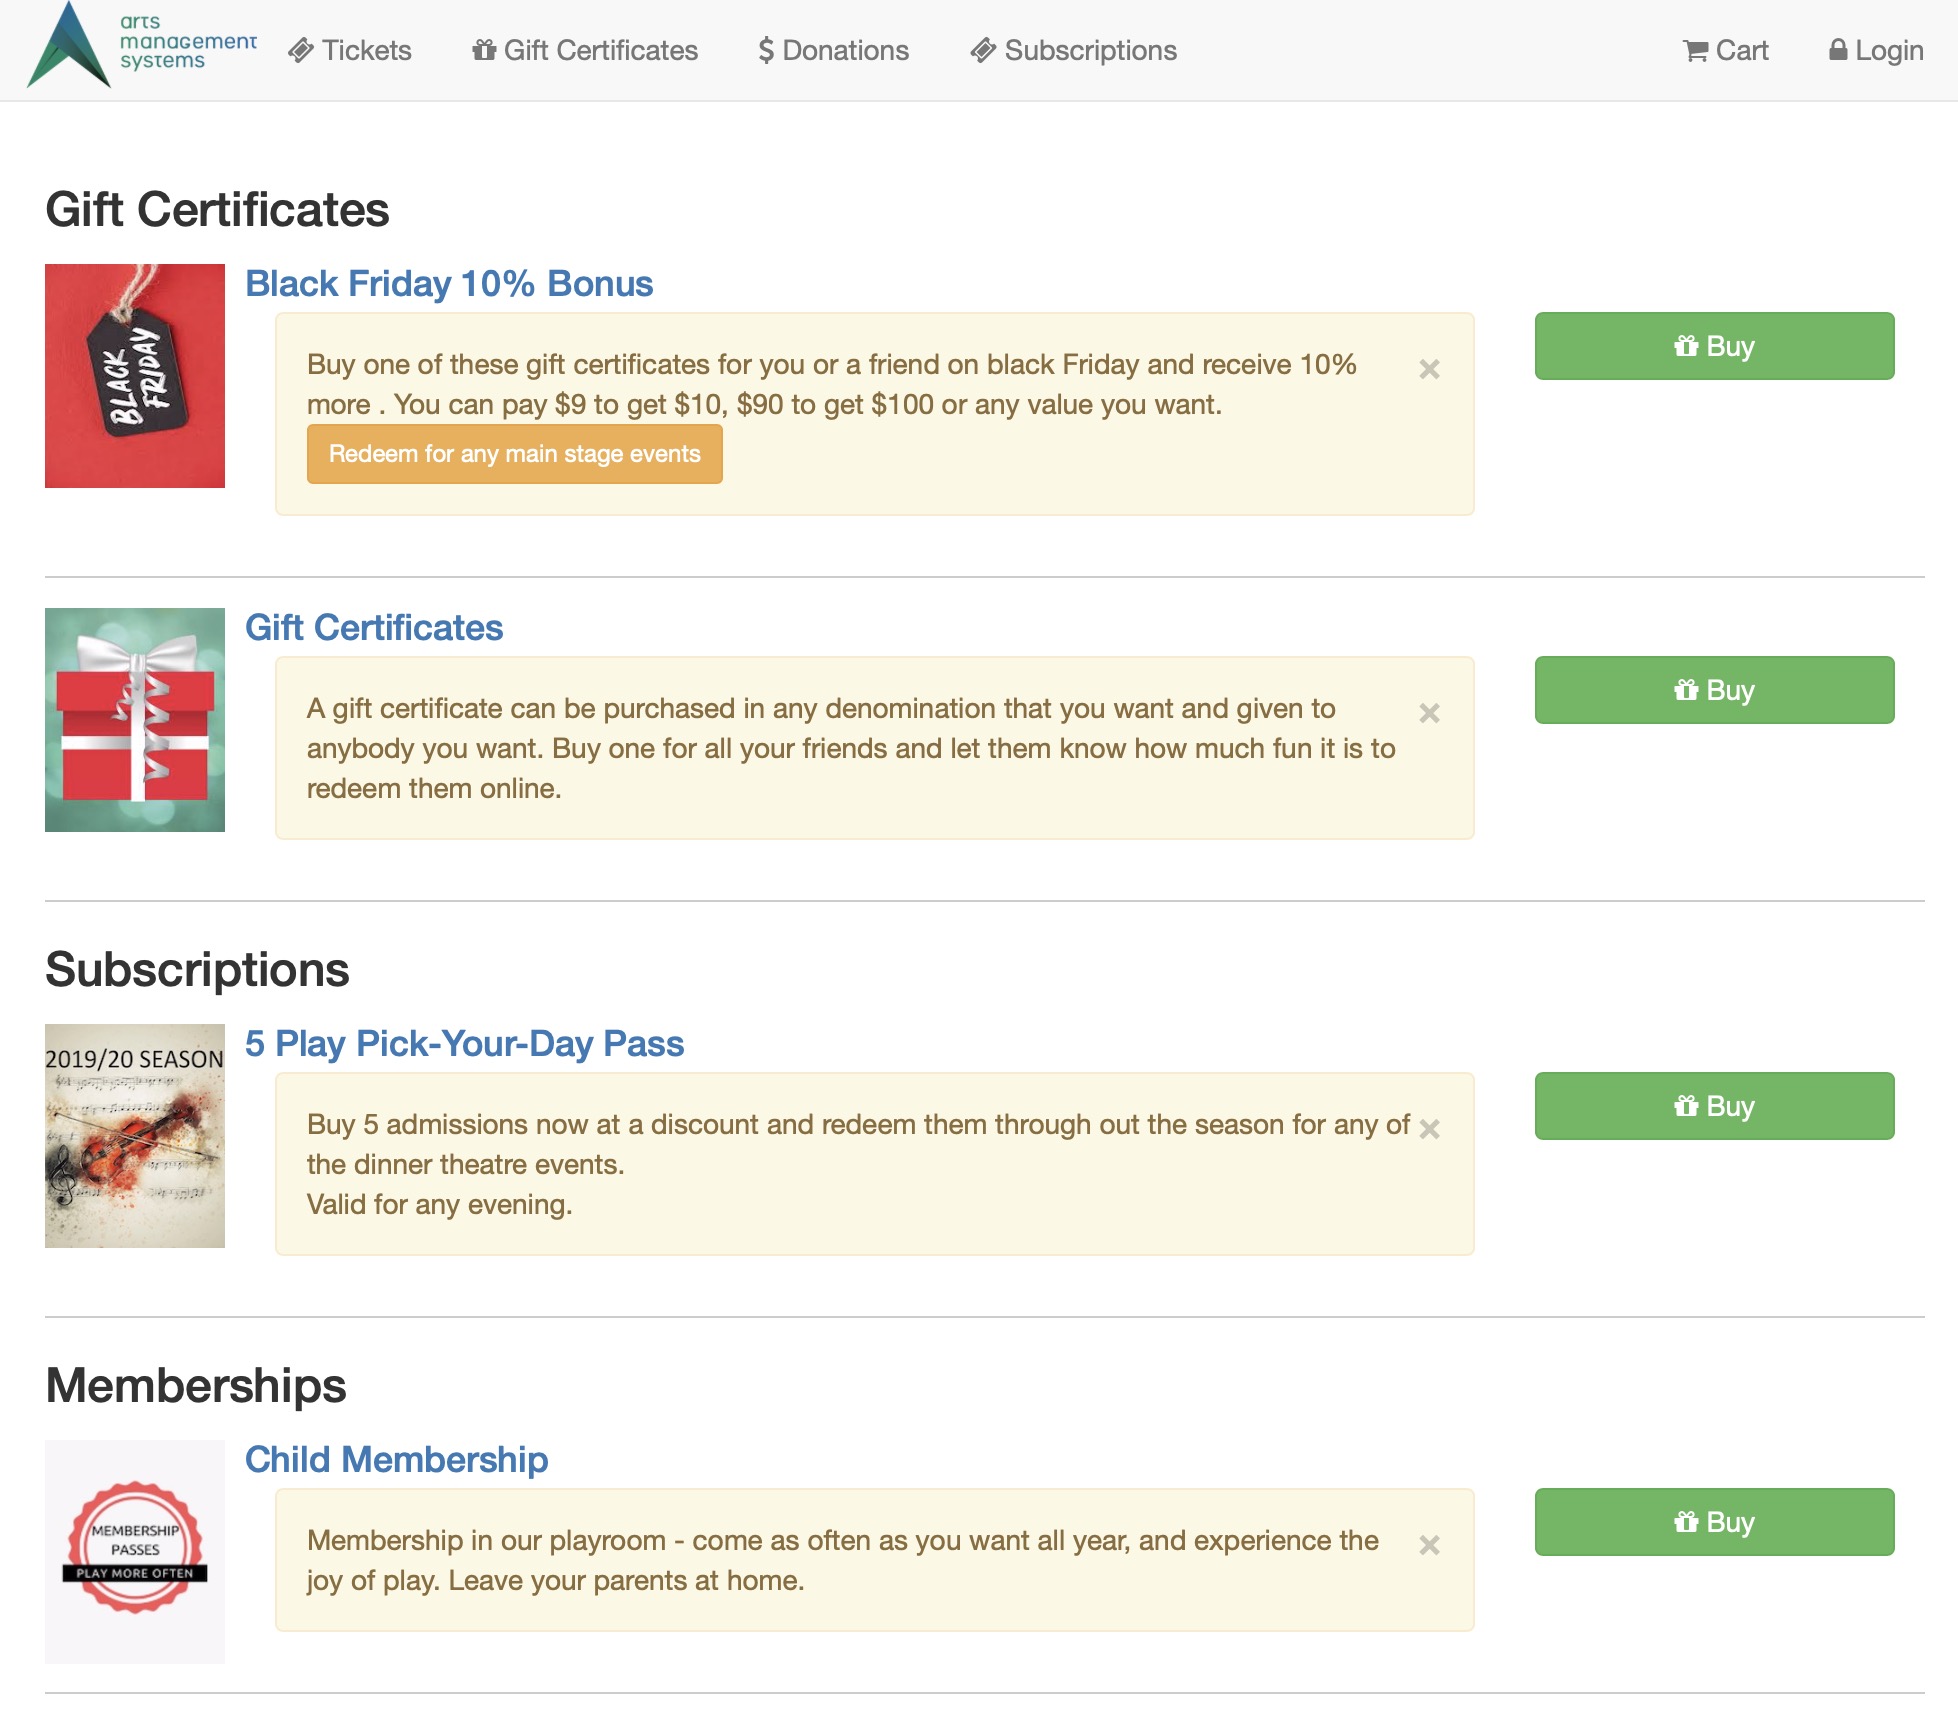
Direct Link to a Pass
https://tickets.artsman.com/TheatreManager/1/login?membershiptype=9[&tmsource=yyyyyy]
The above link will direct a patron to the specific pass or gift certificate, ready to buy it.
or
https://tickets.yourvenue.org/TheatreManager/1/login?pass=0[&tmsource=yyyyyy]
The above link will direct a patron to the pass/Gift Certificate/merchandise page. The patron can then use the drop down options to choose the type of Pass, Gift Certificate or Membership they wish to purchase.
You can also have a link to one (or more) groupings (categories) of passes/memberships.
Other Parameters
- tmsource=yyyyyy (optional) where yyyyyy is a tracking code that is placed on any cart for tracking the source of the referral.
Direct Link to get Gift Certificate Balance
Showing the current balance on a patron's gift certificates/passes
https://tickets.yourvenue.com/TheatreManager/1/login?btnPassRemainingValues[&tmsource=yyyyyy]
The above link will direct a patron to the pass/Gift Certificate page that shows the current balance on any passes that still have a balance that can be used. The patron will need to log in first, if they are not currently logged in.
Other Parameters
- tmsource=yyyyyy (optional) where yyyyyy is a tracking code that is placed on any cart for tracking the source of the referral.
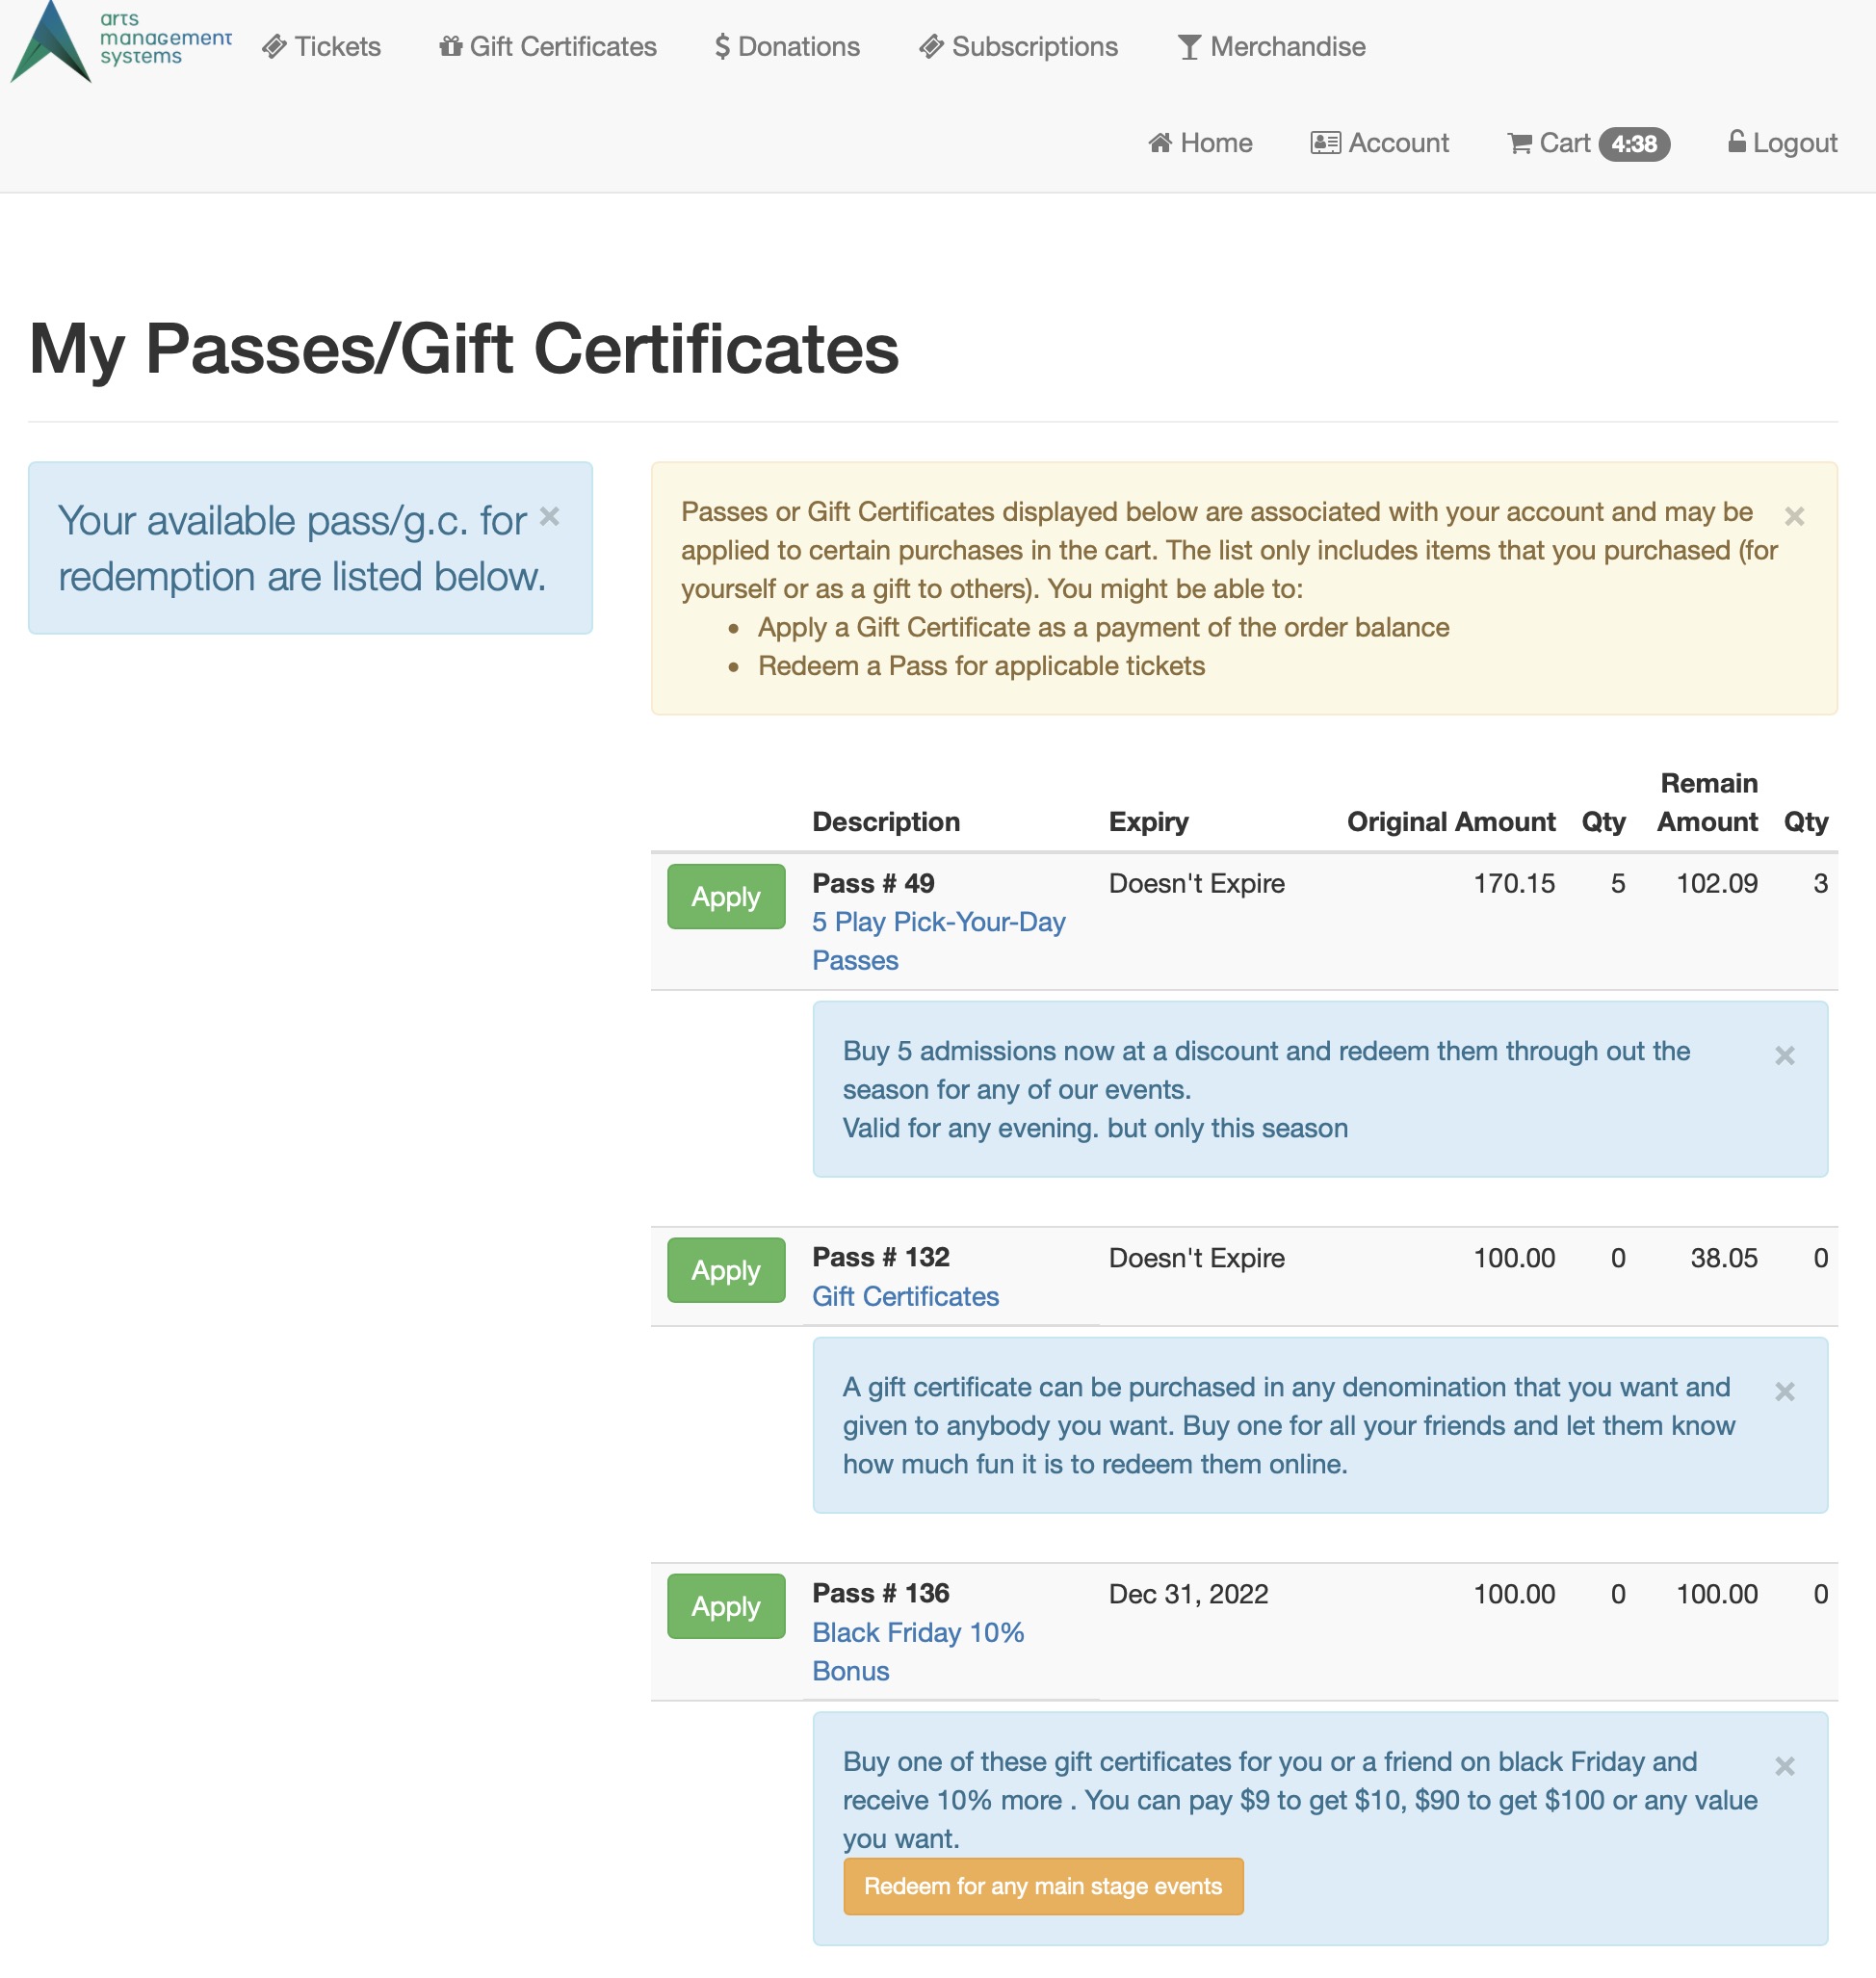
Direct Link - Inventory/Merchandise Related
Direct Link to Merchandise
https://tickets.yourvenue.org/TheatreManager/1/online?merchandise
Merchandise and Rentals are resources and found in the same location with Theatre Manager. If your organization offers both options online the ?merchandise link will display only those items where the Sales Method is set to For Sale.
For further definition of merchandise items you may wish to use &group=XX as an additional parameter to access resources based on their Resource Group. Each resource requires a Resource Group at the time of setup. To determine the value of XX you'll need to locate the Facility Resource Group number.
|
Merchandise are resources where the sales method is set to FOR SALE |
Facility Resource Group Sequence Number
- Click Setup >> System Tables >> Code Tables.
- Select Facility Resource Groups
- Locate the Facility Resource Group number in the Seq # column
The Facility Resource Group number is in the far left column labelled Seq #. It can be used to replace the "xx" in the example link above.
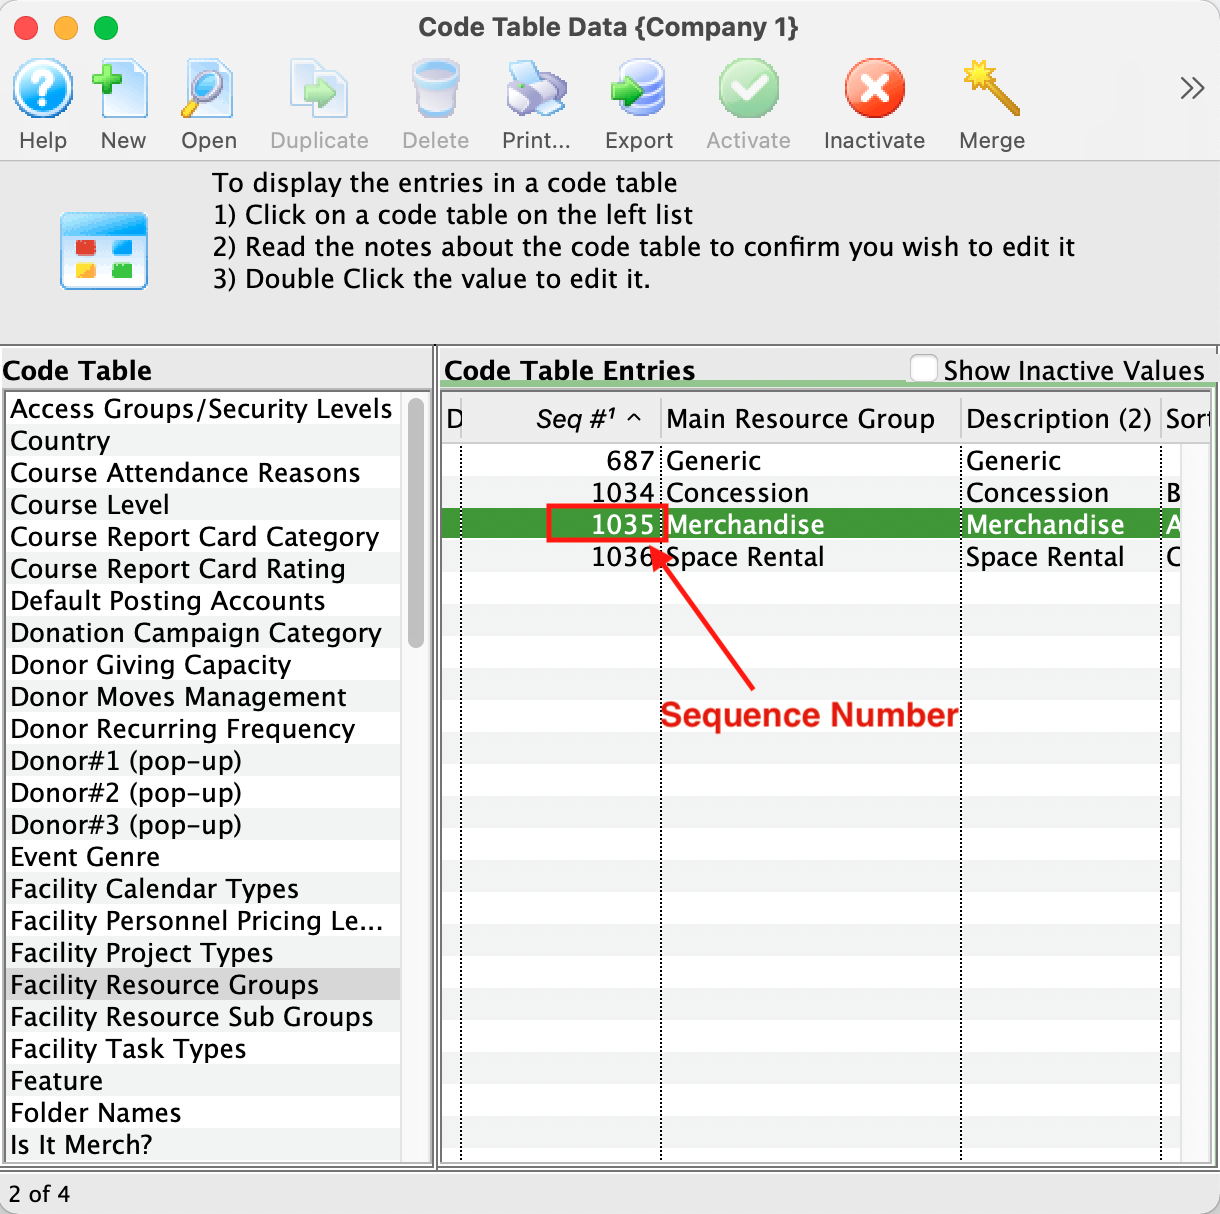
Direct Link to Rentals
https://tickets.yourvenue.org/TheatreManager/1/online?rentals
Rentals and Merchandise are resources found in the same location with Theatre Manager. If your organization offers both options online the ?rental link will display only those items where the Sales Method is set to Rental.
For further definition of rental items you may wish to use &group=XX as an additional parameter to access resources based on their Resource Group. Each resource requires a Resource Group at the time of setup. To determine the value of XX you'll need to locate the Facility Resource Group number.
|
Merchandise are resources where the sales method is set to RENTAL |
Facility Resource Group Sequence Number
- Click Setup >> System Tables >> Code Tables.
- Select Facility Resource Groups
- Locate the Facility Resource Group number in the Seq # column
The Facility Resource Group number is in the far left column labelled Seq #. It can be used to replace the "xx" in the example link above.
Direct Link to Resources
https://tickets.yourvenue.org/TheatreManager/1/online?resources
Resources can consist of a combination of Resources, Rentals and Merchandise. All of these options are setup in the same location with Theatre Manager. By using the ?resources link a full list of all Rentals and For Sale items, as defined in the Pricing & Inventory tab of the resource setup, will appear online.
For further definition of resource items you may wish to use &group=XX as an additional parameter to access resources based on their Resource Group. Each resource requires a Resource Group at the time of setup. To determine the value of XX you'll need to locate the Facility Resource Group number.
|
Merchandise are resources where the sales method is either RENTAL or FOR SALE |
Facility Resource Group Sequence Number
- Click Setup >> System Tables >> Code Tables.
- Select Facility Resource Groups
- Locate the Facility Resource Group number in the Seq # column
The Facility Resource Group number is in the far left column labelled Seq #. It can be used to replace the "xx" in the example link above.
Direct Link to specific resource
https://tickets.yourvenue.org/TheatreManager/1/login?resource=xx&qty=qq[&tmsource=yyyyyy]
The link above will go directly to the resource or inventory item named by resource (by providing the resource/inventory item #).
|
Each of the items in the link (except resource) are optional |
|
You can also use this to quickly select a number of merchandise or resources for purchase |
- resource=xx xx=the unique resource or inventory number. This parameter is mandatory
- qty=qq causes the system to default for 'qq' resources or inventory items to purchase. If not specified, this will default to 1.
- tmsource=yyyyyy (optional) where yyyyyy is a tracking code that is placed on any cart for tracking the source of the referral.
You can put any combination of the parameters together that you wish. if the system cannot find the resource based on your combination of selections, you'll be told.
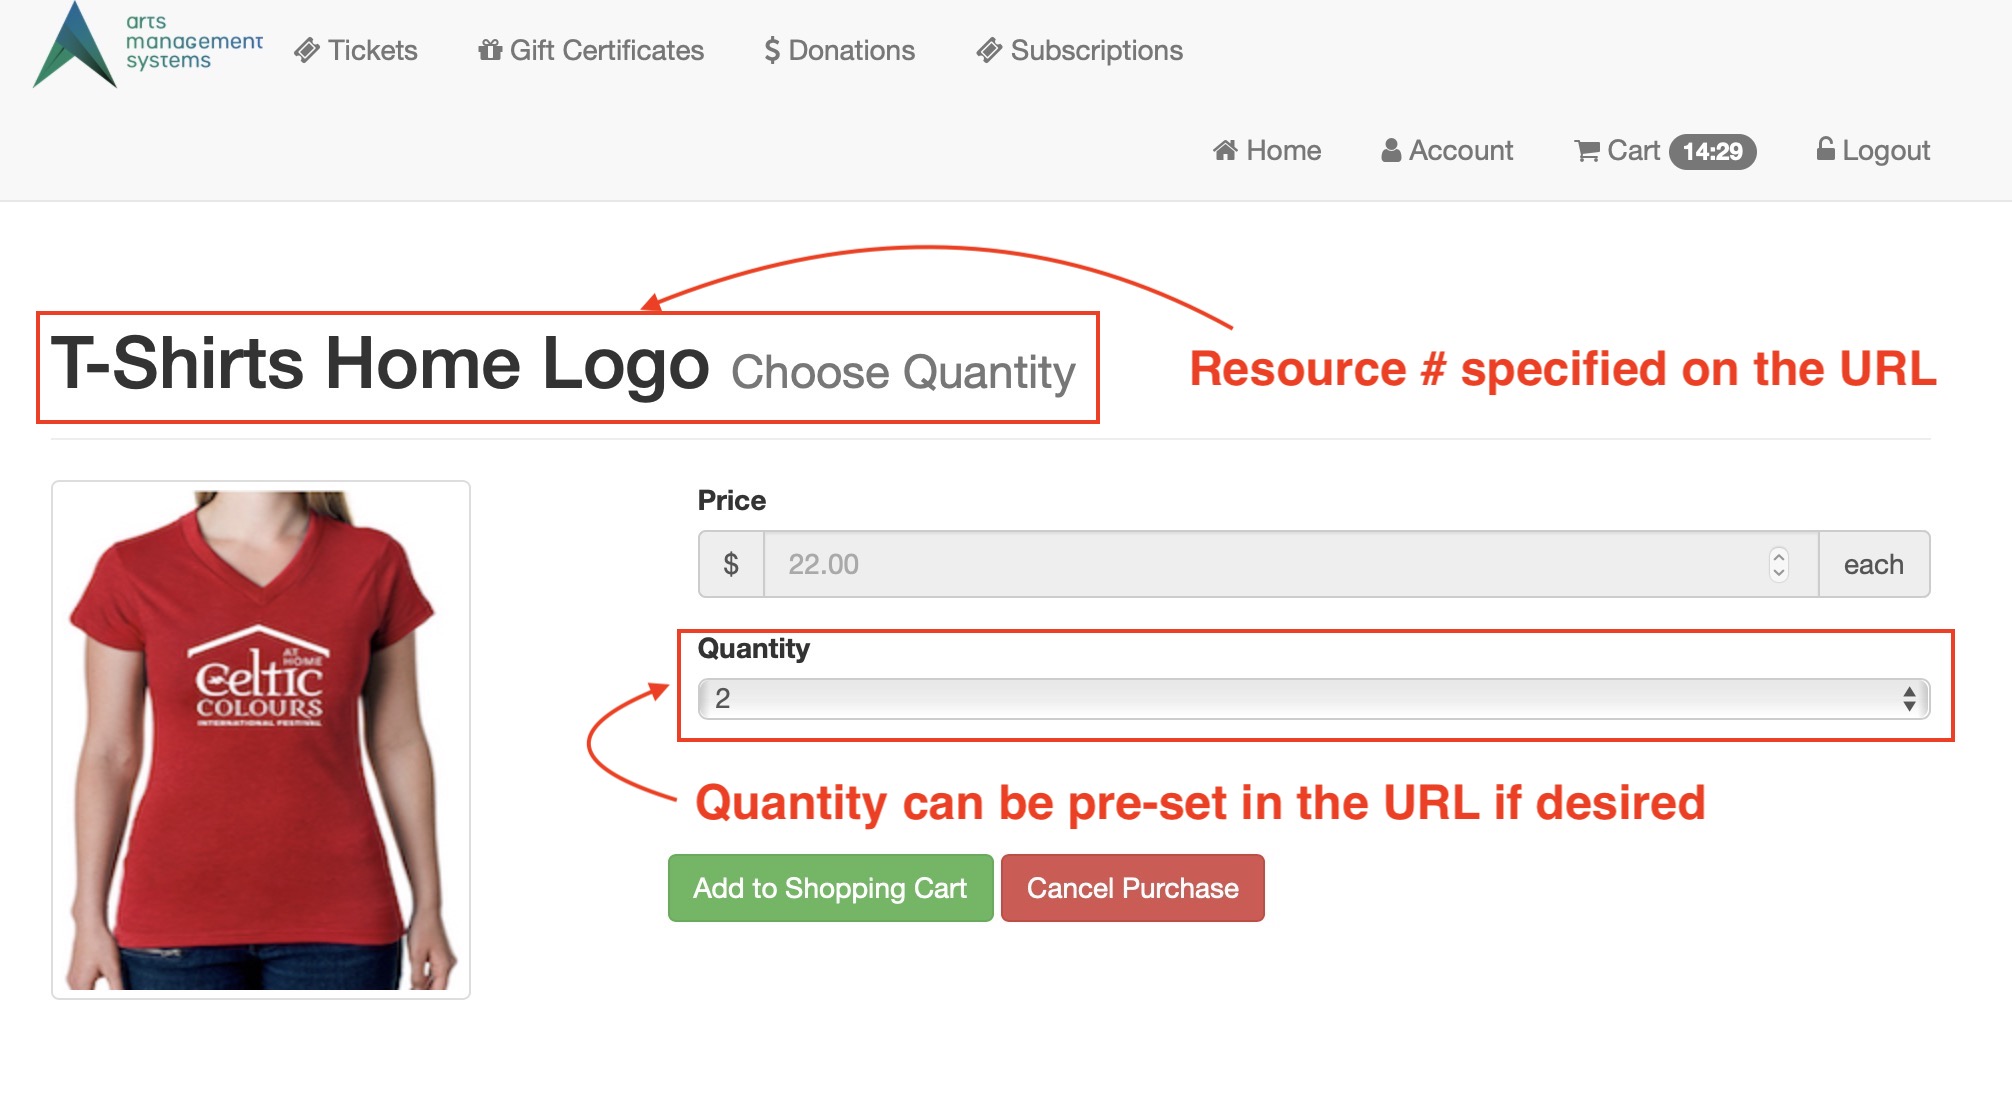
Direct Link specific resource (quick add)
https://tickets.yourvenue.org/TheatreManager/1/login?resourcequick=xx&qty=qq[&tmsource=yyyyyy]
The link above will ADD the resource or inventory item named by resource (by providing in the resource/inventory item).
|
Each of the items in the link (except resourcequick) are optional |
|
You can also use this to quickly select a number of merchandise or resources for purchase |
- resourcequick=xx xx=the unique resource or inventory number. This parameter is mandatory
- qty=qq causes the system to default for 'qq' resources or inventory items to purchase. If not specified, this will default to 1.
- tmsource=yyyyyy (optional) where yyyyyy is a tracking code that is placed on any cart for tracking the source of the referral.
You can put any combination of the parameters together that you wish. if the system cannot find the resource based on your combination of selections, you'll be told.
|
The image below shows what a resources if you were adding it normally. resourecequick bypasses this window and adds the item directly to the cart - as if it had filled in the fields that you see on the image. |
Direct Link to Coupon & Pre-Access Codes
https://tickets.yourvenue.org/TheatreManager/1/online?presale&code=xxx[&redirect=zzzz][&tmsource=yyyyyy]
Coupon
https://tickets.yourvenue.org/TheatreManager/1/online?coupon&code=xxx[&tmsource=yyyyyy]
Parameters:
- code=xxx - where xxx is the short name of the coupon code. For example: coupon&code=FIVEOFFTUESDAY
- redirect=zzzz (optional) can be used to direct the user to a specific web page after the coupon is accepted. The default is the cart page but you can substitute btnGetEventList for zzzzz to send the user to the event list if its a pre-access code.
Example of Pre-Access Codes added to a cart and displays all valid events for the pre-accesshttps://tickets.yourvenue.org/TheatreManager/1/online?presale&code=xxx&redirect=btnGetEventList
There are two aliases for 'redirect' that can be used interchangeably:- next -or-
- F_HTML_REDIRECT_COUPON
- tmsource=yyyyyy (optional) where yyyyyy is a tracking code that is placed on any cart for tracking the source of the referral.
The above links will auto add a pre-access or coupon code for a patron.
Direct Link to Venue
https://tickets.yourvenue.org/TheatreManager/1/login?venue=xx[&tmsource=yyyyyy]
Purchasing Tickets to a Venue
The above link can be used when a venue has different type of events and a link is required to directly sell any performance in that venue.
Parameters:
- venue=xx - the 'venue' value is defined by Theatre Manager as the unique venue map number. To find the venue map number:
- Click Setup >> Venue Maps.
- Locate the far left column is labeled Map #:
This is the unique sequence number representing the map. It can be used to replace the "xx" in the link above.
- tmsource=yyyyyy (optional) where yyyyyy is a tracking code that is placed on any cart for tracking the source of the referral.
Direct Link to pay for Order
https://tickets.yourvenue.org/TheatreManager/1/login?order[=xxx][&tmsource=yyyyyy]
Selecting an ordr to pay online
The above link can be used when you wish to send an email to a patron to have them pay for the order online.
Parameters:
- order - indicates that the web page should open at the unpaid order selection window online
if you add the order number using order=xxx then the specific order will be automatically added to the cart. It means you can put a link in an email merge to pay for a specific order if you want.
This will land the patron on the Order Balance web page (after they log in) so that they can select the order to pay online.
Direct link to Calendar
https://tickets.yourvenue.org/TheatreManager/1/calendars/upcoming_events?view=month&start=2018-06-01
The Calendar displays upcoming Performances and Classes available for purchase. Patrons can choose to download an existing copy of the calendar as it appears today in an ICS file format or subscribe to the calendar which will allow for automatic updates to their iCal, Outlook or Google calendar program.
Optional Parameters
- view
- view=month - show items in a monthly calendar view as per the example below - this is the default
- view=week - show items in weekly calendar format
- view=list - show items in a list view
- indicate the start date for the calendar in yyyy-mm-dd format
Direct Link to Mail Lists
- You can direct people to a sign up web site that only requires name, email address and clicking on some mail lists that describe how your venue will contact them. This always uses a 'double-opt-in' approach for data accuracy and prevent spamming.
- You can also have people log into the web site and select mail lists on the patron account window. These mail lists may optionally be set for double opt in
Direct Link to mail list sign up page needing only Name and email
https://tickets.yourvenue.org/TheatreManager/1/login?maillistquick[&tmsource=yyyyyy]
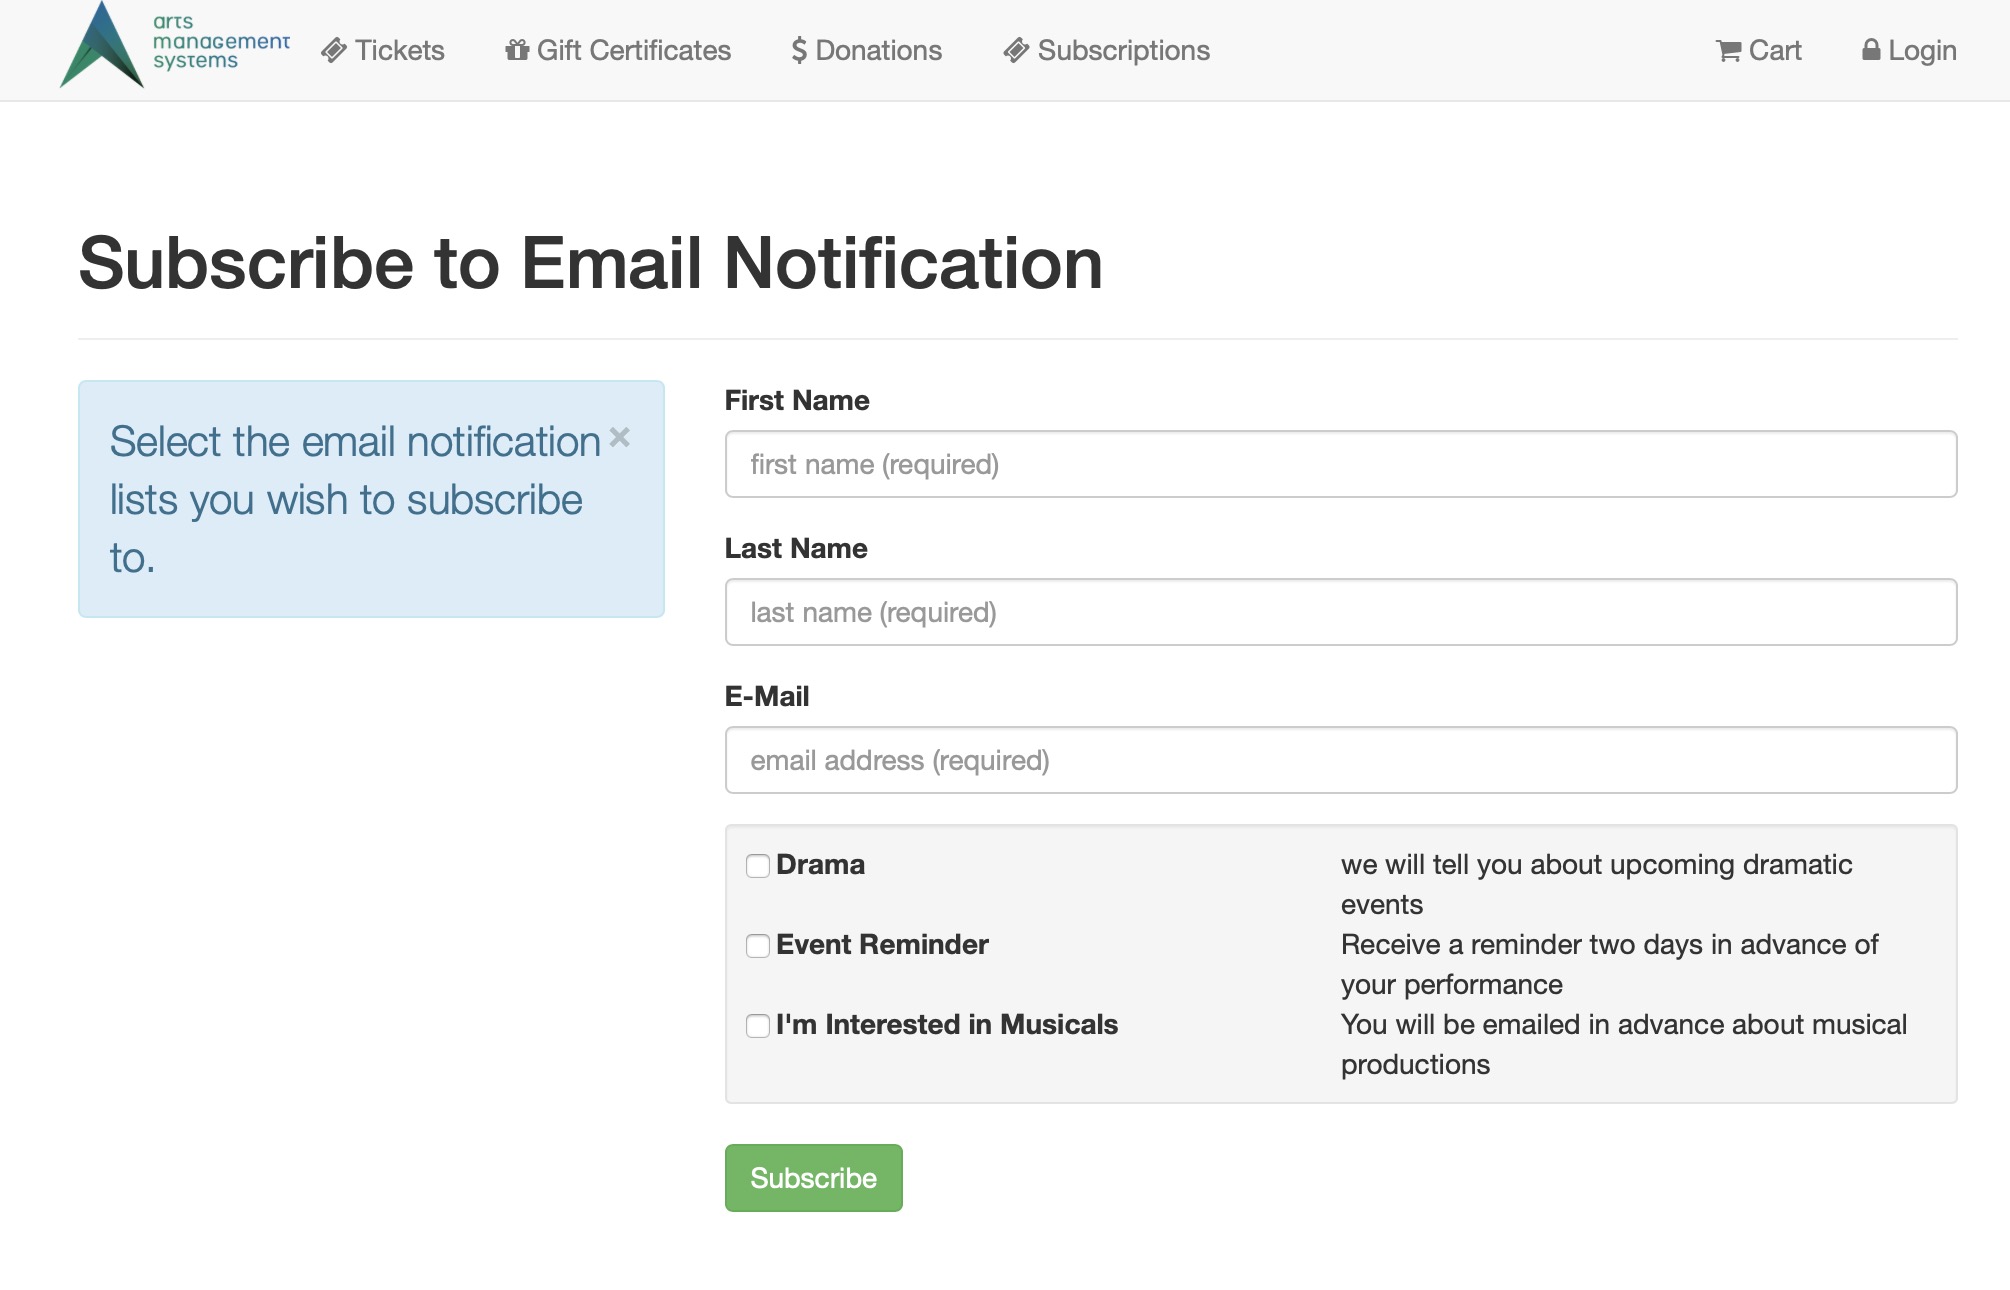 This link will allow a patron to subscribe to the mail lists indicated by simply adding their first name, last name and email address.
- If the patron's email address does not exist, Theatre Manager will create a limited profile patron in the Theatre Manager database.
- If the patron's email address already exists, Theatre Manager adds the patron to the mail list
- In both cases, a double opt in email is sent to the patron's email address asking them to confirm they want to be added to the mail list. If they fail to respond within the time limit on company preferences, they will be removed from the mail list automatically
Setup Requirements for adding to a mail list Anonymously
The Mail Lists that are visible in this web page are those with the following characteristics:
- allow subscribe/unsubscribe on the web -and-
- patron does not have to be logged in to subscribe
- External Name is a short name that the user can click on the web page such as 'Tell me about Auditions'
- Description is a longer description that can explain to the patron what the purpose of the mail list using 'marketing friendly' words like 'we will keep you informed about upcoming auditions for your children about a month before they occur'
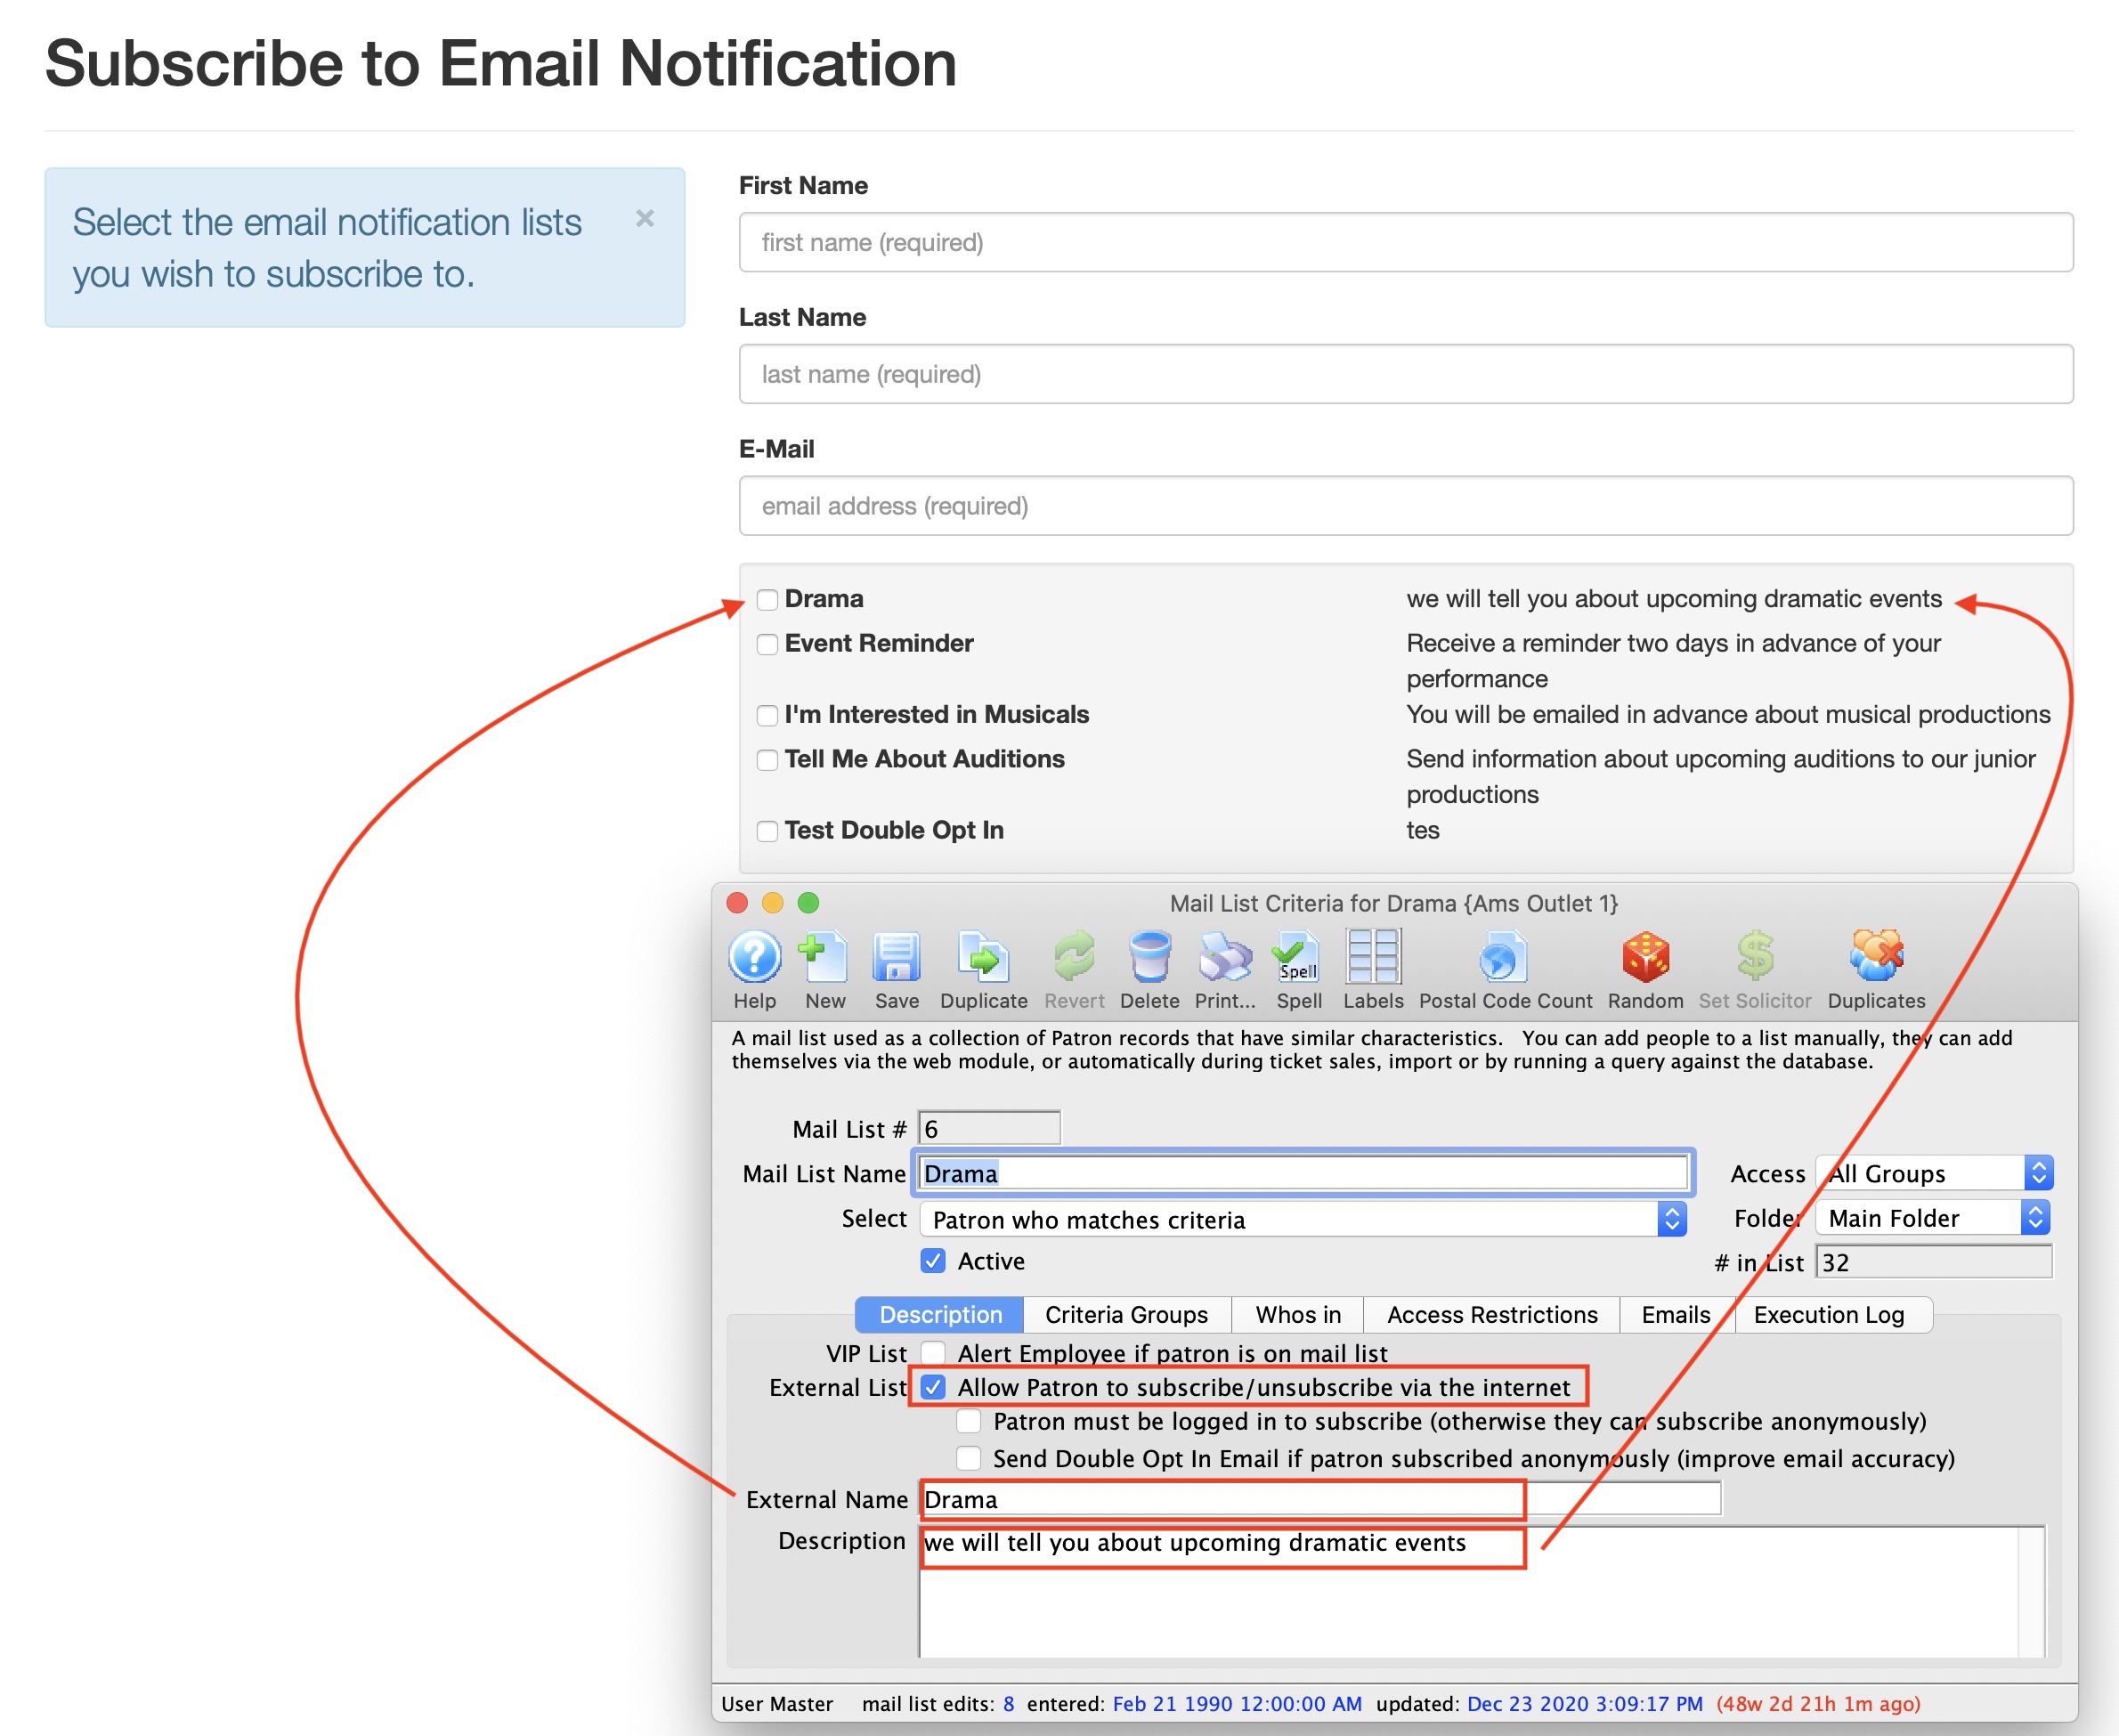
Direct Link for patrons to manage their own email lists after logging in
https://tickets.yourvenue.org/TheatreManager/1/login?maillist[&tmsource=yyyyyy]
You can use this link to allow people to see which mail lists they belong to. Since they have to log in, double opt in is not applicable, but can be used.
This will take the patron directly to the Mail List page within the online sales. Patrons can choose to subscribe and unsubscribe to Mail Lists after they have logged into the online sales.
Setup Requirements for adding to a mail list Anonymously
The Mail Lists that are visible in this web page are those with the following characteristics:
- allow subscribe/unsubscribe on the web -and-
- patron must be logged in to subscribe
- External Name is a short name that the user can click on the web page such as 'Tell me about Auditions'
- Description is a longer description that can explain to the patron what the purpose of the mail list using 'marketing friendly' words like 'we will keep you informed about upcoming auditions for your children about a month before they occur'
Accessing Web Page Images
https://tickets.artsman.com/TheatreManager/1/image?event=60
You can access the images on the web site for events or venues. They are done in a heirarchy, so that if you ask for the event image and it is not available, you'll get the venue image. If that is not available, you'll get the outlet image.
- Images for an event have ?event=xx as a parameter - https://tickets.artsman.com/TheatreManager/1/image?event=60
- Images for a venue have ?venue=xx as a parameter - https://tickets.artsman.com/TheatreManager/1/image?venue=48
Branding web sales to make it look like the main web site
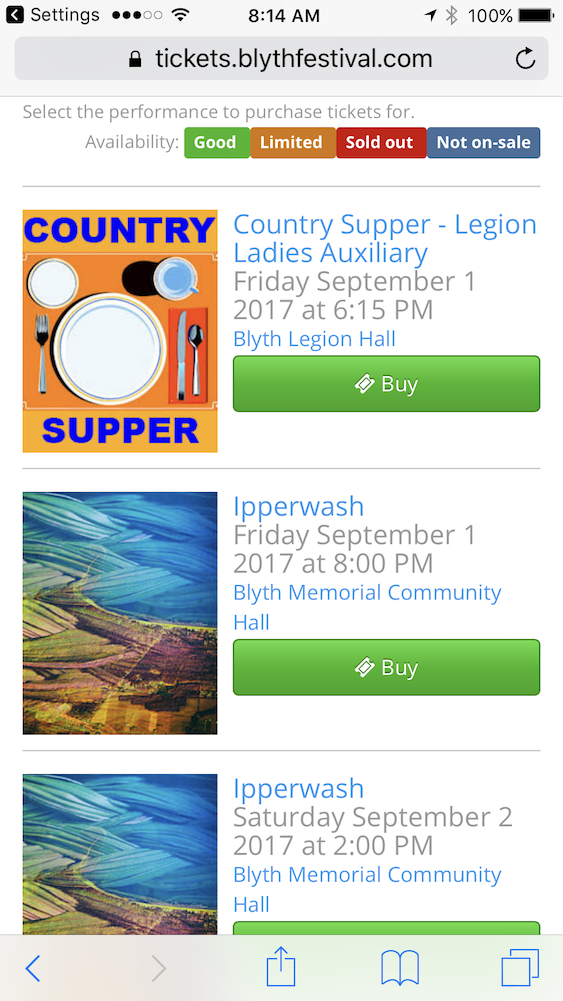 Theatre Manager comes with a set of web pages that can be dropped in place so you can have web sales running in very short order. These web pages provide all the functionality of the web sales component of Theatre Manager including ticket sales, online donations, gift certificate sales, managing the shopping cart, and much more.
While these web pages contain all the functionality, many venues like to change the look of the web pages to 'brand' the pages in their own image. To brand a site, the recommended steps are below. We recommend making a minimum of changes to the pages as it means that you can upgrade pages when we add future functionality quite easily. This is possible because we have tried to isolate the required changes to a few files at most. In practice, this works out very well.
The general approach to branding the web site is:
- Use the sample pages and review the sales process. Also see examples of what others have done to show possibilities.
- Create a custom page design as the first step. Then use the standard pages as they are before making deeper changes.
- There are notes within Theatre Manager that get merged into the web pages. These describe search options, sales text, notes, maps etc that display on the web. It allows control of a number of changes to remain in the hands of the end user (a bit like a CMS).
- Only as a final step, adjust the text content on a few important web pages. Likely, there should only be changes required for mailing, box office hours and a couple of other pages.
If you do want to change a page, copy that page into the same location in the WebPagesEN folder and make the changes to the COPY. Theatre Manager will reference the WebPagesEN folder first when looking for a web page then the default pages from within the TMServer if it finds none.
Try to minimize changes to pages as it affects ability to upgrade pages later on.
Before anything can be changed, you need to know where the web pages are. They are always installed in the WebPages folder of the Tm Web server that is set up when Theatre Manager is first installed. If you need remote access to this folder, we suggest using a GIT checkin/checkout process to edit pages locally and push the pages to your web server..
Types of Pages
The Web Sales Modules is comprised of a number of different pages, such as, the content pages, login page, shopping cart and checkout pages to name a few. To change the pages to be specific to your venue, your web developer/designer will need to edit the appropriate pages.
The links on the side navigation beginning here, will guide you through the pages in the Web Sales Module and give you detailed information on how each web page is used by module.
You can alter the source code of the Web Sales pages to suit your needs. However, if you do, Arts Management Systems is not responsible for supporting or debugging errors that may occur.
|
Please ensure you have a backup of the web pages prior to make changes. |
Throughout this section of the help, you will see
|
Programmer's Note: These notes provide the web developer/designer with further information on how to customize the web pages. |
|
Programmer's Note: Remember that changing the name of any of the html files that come with the Web Sales Module will require you to check that any pages that link to the new renamed page has been revised to accomodate for that change. Otherwise you will have broken links or errors on your pages |
Adjusting Content on Important Web Pages
The other caveats:
- Do not change the names of any field within a <form> tag or an <input> tag
- Do not adjust any calculation between a <field> and </field> tag without consulting with an Arts Management Systems support person first. These calculations and field names are items merged back into a page from the database before it is sent to the user and in effect, are the guts of the web process
Other than those general rules, open any page with your favorite page editor and make changes as you like. The pages that we find venues change most often are:
- TMError.txt - to alter some of the error message text for some error conditions
- tmTemplates/tmContact.html - to adjust any text around how to contact the venue
- tmTemplates/tmnavButtons.html - to adjust which buttons are acceptable for the venue at the top of the page
- TMdonation.html - to add comments about online giving
- tmScripts/themeCDN.html - to set the bootstrap theme for the web pages with a CDN backing it up
Changing Page Design
Editing Bootstrap Themes
|
The fastest and best way to completely alter the look of the web pages is to change the theme using a customization tool like Bootstrap Live Customizer.
This can be done in minutes |
Alternatively the custom.css file can be altered to define individual element within the pages.
Location of Web Pages for ticketing site
The web pages for the ticketing site:
- are located in a folder on the Web Listener computer (for those clients who self host) -or-
- are located in a git repository (for clients using Artsman Cloud Hosting).
The web page file structure consists of a WebPagesEN folder containing only those pages previously customized. A full set of the default pages are can be download from
https://gitlab.artsman.com/_public/tmresponsivewebpages.
When making edits to existing pages the latest default page should be downloaded and copied to the corresponding page within the local folder.
Updating the Logo
The logo at the top of the ticketing site in the navigation bar is a company logo. The quickest way to update the image would be to create a tmCompanyLogo.jpg file and place it in the /WebPagesEN/tmGifs folder. This will replace the default image.
Alternatively an image can be added to the /WebPagesEN/tmGifs folder and the tmnavButtons.html page (located in the /WebPagesEN/TMtemplages folder) can be updated with the image name.
Additional Edits
Other commonly edited web pages are:
- tmEventAdDefault.html - the ad at the bottom of the print at home ticket
- tmEventBannerDefault.html - the banner at the top of the print at home ticket
- tmContactHours.html - to include the hours that the box office is typically open
- tmnavButtons.html - add or remove buttons in the navigation bar to reflect the kind of items you sell online
- tmSocialMedia.html - to provide the complete URL's of your venue's social media links
- favicon.ico - to provide a customized icon for your venue in the browser URL bar.
Removing Crimson Navigation Buttons
In the default stylePages.css, the buttons within the online sales will appear red when using an Internet Explorer browser. For some clients, this works with their default pages. Others would prefer not to have the buttons appear in red. Please see the steps below on how to alter the buttons.
- On the Apache machine navigate to the /WebPagesXX/tmGifs folder.
- Open the styleButtons.css page using an html editing tool.
- Locate the following line:
filter:progid:DXiMageTransform.microsoft.Gradient(GradientType=0,StartColorStr='#ff800000',EndColorStr='#ff333333');
- Add a /* before the line.
- Add a */ after the line but before the } symbol.
- Repeat the above two steps for all four filter lines within the styleButtons.css file.
- Save the changes.
- Clear the cache on the web listener to reflect the change.
GitHub Desktop
GitHub Desktop is one of many third party tools that can be used for accessing web pages hosted on the Artsman Cloud in a git repository. Git is a distributed version-control system. It's great at tracking who made changes to what and when.
To setup access to your specific company web pages via Git, email support@artsman.com with the full name of the employee who will be allowed to make changes to your pages, and their company email address. For security and tracking purposes, only employee specific email addresses are accepted, like "johnsmith@example.com".
To use GitHub Desktop simply download and install the program. Clone the git repository pages to your computer for editing locally. After edits are made Commit and Push to the master branch of the repository directly through GitHub Desktop.
|
Only previously customized web pages will appear in the Artsman Cloud git repository for your organization. If the page you wish to edit does not appear on your local machine it may not have previously been edited. You'll need to download the default responsive pages and move that desired page to the corresponding folder on your local machine before making edits. Your repository should only contain customized web pages.
Remember to download the latest responsive pages each time before you begin making edits. |
Inital Setup
- Copy the Repository URL
- Clone the repository to local machine
Using GitHub Desktop
- Pulling recent changes
- Committing Changes
- Pushing Changes
Copy GitLab Repository URL
The GitLab Repository URL is needed when cloning the repository locally. The steps below should only need to be done once per repository during the initial setup.
Copy GitLab Repository URL
- In a browser navigate to https://gitlab.artsman.com
- Select the Standard tab
- Enter your Email Address and Password
Login information is requested through the Artsman Support team. If you have not previously been provided access please email the support team. When access is granted an email will be sent directly from GitLab to your email with steps for setting a password and logging in.
- Click the repository you wish to clone
- Click the blue Clone button
- Click the copy button next to the Clone with HTTPS URL

This will copy the URL for the repository to your computers clipboard making it ready to paste into GitHub Desktop for cloning.
Cloning Repository to GitHub Desktop
Cloning a Repository to GitHub Desktop
- Open GitHub Desktop
- Click the arrow next to Current Repository to expand the menu
- Click the Add button
- Select Clone Repository...
- Select the URL tab at the top of the window
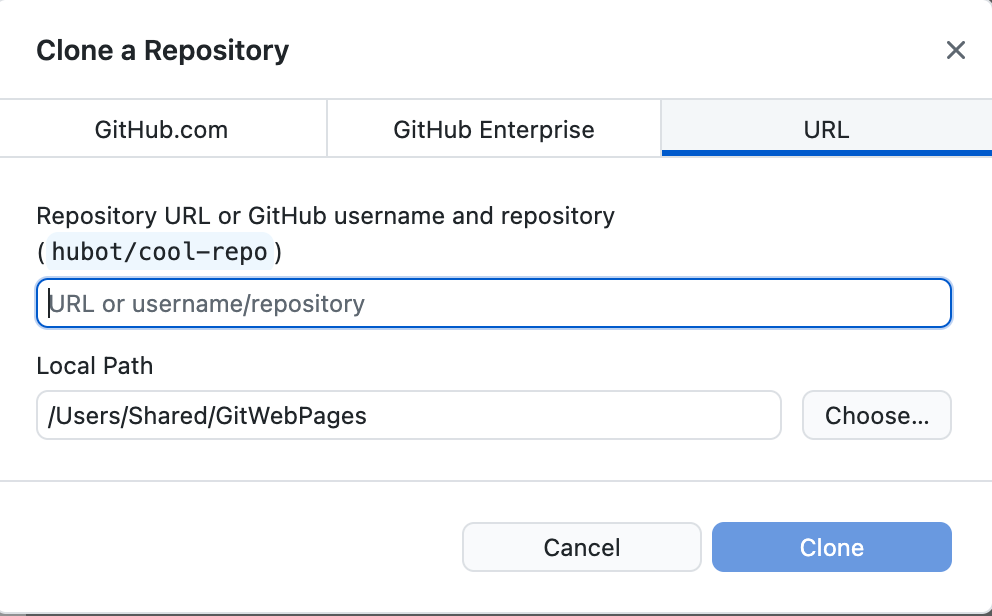
- Enter the URL copied from the git repository
- Select the desired location to save the pages
- Click the Clone button
You may be prompted to enter the your login credentials for the GitLab repository.
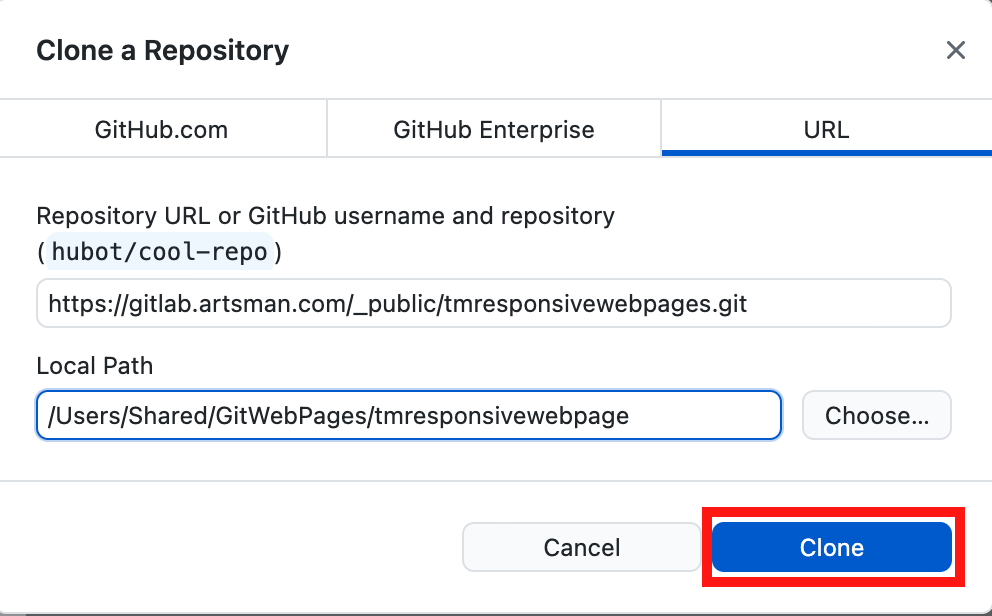
The web pages are now copied to your local computer for editing. When editing new pages always make sure to use the latest version of the responsive pages to ensure the page you are working on contains all the latest features.
Pull changes from GitHub Desktop
It's important to always start any web page editing by Pulling changes from the existing repository. This ensures any changes made that are not currently in your local repository are pulled to your machine before you begin making edits.
Missing the step of Pulling means you may need to Rebase before completing the process of adding your changes to the repository. Rebasing a repository with conflicting changes requires a deeper understanding of git. For further information please see GitHub online documentation for assistance.
Pulling Changes from GitHub Desktop
- Open GitHub Desktop
GitHub Desktop is great at picking up when new pages are available in a repository. Changes are often detected within moments of opening the program and notifications can be seen in the main display.
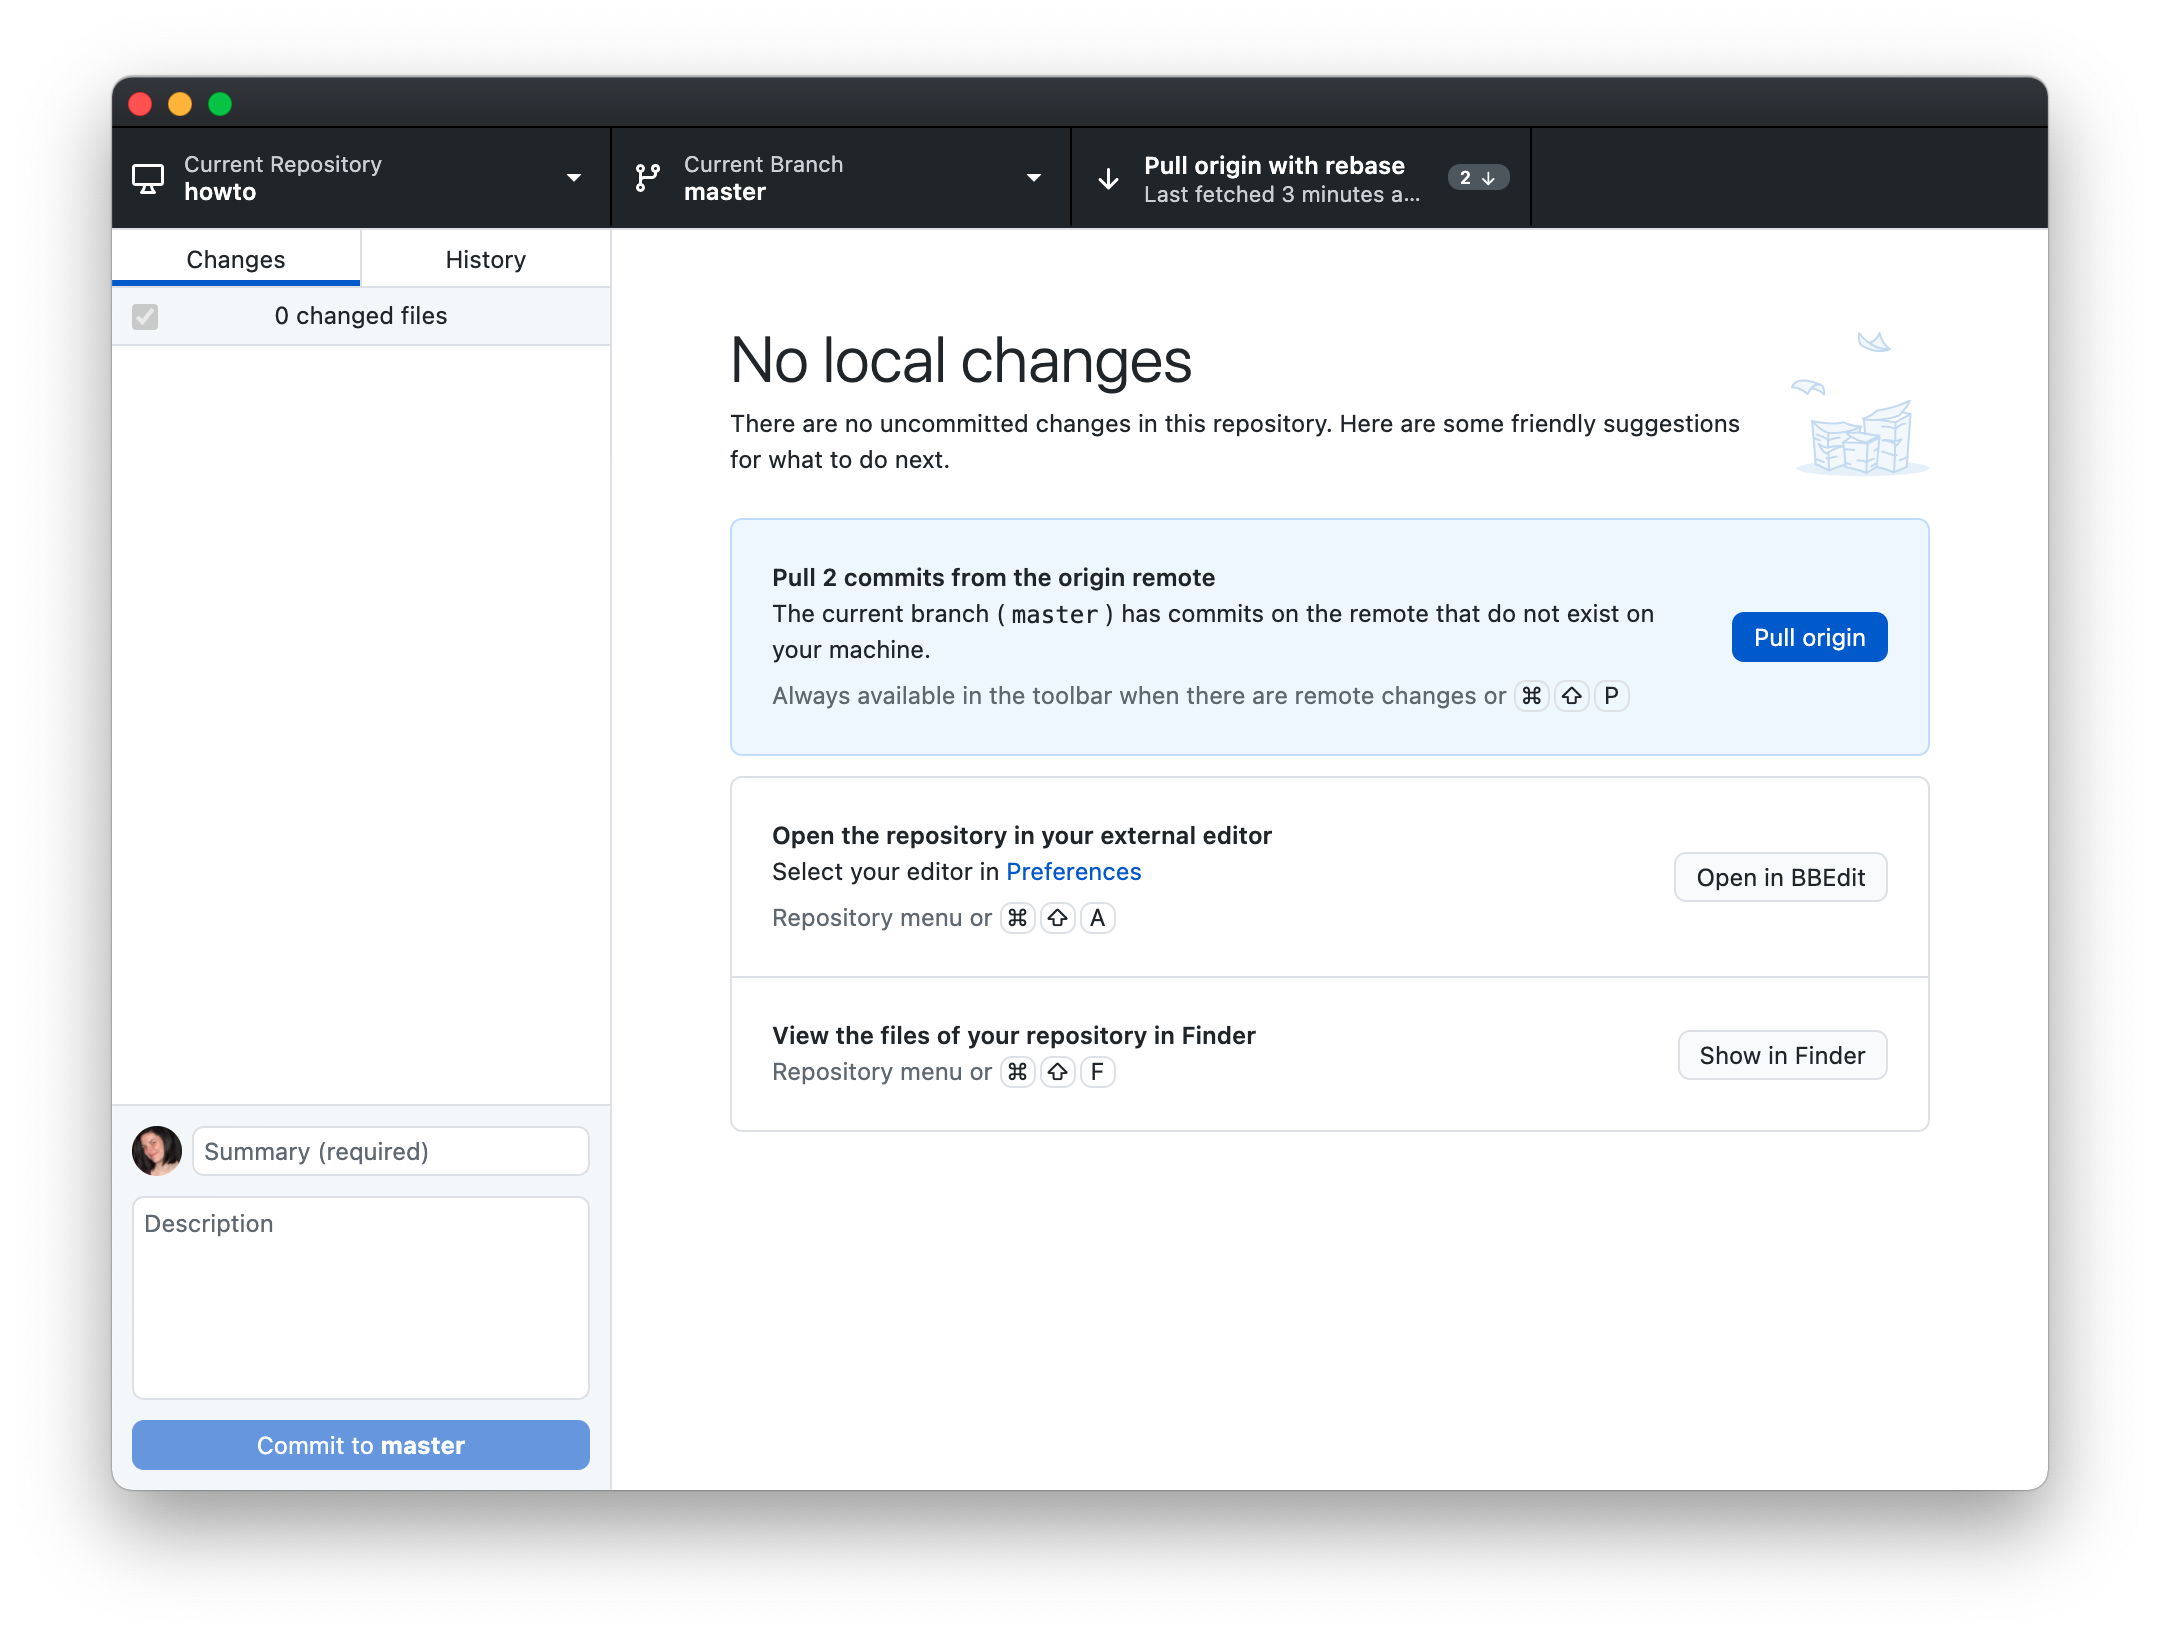
- Click the Pull Origin button to pull changes to your local repository
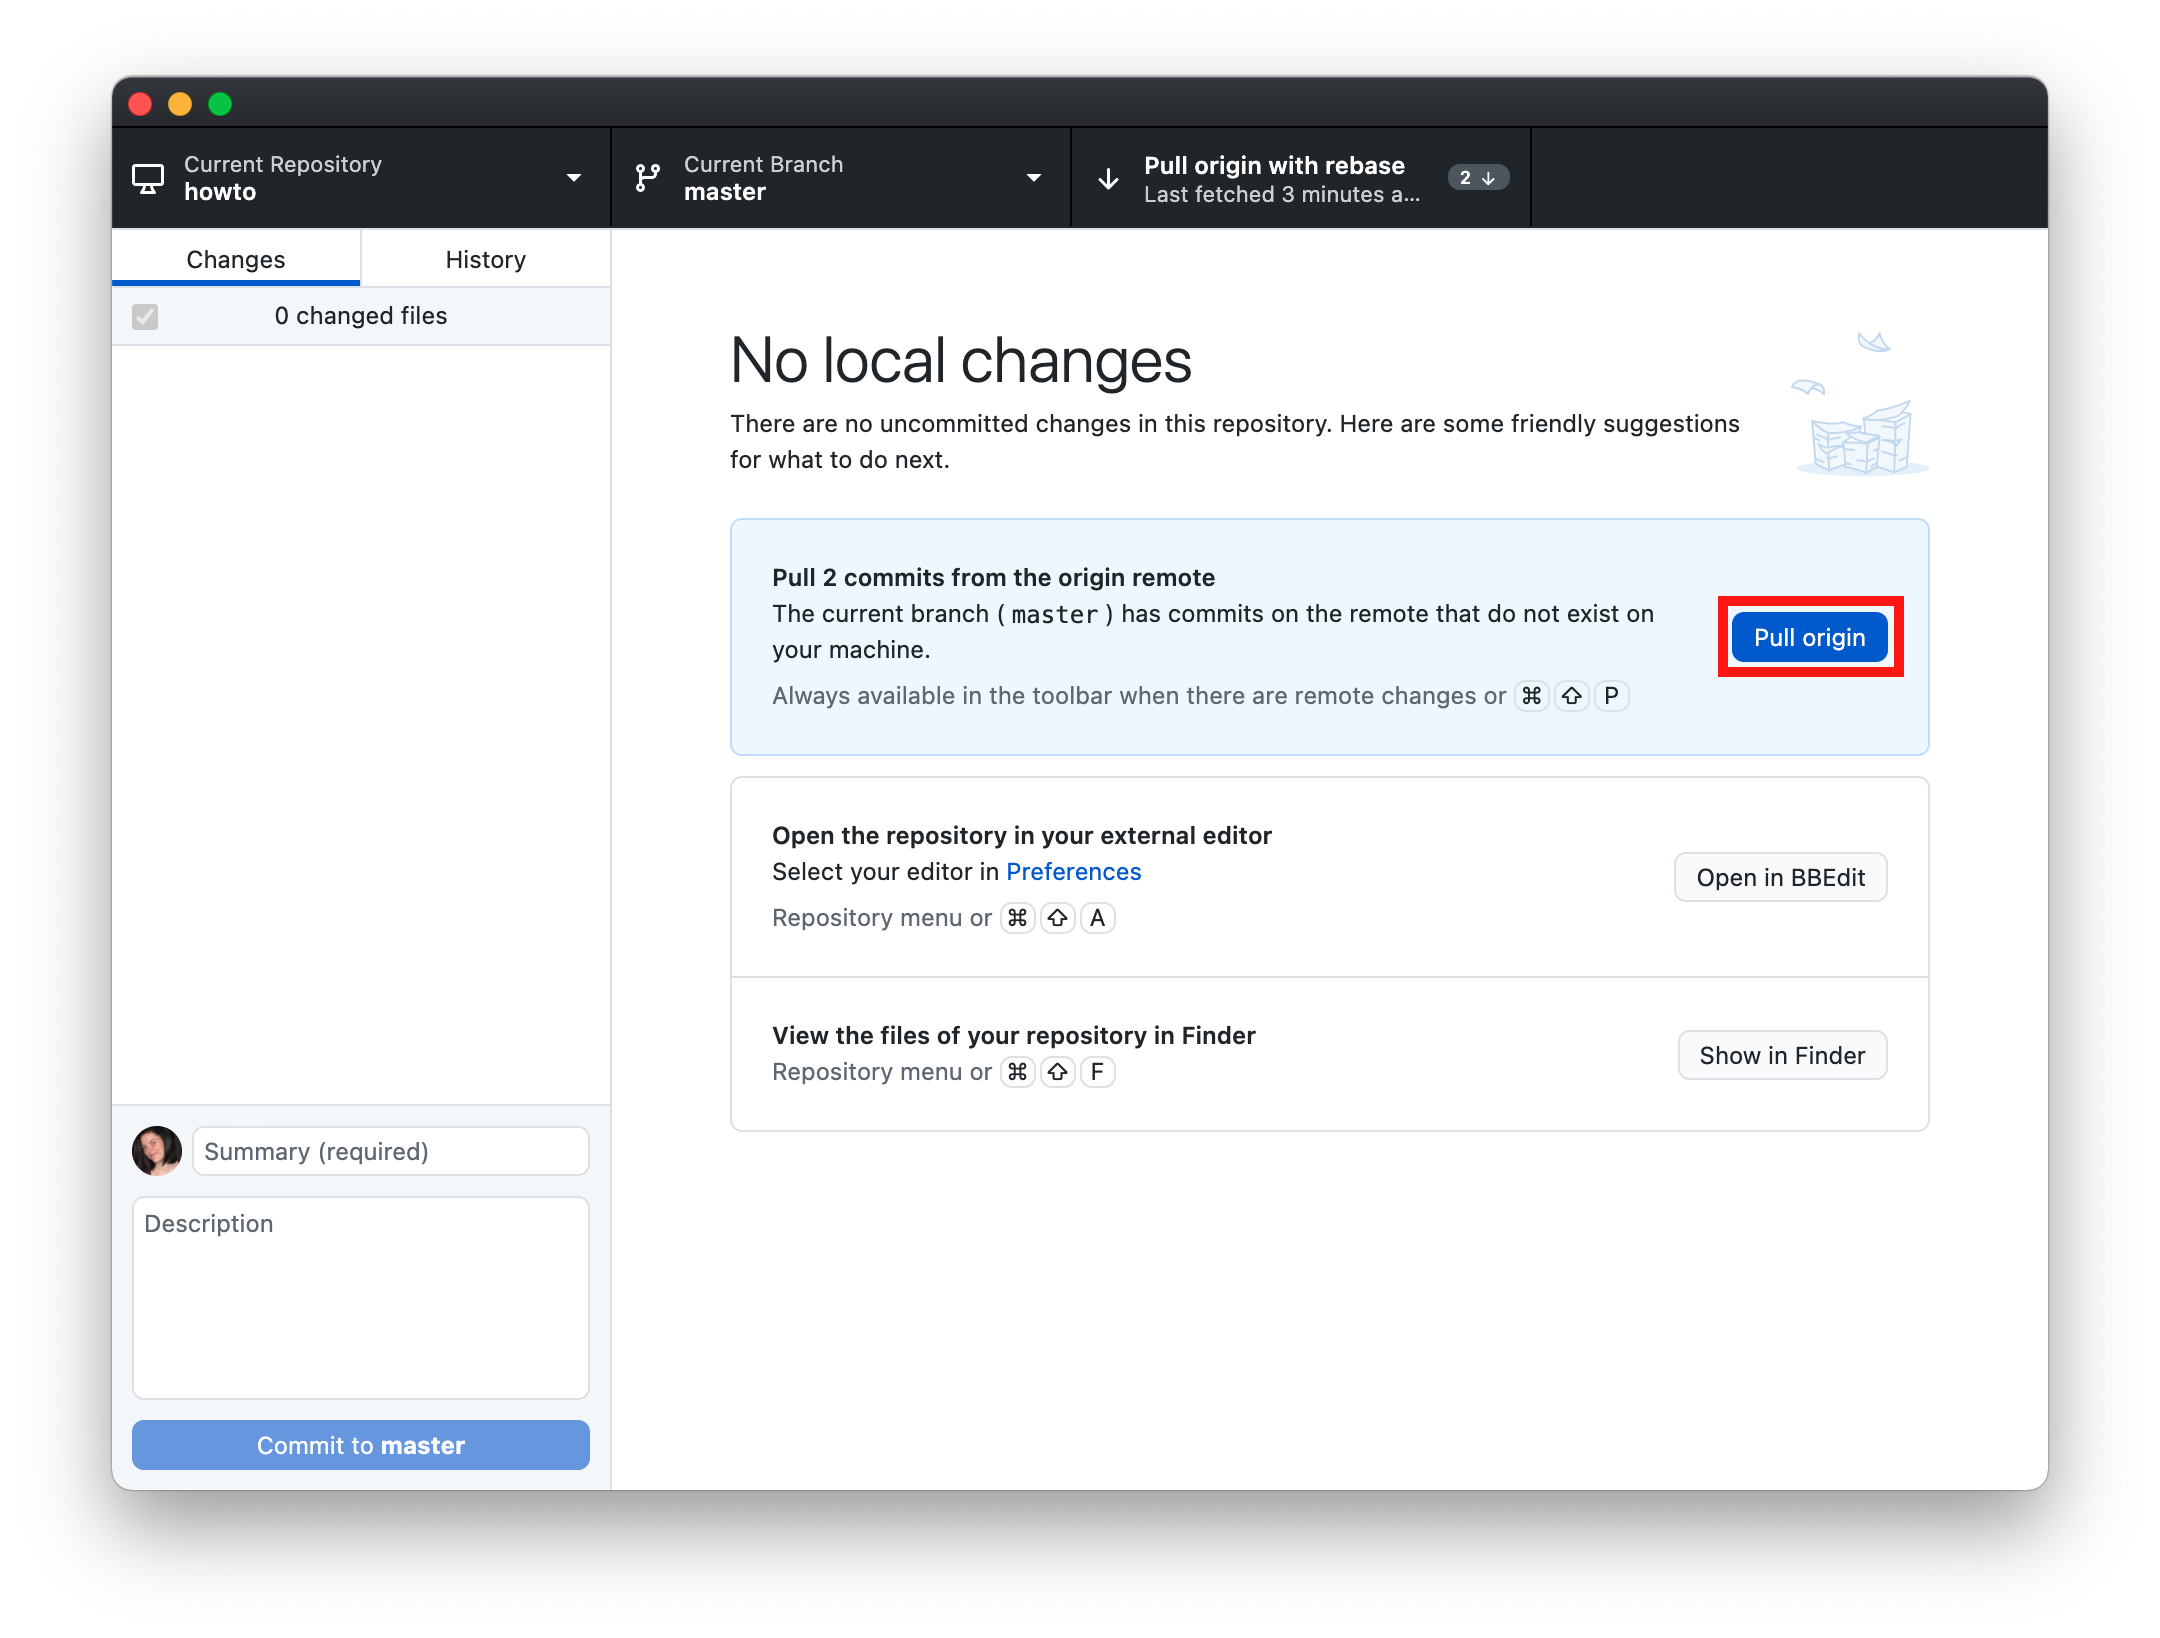
Any changes previously waiting to be pulled will now be in the folder on your local machine. The web pages are ready to be edited.
Committing changes to GitHub Desktop
Once web pages have been editing locally they need to be Committed before they are Pushed to the Artsman cloud repository. This allows you to add select changes while continuing to make edits.
Committing Changes to GitHub Desktop
- Ensure pages that have completed edits are selected
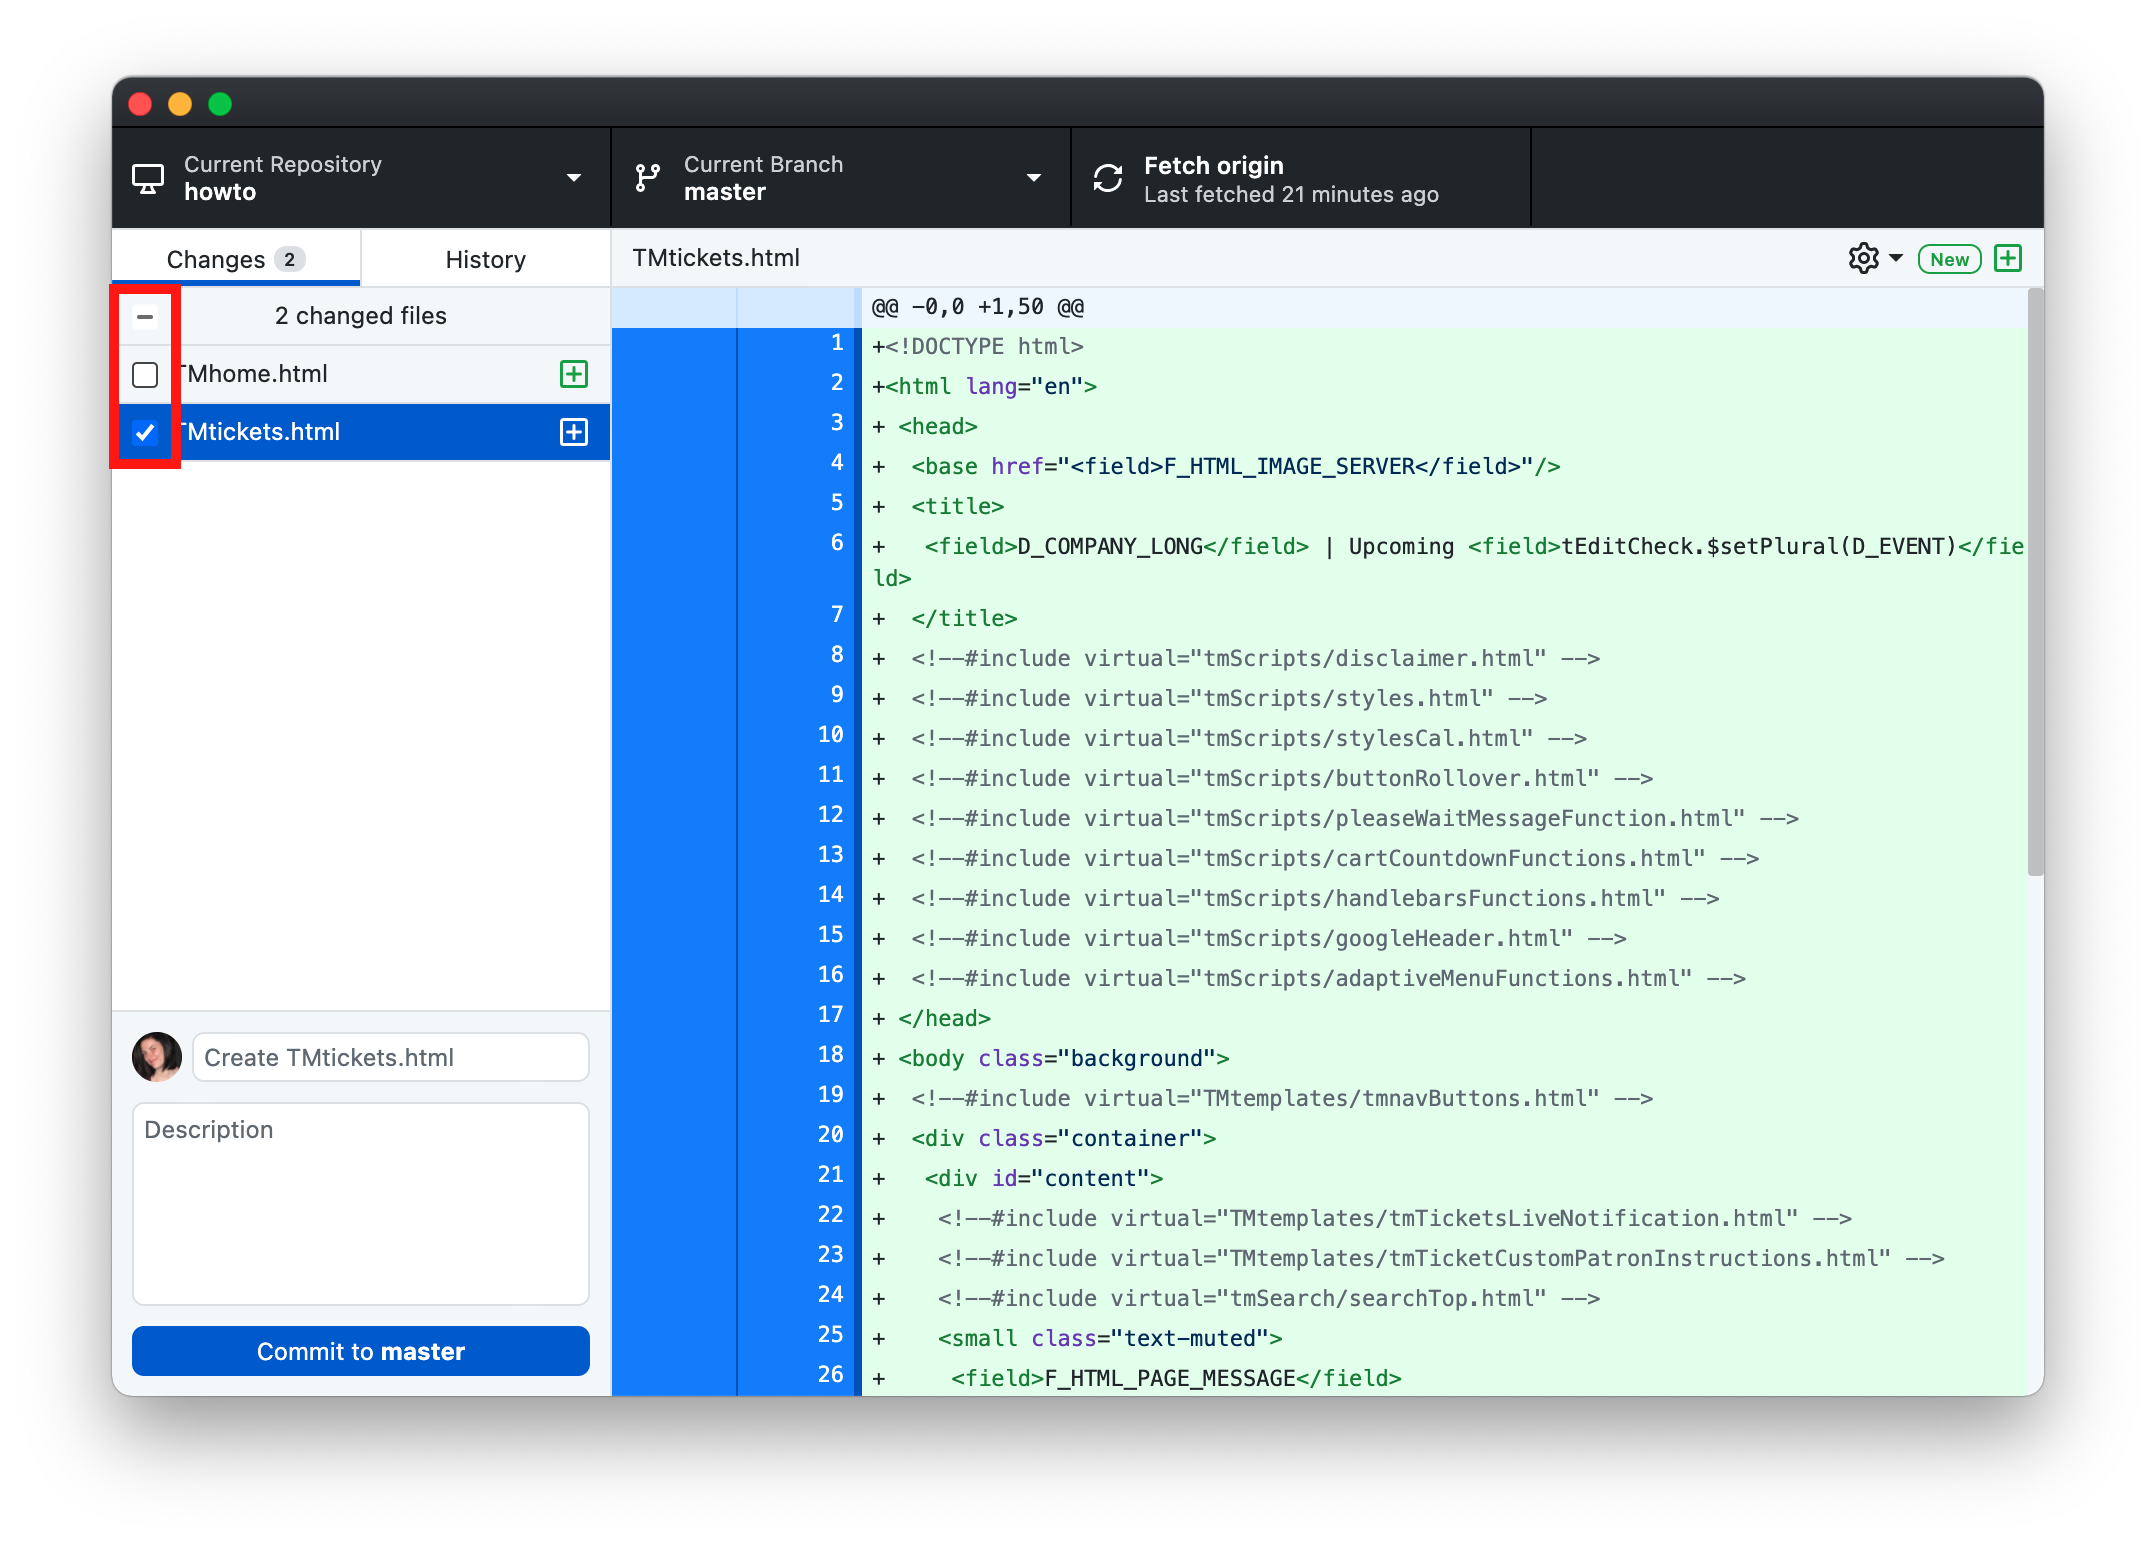
- Enter a title and details for the commit
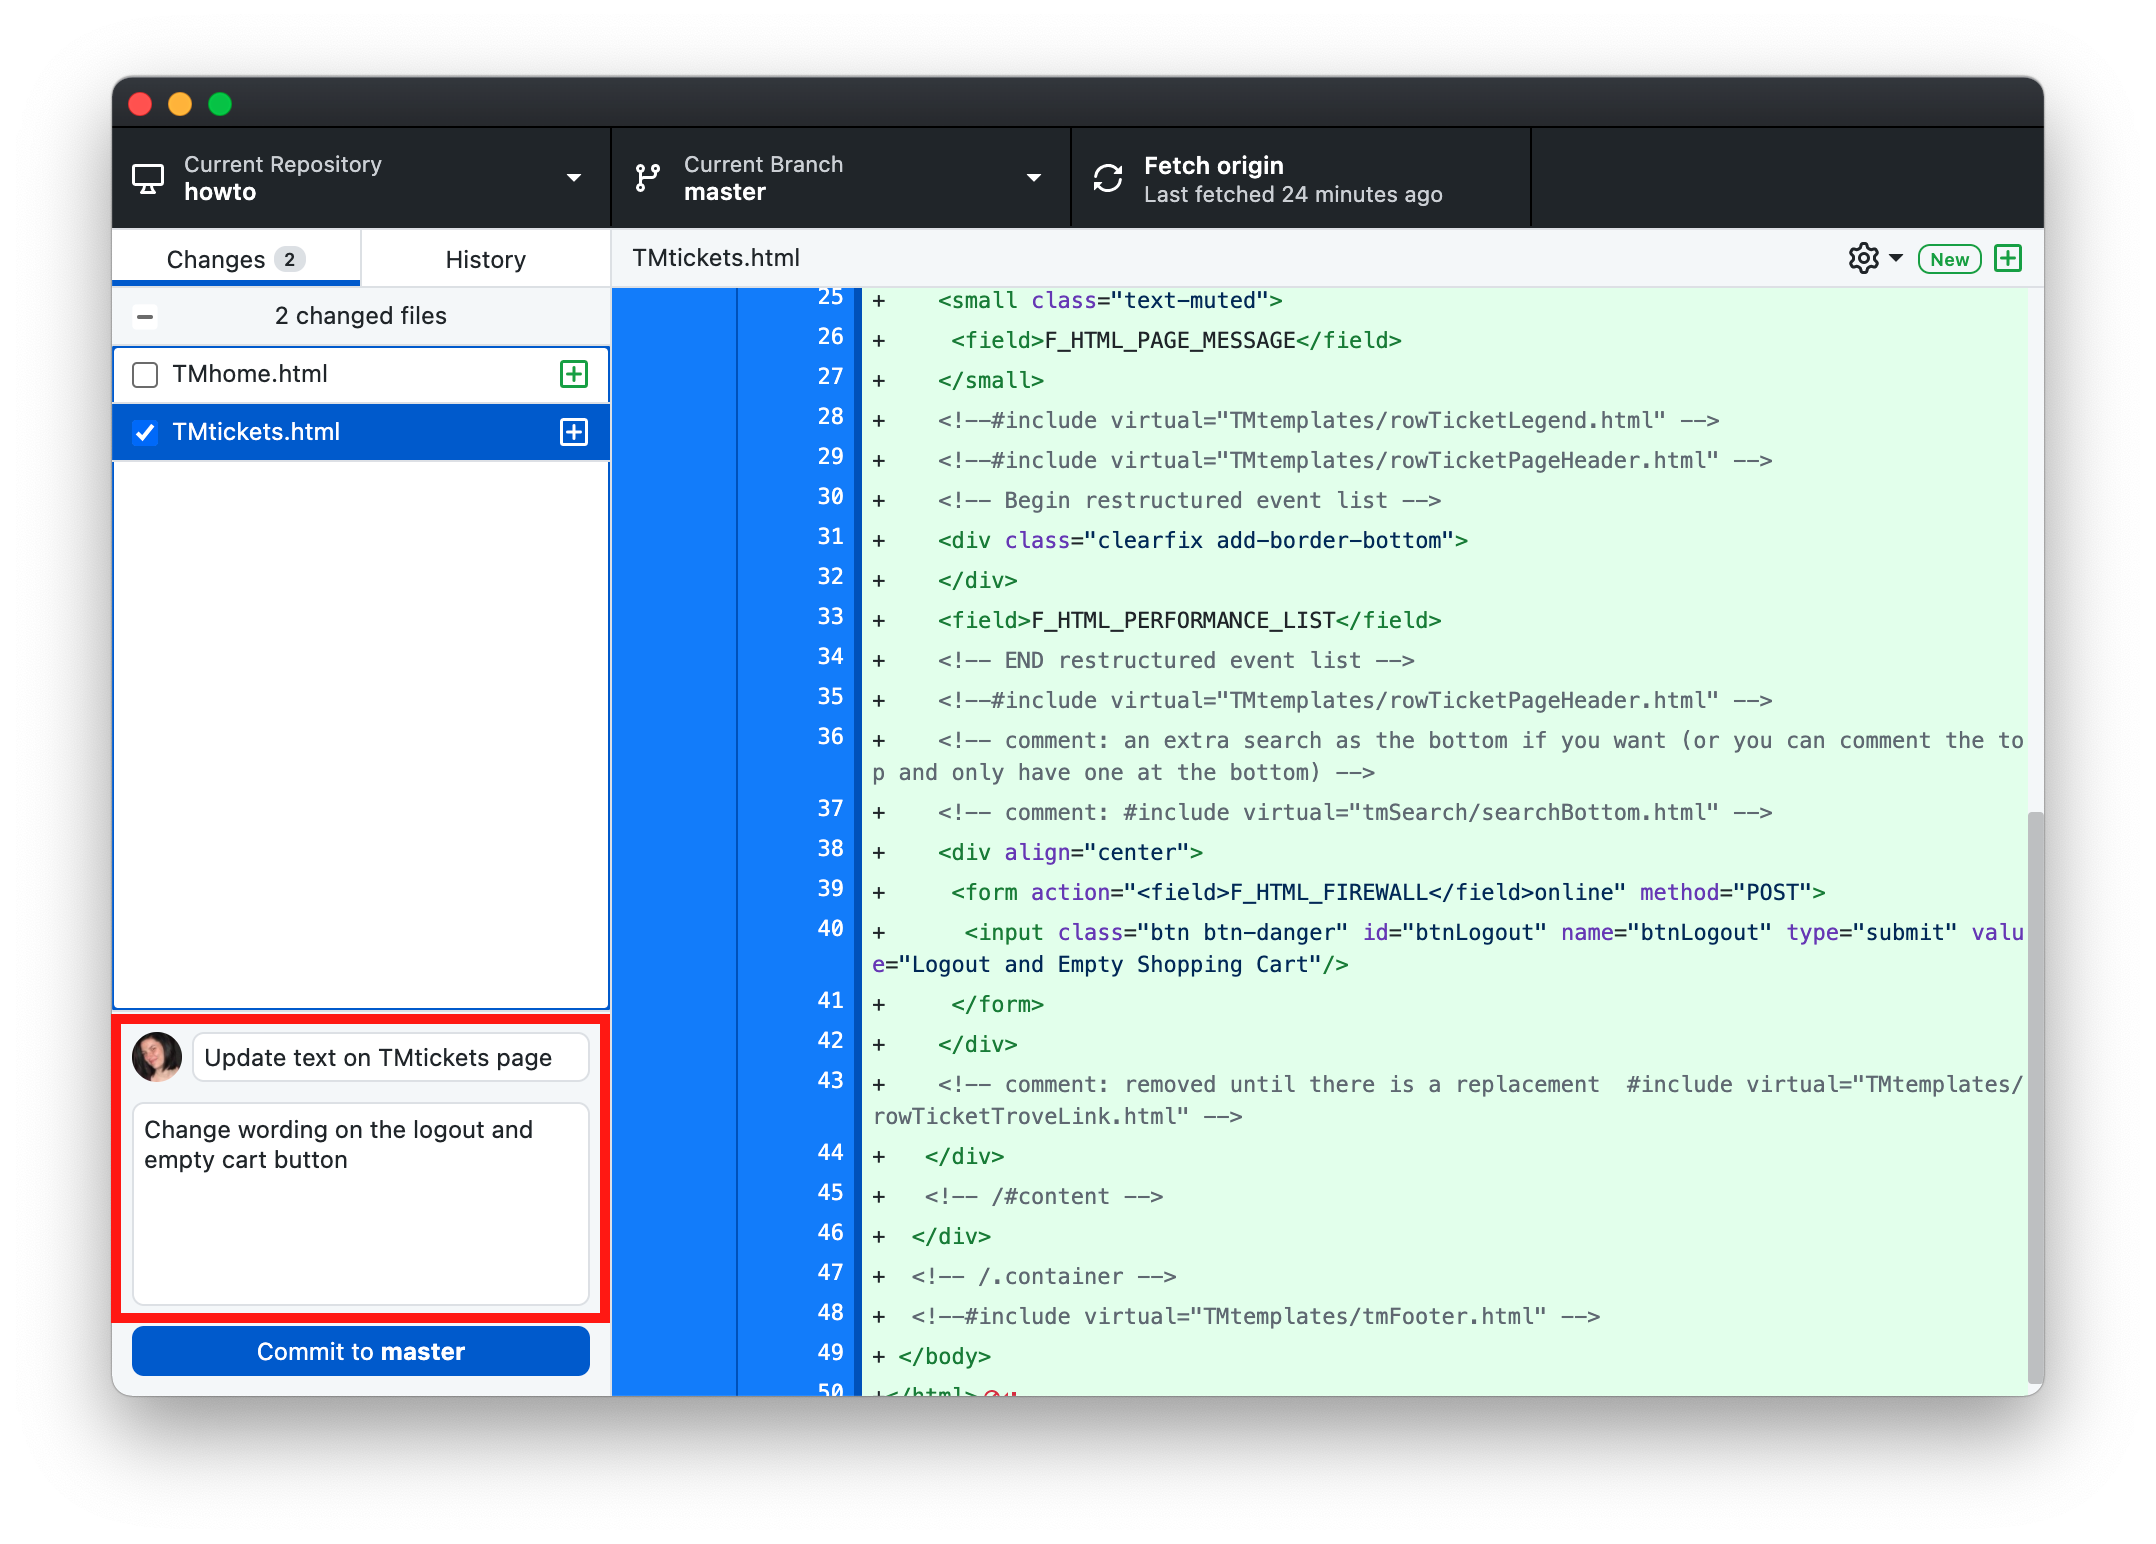
- Click the Commit to master button
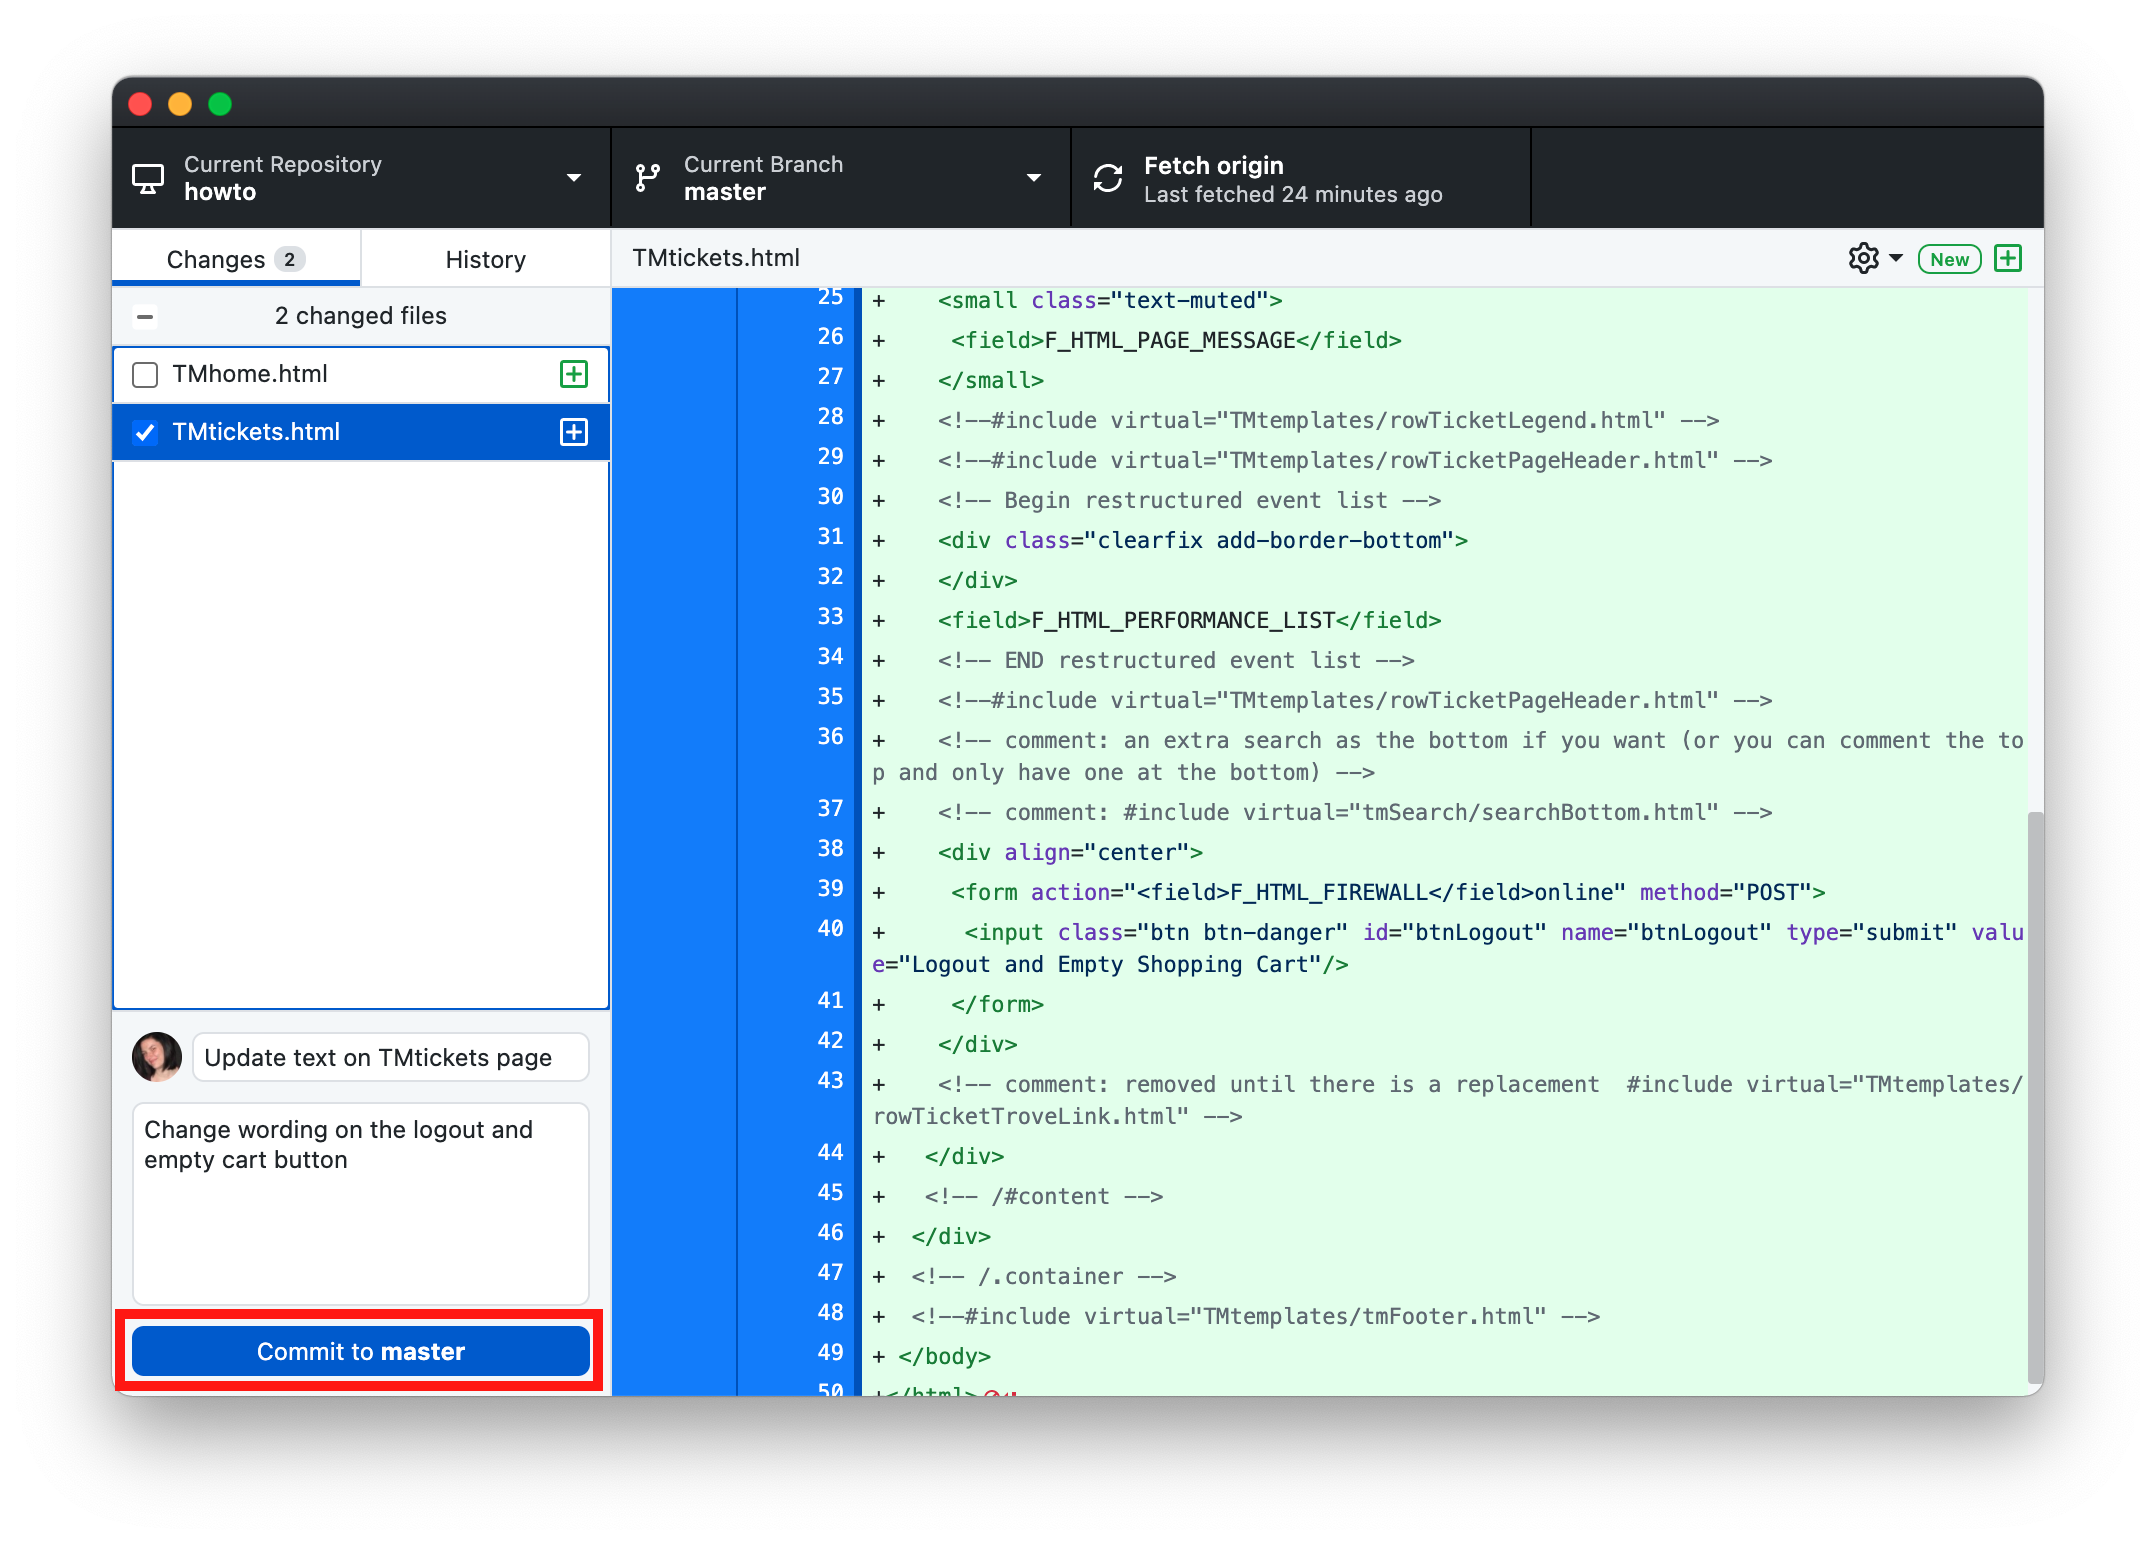
These changes are now ready to be pushed to the repository.
Push Changes to GitHub Desktop
Pushing changes moves the pages up to the Artsman git repository. Only pages that have been Committed can be Pushed. Once the pages have been pushed they run through a series of tests before they are available to be accessed by the web listener. To see edits following the test process you many need to clear the cache on the web listener.
Pushing Changes to GitHub Desktop
- Click the Push origin button
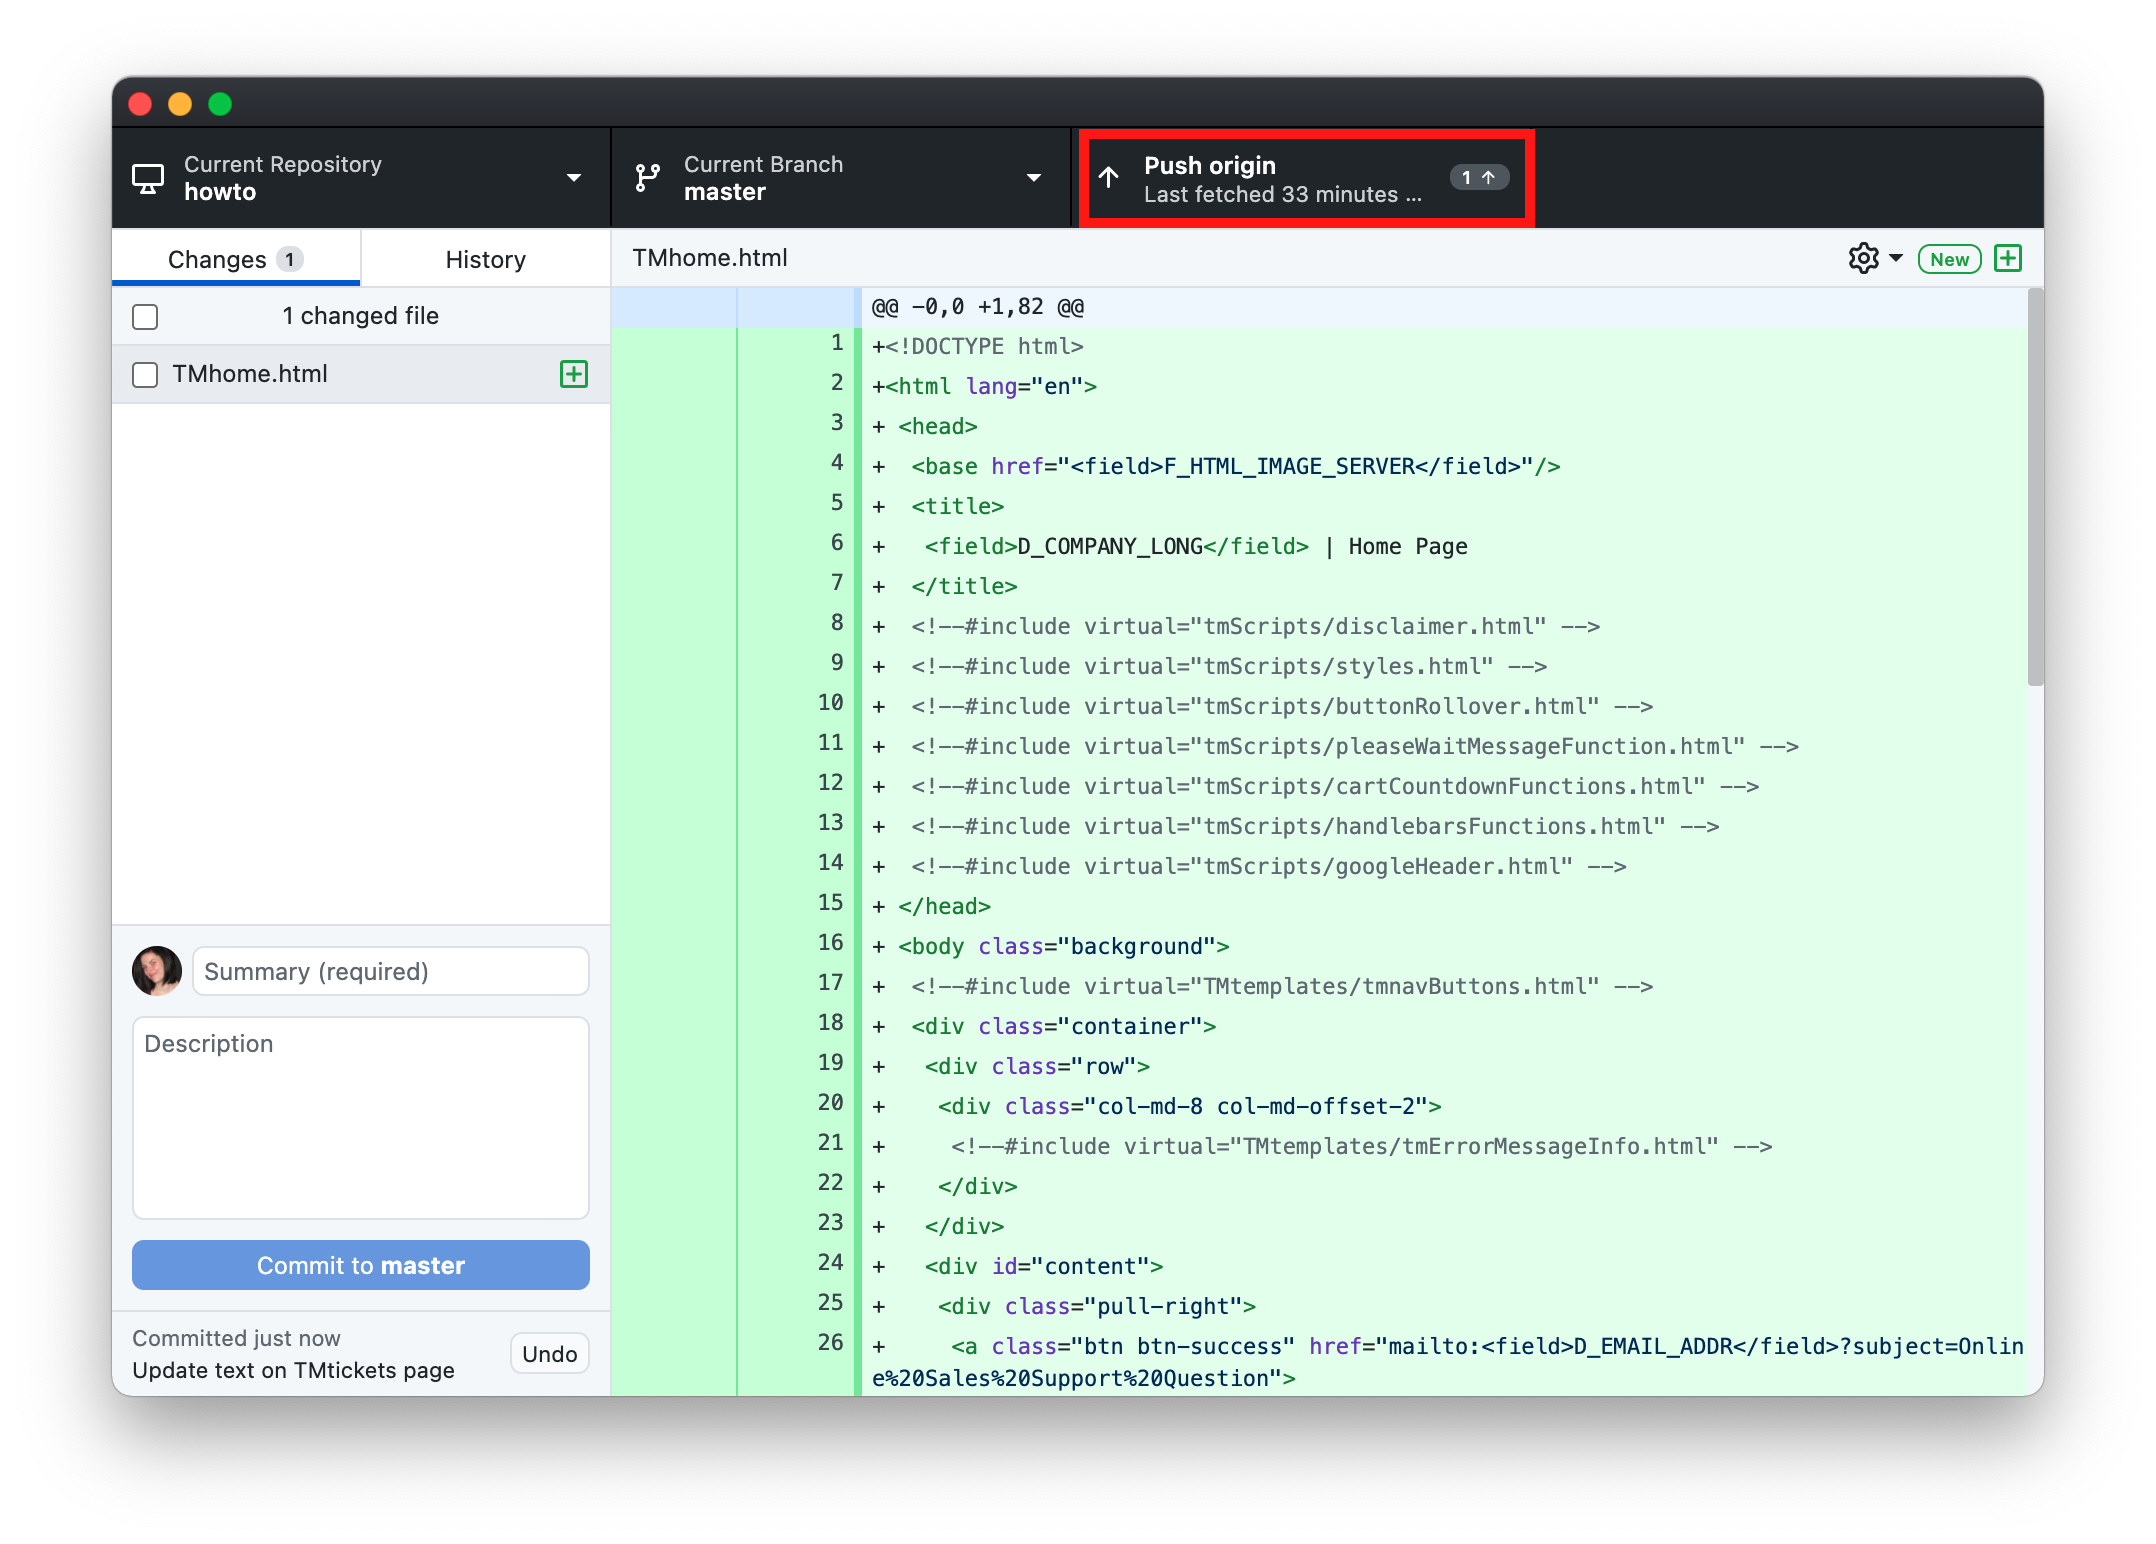
Changes have now been added to the online repository. Most changes will appear online within moments of editing. Items that are more deeply cached may require a clear cache and occasionally a restart of the Theatre Manager server. If you do not see your changes after clear the cache in Theatre Manager please contact the support team assistance.
Bootstrap Live Customizer
- use the bootstrap live customizer page,
- download the customized theme/CSS files, -and-
- how to implement the changes.
Choose a Starting Theme
- Open the Bootstrap Live Customizer web site.
- In the top right corner, click Select predefined theme.
- Select a predefined theme and click Load
- Click the Close button in the lower right hand corner of the popup window to confirm the theme.
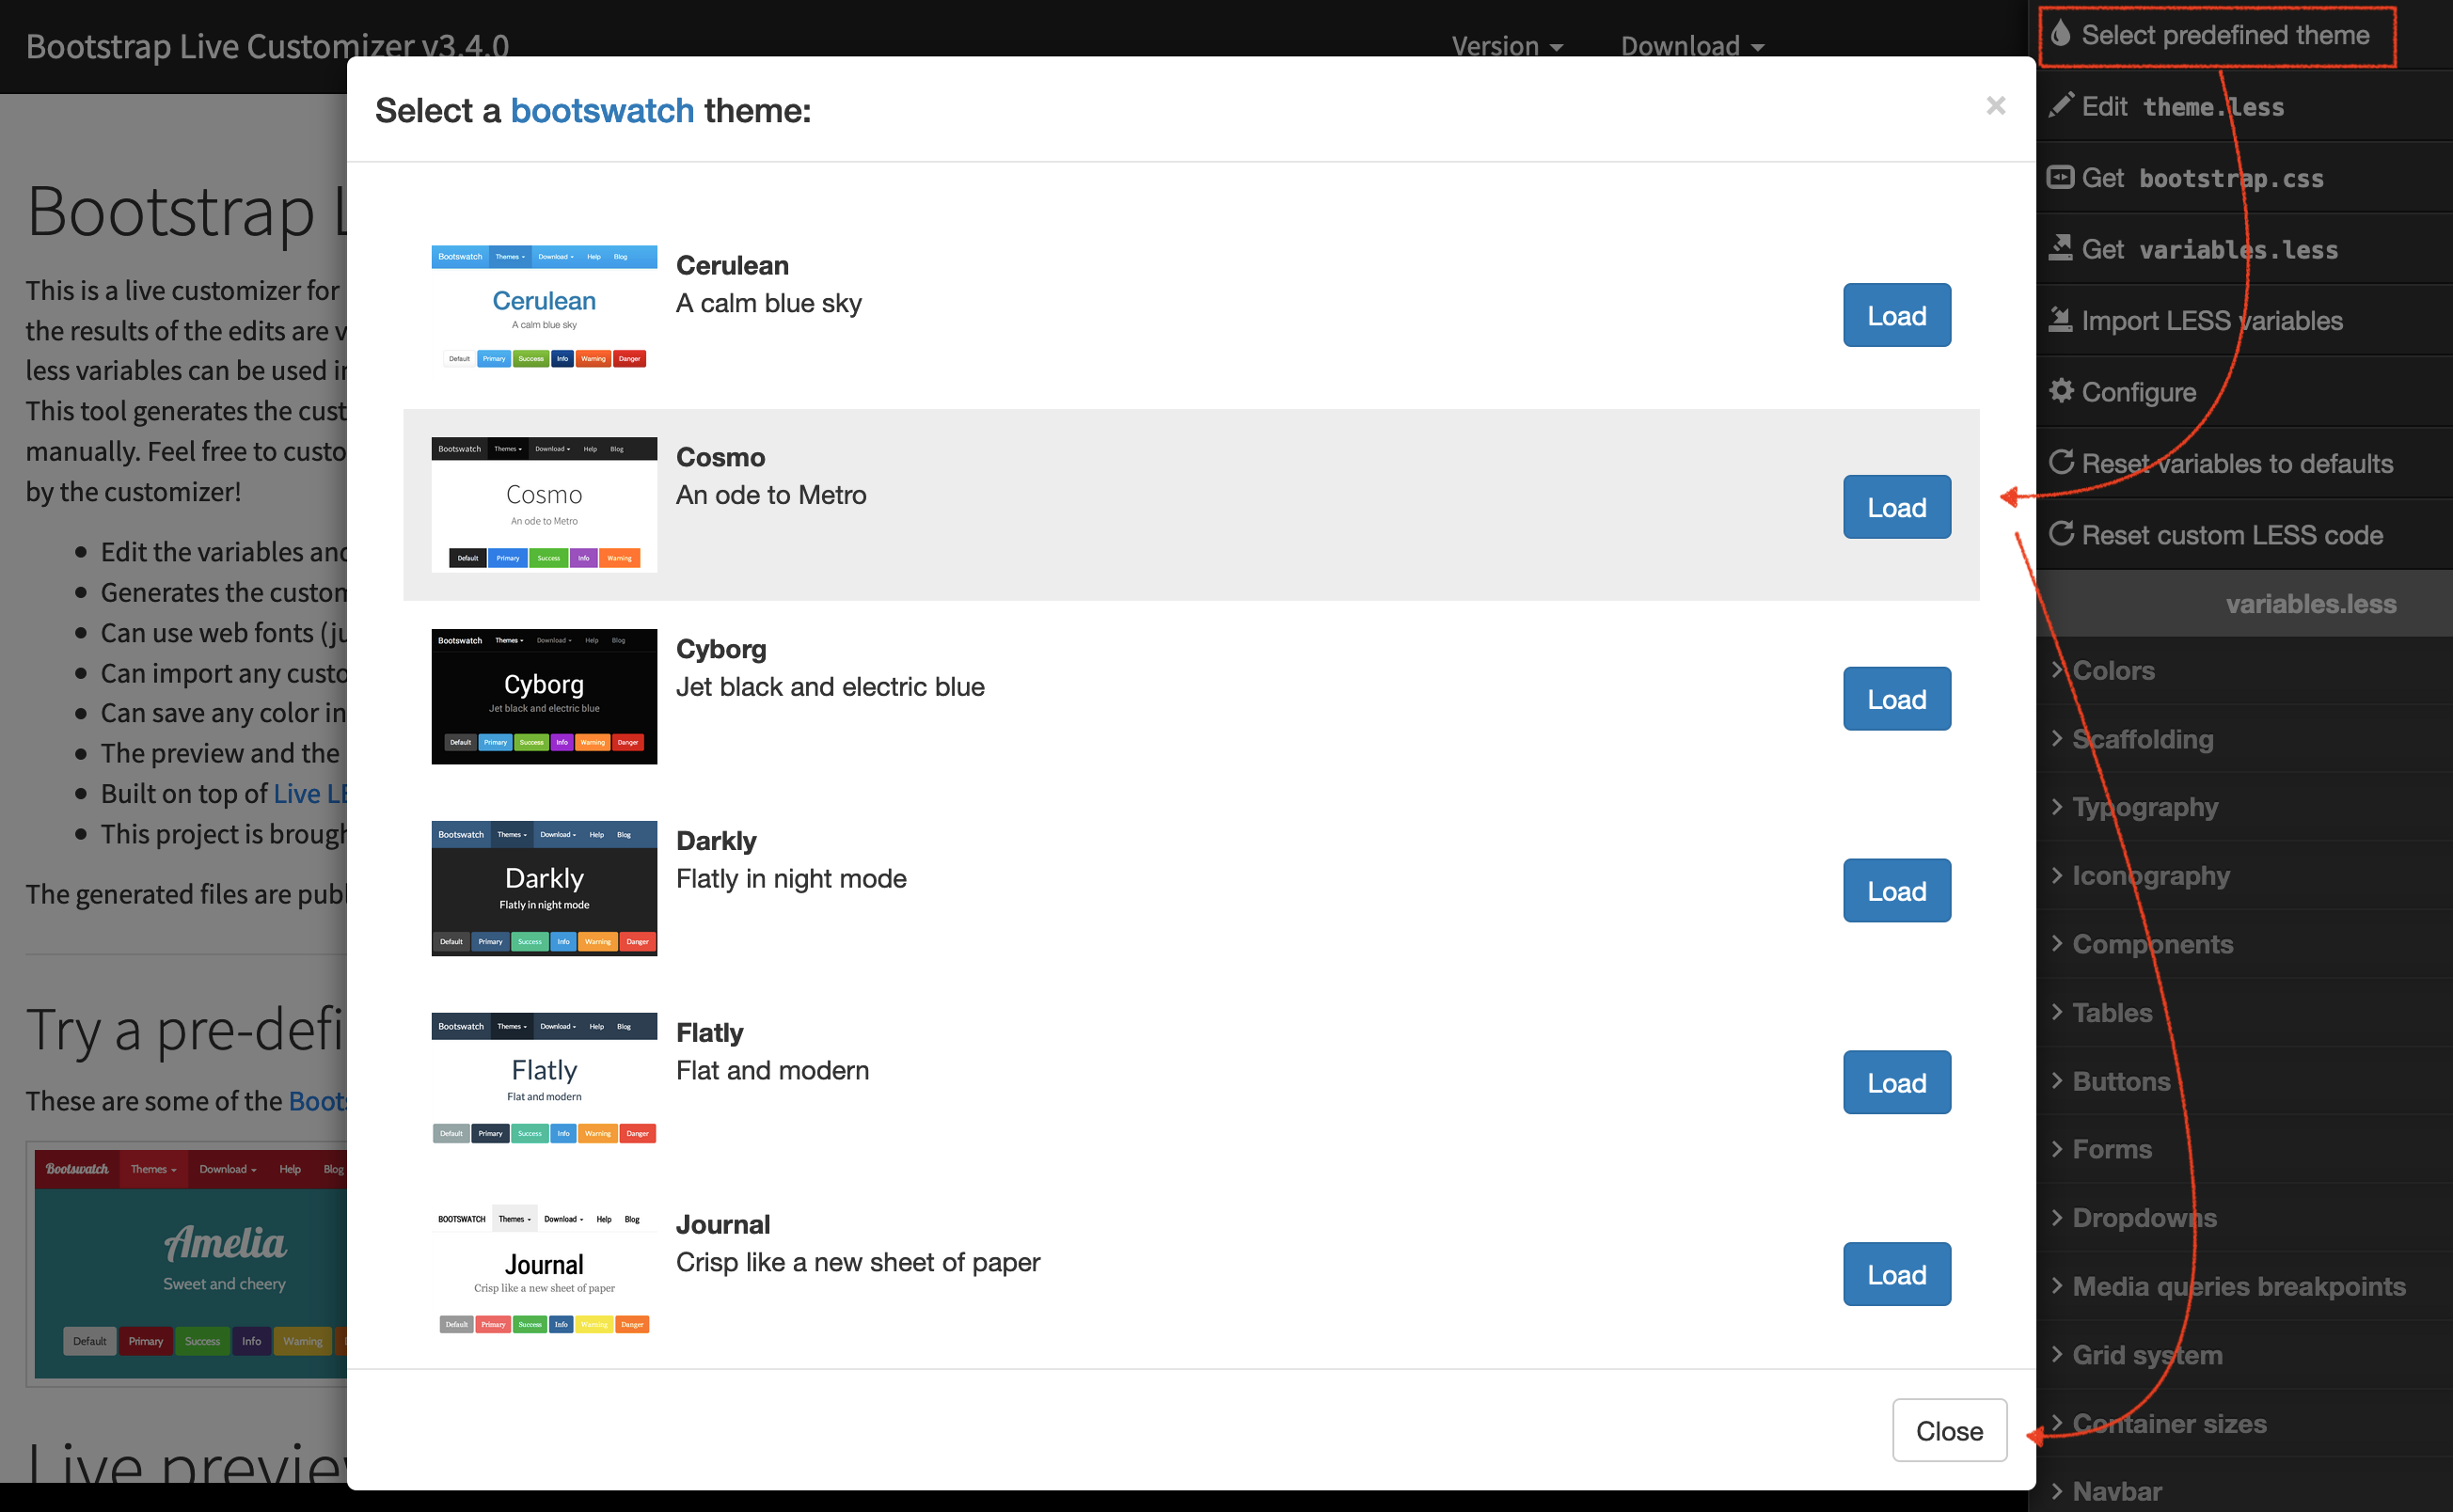
Customize the Theme
- Click Colors in the right column.
- Enter the RBG or HEX value color for each of the default Brands.
- In the body of the page Hover over a Button/Tables/Forms/Alerts/etc. and click the related variables button pop up to the right side of the window.
- Update the colors for the related variables in the fields on the right of the page.
Download Customizations
- Click Download at the top right of the page.
- Select bootstrap.min.css.
- The bootstrap.min.css file will download to the designated browser downloads folder.
The Download button can also be used to save the variables.less file, which can be used in the future to further change the theme in the Bootstrap Live Customizer
Placing the Customized Theme
- Create a new folder at /WebPagesEN/tmScripts/theme
- Create a new folder at /WebPagesEN/tmScripts/theme/css
- Copy the fonts folder at /WebPagesEN/tmVendor/bootstrap-3.4.1/fonts in the default web page templates to /WebPagesEN/tmScripts/theme/fonts in your customized web page templates
- Place the theme.min.css in the /WebPagesEN/tmScripts/theme/css folder on the Web Listener computer.
- Place the variables.less in the /WebPagesEN/tmScripts/theme/css folder on the Web Listener computer. (To save for future customization changes)
- Update the /WebPagesEN/tmScripts/themeLocal.html and /WebPagesEN/tmScripts/themeCDN.html pages:
- Comment out the current style reference and
- add the following link to the bottom of the page to use your personalized style sheets:
<link href="tmScripts/theme/css/theme.min.css" rel="stylesheet" />
- After putting the new theme in place, clear the web listener cache and your web pages should display the new design.
|
If your web pages are hosted on Artsman Cloud and you do not have access to the git repository, please send the customized bootstrap.min.css and variables.less file to support and we'll put the customized theme in place for you. |
Correcting Crimson Navigation Buttons
This page is under construction.
Make Changes within Theatre Manager for Web Content
The kinds of changes that fall into this category and involve no web design work are:
- Pagination of the list of events presented to the user
- Maps showing recommended seats or the seats in the venue
- Search setup for finding best seating
- Naming of events, gift certificates, passes, season subscription packages, donation campaigns
- Naming of sales promotions, price codes and display options for these two fields
- Naming of mail lists that users can sign up to
- Allowing people to browse anonymously for tickets - or- required to sign in at the beginning
- Print at home ticketing
- Availability of coupon codes on the web
- Comments and text to describe performances, events, donations, passes, subscriptions, etc
- Onsale dates for events
- Time outs for sales in a shopping cart
- and a number of other business processes
These kinds of changes are simple text changes to various data fields within Theatre Manager or changes to options in the Company Preferences area. Most do not require any changes by a web designer as they are daily operational aspects of TM.
|
It is possible to add some html tags to some of the large descriptive fields like the event description. If there are html tags in those fields, you can have additional control over the display of text. eg, you can include <b><em><a><img> type tags very easily to create a desired look without changing pages. |
Permitted Web Ticket Printing Options
There are three options available for ticket handling in online sales.
- A patron can request their tickets to be mailed,
- Tickets can be printed at home, or
- Tickets can be held for will call.
The options available to the patron depend on the organization's policies. To set these options go to Setup >> Company Preferences and select the Web Options tab.
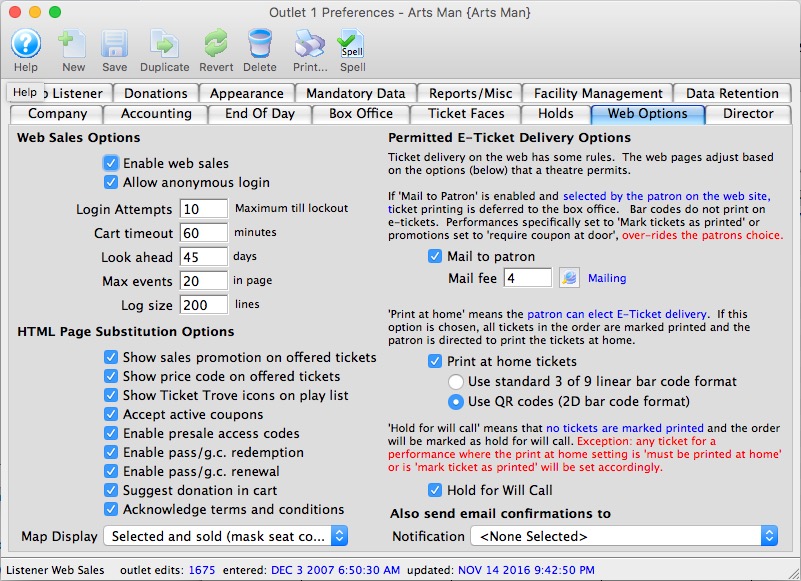
Mail To Patron
The Mail to Patron option, when checked, displays a button in the TMcart.html, TMcheckoutNoPayment.html and TMcheckout.html pages. When a patron clicks the button, the Order Ticket Mailed Status changes to 'Patron Wants Tickets Mailed.' This criteria can be used to batch print the tickets at the box office.
When the 'Mail to Patron' button is checked, a Mail Fee from the Fee Tables must be selected. The fee does not have to have a dollar value associated with it but is mandatory for the setup.
If the box is not checked, the button providing the option to have tickets mailed will not be visible. Removing the check from this box does not mean the default text on the checkout page regarding mailing options changes. The TMcheckout.html page may need to be altered to exclude the mailing details if an organization does not mail tickets.
|
If a patron selects mailing of tickets BUT there is a sales promotion that requires a coupon in the shopping cart, the mail tickets to patron setting is ignored and replaced by HOLD @ WILLCALL FOR COUPON. This can be changed in the sales promotion edits tab |
Print At Home
When the 'Print At Home' option is checked the patron can choose to check a box in the online sales process indicating they wish to print thier own tickets. This provides the option for the organization to allow patrons to print bar codes for some events and not others.
Checking the 'Print At Home' option will allow a bar code to be printed for performances where 'Print at home' is enabled at the Event or Performance level. This feature allows for later scanning when the patron arrives at the venue. There are two choices for bar code format:
- Standard 3 of 9 linear bar code format - this will print a picket fence bar code and is only suggested if you are using the Motorola MC55 scanners which do not understand any other bar code format.
- QR Codes (2D bar code format) - this is the preferred option and recommended in all other cases for additional security.. The Lineapro bar code scanners can read this format easily.
If a patron chooses to print their tickets at home, the Ticket Printed field is updated with the date and time of the completed cart. The tickets are marked as printed in Theatre Manager. When a batch print of unprinted tickets is performed, the tickets printed at home will not be included.
Hold For Will Call
If the options to mail tickets or print them at home are not enabled the default option is to 'Hold for Will Call.' This insinuates the patron will be picking up their own tickets. By default, if the 'Mail to Patron' and 'Print at Home' options are enabled but the patron does not choose either, the Order Status is set to 'Hold for Will Call.' 'Hold for Will Call' simply means there are no special handling rules for the tickets.
When the 'Hold for Will Call' box is checked, it allows the patron to choose not to print thier tickets or have them mailed. In some cases an organization may insist the patron' tickets not be held at will call. Unchecking the box forces the patron to choose between printing their tickets or having them mailed. This often happens when there will not be staff to manage ticket pick-ups at the venue prior to the performance.
Logical Order of the Checkboxes
There is a hierarchy to how the Permitted E-Ticket Delivery Options work. When the options listed are checked, they also become available for the Event and for the Performance.
- Condition #1: If a Delivery Option is to be available online, it needs to be checked in the Web Options tab of Setup >> Company Preferences. The option can be made available for select events or performances (see below). However, if the option is not enabled in Company Preferences it will not be accessible within the desired Events.
- Condition #2: The default Delivery Option needs to be set in the Event tab of an Event Setup.
- Condition #3: If the condition for a select Performance should differ from the Event default, it can be altered. Select the Performance tab within the Event Setup and double click on the Performance. Choose the Ticket Printing tab and indicate the default for the selected Performance.
Turning on Print at Home Option For a Selected Event or Performance
To turn on the print at home option for a selected event or performance, you complete the following steps:
- Turn on "Print at Home Tickets" in Company Preferences >> Web Options.
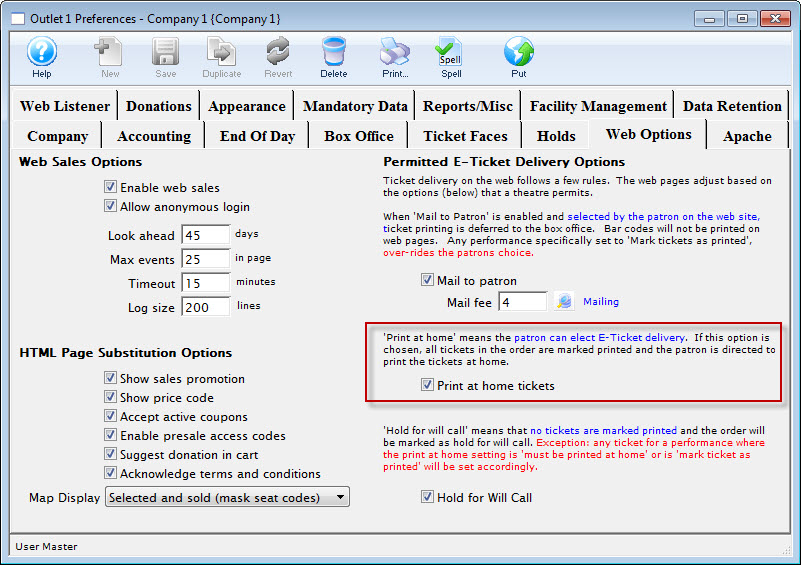
Click here for more information on the Web Options tab.
- Open the Event you want to allow patrons to print their own tickets to.
Click here for more information on finding events.
- Enable Tickets can be printed at home (Patron Choice) for the event. Click the Save
- Click the Turn On
 button.
Tickets for the Event and all of the performances can now be printed at home.
- Open the correct performance in the Performances tab of the Event Window and select the Ticket Printing tab.
- Choose Tickets Cannot be printed at home (patron must select mail or will-call) for the performances you do not want patrons to print at home.
 button.
The confirmation dialog telling you "Turning on the print at home feature will update the ticket print options amd set this to be the same for all performances if you save the record. You can then individually edit a performance to customize settings if you wish.
To turn OFF Print at Home for selected performances, you complete the following steps:
Web Designer Testing Environment
Many of our clients engage the services of, or have in-house, a web designer who prefers to customize the online ticketing web site themselves. Arts Management Systems is often asked how to set it up so that web designers can work independently and off site in a testing environment and see the effects of changes to the online ticketing web pages before making it live. The following outlines the steps to take to create a Web Designer Testing Environment:
Step #1: Duplicate the Current Web Templates
The directory for all the online web pages is located on the Web Server and depending on the platform:
- Mac HD>> BoxOffice >> WebPages >>1 if your Web Listener is Mac -and-
- Window Local C: >> BoxOffice >> WebPages >> 1 if your Web Listener is a Windows machine.
- Duplicate the WebPagesEN folder and name the copy WebPagesTS (where TS denotes Test).
|
AMS Cloud or GIT users need to do somerthing similar:
|
Step #2: Setup Remote Access
- For AMS Cloud users already using Git
- Skip to step 3
- For self hosted venues
- Consult with your IT Department to establish a way to get web pages to the web server.
- We recommend a Git repository established through Arts Management so that you push your web pages to our site and they are then migrated to your web site.
Step #3: Testing Changes in a Web Browser.
- Change the files in WebPagesTS folder as desired using your favourite editor. This will not affect your live web pages.
- Migrate the changes to your web server
- If editing the pages directly on the web server, you have nothing to do for this step
- If using Git, just push in your changes
- If using some alternate method like FTP, of file sharing, move the pages to your web server
- Force reloading the web Cache. There are 3 ways to do this:
- By accessing the director and clearing the web page cache (self hosted only)
- By asking AMS support for the special URL to clear web cache using a browser (it is not documented here on purpose)
- By clearing the cache in company preferences inside Theatre Manager
- Test the Page changes
The TM Server is designed to be multi language. It comes provided with English (WebPagesEN) and French (WebPagesFR). To use the test pages, you just need to 'switch languages' using
https://tickets.myserver.com/TheatreManager/1/online&event=0&lang=TS where tickets.myserver.com is replaced with your ticket subdomain.
- Switch Back to English after testing
https://tickets.myserver.com/TheatreManager/1/online&event=0&lang=EN
Step #4: Place the newly edited files.
When you like some or all of the pages you have changed in WebPagesTS
- Save a copy of the original pages in WebPagesEN so you can revert them back if need be
- Copy the tested pages from WebPagesTS into WebPagesEN folder in the same folder structure
- Migrate the changes to your web server using the same method as Step 3
- Test test your web pages again .. just to make sure. And do a complete checkout.
https://tickets.myserver.com/TheatreManager/1/online&event=0&lang=EN
Customization Ideas
Each client is provided the standard web pages designed by Arts Management Systems. Some organizations choose to make minor adjustments to they style sheets in order to reflect their default homepage. Others choose a more customized design of the pages. Examples of customized pages can be found on the Sample Web Sites page.
Below you will find some examples other sites have used in their customization process. These examples can be used to create a more personal feel to your web site. If you are not familiar with html we would strongly recommend contacting your web designer for assistance.
Adding a Merchandise Button
There are many naming conventions for adding a merchandise button to the online ticketing site. Some organizations add a Shop button, others a Merchandise button and others a Rental button. The name of the button depends on the use of the resource module in Theatre Manager and the content to be accessed. The icon for the button may also vary depending on the buttons use. Options for the icon can be found on the Font Awesome website. We encourage you to use the naming convention and icon that work best for your organization.
Adding the Code
- Open the tmnavButton.html page
The page tmnavButton.html is located in the WebPagesEN/TMtemplates folder.
- Add the following HTML to the page:
<li>
   <a href="<field>F_HTML_FIREWALL</field>login?merchandise=0">
   <i class="fa fa-shopping-cart">
   </i>
      Merchandise
   </a>
</li>
The recommended location would be after the Tickets, Gift Certificates and Donation buttons and before the Subscription button.
Adding a Button for a Specific Donation
- "Add $10 to support our Theatre School!"
- "Give $50 to our Annual Fund Drive!"
- "Support Music in our community! Add $25 to your order"
Or any other needs your Marketing and Development Department can identify.
This process includes web page editing. If you have a web designer on hand, they can perform these edits. If you wish to contract with Arts Management Systems to perform these or any customizations for you, please contact the Support Team at support@artsman.com
|
Note: There is a difference between:
|

Adding the coding to the web page.
- Select the web page you wish to add the button to.
The most commonly used page is rowCartDonationSuggestion.html.OPTIONAL- An include directive can be added to any of these pages:
- The Home Page (tmHome.html)
- The Login page (tmLogin.html)
- The Shopping Cart (tmCart.html), which is pictured below.
- Replace the existing contents with the following HTML to the page:
<field>pick(F_DONATION_ALLOWED,'<!-- comment: based on setting in company preferences to show suggested donation','')</field>
<!--#include virtual="TMtemplates/tmMessageDismiss.html" -->
<div class="container" align="center">
<form action="<field>F_HTML_FIREWALL</field>online" METHOD=POST>
<input class="btn btn-success" name="btnDonationAccept"type="submit" value="ADD $10 TO SUPPORT OUR THEATRE SCHOOL DEVELOPMENT"/>
<input id="DD_DC_SEQ" name="DD_DC_SEQ" type="hidden" value="41"/>
<input id="DD_AMOUNT_PLEDGE" name="DD_AMOUNT_PLEDGE" type="hidden" value="10"/>
</form>
</div>
<field>pick(F_DONATION_ALLOWED,'-->','')</field> - Ensure that:
- The HTML is outside ALL OTHER FORMS on the page you add it to.
- You change the ’10’ to the suggested amount’.
- You change the ’41’ to the proper campaign sequence number from within Theatre Manager.
- You change the ‘add $10 to support….’ to reflect the text you wish to use on the button.
- You include any mandatory donation fields by using including DD_FLDx_FC_SEQ references.
Adding a Donor Field
There are fields in the Notes tab of a Donation that can be added to the tmDonationHiddenFields.html so they appear on the TMdonation.html page in order to collect more details about the donation. The example below accesses the Donor#4 field. This is a text field. The patron can type information into the field within the online sales and the details will populate in the Donor#4 field in Theatre Manager once the Order is complete.
This process includes web page editing. If you have a web designer on hand, they can perform these edits. If you wish to contract with Arts Management Systems to perform these or any customizations for you, please contact the Support Team at support@artsman.com

Adding the coding to the web page.
- Select the web page you wish to add the field to.
The most commonly used page is tmDonationHiddenFields.html. - Add the following HTML to the page:
<div class="form-group">
<label for="DD_FLD4"> In Memory of...
</label>
<input class="form-control" id="DD_FLD4" maxlength="100" name="DD_FLD4" type="text" value="<field>DD_FLD4</field>"/>
</div> - Test:
- The field appears in the correct location within the web page.
- The text populates into the correct field in Theatre Manager when a Donation is added online.
Altering the Header and Ad on the Print At Home and PDF Ticket
This web page provides instructions for:
- Changing the default pageHeader or ticketAd for all print at home tickets
- Creating a custom pageHeader or ticketAd for all performances of a single EVENT
- Creating a custom pageHeader or ticketAd for a single PERFORMANCE

Changing the default footer and/or header for ALL print at home tickets
The easiest way to update the header and/or footer for a print at home ticket is to create new files and place them into the WebPagesEN >> tmGifs folder.
- pageHeader.gif - is the name of the page header file. In the example above, it is 75 pixels high and 700 pixels wide.
- ticketAd.png - is the name of the Ad at the bottom of the page. The sample image is 200 pixels high and 700 pixels wide.
In general, the width of each of the images should remain around 700 pixels. The height of the images can vary as long a the total height of both images causes the print at home ticket to remain on one page. You could, for example, make the top image 50 pixels high and use the remaining pixels in the lower area.
The sample pages were crated with conservative heights. You could probably get away with a total of 400 pixels or more in height between the header and footer.
Changing the footer and/or header for a SPECIFIC EVENT
If you want to change the header or footer for a single event, you can create a web page that over-rides the header and/or footer. This allows you to have:
- specific sponsors or instructions in the 'ticketAd.png' for an event or
- a different header for your mainstage, or classes, or inventory or streaming events if you wish.
As an example, let say you want to change the header (and/or) footer for only event 109 (See No Evil).
| Changing the Header |
|
||
| Changing the Footer |
|
Changing the footer and/or header for a SPECIFIC PERFORMANCE
If you want to change the header or footer for a single performance within the event, you can create a web page that overrides the header and/or footer. This allows you to have:
- specific sponsors or instructions in the 'ticketAd.png' for the performance or
- a different header for a performance such as the final performance of a class, or for a touring or streaming performance
As an example, let say you want to change the header (and/or) footer for only event 443.
| Changing the Header |
|
||
| Changing the Footer |
|
|
Print at home tickets must be enabled in company preferences and for specific events before a patron can print them. |
|
In the instructions below, the names of images and files are case sensitive. Please make sure they match exactly. |
Button to Apply a Specific Coupon Code
The lines below are an example of how to create a button that will apply a specific Coupon Code to the online cart. This button can be added to any page within the online sales. It would most commonly appear on the TMtickets.html page or the TMcart.html page.
This process includes web page editing. If you have a web designer on hand, they can perform these edits. If you wish to contract with Arts Management Systems to perform these or any customizations for you, please contact the Support Team at support@artsman.com

Adding the coding to the web page.
- Select the web page you wish to add the field to.
The most commonly used page is TMtickets.html. - Add the following HTML to the page:
<form action="<field>F_HTML_FIREWALL</field>online" METHOD=POST>
<input class="btn btn-success" name="btnCouponAccept" onclick="process()" type="submit" value="Click To Receive Our Special Promotion"/>
<input type="hidden" id="CH_CODE" name="CH_CODE" value="1234">
<input name='param' type='hidden' value ='altbtn=btnGetEventList'>
</form> - Ensure that:
- You uncomment the div statement.
- You change the ’1234’ to the proper coupon code value from within Theatre Manager.
- You change the ‘Click To Receive Our Special Promotion’ to reflect the text you wish to use on the button.
Customizing the Event Date and Time Display
The Event Buy options can be edited and displayed in two different ways. The two options for the 'Buy' button when purchasing Events online are detailed below. We have the conventional 'Buy/Reserve' option;

There is also the option to change that display to show both the Date and Time within the Buy Button itself, option example below.
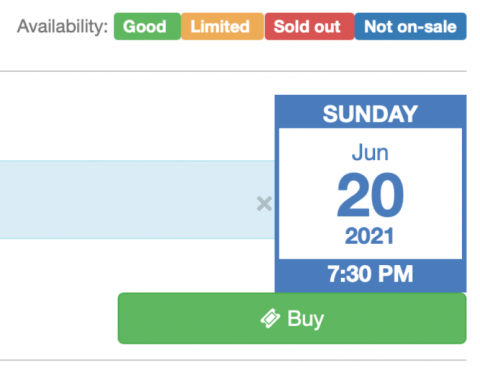
Adding the Code
Options for editing the Buy button can be found by accessing and editing the rowTicketEventName.html.
If you want to have a 'calendar' like date on the right of the list of Events, then uncomment rowTicketEventCalendarButton.html, and comment rowTicketEventCalendarDate.html.
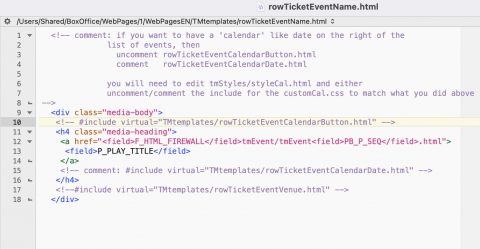
You will need to edit tmScripts/styleCal.html
and either uncomment/comment the include for the customCal.css to match what you did above.
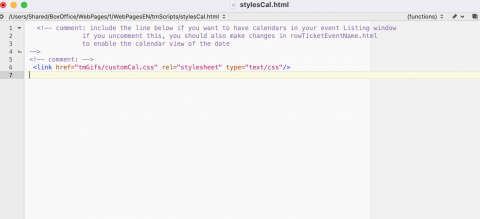
Direct Purchase Button for a Member Type
The lines below are an example of a button that will add a specific member type to the cart with a fixed value and quantity. This button can be added to any page within the online sales. It would most commonly appear on the TMpass.html page or the TMcart.html page.
This process includes web page editing. If you have a web designer on hand, they can perform these edits. If you wish to contract with Arts Management Systems to perform these or any customizations for you, please contact the Support Team at support@artsman.com

Adding the coding to the web page.
- Select the web page you wish to add the field to.
The most commonly used page is TMpass.html. - Add the following HTML to the page:
<div align="right">
<form action="<field>F_HTML_FIREWALL</field>online" method="POST" role="form">
<input name="MT_SEQ" type="hidden" value="23"/>
<input name="PS_QUANTITY" type="hidden" value="1"/>
<input class="btn btn-success" name="btnReservePass" onclick="process()" type="submit" value="Purchase/Renew a Voting Membership for $150"/>
</form>
</div> - Ensure that:
- The HTML is outside ALL OTHER FORMS on the page you add it to.
- You change the '23' to the proper member type sequence number from within Theatre Manager.
- You change the 'Purchase/Renew a Voting Membership for $150' to reflect the text you wish to use on the button.
Eliminating the Pricing Selection List
The html code below will provide a single option for pricing rather the the price code drop down list that is currently a part of the online sale pages. This text most commonly would effect the TMticketsPrice_MapDefault.html and TMsubscriptionPriceMapDefault.html pages.
<input name=SC_DESCRIPTION type=hidden value="<field>F_HTML_PROMOTIONS_LIST.1.SC_SEQ</field>>
<field>F_HTML_PROMOTIONS_LIST.1.PC_SEQ</field>
<field>F_HTML_PROMOTIONS_LIST.1.SCD_ORIGINAL_SC_SEQ</field>
<field>F_HTML_PROMOTIONS_LIST.1.SCD_ORIGINAL_PRICE_CODE</field>
<field>F_HTML_PROMOTIONS_LIST.1.SCD_SAVINGS</field>
<field>F_HTML_SELECTED</field>
<field>pick(D_WEB_SHOW_PROMOTION,'',con(F_HTML_PROMOTIONS_LIST.1.SC_DESCRIPTION,' '))</field>
<field>pick(D_WEB_SHOW_PRICE_CODE,'',con(F_HTML_PROMOTIONS_LIST.1.PC_DESCRIPTION,' '))</field><field>F_HTML_PROMOTIONS_LIST.1.PS_TOTAL_COST</field>
Hiding General Admission Arrival Notes
When setting up an event, that is not a Course or Reserved seating performance, the General Admission (Festival Seating) Sales Method is used. This allows for flexibility in capacity. It is commonly used for Live Stream or Pre Recorded videos. This poses a challenge when purchasing online as the default web pages display arrival notes that do not apply to Live events.
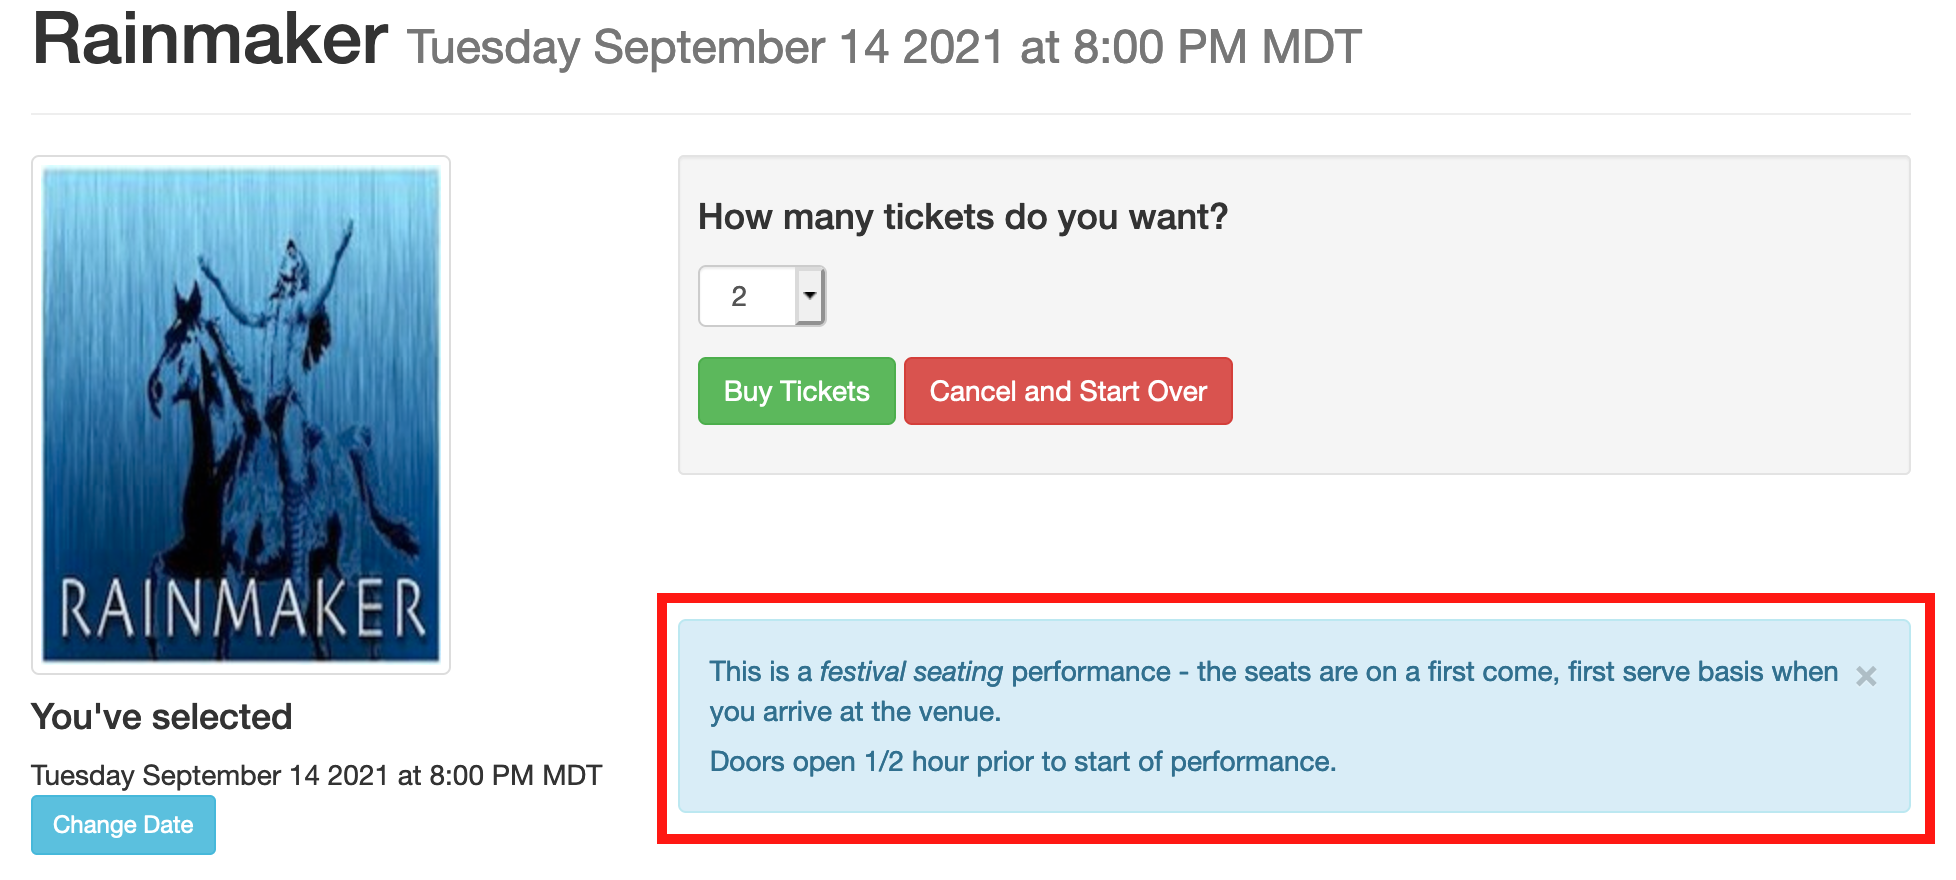
Hiding these notes requires created a customized web page referencing the Map Sequence number from Theatre Manager and the Sales Method. Below are the steps for removing the box containing the text from the page. Alternatively, a custom page containing notes specific to the streaming event could be created and added in place of the existing general admission arrival notes.
|
The steps below assume a basic understand of HTML and web page editing. Please contact your web designer should you need assistance with completing web page edits. |
Finding The Map Sequence Number
- Open the Venue List window in Theatre Manager.
Click here for steps on how to access the Venue List window.
- Double-click on the Venue in the list to open it.
- Double-click the map in the right column.
- Take note of the Pricing Map number.
Create A Custom Web Page
The page containing the arrival notes is the TMticketsSection_MapDefaultf.html page located in the tmMaps folder. The " f " at the end of the page name indicates the Festival Seating page. This is the page that requires customization.
- Download the latest default web pages.
- Navigate to the /1/WebPagesEN/tmMaps folder.
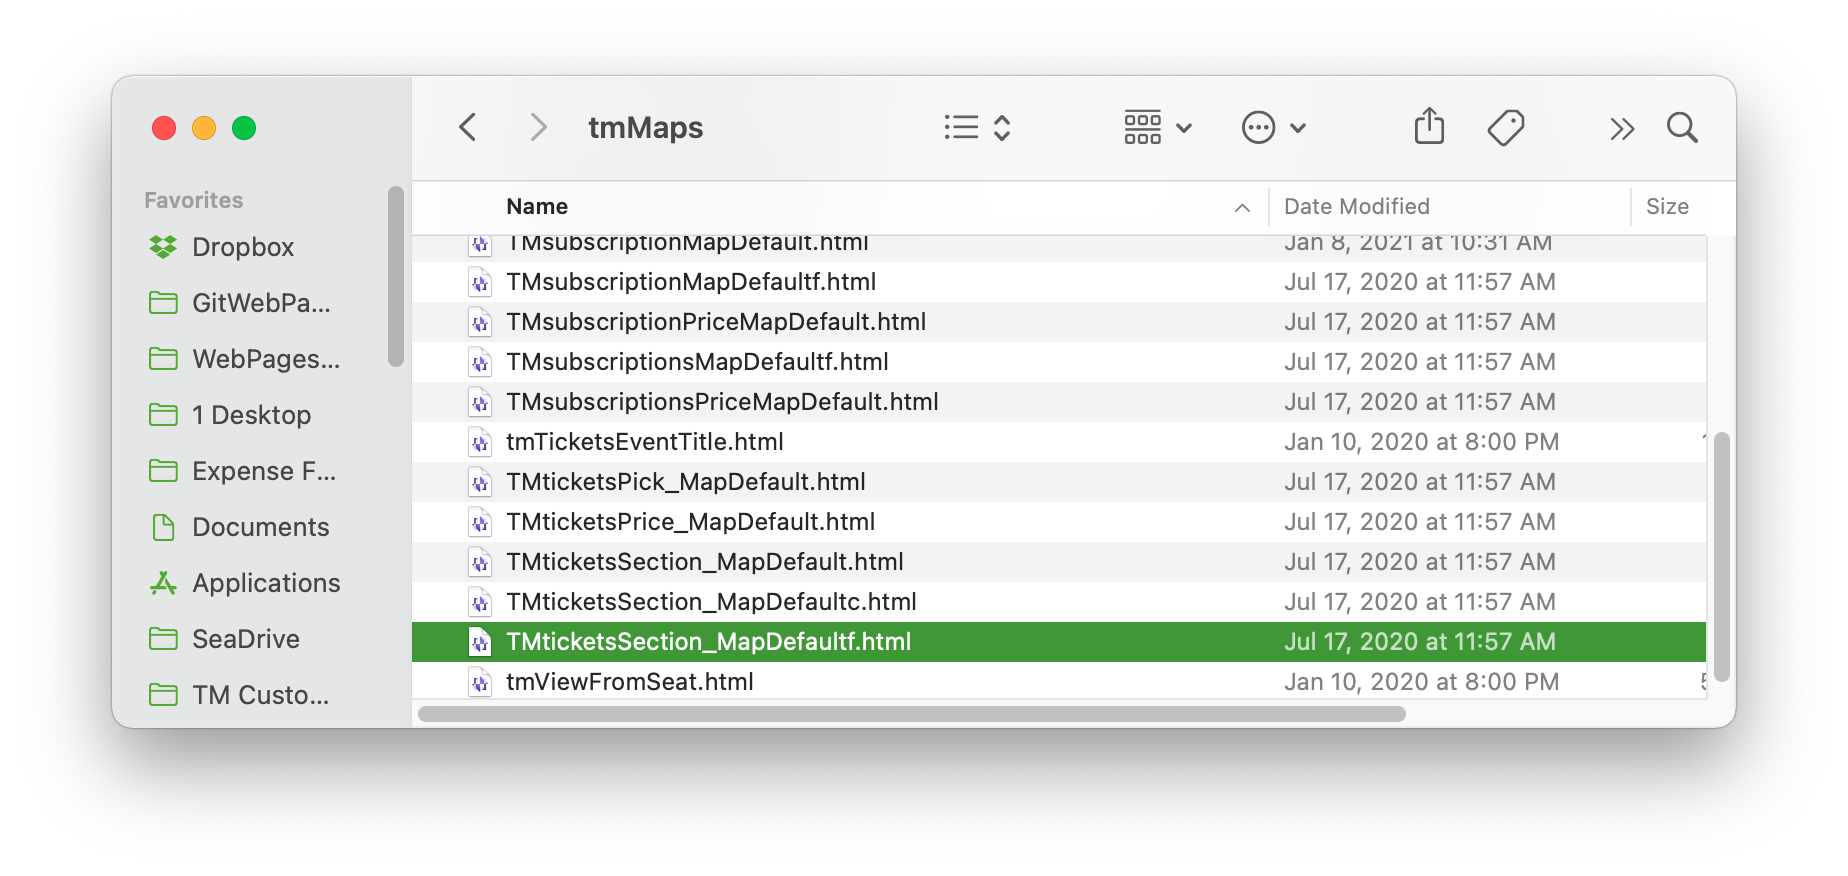
- Copy the TMticketsSection_MapDefaultf.html to the organizations /WebPagesEN/tmMaps folder.
- Delete the word Default from the name of the page and replace it with the Pricing Map Number being extra careful not to remove the " f " at the end of the title.
Editing The Web Page
The final step is to edit the web page. The steps below outline how to remove the notes from the page.
- Open the Custom Web Page from above using a tool like NotePad++ or BBEdit.

- Scroll down to Line 53.
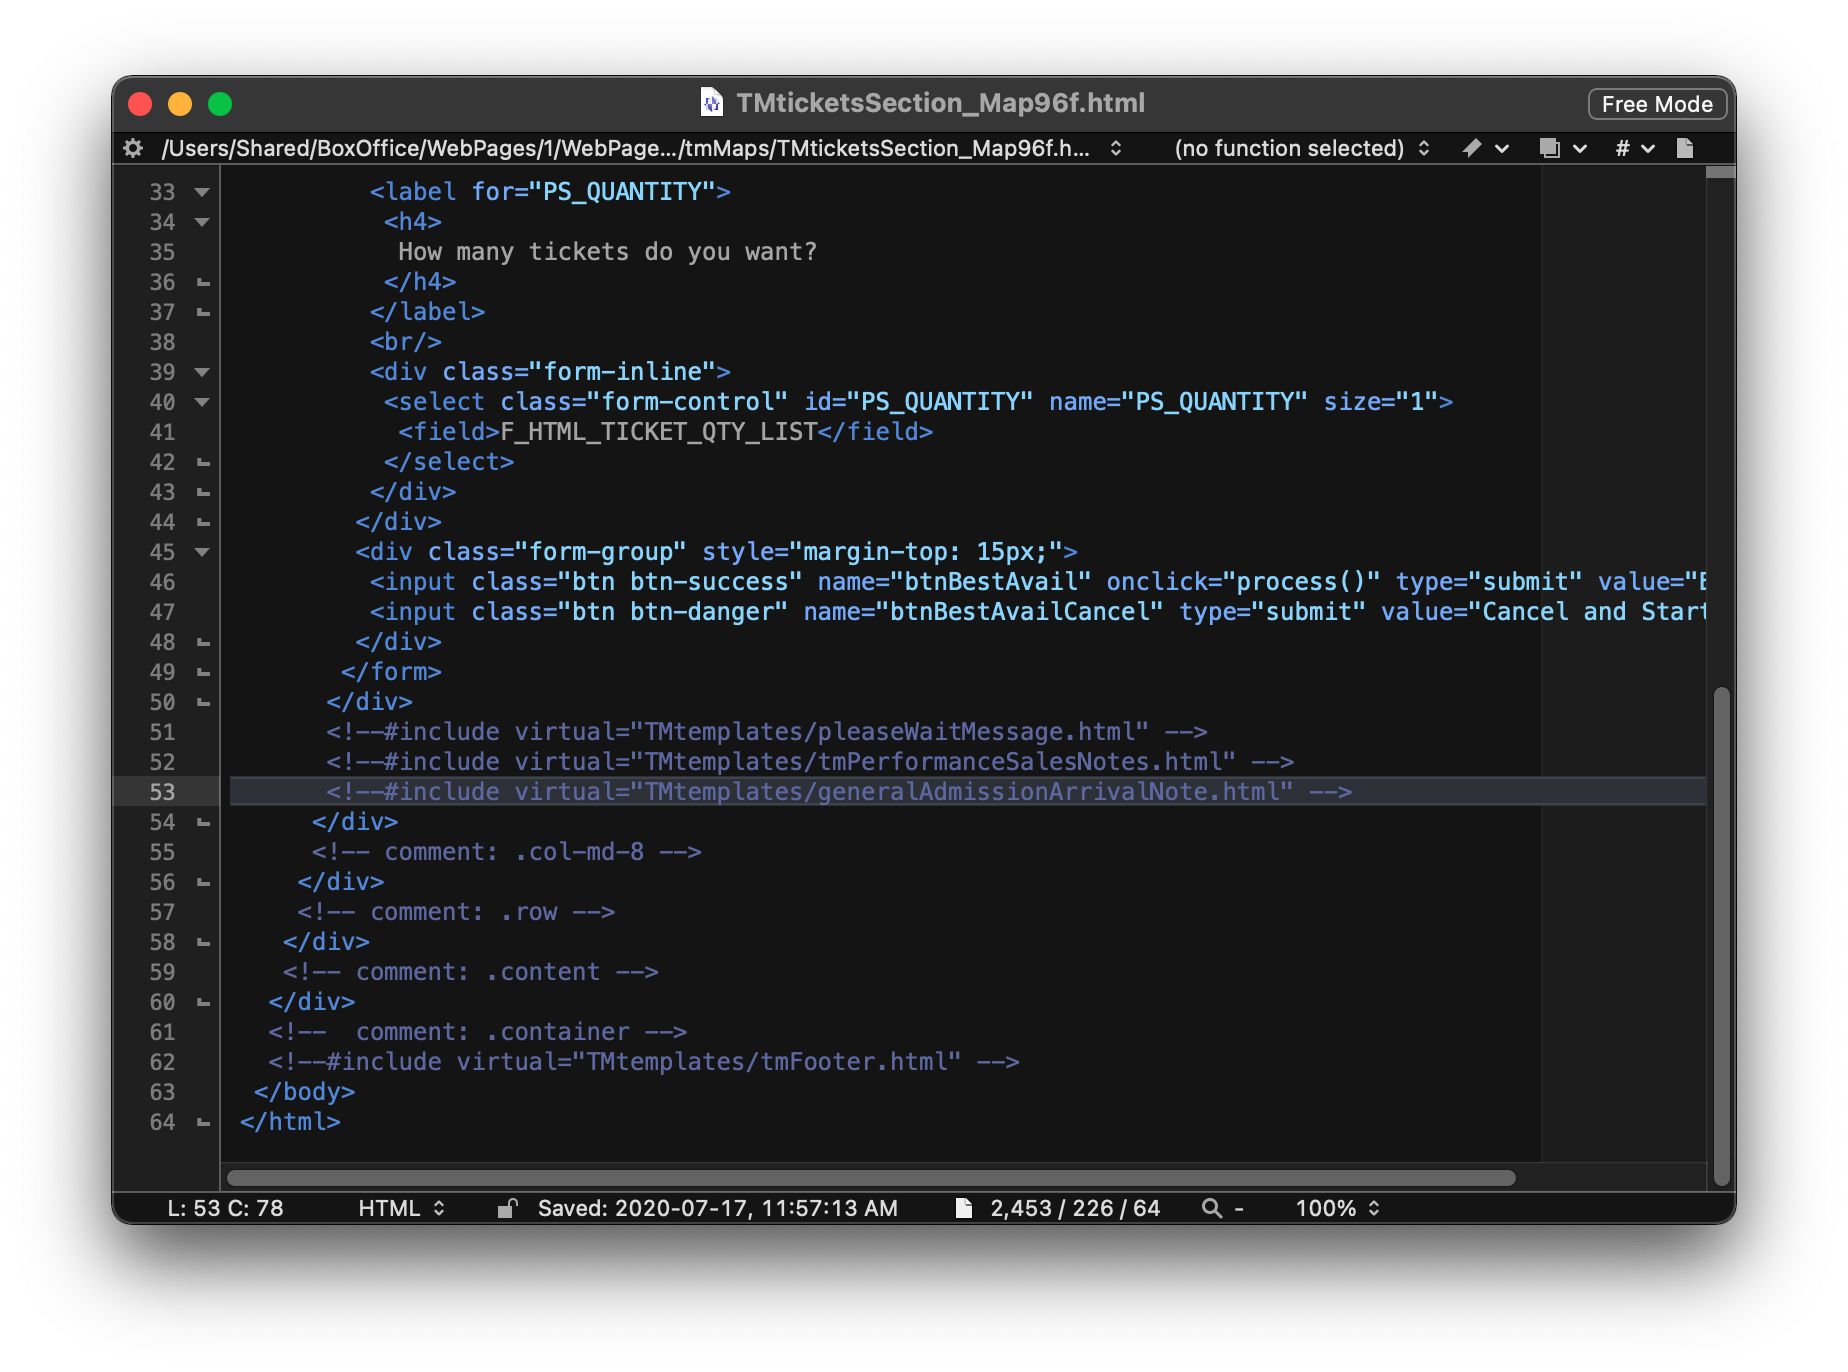
- Comment out the include statement for the generalAdmissionArrivalNotes.html.
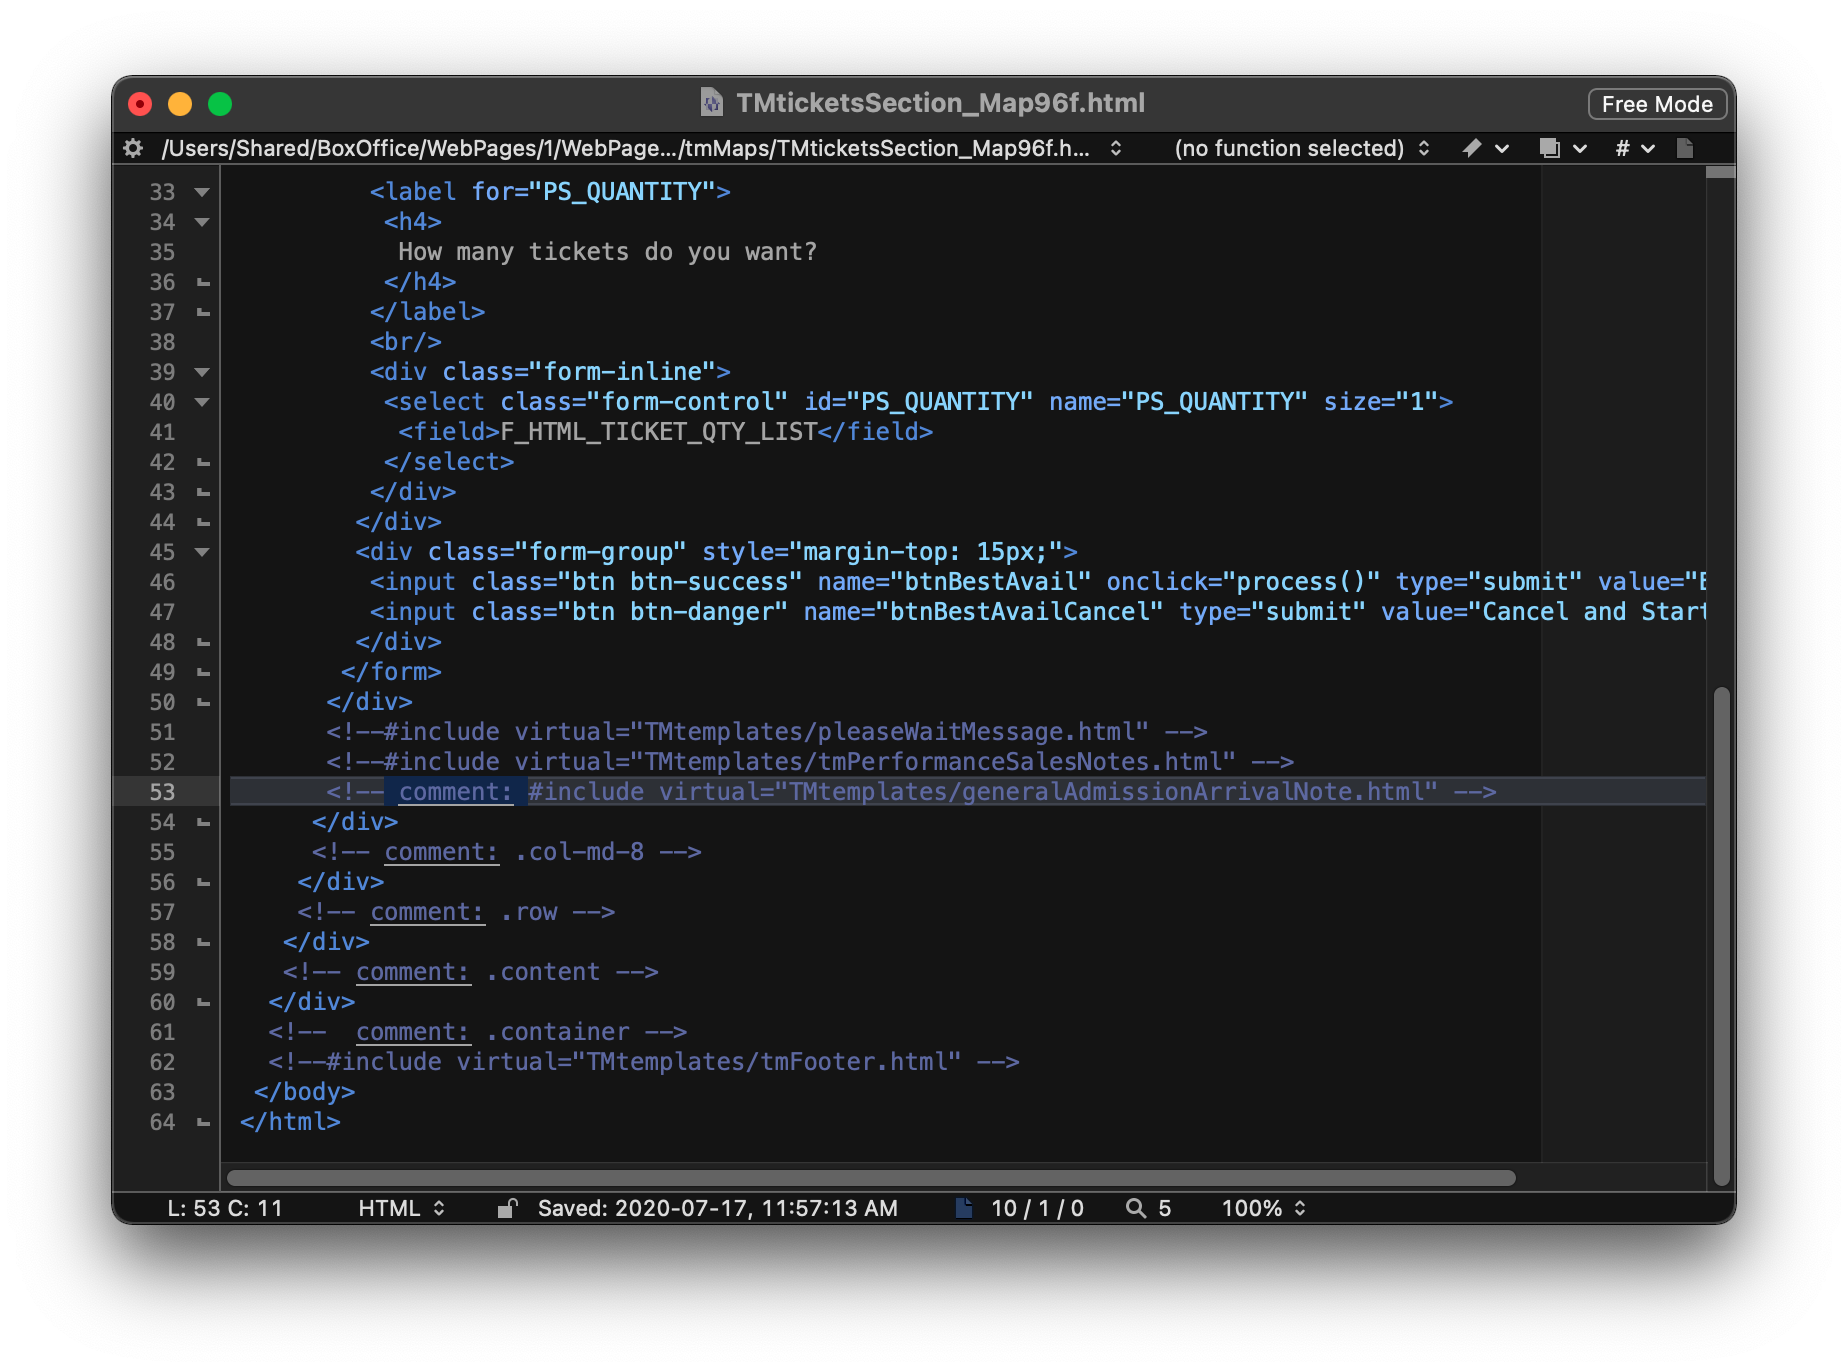
Mandatory Donation Fields
If you have any mandatory fields set for donations (such as "Why Patron Gave" or other field on the Notes tab), then your online donors will need to have this field filled in for them automatically. Otherwise, they will not be able to donate online as the database will require the field, and the patron has no way of entering it. To determine which fields may be mandatory, go to:
- Setup >> Company Preferences >> MANDATORY DATA tab
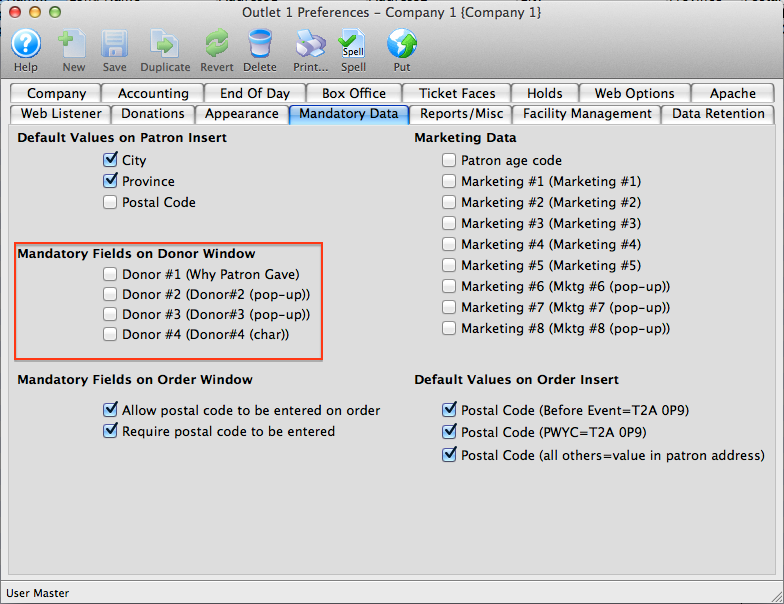
To correct this for online sales, you have two options:
Option 1: Editing the web page (recommended)
This process includes web page editing. If you have a web designer on hand, they can perform these edits. If you wish to contract with Arts Management Systems to perform these or any customizations for you, please contact the Support Team at support@artsman.com
If you still wish those fields to be mandatory for the Box Office or Development Department, then you will need to make a slight adjustment to the tmDonationHiddenFields.html web page.
The process starts by obtaining a Sequence Value from Theatre Manager
- Determine which field is set to be Mandatory.
- In Theatre Manager, go to Setup>>System Tables>>Code Tables.
- Look under the Donor #1, #2, #3 pop-up (or if the field has been renamed, look under its name).
- Choose which value is going to be the default value. In this example, we've chosen Internet Donation.
- Obtain the Sequence number for that value You may have to RIGHT click on a column header to show all the available columns, and select the Sequence number. In this example, the Sequence number is 982.

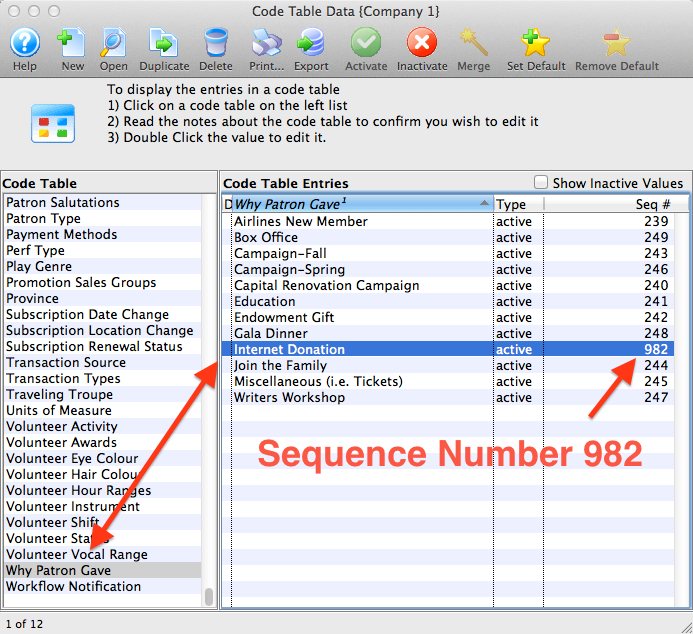
Now you will need to go edit the tmDonationHiddenFields.html web page, located in the TMtemplates folder.
- Move a copy of the tmDonationHiddenFields.html web page into the TMtemplates folder.
- Open the tmDonationHiddenFields.html page and locate the following:
- Make the desired edits If the Sequence Number of the value you want to default to for Donation Field #1 = 982, then the line of code would look like this:
- Save the edited page in the TMtemplates folder.
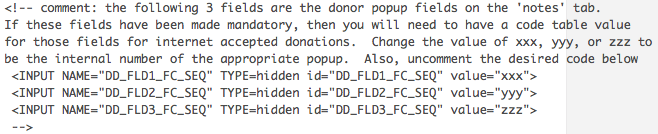
This allows you to set a "default" value on these fields for web sales.
<!-- comment: the following 3 fields are the donor popup fields on the 'notes' tab.
If these fields have been made mandatory, then you will need to have a code table value
for those fields for internet accepted donations. Change the value of xxx, yyy, or zzz to
be the internal number of the appropriate popup. Also, uncomment the desired code below
<INPUT NAME="DD_FLD1_FC_SEQ" TYPE=hidden id="DD_FLD1_FC_SEQ" value="xxx">
<INPUT NAME="DD_FLD2_FC_SEQ" TYPE=hidden id="DD_FLD2_FC_SEQ" value="yyy">
-->
<INPUT NAME="DD_FLD3_FC_SEQ" TYPE=hidden id="DD_FLD3_FC_SEQ" value="982">
Option 2: A global change
You can make the field non-mandatory. This will make the field not required for both Web Sales and in the Box Office/Development Office. To make this global change:
- Go to Setup >> Company Preferences >> MANDATORY DATA tab
- Simply UNcheck the mandatory field options.
You will see a section for "Mandatory Fields on Donor Window" as noted above.
Navigation Buttons
There are two groups of buttons:
- Menu Navigation Buttons
- Data Submit/Navigation Buttons
The menu Navigation buttons reside within the TMtemplates/tmnavButtons.html file, and are dynamically imported into each page via the <include> command. The command looks like:
<!--#include virtual="TMtemplates/tmnavButtons.html" -->
and creates buttons that look like:

Since buttons are subject to style changes, we are able to use the Bootstrap Style Sheets to make them fit whatever concept your site incorporates, such as:


These buttons default to the bootstrap stylesheets for the 'nav navbar-nav' class.and can be enhanced in the custom.css style sheet
Data Submit/Navigation Buttons
The other buttons in each page serve different purposes by sending data to the database. These buttons work exactly the same way as the menu buttons only they allow Theatre Manager to receive the data that has been entered into the page and then load a new page page based on that data. An example of this would be to click on the Buy Tickets button
![]() which will take the patron to the TMtickets.html page allowing you to select a performance to buy tickets for. The Data Submit buttons will look like the following
which will take the patron to the TMtickets.html page allowing you to select a performance to buy tickets for. The Data Submit buttons will look like the following ![]() (although the words may vary)
(although the words may vary)
The Data Submit buttons default to the stylesheets for the 'btn' class and can be modified with 'btn-success', 'btn-warning', 'btn-info' and others such as 'btn-small'
Buttons Commands
This is a list of the button commands that Theatre Manager requires. They are entered as the name="xxx" portion of each input tag.
These commands cannot be altered.
- btnLogin
- btnLoginAccount
- btnLoginFromDetail
- btnHome
- btnHistoricalCart
- btnHistoricalCartDetail
- btnAccount
- btnAccountRequest
- btnAccountAdd
- btnAccountUpdate
- btnPassword
- btnPasswordCancel
- btnPasswordAccept
- btnPasswordRequest
- btnPasswordSend
- btnMailList
- btnMailListAdd
- btnMailListRemove
- btnTicket
- btnGetEventRange - Deprecated. use btnGetEventList instead. This button uses btnGetEventList anyway
- btnGetEventAll - Deprecated. use btnGetEventList instead. This button uses btnGetEventList anyway
- btnGetEventList
- btnSelectEvent
- btnBestAvailCancel
- btnBestAvail
- btnReserveCancel
- btnReserveTicket
- btnPass
- btnReservePass
- btnPassAmountCancel
- btnPassAmountAccept
- btnDonation
- btnDonationAccept
- btnCart
- btnCartRemoveItem
- btnMailFeeAdd
- btnCheckout
- btnCheckoutAccept
- btnLogout
- btnLogoutCancelOrder
Seat View for Web Sales
When purchasing a ticket online a link can be added offering the patron an opportunity to see the view from their selected seats prior to adding tickets to their cart. This option requires some setup in order to work successfully online.
Once the setup is in place, the seat view button will become available. Clicking the button will open a new tab in the browser displaying the seat view image.
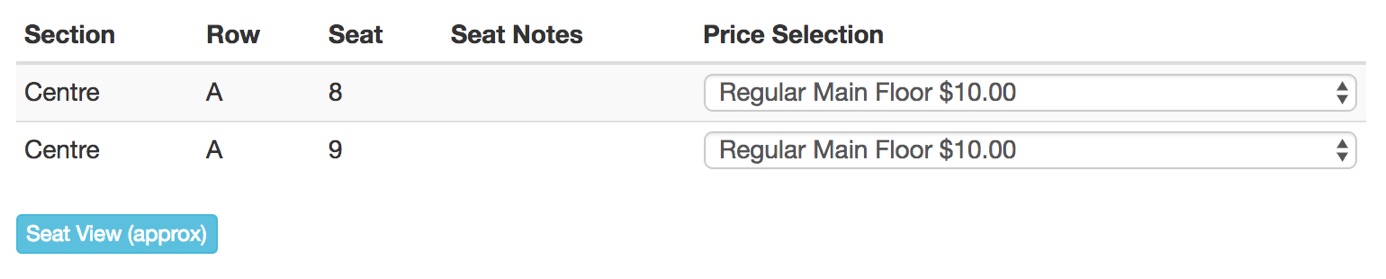
Adding the Seat View Image
- Take a picture from each seat or from one seat that will represent multiple seats inside the venue.
- On the Web Listener computer, create a tmSeatView folder inside the WebPagesEN/tmGifs folder to store the seat view images.
- Place all the seat view images into the tmSeatView folder ensuring the naming convention for each image is clear.
Updating the Theatre Map
- In Theatre Manager, open the Theatre Map.
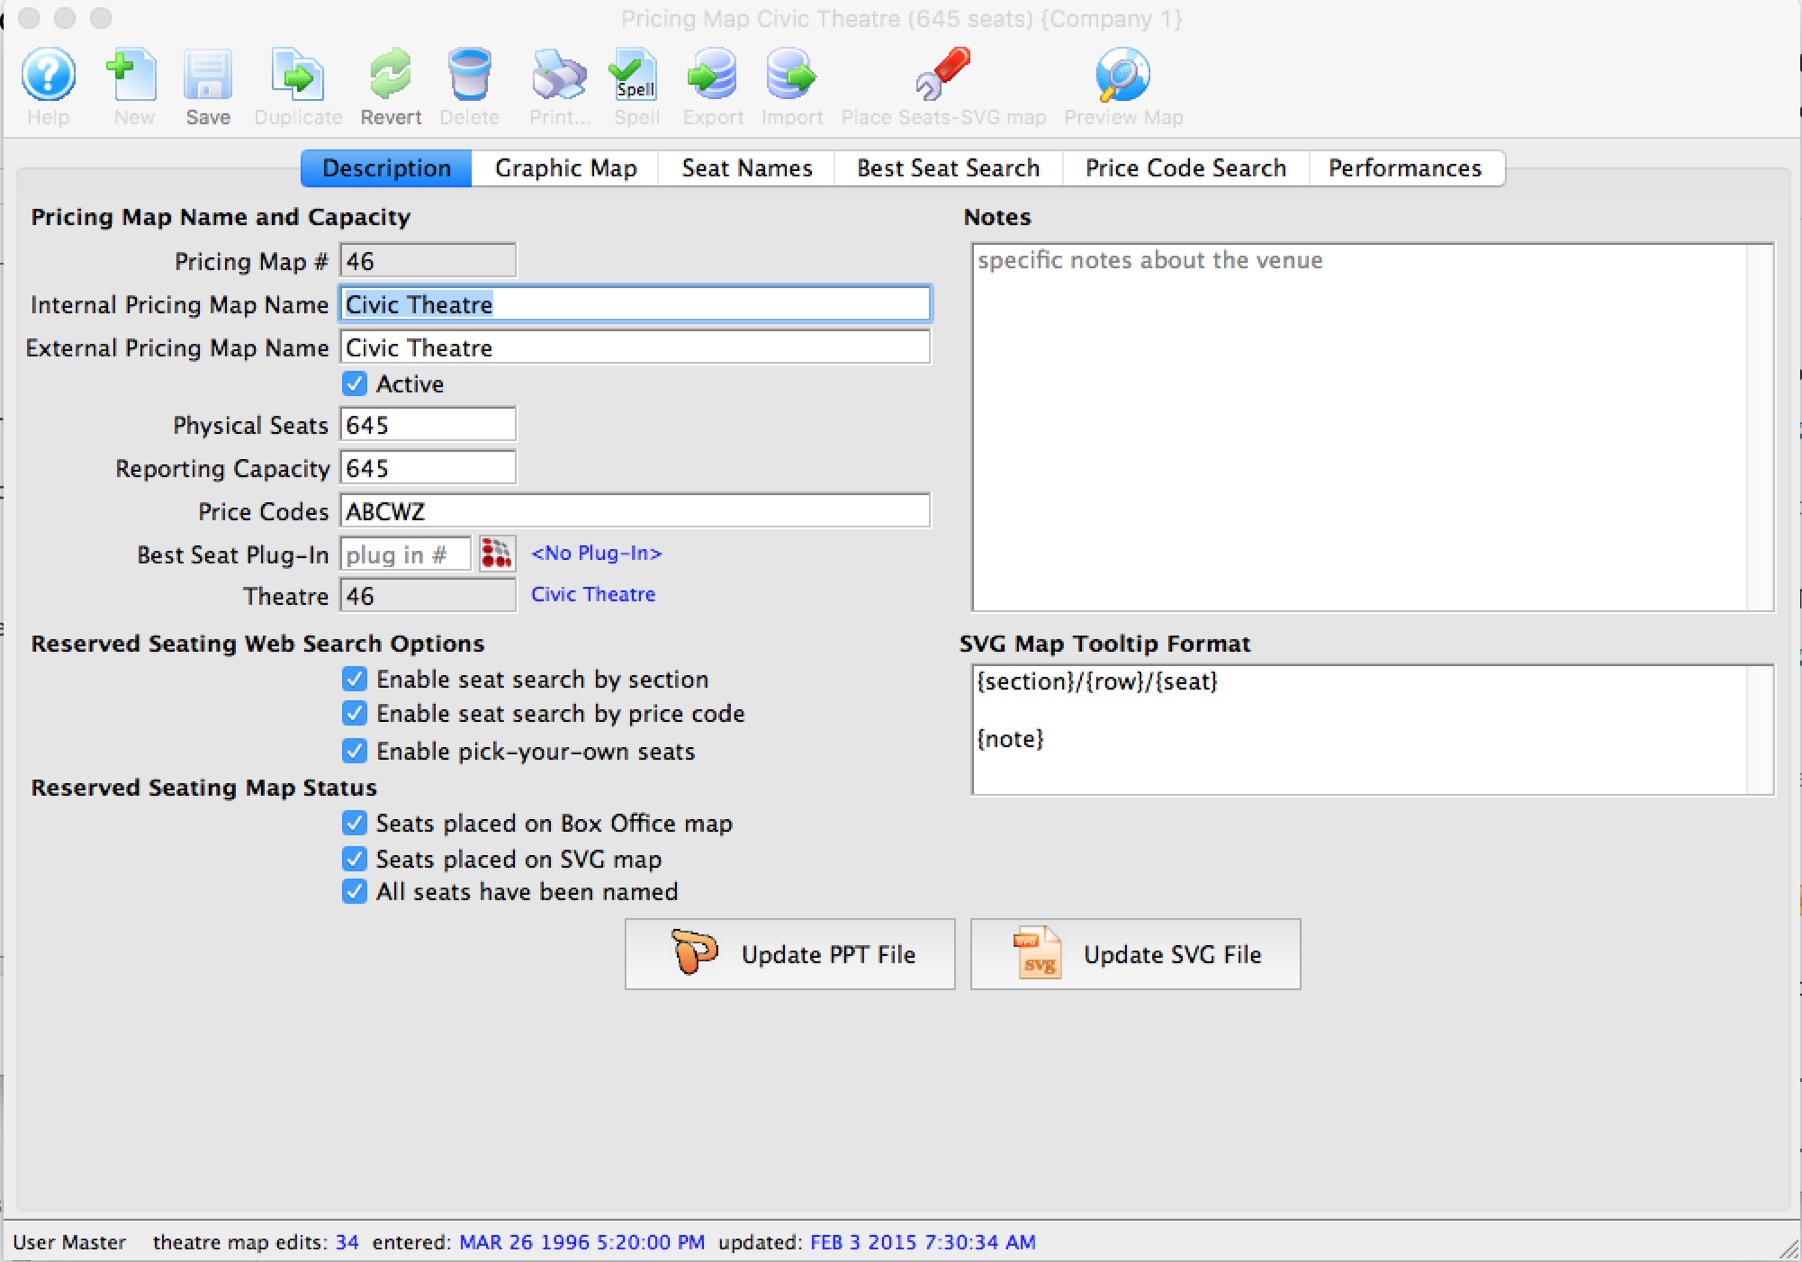
For details on how to access the Theatre Map window, click here.
- Select the Seat Names tab.
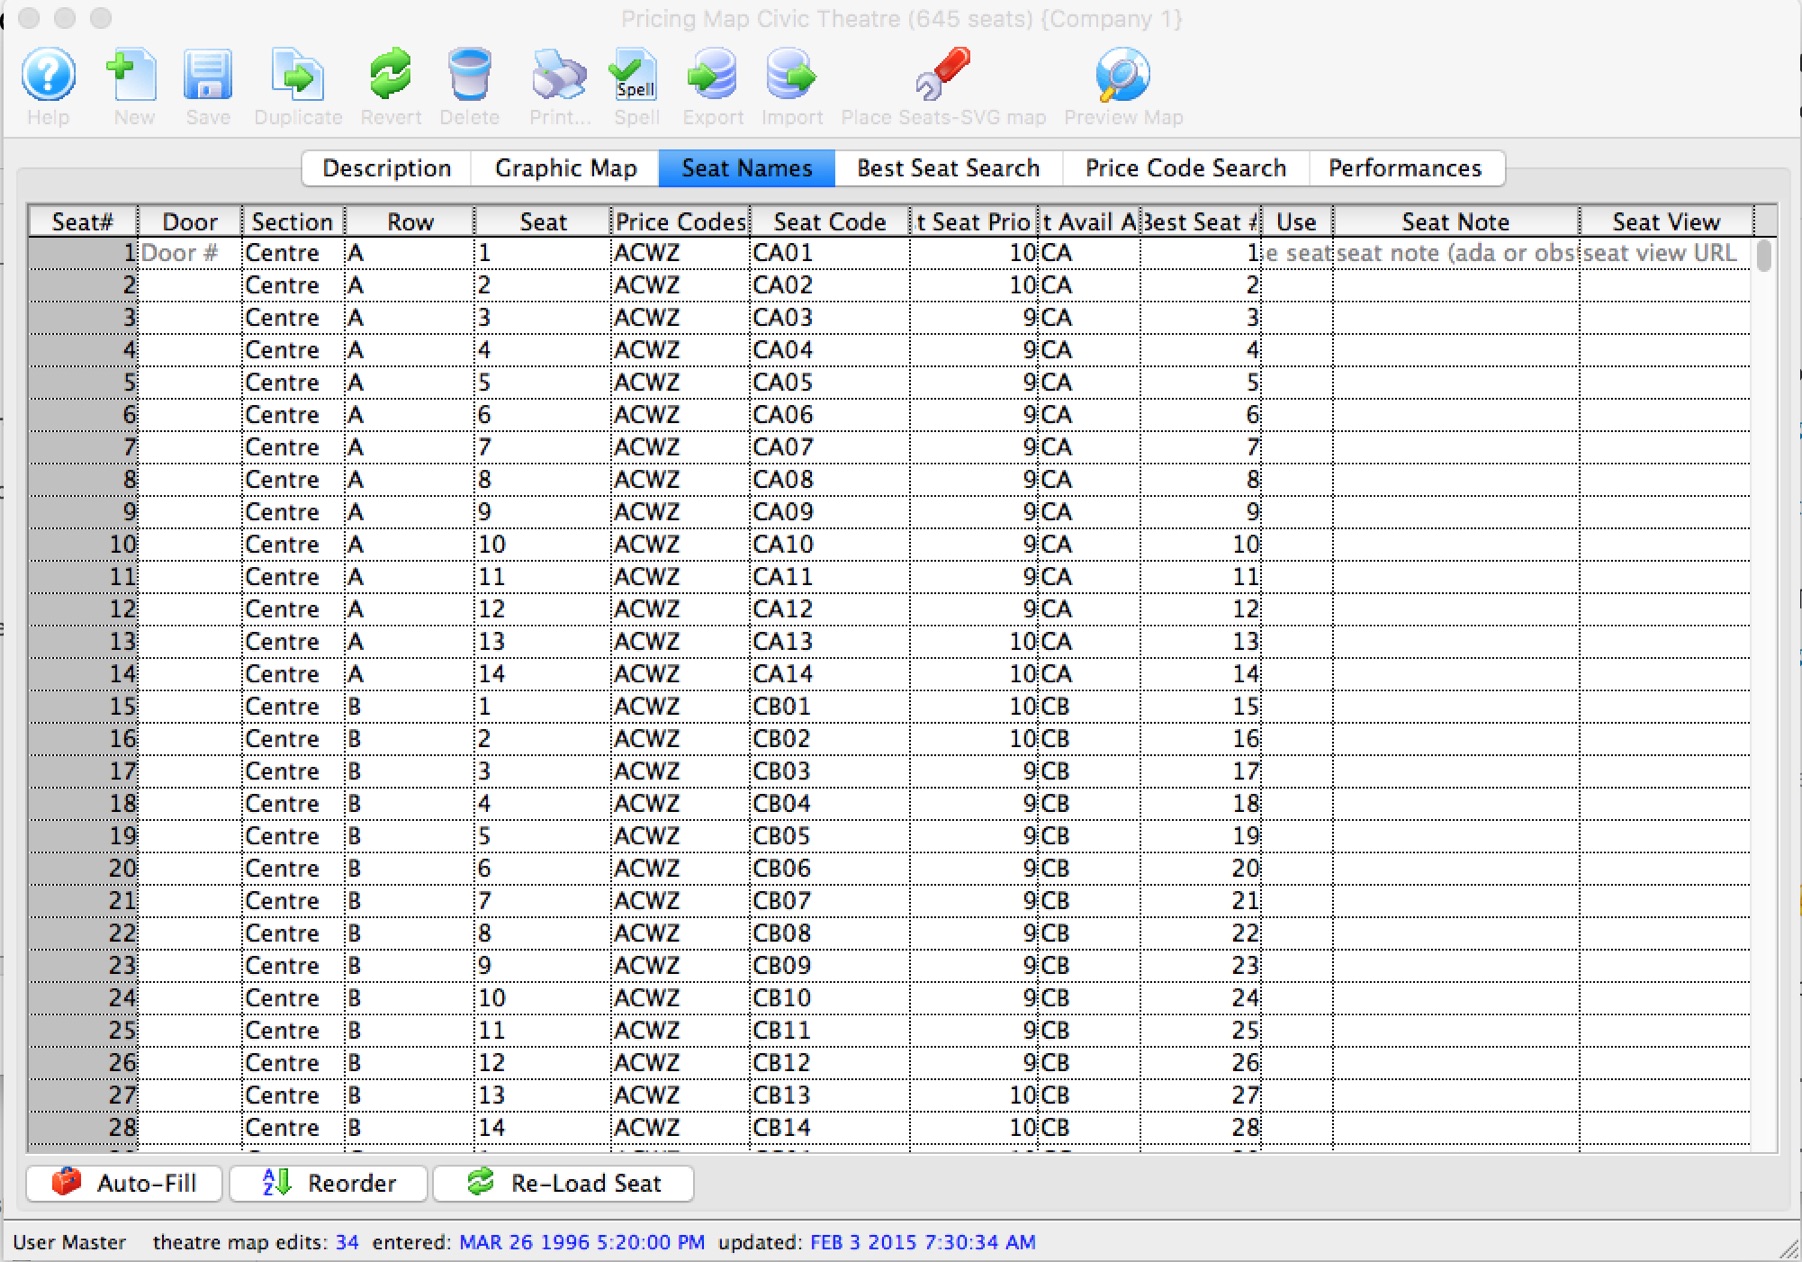
For more information on the Seat Names tab, click here.
- Update the far right Seat View column next to each seat with the name of the seat view image placed in the tmSeatView folder above. The column should contain the full name of the seat view image including the extension. You can use the same image for a row or area of the venue if the seat view doesn't change that much. Examples:
If you:
- use your smart phone or digital camera to take a picture from the middle of row 'H' on the left of the theatre, that image could represent the view from all of row 'H' and perhaps even row 'J' and 'K'.
- Retrieve that image from your camera and reduce its physical file size so that it is about 50 to 75K (at most - since most cameras take at least 4 megabit pictures, and sharply reducing the image size is important for web performance).
- You might rename that file ViewFromRowHJK.jpg so that you know what it is at a glance
- Place that picture into the tmSeatview folder described above
- put the name of the file ViewFromRowHJK.jpg into the Seat View column for all the seats in rows 'H', 'J', and 'K'.
- repeat for the next view from a seat picture you take of the venue
- Save and close the Map.
Editing the Seat View Web Page
- Copy the tmViewFromSeat.html web page into the WebPagesEN/tmMaps folder.
- Edit the tmViewFromSeat.html page using a tool like NotePad++ or BBedit.
- Update Line 8 with the desired text to appears as the link online.
Once the above steps are complete, restart the Web Listener to clear any previously cached web pages.
Sold Seat Colour Online
The default appearance for unavailable seats online is the FontAwesome icon of a person. When a map contains many small seats this may not be ideal as the people might appear to overlap. It may be more desirable to have the unavailable seats appear in a solid colour (or other icon) separate from available seats and suggested seats.
To make this change you will want to edit the tmPickYourSeatMapDisplay.html web page. Locate line 43, it should look like this:
<object class="embed-responsive-item" data="<field>F_HTML_SEATMAP</field>&reserved_colour=00FF00&reserved_only=false&format=pick&unavailable_color=FFFFFF &unavailable_text=&seat_font=FontAwesome&seat_font_load=cdn" id="venue_map">
Change Line 43 to be:
<object class="embed-responsive-item" data="< field>F_HTML_SEATMAP< /field>&reserved_colour=00FF00&reserved_only=false&format=pick&unavailable_color=000000&unavailable_text=" " id="venue_map">
This will remove the people (seat_font=FontAwesome&seat_font_load=cdn) and make the sold seats appear black (unavailable_color=000000). The colour of the unavailable seats can be updated to the desired HEX colour.
For additional features regarding changing the map online please click here.
Altering the Number of Lines in the Pricing List
This process includes web page editing. If you have a web designer on hand, they can perform these edits. If you wish to contract with Arts Management Systems to perform these or any customizations for you, please contact the Support Team at support@artsman.com

Edit the code on the web page
- Select the web page to edit.
The most commonly used pages are rowTicketReserved.html, rowTicketFestival.html, and rowTicketCourse.html. - Locate the following HTML on the page:
<select class="form-control" id="SC_DESCRIPTION" name="SC_DESCRIPTION" size="1"> - Edit the following
- Change the size="1" to the number of lines you wish see to displayed.
- The sample above shows a size="3" to show 3 price lines.
Navigation Button To Select Performances
A button, directing you to a select list of Performances, can be created in the navigation buttons at the top of the online sales windows. This button can be used for Courses, Opening Nights, Special Events or other performances where you want to list a select group of Performances.
The key for this button is flagging the Performances with the same reference and using that reference in the button to pull the desired shows. The setup requires editing the performances and adding the button to the online sales.
To flag the performances, you perform the following steps:
- Click the Event
 button in the main theare manager tool bar.
 - Search for and open the desired Event.
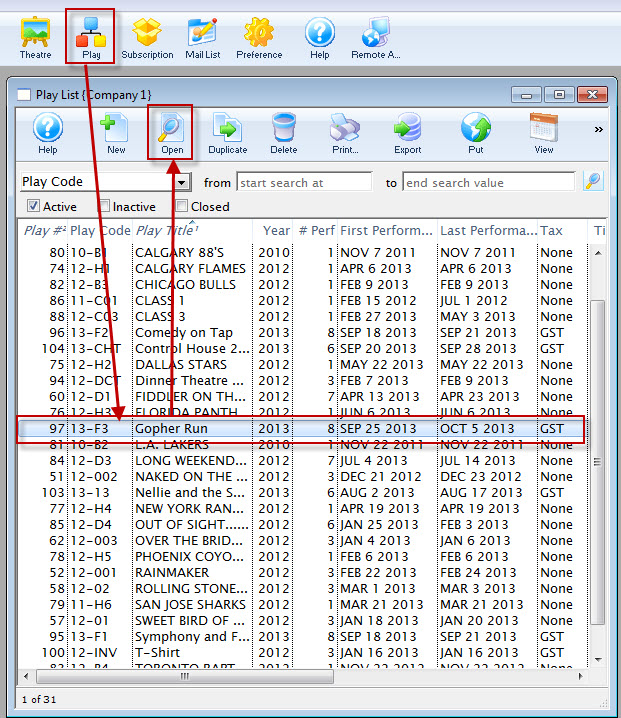
- Select the Performance tab.
Open the desired Performance.
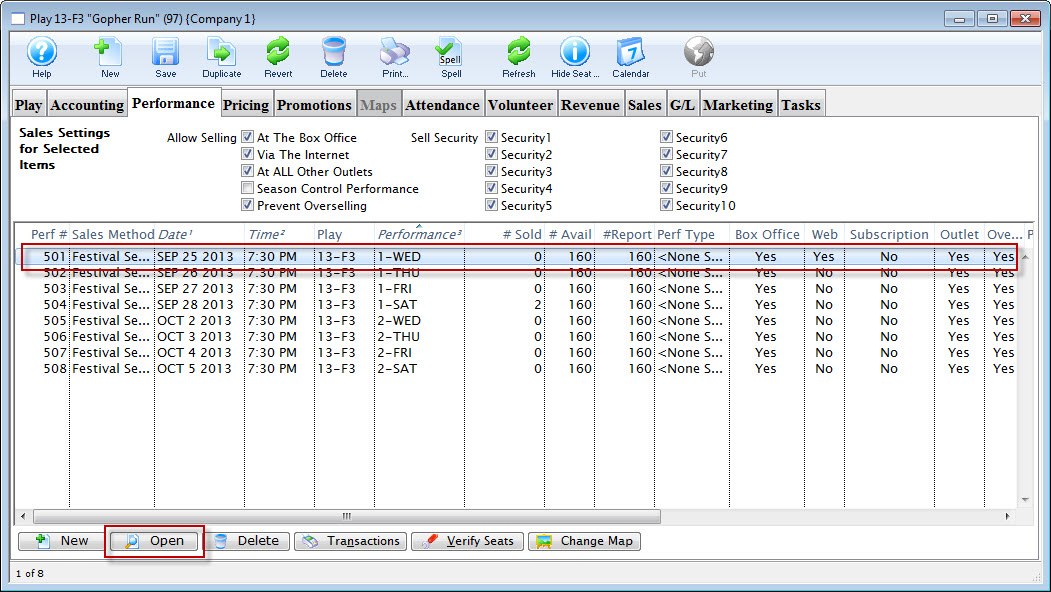
- Select the Web Settings tab, and enter a value in the Performance Flag field.
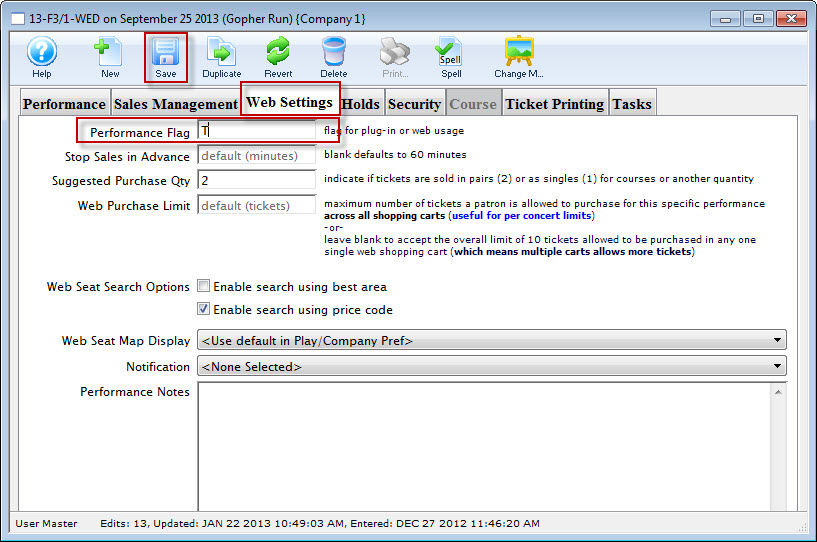
In our example we have used the letter T.
- Save and close the window.
Adding The Button
A button can be added to the existing buttons across the top on the online sales window. Edit the tmnavbuttons.html page.
This process includes web page editing. If you have a web designer on hand, they can perform these edits. If you wish to contract with Arts Management Systems to perform these or any customizations for you, please contact the Support Team at support@artsman.com

Adding the coding to the web page.
- Select the web page you wish to add the field to.
The page to edit is tmnavButtons.html. - Add the following HTML to the page:
<li>
<a href="<field>F_HTML_FIREWALL</field>login?event=0&search=PB_PERF_FLAG='T'">
<i class="fa fa-ticket">
</i>
Special Performances
</a>
</li> - Edit the following
- You change the 'Special Performances' text to reflect the text you wish to use for the button.
- Update the letter 'T' to match the letter used when setting up the Performances
Navigation Button for Courses
A button can be added to the tmnavButtons.html which provides a link directly to courses currently available for sale online.
This process includes web page editing. If you have a web designer on hand, they can perform these edits. If you wish to contract with Arts Management Systems to perform these or any customizations for you, please contact the Support Team at support@artsman.com

Adding the coding to the web page.
- Select the web page to edit.
The page to edit is tmnavButtons.html. - Add the following HTML to the page:
<li>
<a href="<field>F_HTML_FIREWALL</field>login?event=0&search=PB_SALES_METHOD='6'">
<i class="fa fa-ticket">
</i>
Theatre Classes
</a>
</li> - Edit the following
- Change the 'Theatre Classes' text to reflect the text you wish to use for the button.
Sales Methods
Buttons can be created for all 7 types of Sales Methods. The most common online options are:
- Sales Method 1 - Festival/General Seating
- Sales Method 2 - Reserved Seating
- Sales Method 3 - Inventory
- Sales Method 6 - Courses
Purchase Option for a Specific Member Type
The lines below are an example of a button that will add a specific member type to the cart with a fixed value. This button can be added to any page within the online sales. It would most commonly appear on the TMpass.html page or the TMcart.html page.
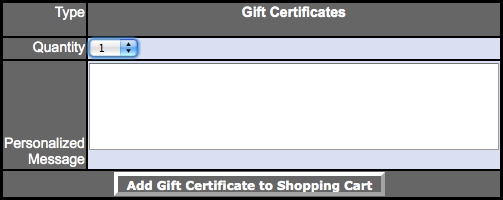
<TABLE width="345" BORDER=0 CELLPADDING=1>
<TR>
<TD WIDTH=92 class="tablerowheader" align="center">
<P align="right">Type</P>
</TD>
<TD width="240" class="tablerowheader">
<FORM ACTION="<field>F_HTML_FIREWALL</field>online" METHOD=POST><DIV ALIGN="center">
<label for="Team"><strong>Gift Certificates</strong> </label>
<input type="hidden" name="MT_SEQ" value="14">
</DIV>
</TD>
<TR>
<TD WIDTH=92 class="tablerowheader">
<P align="right">Quantity</P>
</TD>
<TD class="tablerowdetail">
<select name="PS_QUANTITY" size="1" id="PS_QUANTITY">
<option value="1" selected>1</option>
<option value="2">2</option>
<option value="3">3</option>
</select>
</TD>
</TR>
<TR>
<TD valign="top" class="tablerowheader" align="right">Personalized Message</TD>
<TD class="tablerowdetail" align="left">
<textarea name="M_NOTES" cols="50" rows="5"><field>M_NOTES</field></textarea>
</TD>
</TR>
<tr class="tablerowheader">
<td colspan=2 align="center">
<input name="btnReservePass" type=submit value="Add Gift Certificate to Shopping Cart" class="new" onMouseOver="pviiClassNew(this,'newover')" onMouseOut="pviiClassNew(this,'new')" onClick="process()">
</FORM>
</TD>
</TR>
</TABLE>
Redirecting the Add Code Button
When entering a coupon code in the online sales the patron clicks the Add Code button. This button appears in the TMtickets.html and TMcart.html pages. The button accepts the coupon or access code and returns the patron to the TMtickets.html page.
This process includes web page editing. If you have a web designer on hand, they can perform these edits. If you wish to contract with Arts Management Systems to perform these or any customizations for you, please contact the Support Team at support@artsman.com

Edit the code on the web page
- Select the web page to edit.
The page to edit is tmTicketsPresalesCoupon.html. - Locate the following HTML on the page:
<input name="param" type="hidden" value="altbtn=btnGetEventList"/> - Edit the following
- Change the 'btnGetEventList' text to 'btnCart'.
Custom Genre
The Genre setting with Theatre Manager are directly connected to the Ticket Trove application. This means the drop down is restricted to the current list of options and is not available for customization. You can however, create your own custom genre lookup using the Event code used to define each event within Theatre Manager OR the Performance Flag field which is associated with each performance within the database. This allows you to group together different types of performances or events and create your own sort options within the online sales.
Custom Genre using Event code
Using the Event Code within Theatre Manager you can create your own customized drop-down for genre. Lets consider you have three style of theatre programming; Mainstage, Theatre for Young Audiences and Alternative Theatre. You can use a value of the event code to create a custom genre search for the web sales process. You then comment out on the TMtickets.html and add code to reference the Event Code.
|
The Event Genre will still apply in the TicketTrove application. |
When building events in Theatre Manager an event code is created. The event code consists of 6 characters with a default assumption that the code begins "XX-" where XX it traditionally the year/season of the event. Following the [-] dash you can then add your value. In this example lets assume MXX, YXX and AXX where M represents MainStage, Y represents Theatre for Young Audience and A represents Alternative Theatre.
When Building your Mainstage Series of events your event codes could look something like 13-M01 for the first mainstage event, 13-M02 for the second mainstage event and similar for the Theatre for Young Audiences ( 13-Y01 ) and Alternate Theatre (13-A01). Then considering the 4th character in the code i.e.: M for MainStage, Y for Young Audiences and A for alternative you would add coding to your template to result in a lookup that would appear like the following.
See Adding code to Web Page for details.
Adding Code to Web Page
The customized code can be added to the TMtickets.html page. Look for the Genre field on the template; lines 76 to 80.

Add the comment values to comment out the present Genre Drop Down as follows:

Then copy and paste the following code either above or below the Genre code you comment out and you will have your new custom Genre lookup based on the value within the event code. Note that you can have as many lookups based on any value of the code you wish. Simply add as many [ option value="position('M' in P_SHOW_CODE)=4">Mainstage Theatre ] as you need. In this example we evaluate the fourth character in the Event code where M will show you MainStage Theatre.
<tr>
<td align="right">Custom Genre List</td>
<td>
<select name="search" id="search">
<option value="">"any kind"</option>
<option value="position('M' in P_SHOW_CODE)=4">Mainstage Theatre</option>
<option value="position('Y' in P_SHOW_CODE)=4">Theatre for Young Audiences</option>
<option value="position('A' in P_SHOW_CODE)=4">Alternative Theatre</option>
</select>
</td>
<td align="left">
<input name="btnGetEventList" type="submit" id="Search" value="Search" class="new" onMouseOver="pviiClassNew(this,'newover')" onMouseOut="pviiClassNew(this,'new')" onClick="process()"></td>
</tr>
Once the code above has been added to the TMtickets.html page the page should be saved in the WebPagesEN folder. Clear the Cache on the web listener and refresh the page in the browser. The updated changes should now be visible and available to select.
Your Web Templete will then appear as follows:

Your new lookup will then display as:

When selection is made and the search button is clicked it will return all events in this example with an event code 13-M.
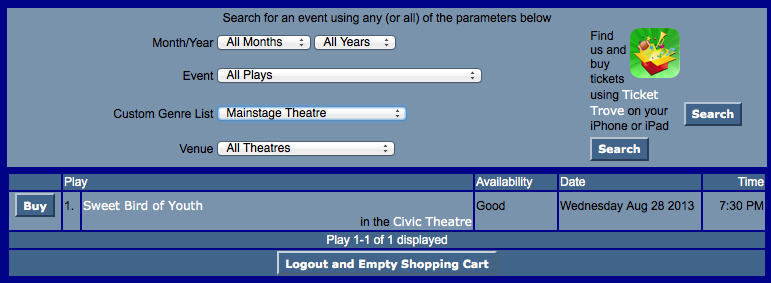
Custom Genre using Performance Field #1
Using the Performance Flag field within Theatre Manager you can create your own customized drop-down for genre. You then comment out on the TMtickets.html and add code to reference the Performance Flag.
|
The Event Genre will still apply in the TicketTrove application. |
To create your own customized Genre for online reporting, you perform the following steps:
Step 1 - Rename the Custom Genre Field
The first step is renaming the existing Performance Flag to something that will make sense in the future. This is done in Company Preferences.
- Click Setup >> Company Preferences.
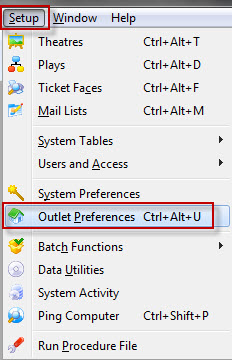
The Preferences window opens.
- Select the Appearance tab.
- Scroll down to Performance Field #1 (lookup).
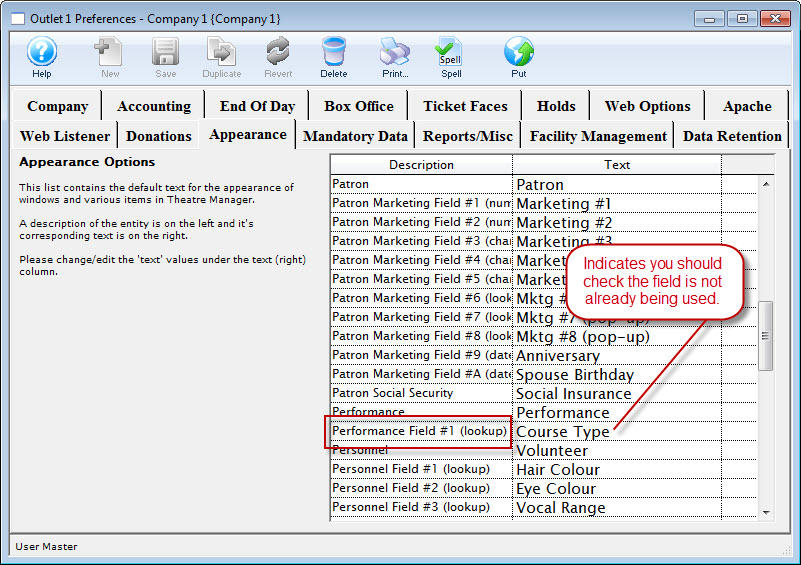
- Click in the field to the right of the Performance Field #1 and change the text to Custom Genre.
- Click the Save button.
- Close the Company Preferences.
|
The Performance Field #1 may be used in other parts of Theatre Manager (such as course). If the fiedl contains something other than Perf Type, double check it is NOT being used elsewhere before changing any information. |
Step 2 - Add Custom Genre Options
Yoiu can now add a unique list of Genres to your database. You do this in the code table. Click here for more information on Theatre Manager's Code Tables.
- Click Setup >> System Tables >> Code Tables.
- Single click on the Custom Genre option in the left column.
This is not to be mistake with the default Play Genre for the TicketTrove application.
- Click the New
 button.
The Custom Genre (inserting) window opens.
- Enter the name of the Genre to be added to the database.
Options may include items currently found in the Event Genre as well as those unique to the organization.
- Click the Save
 button and close the new Genre.
Repeat steps 3 through 5 above until all Genre's have been entered.
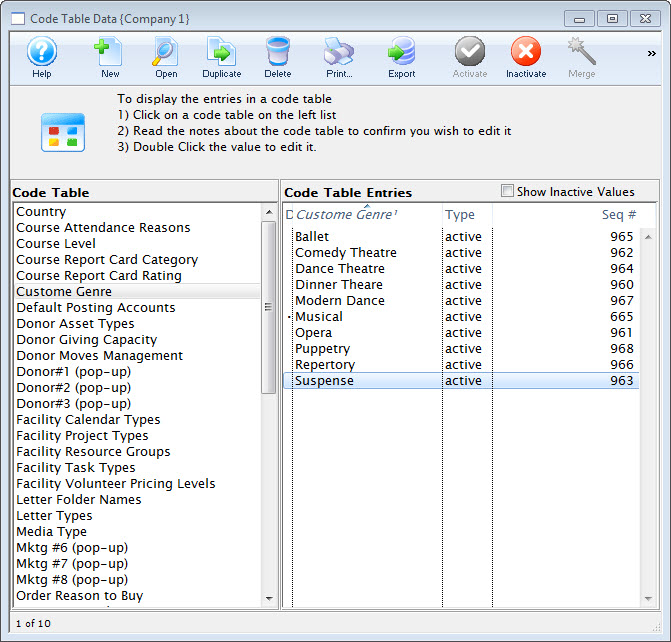
- Close the Code Tables window.
Step 3 - Setting a Custom Genre
Once the list of Genres is created, you need to assign them to each Performance. This method allows for flexibility between individual Performances.
- Click the Event
 button at the top of the window in Theatre Manager.
The event list opens.
- Search for and open the desired Event.
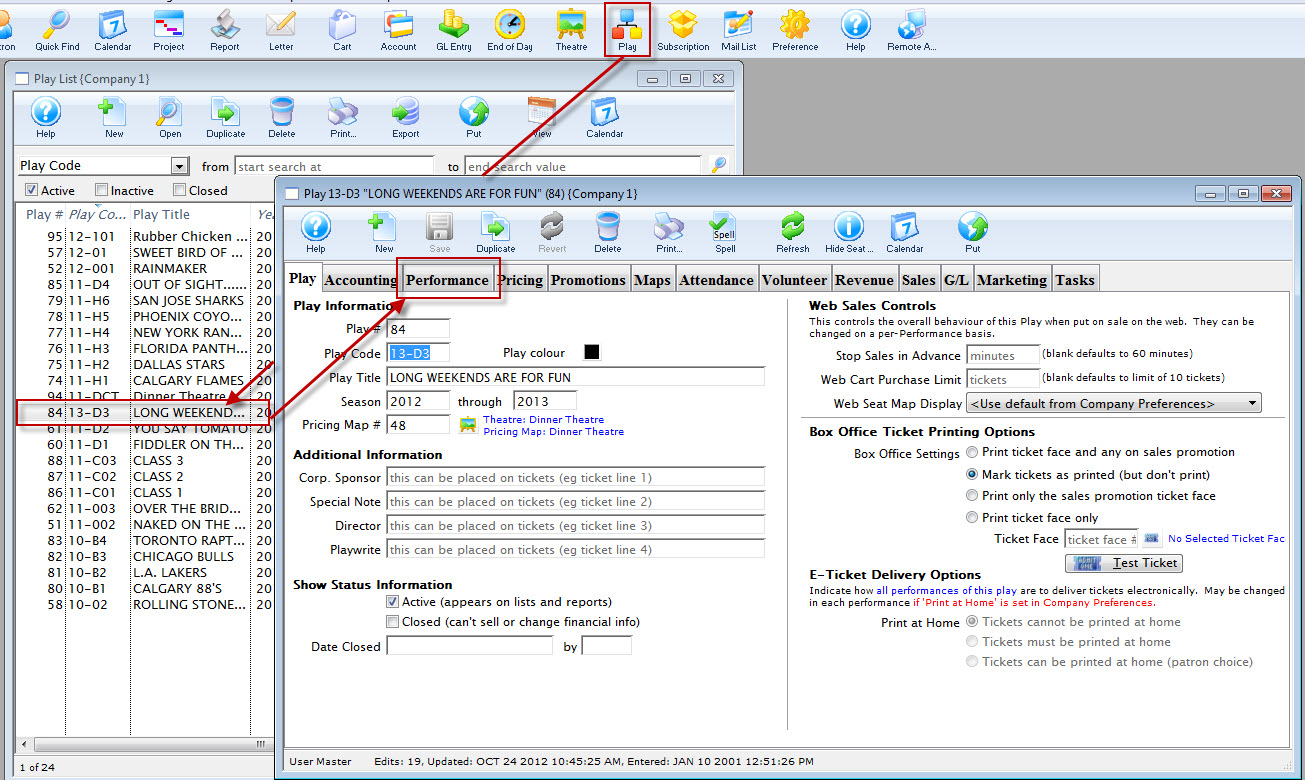
- Click the Performance tab.
- Open the Performance and select the desired Genre from the drop down.
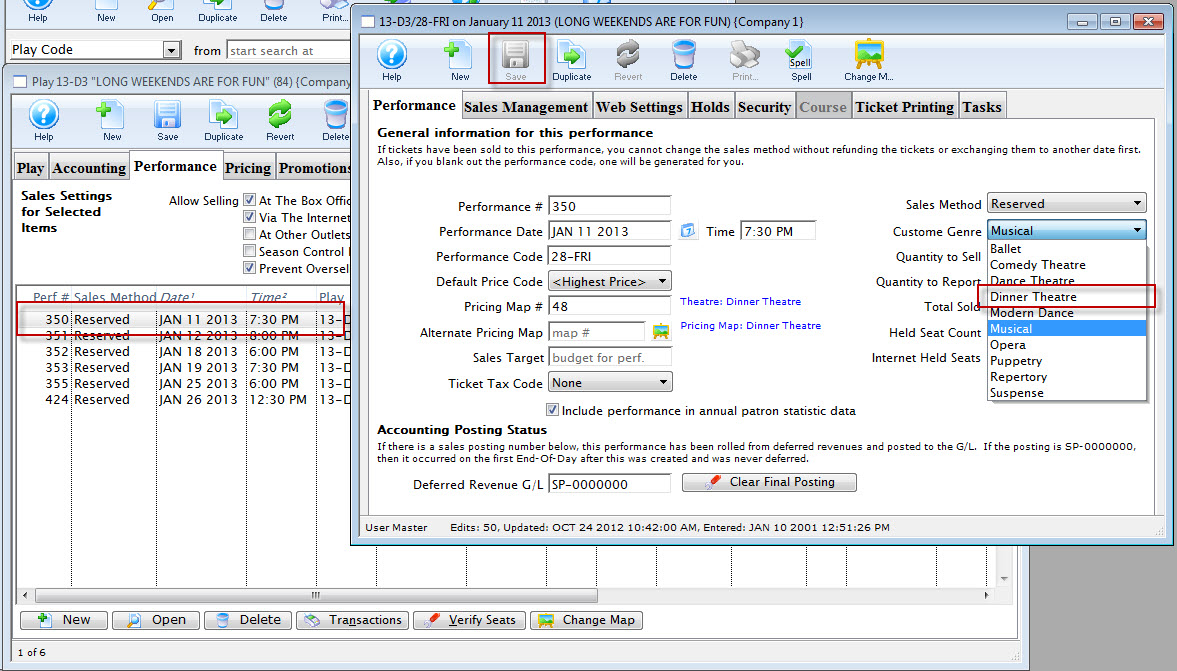
- Click the Save button and close the Performance detail window.
Repeat the steps until all Performances have a Genre.
- Close the Event window.
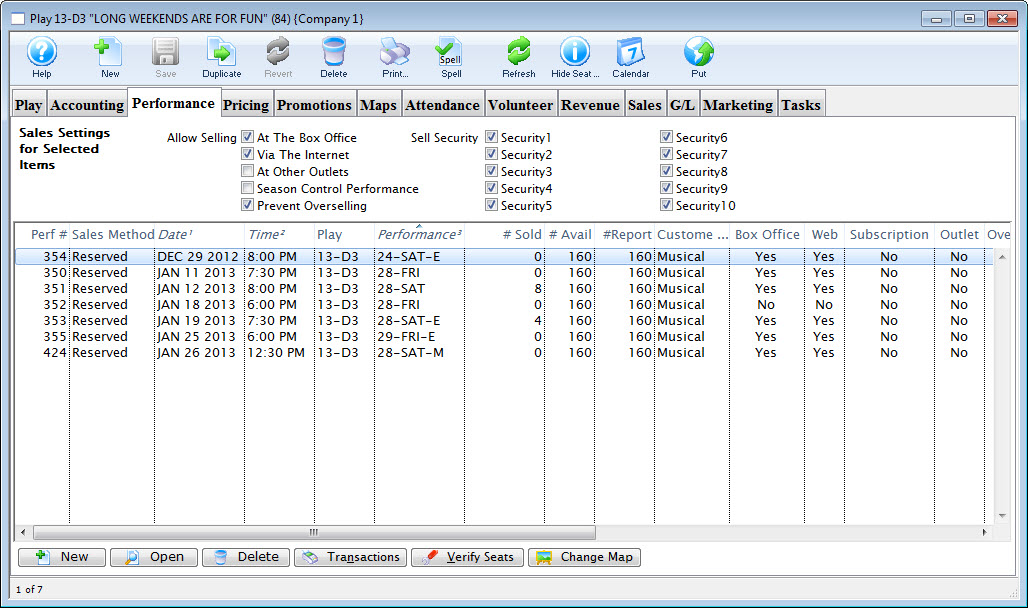
Step 4 - Locating the Custom Genre Sequence Number
Each Custom Genre is assigned a unique sequence number when you add it to the database. This sequence number is needed to add the Custom Genres to the online sales web page.
- Click Setup >> System Tables >> Code Tables.
- Choose the Custom Genre option in the left column.
This is not to be mistake with the default Play Genre for the TicketTrove application. The Sequence number will appear in the left column.
- Take note of the Sequence number and the corresponding Genre name.
5 - Adding Code to Web Page
The customized code can be added to the TMtickets.html page. Look for the Genre field on the template; lines 76 to 80.
Add the comment values to comment out the present Genre Drop Down as follows:
Then copy and paste the following code either above or below the Genre code you comment out and you will have your new custom Genre lookup based on the value of the Performance Field #. The code can be found below. The PB_TYPE1_FC_SEQ is followed by a number. This number is the Custom Genre Sequence number from above. Note that you can have as many lookups based value of the Sequence number you wish. Simply add as many [ option value="PB_TYPE1_FC_SEQ='XXX'">Comedy ] as you need.
<tr>
<td align="right">Custom Genre List</td>
<td>
<select name="search" id="search">
<option value="">"any kind"</option>
<option value="PB_TYPE1_FC_SEQ='955'">Comedy</option>
<option value="PB_TYPE1_FC_SEQ='956'">Drama</option>
<option value="PB_TYPE1_FC_SEQ='957'">Recital</option>
</select>
</td>
<td align="left">
<input name="btnGetEventList" type="submit" id="Search" value="Search" class="new" onMouseOver="pviiClassNew(this,'newover')" onMouseOut="pviiClassNew(this,'new')" onClick="process()"></td>
</tr>
The result will be the same as shown for the Event code of the previous page.
Once the code above has been added to the TMtickets.html page the page should be saved in the WebPagesEN folder. Clear the Cache on the web listener and refresh the page in the browser. The updated changes should now be visible and available to select.
Analytics (Google, Pixels and Links)
|
Regardless which option or approach you require - after placing javascript code or google tracking account into the database, test the web pages. If something breaks, take the pixel code out and fix it - then retest |
General Approach to tracking web page usage
In most cases, tracking means you should only need to:
- Add an additional parameters to a direct access links to TM's web pages
- add or edit some fields in company preferences and not change web pages
Direct Link tracking in Theatre Manager Carts - most accurate
- Using Theatre Manager's direct access links in eblasts and web pages and adding a tmsource tag to the link.
- The source is tracked on each shopping cart to let you know the original source URL or marketing activity that led to the cart being created.
- It is the most direct indicator of completion of sale from start to end and can be analyzed on reports or in the cart list.
Page Usage Tracking using Google Account
Use Google Analytics to determine which pages are accessed:
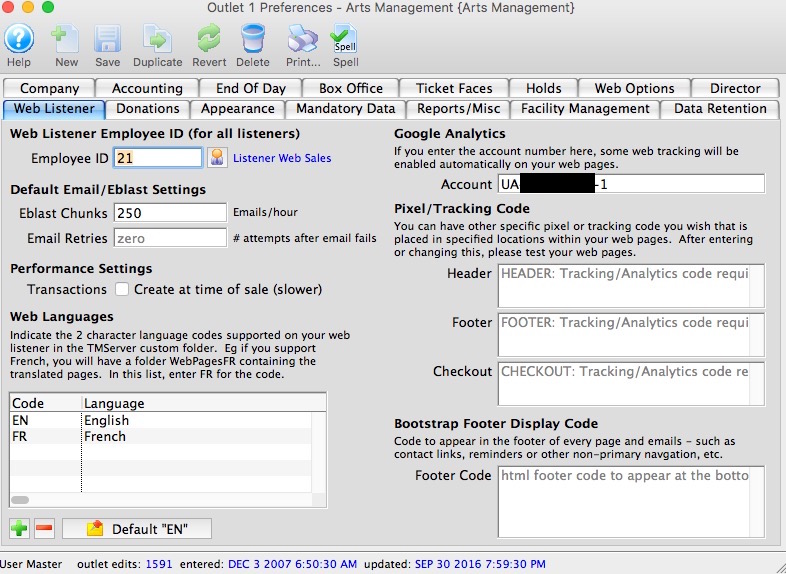 Google's preferred way of page tracking:
- is done by simply adding google account number to the company preferences which is
- automatically merged into the google header html page called googleheader.html by the web server processes
- An older method from google that places google code in the footer of the html page.
Pixel Conversion Tracking
- Using the same company preferences to cause pixel conversion code to be added automatically to certain web pages or Facebook, Google, or MOGO conversion pixels. Typically, we have found that you may need to provide one or more of the following three snippets of code:
- Header - if you want that pixel or tracking code added to every page header automatically
- Footer - if you want that pixel or tracking code added to every page footer automatically
- Checkout - which sends the final pixel conversion data, including some customized cart totals or other data to your pixel tracking company
-
In some rare cases, you may want to actually edit a web page. The best way to find out which web page is to:
- follow through the sales process
- get to the page you want -and-
- right-click to view page source or inspect an element.
Mogo/Facebook/Google Marketing Pixel Conversion Codes
|
The following is a general reference for placing pixel code within Theatre Manager so that they appear on the appropriate web pages. |
|
For employees of MogoArts, your pixels have been used in web pages at a number of Theatre Manager venues. Please refer to Mogo's internal corporate Wiki Pages that describe your internal processes for Theatre Manager. An image has been provided. |
|
Variables can be used within pixels to get actual cart values. |
Implementing Tracking Pixels
The general steps for implementing pixels are:
- Get your pixel code from MogoArts, Facebook or Google. There will likely be at least 2 or 3 of them
- There are source pixels that you place on your referring web site as part of the campaign. Eg, you might have a facebook pixel on a facebook page.
- There may be middle pixels that you place on your marketing web site - which is where the Facebook or mogo pixel refers you to.
- On your marketing web site, you would have information on the event and a buy button that takes you to the Theatre Manager commerce pages. Refer to making links for your marketing page.
- The end of the process is the final pixel on the checkout page.
Pixels:
- are created entirely by your pixel company or your marketing representatives
- are maintained by your pixel company.
- can contain Variables referencing cart data, if thats what you need to track
- are most often pasted into Theatre Manager's Company Preferences->Web Listener tab, most likely in the Checkout field.
- The pixel company may also have pixels they want placed in every page. Google is an example for page tracking
- can be placed in aggregate. If you want both Mogo and Google pixels, paste them into the appropriate section of Theatre Manager web listener preferences.
- TEST your web pages from beginning to end and complete a transaction. Then verify that the data from your pixels is getting to your pixel tracking web site (eg MOGO or Facebook).
Other Cautionary info on Tracking Pixels
|
Mogo, Facebook, or Google pixels can be placed in Company Preferences->Web Listener tab as required to accomplish what you want without needing to edit any web pages. You can also edit web pages directly if you have unique requirements. |
|
Conversion pixel codes imbedded in iFrames are not allowed by the Credit Card PCI Council on web pages due to a security risk called Click-Jacking (effectively a man-in-the-middle attack vector).
If the MOGO pixel provided is with an iFrame, please inform them to give you one that is javascript. For your own safety, Theatre Manager web pages do not support embedded iFrames because the PCI Council forbids it. |
Confirming Tracking Code Placement
A tracking code added to the Header or Footer field in Theatre Manager should be visible in the source code of all pages on the ticketing site. Code added to the Checkout field would be visible on the final page of the sales process. A sample link would be:
MogoArts Internal Wiki Documentation
|
This is not an endorsement of pixels from MogoArts. |
We have seen MogoArts' internal documentation wiki. We are not sure of the exact web page, we believe it is called 12_44_43-Vendor - Ticketing Wiki - Google Sheets2222. It contains instructions that look like the image below.
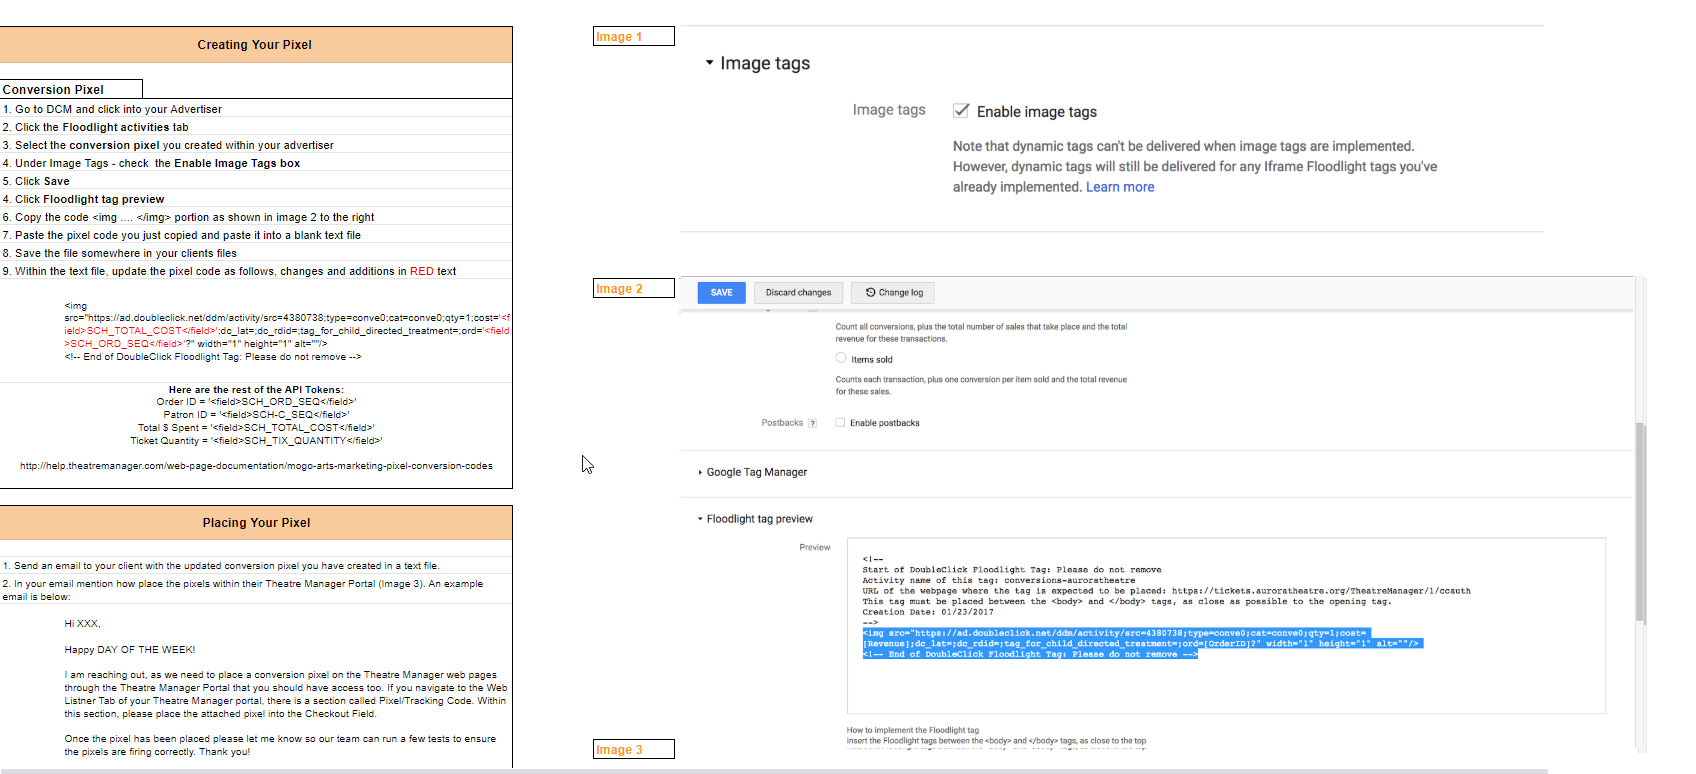
Variables in Pixel Pages
|
** NOTE: All field references need to be added to the pixel code using <field> tags. An example would be
<field>SCH_ORD_SEQ</field> |
Google Translate - multi language
|
The following technique is a quick and mostly effective way to create translated pages. it is NOT supported, nor ENDORSED - properly translated web pages are always better. |
Sometimes you may be doing a show that caters to a language outside your usual cultural domain. The following is a quick and dirty way to get Google to translate your pages for you after they have been rendered. Effectively:
- the TM Server renders the pages in english and delivers them to the user
- Google Translate does the best job it can do of translating that page into the language chosen by the user. It won't be perfect, but it might be good enough.
- From that point on, all pages on your web site will be in the other language.
To implement
- Start Theatre Manager
- Open company preferences at the Web Listener Tab
- Copy the text in yellow below and paste into the Bootstrap Footer Display Code
- Replace UA-xxxxxxxx-x with your own google account number
- Save the company preferences
- Test your web pages - you should see a popup like the this:
|
<!--Google Translate Code --> <div id="google_translate_element"> </div> <script type="text/javascript"> function googleTranslateElementInit() { new google.translate.TranslateElement({pageLanguage: 'en', layout: google.translate.TranslateElement.InlineLayout.SIMPLE, gaTrack: true, gaId: 'UA-xxxxxxxx-x'}, 'google_translate_element'); } </script> <script type="text/javascript" src="//translate.google.com/translate_a/element.js?cb=googleTranslateElementInit"> </script> |
Google Analytics
The sample source for a web page footer can be pasted into Theatre Manager in Setup >> Company Preferences. The footer is added to each page within the default web pages. You will need to sign up to get a UA-XXXXX-X number that will replace the value in the sample code.
|
Theatre Manager's Company Preferences uses the Traditional Snippet and placement in the footer on your WebPages. For more information about Google's Traditional Snippet, click here. If you'd like to utilize Google's new Asynchronous Snippet, suggestions for doing so will be included at the bottom of this page. |
Once you have this set up in Theatre Manager, you can also include it in your eblasts. Analyzing the statistics occurs by logging in to the Google Analytics Login Page.
You can also track the direct source of why a cart was created using the &tmsource=yyy tag.
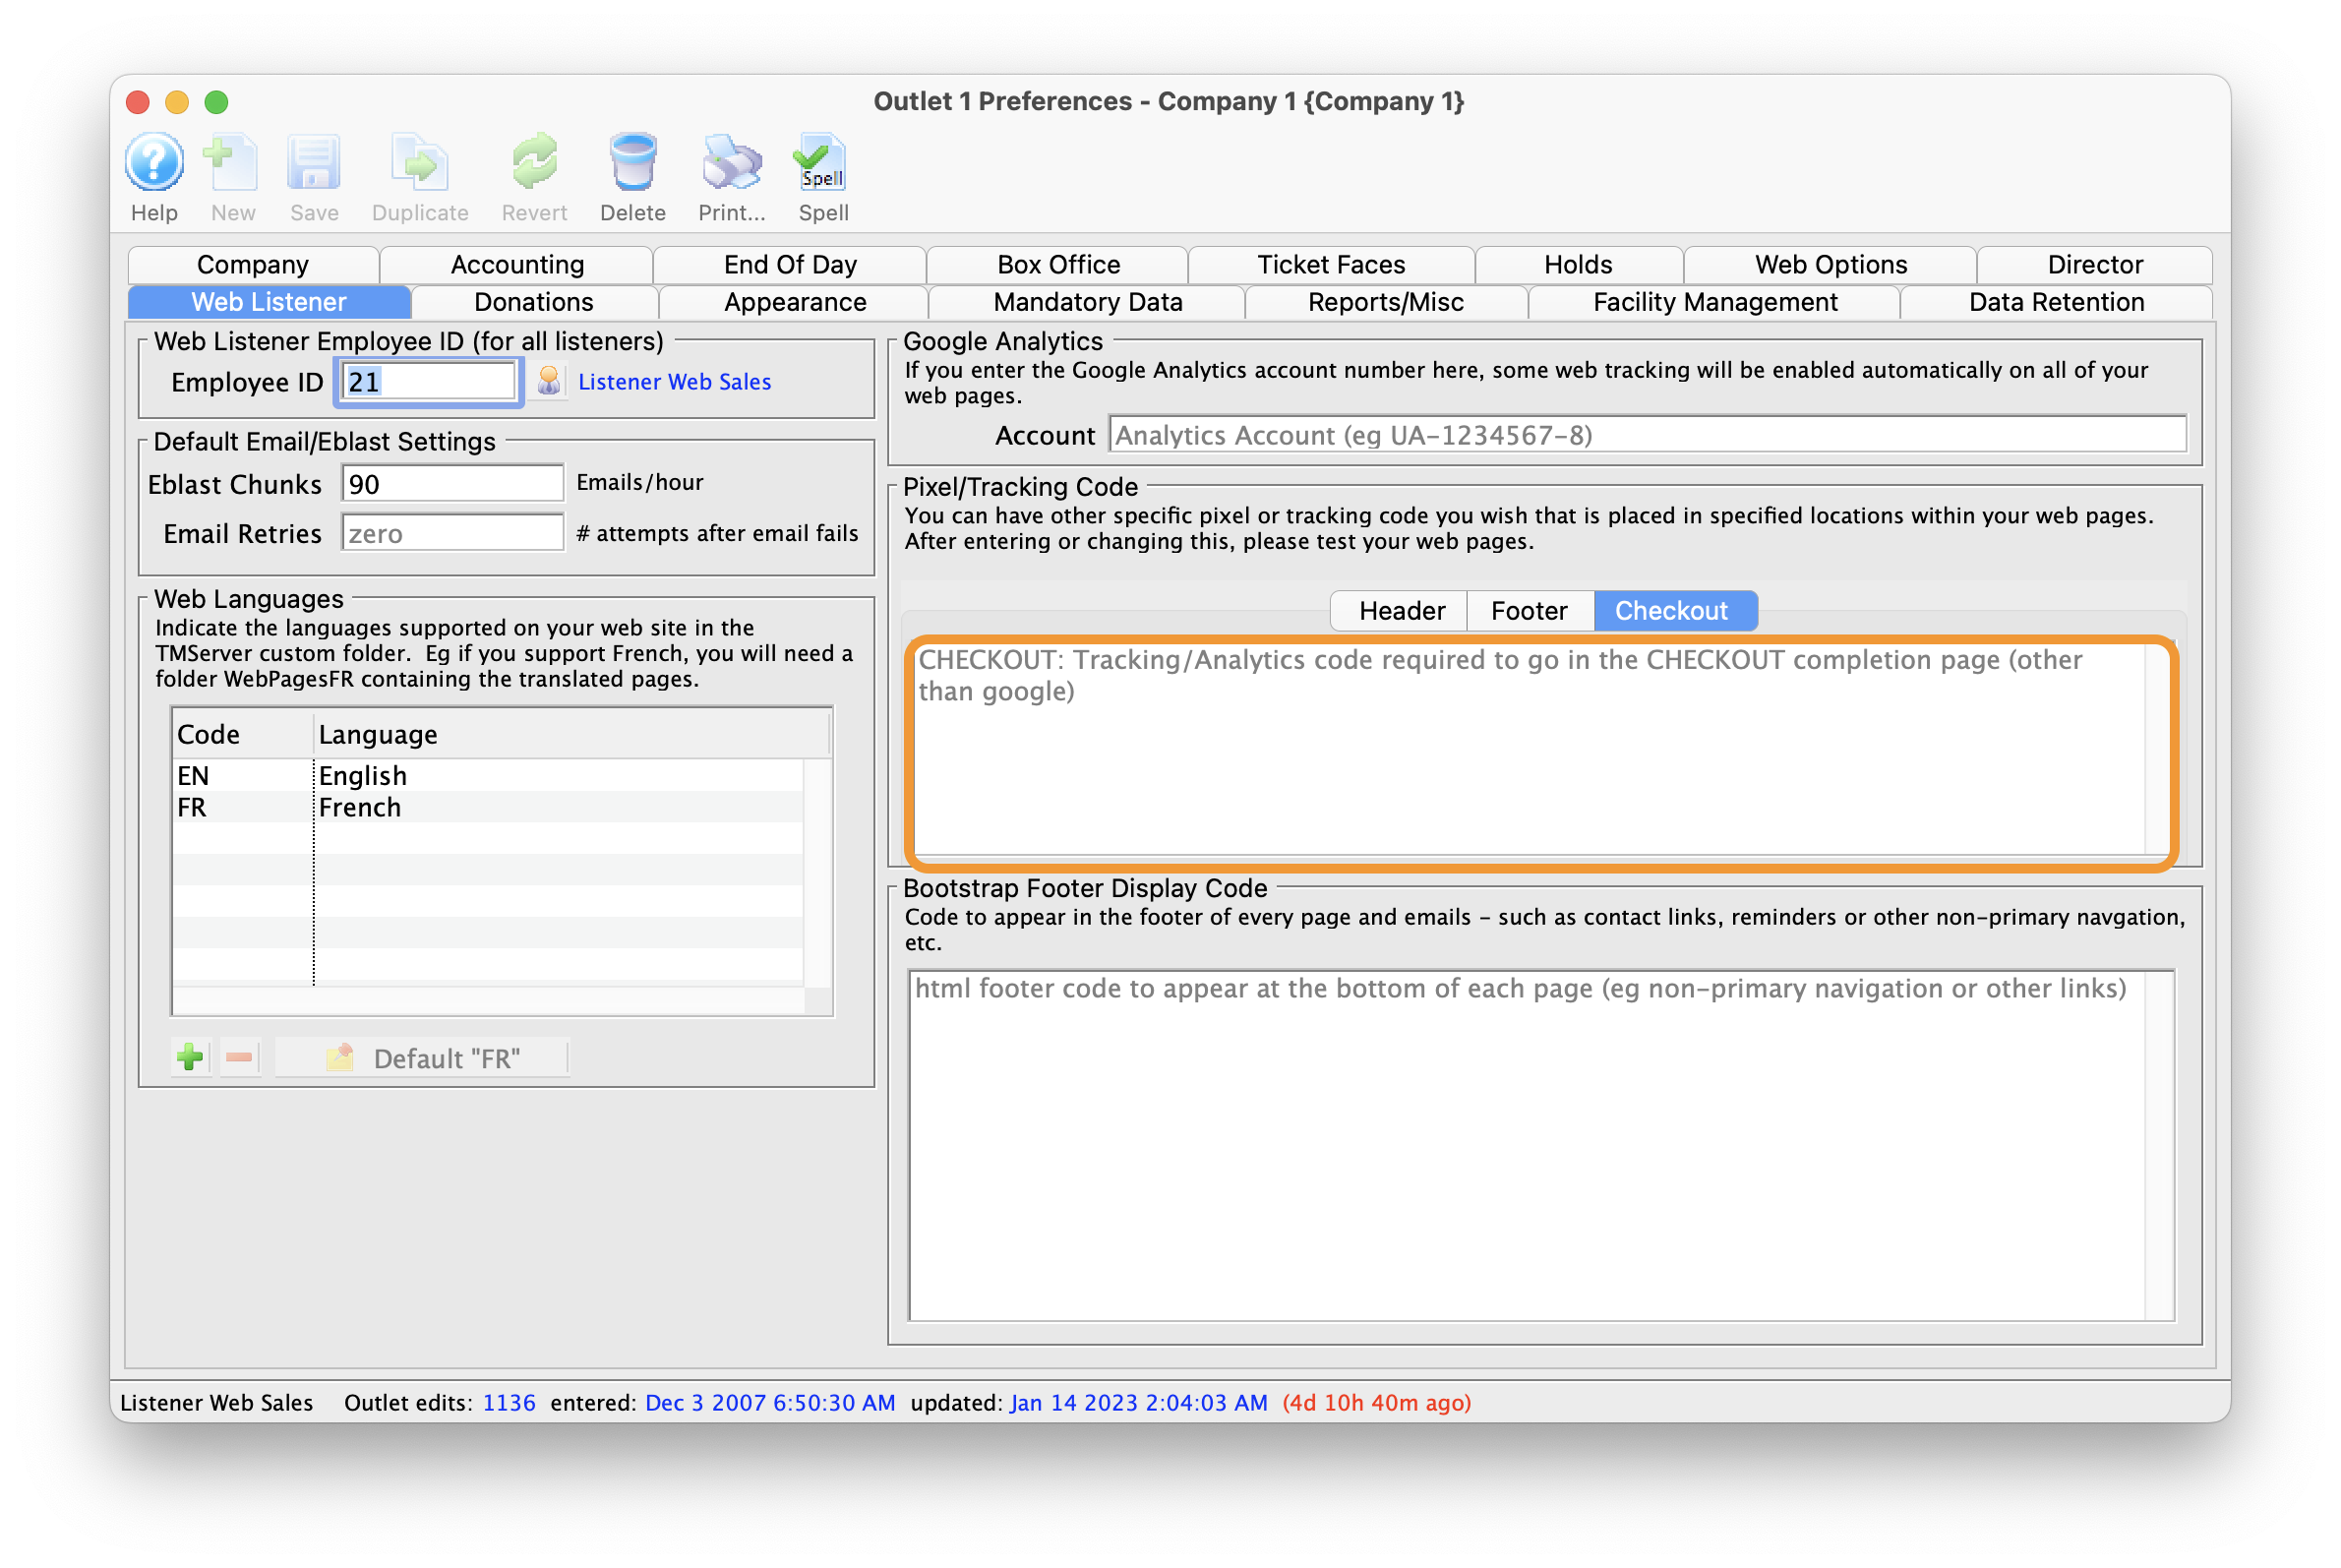 >
>
Additionally, there is a provision in Theatre Manager's word processor to add the Google Analytics code from the Web Listener Tab to a Form Letter, which can then be used as an Eblast to patrons in the database. For general information on how to create a Form Letter in Theatre Manager, click here. To add the Google Analytics code to a letter:
- Open a Form Letter (existing or create new). If you need instructions, click here.
- Right-click in the letter at the footer or wherever you'd like to embed the code to bring up the context window .
- Select Insert Data Base Field > Current Addresses > Google Analytics Code.
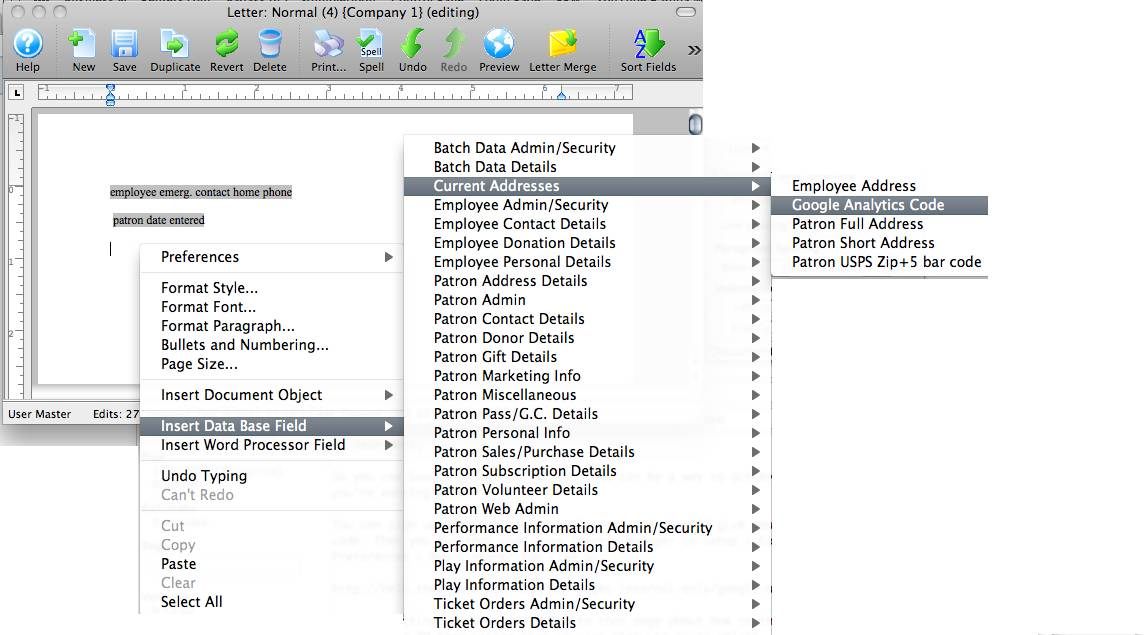
Once the letter has been emailed to patrons, the same sort of analysis that can be done with web pages can be done for your eblast. For more information on setting up for an eblast from within Theatre Manager, click here.
Using the Asynchronous Snippet from Google Analytics
To make use of Google's Asynchronous Snippet, just enter your Google account number into the company preferences page above . Theatre Manager self configures the web pages to start tracking.
Troubleshooting web sites
Browser unable to access web site or security issues
ALWAYS Test the TLS certificate
To Do This:
- Go to the web site ssllabs.com/ssltest and run a test of the ticketing URL to see what is reported. Enter the URL and make sure keep the results private by not showing them on the boards.
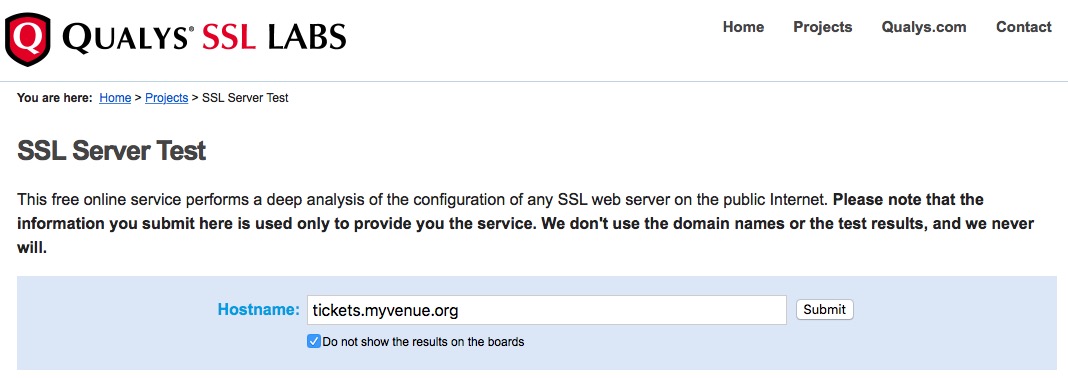
- Review the results as below. At this time, make sure that:
- the site gets at least an 'A' score
- there are no unexplainable comments
- only TLS 1.2 and later is supported with SHA 256
- and that the users browser is in the list of acceptable/current browsers. Anything older, will not connect
Review the results of the TLS Certificate Test
The ENTIRE document tells us something about what browsers the web site will support and how they will support those browsers. The key parts are described as follows.
Overall Score
The overall Score is near the top and may have a message or two. This looks like the image below.
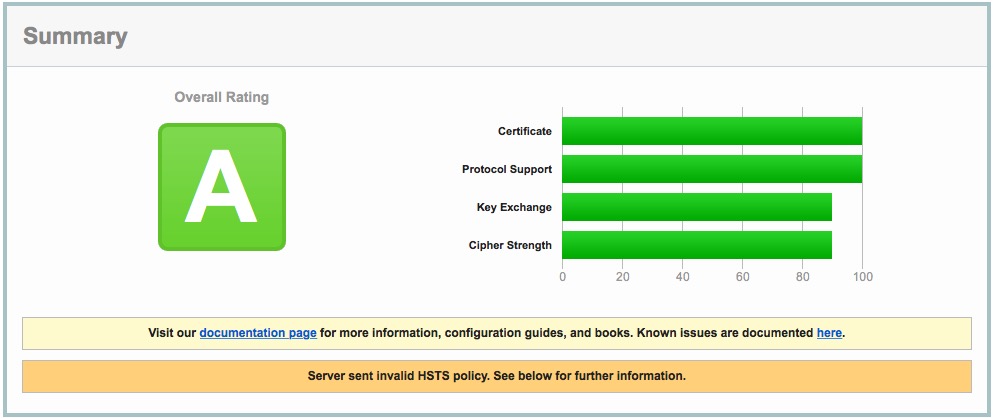
Configuration Protocols
Review the protocols supported. This will change from time to time and only get stronger. As of Sept 2016, the PCI council and the browser makers (Google, Safari, Firefox, etc) are all pushing TLS. The minimum current safe browsing standards are TLS 1.1 or TLS 1.2. Anything lower means your web site is vulnerable to some web attack. TM Server is designed to only allow TLS 1.2 at this time - because of PCI.
Please ensure that only TLS 1.2 is enabled.
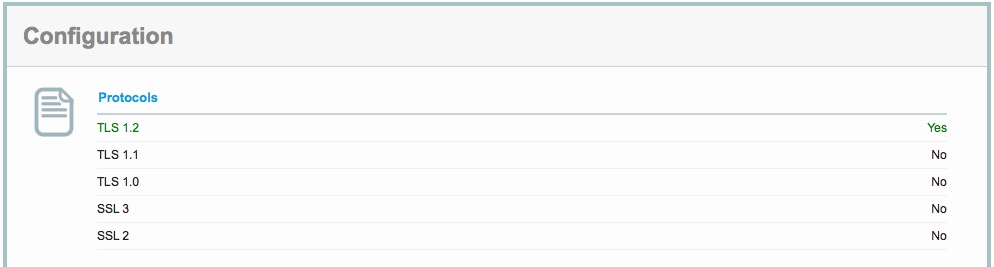
Review the browsers supported
A little further down the report is a complete list of many different browsers. The list includes many older ones and all the current versions and tells you:
- Which browsers cannot connect. eg IE 6, 7, 8, 10 & Safari on OSX 10.8.x and earlier cannot use the web site - simply because the browsers do not support the minimum secure protocol as recommended by PCI.
- For those browsers that connect, it tells you with protocol and (TLS 1.2) and level of encryption (RSA 2048/SHA 256) with ECDHE (Elliptic Curve Diffie-Hellman Exchange) protocol for negotiating the key exchange between the web site and browser (very secure).
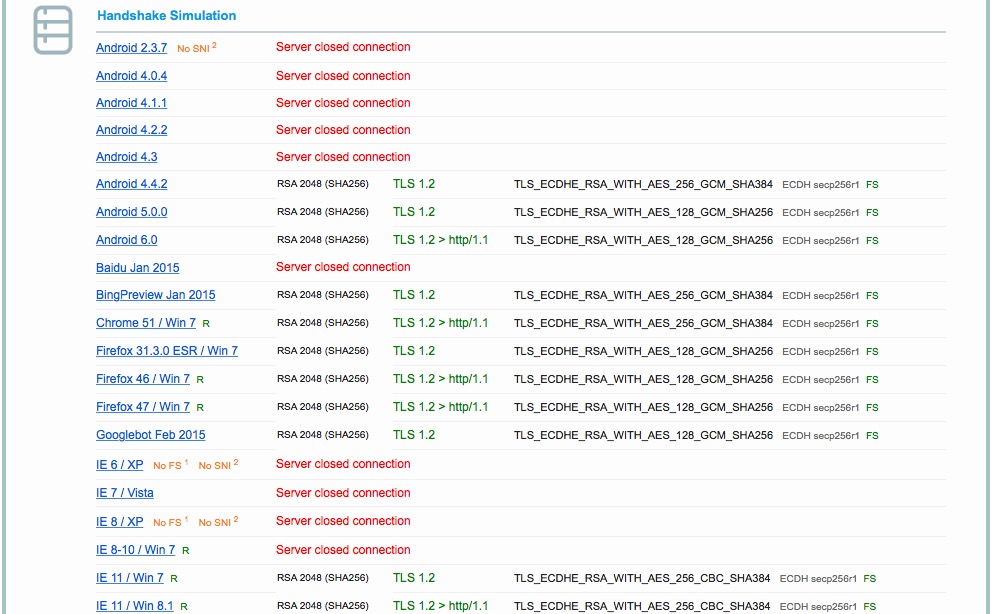
Microsoft IE 11 unable to access Web Site
|
In general, IE 11 cannot distinguish the various security methods automatically like other browsers and need to be told to ignore SSL 2.0: |
- Microsoft indicates this is an issue if both SSL 2.0 and TLS 1.2 are enabled as security options in IE 11
- The solution, they say, is to disable SSL 2.0 (which is normally disabled by default and is no longer supported by any commerce web site
If your customers ask, this may be their problem.
Patrons can't use an email address

Why can't a patron use an email address?
If a person cannot create an account with a specific email address within Theatre Manager web sales, it is for one of 3 reasons:
- The email address is already in the system for one patron and the only course of action is to request a forgotten password
- The email address is in the system but attached two TWO OR MORE patrons in different households. TM allows sharing of an email within a household, but not across households. So, TM denys use of that email address until the box office sorts out who really owns it using the find duplicate email address function. It could be that people need merged from two separate data imports, or one person should not have it.
- we cannot find the domain name or there is no MailBox (MX) server for the email address. Perhaps they've specified something like ImBad@rotten.org - which really doesn't exist, so we can't create it.
|
Unless you have changed messages in tmError.txt to the contrary, use the above checklist to check email address rejection.
The forgot my password web page shows this generic message. |
Why can't the messages be more specific?
Can Theatre Manager actually distinguish amongst the types of errors above? yes it can - there are actually separate error messages in the tmError.txt for all these situations. However, they just happen to say the same thing 'Email address can't be used'
Why is that? The PCI council (Visa and Mastercard) make all the rules as to what kinds of applications are compliant. Theatre Manager is audited and approved by the PCI council to make sure we follow the rules of safe storage of their credit card data and safe online web sales following their prescribed audit cycles.
One of the rules concerns privacy. A web site should NOT give back any information about accounts and login credentials. The thinking is that if there is an easy way for a bad buy to find out which email addresses are in a system, they are half way there to logging in. Thats because people tend to use the same id's and passwords at many sites. So, if they've cracked another site, then its easier to infiltrate venues that give out this kind of knowledge.