Newsletters
In 2014, the format of the newsletters was changed to be shorter, one page eblasts sent directly to users. You can explore past content via this link.
Here are some past issues:
| Dec 2013 | TM Scanner iPhone/iPod ticket scanning app, an update to Ticket Trove, a welcome to some of new venues, some great articles on data and subscriptions from the National Arts Marketing Project and some recent applause for a number of our clients. |
| Dec 2012 | Congratulations to Rick Geary of SPAC as 'The Business Review's CFO of the year! Using Theatre Manager to implement dynamic pricing in both price and house scaling. A list of local ticketing associations that may be of interest. News about Theatre Collingwood's documentary and a new venue for Ensemble Theatre. Welcoming Imperial Theatre, Duluth-Superior Symphony Orchestra, Palm Beach Dramaworks, Buddies in Bad Times, Talk is Free, Birmingham Children's Theatre, Toronto's Young People's Theatre, and Smith Centre for the Arts. |
| May 2012 | Announcing our new web site, Red Butte Garden's 'one day concert sale', Margo Gram as 'Presenter of the Year', MidWest Theatre receives the 2012 Governor's Arts Award, Plano Symphony's 6-sigma documentation of business processes and Santa Rosa Symphony's Audit Process, not to mention some new friends to Arts Management: Baldknobbers, Peninsula Music Festival, Arts United of Fort Wayne Indiana, London Fringe and Dance House |
| Dec 2011 | Merry Christmas to all, The Perfect Audit, WYSIWIG e-blasts, a marketing idea for Season Subscriptions and an article from Salt Lake Tribune. |
| July 2011 | Success at the Scotties Tournament of Hearts, TicketTrove, new Moneris and Authorize.net gateways and Groupon. |
| Dec 2010 | Using Google Analytics, Google Maps, the Hot Seat Analyzer and a great example of a WYSIWIG eblast. |
| June 2010 | Version 9, PA-DSS 1.2, WYSIWIG e-blasts, volunteer scheduling example in facility management with auto email notification, SPAC testimonial. |
| Mar 2010 | Announcing Facility Management Module, E-Z remote support with built in teamviewer, quick reference guides and video tutorials, and welcome to EMPAC, Saratoga Performing Arts Center, Brockville Arts Center, Canadian Arts Alliance, and Ottawa Arts Court Foundation. |
| Nov 2009 | 'Wicked' sales and Proctors, Version 8 at Pioneer, Tip: Form Letters, Courses at Ballet Memphis |
| July 2009 | Resizing PCCW.mdb database, Carousel Theatre in Vancouver, Version 8 announced |
| Apr 2009 | Manitoba Opera using TM for Fundraising, Barn Theatre featured in Dramabiz, Creating Subscription Packages |
| Jan 2009 | Vancouver Fringe doubles attendance without a box office, William Paterson's 'Sweet Deal' for web sales, Year End Rollover |
| Oct 2008 | Automated ticket stock reminder, the support process, plug-ins and Magnetic North. |
| May 2008 | Red Butte unifies business processes with Theatre Manager in their museum and concert bowl, Mail lists at Hillbarn Theatre |
| Mar 2008 | Version 7 conversion process, Intix Chicago, TLS certificates |
2010 - CAMT Survey Results: Theatre Manager is used by a lot of people who like it
|
I’d like to share with you the results of a survey done by the Centre for Arts Management and Technology at Carnegie Mellon University. I’d like to thank each of you who responded to this survey as it is indicative of a tremendous vote of confidence in Theatre Manager in the survey's results. |
The authors are careful to note that the number of respondents does not represent market share as they were using it to gauge the following for organizations of different sizes:
- what attributes do arts organizations consider critical in a ticketing tool
- what factors influence organizations’ ticketing software choices
- which tools are arts and cultural organizations using
- how satisfied are arts and culture organizations with their current ticketing solutions
The Carnegie Mellon Survey Results
Theatre Manager had the second greatest number of respondents to the survey and I thank each of you that took time to fill it out. What is interesting is that in the two categories of organizations up to $3M, Theatre Manager was used by the majority of survey participants. The software satisfaction ratings in that category are quite high.
In organizations of $3 to $5M in size, Theatre Manager was the second most cited software which is a pleasant surprise because we feel we try to provide value to organizations of any size. Some of our competitors focus their sales efforts on this size of arts organization due to the cost of their software. So this means people are still able to recognize that Theatre Manager provides comparable functionality at far less money.
Even organizations larger than $5M use Theatre Manager very successfully. Customers in this size have used Theatre Manager to sell in excess of $1.2M in single day sales.
Our goal is to continue to make full featured software at an affordable price and it is comforting to see that the elements that are key to your needs are represented in Theatre Manager.
Valuable Advice in the Survey
At the end of the survey results are a few pages that list some areas to consider and questions to ask of a software vendor before selecting their software. If there are people you know that are looking for software, you may wish to share these pages as it gives some concise advice from the survey participant about what the peer group found important.
Again, thank you for taking your time to fill out the software. It reinforces our belief that Theatre Manager is THE best integrated solution for the ticketing industry.
Some Theatre Manager Facts
Theatre Manager:
- is a fully integrated CRM that features ticketing, subscriptions, development, gift certificates, volunteer management, artist management, web sales, media management, facility management, project planning, scheduling, and more
- is used by thousands of users and hundreds of venues to manage in excess of 600 million each year
- runs on your choice of hardware - Macintosh and/or PC - in your office as a self hosted solution
- has a purchase price that is often less than the annual maintenance cost of some competitive software with fewer features
- has a very economical annual operating cost
- has no 3rd party ticket fees (never has, never will)
- supported by 26 years of providing excellent software and value
Center for Arts Management and Technology | camt.artsnet.org
Technology in the Arts is a series of services from the Center for Arts Management and Technology (CAMT), an applied research center at Carnegie Mellon University exploring ways in which arts managers can employ online technologies to more effectively meet their organizational goals and engage audiences.
The results of the survey are available for use by anybody and freely distributable under the Creative Commons Attribution-Noncommercial-Share Alike 3.0 United States License.
2010 - December 2010 Newsletter
 The December ArtsMan Chronicle contains a number of 'how tos' about adding Google Analytics to your web pages, mapping some patrons on Google maps and ad the hot seat analyser. We also welcome new venues to Theatre Manager.
it has been an exciting summer since the release of Version 9 and the latest version is 9.04.12. For any venue currently using version 9, we recommend upgrading to this version as soon as possible as it addresses an important issue where best seat searching could cause a web listeners to continually try to find seats on a nearly full venue.
Version 9.05 is in the works. It will have a significant expansion in the scope of the Facility Management module - and billing for events in your venue, including incidentals like staffing, resources, and consumables like coffee and refreshments will be available - all thanks to the feedback for those who are using the system. We appreciate your help.
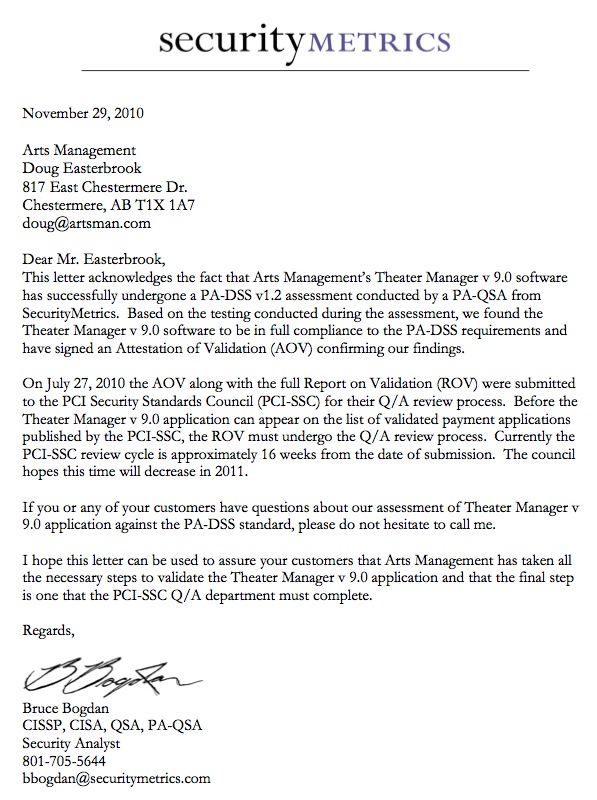
In June we underwent the PA-DSS 1.2 audit for PCI compliance and passed successfully - thanks to our auditors 'Security Metrics'. Theatre Manager is currently sitting in front of the PCI council for final acceptance and we are advised that they are as much as 6 months behind in looking at a deluge of applications to meet their deadline. So, while we thought being fully prepared months in advance would work to the benefit of all, we are still waiting. Rest assured, it is coming (see the attached letter on this subject from our assessor).
A final note on PCI compliance for those who are using PCI scans, there is a new version of the Apache Installer to take you to version 2.2.17 and a specific advisory about FileEtag that may assist addressing results on some recent scans.
2010 - June 2010 Newsletter & Announcing Version 9
 The June ArtsMan Chronicle is now available for your reading pleasure. It contains a number of articles such as Rick Geary's kind and generous comments about Saratoga Performing Arts Center's very pleasurable experience as a large venue converting from TicketMaster.
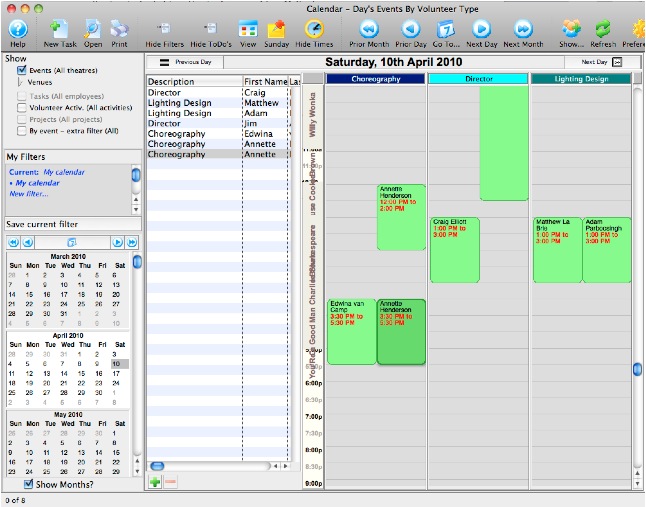 There is also a cool example of how the Facility Management module can be used to schedule and notify your volunteers and/or artists of rehearsal schedules, where they should be, and integration with their own calendars. Introductory pricing ends July 31st.
Mostly, we are excited to announce the imminent release of Version 9. In addition to the many enhancements that you've come to expect, there are two key features. These are:
 PCI PA DSS 1.2 compliance. There are still 4 months left in Theatre Managers PABP 1.4 certification. The replacement certification is PA DSS 1.2 and we have completed all the documentation and paperwork and are ready to take it for the preliminary audit on June 10/11. Version 9 will be released after the audit.
- There is also WYSIWIG editing of e-blasts and optimization of storage of images that go along with e-blasts. We think you'll like this.
The version 9 field trial has been ongoing for about 3 months at selected venues and we are just putting the finishing touches to it and the upgrade documentation because it involves all components, per PCI audit requirements.
2015 - Google dropping support for XP, Vista, OSX 10.8
- Google reiterated their announcement from much earlier this year that they would no longer support XP, Vista and OSX 10.08 and earlier as of the end of 2015
- The banking system, specifically the PCI council, has announced that only advanced security like TLS 1.2 and later will be supported for authorization of credit cards.
- The PCI council is also requiring use of TLS 1.2 or later for web sites that support e-commerce in order to protect the consumer from fraud.
Theatre Manager is keeping abreast of these changes, many times on a daily basis. We continually update all of our software components to work with the latest security requirements.
|
What does this mean to your patrons and why is this a good thing? You will likely receive sporadic reports from customers indicating that they are unable to purchase tickets from your web site using their browser. The answer is to help them understand that, for their own safety, commerce relies on high security. Moreover, all the current browsers are implementing this requirement and removing support for older browsers. This is part of a concentrated effort on the part of Google, FireFox, Safari, Opera and Microsoft Edge to move people to a place of safety. In many cases, all that a patron needs to do is switch browsers from older, no longer supported ones to the most current available. |
2016 - First National Theatre Manager User Conference

First National Theatre Manager User Conference
Save the Date for a Proctors/Arts Management Collaboration
 Mon, May 9 - Wed, May 11, 2016
at Proctors Theatre
Schenectady, New York.
An Invitation to Learning
Proctors, in association with Arts Management Systems, invites you to the First National Theatre Manager Conference.
For the past 5 years, Proctors and other presenting houses using Theatre Manager in the North East have hosted annual regional conferences. Attendees coming to these friendly informative sessions have steadily grown and we are excited to extend this platform to a national level.
These conferences are aimed at employees and volunteers engaged in box office, marketing, patron development, database and server management, accounting, web sales, ticket scanning and other topics.
Specific details will follow in about a week.
Conference Organization
Arts Management Systems, beleives passionately that the best user conference experience is one that is owned and organized by the users themselves.
While our staff will host some topics, the user community will present some other really interesting sessions. If the past is any guide, expect a lot of interaction with your peers as well as revelations about the extensive capabilities of Theatre Manager.
Privacy notice
Arts Management Systems respects your right privacy and will send an email directly to you. You will then receive a second email from AMS when Proctors makes the conference web site available. If you do not get an email, please contact diane@artsman.com to update your contact information on our support database.
2017 - Offsite Backups are a key way to thwart recent Ransomware viruses
In the vein of better be safe than sorry, we always suggest that venues make an offsite backup of their database on a daily basis. It is better if this backup is:
- on a different network than the main database and/or
- on an external drive that is physically disconnected from the server after the backup is done and/or
- sent to an FTP site or machine external to the server and/or
- sent to some cloud backup
The important concept is that if you do get hit by ransomware or malicious software, then you have a backup that is ‘airgapped’ on another machine that is not connected to this machine. It is also why recommend that the database sever never be on a domain - making it harder for a virus to propagate from a download.
Today, we are suggesting that everybody make a backup onto another device, especially if you have windows servers — and make it standard practice going forward. Copying todays backup to a USB key today and removing it is probably a good first step.
If you want to read about the virus.
- http://money.cnn.com/2017/05/12/technology/ransomware-attack-nsa-microsoft/
- http://www.npr.org/sections/thetwo-way/2017/05/12/528119808/large-cyber-...
- https://www.theguardian.com/technology/2017/may/12/global-cyber-attack-r...
- http://www.zerohedge.com/news/2017-05-12/massive-ransomware-attack-goes-...
There is some good news — apparently the makers of the virus software put a kill switch in it — and a particularly astute individual diagnosed this and helped mitigate the attack.
https://www.theguardian.com/technology/2017/may/13/accidental-hero-finds...
Those who are:
- using linux or OSX database servers are not affected.
- running their servers on our Cloud are not affected.
- using our cloud backup storage for offsite backups - have an offsite backup from last night at minimum
Regardless, making a backup just in case and copying to another machine is wise.
We apologize in advance if this might sound urgent (it is) .. and, like any cold prevention - better to stop it before you catch it. if you have any questions or need assistance, please let us know on the support email.
2017 - Second National Theatre Manager User Conference
Second National Theatre Manager User Conference
Save the Date for a Proctors/Arts Management Collaboration
REGISTER NOW for early bird pricing
Mon, May 8 - Thurs, May 11, 2017
at Proctors Theatre
Schenectady, New York.
An Invitation to Learning
Proctors, in association with Arts Management Systems, invites you to the Second National Theatre Manager Conference.
For the past 6 years, Proctors and other presenting houses using Theatre Manager in the North East have hosted annual regional conferences. Attendees coming to these friendly informative sessions have steadily grown and we are excited to extend this platform to a national level.
These conferences are aimed at employees and volunteers engaged in box office, marketing, patron development, database and server management, accounting, web sales, ticket scanning and other topics.
Registration Link
Conference Organization
Arts Management Systems, beleives passionately that the best user conference experience is one that is owned and organized by the users themselves.
The format is improves on the first conference based on feedback. Our staff will host some formal topics and the user community will present some other really interesting sessions. If the past is any guide, expect a lot of interaction with your peers as well as revelations about the extensive capabilities of Theatre Manager.
2018 - Third National Theatre Manager User Conference

Third National Theatre Manager User Conference
Save the Date for a Proctors/Arts Management Collaboration
REGISTER NOW for early bird pricing
Mon, April 30 - Thurs, May 4, 2018
at Proctors Theatre
Schenectady, New York.
An Invitation to Learning
Proctors, in association with Arts Management Systems, invites you to the Third National Theatre Manager Conference.
For the past 7 years, Proctors and presenting houses in the North East have come together to host annual regional conferences and two national conferences. Attendance at these community driven, informative, and friendly sessions has steadily grown and we are excited to participate each year. Come and learn why TM is simply the most fully featured CRM in the market providing the most cost effective solution for your information needs.
These conferences are aimed at all employees, managers, IT staff, and volunteers engaged in box office, marketing, patron development, database and server management, accounting, web sales, ticket scanning and other topics.
Registration Link
Conference Organization
Arts Management Systems, beleives passionately that the best user conference experience is one that is owned and organized by the users themselves.
The format is improves on previous conference feedback. Our staff will host some formal topics and the user community will present some other really interesting sessions. If the past is any guide, expect a lot of interaction with your peers as well as revelations about the extensive capabilities of Theatre Manager.
Training Curriculum's
Expectations while the Trainer is Onsite
Coverage for Telephones, Meetings and Appointments
- Please have a volunteer, or someone who will not be involved in the training sessions, cover answering telephones and taking box office ticket sales on paper. This assists in eliminating interruptions during training.
- Wherever possible, reschedule meetings and appointments to dedicate time to the training sessions exclusively. Another option is to see if another staff member could attend the meeting/appointment on the trainee's behalf.
Training Environment
- For optimum training, you need to set aside a dedicated training area (large board room, classroom) where everyone will comfortably fit for the day long training sessions.
- Prepare to have at least 1 computer for every 2 people. We have found training is best when each person has his or her own computer to work with. Our training is ‘hands-on’ learning, this maximizes the learning opportunities by ‘doing’ and not ‘watching’. Each training computer will require access to the network to communicate with the database. Access to the Internet is not mandatory, but is helpful when we are reviewing web sales and email blasts.
- Please ensure there are enough available power plugs and power supply for all the additional workstations/laptops/projectors in the training room. The Trainer will require a minimum of 1 and up to a possible 3 outlets (depending on additional hardware you may have purchased) made available to them.
- The work and data that is required to be entered into Theatre Manager will be done by your organization's staff members (the trainee's). The training sessions are geared towards hands on experience by the end user, rather then a sit back and watch style of training.

The trainer is not responsible for adding new data to the system. It will be up to your organization's staff members to add/create the required data into the system on a timely fashion to keep the progress of the training sessions moving forward.
- If wireless network access is not available, an extra Ethernet port, within the training area for our trainer's laptop is helpful. This allows us access to the database as we perform the training functions.
- Easy access to bottled water, coffee, tea, etc. would be gratefully appreciated. In most cases, the Trainer is constantly talking and the refreshment(s) replenish a dry mouth. This will enable the Trainer to keep "going strong" throughout your training sessions.
Training Times
- To maximize your learning time while the Arts Management Trainer is onsite, training encompasses the full day for each of the training days.
- The starting time is open to discussion and can be slightly adjusted. This discussion will need a confirmation from the Arts Management Trainer and depending on the requested starting time, may require some special considerations
- A typical training day is as follows:
- 9:00am - 10:25am - Training Session
- 10:25am - 10:35am - Short Break
- 10:35am - 12:00pm - Training Session
- 12:00pm -1:00pm - Lunch Break
- 1:00pm - 2:25pm - Training Session
- 2:25pm - 2:35pm - Short Break
- 2:35pm - 5:00pm - Training Session
- We request the trainees show up a few minutes prior to the training session. This ensures that not only can the Trainer keep on schedule, but it allows you to maximize the Trainer's time and knowledge transfer.
Cross training staff members who miss a training session
- Although not a requirement, it is recommended that a team lead or representative from each department that will be utilizing Theatre Manager, be present for the entire training process. Most certainly box office, and including but not limited to development/fundraising, marketing and accounting. Understanding the setup and creation of another departments data is important to know how your department may use that data or may assist in understanding the impact of that data within your own department.
- It is the responsibility of your organization to bring other staff members up to speed on topics previously covered. Due to the short time span for your conversion process and training, re-training on topics covered in a previous session impacts the training of other topics. It is important for staff members to be prepared and available for the appropriate sessions.
- With so many different topics that need to be covered throughout the various sessions, repeating a session will impact the training schedule and may cause other sessions to be dropped from the training curriculum.
Employees with Special Requirements or Requests
- Let the Trainer know if someone on your staff requires any special handling during the training process. For example, if a staff member is dyslectic, or requires additional smoking breaks, or is required to leave the room every 60 minutes to check on something.
- When we know ahead of time of any special requests, we are in a better position to adjust either the training curriculum or "training style" to make the training process move more smoothly for all individual(s).
- 2 weeks prior to training
- 1 week prior to training
- Remote Install
- Days 1-8
New Installations – Self Hosted Clients
- 2 weeks prior to training
- 1 week prior to training
- Remote Install
- Days 1-8
Preparation
2 Weeks Prior
New and Existing Hardware Setup
- Have any new computer workstations or servers setup, configured, and tested for network connections.
- Installation of all Operating System Updates and Patches on:
- Theatre Manager's Database Server
- Apache Web Listener
- Theatre Manager Web Listener workstation(s)
- All workstations that you intend to have Theatre Manager installed on.
- At minimum, configuration of software based firewalls to allow the required TCP/IP Ports (5432, 6181) for the Workstation Ports
- Create the DMZ location for the Apache Web Server used exclusively for online web sales
Router
- Refer to Router Ports
- At minimum, configuration of TCP/IP Port Forwarding for ports 80, 443
- At minimum, configuration of TCP/IP Port 5111 from internal network to Apache Web Server located in the DMZ
 Click Here
 1 Week Prior
Prepare the Box Office for Closure
Once your database is sent to AMS for conversion, you will no longer be able to enter ticket sales, donations, or data of any kind. You may use it for reference, but not data entry. If your Box Office is required to be open during this time, please contact Arts Management System’s Marketing and Sales Department for further instructions about what you will need to do.
Send your database(s) to Arts Management Systems to start converting
Complete your End of Day in your current software application(s) and send the information to Arts Management you require to be imported into Theatre Manager. The actual date the data is required to be sent, will be provided to you by Arts Management.
Information to Prepare for Day 1 of Training
- The "Local" Administrator password for the database server. This may be a different password then the "Domain" Administrator account. This account is required for the database server only.
- If you have a Network Domain setup, the "Domain" Administrator user ID and password for the server and workstation(s)
- If you are not using a Network Domain setup, the "Local" Administrator user ID and password for workstation(s)
- If you are using a Wireless Network that will be used by the Onsite Trainer, the Wireless Network password
- Chart of Accounts (a list of the General Ledger accounts - just the account number and account description) used to maintain money received from patrons, revenues for events, gift certificates, donations, memberships, tax accounts, etc. ready and available for training
- Fiscal Year Starting Month (i.e. January 1, July 1, September 1)
- Venue Maps of the venue(s) (for reserved seat sales) indicating the various sections, rows, and seats numbering patterns. Please ensure that this map is accurate to the actual physical seats in the venue. If you are unsure, please physically walk to the venue(s) prior to the trainer’s arrival and count the number of seats in each row to match them to the Venue Map. It has been our experience that over time and with possible changes to the venue itself, the Venue Map image may not represent the current physical venue layout.
- Brochures (these inform us of pricing options for single and season tickets)
- Organizational Chart
- Evening contact phone numbers (for data verification questions)
- Credit Card Merchant Account Setup Information
- Examples of Gift Certificates that you provide patrons
- Samples of existing ticket(s) that you are currently providing to the patrons. This will assist in designing the new ticket layout, which Theatre Manager will be printing.
- Samples of existing reports that you are currently use for event balancing and revenue accounting. These reports will be useful in determining which of the many reports in Theatre Manager are comparable to those you already work with.
- A pricing chart of the venue(s) indicating the various price levels based on where the patron sits, “scaled” or “tiered” houses. (if applicable)
- A pricing chart for the various ticket prices, including season packages the patron may purchase.
- A list of the various sales promotions used for discounting when selling tickets.
- A list of the upcoming events (dates and times) and the prices charged to the patrons for each event.
- Sample donation thank-you letter, donation solicitation request, pledge payment reminders that you would provide to a donor
- Sample marketing letters that you would provide to a patron
Click Here Prepare for the Remote Installation
- Review the information under Remote Installation of Software to verify that the required computer(s) are in place and the user id/password information required for the remote setup is ready
1 Day Prior
Creating a Training Area
- Prepare the training area for ample room for workstations
- Prepare the training area for and required Ethernet Hubs, Wireless network access
- Have in place additional powerbars and/or extension cords
Remote Installation of Software
Remote Access
Arts Management will require remote access to the Database Server, TM Web Server and TM Web Listener workstation(s) to complete the installation of Theatre Manager's key components. There are two options for providing remote access:
- Provide Arts Management step-by-step instructions for your remote connection preference including any username and passwords that we may encounter along the way during the connection process.
- Use the Remote Assistance application that we have built directly into Theatre Manager's application (Team Viewer) For more information on TeamViewer and how it functions please click here.
A Team Viewer Remote Assistance installer can be downloaded from the Arts Management website and can be used to provide a remote Session ID and Password. If required, install on the Database Server, TM Web Server and the TM Web Listener workstation(s).
- Download the TeamViewer installer to the desktop using the links below:
THE INSTALLATION FILE FOR PC:
http://www2.artsman.com/Software/AMSQuickSupportPC.zipTHE INSTALLATION FILE FOR MAC:
http://www2.artsman.com/Software/AMSQuickSupportMac.zip - Extract the TeamViewer installer to the desktop.
- Open the AMSQuickSupport folder on the desktop.
- Double click on the AMSQuickSupport icon to start the application.
- A new window will appear displaying an ID and Password.
It may take a few moments for the ID to populate. If the ID does not populate it may be the network security settings do not allow for communication on port 80 or 5938.
- Provide the Session ID and Password shown on the window to the Arts Management Support Team. This will enable them to gain access to that computer.
___________________________________________________________
Click Here Check the Setup of Each Computer Before Providing Arts Management Access
- Database Server, TM Web Server, and Web Listener(s) - Verify Apple/Windows Operating System Auto Updates has been turned OFF
- Database Server, TM Web Server, and Web Listener(s) - If the Apple/Windows Firewall has been turned on, allow the necessary TCP/IP Port access through for the required Theatre Manager ports
- Database Server, TM Web Server, and Web Listener(s) - hard drive spin down has been disabled
- Web Listener(s) - Wireless access has been disabled
Logging into the Computers Before Providing Arts Management Access
- Log into the Database Server as the "local" Administrator account. Do not log into the Database Server using the Domain Administrator account as the PostgreSQL database engine requires that the user id being logged in is the Local Administrator account during the installation process.
- Log into the Database Server in 'console' mode. If possible, go directly to the server's main monitor and keyboard and log in. Creating a 'Remote Session' and then providing us remote access to the 'Remote Session' in many cases causes issues during the installation process.
- If it is required to create a RDC session to the Database Server, TM Web Server, and/or Web Listener Workstation(s), do not 'Close' or 'Minimize' the RDC session at any time for it will disable TeamViewer's remote access. You may 'Shrink' the window down and move it out of the way if you desire to use your own terminal for another task and move the RDC connection out of the way.
- Log into the TM Web Server and Web Listener(s) workstations using the Administrator account. You may log into these computers using the Domain Administrator account and you may use a RDC session if required.
Information to Provide Arts Management
- The Administrator password to access each of the Database Server, TM Web Server, and Web Listener Workstation(s)
- If your using TeamViewer, the Session ID and Password for each of the Database Server, TM Web Server, and Web Listener Workstation(s)
Installation of the Software
If your organization is taking advantage of the Remote Installation, the following will be done approximately 4 to 7 days prior to the trainers onsite arrival:- Downloading of all Theatre Manager software applications
- PostgreSQL Database Server
- Installation and configuration of PostgreSQL Database Server
- Creation and setup of the Theatre Manager's Demo database
- Setup of Daily Backup Script for Theatre Manager's database
- Installation and configuration of Theatre Manager's application
- Testing connectivity testing between Web Listener workstation(s) and to the TM Web Server
- Testing TCP/IP Port 5432 is not being blocked by firewalls
- TM Web Server
- Installation and configuration of TM Web Server
- Installation of the default set of online web sales pages
- Testing connectivity to each Web Listener workstation(s) and out to the Internet
- Testing required ports are not being blocked by firewalls
- Starting the process for setup up of the web site ticketing sub-domain http://tickets.xxxxxx.xxx
- Starting the process for setup of the web site ticketing TLS confirmation email address
- Web Listener Workstation
- Installation and configuration of Theatre Manager's application
- Testing connectivity testing between Database Server, TM Web Server, and Internet access
- Testing TCP/IP Port 5000 is not being blocked by firewalls
- Network
- Test the TCP/IP Ports 80, 443 are Port Forwarded to the TM Web Server
- Test the TCP/IP Port 6181 is open to outbound
How Long will the Process Take?
In most cases, the remote install will take approximate 4+/- hours to complete, however we would recommend anticipating that we will be spending a good portion of the day not only setting up Theatre Manager, but testing the interaction between the Database Server, TM Web Server, and Web Listener Workstation(s). The time to complete the upgrade process will depend on:- Speed of your remote access
- Hardware architecture
- Receiving the required remote access and administrator passwords
- The current state of the network and TCP/IP port settings
Day 1 Morning
Click Here Please have Ready for Trainer's Arrival
- The "Local" Administrator password for the database server. This may be a different password then the "Domain" Administrator account. This account is required for the database server only.
- If you have a Network Domain setup, the "Domain" Administrator user ID and password for the server and workstation(s)
- If you are not using a Network Domain setup, the "Local" Administrator user ID and password for workstation(s)
- If you are using a Wireless Network that will be used by the Onsite Trainer, the Wireless Network password
- Chart of Accounts (a list of the General Ledger accounts) used to maintain money received from patrons, revenues for events, gift certificates, donations, memberships, tax accounts, etc. ready and available for training
- Fiscal Year Starting Month
- Venue Maps of the venue(s) (for reserved seat sales) indicating the various sections, rows, and seats numbering patterns. Please ensure that this map is accurate to the actual physical seats in the venue. If you are unsure, please walk to the venue(s) prior to the trainer’s arrival.
- Brochures (these inform us of pricing options for single and season tickets)
- Organizational Chart
- Evening contact phone numbers (for data verification questions)
- Credit Card Merchant Account Setup Information
- Examples of Gift Certificates that you provide patrons
- Samples of existing ticket(s) that you are currently providing to the patrons. This will assist in designing the new ticket layout, which Theatre Manager will be printing.
- Samples of existing reports that you are currently use for event balancing and revenue accounting. These reports will be useful in determining which of the many reports in Theatre Manager are comparable to those you already work with.
- A pricing chart of the venue(s) indicating the various price levels based on where the patron sits, “scaled” or “tiered” houses. (if applicable)
- A pricing chart for the various ticket prices, including season packages the patron may purchase.
- A list of the various sales promotions used for discounting when selling tickets.
- A list of the upcoming events (dates and times) and the prices charged to the patrons for each event.
- Sample donation thank-you letter, donation solicitation request, pledge payment reminders that you would provide to a donor
- Sample marketing letters that you would provide to a patron
Onsite Trainer Arrives
As this is most likely the first time to your facility for our training, providing the trainer a sense of your organization is important as then they can get a better sense of how to customize the training they will provide to your organization. Some ideas to give them a sense of your organization are:- Location and setup of the box office
- Location and walk through of the venue seating location(s)
- Locations for other administration staff's offices
- Location of the training location
- Location of a coffee/lunch room area
- Location of the water closet
Meet & Greet
- All staff members should attend this important meeting (usually 30-90 minutes)
- Have staff bring their goals and hopes for the new software
- Arts Management goal is to get you functioning by the end of training
- You may not be using all 100% of Theatre Manager by the end of training
- Bring forward any changes in the training agenda based on your specific goals
Getting to Know Your Business
- Seating chart layouts
- Events that you have upcoming
- Pricing Information – Price categories, promotions, discounts, zone pricing within the venue
- Deferred/Earned Revenue
- Breakdown of ticket revenue within the General Ledger
- Additional Fees or surcharges that you charge to patrons
- Gift Certificates, Memberships, and Passes
- Donation Campaigns
- Donation Giving Levels
Pricing Strategy
- Review the existing pricing strategy for base prices for single, group, season, etc. prices
- Review the existing pricing strategy for discounted tickets (2 for 1, 10% discounts, seniors)
- Create a crossover spreadsheet on how the existing pricing strategy will be implemented within Theatre Manager's price codes and sales promotions
Data Exporting
- Where do we stand on the progress of the data exporting?
- Patron Data
- Mail Lists
- Patron Relationship Data
- Media/Press Information
- Ticketing Data
- Donation Data
- Memberships
- Outstanding Gift Certificates
- Volunteer Information and History of Activities
- Any other databases on employee’s computers
- Exporting final data conversion from existing databases
Data Preparation for Importing
- Clarification & preparation of patron data that is required to be imported
Day 1 Afternoon
Click Here Installation of the Software
If your organization took advantage of the Remote Installation, the trainer will quickly review the location and setup for each server(s) and less time will be spent on this task. If the remote installation did not happen, then the trainer will take the time to complete the Remote Installation tasks first, prior to completing the following setup:- Complete hardware inventory (recording IPs, passwords, specifications, etc.)
- Installation and configuration of Theatre Manager on each of the workstations
- Connectivity testing from workstations to server
- Check on status - setup up of sub-domain http://tickets.xxxxxx.yyy
- Check on status - router port forwarding 80, 443, 20, 21, 6181 etc.
- Check on status - getting TSL confirmation email address
- Start – SMTP Mail Server, authentication required?, user id, password
- Start - Testing of SMTP Mail Settings to verify that emails can be sent from Theatre Manager
- Ensure copies of non-Theatre Manager applications are available (PowerPoint, Excel)
Install Converted Database
- Installation and setup of the converted database
- Review any imported data for verification of accuracy
Venue Maps
For this training session, it will be important to have at least 1 workstation available that has MS Excel and MS Powerpoint installed on it.- Theory around Price Codes and Sales Promotions
- Start creating a Venue Map
- Creation of seat layout
- Creation of seat names (section, row and seat descriptions)
- Assigning Best Available Seating (to allow Theatre Manager to know exactly the order in which the box office wishes to sell each seat within a venue)
- Defining Best Seating Area for patrons to choose from when purchasing tickets via the web
Day 1 Homework
Click Here Venue Maps (Box Office)
- Cleanup of graphic picture and seat locations within the map
Data Preparation for Importing (Box Office)
- Export out all final data from the existing computer system that is required to be imported into Theatre Manager
Reports (Box Office & Development)
- If not already provided to the Trainer, Box Office & Development to print out sample copies of common reports from the Prior System they run on a regular basis (end of day, end of end, month end, end of show, etc.)
- Also provide the criteria or conditions used to generate the report
Data Importing (Arts Management)
- Finalize cleanup of Patron information
- Import Patrons
Day 2 Morning
Click Here Install Updated Database
- Install updated/data imported database
- Review any imported data for verification of accuracy
Getting to Know Your Business
- Complete any ‘getting to know your business’ discussions from the prior session
Venue Maps
- Complete venue map(s) creation to a point where they can be used for event creation
- Cleanup of seat square layout (make the map look pretty)
Creating General Ledger
- Theatre Manager’s required accounts
- Deferred/Earned accounts
Data Preparation for Importing
Review the questions from the Arts Management Data Import Team that they may have on your data they are trying to import.- Clarification & preparation of Events, Performances, Tickets, Mail Lists, and Volunteer information
- Some cleanup of data may be required in an Microsoft Excel spreadsheet containing Event & Performance information. This information will be required to be completed prior to importing any tickets.
Day 2 Afternoon
Click Here Creating Sales Promotions
- Creation of sales promotions
Creating Events
- Start creating Ticketing Events (when the map has been completed)
Setup of System Tables
There is many areas within the System Tables that will need to be updated. Today's settings will pertain to the ticket selling portion only. Some of the setup will be done by the trainer at this time. Time has been allocated within the schedule to review these tables in more detail.- System Preferences
- Company Preferences
- Tax Tables
- Payment Methods
Data Preparation for Importing
Review the questions from the Arts Management Data Import Team that they may have on your data they are trying to import.- Complete the cleanup of data may be required in an Excel spreadsheet containing Event & Performance information. This information will be required to be completed prior to importing any tickets.
Day 2 Homework
Click Here Venue Maps (Box Office)
- Cleanup of graphic picture and seat locations within the map
Data Preparation for Importing (Box Office)
- If the spreadsheet has not been completed, complete the cleanup of data may be required in an Excel spreadsheet containing Event & Performance information. This information will be required to be completed prior to importing any tickets.
Reports (Box Office & Development)
- If not already provided to the Trainer, Box Office & Development to print out sample copies of common reports from the Prior System they run on a regular basis (end of day, end of end, month end, end of show, etc.)
- Also provide the criteria or conditions used to generate the report
Data Importing (Arts Management)
- Finalize cleanup of Events, Performances, and Mail Lists
- Import Events and Performances
Day 3 Morning
Click Here Install Updated Database
- Install updated/data imported database
- Review any imported data for verification of accuracy
Review of Prior Training Topics
- Review of Venue Map setup and default price codes
- Review of Ticket Event Setup process for the event(s) that have been setup
- Review of Pricing Strategy to verify that the "what about this situation of pricing" as been covered. This review is import to reflect back on all possible pricing conditions to make sure that they have been entered into Theatre Manager.
Continue Venue Setup
- Continue creating and additional Venue Maps
Finalize Ticket Event Setup
- Continue creating Ticketing Events
- Continue creating sales promotions, enabling/disabling event sales promotions as required
Continue Setup of System Tables
- Continued setup of General Ledger Accounts
- Final setup of code table values for Default Posting Accounts, Payment Methods, Tax Tables, Fee Tables, Merchant Accounts
- Continued setup of code table values for Reason Why Patron Bought, Salutations, Suffixes, Patron Types, Locations, etc.
Preparation for Training on Ticket Sales
This setup may be done quickly by the Trainer just to get some information ready for the ticket sales training session. Time has been allocated later in the installation process to cover it in more detail.- Setup of a donation campaign(s) that would be used by the box office if they received a donation during a ticket sale.
- If applicable, setup of a donation campaign(s) that would be used by the box office if a ticket was returned and converted into a donation rather then refunding the money back to the patron
- Setup of Donation code table for Why Patron Gave (as it relates to the donation)
- Setup of the Gift Certificate.
- If applicable, setup of a Ticket Voucher that would be used by the box office if a ticket was returned and converted into a voucher rather than refunding the money back to the patron
Data Preparation for Importing
- Clarification & preparation of Tickets, Volunteer Data, and any other final data
Day 3 Afternoon
Click Here Employee Setup
- Setup of Employees and Donation Solicitors
- This section is to "create" employees only within Theatre Manager's database
- The setting of the security levels for what each employee can do and has access to within Theatre Manager's database, is held in a separate training session.
Finalize Installation of the Software/Hardware
Depending on what is outstanding to be setup, it may or may not require the assistance of your IT Department to assist in the completion of some tasks.- Installation of Theatre Manager's application on all remaining workstations
- Setup and testing of ticket printers
- Setup and testing of credit card swipes (if applicable)
- Setup and testing of bar code scanners (if applicable)
- Testing for sub-domain http://tickets.xxxxxx.yyy
- Final setup of TM Server with TLS certificate (if purchased through AMS)
- Testing of Web Sales using the standard default pages
- The Trainer will provide some customization to the standard set of web pages based on the venue's existing web site (background/foreground color selections, font and link styles, page header images, etc.)
Meeting with Executive Director - Review of Onsite Training
- Status update of where we are in the training process
- Outstanding tasks that need to be completed
- Missed topics that were part of the base curriculum and reasons why they were missed
- Possible options (cancel future topics, shortened time allocation to future topics, postpone a future topic for another onsite training session in the future) to catch up on any missed topics
Day 3 Homework
Click Here Reports (Box Office & Development)
- If not already provided to the Trainer, Box Office & Development to print out sample copies of common reports from the Prior System they run on a regular basis (end of day, end of end, month end, end of show, etc.)
- Also provide the criteria or conditions used to generate the report
Data Importing (Arts Management)
- Finalize Donation Campaigns, Giving Levels, Donations
- Import Mail Lists, Donation Campaigns, Giving Levels, Donations
Day 4 Morning
Click Here Install Updated Database
- Install updated/data imported database
- Review any imported data for verification of accuracy
Create Training Database
- Create a training database to not effect live data
Theatre Manager Introduction
- Logging into the database
- Toolbar Functionality and Menu Introduction
Patron Management
- Finding Existing Patrons
- Tricks for searching different ways for patrons
- Different Patron Icons
- Changing displayed columns, re-ordering the displayed columns
- Editing Existing Patrons
- Creating New Patrons (multiple address and contact numbers)
- Patron Marketing Tabs (Marketing, Profile, Patron, Contacts, Address, Donor, Media)
- Patron Contact Flags
- Concept of Households versus Patrons (How they are used with each other)
- Merging Duplicate Patrons
- Merging Patrons into a Common Households, Setting Primary Patrons
- Splitting Patrons from a Common Households back into Separate Accounts
Ticket Sales
- Single Ticket Sales
- Ticket Exchanges
- Ticket Quick Change of Price Code and /or Sales Promotion
- Ticket Refunds (cash refund, for a donation, for a voucher, for fixing a mistake)
- Ticket Fees (Ticket Handling, Mailing Fee, Exchange Fee)
- Ticket Fee Setup – Verify they are set correctly and automatically applied
- Ticket Holds versus Ticket Timed Holds for Specific Patrons
- Inserting a donation and/or Gift Certificate in conjunction with a ticket sale
- Group Tickets
- Season Ticket Sales (First year only)
Day 4 Afternoon
Click Here Ticket Sales (Continued)
- Continue on the topics from the prior Ticket Sales session
Donation Receiving with a Ticket Sale
This will only review the process of receiving a donation at the time of a ticket sale. More time in a separate session as been allocated for the full training on the Donation Module.- Receiving a donation at the time of a ticket sale
- Turning a returned ticket sale into a Donation, rather than refunding the money
Gift Certificates Selling/Redemption
- Selling Gift Certificates
- Redeeming Gift Certificates
- Turning a returned ticket sale into a Gift Voucher/Certificate, rather than refunding the money
Understanding Accounts Receivable
- When to use payment method ‘On Account’
- Order Reservations (option of Order Reservation and its implications)
- Refunding ‘On Account’
- Buying ‘On Account’
Managing A Sale After the Fact
- Best Ways to Fix Mistakes that are Identified by the End-Of-Day Process
- Adding Payment to An Existing Order
- Correcting Ticket Fees within an Order
- When to create a New Order versus Editing an Existing Order
- Printing Invoices from the Patron window
End of Day Processing
- Till Balancing for each employee (Box Office)
Box Office & Development Reports from Prior System
- If not already done, provide the Trainer sample copies of reports and criteria used in the Prior System to generate the reports
Day 4 Homework
Click Here Data Importing (Arts Management)
- Finalize cleanup of Tickets information
- Finalize cleanup of Volunteer information
- Any changes to previously imported data
Break Time
Click Here NO ONSITE TRAINING
- Approximately occurs between Day 4 and Day 5 and could be the Saturday and Sunday
- Although the trainer is not onsite, the trainer is actively completing any outstanding setup items needed for your installation along with coordinating the continuation of the data importing process.
- If there is data importing happening over the break, there will be no live database as the database will be taken offline to complete the data import process. If the database is required to be used during the Break Time to complete outstanding items, please coordinate times with the Data Import Team.
- Please remember that we may be calling the assigned staff member in case the Data Import Team has questions about the data and requires clarification of the data during the Break Time.
Box Office
- Go home to relax as there will be more new information during Day 5 to Day 8, but do not forget the information that was covered during Day 1 to Day 4.
- The box office staff can use this time to catch up on any past work that they are required to do.
Data Importing (Arts Management)
- Import Historical Tickets
- Import Volunteer information and any any other data that has been received
- Complete End-Of-Day Processing for Imported Data
Day 5 Morning
Click Here Install Updated Database
- Install updated/data imported database
- Review any imported data for verification of accuracy
Review of Prior Topics
- Patron Management
- Ticket Sales
Gift Certificates, Memberships, and Passes
- Membership Setup
- Internal vs. External names
- Edits and Controls
- Statistics
- Selling Gift Certificates, Memberships, and Passes
- Redeeming Gift Certificates, Memberships, and Passes
Day 5 Afternoon
Click Here Donation Campaigns
- Internal vs. External names
- Edits and Controls of each Campaign
- Statistics
Donation Giving Levels
- Giving Level Matrix Setup
Donation Management
- Introduction to the Donor Marketing Tab
- Entering new donations from the patron window
- Program year versus Fiscal year versus Calendar year
- Matching Gifts & Automatic setup of Matching Gift receivables
- Automatic maintaining of Financial Year for past, current, and future years
- Maintaining Solicitors, and if they received a commission for getting the donation
- Allowing Program Giving Levels to be calculated on donations, soft credits, and/or matching gifts or a combination of them all.
- Customize the donation specific Marketing Fields
- Defaults and customization of Program Names
- Maintaining the next contact date for this patron so the patron can become an annual donor
- Easy maintenance of who your Matching Gift Companies are
- At a glance overview of donor giving history for the past 8 years, averages, maximums, and minimums
Word Processing
- Introduction to the new word processing module
- Designating the file used for the letter data
- Creating a form letter
Form Letter Merging
- Assign a Donation Thank You letter to a Specific Donation
- Print out the Donation Thank You Letter
Advanced Donation Management
- Printing Donation Receipts (Canadian Clients)
- Developing Pledge Payment Schedules
- Assigning Pledge Payment Reminder Letters
- Sending of Payment Reminders
- To-Do’s and Contact Notes
- Allowing multiple Soft Credits per donation
- Easy setting of Relationships between donors
- History tracking of each pledge letter, donation thank you, contact note, and donation tax receipt sent to this patron
- Various security options available that can be defined for each employee to define what they can and cannot do
- Review of the numerous donation detail, summary, giving trends, giving level, reports geared towards telemarketers, board members, development staff, and management.
Finalize Donation Setup
- Final setup of General Ledger if current, future, or past accounts need to be defined
- Final setup of System Tables
Day 5 Homework
Click Here Box Office
- Box office to complete final changes to venue maps (if no data import tonight)
- Box office to review the standard ticket face to see if any changes are required
- Confirm that all imported patron, mail list, event, performance and ticketing data is complete and accurate
Development
- Development to make any necessary changes to the imported donation campaigns
- Confirm that all imported patron, mail list, relationship, donation data is complete and accurate
Data Importing (Arts Management)
- Any changes to previously imported data
Day 6 Morning
Click Here Install Updated Database
- Install updated/data imported database
- Review any imported data for verification of accuracy
Review of Prior Topics
- Patron Management
- Ticket Sales
- Donation Management
End of Day Processing
- Till Balancing for each employee (Box Office and Development)
- Creating a Deposit, Sales Posting, and Posting to the General Ledger
- Printing the End-Of-Day Reports
Online Credit Card Payment Server
- Review of Online Credit Card Payment Server Reports
- Settlement of Online Credit Card Payment Server via Theatre Manager
- Forced Deposit Issues (stop, drop, and roll!)
- Management of Online Credit Card Payment Server (Box Office needs easy access)
- Review of Online Credit Card Payment Server manual settlements procedure
- Review of the 4 Major Players Involved with Processing Credit Cards
- Theatre Manager – entry and collection of data that talks to the Online Credit Card Payment Server
- Online Credit Card Payment Server – Middleman who receives data from Theatre Manger and communicates with your Service Provider; then communicates back to Theatre Manager.
- Service Provider – the entity that authorizes the credit card. Do you have their contact information easily available?
- Your Bank – the location where the Service Provider deposits the money after a successful settlement of the Online Credit Card Payment Server.
Transferring End-Of-Day Activity into Accounting Package
- Theatre Manager is based on Accrual Accounting Principles and as such, all reports for End-Of-Day summary of activity are presented in that fashion.
- Review of Theatre Manager's End-Of-Day Reports to make sure that the selected report to have the Box Office run at the end of each day will provide the information in the best possible layout for the accountant.
- Review of Theatre Manager's Account Receivables Reports
Managing A Sale After the Fact
- Fixing Incorrect Pre-Deposited Payments and Post-Deposited Payments
- Printing an Invoice from the Patron Window
- Printing Invoices from the Batch Functions menu
- Printing an Invoice and Emailing the Invoice to the Patron for the Patron Window
Day 6 Afternoon
Click Here Mail Lists
- Difference between Who (mail list) and What (report)
- Database mining to build Mail Lists
- Adding Specific Patrons to a Mail List
- Removing Specific Patrons from a Mail List
- Using the powerful “Having” button
- Combining various Mail Lists into a single Mail Lists
Label Printing and Exporting Data via Mail Lists
- Printing Address Labels and Envelopes
- Exporting Patron Names & Addresses for External Use
- Printing a Form Letter to be sent to Patrons on a Mail List
Word Processing
This section may not need to be covered again if it was covered during the Donation Management training session.- Review of the word processing module
- Designating the file used for the letter data
- Creating a form letter
Form Letter Merging
- Merging a Form Letter with a Mail List
- Email Blasts - This will cover only high level overview. More detailed information can be provided if there is time available on Day 8 or during a separate training session (i.e. Follow Up Training)
Introduction to Reports
The purpose of this session is not to learn each and every report in Theatre Manager, rather it is used to learn about the Report Criteria Window and how to access the data so you print Theatre Manager's reports.- Box Office and Donation Reports
- Indepth review of Part of the Criteria Window
- Using Filters to quickly find data base fields
- Saving reports as PDF's for saving on the Server
- Creating Custom Categories
- Saving and using previously saved criteria
- Using the “Test” button
- Running similar reports with the same criteria
- Altering the criteria on the existing data
- Exporting data directly into MS Excel documents
- Producing reports in Theatre Manager that mimic the reports from your prior system (based on the reports that have been supplied to the Trainer)
- Creating criteria for reports that mimic the report criteria from your prior system (based on the reports that have been supplied to the Trainer)
Meeting with Executive Director - Review of Onsite Training
- Status update of where we are in the training process
- Outstanding tasks that need to be completed
- Missed topics that were part of the base curriculum and reasons why they were missed
- Possible options (cancel future topics, shortened time allocation to future topics, postpone a future topic for another onsite training session in the future) to catch up on any missed topics
Day 6 Homework
Click Here Preparation for Going Live
- Box Office to start entering any sales into Theatre Manager that were received since the Data Import Cutoff Data and have already been reported to the Accounting Department.
Day 7 Morning
Click Here Meeting with Web Designer
- Quick introduction with the Web Designer
- Explain the role that they may most likely will be playing within editing of the standard web pages
Online Web Sales
- Review of architecture involved (Apache, Web Listener, Online Credit Card Payment Server)
- Starting/Stopping the Web Sales Listener
- Review the role that the Web Sales Listener plays in tracking all the interaction happening for online web sales
- Starting URL https://tickets.xxxxxx.yyy
- Logging into the online web sales module to review the options:
- Anonymous browsing
- Creating a new patron account
- Purchasing Tickets
- Purchasing Gift Certificates
- Making a Donation
- Review of the Shopping Cart
- Adding oneself to a mail list
- Updating personal contact information (name, email, address, phone number)
- Updating personal contact methods (do not mail, do not email)
- Completing a web order
In order to get the full experience of what happens online, participants will need to enter in a valid Credit Card to complete their online purchase. Immediately after the training session, any and all credit card authorization(s) created during the training session will be voided and any item(s) purchased will be cancelled. Participants should be prepared to have at least one credit card available to complete at least one online web sale order that the group is able to review.
- Emails that are received by the patron during the online shopping experiences - which they can be (and should be) all customized to your venues specific requirements. Think of these emails as a form of advertising.
Web Sales Page Customizations
- Review the location for where the Apache/htdocs is located
- Review the base set of code and html page naming conventions
- Reminder of the importance of 'Clearing Cache' to enable web page changes to take effect
- Provide link to Theatre Manager's online help created specifically for the web developer
- For remote access to the Apache Server by the Web Designer, the IT Department must provide the required access
- For remote access to the Web Listener by the Web Designer, the IT Department must provide the required access
|
If Arts Management was contracted to perform the Web Sales Customizations, the Trainer will compose a list of the required changes identified during this morning's session. Arts Management will then allocate a separate date and time in the future to complete those changes. This will allow the Trainer to spend the time bringing your staff up to speed on how to use Theatre Manager rather then taking time away from training to complete the Web Sales Customizations. |
Day 7 Afternoon
Click Here Web Sales Management
- Starting/Stopping the Web Sales Listener
- Checking for Web Sales Activity
- Shopping Cart Window Review
- Review of completed shopping carts
- Review of in progress shopping carts
- Review of timeout/cancelled shopping carts
- Patron window Shopping Cart list
- Running a report of web sales activity [Order Detail-by Patron (Ticket, Pass, Gift Certificate, Donation, Fee and Payment)]
- Shopping Cart Window Review
- Current Internet Holds Window
- Pending Unsent Emails Window
- Web Listener Log Window
- Completing a payment transaction for a patron who doesn't want to enter their credit card number over the internet
- Discussion of what to do with the tickets sold via the Internet
- Discussion of what to do with the Gift Certificates sold via the Internet
- Discussion of what to do with the Donations sold via the Internet
- Set up Work Flow Notifications for Gift Certificates and Donations
- Batch ticket printing for online web sales that are required to be mailed to the patron
Updating Theatre Manager for Online Content
- Setting Events available for sale online (immediately, date/time specific)
- Setting Gift Certificates available for sale online
- Setting Donation Campaigns available for sale online
- Setting Sales promotions available for online ticket purchases
- Taking an event/performance offsale immediately
- Defining the maximum number of tickets in a shopping cart, maximum number of tickets for an event, maximum number of tickets for a performance
- Setting of performance notes to show online via the Tickets page
- Setting of event notes and images to show online for event information for the iPhone/iPad application
Web Sales Settings and Procedures
- Review web options available (ask for donation, terms & conditions, showing price code/sales promotion)
- Review the SMTP Mail Server settings in Company Preferences and in Employee Preferences
- How to log in as the web listener user
- Automatically having the web listener log into Theatre Manager upon startup of the computer
- Daily check to make sure web is running and process to follow if it isn't
Day 7 Homework
Click Here Box Office
- Continue entering past ticket sales to get all sales up to and including current date
Development
- Continue entering past donations received to get all donations up to and including current date
All Staff
- Continue to explore online web sales
Day 8 Morning
Click Here Employee Management
- Defining and setting Employee Security Levels
- Defining and setting Employee Access Restrictions
- Defining and setting Employee Function Restrictions
- Subscribe to Arts Management's RSS Feed via Employee Preferences
Ticket Faces
Any customizations to the ticket faces will be done by the Trainer. The time spent in this section is normally done independently to allow the Trainer to concentrate on completing the changes as quickly as possible.- Finalize Customization of Event Ticket Faces
- Finalize Customization of Credit Card Receipts
- Finalize Customization of Gift Certificate Tickets
Batch Ticket Printing
- Printing Tickets for mailing
- Printing Tickets the night of the event
- Printing Tickets for web sales
Support for Theatre Manager
- Use Theatre Manager's online help site to first search for your answer
- Subscribe to Arts Management's RSS Feed
- Contacting Arts Management for Technical Support
- Discussion about the difference of Support versus Training
- Process for checking for new updates to Theatre Manager
- Process for installing Theatre Manager on a New Workstation
- Updating Theatre Manager on Existing Workstations (Push Out versus Walk Around)
Bringing New Staff Members Onboard
- Existing users should be crossing training new users
- Departing employees should be cross training new employees
- Use Theatre Manager's screen casts from our online help site to train on each section
- Use Theatre Manager's online help site to first search for your answer
- Subscribe to Arts Management's RSS Feed
- Create a Training Database and let the new staff member learn without effecting "live" data
- Optional onsite followup training
- Optional telephone training
Day 8 Afternoon
Click Here Review of Outstanding Tasks
- Review of what has been completed to date
- Review of the next steps within the process before able to go live with Theatre Manager
- Assigning of responsibility for each of the tasks to get completed
- Determine estimated time for completion for outstanding tasks
Meeting with Executive Director - Review of Onsite Training
- On how training went
- Outstanding tasks that need to be completed
- Missed topics that were part of the base curriculum and reasons why they were missed
- Possible options (future onsite training session, telephone training sessions) to catch up on any missed topics
Open Floor Questions/Review of Prior Topics
- Venue Maps
- Event Management
- Patron Management
- Ticket Sales
- Gift Certificates, Memberships, and Passes
- Donation Management
- End-Of-Day Procedures
- Online Credit Card Payment Server
- Word Processing
- Form Letter Merging
- Mail Lists
- Printing Mail Labels
- Reports
- Exporting Patron Names & Addresses for External Use
- Web Sales Management
- Employee Management
- Available time for revisting a missed session
- Available time for a new session that is not part of the Core Training Curriculum
Onsite Trainer Departs
- All the best to all who participated during this training process! The optimum training process and experience is directly related to the effort that each one of the participants put into it on a daily basis.
Day 8 Homework
Click Here Box Office
- Staff to continue entering missed sales since start of data conversion ‘cut off’ and entering in all new ticket sales
Development
- Staff to continue entering missed donations since start of data conversion ‘cut off’ and entering in all new donations received
Web Developer
- Complete any requested customized web sales page changes required
All Staff
- Continue to work on all outstanding tasks that were not completed during training.
Follow Up Training
Using the following Day 1 through Day 4 outline:
- If 1 day was purchased, then use Day 1
- If 2 days were purchased, then use Day 1 and Day 4
- If 3 days were purchased, then use Day 1, Day 2, and Day 4
- If 4 days were purchased, then use Day 1, Day 2, Day 3, and Day 4
- If 5 or more days were purchased, then use Day 1, Day 2, Day 3, repeat Day 3 again until the last day, then end on Day 4
Preparation
Preparation for our onsite arrival will ensure a more successful implementation of Theatre Manager's Follow-Up training.
Training Topics
Making the most of the training will depend on a clear list of specific topics your organization wishes to cover during the training time.
Please prioritize the list of topics you wish to cover. Your trainer will indicate if there is sufficient time to cover all the topics in the training time you have booked, or if topics will need to be limited to time constraints in order to touch base on each topic.
If it is deemed that there are too many topics for the training time, it will be your organization's choice if they wish to:
- Remove topics from the Training Topics list
- Allocate time limitations to certain topics, in order to touch base on all the topics in the list
- A combination of the above
Within each topic that you wish to have covered, have each person who will be attending the session write down (yes write them down) a list of questions, comments, concerns, or areas that they wish to have reviewed. In some cases, these questions will serve as the starting point for the training of that topic. Please prepare a copy of all questions from all the staff members to provide to the Onsite Trainer either in advance of their onsite arrival, or the morning of their arrival on Day 1.
Why do we suggest that everyone write down their questions? Simple answer is to make sure that nothing gets missed or forgotten to be asked while the trainer is onsite. There will be a lot of information about Theatre Manager occurring while the trainer is onsite and we have found that when it comes to the specific topic of training, questions that were really important to be asked, were not covered as the question was not asked.
2 Weeks Prior
New Hardware Setup
- Have any new computer workstations or servers setup, configured, and tested for network connections.
- Installation of all Operating System Updates and Patches on:
- Theatre Manager's Database Server (if it is new)
- Apache Web Listener (if it is new)
- Theatre Manager Web Listener workstation(s) (if it is new)
- All new workstations that you intend to have Theatre Manager installed on.
- At minimum, configuration of software based firewalls to allow the required TCP/IP Ports (5432, 6181) for the Workstation Ports
Upgrade Theatre Manager
- When providing training, we find it best to be training on the most recent version of Theatre Manager. Please visit our Upgrading Theatre Manager help page to review the steps involved.
- With an onsite upgrade by the trainer, in most cases it is best to have it completed prior to the Training Topics being covered. Depending on your current version of Theatre Manager, it may take 4+ hours (or longer) to complete the upgrade. These 4+ hours would result in a loss of time allocated for actual training.
- If you decide to have Theatre Manager upgraded while the trainer is onsite, inform Arts Management immediately. This will allow us to determine the best time allocation within the training schedule to complete the process. Depending on your current version of Theatre Manager, Arts Management will need to schedule resources to complete the task before the Onsite Trainer arrives.
- It is our recommendation to have Theatre Manager Upgraded to the most recent version of Theatre Manager before the Onsite Trainer arrives.
1 Week Prior
Information to Prepare for Day 1 of Training
- The "Local" Administrator password for the database server. This may be a different password then the "Domain" Administrator account. This account is required for the database server only.
- If you have a Network Domain setup, the "Domain" Administrator user ID and password for the server and workstation(s)
- If you are not using a Network Domain setup, the "Local" Administrator user ID and password for workstation(s)
- If you are using a Wireless Network that will be used by the Onsite Trainer, the Wireless Network password
- Actual examples of items/events/schedules in your upcoming (or existing) calendar
- Depending on the specific training topics you have requested for, a projector and backdrop screen may be required. The projector is best for a computer hookup with a fairly high degree of resolution
- Within each topic that you wish to have covered, have each person who will be attending the session write down (yes write them down) a list of questions, comments, concerns, or areas that they wish to have reviewed. In some cases, these questions will serve as the starting point for the training of that topic. Please prepare a copy of all questions from all the staff members to provide to the onsite trainer either in advance of their onsite arrival, or the morning of their arrival on Day 1.
Upgrade Theatre Manager
- When providing training, we find it best to be training on the most recent version of Theatre Manager. Please visit our Upgrading Theatre Manager help page to review the steps involved.
- With an onsite upgrade by the trainer, in most cases it is best to have it completed prior to the Training Topics being covered. Depending on your current version of Theatre Manager, it may take 4+ hours (or longer) to complete the upgrade. These 4+ hours would result in a loss of time allocated for actual training.
- If you have decided (from the 2 Weeks Prior preparation tasks) to have Theatre Manager upgraded while the trainer is onsite and have not indicated this to Arts Management, please inform Arts Management immediately. This will allow us to determine the best time allocation within the training schedule to complete the process. Depending on your current version of Theatre Manager, Arts Management will need to schedule resources to complete the task before the Onsite Trainer arrives.
- It is our recommendation to have Theatre Manager Upgraded to the most recent version of Theatre Manager before the Onsite Trainer arrives.
1 Day Prior
Creating a Training Area
- Prepare the training area for ample room for workstations
- Prepare the training area for and required Ethernet Hubs, Wireless network access
- Have in place additional powerbars and/or extension cords
- If required, setup the projector and backdrop screen
Information to Prepare for Day 1 of Training
- Within each topic that you wish to have covered, have each person who will be attending the session write down (yes write them down) a list of questions, comments, concerns, or areas that they wish to have reviewed. In some cases, these questions will serve as the starting point for the training of that topic. Please prepare a copy of all questions from all the staff members to provide to the onsite trainer either in advance of their onsite arrival, or the morning of their arrival on Day 1.
Day 1 Morning
Please have Ready for Trainer's Arrival
- The "Local" Administrator password for the database server. This may be a different password then the "Domain" Administrator account. This account is required for the database server only.
- If you have a Network Domain setup, the "Domain" Administrator user ID and password for the server and workstation(s)
- If you are not using a Network Domain setup, the "Local" Administrator user ID and password for workstation(s)
- If you are using a Wireless Network that will be used by the Onsite Trainer, the Wireless Network password
- The itemized list of questions by topic that each of the staff members wants to cover for each Training Topic
Onsite Trainer Arrives
As this is most likely the first time to your facility for our training, providing the trainer a sense of your organization is important as then they can get a better sense of how to customize the training they will provide to your organization. Some ideas to give them a sense of your organization are:- Location and setup of the box office
- Location and walk through of the venue seating location(s)
- Locations for other administration staff's offices
- Location of the training location
- Location of a coffee/lunch room area
- Location of the water closet
Meet & Greet
- All staff members should attend this important meeting (usually 30 minutes)
- You may not be using all 100% of Theatre Manager by the end of training
- Bring forward any changes in the training agenda based on your specific goals
Review the Training Topics
- Review the Training Topics that were provided prior to the trainers arrival
- Agree on the sequence that the topics will be covered in and the time allocation for each topic
Proceed with Training
- Start with the first topic
Day 1 Afternoon
Continue with Training
- Continue with the Training Topics
Day 1 Homework
Software Installation (IT Department)
If your organization requires Theatre Manager to be installed on additional workstations for any new users that require access, the Theatre Manager installation files will be provided.- Installation and configuration of Theatre Manager on each of the workstations
- Connectivity testing from workstations to server
Day 2 Morning
Continue with Training
- Continue with the Training Topics
Day 2 Afternoon
Continue with Training
- Continue with the Training Topics
Meeting with Executive Director - Review of Onsite Training
- Status update of where we are in the training process
- Outstanding tasks that need to be completed
- Missed topics that were part of the agenda and reasons why they were missed
- Possible options (cancel future topics, shortened time allocation to future topics, postpone a future topic for another onsite training session in the future) to catch up on any missed topics
Day 3 Morning
Continue with Training
- Continue with the Training Topics
Day 3 Afternoon
Continue with Training
- Continue with the Training Topics
Day 4 Morning
Continue with Training
- Continue with the Training Topics
Support for Theatre Manager
- Use Theatre Manager's online help site to first search for your answer
- Subscribe to Arts Management's RSS Feed
- Contacting Arts Management for Technical Support
- Discussion about the difference of Support versus Training
- Process for checking for new updates to Theatre Manager
- Process for installing Theatre Manager on a New Workstation
- Updating Theatre Manager on Existing Workstations (Push Out versus Walk Around)
Bringing New Staff Members Onboard
- Existing users should be crossing training new users
- Departing employees should be cross training new employees
- Use Theatre Manager's screen casts from our online help site to train on each section
- Use Theatre Manager's online help site to first search for your answer
- Subscribe to Arts Management's RSS Feed
- Create a Training Database and let the new staff member learn without effecting "live" data
- Optional onsite followup training
- Optional telephone training
Day 4 Afternoon
Continue with Training
- Continue with the Training Topics
Meeting with Executive Director - Review of Onsite Training
- On how training went
- Outstanding tasks that need to be completed
- Missed topics that were part of the base curriculum and reasons why they were missed
- Possible options (future onsite training session, telephone training sessions) to catch up on any missed topics
Break Time
Open Floor Questions/Review of Prior Topics
- Previously covered topics
- Available time for revisiting a missed session
- Any new topics that were not part of the original agenda
Onsite Trainer Departs
- All the best to all who participated during this training process! The optimum training process and experience is directly related to the effort that each one of the participants put into it on a daily basis.
Facility Management
- Preparation
- Days 1-4
Preparation
Preparation for our onsite arrival will ensure a more successful implementation of Theatre Manager's Facility Management module.
Click Here 1 Week Prior
Information to Prepare for Day 1 of Training
- The "Local" Administrator password for the database server. This may be a different password then the "Domain" Administrator account. This account is required for the database server only.
- If you have a Network Domain setup, the "Domain" Administrator user ID and password for the server and workstation(s)
- If you are not using a Network Domain setup, the "Local" Administrator user ID and password for workstation(s)
- If you are using a Wireless Network that will be used by the Onsite Trainer, the Wireless Network password
- Actual examples of items/events/schedules in your upcoming (or existing) calendar
- Arrange for a projector and backdrop screen. The projector is best for a computer hookup with a fairly high degree of resolution
1 Day Prior
Creating a Training Area
- Prepare the training area for ample room for workstations
- Prepare the training area for and required Ethernet Hubs, Wireless network access
- Have in place additional powerbars and/or extension cords
- Setup the projector and backdrop screen
Day 1 Morning
Please have Ready for Trainer's Arrival
- The "Local" Administrator password for the database server. This may be a different password then the "Domain" Administrator account. This account is required for the database server only.
- If you have a Network Domain setup, the "Domain" Administrator user ID and password for the server and workstation(s)
- If you are not using a Network Domain setup, the "Local" Administrator user ID and password for workstation(s)
- If you are using a Wireless Network that will be used by the Onsite Trainer, the Wireless Network password
Onsite Trainer Arrives
As this is most likely the first time to your facility for our training, providing the trainer a sense of your organization is important as then they can get a better sense of how to customize the training they will provide to your organization. Some ideas to give them a sense of your organization are:- Location and setup of the box office
- Location and walk through of the venue seating location(s)
- Locations for other administration staff's offices
- Location of the training location
- Location of a coffee/lunch room area
- Location of the water closet
Meet & Greet
- All staff members should attend this important meeting (usually 30 minutes)
- You may not be using all 100% of Theatre Manager by the end of training
- Bring forward any changes in the training agenda based on your specific goals
Who Should be Attending this Overview Session?
- General Manager
- Why things didn't work out as planned
- How did item 'x' or item 'y' fell through the cracks
- Business Manager
- Invoicing and billing
- Facility Manager
- Venue/Building Availability
- Providing overall picture of what date/time is available for bookings
- Providing overall picture of what date/time for scheduling regular building maintenance projects
- Project Manager
- Single source of all scheduling
- Overall views for each ongoing project
- Artist Services Coordinator
- Booking Venues, studio space for Artists
- Booking Housing, accommodations for Artists
- House Manager
- Estimate labor requirements for external clients
- Organization and allocating ushers, captains, and other people working the events
- Taking/tracking housing deposits and payments
- Box Office Manager
- What is going on in the building as a whole
- Monitor and react to changes to venue changes
- Audio/Video Engineers
- Project staffing requirements for where everyone needs to be
- Master Carpenter
- What is going on in the building as a whole
- What is happening next
- Arrangement of the crews
- Senior Management
- What is going on in the building as a whole
- High level view of what is going on
Getting to Know Your Business
- Events/Projects that you have upcoming
- Your existing method of scheduling and managing your facility
- What you like/dislike when using your existing method(s) of scheduling and management of your facility
- Opportunities for what you can use Facility Management for
Facility Management Overview
- Slide Show Presentation containing the overview of Theatre Manager's Facility Management Module
- "Hands-on" experience using the Facility Management Module will be part of the next session. This session will be a sit back and soak in the information presented.
Click Here Day 1 Afternoon
Facility Management Overview (Continued - if required)
- Slide Show Presentation containing the overview of Theatre Manager's Facility Management Module
- "Hands-on" experience using the Facility Management Module will be part of the next session. This session will be a sit back and soak in the information presented.
Click Here Day 1 Homework
Data Preparation for Exporting (IT Department)
- Based on the existing scheduling software, export data that could potentially be imported into Theatre Manager (Projects, Volunteers, Positions, Resources, Inventory, Personnel Activities, Billing Rates, etc.)
Software Installation (IT Department)
If your organization requires Theatre Manager to be installed on additional workstations for any new users that require access, the Theatre Manager installation files will be provided.- Installation and configuration of Theatre Manager on each of the workstations
- Connectivity testing from workstations to server
Click Here Day 2 Morning
Employee Management
- Create new employees for new users
- Providing the basic required access (an indepth review of the access requirements will be done in a separate session)
Theatre Manager Introduction
- Logging into the database
- Toolbar Functionality and Menu Introduction
- Accessing the Calendar
Terminology
- What does Calendar mean?
- What does Event mean?
- What does Task mean?
- What does Project mean?
- What does Participant mean?
- What does Employee/Staff mean?
- What does Volunteer mean?
- What does Resource mean?
- What does Inventory mean?
Mechanics of Using the Calendar
- Accessing the Calendar
- Changing the views using Filters to display calendars with people, tasks, and projects
- Navigation via the date toolbar
- Changing the default calendar preferences for setting colors
- Using quick buttons for hiding/showing information on the calendar
- Saving your display preferences
Calendar Filters
- Calendar management to isolate the view to a single venue or event; or a group of events; or to a related set of tasks
- Creating Custom Views
- Saving Calendar Filters
- Filters can be Universal and Shared or kept Private
Break Time
Where to Start? (Project or Task.... Chicken or Egg)
- Start with the Task or Project first?
- Updating Code Tables - Task Types and Project Types
- Updating Global Colors settings in the Calendar
- Assigning Delegate Employees to Employees
Tasks
- Making new tasks private
- Adding attachments to tasks
Click Here Day 2 Afternoon
Setting up Venues and Calendar Types
- Setting up new venues, meeting rooms, dressing rooms, rehearsal halls
- Updating Code Tables - Calendar Types
- Updating Global Colors settings in the Calendar
- Assigning Delegate Employees to Employee Preferences
Tasks (Continued)
- Using your real life facility management cases, start adding tasks
- Adding attachments to tasks
Resources & Inventory Management
- Creating Resources
- Defining Resource classifications
- Creating Inventory
- Determining profit versus non-profit costing
- Setup of G/L Accounts for Cost of Goods Sold versus Income Accounts
Tasks (Continued)
- Adding Resources/Inventory to tasks
Break Time
Project Management
- Creating a New Project
- Dragging existing tasks from the calendar into a Project
- Adding new tasks to the project, then showing then on the calendar
- Assigning Participants to the task, making them apart of the Project
Gantt Chart for Viewing and Project Management
- Turning the Project into a Gantt Chart view
Project Management (Continued)
- Use an Existing Project as a template and Duplicate it for 'next time' (very powerful)
Tasks (Continued)
- Assigning Venues to tasks
- Adding Resources/Inventory (billable and non-billable) to tasks
- Adding Participants to tasks
Data Exporting/Importing
- Review if there is any data to be imported (volunteers, positions, resources, projects, tasks, etc.)
Practice/Workshop Time
- Go play with what you have learned and keep updating your projects
Meeting with Executive Director - Review of Onsite Training
- Status update of where we are in the training process
- Outstanding tasks that need to be completed
- Missed topics that were part of the base curriculum and reasons why they were missed
- Possible options (cancel future topics, shortened time allocation to future topics, postpone a future topic for another onsite training session in the future) to catch up on any missed topics
Data Exporting (IT Department)
- Based on the existing scheduling software, export data that could potentially be imported into Theatre Manager (Projects, Volunteers, Positions, Resources, Inventory, Personnel Activities, Billing Rates, etc.)
Click Here Day 2 Homework
Data Exporting (IT Department)
- Based on the existing scheduling software, export data that could potentially be imported into Theatre Manager (Projects, Volunteers, Positions, Resources, Inventory, Personnel Activities, Billing Rates, etc.)
Data Importing (Arts Management)
- If data has been provided to import:
- Review the exported data to see if it could be imported
- Import Resources, Inventory, Personnel Activities, Billing Rates, etc.
Facility Manager
- If no data is going to be imported tonight:
- Continue to setup Resources and Inventory used within the facility.
- Continue to setup code table values associated with the Facility Management module.
Software Installation (IT Department)
If your organization requires Theatre Manager to be installed on additional workstations for any new users that require access, the Theatre Manager installation files will be provided.- Installation and configuration of Theatre Manager on each of the workstations
- Connectivity testing from workstations to server
Click Here
Day 3 Morning
Install Updated Database (if required)
- Install updated/data imported database
- Review any imported data for verification of accuracy
Review of Prior Topics
- Calendar Views
- Creating a Calendar Filter
Vacation/Holidays and Background Tasks
- Adding Statutory holidays to the calendar
- Items going on all day long, that you want people just to know about
- Employee Vacation days
Moving the Start Date of a Project
- Project dependent tasks
- Gantt dependent tasks
- Manually moving tasks
Calendar Views
- Multiple Calendar Views at one time
- Variations of the calendar default views
Task Management
- General Overview
- Attaching Events to a task
- Searching for Events & Performances
- Attaching Resources to the task
- Creating Resources as required
- Review the Calendar display - Show by Resource, from the Resource Point-Of-View
- Review the Calendar display - Show by Venue, from the Venue Point-Of-View
- Review the Calendar display - Show by Employee, from the Employee Point-Of-View
- Setting Alarms for reminder of important tasks
- Personnel versus Participants
- Complete entering Participants/Staff
- Add Volunteers
- Finding Existing Patrons
- Tricks for searching different ways for patrons
- Different Patron Icons
- Changing displayed columns, re-ordering the displayed columns
- Editing Existing Patrons
- Creating New Patrons (multiple address and contact numbers)
- Adding a desired position to personnel
- For a downloadable checklist of all of the Day 3 Activities and information
-
Click Here
Break Time
Personnel/Staff/Employees/Volunteers/Participants
Patron Management
Personnel Management
Day 3 Afternoon
Personnel Management (Continued)
- Setting up new positions/job functions that are allowed to be assigned to personnel
- Defining duration hours (before, after, during) for those positions
- Defining billing rates/costs and G/L accounts for those positions
- Return back and assign the new positions/job functions to personnel
Task Management (Continued)
- Return to the previously created tasks and assign personnel positions
Personnel Management (Continued)
- Return to the Personnel Window and see the history list being updated
- Edit tasks assigned to the Personnel via the Tasks tab
Practice/Workshop Time
- Practice locating patrons
- Update the skill sets for your own personnel record and then other employees
- Start updating your tasks with Resources and personnel assignments
Employee Management
- Limiting the access to the new employees only to Facility Management & Personnel Windows
- Update security to only include personnel management, versus marketing information
- Excluding box office module, donation module, and other non-required modules
- Providing view only access versus insert, edit, or delete privileges
- Providing access to personnel to only print reports
Break Time
Project & Task (Continued)
- Create 2 new tasks in the future, not assigned to a project or personnel
- Create a new project
- Click on the tasks tab
- Take the tasks and drag it onto the list to associate it with a Project
- Back to the question: Project or Task; Chicken or Egg
- Adding new tasks within the Projects task list
Gantt Chart
- Sounds really technical doesn't it?
- Review the Gantt Chart window
- Changing of views
- Moving tasks within the Gantt Chart view
- Editing tasks via the Gantt Chart view
- Adding tasks via the Gantt Chart view
- Linking Tasks with dependencies/relationships
- Adding Suspensions to tasks
- Adding Split-Times to tasks
Data Exporting/Importing
- Review if there is any data to be imported (volunteers, positions, resources, projects, tasks, etc.)
Data Exporting (IT Department))
- Finalize export for Projects, Volunteers, Positions, Resources, Inventory, Personnel Activities, Billing Rates, etc.
Practice/Workshop Time
- Go play with what you have learned and keep updating your projects
Click Here Day 3 Homework
Data Importing (Arts Management)
- If data has been provided to import:
- Finalize import for Resources, Inventory, Personnel Activities, Billing Rates, etc.
Facility Manager
- If no data is going to be imported tonight:
- Complete the setup of Employees to access Theatre Manager and assigning the required security access privileges.
- Continue to setup Resources and Inventory used within the facility.
- Continue to setup Personnel and assigning Personnel Positions/Job Functions.
- Continue to setup code table values associated with the Facility Management module.
- For a downloadable checklist of all of the Day 3 Activities and information
Click Here
Day 4 Morning
Install Updated Database (if required)
- Install updated/data imported database
- Review any imported data for verification of accuracy
Review of Prior Topics
- Calendar Views
- Creating a Calendar Filter
- Creating a Project
- Creating and updating Tasks
- Updating Personnel with Positions
Notifications
Facility Management Notifications are different then Workflow Notifications. This section involves the management of what to do within the Pending Notifications Window.- General Startup Warnings
- Tasks Assigned to You
- Letters or Emails to be Sent
- Email Responses Waiting to be Retrieved
- Unsent Notifications
- Awaiting Responses
- Task/Meeting Notifications
- New Responses from Participant Responses
Managing Incoming and Outgoing Personnel Email Notification Responses
- Managing the Email responses outside of the Notifications Window
Invoicing and Billing
- Printing out invoices for completed Projects
- Maintaining default set of invoice comments
Practice/Workshop Time
- Go play with what you have learned and keep updating your projects
Click Here
Day 4 Afternoon
Introduction to Reports
The purpose of this session is not to learn each and every report in Theatre Manager, rather it is used to learn about the Report Criteria Window and how to access the data so you print Theatre Manager's reports.- Facility Management Reports
- Indepth review of Part of the Criteria Window
- Using Filters to quickly find data base fields
- Saving reports as PDF's for saving on the Server
- Creating Custom Categories
- Saving and using previously saved criteria
- Using the “Test” button
- Running similar reports with the same criteria
- Altering the criteria on the existing data
- Exporting data directly into MS Excel documents
- Producing reports in Theatre Manager that mimic the reports from your prior system (based on the reports that have been supplied to the Trainer)
- Creating criteria for reports that mimic the report criteria from your prior system (based on the reports that have been supplied to the Trainer)
- **Printing the Calendar
- **Printing the Gantt Chart
- **People attached to a Project
- **Who is doing What & When
- **Reports on Venue Activity
- **Reports on Staff Activity
Review of Outstanding Tasks
- Review of what has been completed to date
- Assigning of responsibility for each of the tasks to get completed
- Determine estimated time for completion for outstanding tasks
Meeting with Executive Director - Review of Onsite Training
- On how training went
- Outstanding tasks that need to be completed
- Missed topics that were part of the base curriculum and reasons why they were missed
- Possible options (future onsite training session, telephone training sessions) to catch up on any missed topics
Break Time
Open Floor Questions/Review of Prior Topics
- Project Management
- Task Management
- Resources Management
- Patron Management
- Employee Management
- Pending Notifications Management
- Invoices and Billing
- Reports
- Available time for revisiting a missed session
Practice/Workshop Time
- Go play with what you have learned and keep updating your projects
Onsite Trainer Departs
- All the best to all who participated during this training process! The optimum training process and experience is directly related to the effort that each one of the participants put into it on a daily basis.
Click Here
Day 4 Homework
Facility Manager
- Complete the setup of Employees to access Theatre Manager and assigning the required security access privileges.
- Continue to setup Resources and Inventory used within the facility.
- Continue to setup Personnel and assigning Personnel Positions/Job Functions.
- Continue to setup code table values associated with the Facility Management module.
All Staff
- Continue to work on all outstanding tasks that were not completed during training.
Click Here
New Casual Box Office Staff
When you bring in new box office staff members or casual staff members, they need to be brought up to speed on the general basics of what they may need to know to perform their functions within the box office. The following is a listing of topics you can cover with a new casual staff member. This list of topics will vary, depending on their actual role and set of responsibilities.
|
The following list of topics is a guide for new box office members and/or casual staff members rather then the comprehensive list of the core set of tools and functions a Box Office Manager would need to learn and know for complete Theatre Manager application knowledge. |
|
Another option is to allow the new box office member to follow a self-guided demonstration of the Theatre Manager application using a generic demo database. The step-by-step self-guided learning tool can be followed by the employee at their leisure. |
Preparation Part 1: Setting Up A New User
- Log in as the Outlet Administrator or Master User and create a new user login profile
- Set the initial password and have it be PCI compliant
- Review and limit use of hold code overrides (e.g. wheelchair)
- Need to provide enough access to perform their work responsibilities
- Need to restrict access to areas that they do not require to avoid them getting lost
- Assign a default e-mail address for login password retrieval
Preparation Part 2: Creating a Training Database
- Delete the old training database first (NOT the LIVE database)
- Use a training database to allow the new employee to 'play around' without worry of 'backing out' what they do
- Always use payment method of Cash - to avoid accidentally charging a real card
- How to change from the LIVE to TRAINING database and just as important, how to change back to the LIVE database after training
How to log into Theatre Manager
- Logging into the application
- Resetting the initial password to another PCI compliant password
- How to retrieve a forgotten password
Patron Management
- The key to having success is knowing proper Patron Management. If you can find the patron, then you can move from there.
- Searching for patrons
- Updating patron accounts
- Adding new patron accounts
- Merging and Splitting Household Members (If applicable)
Ticket Selling
- Before showing them 'how' to do it, you will need to explain to them your Box Office Policy rules for what you allow for Exchanges and Refunds of tickets:
- Cross show exchanges
- Waiving lower price and/or collecting for higher priced exchanged events
- Price zones and/or pricing levels
- Selling tickets
- Exchanging tickets
- Refunding tickets - they need to know this for the situations where they may need to just refund all the tickets and start over.
- Overriding a held seat (wheelchair seats)
- Holding tickets for a future release date (optional based on box office policy)
- Releasing tickets (optional based on box office policy)
Processing/Handling Fees
- Order Fees
- Exchange Fees
Payments
- Taking a payment
- Correcting a payment
- Deleting/voiding a payment made in mistake
Finishing the sale
- Printing tickets immediately
- Printing a cash and/or credit card receipts
Donations
- Entry of a donation during a ticket sale
Gift Certificates
- Selling a gift certificate during a ticket sale
- Selling a gift certificate as a stand alone sale
- Providing the gift certificate (merge with form letter or printing out a ticket)
Redemption of Passes and Gift Certificates
- Redemption of Passes and Gift Certificates for Tickets
- Showing how to see all the Gift Certificate Redemptions
- Printing or not reprinting the remaining value of a gift certificate
Activities After the Fact
- Printing tickets from the patron window
- Reprinting lost tickets
- Reprinting a credit card receipt
Web Sales
- Monitor activity to make sure running
- Provide 'how to' create the online patron account
- Provide 'how to' login
- Provide 'how top' request the login password
- Have them set up an account, purchase tickets and complete the checkout
- Refund the tickets sold in the system
- Review the emails that are sent to the Patron
- How to 'see' an order that a patron currently has open http://help.theatremanager.com/theatre-manager-help/shopping-cart-detail
- How to 'complete and checkout' and order when the patron calls the box office to use the credit card over the phone rather than online http://help.theatremanager.com/theatre-manager-help/checkout-cart-behalf...
Technical Situations
- Providing log in access to the computer (not Theatre Manager, rather the actual computer) in case of reboot or power failure
- How to insert new ticket stock, or clear a ticket stock jam of paper
- Who to contact and/or how to restart the web listener
- No power? No access to Theatre Manager? Take their money; write them a paper ticket; let them in the venue; process the ticket sales & payment later (don't panic)
The Day of the Event
- Batch ticket printing
- Unprint a batch or subset of tickets
- Before-Event-Sales for window sales
- PWYC for window sales (if applicable)
End-of-Day Processing
- Till Balancing (if applicable)
- The complete EOD process is geared towards non-casual staff and will be run by the box office manager or equivalent.
Support & Help
- Quick Reference Guides - http://help.theatremanager.com/quick-rference-guides
- Patron Management PDF - This is a must read after the day's training!
- Review other topics of interest; watch screen-casts at home as part of training
- Help
- Goto the Box Office Manager or primary contact - ask your question here first
- Review Online help - http://help.theatremanager.com/theatre-manager-help
- Ask Support - support@artsman.com or (888) 536-5244, ext. 1 Monday-Friday 8:00 AM - 5:00 PM MST - this is geared towards 'how to' support, rather than training. If it is deemed that the support questions are really about 'learning the system', then you will be asked to contact our sales department for Additional Training
- Request Additional Training - sales@artsman.com or (888) 536-5244, ext. 2 and set up a scheduled appointment with a support representative for one-on-one training
Review Progress and Access to Modules
- You'll need to monitor the progress of your casual staff member to see if they need additional access to learn more as they may turn into a star employee
ams
If you see this page in error or believe you should not have access to it, please contact management right away.
This part of the web site deals with policies and procedures.
Human Resource's Policies
AMS & Customer Data Policy
Arts Management Systems' data and Customer's data is to be considered sensitive at all times and treated with the utmost care. This is especially true when it comes to data relating to PCI compliance and credit card information. There is also, in general terms, no need to have customer data transferred to our custody, especially with sensitive data in it.
AMS & Customer Data Policy
It is Arts Management Systems policy that Employees:
- At no time will customer data be transferred into our custody without the explicit knowledge and agreement of the customer.
- Do not transmit any database containing encrypted sensitive credit card data outside the customers network and never to AMS premises.
- Try to solve all problems without any data ever having to leave the client’s servers, even if it means loading their production database into a separate test database on their servers for purposes of diagnostics.
- Collect only data required to solve the problem and reproduce it such as order number, patron number, ticket number, cart #, dates, etc.
- Data placed on our servers for Tier II support will be stored in a restricted location until such time as the problem resolution process begins.
- Do not keep any data given to you for diagnostic purposes for longer than is absolutely necessary.
- On a Mac, this is done by putting the file in the trash and using ‘File->Secure Erase’
- On a PC, a tool like Eraser is to be use to securely delete.
General
- Arts Management Systems hereinafter called “AMS”.
Revision History
- June 2010
- Aug 2016
- Sep 2019
Gathering Sample Data
|
Standard practice requires removal of all card data before a database transfer is to occur (if a database needs to be transferred to AMS in the first place) |
Testing @ Customer Site
- Make a backup of the customer's database using the BackupTM_SUPPORT backup script. This automatically implements the postgresql database dump flags below.
- load the backup database that exhibits the error onto the customers server as a 'test' database so that production is not affected.
- Perform one last test on the test database at the customer site to ensure the problem still exists
Testing in Tier II Development Environment
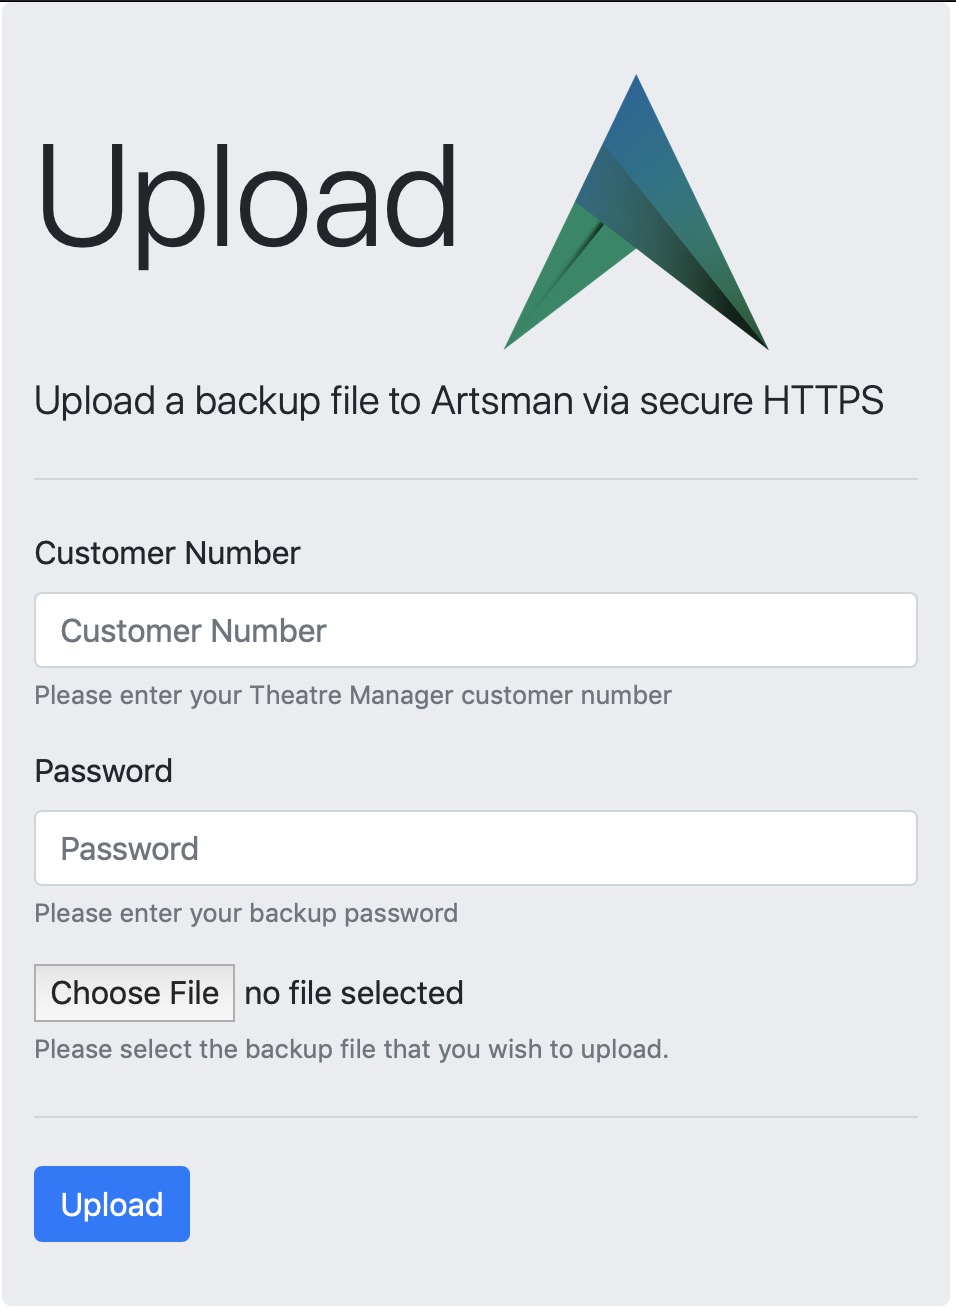
- Make a SUPPORT backup using BackupTM_SUPPORT which
- Dumps the backup database under a separate name (that end in _SUPPORT) on the backup folder
- This uses the
-T fCreditCardsEncrypted parameters with pg_dump to ensure no such data is transmitted.
eg:the default parameters in the support script exclude any encrypted card data. other files can be added if they are large (other candidates are transactions, web logs and/or eblasts)
pg_dump -F c -v -T fCreditCardsEncrypted datbase > /path/to/backup.backup
- Use the link https://backups.artsman.com and enter the appropriate credentials as per the web page image to the right. This will migrate the _SUPPORT database to a secure location on private server via https using latest high transport layer encryption available (currently TLS 1.3)
- Inform Tier II when the database has uploaded and they will resolve the case and remove the data.
Exceptions for Credit Card Data
|
There are NO permitted exceptions that allow credit card data to be transferred out of the customer network at any time. The BackupTM_SUPPORT script must be used to create a backup that excludes encrypted card data before sending via secure https. |
Acceptable Use Policy
Recognizing that employees may use Arts Management computers from time to time for non-related Arts Management business; this document outlines Arts Management’s position on the Acceptable Use of Computers Employees need adhere to during the performance of their duties.
Acceptable Use Policy
It is Arts Management Systems policy that Employees:
- Adhere to safe computing practices when using the Intranet, Internet, Email, IM, FTP, web and other related communication tools;
- Use their company computer for work related to Arts Management Systems in performance of their duties;
- Obtain specific approval for non-work related uses or for an exception to any item mentioned in this policy; and
- Prevent others from contravening the Acceptable Use Policy.
General
- Arts Management Systems hereinafter called “AMS”.
- AMS spends considerable resources to implement and maintain a corporate network of computers, routers, telephony, VPNs, data services, corporate information, and application portfolio’s (hereinafter called “assets”) for the benefit of the company and its employees. It is the intent of the company to safeguard those assets and ensure that the company adheres to copyright and fair trade practice.
- AMS employees are encouraged to take full advantage of this network (Intranet), including the Internet access to the World Wide Web, subscription-based information resources, newsgroups, list-servs, bulletin boards, threaded discussions, Telnet and FTP resources to maintain a knowledge base suitable for the successful performance of their duties.
Revision History
- March 2006
Personal Responsibility
- It is the responsibility of the employee to take all reasonable steps to ensure compliance with the conditions set out in this document, and to ensure that only acceptable use of AMS computers and related communication occurs.
- The employee is responsible at all times for the proper use of any computer(s) and other related equipment provided to the employee by AMS.
- The employee is responsible for safeguarding the assets of the company by following the acceptable use policies.
- The employee is responsible for safeguarding any assets of our customers while connected to their networks.
Compliance
- Compliance is required from all AMS employees and/or affiliated individuals that connect to any AMS network behind the corporate firewall and to the Internet.
- AMS employees are responsible for any guest access to the network and their respective compliance.
Unacceptable Use
It is often easier to understand acceptable use by identifying inappropriate use. The following list, while not exhaustive, exemplifies some unacceptable uses:
Creation or Transmission
- The creation or transmission of any material in violation of any local, provincial, state, or federal law. We must be cognizant that we deal with customers around the world and that laws may vary from one jurisdiction to another.
- The creation or transmission of material, which is designed or likely to cause annoyance, inconvenience or needless anxiety.
- The creation or transmission of defamatory material.
- The creation or transmission of material protected by trade secrets or privacy laws.
- The transmission of purchased software that would contravene any license agreements imposed on AMS by our Vendors.
- The creation or transmission of any offensive, obscene or indecent images, data or other material, or any data capable of being resolved into obscene or indecent images or material.
- The use of profanity, obscenity or other language that may be offensive to another user.
- Repeated, unsolicited and/or unwanted communication of an intrusive nature is strictly prohibited. Continuing to send e-mail messages or other communications to an individual or organization after being asked to stop is not acceptable.
- Representation on a Blog, list-serv, or similar IM comment posting venue, to express strong, misleading, or libelous views, which may or may not represent the views of AMS, its employees and/or affiliated individuals.
- Any form of vandalism, including but not limited to, damaging computers, computer systems, or networks, and/or disrupting the operation of the network.
- Creating and/or placing a computer virus on the network, or working in such a manner that may make it easy for a virus to infect the corporate network.
- Use of the network for financial gain, commercial activity, or illegal activity. (e.g. hacking, spam)
- Use of the network for political activity.
- Use of the network to access pornographic or obscene material.
- Deliberate unauthorized access to facilities, services, or customer networks accessible via the AMS network.
- Opening of ‘holes’ in the network to provide unauthorized access to other individuals without consent.
- Use of another person’s account without consent (System Administrators have implicit permission to manage the all aspects of the network which may include account access).
- Copying and/or downloading commercial software or other material in violation of any local, provincial, state, or federal copyright laws. (e.g. downloading music from non law-abiding websites)
- Wasting employee effort or networked resources, including time and the effort of employees involved in the support and maintenance of those systems.
- Corrupting or destroying another employee or user’s data.
- Violating the privacy of other employees or users.
- Disrupting the work of other employees or users.
- Using the AMS network in a way that denies network service to other users.
- Continuous use of networking software or hardware after AMS has requested that it be removed because it is deemed inappropriate use and/or causes disruption to the correct functioning of the AMS network and its associated computers.
- Disabling of any networking corporate software or hardware used to safeguard, monitor and maintain correct functioning of the AMS network and it’s associated computers.
Communication
Network
Downloading
Miscellaneous
Access to Outside Networks
- AMS follows the acceptable use policies of our Internet Service Provider’s (ISP) used by each employee to access the Internet. AMS also regards any breach of their Acceptable Use Policy as unacceptable use.
- Where the AMS network is being used to access another network (e.g. a client’s network), any breach of the client’s Acceptable Use Policy is regarded as unacceptable use of AMS.
Withdrawal of Service
- Where necessary, some service(s) may be withdrawn from the employee where a violation of the Acceptable Use Policy has occurred and/or persists despite appropriate notification.
- Restoration of service(s) will only be made when AMS is satisfied that a future breach of the Acceptable Use Policy will not occur and/or steps have been taken to correct the item causing unacceptable use.
Legal and Statutory
- AMS and its employees perform all best efforts to assist any Authorities where required by law in the investigation of any breach of our network and unauthorized access to our corporate assets by outside individuals and/or organizations.
- When an internal violation of the Acceptable Use Policy is illegal or unlawful, or results in loss or damage to AMS, its employees and/or affiliated individuals, AMS assets or the assets of third parties accessible via the AMS network, the matter may be referred for legal action and/or termination of employment.
General Questions
March 2006 – Does this mean we can not download music?
(Responded by Doug) If you have an iPod, iTunes or similar tool to store electronic music, then AMS views putting your own personal music on it as an acceptable use and it is up to you to manage their licenses to use your own music.
March 2006 – What do you mean by “Use of Network for Political Activity”?
(Responded by Doug) This is a tough question and it really goes to the purpose of the company network. It is primarily for company business and political activity really isn’t that.
So, for a completely crazy example, imagine somebody setting up a political web site for the Marijuana Party inside the router (AMS Network) that attracted millions of hits a second and overwhelmed things. AMS doesn’t think that would be quite appropriate as it would affect support, phone line quality, etc. It may also have a moral effect on the company.
Making a donation to a political party via the network - can't see a problem with that - its just a commerce thing.
Now, on the other hand, it doesn't mean political activity is out of the question. I personally believe that everybody should contribute back to the community in their own way. I choose to volunteer at StoryBook Theatre, my wife chooses to volunteer at school that the kids are at. If you, or someone chooses to volunteer for a political party - that great.
What the policy also states is that if you think this is a non-work task you want to do - lets say supporting a political campaign and doing e-mailers for them - then the right thing to do is first ask to have permission to use AMS resources for that. It is good for both the employee and AMS. Why? Because then everybody acknowledges that something is happening.
When I worked at Esso some 20 years back, they had a Permitted Use Policy on company resources. At that time the Internet and email really was nothing - didn't exist. (I sound like a dinosaur). But they did have policies on using company photocopiers. If you wanted to use it for personal things, you were supposed to ask permission. And, people did. My boss was big into the boy scouts - he had permission to do stuff for them, including time off. I was doing Storybook Theatre and I had permission to do the monthly minutes on the photocopier. That way, the boss knew where all his paper was going.
Acceptable use isn't no – it means acceptable, permitted, or planned use that is reasonable above board and consistent with good company stewardship. I think AMS should be quite happy to support extra curricular activities providing they are not to a detriment to the company’s purpose – provided permission is given. That’s a win for everybody.
March 2006 – Will I be able to use Personal Software on My Computer?
(Responded by Darwin) For personal software that is licensed to AMS, yourself and/or affiliated individuals, there should be no problems to install the software and use it on your work or home computer as long as the software’s main purpose is not listed or referred to in the Unacceptable Use section of this policy. With all software purchases, it is best to review the specific software license that came with the software to see if they have any specific licensing requirements when using their software and that you are in compliance with their listed licensing requirements.
Also, if the software is purchased or downloaded by an employee for personal use, permission should be sought to use it on a company machine. If your personal software does not affect the network, the machines intended use, or contravene the accepted use policy, it will more than likely be approved.
Bereavement Leave Policy
Bereavement leave enables employees to take time off work to deal with the death of a family member.
Bereavement Leave Policy
It is the policy of Arts Management Systems that Employees are entitled to be absent from work for bereavement up to 3 days, of which 2 days will be with pay. Additional paid leave is at the discretion of management approval.
Definition
Bereavement leave, sometimes called funeral leave, is time off work to help employees mourn the death of relatives or close friends, without fear of job loss. Bereavement leave normally serves two purposes, giving an employee time to attend a funeral service (i.e. fulfilling ceremonial obligations) and to mourn the loss of a loved one.
Employees may not be dismissed, suspended, laid off or demoted when on bereavement leave.
The province of Alberta does not legislate specific Employment Standards Code for bereavement leave. In jurisdictions without this legislated bereavement leave, the decision to grant time off or not is left to the employer.
General
- Arts Management Systems hereinafter called “AMS”.
Revision History
- October 2013
Coverage
- Generally, bereavement leave will not require a medical death certificate or other proof of death, but may be requested at AMS’s discretion.
- Although the majority of all collective agreements and jurisdictions provide bereavement leave as completely unpaid leave, AMS will provide:
- Bereavement leave up to 2 days will be paid leave.
- Bereavement leave after 2 days will be unpaid leave.
- Given adequate notice, AMS may allow an employee additional time off to accommodate specific circumstances such as:
- Extended travel distance considerations according to the relative proximity of the deceased to the employee
- Preparation for funeral services
- Co-ordination activities for dependent persons
- Respect of cultural and religious considerations where expectations around mourning may require additional time
- Extended bereavement leave beyond the standard 3 days is available and may be requested by the employee to be taken as vacation or an unpaid extended leave of absence.
- Paid bereavement leave after 2 days of absenteeism, is at the discretion of AMS.
General Questions
How long can employees be off on bereavement leave?
Although the Province of Alberta does not legislate specific bereavement leave under The Employment Standards Code, most jurisdictions and workplaces allows employees to take up to 3 days as bereavement leave to deal with the death of a family member as unpaid bereavement leave. In jurisdictions without this legislated bereavement leave, the decision to grant time off or not is left to the employer. AMS is following the standard bereavement time of 3 days of which the first 2 days are with pay.
Does bereavement leave need to be taken as consecutive days?
No. Bereavement leave time does not need to be consecutive days and AMS acknowledges that the the days taken for bereavement may vary depending on each employee's unique situation.
Who can take bereavement leave?
All employees without exception.
Are employees required to be paid while on bereavement leave?
No, the legislation only requires an employer to provide time off and allow an employee to return to their job when the leave has ended. Employers are not required to pay wages during the leave. Employers can at their own discretion, give greater benefits than those provided for in the legislation.
Is an employee entitled to be paid for bereavement leave?
Yes, provided the employee has been continuously employed for at least 30 consecutive days. Employees who have been employed for less then 30 consecutive days are still entitled to take bereavement leave as unpaid leave.
Can an employee continue to work and be paid for bereavement leave at the same time?
No. Bereavement leave is a benefit that should not be seen a method to incur additional paid wages; it is time provided to the employee to take time away from work to help mourn the death of relatives or close friends without fear of job loss.
Must an employee take bereavement leave?
No. AMS acknowledges that each employee is unique and may not desire to take bereavement leave. However management does reserve the right to request that the employee take time for bereavement if it is determined that the employee showing signs of (but not limited to):
- Making poor decisions / impaired decision-making
- Inability to concentrate
- Lack of motivation, decreased productivity
- Supervised or supervising ineffectively
- Confusion, memory lapses
- Anxiety, crying or other emotional responses
- Social withdrawal
- High absenteeism or injury rate
- Compromising workplace safety
Who are considered family members?
Family is defined very broadly for Employment Standards’ purposes.
- Spouse or common-law partner
- Parents or guardians of the employee and his or her spouse or common-law partner
- In-laws of the employee and his or her spouse or common-law partner
- Siblings
- Children
- Grandparents and grandchildren of the employee and his or her spouse or common-law partner
- Children of the employee's spouse or common-law partner
- And, anyone who lives with the employee as a member of his or her family
What must employees who take bereavement leave tell their employer?
Employees must tell their employer, as soon as possible, which days they will need off. Employers can request reasonable verification that the leave is needed.
What is reasonable verification?
Employers can request reasonable verification of the need for the leave. Reasonable verification for bereavement leave might be an obituary from a local newspaper or medical death certificate.
Can employees take part of a day as bereavement leave?
When an employee takes part of a day for bereavement leave, the employer may count that as a full day of the leave. Employers do not have to accommodate an employee taking the leave in part days, as long as they allow the employee to take the leave.
Can employees be fired or laid off because they take bereavement leave?
No. Employers cannot terminate or lay off employees because they have taken or are planning to take a leave.
What happens when the leave ends?
Employees must be allowed to return to their job, or a comparable job with the same or greater benefits and pay, when they return from leave. Employers may not discriminate or attempt to punish employees for taking a leave.
What happens to the employment history and benefits while an employee is on leave?
While employees are on paid/unpaid leave the employment is deemed to be continuous. When employees return from the leave they are still entitled to any benefits they had before the leave, and their years of service include the time away on the leave.
Is bereavement leave an annual entitlement?
The entitlement to bereavement leave is not an annual entitlement. If an employee suffers more than one death in the family in one year, the employee would be entitled to bereavement leave for each of those deaths.
Is bereavement leave combined in the event of multiple deaths?
The entitlement to bereavement leave is not combined in the event of multiple deaths. If an employee suffers more than one death in the family in a single incident, the employee would be entitled to bereavement leave for each of those deaths as if they occurred separately.
Is bereavement leave additional to regular scheduled days off or preplanned vacation days?
No. Bereavement leave covers only scheduled working days. If the death occurred during an employee's vacation, bereavement leave would not apply.
Can other employees donate their vacation time to another employee for bereavement leave?
In most cases, yes. Employees must inform AMS management, as soon as possible, if they intend to use a portion of their vacation days as a donation to another co-worker. It is at the discretion of AMS management to accept this donation or not. Management will verify that the employee donating the vacation days has adequate vacation time to donate along with enough remaining available vacation days for the donating employee's personal use.
Network Security Policy
Recognizing that employees may use Arts Management computers from time to time for non-related Arts Management business; this document outlines Arts Management’s position on the Network Security Employees need adhere to during the performance of their duties.
Network Security Policy
It is Arts Management Systems policy that Employees:
- Adhere to safe computing practices when using the Intranet, Internet, Email, IM, FTP, web and other related communication tools;
- Use the company network for work related to Arts Management Systems in performance of their duties;
- Obtain specific approval for non-work related uses or for an exception to any item mentioned in this policy; and
- Prevent others from contravening the Network Security Policy.
- Ensure the Firewall is enabled on their computer
- Use Company authorized hardware for their network connections
- Use a VPN at all times to access company servers
General
- Arts Management Systems hereinafter called “AMS”.
- AMS spends considerable resources to implement and maintain a corporate network of computers, routers, telephony, VPNs, data services, corporate information, and application portfolio’s (hereinafter called “assets”) for the benefit of the company and its employees. It is the intent of the company to safeguard those assets and ensure that the company adheres to copyright and fair trade practice.
- AMS employees are encouraged to take full advantage of this network (Intranet), including the Internet access to the World Wide Web, subscription-based information resources, newsgroups, list-servs, bulletin boards, threaded discussions, Telnet and FTP resources to maintain a knowledge base suitable for the successful performance of their duties.
Revision History
- April 2006
- Aug 2020
Security Implementing
- a firmware patch so that you need a password to get a machine started and booted
- implementation of passwords on start up (we are all there anyway)
- implementation of passwords on wake from sleep mode
- implementation of some 'phone home' software where if your machine wakes up in an unknown IP address, it sends an email to a specified email address to let us know where it is should somebody else "borrow" your laptop without you knowing.
Data Security
Tools
- There are a number of tools that AMS has for just doing stuff and manipulating data such as BBEdit, Microsoft Excel, and what have you, or tools for connecting to clients such as Timbuktu, Remote Desktop, Team Viewer and VNC. AMS would like to make sure everybody has the full complement of tools available... just in case they are needed.
General Maintenance
- AMS also wants to do diagnostics on each computer to make sure its ok. This includes Diskwarrior to fix the desktop, Apples' repair permissions to correct some permission setting that seems to happen to log files and plists (and affect some software updates coming in) and, making sure that latest software updates are run.
- Clearing out system logs that have grown. I just removed some stuff and got back half gigabyte of system logs. These are in /var/logs, /library/logs ~/library/logs
- Updating bluetooth firmware
- Updating any other software
Routers & Wireless Connections
General Questions
There are no general questions at this time.
Overtime & Days in Lieu Policy
Overtime and Days in Lieu compensates employees when they are required to work in excess of the limits defined in the Employment Standards Code.
Overtime & Days in Lieu Policy
It is the policy of Arts Management Systems that allows Employees overtime hours to be banked and later taken off with pay, hour for hour, during regular work hours. Overtime hours can be banked for a period of 3 months. Banked time not taken within the 3 month period may be paid out at time-and-a-half.
Definition
In Alberta, under the Employment Standards Code, overtime is treated on a daily and/or weekly status. Overtime must be paid to all employees (regardless if they are paid a weekly, monthly, or annual salary except if they are exempt) on hours worked in excess of eight hours a day or 44 hours per week, whichever is greater (the higher of the two numbers is overtime hours worked in the week). The overtime rate is 1.5 times an employee’s regular rate of pay unless the employer and employee have entered into an overtime agreement.
General
- Arts Management Systems hereinafter called “AMS”.
- AMS and its employee’s are entering into an overtime agreement.
- The Code requires an overtime agreement to be in writing. Employers must give employees who are covered by an overtime agreement a copy of the agreement.
- AMS’s employees are all viewed as professionals. With professionals, AMS’s employee’s need to be prepared for each client’s onsite visit. Time spent by employees preparing for client training sessions is not view or recognized as overtime within this agreement.
- AMS views this rules as guidelines and wants to be fair to the employees for the hours that they work.
Revision History
- January 2010
What is Overtime?
- All employees, including those who are paid a weekly, monthly, or annual salary, are inclined to have paid overtime pay for overtime hours they work unless they have entered into an overtime agreement.
- Overtime hours are to be calculated both on a daily and on a weekly basis. The higher of the two numbers is overtime hours worked in the week.
- Except as noted below, overtime is all hours worked in excess of:
- eight hours a day, or
- 44 hours a week.
Overtime Agreement
Hourly Part-Time or Casual Employees
- Hourly Part-Time or Casual employees will be paid out for all overtime hours worked at a rate of 1.5 times the employee's regular rate of pay.
- Hourly Part-Time or Casual employees are not applicable for banking overtime as Banked Time in Lieu.
Commission Paid Employees
- Employees who are paid exclusively by incentive pay such as commission, piecework or a similar method, are not applicable for banking overtime as Banked Time in Lieu.
Salary Paid Employees
This agreement allows overtime hours to be banked and later taken off with pay, hour for hour, during regular work hours. This agreement relates to all overtime pay.- Overtime hours are calculated the same way under an overtime agreement, as it would be if overtime pay is to be paid at time-and-a-half.
- Only overtime, which has been authorized and pre-approved by the department manager or designate, will be recognized as Banked Time in Lieu.
- Banked Time in Lieu must be taken within three months of the end of the pay period in which the overtime was earned.
- Banked Time in Lieu that is not taken at the end of the 3 Banked month time period, the overtime hours will be lost and will not be paid out at time-and-a-half.
- Daily and weekly schedules may vary from time to time, and diversification in work schedules may be required to meet changing operational needs. Employees may be requested to work overtime during periods of unexpected and/or unavoidable workloads. Where possible, reasonable notice will be given under these circumstances.
- Time taken off in lieu of overtime pay is equal to the actual number of overtime hours worked, at the employee's regular rate of pay.
- In compliance with Employment Standards, employees in management positions are not eligible for overtime compensation.
- On termination of employment, any outstanding overtime, which has previously been approved, will be paid out and included in the employee's final pay.
Travel Time
- In most cases when airplane travel is required, travel time starts approximately 1.0 hour prior to domestic flights and 2.0 hours for international flights. Travel time will stop approximately 1.0 hour after arriving at the destination.
- There will be travel time that is less then a full day and there will be time that is more then a full day. At most, a single travel day is earned as Banked Time in Lieu on either side of an onsite trip. As single travel day is used as a guideline for over a time period the over/under should average out.
- Travel time to and from the airport when leaving your place of residence, is not eligible for overtime compensation.
- Travel time on weekends is eligible for overtime compensation.
- Travel time on a regular weekday where you were scheduled to work, is deemed part of your regular work week.
Weekend Stayovers
- Overtime will only be recognized if time on the weekend was used for training purposes. If training was not scheduled to occur over the weekend day(s), then no overtime will be recognized for the Weekend day(s).
- Weekend days where there is no scheduled training activities, are treated as regular weekend days off.
Work Requested by Client
- While onsite, a client may request that AMS perform work on their behalf during the installation, training, and/or upgrade process. If AMS is requested to perform work, then this work will be invoiced back to the client for it would not (in most cases), be part of the pre-arranged agreement for onsite activities between AMS and client.
- All overtime that is accepted and confirmed completed by the client, will be recognized as overtime. An overtime sheet will be required to be completed, signed by the client, and provided to the department manager or designate upon completion of the work. When the completed and signed overtime sheet has been received by the department manager or designate, then the overtime will be added to the Banked Time in Lieu.
- Failure to provide a completed overtime sheet to the department manager or designate, will forfeit the overtime hours.
Requests to Use Banked Days in Lieu
- Requests to take time off in lieu will be considered by the department manager or designate, and approved based on current operational needs.
- In most conditions, the day will need to be a mutually agreeable date between the department managers or designate. If a mutually agreeable date cannot be determined, a date will be chosen and assigned at AMS’s discretion.
How is Overtime Paid?
Hourly Part-Time or Casual Employees
- Overtime will be paid at the rate of 1.5 times the employee's regular wage rate.
Commission Paid Employees
- Employees, who are paid exclusively by incentive pay such as commission, piecework or a similar method, have no established rate of pay. Therefore, for the purpose of calculating overtime entitlements, the wage rate is deemed to be the minimum wage.
- If the incentive pay is less than what would have been earned applying the minimum wage, the employer must top up the incentive pay earnings to match minimum wage.
- Overtime will be paid at the rate of 1.5 times the minimum wage rate.
Salary Paid Employees
- If an employee is paid by a combination of salary and incentive pay, and the salary is greater than minimum wage, the salary establishes the hourly rate for the purpose of calculating overtime entitlements.
General Questions
If a General Holiday (Public/Statutory Holiday) is worked
Hours worked on a general holiday and paid at 1.5 times the regular wage are not used in computing either daily or weekly overtime. However, when employees do not qualify for the general holiday or if they are given another work day off with pay in lieu of working on the general holiday, the hours are counted for the purpose of calculation overtime.
If training happens on a Saturday only for a weekend stayover, is the Saturday recognized as a potential Banked Time in Lieu?
Yes. The Saturday will be available to be recognized as potential overtime. Because no training was done on Sunday, Sunday is not available to be recognized as potential overtime.
Do I have to work overtime at night to complete a task for the client?
AMS views its clients as professionals. Our clients expect us to be professionals when we are either in the office or onsite. The goal is to make the client successful. When the client succeeds, you will succeed, and by default, AMS will succeed. AMS strongly recommends that you evaluate your time when onsite and use ‘wasted time’ or ‘idle time’ when onsite to compete tasks in order to avoid being in a situation where overtime may become required.
If there are tasks such as map building, data conversion preparation, event building, season subscription preparation, etc. where the task could be done by the client, explain to the client that in order to stay on schedule, human resources/time needs to be allocated to complete the task. The client can determine if they have the available resources to complete the task in the required timeframe or if they need to authorize AMS to complete the task on their behalf (i.e. back in Calgary’s office, or in the hotel room at night). When the client determines that they need the assistance of AMS, it is an easy acceptance process for them to acknowledge that overtime is required and that they will be invoiced for it.
If the client does not authorize the overtime and the uncompleted task impacts the scheduled agenda, work with the client to rework the scheduled agenda to accommodate the uncompleted task into the next days schedule. Reorganize either the remaining training topics for the remaining time period, or mutually agree on training topics that can be removed from the training agenda.
Sexual Harassment Policy
Arts Management Systems Ltd, is committed to a healthy, harassment-free work environment for all our employees. Arts Management Systems Ltd. has developed a company-wide policy intended to prevent harassment of any type, including sexual harassment, of its employees, customers and clients and to deal quickly and effectively with any incident that might occur.
Definition of harassment
Harassment that is covered under the Alberta Human Rights Act occurs when an employee is subjected to unwelcome verbal or physical conduct because of race, religious beliefs, colour, gender, gender identity, gender expression, physical disability, mental disability, age, ancestry, place of origin, marital status, source of income, family status or sexual orientation. Alberta human rights law prohibits workplace harassment based on these grounds. Harassment that is not linked to one of these protected grounds is not covered under the Act. The behaviour need not be intentional in order to be considered harassment.
Examples of harassment that will not be tolerated in Arts Management Systems Ltd. are: verbal or physical abuse, threats, derogatory remarks, jokes, innuendo or taunts related to any employee's race, religious beliefs, colour, gender, gender identity, gender expression, physical disability, mental disability, age, ancestry, place of origin, marital status, source of income, family status or sexual orientation. Arts Management Systems Ltd. also will not tolerate the display of pornographic, racist or offensive signs or images; offensive jokes based on race, gender or other grounds protected under the Act that result in awkwardness or embarrassment; and unwelcome invitations or requests, whether indirect or explicit.
Definition of Sexual Harassment
The Alberta Human Rights Act prohibits discrimination based on the ground of gender. Protection from sexual harassment is included under the ground of gender. Unwanted sexual advances, unwanted requests for sexual favours, and other unwanted verbal or physical conduct of a sexual nature constitute sexual harassment when:
submission to such conduct is made either explicitly or implicitly a term or condition of an individual's employment; or submission to, or rejection of, such conduct by an individual affects that individual's employment.
Sexual harassment can include such things as pinching, patting, rubbing or leering, "dirty" jokes, pictures or pornographic materials, comments, suggestions, innuendoes, requests or demands of a sexual nature. All harassment is offensive and in many cases it intimidates others. It will not be tolerated within our company.
How to proceed if you are being harassed
- If it is possible, tell the harasser that their behaviour is unwelcome and ask them to stop.
- Keep a record of incidents (date, times, locations, possible witnesses, what happened, your response). You do not have to have a record of events in order to make a complaint, but a record can strengthen your case and help you remember details over time.
- Make a complaint. If, after asking the harasser to stop their behaviour, the harassment continues, report the problem to one of the following individuals:
a. Department Manager (if possible) b. Director of Human Resources c. Union Representative
You also have the right to contact the Alberta Human Rights Commission to make a complaint of harassment that is based on any of the grounds protected from discrimination under the Alberta Human Rights Act. The protected grounds are: race, religious beliefs, colour, gender, gender identity, gender expression, physical disability, mental disability, age, ancestry, place of origin, marital status, source of income, family status and sexual orientation. You can also report any incident of assault that has occurred to the police.
Internal harassment complaint process
Once an internal complaint is received by Arts Management Systems Ltd., it will be kept strictly confidential. Appropriate action will be undertaken immediately to deal with the allegations. Action taken may include mediation. The Department Manager will interview you as well as the alleged harasser and any individuals who may be able to provide relevant information related to your allegations. All information collected will be kept in confidence. If appropriate, Arts Management Systems Ltd. will attempt to resolve the complaint by mediation. If mediation is not successful, an investigation will be undertaken by an investigator designated by Arts Management Systems Ltd. If the investigation reveals evidence to support the complaint of harassment, the harasser will be disciplined appropriately. Discipline may include suspension or dismissal, and the incident will be documented in the harasser's file. No documentation will be placed on the complainant's file when the complaint has been made in good faith, whether or not there was a finding of harassment. If the investigation fails to find evidence to support the complaint, there will be no documentation concerning the complaint placed in the file of the alleged harasser. Regardless of the outcome of a harassment complaint made in good faith, the employee lodging the complaint as well as anyone providing information will be protected from any form of retaliation by either co-workers or superiors. This includes dismissal, demotion, unwanted transfer, denial of opportunities within the company or harassment for having made a complaint or having provided evidence regarding the complaint.
Responsibility of management
It is the responsibility of a director, manager or any other person within this company who supervises one or more employees to take immediate and appropriate action to report or deal with incidents of harassment of any type, whether brought to their attention or personally observed. Under no circumstances should a complaint be dismissed or downplayed, nor should the complainant be told to deal with it personally.
Arts Management Systems Ltd. seeks to provide a safe, healthy and rewarding work environment for its employees, clients and customers. Harassment will not be tolerated within our company. If you feel that you are being harassed, contact us. We want to hear from you.
Sickness & Absenteeism Policy
Sick leave enables employees to take time off work when ill.
Sickness & Absenteeism Policy
It is the policy of Arts Management Systems that Employees are entitled to be sick or absentee from work due to illness up to 5 consecutive days with pay.
Definition
Sick leave enables employees to take time off work when ill. It is not intended for leave of family obligations although it may sometimes be used as such.
Employees may not be dismissed, suspended, laid off or demoted when on sick leave.
General
- Arts Management Systems hereinafter called “AMS”.
Revision History
- January 2010
Coverage
- Generally, sick leave of less then 5 days will not require a medical certificate, but may be requested at AMS’s discretion.
- Sick leave after 5 days will be unpaid sick leave.
- Paid sick days after 5 consecutive days of absenteeism, is at AMS’s discretion. In times of sickness, AMS will support the employee and will require a doctor’s note describing the condition and diagnosis treatment.
- AMS may allow their employees to use part of their sick leave for certain family obligations. This requires management approval before sick leave or absenteeism occurs.
- Given adequate notice, AMS will allow an employee time off to accommodate unavoidable personal business appointments, including medical and dental appointments for dependent persons. Such time off will subsequently be made up at a time mutually agreeable to AMS and the employee.
- If the employee needs to take a longer sick leave because of health reasons, he/she may be entitled to take longer unpaid sick leave. He/she may then be eligible for Employment Insurance sickness benefits or benefits from other compensation plans for work-related illness or injury.
Recommendations
- AMS strongly recommends that employees have short-term and long-term health benefits. If requested, AMS will provide a list of contacts to consult with if you request such information for benefit plans. By no means are you required to use the services of these contacts, rather they can be provided as a starting point into finding a short-term and long-term health benefits package that suites your specific needs and requirements.
- AMS will be here to support the employee in times of illness for their attempts to obtain any 3rd party insurance payments that may qualify to supplement lost income due to sickness that is not covered under this policy.
Banked Sick Time
- AMS does not maintain a monthly credit system to track unused and used banked sick time. With this in mind, AMS does not allow employees to bank sick time.
General Questions
If an employee was absent from work for a scheduled shift and was paid sick pay by the employer for that day, can the employee be required to make up a shift?
Yes. Sick pay or any absenteeism is not wages and sick days do not constitute hours of work.
Supplemental Unemployment Benefit (SUB) Program
Artsman's Supplemental Unemployment Benefit Program is in place to comply with Service Canada's SUB program.
Employers can use a Supplemental Unemployment Benefit (SUB) plan to increase their employees’ weekly earnings when they are unemployed due to a temporary stoppage of work, training, illness, injury or quarantine.
Payments from SUB plans that are registered with Service Canada are not considered as earnings and are not deducted from EI benefits (pursuant to subsection 37(1) of the EI Regulations).
1. The plan covers the following group(s) of employees:
All full time employees with 1 year of service.
2. The plan will supplement EI benefits for periods of unemployment caused by illness.
3. Verification that the employees have applied for and are in receipt of EI benefits will be made before SUB payments are paid.
4. The SUB is payable at 95% of the employee's normal weekly earnings while the employee is serving the one-week EI waiting period.
5. Option B (automatic adjustment): The plan provides that the gross amount of EI benefit from this employment plus the SUB payment will equal 95% of the employee's normal weekly earnings.
6. The plan provides SUB payments for at least 4 weeks
With management approval, payments can be made longer than 4 weeks, depending on the situation.
7. The start date of the plan is:
May 10, 2021.
8. Service Canada - SUB Program will be informed in writing of any change to the plan within 30 days of the effective date of the change.
9. The plan is financed by the employer's general revenues.
10. SUB payments will not reduce any guaranteed annual remuneration, deferred remuneration, or severance pay.
11. This plan provides for an offset of EI benefits that may have to be repaid as part of the employee's income tax return. The weekly gross EI benefit from this employment, the SUB payments previously paid plus this offset amount will not exceed 95% of the employee's normal weekly earnings.
12. Should the SUB plan terminate, all remaining assets will revert to the employer, be used for SUB payments and/or be used for the administrative costs of the plan.
13. Employees do not have a right to SUB payments except during the period of unemployment specified in the plan.
Travel & Expense Policy
Recognizing that employees may be required to incur office related expenses and to travel from time to time on Arts Management related business; this document outlines Arts Management’s position on the reimbursement of those expenses the Employee may incur during the performance of their duties.
Reimbursement Policy
It is the policy of Arts Management Systems that Employees will be reimbursed the actual cost of expenses, which have been wholly, exclusively and necessarily incurred in the performance of their duties.
Definition
General
- Arts Management Systems hereinafter called “AMS”.
- Expenses must be ordinary and necessary.
- Employee will be expected to pay for their own expenses while carrying out the duties of employment.
- Reimbursement for incurred expenses will follow after an Expense Statement has been submitted.
Revision History
- February 2006
- September 2001
- June 1995
Personal Expenses
- Only expenses related to AMS business are covered by this policy and expenses of a personal nature will not be reimbursed.
- Expenses for a spouse or other individual accompanying the employee will not be reimbursed, however special consideration may be given with prior approval.
Personal Automobile
- When appropriate, the Employee may be requested to use a personal automobile for travel purposes.
- AMS will reimburse any out of pocket expenses for such travel but will not pay mileage. AMS will assist the Employee claim for such mileage as a valid tax deduction from the Government.
- Travel to and from the airport will not be reimbursed, however parking at the airport will be paid.
- In general, local trips by an Employee are not claimable, but where an Employee makes frequent trips in the normal performance of their duties, special consideration may be given with prior approval.
Company Automobile
- AMS does not have a Company Automobile.
Places of Work
General
- The Employee’s place of work will be based out of their personal residence.
Equipment and Supplies
- AMS will pay for telephone, fax, Internet access, and other required office supplies pertinent to the business of AMS.
- AMS will supply required computers and associated equipment necessary to perform work related duties.
- Providing the necessary Property and Theft Insurance coverage of AMS company equipment at your home or during your travels, will be the responsibility of AMS. Within reason, all necessary precautions will be taken on behalf of the Employee to safe guard AMS company equipment.
Office Space
- AMS will not pay for rent, lease, repairs & maintenance, cleaning materials, utilities such as heating and lighting, capital cost allowance, property taxes, house insurance, mortgage interest, or other similar costs to use this portion of their personal residence. AMS will assist the Employee claim for such expenses as a valid tax deduction from the Government.
Travel Expenses
General
- When traveling beyond the city of Calgary (or normal place of residence) when required to perform Work in another city, AMS considers those to be travel expenses.
- Travel expenses are the ordinary and necessary expenses of traveling away from home for your business, profession, or job.
- To minimize costs for the client, AMS will reimburse costs associated with adding car rental insurance coverage for SEF20 (Loss of Use), SEF25 (Collision), and/or SEF27 (Legal Liability for Damage to Non-Owned Automobile) or similar Endorsements to your personal automobile policy.
Airfare and Hotel
- AMS will attempt to prepay airfare and hotel. In some situations, the Client may prepay for airfare and hotel expenses.
- The Employee understands that a Client of AMS may stipulate travel conditions and the Employee will endeavor to respect the Client’s requests.
- If airfare and hotel are unable to be prepaid by AMS or the Client, the Employee understands that they may be required to provide payment for such expenses.
Car Rental
- Car rental and associated expenses such as rental insurance, parking fees, bridge & road tolls, and gasoline.
- Work-related running costs for a car owned or leased by somebody else – a borrowed car.
- Fares for taxis or other types of transportation between the airport or train station and your hotel, the hotel and the work location, and from one customer to another.
- Expenses for using the Employee’s personal car are covered in Personal Automobile.
Incidentals
- Reasonable small expenditures where it is either impractical or impossible to acquire receipts may be claimed. Such expenditures would include such items as meter parking, coin telephone, subway tokens, reasonable gratuities for baggage assistance, etc.
- While receipts are not required, such actual expenditures must be itemized for each travel day.
Cash Advances
- In general, travel advances will not be given to Employees, however special consideration may be given with prior approval.
- Costs will be reimbursed in advance of travel for expenses incurred in order to obtain discounts e.g. airline tickets purchased in advance in order to obtain discounted pricing.
- In the event a trip, for which a cash advance was provided, is cancelled, a refund of the cash advance may be immediately requested.
- Unused portions of Cash Advances should be returned along with the completed expenses form.
- Further advances will not be granted if previous advances have not been accounted for or repaid.
Other
- Meals, out of province (state and/or country) travel emergency medical insurance premiums, and other required living expenses within reason.
- Tips you pay for services related to any of these expenses.
- Proof of cost of obtaining foreign currency.
Mobile Phones
- AMS will not reimburse employees for the use of their own equipment except for the cost of business calls necessarily incurred while carrying out their duties, and where detailed evidence of the costs is submitted.
Corporate Credit Cards
- AMS does not provide a corporate credit card to its Employees.
- If a separate credit card is required to keep track of work related expenses, or an increase in credit limit is required, AMS will assist the Employee with documentation required from the Bank or other such lenders.
- With prior approval from AMS, AMS may suggest each Employee get a personal USA Visa for company travel in the USA. AMS's accounting department will add those credit cards to the web banking capabilities so that the outstanding balances can be paid directly should the need arise. AMS will assist the Employee with documentation required from the Bank or other such lenders in obtaining a personal USA Visa.
Reimbursement of Expenses
- The Employee will provide proof of payment for incurred expenses to AMS, before AMS will reimburse the Employee for such expenses.
- Expense Statements submitted between 15th and end of month will be paid with the next payroll at the 15th. Expense Statements submitted between 1st and 15th of the month may make the 15th. If company travel is heavy, there could be an extra cheque run at the end of the month. Extenuating circumstances may occur if Doug (who has signing authority of the cheques) is ever out of town for a month.
- The Reimbursement Payment is not late until any deadline is upon us. If this affects any personal financial planning, it is the Employee’s responsibility to make appropriate arrangements. It is best that there is no dependency on early payment from AMS to meet personal financial obligations.
- For all expenses not submitted to AMS for repayment, and if those expenses are applicable to local and current tax laws, the Employee may claim for such incurred expenses as a valid Employment Expense tax deductions from the Government.
General Questions
There are no general questions at this time.
Vacations & Vacation Pay Policy
Vacation entitlement is granted with two purposes in mind. Firstly, a period of rest and relaxation benefits the employee both physically and mentally without loss of income; and secondly, vacation entitlement is a management tool for recognizing the longevity of service years of the employee.
Vacation Policy
It is the policy of Arts Management Systems that Employees are entitled to vacation with pay based on their job level, position and years of service.
General
- Arts Management Systems hereinafter called “AMS”.
Revision History
- January 2010
Entitlement
The entitlement to vacations and vacation pay are intended to ensure that employees annually have a rest from work without loss of income.
The basic entitlement to annual vacations is as follows:
- The employee must be a full time employee;
- The employee must have completed at least 6 months of continuous employment.
- Vacation can be used after the first year of accumulating time off, unless by prior management permission.
| Service | Vacation Time | Earning Rate |
| 12 months | 10 work days | 1 1/4 days |
| 5 years | 15 work days | 1 2/3 days |
| 10 years | 20 work days | 2 1/12 days |
| 15 years | 25 work days | 2 1/2 days |
| 20 years | 30 work days |
The above entitlements will apply in all cases unless superseded by contracted agreements at point of hire. All such contracted agreements must be reviewed with the Human Resources Department prior to commitment with the new employee.
- An employee, who has started employment prior to the 15th of the month, will receive full vacation credit for that month.
- Employees are eligible to take their vacation effective immediately the month it has been allocated to them.
- Vacations must be taken sometime in the 12 months after the employee becomes entitled to the vacation.
- For a new employee within their first year of continuous employment, the employee may borrow 1 week (5 days) from their 1st year ahead.
- Employees may carry over 1 week (5 days) of their current allowed vacation time into the next period, for up to 3 months. All other vacation must be taken in the year earned (unless specific management approval is given) and if not taken, is forfeit. The company believes vacation should be taken each year and does not allow hoarding.
- Vacations will be given in one unbroken period unless the employee requests to take their vacations in shorter periods. This is permissible so long as those periods are at least one day long.
- If a mutually acceptable time for the employee's vacation cannot be found, the employer can decide on the time. However, the employee must receive at least two weeks notice in writing of the start date of their vacation. The employee must take their vacation at that time.
Vacation Pay Calculation
Monthly Salary Employees
- Monthly salaried employees receive their regular rate of pay while they are on vacation. It is not additional funds.
Hourly Wage and Casual Employees
- All other employees receive vacation pay as a percentage of wages (four percent) for the year for which vacation was given.
- "Wages" includes any previously paid vacation pay, but does not include overtime earnings, general holiday pay, pay in lieu of a notice of termination or an unearned bonus.
- "Year for which vacation is given" refers to the year immediately before the employee becomes entitled to the vacation.
What is not included in the calculation of vacation pay?
- Overtime pay, general holiday pay and termination pay.
- Unearned bonuses.
- Expenses or allowances.
- Tips or other gratuities.
Timeliness of Vacation Pay Payment
Employees have a choice on how they receive payment for money that would be due during vacation
- Paid during the regular payday. This is the default.
- Payment of the salary that would be due just prior to beginning of vacation. This option may be used upon employee request.
Vacation Pay Disbursement
- Vacation pay may be disbursed on the regular payday, during the vacation time period, or immediately following a vacation, but only where it would not be practical to make the payment earlier. In the case of Alberta, employees can instead request to receive their vacation pay at least one day before starting a vacation.
- If vacation pay has not previously been paid out and the employee requests it, it must be paid in a lump sum at least one day before the employee's vacation. In any event if prior payment is not practical , the vacation pay must be given to the employee no later than the next regular payday after the vacation begins.
- Where an annual vacation is fragmented, only a portion of vacation pay must be paid before each period of vacation. This also applies if an employee does not take vacation in complete weeks.
- If the employee chooses to receive their vacation pay payment in a lump sum prior to commencement of their vacation period, the employee must provide the employer (at minimum) 1 months notice before the starting date of the vacation period.
- Employees who do not request vacation payment prior to commencement of their vacation period or fail to meet the advance notice requirement to this request, vacation pay will be disbursed on the regular payday.
Scheduling of Vacations
In all Canadian jurisdictions, it is the employer's prerogative to determine when each employee may take an annual vacation, within certain limits laid down by law. First, a vacation must be granted within a specified period after the date on which the employee becomes entitled to it. Second, it is required that employers provide a minimum at least two weeks of notice to their employees before they start their vacation. It is recommended vacation be scheduled at least 4 months in advance to ensure availability within the scheduling calendar. Obviously, such notice is not normally necessary where an employer and an employee agree on a mutually satisfactory vacation starting date.
- AMS encourages employees to take minimum vacations at 5 days to receive full benefit from the time away from work.
- Although discouraged, with prior consent under extenuating circumstances, employees may be able to take 1/2 day vacations.
- AMS will help their employees by allowing them sufficient flexibility to:
- a) break their leave up into shorter periods take vacation at the same time as their spouse.
- b) take annual leave during the summer when children are at home.
- c) This measure enables employees to divide up vacation time in a way that best suits them.
- AMS has the final say when vacation can be taken.
Division of Vacation Time
- In Alberta, employers must allow their employees to take their annual vacation with pay in one unbroken period.
- Nevertheless, vacations may sometimes be divided into shorter periods. The decision on whether or not to split a vacation is left at the employee’s discretion, although obtaining the employer’s consent is a prerequisite. The employer may refuse such a request.
Waiver of Vacation
- Waiver of Vacation specifically allow employees to forego their annual vacation in exchange for pay in lieu. In general, this request will be refused unless the employee can provide sufficient information to the employer that the proper rest and relaxation that benefits the employee both physically and mentally will be maintained to avoid any adverse effects to the employee’s ability to perform his/her responsibilities.
- If the employee has more then 2 weeks vacation, the unused portion over 2 weeks could be considered for waiver as long as the employee has previously taken or plans on taking the 2 weeks vacation.
- In all cases, the decision to waive a vacation must be agreed to by both the employee concerned and the employer.
Postponement of Vacation
The postponement of an annual vacation for a specified year of employment is expressly permitted, subject to certain conditions:
- A written agreement to postpone a vacation must be signed by the employee affected and the employer to be effective.
- If an employer postpones or cancels an employee’s previously scheduled annual vacation, the employer will reimburse the employee affected any vacation-related expenses that cannot be recovered through other means (e.g., non-refundable deposits, penalties and pre-paid expenses).
Statutory Holidays
There are 9 statutory holidays that are observed by AMS per Alberta guidelines and 1 personal floater day, for a total of 10 days. November 11th (Remembrance Day) is a standard holiday and at the employee's option, this may be deferred to another day such as Boxing Day.
If a holiday falls on a non-workday then another day will be observed as the holiday - usually the preceding Friday or the following Monday. The Labour Standards Act leaves it up to the employer to decide.
The following days are observed as Statutory Holidays:
- New Year's Day (January 1)
- New Year's Day is the closest thing to being the world's only truly global public holiday, often celebrated with fireworks at the stroke of midnight as the new year starts.
- Family Day (February - approx 3rd Monday)
- Family Day was originally created to give people time to spend with their families but it also provides a day off between New Years Day and Good Friday as they are approximately three months apart. Common Family Day activities include skating, playing hockey, snowboarding/skiing and going to various winter festivals.
- Good Friday (April - approx 3rd Friday)
- Good Friday marks the death of Jesus Christ according to the Christian religion. It is a fundamental part of Christianity along with the resurrection of Jesus on Easter Monday. Many agree that this is a more important holiday than Christmas because it is the ultimate proof that Jesus is the son of God beacuse he came back from death.
- Victoria Day (May - approx 3rd Monday)
- Victoria Day is a Canadian statutory holiday celebrated on the Monday preceding May 24. It honours Queen Victoria's birthday.
- Canada Day (July 1)
- Canada Day celebrates the birthday of Canada. On July 1, 1867 Canada became a new federation with its own constution by signing the Constitution Act (formerly known as the British North America Act).
- Canada Day is usually observed on July 1st but if that's a Sunday then Monday will be given as a day off. If it's a Saturday then normally Friday becomes the day off.
- Labour Day (September - 1st Monday)
- This holiday officially celebrates workers and the labour union movement.
- Thanksgiving (October - 2nd Monday)
- The original idea is to give thanks for the past harvest season but for many Canadian families the tradition has shifted and the focus is now to eat a large turkey dinner and get together with family. Apple cider and pumpkins are a must for any traditional thanksgiving celebration as well as turkey stuffing and pumpking pie. The first time Thanksgiving was held in Canada was in 1872 to celebrate the recovery of the Prince of Wales from a serious illness. After 1879 celebrations were held every year but not always in October - it used to be observed around Armistice Day in November.
- Remembrance Day (November 11 - this may be deferred at the employee's option)
- On remembrance day members of the armed forces (soldiers, sailors and airmen) are commemorated. The other common name for this day is Armistice Day which marks the date and time when armies stopped fighting World War I. on November 11th at 11am in 1918 (the eleventh hour of the eleventh day of the eleventh month). Some 100,000 Canadian soldiers died in the First and Second World Wars.
- Christmas Day (December 25)
- For centuries, Christian writers accepted that Christmas was the actual date on which Jesus was born.
Other days that are not official Statutory Holidays, but could be observed by using your personal floater day:
- Easter Monday (April - the Monday following Easter Sunday)
- Easter Monday is celebrated as a holiday in some largely Christian cultures, especially Roman Catholic and Eastern Orthodox cultures. It is customarily a day for visiting family and friends.
- Civic Holiday (August - 1st Monday)
- The Civic Holiday is celebrated on the first Monday of August. The Civic Holiday is commonly referred to as the August Long Weekend. It is probably the busiest day on highways as tens of thousands of families go camping, to cottages etc this weekend.
- Boxing Day (December 26)
- The tradition has long included giving money and other gifts to those who were needy and in service positions. The European tradition has been dated to the Middle Ages, but the exact origin is unknown and there are some claims that it goes back to the late Roman/early Christian era; metal boxes placed outside churches were used to collect special offerings tied to the Feast of Saint Stephen.
- Boxing Day is primarily known as a shopping holiday, much like the day after Thanksgiving in the United States. It is a time where shops have sales, often with dramatic price decreases. For many merchants, Boxing Day has become the day of the year with the greatest revenue.
General Questions
Upon employee request, can vacation with pay be given prior to completing a full 12 months of employment?
Yes, if the employer agrees. Typically, at least 6 months of service must have been completed.
What if a general holiday falls within an employee's annual vacation?
If eligible for the general holiday, the employee is entitled to take off either the first scheduled working day after their vacation, or in agreement with the employer, another day before the next annual vacation (that would otherwise have been a work day for the employee).
If an employee has been paid vacation pay but not given vacation time, can they choose not to take vacation time?
No. Employers must give, and employees must take, the vacation time to which they are entitled. Where employees have already been paid vacation pay, this time off will be without pay.
If employment is terminated before the employee completes 12 months of employment, what vacation pay is owing?
Four per cent of the employee's wages earned during the period of employment.
If employment is terminated after the employee completes 12 months of employment, what vacation pay is owing?
- The unpaid vacation entitlements for the previous year; plus
- the unpaid vacation entitlements for the current year pro-rated (calculation based on the number of days for the last date of employment, divided by 365 days).
- Where proper termination notice is given, or notice is required to be given by the employer, vacation pay must be paid within three days of termination.
- Where neither the employer nor employee is required to give termination notice, vacation pay must be paid within 10 days.
- If an employee quits without giving proper termination notice, the employer must pay vacation pay to the employee within 10 days after the date on which the notice would have expired if it had been given.
When is vacation pay to be paid to an employee whose employment is terminated?
AMS Private Cloud
 Arts Management Systems has a Private Cloud Network option to assist clients with hardware needs related to the Theatre Manager database and online sales.
Private Cloud Package provides the needs for:
- Database Servers with streaming replication for live backups
- Redundant TM Web Listeners
- Redundant high availability NGINX Servers
- Comprehensive backup strategy
- Dual SOC2 compliant server locations (Montreal and Vancouver)
Venue Responsibilities
When using the cloud, the venue is only responsible for providing workstations for the employee to use and sufficient internet bandwidth to access the data in the AMS cloud. Users can access their data from anywhere.
AMS Private Cloud Data Centres - Montreal/Vancouver
- PCI Compliance
- All AMS Cloud Customers are automatically set to Schedule 'C' compliance. This means cards are never stored in the database (ever). TM detects that they are on the private cloud and sets the value appropriately.
- In addition, you can specify which workstations can accept credit cards or you can set so that none can take credit cards.
- Refer to the PCI Scope Diagram for AMS Cloud which may indicate that
- Schedule 'B' or 'B-IP' could be possible if using POS pin-pad terminals, or
- Schedule 'A' is using Moneris hosted payment page.
- Montreal Estruxture.com
- The AMS Cloud facilities are private co-located machines in our own rack space located in a SOC2 data centre
- First few pages of SOC2 Compliance report
- Vancouver Terago.ca
- Is also SOC2 Certified
- Connecting to AMS Private Cloud uses the procedures outlined on this page.
Implementing AMS Cloud checklist
Sales Cycle
| Item | Notes | Responsibility | |
|---|---|---|---|
| 1.1 |
Consult with client and make sure that they are aware of their options for how they want to implement PCI compliance in the database. Options are one or more of the items below:
|
Sales | |
| 1.2 |
Make sure that their internet is of sufficient speed and robustness to accommodate web sales.
|
Sales/Support | |
| 1.3 | Identify if the migration is also including an upgrade in the version of Theatre Manager and/or migration of web pages. This will affect estimates | Sales | |
| 1.4 |
TLS Certificates:
|
Sales/Support | |
| 1.5 | If migrating to the AMS Cloud from an existing client, identify the prospective date for conversion, with alternates. | Sales | |
| 1.6 |
The client will lose the ability to sell tickets or make changes to their database for a period of time. If an guesstimate is needed, it can be derived as follows:
|
Sales/Support |
Prior to Migration
| Item | Notes | Responsible |
|---|---|---|
| 2.1 |
Create initial settings in AMS cloud Server Database. This involves:
|
Development |
| 2.2 |
Set up Web Sales
|
Development |
| 2.3 |
Setup main web server with routing/TLS
|
Support |
| 2.4 |
Setup Web Sales
|
Support |
Migration Days
| Item | Notes | Responsibility |
|---|---|---|
| 3.1 |
Initiate change of your external DNS record CNAME for tickets.myvenue.org to point to myvenue.hosted.artsman.com.
we will create the DNS record for myvenue.hosted.artsman.com |
Support |
| 3.2 |
Start the backup an migration process for the database
|
Support |
| 3.3 |
Load up the database
|
Development |
| 3.4 | Make sure that the database has a unique DB USER SUFFIX specified in system preferences. If building a training database, also make a unique one for it by clicking the 'test' database option. | Development |
| 3.5 |
Upgrade database to latest version - always done on our cloud computers.
This occurs automatically when Theatre Manager Server started on the Sites Web Sales VM |
Support/Development |
| 3.6 |
Make sure timezone is correct on the system preferences and then update all performances to make sure the performance date time is set correctly for the timezone. In PgAdmin, use:
set timezone 'xxxx'; Update F_PLAYBILL set PB_PERFORM_DATETIME = null returning PB_SEQ,PB_PERFORM_DATETIME |
Support/Development |
| 3.7 |
Test the AMS login procedures with the info that was saved in Daylite.
When it works internally:
|
Support |
| 3.8 |
Start and test web sales, including:
|
Support |
| 3.9 |
Test Client's email server settings by making sure you:
If the client uses Facility Management, make sure the scheduling email and pop/imap server work. |
Support |
| 3.10 | Test Reveal Setup - have one of the employees sign in and view their Reveal Dashboards and see that they can see/create graphs. | Support |
| 3.11 | If the client has built services that rely on the REST API for their main marketing site, make sure that they are working. | Support |
AMS Cloud Backup Strategy
- ONSITE at Data Centre
- Streaming Replication: every database transaction is replicated on a 24x7 basis to second database server on another machine so that latest transaction is always on second sever. This serves as generally instant-on response in case of total failure of one machine.
- 2 Daily Snapshots: are made and put on 3rd machine. The purpose is to provide redundancy in case the two primary master/slave machines die at exactly the same time. This allows restoration of a database that is no more than 12 hours old - and 30 daily copies are kept of snapshot backups
- 24 Month End Backups: The backup process is designed to retain at least 2 years of monthly backups at the data centre
- OFFSITE at another location
- 7 Days of Offsite Backups: 7 days of daily snapshots are saved at an offsite FTP server in 'live mode' (i.e. 14 backups). This is in case there is a physical unforeseen act of god at the data centre (eg fire, insurrection, etc).
- Recyclable NAS Storage: The offsite backups are also saved to a separate NAS box and stored until the device runs out of space and older backups start to recycle. This provides typically months worth of offline backups that take a little longer to access
- ** periodically, the offsite backup cycle may get reset and the storage retention start again as they are not the primary backup
- Customer Backups at location of their choice
- Personal Backups: Each venue, per contract, can have a copy of the database sent to them daily by FTP, they just need to make and ftp site. The venue can specify how many days they want to keep and we’ll delete anything older -- The customer can pick that retention period
Comparison of Web Sales with other vendors
| Competitor | Sample Site | Comments Quirks or Additional Features | |||||
| Arts Man | tickets.artsman.com |
|
|||||
| AudienceView | calshakes.org | ||||||
| Choice Tickets | $1.50 fee $2.00 academic fee |
Kingsbury Hall | |||||
| OvationTix | colonytheatre.org |
|
|||||
| Patron Manager | orlandoshakes.org | ||||||
| Showare | mtroyal.ca | ||||||
| Spektrix | bardonthebeach.org | ||||||
| Tessitura | strazcenter.org | ||||||
| TicketFly | redbuttegarden.org | ||||||
| TopTix | vancouverfringe.com |
|
Exceptional Customer Support
Philosophy
Providing exceptional customer support and developing trust with our customers is something that takes a long time to create, while at the same time is something that rapidly degrades without proper care and attention.
When we develop that trust and mutual understanding with our customers; all aspects of Arts Managements relationship with that customer improves, including sales, references, ease of answering future support questions, onsite training, etc.
Customer satisfaction is completely within the Support Team’s roles and responsibilities because they interact with the customer most often after the initial sale.
Support Mission
Provide prompt and accurate customer support the first time upholding to the corporate goals and image every time the client requires assistance, by using past experience, existing tools, and carefully proven methods.
Goals
The goal is excellent customer service. We will try to quantify it this way such that the initial response to:
- a phone call is within 4 hours of receiving a voice mail, and within the day that it occurs if it's not in the last hour of the day. Phone support is not intended to be carried over to the next day.
- an email request is within 4 hours of receiving the email. Next day email response to a late day email is satisfactory.
- Observe PA DSS PCI requirements at all times when providing support, especially for remote access and managing customer data
Expectations
Primary Level Support
Primary support represents the initial contact that a customer makes with our support team. Generally, the roles and responsibilities are
- Handle all incoming voice mails, emails and faxes.
- Prioritize and categorize the support requests in FogBugz
- Verify eligibility for support using Daylite
- Correct any contact information in Daylite including adding new contacts and email address, and changing existing ones if people leave the organization
- Determine which help page best answer the customers question and augment if necessary, either in the web page if the page was not clear, or in the corresponding email response if it is a very specific answer
- Consult Second level support for non-obvious problems
- Keep your iChat status up to date with your current status in general terms. eg 'On Phone', 'Email Support', 'Doing Demo', etc. so that other team members are aware of your status.
Tier II Support
The purpose of second level support is to provide a developer level resource to the support team who can examine code for issues if necessary or provide a greater depth of experience based on understanding what is going on 'behind the scenes'.
The responsibility of second level support is:
- Verify if an 'odd situation' is a bug (or not) based on the observed results of a test provided by Primary Support
- Accept only items that cannot be completed by primary support
- Provide an estimate for completion of the task by second level support and record in FogBugz.
- Indicate if the problem is an enhancement/feature request, or a bug along with how critical it is to resolve
- Update the iChat Status to reflect the problem and customer. eg 'Barrington db balance', 'SOPAC Subscriptons' etc.
General Guidelines
- Primary support will be completed by the end of the day for calls received.
- Verify eligibility of customers for support in Daylite. Customers with expired maintenance will be referred to the Sales & Marketing Department for further action.
- All support arrives via and will be documented using FogBugz. Support is linked to the email address of the client by entering that in the correspondent field before the next support item is taken.
- When you need to leave your desk and the support will be unattended, set your iChat status to 'away' with a reason or expected return time.
- Use online help web links where possible to provide assistance with responses. If there is no link or answer in an existing page, consider enhancing the page before answering the customer and then send the revised page link to the customer.
Be Proactive
- To reduce further email requests for clarifications, provide all the details the first time. In other words, avoid off the cuff responses or a one-sentence replies that contains vague details.
- Do not respond with the 10% solution. If you do not know the answer, or are not 100% sure of an answer, investigate and verify how it works in Theatre Manager. Try not respond until you know the definitive answer.
- If a response will take some time, let the client know you are working on a solution.
- If a request for more information is required, provide the client on information and guidance the kind of information the support team needs to resolve their questions.
- Read the cases that have been closed in a day to see if you can learn something from them
- Use your team members, the online help, and Tier II as resources to resolve issues
Telephone - Priority 1
Preliminary Procedures
Listen to the voice mail in quicktime and do the following with it:
- Determine the approximate customer requirement in the voice mail and put a synopsis in the FogBugz description field.
- Copy the phone number to the description field and/or alter it to math the voice mail. Sometimes the incoming phone number identified by the phone system is the customers switchboard
- Change the title of the voice mail to something meaningful indicating the topic area that the customer called about.
- Find the patron in Daylite and put their primary email address into the correspondent field
- If you think you know roughly what it might take to resolve the problem, place an estimate of time
- Assign it to support (generic), or a particular person on support that day.
- Assign a priority to it.
- Check to see if the customer also sent and email on the same subject and then link that incoming email case to the phone case
- Add the version number and computer OS to the boxes if known
Response Procedures
- When a problem is assigned to you, do any specialized research required on the problem so that you are ready to deal with the call. Call the customer back, or if the answer is explained directly in our support site, email the customer with the support link and then follow up in short order to discuss the email link.
- Generally, phone replies are for questions that we think can be answered in ten minutes or less.
- Anything requiring longer explanation should be scheduled for training and/or for a specific time period. If that is the case, contact the customer right away, explain that it is a probably long response requiring concentrated 'quiet' time and arrange an off peak or appropriate time that meet the needs of both the customer and Arts Management. Generally, mornings appear to be best.
- If the problem being reported is likely to take a long time and requires further research, advise the customer of the time you will get back to them with the probable answer.
Email & Fax - Priority 2
- Will be replied to within 4 hours of when they come in.
- Will be replied with step-by-step guidelines to resolve their question.
- Will refer to web site links for information as much as possible (the goal is all requests for information and processes
- Faxes will be stored on the server and linked in Daylite to the ‘references’ pane.
- Email contacts will be entered and updated in Daylite so that a ‘white list’ of their names can be created for valid email filters to Arts Management’s Email system and sending announcements to users and knowing that the user will receive the announcement. When available, the following minimum information will be captured:
- Email address
- Full Name (first and last name)
- Direct telephone numbers
- Address
- Position within the organization
Online Help - Priority 3
The goal is that any question that could be answered more than once must be answered with reference to a web page so that procedures and processes are consistent throughout all support responses.
All staff members are responsible for:
- Identifying deficiencies and provide the updated corrections or improvements in manuals and support documentation.
- Monitoring Email responses and add to existing online support web pages where appropriate.
- Perform queries within online support web pages to bring up answers to questions and provide those links to clients within responses to their questions.
Daylite
When a new venue comes on board or there is a staff change at an organization, the responsibility of the primary support team is to update Daylite with new contact information and/or correct some existing information at the start of the support process.
- All contact information will will be documented in DayLite and the contact associated with an organization. This means names and addresses for all contacts. There is a 'grab' button to get the primary organization address to simplify data entry.
- Please check with Daylite to confirm the version number that the venue is using to transfer to FogBugz support tracking.
- If somebody leaves an organization, please mark there relationship as 'former employee' and the description as 'former xxxxxxx' - daylite.
Support Guidelines
General
General Philosophy
- Customers are our best source of continuing business and new referrals. They are to be treated with courtesy and respect at all times.
- All clients are to be treated as equal and will get complete detailed explanations. This is to avoid the cases where some clients who are friendly get chatty responses; some clients get terse responses; some clients get no responses.
- Have the client assist in duplicating problems that they bring to our attention. Once a problem can be duplicated, or we have received the steps to create the problem, a resolution can be determined.
Time Consuming Issues
Some issues will consume an inordinate amount of time and may or may not be chargeable back to the customers if they are asking us to do something that ordinarily they should be doing. Since the primary purpose of support is provide 'how to' answers, and most of these fall into 'do it for them', you may have to confirm with sales if is it to be charged back or not.
In all cases, time consuming issues are to be done after primary support items are dealt with unless given as a special project.
Examples are:
- Ticket face coding will be completed during non-busy support times.
- System balancing will be completed during non-busy support times.
- Building a new venue map is generally a special project
- Season subscription setup/training will be completed during non-busy support times. This process may take 1 to 2 hours, so a block of time needs to be set aside.
- Web support will be completed during non-busy support times - unless it is an emergency and sales will not work
Training & Demo Sessions
- Training and demo sessions are all to be pre-arrange and handled through the Sales & Marketing Department.
- Telephone training/demo sessions will be completed during a scheduled time when there is secondary support available to handle the calls or during a non-busy support time. This process may take 1 to 2 hours, so a block of time needs to be set aside. Between the hours of 8:00AM to 10:00AM if possible.
- Limit the number of training, demos or setup sessions scheduled for Wednesday’s. This is the support’s heaviest day of the week.
- Always check to see who else is available to provide primary support when a phone training session is planned and keep the team informed of status via iChat 'status' (eg 'training customer' or 'phone demo', etc.)
Transfer Ownership of a Case
Prior to leaving the office, there is to be a turn-over process.
- Examine all your existing cases that are in progress.
- Discuss them with a team member and assign a case to somebody else with their permission.
- Repeat for all cases currently in your bailiwick prior to departure.
- the expectation is that all cases can be reassigned to someone else
- If there is a complicated case and you choose to keep it, then you are expected to follow that case until it is done. That means, while at a customer site, to complete that case after hours. Or, if on vacation, to deal with the case on an ongoing basis to continue to provide excellent customer service.
Remember: complete or turn over all cases prior to going on a protracted leave and advise your team of any peculiarities on the case
Remote Access
- Ask the customer to activate the remote access session
- Ask them to provide you the number and password for remote access the session
- Connect to their work station
- Ask the customer to confirm our identity by providing them their customer number and having them look it up in 'about Theatre Manager' or providing the case number that they received from us that initiated the need for report support session (PCI requirement for authentication)
- As part of the pre-amble, inform them how they can disconnect you immediately if there should be anything come on the screen that they feel you should not see or is private.
- Provide the appropriate support
- When the support all is finished, have the client disconnect you and have them acknowledge you are gone
- Do not leave a session active when you are done. If need be, close the session on their end to force you out.
|
All Theatre Manager access passwords are required to be PCI compliant in Version 9 |
Daily Activities
First Thing (7:45 to 8:00 am)
- Log into Daylite
- Log into FogBugz and review your cases from the prior day
- Listen to and prioritize all Voice Messages that came in since the close of support the previous day. This is to be done first thing in the morning before any other support is commenced
- Prioritize all existing and new cases
Be there ready to begin support at 8:00AM. Not 8:15AM, not 8:25AM.
Morning Activities
- Call back clients that have purchased after hours support. Their organization account has ‘911/After Hours Support’ in the Groups Classification tab in Daylite.
- Send emails to clients who call outside support hours that indicated the regular support hours. Also, answer their question if you can by email with a web help link to get them started.
- Check all existing cases for any further customer replies and deal with those first. It is especially important for cases 'waiting for customer response' or those assigned to second level support.
- respond to clients in priority order
Afternoon Activities
- Re prioritize all existing cases, especially those whose system is down versus common questions
- Prioritize by East coast versus West coast and answer the East coast first.
- Need to be careful not to postpone a critical support issue, with an incoming phone call for training or help style question. Let the client know that we will get back to them as soon as practical. Complete the critical support issue.
All Day Activities
Close of Day (4:30 to 6:00 pm)
Those on the easy coast might start a little earlier if arranged with management and support volume warrants it.
By around 4:30, we need to start the process of closing the support day - and at the same time deal with ongoing incoming requests. Above all, we want to make sure that we meet the overall goals of responding to voice mail within 1 hour/same business day and email within 4 hours.
Near the close of day, re-prioritize all support. At this time, the general expectations before closing up for the night are:
- All outstanding voice messages will have been replied to
- All emails and faxes that arrived prior to mid afternoon will have been replied to.
- Very late incoming emails will be answered is possible, and if not left for the next day. Since all emails are auto-responded, the customer should have received confirmation that we received it and replying is not necessary
- All new customer contact information that you received during that dat has been updated in daylite. Normally, there may be one or two people, so the volume is not high
- at 5:00pm, check for voice messages one last time
Prioritization Policies
Some factors to consider when altering priority of support requests are below. If more than one applies, accumulate the effect. For example if a customer calls twice, is on after hours, and says that they cannot sell a ticket, then that is +5+5+10 -> so that makes it high priority
| Factors affecting Priority | Effect | Subsequent Action |
| Venues that cannot process a sale | +10 | Call the customer immediately |
| Any issue where data is not being stored in the database properly | +8 | Call Customer and then after validation of the issue, Contact Tier II Immediately. Any data issues are of prime importance. |
| People with after hours support that left a message overnight | +5 | Call the customer back and follow up response with email of link to web help, if applicable. |
| People who phone for support | +3 | Evaluate contents of voice mail and email response and/or call back | People who left an email after close of business the prior day | +2 |
| An extension to an existing support case with the same topic | +1 | if the customer is not seeing the answer being provided, call the customer. |
| People requesting status on existing Tier II reguest | +1 | attach new case (if there is one) to original case, determine status from Tier II and email the status to customer. |
| East coast support requests (mid afternoon only) | +1 | Give time zone priority over west coast for email responses |
| An extension to an existing support case with a new topic | neutral | Create a new case and evaluate as normal priority |
| People who send a support personal email to a personal email account | neutral | Create a case and treat in order entered. Inform customer that email was logged with the case number. |
| A new case concerining an item already elevated to Tier II support | -1 | attach new case as subcase of the original and email client that the information was attached to an existing case. |
| People who have been provided a workround but insist on a fix to Theatre Manager | -5 | bring to attention of management |
Treat Customer Data with Care
|
There are NO permitted exceptions that allow credit card data to be transferred out of the customer network at any time. The BackupTM_SUPPORT script must be used to create a backup that excludes encrypted card data before sending via secure https. |
FogBugz Issue Management (Change Control)
Reviewing issues
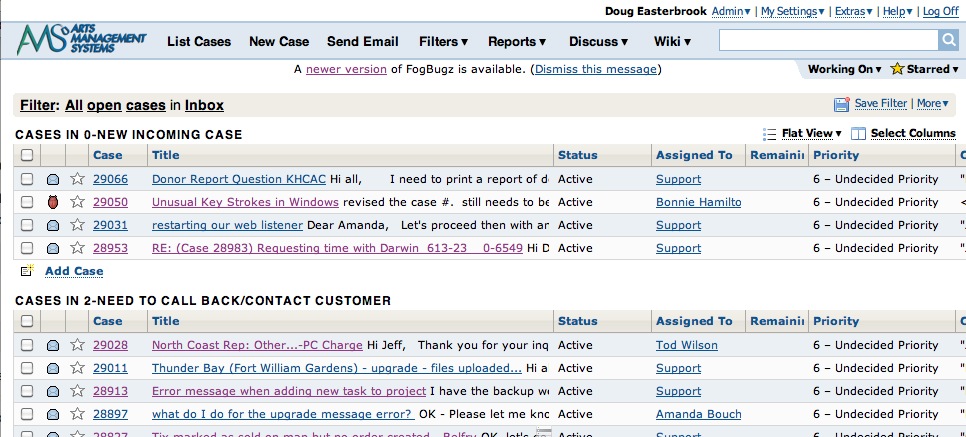
When reviewing cases in the support log, they will be sorted in a natural action-item order. The version column indicates what version the user has in which the issue as noted. Priority indicates when it might be addressed. Developers will use the filter action to look for their own cases for specific development milestones.
Find issue by number

You can also enter descriptions in this field such as ‘Gift Certificate’ to find all issues with those words in the title or the text of the case. See the FogBugz help for more details.
Issue details
Description
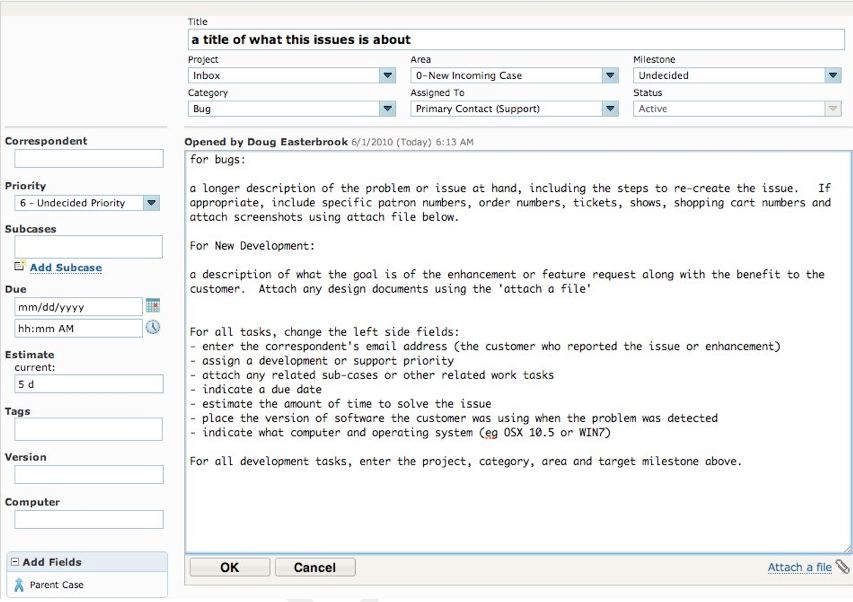
This is the general description of what is wrong. Depending on the source of the issue there may be step-by-step instructions to reproduce, or just a blab of text asking for something to work a certain way. If you don’t understand the description, get clarification from the submitter or the correspondent. The submitter is the person who created the task (‘opened by’). The correspondent is the email address of the customer who submitted or reported the issue.
For all Bugs or Support Issues
Enter a longer description of the problem or issue at hand, including the steps to re-create the issue. If appropriate, including specific patron numbers, order numbers, ticket numbers (or ticket section/Row/Seat/Event/Performance), shows, shopping carts and attach screenshots using the 'Attach File' link at the bottom of the screen.
- Enter the correspondent's email address if the incoming item is a phone message
- Assign to a staff member (normally yourself, but could be second level support>
- attach or relate to any prior sub-cases that you are aware of or are in the links
- Estimate the amount of time that it may take to solve the issue
- Enter the version of the software in the form VXXXXX - such as V82501 - that the user experienced the issue with
- Indicate what operating system that the user illustrated the problem with
For New Development
For new development tasks, or task transferred from support to development:
- enter the estimated due date (or date that the customer might want the item) if there is a deadline
- Assign the task you 'unassigned development'
- Change the 'project' from 'Inbox' to 'Theatre Manager'
- Change the area that the problem is in to categorize it. That way, when code is opened up, we can look at other tasks in that area and resolve one or more issues, or see how often the issue has been reported
- Indicate the approximate release we may wish to release this code
History
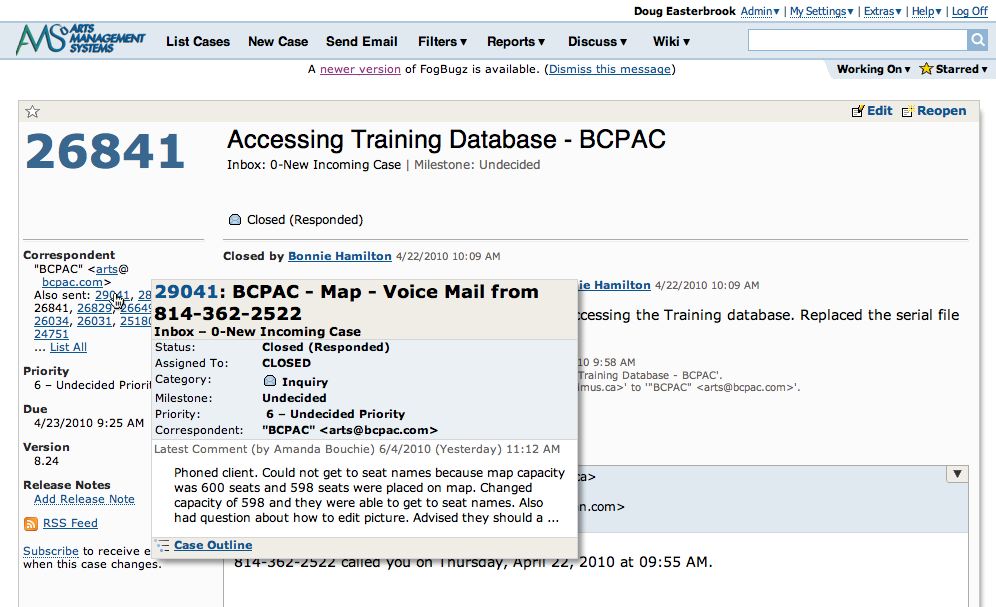
History of a bug is obtained simply by clicking on it. This tracks a chronological view of every change made to the task, who changed it, and comments relating to the change and why. It could be thought of as a ‘long email’ with a historical trail.
Sometimes, a client may submit multiple issues that may, in fact, be related. You can view them simply by running your mouse over the other cases sent by the correspondent.
If cases are deemed related, they should be filed as ‘sub-cases’ of the main case.
You can also see the entire history of the corespondent by clicking on the email. Click on the first half to see that person, click on the domain name to see everything from that domain (or company)
Development Estimates
- Proposed changes in the text area
- Estimate in the estimate area
- Set the category, area, milestone as required
- Associate any sub cases
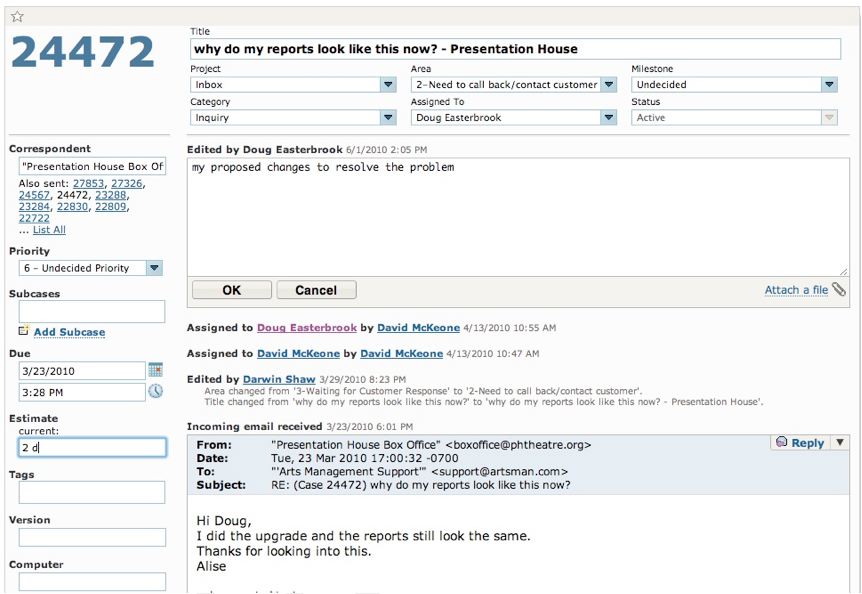
Forward an issue
Replying to the originator (which could be a customer) means finding the last thread where the customer corresponded and replying to that with your resolution and the proposed version in which the fix will be released. Add any links to online help in theatremanagerhelp.com that are pertinent to the problems.
Creating an issue
Start by selecting the category of issue that this will be, then use the following guidelines.
- Bug – This is a defect in the application
- Feature – This is a change to the functionality of the application
- Inquiry – This is a query about how the application works
- Schedule Item – This is a proposed new feature for the application that has not yet been approved
Emailing Cases
When a case has been created and assigned to you (perhaps by another person), you should also receive an automatic email with the case number and a link to the case so that you can find it quickly. If you reassign a case to another person, they will then get an email.
It is recommended that you have a separate 'case' folder in your email program and use 'mail rules' to move cases there automatically. Anything that is unread is, of course, new or has a change of state.
Mail will keep those threaded for convenience.
Completing an issue
- Edit the case
- Change the project to Theatre Manager
- Category to bug or enhancement
- Area to reflect the part of the application that was changed
- Who completed the task (if it is different than the assignee)
- And the release number milestone that the fix is targeted for
- Fill in the estimate if it was not already filled in.
- Add notes about the resolution. This is probably similar to the VCS notes.
- Click OK to save the changes.
-
Set the the case to be tested
- Management will assign a tester to the case to confirm functionality
- This should include visual inspection of the code where appropriate
- Then, resolve the case and provide:
- The actual hours to resolve the issue
- Add release notes that are suitable for providing to the customers and pasting into the theatremanagerhelp.com release notes.
- Close the case
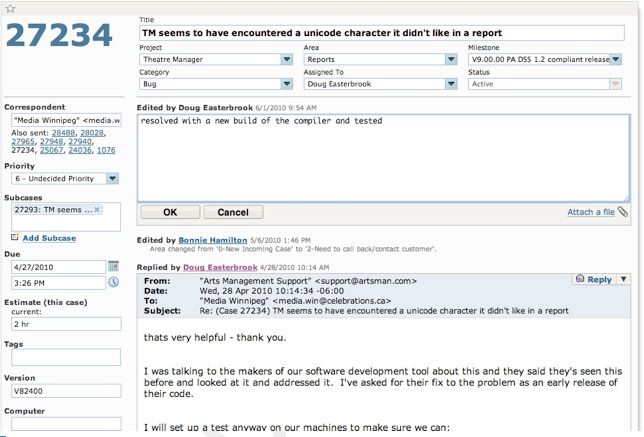
Product Development Process
Defect Tracking Process
Prior to working on an issue, developers should ensure that an issue has been logged in the defect tracking tool. If an issue is not logged, then the developer should escalate the issue to management to confirm priority.
FogBugz
The defect tracking tool used by Arts Management Systems development is FogBugz. While this document is not meant to be a complete guide to using this tool, there is a list of common tasks a developer should know how to do in the FogBugz Tutorial.
System administration for FogBugz is handled by the Arts Management IT and Product Development Department. FogBugz is accessed via the web and signing in at mail.artsman.com/fogbugz/
Issue Submission
Who Can Submit Issues
All Arts Management personnel with access to FogBugz can submit issues into the defect tracking database. Customers submitting support requests arrive in the same database. Arts Management staff can directly convert a support request to a development issue if it is determined to be a program issue. If you do not have access to FogBugz, contact the Development Team to be issued an ID and Password.
Product Design Team
Technical Support Teams
Feature and change requests will also be submitted to the Product Design Team.
Software Quality Assurance Team (SQA)
The issues reported from SQA will include refinements to existing issues, new issues caused by a break to existing code, and change requests.
User Acceptance Testing
Issues logged during user acceptance testing will have step-by-step instructions to recreate and sample data if necessary (see the section below entitled Secure Storage System).
Development Team
Target Release
Severity
Within a Target Release tasks should be accomplished based on severity. However, new features and change requests should be implemented prior to bug fixing.
Severity is assigned by the Development Manager
| 1 | Fix Immediately | Critical issue causes a system crash, data loss or corruption. The system becomes unstable or unusable. No workaround exists. Items of this nature should be fixed immediately in a patch release. |
| 2 | Fix next point release | Problem of a serious nature causes the software to operate in an unpredictable or detrimental manner with a serious adverse impact to the user. Major functionality is missing or broken. Workaround exists but is unacceptable. |
| 3 | Fix in point release if possible, incremental otherwise | A moderate problem causes system functionality to degrade with a moderate adverse impact to the user. Minor functionality is missing or broken. An acceptable workaround to the problem exists. |
| 4 | Fix next incremental release | The problem is not detrimental to the operation of the system. It is scheduled for correction in a future major release. |
| 5 | Fix if Time | The problem is not detrimental to the operation of the system and will be addressed for the proposed version if there is time. Can be deferred to any subsequent version |
| 6 | Undecided | Priority or severity has not been assigned yet |
| 7 | Rejected | Issue has been reported that has been determined as either not a bug, how the system operates, or has simply been rejected. |
Issue Resolution
Validating
Is this the expected behavior?
The first step a developer should go through when faced with a new issue is to validate the issue. Put simply, this is deciding, if given what the user is trying to accomplish, is the software behaving in the way expected. It is typically at this stage that the developer will also do an “its different therefore it’s wrong” check. Given the long adoption cycle for Point Of Sale software, there are issues that will occasionally slip past the Product Management review process in which a user is effectively reporting that because a goal is achieved in a different means from a previous version, it is a bug.
If this is the expected behavior then the issue should be rejected and marked “works as designed”.
At this point the developer may also encounter an issue which works as designed, but the “bug” suggested in the issue is in fact a good idea for a feature that has not been implemented. At this point the developer should contact product management about the possibility of creating a new feature or a Change Request that incorporates the functionality indicated - and then make an entry in FogBugz to begin the change tracking process.
Pre – Testing
If it appears the software is behaving erratically it is important to try and recreate the fault. If the problem cannot be recreated or cannot be supported with logs by the developer or the business partners onsite it is most likely not an issue with the software, but an issue with the state of the platform the software was running on.
If the issue cannot be recreated and there are no logs to support it, the issue should be rejected and marked “can not reproduce”. The customer should be advised to enable auditing and logging for a time to see if the problem persists, and if additional data can be captured.
Scoping
Addressing Security Concerns
As our software deals with sensitive data all changes to the software should always trigger discussion as to the impact of the change on the security of the applications and the data relating to PCI PA-DSS compliance and a worksheet completed if it is determined that the code change may affect sensitive information.
Return for more information
In the case where the developer needs more information to proceed, the issue can be returned to the submitter with a request for more information.
Sent for Design
When the solution for an issue will impact other parts of the application or the overall functionality of the application, the issue can be sent to the design group and marked “needs design”. The developer in most cases should include a summary of what the potential impact is going to be, to avoid having the designer try to replicate the work already done in investigation by the developer. Meetings and discussions with the designer may be needed to ensure clarity of what the issues are.
Technical Specification
When to do them?
A technical specification is required for all significant new development. Other issues should be accompanied by a technical specification if the changes the issue required were significant enough to merit a functional design. A technical specification can also be required for other reasons, and your supervisor will advise you if one is required for a given task. A good general guideline is to ask yourself “Is this complex enough that another developer would have difficulty following what is going to be done without a document?”
A technical specification is generally not required for bug fixes.
What goes into them?
There is no written in stone outline of what must go into a technical specification. There is a template for the specification located on the internal share point portal, but that is meant as a starting place. You should include enough detail in your technical specification so that if you were to no longer be available, another developer could successfully implement it.
Template
The template for the technical specification is located on the Artsman file server in the TM Development/TM Design Documents folder and is called AMS Design Template.doc. Documents are to be named ‘yymmdd
The template is meant to be an example or a guideline to the way a technical specification might appear. Sections may be deleted as needed or rearranged as necessary.
Once a technical specification is complete you must have a peer review before implementing the proposed changes. This peer review is not to judge the quality of the developers work, but the quality of the proposed solution as well as its compatibility with other areas of the system. A proposal that might be absolutely perfect for one area can completely destroy functionality in another if it is not compatible.
The peer review need not be in person. Copies of the technical specification can be emailed to participants with revision tracking turned on and then reviewed as they come back one at a time.
A good technical specification review will include other developers that can critique the methods and code that are going to be used. Design and SQA can benefit from the information as well, but are not a required part of the review process.
Sensitive areas of the application including, but not necessarily limited to, any protected classes should have limited peer review. This review should include the developer and one member of the Architecture team.Optional elements
Peer Review
Methods
Persons involved
Security Concerns
Developer Coding Cycle
Version Control
VCS 101
While this document does not cover the use of our version control software extensively, Omnis Studio VCS does have a list of common tasks a developer should know how to do.
Implementation
Platform
The development platform will be primarily Mac OSX using Omnis Studio and Python.
Compatibility testing for Windows will occur on the Mac under a Parallels Virtual Machine on Vista, Windows 7, Windows 8, Win 10, Win 2008 and Win 2012 server
IDE
Primary Development is done using:
- Omnis Studio (which controls, chroma-codes and interprets code as it is entered)
- Python using Pycharm (which chroma-codes and inspects code as it is entered for pep-8 compatibility)
- Some minimal ‘C’ code. In such case, Developers are free to use any editors as long as these do not introduce editor specific artifacts into the source code.
Tools
There are a number of other tools that are used by developers for specific tasks. If you have doubt about using a tool consult your supervisor or one of the architects. Most source text editing is done with BBedit (eg for web pages and plist files)
All code and key are stored in as VCS, specifically the Omnis Studio VCS or the Git Repository.
Code Writing
Best practices
There are documented coding guidelines that Arts Management Systems developers should follow.
Security Practices
Arts Management Systems developers are expected to stay current on issues and potential security vulnerabilities in the technology used in the Arts Management Systems product. Arts Management Systems architects will be responsible for monitoring these areas and escalating to management when an issue arises that needs to be addressed in a future product release.
In Code Documentation
In-code documentation is required for all new code as described in the coding practices.
Protected Classes
There are a few areas of the application that are critical for the stability of the product. As such they are the responsibility of the senior developers and architects to maintain. These are called protected classes and you need to contact the architect if you need to work with them and have a mandatory code review after you change them.
Defect tracking notes
As you work you should keep track of the units you change and what the overall changes to those units are. This can most easily be added to the check in notes in the VCS.Unit Testing
Inclusive Testing
Exclusive Testing
Step Through and Branch Testing
With step through testing, you can quickly throw a lot of small tests at a bit of code. An example might be converting a number to text. Adjusting the input parameters and stepping over code to see the results can quickly test many different parameters.
Security Testing
Credit Card & Security Testing
NB: Make sure any testing uses only test cards and never use real credit cards in a non-production environment.
When altering any code that deals with credit card information, it is important that key tests are performed to ensure the software remains in PCI compliance. All security patches and system and software changes need to be tested before being deployed, including but not limited to testing for the following.
| PA-DSS | Requirement | Testing Procedure | What we do in Theatre Manager |
| 5.1.1.1 | Validation of all input (to prevent cross-site scripting, injection flaws, malicious file execution, etc.) | Validation of all input (to prevent cross-site scripting, injection flaws, malicious file execution, etc.) | When using the Theatre Manager application, input validation for almost all fields is done through the specialzed protected class called oEditCheck which does specialized validation on inputs. Every text input field in the system will invoke a method from this class. Test your code in the 'evAfter' clauses to make sure that it does for all entry fields.
Since the Theatre Manager 'fat' client is a compliled application and not web based, much of this PCI requirement does not apply. The Theatre Manager commerce web server uses the same edit routines as the 'fat' client but has cleansing routines for parsing data prior to it hitting the edit routines. Refer to OWASP below. |
| 5.1.1.2 | Validation of proper error handling | Validation of proper error handling | particularly for credit card information, make sure that data is not diplayed back to an operator or customer that shows the entire PAN when errors occur. Refer to 5.1.1.5 for routines to display protected information appropriately. |
| 5.1.1.3 | Validation of secure cryptographic storage | Validation of secure cryptographic storage | all card information is updated in the database using a single protected classes called tfCreditCard.$reviseCreditCard. All access to cards is through that protected class and any use will ensure that cards are encrypted properly. However, after a test using credit cards, do an sql query on CD_CARD_NO to make sure nothing exists in clear text. |
| 5.1.1.4 | Validation of secure communications | Validation of secure communications | Card authorization occurs in via https and the merchant providerl. The protected classes oCCAuthorize handle all https communication and will not respond unless the merchant provider supports TLS 1.2 or later (high encryption) |
| 5.1.1.5 | Validation of proper role-based access control (RBAC) | Validation of proper role-based access control (RBAC) | Access to card information is managed in Theatre Manager through a protected class called oSecurity. All display of credit card information is done through another protected class called oEditCheck.$fetchCreditCard which converts all items for display using RBAC. |
OWASP testing
For web based components (i.e oWebComxxx), ensure that OWASP vulnerabilities are also tested and verified per PA-DSS standards 5.2.1-5.2.10. This section in the PA-DSS document repeats the current top 10 OWASP vulnerabilities (circa 2010) and are repeated below. Make sure to test those as well as review OWASP to keep this section of the test requirements evergreen.
Above all, read the OWASP top 10 when developing a Web API because they explain clearly what things mean and strategies how to avoid.
| PA-DSS | Requirement | Testing Procedure | What we do in Theatre Manager |
| 5.2.1 | Cross-site scripting (XSS). | Cross-site scripting (XSS) (Validate all parameters before inclusion.) | Look at any incoming parameters for javascript and other characters and simply removes them. We have determined that there is no valid need to have words like <script> in a enterable fields like name or address. Refer to rtWebSales.cleanUpParameters |
5.2.2 |
Injection flaws, particularly SQL injection. Also consider LDAP and Xpath injection flaws, as well as other injection flaws. | Injection flaws, particularly SQL injection (Validate input to verify user data cannot modify meaning of commands and queries.) | none of the API's in any oWebComXXX accept SQL for input. Make sure each parameter is checked for existance and validity using oWebComBase.$getWebParameters. |
| 5.2.3 | Malicious file execution | Malicious file execution (Validate input to verify application does not accept filenames or files from users.) | ensure that oWebComXXXX does not accept file names and does not read the file system. All input is sanitized and merged into variables of fixed length (the nature of Omnis Studio) so buffer overflows are not possible. |
| 5.2.4 | Insecure direct object references. | Insecure direct object references (Do not expose internal object references to users.) | OWASP recommends use of API's to address this issue. Build a new oWebComXXX for each web function. |
| 5.2.5 | Cross-site request forgery (CSRF). | Cross-site request forgery (CSRF) (Do not rely on authorization credentials and tokens automatically submitted by browsers.) | TM puts tokens in the cookie that are unique per session and per request. |
| 5.2.6 | Information leakage and improper error handling | Information leakage and improper error handling (Do not leak information via error messages or other means.) | ensure all messages are read from a table (tmError.txt) and only provide user direction, not system state. |
| 5.2.7 | Broken authentication and session management | Broken authentication and session management (Properly authenticate users and protect account credentials and session tokens.) | use the build in tCookie function to read and write cookies. Cookies are 3DES encrypted and contain time information to know if the patron is going back or forward. Requests that cannot be decrypted and have stale information are discared before they get to the oWebComXXX |
| 5.2.8 | Insecure cryptographic storage | Insecure cryptographic storage (Prevent cryptographic flaws). | make sure all internal keys and pw are never clear text in variables. Always store encrypted and use decryption to get the true value. |
| 5.2.9 | Insecure communications | Insecure communications (Properly encrypt all authenticated and sensitive communications.) | Implemented using TLS for the entire web site. Specific tokens like cookies and CC data are AES256 encrypted within the TLS layer. Always test for this. |
| 5.2.10 | Failure to restrict URL access. | Failure to restrict URL access (Consistently enforce access control in presentation layer and business logic for all URLs.) | All access to the web components are throught an API call. These are routed through a single apache module that adds some tokens of its own and redirects the URL to a specific machine, changes the IP and crosses a firewall from the DMZ using NAT. There is never direct access to any oWebComXXX |
Checking in changes
Periodic Build Testing
After you have checked in all your changes you should perform a clean build test. This is accomplished by renaming your local copy of the source, and getting the latest source from the branch you were working on. Then performing a build to ensure that the code still works.
Peer Review
Methods
The size and scope of the peer review process is dictated by the scope of code changes. Altering a line of code to fix an issue does not necessarily merit a code review. Introducing new functionality or altering the user experience of the product on the other hand should require a code review.
Persons involved
At a minimum your code needs to be reviewed by one of the senior developers. If your code changes impact more than a single area then an architect needs to review it. If your code impacts the database schema then an architect needs to review it. Any time there is a change to code that handles track data or credit card numbers; it needs to be reviewed by a senior developer.
Security and Protected Classes
Any time your code changes involve the use credit card data, encryption or decryption and/or any of the protected classes, these changes should be discussed with an architect before, and reviewed by an architect afterwards to ensure the highest level of adherence to coding best practices. The TM coding practices specifically addresses how sensitive data is to be dealt with in the Studio Code. OWASP practices specifically address tests for web objects.
Hand Inspection
A peer review can take many forms. For particularly important code, a 'hand inspection' of the code may be required. Normal code walkthroughs involve explaining the purpose of code segments and object classes. A hand inspection is when a second party actually steps through the new code to verify assumptions, parameters, values, comments and alter boundary conditions to simulate odd or unpredictable cases and attempt to identify unforseen defects.
Review Approval
The approval of a code review results in a the development build and forwarding to QA for testing. This also generates entries in the upcoming release notes which are build as each development release is built. An entry in the release notes constitutes approval of the development build.
Release to Software Quality Assurance
Documentation
As part of passing an issue to SQA for testing you should consider what you have done, and what impacts that will have on the environment and user interface of the application. As developers we often will do things like stopping and restarting a service, or registering a COM control, or installing 3rd party drivers, that the SQA testers will not just know to do. Document these steps that they will need to perform to ensure that development and testing cycles are not wasted. Make sure to attach the FogBugz case numbers for the issue being sent to SQA for testing.
Defect Tracking Cycle
In the defect tracking tool you can forward an issue and mark it ready to test. This will allow SQA to pick it up and begin testing.
In person follow up
While not a requirement it is recommended with any significant change that you follow up in person with the SQA testers that are testing your code. Answer any questions they have, address any concerns. We are all part of the same team and it is all of our jobs to release the best software we can.
Candidate Builds for QA/Production
The build for QA testing (i.e. any candidate for production release) will include building from the VCS. The option Build without Comments will be used to remove comments from any documentation in the applications.
Because of the way Omnis Studio is tokenized and structured and how the VCS operates, this will also have a supplementary effect of removing any commented test PAN’s and or other text based security information that may be present in the code.
Separation of Environments
The Studio VCS is used to help control and separate the Development, Test and Release functions.
- Developers test on their own machines, and at the end of the building and unit test processes, must place code into the VCS.
- The QA Test team builds candidate release from the VCS and uses their own test databases and test suites to prove the bug fixes or enhancements
- Code designated as a production release will go through the final build and testing process
Release Builds
|
There are two ways to release Theatre Manager to customers.
|
The release process for Auto Deployment and Downloadable Installers is similar. There will always be:
- Beta build for internal testing
- Release Candidate for testing within the support team
- Targeted Releases for specific customers with specific problems
- General Release for releases that pass muster in the above three test levels
- Backout Release which is a re-deployment of the prior version, except with the version number rolled ahead of the abortive release.
When code has been designated for potential release:
- a final build of the code will take place using Build without Comments
- it will be placed onto the build directory and new installers built using the automated deployment scripting tool that is platform appropriate:
- Macintosh: we use packages to make a mac platform .pkg installer (see release notes)
- Windows: we currently use Installer Vise
- the installers will be tested on all platforms to ensure they run as expected
- the full installer will be placed on the production servers as 'Final Candidate'
- the Support team will download and perform complete installation and usage tests, prior to public availability and notification.
Beta Release
In many cases, one or two beta sites are selected for final testing prior to full notification of a new version - depending on the nature of the changes.
Selection is based on a number of factors such as desire/need for the specific change. Most often this will be one of what is termed a QA tested Development Release.
It could also be a new site where there is a Senior Arts Management representative onsite to watch for any anomalies that were not discovered in the comprehensive testing process. The key in this situation is approximately 8 days of comprehensive observation of the entire application by a knowledgeable person.
If there is a significant number of changes for a prospective public release that are of a nature that warrants a beta program with mulitple venues; a call will be made for willing beta participants who have test servers and can test. This occurs after QA testing have determined that the version is a candidate for public release.
Production Release
When an installer is deemed ready for public release, a number of steps need to occur:
- Release notes are to be created and published in the version release notes that contain:
- change notes compiled from aggregating and editing the developer checkin notes from the VCS and enhancing with information from FogBugz.
- a complete steps to upgrade all affected components
- an estimate of the time that a release will take
- any special notes or warnings as necessary
- The release will be placed into the 'PriorVersion' directory and given a codified name for Arts Management purposes
- A file on the server will have an entry placed into it that details the version number, release date and codified name. The purpose for this is so that a client can retrieve prior versions in the case a backout is required
- A brief 'marketing summary' of the release notes will be created and placed into the RSS feed on the main help page and published for public consumption
Auto Deployment Builds
Set Version in Theatre.lbr
in Startup_task method, set the following three items:
- Version Number according to the versioning terminology.
- Migration Step to be the minimum allowed TM server version that the client will work with
- Release Date to be the intended release date
Privatize/Lock the Library classes.
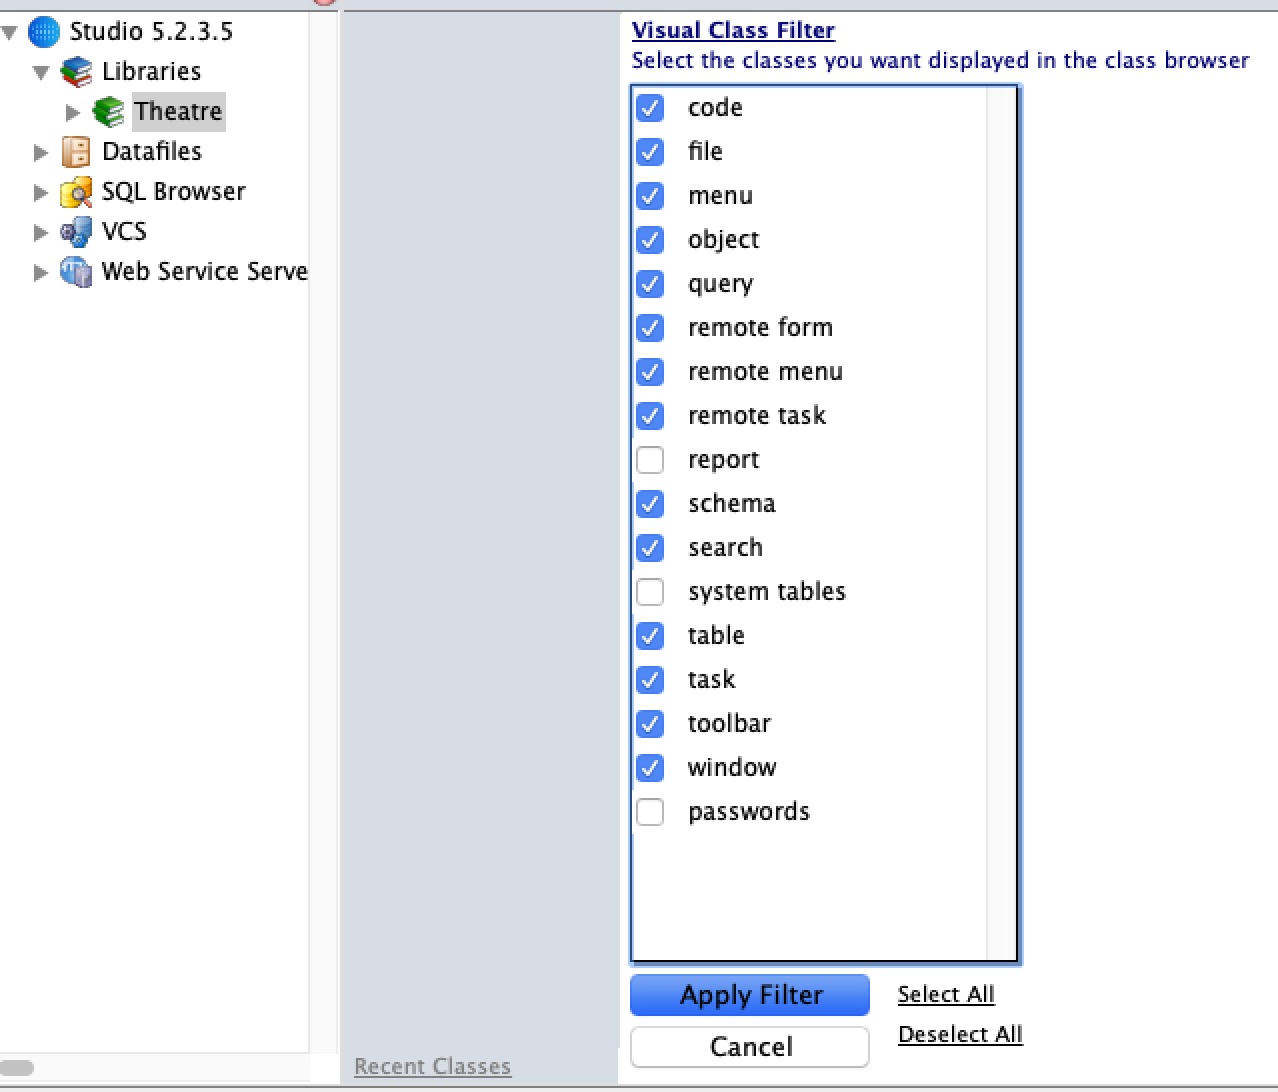 Auto Deployment builds require the Theatre Manager library be built without comments and to be locked except
- All Report Classes - excluded using filters in the Studio development tool
- Password Classes - excluded using filters in the Studio development tool
- Systems Classes - excluded using filters in the Studio development tool
- the 10 or so specific classes that are marked with a bullet and are easily found by sorting the classes. An example is shown below
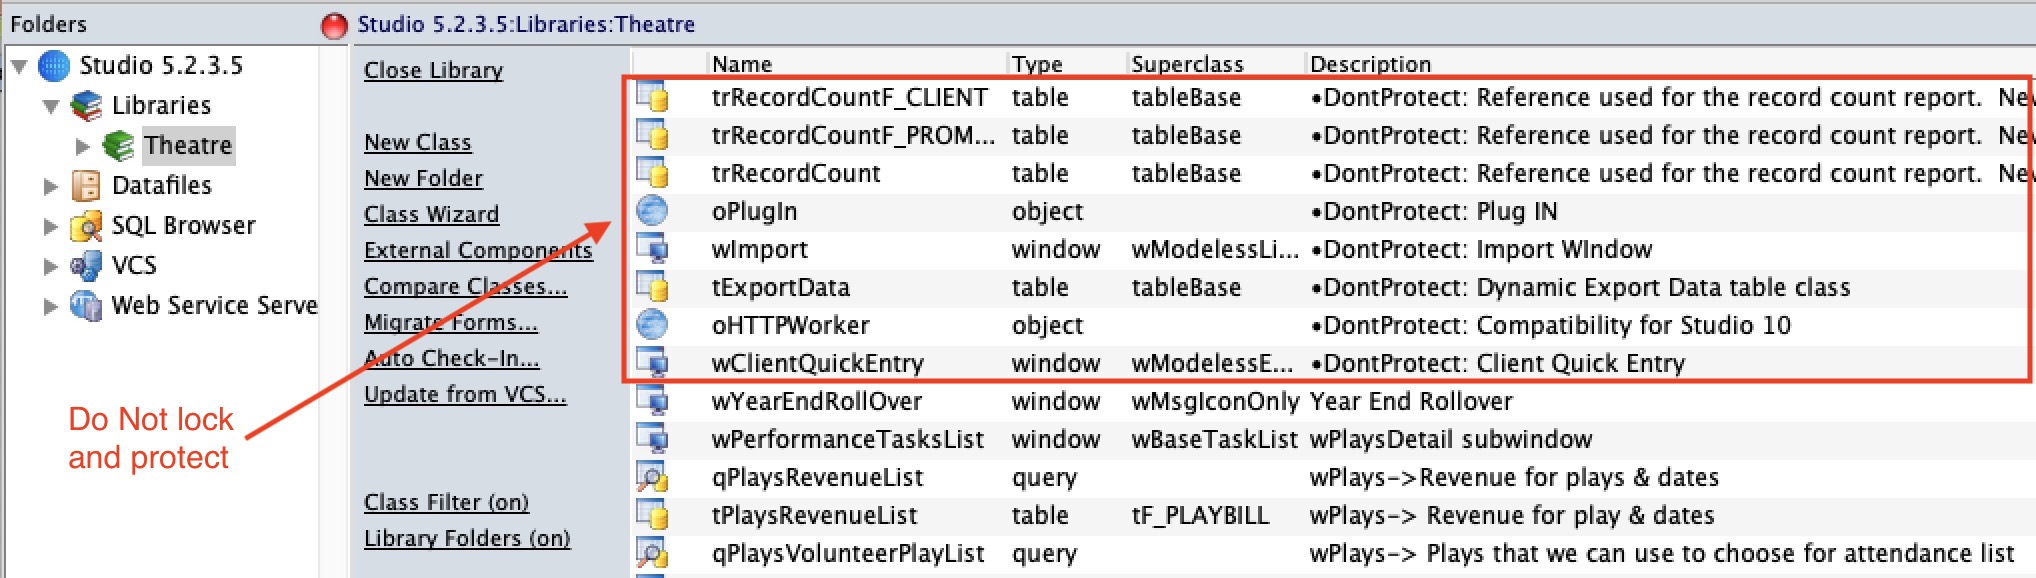
Testing With Runtime on Test Environment
For beta testing, test the library with the Theatre Manager runtime on your machine Once that is done, build a beta auto deployment package and release to developers.
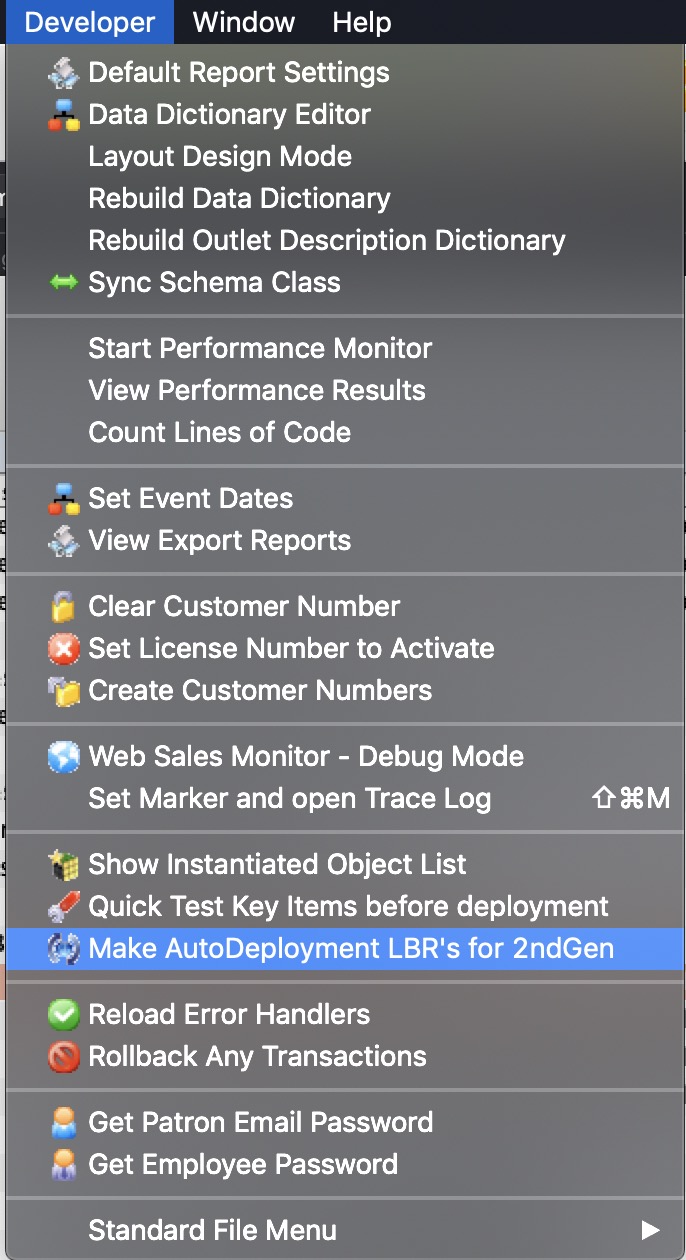
Building Auto Deploy Package
- Rename the Theatre.lbs library to be TheatreXX.YY.ZZ.lbs where the XX.YY.ZZ matches the versioning terminology.
- Use the Studio development tool to make a specialized JSON payload, encode and zip it into a file.
The menu is Developer->Make AutoDeployment LBR's for 2ndGen
- This will:
- ask you for the location of the libraries and reject if not in the proper name
- encode, compress and zip the file for you into the desktop
- Display a message telling you to open terminal and paste the clipboard into the command line to generate a SHA384 hash
- Open Terminal and paste from the clipbard. The command should look similar to below. When you hit return you will get the proper SHA-384 checksum for the zip file.
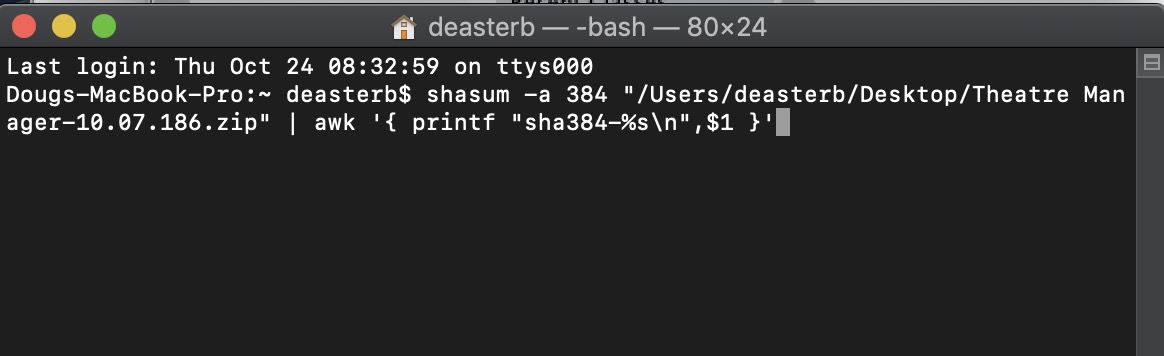
Staging deployment package to the CDN
- Login into Digital Ocean and go into the artsman-updates CDN folder. Drag the TheatreManager-XX.YY.ZZ.zip file created in the previous step to the Digital Ocean CDN and make sure to set the permission to public
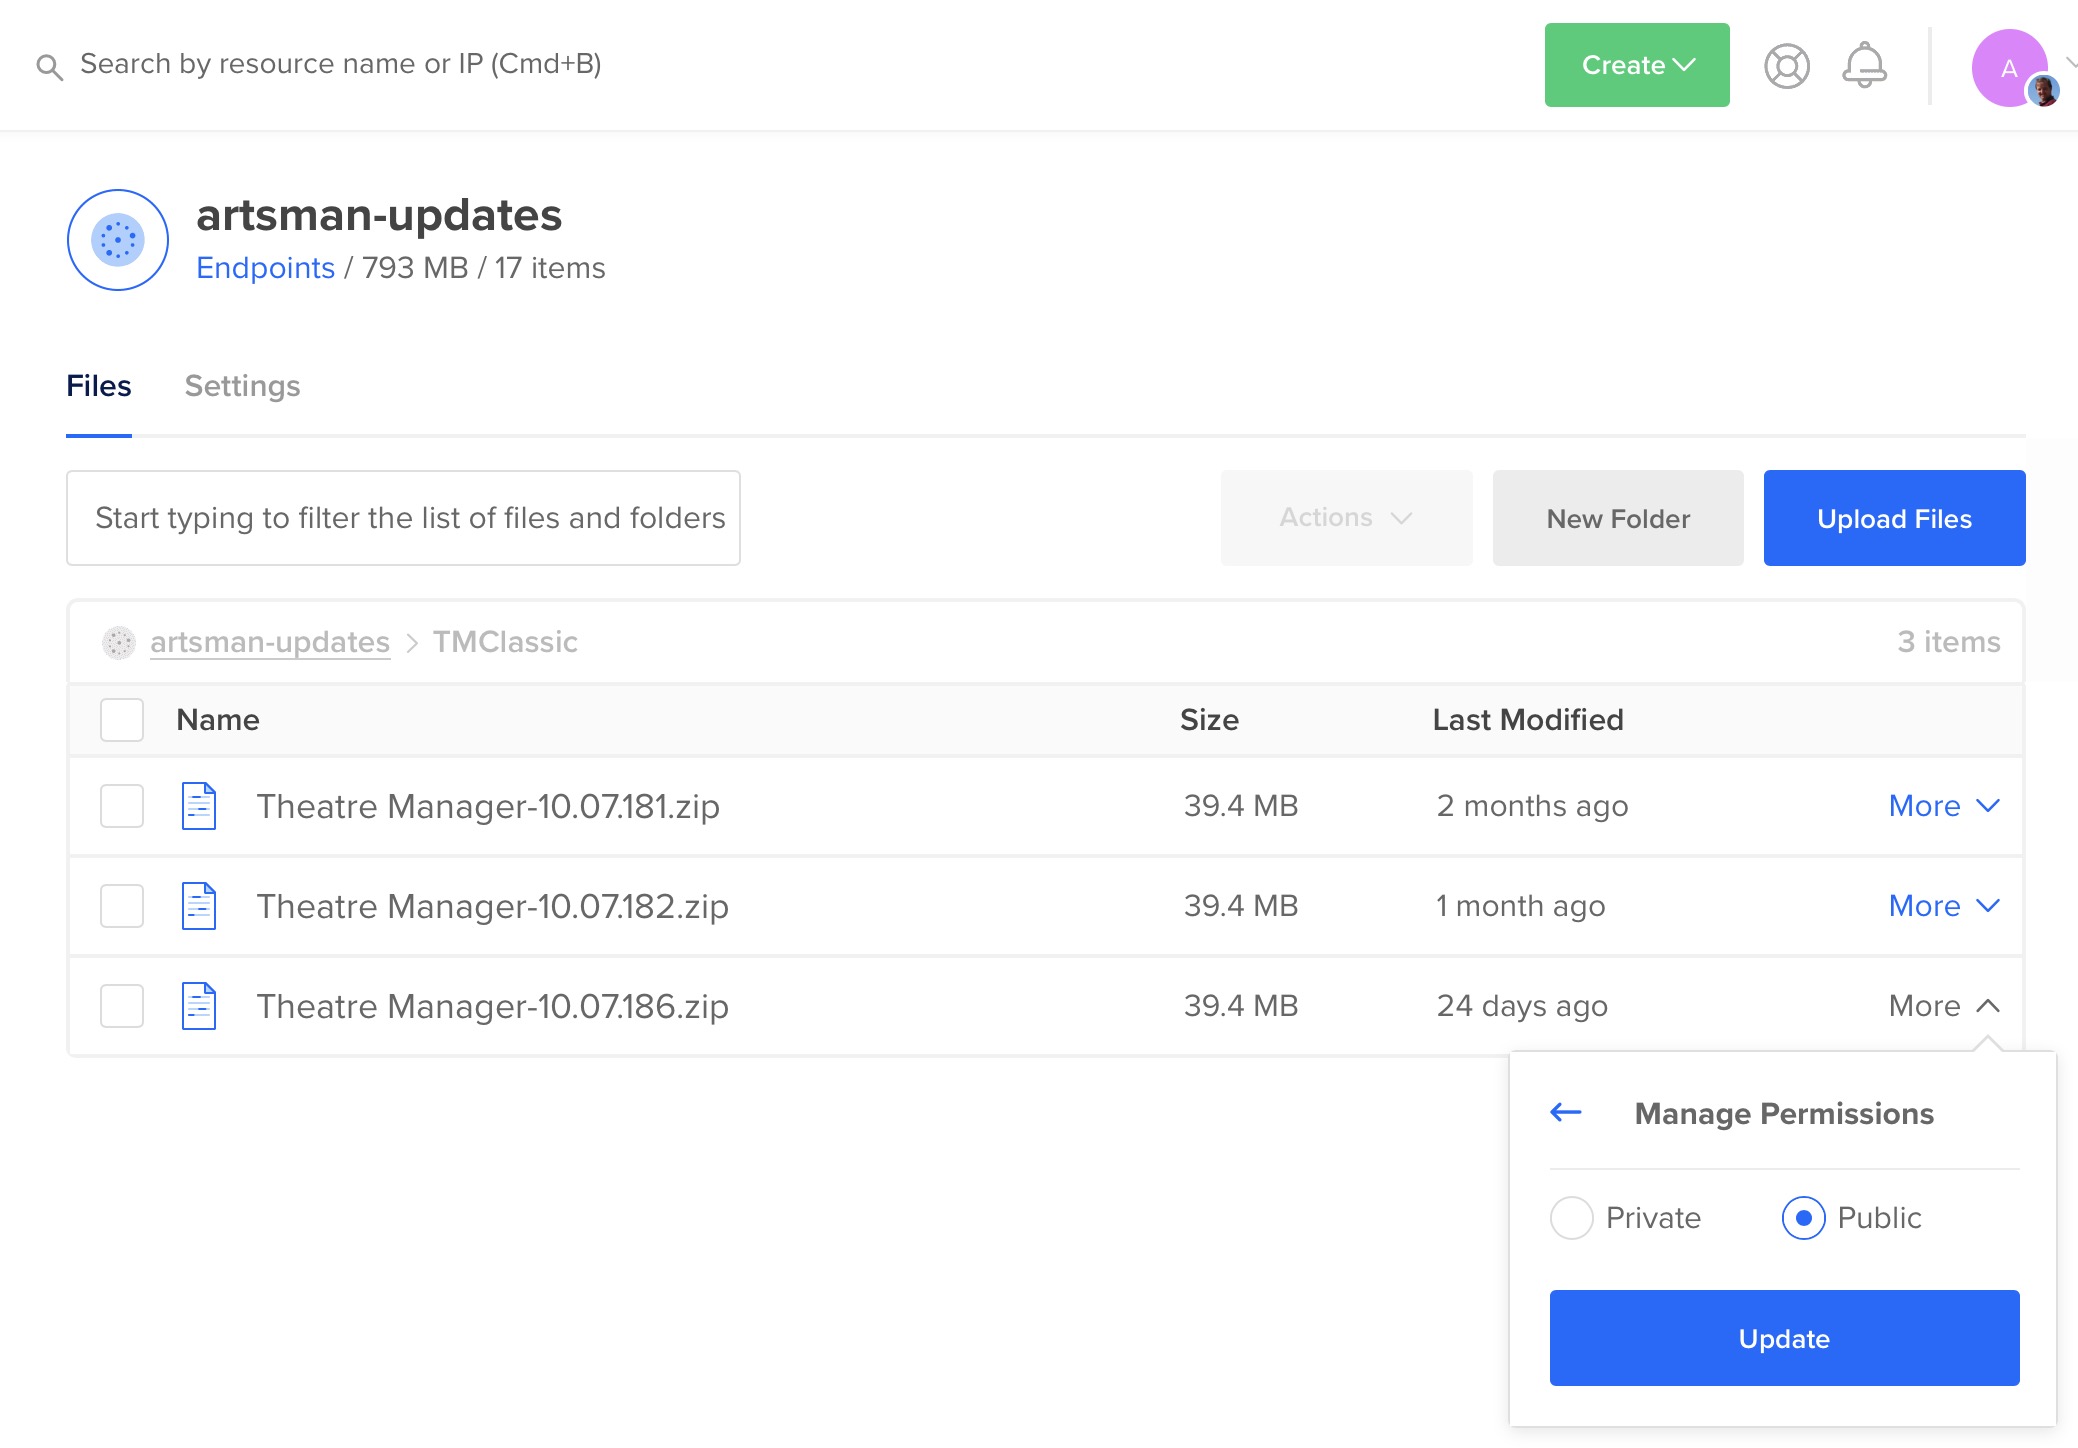
-
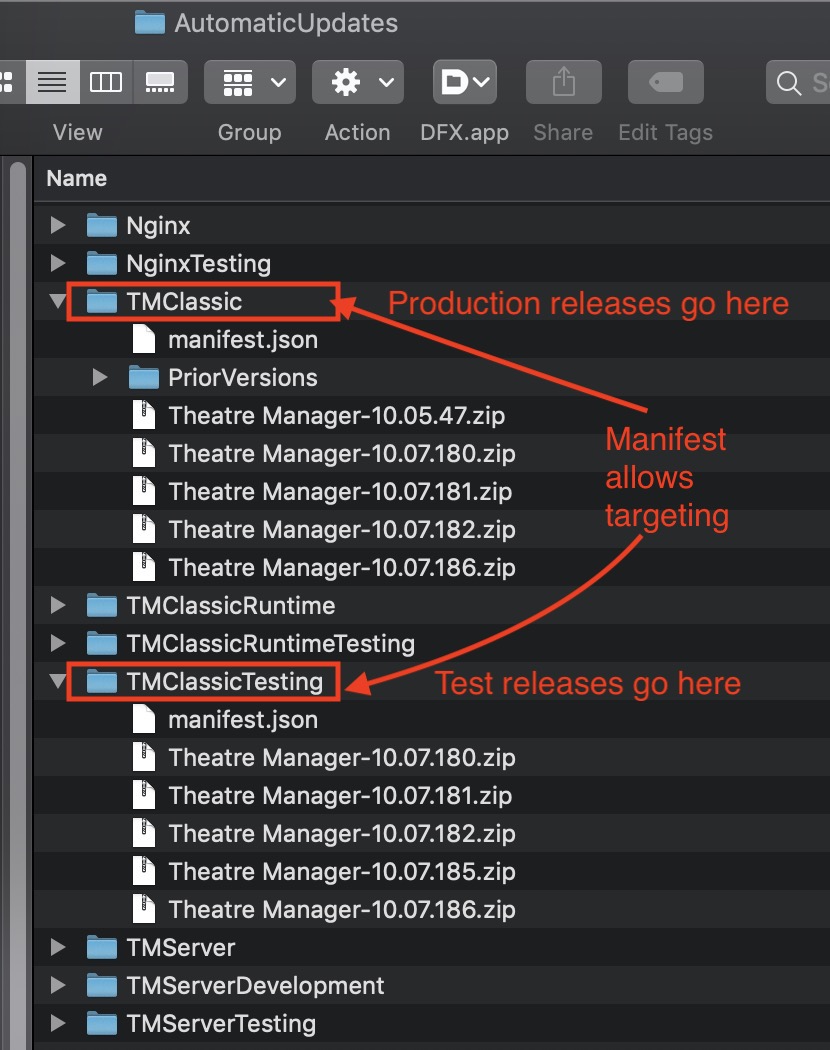 Also, log into the web server via seafile and push the release candidate into the folder as shown.
- You can place the file into both the production and test folders.
- A release will not proceed until the manifest.json file is edited.
The Manifest.json file
The following shows the constituent parts of the manifest file (json format) that needed to be edited for a release to. occur. If the manifest is not a completely valid JSON file, no release will occur.
A release should be done in four stages. It should be gradually released to:
- Via the Test release manifest and directories:
- all developers and verified for deliverability and changes.
- all support staff and verified in course of normal use.
- Via the Production release manifest and directories:
- the specific customer(s) that need the change immediately to correct their issue
- all customers subsequent to verification of each release stage
The components of the JSON file are:
- Major and Minor version numbers that this release is applicable for according to the versioning terminology.
- Minimum TM Server to co-ordinate that the release will not download unless the TM server is at that version
- Release Payload - the name of the release
- Permitted Customers - the licensee's that are able to download the version. If this is incorrect, nothing will download to the customer.
- SHA384 checksum - of the payload. if this is incorrect for the version, nothing will download
- CDN Location - the URL of the file to download. if this is missing or private in the CDN, nothing will download.
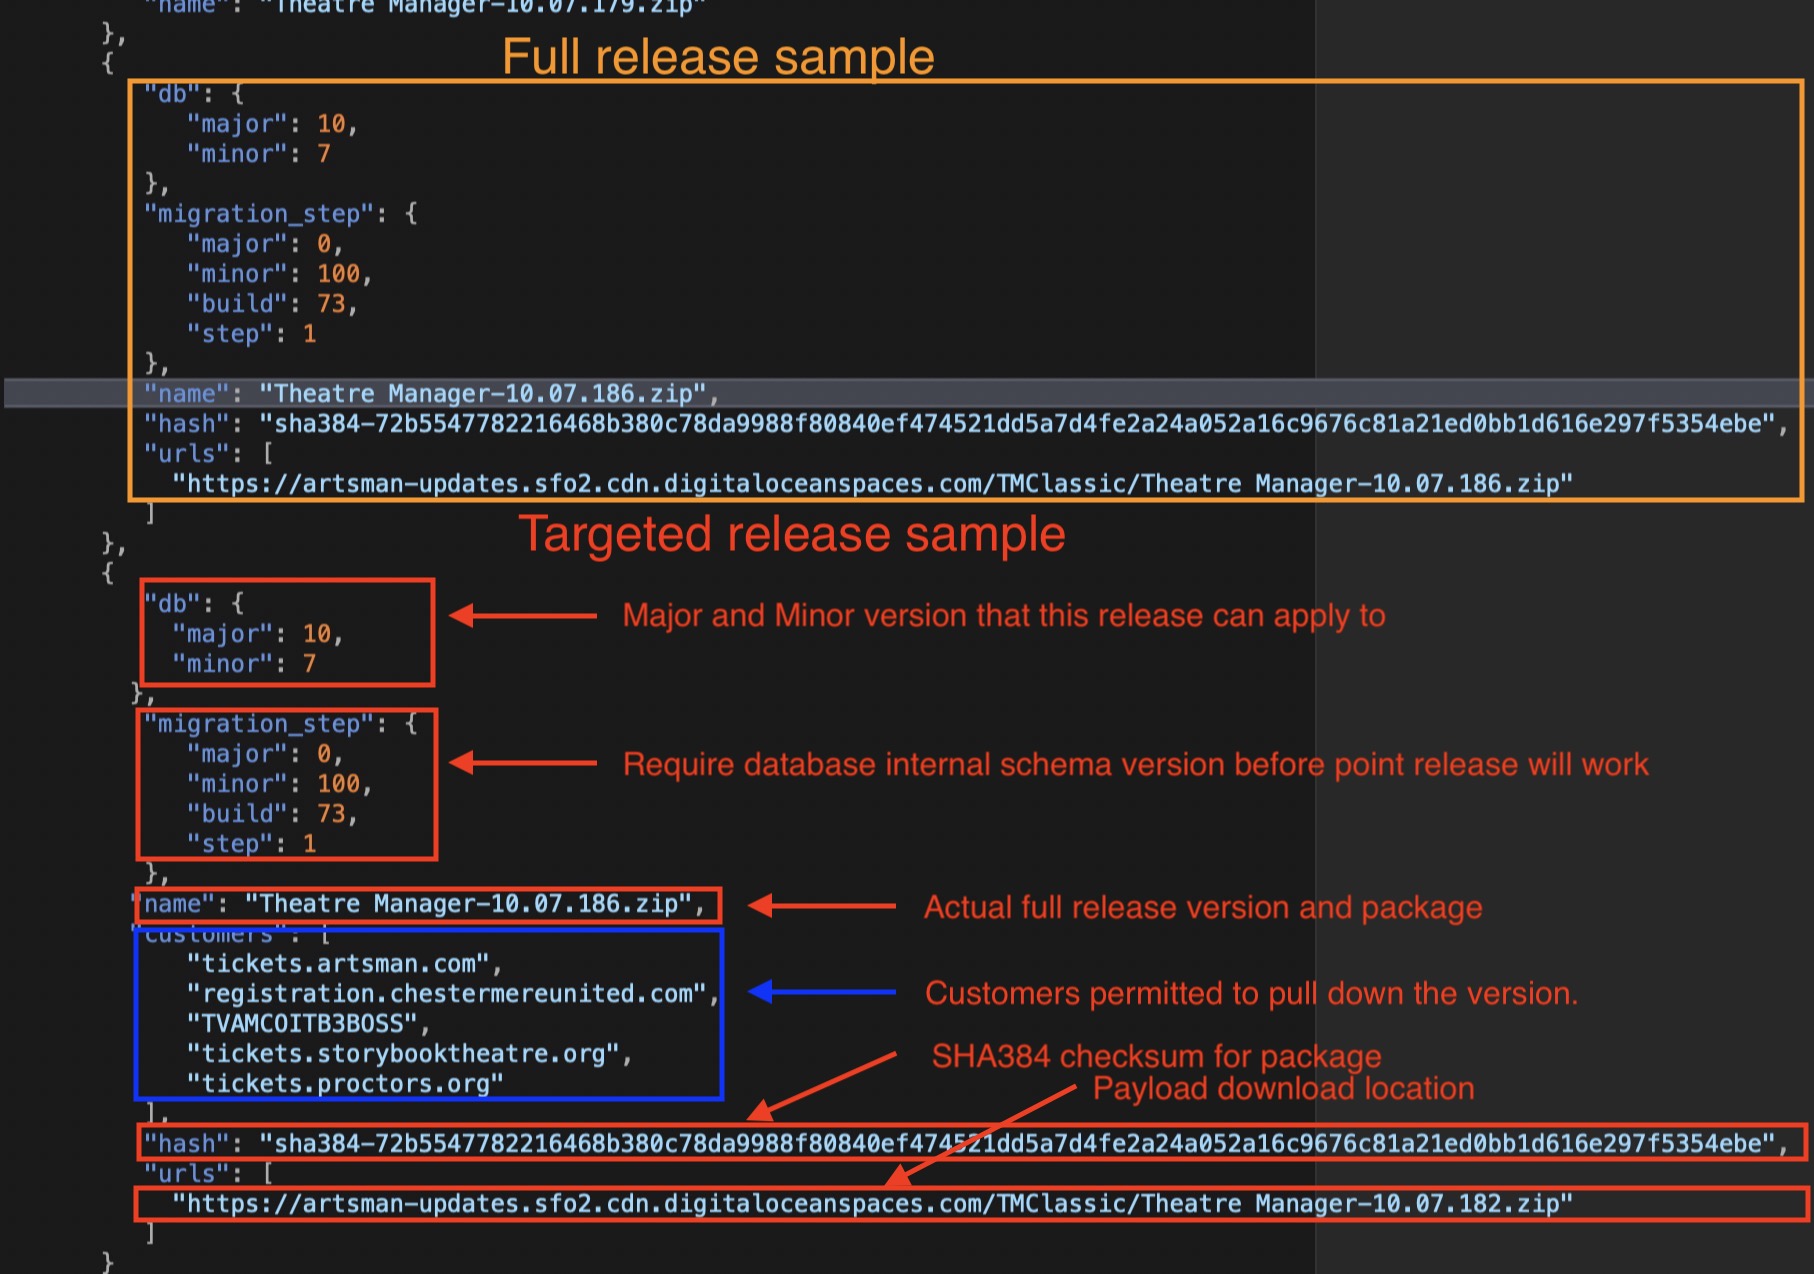
Backout Process
The backout steps are:
Remove current production installers
-
Remove the version and file number from the file containing the list of releases on the web site
- Mark the deployment package the Digital Ocean web site PRIVATE and change the manifest.json file so that deployment will not continue by putting a '-' in front of the venue URL's. Do not remove the venue URL's since the back-out will require knowing who could have downloaded the version. Rename the TMSetup.zip or TMSetup.exe installer file so that it can only be accessed if the file name is known. This is for internal purposes and restricted access.
- Edit the release notes on help.theatremanager.com for that version and mark as pending final testing
- For customers that are using that version:
- ascertain the impact of continuing to use the version by doing a mini SWAT analysis. (i.e. are they affected by the issue that was discovered, or don't they use that part of the application).
- If customers need rolled back, they will be instructed to put the older version in place
- the support team will roll back the database version so that they can use the older version.
- Assign first priority for development to make any corrections to the code that prompted the backout in the first place for the next developer release.
Create a New Installer
In the case of catastrophic condition, rebuild the previous version and release it as the 'next' point release. In effect, we make the prior release into the future release so that customers can upgrade and roll forward to the future release (which is really a prior release)
Version Control
- Omnis Studio VCS - which is provided by the vendor and used exclusively for the version control of any Omnis Studio Code
- GIT - which is used as a version control system for any other project, specifically python, web pages, and C code
GIT Repository
There is ample documentation on
- git-lab on line
- and the general usage of git to make:
- repositories
- Pushing changes (similar to Check-in)
- Pulling revisions (get latest changes for a branch)
- Making branches (we always have master, current development branch and any a number of specific branches for features)
- Merging branches
Various Git tools provide ample ways of diff-ing changes in versions, seeing who made the change (blame) etc.
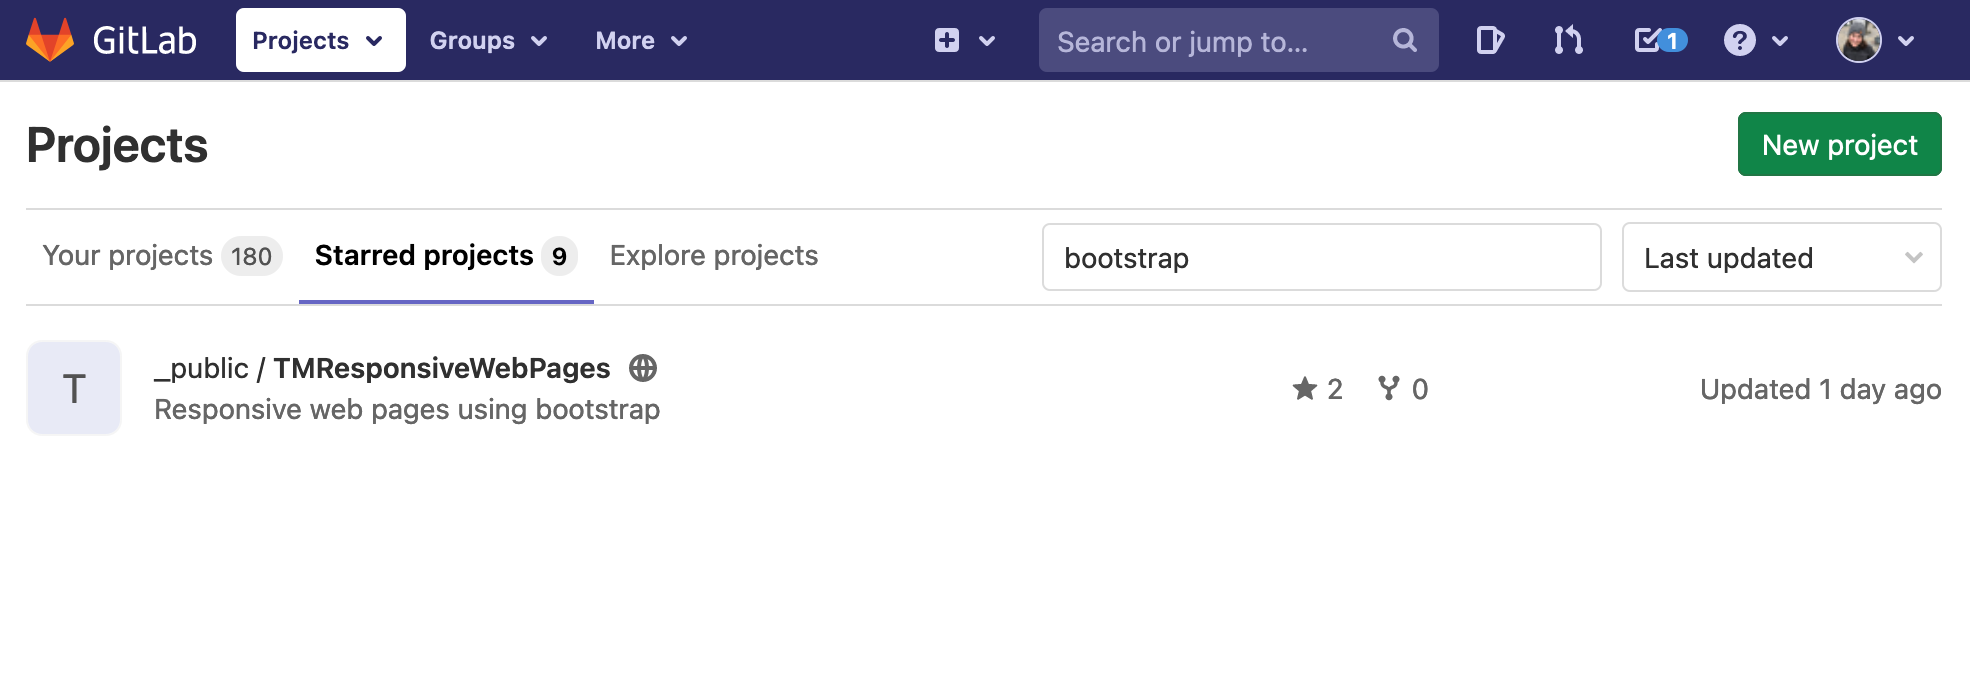
Omnis Studio VCS
Branches
The Main is the head branch. It is where all new development is done. It is also the first place you should fix when patching an issue.
HotFix branches are created at the time of release. The latest branch is forked and new development continues in latest while issues that are reported are fixed in HotFix.
Getting Source
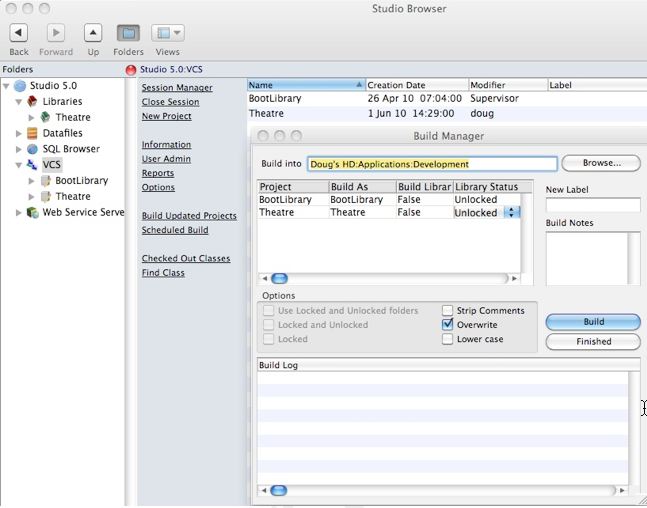
Get Latest Revisions

Check the recursive checkbox, and when the Build tree check box appears check it as well. Click OK to begin the get process.
It is possible to build prior revisions of the code based on labels. Labels are applied to each major release and the Build Manager will perform that task when a release is done.
Classes can be deleted or marked deleted in the VCS when they are no longer required or referenced. For that reason, it is recommended on a periodic basis (eg when a major release is completed, or you have finished a project), to check in all code and then rebuild the library.
Comparing Revisions

Checking Out
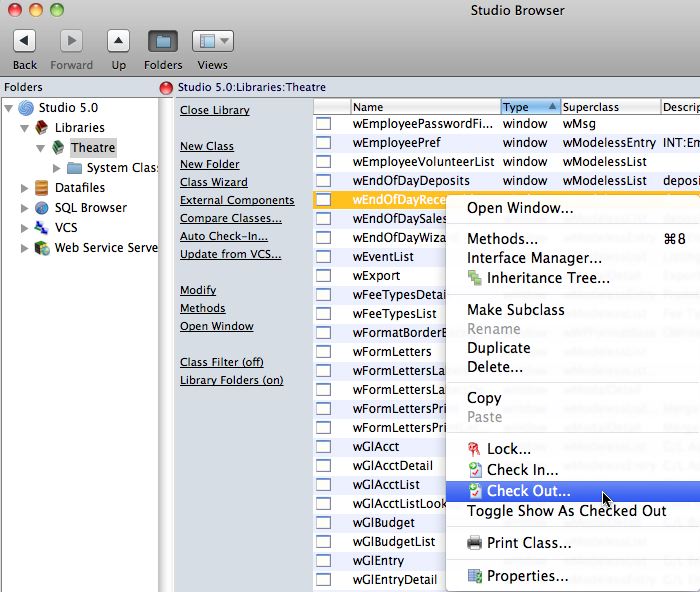
On the checkout window, indicate:
- the reason you are checking out the component. If there is an associated FogBugz case, enter that as in the checkout notes along with a brief synopsis of the activity intended to be worked on.
- If you are updating from the VCS or testing a component, indicate that you are copying out the components for testing.
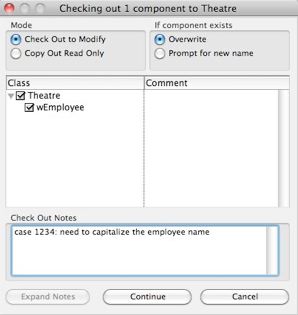
Adding Classes
The name of the class is to be given a name according to the naming conventions in the coding practices.
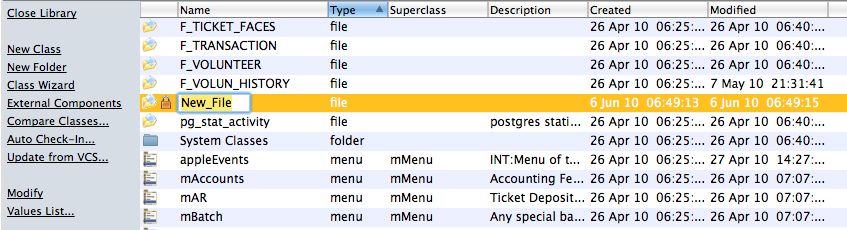
If you decide to discard the class before checking it in, simply delete it. If you check it in and discover that you no longer want it or need it, the it must also be deleted from the VCS.
Checking In Changes
When checking in, make sure that you:
- put the issue number from FogBugz in the check in notes (if available).
- add an explanatory comment with the case number
- indicate the severity of the issue and scope of the change
- update the version number to match the current release version to indicate when it was fixed.
- Complete the case number in FogBugz and to indicate its status, mark it complete, ready for testing and put in release notes into FogBugz as well. Ideally, the release notes and the check in notes should be the same.
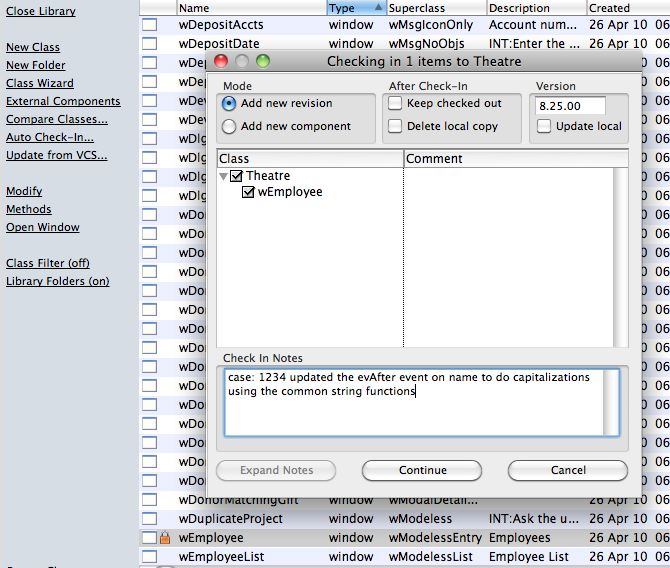
Current Responsibility Matrix
| Area | Person |
| Architecture and product design | Dave McKeone |
| Ensuring changes meet PA-DSS and secure coding practices followed. | Doug Easterbrook |
| keeping up to date with changes in PA-DSS guidelines | Doug Easterbrook/Dave McKeone |
| Ensuring vendor personnel with PA-DSS responsibilities receive training | Doug Easterbrook/Dave McKeone |
| Following PCI guidelines for development processes | all developers |
| Following PCI installation guide and training customers in PCI requirements | Training and support staff. |
Software Development Lifecycle
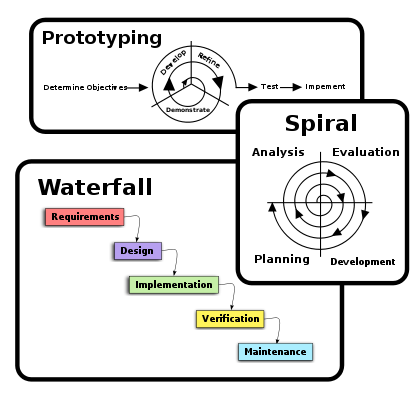 This document explains Arts Management Systems Software Development Life Cycle. This document is not intended to be all inclusive but rather a high level outline of our processes. Detailed processes are described in associated ‘living’ documents. This document is for internal use only and is not to be distributed.
Wikipedia presents 3 basic methodologies for software development as illustrated in this picture. There is another interesting description of other methodologies and variations on www.noop.nl if it is of interest.
The nature of Omnis Studio as a development tool lends best to the prototyping methodology which is more recently known as Agile Development
From Wikipidia, agile software development refers to a group of software development methodologies based on iterative development, where requirements and solutions evolve through collaboration between self-organizing cross-functional teams. The term was coined in the year 2001 when the Agile Manifesto was formulated.
Agile methods generally promote a disciplined project management process that encourages frequent inspection and adaptation, a leadership philosophy that encourages teamwork, self-organization and accountability, a set of engineering best practices intended to allow for rapid delivery of high-quality software, and a business approach that aligns development with customer needs and company goals.
Agile Principles
| Individuals and interactions | over processes and tools |
| Working software | over comprehensive documentation |
| Customer collaboration | over contract negotiation |
| Responding to change | over following a plan |
Some of the principles behind the Agile Manifesto are:
- Customer satisfaction by rapid, continuous delivery of useful software
- Working software is delivered frequently (days or weeks rather than months)
- Working software is the principal measure of progress
- Even late changes in requirements are welcomed
- Close, daily cooperation between business people and developers
- Daily conversation is the best form of communication (co-location)
- Projects are built around motivated individuals, who should be trusted
- Continuous attention to technical excellence and good design
- Simplicity
- Self-organizing teams
- Regular adaptation to changing circumstances
Source: Wikipidia
Contrasted with Waterfall Methodology
A common criticism of the waterfall model is its inflexible division of a project into separate stages, where commitments are made early on, making it difficult to react to changes in requirements as the project executes. This means that the waterfall model is likely to be unsuitable if requirements are not well understood/defined or change in the course of the project.
Agile methods, in contrast, produce completely developed and tested features (but a very small subset of the whole) every few weeks. The emphasis is on obtaining the smallest workable piece of functionality to deliver business value early and continually improving it and/or adding further functionality throughout the life of the project. If a project being delivered under Waterfall is cancelled at any point up to the end, there is often nothing to show for it beyond a huge resources bill. With Agile, being cancelled at any point will still leave the customer with some worthwhile code that has likely already been put into live operation.
Release Definitions
Using agile development, Arts Management Systems strives to be in the position of being able to release a new version at any time to respond to clients in an 'agile' manner. By definition, this means that small, incremental units of work are done at one time, checked in, QA'd and set aside for release. It involves coordination amongst the teams to defines what is working, and what is not, isolate the scope and do a build only on what we determine to be working, even if it does not meet the full intended scope. After all, some working software for the customer is better than none.
That being said, releases are generally of 3 types:
- Development Release: this release typically addresses a very critical need for a specific customer.
- Production Release: this release is made available to customers when an arbitrary number of work items have been completed that meet customer needs, however significant or insignificant in scope. There will generally be at least one functional release per month that will have comprehensive release notes and back-out strategies. Clients do not need to implement the functional release unless there are items of interest to them. Functional releases are alway cumulative so skipping one release and implementing the next always gives the client the cumulative effect of all functional releases.
- Major Release (the major release number is incremented): this release is scheduled to coincide purely with PA DSS certification because the PCI standards council has decided in an arbitrary manner that applications can only increase the release number at the time of their PCI audit. For Arts Management, that will mean a new release number every three years.
Release Process
There are a number of development methodologies that can be used in agile development such as Extreme Programming or Scrum. The particular process that we use the most is the Agile Unified Process although, by definition, agile programming can draw from various methodologies as the need dictates.
General Principles of Agile Unified Process
The links will take you to the implementation of the process in our product development process
- Model. Understand the business of the organization, the problem domain being addressed by the project, and identify a viable solution to address the problem domain.
- Implementation. Transform model(s) into executable code and perform a basic level of testing, in particular unit testing.
- Test. Perform an objective evaluation to ensure quality. This includes finding defects, validating that the system works as designed, and verifying that the requirements are met.
- Deployment. Plan for the delivery of the system and to execute the plan to make the system available to end users.
- Configuration Management. Manage access to project artifacts. This includes not only tracking artifact versions over time but also controlling and managing changes to them.
- Project Management. Direct the activities that takes place within the project. This includes managing risks, directing people (assigning tasks, tracking progress, etc.), and coordinating with people and systems outside the scope of the project to be sure that it is delivered on time and within budget. We use FogBugz to track development tasks in a particular development release iteration, status and additional notes about them.
- Environment. Support the rest of the effort by ensuring that the proper process, guidance (standards and guidelines), and tools (hardware, software, etc.) are available for the team as needed.
Philosophies
The Agile UP is based on the following philosophies:
- The staff knows what they're doing. People are not going to read detailed process documentation, but they will want some high-level guidance and/or training from time to time. The AUP product provides links to many of the details, if you are interested, but doesn't force them upon you.
- Simplicity. The Agile UP conforms to the values and principles of the agile software development and the Agile Alliance.
- Focus on high-value activities. The focus is on the activities which actually count, not every possible thing that could happen to you on a project.
- Tool independence. You can use any toolset that you want with the Agile UP. The recommendation is that you use the tools which are best suited for the job, which are often simple tools.
- The AUP an be tailored as required to meet the needs of the development release iteration.
Releases
The Agile Unified Process distinguishes between two types of iterations. A Development Release Iteration results in a deployment to the Quality Assurance and/or Demo area. A Production Release Iteration results in a deployment to the Production area.
A development release iteration is tested manually and/or with automated software tests checked into the VCS and built for QA who verify it works as designed. Any development release iteration can be sent to a customer after QA testing but is not advertised and may not have release notes.
A succession of the development releases, that becomes the Production Release will have release notes, implementation notes, documented interactions, etc. as per the examples in Version Release Notes
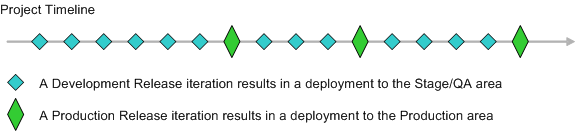
TLS Certificates
Creating KEY and CSR - Certificate Signing Request
To generate a Certificate Signing Request (CSR), you will need to create a key pair for your server. These two items are a digital certificate key pair and cannot be separated. If you lose your public/private key file or your password and generate a new one, your TLS Certificate will no longer match. You will have to request a new TLS Certificate and may be charged by the TLS Issuing company to do this.
Step 1: Generate a KEY Pair
The utility "openssl" could be used to generate the key and CSR. This utility comes with the OpenSSL package and is usually installed under /usr/local/ssl/bin. The following instructions will use the openssl that is installed with the standard Apache installation on an OS-X computer.- Open Terminal
- At the command prompt, type: cd /Library/TLS to navigate to the desired folder where the files will be generated
- At the command prompt, type: openssl genrsa -out server.key 4096 to create a key file with 4096 bit encryption
- Wait for the server.key file to finish being created in Terminal The process is complete when Terminal returns to the command prompt. A server.key file will now appear in the /Library/TLS folder from above.
The server.key file (first part of the "key pair" files) has now have been created in the /Library/TLS folder. This RSA private key file is a digital file that will be used to decrypt messages sent to Apache. It has a public component which is distributed (via the Certificate file) which allows people to encrypt those messages to Apache.
Step 2: Generate the CSR
- If you have moved from the current directory from Step 1 above, at the command prompt, type: cd /Library/TLS
- At the command prompt, type: openssl req -new -key server.key -out server.csr to enter the server.csr setup process This creates the server.csr linked to the server.key file for security purposes.
- Enter the following details:
- Country Name (2 letter code) [AU]: the two-letter code without punctuation for country Enter US (for USA) or CA (for Canada).
- State or Province Name (full name) [Some-State]: the full name of the State or Province Do not abbreviate the state or province name.
- Locality Name (eg, city) []: the City name
- Organization Name (eg, company) [Internet Widgits Pty Ltd]: the full legal Company Name If the company or department has an &, @, or any other symbol using the shift key in its name, you must spell out the symbol or omit it to enroll. Example: XY & Z Corporation would be XYZ Corporation or XY and Z Corporation.
- Organization Unit Name (eg, section) []: this can be left blank This field is optional; but can be used to help identify certificates registered to an organization. The Organizational Unit (OU) field is the name of the department or organization unit making the request.
- Common Name (eg, YOUR name) []: the primary domain name the TLS Certificate will be generated for Enter the tickets.myvenue.org URL for the web sales ticketing site. Do not prefix it with http:// or https://. This name must match EXACTLY to what will be used for the https://tickets.myvenue.org online ticketing site.
- Email Address []: the registered domain approval email address This can be one of the five email addresses approved by GeoTrust or the email address registered to the domain.
- A Challenge Password []: do not enter a password for the TLS Certificate Entering a password means the Theatre Manager Server will not be able to start Nginx as the password is required during startup and is not supported at this time.
- An Optional Company Name []: this can be left blank
-
A server.csr file will now appear in the /Library/TLS folder from above.
A public/private key pair has now been created. The private key (server.key) is stored locally on the server machine and is used for decryption. The public portion, in the form of a Certificate Signing Request (server.csr), will be for certificate enrollment.
Step 3: Generate the Diffie-Helman
- If you have moved from the current directory from Step 1 and 2 above, at the command prompt, type: cd /Library/TLS
- At the command prompt, type: sudo openssl dhparam -out dhparam.pem 4096 This creates the Diffie-Helman file.
- Wait for the dhparam.pem file to finish being created in Terminal This process will take some time and is complete when Terminal returns to the command prompt. A dhparam.pem file will now appear in the /Library/TLS folder from above.
The server.csr file (second part of the "key pair" files) has now have been created in the /Library/TLS folder.
The /Library/TLS folder now contains the necessary starting files for the TLS Certificate. The next step is to submit the CSR file for certificate creation.
Submitting CSR for TLS Certificate Creation
To submit the request for TLS Certificate Creation, you will need the Certificate Signing Request (CSR) file called server.crt created from the previous step.
Submitting CSR for TLS Certificate - NameCheap
Step 1: Access GeoTrust's Vendor Portal
- Access the NameCheap vendor portal via https://www.namecheap.com/myaccount/login.aspx?ReturnUrl=%2f
- Enter user name artsman
- Enter password refer to Daylite
- Click Sign in and Continue
Step 2: Place Order for Certificate - PositiveSSL Multi-Domain
- Click Security >> TLS Certificates.
- Click the Buy Now button under the PositiveSSL Multi-Domain option.
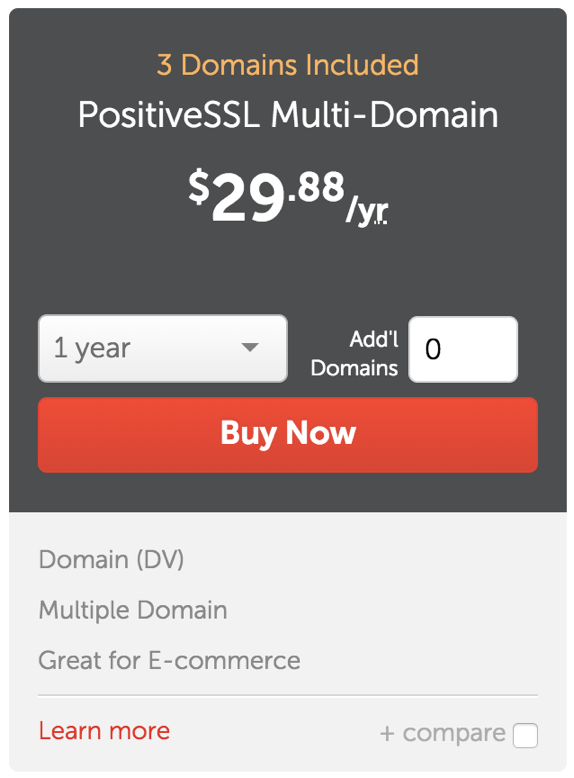
- Select the number of years the TLS purchase will be valid for. Most clients purchase for 2 years.
- Click the Add to Cart button.
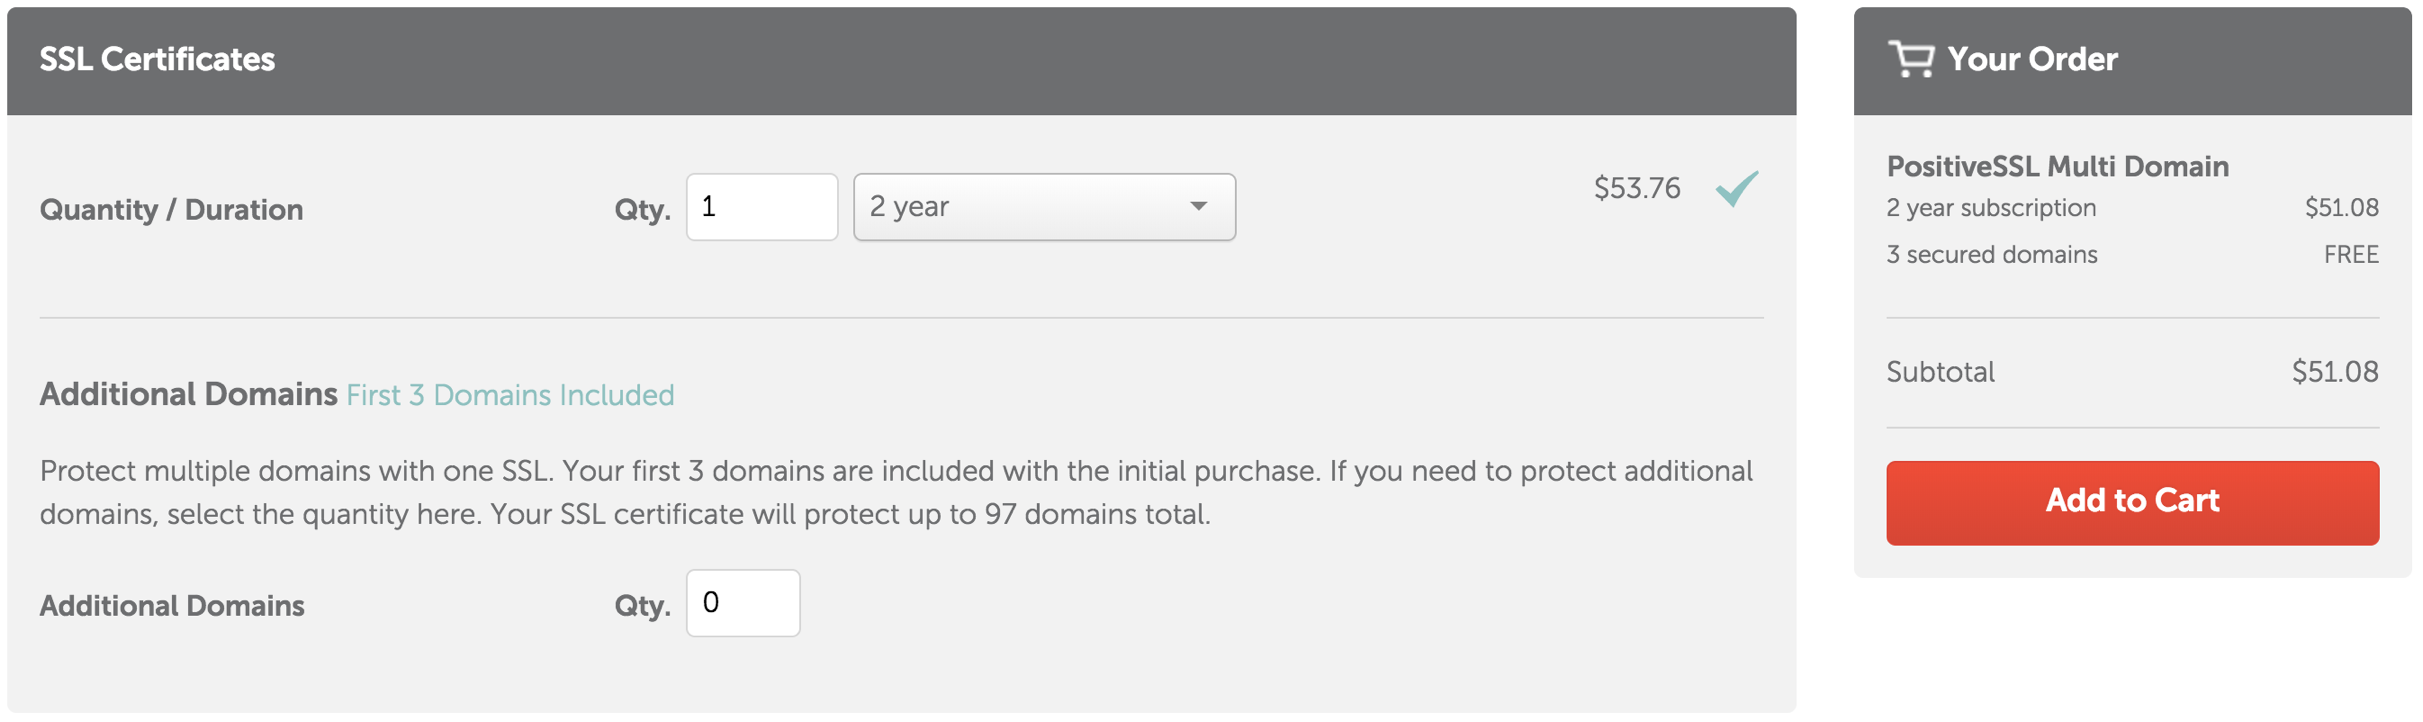
- After reviewing the order details are correct, click the Confirm Order button.
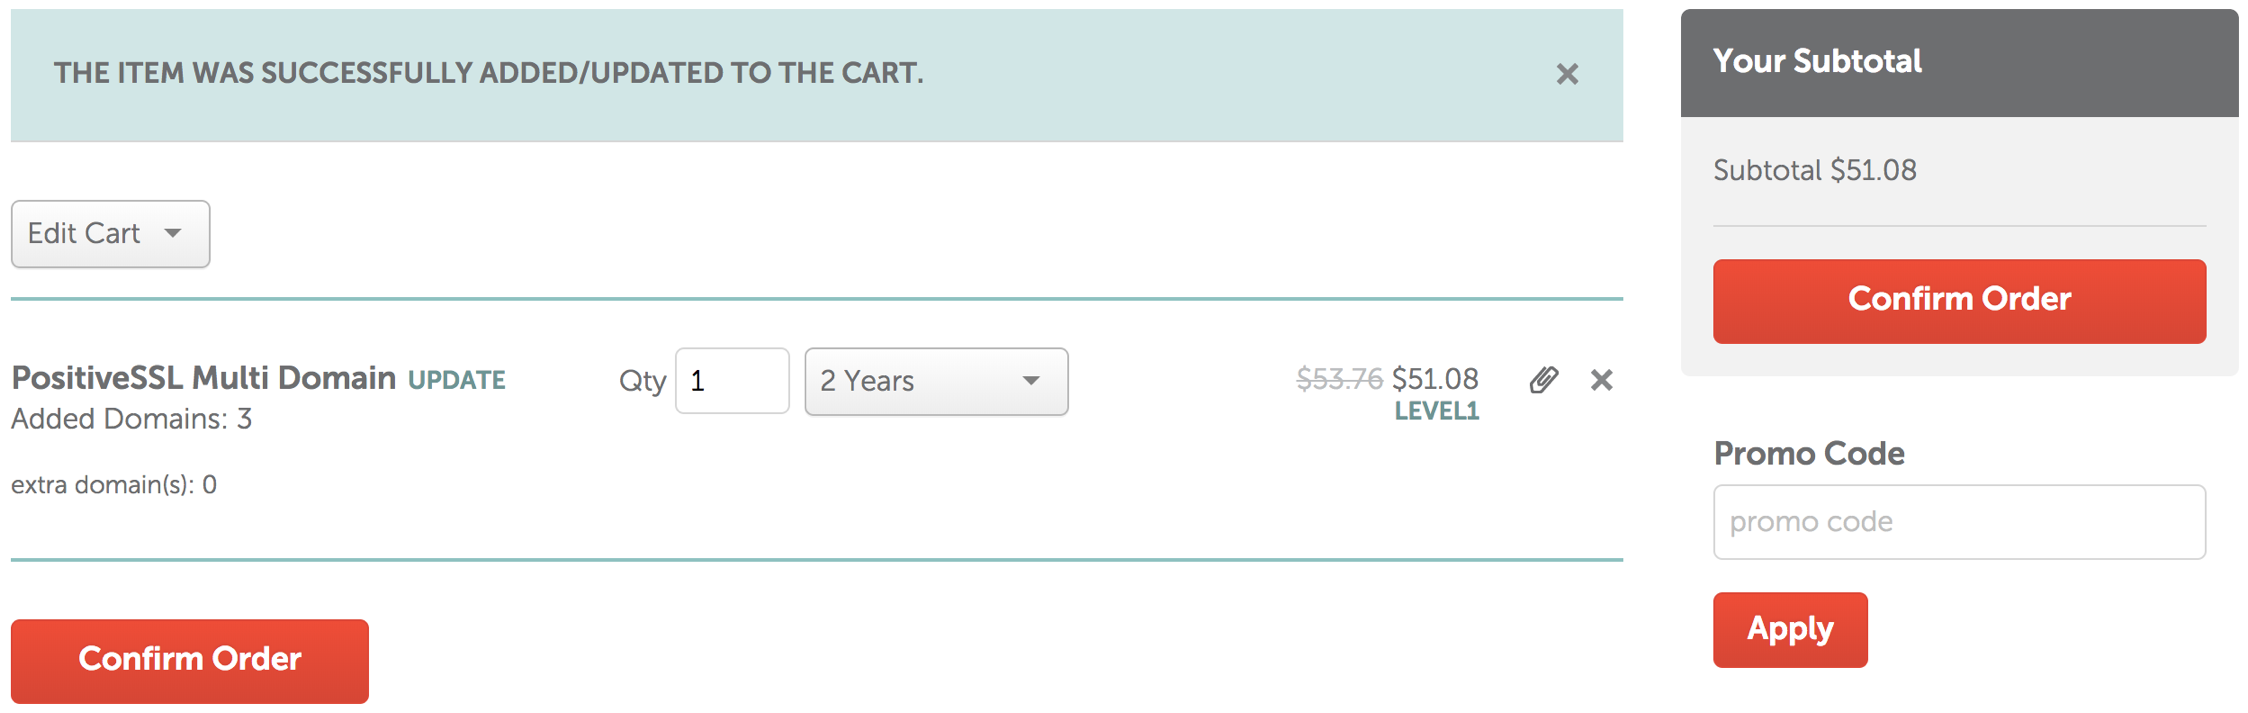
- Click the Pay Now button to purchase the PositiveSSL Multi-Domain SSL.
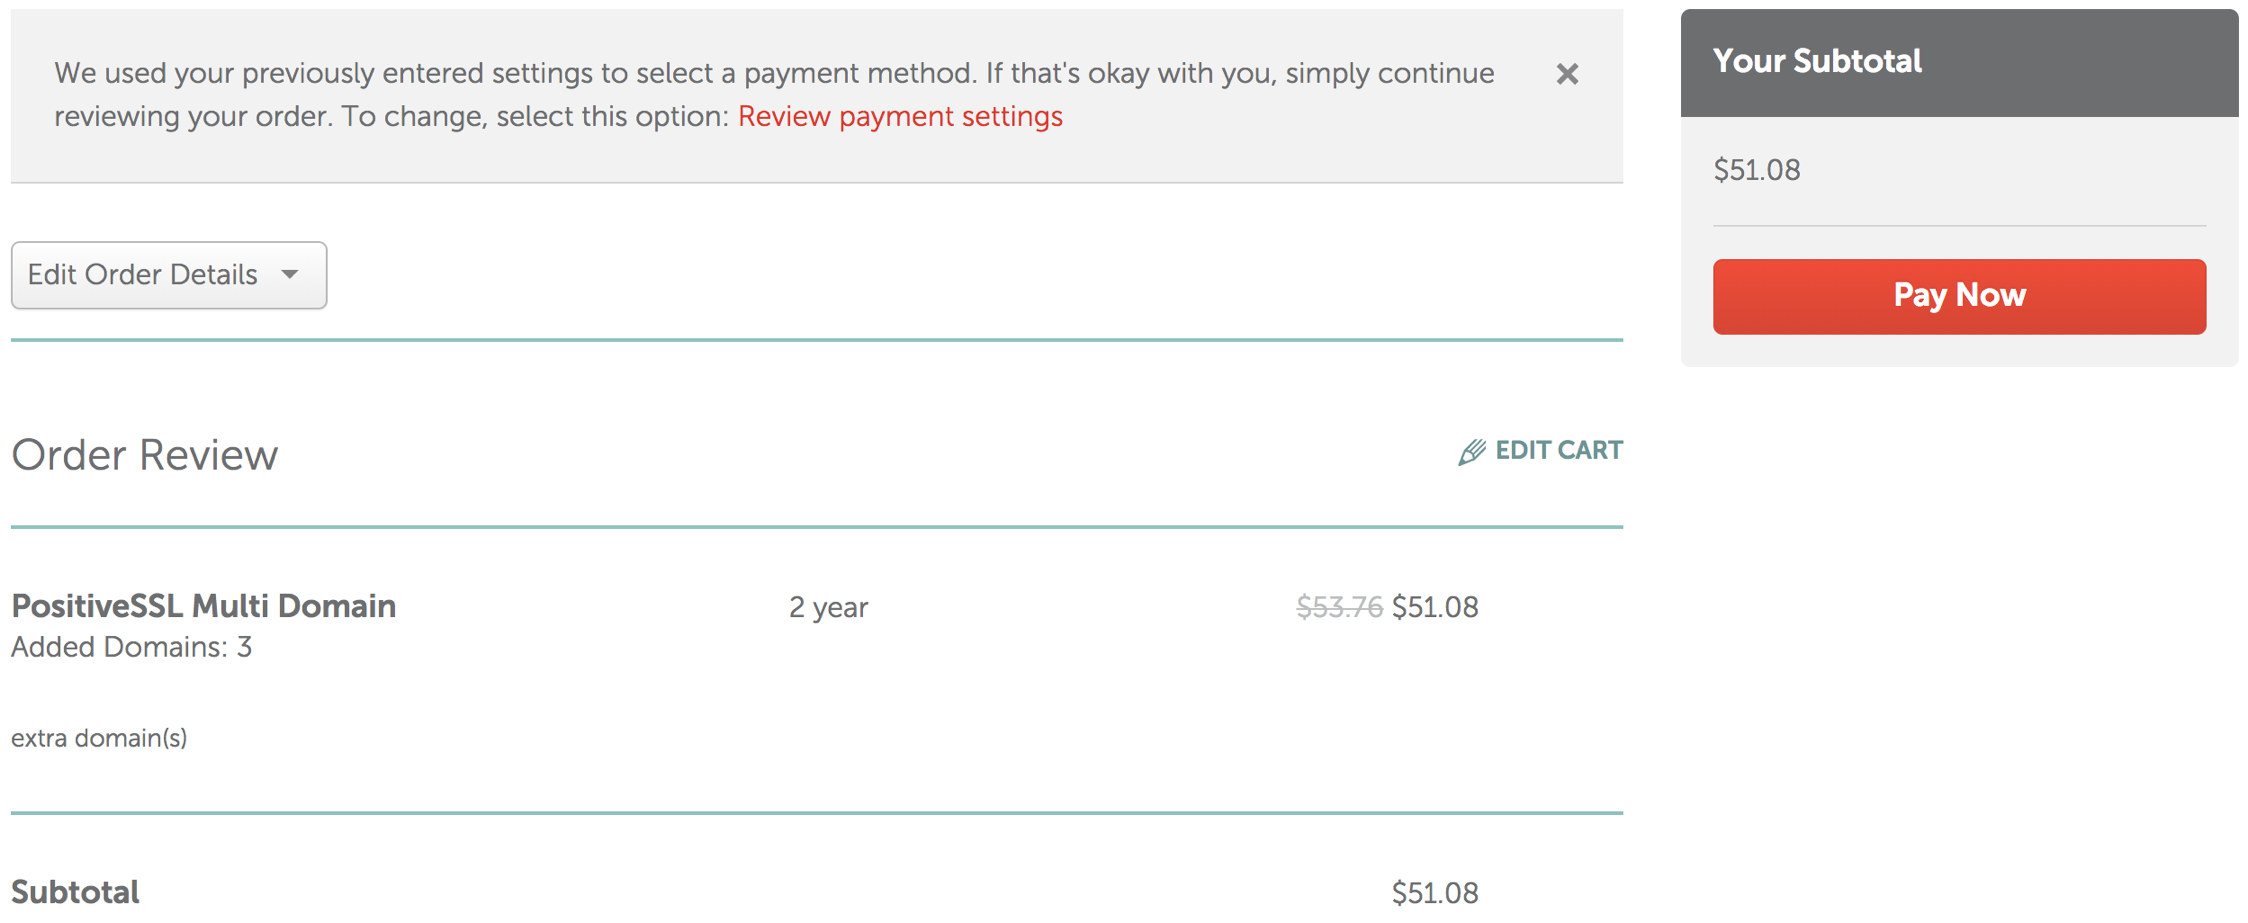
Step 3: Activate the TLS Certificate - PositiveSSL Multi-Domain
- Click the Manage button in the Purchase Summary window.
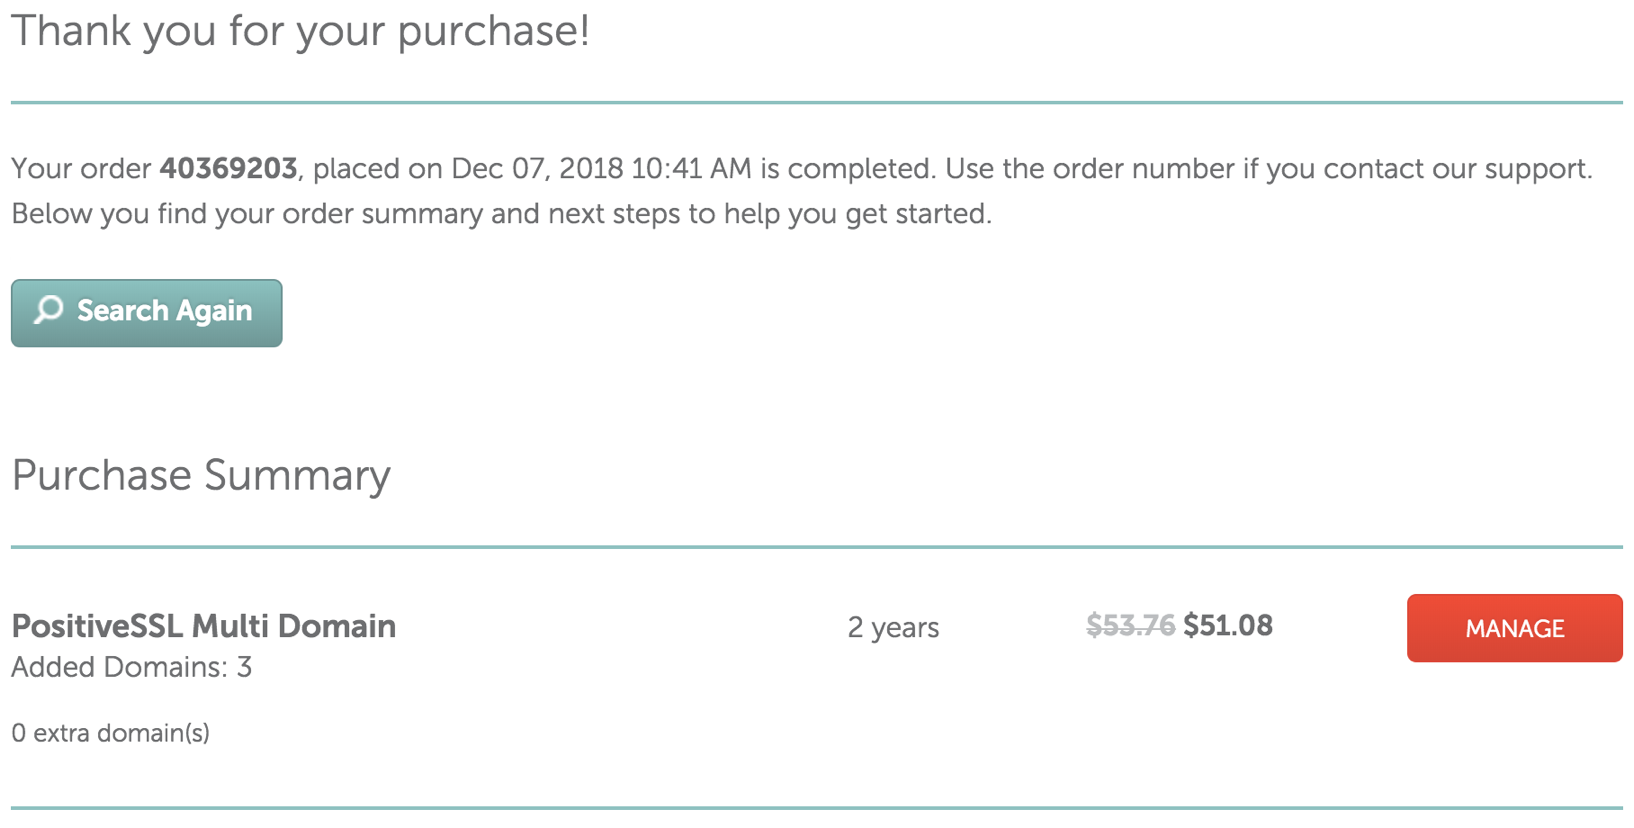
- Click the Activiate button to start the activation process.
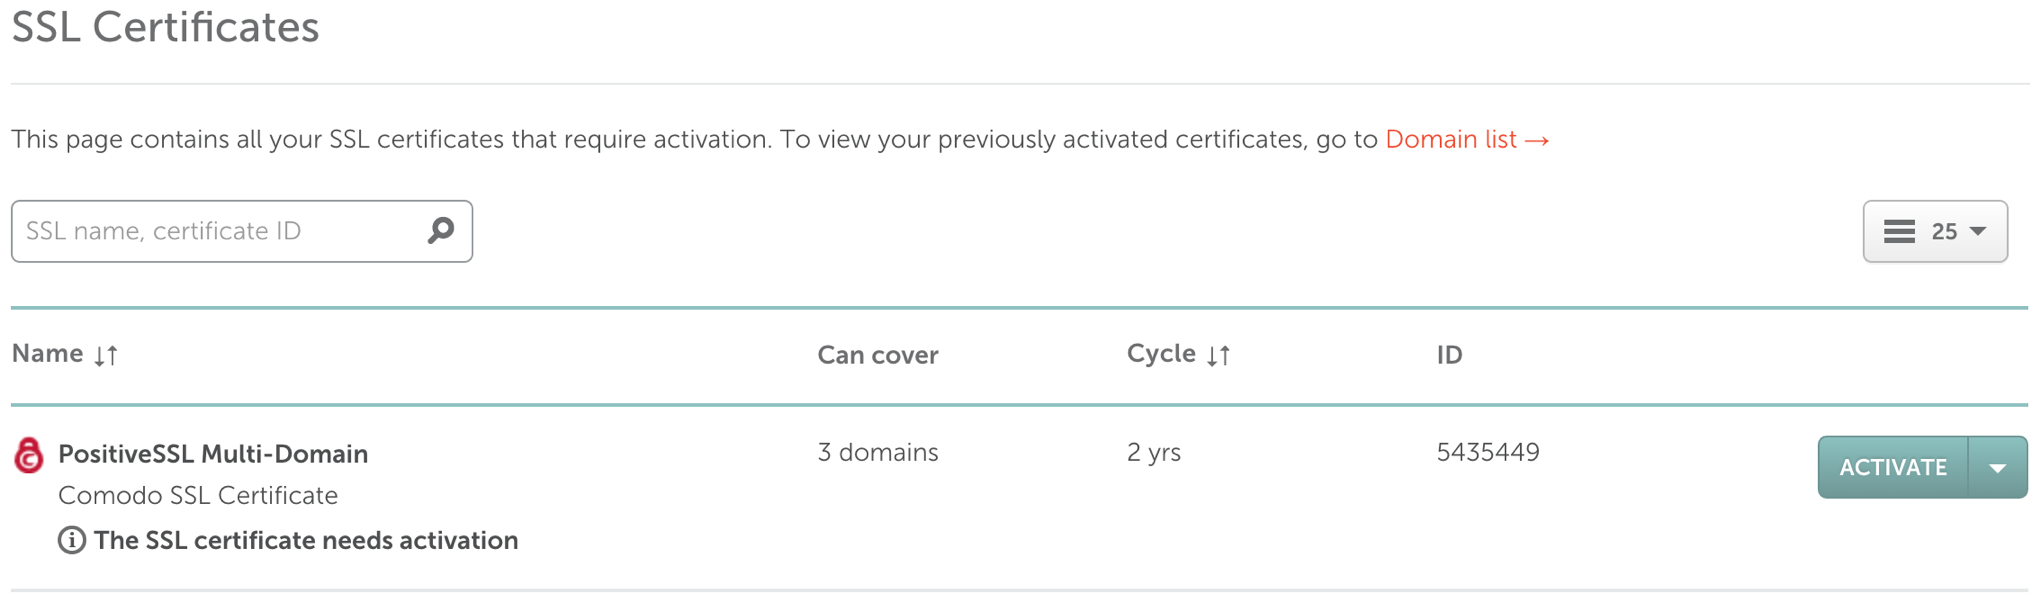
- Step 1: Enter CSR & domains PositiveSSL Multi-Domain will cover
- Copy and Paste the content from the .CSR file into the Enter CSR field. The Primary Domain field will populate with the domain name.
- Enter the additional domain names in the Add 2 more domains fields.
- Click the Next button.
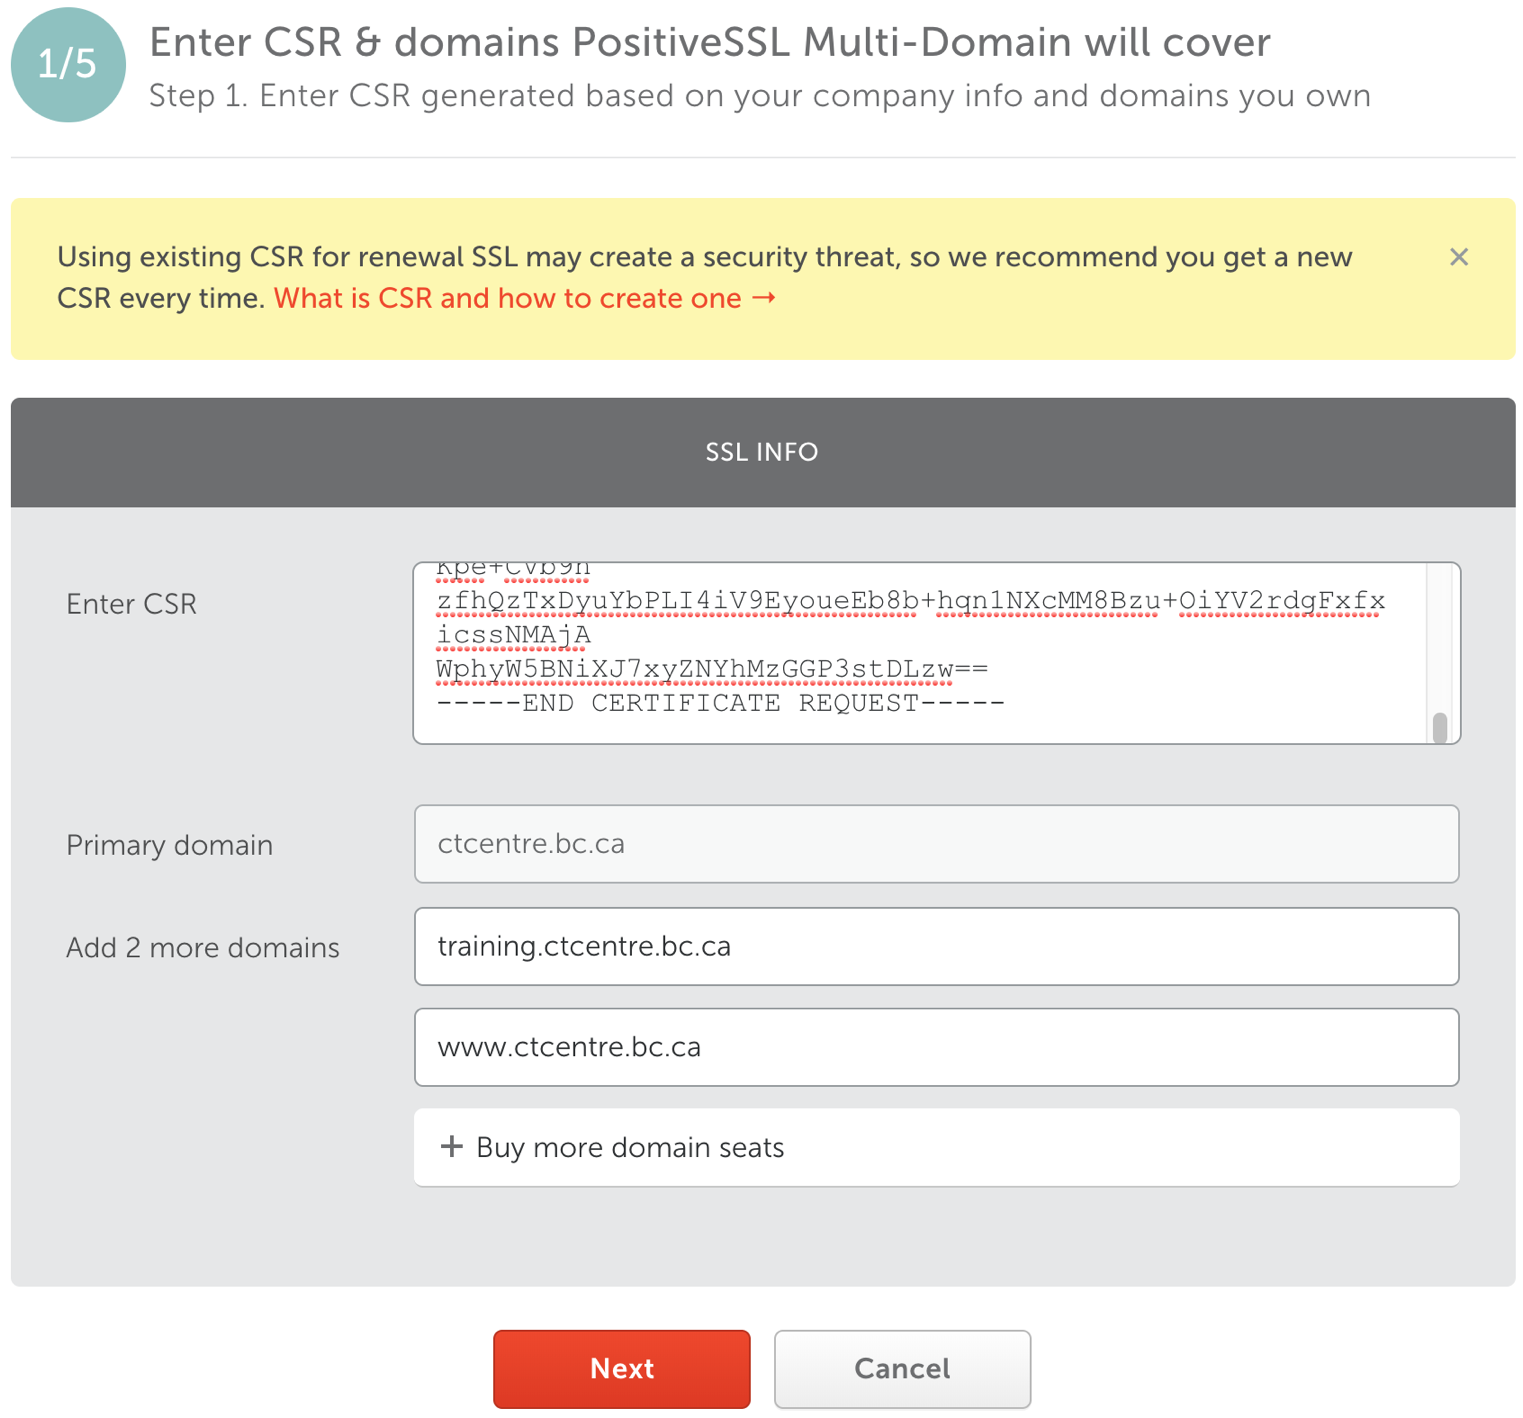
- Step 2: Check PostiveSSL Multi-Domain CSR info
- Review the Domain names.
- Select the web server. This is usually set to Any other server (cPanel, Apache, NGINX, etc.).
- Click the Next button.
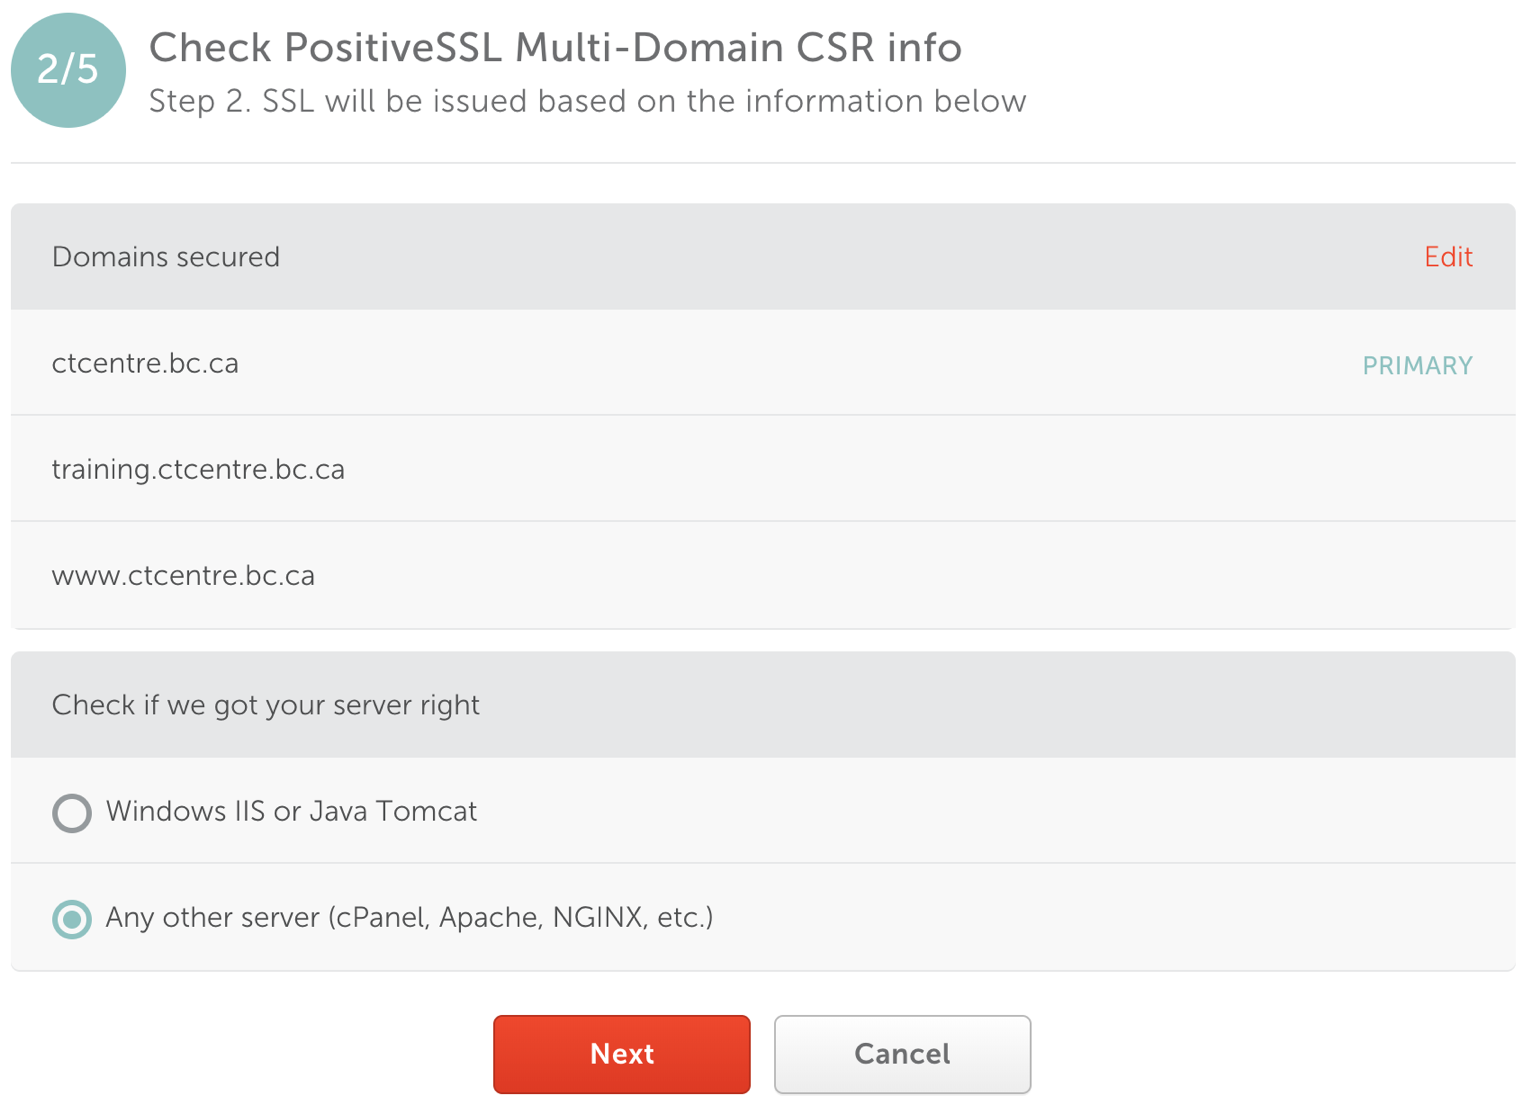
- Step 3: Confirm that you own the domain
- Choose the Approver emailfrom the drop down for the domain.
- Check the Same DCV for all domains box. This will ensure one email goes to the client to approve all three domain names.
- Select the same email Approver email address for the remaining domains.
- Click the Next button.
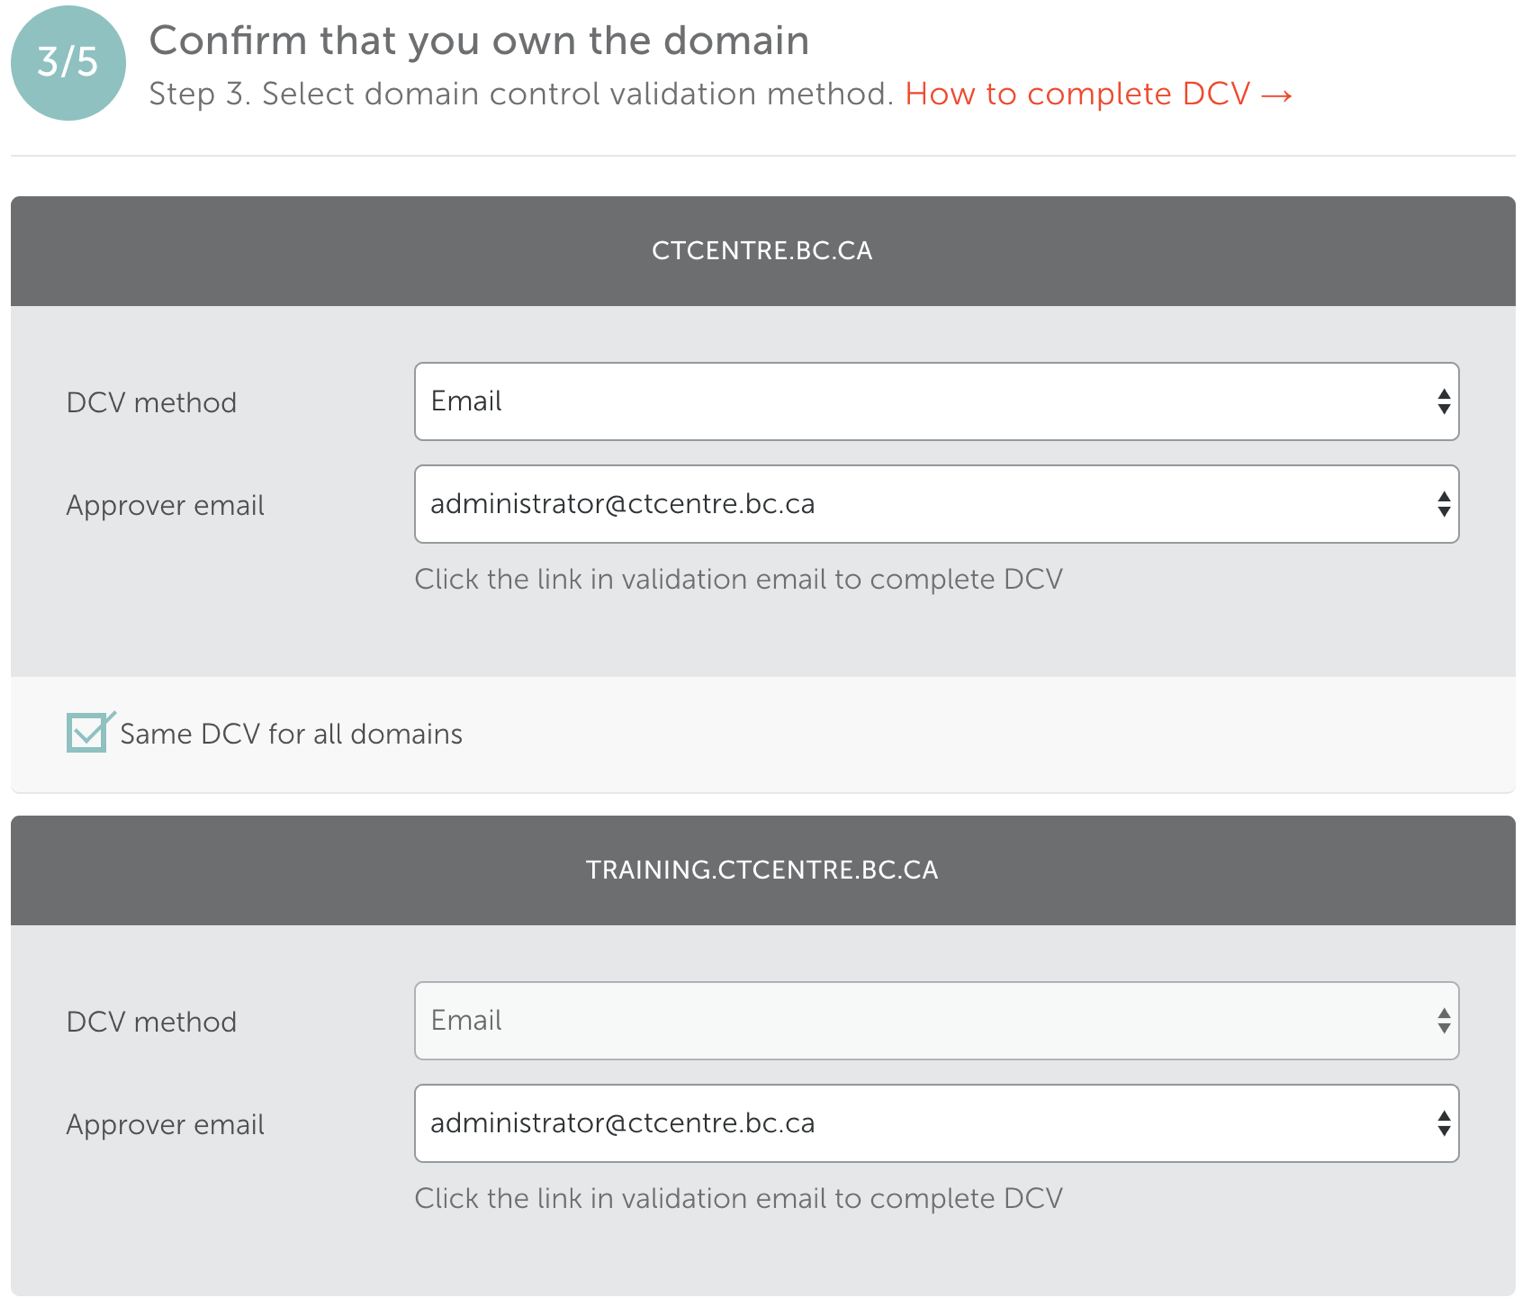
- Step 4: PostiveSSL Multi-Domain contacts
- Edit the Admin email to be certificates@artsman.com. This is the email the .crt file will be sent to.
- Click the Next button.
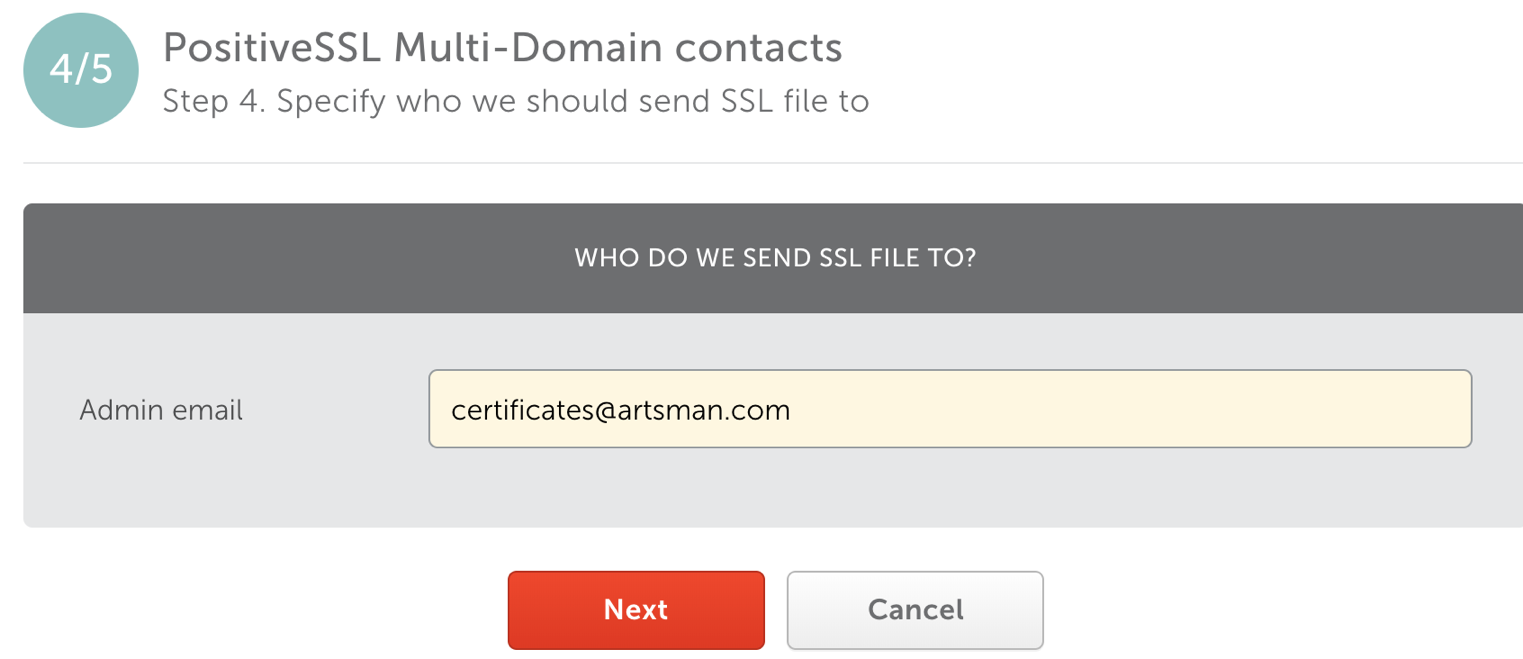
- Step 5: Review & submit
- Review the TLS details to ensure they are correct.
- Click the Submit button.
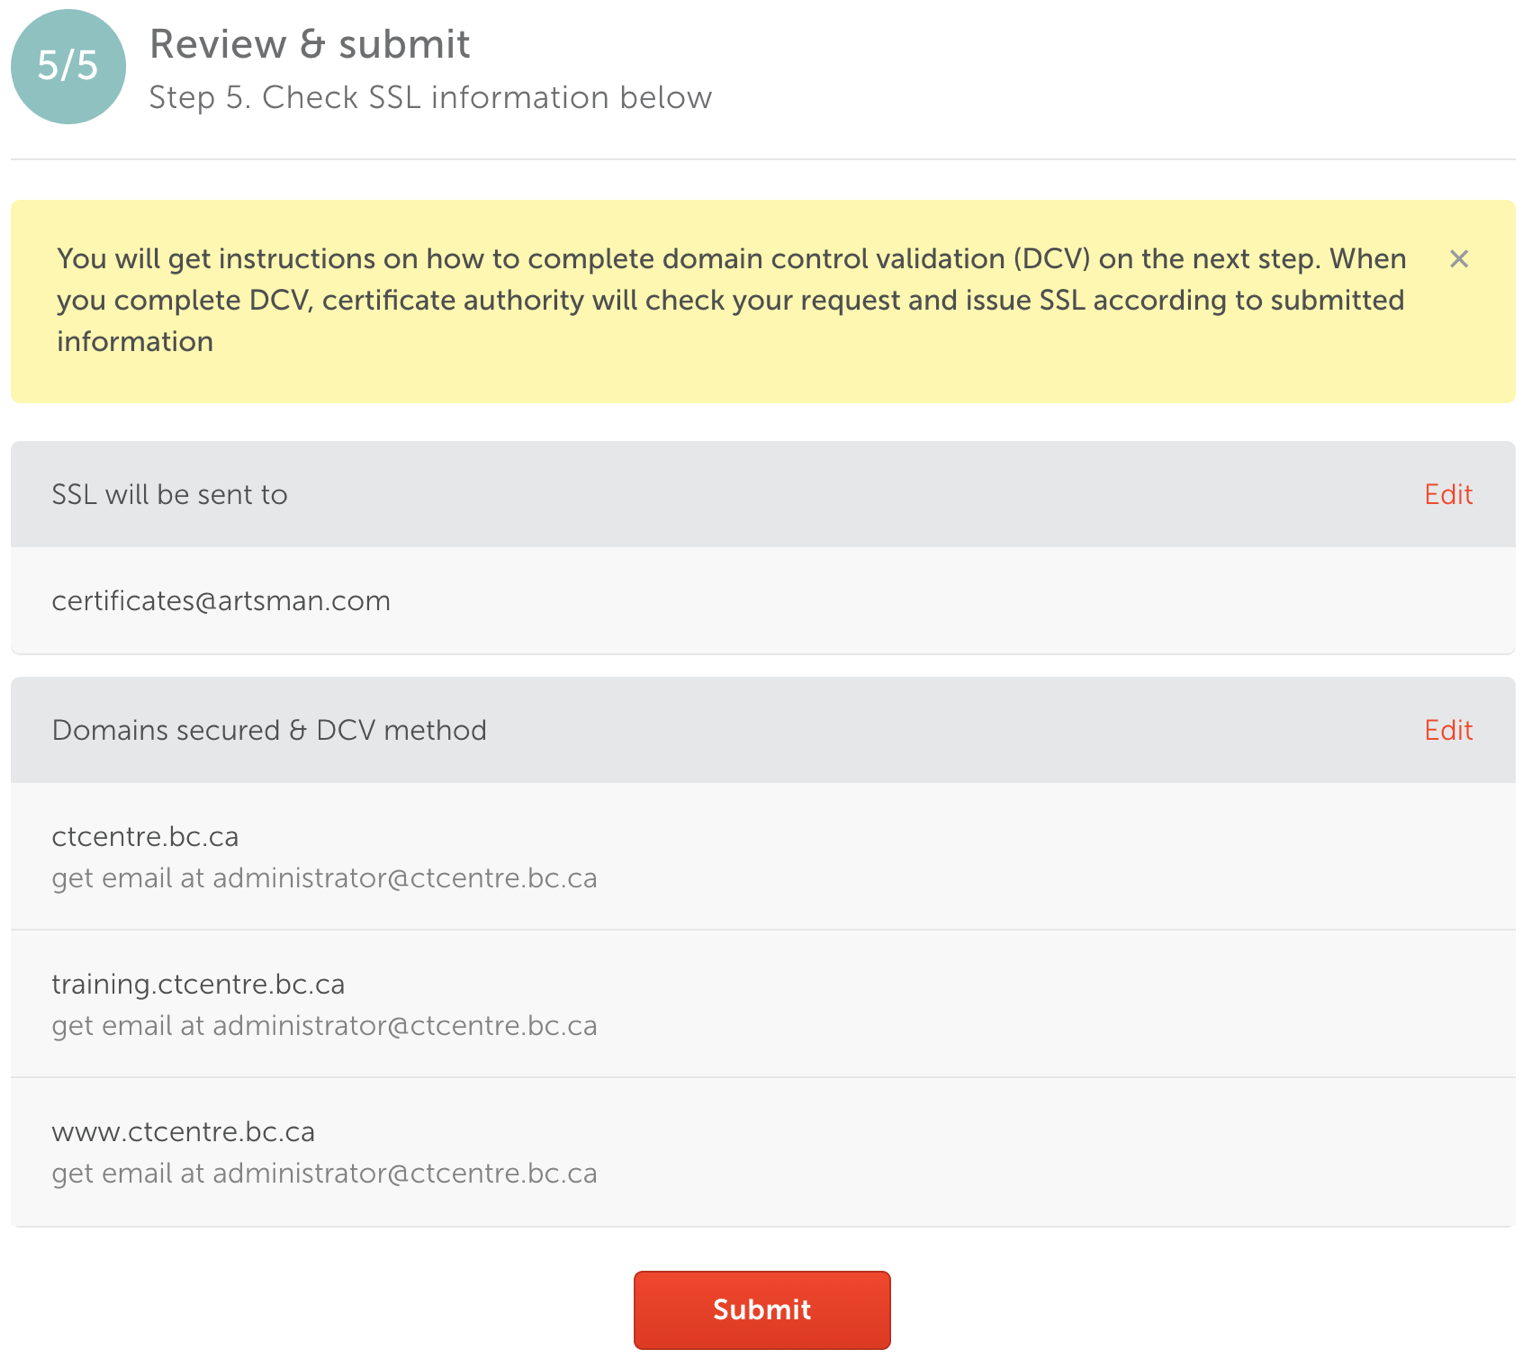
- Copy and Paste the Certificate Authority's ID and Namecheap Order ID details along with the date into the Daylite Order/Install TLS Task.
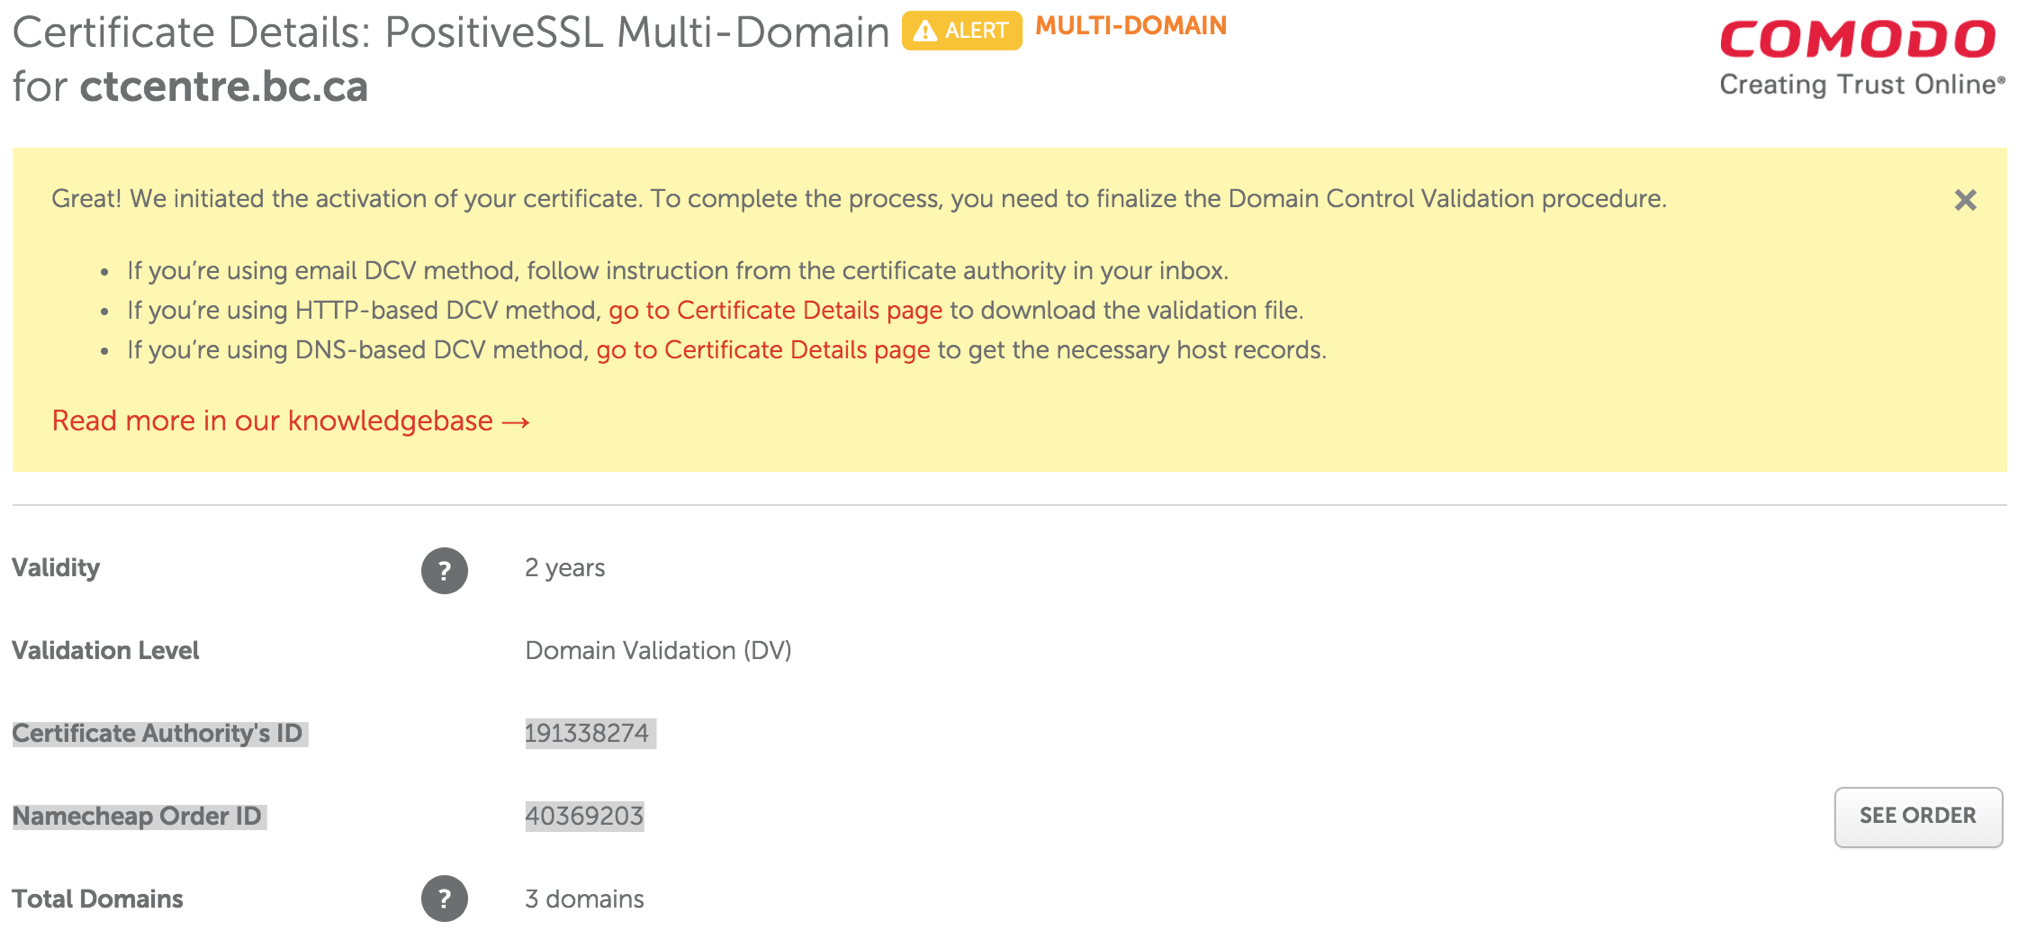
Submitting CSR for TLS - GeoTrust
|
Geotrust TLS certificates are no longer used - refer to Name Cheap TLS Certificates instead. |
Step 1: Access GeoTrust's Vendor Portal
- Access GeoTrust's vendor portal via
- Enter user name artsman
- Enter password refer to Doug, Darwin or Dave for the password
- Click Log on
Step 2: Place Order for Certificate - QuickSSL Premium Enrollment
- Click Order Certificates in the left side navigation bar.
- Click Place Order for the ACTIVE QuickSSL Premium contract.
- Validity Periods
Select Validity Period (1 year, 2 years, 3 years, etc) based on what the client purchased in their signed Letter of Confirmation (LoC). Wait for the window to reload before proceeding.
- Renewal
Select Initial Order or Renewal. If renewal is selected, they MUST BE renewing a previous TLS Certificate that was issued from GeoTrust.
- Competitive Replacement
In most cases, select No, I can't take advantage of this offer. Select Yes in the case where we would be renewing an existing tickets.myvenue.org TLS Certificate that was originally issued from another Certificate provider other then GeoTrust.
- Special Instructions
Leave this field empty.
- Click Continue
- Open up /Library/Apache2/bin/server.csr in BBedit.
- Enter CSR
Copy the entire contents of server.csr file (including the BEGIN CERTIFICATE REQUEST and END CERTIFICATE REQUEST tag lines) into Certificate Signing Request field.
- Click Continue
- Leave the Add Additional Domains field blank.
Adding to this field will increase the cost of the TLS Certificate.
- Click Continue
- Verify Server URL
Review information on the page for accuracy.
- Click Continue
- Site Administrator Contact Information
Enter in Site Administrator contact information from the clients information as per instructions
- Technical Contact Information
Enter in Technical Contact information as:
First Name: David
Last Name: McKeonoe
Title: Director of Development
email: as per current email
Phone Number: 403-536-1214
- Click Continue
- Approval of Your Certificate Request
Select Approval Email address from the clients information as per instructions
- Click Continue
- Order Summary
Review information on the page for accuracy.
- Check the box "I agree to this Subscriber Agreement" at the bottom of the page.
- Click Submit Order
Inform the AMS Installer or the client contact that the TLS Certificate has been submitted and is now awaiting for their approval.
Approving TLS for Creation
The approval of the TLS Certificate is performed by the client. The client is required to reply to the email sent to them by Comodo in order to continue with the process.
The process for approving the TLS Certificate for creation is as follows:- Client (Site Administrator Email Address) will receive the 1st email from Comodo (orderprocessing@geotrust.com) indicating that the TLS Certificate has been submitted for creation.
- Client (Approval Email Address) will receive the 2nd email from Comodo asking for approval for TLS Certificate to be created at the specified authorization email address provided to approve the TLS Certificate.
- Client (Approval Email Address) will respond to 2nd email from Comodo approving the creation of the TLS Certificate by clicking on the acceptance link within that email.
- Upon approval from the client to create the TLS Certificate, Comodo will create the TLS Certificate.
- Client (Site Administrator Email Address) and Technical Contact (certificates@artsman.com) will receive the 3rd email from Comodo containing the actual TLS Certificate information.
The final email may arrive anywhere from 10 minutes to 12 hours after email #2 was accepted by the client (Approval Email Address) depending upon the next processing cycle by Comodo.
If the 2nd email is NOT received by the client at the Approval Email Address, it may be caused by that email account is not working correctly. Test to see if the email account they have provided to use for the Approval Email Address is able to receive 'normal' emails.
Creating CRT Certificate Files
After AMS has received the TLS certificate email from Comodo that contains the Web Server Certificate and the Intermediate-CA Certificate, AMS will make the TLS certificate files to put it into the Theatre Manager Server on the Web Server for the client. The following steps outline how to create the remaining files that will complete the TLS certificate installation.
Step 1: Create the certificate CRT file
- From the Comodo Order confirmation email, move the .zip file to the desktop.
- Extract the .zip file.
- Open the two files in the extracted folder using BBEdit.
- Copy the entire contents of the .crt Web Server Certificate (including the BEGIN CERTIFICATE and END CERTIFICATE tags).
- Paste the content into an new BBedit document.
- Copy the first bundle in the .ca-bundle file (from the first BEGIN CERTIFICATE to the first END CERTIFICATE tag). Do not include the upside down question mark.
- Paste the content on a new line under the .crt.
- In BBedit, go to File >> Save As...
Location: Desktop
Filename: server.crt
Line Breaks: Unix (LF)
Installing TLS Certificate
Installing TLS Certificate For Theatre Manager Server
Placing the TLS Certificate.
The Theatre Manager Server checks for updated approximately every 30 minutes. During this process it also looks for new TLS Certificate files. Placing the TLS Certificate files in the correct location on the server will ensure the next time the Theatre Manager Server checks for updates it pulls down the new TLS Certificate. This works successfully as long as the client is not blocking the connection or has automatic updates turned off.
- SMB to the certificates folder on smb://smb.west.artsman.com.
- Open the folder with the domain name matching the TLS Certificate.
- Create a new folder titled Replaced followed by the date. An example would be Replaced20210714.
- Drag and drop the content of the folder into the new replaced folder.
- Copy the TLS Certificate files created including the .csr, .key, .crt and .pem files into the certificate folder.
Manually placing the TLS Certificate.
- Gain access to the Web Server computer. This will be the machine in the DMZ if a DMZ is present.
- Open the Theatre Manager Server in a browser by navigating to 127.0.0.1:3012
- Select the Configure tab at the top of the window.
- Scroll down to the Transport Layer Security (TLS) section of the page.
- Drag and drop the TLS Certificate .crt, .key and .pem files onto the highlighted section.
- Click Save at the bottom of the page.
Testing TLS Certificate
Once the TLS certificate files have been places and Nginx restarted, the certificate can be tested.
Use Qualys TLS Certificate Test to test the TLS Certificate.
Alternate method using firefox: Testing the TLS Certificate
- Open the Firefox browser.
- Enter the full site address in the address bar.
This would the https://tickets.yourvenue.com/TheatreManager/1/login&event=0.
- Click enter on the keyboard for the site to display.
- Click the lock next to the address in the address bar.
This should be done after the site has finished loading. A box will appear indicating the status of the TLS Certificate.

- Click the More Information button. The Page Info window will open.

- Select the Security tab in the Page Info window.
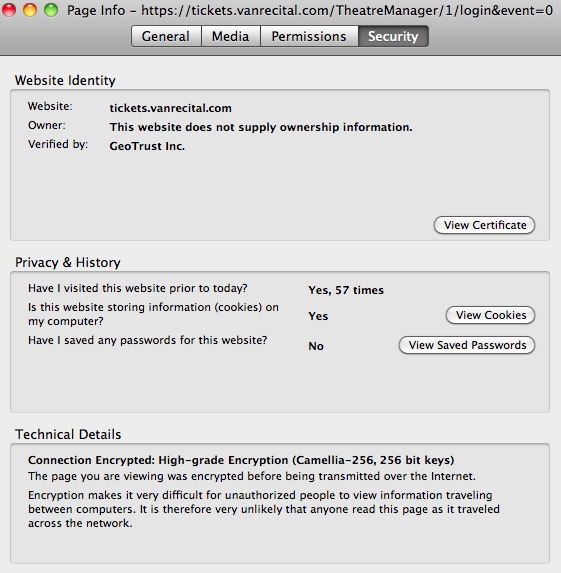
- Click the View Certificate button. The Certificate Viewer will open to the general tab.
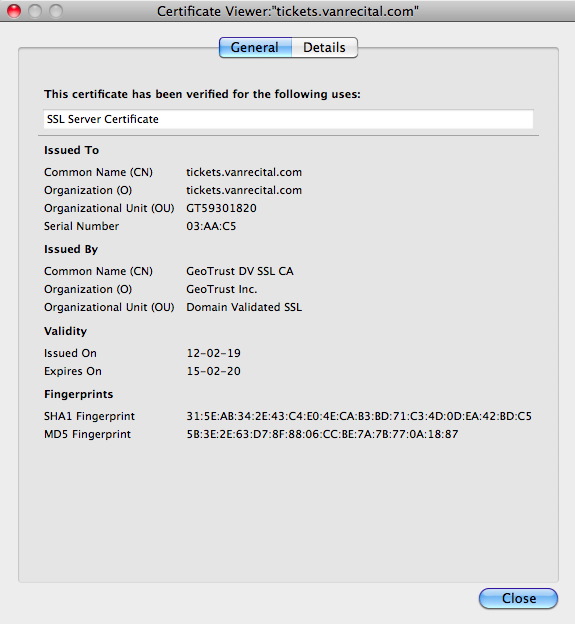
- Review the Issued On and Expiry Date in the Validity section of the viewer. If the TLS certificate has been installed correctly the date should be equal to the number of months purchased for the certificate
- Go to http://www.sslshopper.com/ssl-checker.html.
- Enter the domain the TLS certificate was created for (exp. tickets.myvenue.com).
- Review the details to ensure there are no broken red arrows in the chain files.
A broken red arrow means the server chain is not correct. This is the chain added to the .crt file after the certificate. It is either not being read or is not up to date.
Troubleshooting TLS Certificates
TLS on Router
The TLS certificate associated with the ticketing site may not always be the only TLS certiificate in the network. The TLS certificate in Nginx may have installed correctly without error or warnings. The web pages appear correctly within the network. However, when attempting to access the site externally, the web pages do not display. The web site looks like it may be pointing to IIS or another application. The network setup will appear correct and everything on the Web Server machine is running. Reviewing a test of the TLS Certificate does not display the Comodo Logo.
In this situation an TLS may be built into the router. The IT person will need to locate the TLS Certificate and disable it.
TLS doesn't appear on HTTP
When visiting the ticketing site the address starts with http rather then https. The style sheets are missing and the buttons do not appear.
This is caused by a missing S from https in the Web Server URL field under the Director tab of Setup >> Company Preferences.
The site can be accessed using https but not http
When accessing the ticketing site using http rather then https the Web Pages are not displayed. The ticketing site is replaced by another website, application or login. The link will not redirect to https automatically but rather needs to be altered to include the S.
Port 443 governs https by default. Port 80 is reserved for http. Some organizations use port 80 for other applications such as web mail. In cases like this all direct links to the ticketing site will need to start with https.
Coding Practices
Coding Styles/Methodology
Encapsulation
- Generally any specific SQL commands should be placed in PGSQLDAM or any other DAM that is being used. Avoid using direct SQL where possible. Exceptions can be made where performance is a concern.
- Put most ‘work’ methods in the main table classes so that they are accessible from all parts of Theatre Manager (Windows, Web, Reports, Future Features). If a query/table class requires the functionality it should inherit from the main table class and add appropriate fields to do so. For example, a method that calculates subscription prices is stored in tF_SUBSCRIPTION because that is the database table that stores the subscription.
Looping
- The For list.$line to list.$linecount step 1 form is generally preferred for loops for the best blend of efficiency and readability. While…End While and Repeat…Until are slower and should only be used when required. In performance sensitive areas the construct below is preferred.
If using this construct, at the end of the loop, you must do a 'set current list' as a guard action and the setting of the list must be in a reversible block.
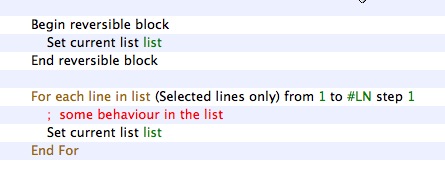
- Any long running loops should be nominated for conversion or re-factoring into SQL stored procedures if they perform any database access.
Method coding and placement
- One should avoid, where possible, putting behavior code in events under objects on a window. It is preferred to have a public or private method in the window class that an event calls, rather then putting the code directly under an event. This allows for encapsulated functionality and allows the behavior to be called for other purposes. For example, a button that opens the patron window should have the same code whether it opens from a toolbar button, or a push button -- This would be located in $clickBtnOpenPatronWindow of the class and called from both the push button $event and the toolbar button $event.
- Avoid writing code in window methods where possible. Window method code should only contain interface and interaction. If and code deals with database, the approach to be used is:
- to put that code into a table class
- invoke it from the window class by doing 'do list.$doMyMethod(parameters)'
- A comment in all methods is essential. At the very least a comment section should include what the method is expected to do based on what inputs.
- When altering existing code within a method, the developer should put a comment indicating what version the code was altered in as well as the initials of the developer altering it. E.g. ; V90000 DM (Version 9.00.00 [D]avid [M]cKeone)
Parameter Passing
- Throughout TM, the TMObjs.$makeparamrow() and TMObj.$loadparamvars() functions are used for passing parameters between objects. This method is favoured over passing individual parameters to a top-level class, especially when a large number of the parameters are optional. See wModeless.$construct for an example.
- When over-riding any method:
- always put the parameters in place that the superclass has:
- in the same order (verify the order always)
- document with the same parameter definitions
- copy whatever documentation from the superclass and augment with why you are over-riding the class if it is not obvious
- always put the parameters in place that the superclass has:
- All parameters are to have an initial value specified for default case. 0, kTrue, Kfalse or #NULL is acceptable if no value is wanted
Table Classes (SQL database)
- All foreign key relationships should be in $buildChildRecordList of the appropriate main table class. E.g. All relationships for the F_CLIENT database table are in the tF_CLIENT table class.
- All F_APPLICATION replaceable variables (indicated by a ‘g’ prefix). Should be specified in the $getReplacementSelectNames. Use $getReplacementSelectNames where possible:
- To avoid setting values in the omnis list - for performance reasons
- To add functions to replace gVars, especially where there may be multiple parent records to a relationship (eg sold by, changed by, printed by all connect to employee)
- To obtain key customer data like Primary Phone, email address and other data that varies depending on the outlet (department) of the employee who is logged in. Example: the primary address for patron 1 made be different for outlet A and B
- In reports so that there is limited record looping in the detail section of report (again for performance)
- Any validation on a table should be done in $verifyRecord of the main table class for that database table.
Tidying Up Code
- Remove unused variables from the Local variables
- Remove unused variables from the Instance Variables. If a variable is not used in a superclass class, but is used in a number of subclasses, then in the superclass, in the construct, after the quit method, calculate the variable as itself so it will not show up as unreferenced.
- Check the class variables and see if they are used and remove if not
In Code Documentation
Class Documentation
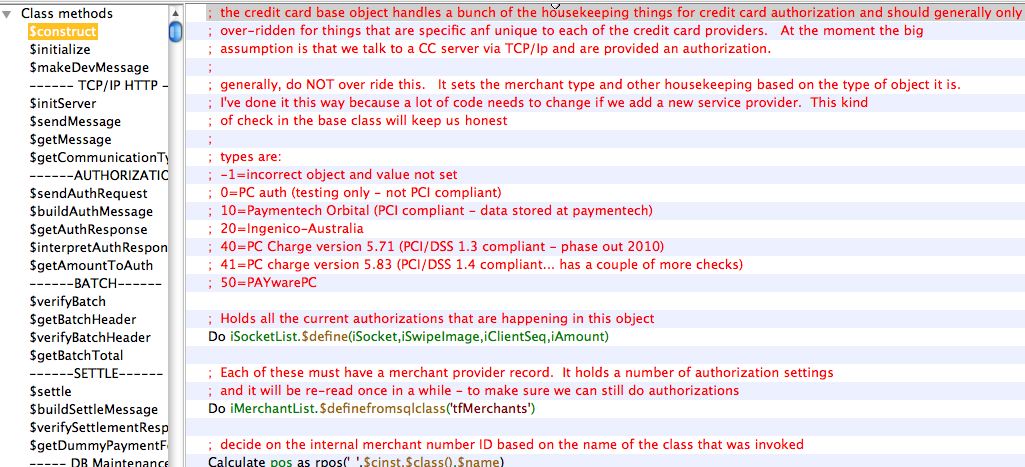
Method Documentation
- a description for each parameter must be entered in the upper area
- In the method, at the top, is a description of the purpose of the method
- The parameters are repeated in text format as part of the method so that when a method is over-ridden, the parameter description will be copied into the over-ridden method.
- If there is an expected return value, document those at the top of the method
Also indicate if this method should never be over-ridden except in rare cases, could be overridden, or should be overridden.
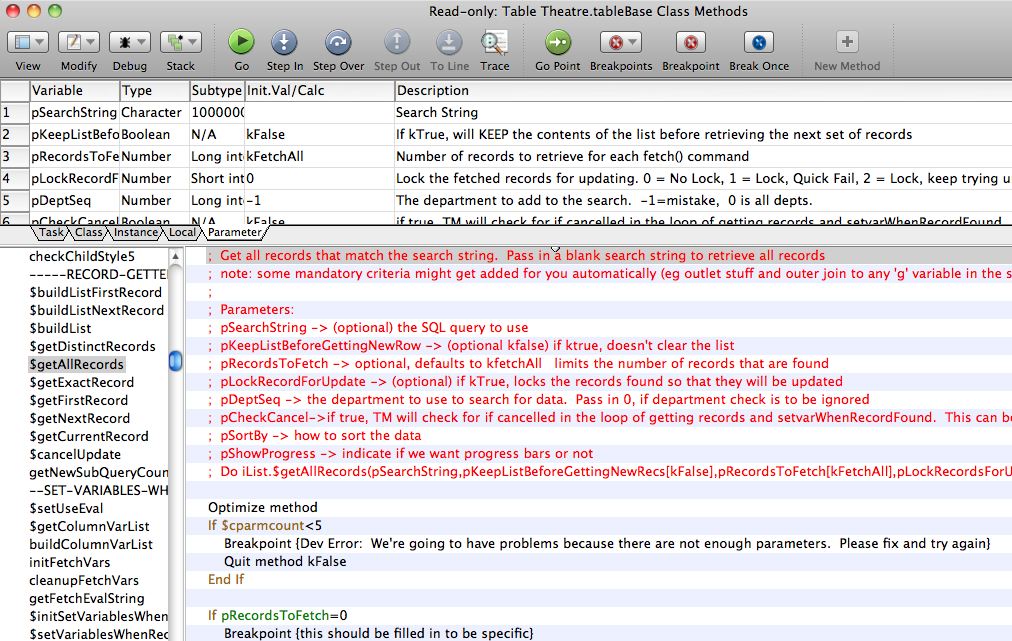
Schema Documentation
This is one of the most important setup steps when creating new data base fields.
Schemas are to be documented in three places.
File Class
First, all database schemas will have a Studio ‘File’ class like the example below. The description in this area is for programmer assistance. It will show as tooltips to describe the field when looking it up for coding purposes.
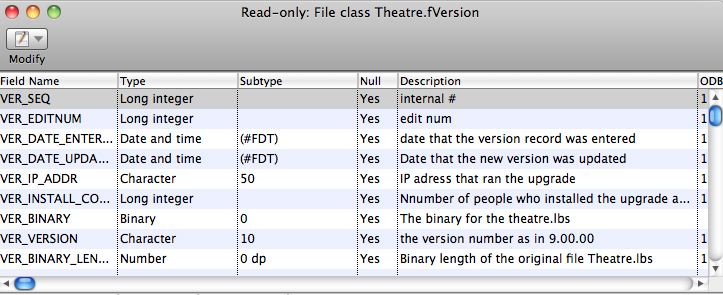
Schema Class
Most file classes have a corresponding schema class. The schema class is what actually is used to describe the database fields and interact with the database. The field names, types, subtypes, and descriptions should be copied from the file class. This is also for programmer tool-tip quick documentation
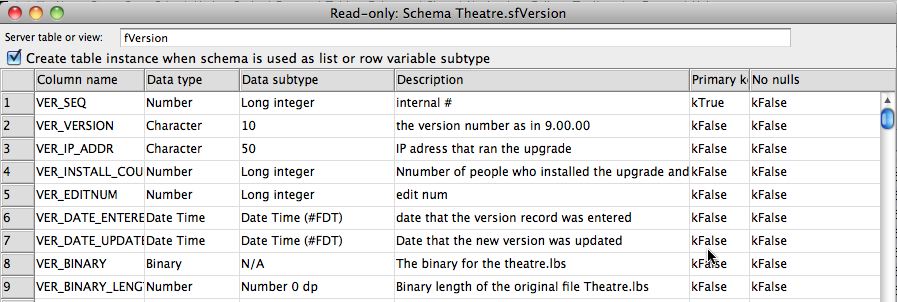
Data Dictionary
Once the file and schema classes have been defined, customer friendly field names are to be placed into the data dictionary. This is accessed off the Developer Menu->Data Dictionary.
Customer friendly descriptions are to be defined, along with a number of other data attributes as follows:
- Criteria Name (medium length name of the field for help)
- List Heading (short description of the field for the top of list columns wherever the field is used)
- Description (the tool tip to be displayed for the user when they hover over the field on any window)
- Usage flags for visibility and other options in Theatre Manager
- Justification for columns in lists
- Criteria level for use as a search field in reports and mail lists
- Lookup table - if the field is an enumerated data type and the user is to select 'is one of' the values from the list
- Search Sub Window which defines the sub window class to be used in list windows when this variable is used a search field
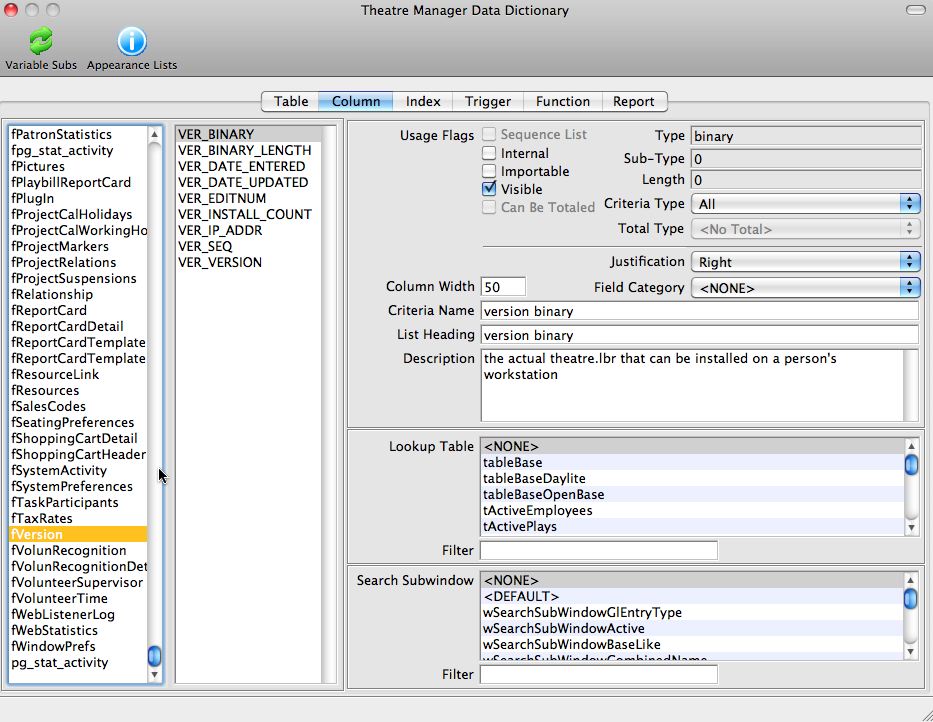
Enumerated Type Documentation (codetables)
- FC_SEQ is the lookup number stored in a SEQ key in the database
- FC_RESULT1_NAME is the description displayed to the user
- FC_DEFAULT set to true for the item that is the default entry field
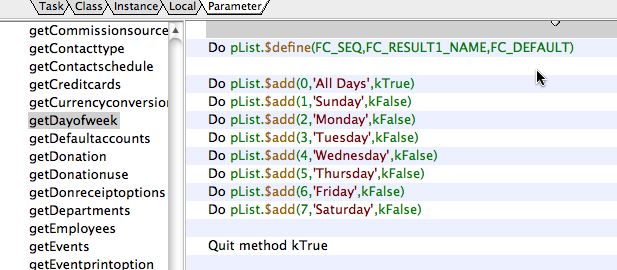
Within the 'oCodetables' class, there are a number of getters that will load up any one of the tables into your object.
Naming Conventions
Class Naming Conventions
| Class Type | Prefix | Notes |
| Code | c |
|
| File | f or F |
|
| Menu | m |
|
| Object | o |
|
| Query* | q |
|
| Remote Task | rt | |
| Report | r | |
| Schema | s |
|
| Table* | t |
|
| Task | none |
|
| Toolbar | T_ | |
| Window | w |
|
*Query class names should match the corresponding table class. E.g. tClient and qClient.
Data Dictionary
- All file classes (database tables) used for the Theatre Manager database must be assigned a unique prefix in the Data Dictionary. For example, F_CLIENT uses C_, F_PLAYSEATS uses PS_. There are several essential parts of Theatre Manager that rely on this naming convention for automatic foreign key determination.
- All primary key records are named with the prefix for the file class (database table) followed by SEQ. The primary key for F_CLIENT (C) is C_SEQ.
- All foreign key records require the use of the unique prefix within the name, as well as the suffix _SEQ. For example the F_CLIENT (C) foreign key on the F_PLAYSEATS (PS) record is PS_C_SEQ.
- If the user should not ever see a column, then it should be marked as internal. It is not required to enter a description for internal fields.
Method Naming Conventions
- Methods are named with camel case beginning with a lower-case letter. E.g. $myMethod
- A method used for a button behavior should begin with $clickBtn. E.g. $clickBtnBuyTicket
- getter methods should start with $get (eg $getCurrentColour)
- setter methods should start with $set (eg $setCurrentColour)
- group similar function methods under a dummy header method with a name that starts with some ---- eg '---- Window Open Methods ----'
Variable Naming Conventions
However, if is a parameter, local, or instance var that is meant to track a cope of a database SEQ key, then call it what it is. eg pM_SEQ means that the parameter we expect is an M_SEQ key. This helps with variable assignment.
All database names will be named using underscores and in UPPER_CASE to make an obvious differentiation between the database and other task/class/instance/local variables.
Scope / Type |
Prefix | Convention |
Task |
t |
|
Class |
c |
|
Instance |
i |
|
Local |
none | Developer preference, prefer myVariable rather than MyVariable. |
Parameter |
p |
|
Constant |
k |
|
Proctected Classes
The architects will monitor the VCS activity on these classes by running checkin/checkout reports for any violations of this policy.
Credit Card Processing
Developers should be aware if they are modifying anything that can impact or change what we do with sensitive customer data, a senior developer must review it. Keep the PA-DSS guidelines in mind when developing in these areas is key, and you can review the Theatre Manager install documentation under PCI compliance.
|
A change that may affect credit card processing needs to be reviewed carefully and is subject to the rules of Versioning Methodology |
|
When testing credit card functions, never use real card data, whether from customer or personal. We have test accounts and test credit card numbers that can be used to verify functions or issues reported by the user in the credit card area. |
The following classes in the VCS are under the protection of the Senior Architect any potential changes to these classes need to be run by them first. These are the key base classes that affect credit card sales, refunds, exchanges, or storage of the credit card data.
- Any class with a name that starts with oCCAuthorize
- Any changes to the tfCreditCard table class that stores and encrypts data in the database.
- Any file, schema and table classes for ‘Merchant Setup’ such as fMerchant, sfMerchant, and tfMerchant
- Any changes to the wMerchant window
External Components
- Theatre Map - for displaying pictures on the screen. Changes to this library are handled through a test library that exposes all functions and methods.
- TMObjs - to improve performance on a small number of string related functions. Changes to this code are tested through an automated test library. See the systems architect.
- oWrite - a word processor purchased from Brainy Data. oGantt - the gantt chart display tool purchased from Brainy Data.
When a new eternal component is available, all developers will use the latest version on their test platform while coding to uncover adverse effects for sufficient enough time as determined by the senior architect. Regression testing will also be performed prior to release by SQA.
Superclass objects
- tableBase – the base table class for all database i/o
- any class that starts with ‘wModeless’ (wModeless, wModelessList, wModelessEntry, etc) – these are the 4 or 5 key windows that control and manage all GUI interaction and record i/o.
- any class that starts with ‘reportBase’ as they look after reports
- the oQuery and oQueryGroup objects as they are used to pass around an SQL query between objects.
- oStringFields - which handles specialized string manipulation
- oEditCheck - which handles special validation for certain kinds of data
- the oSecurity object that handles the Role Based Access Control
Web Listener Objects
The object pertinent to web listeners are:
- Anything that starts with 'oWebCom' - each of which represents a unique API to the database from the web
- wWebSales - which is the GUI interface to the web component
- rtWebSales - which is the remote task started every time an end user sends a URL to the apache server.
The web sales listener can only respond to traffic sent to it via the nginx module. - cWebSales - the broker for transferring messages to/from the interface and any instance of a web object that was created
Sensitive information in Code
- When the sensitive data is stored in the database (like user ids for logging in, or credit card numbers), it will use high encryption such as AES256 or better. Any seeds or salted keys will also be encrypted using some such mechanism and stored as a static variable inside the database or application.
- Any data to be transmitted from one machine to another:
- shall use the most recent high encryption transport technology (currently TLS 1.2 or 1.3) and
- shall not use any encryption found to have been compromised (SSL1 through TLS1.1 etc)
- Any key, user id, or encryption salt that must, by necessity, be stored in the application shall also be encrypted as a static variable and decrypted before use during each run of the application and/or of that method so that keys rarely exist even in memory in unencrypted form.
- Any un-encrypted key should be in local variables so that they are destructed automatically at the end of the method. This constant decryption and discarding of keys, salts, logins, and credit card data should minimize the possibility that it may exist in real memory, or even in virtual memory
- Never use real credit cards to test credit card processes in the test environment. Use the supplied test cards and accounts that are provided by the test merchants.
Upgrade Methodology
- Each version has a Steps and Update method.
- E.g. For version 8.24.xx there are methods called “Steps 8.24.xx” and “Update 8.24.xx”.
- It is expected that each upgrade performed in Update has a matching step in Steps.
- There is also a method called 'versionUpdates' that adds the update step to a list. This must be set for the upgrade to be invoked
- All changes to the file fSystemPreferences must be made in 'addSystemPreferencesFields' as these particular fields are sensitive and must be set up prior to login or creating other upgrade steps
- All other new fields or tables are established in 'addAllNewDBFields' which is done before any of the update steps are run. This ensures the database consistency before any steps begin
Vulnerability Awareness/Training
If any site reports a threat that may affect security, a project will be created in Fogbugz to deal with testing where it impacts Theatre Manager.
- postgresql Always check for the current production version of postgres and see if there is a new release. Releases typically are about once per quarter. When there is a new version, then make sure to read the release notes to see if there are
- bug fixes beneficial to Arts Management
- and fix that specifies some security vulnerability
- Developers are always expected to be at the latest release for testing
- Nginx. The web server processes are dependant upon Nginx and PCI compliance scans generally identify old or outdated versions of Nginx. Check monthly to see if there are any new stable releases available. We do not use Alpha or Beta releases of Nginx, only mainline releases.
- Omnis Studio Check for an new releases or patches to the devlopment tool. Of special interest are bug fixes and/or any release that implements additional security in other areas like TLS, etc.
- macnn is a newsnet style mac based web site. It can usually be relied upon to report both mac and PC news (especially if it is negative)
- Credit Card processors such as
- Orbital regarding notices about Paymentech Orbital
- Refer to supported merchant processor page for other links
- OWASP - to review emerging internet vulnerabilities at least semi annually.
- per PCI requirement 2.2, periodically check NIST for reported security vulnerabilities and record pertinent ones in the vulnerability assessment for each component we use.
Data Importing
Data Review
Before you start anything
- Do not just dive in and start cleaning up data at the first file you see.
- Make sure you have all the 'current' data that will be used for importing.
- Review ALL the files for completeness and record counts.
- If there is 5,000 donations, and 90,000 patrons, verify with the client that this is the approximate number of records they are expecting. Perhaps their export process was incomplete and there should be 50,000 donations.
- Double check that you have all the starting information that you need to move forward and all of the initial questions answered. Nothing is worse then moving forward on what you think is best, only to find out later that you assessment was incorrect and you need to start over.
- Do not go into a cleanup and preparation process and start deleting any data or columns that you do not know what they mean. Even if they contain 'junk' data. That 'junk' data may turn out later to be a key index field that could be the primary link to 'this' file, or to 'another' file.
- If they provided 'sample' data, compare the files that they sent in the sample to the 'final' set of files. Did they resent the 'sample' files too. If so, great. If not, where are they and why not?
What to look for
- When you start reviewing all the files the first thing to look for is a 'key link' or a column of data that 'links' this record to any other records. Once you find the 'key link' to each file, the record connections and how the data relates to each other will become clear.
Create New Database
- Download the most recent "empty" database
- Restore the downloaded "empty" database
- Configure "TheatreManagerServer" to:
- Database name: "empty"
- Web Listeners: 1
- Classic Web Listeners: 0
- Housekeepers: 1
- Using the Theatre Manager application, log into the "empty" database.
- Setup >> Company Preferences >> Reports/Misc tab >> Set Maintenance Jobs to run from 8:00am - 5:00pm.
- Restart the "TheatreManagerServer" processes to read in the new Company Preferences settings.
- Setup >> Batch Functions >> Worker Jobs - Verify all jobs have completed successfully.
- Setup >> Company Preferences >> Reports/Misc tab >> Set Maintenance Jobs to run from 1:00am - 5:00am.
- Set the System Preferences
- Appearance - Canadian/USA spellings and descriptions (State/PST, Federal/GST/HST)
- Licence - Set the DB User Suffix
- Licence - Set the initial Customer License number
- Set the Company Preferences
- Company - set default contact company information (reference Daylite)
- Accounting - set general accounting information (Fiscal Year, Start Month, Store Year Start/End)
- Director - set Web Server URL and Custom Template URL for their web sales site. NOTE: make sure there is https:// in the URL when using port 443
- Donations - in the Donation Comments, replace
with client's organization. Set Government Website. - Canada: canada.ca/charities-giving<\li>
- USA: irs.gov/eo
- Appearance - set the Canadian/USA spellings (Color, Zip Code, State, Medic/Behavior, Social Security, Hair Color, Eye Color, Theatre, Venue)
- Reports/Misc - visit the client's existing website to gather icons and information for: TicketTrove icon, company overview, logo for reports (reference client's website), set Time Zone.
- Set Invoice Comments
- Replace
with client's organization in 2 places - Canadian/USA spellings for cheque/check
- Replace
- Set Code Tables
- Country - set the default country
- Province/State - set the default Province/State
- Payment Methods - Canadian/USA spelling for cheque/check
- Merchant Account
- Set to the proper Merchant Account Processor (refer to Daylite)
- Verify Primary URL's for authorization are set for Production and not Test mode
- Currency - Default this to the company's Country
- Miscellaneous
- Chase Paymentech - Connection Information
- authorize.net - Merchant Support Services, (877)447-3938, support@authorize.net
- Moneris - Moneris Support Services, (866)319-7450, eselectplus@moneris.com
- Elavon Virtual Merchant - Customer Service Center, (800) 725-1243, custsvc@elavon.com
- Bambora North America (Beanstream) - Customer Support, (888) 472-0811, support.northamerica@bambora.com
- Authorization and Settlement URL's - Connection Information
- Patron Account's
- Update the Master User and Web Listener patrons to be in the correct city/province with company name
- Rest Database Date and Time Stamps
- Resets the data and time stamps on existing database records to the current date.
- Purges any transactions in the database.
- Prepares the database to make it appear like a first time use.
- File >> Import/Export >> Company Settings >> Outlet Management >> Timestamps button
Create New Outlets
- Download the most recent "client" database
- Restore the downloaded "client" database
- Log into the "client" database as the Master User
- Set the System Preferences
- Licence - Update the Customer License number to include the Outlet Module
- This process will automatically log you out of the database.
- If required, update the Daylite company profile with the new customer number (both primary and new outlet)
- Log into the "client" database as the Master User
- Using the Developer Tool for License Number creation, increase the 'Number of Department Licenses'
- If required, update the Daylite company profile with the new number of user licenses
- Create New Outlet (Setup >> Outlet Preferences)
- Initialize New Outlet with Values based on Existing Outlet (File >> Import/Export >> Outlet Settings >> Outlet Management >> Create Initial Outlet Settings). These will duplicate/create values based on the existing outlet's data. This is an OPTIONAL step, but it will save you a bunch of setup work if the values will be similar for the new outlet. The process will ask you if you wish to duplicate each section before it will duplicate the data.
- Tax Rates
- Code Tables
- Ticket Faces
- Chart of Accounts
- Fee Types
- Invoice Comments
- Create New Merchant Account (Setup >> System Tables >> Merchant Accounts) and assign it to the New Outlet. You can also duplicate an existing merchant account and assign it to the New Outlet. Note: This step needs to be completed BEFORE you will be able to create employees for the new outlet.
- Create New Marketing Records for New Outlet. When the new outlet was created, it created a job listing. These jobs need to be run via Setup >> Batch Functions >> Worker Jobs. Note: This step will take a while to complete and needs to be completed BEFORE you will be able to create employees for the new outlet.
- Create New Patron for Outlet Administrator (New Outlet)
- First Name: {Outlet Name}
- Last Name: Admin
- Company: {Outlet Name}
- Title: Outlet Administrator
- Work Address: Do Not Mail
- Work Phone: {Outlet Phone}
- Marketing Flags: Do Not Mail, Email, and Delete
- Set Patron as Employee for Outlet Administrator (New Outlet)
- Outlet Administrator: Yes
- Access ID: admin_{Outlet Name}
- Employee Initials: ADM{outlet#}
- Initial Window: Patron Window
- Transaction Source: Box Office
- Merchant #: {Outlet Merchant Created Above}
- Set Login Password
- Create New Patron for Web Services (New Outlet)
- First Name: {Outlet Name}
- Last Name: Web
- Company: {Outlet Name}
- Title: Web Services
- Work Address: Do Not Mail
- Work Phone: {Outlet Phone}
- Work Email: tickets@{outlet email domain}
- Marketing Flags: Do Not Mail, Email, and Delete
- Set Patron as Employee for Web Services (New Outlet)
- Outlet Administrator: No
- Access ID: web_{Outlet Name}
- Employee Initials: WEB{outlet#}
- Initial Window: Web Sales
- Transaction Source: Internet Sales
- Merchant #: {Outlet Merchant Created Above}
- Set Login Password
- Update Existing Master User Patron for System Administrator
- First Name: System
- Last Name: Admin
- Company: {Primary Outlet Name}
- Title: System Administrator
- Work Address: Do Not Mail
- Work Phone: {Outlet Phone}
- Marketing Flags: Do Not Mail, Email, and Delete
- Update Existing Master User Employee Account
- Access ID: admin_system
- Employee Initials: ADMS
- Initial Window: Patron Window
- Transaction Source: Box Office
- Using the Menu options, duplicate existing data for new outlet for:
- Invoice Comments - only if you didn't duplicate them already or created the default set of comments
- Sales Promotions (or have client start creating new Sales Promotions as they need them)
- Using the Menu options, export any existing data applicable for the new outlet:
- Venue Maps
- Venue Pricing Maps
- Venue Pricing Map Seat Names
- Log out of database
- Log into database as the Outlet Administrator for the New Outlet
- Review Code Tables to assign 'default' values (Setup >> System Tables >> Code Tables >> Set Default button in toolbar)
- Using Developer Tools, remove any duplicate existing data for new outlet for:
- Code Tables >> Facility Project Types
- Code Tables >> Folder Names
- Using Menu options, Import any applicable data for:
- Ticket Faces
- Venue Maps
- Venue Pricing Maps
- Venue Pricing Map Seat Names
- Set default Sales Promotion (Setup >> Sales Promotion >> Set button in toolbar)
- Update Outlet Preferences
- Ticket Faces >> Address Ticket
- Ticket Faces >> Receipt Ticket
- Web Options >> Enable Web Sales
- Web Listener >> Set Employee ID for web sales
- Appearance >> Volunteer fields #1, #2, #3, #4 (Hair Colour, Eye Colour, Vocal Range, Instrument)
- Appearance >> Volunteer Flags #1, #2, #3, #4 (Dance, Sing, Act, Play Instrument)
- Box Office >> Why did Patron Buy (for quick cash sales)
- Assign any existing employees who need access to the New Outlet as Employees of the New Outlet (Outlet Administrators or Normal)
May need to clear some values left behind if you've copied them over from the primary outlet:
update fTaxRates set tr_tax1_ca_seq=0, tr_tax2_ca_seq=0, tr_tax3_ca_seq=0,
tr_tax1_def_ca_seq=0, tr_tax2_def_ca_seq=0, tr_tax3_def_ca_seq=0
where tr_d_dept_seq=2
update fFeeTypes set fee_amount=0, fee_active=TRUE, fee_auto_calculate=FALSE,
fee_tr_Seq=0, fee_ca_Seq=0, fee_pb_seq_list=''
where fee_d_dept_seq=2
Employee Information
An employee needs to be first added to the database as a patron, then it can be activated as an employee. Using the Patron Import process, it will do both steps at the same time. Refer to either information provided by the client as part of the data import for the listing of employees, or refer to the company's website for a listing of the current Staff Members.
Remember, within the data to be imported, it should contain a listing of employees who are currently working at the venue and has worked in the past. Do we import past employees? Yes we should. This way we can tag historical ticket sales, membership sales, donation sales to those employees if that reference is within the data. Just as historical data is important, having a listing of historical employees shows the completeness of data importing that Arts Management provides. It goes towards the 'extra step' that we do. Having employees imported during data conversion also allows the onsite trainer to 'move quicker' during the initial training as everyone has their own login ID, and less time is spent setting up employees on the first day when the goal is to introduce them to the application rather then 'how to setup employees'. This also avoids the initial discussions of user access and who gets what privileges - at least until later.
Employee Initials are important. If they are not provided in the import data, they will be created based on the employee first, middle and last name. If possible, define them within the import spreadsheet.
After importing the employees, it is recommended to review the initials and make them unique for each employee. This is not mandatory, however it does allow for more easy identification between the employees throughout Theatre Manager.
All employees import will be created with a user access level set as a 'Normal User
Initial password will be set as Tickets@123
Import Column Template: MKT_FIELD_1,gPatronType,E_INITIALS,C_FIRST_NAME,C_INITIAL,C_LAST_NAME,C_TITLE,gEmailWork,gPhoneWork,C_COMPANY,AD_ADDRESS1,AD_CITY,AD_PROVINCE,AD_POSTAL_CODE,AD_COUNTRY
Defaults: gPatronType = Staff Member
Venue Maps
Gather a listing of the various venue maps, physical locations, number of seats within each venue, and for reserved seating, a seating chart - clearing showing the different sections, row and seat names.
The venue map is something that will need to be created in Theatre Manager manually. As part of the import, refer to the client's website for a venue icon for TicketTrove along with a venue description that can be used.
The Best Seat Search - provide a default to allow the most choices for the patron. When the trainer is onsite, they can have the client review the seating options and make the necessary changes required.
Import Column Template: Logical Seat,Door,Section Name,Row Number,Seat Number,Price Codes,Seat Code,Seat Priority,Best Avail Area,Best Avail Index,Seat Note Use?,Seat Note,Seat View
For the Best Seat #, just number then sequential from top to bottom. When the trainer is onsite, they can have the client review the seating chart to determine exactly how they want the seats to be numbered for sale and make the necessary changes required.
G/L Accounts
G/L Account Columns: gType,CA_FULL_ACCT,CA_EXTERNAL_ACCT,CA_DESCRIPTION,CA_POSTING,CA_LEVEL
CA_FULL_ACCT = account number WITHOUT any dashes in it. If you add formatting to this field, the record will not be imported. Easiest to just import the CA_EXTERNAL_ACCT as a formatted field, and the import routine will set the CA_FULL_ACCT for you.Account Types (gType)
- 1, Asset
- 2, Liability
- 3, Equity, Capital
- 4, Income, Revenue
- 5, Cost of Goods
- 6, Expenses
- 8, Other Income, Other Revenue
- 9. Other Expenses
Account Setting (CA_POSTING)
- 0 = Detail - default value for new records
- 1 = Posting
Reporting Level (CA_LEVEL)
- 1 = default value for new records
- 2
- 3
- 4
Unless specified, the External Account Number will default to the Account Number
Events and Performances
Gather a listing of the events and performances.
Event and Performance Columns: P_PLAY_YEAR,P_SHOW_CODE,PB_SHOW_CODE,P_PLAY_TITLE,PB_SERIES_CODE,PB_PERF_NOTES,PB_PERFORM_DATE,PB_PERFORM_TIME,gSalesMethod,gTax1Account,gAccount,gTaxRate,P_VE_SEQ,P_TM_SEQ,P_ACTIVE
To help create the Event Number for the Event Code, refer to the previous event code in the list:
- Column A = Season Year
- Column B = Event Title
- Column C = Event Number (calculated by the following)
- =IF(B2=B1,IF(A2=A1,C1,C1+1),C1+1)
- Column D = Performance Date
- Column E = Performance Time
- Column F = Show Code [YY-99](calculated by the following)
- =CONCATENATE(MID(A2,3,2),"-",IF(C2<=9,"0",""),C2)
To help create the Series Code, take the day of the week from the performance date.
- =weekday(Date)
- 1 = Sunday
- 2 = Monday
- 3 = Tuesday
- 4 = Wednesday
- 5 = Thursday
- 6 = Friday
- 7 = Saturday
or use the calcuation of:
=IF(WEEKDAY(G2)=1,"SUN",IF(WEEKDAY(G2)=2,"MON",IF(WEEKDAY(G2)=3,"TUE",IF(WEEKDAY(G2)=4,"WED",IF(WEEKDAY(G2)=5,"THU",IF(WEEKDAY(G2)=6,"FRI",IF(WEEKDAY(G2)=7,"SAT","error")))))))
gSalesMethod
- Troupe [0]
- Festival Seating [1]
- General Admission [1]
- Reserved Seating [2]
- Consignment [3]
- Inventory [4]
- Auction [5]
- Course [6]
- Class [6]
gTaxCode
- No Tax
- GST 5%
- HST 15%
For importing G/L Accounts, use the column titles of:
- gAccount = Earned Single Ticket Revenue
- gTax1Account = Deferred Ticket Revenue (optional)
- gTax2Account = Earned Season Revenue (optional)
- gTax3Account = Deferred Season Revenue (optional)
- If gTax1Account is not provided, gAccount will be used for Deferred Ticket Revenue
- If gTax2Account is not provided, gAccount will be used for Earned Season Revenue
- If gTax3Account is not provided, gTax2Account will be used for Deferred Season Revenue
Change Outlet Number
- It is OK to be logged into the outlet that you are updating - when your running this routine, as it will force you back to the login window when the process has been completed.
- Have all users and web services 100% logged out of the outlet you are updating.
- This process will disable triggers one table at a time, as the table is updated.
- If your running this in a live environment where other outlets still may be using the database, perform this function when there is no access to the database from users, or web sales (i.e. after midnight). Due to the fact that triggers are being disabled on a table while the table is being updated.
- This routine is fairly fast but does depend on the hardware it's being run on. Running this process on a fully loaded server, a normal database may take anywhere from 30 - 60+ minutes to complete. On a large database (4 GB compressed backup), it may take anywhere from 10+ hours to complete.
- 160MB compressed backup took 25 minutes (June 2015)
- 455MB compressed backup took 60 minutes (June 2015)
Note: you will require remote access to the database via pgAdmin to execute 2 SQL commands to enable/disable a user access level (you will be prompted with the exact command during the process). Once just prior to running the process, and once again after the process has completed. The changing of the outlet number will still happen even without the enable/disable of the user access level, however it will just take longer to complete. The routine disables triggers from running on the updated table.
- Download the most recent "client" database
- Restore the downloaded "client" database
- Using the Developer Tool, Log into the "client" database as the Master User
- Reset Department Number (File >> Import/Export >> Outlet Settings >> Outlet Preferences)
- Enter in the FROM Outlet Number
- Enter in the TO Outlet Number
- Click "Reset Dept"
Donations
Campaigns
If the giving level matrix is already setup, then just pass in ONE of the columns for DC_GM_SEQ or GM_DESCRIPTION, it will link the campaign based on those fields.
If the giving level matrix is not created, it will create the giving level matrix based on the GM_DESCRIPTION field - this saves you from having to create them all first, then importing. It will create the giving matrix, then you can go back later and update the giving levels within the matrix.
If the gAccount number has not been created in the Chart of Accounts, the import routine will create it for you - this saves you from having to create them all first, then importing.
At a minimum, import DC_CAMPAIGN, gAccount, GM_DESCRIPTION - then you can go in and customize the donation campaigns to each of their own unique needs.
Do you need to create the campaigns before importing donations? No you do not. If the donation campaign does not exist during donation import, the donation import routine will create the donation campaign automatically based on these same fields.
Campaign columns: DC_CAMPAIGN,DC_DESCRIPTION_EXTERNAL,gAccount,DC_GM_SEQ,GM_DESCRIPTION,GM_SEQ,DC_NOTES
Pledges and Gifts
When preparing the import file for donation gifts, the key item that needs to happen is the proper mapping to the Patron Record. Identify that field and ensure that when the Patron record is imported, that the field can be used to map each donation gift to the patron.
Never delete any data. Just move the column to the far right of the spreadsheet, just in case you need to reference that data later. If there is any data in the end that looks like notes, comments, dates, or just references to other data, then move it into a notes field. This at least leaves a trail for the client to reference in the future if they need be.
Donation columns: MKT_FIELD_1,DD_FISCAL_YEAR,DD_PROGRAM_YEAR,DC_CAMPAIGN,gAccount,DC_GM_SEQ,DD_DONATION_DATE,DD_AMOUNT_PLEDGE,DD_AMOUNT_ACTUAL,PAY_TOTAL_PAID,gDonor1Field,gDonor2Field,gDonor3Field,DD_NAME_OF,gPaymentMethod,PAY_CARD_NO
Excel calc to determine fiscal year: =IF(MONTH(D2)>=5,YEAR(D2)+1,YEAR(D2))
Cleanup Steps
Items to Remove
- $0.00 donations - unless you are doing prospects, then you need a base starting about. If so, set the to $1.00
- Negative dollar donations - as these are invalid
Items to Keep
- Keep the donation, even if you do not know who it belongs to. Assign it to a generic patron (i.e. House account) as later on after the data gets into Theatre Manager, the client may be able to track down who the donation really belongs to and transfer the order. Even if they do not, at least there is a historical record of 'something' coming into the organization in the form of a donation.
Donation Date
- Make sure that there are NO future dated donations. Reset them to at least have a current date, or remove them from the import.
- A future dated donation may mean that the data has not been entered into the accounting system and thus at year end, may not match Theatre Manager's data.
- Check really old donation dates to make sure for accuracy. Showing just a 2 digit year is not good enough. Many donations may come across as 1903 instead of 2003; 1904 = 2004. Rule of thumb is anything prior to 1985 should really be reviewed closely as electronic record keeping prior to that is minimum.
Fiscal Year
- Prior to determining the calculation for this field, you will need to know when the Fiscal Year start month and if they show the Year at the Beginning or at the End.
- Sort the Donations by Date Donated and assign the Fiscal Year
- Keep in mind, this fiscal is for financial reporting, not when to show the donation in the program. The fiscal year needs to be set into the proper year the donation was received.
- If the donation is to appear for a different season or program year, use the Program Year field to set this.
- If the donation is NOT paid for and there is a note about it being paid in a future year, you can set each Pledge Payment into a separate future Program Year.
- Again, this field is tricky to set and all we can do is our best. Once the data has been imported, the client is able to go through and set them as they see fit. If there is a mass easy change that can be done, AMS Developers can quickly update this field after the data has been imported.
Program Year
- The program year is a bit more harder to give an exact answer. If the data clearly defines it, then it is easy.
- In most cases, it does not follow the fiscal year, as the donations leading up to the end of the fiscal year may indeed be for the next program year.
Program Name
- Review the data and do not alter this information (unless to clean up). This is important information to know and should not be overlooked. It is critical that this information remain intact
- Review the data and if there is information in a column to say this is an Anonymous donation, make this field say 'Anonymous'
- If no program name is given, it will be set upon entry based on the information in the patron's marketing record for the default publication name, then in Company Preferences for the default setting based on the patron name.
- HINT: If the word 'anonym' appears anywhere in the Donation Notes field, then the Program Name is set to be 'Anonymous' by the import routine. So if you miss setting it, there is another internal check. This is an important field to set.
Donation Use
- This is an important field to track how the donation came into the organization
- 1=Gift
- 2=Donation with Ticket Sales
- 3=Matching Gift
- 4=Donation from Ticket Refund
- 5=Internet Donation
- 8=Soft Credit
- 10=Prospect
- 11=Soft Pledge
- 12=Hard Pledge
Receivables
- This is important to ask the client if all the donations about to be entered have been paid for in full.
- If so, set the payment amount field to match the Donation Actual Amount column. Otherwise you will get Accounts Receivable amounts created.
Campaigns versus Funds
- If both are supplied in the spreadsheet, which one gets Theatre Manager's Campaign (DC_CAMPAIGN) setting? Go review the Chart of Accounts listing. This will tell you how they want the donation revenue divided up. Theatre Manager's campaigns are based on the option to go to different General Ledger Accounts.
- Place the other Campaign or Fund into a donation pop-up field.
- Now even if you get it wrong and the client wants it changed later, we can using the assistance of the AMS Developer to run a routine that will switch the data around
End of Day and Posting
After the data has been imported its time to post the data to the accounting module.
Prior to starting:- Set the Fiscal Year month in company settings
- Set sales promotions as either Regular, Season, Ticket Type 3, Ticket Type 4, or Ticket Type 5 to match the G/L Accounting setup for the event setup.
Deposits
Determine the Fiscal Year end date (i.e. May 31)
Create a deposit for each Fiscal Year end date. Do not selectively pick dates, nor just do a single massive deposit to get all the imported data deposited. This is a clear sign of sloppiness. Doing it accurately will allow possible analysis down the road of the year-by-year statistics of the accounting module.
Then when you hit the current year, do a deposit for each month end.
Then when you hit the current month, do a deposit for the date that the last payment was entered for.
The deposits should appear as the following if May 31 is the fiscal year end and the last payment imported was Sep 10th.
May 31 2001
May 31 2002
May 31 2003
May 31 2004
May 31 2005
...
...
May 31 2013
Jun 30 2013
July 31 2013
Aug 31 2013
Sep 10 2013
Trick: If you want to have multiple machines performing deposits at the same time add the following search query to allow only a selection of payments.
wDepositList.$buildSearchString
Do iQueryGroup.$loadSimpleQueryString('PAY_DATE_RECVD`>=`JUN 1 2001')
This will allow you to limit a selection of payments between a date range. In this example, it would be implied that MAY 31 2001 was then the year end date for the fiscal year and the deposit date would be set to MAY 31 2002. Thus, this deposit would get a range of JUN 1 2001 to MAY 31 2002.
Creating Transactions
Use the routine File >> Import/Export >> TIckets >> Create Transactions
This is a special menu option where it will create the transactions only. It does not create the sales entry at this time. This allows you to be creating transactions in the background while data import happens without it having any effect on the G/L. This is purely used as an efficient use of time to maximize the number of sessions/machines that you have available.
Trick: If you want to have multiple machines performing transaction creation as the same time, add the following search query to allow only a selection of data.
tF_PLAYSEATS.$journalizeTickets
Calculate exists as con(exists,' and ORD_DATE >= ',$ctask.tDatabase.$sqlDATE('JUN 1 2001'))
tfOrderFees.$journalizeOrderFees
Calculate exists as con(exists,' and ORD_DATE >= ',$ctask.tDatabase.$sqlDATE('JUN 1 2001'))
Donations - no need to worry about as their transactions are created at time of creation.
Memberships - no need to worry about as their transactions are created at time of creation.
Payments - no need to worry about as their transactions are created at time of creation.
Projects - not done at this time, but could update tProjectsJournalizeList.$journalizePersonnelAndResouces for the exists() portion of the search() string.
Sales Entry
Just start the process and let it run normally.
Posting
Post as normal.
Then run the following command to update the posting date of the imported data to set it to the final date of the imported data. As well, set all this data as already been exported - to avoid having to export out all this data in case they use this function later on.
update F_GL_HEADER set GL_DATE_POSTED='2013-09-10 17:00:00', GL_EXPORTED = TRUE
This will give the imported data a consistent date posted and a clean date based on the last date of imported data. As well, it provides a way to easily know what data was imported and a way to use the GL_DATE_POSTED field in reports if we need to exclude this data from the current years reports.
Cleaning Up
If you wanted to de-activate all imported sales promotions so the client can start with all new promotions and have the old promotions not appear in the event setup window:
update fSalesCodes set SC_ACTIVE = FALSE, SC_DATE_END='yyyy-mm-dd' where SC_PROMOTION_USE = 0
Adjustments
In case you missed setting the Sales Promotions into their correct designation of Regular, Season, Ticket Type 3, Ticket Type 4, or Ticket Type 5 - it's too late to easily go back and recreate all the G/L Sales Entries. In most cases as this is historical data anyway, its not too critical (unless of coarse it is current years data and effects deferred/earned season/regular revenue).
Here is an easy way to get all the Patron Statistics to get shown correctly which is more important for when the client goes and does a historical analysis of the patron's buying history.
update all the sales promotions correctly.
delete from fPatronStatistics
select postPatronStatistics(F_TRANSACTION,true,true) from F_TRANSACTION
alter sequence fPatronStatisics_cs_seq_key restart with 1
In case you imported performances for a future date, then the client didn't use the database and you need to go and set those future dated performances (which are now in the past) as rolled over or flagged as history.
update F_PLAYBILL set PB_GL_JOURNAL_NO_CODE='History', PB_GL_SEQ=-1 where PB_PERFORM_DATE<='yyyy-mm-dd' and PB_GL_JOURNAL_NO_CODE=''
Gift Certificates / Passes
Pass Information
Pass Types
Merge Databases into Separate Outlets
- It is OK to be logged into the outlet that you are updating - when your running this routine, as it will force you back to the login window when the process has been completed.
- Have all users and web services 100% logged out of the outlet you are updating.
- This process will disable triggers one table at a time, as the table is update.
- If your running this in a live environment where other outlets still may be using the database, perform this function when there is no access to the database from users, or web sales (i.e. after midnight). Due to the fact that triggers are being disabled on a table while the table is being updated.
- This routine is fairly fast but does depend on the hardware it's being run on. Running this process on a fully loaded server, a normal database may take anywhere from 5 to 10+ minutes to complete. On a large database (4 GB compressed backup), it may take anywhere from 15 to 30+ minutes to complete.
Timeline of Action Events
- Secondary Database Location
- Update your website to let people know web sales is offline for system upgrades.
- Web Sales come off line, all workstations quit using Theatre Manager & log off all Terminal Services sessions
- Box offices complete their EOD processing, run reports, etc.
- Box Office workstations quit Theatre Manager, and log off all Terminal Services sessions
- Backup Secondary Database
- Transfer Secondary Database to Primary Database Location
- Primary Database Location
- Restore Secondary Database
- Backup Primary Database
- Set Secondary Database's Outlet Number
- Update Secondary's Database Sequence Numbers
- Export Secondary Database
- Import Secondary Database
- Access to Theatre Manager’s merged database for key people to review data
- Once review is completed by key people
- allow box office to use the database
- bring web sales online (via Theatre Manager >> Company Preferences >> Web Options)
- review web sales online appearance
- make adjustments to Theatre Manager’s code table values as required
- once given the go ahead for web sales
- update your website to let people back having access to the ‘buy tickets’ buttons.
Reset the "Secondary-Client" Outlet Number - Set the Outlet number to be what you would like the Outlet number to be in the final merged database
- Download the most recent "Secondary-Client" database
- Restore the downloaded "Secondary-Client" database
- Using the Developer Tool, Log into the "Secondary-Client" database as the Master User
- Reset Department Number (File >> Import/Export >> Outlet Settings >> Outlet Preferences)
- Enter in the FROM Outlet Number
- Enter in the TO Outlet Number
- Click "Reset Dept"
- Make a backup of the "Secondary-Client" database
- Download the most recent "Primary-Client" database
- Restore the downloaded "Primary-Client" database
- Using the Developer Tool, Log into the "Secondary-Client" database as the Master User
- Reset Database xxx_SEQ Values (File >> Import/Export >> Outlet Settings >> Outlet Preferences)
- Click "Merge DB"
After Merge has completed
Reset the "Secondary-Client" Sequence Numbers - Sets the Sequence numbers for every table and connecting child records to be different then what is in the "Primary-Client" database
Patron Information
The main goal is to get a consistent look to the imported data. Make the data look pretty and stand out as quality data shining in the application. Fill in empty spots; move data from incorrect or general notes fields, into Theatre Manager's specific named fields. The patron data should be referred to as 'gold' as it takes quality names and contact information to nurture and grow the patron's desire and need to keep returning to the venue over and over again.
This is where Theatre Manager's CRM module stands out. It all starts with clean, clear, and consistent data.
Cleanup Steps
Clear Contents of NULL Cells
- Sort each column of data in ascending order. The first cell should contain valid data. If the first set of cells are blank, select them all and clear the contents to force them to blank. Exports of data create NULL cells of data, they appear blank, but they really are not.
- Select the cell(s); Right-Click; Clear Contents
Missing Columns
- There will be times where there may be missing columns of data. For example: Company Name, Patron Type, Patron Salutation. It is normal. Manually add in the extra columns that are needed to properly separate the data into their own elements.
First Name
- Sort the column and move all Dr., Mr. Mr. & Mrs., Ms., Capt., Rev., Father, Sister, etc. into the Salutation Column.
- Review how they show the patron spouse connectors. Do they use the 'and' or do they use the '&' symbol. If they are consistent with one of them, set this setting in Theatre Manager's System Preferences settings. If they do not use any consistency at all, use the '&' symbol.
- Move any Company Names into the Company Name field.
- HINT: There is no need to alter this 'and' or '&' setting in the import file. During the import process, Theatre Manager will automatically set it based on whatever is in the System Preferences settings.
- HINT: If the first name field contains the first and last name of a patron, there is no need to split it apart. Theatre Manager will automatically split it into the proper fields during the import process. But you MUST supply a column title for the Patron Last Name, even if it is an empty column otherwise the last name will be lost during import on the name split. Best to also supply the Patron Initial column too to allow the name to be split properly.
- Exception: if the first name field is Mary Anne Jones, then it will place the First Name as Mary, Middle Initial as Anne, and Last Name as Jones. In this case if you wish to have it show 100% correctly, splitting of the name into the proper fields should be done manually so that the First Name is Mary Anne and the Last Name is Jones.
Initial and/or Middle Name
- Hint: There is no need to remove the trailing period from the middle initial. Theatre Manager will remove the trailing period upon import.
Last Name
- Move any Company Names into the Company Name field.
- Hint: Sort the list by First Name and by Last Name. At the bottom of the list, it will show you all records missing a first name which typically could be all the records that have the Company Name located in the Last Name field.
Nick Names or Greetings
- These should be imported into Theatre Manager's Patron Greeting Field (C_NICK_NAME).
- Hint: If the field is blank or not supplied, Theatre Manager will define this field based on the settings in Company Preferences.
Formal Name
- If a Formal Name is provided, sort this column and review it for all the salutations at the beginning of the field. Verify the salutation used in the Formal Name column and UPDATE the Patron Salutation column if it is blank to match what the salutation is in this column.
- Using search/replace, adjust all salutations in this column to be consistent.
Address Lines
- There is a maximum of 2 lines. If need be, combine the data into either of 2 columns, or split long addresses into the Address Line 2 column.
- Move any ATTN from other fields into the Address Line columns.
- Multiple addresses can be imported, however you will require the assistance of the AMS Developer to use the CustomOverrideRoutines to accomplish this.
City
- Sort by the City name column then review all the city's and copy/paste in the correct spellings. It only takes a bit of time, however this is the best time to fix up historical mistakes in a mass correction.
State/Province
- Sort by the State/Province column then review all the States/Provinces and copy/paste in the correct spellings. It only takes a bit of time, however this is the best time to fix up historical mistakes in a mass correction.
- Verify and correct all States/Provinces into a 2 character designations.
- If a State/Province is missing, none will be assigned automatically during import.
- If a State/Province is missing and it is obvious based on the City Name, then update the record to have the correct information.
- If a State/Province is incorrect based on the City Name, then update the record to have the correct information. (Historical mistakes and/or data entry where there was less attentiveness to accuracy.)
- Hint: No need to change to the 2 character State or Province code. If the long version of the State/Province is supplied and spelled correctly, the 2 character representation will be used fro the designation when the data is saved back to the database.
Zip Code/Postal Code
- Sort by the Zip/Postal Code field and review the data to update the Country Field based on if it is a Zip Code or Postal Code.
- If there is a separate column for the 4 digit Zip + 4 setting, merge this column with the Zip/Postal Code column to create a single import column.
- Hint: No need to add or remove the dash for a Zip + 4 column. The import routines will add/remove as required.
Country
- Move all indicators to the Country Field for addresses that are USA, Canada, Japan, Germany, etc. and remove them from the field where you located it.
- Make sure that all countries are valid and exist in the Country Code Table.
- NOTE: If the country field is empty on import, it will default to the Company's country as defined in Company Preferences. This may be correct or incorrect for some patron addresses. It is best if the Country (even if the column needs to be added to the import file) is assigned to each patron's record to ensure accuracy.
- Hint: When sorting the State/Province, you are able to determine the Country by the State/Province.
- Hint: When sorting the Zip/Postal Code, you are able to determine the Country by the Zip/Postal Code format.
Marketing Fields, Do Not Mail, Deceased Flags
- If you notice this data in a notes, address, or another column, create a new column and set the data so that it goes into the right data field in Theatre Manager.
- Set the Do Not Mail-Patron if you find a 'do not mail' indication.
- Set the Do Not Mail-Venue if you find a 'wrong address or moved' indication.
- Set the Deceased if you find a 'deceased or died' indication.
Phone Numbers and Email Address
- Each contact must go into its separate column.
- The primary phone number or email address will be assigned to the first phone number imported for that patron. This means that the column sequence order is important for the phone numbers. Have the patron's home, work, then cell phone numbers in that order to avoid having the Cell (or Other) phone number set as the primary contact number when really it should be the Home Phone.
- Move all comments from the phone numbers (i.e. not sure if this number is correct) into the Patron's Marketing Notes column.
- Using search/replace, set all phone number extensions (Ext., #, extension) to be a consistent value of 'x'.
- If there is a separate column for the phone number Extension setting, merge this column with the Phone Number column to create a single import column.
- Hint: No need to set the formatting of phone numbers, the import process will clean up all phone numbers and standardize their setting upon import.
- Hint: If you notice there are many phone numbers without area codes, it is recommended that in System Settings, that you turn OFF the requirement that Area Codes are mandatory. This way, phone numbers do not get imported as "(123) 4-567" and they go in as "123-4567". After the import, you can go back and turn ON this requirement.
- if there are other types of phone numbers (Summer, Winter, Former, Vacation), these can be imported accordingly using the CustomImportRoutine overrides. Refer to an AMS Developer for assistance.
- Do you need to manually go through and remove duplicate phone numbers? If they are for different patrons, then no. Patron Merging will clean this up. If they are for the same patron account, then yes. - OR - ask a AMS Developer for assistance as there is a quick routine that can be run to purge all duplicated phone numbers for a patron that were imported.
Email Address
- Separate out multiple email addresses into their own separate columns.
- Ensure that any website URL addresses (addresses that begin with a www prefix) are moved to the gWebsite column
- Do you need to manually go through and remove duplicate email addresses? If they are for different patrons, then no. Patron Merging will clean this up. If they are for the same patron account, then yes. - OR - ask a AMS Developer for assistance as there is a quick routine that can be run to purge all duplicated email addresses for a patron that were imported.
Mailing Lists
- Hint: no need to alter a column of mail lists if they are comma delimited within the row. The import routine will automatically separate comma delimited names. If they are delimited by another method, (i.e. semi colon, space, hypen), the import routine can be changed OR just do a search/replace to set the name separator with a comma.
- No need to combine into a single column. 16 different columns can be imported at the same time to create mailing lists.
- If you have more them 16 columns of mailing lists, import the first 16 when the patron record is created, then import the remaining columns using the Patron Mailing Lists import option.
Default Solicitors
- Default Solicitors must be entered in as Patrons first. Assign those default solicitor accounts a unique Import ID#. Then those patron's records need to be imported using the Patron Employee Import process. Then using the customImportOverride routines for updating the Patron Marketing Fields, the link to those solicitors can be made.
- If you are thinking in advance, import the Employee records first, so that when importing the patron records, the solicitor association can be made at the same time. This will save import steps and time.
Patron Salutation
- In many situations, this field is set towards the end of the file cleanup. With the data cleanup, you should have moved and/or copied the salutation from other fields (ie. first name, greeting, formal name, Donor Publication Name).
- It is very important that this field be consistent and correct prior to import. Sort by the list and set the field for proper spelling and punctuation.
- Set all 'and' connectors to become '&'.
- Hint: During import, if the Patron Salutation does not exist in the Code Table values, this value will automatically be added for you.
Patron Type
- In many situations, this field is set towards the end of the file cleanup. With the data review, you now have the ability to see how to properly populate the gPatronType column with Individual, Company, Foundation, Staff, Supplier, etc.
- Note: During import records flagged as type Individual will have their Address Location assigned as 'Home'. All other patron types will have their Address Location assigned as 'Work'.
- Hint: During import, if the Patron Type does not exist in the Code Table values, this value will automatically be added for you.
- Default the column value to Individual for all records.
- Sort by first name, last name, company name. All those with no first and last name, assign as Company.
Misc Support TechNotes
Clean Install
There are four main files to an installation or upgrade of Theatre Manager. These files are the TMPostgresSetup, TMApacheSetup, TMSetup and Serial.zip files. Once the installation is complete these four files should be placed in a new folder within the Boxoffice folder called TMInstallers.
Windows TMPostgresSetup.exe File
The Windows Postgres Install creates a BoxOffice folder containing several files required for upgrading or installing Postgres. It also creates one folder called backups containing the Demo database file. This installer places the following files:
- BackupReadme.txt
- This is a text file highlighting the details of how the backup script works.
- Upon completion of an installation or upgrade this file can be deleted.
- BackupTM.bat
- This is the script used for backing up the database.
- The BackupTM.bat file will need to be edited regardless of the installation so it included the correct database name and backup location.
- BackupTMforSupport.bat
- This is the script used when TIER II requires a copy of the database. It does not bring across some data fields, most especially credit cards.
- The file will need to be edited regardless of the installation so it included the correct database name and backup location.
- delage32.exe
- This file determines the date and time used as a part of the backup script name.
- ImportDemo.bat
- This file imports the TheatreManagerDemo.backup file into Postgres.
- The file may need to be edited to to include the correct location of the demo database and the location of postgres.
- The file will create the TheatreManager roll require to create any Theatre Manager database in Postgres.
- After this file has successfully run it can be deleted.
- npp.Installer.exe
- This application is a text editor.
- It can be used to alter files if the OS does not contain a text editor.
- It's more user friendly then basic OS editors like Notepad or Wordpad.
- This file can be deleted after the installation process is complete.
- postgresql-9.4.5-1.exe
- This is the postgres installation file.
- It should always be installed by right clicking and selecting the Run As Administrator option.
- Once Postgres has successfully been installed this file can be deleted.
- ReadMeFIRST.txt
- This file provided step by step instructions on how to install postgres.
- Upon completion of an installation or upgrade this file can be deleted.
- TheatreManagerDemo.backup
- The TheatreManagerDemo.backup file is located in the backups folder.
- Once the ImportDemo.bat file has successfully run this file can be deleted from the backups folder.
Mac TMPostgresSetup.zip File
The Mac Postgres Install places several files required for upgrading or installing Postgres in the Macintosh HD\Users\Shared folder. It also creates one folder called backups containing the Demo database file. This installer places the following files:
- BackupTM.php
- This is the script used for backing up the database.
- The BackupTM.php file will may need to be edited so it included the correct database name and backup location.
- BackupTMforSupport.php
- This is the script used when TIER II requires a copy of the database. It does not bring across some data fields, most especially credit cards.
- The file will need to be edited regardless of the installation so it included the correct database name and backup location.
- CreateDemoDB.sql
- This file imports the TheatreManagerDemo.backup file into Postgres.
- The file runs as a part of the postgres installation.
- The file will create the TheatreManager roll require to create any Theatre Manager database in Postgres.
- After this file has successfully run it can be deleted.
- CronniX
- This application is used to run the BackupTM.php file as a scheduled task.
- A task within the application needs to be setup as a part of the installation process.
- postgresql-9.4.5-1-osx
- This is the postgres installation file.
- Once Postgres has successfully been installed this file can be deleted.
- TheatreManagerDemo.backup
- The TheatreManagerDemo.backup file is located in the backups folder.
- Once the ImportDemo.bat file has successfully run this file can be deleted from the backups folder.
Windows TMServerSetup.exe File
Mac TMServerSetup.zip File
Windows TMSetup.exe File
Mac TMSetup.zip File
The serial.zip File
Additional Files
- Maps Folder
- This folder should be zipped up, dated and a copy placed in the backups folder.
- The original copy of this folder should stay in the Boxoffice folder.
FTP on a Client Machine
|
Note: FTP is no longer required on a web server to push up images and should not be installed. People doing emote support of web pages should be using GIT to sync web page changes with a server. |
REST API - Special URLs
|
At this time, these API's are not public. Please do not give to clients. |
PA DSS 3.2.1 Documentation Index
|
The following table is a cross reference between the Arts Management documentation and the PA DSS 3.2.1 audit for ease of finding it. |
|
During the development process, and especially changes that may affect PCI related fields and procedures, refer to the documentation, testing procedures and authorization procedures that are pertinent below. |
| PCI Audit Security Policy/Standards Requirement | Location in Documentation | ||
| 1.0 Do Not Retain Mag Stripe or CVV2 Data | |||
| 1.1.4a Securely delete any sensitive auth. data stored by prev. versions | |||
| Verify PADSS Implemetation guide includes instructions for merchants on how to securely remove historical non PCI compliant authentication data stored by previous versions of the software. Include detailed procedure and/or tools to be used to securely remove historical data. Document should note this is necessary for full PCI compliance. | There has never been historical non-compliant authentication data. | ||
| 1.1.5a | Documentation of Vendor Procedures for customer troubleshooting | ||
| Documented procedures must include 1) directive to collect sensitive data only when needed to solve specific problem, 2) Storage of data in secure known location with limited access, 3) Collect only the data that is necessary to solve the problem, 4) Encrypt sentitive data on vendor systems while stored, 5) Secure deletion process to be done immediately after use. | AMS Data Policies | ||
| 1.1.5c Customer/Reseller Procedures for Troubleshooting | |||
| Verify PADSS Implemetation guide includes instructions for resellers/integrators on collecting, storing, handling, encryption and deleting sensitive debug or troubleshooting files (see PADSS 1.1.5c Testing Procedures for specifics). | Theatre Manager has no resellers. | ||
| 2.0 Protect Stored Cardholder Data | |||
| 2.1.a Process for secure purging of data after retention period | |||
| Verify PADSS Implemetation guide includes the instructions for purging cardholder data that exceeds the customer-defined retention period. Guide must state this is a necessary requirement for PCI compliance. Maintain a list of all locations where the payment application stores cardholder data that will eventually need to be purged. | See Schedule C/D compliance and shredding credit cards | ||
| 2.7.a Securely delete any crypt keys stored by prev. versions | |||
| Verify PA DSS Implementation guide includes instructions for merchants on how to securely remove historical non PCI compliant crypto keys stored by previous versions of the software. Document should note this is necessary for full PCI compliance. How to re-encrypt historic data with new keys. | All encryption keys are completely unknown to the customer. They are generated randomly and are at least 40 characters long, mixed case, with numerics etc. and never ever displayed to the customer. One key is encrypted in the database, the second in the application. Both are needed to access stored data.
Theatre Manager supports:
|
||
| 3.0 Provide Secure authentication Features | |||
| 3.1c Application should require unique user ID and secure authentication | |||
| Verify customers and resellers/integrators are advised against using (default) administrative accounts for application logins | Refer to section on passwords | ||
| Documentation should advise customers to assign secure authentication to default accounts, disable or do not use the accounts. | |||
| Documentation should also advise customers and resellers/integrators to assign secure authentication for payment applications and systems whenever possible. | |||
| Documentation should advise customers and resellers/integrators how to create PCI DSS-compliant secure authentication to access the payment application (per PCI-DSS 8.5.8 - 8.5.15). | |||
| Documentation should advise customers and resellers/integrators are advised that changing “out of the box” installation settings for unique user IDs and secure authentication will result in non-compliance with PCI DSS. | It is not possible to reduce password settings in Theatre Manager. Customers are advised not to reduce settings in other components | ||
| 3.2 Access should require unique username and password | |||
| Verify customers and resellers/integrators are advised to control access to any systems in the cardholder network, via unique username and CISP-compliant complex passwords. | refer to passwords and adjusting security settings | ||
| 4.0 Log application activity | |||
| 4.2 Automated audit trail to track and monitor access | |||
| Verify that customers and resellers/integrators are instructed on how to set CISP-compliant log settings, per PCI Data Security Standard 10.2 and 10.3. And that disabling the logs will result in PCI non-compliance. NOTE: Documentation wording must specifically address PCI-DSS 10.2.1 - 10.2.7 and 10.3.1 - 10.3.6. | refer to PCI Audit log settings | ||
| 5.0 Develop secure applications (Internal vendor documentation, not customer documentation) | |||
| 5.1 Vendor Software Development Life Cycle Documentation | |||
| Verify software development processes are based on industry standards for software development and that security is included throughout the development life cycle. | Arts Management uses the Agile Software Development Process as defined in numerous Wikipeida and numerous books on the subject. | ||
| Verify all changes to existing code or additions of new code are tested before release. Includes all security patches and software changes. See that documented process includes all points noted in PA-DSS 5.1.1.x. Detail the process that must be followed to document that these tests have been performed (steps for traceablity and accountability). | All code changes are tested and built into developer releases following the developer coding cycle. An integral portion of that is testing, especially security testing where appropriate. | ||
| Require separate development, test, and build envrionments | Refer to AMS Product Development Process separation of environments | ||
| Require separation of duties between development, test, and build functions | Refer to development coding cycle in the Product Development Process | ||
| Require that live PAN data is not used in development or testing. | The Product Development Process refers to the AMS Data Policy. Refer also to TM coding practices and testing practices | ||
| Require the removal of all test accounts and data from application before release | Refer to Product Development Process . The final build process removes all comments, which includes any commented security information. | ||
| Require internal code reviews of all new or modified code in the payment application (both internal and web applications). Must be reviewed by qualified individual other than code originator (internal or 3rd party) using manual or automated proceses . Corrections must be implemented and management must approve code review results before release. Code reviews must be tracked in the change mangement control procedures. | Refer to Product Development Process peer reviews | ||
| Verify that documentation includes process for training of developers on secure coding techniques (OWASP, etc.). | See AMS product Development Process on secure testing and OWASP Refer also to TM coding practices for protecting sensitive information in the code and protected classes | ||
| Testing of all web based applications (internal or externally exposed) must be conducted and application checked for common web vulnerabilities. Testing process should at minimum attempt to exploit vulnerabilties noted in PA-DSS 5.2.1-5.2.10. | Refer to AMS Product Development Process, section on security testing | ||
| Verify the existance of a documented change control process that tracks changes to the application, customer impact, management signoff, functionality testing, and back-out (see PA-DSS 5.3.x). | Change control is managed through:
|
||
| 6.0 Protect wireless transmissions | |||
| 6.1 Wireless transmissions of cardholder data must be secure. | |||
| Verify that customers and resellers/integrators are instructed, if wireless is used in their network, to install a firewall per PCI DSS Requirement 1.2.3.) | Theatre Manager does not require wireless within the lan. However, clients will user them and the Network Diagram illustrates proper usage. Configuration is also explained | ||
| 6.2 Wireless technology must implement strong encryption | |||
| Verify customers and resellers/integrators are instructed on PCI DSS-compliant wireless settings, per PCI DSS Requirements 1.2.3, 2.1.1 and 4.1.1. | refer to Venue Lan setup | ||
| 7.0 Test applications to address vulnerabilities (Internal vendor documentation, not customer documentation) | |||
| Vendor process documentation should detail how new vulnerabilities may affect the payment application. Identify outside sources to be used for vulnerability information. Process should include requirement to test code against newly discovered vulnerabilities. | Refer to the coding practices documentation and vulnerability/awareness training | ||
| Vendor process documentation should detail how security patches or software upgrades are deployed. The process must cover all bullets of PA-DSS requirement 7.2a (timely development, chain-of-trust, maintaining and testing integrity of the patch). | The Upgrade Process requires customers to 'pull' down an update (they are never 'pushed') and indicates the delivery process. The integrity of the installer is maintain automatically. It if it not complete, it will not run. | ||
| 8.0 Facilitate secure network implementation (No PADSS Documentation Requirements) | |||
| 9.0 Cardholder data must never be stored in the DMZ | |||
| 9.1b Application does not require web and DB server to be the same box. | |||
| Verify customers and resellers/integrators are told not to store cardholder data on Internet-accessible systems (e.g., web server and database server should not be on same server.) | Refer to TM Server Nginx Installation and Network Diagram | ||
| 10.0 Facilitate secure remote software updates | |||
| Verifiy documentation contains instructions regarding useage of secure remote access methodologies (if applicable), per PCI Data Security Standard 12.3.9 | Refer to Team Viewer Remote Support which is ordinarily used for support only. However, customers can use it so that we could perform the standard upgrade process on their behalf. | ||
| Recommend customers/resellers/integrators use a personal firewall product if computer systems obtaining or sourcing updates are connected via VPN or other high-speed connection, to secure these connections, per PCI Data Security Standard 1. | References are: | ||
| 11.0 Facilitate secure remote access to application | |||
| 11.2 If the payment app can be accessed remotely, verify doc contains instructions regarding secure remote access to the network, including the use of two-factor authentication. | Refer to remote access. | ||
| 11.3b Internal Vendor documentation (for customer service, etc.) must provides instruction to internal teams on all bullets of 11.3b if vendor resources gain access to customer systems using remote access. Be sure that IG enumerates all of the referred PCI-DSS requirements (e.g. - 8.5.8-8.5.15). Need specific wording in IG that cover all references. | refer to Exceptional Customer support and remote support | ||
| 11.3b Verify vendor provides instruction in the implementation guide to customer on all bullets of 11.3b. Be sure that IG enumerates all of the referred PCI-DSS requirements (e.g. - 8.5.8-8.5.15). Need specific wording in IG that cover all references. | refer to passwords, remote access in the installation guide. | ||
| 12.0 Encrypt sensitive traffic over public networks | |||
| 12.1 Use strong cryptography and encryption techniques | |||
| Verify the vendor includes directions for customers and resellers/integrators to use secure encryption transmission technology (for example, IPSEC, VPN or TLS). | All credit card service providers supported by TM use https. TM requires use of TLS 1.2 or greater and will fail the connection otherwise | ||
| 12.2 | App should not send cardholder information via unencrypted messaging technologies | ||
| If app allows or facilitates sending card data by end user messaging technology, verify the vendor recommends use of strong encryption for sending sensitive card data over a public network using any messaging technologies (e-mail IM, etc.). | Theatre Manager does not do this. See Misc PCI Requirements | ||
| 13.0 Encrypt all non-console administrative access | |||
| 13. Use technology like SSH, or TLS for web-based management | |||
| Verify vendor recommends use of SSH or TLS for secure non-console administrative access. | Theatre manager does not provide web management tools. Use RDC or teamviewer internally for remote access management. | ||
| 14.0 Maintain instructional documentation and training programs | |||
| 14.1 Disseminate instructional docs to all relevant application users | |||
| Verify the PADSS Implementation Guide covers all related requirements in the PADSS requirements | The guide is 100% online and is referred to in this document. The postgres installer opens this the main install web page. Inside Theatre Manager is a 'help' function that takes people to the main online help web page and the install instructions are clearly first. All upgrades refer to the help. | ||
| Verify the PADSS Implementation Guide is reviewed and updated on an annual basis | This web site is used to push RSS notifications to customers on new versions as per the main page which refers to news and updates. it is updated frequently (at least annually for each attestation for the PCI SSC) - with changes tracked by Drupal. | ||
| 14.2 Develop installation training for resellers, etc. | |||
| Verify the training materials cover all items noted in the PADSS Implementation Guide | There are no resellers | ||
| Verify training materials are updated on an annual basis or when new versions of software are released | |||
Legacy Support Pages
While those machines have served us faithfully in the past, they do sometimes need to be retired.
In the event that they cannot be retired, we have moved any support pages here for those legacy bits of equipment and software into this catch-all location so that you can still access the support.
Emailing an Employee their Password
If an Employee forgets their password, then they can have Theatre Manager email them their password so that they may log back in. This requires ALL the following conditions to be true:
- The Employee must have a valid email address listed in their employee preferences window. This email address their primary email address on the Contact Info tab of their Patron record.
- The Employee must have Normal access. Outlet Administrator or Master User Access passwords cannot be emailed.
- The Employee must not have a Resigned Date in their Employee record.
- Resigned means they made too many attempts to log in and are now locked out.
- They will need reinstated first.
- The number of attempts allowed is determined on the PCI Security tab of Setup>>System Preferences.
|
The proper email settings need to be defined in Company Preferences under Web Email Settings. This allows emails to be sent to the Employee. If you receive an SMTP error when attempting to have your password mailed to you, please have somebody who still has access check the SMTP settings first, then try again. |
For an Employee to get their password emailed to them, they perform the following steps:
- Start Theatre Manager by clicking on the Theatre Manager Desktop
 icon.
icon. -
In the log in window, double click on yourself as if you were going to log n
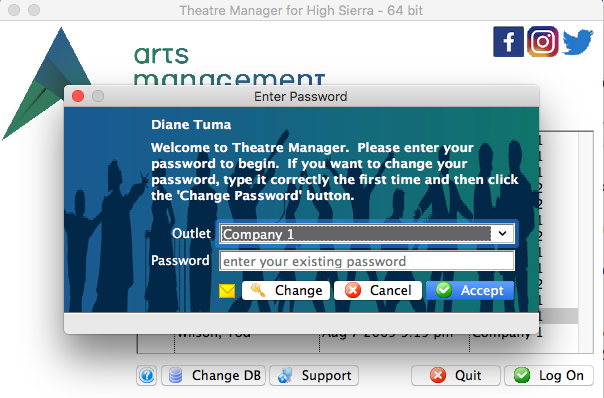
- Click on the yellow 'envelope' at the bottom of the login window.

if the user hovers over the envelope icon, the tooltip will indicate the email address that the password will be sent to.
Theatre Manager will email the password to the primary email address on file in that Employee's patron record.
Deprecated: Ticket Printers Tab
|
NOTE: Printer preferences have moved to a new location: HARDWARE PREFERENCES.
All Devices must be previously set up in device setup |
Architecture and Network Settings
|
Theatre Manager Server is required for Version 10 and is designed to take advantage of the power of machines with multiple cpu cores and works more efficiently as the number of cores is increased.
You can install for Macintosh 64 bit (for OSX 10.6.8 or greater) or Windows (XP and up). |
Architecture
The diagram below illustrates the typical web infrastructure setup. To handle more load you can do one of 3 things:
- Increase the number of services that a machine can handle (assuming there is enough ram and CPU's)
- Add another machine to handle mores services (in the protected area) and tell the server (in the protected area) about them
- Replace a smaller machine with a larger machine and add more services to it
Process Flow
- A patron uses their web browser to initiate a web sales request.
- The request is sent to the firewall/router
- It passes through the router to a Theatre Manager Server (configured as a Web Server/load Balancer
- The web server looks for a TM Server (configured for services) in the protected area that has the availability to handle the request and passes it though to it
- While handing the request, the service may ask for custom web pages from the web server. If there are no custom pages, it uses the latest built in pages deployed with the TM Server
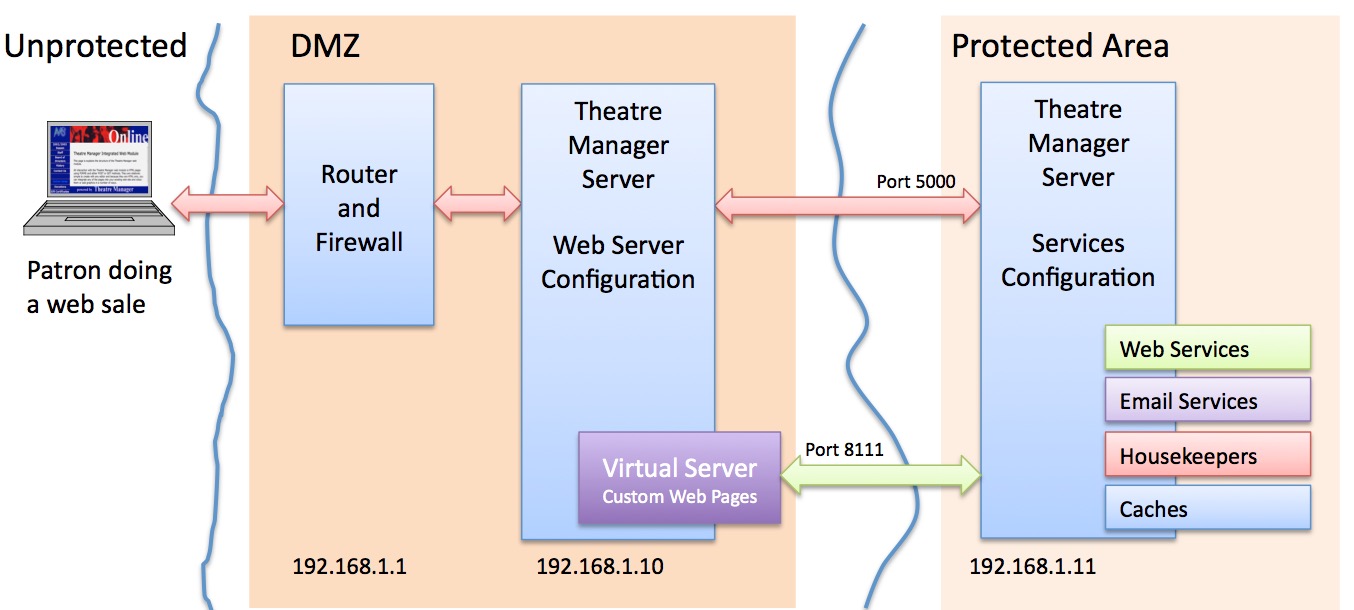
Web Server Configuration
It can also be used in the vast majority of situations with moderate web sales requirements, even if you have:
- one or more machine dedicated to web services -and-
- multiple cores on each machine (4 or more is better) -and-
- machines that are roughly equivalent -and-
- each machine can have services for all outlets
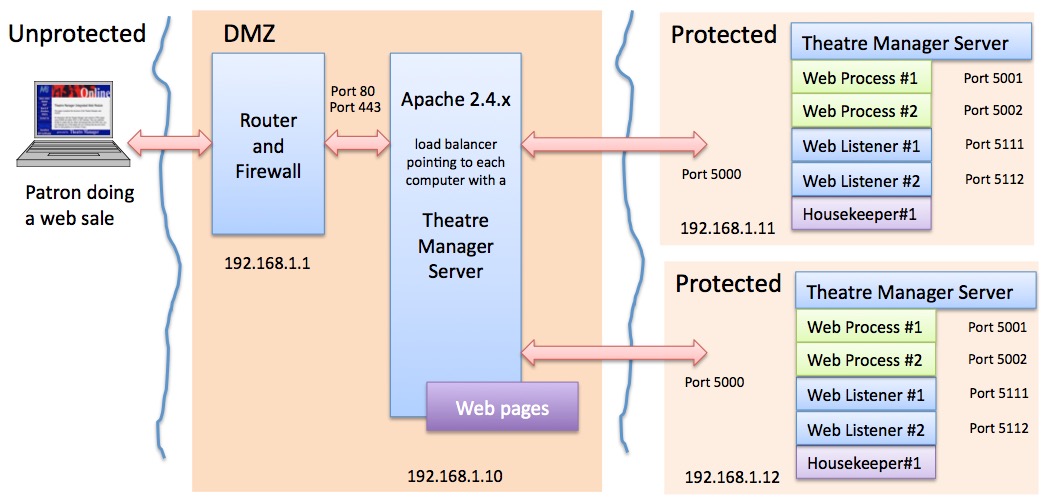
Traffic flow for Simple Setup of Theatre Manager Server
- All web traffic for 'tickets.yourvenue.org' flows through the router and firewall on ports 80 and 443
- The firewall passes traffic to Apache on ports 80 and 443
- Apache has a load balancer that forwards traffic to each Theatre Manager Server machine on port 5000.
- If and web service on the Theatre Manage Server need a template web page, it asks apache for it (on port 80 or 443)
- All completed web pages flow back to the patron.
For this setup to work, each machine must have:
- One or more second generation listener processes
- One of more classic listeners, sufficient to handle the load requested of it from that machine
TM Server Custom Setup
Consider this option if you:
- have multiple outlets,
- need to load balance traffic across multiple machines of varying capability,
- have very large onsales (typically thousands of seats to sold in a short time) and high traffic spikes on occasion
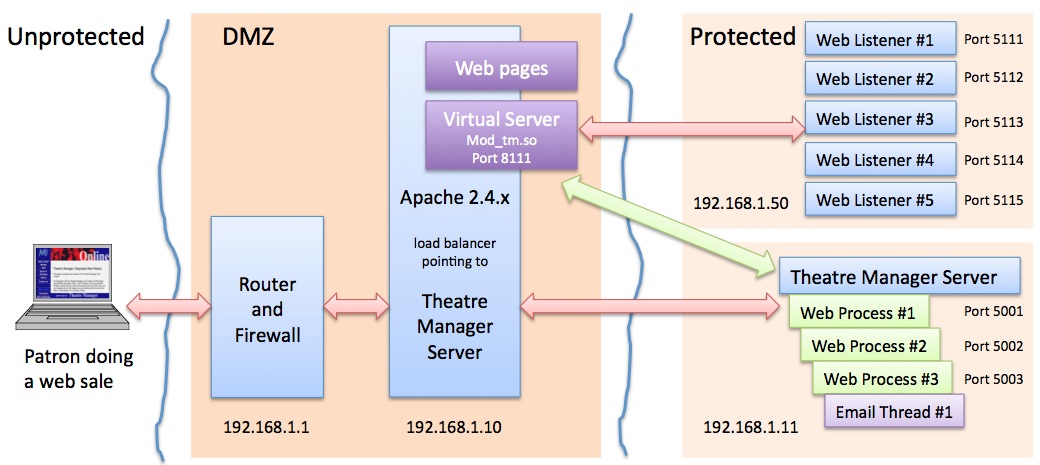
Traffic flow with the Theatre Manager Server
- All web traffic for 'tickets.yourvenue.org' flows through the router and firewall on ports 80 and 443
- The firewall passes traffic to TM Listener on ports 80 and 443
- TM Listener passes all requests to the Theatre Manager Server using the built in Load Balancer.
- The IP/Ports for each of the Theatre Manager Web Server must be specified in the extra/httpd-balance.conf file
- If the Theatre Manager Server can handle the web request, it will do so immediately.
- If the Theatre Manager Server cannot handle the request, the following happens:
- it contacts TM Web Server at port 8111 to talk to the virtual server (this is an internal port and is not exposed to the internet). However, make sure your firewall allows internal communication to this port.
- The Theatre Manager Server hands the response to the customer
Observing the TM Server Processes
- It is running as a service
- You cannot monitor or control it directly.
- You can observe it indirectly using the web listener logs from the web monitor inside TM
- You can also monitor some activity by viewing the console logs/event logs or using an activity monitor/task manager to see the CPU it uses.
- You can control the behaviour of the second generation listener by opening a web browser and using the url http://127.0.0.1:3012 on the machine with the second generation listener
Setup Considerations for TM Server
- cores-1 'Theatre Manager Server' processes start. Meaning a 4 core machine will start 3 processes, an 8 core machine will start 7 processes, a dual 4 core with hyperthreading will start 15 process.
- 3 'Logging' connections will be started for logging activity to the database. These are used by the new server
- 1 or more 'Housekeeper' connections are started to handle worker activity. Worker activity currently means things like:
- Cleaning up expired carts on a periodic basis
- Sending out emails automatically that are due to go, whether created by an eblast or from the customer when they ask for their password or get a purchase confirmation. The email worker is very fast -- over 12,000 emails/hour.
Check Scan Performance
causes Theatre Manager to initiate a test to try to determine the maximum speed for checking in and checking out an entire performance record (when complete, all tickets are returned to their original status).
An onscreen report is generated with statistics of its speed. This can be useful if you need to check network speed when using attendance scanners.
You will need to provide a performance that has ticket sold to it as per the window below and then click 'Test' to initiate the test.
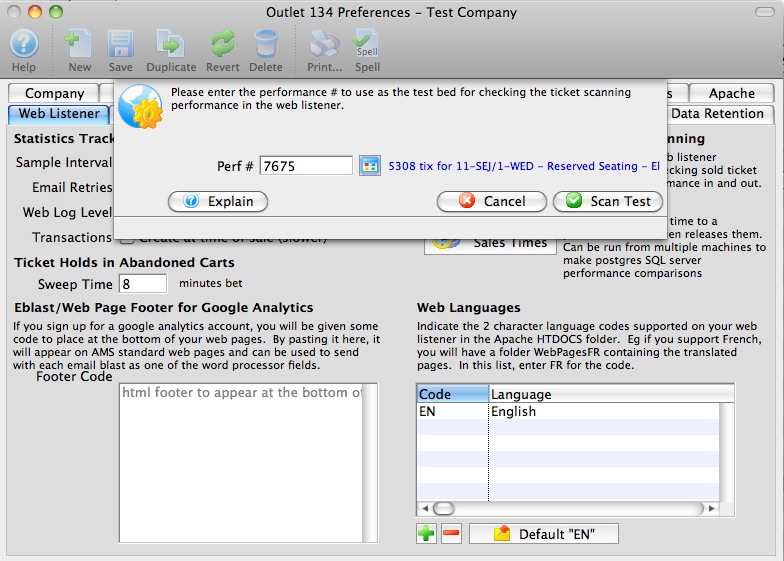
Installation - Motorola MC50, MC55, MC55A, MC5590
|
As of 2019, these scanners are no longer supported (5 years after original notice). Refer to Linea-Pro IOS based scanners
In early 2014, the MCxx family reached a technological end of life after many years of being the standard for scanning in the industry. They do not support any of the latest end to end security and the windows mobile operating system is defunct Recognizing this, we added support for Linea-Pro IOS based scanners (far easier to set up on networks, use and offer more capability). If you have existing MCxx scanners, we can provide support and replacement parts on as-available basis. |

Following are the key functions of the scanner and how to set it up.
- Description of the Motorola MC50 and the buttons on it.
- Downloading and Installing the AMS Ticket scanning program on the scanner using Active Sync.
Note: he link on this installer has been removed as it is no longer supported
- Setup of the scanner and mating of the scanner with your router and network.
- Setup of the login information and some key communication parameters before scanning can occur
Description of the Motorola MC50/MC55/MC55A/MC5590 Buttons
Theatre Manager supports the MC50, MC55, MC55A or similar wireless scanners for tracking people entering and leaving a venue.
The scanner operation buttons are:
- The yellow scan buttons are on both sides at the top of the scanner. They are interchangable so you can use either for scanning.
- When you are using the Theatre Manager AMS Ticket program, all functions are accessed by clicking on the touch sensitive screen using a stylus or your finger.
- The orange button at the bottom left of the keyboard is the numlock button. Pressing it once allows entry of a number. Pressing it twice turns on num-lock. Pressing it again, turns the keyboard back to alpha. It is handy when entering information to set up the device.
Active Sync for Windows
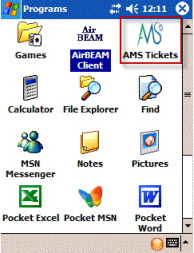 If the AMS Tickets program is not on the scanner, you will need to install it. You can determine if it is in the scanner by clicking the start menu at the top of the scanner and looking down the list for the Programs' menu item. When you pick Programs, you will see a list of applications loaded on the device.
Look for AMS Tickets.
In the screen at the right, you can see the 'AMS' logo with the name 'AMS Tickets' in the first row on the 3rd Column
If you cannot find the icon the program will need to be installed.
|
Installation must be done on a PC because the connection cables that come with the device are USB and serial. If you have a credit card server, this is an ideal machine for this purpose. Installation only needs to be done once because the program is placed into nonvolatile ram, so even if you run out of battery power, it will still be there. |
Prerequisites
You need:
- The Windows Mobile software and the AMS Ticket program. You can download all you need from our web site.
- If you have Win 2000 or XP, then you must install Active Sync 4.5.
- For Windows Vista, 7, 8 and later, Microsoft Windows Mobile Device Center (WMDC) replaces ActiveSync. WMDC offers device management and data synchronization between a Windows Mobile-based device and a computer and is most often installed on the computer as part of the operatiing system.
- A PC computer with a USB connection.
Installing Active Sync 4.5
|
Active Sync 4.5 only applies to installing software on the Motorola scanners using windows 2000 or XP. If you have Vista and above, Microsoft Windows Mobile Device Center (WMDC) replaces ActiveSync and you may need to download and install that instead (if it is not already on the computer) |
| Step 1 |
If you have not already done so, download the installers for the AMS ticket program. Expand the zip file to a convenient location and have a look at the folder. You will see some folders and files that look like the image to the right. If you have plugged in the scanner to your USB port, please unplug it. Double click on the ActiveSync 4.5 installer. This is the first step in getting the program installed. This happens once, regardless of the number of scanners you need to install the program on. |
| Step 2 |
An installation window, similar to the one to the left, opens. Please follow the instructions to Install Active Sync 4.5. Click the Next button. |
|
Step 3 |
After reading the terms, click to accept the licence terms, then click the Next button. |
|
Step 4 |
Enter your user name and customer information and click Next. The software will most likely default the information for you. |
|
Step 5 |
Again click Next. |
| Step 6 |
Click the Install button and wait till the installer is finished doing its work. This can take several minutes, depending on the speed of your machine. |
|
Step 7 |
Once you have installed Active Sync, you should see an icon at the bottom left of your computer in the icon tray. It looks like a couple of 'arrows' in a circle. If it is grayed out (like this picture), the device is not in and not connected. |
|
Step 8 |
If the scanner is its cradle and is connected, you should see the the icon is 'green' (indicating a connection). |
|
Step 9 |
In either case, you can 'double-click' on the icon to open the active sync program. You will see a window like the one on the left. |
|
Step 10 |
If you have no connection, after plugging the scanner devince and the USB cradle, go to File->Connection Settings. This window has some settings that can be changed and should look like the image on the left. The default setting is to allow USB connections, but if you are having issues, please check to ensure the settings are similar. The important thing, is to get the Device Connected message. |
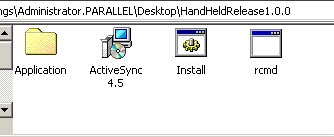
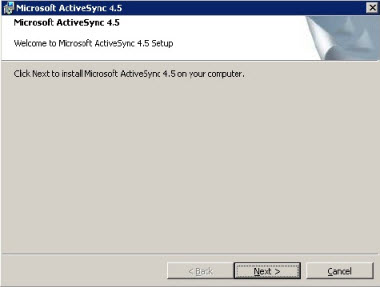
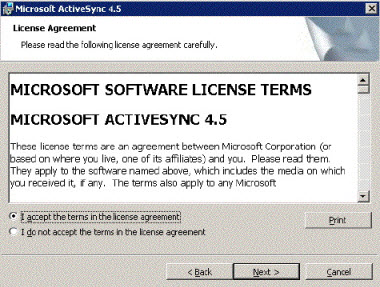
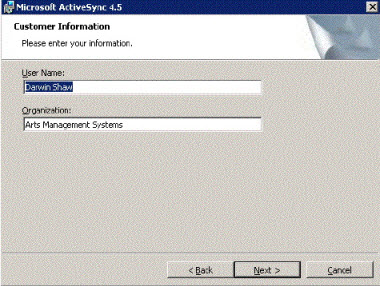
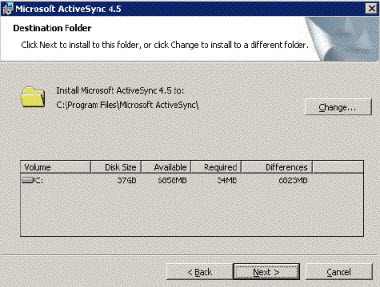


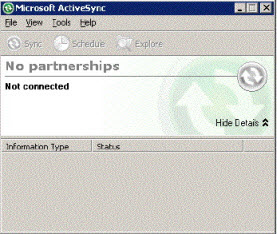
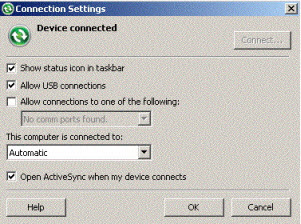
Installation the Scan Ticket Application
|
These instructions are based on installation using Active Sync using a windows XP computer. If you have Window vista or later, Microsoft Windows Mobile Device Center (WMDC) replaces ActiveSync. You can skip the install of Active Sync 4.5 |
|
You will also need to know the scanner type you have (MC50, MC55, or MC55A) and select the latest version of the software from the appropriate folder in the installer archive. |

|
Step 1 |
Once connected to active sync or equivalent (the window does not have to be open):
|
| Step 2 |
As the install progresses, you see the results of dos commands and file copy. This step can take a while (perhaps 10 minutes) as it moves the data onto the hand held device. Do not unplug the hand held device during the installation. |
|
Step 3 |
While the sync is occurring, the scanner device will show items are being transferred with a set of left/right arrows on the screen near the time. There is no animation of the arrows while the transfer is happening. |
|
Step 4 |
At the end of the install, the DOS screen will close on your computer and the screen on your mobile device will ask if you want to reset the computer. Although the messages 'all data and files will be removed', it really means the data that supported the installation of TM or other programs. Click Yes |
|
Step 5 |
After the restart of the device, you need to follow through with the device initialization. This includes: |
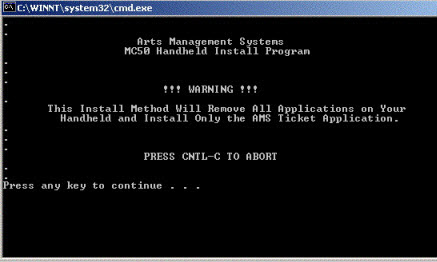
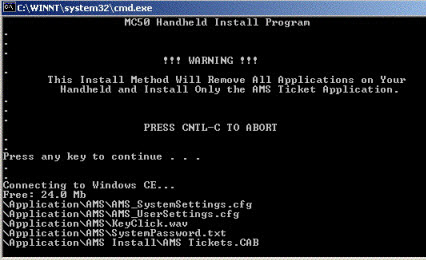
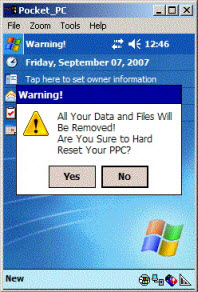
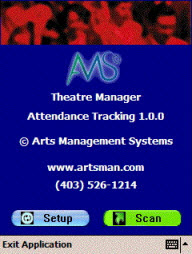
Mating the Scanner to Your Network
Click the icon to down load a PDF instruction sheet of this page.
Setting up a scanner requires two things to be done.
- The first is mating the scanner to your network and making it acceptable to your routers (all routers if you have multiple and if necessary).
- The second is getting the communication and parameters set up.
Mating the scanner with your network
We expect you are running a closed network - where you cannot log on unless your router has the mac address of the scanner entered into it and your scanner is set up to connect to that network using the SSID and WEP password for the wireless router.
You will need to involve your network support people to complete some of this part of the setup. Once done, it should not have to change again.These instructions focus on the part of the setup relating to the scanner.
| |||
 |
| ||
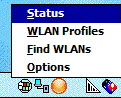 |
| ||
 |
| ||
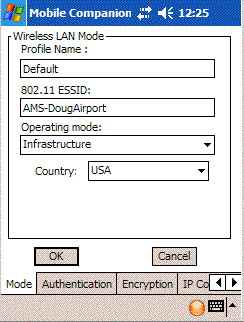 |
| ||
| |||
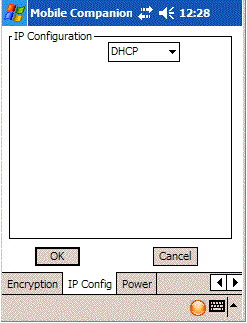 |
| ||
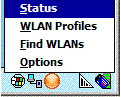 |
| ||
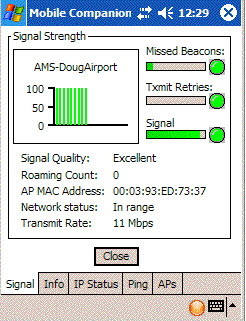 |
|
MC55A addendum for Settings
The MC55A has Windows Mobile 6.5 (r) installed and has a few quirks as the interface is far less intuitive. Please adjust communication settings from within the Ticket Scanning program using the following general steps starting from the 'Theatre Manager Setup' window.
|
|
Create and Managing a profile |
Using the wireless button, select Manage Profiles
| ||
| Now that you have a profile, time to select it and use it. Press and hold on the profile until the popup appears and click 'Connect'. The icon changes if you have active connection. You may need to 'x' out of this window to continue. Before you do, please refer to for last minute settings that you might need to check. | |||
Testing the Signal |
Pressuming you are connected, click the Wireless button again in the ticket scanning program.
| ||
Testing the Network |
| ||
|
Once the network settings are done, then the next step is to try and end to end test. You will need to start at least one Theatre Manager Web Listener. For the purposes of the test, it is better that only one be started. |
|||
Testing a Scan |
On the Web listener window, there is a pop-up at the bottom middle of the screen beside the Show Detail button. This is the log Level selection which is normally set to Error. Change the setting to say Ticket Scanning . The Web Listener will now report more messages, including those sent by a scanner. It is helpful in the diagnostic process.
| ||
Real Life Testing |
The final step in the test process is to take the scanners to locations where you will use them (if you see messages that the scanner is communicating in the previous section).
| ||
Training |
The scanners do work, as there are hundreds in use. However, we recommend that you have a training practice session a few days before using it on your first real event. Have the ushers come in and try it. Help them scan in and scan out people so that they are familiar with the basic operation. Then try the scanners on a small event first - it is almost a certainty that there will be minor problems when real patrons are involved. Patrons bring tickets to the wrong event and your ushers need time to adapt to the controls that a scanner brings. Once you have a few smaller events under your belt and feel comfortable, then you are ready for all events. | ||
Scanner Prefs-Motorola MC50/55
|
Google bought Motorola in may 2012 and subsequently sold it to Lenovo. These scanners are no longer PCI compliant due to low encryption capabilities.
Note: the Motorola scanners are no longer supported. Replacement scanners are the linea pro, which is also more reliable and versatile. |
| Accessing Setup |
 Once the software is installed and the scanner is mated to the network, you can click the start menu, programs and the click on the AMS Tickets application.
It may take a couple of seconds or so to start as the scan program is synchronizing time with a time server and making sure the clock on the program is set properly. When it does start, you will see the screen at the side. Now we can set up scanning for an event / play. This must be done in advance of each performance that you are scanning tickets for. All that needs to be done is set up some parameters. Click the 'Setup' button on the screen. | ||||
 You will be asked for a system password to change the settings for the
performance. Type '123' (this can be changed) and once the password is
right, the next window will automatically appear.
You will be asked for a system password to change the settings for the
performance. Type '123' (this can be changed) and once the password is
right, the next window will automatically appear. | |||||
| Sample Setup |
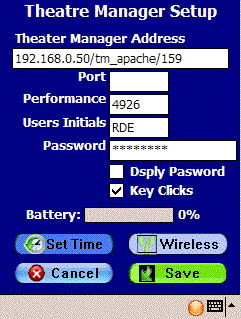 When you open the preferences window using either of the two methods above, you have some fields that must be filled in. These are below (Press the orange button on the keyboard twice to turn the num-lock on mode):
| ||||
|
You can access this option directly from the main screen where the scan & setup buttons are. Click the 'Scan' button and you will see a screen like the one on the left. At the bottom is a 'checkout' button with a red arrow. This means the mode is currently 'check in' and you click this button to change the mode to 'checkout'. It will also change the arrow at the top from green (checkin mode) to red (checkout mode) If there is a green arrow with 'check in' at the bottom, then the current mode is 'checkout' mode. Click the 'Checkin' button to change the mode to checkin. |
Theatre Manager Server Settings For Motorola Scanners
The Motorola Scanners rely on port 80 to scan tickets. The Theatre Manager Server, by default, elevates all traffic to Port 443. For this reason additional settings need to be added to the Theatre Manager Server through the Director to allow for scanner communication on Port 80.
Q: Why are there specific settings for the Motorola Scanners?
A: The Motorola scanners do not support secure connections to the Theatre Manager Server web server. The process below outlines how to setup an unencrypted side-entry point to the DMZ web server, while still maintaining a secure connection to the primary web server. If you’d like to have end-to-end security then please email sales@artsman.com for information on the updated, and fully secure, iOS scanners.
Settings
- On the Web Server computer, open the Theatre Manager Server Director in a browser by visiting http://127.0.0.1:3012
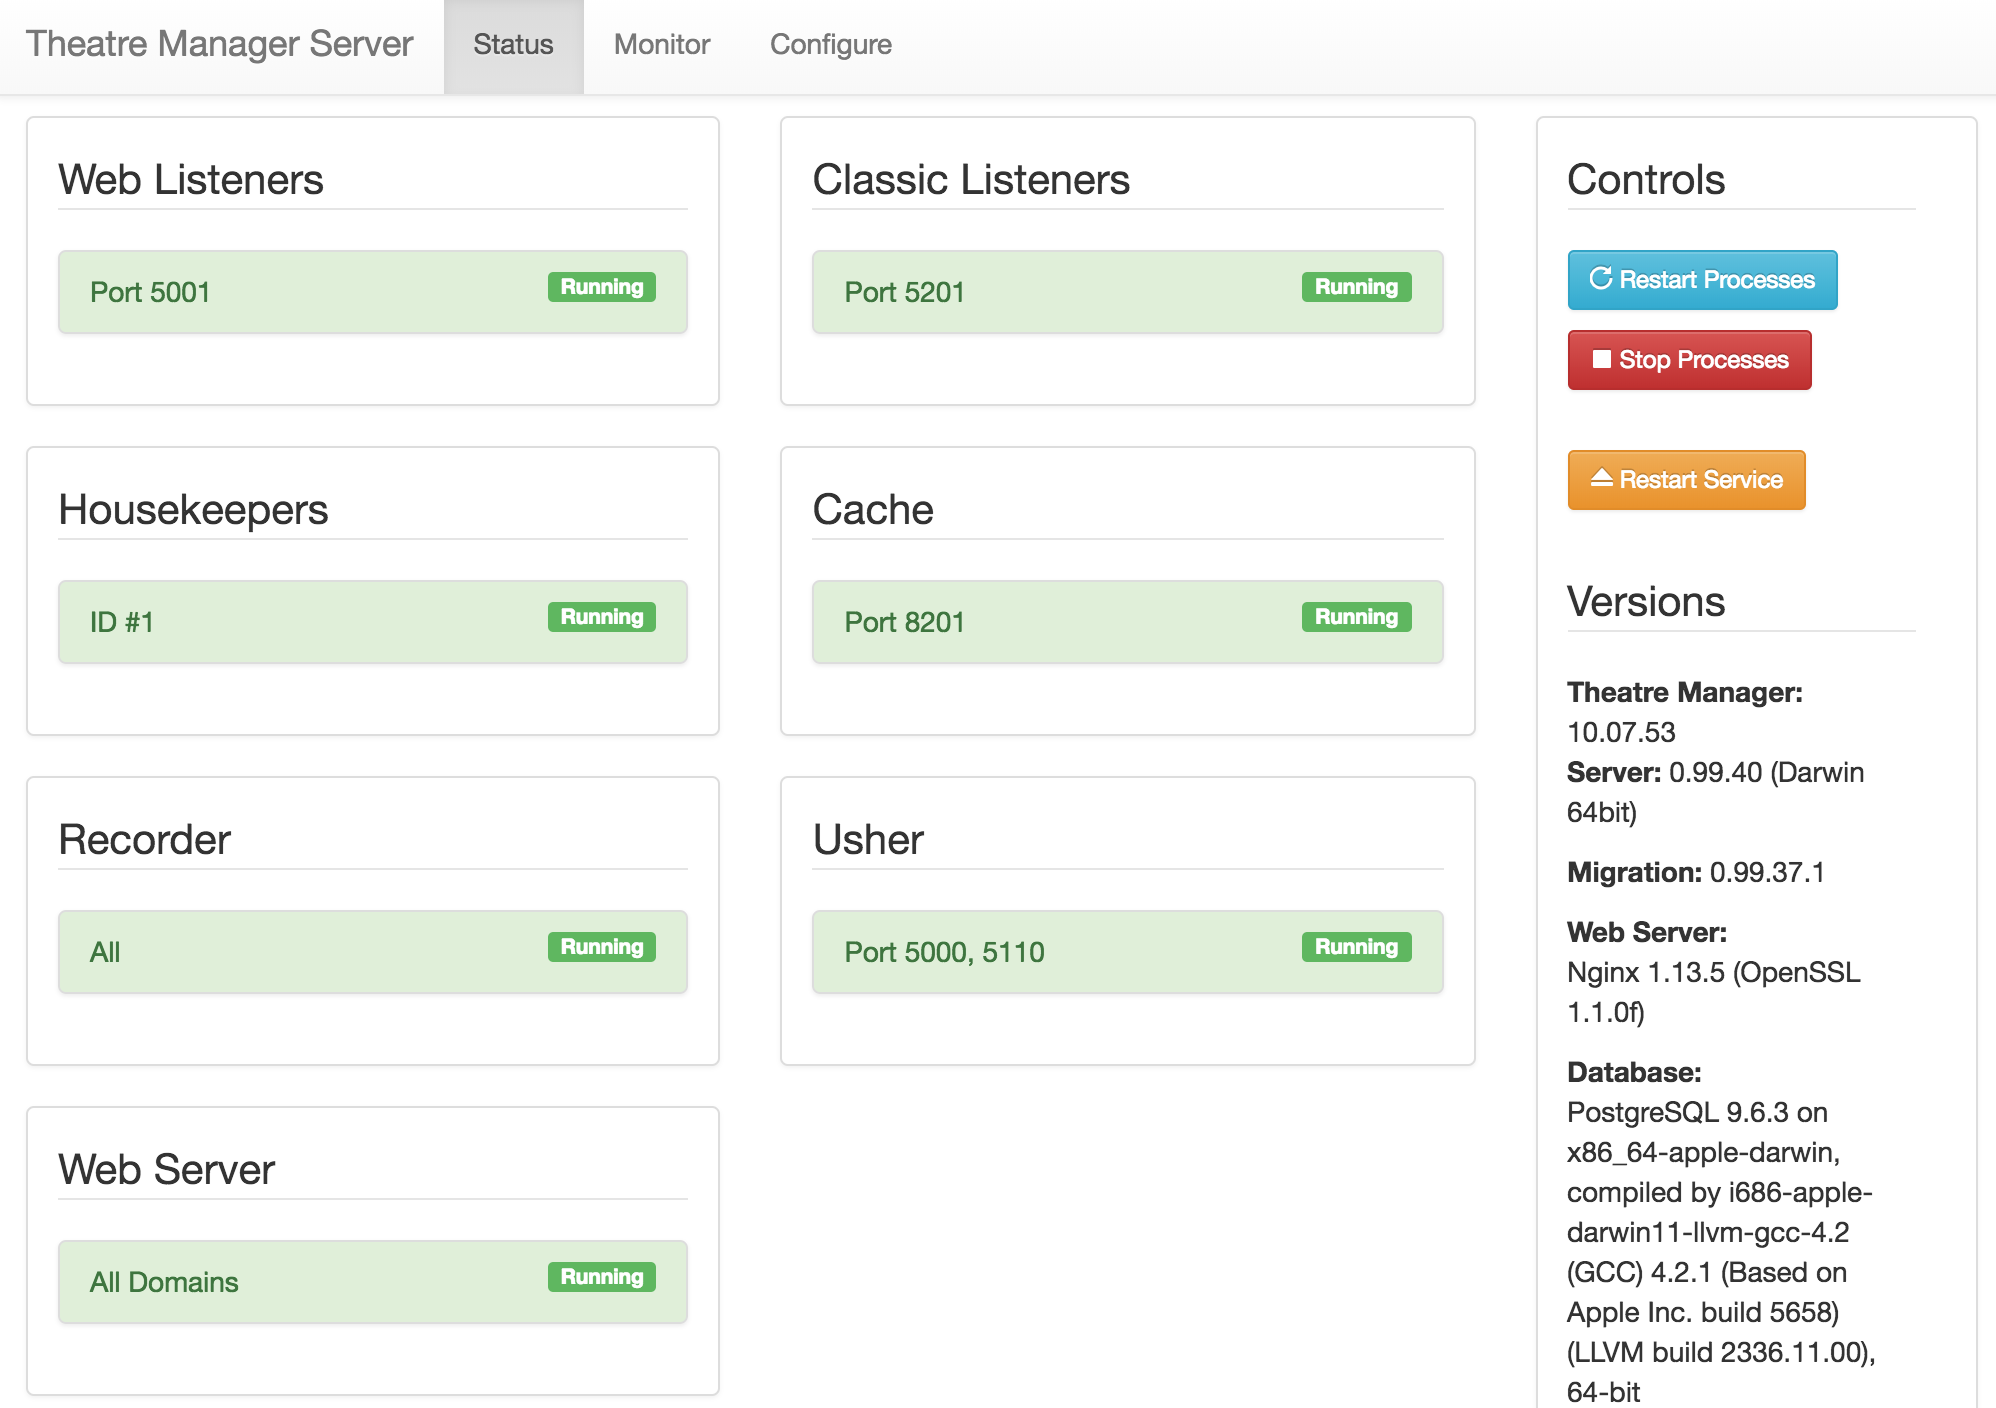
- Select the Configure tab.
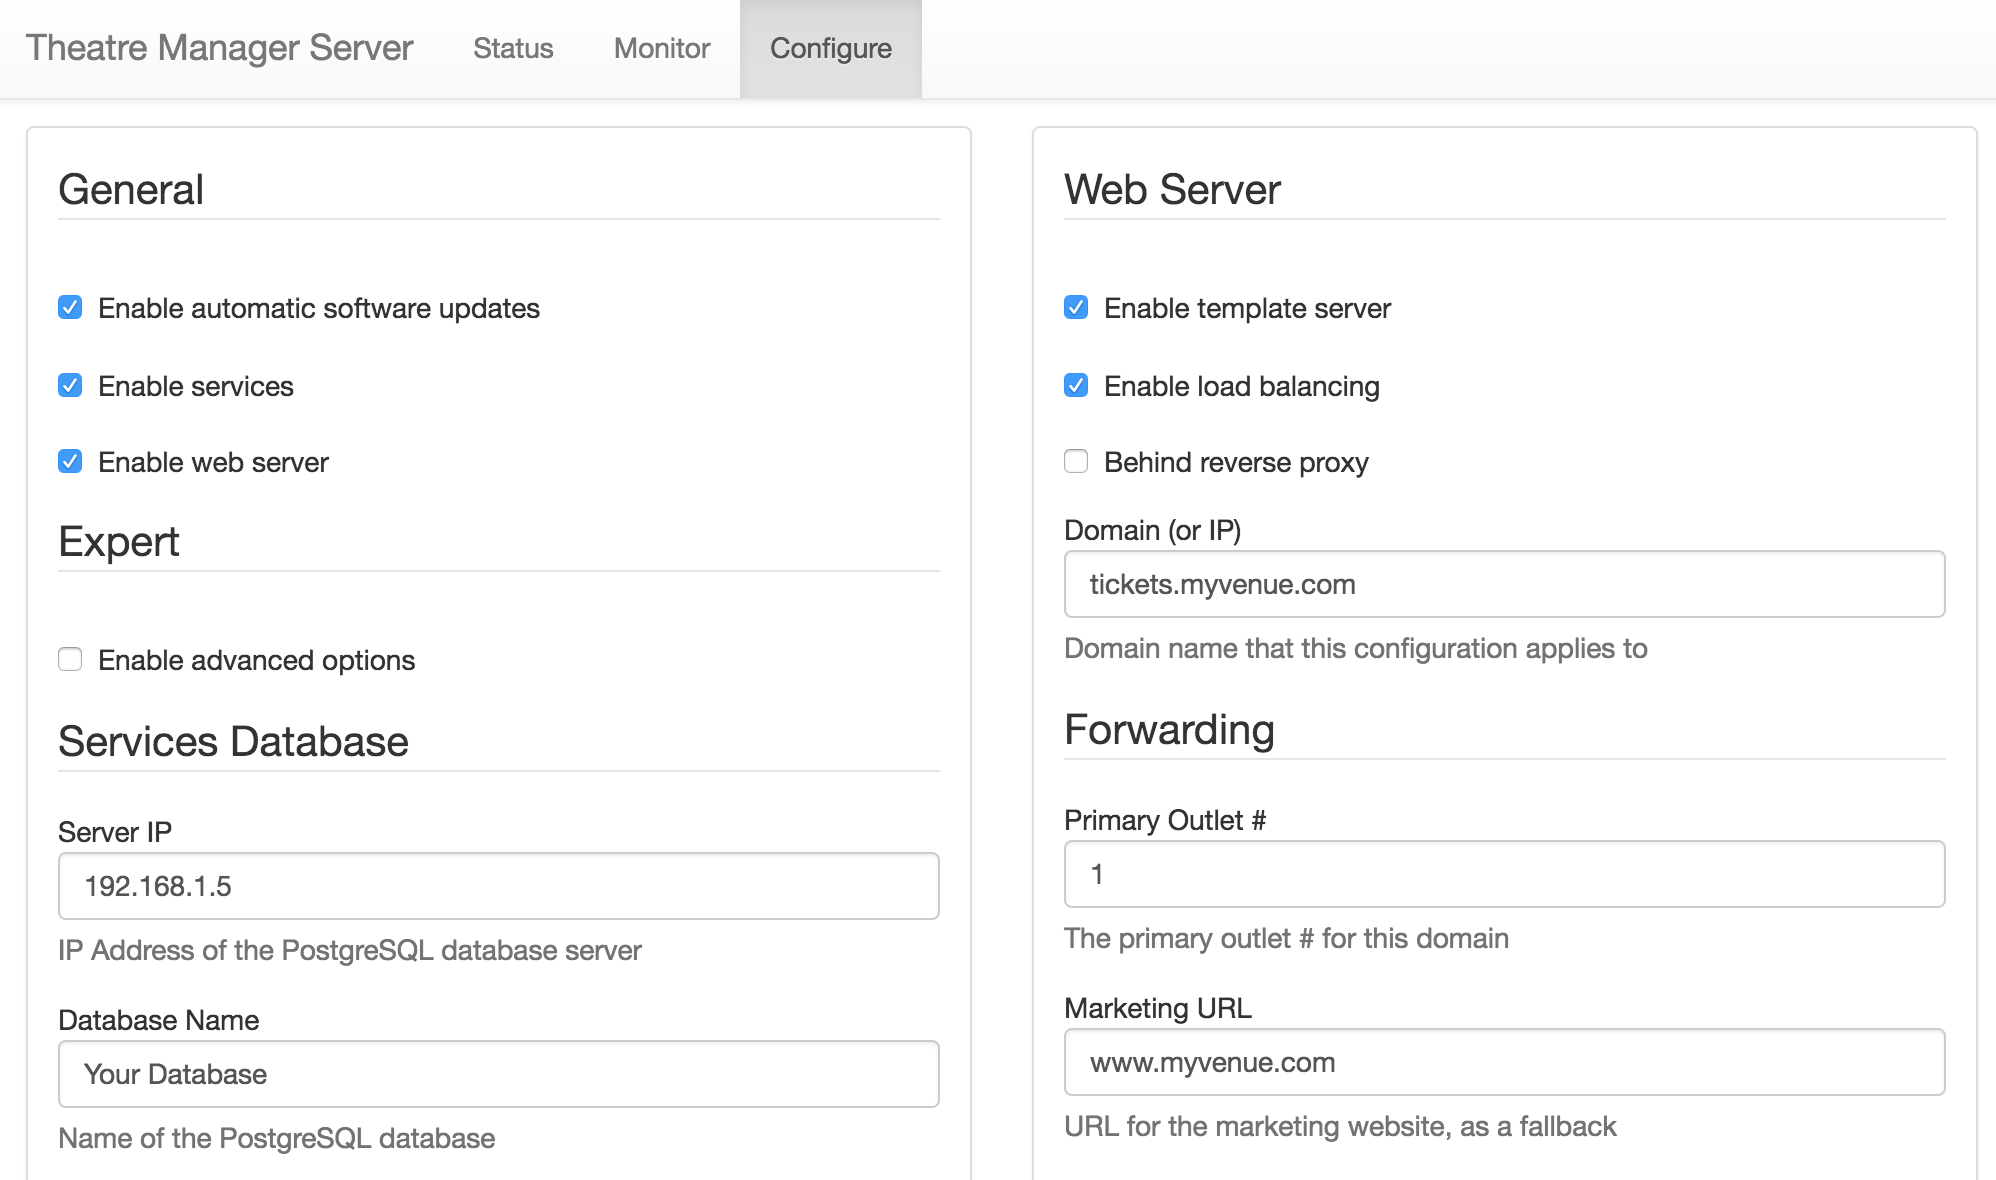
- Check the box for Enable advanced options and click Save at the bottom of the left column. This will open up more tabs within the Director window.
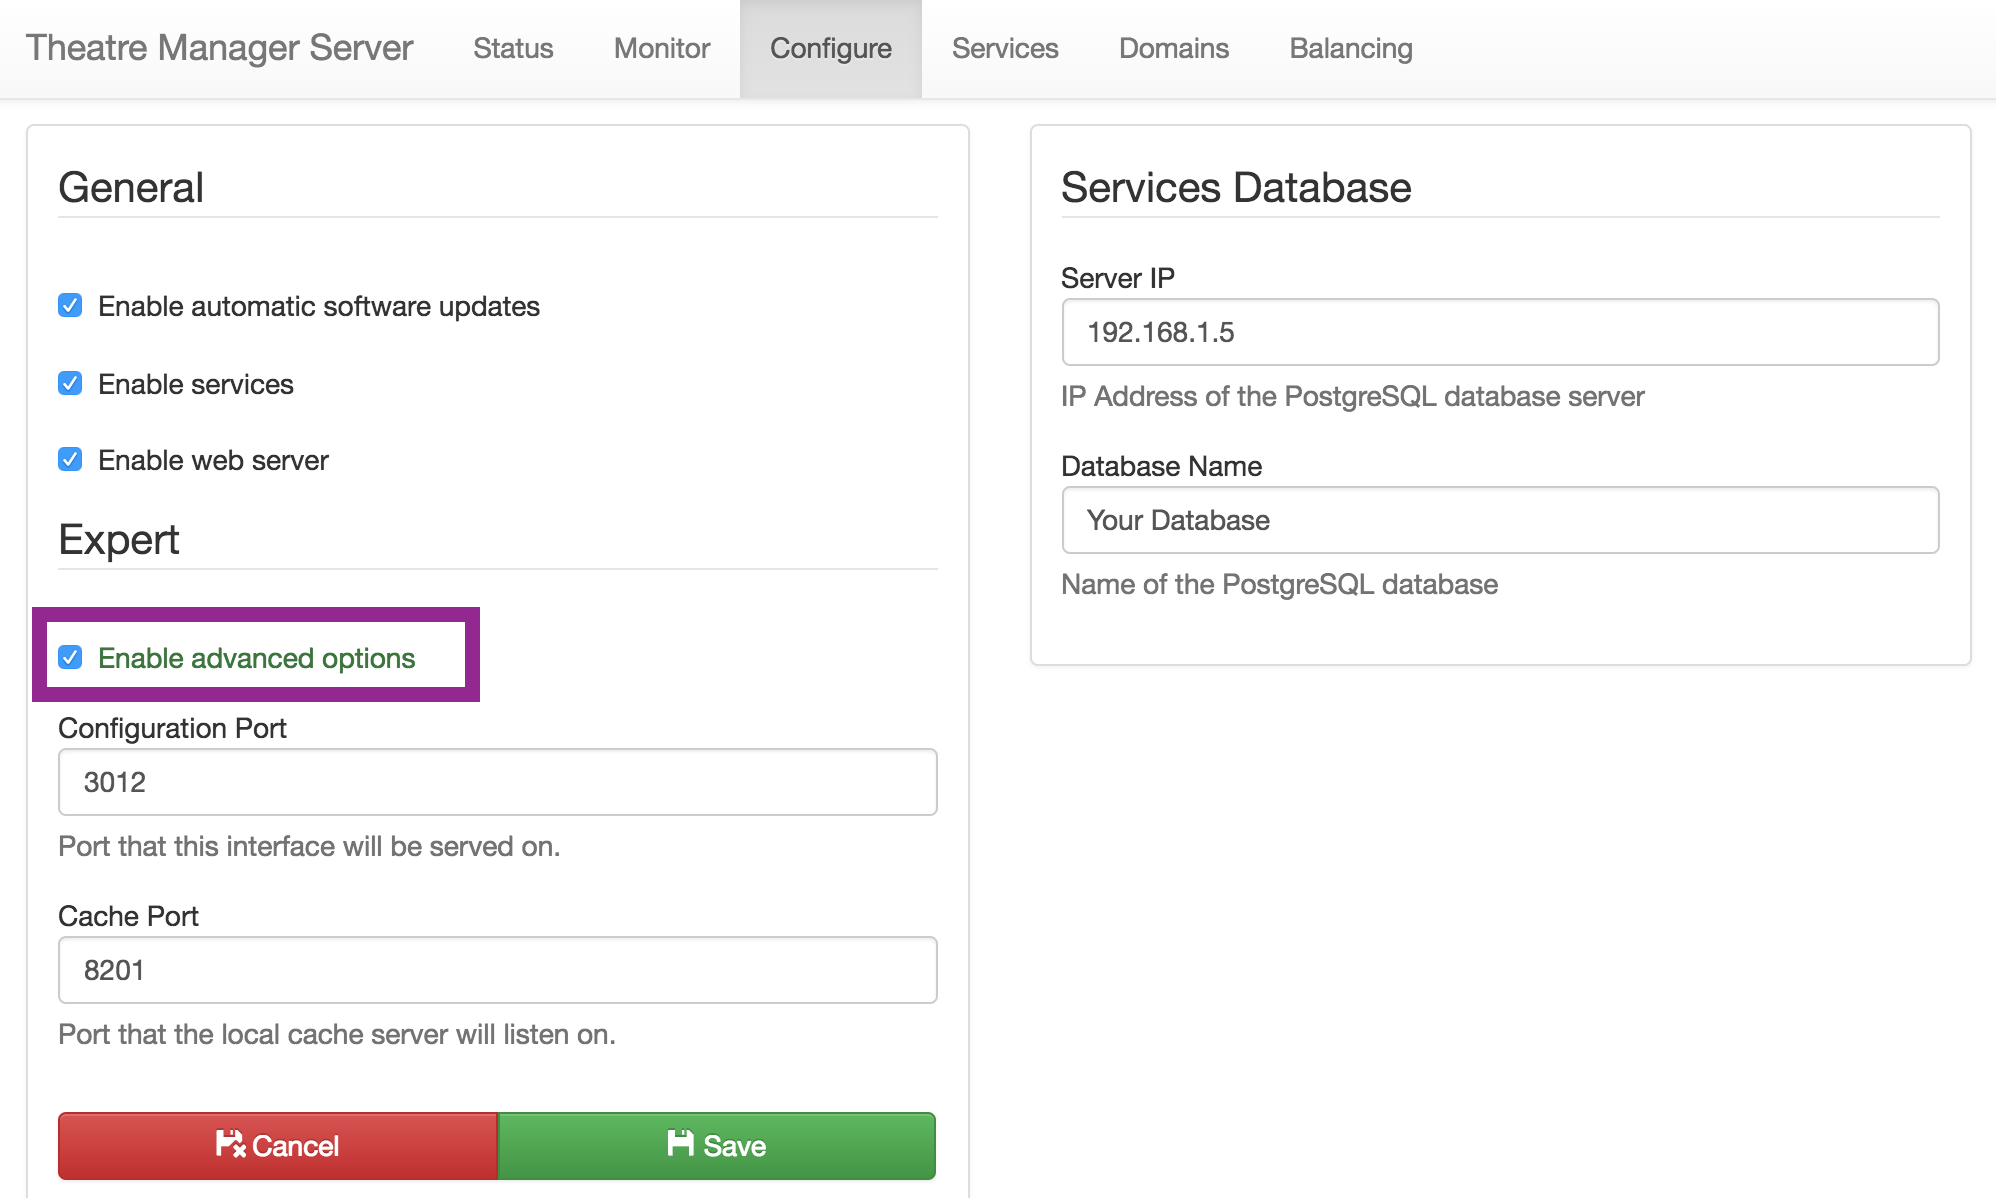
- Select the Domain tab at the top of the Director window.
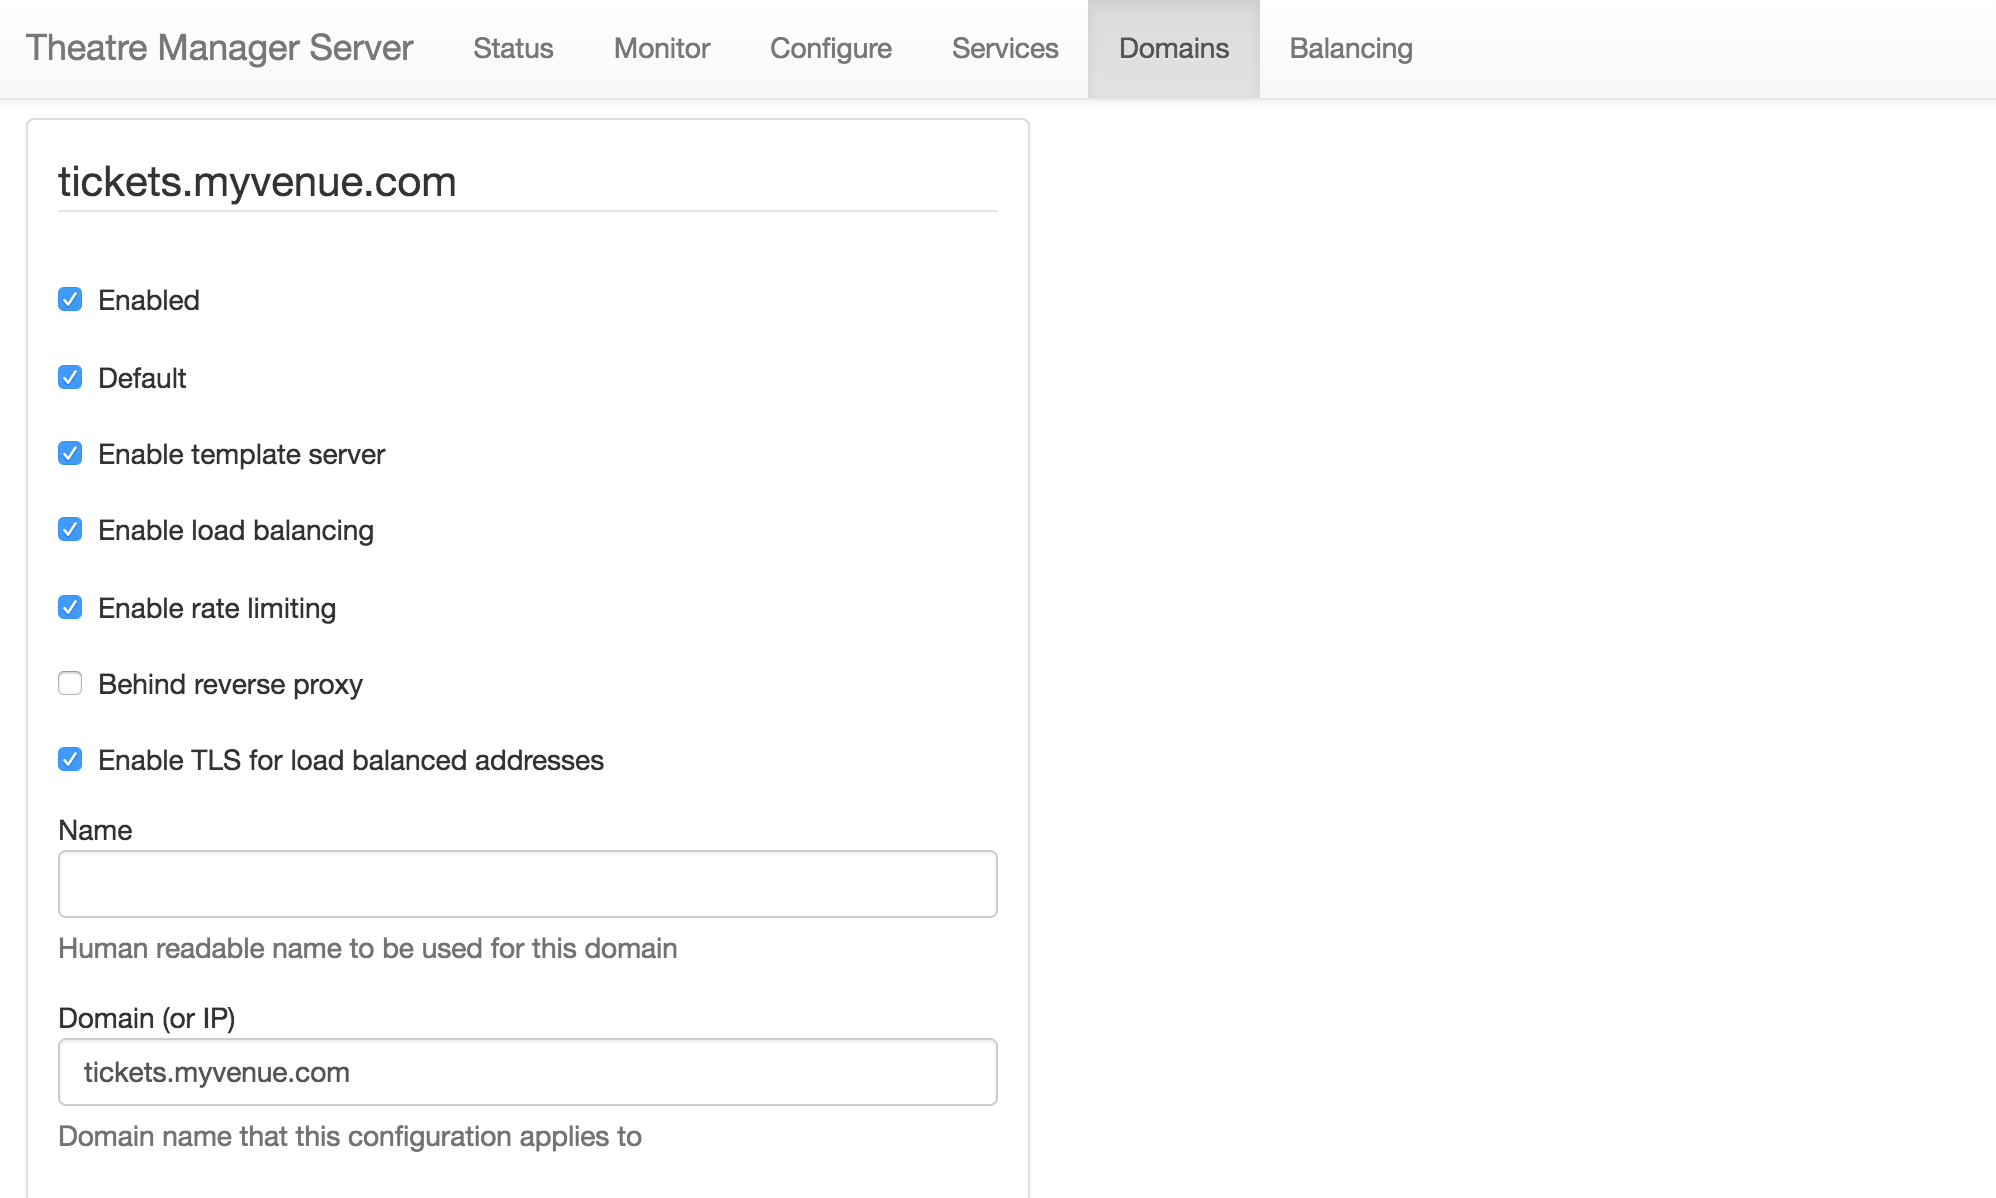
- Scroll to the bottom of the window and click the Add Another Domain button.
- Fill in the following details for the new domain:
- Check the Enabled box.
- Check the Enable load balancing box.
- Check the Enable TLS for load balance addresses box.
- Enter a Name for this connection. It may be something like Your Venue Scanning.
- Enter the Domain (or IP). This should be the IP address of the Web Listener.
- Enter 80 into the Port field.
- Click the Save button at the bottom of the right column.
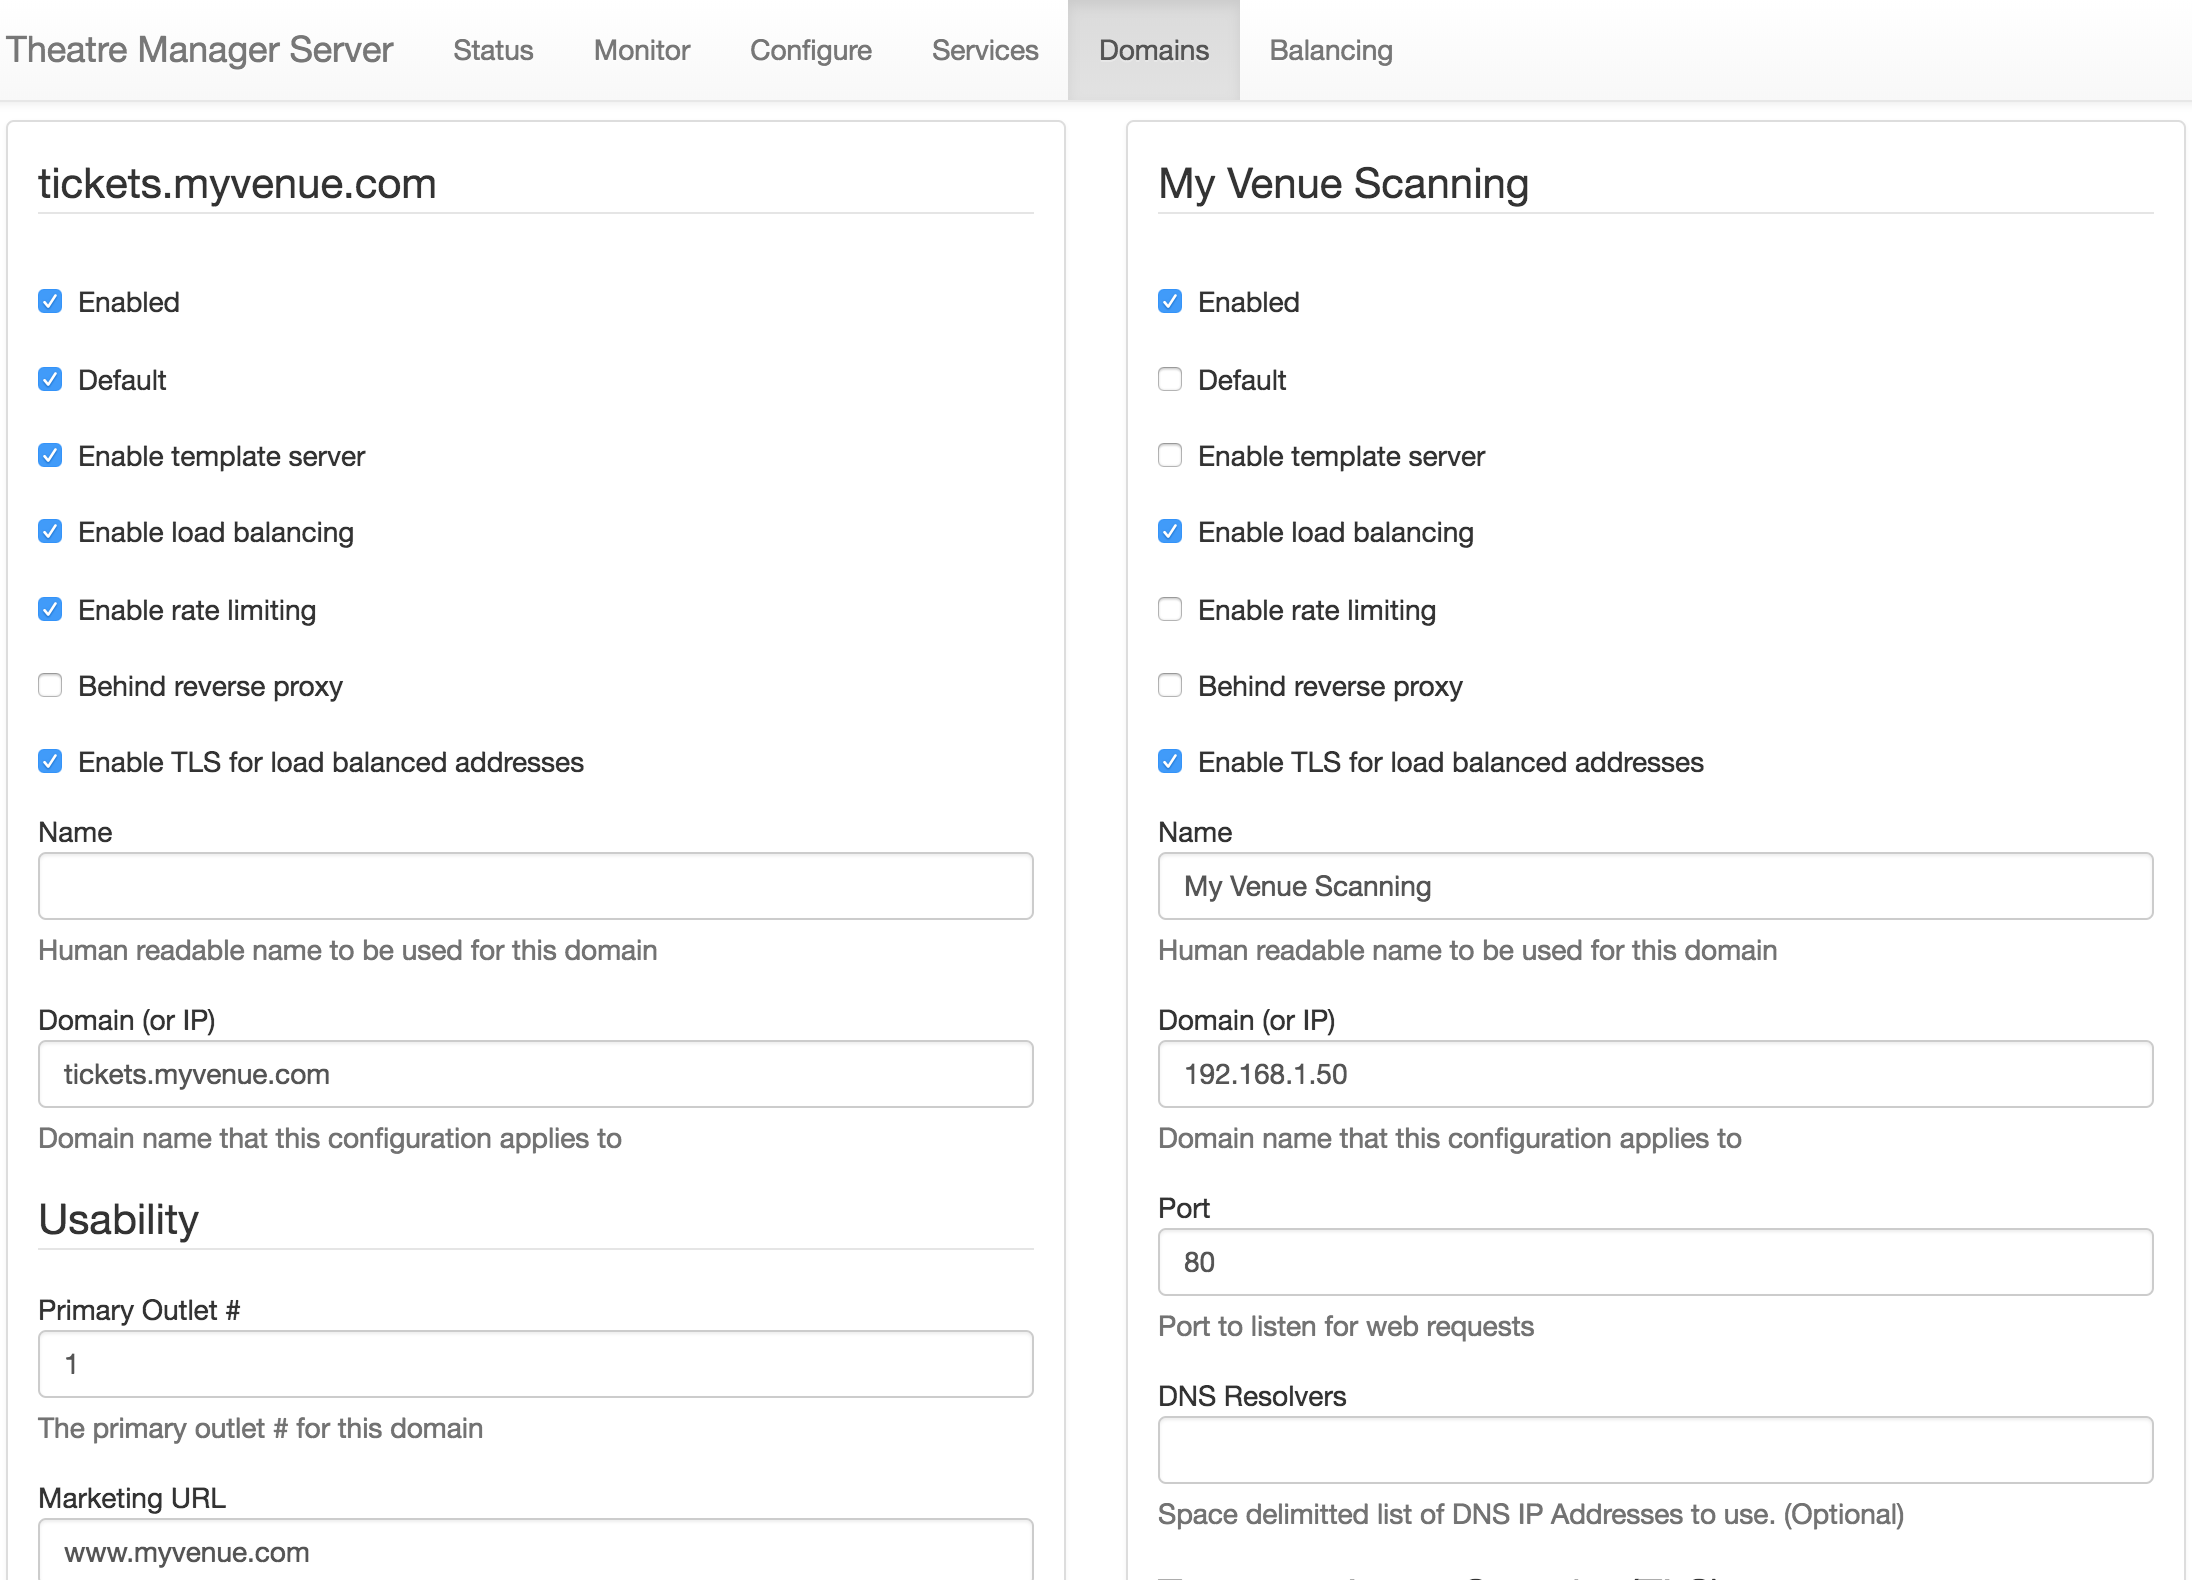
- Select the Balancing tab at top of the Director window.
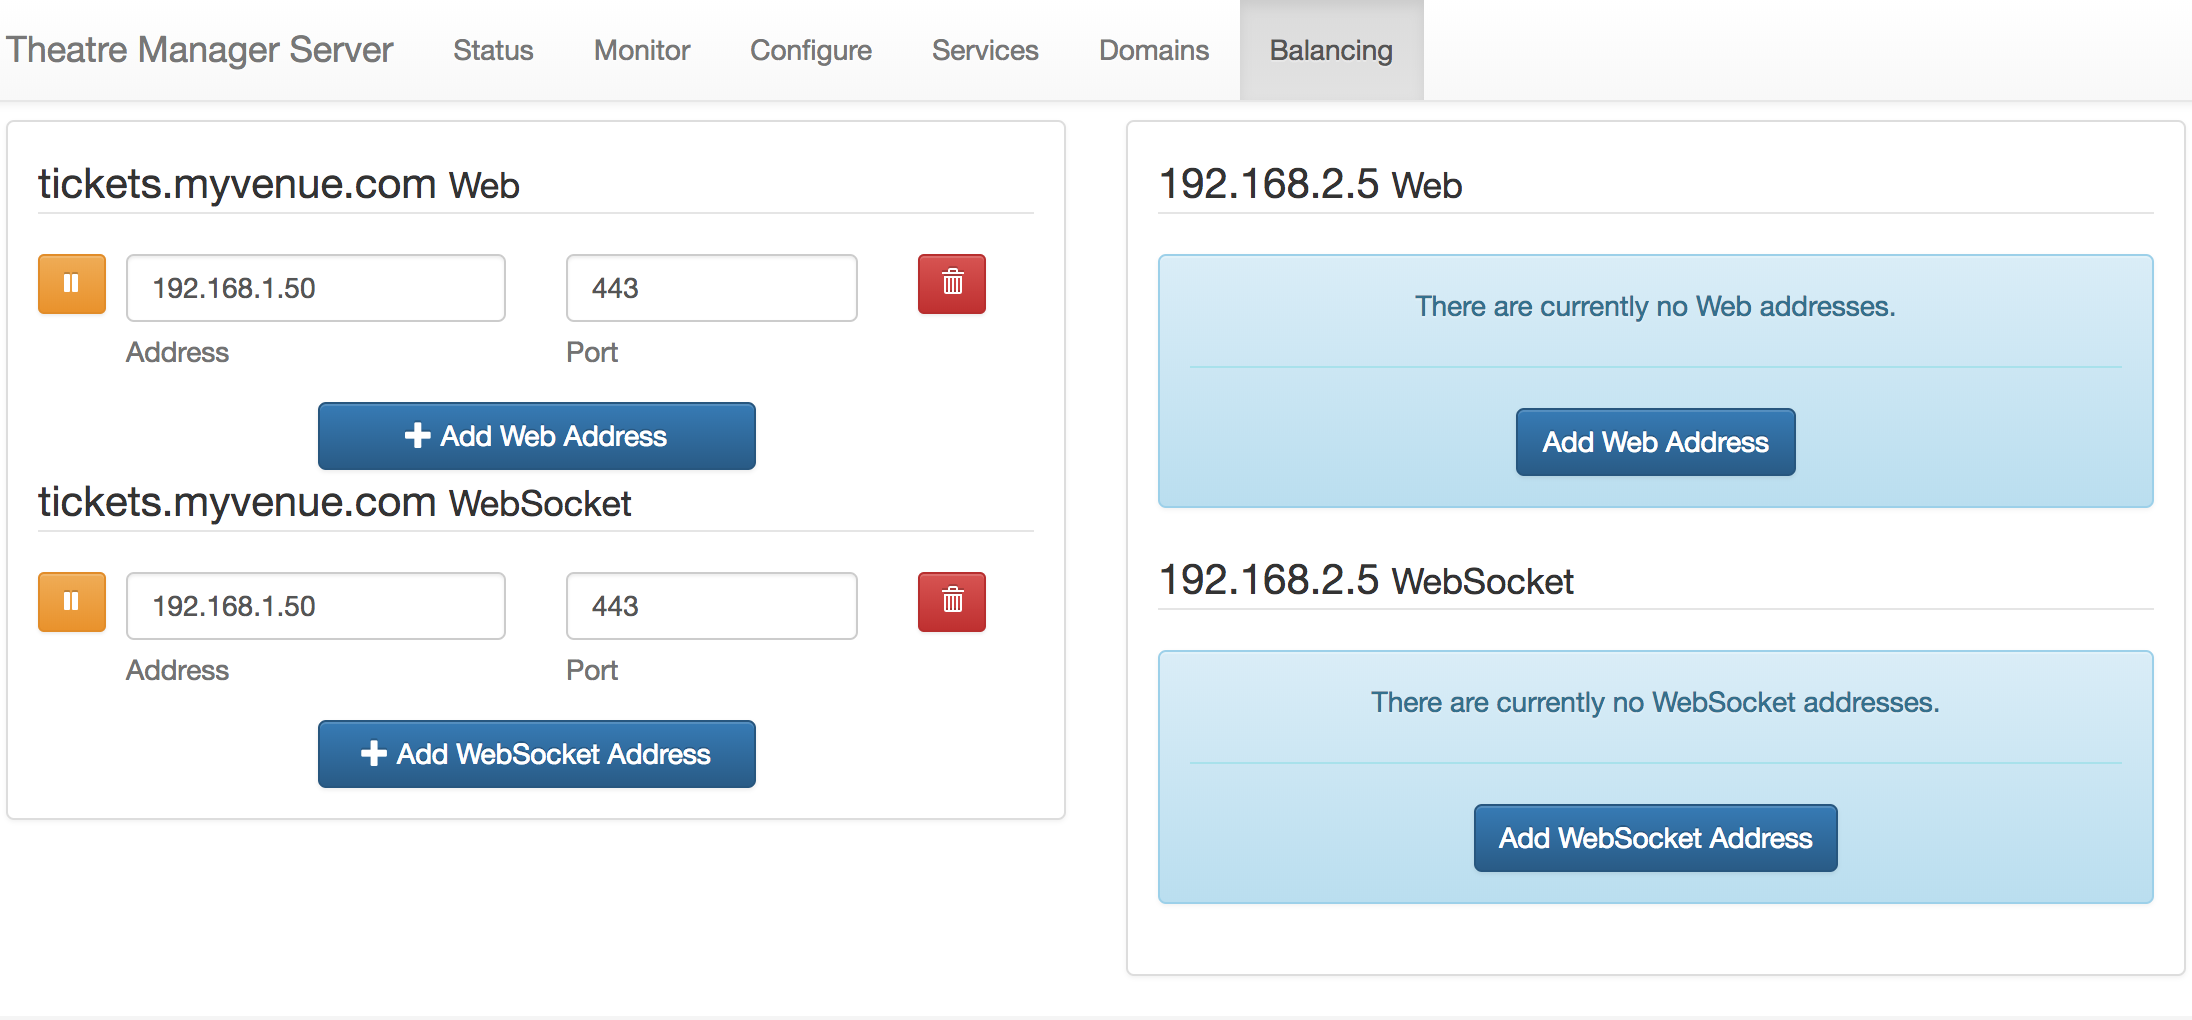
- Click the Add Web Address button under right column.
- Enter the following details:
- Set the Address to be the IP address of the Web Listener.
- Enter 443 in the Port field.
- Click the Save button at the bottom of the right column.
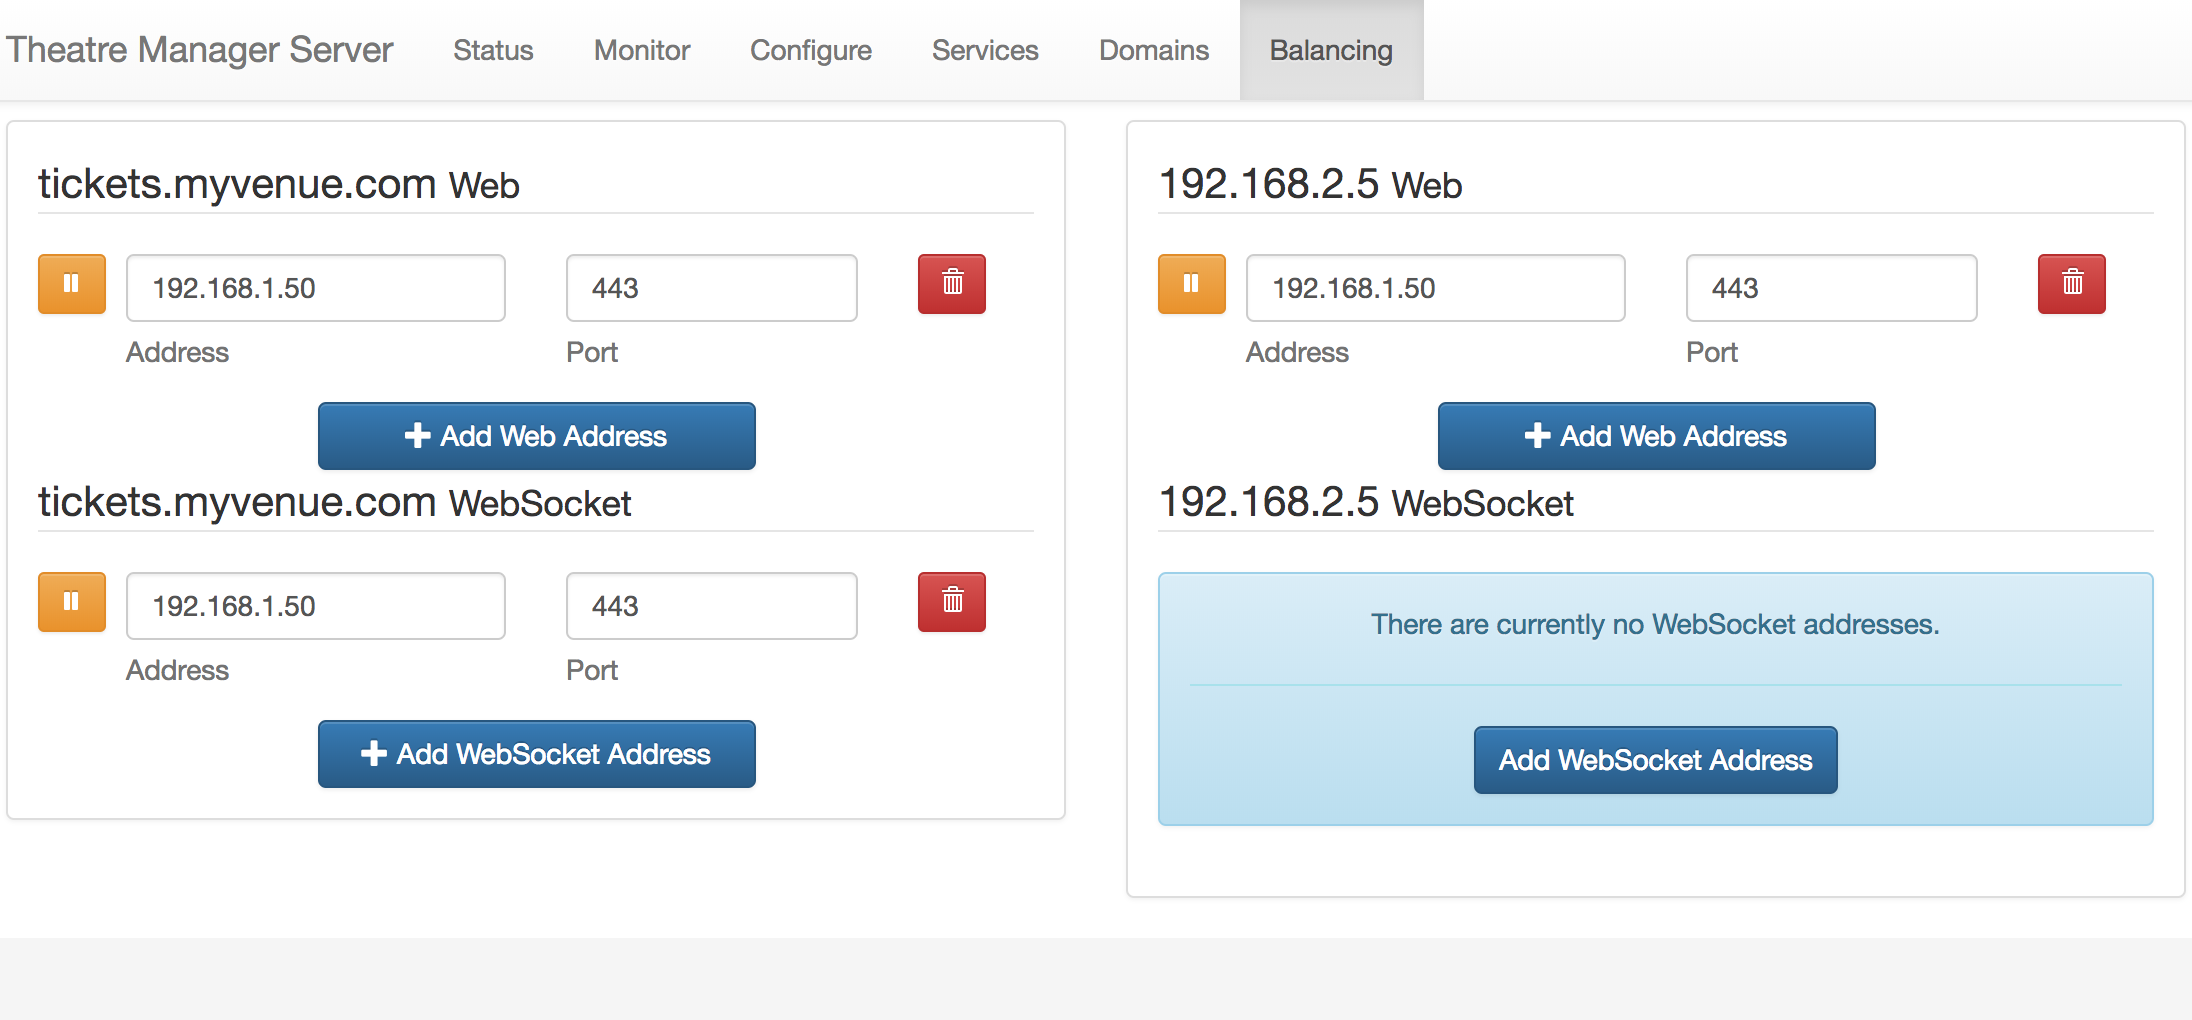
The Theatre Manager Server is now read to scan tickets using a Motorola Scanner.
Wireless Scanner Tips/Troubleshooting
The following list are some things that we've encountered that may help you.
Settings for Performance and Static IP
- Set power performance to maximum
(Jul 2011 O/S) Windows Start -> System Tab -> Power -> Advanced -> Set to "Max Performance"
(Nov 2011 O/S) Windows -> Settings -> System Power -> CPU Power [tab] -> Set to "Max Performance"
- Increase time for auto-shutdown/sleep mode
(Jul 2011 O/S) Windows Start -> System Tab -> ??? -> Advanced -> Either remove sleep mode or set to 10 to 15 minutes
(Nov 2011 O/S) Windows -> Settings -> System Power -> Advanced [tab] -> Turn OFF "Turn off device if not used for" or set to the highest minutes.
- This will stop the scanner from going to sleep and upon waking up, possibly receiving a different IP address.
- It also allows for faster scanning at the door as the usher does not need to wait for the scanner to wake up and re-connect to the wireless router.
- Set the Scanner to have a fixed IP address
Theatre Manager counts the number of scanners in use by the IP address of the scanner that it is connecting from. If it is a DHCP and if each time the scanner connects to the network, it is given a new IP address, then you may run out of ticket scanner licenses.
You can talk with the IT department personnel responsible for issuing IP addresses to determine a range of suitable numbers to assign to the scanners and set the scanner to a fixed IP. This will make connections to the wireless hub faster and allow Theatre Manager to keep track of the various scanners more effectively.
Finally, if you can connect via internet explorer (located in the applications folder on the scanner) on the wireless device to your web site, you should have all the network infrastructure in place to do ticket scanning. This means only the Theatre Manager scanning program needs set up.
Changing the System password
Theatre Manager's application for the scanners is preset with the System Entry Password and System Exit Password of "123" (without the quotes). You may change this password and set your own System Entry and System Exit Password.
After you have changed the password(s), ensure you provide the updated password(s) to the required people within your organization> Otherwise they will not be able to access the Theatre Manager scanner application setup utilities.
To change the password(s), you perform the following steps:
Using Activesync- Gain access to the scanner via ActiveSync.
Start browsing the files on the scanner. To learn more about ActiveSync, click here.
- The files you are looking for are in the Applications -> AMS folder:
- SystemPassword.txt (it contains 123)
- ExitPassword.txt (it contains 123)
- Edit the contents of either file to the new password.
You can edit the password files directly on the wireless scanner itself.
To change the password(s), you perform the following steps:
- Navigate to Windows -> File Explorer -> Applications -> AMS
The files you are looking for are:
- SystemPassword.txt (it contains 123)
- ExitPassword.txt (it contains 123)
Quick tips on scanner connections
Quick tips on scanner connections
- Make sure Wireless is on (it is off by default)
Windows Start -> Settings -> Connections tab
- Change network from "work" to "internet"
Windows Start -> Settings -> Connections -> WIFI -> change "work" to "internet"
- Turn Wireless mode "on"
Windows Start -> Settings -> Connections -> Wireless Manager -> On
- Uncheck the 801.11d checkbox
This can be accessed from the home screen (or from the AMS setup/wireless/Options screen) by:
- Clicking on the wifi settings
- Clicking on the Fusion button on the bottom menu
- Choosing Options, Regulatory (needs to be set to the country you are in to match your router - usually USA or Canada)
- uncheck the 801.11d checkbox.
Scan displays numbers slowly
Symptoms
The symptoms seem to be that the first number from the ticket will appear on the scanner, then a small delay, then the second number will appear, then a small delay, then the rest of the numbers. In total, it might take the scanner just over a second to register all the numbers, rather than a fluid slow of digits to the screen.
Solution #1
If this occurs, the MC55 needs version 2.0.0.4A or later of scan wedge software installed. Please download and reinstall as per instructions to put the new software in place. Also, please record any settings you have made to set up the scanner as the re-install process clears all data and settings from the scanner.
Solution #2
Recent versions of Windows Mobile also has spell checking turned on. This has a rather detrimental effect on ticket scanning - as it the scanner tries to spell check and predict each ticket number as it is scanned. Please turn this off.
Scanner Count Exceeded and Scanner Speed
Only a couple of your scanners appear to be working. The scanners that are not working show the following:
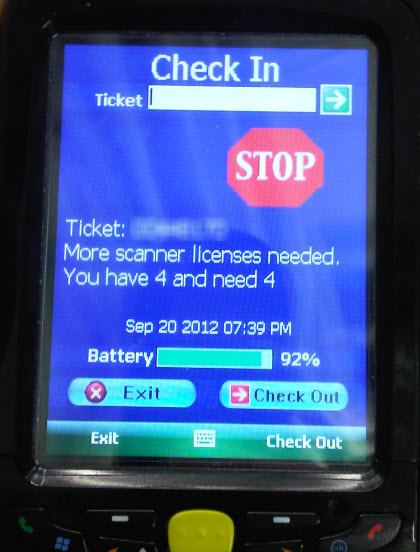
Scanners should be using a fixed IP address. Click here for more information.
Theatre Manager tracks the scanner count by IP Address. If the scanner change their IP address (which they can do if they do not have a fixed IP address) a single scanner could be counted multiple times and your database knows how many scanners you are licensed for. If an IP address changes, then the database says - and now we have a fifth IP address. So somewhere along the line, Scanner #2 got assigned a new IP address.
Second, Stop/Start all the Web Listeners (so they are all off at the same time). This will reset the IP addresses in the log. When you start the scanners again, the new IPs will be registered and the scanner counts will be refreshed. You can also go the to the Web Listener and click the Clear Cache button.
Do not use a DNS Address, use a Static IP Address.
Further on the scanner, is it looking for tickets.YourTheater.com or is it looking for the direct IP address of the Apache machine (192.xxx.xxx.xxx)? Entering the IP of the Apache machine will speed transmission as the scanner will not have to wait for the DNS to resolve. You change this in the scanner setup, and change the address. Click here for the setup page.
Check the Number of Scanners
To check the number of scanners you can pair to your system, choose Setup >> System Preferences.
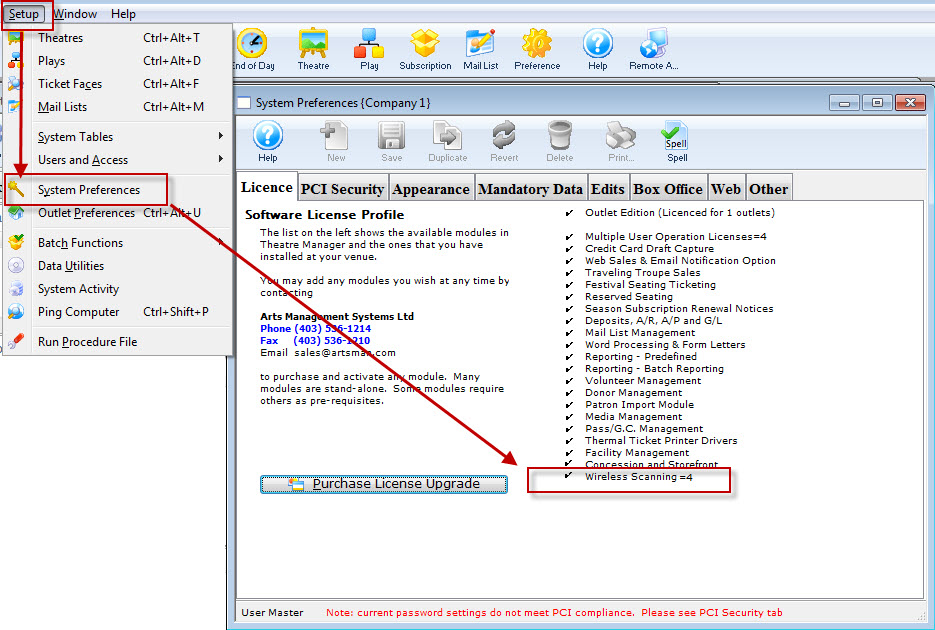
Postgres Setup Pages (OSX)
|
These steps are no longer required if you are using Postgres 9.3 or later on OSX. All current installers use Postgres 9.6 or later. |
Mac OS X Lion or later - Multiple Drive Setup and Install
|
The steps outlined are similar if you have a Mac Mini or Mac Pro running OS X 10.6.x or earlier. You will have an install DVD and can do most of the steps without connecting to the internet. |
The general process to prepare such a machine for optimal performance is:
- Save any data or databases that you have on the machine
- Stripe the drives
- Reinstall Lion Server
- Install Postgres as normal
- Restore a database to that server
The steps have a degree of technical complexity and assume you are able to interpret and adapt to variations in the process yourself.
Striping a Mac with two or more drives under Lion or later
Since Lion does not come with any install disks, you will need to follow a special procedure to stripe the drives on Lion servers as follows:
- Make a backup of any data on the computer that you deem important if you have been using it for a while
- Connect the Mac Mini/Mac Pro to the internet, a monitor and keyboard. The internet is important as it will be required to restore the operating system
- Restart the Mac with the Apple and R keys held down simultaneously. This will boot from the internal Lion partition on the drive
- When the machine responds with the OS X operating system installer screen, select the language of your choice and begin the install
- The next screen will be the utilities window. Select Disk Utility and:
- After selecting a drive, click on the the 'RAID' tab.
- Select STRIPED RAID SET for the 'RAID Type' prompt. The default is a mirrored drive set, so be careful; otherwise, you will end up starting over.
- Drag both individual drives into the RAID Stripe and verify that the estimated size of the RAID set is the total of both drives. (it should look similar to the diagram below)
- Create the RAID Striped Set.
- After confirming you want to do this, Partition Utility will bring the RAID array back online.
- Quit 'Disk Utility'
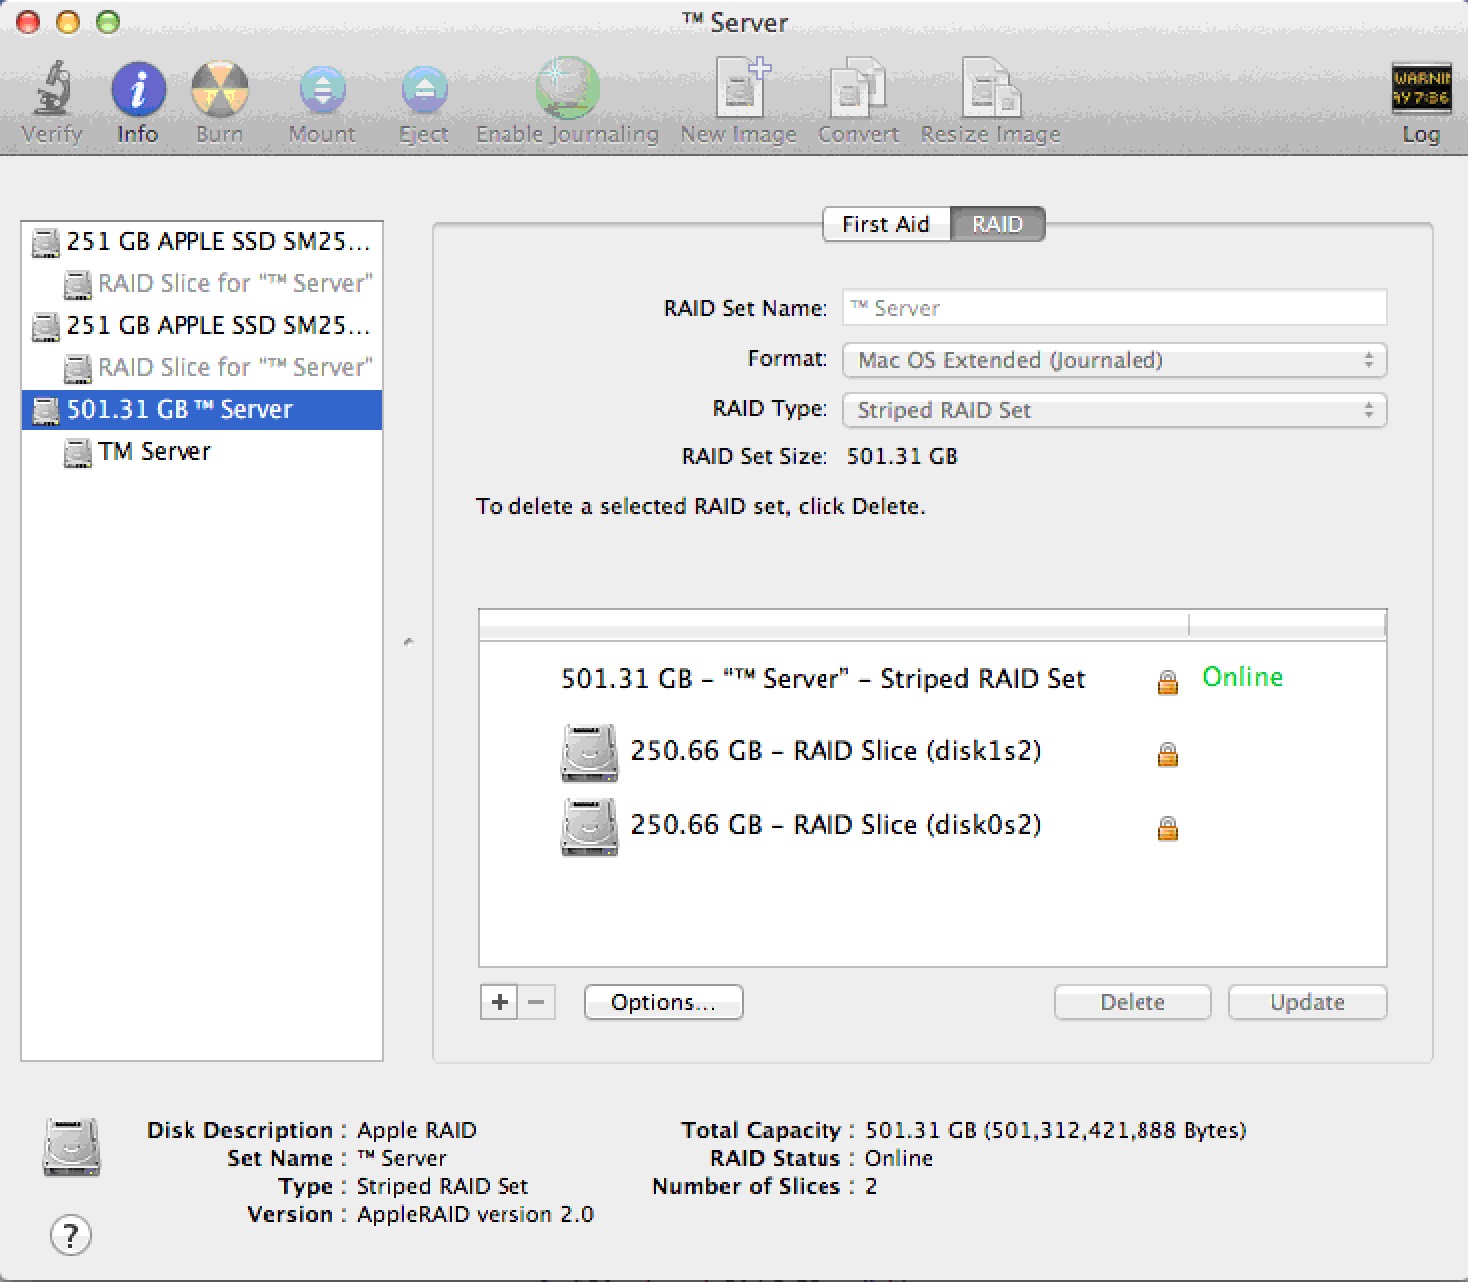
- On the main window, you should now select 'Reinstall Mac OS X Lion' (optionally, you could restore from a time machine backup). Follow any/all prompts and reinstall Lion. It may say that File Vault or some other features are disabled - it's the price of gaining a lot of performance from the dual drive server.
- The download from the Apple web site may take a while, so let the installer do its thing.
Post Installation Steps
- After installing and configuring, download any updates using 'Software Update'. You may need to repeat this step until there are no more updates available.
- Configure the server with a static IP address
- Disable Airport, Spotlight indexing, Time Machine and any power saving settings
- Setup the firewall as required
- Ensure the backup script is setup and thoroughly tested and that there is a step that can successfully FTP the database to another machine (or copy it using the Unix 'cp' command). If a hard drive in the striped RAID set dies, none of the data on any drive is recoverable so OFF-MACHINE backups are mandatory.
Step 2: Create user and import Database
|
This step is no longer required -- the installers do it for you |
In most circumstances, you can skip this and the remainder of the steps if you are only installing a demo. If you are not, you will need to proceed to steps 3 and 4.
Installing a demo if one was not installed
The database server needs a specific user called TheatreManager with specific privileges that will be assigned as the owner of each database. We also want to import a demo database. This step assumes that you have installed things into the /Users/Shared directory. If you did not, then you will need to edit the script and do this step manually.
| 1. | Go to /Users/Shared directory. You should see some files and folders with names that look like below.
|
| 2. | Start terminal and change the user to 'postgres' by typing: su - postgres Press RETURN and then type the postgres user's password (password will not display anything)
|
| 3. | Drag the script '/Users/Shared/CreateDemoDB.sql onto the terminal window. This shortcut saves typing anything. Click into the terminal window and then press RETURN to start the command. If it does not run, then possible issues are:
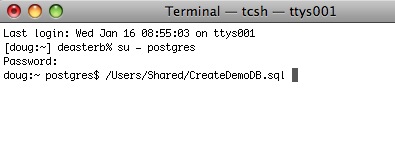
|
| 4. | The script will run and load up the TheatreManagerDemo database. You can modify this script to load up a customer database if necessary by editing it in BBedit or in TextEdit (make sure to save it as text if you use TextEdit - its preference, unfortunately, is to save as a .rtf document). Note, any WARNING messages from the TheatreManagerDemo database creation can be ignored. These warnings are normal.
|
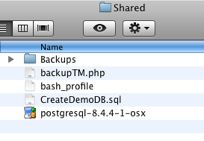
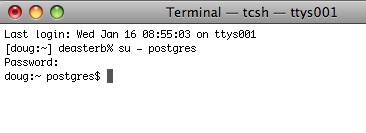
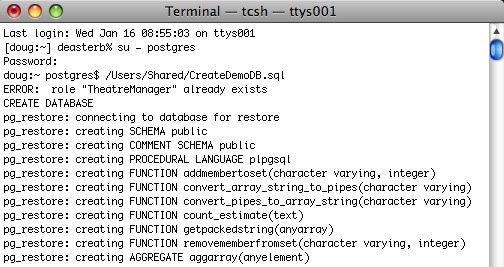
.bash_profile in terminal
|
This step is no longer required if you are using Postgres 9.3 or later. All current installers use Postgres 9.6 or later. |
Otherwise, this step is not required under most circumstances.
| 1. | Start Terminal and navigate to the home directory for postgres user.
Type: cd /Library/PostgreSQL/9.3 |
| 2. | Next, let's update the profile for Terminal to that it makes life easier in Postgres from this point on. Type
it will open with an empty window as below.
Just like when using VI for the other two files, type: to put you in insert mode |
| 3. | 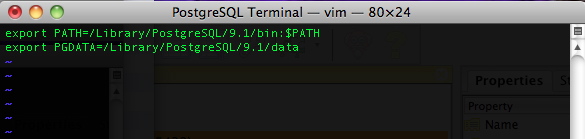
Type the two lines into the file exactly as shown. When done, type, in this order: hit the '' key (the insert mode will dissappear) (the window will show the 'Entering Ex mode' message) and the window will clear and you will be back at Terminal. The next time you start Terminal under the Postgres user account, you will have access to the Postgres commands and data directory in a more convenient fashion. |
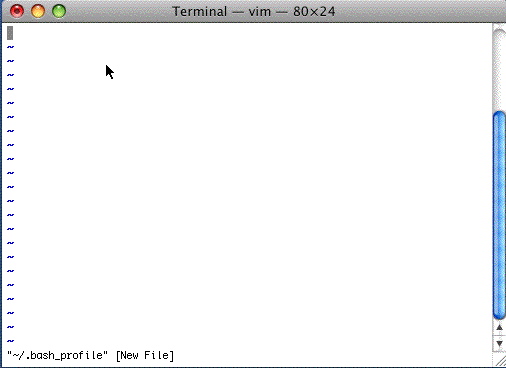
OS X Shared Memory Settings
|
This step is no longer required if you are using Postgres 9.3 or later. All current installers use Postgres 9.6 or later. |
If you used the Theatre Manager Postgres installer, it will detect if you have more than 2 GB of RAM in your machine and automatically insert these into the /etc/sysctl.conf file for you. After installing Postgres the first time, simply reboot the server - these settings will have been done for you and you need not continue with the steps below.
BEFORE STARTING: Ensure you are in Terminal at your own user, not postgres. This is a fairly technical topic and the reference: http://www.postgresql.org/docs/9.0/interactive/kernel-resources.html
| 1. |
Open Terminal again and type: su - [Your UserName] Type vi /etc/sysctl.confType I to insert data Add the lines: kern.sysv.shmmax=1610612736kern.sysv.shmmin=1 kern.sysv.shmmni=256 kern.sysv.shmseg=64 kern.sysv.shmall=393216 kern.sysv.maxproc=2048 kern.maxprocperuid=512 These settings reflect the maximum size of a shared buffer. These settings assume you are running at least 2GB of RAM. If you have less RAM, these settings may need to be altered. shmmax is the key setting; it is in bytes. If the machine has more memory to use, then this could be increased as well. shmall is the shmmax setting divided by 4. Hit the Esc key Hit Shift Q Type wq Hit Enter Restart OS X after doing this. This is required to apply the changes.
Restart OS X after doing this. This is required to apply the changes. |
 There is a sample of this file in /users/Shared/ from the install. If your machine has 2GB of RAM or more, you could move it to the right folder instead by:
Web Support
Wireless Scanner Setup
Theatre Manager supports two types of devices, the Symbol SPT 1864 based on the PALM operating system (version 6 - legacy only), or the newer Symbol PocketPC wireless scanners (MC50 pictured here) based on the Windows Mobile operating system (version 6 & 7).
Click on the picture of the device that you need to set up.
|
The software must be purchased & licenced from AMS in order to use it your venue |
|
|

Wireless Scanner Operation - Palm Device
Use these instructions if you are using a Palm OS based scanning device such as a Symbol SBT1846.
|
YMake sure that you fully charge the devices before a performance so that it has a full battery level. Nothing worse than the battery running out in the middle of admitting patrons. We have tested the device while it is in the charger cradle and it will still scan - if you need to do that. |
There are two general functions that can occur:
Check the Patron into the venue - which is used to make sure the ticket has not yet been used for the event
Check the patron out of the venue - which is used if a patron is already in the venue and you need to let them exit and reuse the ticket for some purpose.
Checking in a Patron
 |
Assuming that the device has been configured (step 1 & 2) and that you have started the Scan Ticket application, checking in becomes a simple task. You need to check if you are scanning people in first. If so your screen will look like the screen to the right. The key is that the code at the bottom right says 'IN' (instead of OU). If it does not say 'IN', click the leftmost button under the screen that looks like the picture below. This button toggles the scanner from 'IN' (check in) to 'OU' (checkout) and vice versa. |
|
|
Scanning occurs by pressing any of the yellow buttons on the scanner. If the scan reads properly, you will see the ticket number in the area reserved for it and the scan will be sent automatically. There are a few responses that can happen. If the ticket is fine and the person can go in, you will see the work 'Go' and hear a beep. There may be a message under the 'ticket #' that says 'OK to Enter'. After a successful scan, do the next ticket. |
|
|
If there is any problem with the ticket, you will see the 'stop sign' and will not hear a beep. Under the 'Ticket Number', you will see a message that might be one of:
At that point you will need to decide what to do with the ticket or how to resolve the problem |


Checking out a Patron
 |
Checking out a patron is very similar to checking in a patron. Use the left most black button on the scanner to toggle between check in ('IN') mode and check out ('OU') mode. Your scanner should look like this. |
|
When you scan the ticket and the patron is about to leave, you should hear a beep and see a big 'Exit' on the screen. If there is an issue checking the patron out, you will not hear a beep. You may see an error under the 'Ticket #' that explains the issue. Errors could be one of:
Based on the response, you may need to decide to what to do with the ticket and/or scanner. |
Wireless Scanner Setup - Windows Mobile - Communication Parameters
|
|
If the previous step was set up right and the scanner is mated to the network, you can click the start menu, programs and the click on the AMS Tickets application It may take a couple of seconds or so to start as the scan program is synchronizing time with a time server and making sure the clock on the program is set properly. When it does start, you will see the screen at the side. Now we can set up scanning for an event. This must be done in advance of each performance that you are scanning tickets for. All that needs to be done is set up some parameters. Click the 'Setup' button on the screen. |
| |
You will be asked for a system password to change the settings for the performance. Type '123' (this can be changed) and once the password is right, the next window will automatically appear. |
|
version 7 sample setup |
When you open the preferences window using either of the two methods above, you have some fields that must be filled in. These are below (note you may want to press the orange button on the keyboard twice to turn it into num-lock on mode):
|
 |
There is one other preference that can be set before we begin scanning. This indicates whether we are scanning the person into the venue, or scanning them as they leave to indicate that the ticket was not used You can access this option directly from the main screen where the scan & setup buttons are. Click the 'Scan' button and you will see a screen like the one on the left. At the bottom is a 'checkout' button with a red arrow. This means the mode is currently 'check in' and you click this button to change the mode to 'checkout'. It will also change the arrow at the top from green (checkin mode) to red (checkout mode) If there is a green arrow with 'check in' at the bottom, then the current mode is 'checkout' mode. Click the 'Checkin' button to change the mode to checkin. |
 |
If you are scanning patrons into the venue, the top of the screen looks like the picture to the right. Notice that the text says 'Check In' and the arrow is green. |
 |
If you are checking patrons out of the venue, the text at the top of the screen says 'Check Out' and the arrow is red. |
Wireless Scanner Setup - Windows Mobile Setup
Updating Customized Web Pages
|
Only the files/folders inside the WebPagesEN folder have custom changes in them. Anything not in this directory uses the standard web pages which are deployed in special directories with each new TM server version so that we can keep things up to date. Refer to instructions on customizing web pages |
|
Venues using AMS cloud and GIT to update your web pages will do something similar, except the location of the web pages that have been customized are in your local git folder. |
Updating Customized Web Sites
When a new version of TMServer is released, there may be some changes to the standard web pages. If so and you want the new feature, then you should make sure you:
- back up your existing web page folder before changing anything. Make sure you have a copy of everything stored safely and/or zipped up to prevent accidental changing.
- Download the latest web pages from ArtsMan
- Compare the standard pages to the customized pages and see if you want to include any new features in the standard pages in your customized ones using the steps below:
- Open the new htdocs folder that you just downloaded
- Find your existing WebPagesEN folder on your primary TM Server machine
- Compare only files that exist in the WebPageEN on your primary TMServer with the standard templates you downloaded and then:
- Make any page updates necessary to implement new features into previously changed pages -or-
- Compare all pages in the WebPagesEN folder with those in default WebPageEN using one of the free automated comparison tools to identify differences. Copy relevant changes from the files in the default WebPagesEN files to those in custom WebPagesEN folder
Backing up your Web Pages
- Log into the machine that is the primary TM server
- Open your browser. You should be using the latest version of that browser available - eg if you are using Firefox, chrome or opera, please check for updates before continuing and install those updates.
- Type https://127.0.0.1:3012 into the URL area and ensure that the TM server interface responds
- Click on the Configure tab as indicated below
- Scroll down looking for the Templates folder. If you:
- See a folder pathname, then you have the right machine and now know where your custom templates are stored. It is typically /BoxOffice/WebPages on Mac or C:\BoxOffice\WebPages on Windows
- do not see the highlighted information, you are probably looking at a Secondary TM Server and need to go find the machine that has the Primary TM Server
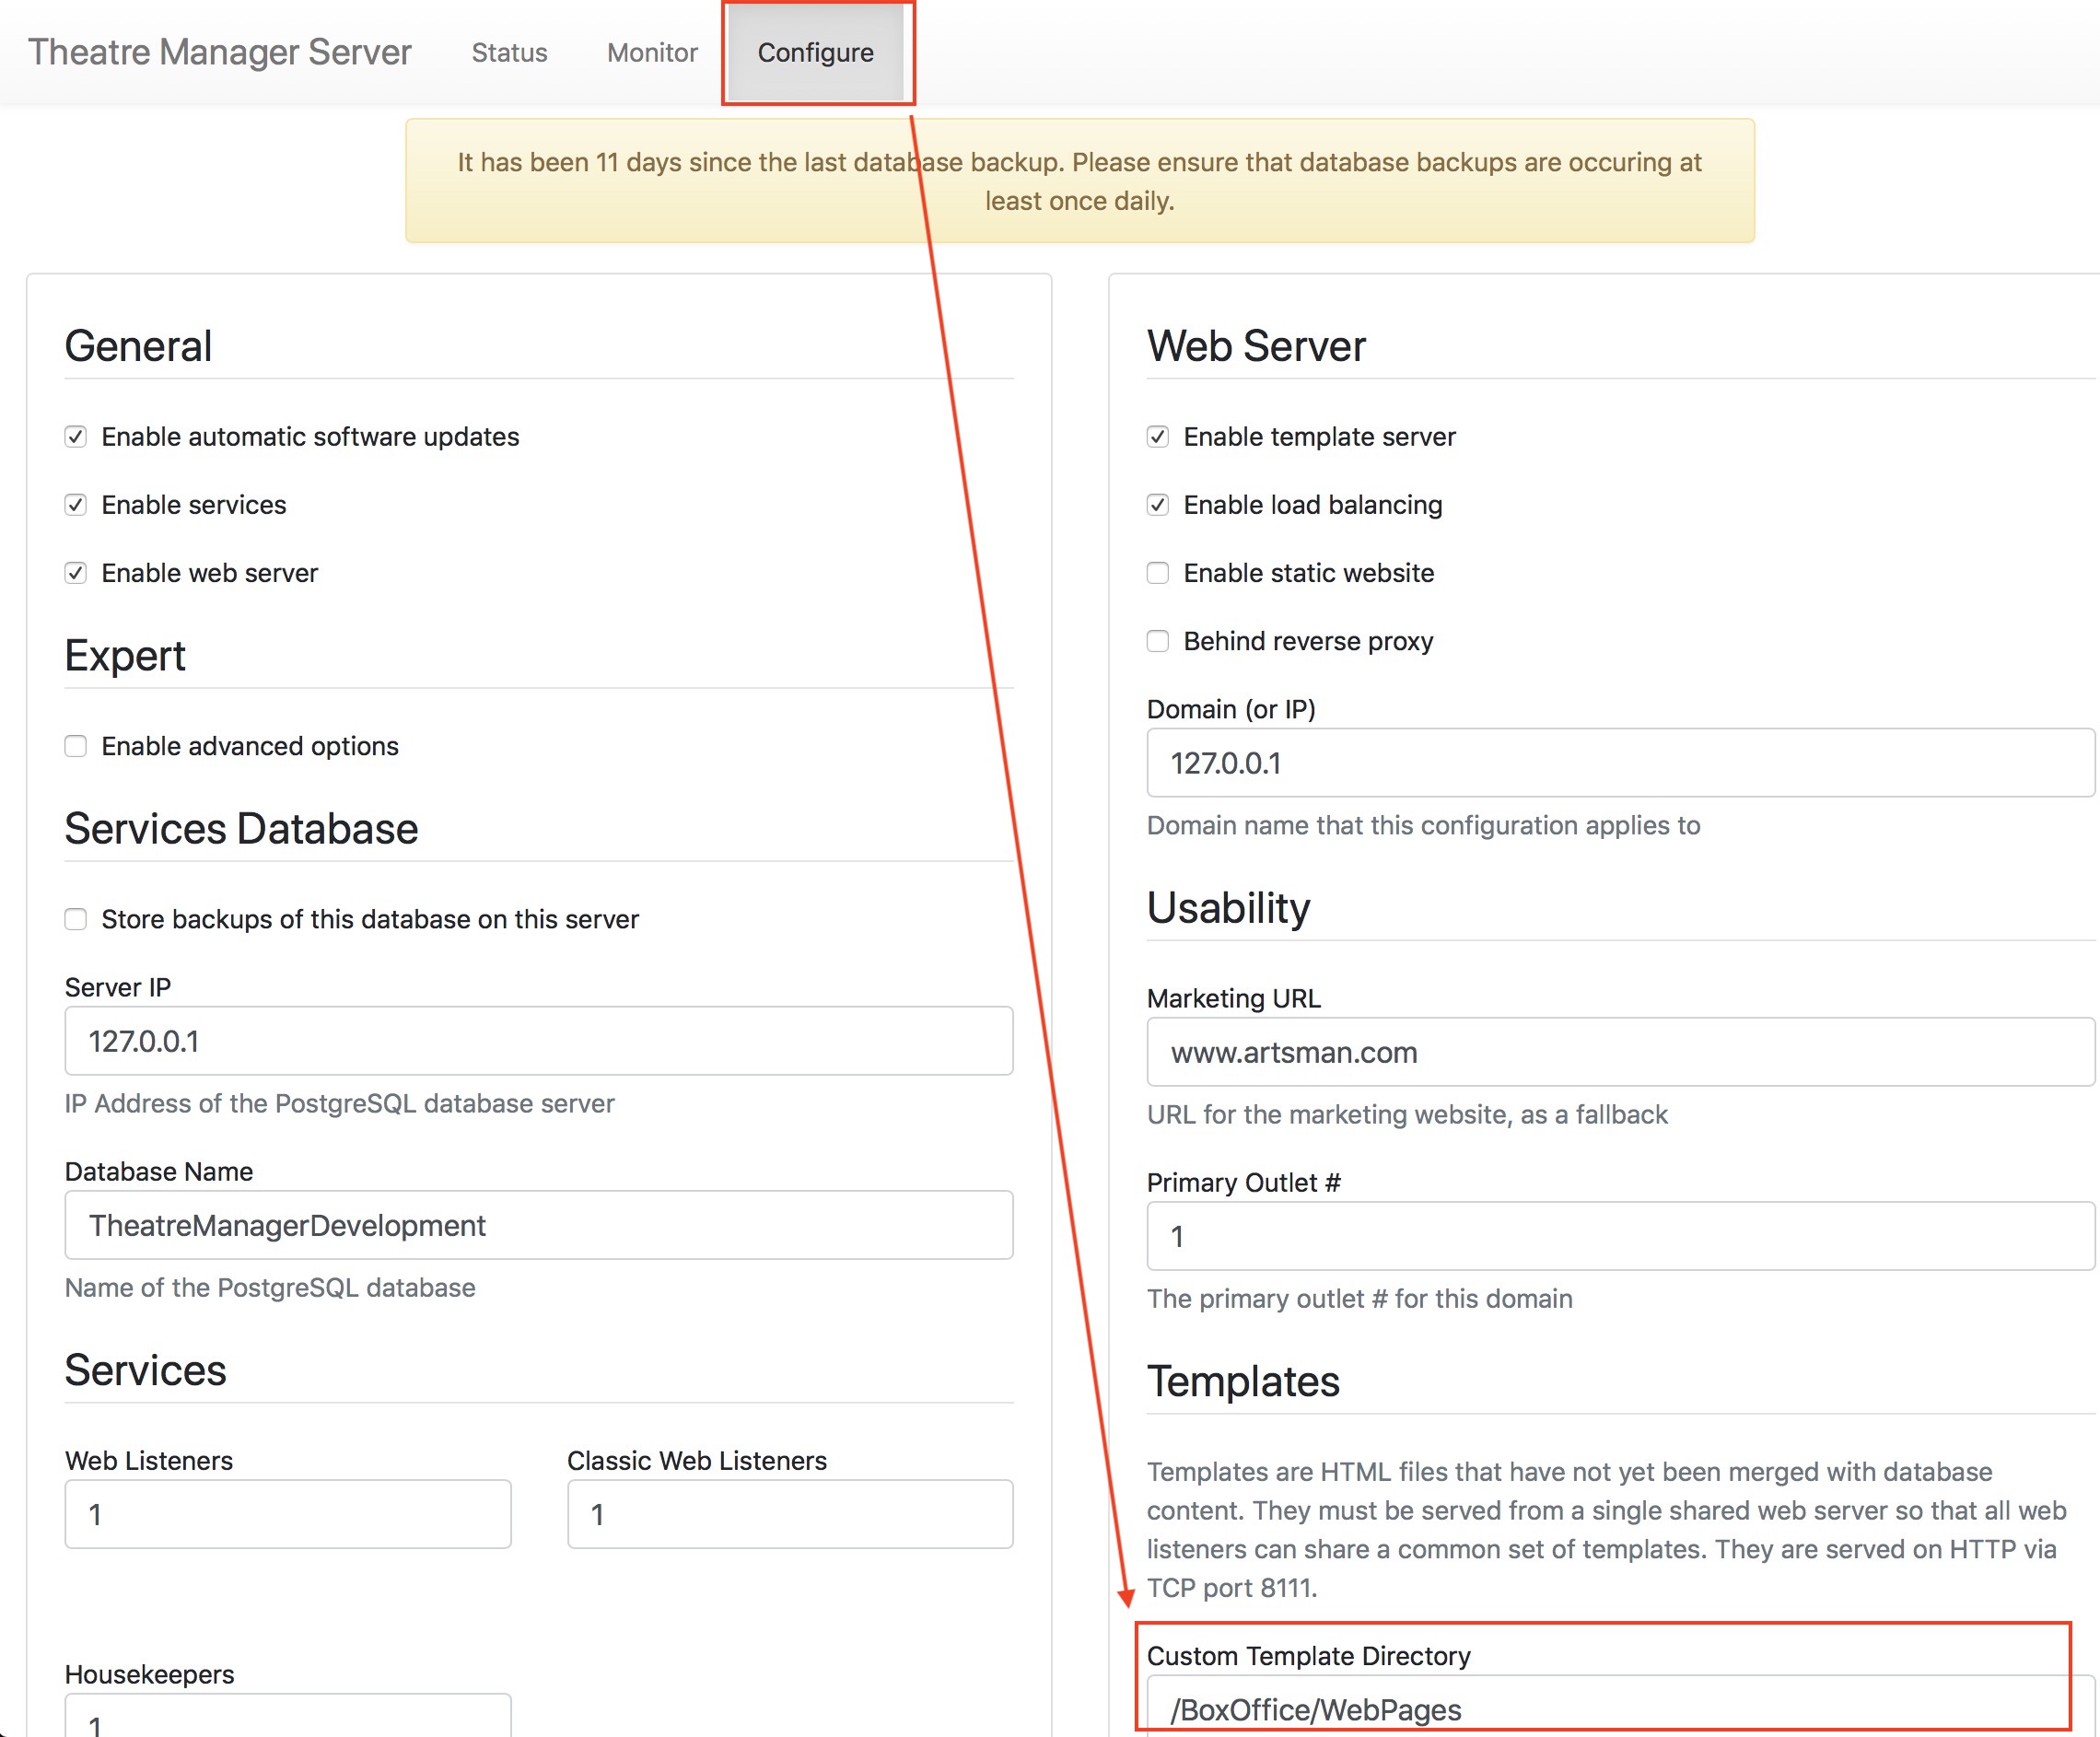
Making Changes to Your Web Pages
Making Custom Changes to Web Pages
This means:
- You find the page you want to change within the WebPagesEN folder you downloaded containing the standard pages. There are:
- comments in each web page that tells you what the name of the main web page is and/or
- The name of the include file containing some of the more detail web code.
- COPY that page to the same folder location inside the live WebPagesEN folder (location found using this web page) so that only pages that are changed are inside the live web pages. We suspect you might have only a few changed pages
- Adding any new images and style sheet changes to the 'tmGifs' folder
Reverting to standard pages becomes as simple as renaming the WebPagesEN folder to something else temporarily.
Files that are 'green'
|
Recent versions of windows can make your web files appear 'Green'. This is especially true if you took your web pages to another machine, compared them and returned them to the original machine as a zipped file. |
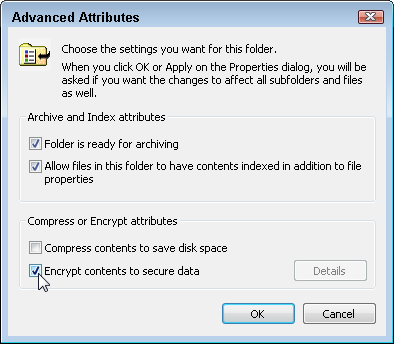 If you notice your file names are green, Windows will go to great lengths to protect itself from reading them and you may see messages on the web indicating that the files cannot be found or read -- yet you see them in front of you.
The solution, fortunately, is simple.
- Select all the files and folders that have green file names
- Right click and select properties from the context menu
- Go to the Advanced Properties
- Uncheck the box that says 'Encrypt Contents To Secure Data' as per the picture to the right
- Save all the changes for the files and folders and files within the folders
- that should change the colour of the file names from green to black - and the file system should now see them.
Hot Standby Server
|
Replication is a feature of postgres and is automatically set up for cloud venues. Self service venues may set this up if they wish - the support team is unable to help you. |
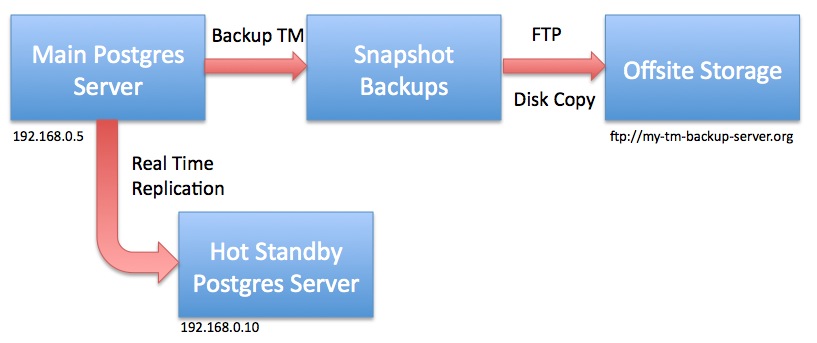
One of the features of Postgres is the ability to create a 'hot standby' database server as a way to introduce redundancy to the system. The notion is that if a catastrophic physical failure occurred to the database server (such as the drives died, the machine melted, it got doused in water or burnt in a fire) and was found to be non-recoverable, then it would be best to get to a backup as soon as possible.
The standard backup approach allows you to go back to a snapshot. If you do a number each day, that may mean going back a few hours and reconstructing what happened from the backup to the failure.
Replication means you have one (or more) standby servers that is shadowing the contents of the main server - and may be as close as seconds old. In the case of failure, you would turn off the replication feature and start using the standby database until your primary server gets fixed.
|
Do not use replication as the only means of backup - always set up snapshot and offsite copies of your database. |
|
We always recommend using the latest version of PostgreSQL for replication. These instructions were created for PostgreSQL version 10 |
|
If you do a minor level upgrade of PostgreSQL on the main database server (e.g. from PostgreSQL v9.6.x to v9.6.y), you must also upgrade the version of Postgres on the hot standby server at the same time. There is no need to migrate the database again.
However, if you do a major level revision, you will need to do ALL the steps to re-establish the hot standby. This will change the time it requires to upgrade (but having a hot backup is worth it). |
|
If you update your version of Theatre Manager, any changes to the data in the main database are also updated on the hot standby. You never have to update the backup server as all changes come from the main server |
The general steps for making a hot standby are:
- Set up the database on the main server starting at Step 1 and going through all the steps . If you are using Theatre Manager, this was already done.
- Set up Postgres on a standby machine using Step 1 and disabling any energy saving features.
- Adjust the configuration of the main database server
- Alter the configuration of the hot standby database server
- Migrate the initial database to the standby
- Start replication
- Monitor for issues
Many thanks to this insightful article by Bartek Ciszkowski for helping make the process on Linux which we adapted to OS X. You can also read more detail on the Postgres site regarding high availability servers for any of the technical details.
Replication can be done on windows per this tutorial and it implies that there are few differences, except how to get the WAL logs replicated from one machine to the other - using a file share.
Main Postgres Server Changes
|
Replication is a feature of postgres and is automatically set up for cloud venues. Self service venues may set this up if they wish - the support team is unable to help you. |
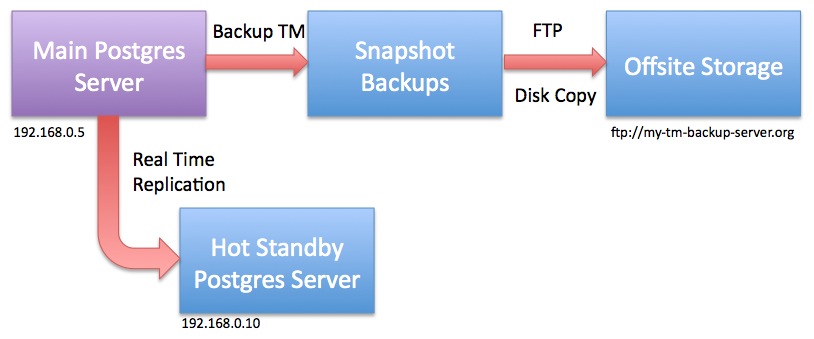
For the purposes of the example, let's assume per the diagram that
- the main database server is at 192.168.0.5 and
- the hot standby server is at 192.168.0.10
|
Do not restart any of the Postgres servers until told to do so. |
Changes to postgresql.conf
You can make these changes using PGAdmin ('Tools->Server Configuration') or by using Terminal and VI to navigate to the Data folder and edit the file. This assumes you know how to make these changes. Note that there are ' (quotes) around the RSYNC parameters below. In PGAdmin, you will not need to enter them - in VI, you will need to enter them.
These settings tell Postgres to send enough information from the master to the slave. You can read about these parameters in the official documentation and adjust them as needed.
|
wal_level = replica max_wal_senders = 10 wal_keep_segments = 32 archive_mode = on archive_command = 'rsync -aq %p postgres@192.168.0.10:/Library/PostgreSQL/10/archive/%f' archive_timeout = 60 |
Changes to pg_hba.conf
Edit the pg_hba.conf file and scroll down to the bottom. There should already be 3 lines that have replication in them which will need to be uncommented and permissions set to 'trust'. Add a line that tells the master server that the 'replication' server is at 192.168.0.10 as per the last line. Replace with the IP address of your hot standby server.
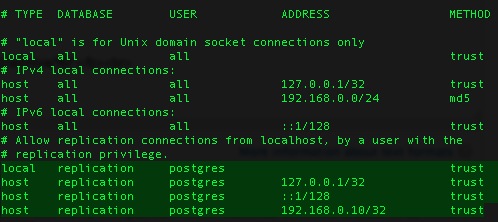
Ensuring rsync permissions work
You must to establish secure credentials between the main Postgres server and the standby server to enable rsync to transfer the files using the command above. It requires some Terminal commands and knowing what you are doing. It may be easier to have two Terminal sessions working.
| As Admin User |
ON THE BACKUP SERVER, Open System Preferences and go to the 'Sharing'. Make sure 'Remote Login' is enabled. It can be set to all users -or- if you want to limit users, make sure the postgres user is in the list.
Make the '.ssh' folder and 'archive' folder for the postgres user in the postgres user's home directory /Library/PostgreSQL/10 and provide access to it. DO THE SAME four commands on the both the MAIN and on the HOT STANDBY server. |
|
sudo mkdir /Library/PostgreSQL/10/.ssh sudo chown postgres:daemon /Library/PostgreSQL/10/.ssh sudo chmod 700 /Library/PostgreSQL/10/.ssh |
(only postgres should have rwx access to the .ssh directory) |
|
sudo mkdir /Library/PostgreSQL/10/archive sudo chown postgres:daemon /Library/PostgreSQL/10/archive |
|
|
|
| As postgres User | ON THE MAIN SERVER,
use ssh-keygen to create a key/certificate file for SSH access and move it to the hot standby. Again, we are assuming that the hot standby will be 192.168.0.10 - replace with your hot standby IP address as required.
|
|
su - postgres cd /Library/PostgreSQL/10/.ssh/ ssh-keygen -b 4096 -t rsa -f id_rsa -P '' |
|
| (note: the end of the command is two single quotes in a row) | |
| you should get a response like:
Generating public/private rsa key pair. |
|
| touch authorized_keys cat id_rsa.pub >> authorized_keys chmod 400 id_rsa scp authorized_keys postgres@192.168.0.10:/Library/PostgreSQL/10/.ssh |
|
|
You should get a response as below
The authenticity of host '192.168.0.10 (192.168.0.10)' can't be established. Then type the following to SSH to the remote machine. You should no longer be asked for a password. If you cannot do this, then replication will not work. |
|
| ssh postgres@192.168.0.10 |
|
| It should respond with a prompt and you can type | |
| exit |
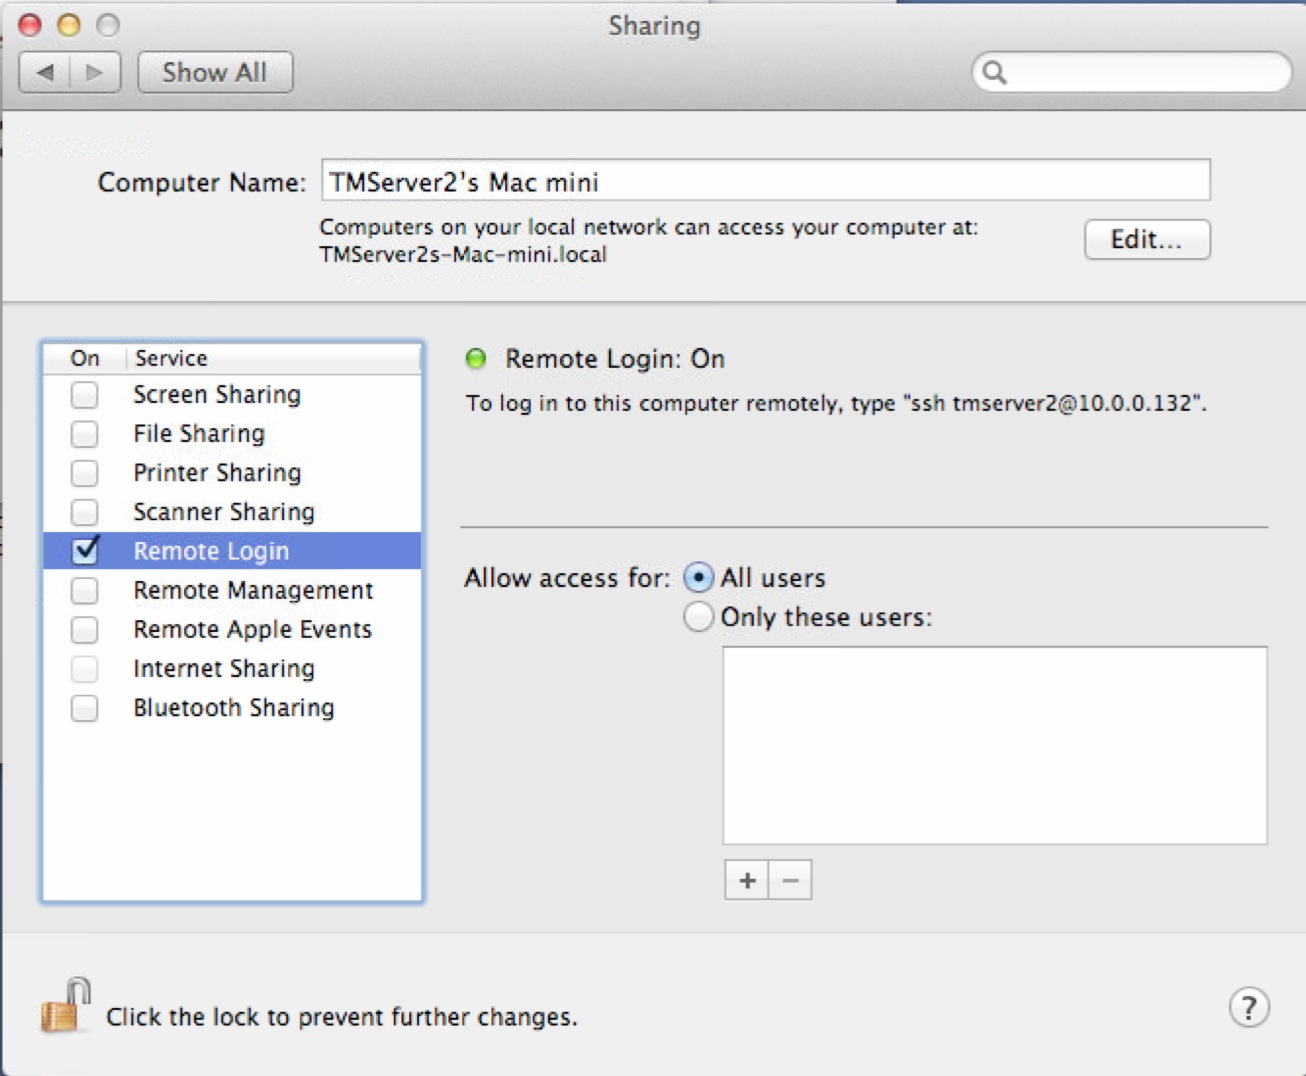
|
If you are not able to connect to the remote machine without typing a password, you may need to do one of:
|
Hot Standby Server Configuration
|
Replication is a feature of postgres and is automatically set up for cloud venues. Self service venues may set this up if they wish - the support team is unable to help you. |
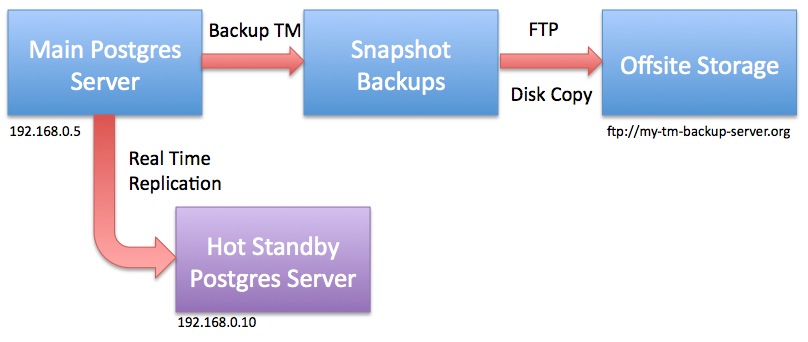
For the purposes of the example, let's assume that:
- the main database server is at 192.168.0.5 and
- the hot standby server is at 192.168.0.10 as per the diagram
- the version of postgres you are using is 10 (otherwise change 10 to xx in all commands, depending on the version of postgres you are using)
|
Stop the Hot Standby server and do not restart it until told to do so.
Start Terminal, then sign on as the Postgres user via the following commands to stop the database:
|
Create recovery.conf
Create a file called 'recovery.conf' (which should not exist) in /Library/PostgreSQL/10 for safe keeping. We will be copying this file later on as Postgres expects to find it the 'data' folder in /Library/PostgreSQL/10/data. However, we cannot put it there yet as we will be deleting everything in that directory later. Replace 192.168.0.5 with the address of your primary database server.
Using Terminal as administrator of the machine, create and edit the recovery.conf since the Postgres user cannot create this file. Alternatively, copy the text and paste it into a BBedit file on the machine and use a copy command to put it into place.
| As admin User |
then enter the contents of the file by typing the yellow text below. (you can usually copy/paste into vi if in 'insert' mode)
|
Make sure that the archive directory exists
If you did not already do this command as part of the set up of the MASTER database, you will need to do so, so that the backup files can be received by the HOT STANDBY server.
| As admin User |
Make the '.ssh' folder and 'archive' folder for the postgres user in the postgres user's home directory /Library/PostgreSQL/10 and provide access to it. DO THE SAME two commands on the both the MAIN and on the HOT STANDBY server if you have not previously done so. |
|
sudo mkdir /Library/PostgreSQL/10/archive sudo chown postgres:daemon /Library/PostgreSQL/10/archive |
|
If you are re-establishing a hot-backup server, make sure to clear out all files from the 'archive' folder on the hot standby. In Terminal, type:
You do not need to stop the main server while setting up the hot standby as we will make a base backup to 'restore to a point in time'. |
Migrating the initial database
|
Replication is a feature of postgres and is automatically set up for cloud venues. Self service venues may set this up if they wish - the support team is unable to help you. |
|
Hot Standby ServerStop the Hot Standby server and do not restart it until told to do so (it should be stopped already). We don't want any data flowing from the main database to the Hot Standby while we are preparing the servers. In Terminal, as postgres user: |
| pg_ctl stop -m fast | |
|
Main Database ServerYou may need to use pg_ctl to stop and then start the main server to get the max_wal_server change to take effect before starting the pg_basebackup. Make sure nobody is using the database, then type in Terminal, as postgres user: |
|
pg_ctl stop -m fast pg_ctl start |
Now that the hot standby is configured, it’s necessary to get the contents of the main database onto it, so that replication can sync up. This is done using a handy command named pg_basebackup, which essentially copies the entire data directory of your main database into a location of your choice. It is also what we know as an online backup, as the main database can stay in use while the command copies all the data.
On the Main Database Server
Start the pg_basebackup command and put the backup file in some place that Postgres can access. The standard backup directory /Users/Shared/Backups should be fine. The base backup should take about as long as your normal backups take and progress is shown in the Terminal window.
Make sure that Postgres has read/write access on both the local machine and the remote machine to the directory you are using.
The scp command is used to copy the base backup to the same location on the hot standby server (replace 192.168.0.10 with your backup server IP). You could use a USB key or any other mechanism to transfer the file that you want. This may also take a long time and progress is shown in the Terminal window.
|
pg_basebackup -U postgres -v -D - -P -Ft | bzip2 > /Users/Shared/Backups/pg_basebackup.tar.bz2
scp /Users/Shared/Backups/pg_basebackup.tar.bz2 postgres@192.168.0.10:/Users/Shared/Backups |
NOTE: The bzip2 command can be quite CPU intensive and only uses a single core. If a multi-core processor is available you may wish to consider using the pigz compression program instead to get a significant speed-up to the backup. Be aware that using pigz requires separate installation and it also uses a different extension than the bzip2 method: .tar.gz vs. .tar.bz2.
|
pg_basebackup -U postgres -v -D - -P -Ft | pigz > /Users/Shared/Backups/pg_basebackup.tar.gz
scp /Users/Shared/Backups/pg_basebackup.tar.gz postgres@192.168.0.10:/Users/Shared/Backups |
On the Hot Standby Server
The hot standby server should already be stopped. We need to use Terminal (as the postgres user) and remove the entire data directory - if it exists.
|
su - postgres Enter the Postgres password pg_ctl stop -m fast (just to make sure Postgres is stopped on the backup server) cd /Library/PostgreSQL/9.6/data rm -rf * ls (There should be no files) |
| tar -xjvf /Users/Shared/Backups/pg_basebackup.tar.bz2 |
| chown -R postgres:daemon /Library/PostgreSQL/9.6/data |
| cp /Library/PostgreSQL/9.6/recovery.conf /Library/PostgreSQL/9.6/data/recovery.conf |
Changes to postgresql.conf on the Hot Standby Server
The expansion of the base backup database from the main server will also restore its postgresql.conf and pg_hba.conf file.
We now need to adjust them to ensure that they are set to be a hot standby database. You can make these changes using PGAdmin ('Tools->Server Configuration') or by using Terminal and VI to navigate to the Data folder and edit the postgresql.conf file.
The settings below tell Postgres that it is the slave machine. You can read about these parameters in the official documentation and adjust them as needed.
|
hot_standby = on wal_level = hot_standby max_wal_senders = 5 wal_keep_segments = 32 |
Look for the 'archive' settings that were restored from the base backup and comment them out by putting a '#' in front of the parameter.
|
#archive_mode = on #archive_command = 'rsync -aq %p postgres@192.168.0.10:/Library/PostgreSQL/9.6/archive/%f' #archive_timeout = 60 |
Changes to pg_hba.conf on the Hot Standby Server
Edit the pg_hba.conf file and scroll down to the bottom. There should already be 3 lines that have replication in them from the main database. If they are not uncommented, you will need to do so and set permissions to 'trust' (and go back and verify the contents of the same file in the main database).

Finally, start the database on the hot standby server
| pg_ctl start |
Cleanup after Replication is Confirmed to be Working
Please confirm replication is working before doing the next step to clean up the temporary base backup files.
The base backup file was created on both the main server and migrated to the hot standby machines. If you have a large database, this file could be sizeable itself and it is best to delete it. On both machines, you can navigate to the /Users/Shared/Backups directory and remove pg_baseBackup.tar.bz2.
Alternatively: in Terminal you can:
| rm -i /Users/Shared/Backups/pg_basebackup.tar.bz2 (you will be asked to confirm the deletion) |
Verifying that the database is replicating
|
Replication is a feature of postgres and is automatically set up for cloud venues. Self service venues may set this up if they wish - the support team is unable to help you. |
- Observe the Postgres log roll forward the changes
- Looking at the replication logs to see that they are created and then removed
- Make some changes to the main database and then using pgAdmin to verify that the changes are in the backup in real time
Using pgAdmin to see Replication Status
|
Replication is a feature of postgres and is automatically set up for cloud venues. Self service venues may set this up if they wish - the support team is unable to help you. |
| select * from pg_stat_replication |
This should give a row back that says the server is 'streaming'. You can repeat the query and the numbers will change, indicating that replication is proceeding.
If you see a different result like:
- The status is 'catch-up', then the backup machine is not up to date with the main server, which may indicate issues.
- There is no row or data in response to this command, it means replication is not running, and your main disk will be slowly filling up -- you will run out of space. Get the properties of the disk on the main server to see how fast it it filling up and send us a support ticket. it often just means restarting one or both servers, or verifying ip addresses on the two machines.
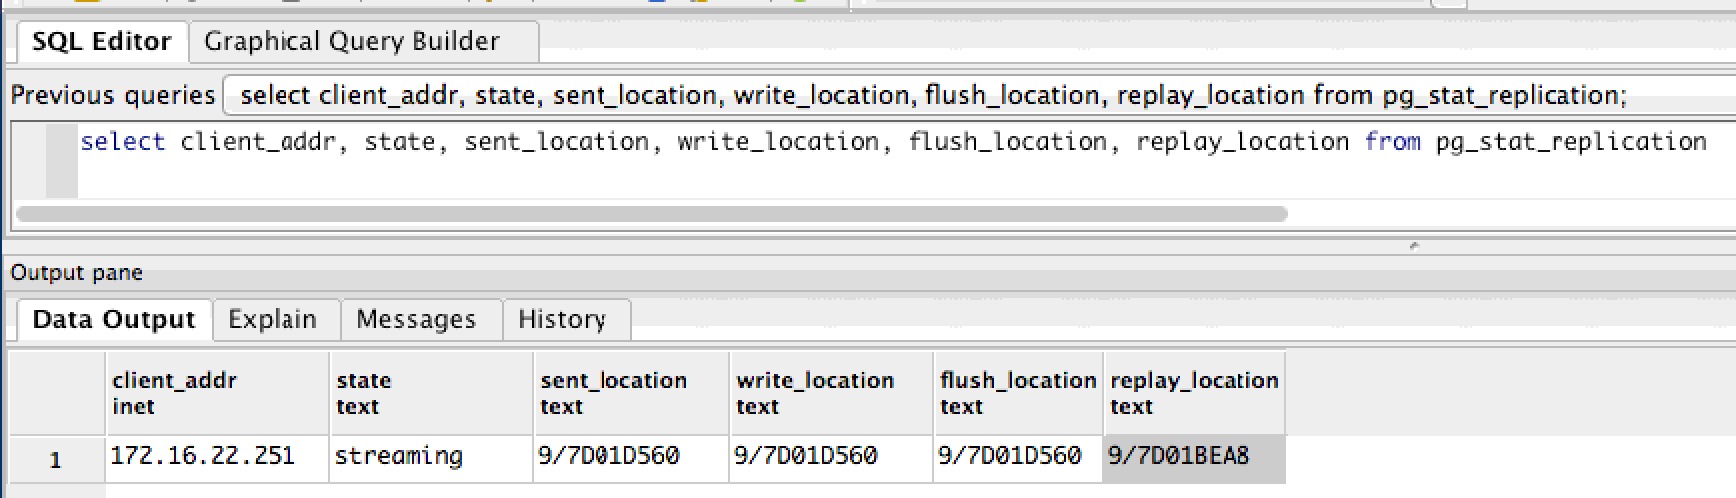
|
If the query gives no rows back (or some other status), then things may not be set up right, or replication has not yet begun because archive log files are being recovered on the Hot Standby Server. |
Using pgAdmin to Watch Transactions
|
Replication is a feature of postgres and is automatically set up for cloud venues. Self service venues may set this up if they wish - the support team is unable to help you. |
Alternatives
Data replicates from the main server to the Hot Standby immediately. If there is a change to the main database, it should appear in the hot standby immediately after that.
|
One way to verify changes is to have the box office sell a ticket to a patron using Theatre Manager. Before the sale, there should be no transaction history for that order; after the sale, there should be some ticket transactions.
Perform this test daily or weekly to make sure that the database is replicating. |
|
Occasionally, if you take the standby down for maintenance, it may get a bit behind. In that case, you may not see changes until the archive files have been fully recovered and you may need to look at the standby server's Postgres log files for progress. The archives are created periodically as per the frequency that you set in the archive_timeout parameter) |
Verifying Simultaneous Activity on Both Servers
Follow these steps to see that data is being migrated:
- Start pgAdmin on the main server, point to the main database and start an SQL session
- Start pgAdmin on the Hot Standby server, point to the standby database (it is a different IP address) and start an SQL session
- On both machines, enter the SQL below into pgAdmin to verify the last 10 transactions
select * from f_transaction order by t_seq desc limit 10 - Log in to Theatre Manager on any workstation (or have anybody sell a ticket)
- in pgAdmin on the MAIN database, rerun the SQL above. There should now be a new login transaction or transactions that match the number of tickets sold.
- In pgAdmin on the Hot Standby database, rerun the SQL above.
- There should be the same transactions visible on the hot standby right away.
- That means the servers have replicated the data.
- In Theatre Manager, release the tickets or log out.
- in pgAdmin on the MAIN database, rerun the SQL above. There should now be MORE transactions representing your activity.
- In pgAdmin on the Hot Standby database, rerun the SQL above.
- You should see the new transactions on the standby server, meaning the servers have again replicated the data.
Reviewing Postgres Log File for Replication Entries
|
Replication is a feature of postgres and is automatically set up for cloud venues. Self service venues may set this up if they wish - the support team is unable to help you. |
You should go to the log files once in a while and ensure that it is replicating and able to see/connect to the other database. After the tail command, you should see that the server entered standby mode and that is connecting to the main server.
Even after setting up the replication to the hot standby server, you should check this log periodically to make sure it continues to work.
|
su - postgres Enter the Postgres password cd /Library/PostgreSQL/9.6/data/pg_log ls -la (to see a list of logs) tail -f name-of-most-recent-log-file |
The example below shows the startup of the standby server after first being created (or being stopped for a period of time). The log files are consumed and, finally, replication starts. Once replication starts, no further 'restore' messages will appear in the logs -- you can then use the pgAdmin query method to view the status of replication on the main server.
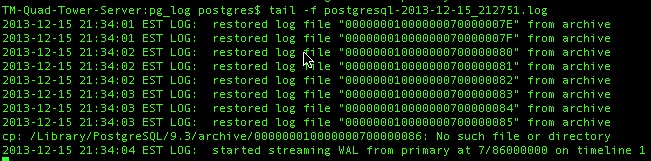
Inspect the Archive Directory
|
Replication is a feature of postgres and is automatically set up for cloud venues. Self service venues may set this up if they wish - the support team is unable to help you. |
You can go to the replication folder and see that new files appear once a minute and old ones go away.
|
cd /Library/PostgreSQL/9.6/archive ls -la (to see a list of recovery files). |
For example:
- 000000010000000000000055 will have as the next file 000000010000000000000056 - about 60 seconds later or whatever time period you set in the archive_timeout command
- Eventually 000000010000000000000055 will disappear as it is processed by the hot standby
- Generally, on the server, there should be only a few of these files (5 to 10). if there are more, the server may be a little busy. If they do not decrease, replication is not working right or the server is overloaded.
- and the above will repeat.
Promoting a Standby to the Main server
|
Replication is a feature of postgres and is automatically set up for cloud venues. Self service venues may set this up if they wish - the support team is unable to help you. |
- Shut down, turn off, unplug and/or remove the main server from the network so that it is no longer active
- On the backup server, create the failover trigger file using the primary failover methodology (described in detail below):
sudo touch /tmp/pg_failover_trigger - The hot standby is now your main server.
- You may need to change the pg_hba.conf file as required to allow workstations to access the database.
It is probably okay because it was originally copied from the main server at time of making the standby. You will only need to change the pg_hba.conf file if you added more sub-nets to the main server.
- Do all the work necessary to get Theatre Manager clients to point to a new database server by doing one of:
- Use Theatre Manager to change the IP address of the database you log into -or-
- Change the IP address of the hot standby to be the same as the Master main server -or-
- Change the DNS to point to the new IP address, if that's what you use to connect to the server
- Log all clients, second generation and classic listeners into the new server IP address
- Log into the database using Theatre Manager.
- Quit and restart the Theatre Manager Server
- Quit and restart any web listeners
- Fix the reason that the main server died and plan to set up a new hot backup server
Primary Method to promoting the Backup Server to Main Server
If your recovery.conf file in the Postgres data directory was set up according to these instructions, it should have a trigger_file parameter and look like the except below.
|
# specify the name of a file whose presence should cause streaming replication to # end (i.e. failover). If you create this file, then Postgres will rename 'recovery.conf' # to 'recovery.done' and promote the hot standby to a primary server without a restart. trigger_file = '/tmp/pg_failover_trigger' |
| sudo touch /tmp/pg_failover_trigger |
- Notice the file
- Finish off the slave process and recover any log files transferred from the main server that still needs recovery
- Rename the 'recovery.conf' file to 'recovery.done'
- when that happens, it is now the primary server
Alternate Method using pg_ctl
use pg_ctl to promote the server
|
su - postgres enter the postgres password pg_ctl promote |
For more information refer to the postgres fail-over documentation
Update or Remove PostgreSQL
Updating Postgres
Download the latest Postgres installer from the ArtsMan web site. Once you have it, make sure you have done the following steps:
- Check the version of Postgres you are running. This is in the 'About Theatre Manager' menu. Look at the bottom left of the 'about Theatre Manager' screen. You will see your database name followed by a number such as (9.4.x) or (9.3.x) etc. Record this version for later.
- Log everybody out of Theatre Manager, including
- Any user at the login window and/or
- The second generation TM Server and/or
- Classic web listeners
- (optional) If you are worried that staff people might log in to Theatre Manager while the upgrade is happening, use PGAdmin (Tools->Server Configuration menu) to edit the pg_hba.conf file to restrict access and
- Comment out any access that is allowed from any another IP address - and only allow access from 127.0.0.1. You do this by double clicking on the row containing the IP address and unchecking it.
- Reload (or restart) the Postgres server configuration to make sure no other user would be able to log in and disrupt the upgrade.
- Make sure you have made a backup of the database, using the procedures in the daily backup job process. (only after everybody is logged out).
- Once you have confirmed the backup exists and have made another copy of that in a different place (just to be safe), then follow the specific instructions for updating the same version or from an older version as required. Refer back to the version of the database that you recorded in the first step above
- If the version is at least 9.4, follow the instructions to update the same version of Postgres.
- If you have a version of Postgres that is older than 9.4 (i.e. 9.3), then follow the steps for updating an older version.
- After the database has been restored, edit the pg_hba.conf and
- Uncomment any access that you removed previously
- Reload (or restart) the Postgres server configuration and make sure others can now log in.
- Restart any web services
Updating the Same Version of Postgres
|
Remember, do not attempt to try this unless you just made a backup of your database. Preferably, you should also have restored that backup on another machine for safety, logged into it using Theatre Manager to prove that you can restore a backup and that it has 100% integrity.
|
|
If you are using Hot Streaming Replication, so MUST stop the replication server FIRST and upgrade the version of postgres on it before doing the main server. If not, you may end up redoing the replication server. Always verify that replication is working properly after a postgres update.
|

- Make sure you are running postgres version 9.2 or later.
- Refer to downloading the latest Mac Installer for postgres
- Make sure you have just made a backup of the databases in the server
- use terminal and PG_CTL to 'stop' the database
a) start terminal
b) type su - postgres
c) provide the password
d) type pg_ctl stop -m immediate
- Run the installer which will update and restart an existing PostgreSQL installation.
Make sure to read the next step before starting the install to decide if you can do an easy install or the custom install.
- If you have set up the hot standby server, make sure to
- stop the hot standby at the same time
- Only use the custom install to update the MAIN server (which does not install a revised demo database) as per below.
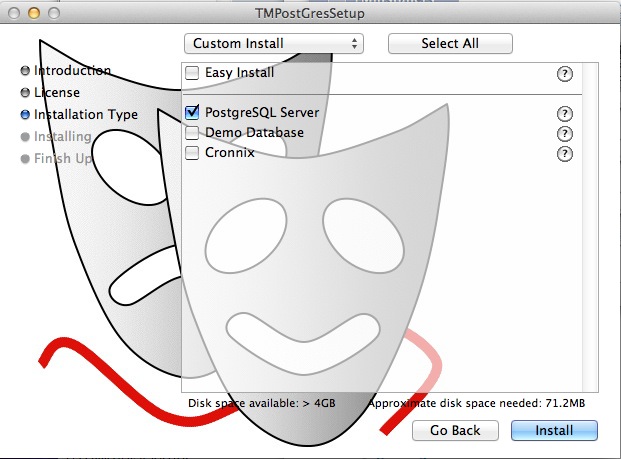
- Upgrade the Hot Standby to the same version of the database server using the same custom installer.
- Verify that replication is still working after the upgrade
- try log in to Theatre Manager afterwards
Update Older Version of Postgres
|
Remember, do not attempt to try this unless you just made a backup of your database. Preferably, you should also have restored that backup on another machine for safety, logged into it using Theatre Manager to prove that you can restore a backup and that it has 100% integrity.
|
The steps are:
- Sign all users out of Theatre Manager and stop all TM Web Services
- Make a manual backup of the database using the terminal command php /Users/Shared/backupTM.php (and restore the backup to a 'test' database to ensure it works).
- Save the PG_HBA.CONF and the POSTGRESQL.CONF settings unique to this server
- Stopping the Postgres server
- Removing the old postgres server by running the un-installer found in the /Library/PostgreSQL/x.x directory.
- This will only uninstall postgres and the services
- Once complete, you will need to move (or delete) the /Library/PostgreSQL/x.x directory which now should contain only the 'data' folder.
- The 'data' folder is retained only for temporary safekeeping until you have installed the next version of Postgres and restored your data satisfactorily.
- Installing the new postgres server using the Theatre Manager postgres installer for OSX
- Reconfiguring the parameters for postgres for PG_HBA.CONF and the POSTGRESQL.CONF
- Restoring the main database from the backup
- Create the new database with the owner 'TheatreManager', and using encoding "UTF8'. If the TheatreManager user is not in the database, contact support right away and do not continue.
- Restore the backup of the database
- setting up the backup job again
- If you previously set up the hot standby server, you will need to follow the complete installation steps for and set it up again for the new version of postgres.
Replication is a feature of postgres and is automatically set up for cloud venues. Self service venues may set this up if they wish - the support team is unable to help you.
Removing Postgres
- Stop the postgres database using the
pg_ctl stop -m immediate' command
- When the server is stopped, use the un-install program in the /Library/PostgreSQL/x.x directory to get rid of it properly
- throw out the entire folder called /Library/PostgreSQL
- restart the mac