You are here
Submitting CSR for TLS Certificate - NameCheap
Step 1: Access GeoTrust's Vendor Portal
- Access the NameCheap vendor portal via https://www.namecheap.com/myaccount/login.aspx?ReturnUrl=%2f
- Enter user name artsman
- Enter password refer to Daylite
- Click Sign in and Continue
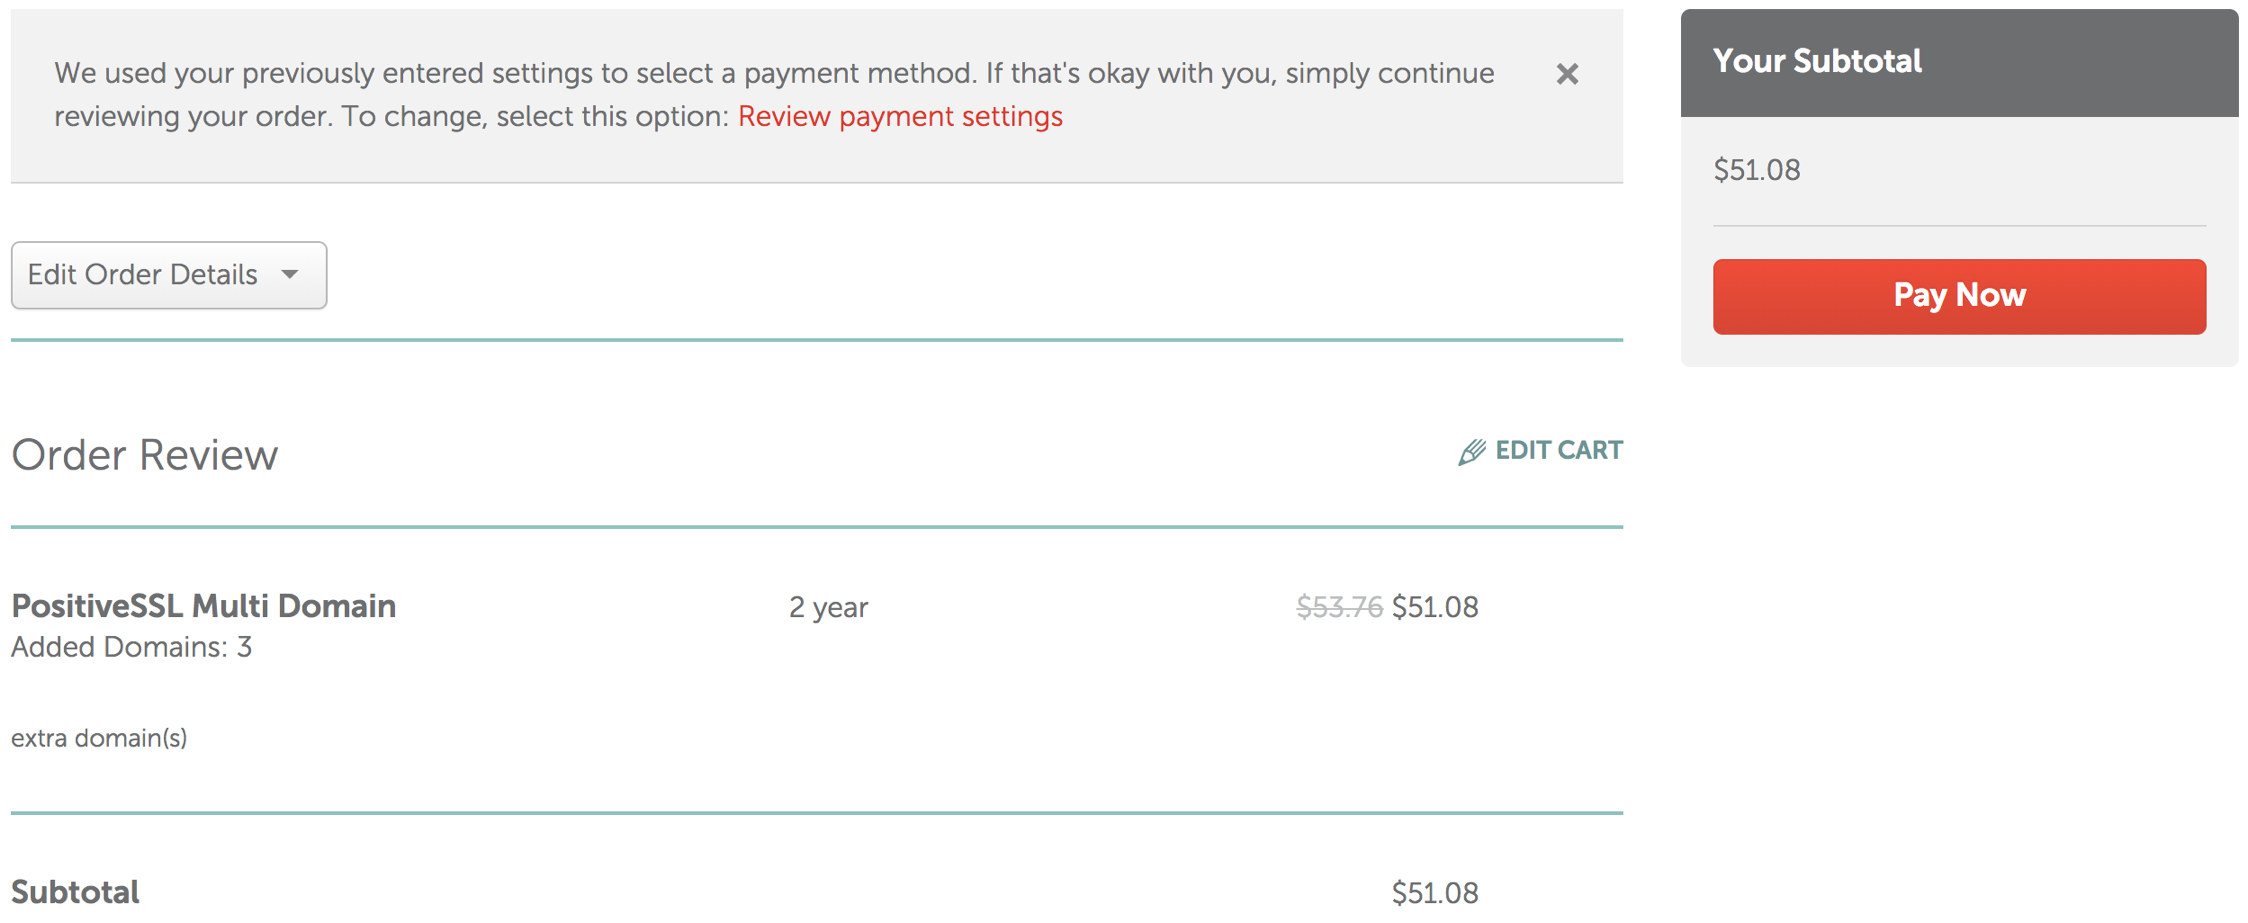
Step 2: Place Order for Certificate - PositiveSSL Multi-Domain
- Click Security >> TLS Certificates.
- Click the Buy Now button under the PositiveSSL Multi-Domain option.
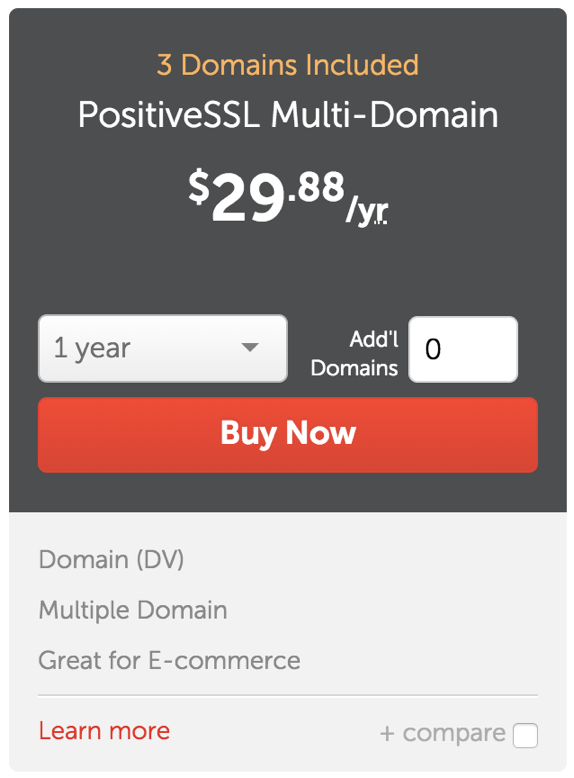
- Select the number of years the TLS purchase will be valid for. Most clients purchase for 2 years.
- Click the Add to Cart button.
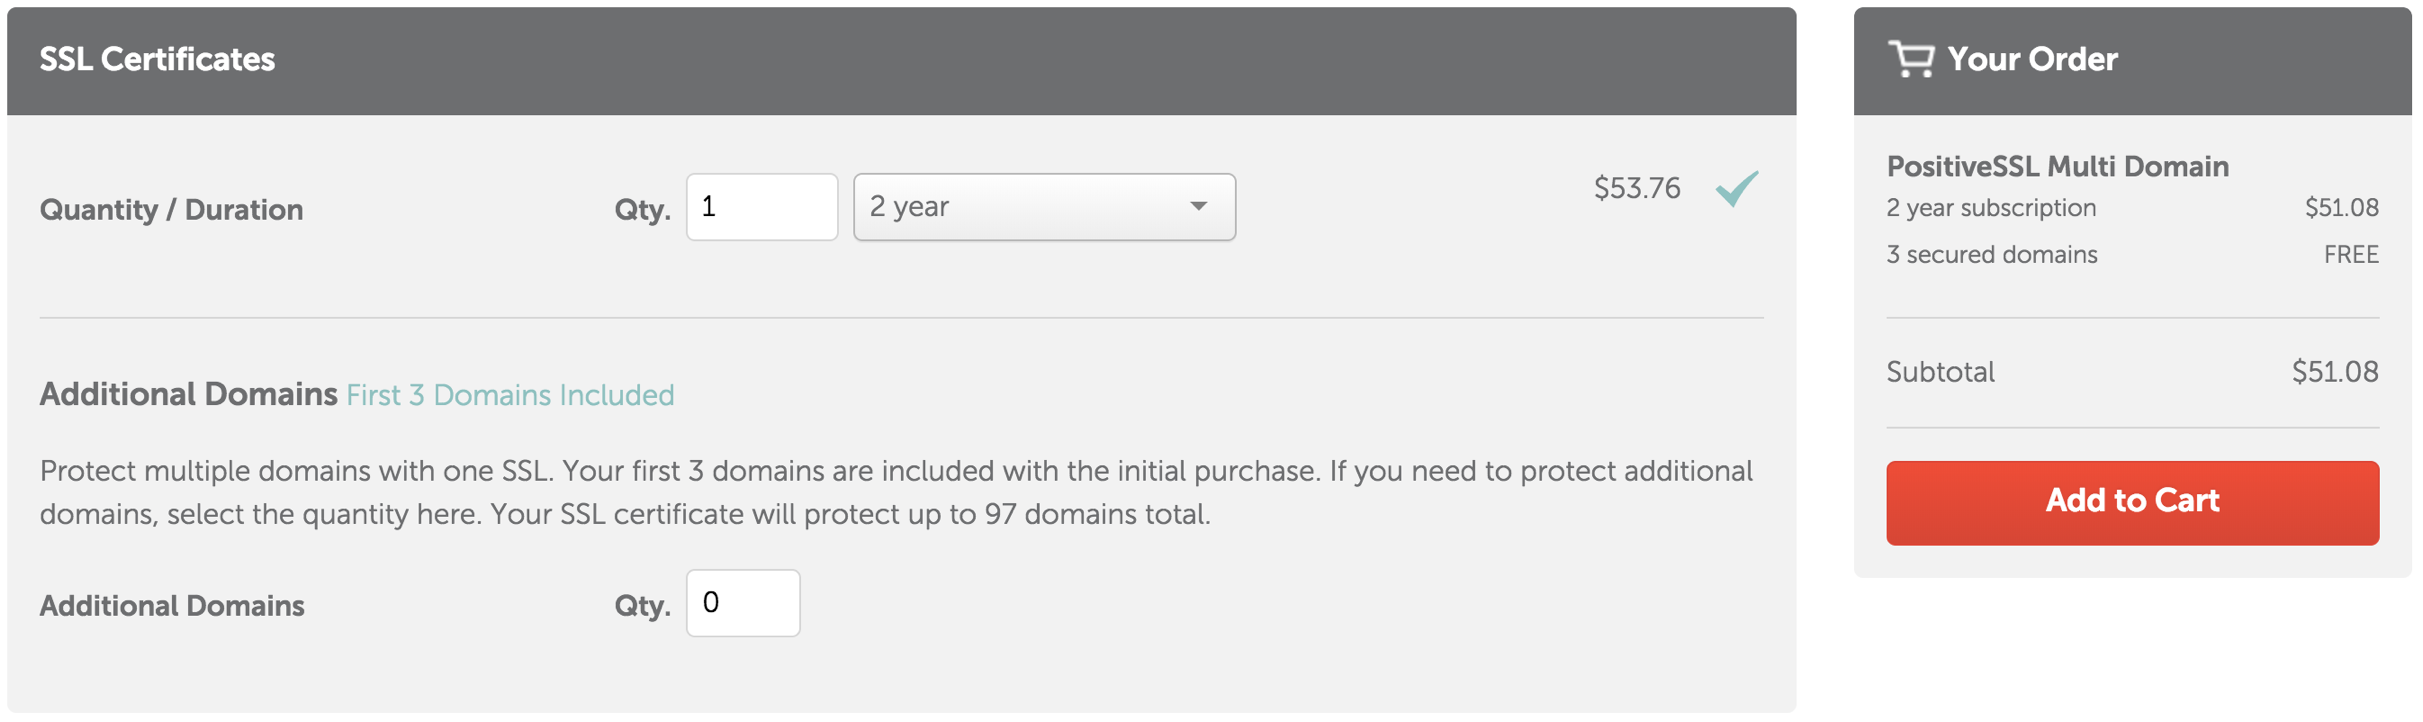
- After reviewing the order details are correct, click the Confirm Order button.
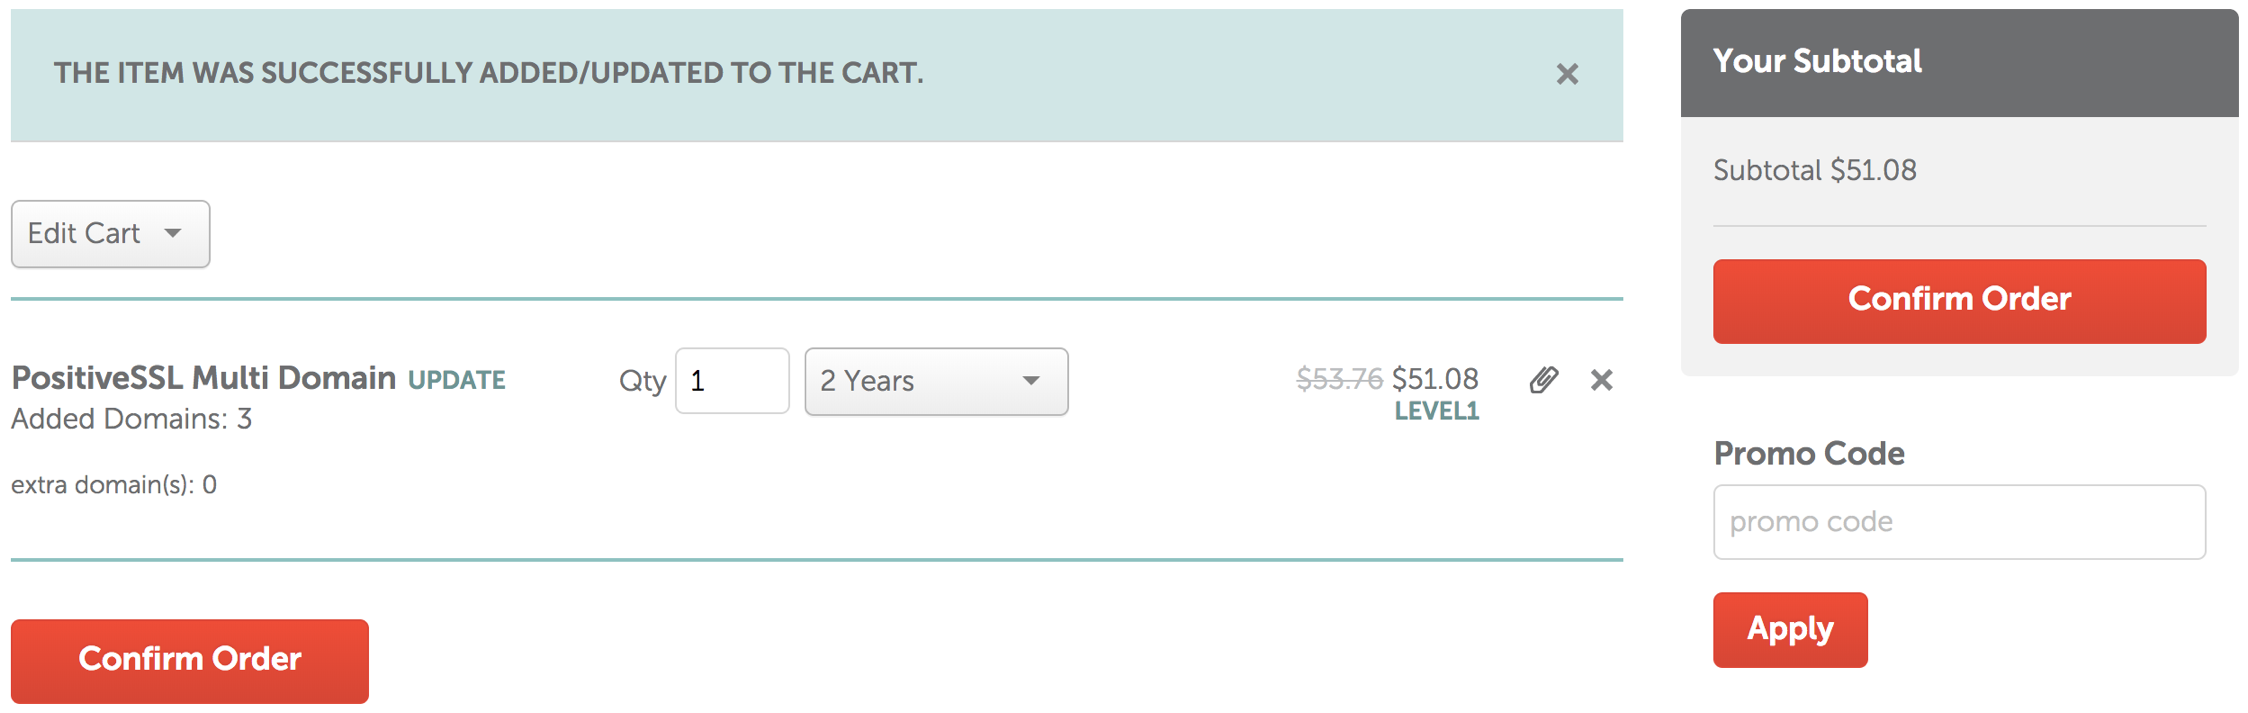
- Click the Pay Now button to purchase the PositiveSSL Multi-Domain SSL.
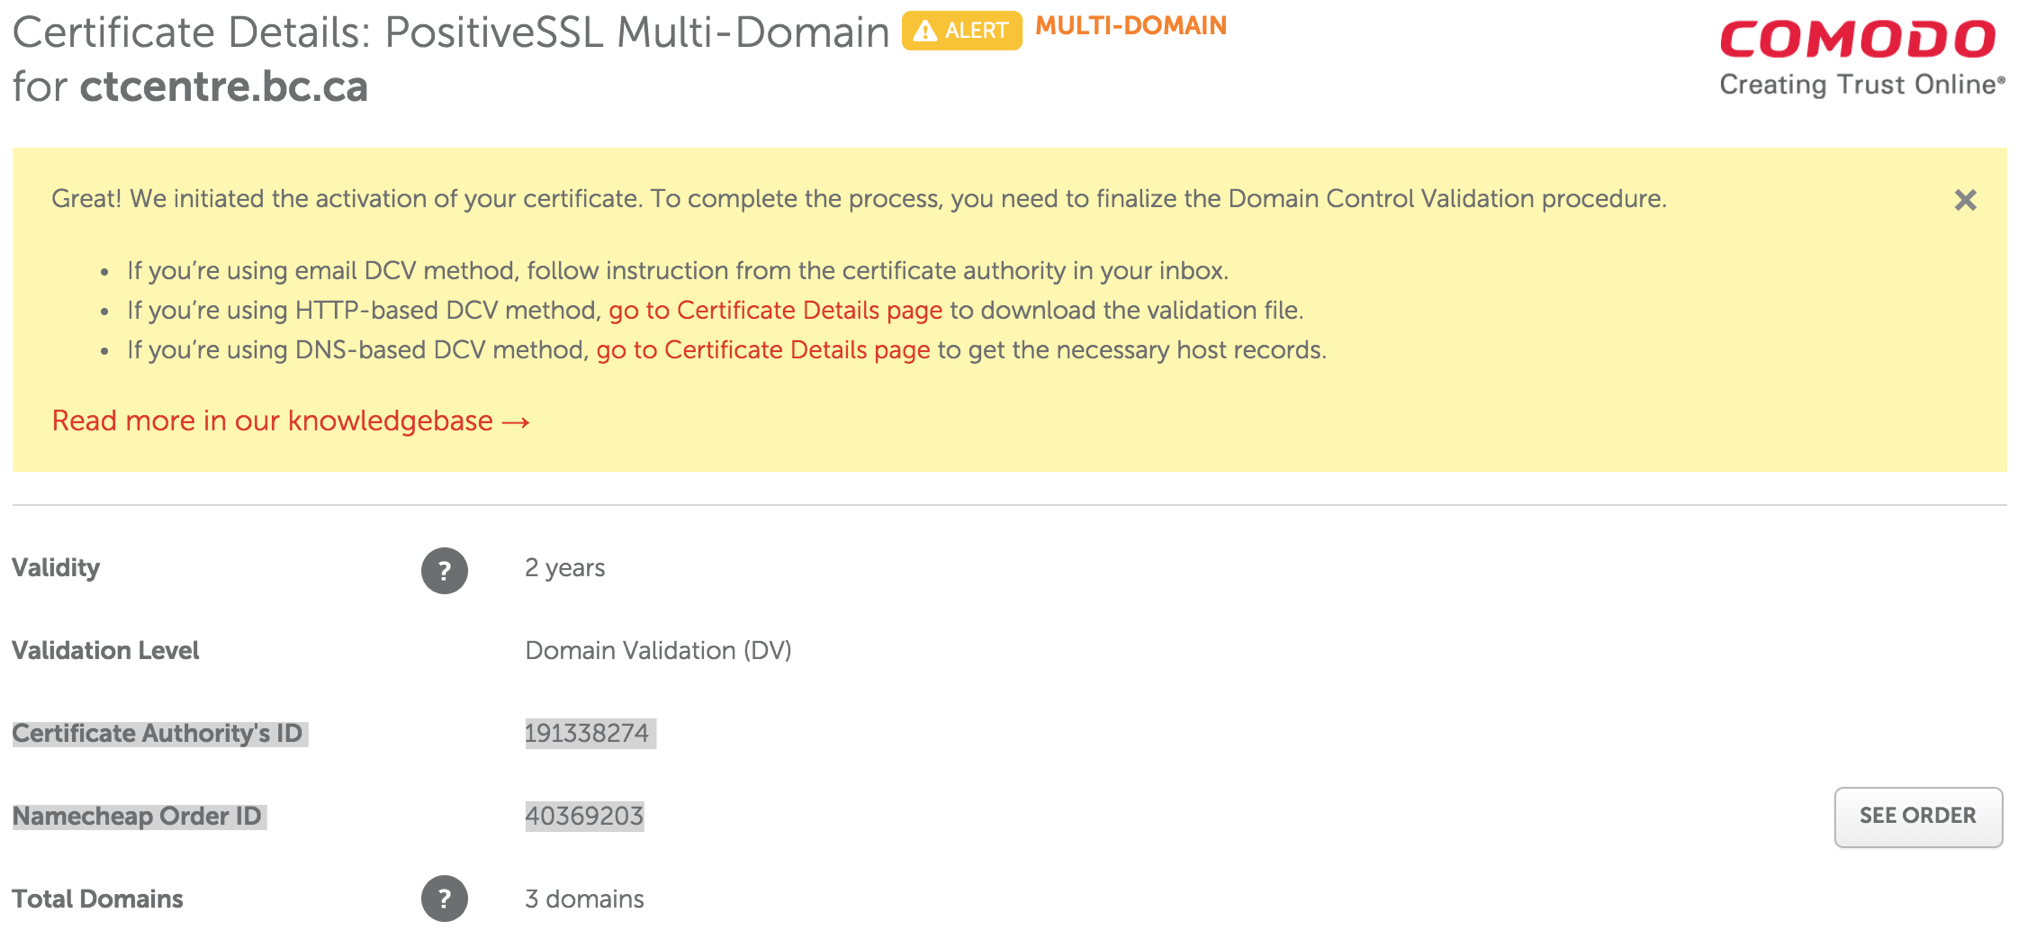
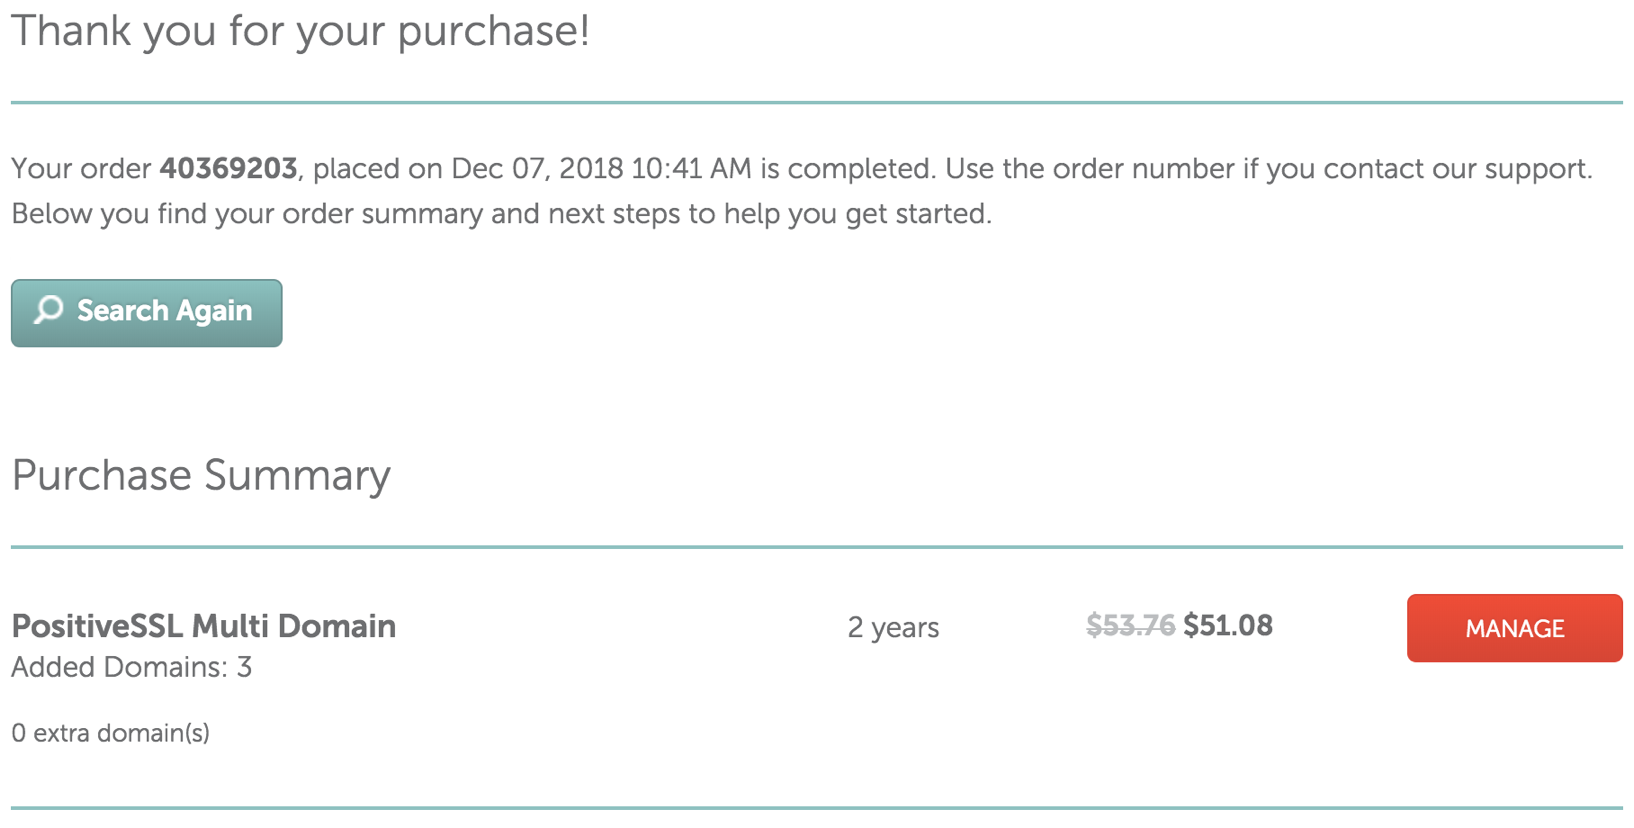
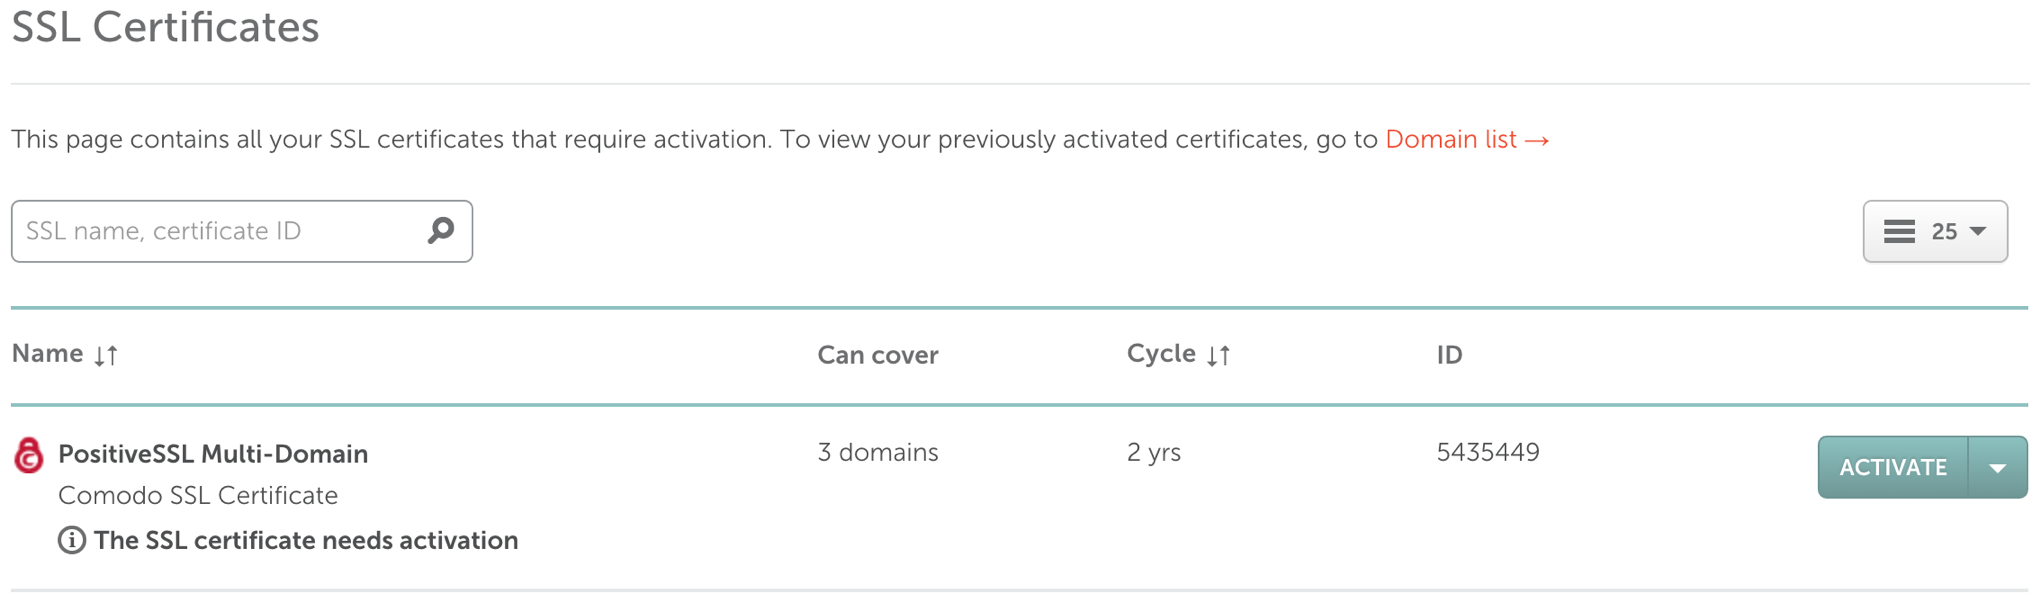
Step 3: Activate the TLS Certificate - PositiveSSL Multi-Domain
- Click the Manage button in the Purchase Summary window.
- Click the Activiate button to start the activation process.
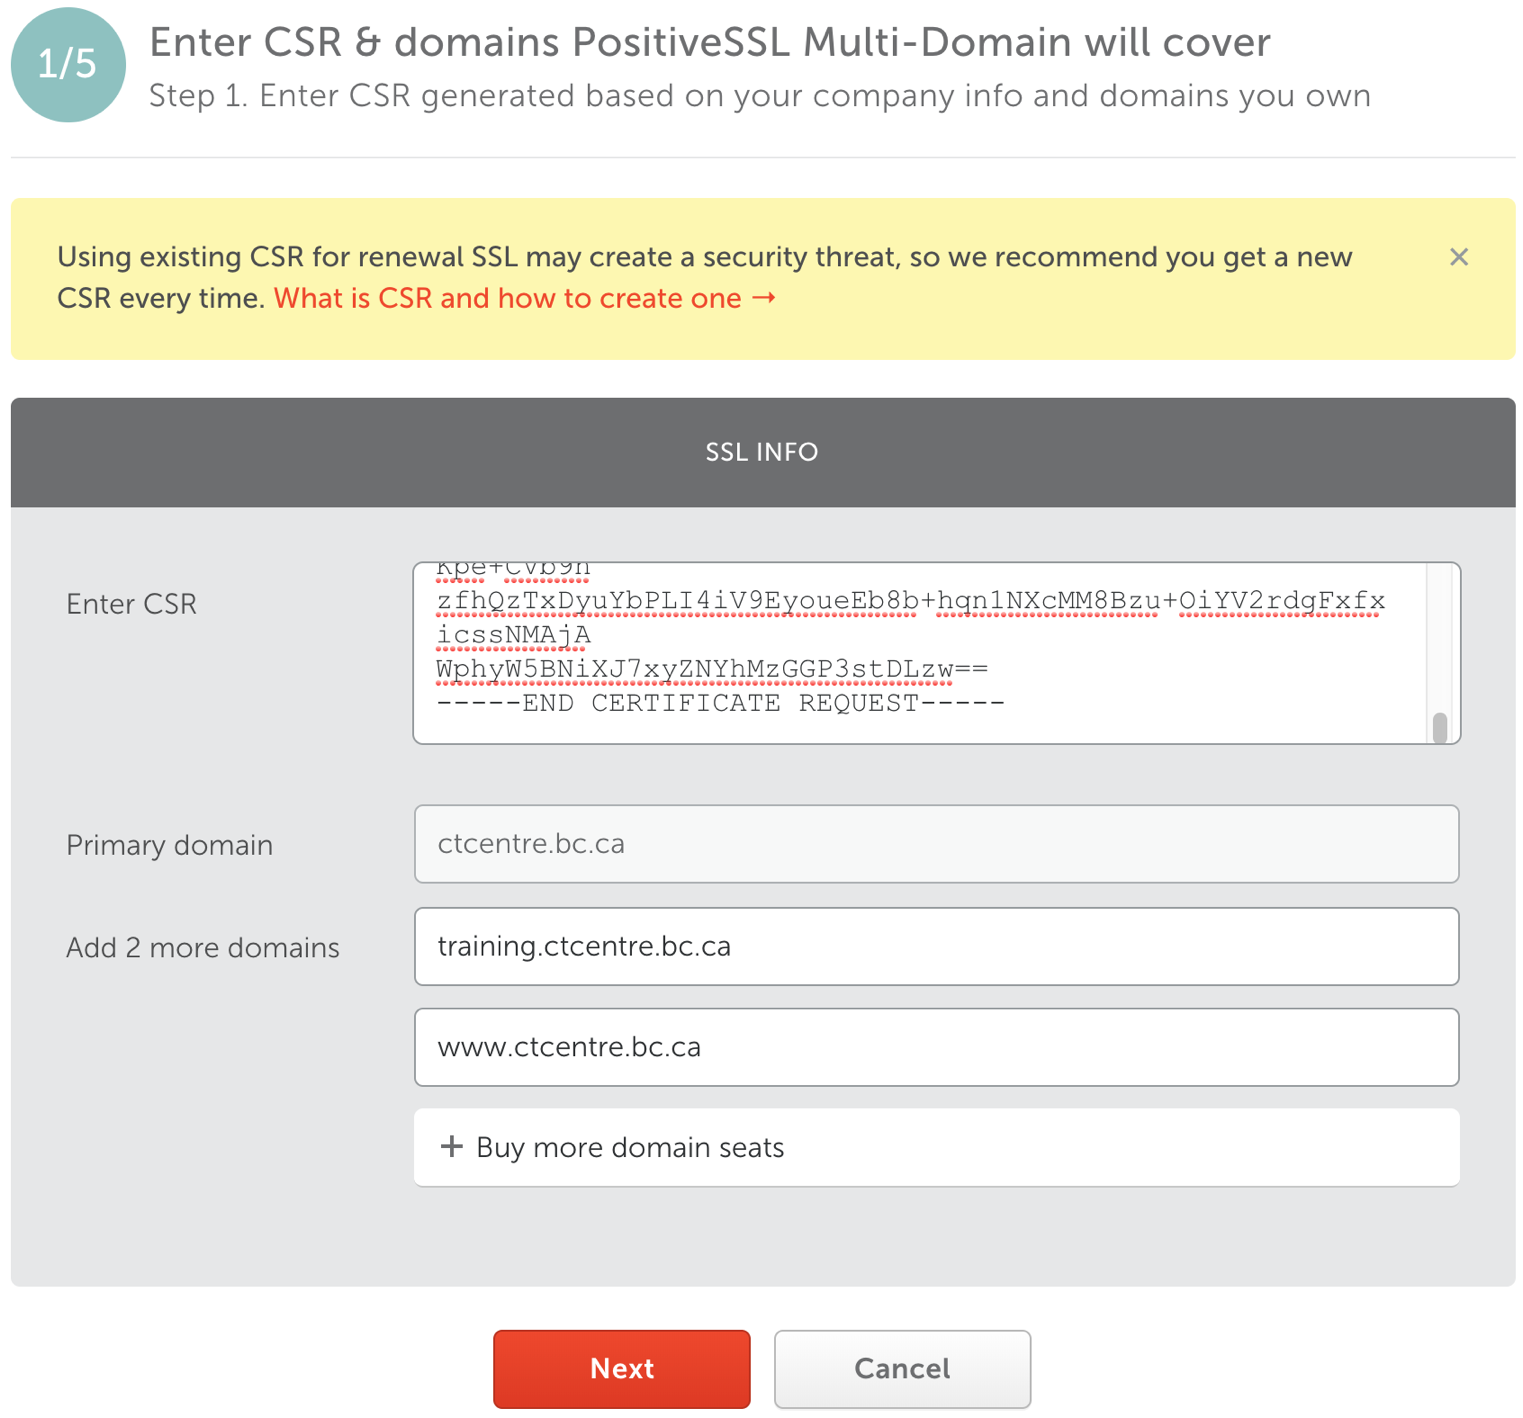
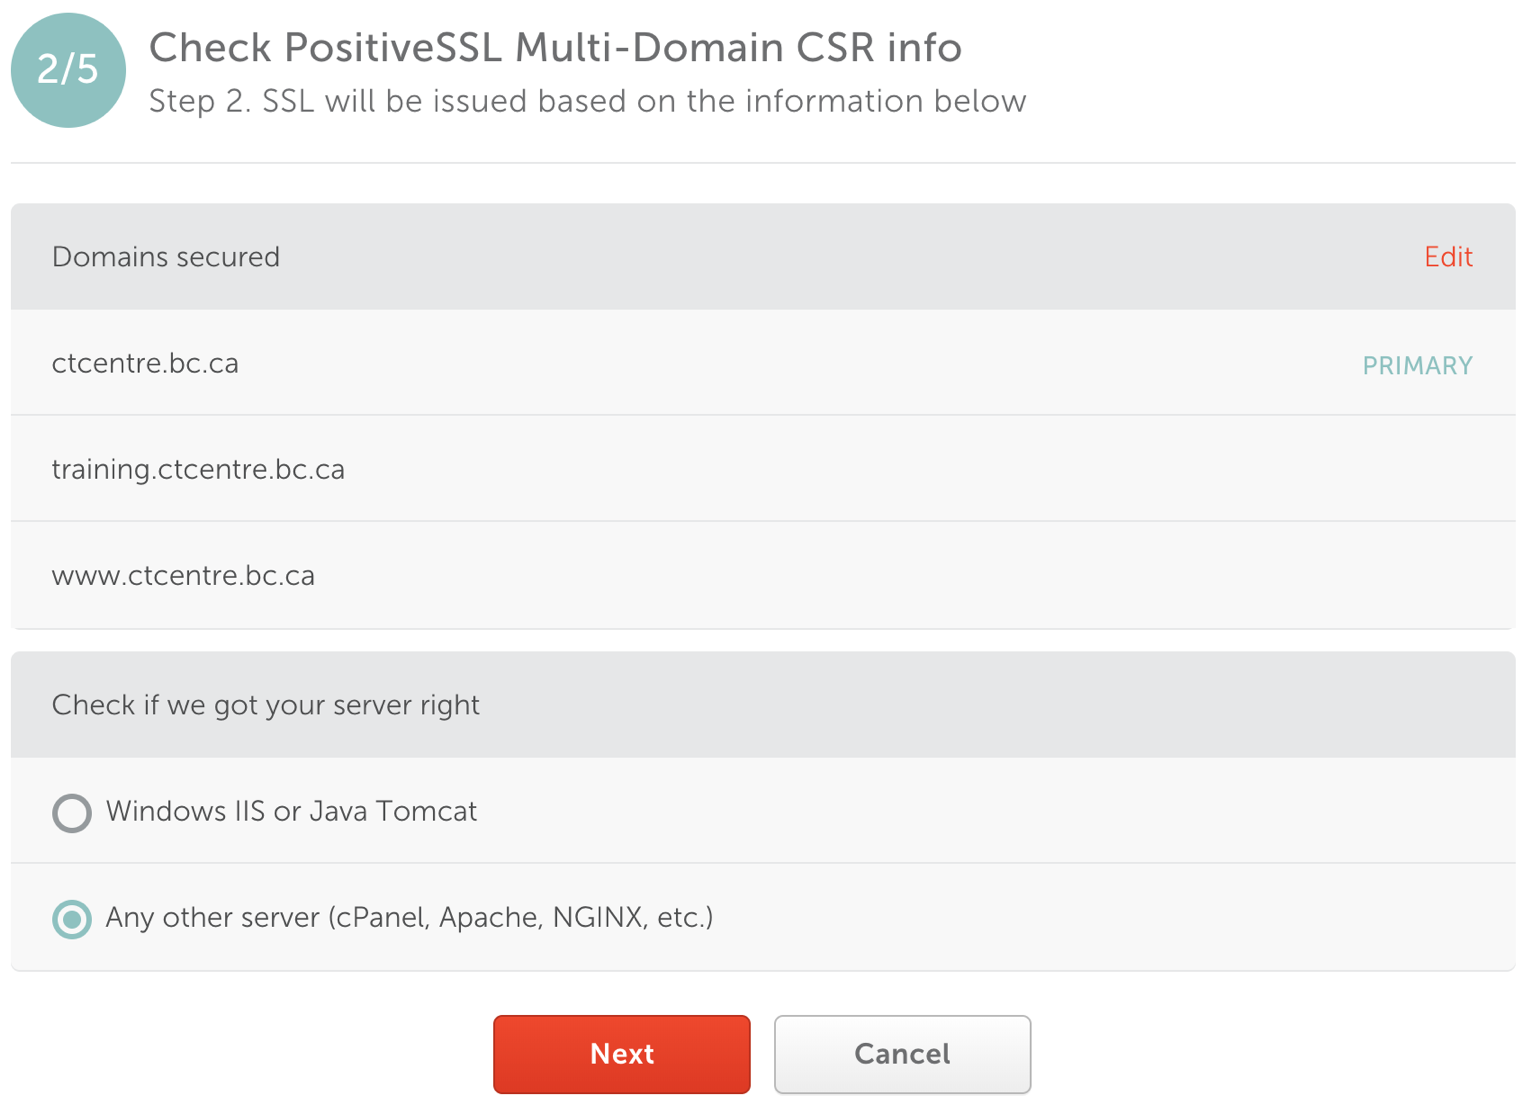
- Step 1: Enter CSR & domains PositiveSSL Multi-Domain will cover
Copy and Paste the content from the .CSR file into the Enter CSR field. The Primary Domain field will populate with the domain name.
Enter the additional domain names in the Add 2 more domains fields.
- Step 2: Check PostiveSSL Multi-Domain CSR info
Select the web server. This is usually set to Any other server (cPanel, Apache, NGINX, etc.).
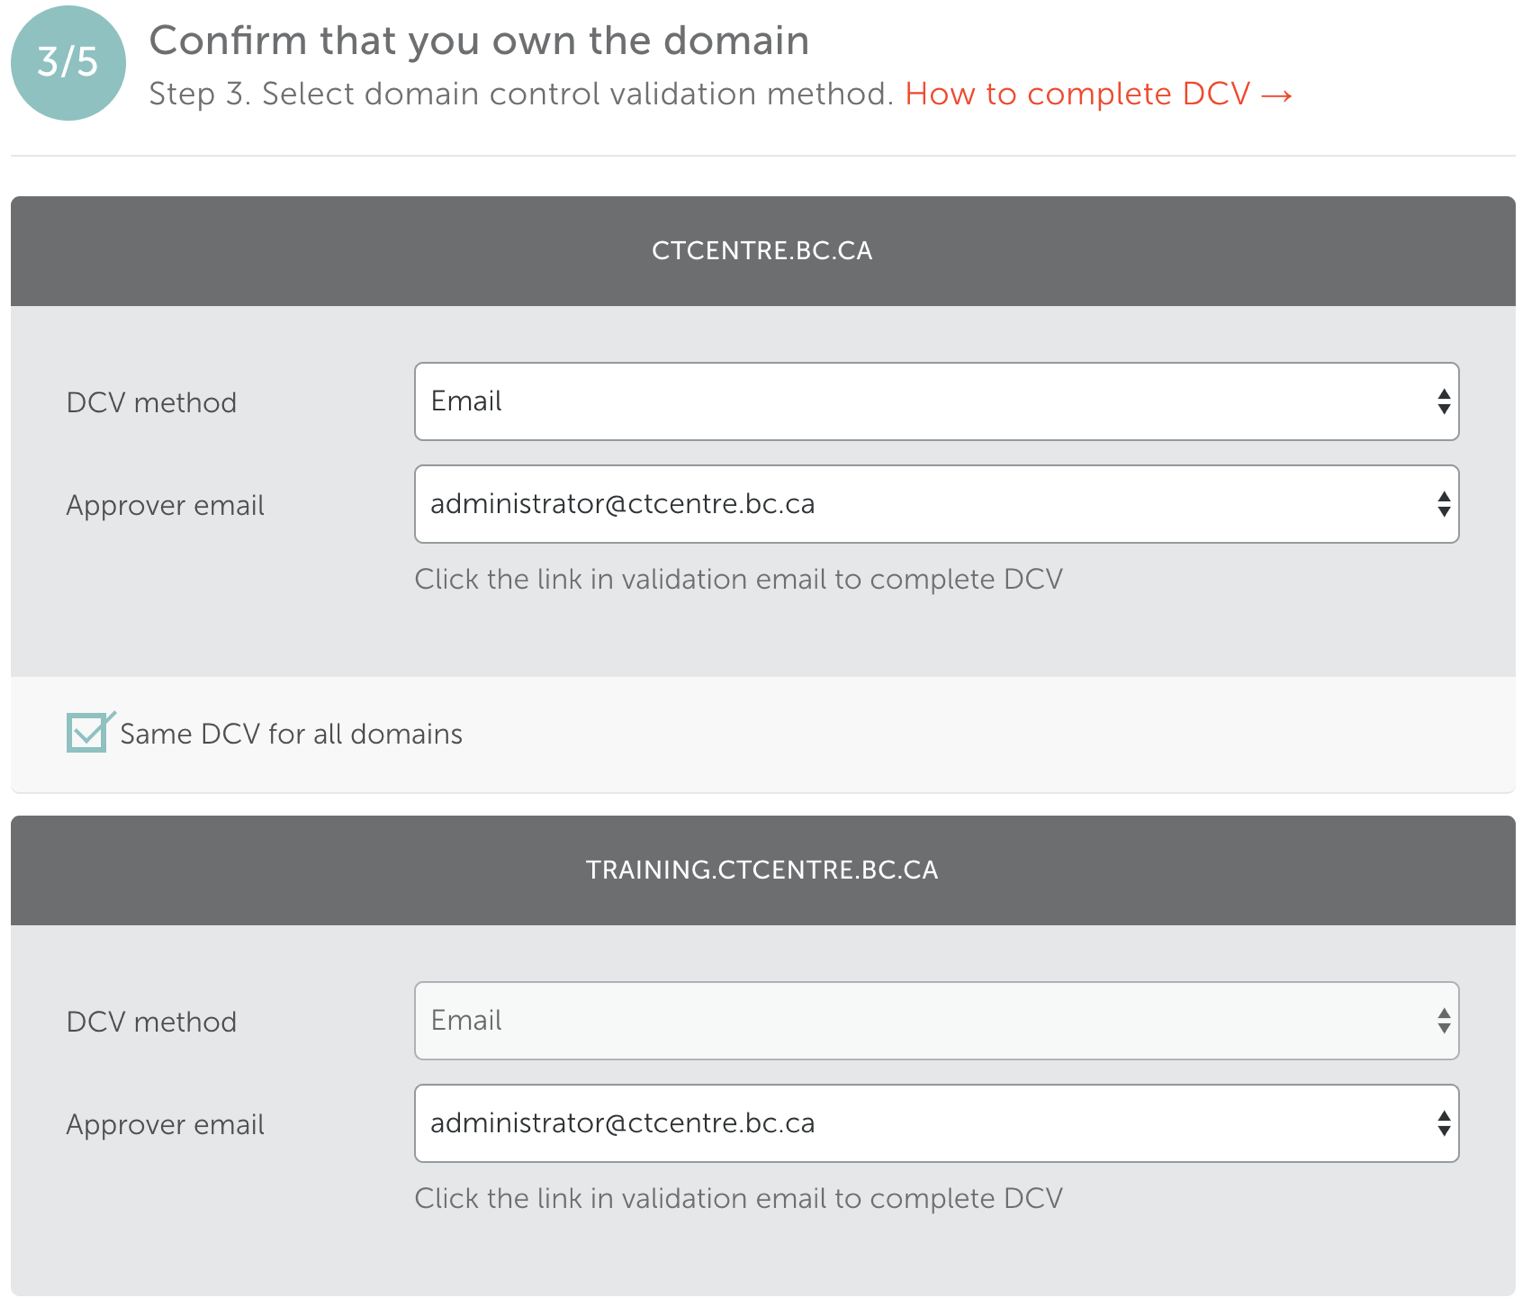
- Step 3: Confirm that you own the domain
Choose the Approver emailfrom the drop down for the domain.
Check the Same DCV for all domains box. This will ensure one email goes to the client to approve all three domain names.
Select the same email Approver email address for the remaining domains.
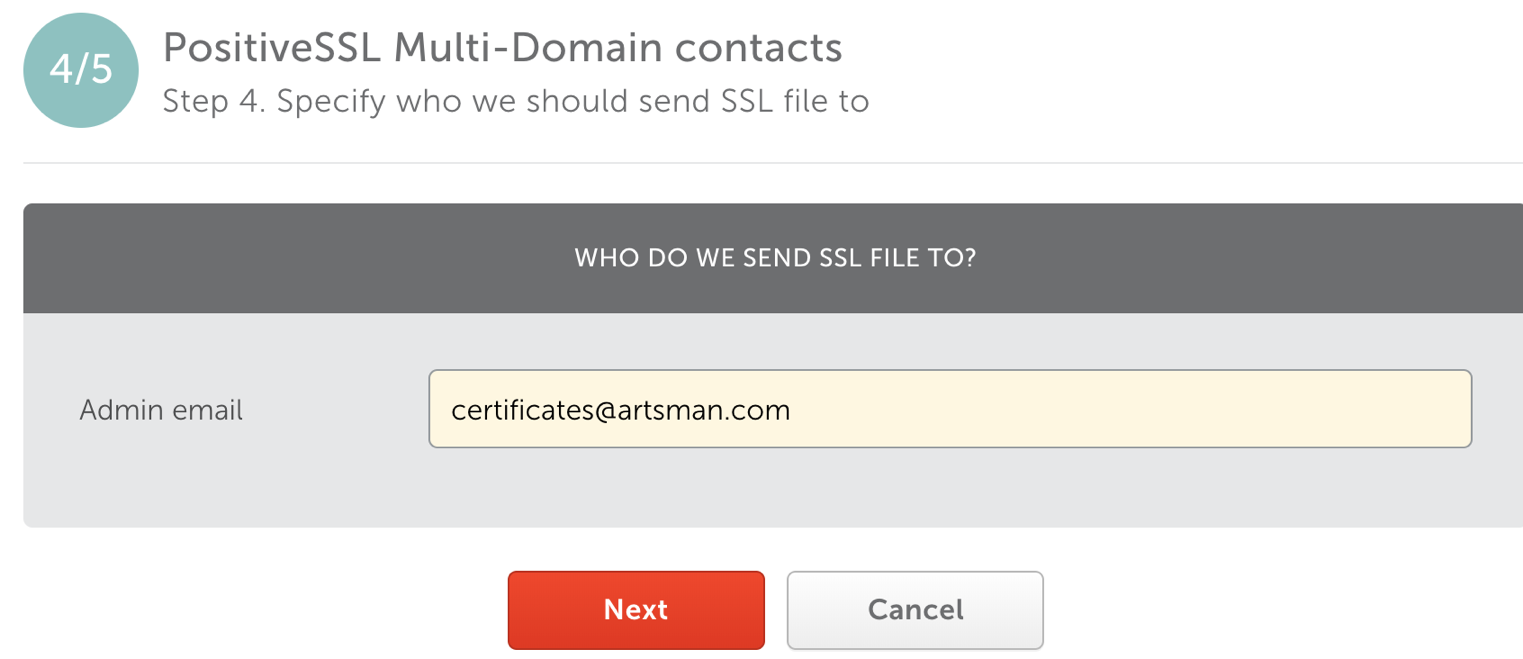
- Step 4: PostiveSSL Multi-Domain contacts
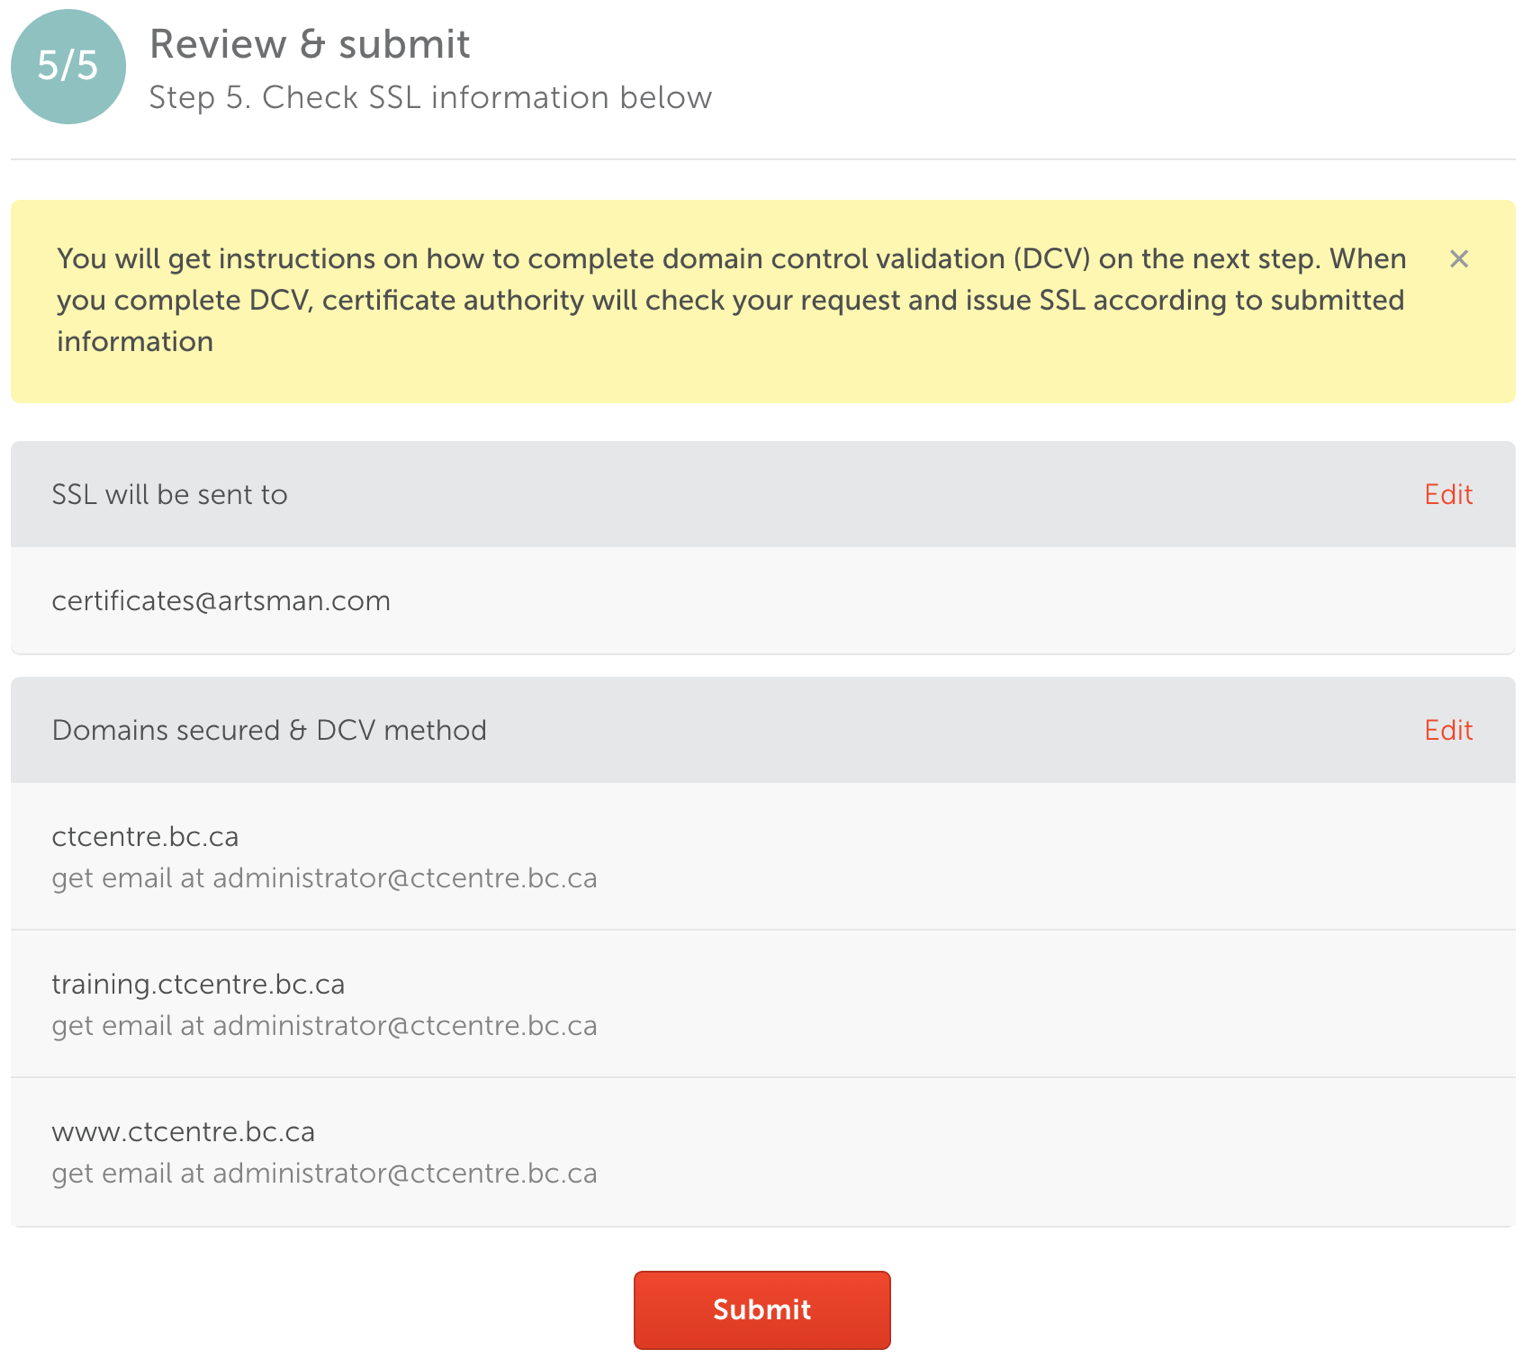
- Step 5: Review & submit
Review the TLS details to ensure they are correct.
- Copy and Paste the Certificate Authority's ID and Namecheap Order ID details along with the date into the Daylite Order/Install TLS Task.