Accounting
The Accounting section of Theatre Manager is used for the general ledger setup, general ledger transactions, deposits, receivables, end of day posting, and year end posting. There are many facets to the Accounting section. All of the Accounting functions can be reached through the main menu bar. For more general information and tips on Accounting, click here.
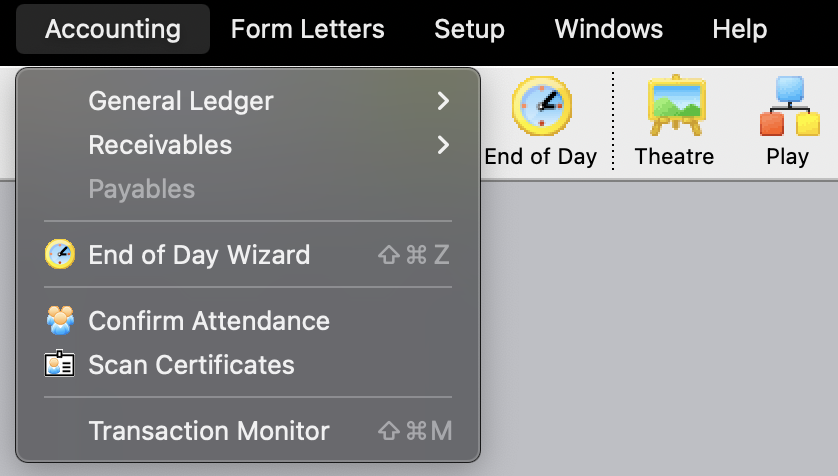
Parts of the Accounting Menu
| General Ledger | The General Ledger sub-menu contains access to the general ledger and general journal transactions. For more information about the General Ledger sub-menu, click here. |
| Receivables | The Receivables sub-menu contains access to bank deposits and receivables within Theatre Manager. For more information on the Receivables sub-menu, click here. |
| Payables | This function is planned for implementation at a later date. |
| End of Day Wizard | The End of Day Wizard is used for posting all sales at the end of the business day to the general ledger. For more information about the End of Day Wizard, click here. |
| Confirm Attendance | The Confirm Attendance function is used for verifying tickets that were actually used for a performance. It allows tracking of tickets once they have been given to the patron. For more information on the Confirm Attendance function, click here. |
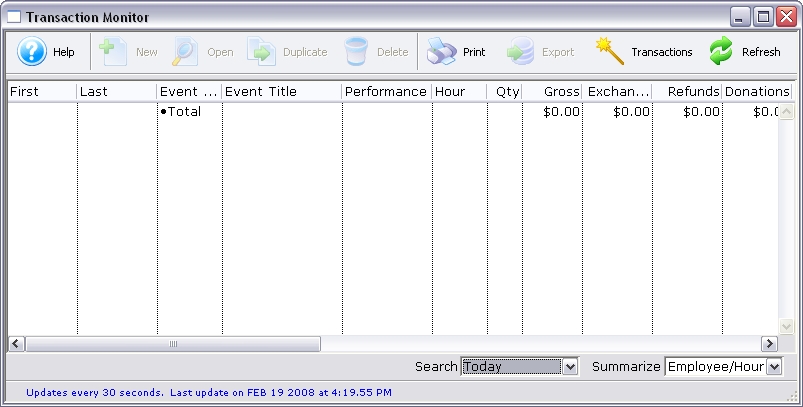
| Transaction Monitor | The Transaction Monitor is used to see transactions that are happening throughout the day in Theatre Manager. This is useful to see how sales are going throughout the day. For more information on the Transaction Monitor, click here. |
Overview of the General Ledger
 |
At the most basic level, the best way to think of Theatre Manager is as a replacement Accounts Receivable Sub-Ledger to your existing accounting system.
Sales and payments within Theatre Manager create daily G/L entries for your financial system, using the account numbers in your financial system. |
 |
There is a Powerpoint presentation on The Perfect Audit that contains most of the principles of Accounting in TM, especially the Golden Rule and the principle of Source Document Capture. We are happy to explain this for those that wish -and if followed - will give you a great audit. |
- Deposit and Sales Entries into your financial accounting system, including future liabilities for deferred revenues like gift certificates, events or donations.
- A list of Accounts Receivables by patron.
- Tax liability information.
- Event / Play revenue breakdown reports, including order fees and exchange fees.
Sales are controlled and accounted for in the General Ledger module and display numerous variations of revenue breakdown. Implementing the General Ledger requires setting up a simplified chart of accounts, creating general journal entries, and posting the entries to the General Ledger. The General Ledger module provides information based on transactions which have been recorded. This differs from the ticket based reports as they show revenue at the moment of time that the report was created. The General Ledger provides detail and summary information.
The design of the General Ledger Chart of Accounts controls how information is maintained in the General Ledger. The number and type of accounts maintained determines the detail that is available from the General Ledger. This enables the ability to have all the detail information remain in Theatre Manager, while your financial package retains the summary information.
Data is entered into the General Ledger through General Journal Entries which record detail information on sales, exchanges and refund transactions for specific time periods. Summarizing the transactions is known as journalizing and the transaction detail created for each Deposit and Sales Entry records a chronological record of events / plays for the time period. The summarizing links together the debits and credits of each transaction and provides a complete record of each transaction.
There are five types of General Ledger entries:
- Deposit entries summarize payments by method of payment; Cash, Check, Visa, Mastercard, American Express and Other.
- Sales entries summarize revenue for new sales, exchanges and refunds. The sales entry can then be broken down and displayed in virtually any format that is required.
- Automatic entries that indicate when to transfer deferred revenue to earned revenue
- Manual General Ledger Entries record periodic transactions such as the payment of tax liabilities, adjustments, and year end closings.
- G/L entries for inter company transfers when using outlet version of Theatre Manager. This will show ticket sales and commissions due/payable when the ticket sale occurs for your outlet at another outlet - perfect for reconciliation of activity between companies.
After the transactions are recorded in the General Journal, the debit and credit information about each transaction is posted to the General Ledger. Posting the General Journal Entries updates the General Ledger Accounts to reflect all transactions which have been journalized. The General Ledger account balances provide summary information on all General Ledger Entries that have been posted.
Accrual Basis Accounting
Accrual Based Accounting reflects the understanding that the economic effect of a revenue generally occurs when the event occurs (eg tickets bought), not when cash is received. This approach supports deferred accounting, management of receivables, post dated payments and other features. In the US, the IRS requires accrual accounting for 'C' organizations under most circumstances and GAAP/FASB requires it. Canada Revenue Agency rules are similar.
Theatre Manager is designed exclusively around Accrual Accounting principles.
Cash Basis Accounting
Under the cash basis, revenues are reported when cash is received. If the order is entered in December, but the cash from the patron is not received until January, the revenue is reported in January because revenues are recorded when cash is received. Most 503C organizations should follow GAAP and use Accrual accounting per IRS and Canadian requirements.
|
This manual is not a source of basic accounting knowledge. For detailed explanations of general ledgers, chart of accounts, debits, credits, journalizing, and posting, consult an accounting manual. Follow the accepted accounting practices when selecting the debit or credit setting for accounts and the chart of accounts created in Theatre Manager's General Ledger should reflect your business practices. |
The General Ledger Submenu
In the General Ledger function you can post general ledger entries, set up general ledger accounts, look at transactions, and handle year end rollover. The General Ledger Sub-menu is accessed from the Accounting Menu >> General Ledger.
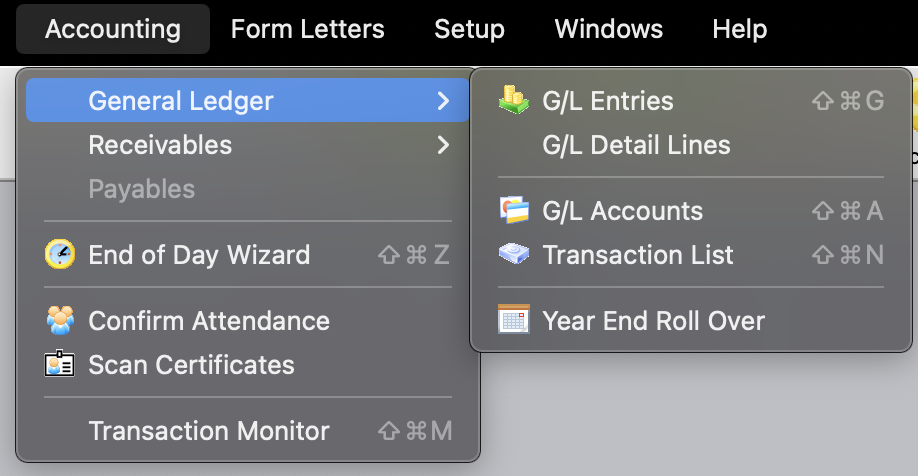
Parts of the General Ledger Sub-menu
| G/L Entries | The G/L Entries window allows the searching and posting of general ledger entries. For more information on the G/L Entries window, click here. |
| G/L Accounts | In the G/L Accounts window you can create and edit the general ledger accounts in Theatre Manager. For more information on the G/L Accounts window, click here. |
| Transaction List | In the Transaction List window you can search the transactions that have been created, including non-financial transactions. For more information on the Transaction List window, click here. |
| Year End Roll Over | Yhe Year End Roll Over function is used at the end of the fiscal year for your organization to "roll over" financial transactions and accounts to the new fiscal year. For more information on the Year End Roll Over function, click here. |
G/L Entries Window
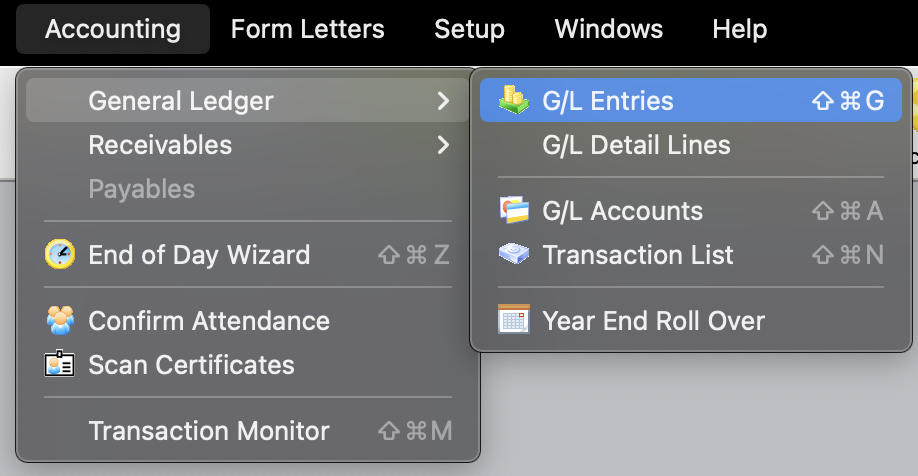
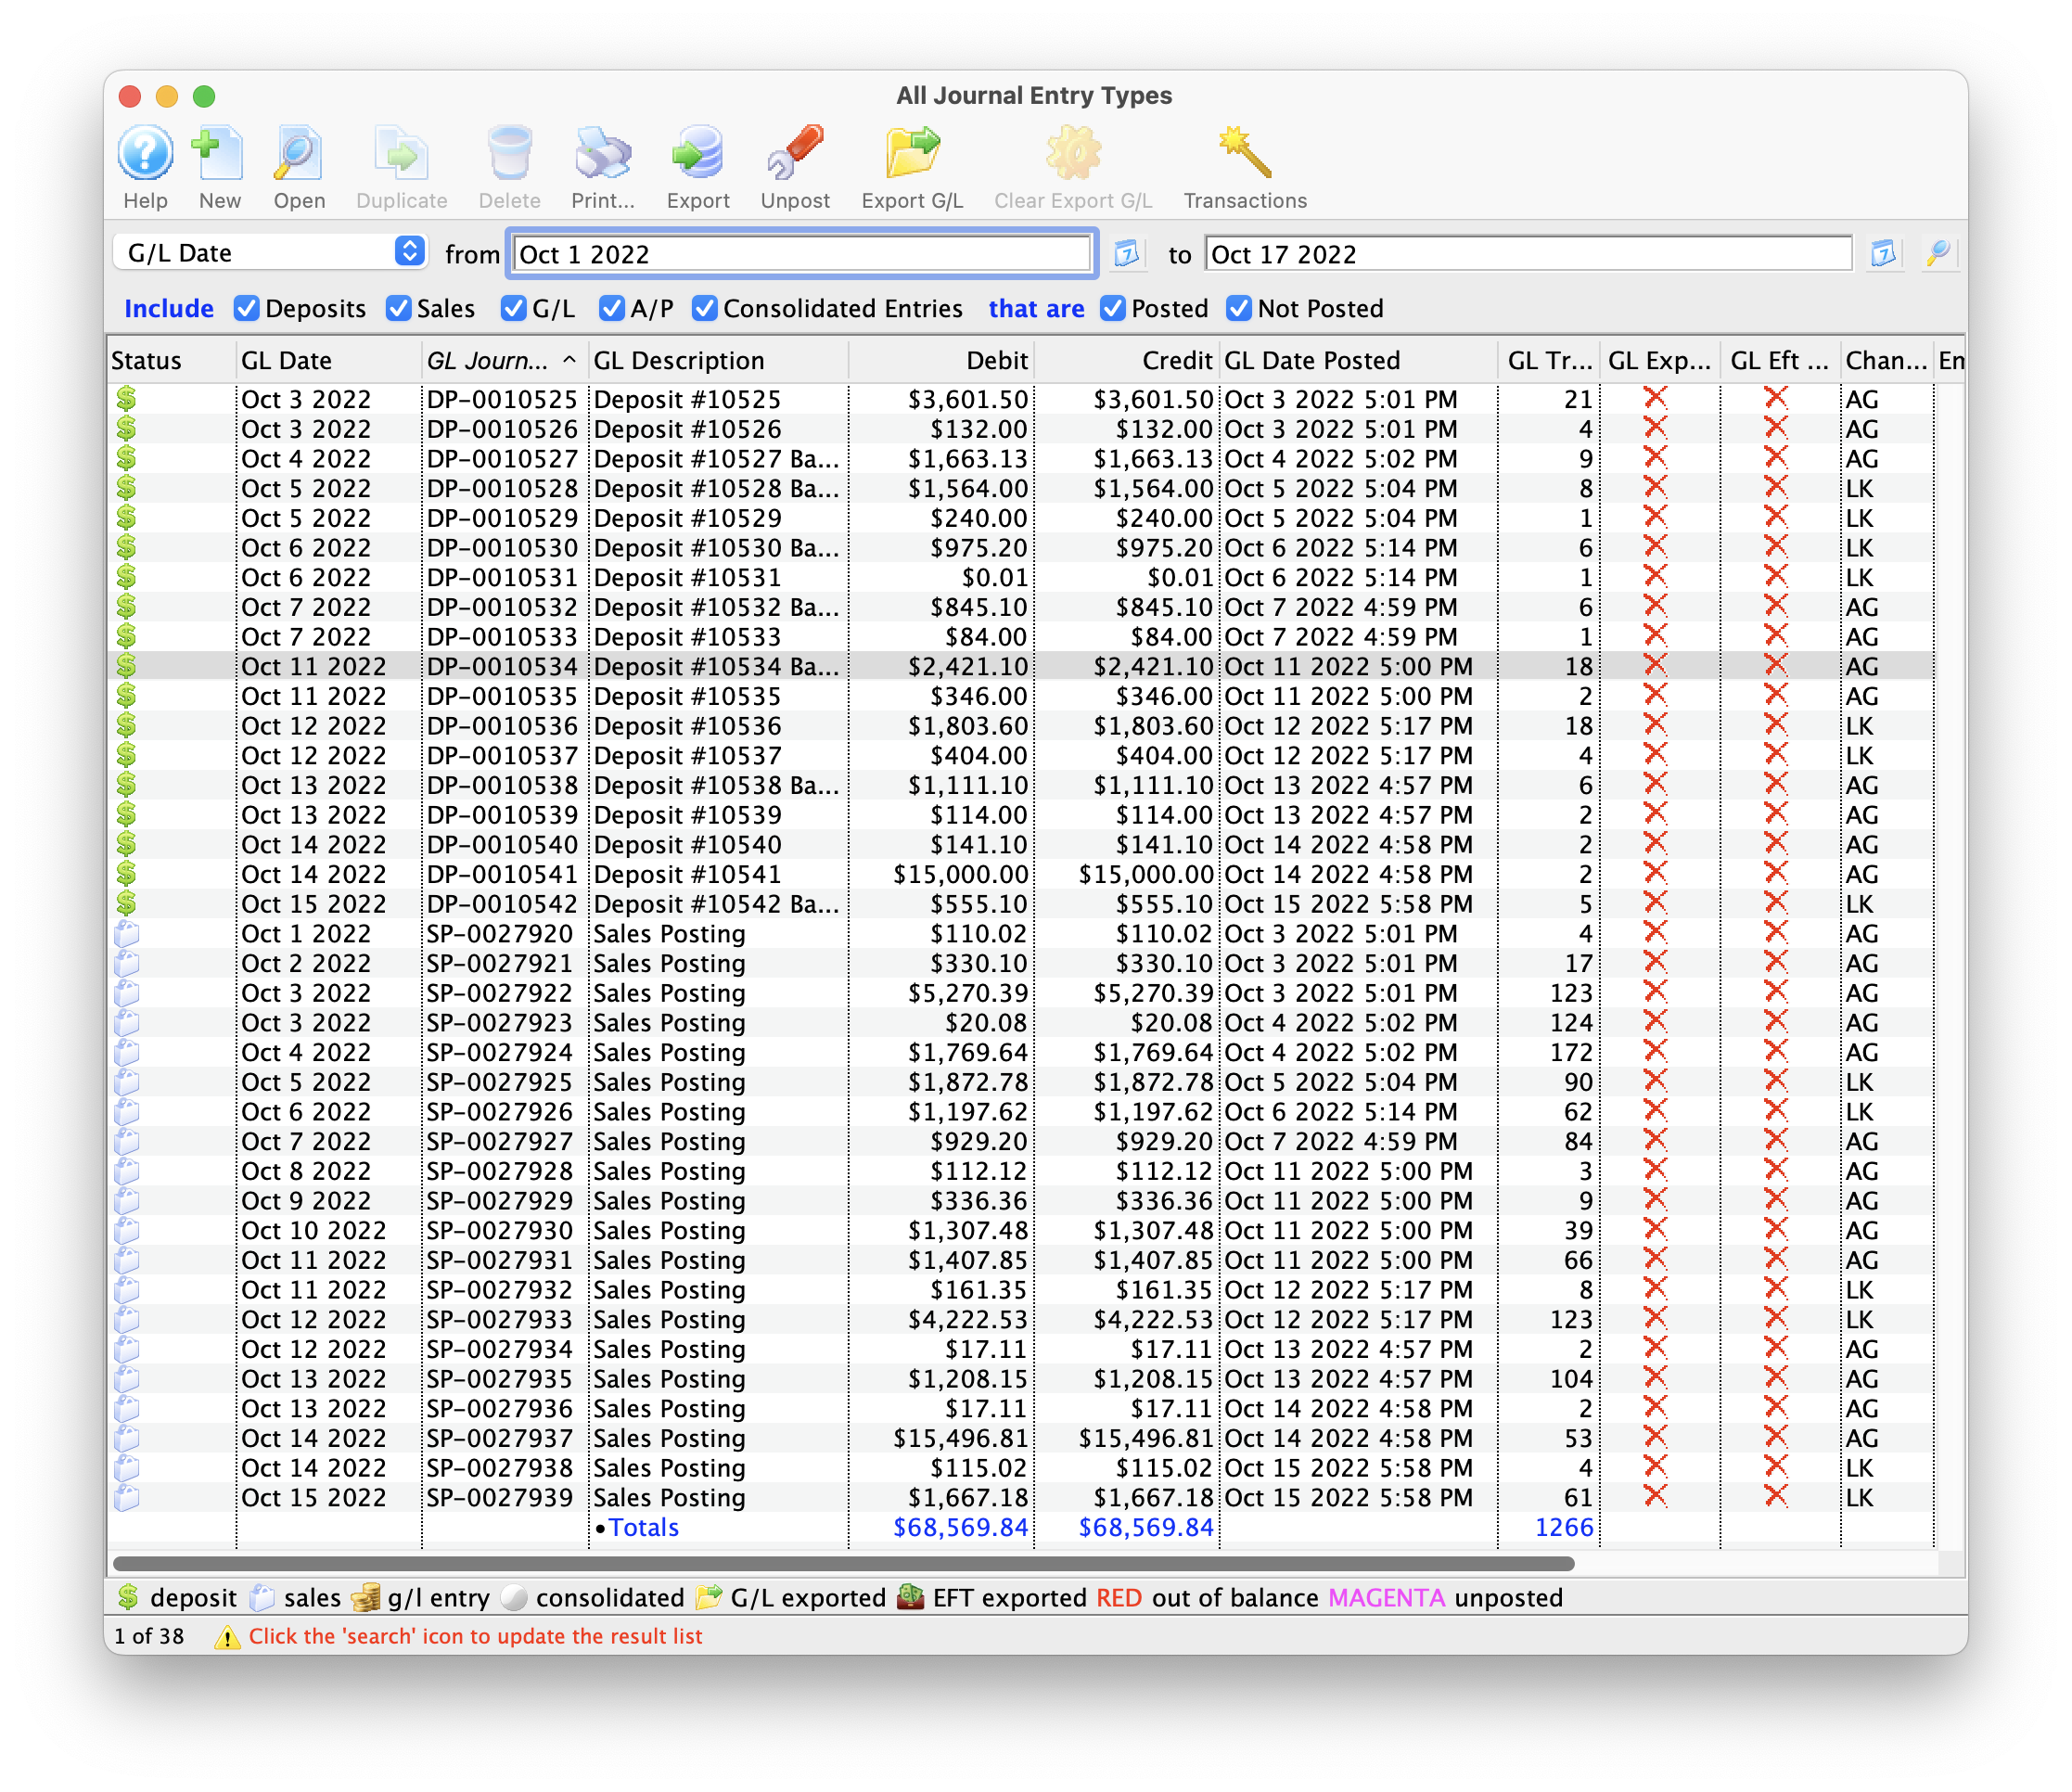
The G/L Entries List Window opens. For more information on the G/L Entries Detail window, click here
G/L Accounts Window
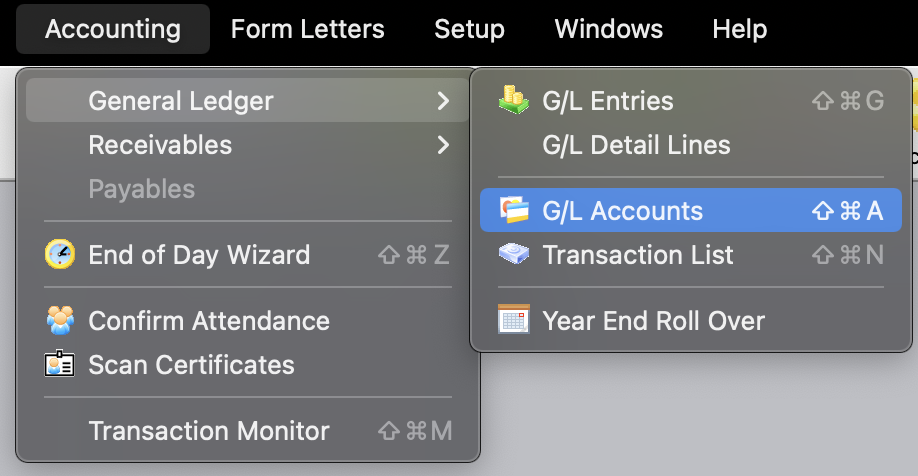
The General Ledger Chart of Accounts contains all the accounts which have been setup in the G/L. The Chart of Accounts can be accessed through the Accounting >> General Ledger >> G/L Accounts menu.
The G/L Chart of Accounts Window opens.
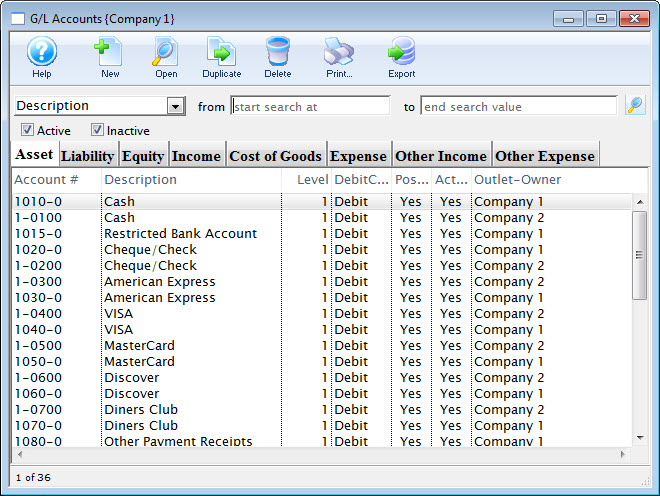
Both the active and inactive accounts can be displayed using the check boxes. Click here, for a description of the General Ledger Accounts window.
Transaction List Window
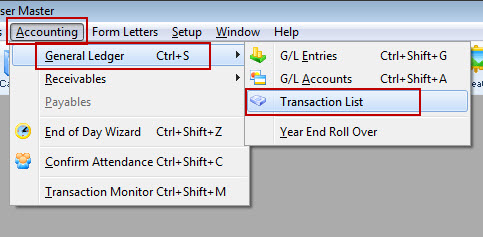
The G/L transaction List Window opens.
For more information on the G/L Transaction History window, click here.
Transaction History List
Parts of the Transaction History Window
 |
This function is not available in this window. |
 |
Opens the Transaction Detail window for further detail about the transaction. |
 |
This function is not available in this window. |
 |
This function is not available in this window. |
 |
Prints a copy of the information in the window. |
 |
Exports the information in the window to a TXT document for the purpose of importing into another program. |
 |
Opens the Patron record of the patron associated with the transaction. |
 |
Attempts to unpost the transaction where applicable. |
 |
Creates a reverse debit or credit for the transaction. This function is not yet available. |
 |
Analyzes the TS transactions to verify that they are in balance. |
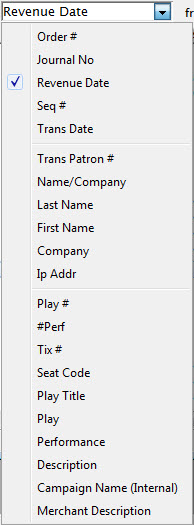 |
A drop down menu of the available search functions. |
 |
Initiates a search based on the parameters in the To and From fields. |
| Include | The items checked will be included in the search. Uncheck an item to remove it from the search. |
| Seq. # | The sequence number of the transaction. |
| Trans. Date | The date of the transaction. |
| Journal No | The journal number of the transaction. |
| Code | The transaction code associated with the transaction. |
| Transaction Desc | A description of the transaction. |
| Order # | The order number the transaction was part of. |
| Event / Play | The event / play the transaction is associated with. |
| Performance | The performance the transaction is associated with. |
| Description of Entry | An entry description. |
| Debit | The amount of the debit associated with the transaction. |
| Credit | The amount of the credit associated with the transaction. |
| User | The user who handled the transaction. |
| Qty | The quantity of items in the transaction. |
| Total | The total of the transaction |
| First Name | The first name of the patron associated with the transaction. |
| Last Name | The last name of the patron associated with the transaction. |
| Company | The company associated with the transaction. |
| Patron # | The patron number associated with the transaction. |
| Campaign | The donation campaign associated with the transaction. |
| Description | A description of the donation campaign. |
| Promotion | The promotion that used with the transaction. |
| Group | The report group of the promotion. |
| Merchant | The merchant that was used to process the transaction. |
| Event / Play Title | The event / play title associated with the transaction. |
| Event / Play Code | The event / play code associated with the transaction. |
| GL # | The general ledger number associated with the transaction. |
| Fee | The fee associated with the transaction. |
Transaction History - Detail
The parts of the window are:
Toolbar / Ribbon Bar
 |
Help - Opens the online help. |
 |
Duplicate - Duplicates and Reverses the transaction to create an offsetting entry |
 |
Delete - Unavailable |
 |
Patron - show the patron this transaction belongs to. Opens the Patron record for the patron associated with the transaction. |
 |
GL Entry - Show the GL Entry containing this transaction if it has been posted |
 |
Unpost - Clears the journal number on the transaction if it can be unposted so it can be posted again |
General Information
Displays general information about the transaction, such as:
- Type
- Patron
- Order Number
- Date Created
- GL Journal Number
- Transaction ID Number
- Dated
Transaction History - GL tab
The GL Entries tab displays:
- for posted transactions - the accounts that the entry has posted to and contained in the G/L
- for not-yet-posted transactions - the accounts that the entry is expected to post to during end of day using the current account setup in events, passes, donations, etc. If those setup accounts are changed, prior to posting, the transaction will post to those changed accounts. In other words, the accounts that the system posts to is determined during end of day posting.
 |
|
Transaction History - Notifications
If a transaction has any notifications associated with it, you will see the recipients in this list. You can:
- View the contents of the notification sent to the employee
- See whether it has been read (or not)
- Resend the notification by changing its status to Not Done
Year End Rollover
- Current year monthly financial totals are moved into the previous year monthly totals.
- Donations that were deferred for the next fiscal year are transferred from deferred revenue to earned revenue.
- Passes and Gift Certificates that were deferred for the next fiscal year are transferred from deferred revenue to earned revenue
- Hours attributed to volunteers/staff are rolled forward one year.
- Marketing statistics are recalculated to reflect the new fiscal year
- Optional Steps:
- Ticket sales for the next fiscal year can all be transferred from deferred revenue to earned revenue based on accounting settings in Company Preferences
- All events with dates in the past can be closed automatically to prevent any sales, exchanges or refunds from occurring.
 |
The amount of time taken by the year end rollover is dependant only on the number of accounts and posting history. It should take only a couple of minutes to do the actual rollover once you have the reports you want. |
 |
Complete the final End Of Day for the current year before doing a Year End Rollover. This generates the final deposit, creates all sales entries, posts to the G/L and then you can run any G/L reports that are traditionally required for auditors.
Refer to timing to decide when to do the rollover. |
 |
Sales can continue on the web and at the box office while year end rollover is in progress. Just don't do your end of day until Rollover is complete. |
Year End Backup
Almost all reports in Theatre Manager can be re-run with the exception of the receivables report. That changes when anything new is bought and/or paid for. Auditors like to see your receivables as of year end and reconcile it to your accounting program.
This audit backup generally coincides with when you run the year end rollover, especially if you do your rollover on the last day of the fiscal year or the first day of the next year. If you decide to delay the year end rollover, then you will have future G/L entries that are pending posting (after the rollover), which will affect receivable reports. In that case, you will also want to do a back up as at the end of the fiscal year.
 |
Venues with databases on the AMS cloud should contact AMS support with message asking to make a special backup for year end. |
 |
You must manually create a backup at a time of your own choosing by following these instructions and saving the backup file. |
Timing of Year End Rollover
- wait until the first day of next fiscal year to run the rollover. This will capture internet sales through midnight and into the current year -or-
- do it a day or so early. Any sales occurring after rollover will be allocated to the next fiscal year.
- Generally speaking, a good accounting practice is that year end rollover should be run as soon as possible after the actual end of year
If you have not run a Year End Rollover and the last day of the fiscal year has now passed:
- the user will receive a message when trying to post G/L entries at end of day. This message indicates that some sales or deposit postings were not done because they are in the next fiscal year. This still gives time to print the G/L reports for prior year and make adjustments.
- any donations entered after the start of the new fiscal year default to the past fiscal year. If the intention of a donation is to be in the NEW fiscal year, then change the fiscal year on the donation entry window manually -or- do Year End Roll Over and the fiscal year default will change.
If the organization does a Year End Rollover and still needs to make manual adjustments to the G/L, they can be done to the prior year. Then print a G/L report for the prior year (because of the roll over, the current year moved to the prior year). This means the user can still get any financial information needed.
Year End Rollover and Extended Break Settlements
Fiscal Year End Roll Over
If your offices will be closed during the time of your Fiscal Year End (such as over December 31, for example), you may want to make Year End Roll Over (YERO) preparations before you close for the season that need to occur prior to transacting any business in the new fiscal year.
Why is this important?
The primary reason Theatre Manager needs a YERO performed is to appropriately move donation funds into the correct fiscal year. Typically, future campaign funds are kept in a separate General Ledger account (deferred) until the first day of the new fiscal year. The YERO process moves these funds from the deferred account to the earned account. New donations, intended for the upcoming fiscal year, will need to be appropriately allocated according to the ACCOUNTING tab of the campaign setup. The YERO also advances the default fiscal year setting when entering a donation. If the YERO has not been performed, the funds will not be allocated to the correct fiscal year. Season and event ticket income may also be affected depending on the settings in your database.
The complete YERO steps can be reviewed and followed at Year End Rollover as it provides you the step-by-step instructions to complete the process.
Special notes:
- Be sure to make a backup of the database prior to running the YERO.
- Be sure to read the section on the optional step carefully. Although most organizations do not use this option - review them with your accountant to see if they do apply to you.
- Do not interrupt the YERO process. It may take from several minutes to several hours to complete and the computer may look "stalled" during that time. Do not stop the process or interrupt the computer at any time. If you are unsure, contact Arts Management Systems Support first. If you quit the process, you may need to restore to a backup copy of the database before you can continue.
End of Day over an Extended Break
In addition, you may need to take into consideration your End Of Day process over an extended break, such as the upcoming holidays. Ideally, you need to keep the Deposits and Sales Entries portion of the End Of Day going on a regular basis over the break - bearing in mind that even though there is no one in the office selling tickets, if you have web sales, it will continue to run. Please refer to strategies to keep your system running smoothly over an extended break.
Steps in the Year End Rollover Process
 |
|
 |
Do not interrupt the year end rollover process once you start it and it should finish in a few minutes.
If you do interrupt it, please contact Arts Management Support and it may be possible for us to re-run it for you |
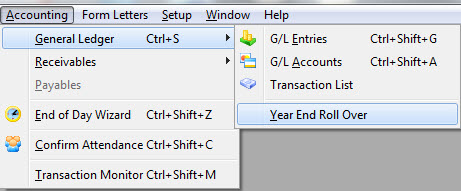
- Use the Accounting >> General Ledger >>Year End Rollover menu.
- Check off all items in the 'check list' section to confirm that you completed them and/or have the data and that you are ready to continue the Year End Rollover.

-
The check list contains a list of things that you should do (such as reports) before starting the rollover. Please make sure you do all the steps that you need before continuing.
- Receivables Based on Order Balances - By Event - to see if people owe you for events before they are closed
- Receivables Based on Order Balances - to find out who still owes you money
- the Post dated Payment Report - which can easily be printed from the Post Dated Payment List window
- Balance Sheet Detail-5 Year Comparison
- Balance Sheet Detail-Monthly for Current Year
- G/L Trial Balance
- Donor with Balance Due
Reports you should consider running include ones below. Send them to the background report queue and wait for them to complete. That way you will have reports as-at-year-end saved in your database and you can reference them later.
Check with your Auditors for a complete list:

-
The check box in the 'Optional Steps' at the bottom of this window to transfer events from deferred to earned revenue can ONLY be checked if your company preferences are set to defer revenue only from one "season" to another "season". (Other settings should prevent use of this option).

-
The check box to 'Close Past Events' will take all events that are completely in the past fiscal years and close them - so that ticket sales, exchanges and refunds can no longer occur. This can be reversed by editing the event and re-opening it.
- Click the Perform Year End Rollover
 button to continue.
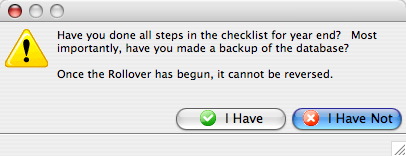
- A window opens confirming you are ready to run the Year End Rollover.
- A confirmation window opens stating the Rollover is complete.

Changing Fiscal Year End
 |
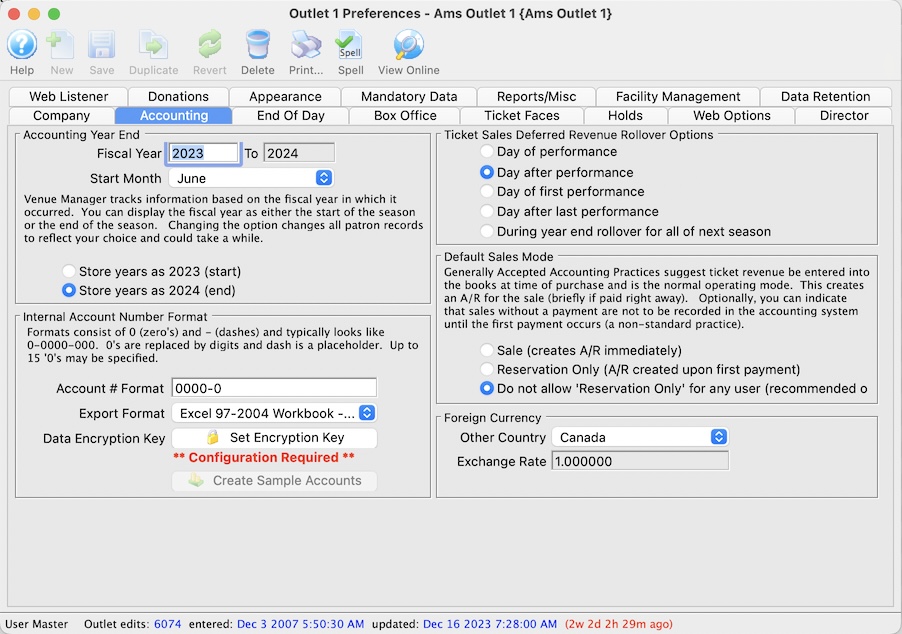
If you are changing your fiscal year end, you can run a year end rollover:
This is such a rare situation, that we suggest you contact the support team. |
Making a shorter fiscal year
If, for example, your current fiscal year ends in October and you want to change the fiscal year end to be July of the same year, then you are making your fiscal year shorter. The current fiscal year will not be 12 months, it will only be 9 months and then the fiscal year will go from August to July moving forward.
At End of Day on July 31st of the shortened fiscal year
- Stop all sales in Theatre Manager
- Complete the final End Of Day for the shortened fiscal year on the day that you want to be the new year end.
- Make a backup of the database. If you are using AMS cloud, ask support team to make one for you to file away
- Alter the fiscal year end in Company Preferences to indicate the new end month of the fiscal year.. it will be 'JULY' in this example.
- Do the year end rollover to set the new fiscal year. In the example above, you will be doing a year end rollover on July 31st (instead of Oct 31st)
In the accounting data in TM, you will see the following effects.
- The prior year fields in accounting will show 9 months containing data and 3 months without data (since that represents August, September and October which have not happened yet.
- The title on the month columns in history will not reflect correctly. This is because TM simply calls the accounting periods - period 1 to period 12. For convenience, TM displays the month based on the value in default data - which is now meaningless since you adjusted the year end period. . Think of months as period 1 to period 12.
- The new year will start as expected, in the new month, starting in a new period 1 in the new fiscal year fields.
Making a longer fiscal year
For example, if you are changing your fiscal year from July 31 to October 30, (which means 15 months in the fiscal year), then you are trying to have more than 12 months in the current fiscal year. Theatre Manager only recognizes 12 motnhly periods, even if your accotning system recognizes more.
To make the change in TM, on July 31st of the current fiscal year:
- Alter the current fiscal year end in Company Preferences to indicate the new end month of October
- TM puts the monthly totals into the last periods in reports and on screen. They will contain totals for multiple months. This means:
- Month 10 (now named August, but formerly called May before you changed the fiscal year end month) will have accounting totals for both May and August.
- Month 11 (now named September) will contain totals for June & September
- Month 12 (now named October) will contain totals for July and October
- You will defer the year end rollover to the month that it should now occur, which is Oct 31st.
- The financial totals for the 15 months of the prior year will be correct -- and ther appear in the monthly columns adjusted by 3 months, with the last 3 months (Aug, Sept, Oct) each containing two months of financial data as described above.
The effect you will see in the accounting data for TM is that:
Fixing EOD Imbalance created because of Year End Rollover
 |
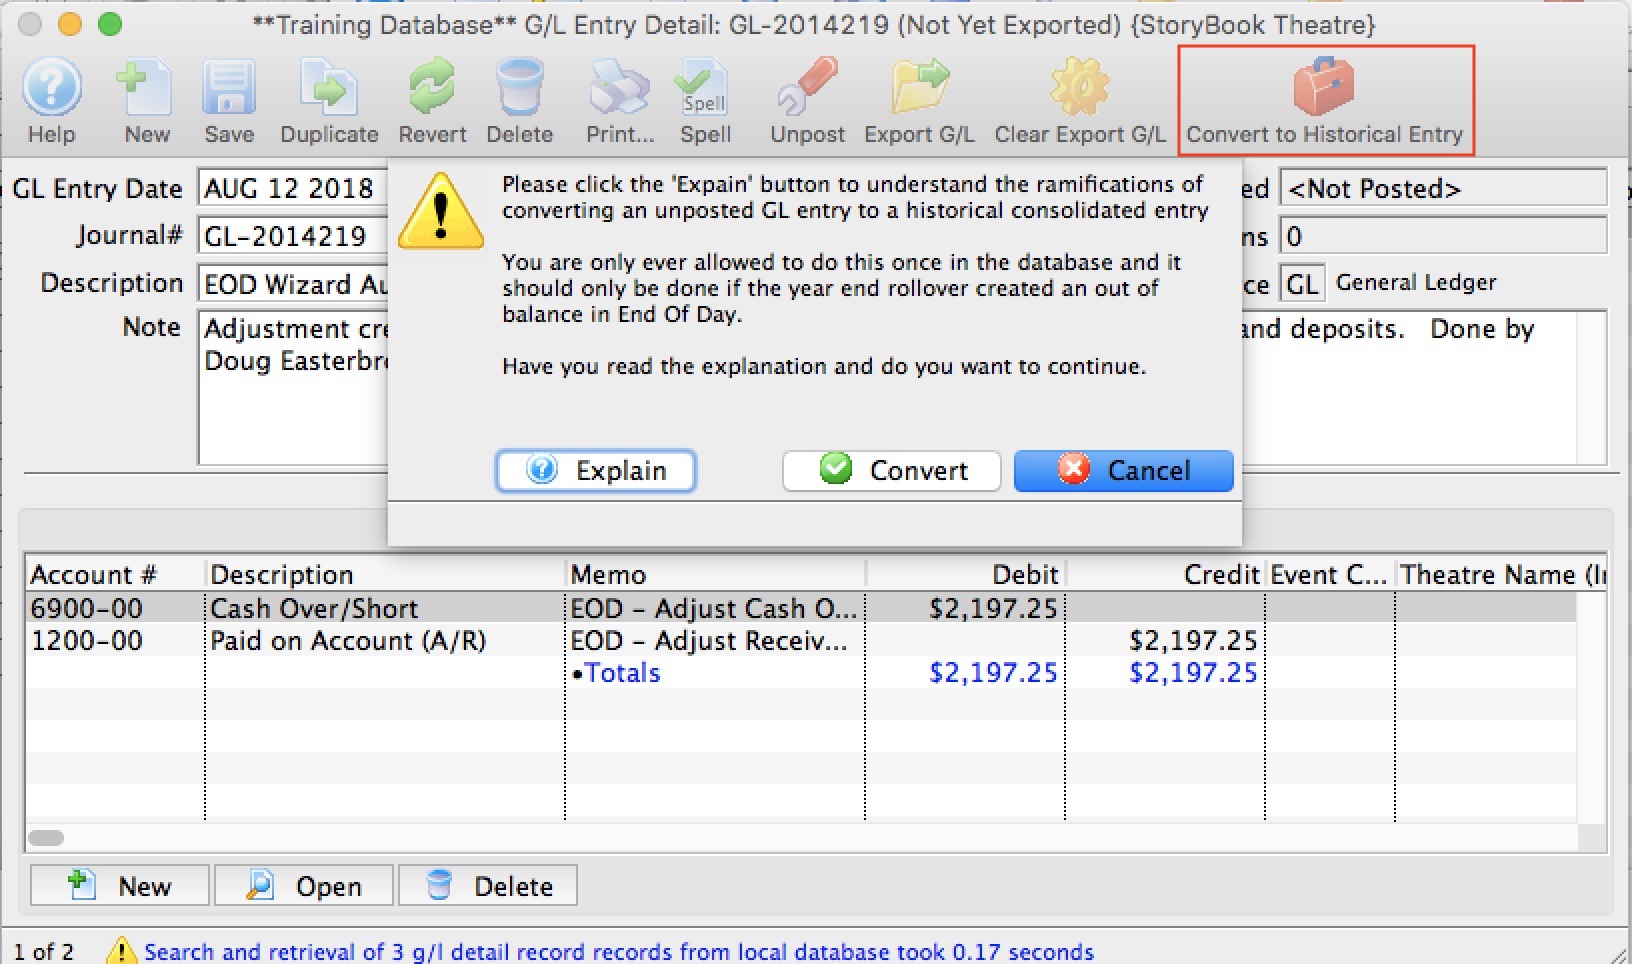
Please read carefully and fully understand the ramifications of this one time only feature before using it.
It will make a historical balancing entry and should only be used if your most recent Year End Rollover resulted in an End of Day imbalance. |
 |
DO NOT use this process to correct and EOD imbalance in the middle of the year. It is only to be used if the EOD imbalance occurred directly after running Year End Rollover |
Why did I get an imbalance in the first place?
This issue should only arise if you:
- just ran your year end rollover -and-
- discovered that your first end of day after that was out of balance,
- The year end rollover process was redesigned in Mid 2018 to make it a much faster process. It now rebuilds annual GL totals from all past GL entries. The added benefit is that year-end-rollover to be rerun (please contact the support team to if you need this).
- Your venue has been using TM for a long time (most likely from version 6 era decades ago) -AND-
- A consolidated GL entry might not have been created properly - so this will address this missing data in the database
When NOT to use this process
DO NOT use this process if you just discovered and EOD imbalance in the middle of the year. Instead use the Troubleshooting End of Day imbalance checklist to find your issue.
Otherwise, we suggest to contact the support team to get assistance and to verify that the process should be used.
Who can do this process?
Only a master user or outlet administrator can make this entry. It is not visible for any other user.
What is the process and rules surrounding this feature
If you discover an EOD imbalance after your first end of day after year end:
- Try all troubleshootin processes as you would normally should end of day be out of balance.
- If you still cannot find the imbalance, contact the support team
If, after involving the support team and the End of Day Imbalance is still present, then:
- Force the EOD to balance by creating the adjusting entry under your normal user account.
- Do not post this force balanced GL entry.

If you posted it in TM, the next step you take depends on whether you passed this GL entry to your accounting system:
- If you just posted in Theatre Manager and have not created your end of day G/L report to pass to your accounting staff, please unpost this GL entry immediately.
- If you have already passed the Adjusting entry to your accounting staff, then:
- reverse the GL entry in TM.
- Create another force balance Adjusting Entry. The totals should be the same as the one you just reversed.
- Log in as the Master User or Outlet Administrator for your outlet. The feature is not available to anybody else
-
 Find the EOD adjustment GL entry you just created. It must not be posted and it must be of type 'GL'
- Click the Convert to Historical Entry
- Confirm that you want to convert this GL entry to historical by clicking the Convert button.
What does this process do
Converting a GL Entry to historical will:
- Change the source of the GL entry from GL to CO, meaning that it is a historical consolidation accounting entry from years ago.
- Add text to the notes indicating that that it was a force balance after year end rollover
- Change the date on the GL entry to 10 years ago to the date
- Mark the entry as posted so that it will not be posted again
- It will back date the posting date to 10 years ago. This means it will not show up in today's end of day.
- Mark the GL entry as exported - meaning it cannot be exported and passed to your accounting system if you have automated that process
- Adds a flag to the GL entry to mark this a a special GL entry. Once you have created this one-time GL entry for a Year End Rollover problem, you will never be able to create another one.
- Theatre Manager will then rebuild the account balances as if it were ding year end rollover to bring TM's A/R account into balance. Since this GL entry is now 10 years old, it make it appear as if the force balance never occurred.
Receivables Submenu
The General Ledger function allows the posting of general ledger entries, setting up general ledger accounts, looking at transactions, and handling year end rollover. The General Ledger Sub-menu is accessed from the Accounting Menu >> General Ledger.
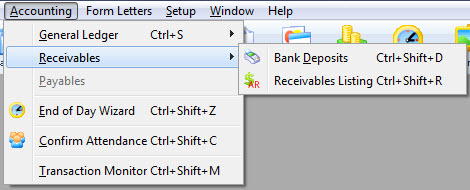
Parts of the Receivables Submenu
 |
Bank Deposits. If credit card payments are deposited into separate bank accounts, they may require a separate deposit number. For more information on Bank Deposits, click here. |
 |
The Receivables List window is used to review all patrons with balances in the Accounts Receivable ledger. For more information on the Receivables List window, click here. |
Payment Request List
- activity created by EMV pin pads (currently Moneris only) and
- the status of the request.
Bank Deposit Entry
For cash control, an employees cash receipts should be balanced to their sales on a daily basis.
If credit card payments are deposited into separate bank accounts, they may require a separate deposit number. A single type of payment method is used to identify each sales. Theatre Manager can quickly remove a particular payment method from the daily deposit using the delete button. To do this, you:
- Highlight the payment method to be removed from the deposit.
- Click the delete button. The deposit total is automatically recalculated.
Your accounting polices and practices will determine how to develop the deposit totals.
- Open the Bank Deposits window selecting Accounting >> Receivables >> Bank Deposits menu.
The payment selection criteria window opens.
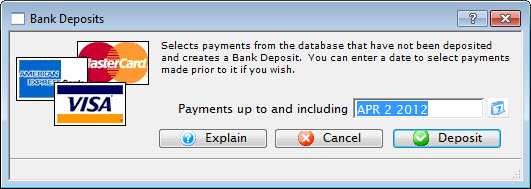
- Confirm the time period for the deposit.
Set the ending date to select all payments which have not been deposited. The current date is automatically displayed in the date filed on the message window.
When balancing is done for the day of the sales, the date used will be the current date. When balancing is done the day after the sales, the date used will be the previous days date. If correcting ticket orders caused new payments, then the date used will be the current date -- when this is performed, new payments that have been entered will be included in the payment selection and may have to be removed.
It is recommended that if the balancing is performed the day after the ticket sales. You do not enter new payments until the previous days payment receipts are balanced. This prevents mixing payments for two separate time periods in the same deposit. If new payments have been entered, the new payments should be identified and removed from the deposit before it is created.
- Click the Deposit
 button.
The Deposit Window is now accessible.
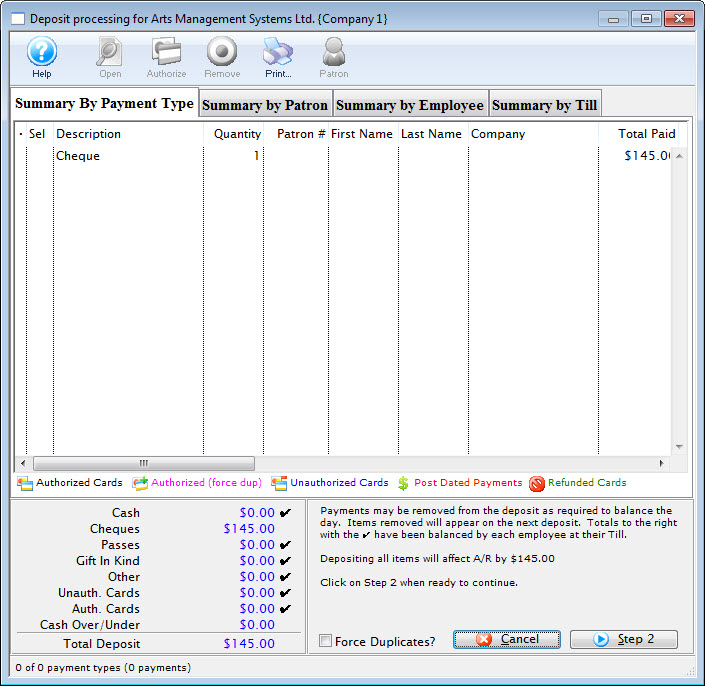
For more information on the Deposit window, click here.
- Verify that the payments listed match the payment receipts in hand.
Before continuing with the deposit process, remember to balance the actual receipts to the daily receipts shown in the deposit window.
- Remove any payments from the list which are not to be deposited.
- Click the Step 2
 button.
The second step of the Deposit window will open.
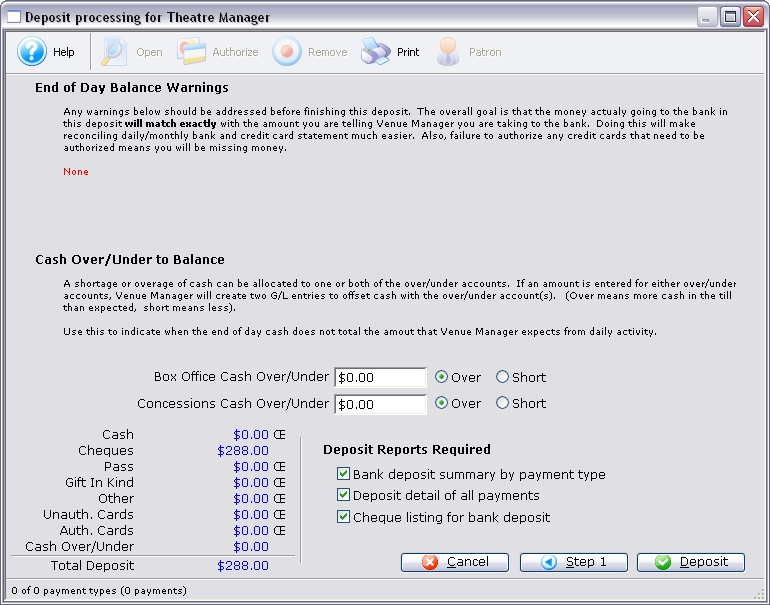
- Verify that there are no warnings listed at the top of the window.

- Enter any shortages or overages for the Box Office and Concessions.

- Set the preferences for the reports to be printed.

- Click the Deposit
 button to finish.
The Receivables List Window
Once you see your receivables listing, you may want to:
- review the steps to clear or manage receivables
- Print the 30-60-90 day receivables report based on order balance. If you are targeting a group of individuals like ongoing donors, many want to create a mail list of them and use that as criteria.
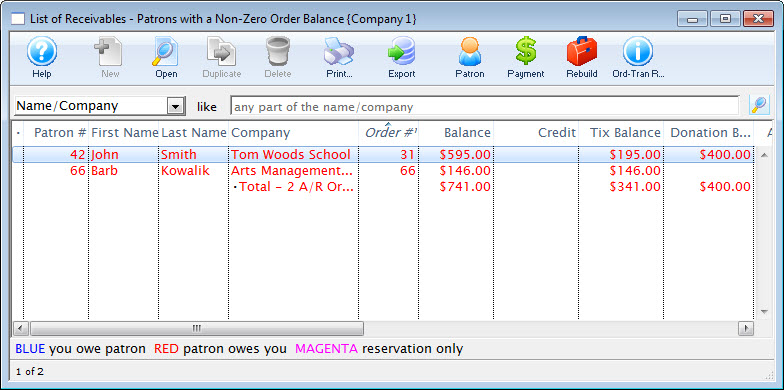
Parts of the Receivables List Window
 |
Opens the online help. |
 |
This function is unavailable in this window. |
 |
Opens the Patron record for the selected patron. |
 |
This function is unavailable in this window. |
 |
This function is unavailable in this window. |
 |
Prints a list of the patrons in the Receivables List window. |
 |
Exports the list of patrons in the Receivables List window into a TXT document for use in another program. |
 |
Opens the Patron record for the selected patron. |
 |
Adds a Payment to the slected order. |
 |
Rebuilds the selected order to verify that it is in balance. |
 |
Runs the Order and Transaction reports to verify that all orders listed are in balance. |
 |
The different ways to search the window. |
 |
Begins a search based on the parameters in the From and To fields. |
| Patron # | The patron number of the patron. |
| First Name | The first name of the patron. |
| Last Name | The last name of the patron. |
| Company | The company of the patron. |
| Order # | The order number associated with the listing. |
| Balance | The total balance owed by the patron. |
| Credit | The total credit amount owed to the patron. |
| Tix Balance | The amount of the balance that is owed for tickets. |
| Donation Balance | The amount of the balance that is owed for donations. |
| Age | The length of time that order has been past due. |
| Notes | Any notes associated with the order. |
| Deposit Date Due | The original date that deposit was due. |
| Final Date Due | The original date the final payment was due. |
| Inv Date | The original invoice date. |
| Order PO # | The PO number associated with the order. |
| Sold By | The user that sold the order. |
Post Dated Payment List
 You can access a list of post dated payments directly from the Receivables menu.
This will show you a list of all post dated payments, including those for future dates. Any current or past due post dated payments will show up in the end-of-day deposit window to allow them to be deposited.
In addition, this list should be viewed just prior to year end rollover and printed for the auditors - who typically like to see the post dated payments.
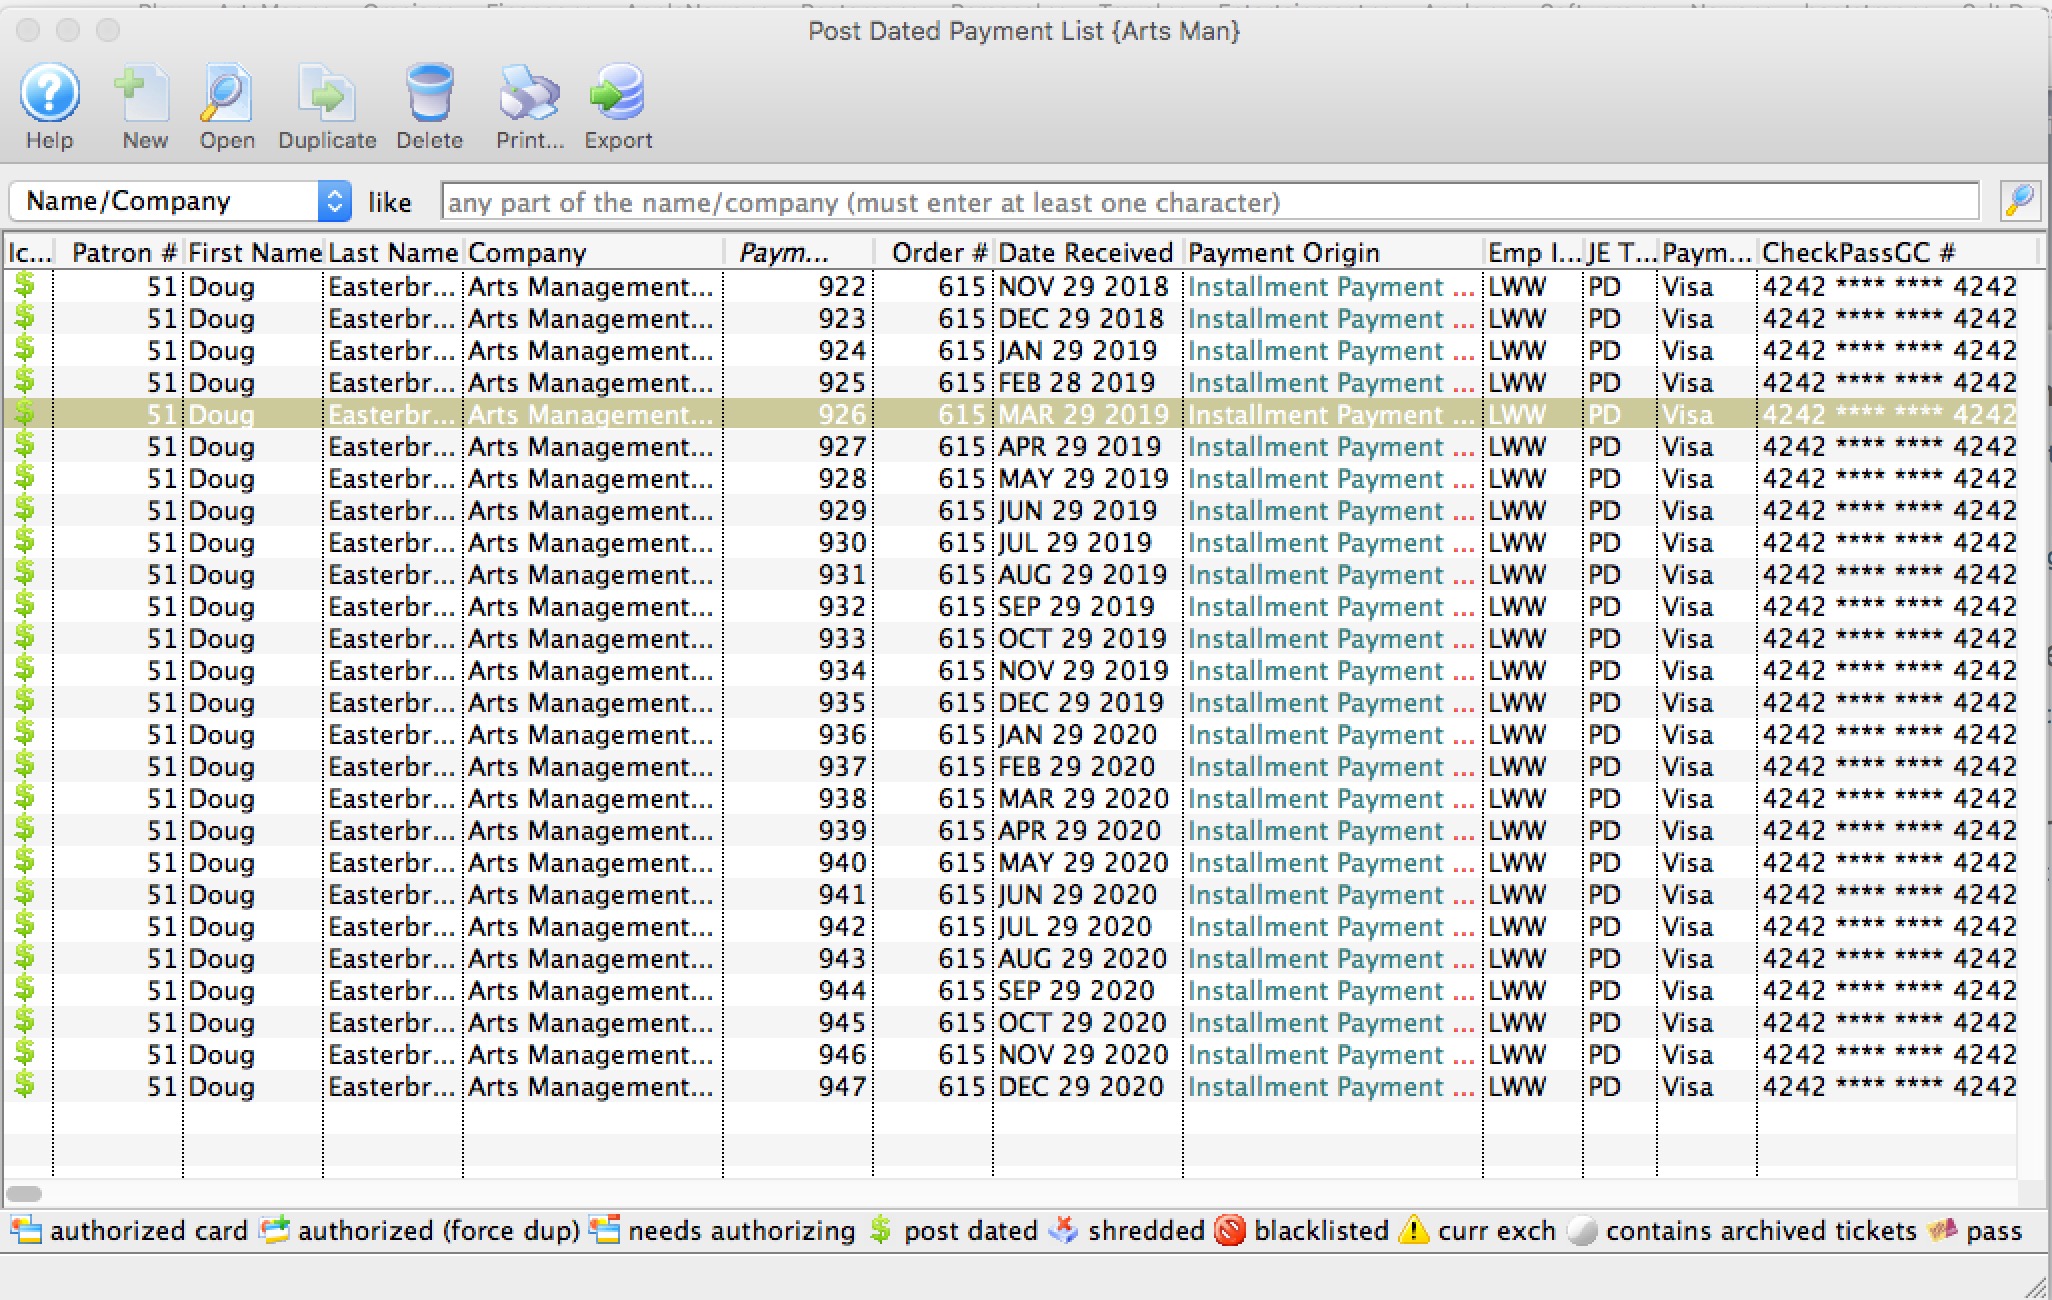
Parts of the Post Dated Payment List Window
 |
Opens the online help. |
 |
This function is unavailable in this window. |
 |
Opens the payment record. |
 |
This function is unavailable in this window. |
 |
yo can delete a post dated payment. This will alter the balance owing on the order. |
 |
Prints the list of the payments on the Post Dated Payment List window to produce the post dated payment report. |
 |
Exports the list of payments into a TXT document for use in another program. |
 |
Opens the Patron record for the selected payments. |
 |
The different ways to search the window. |
 |
Begins a search based on the parameters in the From and To fields. |
| Patron # | The patron number of the patron. |
| First Name | The first name of the patron. |
| Last Name | The last name of the patron. |
| Company | The company of the patron. |
| Notes | Any notes associated with the order. |
| Sold By | The user that sold the order. |
End of Day Wizard and Daily Balancing
The End of Day wizard should be run at the end of each business day (or first thing the next morning) to create deposit and sales entries. To segregate daily business, the entries should be created prior to entering new sales and payments (corrections excepted). Creating the journal entries prior to entering new sales and recording payments, prevents combining deposits and sales for two periods in the same general ledger entry.
All ticketing and payment corrections and errors should be completed prior to creating a deposit or a sales entry.
To simplify analysis of the sales and deposit entries, create the minimum number of as sales and deposit entries as necessary in any given day. If you create more than one, you must remember to combine everything for that day in your search criteria before analyzing them.
The End of Day Wizard is accessed through the Accounting >> End of Day Wizard menu.
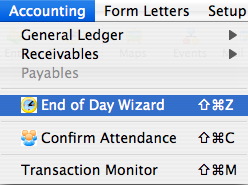
This will open the End of Day Wizard Window allowing you to clear up the business transactions for the day all in one location.
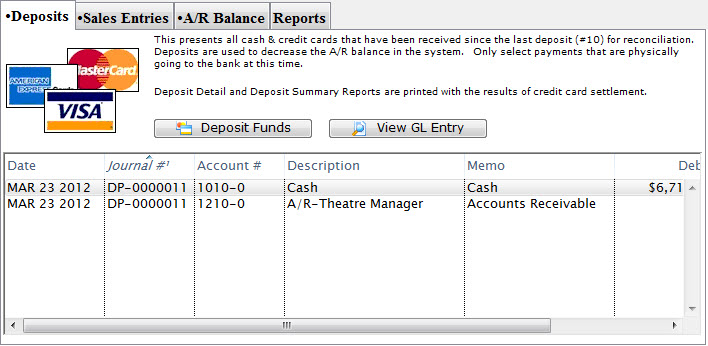
For more information on using the End of Day Wizard, click here.
Timing for Creating Deposit and Sales Entries
Deposit and sales entries can be created at any time. You can create them any number of times per day. If you want to balance the A/R in Theatre Manager, both the deposits and sales should be created at the same time period and at the same time. The End of Day Wizard takes you through the process and identifies if you are out of balance. If you wish, you can also do it manually using the various menu items under the accounting menu. To simplify revenue analysis, the sales entry should be created immediately after the deposit entry.
Normally:
- The deposit and sales entry should be created daily.
- only one sales entry is created for the same time period covering the deposit.
However, a sales entry is automatically created for each revenue date since the last sales entry was created. Should you decide not to create sales entries for a week, running the process will create a Sales Posting for each day that sales occurred in that week period.
Time Stamps on Transactions
Reviewing transactions for any time period is made possible by the date and time stamps that are placed on each transaction when it is created.
Time stamps are attached to transactions -- ticket sales, refunds, exchanges, and payments -- and are created at the time the transaction was entered into Theatre Manager. Time stamps identify the date and time that the transaction occurred and enable reports to summarize transactions for specific time periods.
Transactions created to "correct errors" are dated for the time they occurred. Orders, payments, refunds, or exchanges created today to correct yesterdays errors are date and time stamped today. Any amounts included in the transaction are included in the deposit and sales entries created today. Any transactions required to correct yesterdays transactions should be journalized in a sales and deposit entry prior to new sales being created. These transactions should be included in yesterdays "Deposit and Sales Analysis". Refer to the section Date & Time Stamps for more information.
Employee Till Balancing
The Till Balance feature allows you to have all employees balance their own tills at the end of each shift. This speeds up the End of Day and removes the room for error when employees may have already left for the day.
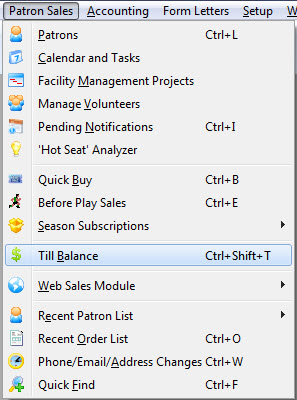
- Open the Till Balance window.
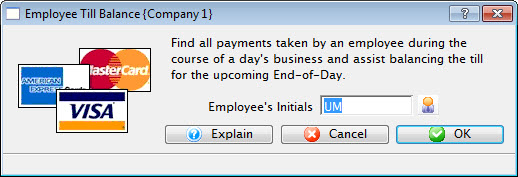
- If this employee has had one or more shifts since the payments have
been deposited, the following window will appear (if not, proceed to step
4).
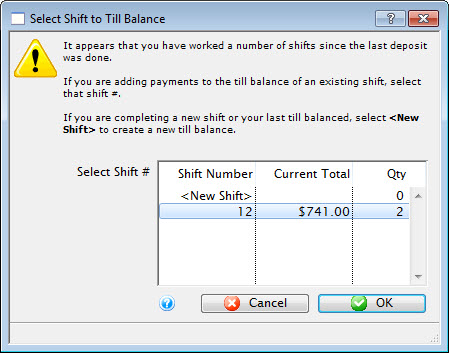
When a shift's till is created, it is assigned a unique number. If the employee has entered one or more payments since the last time they balanced a till, and the payments have not been posted in the end of day process, the employee has the option to:
- Assign the payments to the same till as they previously balanced. This means that all money taken across a number of days is simply being lumped together into one till #.
- Create a new shift till for the unbalanced payments. This means you are putting new money into a new till #.
- A combination of the above by putting some money into an existing till and the rest into a new till. You can do this by
- selecting the existing till
- removing all but the 'new' payments you want to add to that existing till
- indicate that the till now balances with the selected payments.
- Anything not balanced in one till will be left to the balance in another till.
- Anything marked as not balanced in an existing till will be taken out of that till. It can then be put into another till (new or otherwise), effectively providing at way to move money between employee till numbers.
-
Select the Shift # and click the OK
 button.
The Till Balance window opens. For more information on the Till Balance window, click here.
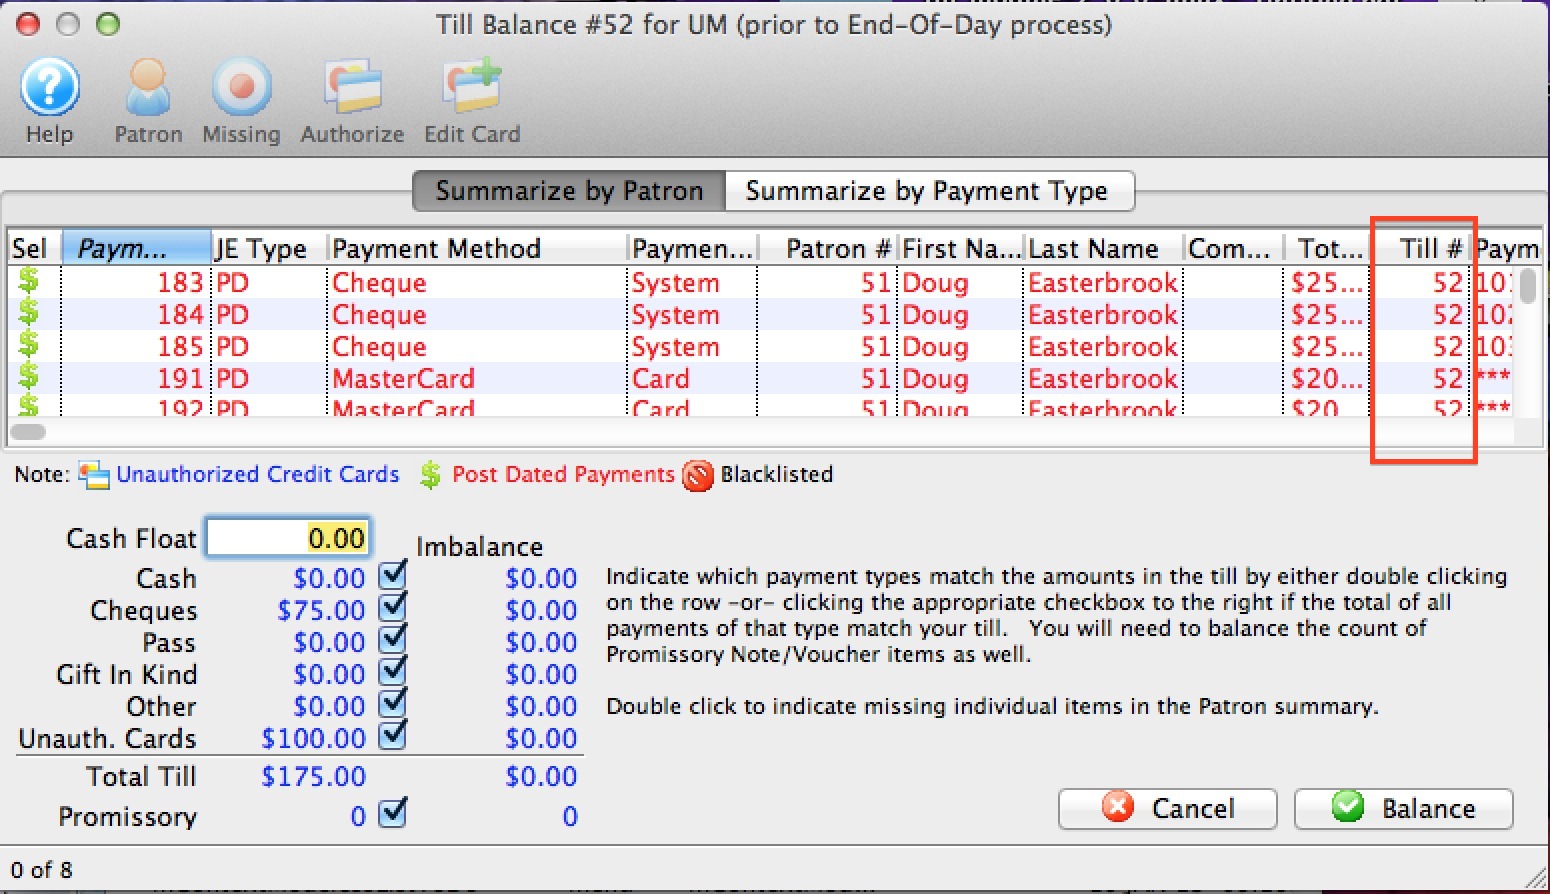
- Once all payments are marked as being in the till a number should appear under the Till # column. The Imbalance column at bottom left will also have $0.00 for each item.
- Click the Balance
 button.
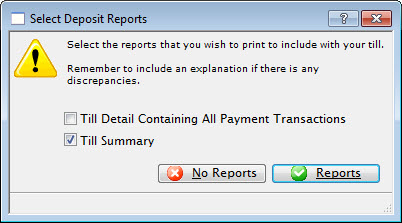
- Mark which report to print and click the Reports
 button.
The Till Summary is suggested.
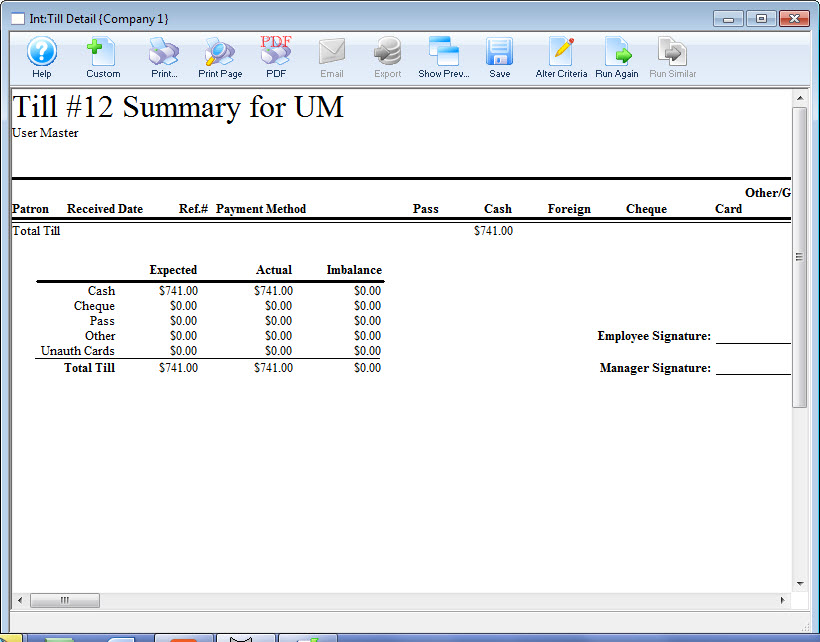
- Bundle the Till Report with the monies that were received by the employee until the time that the deposit is run.
Till Balance Window

 |
Only physical payment methods where this is a chance of discrepancy appear in till balance. This includes Cash, Check, Pass/GC, and other payment methods. The reason is that a manual tally of these payments may point out instances where the value on the check and the value entered into Theatre Manager may be different. It gives a chance of correction at source.
Credit Card payments processed through your merchant account will NEVER show in the till balance window because they can never be for the wrong amount. (The system created the amount and sent to the bank, so there is no possible discrepancy in amount in the system). Post dated credit cards may appear as a convenience to allow the user to authorize them (although this is usually done in end of day). It may be useful if emergency mode was enabled for part of the day.
|
Parts of the Till Balance Window
 |
Opens the online Help for this window. |
 |
Opens the selected Patron |
 |
If enabled, marks the selected payments as missing. |
 |
If available, authorizes the selected credit card. |
 |
If available, allows you to change the card that a post dated payment is being changed to. |
 |
Displays the summary table by patron. |
 |
Displays the summary by the type of payment |
| Patron # | The patron number for that patron that this payment is assigned to |
| First Name | First name of the patron this payment is assigned to |
| Last Name | Last name of the patron this payment is assigned to |
| Company | Company name of the patron this payment is assigned to |
| Total Paid | Amount paid by the patron, using this payment method |
| Till # | Has this payment been marked as being in the till? The default is blank, which will change to the till number once the payments are marked manually as being in the till |
| Card Number | The card number/ check number of this payment |
| Payment types | Where you mark (using the check boxes) the payments as being physically in the till. Any payments that are not in the till should be marked as such. You can batch mark payments of a certain type as being in the till, then double click specific payments to remove them |
End of Day What to Expect
It is important to close out the daily transactions and balance Theatre Manager on a frequent basis. If this occurs 365 days each year and the GL entry created by Theatre Manager is posted to the organization's accounting system, there should be no problems with the annual audit. This is based on making the GL entries in the accounting software exactly the same as TM creates them.
 |
Theatre Manager is an accrual accounting system!
The Accounts Receivable account (A/R) is a revolving account to manage sales and payments. Each sale (ticket, donation or pass) increases the sales account for that item AND increases the A/R account. When the payment is received, the asset account for that payment is increased while A/R is decreased. If everything is paid for, then the net change to A/R on a daily basis will be zero. If an item is not paid for (i.e. pledge, group ticket sale, or reservation), there will be an increase in A/R on that day. At some subsequent day, once the order is paid for, there will be a decrease in A/R. |
Typical GL Entries Seen at End of Day
| Posting Type | Debit | Credit | GL Entry Type |
| Sales of Items | |||
| Ticket Sale | A/R | Deferred Revenue for Event | Sales Posting (SP-xxxxxx) |
| Donation | A/R | Earned Income for Donation Campaign | Sales Posting (SP-xxxxxx) |
| Pass or Gift Certificate Sale | A/R | Liability for unused Passes | Sales Posting (SP-xxxxxx) |
| Membership Sale | A/R | Earned Income for Membership | Sales Posting (SP-xxxxxx) |
| Payments | |||
| Credit Card, Check or Cash Payment | Visa, MCard or Bank account | A/R | Deposit (DP-xxxxxx) |
| Redemption of Pass | Liability for unused Passes | A/R |
Deposit (DP-xxxxxx) |
| Transfer to Restricted Account | Asset Account for restricted donation campaigns | Main Bank Account | Deposit (DP-xxxxxx) |
| Automatically Generated Postings | |||
| On day after event, transfer from deferred to earned revenue | Deferred Revenue for Event | Earned Income for Event | Sales Posting (SP-xxxxxx) |
| On year end Rollover | Deferred income for donations dated in a future fiscal year | Earned Income for the campaign | Sales Posting (SP-xxxxxx) |
| Manual GL Adjustments | |||
| Adjustments to GL | Any Account, usually not A/R | Any Account, usually not A/R | GL-xxxxxx |
End of Day Wizard Window
Since Theatre Manager treats sales and payments as separate items, the user needs to do four steps each day to balance. We recommend completing all steps by the end of the day -or- next morning prior to the day's sales.
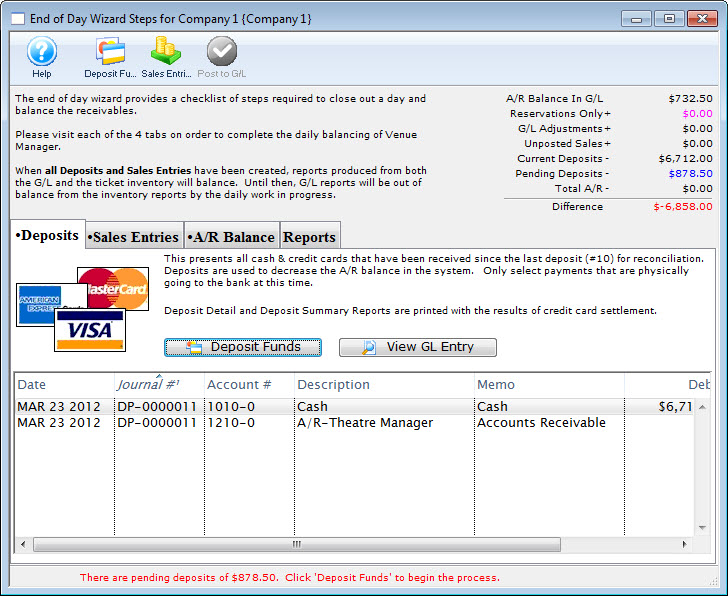
Parts of the End of Day Wizard Window
Toolbar/Ribbon Bar

 |
Help - Opens the online help. |
 |
Deposit Funds - Selects all undeposited payments by payment date and creates a bank deposit |
 |
Sales Entries - Creates G/L entries based on all new sales transaction in Venue Manager |
 |
Post to G/L - Posts the G/L Entries that comprise the 'end of day' totals to the ledger |
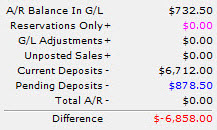 |
The calculator located in the upper right hand corner of the window is used to track where the balance stands as the user progresses through the End of Day process. |
 |
The Deposits tab is used for creating deposits to send to the bank. For more information on the Deposits tab, click here. |
 |
The Sales Entries tab is used to journalize all sales entries to the General Ledger. For more information on the the Sales Entries tab, click here. |
 |
The A/R Balance tab is used to journalize all outstanding A/R to the General Ledger. For more information on the A/R Balance tab, click here. |
 |
The Reports tab is used for printing reports when the End of Day process is complete. For more information on the Reports tab, click here. |
Deposit Tab

Parts of the Deposit Tab
 |
The Sales Entries tab is used to journalize all sales entries to the General Ledger. For more information on the the Sales Entries tab, click here. |
 |
The A/R Balance tab is used to journalize all outstanding A/R to the General Ledger. For more information on the A/R Balance tab, click here. |
 |
The Reports tab is used for printing reports when the End of Day process is complete. For more information on the Reports tab, click here. |
| Date | The date the journal was created. |
| Journal # | The journal to which the payment(s) was posted. |
| Account # | The unique account number for the payment type. |
| Description | A description of the account. |
| Memo | A detailed description of the journal. |
| Debit | Deposits will debit their corresponding account number for the payment type. |
| Credit | All deposits will credit Accounts Receivable in the General Ledger. |
 |
Deposits outstanding funds. For more information on using the Deposits tab, click here. |
 |
Opens the Transaction History window with information on the payments received. |
Step 1: Deposit Detail Window
- is used to identify payments made since the last deposit that can be taken to the bank or settled in a credit card batch
- Remove any post dated credit card payments that cannot be authorized or checks that cannot be found.
- Replace the credit card number or expiry date on a post dated credit card payment to allow it to be authorized
- aggregate them into a 'batch' to take to the bank and create a deposit posting/GL entry (DP-xxxxxxxx) that can be used by the end of day process.
 |
The deposit window is designed to match exactly the money put into your bank account -- so that it make it easy to reconcile your bank statement with your accounting program. If you cannot authorize (or find) a post dated payment, or do not want to take specific payment to the bank, REMOVE it from the deposit so that the deposit list matches exactly what will be put into the bank in a single deposit. |
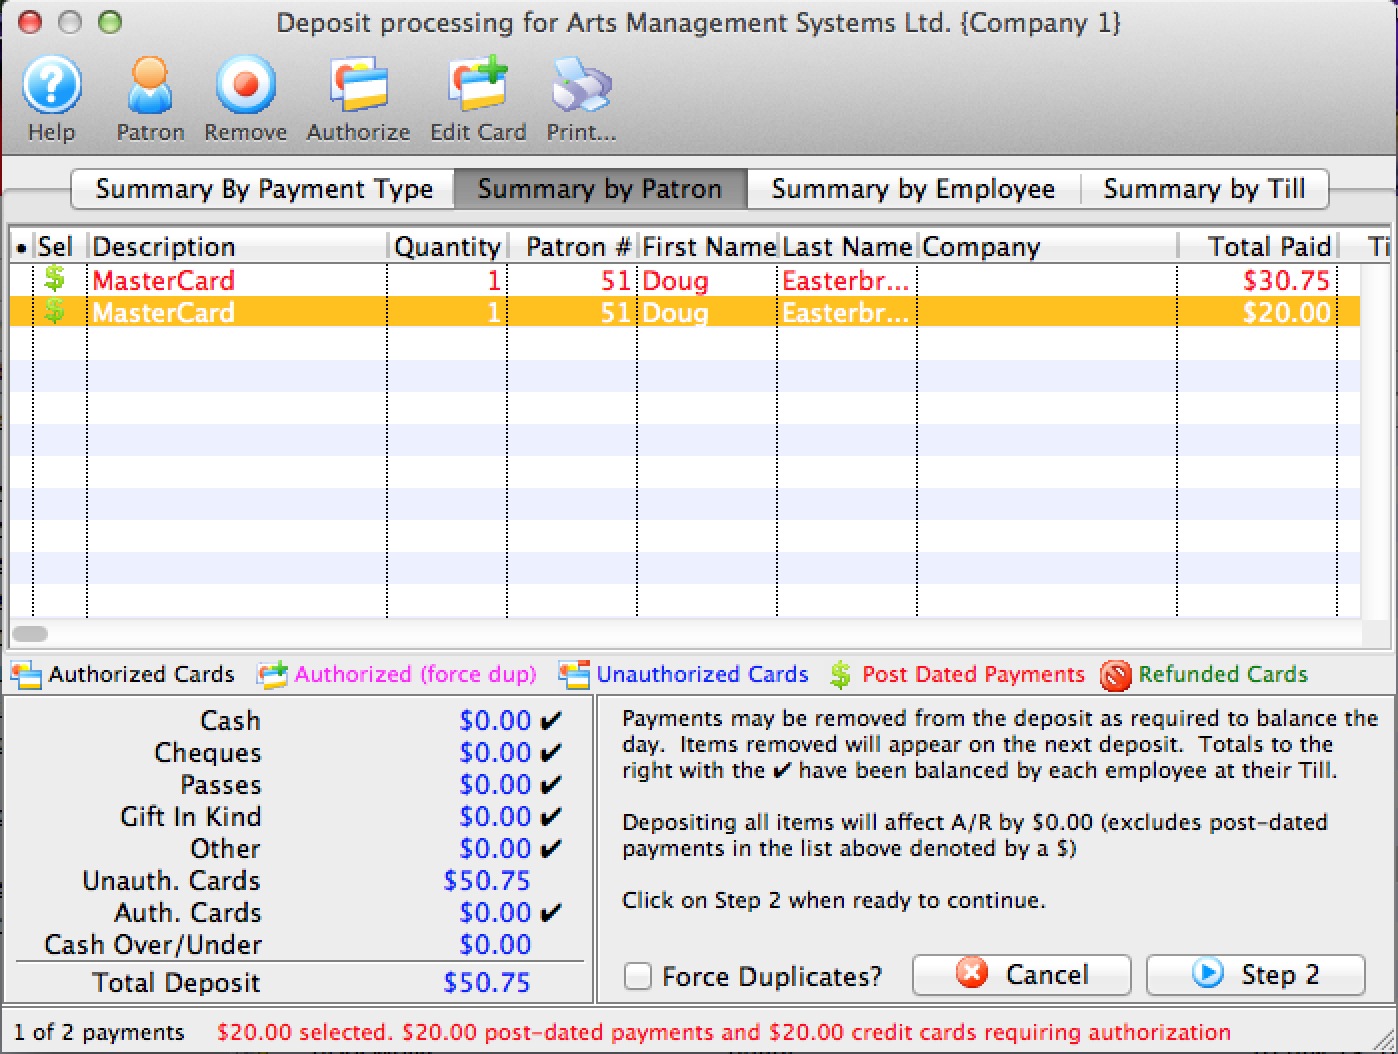
Parts of the Deposit Window
 |
Opens the online Help. |
 |
Opens the Patron record for the associated payment. Only valid on Summary by Patron tab. |  |
Removes the selected payments from the deposit. This only removes (not delete) a post dated credit card payment from a deposit. Once a payment is removed, the deposit total will be smaller. The removed payment will re-appear the next time you run the deposit window. Hopefully in that time frame, you will have a replacement credit card or the customer will have topped up the balance on the card so it can be authorized.
While valid on all tabs, the effect is a little different, depending on the tab you are on:
|
 |
Authorizes the selected payments through the credit card server if necessary. Valid on all tabs for credit cards |
 |
Allows you to change the card that a post dated payment was being charged to - in case of a decline and the patron provides a replacement credit card for the purchase.
This option is only valid on the Summary by Patron tab where you can select the individual payment that you want to change. |
 |
Prints a list of the payment in the Deposit window. |
 |
Summarizes the payments in the deposit by payment type. |
 |
Summarizes the payments in the deposit by patron. |
 |
Summarizes the payments in the deposit by the employee who received them. |
 |
Summarizes the payments in the deposit by the till they were associated with. |
| Description | A description of the payment. |
| Quantity | The number of payments. |
| Patron # | The patron number of the patron the payment is associated with. |
| First Name | The first name of the patron associated with the payment. |
| Last Name | The last name of the patron associated with the payment. |
| Company | The company associated with the payment. |
| Received By | The employee who received the payment. |
| Total Paid | The total amount of the payment. |
| Till # | The till number the payment is associated with. |
| Payment Desc | A description of the payment. |
| Date Received | The date the payment was received. |
| Merchant | The merchant used to process the payment. |
| Date Updated | The last date the payment was updated. |
| Troutid | |
| Auth. # | The authorization number of the payment if it was a credit card. |
| Credit Card | The credit card number used to make the payment. |
| Payment # | The payment number. |
| Cash | The amount of cash received with the payment. |
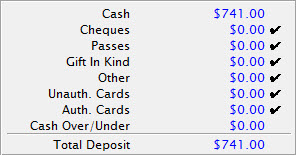 |
The breakdown of all the deposits received and the total deposit amount. |
| Force Duplicates? | If there are similar transactions that seem like duplicates and need to be authorized, this will force the transactions through on the credit card server. Duplicate transactions are rejected by default. |
 |
Cancels the Deposit window. |
 |
Moves to Step Two of the deposit process. |
Change Post Dated Credit Card
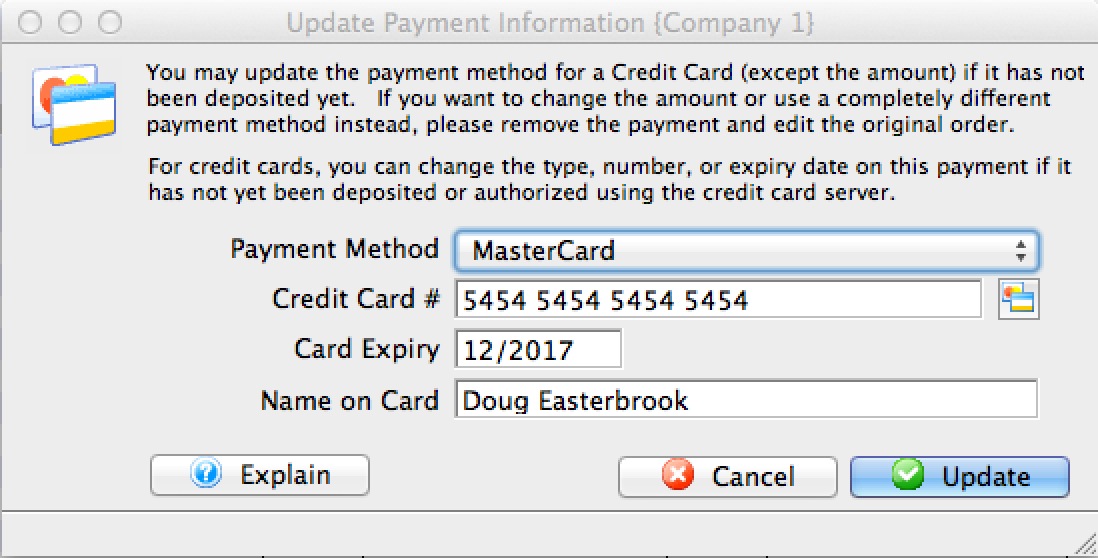 If a credit card has not yet been authorized because
- it is a post dated payment or
- you were operating using emergency mode
- 'Summary by Patron' tab of the Deposit window
- 'Summary by Patron' tab on the Till balance List
- Payment list on the patron window
- Prior payment list on the Order window -or-
- If the card is used for recurring donations:
- you need to change it on the recurring donation window in the payment section PRIOR to the next recurring donation being created.
- If the recurring donation was created and the card wont authorize, change the card number in the Deposit window (item #1 above)
Simply:
- select one or more unauthorized credit cards in the list of payments
- make sure that they are for the same patron
- Right click to edit it using a context menu. (The deposit and till balance windows also have an icon at the top of the window).
- You will see a window that lets you put in the credit card details similar to the one above right.
- Type in (or swipe) a new credit card, expiry, and name on card.
- Alternatively, use the lookup to select a prior existing card from the patron's list of credit cards
- When you update the payment, it will replace the new card on all the existing, selected, not-yet-authorized payments.
 |
When you next to end of day and need to authorize the payments, they will authorize using the replacement credit card. |
Step 2: Confirming the Deposit
End of Day Balance Warnings
Step 2 of the deposit process shows possible issues
- balancing credit cards through web sales
- balancing credit cards accepted through an EMV Devices
- with outstanding/unprocessed post dated payments that may need to be found and
- Authorized if they are credit cards (or removed if they will not authorize)
- found in your safe if they are checks and confirmed for value and date so you can take them to the bank
- where debit/credit offsets for credit cards that could be cancelled and save credit card fees
- in authorize.net end if somebody forced a prior end of day
- etc.
Cash Over Under
If you find cash in emplioyee tills to be over/under, you can enter the amounts here and a GL entry will be created for your over/under balancing account. This is used to bring A/R into line.
Deposit Reports
Click to indicate which deposit reports you want printed. Normally, the pertinent one is the check listing. All of them can be recreated at any time in the future
Sales Entry Tab
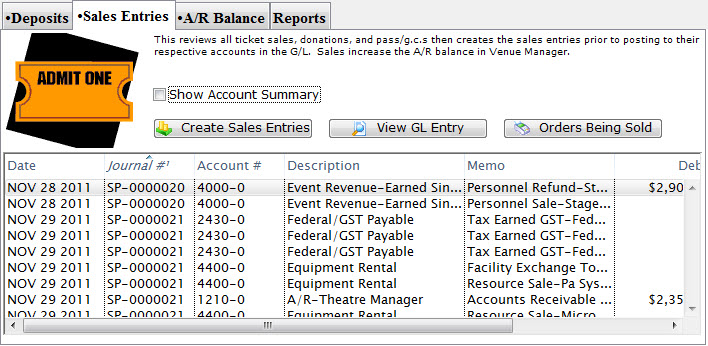
Parts of the Sales Entries Tab
 |
The Deposits tab is used for creating deposits to send to the bank. For more information on the Deposits tab, click here. |
 |
The A/R Balance tab is used to journalize all outstanding A/R to the General Ledger. For more information on the A/R Balance tab, click here. |
 |
The Reports tab is used for printing reports when the End of Day process is complete. For more information on the Reports tab, click here. |
| Date | The date the journal was created. |
| Journal # | The journal to which the payment(s) were posted. |
| Account # | The unique account number for the payment type. |
| Description | A description of the account. |
| Memo | A detailed description of the journal. |
| Debit | Debits will be created for there corresponding account number in the G/L. |
| Credit | Credits will be created for there corresponding account number in the G/L. |
| Play Code | Event the sales entry is associated with. |
 |
Enable the checkbox to summarize the data by account number. |
 |
Begins the process of journalizing the sales entries to the General Ledger. For more information on the Sales Entry Creation process, click here. |
 |
Opens the G/L entry associated with the selected items. |  |
Opens a window to view any orders currently in the process of being sold which may affect the End of Day balance. |
A/R Balance Tab
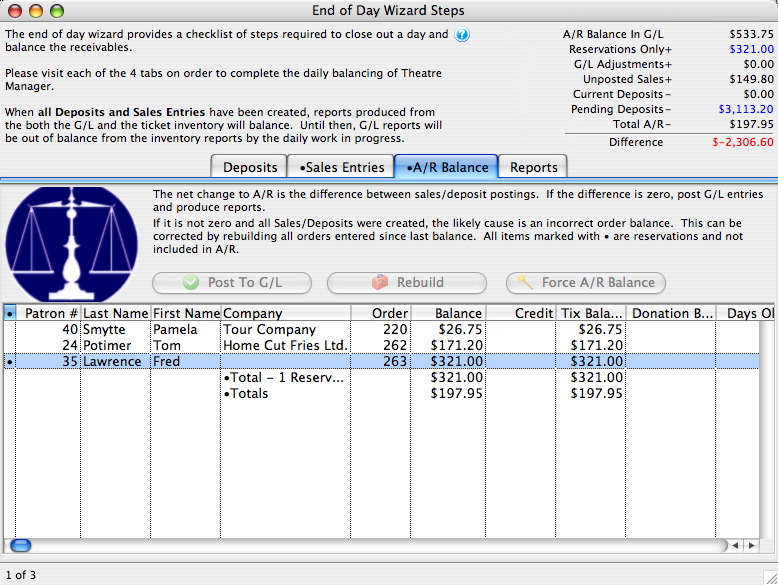
Parts of the A/R Balance Tab
 |
The Deposits tab is used for creating deposits to send to the bank. For more information on the Deposits tab, click here. |
 |
The Sales Entries tab is used to journalize all sales entries to the General Ledger. For more information on the the Sales Entries tab, click here. |
 |
The Reports tab is used for printing reports when the End of Day process is complete. For more information on the Reports tab, click here. |
| Patron # | The number of the patron who made the order. |
| Last Name | The patron's last name. |
| First Name | The patron's first name. |
| Company | The patron's company if applicable. |
| Order | The order number. |
| Balance | Outstanding balance on the order. |
| Debit | The patron account is debited for purchase of tickets, memberships, etc.. |
| Credit | The patron account is credited for refunds and returns. |
| Tix Balance | The amount of the total which is due for tickets. |
| Donation Balance | The amount of the total which is due for donations. |
 |
Post the accounts receivable to the General Ledger. For more information on the Post to G/L process, click here. |
 |
Rebuilds the balances of the orders. |
 |
Creates a balancing entry in the GL for a Box Office write-off. |
End of Day Wizard Reports Tab
Parts of the Reports Tab
 |
The Deposits tab is used for creating deposits to send to the bank. For more information on the Deposits tab, click here. |
 |
The Sales Entries tab is used to journalize all sales entries to the General Ledger. For more information on the the Sales Entries tab, click here. |
 |
The A/R Balance tab is used to journalize all outstanding A/R to the General Ledger. For more information on the A/R Balance tab, click here. |
 |
Prints the selected report to the screen. |
 |
Exports all not-yet-exported general ledger entries to disk for use in another program. If you do not export one day, this button ensures the files are created the next time it is used for all past (not-yet-exported) GL entries. If you:
|
| Create EFT File | If you are using EFT within your organization and have set the EFT Merchant Account, you can export your EFT data, ready to upload to your bank. |
| Printed | Denotes whether the report has been printed. A 'Yes' will appear when it has. |
| Report Description | A description of the report. |
| Report Parameters | The parameters that are used for the report. |
| Report Help | A lengthier description of the report. |
Multiple End of Days/Reports on the Same Day
The reason for only producing the reports once per day (after the LAST posting for the day) is that the default criteria in the reports at end of day default the criteria to be everything for that day out of convenience to you. Meaning, if you post three times in one day, the end of day reports produce an aggregate of the 3 postings.
If you wish to separate the postings into parts of a day, you can:
- access the same reports under Theatre Managers Reporting system (General Ledger section) and put criteria into separate the day into parts. For example, use criteria in the reports for GL DATE POSTED between midnight and noon. Or from Noon to 4 pm.
- or when looking at a finished report in the end of day, click the criteria button and change the criteria to reflect only the part of the day you are interested in
Using the End of Day Wizard
The End of Day wizard is simple to use. It allows you to process all necessary accounting transactions from one location. There are three steps in using the End of Day wizard:
Once the above steps are run the Reports tab can be used to generate the desired reports for entering details in the accounting software. The most commonly generated reports are indicated with stars next to them.
Deposit In The End Of Day
 |
Recurring donations are created during end of day deposit automatically on the date that they are next due. |
- Open the End of Day Wizard window.

For more information on the End of Day Wizard window, click here.
- Start with the Deposits tab (which will be blank). Click the Deposit Funds
 button.
The Bank Deposits window opens.

- Enter the date up to including the date you want to make the deposit.
- Click the Deposit
 button.
The Deposit window opens.
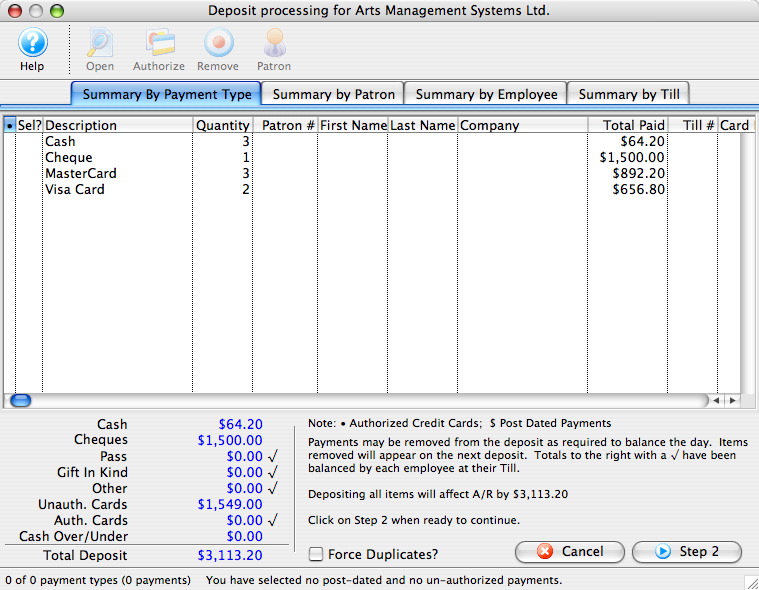
For more information about the Deposits window, click here.
- Click the Step 2
 button to continue with the deposit.
The Confirm Deposit window opens.
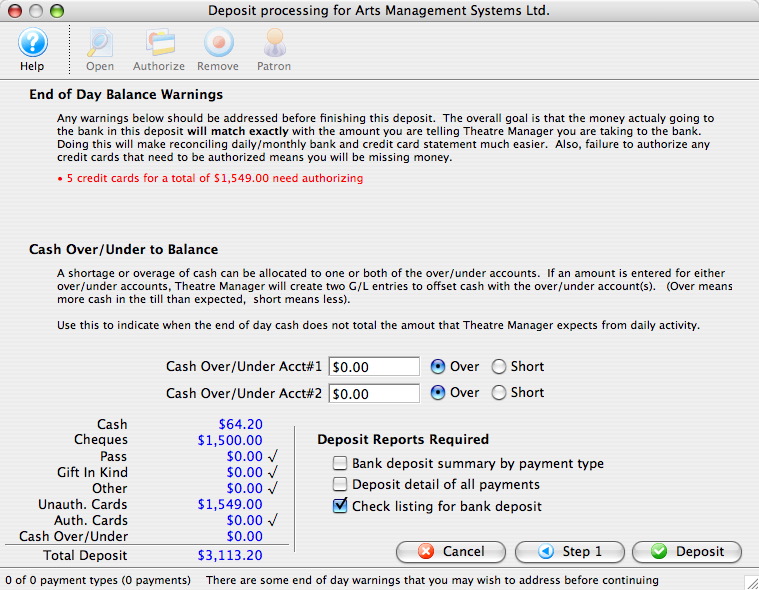
If the Box Office or Concession tills have an overage or shortage, fill the fields with the correct amount to show it as over or short.
- Click the Deposit
 button to continue with the transaction.
The Deposit Confirmation opens.
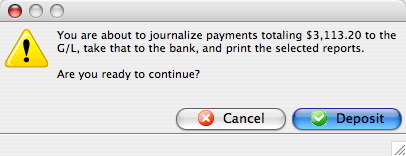
- Click the Deposit
 button to continue.
Any reports selected are generated to the screen for printing. You are returned to the End of Day Wizard window with the deposits displayed.
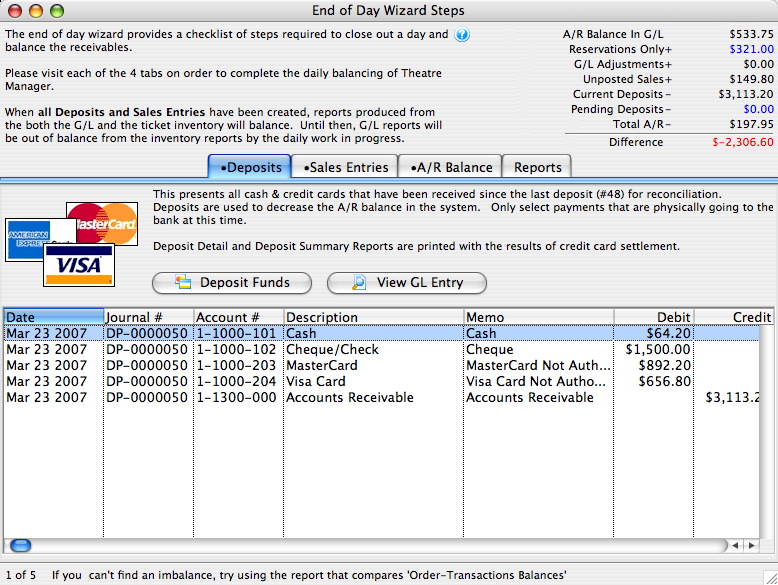
To continue the End of Day process with adding Sales Entries, click here.
Using the End of Day Wizard with Paymentech Orbital
-
Completing the End of Day when setup using Paymentech Orbital is exactly the same as completing the standard End of Day as outline in the previous page. There is however one new step which requires logging into the Orbital Account, retrieving the credit card batch summary and entering the values into Theatre Manager. Access to your Orbital Account is defined in Step #5 below.
- Open the End of Day Wizard window. Click
 button from the main Theatre Manager Toolbar / Ribbon Bar.
For more information on accessing the End of Day wizard, click here.

- Start at the Deposits tab which will be blank. Click the Deposit Funds
 button.
The Bank Deposits window opens.

- Enter the date up to which the user would like to make the deposits.
Traditionally, accept the current default date to deposit all payments up to the moment.
- Click the Deposit
 button.
The Deposit window with the Orbital feature window opens.
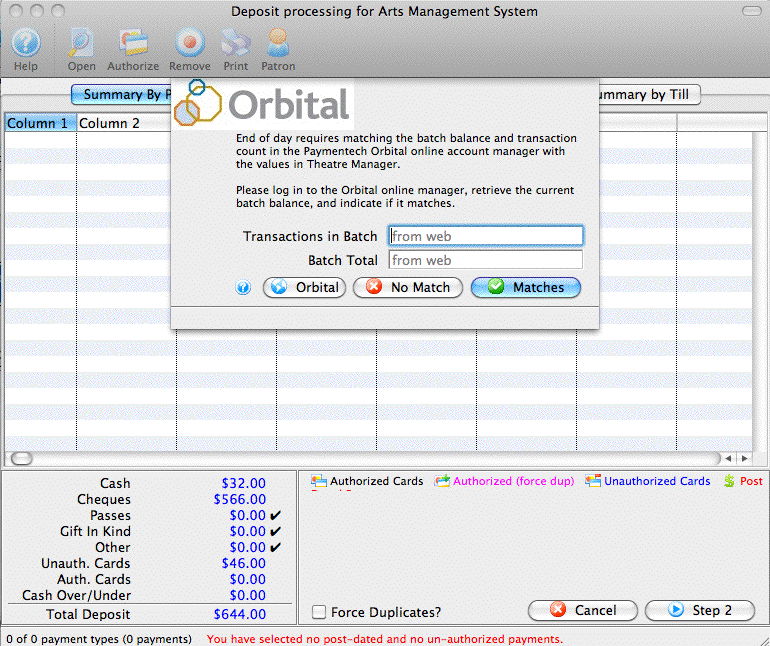
- Click the Orbital
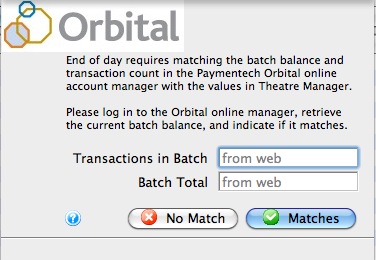
 button to access your Orbital Virtual Server account, obtain your transaction count and total. Enter the number of Transactions in Batch and the value for the Batch Total obtained from your Virtual Server Account.
For more information about the Orbital Virtual Server window, click here.
- Click the Matches
 button to continue.
- Click the Step 2
 button to continue with the deposit.
The Confirm Deposit window opens.

If the Box Office or Concession tills have an overage or shortage, fill the fields with the correct amount to show it as over or short.
- Click Deposit
 to continue with the transaction.
The Deposit Confirmation window opens.

- Click the Deposit
 button to continue.
Any reports selected will be generated to the screen for printing. The user will be returned to the End of Day Wizard window with the deposits displayed.

To continue the End of Day process with adding Sales Entries, click here.
Finding the Paymentech Orbital Balance
|
Theatre Manager assumes you have turned off auto-settle in the admin settings and that Theatre Manager will do the settlement. Do not settle the batch using the Orbital interface. |
To find the batch total, you will need to:
- log into the Orbital Virtual Server for your merchant account with your user id and password.
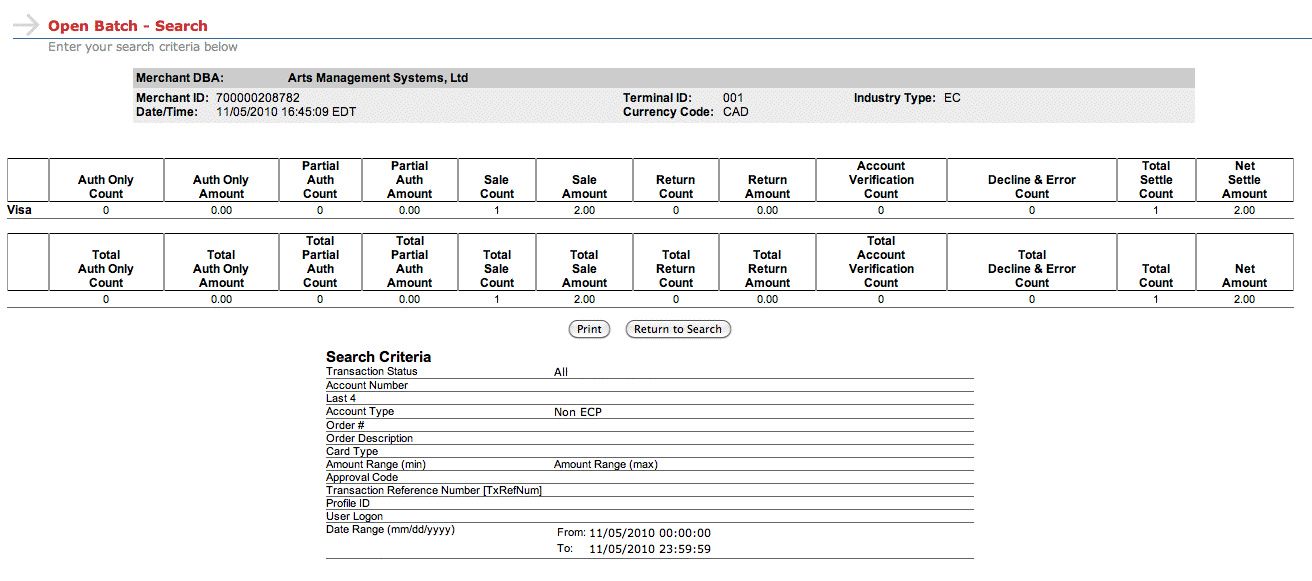
- Click on the 'Open Batch' link at the top of the web page and you will see the page below
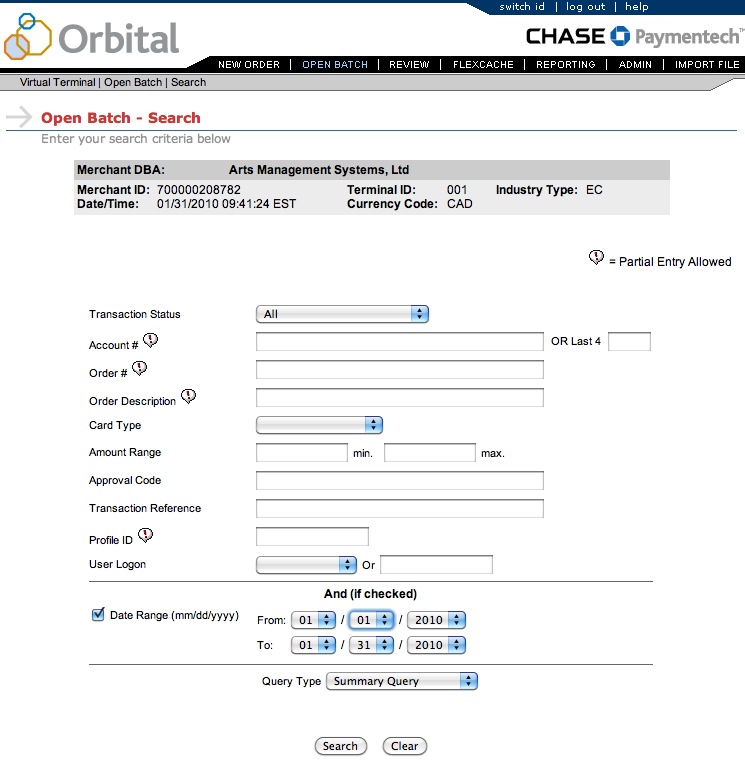
- On the 'Open Batch - Search' window, change the following search parameters. Others should be blank.
- Remove the check next to Date Range.
- Set the Query Type to be Summary Query
- Click the Search button
- When the screen below is shown, look for the values in the middle of the screen called
- Total Count in the 2nd last column of the second table. In this example it is 1 and represents the number of transactions
- Net Amount in the last column of the second table. In this example it is 2.00 and represents the total value of the current batch that has not yet been settled. You will want these total which include any refunds that may have been purchased
- When you have both those values, place them into the dialog window of the Theatre Manager Deposit process in the window show below and click Matches.
These values may be zero if there are no credit cards waiting to be settled.
If you do not know the balances or have already forced settled a batch, click No Match (this is not the normal practice).
Authorize.Net End Of Day Process
End of day in Authorize.net is similar to any other merchant provider. You follow the basic end of day process outlined previously. However, Authorize.Net operates with one little (but important to know) difference compared to the other credit card service providers.
Most providers allow you to authorize cards, get a batch total, and then settle the batch. Each 'settlement' results in a batch being flushed to your bank. If you settle twice a day, you will likely have two entries in your bank account.
Authorize.net allows one batch per day. You can settle in Theatre Manager as many times as you want and all of them will be aggregated into one single batch that appears on your bank statement. That single batch is 'swept' into your bank account at a time of your choosing (set by each merchant in the online interface in authorize.net and can be changed at any time). We recommend that you set the batch sweep to be approximately 12 hours after the time you regularly do your end of day processing. For instructions on setting the sweep time, click here. For example:
- If you do your end of day in at 8 in the morning, then setting the automatic sweep to between evening and midnight would allow sufficient time for correction.
- If you typically do your end of day before going home for the evening, then a sweep of all settled cards at 4 am would be a good idea.
The following describes how Authorize.net differs (slightly) as it may be important to understand the effects if you need to create more than 1000 transactions between each end of day. (This is a very large number of transactions and is rarely exceeded - even by large venues and onsale dates).
|
Authorize.net also has an online Merchant Login where you can view your current charges at any time -and- review current unsettled transactions and past batches. |
|
Your Authorize.net account must have permission to call the Transaction Details API in order to settle. It is a permission your service provider must give you. |
Authorize.net Authorization
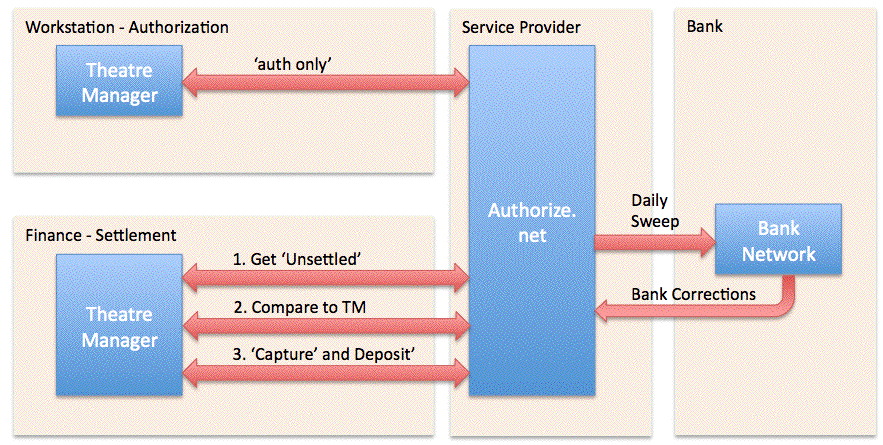
To enable the level of End-of-Day reconciliation that Theatre Manager users have come to expect, the authorization in Authorize.net is done a little differently.
- Each authorization is sent using a mode called 'auth only'. This gives you an authorization number and a guaranteed hold on the patrons credit card - just like a full authorization - for up to 30 days, or until released. The situation where you would personally experience 'auth only' is when checking into a hotel where a hold is put on your card for the duration of your stay.
- In Theatre Manager, the amount 'held' is the exact amount of the sale (it is never more, nor less). Refer to the top part of the diagram above - Theatre Manager simply asks Authorize.net to guarantee a hold on the right amount of funds.
Authorize.net Settlement

There is a quick additional setup step inside the Authorize.net online interface to allow settlement from within Theatre Manager. Click here for instructions. The Authorize.net settlement process is also a little different because of the authorization process, yet provides some interesting benefits. In general, when you decide to settle your batch:
- Theatre Manager retrieves all the unsettled 'auth only' transactions from Authorize.net. However, Authorize.net will only send the most recent 1000 transactions back to Theatre Manager. This should be perfectly fine for almost every venue almost every day.
-
Theatre Manager compares those transactions on a one-by-one basis to the payments that have not yet been deposited. In theory, they should match exactly. If they do, Theatre Manager goes on to the next step. If the transactions do not match exactly, then a short list of discrepancies is shown that can only be:
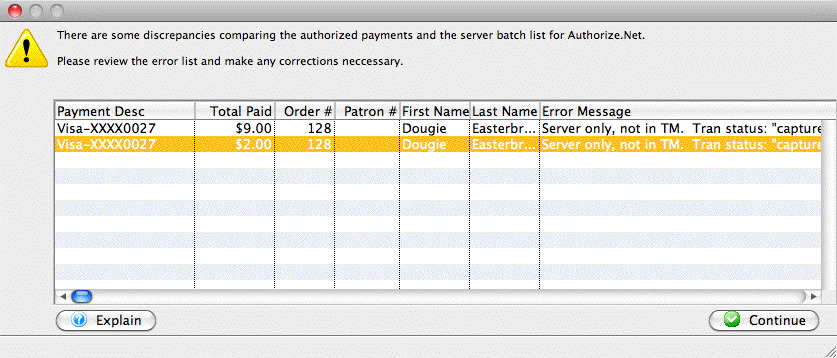

Very important - please read the error message column to see if: - The transaction is in Authorize.net and not in Theatre Manager -OR-
- The transaction is in Theatre Manager and not authorize.net
- Payments in Authorize.net that are not in Theatre Manager.
This might happen if
- You settled the match in Authorize.net manually the previous day and did not settle TM. If this is the case, you will see multiple lines in the list .. and the total should match prior days deposit plus today's business
- a user logs in to the Authorize.net online interface using their web browser and authorizes a card independently of Theatre Manager (this in itself is a no-no). In other words, something that should never happen.
- there is a communication error after Theatre Manager sends the authorization - and before Authorize.net can send on back. If these happen, then you will probably already know about it and need only void the card in Authorize.net to make both balance.
- There is some sort of communication error during end of day and TM settles the batch, but they payments were not marked as 'capture' in Authorize.net. If that happens, you will have a continuing out of balance that is constant day-after-day. To fix it:
- find the payments in Authorize.net that were part of the batch that had the problem. Conveniently, the eod of day will provide an audit list for you (it things they are missing in TM, but they are not).
- mark them captured manually in Authorize.net so that the same payments are both captured in auth.net and already previously deposited in TM.
- there is a chargeback from visa - in which case it might show up as a discrepancy. The advantage is that you will know about these when they happen and can correct it in Theatre Manager immediately.
- Payments in Theatre Manager that are not in Authorize.net.
The only reasons where this would occur is:
- refunds processed after end of day and before the daily sweep. (Which you should avoid).
- If you have turned on auto-settle in the online authorize.net interface -- which would never be set up that way during the install and you should change Authorize.net to self settle.
- Once you are satisfied that the payment matches the Authorize.Net batch, you settle Theatre Manager by clicking on the final deposit button on the end of day deposit window. Theatre Manager has to do the EOD a little differently than simply settle:
- Theatre Manager will go through each of the payments that match from the step above and tell Authorize.net to 'capture' the card. Capturing the card means that the hold is removed and instantly replaced with a binding authorization
- These 'captured' cards sit in the batch at Authorize.net and are 'swept' once a day to move them all into the bank, just like other authorization software.
Balancing audit Messages in Authorize.net end of day
When you see this window:
- Make the error column wider as it may give you enough information to help you diagnose the issues
- Click 'Print Error List' to see actions that you might take to solve the problem which is included with the message description. See a sample report below.
- Contact support if you need further explanation of the message and what to do.
Special Note on Authorize.net refund processing
 |
Refunds are processed immediately by Authorize.net.
If you do a lot of refunds before the sweep time and settle end of day after the sweep time, you may be told that you are out of balance by what seems to be the total amount of your refunds.
See explanation why Authorize.net processes refunds right away. |
Implications of the Authorize.net EOD approach
 |
Refunds are processed immediately by Authorize.net. YOU CANNOT VOID A REFUND.
If you fail to settle a batch containing a refund before the authorize.net sweep time, you will receive a warning during the end of day that the batch may be out of balance (even if it is not). Your balance will appear be out by the total amount of refunds you processed before the sweep time. You will see this every time you:
|
 |
Set your sweep time (in authorze.net settings on their web page) to be about an hour after you normally do your end of day to minimize the messages about refunds. |

There are a few subtle implications of the way Authorize.net works that you may encounter in your reconciliation. Most venues should not see them, but in case you do, these are:
- Multiple Ends-Of-Day: If you do an end of day more than once per day, you will still only see one deposit to your bank because the batch is never closed. Authorize.net 'sweeps' all 'captured' cards once per day and moves them into your bank. This may be useful as Theatre Manager can aggregate EOD into one posting if desired.
- Running End-Of-Day during the Sweep: The Authorize.net bank sweep should be set to run 6 hours after typical end of day. We recommend avoiding doing an end of day in Theatre Manager when the 'sweep' normally occurs otherwise part of a TM batch might be 'swept' to the bank on one day and the rest on the net day - resulting in a split batch. All a 'split batch' does is require you to use a calculator two add two numbers on a bank statement together to compare to your accounting system.
- Setting the Sweep Time: is dependant on when you typically do end of day because of how REFUNDS in a batch are dealt with (see below). We suggest setting the sweep time to 6 hours after the time that you normally do end of day to give the best chance of a refund falling into the current day business. For example, if you do end of day:
- each night, then 2:00 am is a good choice for the sweep time.
- each morning, then we suggest 2:00pm for the sweep time.
- Refunds in the batch. There is a difference between a VOID and a refund. A void cancels out an existing charge and there will be no issues during EOD because of voids. However, if a credit card charge is DEPOSITED in theatre manager and you want to refund that money some days or months later, the only way to do so with the independent refund feature in Authorize.net. You must explicitly enable this feature and if you do so:
- you SHOULD limit who can provide refunds -and-
- you MUST DO END OF DAY TO SETTLE YOUR TM BATCH in the same day that you did the REFUND in order to see it in the end of day BEFORE THE SWEEP TIME HAS OCCURRED.

Authorize.net automatically 'captures' refunds immediately (we wish it didn't) so if you don't settle before the sweep, it will appear like you are out of balance and have an additional refund transaction in TM that does not seem to be in Authorize.net. In reality, you are most likely in balance because the refund just got placed in the previous day's batch. You will need to look in the previous day's batch for the refund to make sure you don't refund twice.
Addressing Auth.net refund process if it gets deposited before you get a chance to do end of day:
- Start the end of day deposit.
- You will get a discrepancy doing end of day. TM will say the batch doesn't match and provide the edit log.
- Read the description in each line of log to see if it gives additional info.
- If the errors in the log are all refunds from the prior day and they are in the settled batch on auth.net's online portal, then they are already in auth.net -- so just settle the batch
- If the errors are new authorizations, contact support. it means you'll need to check yesterdays settlement to see if somebody forced it.
- Voids in Batch are when you authorize a charge and then void it before settlement. Authorize.net will leave a transaction on their size for ZERO dollars. This may result in TM showing the 'void' in the audit list at the end of the day. Please verify that the amount is zero. It is also for your protection to ensure that somebody did not authorize then void without anybody in finance knowing about it.
- More that 1000 authorizations between End Of Day: It is very rare that ay venue will have 1000 distinct transactions in any one day - and likely only on a heavy on-sale day. 1000 authorizations might reflect well over $0.5M per day. On the rare day that you may have more than 1000 authorizations, you may wish to plan your day and:
- Run an end of day when you are nearing 1000 transactions. This is because Authorize.net will retrieve only the most recent 1000 transactions and doing an end of day approximately every 1000 transactions means that the standard settlement process will run normally, providing a good edit list if possible mistakes.
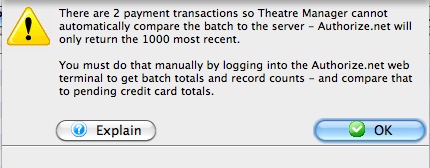 On a really busy day, you can simply use the methodology for large batches and settle everything after all goes quiet for the day. If Theatre Manager cannot do the normal settlement process for Authorize.net, you will get a message similar to the one at right informing you. At that point you will need to get a batch total from the online interface -- and compare it manually to the Theatre Manager total. When both agree, simply close the batch and settle as normal. TM will avoid the payment balancing step (due to the Authorize.net 1000 transaction download limitation) and set all cards to 'capture'. The bank sweep will get them the next day and move them to your bank as normal.
Totals for Large Authorize.net Batches
This should only be required when there are more than 1000 transactions in a batch. This is due to a limitation on the Authorize.net servers which only returns the 1000 most recent transactions (suitable for most days business). If you are in a day with more than 1000 transactions, use the batch total and transaction count to compare to the totals in theatre manager and then force settle. TM will then change all cards to 'capture' them.
If there are less than 1000 transactions in the batch, Theatre Manager should identify discrepancies automatically.
Please note that a batch may appear out of balance if there are refunds in a batch, which is affected by your choice of sweep time. Check for voided payments in the Theatre Manager edit list -> error message column and make sure that they are expected.
 |
Theatre Manager assumes you have turned off auto-settle in the admin settings and that Theatre Manager will do the settlement. Do not settle the batch using the Authorize.net interface. |
To find the batch total, you will need to:
- log into the Authorize.net Merchant Login window and enter your user id and password for your merchant account.
- Click on the 'Reports' link at the top of the web page and you will see the page below
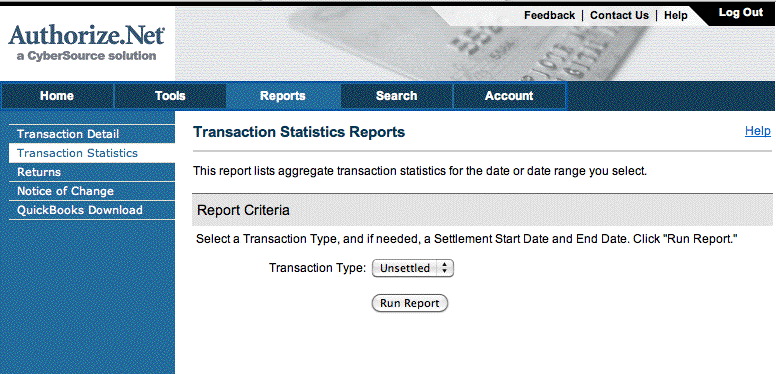
- Click on the 'Transaction Statistics' on the left side.
- Set the Transaction Type to Unsettled.
- Click the Run Report button
- When the screen below is shown, look for the values in the right side of the screen near the bottom:
- Total Count in the last column. In this example it is 11 and represents the number of transactions
- Net Amount in the last column. In this example it is 1,053.27 and represents the total value of the current batch that has not yet been settled.
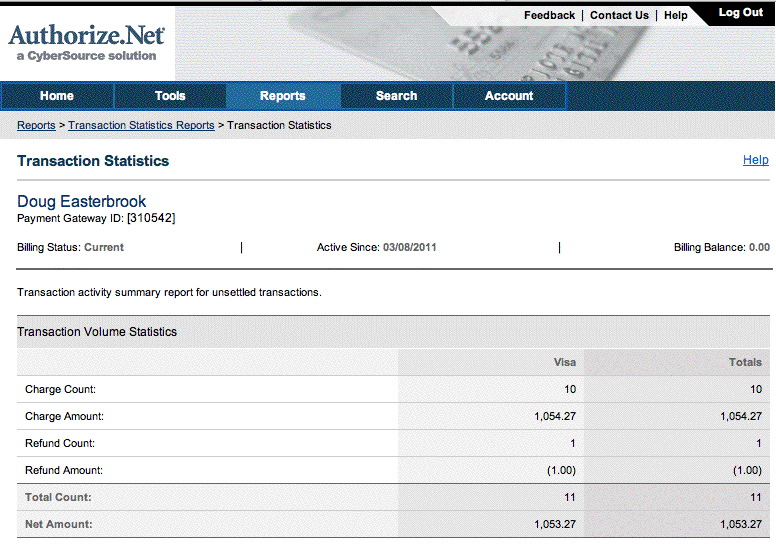
- When you have both those values, compare them to the credit card total for that batch in Theatre Manager and continue if in balance. If not in balance, then you will need to compare the payment list in TM with the transaction audit list on the server.
Elavon End of Day
-
Completing the End of Day when setup using Elavon is exactly the same as completing the standard End of Day as outline in the previous page. There is however one new step which requires logging into the Elavon Account, retrieving the credit card batch summary and entering the values into Theatre Manager. Access to your Orbital Account is defined in Step #5 below.
- Open the End of Day Wizard window. Click
 button from the main Theatre Manager Toolbar / Ribbon Bar.
For more information on accessing the End of Day wizard, click here.

- Start at the Deposits tab which will be blank. Click the Deposit Funds
 button.
The Bank Deposits window opens.

- Enter the date up to which the user would like to make the deposits.
Traditionally, accept the current default date to deposit all payments up to the moment.
- Click the Deposit
 button.
The Deposit window with the Elavon feature window opens.
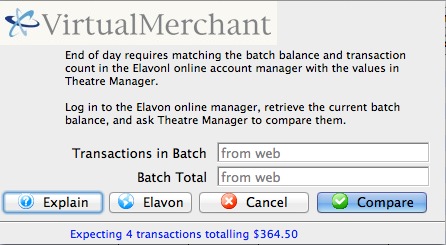
- Click the Orbital
 button to access your Elavon VirtualMerchant account, obtain your transaction count and total. Enter the number of Transactions in Batch and the value for the Batch Total obtained from your VirtualMerchant Account.
For more information about the Elavon VirtualMerchant window, click here.
- Click the Matches
 button to continue.
- Click the Step 2
 button to continue with the deposit.
The Confirm Deposit window opens.

If the Box Office or Concession tills have an overage or shortage, fill the fields with the correct amount to show it as over or short.
- Click Deposit
 to continue with the transaction.
The Deposit Confirmation window opens.

- Click the Deposit
 button to continue.
Any reports selected will be generated to the screen for printing. The user will be returned to the End of Day Wizard window with the deposits displayed.

To continue the End of Day process with adding Sales Entries, click here.
Finding the Elavon Balance
 |
Theatre Manager assumes you have turned off auto-settle in the admin settings and that Theatre Manager will do the settlement. Do not settle the batch using the Elavon interface. |
To find the batch total, you will need to:
- log into the Elavon VirtualMerchant for your merchant account with your user id and password.
- Click on the Current Batches link at the left of the web page
- Click on the Main link (you may see info here, but if there are returns, they do not appear until you click 'Credit Card')
- Click on the Credit Card link and you will see a page like below showing the 'Current Batches: Credit Card' page
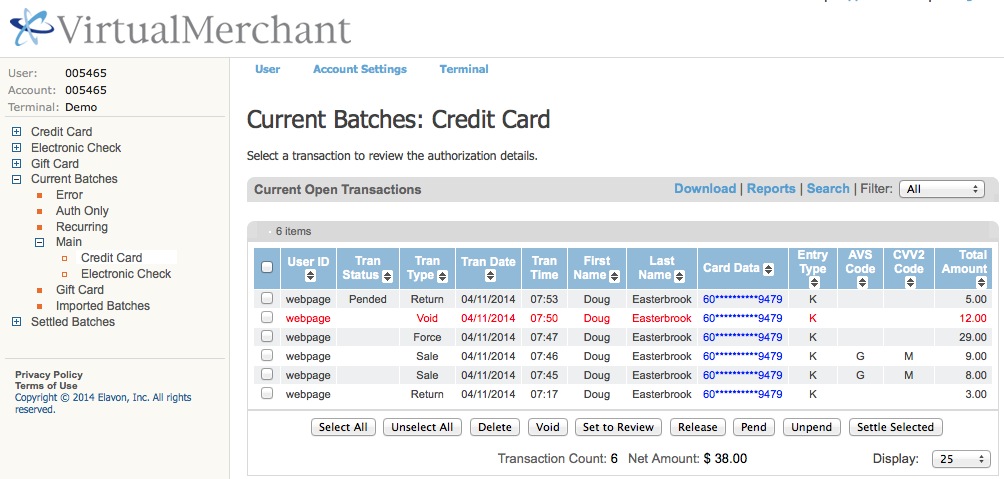
|
Elavon may have some items in the list above marked as pending or set to review in the 'Tran Status' column, especially for returns.
You should:
|
- Look at the bottom of the screen. You may (or may not) wish to alter the number of lines to display at the bottom right.
At the bottom centre, look for the following information:
- Transaction count - in the example it says 6. However, there is one VOID in the list that Theatre Manager will no longer know about. Subtract the voids from the total and enter that as the transactions count.
Example 6 (total) - 1 (voids) = 5 (net transactions)
- Net Amount - in the example, it is $38.00
- Transaction count - in the example it says 6. However, there is one VOID in the list that Theatre Manager will no longer know about. Subtract the voids from the total and enter that as the transactions count.
- When you have both those values, place them into the dialog window of the Theatre Manager Deposit process in the window show below and click Matches.
These values may be zero if there are no credit cards waiting to be settled.
If you do not know the balances or have already forced settled a batch, click No Match (this is not the normal practice).

Past Elavon Batches
To do so, you will need to:
- log into the Elavon VirtualMerchant for your merchant account with your user id and password.
- Click on the Settled Batches link at the left of the web page
- Click on the Main link and you will see a page like below showing the 'Settled Activity' page
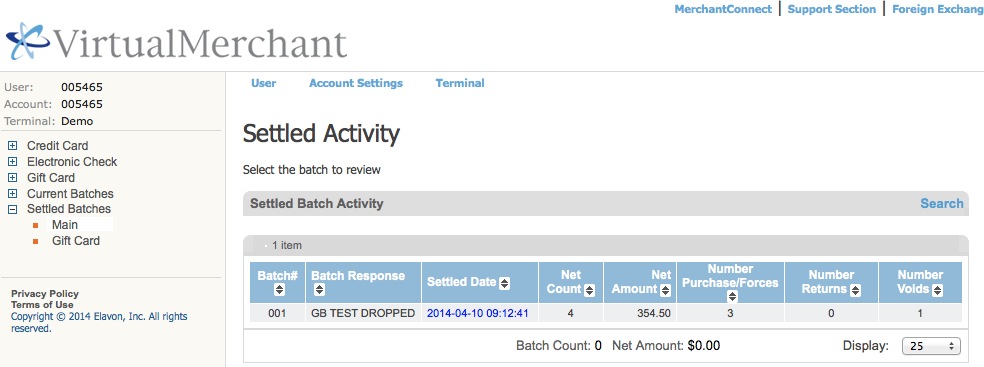
- you can double click on a 'blue' batch number under the 'settled date' column to see the detail in it
- you can also use the search functions.
- For more information or assistance, please refer to the virtual merchant user manual or call Elavon
Moneris Pinpad End of Day
End of day pin pad settlement
If you are using Moneris Pin Pads for authorizing credit cards at the box office, Theatre Manager will:
- set the proper amount on the device for each authorization or refund
- Capture the partial credit card and token to create the payment record in Theatre Manager
- Interrogate the machine totals during end of day to make sure they match - and-
- Settle each pin pad that has a balance on it when you do the end of day that includes cards processed on it
 |
Normally, there should be no imbalances. However, if you do get one, it may look like the message below that tells you
|
Out Of Balance Correction
If you receive an imbalance it will tell you whether the discrepancy is in the totals and/or the number of transactions. You may have to go to the device batch totals and find out which credit card charges should not be there and remove them from Theatre Manager and/or the device to make things balance.
The message will identify what Theatre Manager thinks is out of balance (money, and/or # transactions, and pin pad)
Who to contact first depends depends on who thinks they have more transactions
Use the following to determine who to contact:
- Please look at the Batch Total on the device setup identified as being out of balance (see image for the button)
- COMPARE that to the Payment Request List for the pin pad for the appropriate time span (since last pin pad settlement)
- if TM thinks there are:
- fewer transactions than Moneris - see if there are some request(s) that was not processed by TM. This can likely be addressed by contacting Artsman support.
- more transactions than Moneris then contact Moneris, using the Payment Request List as your audit log. They should be able to see everything you see and they can explain the discrepancy.
You will need Moneris's assistance removing them from the device if that is needed to balance to Theatre Manager.
Creating Sales Entries
The purpose of creating sales entries is to:
- Create sales transactions for sales that occurred on the web
- Take all sales transactions (tickets, donations, gift certificates, etc) and create G/L entries that aggregate the sales since the last time this process was run.
- Find all ticketed events eligible for rolling over revenues from deferred to earned and make G/L entries for those sales
- Run some daily clean up activities such as:
- removing patrons from double opt-in mail lists if they have not responded within the limit in company preferences.
- Deleting old shopping carts per the retention periods in company preferences
- Deleting old eblasts and letter correspendance per the retention periods in company preferences

- Click the Sales Entries tab.

- Click the Create Sales Entries
 button.
This will open the Create Sales Entry Window allowing the user to journalize the Accounts Receivable. Depending on settings in company preferences->accounting tab, you may also want to select conversion of some orders from reservation only to earned income, especially if the performance has just occurred.
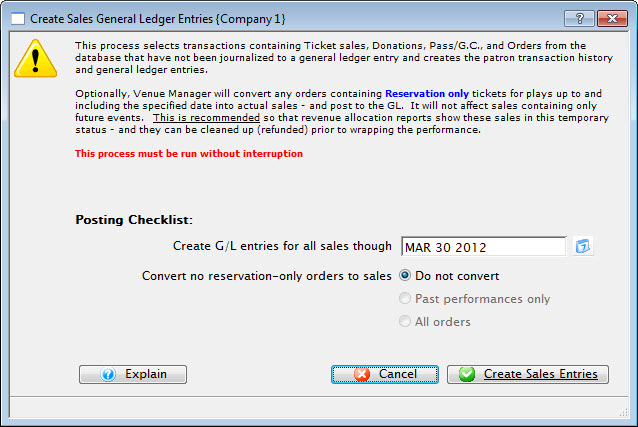
- Enter the date up to which Theatre Manager should journalize the A/R.
- Click the Create Sales Entries
 button.
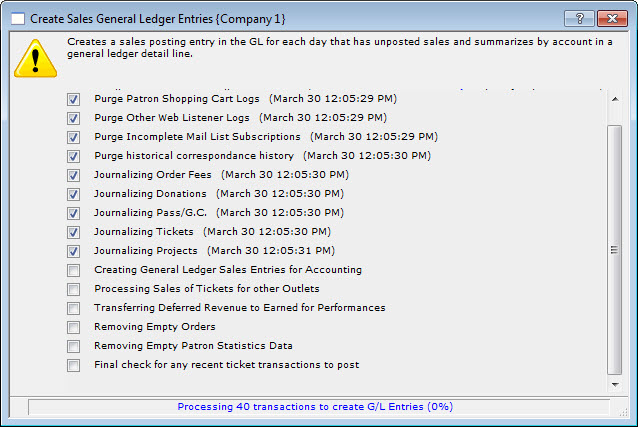
A window displays the progress.
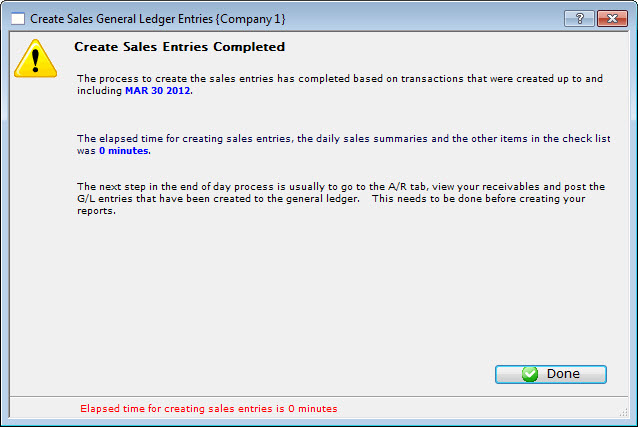
- Click the Done
 button.
The Sales Entry process is completed and you return to the Sales Entry tab.
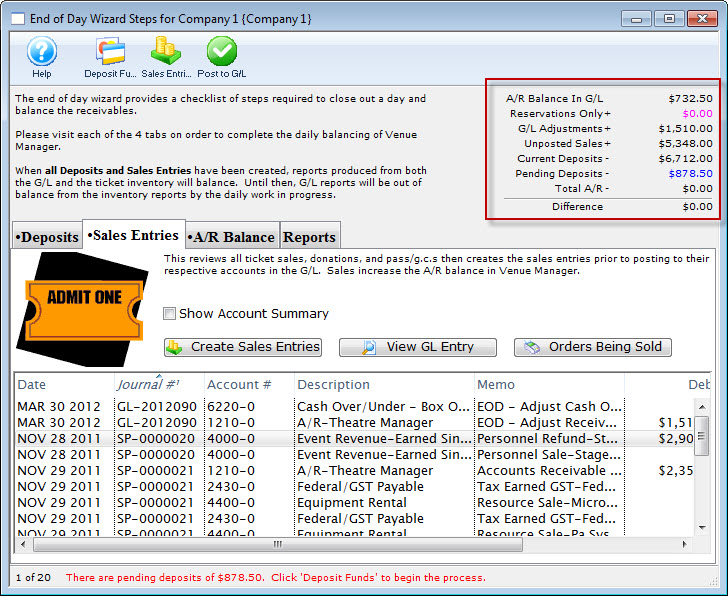
All the Sales Entries will be displayed under the Sales Entries tab.
In the upper right hand corner of the End of Day wizard, the amount should be zero to show that the Deposits and Sales Entries are in balance. If they are not, then research will need to be done to determine where the problem is. For more information on finding the imbalance, click here.
The unposted sales and deposits must now be posted to the GL. For more information on posting to the General Ledger, click here.
Posting To The GL
When payment has not been received for goods or services, the balance is recorded under Accounts Receivable.
- Click the A/R Balance Tab on the End of Day wizard.

- Click the Post to GL
 button.
The confirmation window opens.
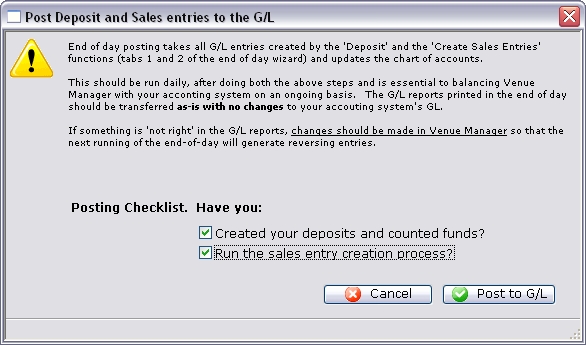
- Answer both questions by checking the box, then click the Post to GL
 button.
The unposted sales are added to the A/R Balance in the General Ledger and balance with the Patron A/R.
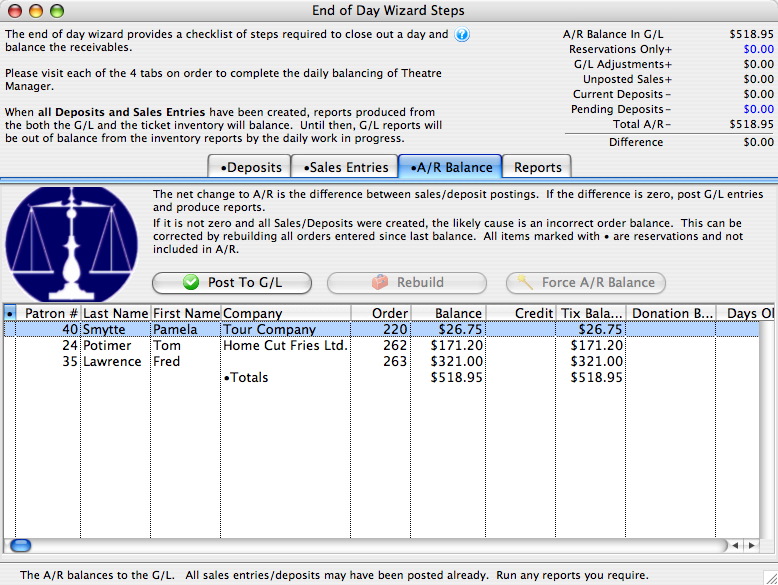
The upper right hand corner of the End of Day wizard should still be zero. If it is not, click here for more information on finding the problem.
A variety of reports can be printed based on the new General Ledger entries by using the Reports Tab. For more information on printing reports, click here.
Force A/R Balance
You are presented with a message, similar to the one below, indicates the amount of the imbalance and asks if you want to create a balancing entry against the cash over/under account.
Before continuing, please make sure you have done all steps to determine the source of a possible imbalance BEFORE using the 'Force A/R Balance' function. If you cannot "find" your error, please contact the support team prior to completing this action. Forcing an EOD imbalance and writing it off is a last resort activity and you should have at least tried redoing the end of day and checking order/transaction balances.
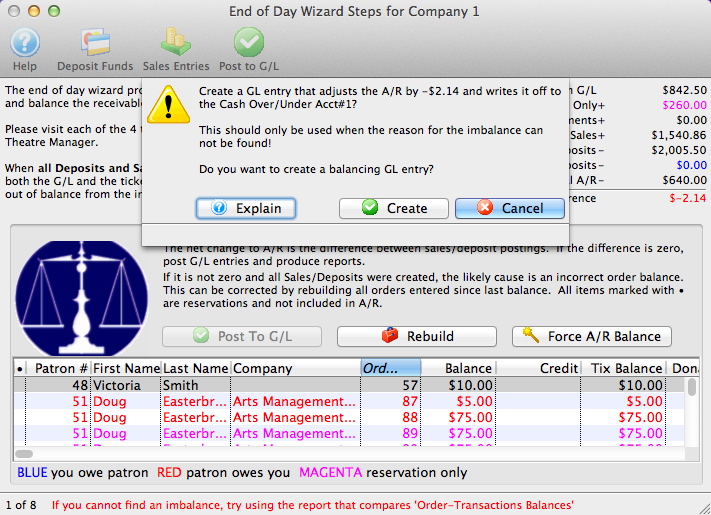
The End of Day Balance Reports
 |
The recommended end of day reports for transferring data to your accounting system are highlighted in red. Both the highlighted reports provide a G/L listing with Debits and credits for easy entry to your accounting package. Most people use the first one and the purposes are::
|
 |
We highly recommend using the Export GL button to create a file that you can import into your accounting system.
Please refer to Supported Formats which is selected in company setup accounting tab. |
- Click the Reports tab in the End of Day wizard.
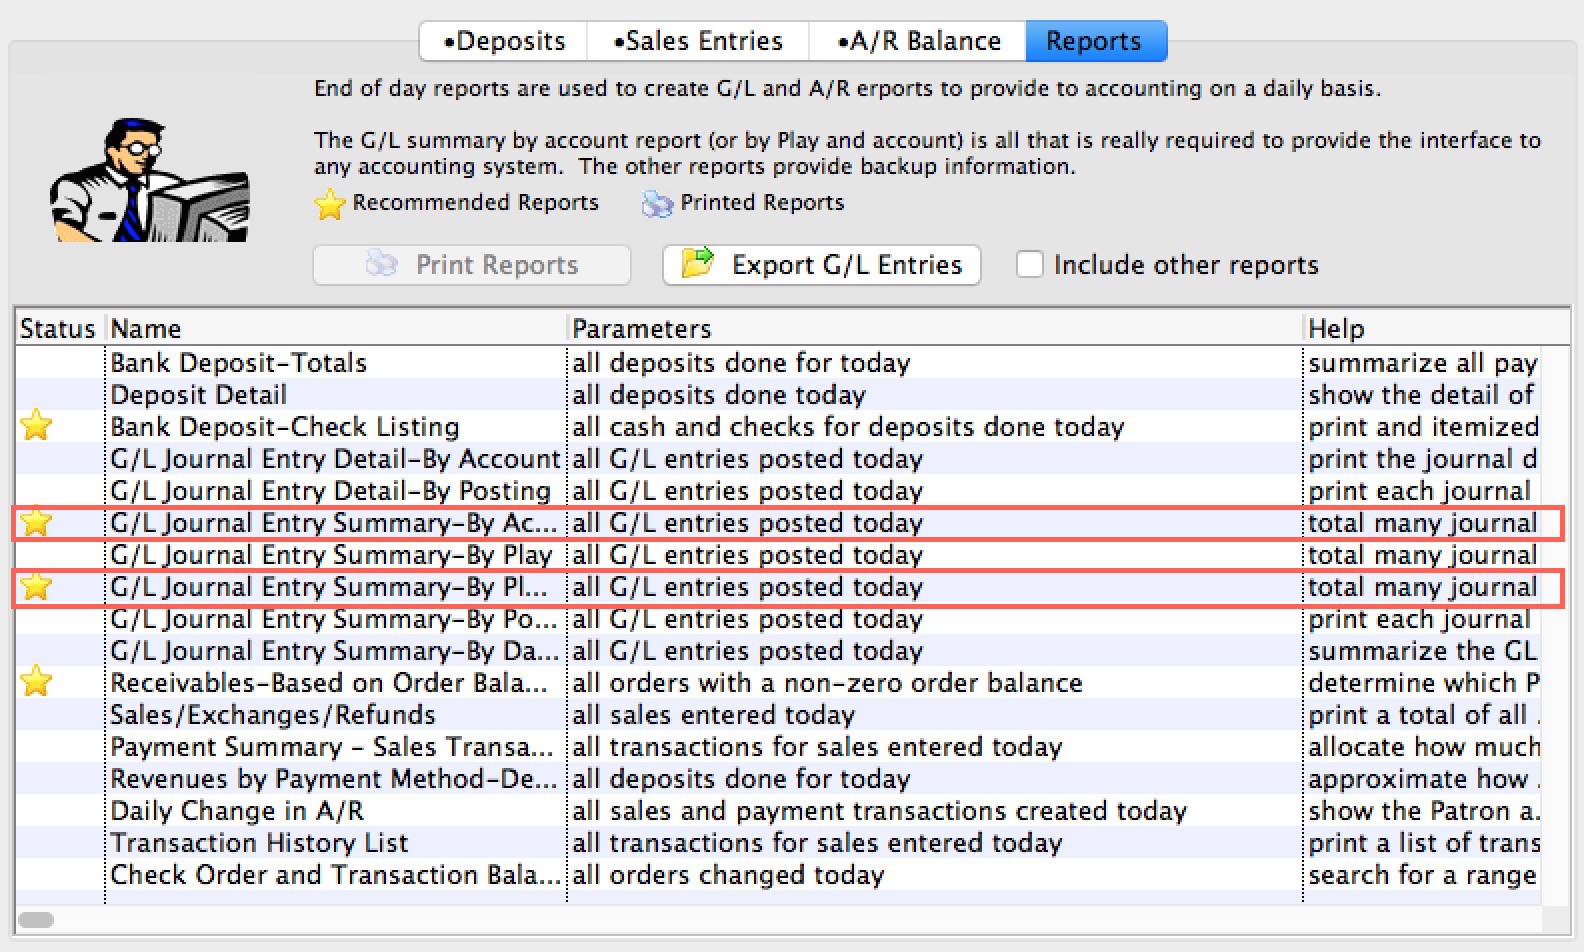
- Double click on the report(s) to be printed.
If you are printing a report to transfer to the accounting system, you should probably use one of the two highlighted because they help you comply with the general intent of:
- the law Sarbanes–Oxley Act to make sure you are less likely to be doing off the balance sheet transactions
- very helpful in fulfilling IRS requirements and rules of reporting (examples reasons are)
- generally revenue is reported at time of sale, even if you are only taking taking deposits for tickets such as group sales
- also applied to donations where you have not yet received any cash or payment al all - because if you have anything that resembles a contract ... it needs to go into the books.
- GAAP/FASB requirements
- CCRA financial tracking
The reports selected are generated on the screen.
- Click the Print button on any reports you want paper copies of.
Once all reports have been printed, and there is no imbalance, the End of Day process is complete. Congratulations!
Troubleshooting End of Day Wizard Problems
Also, note the 'Create Sales Entries' process in the End of Day wizard actually takes two passes at checking for an imbalance. If your venue is not busy, this will handle most end of day issues automatically. However, if it does not -AND- you are having an extra busy day, then re-running the 'Create Sales Entries' can catch any sales that straggle in and counts them.
Problem |
Action |
| You received a deposit in process message when attempting to use the End of Day: |
|
| Matching a deposit to your Merchant Account: |
Please refer to the following to make sure you've looked at your batch totals and/or settled the batches
If your merchant batch total is different than Theatre Manager, it means one of two things:
|
| Making the end of day balance go to zero so you can post: | Please refer to correcting an imbalance to resolve the problem. |
| You receive a message indicating that there are orders currently being sold: |
Some orders may currently be in the process of having tickets sold to them or taking payments. You might need to
|
| The inability to post to the general ledger after balancing: | Please refer to cannot post to the General Ledger |
| If the payments can not be seen in the deposit process window: |
|
| You just ran the first End of Day after Year End Rollover and found an issue | Please refer to End of Day Imbalance after Year End Rollover |
Correcting an Imbalance in the End of Day Wizard
An imbalance can be caused by a variety of things such as:
- A power outage in the middle of a transaction
- A power outage in the middle of the the End Of Day
- A misapplied fee or refund during the sales process
- A manual GL Entry that was incorrectly applied
- A GL entry with no detail lines
- An EMV (pinpad) authorization initiated by Theatre Manager in which there was a time out or failure
- Other reasons
There are several steps you can take to correct an imbalance in the End Of Day prior to contacting Support.
The first step is easy: don't panic.
 |
There are two important things to remember about an imbalance in the End Of Day:
|
| 1 | First, verify no users are in the middle of selling tickets, donations, or passes. The End of Day wizard excludes any order in the process of being modified (i.e. tickets being sold) and does not journalize them.
|
| 2 | Re-run the End of Day process again to see if any new sales show up.
|
| 3 | Run the report called Utility Functions and Database Analysis Reports >> Check Order and Transaction Balances.
|
| 4 | Run a Transaction History >> Transaction History List report.
|
| 5 | Run Setup >> Batch Functions >> Order Balances
|
| 6 | Go into Accounting -> General Ledger -> G/L Entries. Are there any manual G/L entries since last time balanced?
|
| 7 | Did the system crash in the middle of creating sales entry? If so make sure G/L entries are not out of balance.
|
| 8 | Did the system crash in the middle of a deposit? The deposit entries will need to be fixed in order to balance.
|
| 9 | Has anybody gone into a Patron's transactions and either duplicated or reversed debits and credits in an attempt to fix something? If so:
|
| 10 | Run a Utility Functions and Database Analysis Reports >> Check Order and Transaction Balances report again.
|
| 11 | Have TM Support run a query to find any transactions that are posted but are not connected to a a GL entry
The general form of the query is below and will need modified depending on what is found.
select * from f_transaction where T_GL_SEQ not in (select GL_SEQ from F_GL_HEADER) |
| 12 | Look to see if there are any gift cards or passes that were sold/refunded/adjusted and are not in GL entries. |
| 13 | Did you just complete the first year end rollover since Jan 1 2018 and are users TM for a long time? The new rollover process recalculates all account balances from inception of the database and this could be a leftover imbalance from before version 6. Please contact AMS support if this is the case. In the end, a one-time-only manual adjustment will be necessary by forcing the end of day balance that should be noted and ignored in the accounting program.
AMS team will need to:
|
| 14 | Force the A/R Balance.
If you have:
|
Cannot Post to the General Ledger
Problem |
Action |
| Has the End of Day been completed? | If not, complete an End of Day. |
| Is it in balance? | If not, review the instructions above on finding and fixing an imbalance. |
| Are account numbers missing? | Check to make sure that all account numbers are entered in deposit and sales entry windows in End of Day. |
| >Are any GL entries unbalanced? | Go into Accounting >> General Ledger >> G/L Entries, and make sure that all debits and credits are equal for each entry. |
| Is it a new fiscal year? | If the organization is at or past year end, a Year End Roll Over needs to be completed. If the organization has not done a year end rollover, it will not be able possible to post GL entries in the new fiscal year. For more information on handling a Year End Roll Over, click here. |
| Are there any posting dates in the future? | Check sales posting dates - are any in the future? Future dates cannot be posted. |
| Does the user have permission? | Does the user have authorization/permission in the user ID permissions in the system to post? If not, the user will need to obtain permission. |
| Is your Merchant Provider different than TM? | It is possible that Theatre Manager got a timeout sending a credit card, and if it was sent again with a force duplciate, you would expect this. Compare TM edit list with the authorization detail online at your merchant account and then void the extra in your online merchant account. If the deposit doesn't match, them please refer to solving merchant account Imbalance |
Deposit In Progress Flag
If you experience an interruption of power or connection to the database server during the End Of Day, when you attempt the End Of Day again, Theatre Manager may respond with a message that a 'Deposit is In Progress,' indicating that it believes the End Of Day Wizard is still active and is currently depositing credit card funds through your merchant processor.
The resolution for this is simple, and you can get back to running your End of Day in seconds by unchecking the 'Deposit In Progress' box in the Merchant Account setup. You cannot check this box, you can only uncheck it. Only do so if you are 100% sure there is no settlement occurring for this merchant account (i.e. nobody has End Of Day open). Unchecking it, resets the End Of Day and allows a settlement to happen.
To reset the Deposit in Progress Flag, you perform the following steps:
- Ensure that no one is currently doing the End Of Day.
- Log on as the Master User.
- Select the Setup>>System Tables>>Merchant Account menu.

- Select your Merchant account from the list.
Double click on the Merchant account to open it.
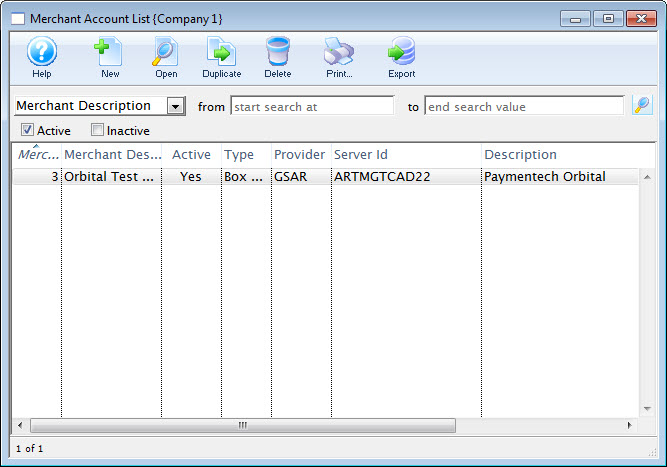
- Click the
 tab.
tab.
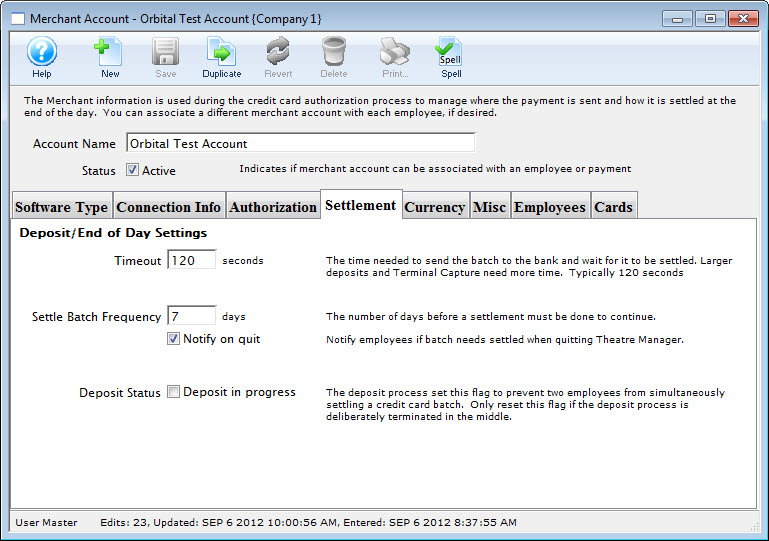
- Uncheck the 'Deposit Status' box.
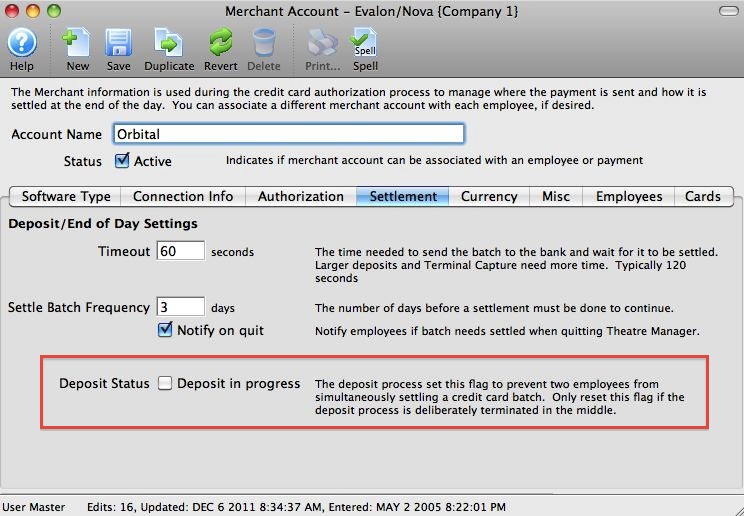
- logon using your Employee account.
- Restart and proceed with the End Of Day.
Balancing Outlet Sales
- Daily Basis - run the end of day wizard and post to your G/L
- Periodically - reconcile the 4 receivables and payable accounts with each outlet and pay each other.
Periodically Balancing Outlets
 |
Balancing outlets and what you owe to each other assumes you have set up the outlet accounts (in each outlet) as per the instructions in setting up outlet posting accounts |
The general process is that on a daily, weekly, biweekly or monthly period, as agreed to by each outlet, you should reconcile the special accounts for posting outlet receivables and payables. This is done as follows:
- Each outlet completes their end of day and posts to the GL on the anointed date
- Each outlet runs the G/L Journal Detail by Account report with criteria that specifies the three accounts for their outlet that represent and a date range. EG:
- A/R Ticket sales other outlets owe you
- A/R Commissions owed from other outlets
- A/P Tickets sales owed to other outlets
- And the same transaction date range - eg if you are doing for a month, then specify the month in the criteria
- The text in the journal description indicates which outlet owes whom for commissions and sales and receivables. Add them up so that:
- Your receivables (from each outlet) or ticket sales and commissions
- LESS your payables to each outlet
- -----------------------
- Result in WHAT YOU OWE EACH OTHER
- Write and checks to each other as required
- Repeat after the next period is over
Optionally - Make a Clearing entry in TheatreManager
Once you know what each outlet owes you and you owe them, we highly recommend making a manual GL clearing entry for the above 3 accounts indicating that things have been paid (i.e. create GL entries to set the balances to zero and offset the bank account with the income received or check paid). That way you will see the manual GL entry with the appropriate date on it and can see the settlement dates.
Other places with financial data
While the above is the sole process for dealing with outlet reconciliation, you can also look at events to see who's been selling them for you.
On the Sales tab, you can see the current state of affairs. Note: tickets can be refunded from other outlets so there may be days with negative numbers. And since this data can be reported on, you could use a daily sales report to see across events.
On the Revenue Tab:
Daily Change in A/R and the End Of Day
There are two reports you can be compared while performing the End Of Day to determine which event / play(s) and/or payments caused an A/R Balance to show in the End-Of-Day process,however, you need to take special care when comparing the reports and you need an understanding of their meaning.
- The first is the GL Journal Entry Summary By Account. We recommend all venues run this report on a daily basis to inform the Accounting department of the GL Transactions made by Theatre Manager. It is a complete account of all sales and payment activity entered into Theatre Manager for a period of time. An example of a GL Journal Entry Summary By Account report appears below:
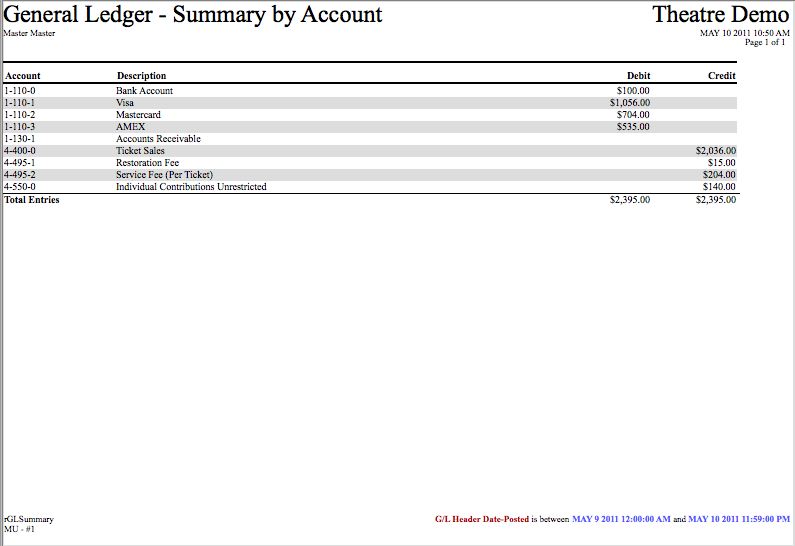
- The other report you can use is the Payment Summary - Sales Transaction Allocation report. The AR amount on the Sales Transaction report fluctuates as the days progress, as tickets are sold and payments are received. Tickets sold, but not paid for, payments taken for tickets sold previously, ticket exchanges/upgrades/downgrades, or ticket refunds affect the Daily Change in AR. Therefore the Sales Transaction Allocation report cannot be used as an accurate measuring stick for allocating sales revenue to an event / play based on the payments received. An example of the Sales Transaction Allocation report appears below:
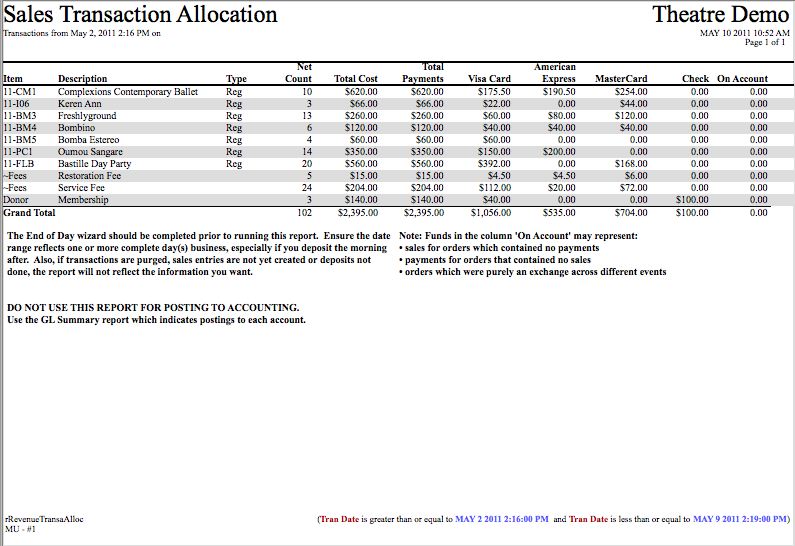
The critical piece to compare is the date - and time - range of the two reports. To do this, you need to look at the General Ledger postings to find when the last posting in the previous End of Day occurred.
- Go to the Accounting>>General Ledger>>GL Entries menu.
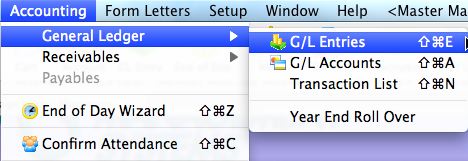
- Search for the Journal entries for a week or so prior to the last End Of Day.

- Sort the report by the Date Posted column.
Sorting will group the transactions in the order they were posted (matching each End-Of-Day process).
The listing shows the last posting of the previous End Of Day was on May 2, 2011 at 2:15 PM. The Sales Transaction report will need to start at least one minute after the last posting (2:16 PM).
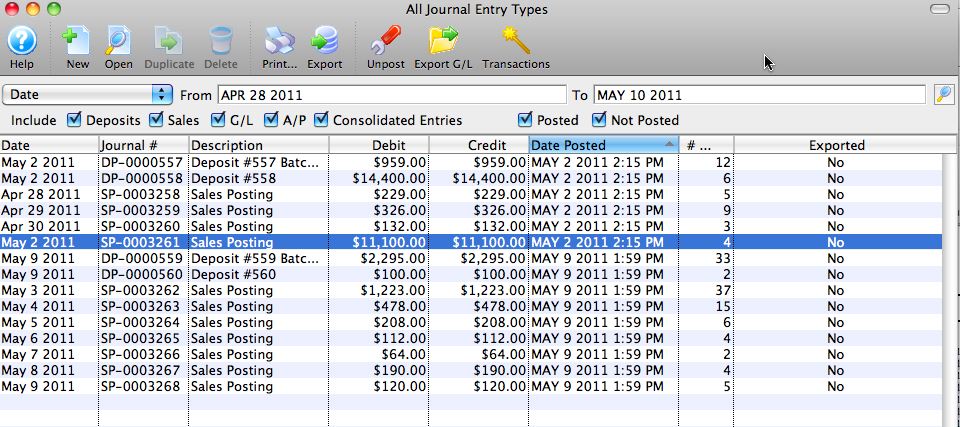
- Open the Sales Transaction Allocation report.
Enter criteria to obtain transactions from 2:16 PM (one minute AFTER the previous End Of Day).
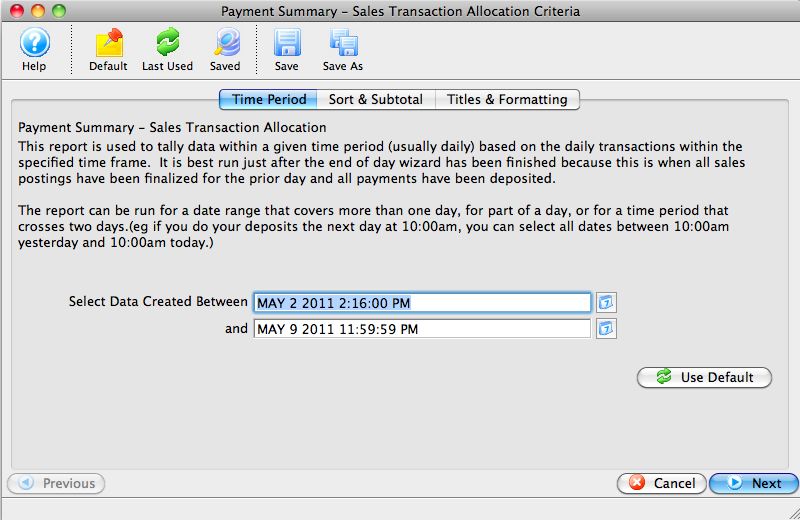
- Run the Sales Transaction Allocation report.
The Sales Transaction Allocation report will now match the GL Journal Entry Summary by Account report.
The Transaction Monitor
The Transaction Monitor displays the transactions which have taken place on the current day. Theatre Manager automatically updates the monitor every thirty seconds.
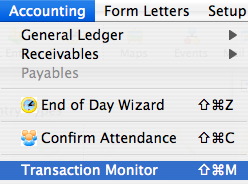
Parts of the Transaction Monitor Window
 |
This function is not available in this window. |
 |
This function is not available in this window. |
 |
This function is not available in this window. |
 |
This function is not available in this window. |
 |
Prints a copy of the information in the window. |
 |
This function is not available in this window. |
 |
Opens the Transaction window. For more information on the Transaction window, click here. |
 |
Forces an update of the data in the window immediately. |
| First Name | The first name of the employee who performed the transaction. |
| Last Name | The last name of the employee who performed the transaction. |
| Event / Play Code | The event / play code of the event that was affected. |
| Event / Play Title | The title of the event / play affected. |
| Performance | The performance the transaction occurred for. |
| Hour | The hour in which the transaction occurred. |
| Quantity | The quantity of tickets in the transaction. |
| Gross | The amount of sales of the transaction. |
| Exchange | The exchange amount of the transaction |
| Refunds | The refund amount of the transaction. |
| Donation | The donation amount of the transaction. |
| Membership | The membership amount of the transaction. |
| Total | The total of the transaction. |
| Date | The date of the transaction. |
| Time | The time of the transaction. |
| Fee | The fee associated with the transaction. |
| Campaign | The donation campaign associated with the transaction. |
| Description | A description of the transaction. |
| Seq # | The sequence number of the transaction. |
| Code | |
| Trans. Date | The transaction date. |
| Total | The total of the transaction. |
| Event / Play # | The event number associated with the transaction. |
| Performance # | The performance number associated with the transaction. |
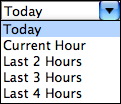 |
Selection to show the transactions for the current day, current hour or by the last two hours. |
 |
The preferred view of the transactions to be displayed in the monitor window. |
Creating G/L Entries
Theatre Manager is designed to automatically facilitate a number of the processes involved with creating and tracking postings to the General Ledger. To review these postings, the G/L Entries window can be used. For more information on the G/L Entries window, click here.
How Theatre Manager Works with the G/L
There are three types of General Ledger entries created by Theatre Manager:
- Deposit entries that summarize payments by the method of payment such as cash, check, credit card, other and custom payment types.
- Sales entries that summarize the revenue received for ticket sales (and refunds, exchanges), donations and passes, gift certificates and memberships.
- Manual entries that record periodic transactions, such as the payment of tax liabilities, corrections to reallocate revenue, year end activities and any adjustments needed to balance the A/R.
Timing for Creating Deposit and Sales Entries
Deposits and sales entries can be created at any time. The organization can create them any number of times per day. In order to balance the A/R in Theatre Manager, the two entries should be created for the same time period and at the same time.
The End of Day Wizard takes the user through this process and identifies any transactions that are out of balance. For more information on the End of Day wizard, click here. It can also be done manually using the various menu items under the accounting menu.
To simplify revenue analysis, the sales entry should be created immediately after the deposit entry.
Normally:
- The deposit and sales entry should be created daily.
- Only one sales entry is created for the same time period as the deposit.
However, a sales entry is automatically created for each revenue date since the last sales entry was created. Should the user decide not to create sales entries for a week, running the process will create a Sales Posting for each day that sales occurred in that week period.
Recommended Daily Practice
The End of Day wizard should be run at the end of each business day (or first thing the next morning) to create deposit and sales entries. To segregate daily business, the entries should be created prior to entering new sales and payments (corrections excepted). Creating the journal entries prior to entering new sales and recording payments, prevents combining deposits and sales for two periods in the same general ledger entry.
All ticketing and payment corrections and errors should be completed prior to creating a deposit or a sales entry.
To simplify analysis of the sales and deposit entries, create the minimum number of sales and deposit entries as necessary in any given day. If more than one is created, the user must remember to combine everything for that day in your search criteria before analyzing them.
Time Stamps on Transactions
Reviewing transactions for any time period is made possible by the date and time stamps that are placed on each transaction when it is created.
Time stamps are attached to transactions -- ticket sales, refunds, exchanges, and payments -- and are created at the time the transaction was entered into Theatre Manager. Time stamps identify the date and time that the transaction occurred and enable reports to summarize transactions for specific time periods.
Transactions created to "correct errors" are dated for the time they occurred. Orders, payments, refunds, or exchanges created today to correct yesterday's errors are date and time stamped today. Any amounts included in the transaction are included in the deposit and sales entries created today. Any transactions required to correct yesterdays transactions should be journalized in a sales and deposit entry prior to new sales being created. These transactions should be included in yesterdays "Deposit and Sales Analysis".
The General Ledger Entries Window
This window is accessed through the Accounting >> General Ledger >> G/L Entries menu. The window displays the transactions which have been posted to the G/L during the times defined in the search criteria.
Parts of the G/L Entry Window
 |
Begins the creation of a new general ledger entry. For more information on creating manual entries, click here. |
 |
Opens the selected entry in the G/L Entry Detail window. For more information on the G/L Entry Detail window, click here. |
 |
This function is unavailable in this window. |
 |
This function is unavailable in this window. |
 |
Prints a copy of the currently selected entry. |
 |
Exports a copy of the currently selected entry. This only exports the selected lines to a text file. For an export of the GL entry in a special accounting format, use the Export G/L button. |
 |
Exports the detail of the selected entry. For more information on using the Export G/L function, click here. |
| Clear Export GL | Resets the Exported Flag on the GL entry so that it can be exported again in the GL Accounting Export Format that is specified in Company Preferences. |
 |
For the selected G/L entry, this button can be used to
|
 |
Opens the selected entry in the Transaction History window to allow the user to see all transactions incorporated into the entry. For more information on the Transaction History window, click here. |
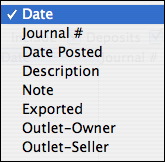 |
The search criteria options available for the window. |
| From To | The search criteria to be used for the search. |
 |
Begins the search process. |
| Include: | The types of accounts to be included in the search. Check the box next to the ones to be included. |
| Date | When the entry was added to the General Ledger. |
| Journal # | The journal number assigned to the entry. |
| Description | A brief description of the entry. |
| Debit | The amount which was debited. |
| Credit | The amount which was credited. |
| Date Posted | The date which the entry was posted. |
| # Trans | The number of transactions which the entry is composed of. |
| Exported | Notes whether the entry has been exported or not. |
Reviewing the Transactions for a General Ledger Entry
- Open the G/L Entries window.

For more information on the G/L Entries window, click here.
- Select the entry to be viewed.
For more information on finding a G/L entry, click here.
Creating Manual GL Entries
Steps to Create A Manual GL Entry
In the Main Menu, selecting Accounting -> General Ledger -> G/L Entries
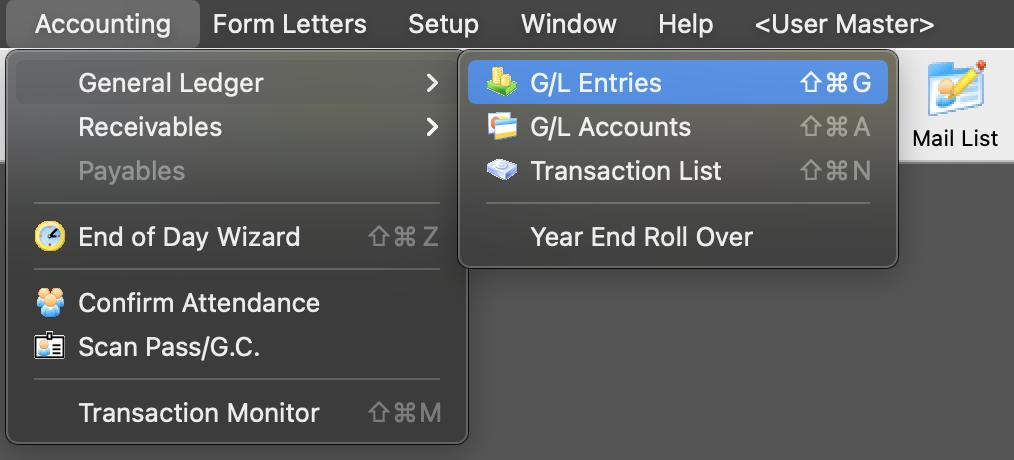
- Inside of the Journal Entry Type Window, Click the New button
- This opens up the GL Entry Detail Window. To start, enter the date you are creating the entry.
- Enter a Description for the entry.
- Enter a detailed note indicating the reason for the entry.
- Click the Save button at the top of the window. After clicking Save, the G/L Entry Detail Window will update to allow input of the actual G/L entry.
- Click the New button in the lower left corner of the G/L Entry Detail window.
- Click the account icon to the right of the Account field.
- Select the CREDIT G/L account.
- Click the Select button in the lower right corner to select the account number.
- If this GL Entry is for a specific event, use the lookup to locate the event code.
- Enter the Amount of the CREDIT.
- Click the OK button.
- Click the New button in the lower left corner of the G/L Entry Detail window.
- Click the account icon to the right of the Account field.
- Select the DEBIT G/L account.
- Click the Select button in the lower right corner to select the account number.
- If this GL Entry is for a specific event, use the lookup to locate the event code.
- Enter the amount of the DEBIT.
- Click the OK button.
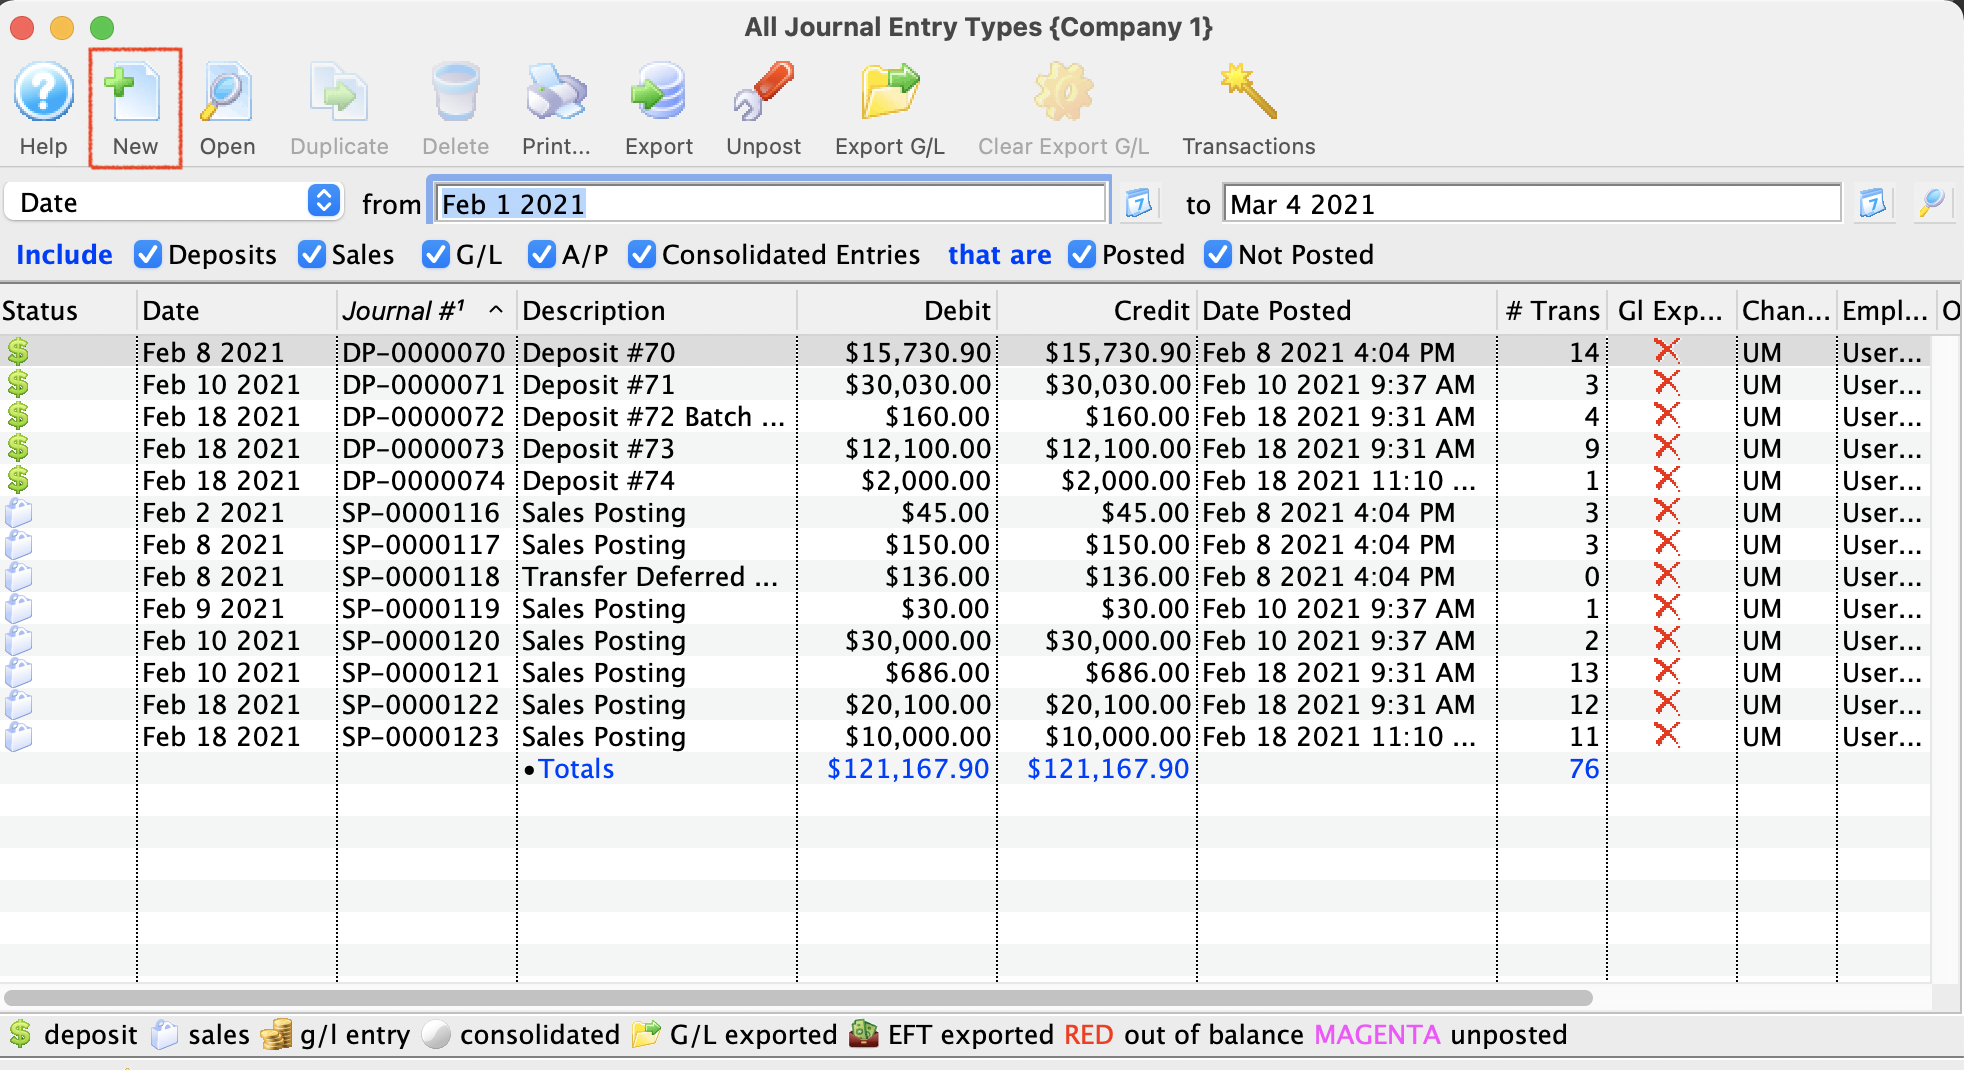
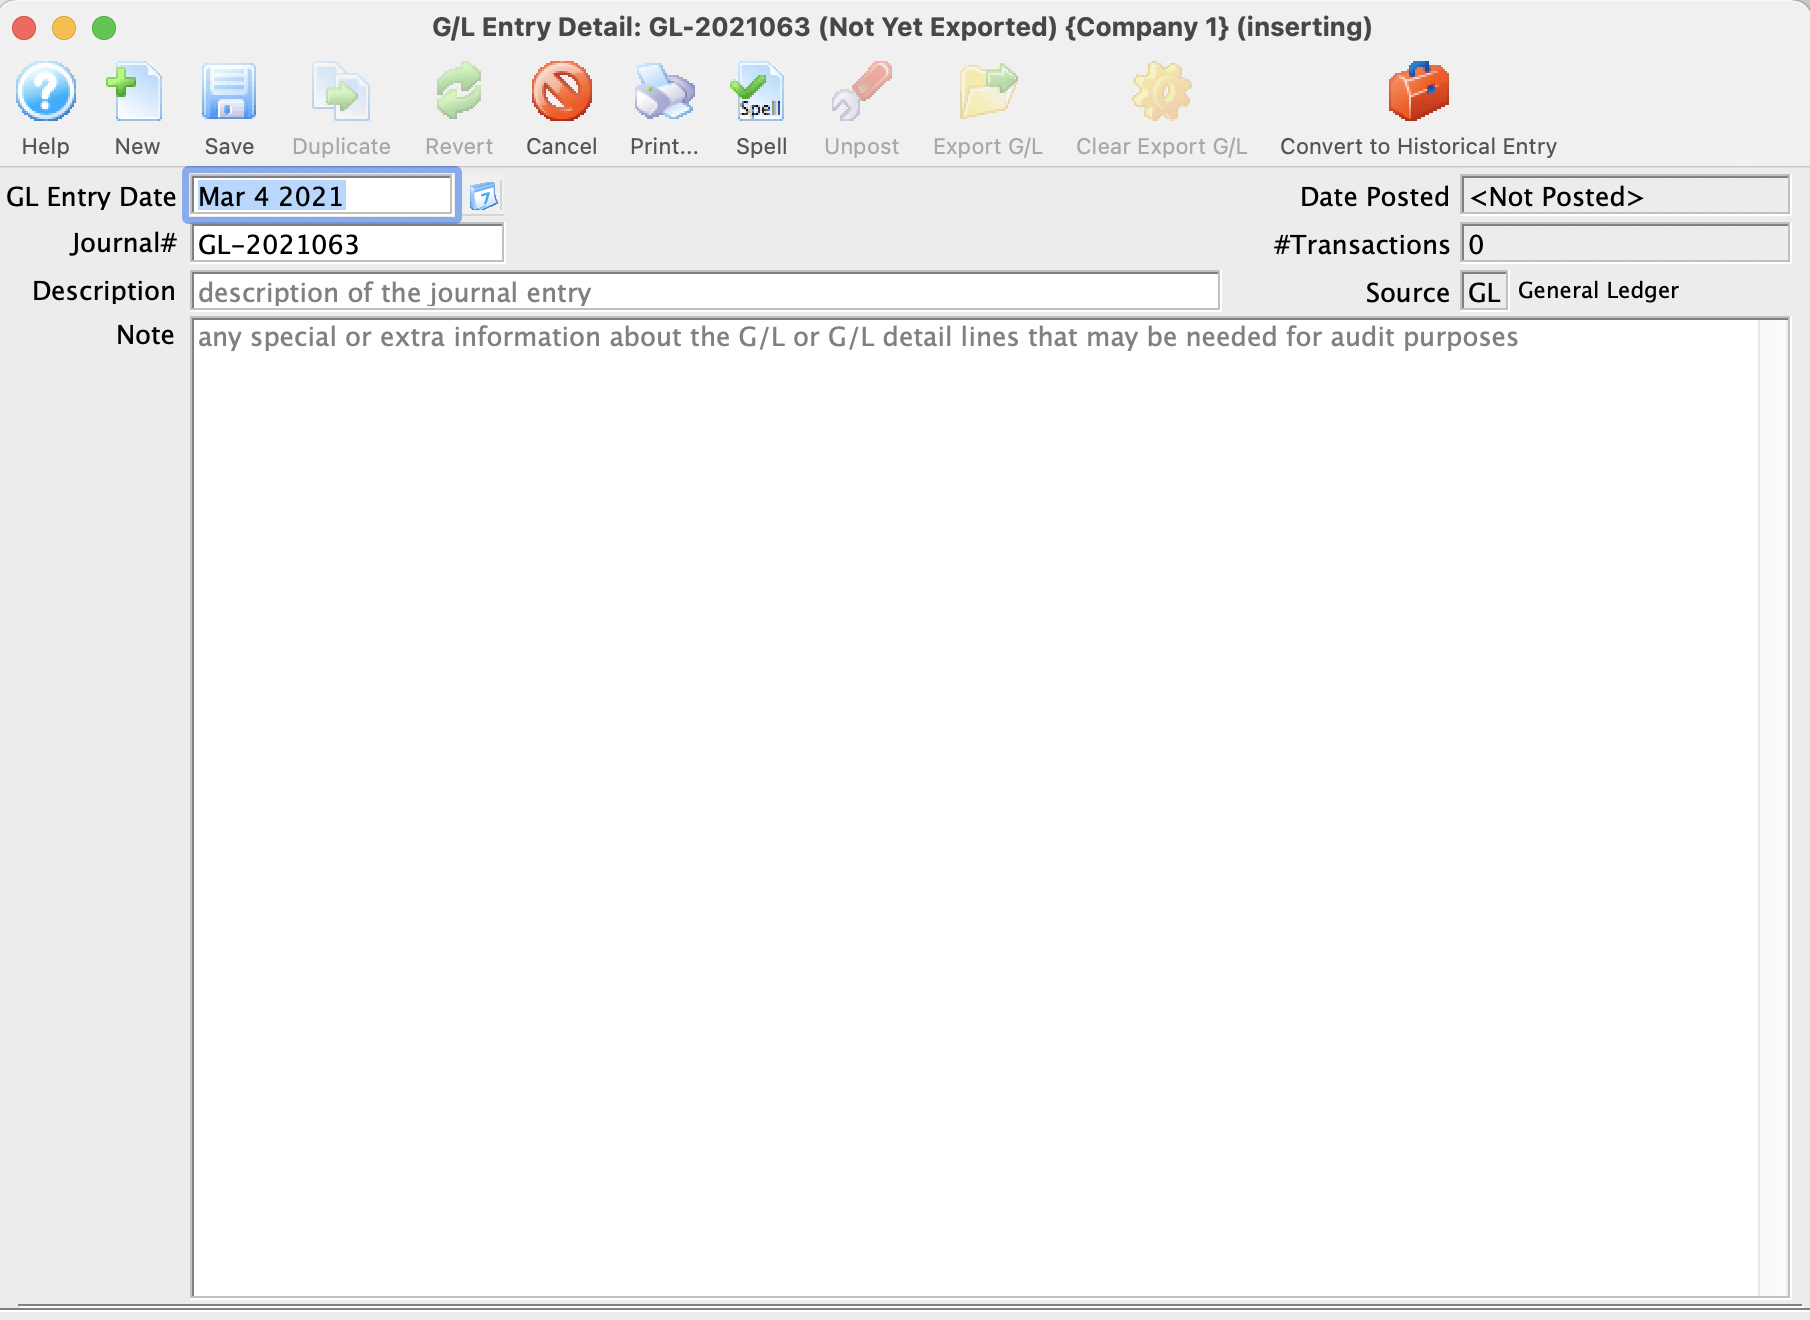
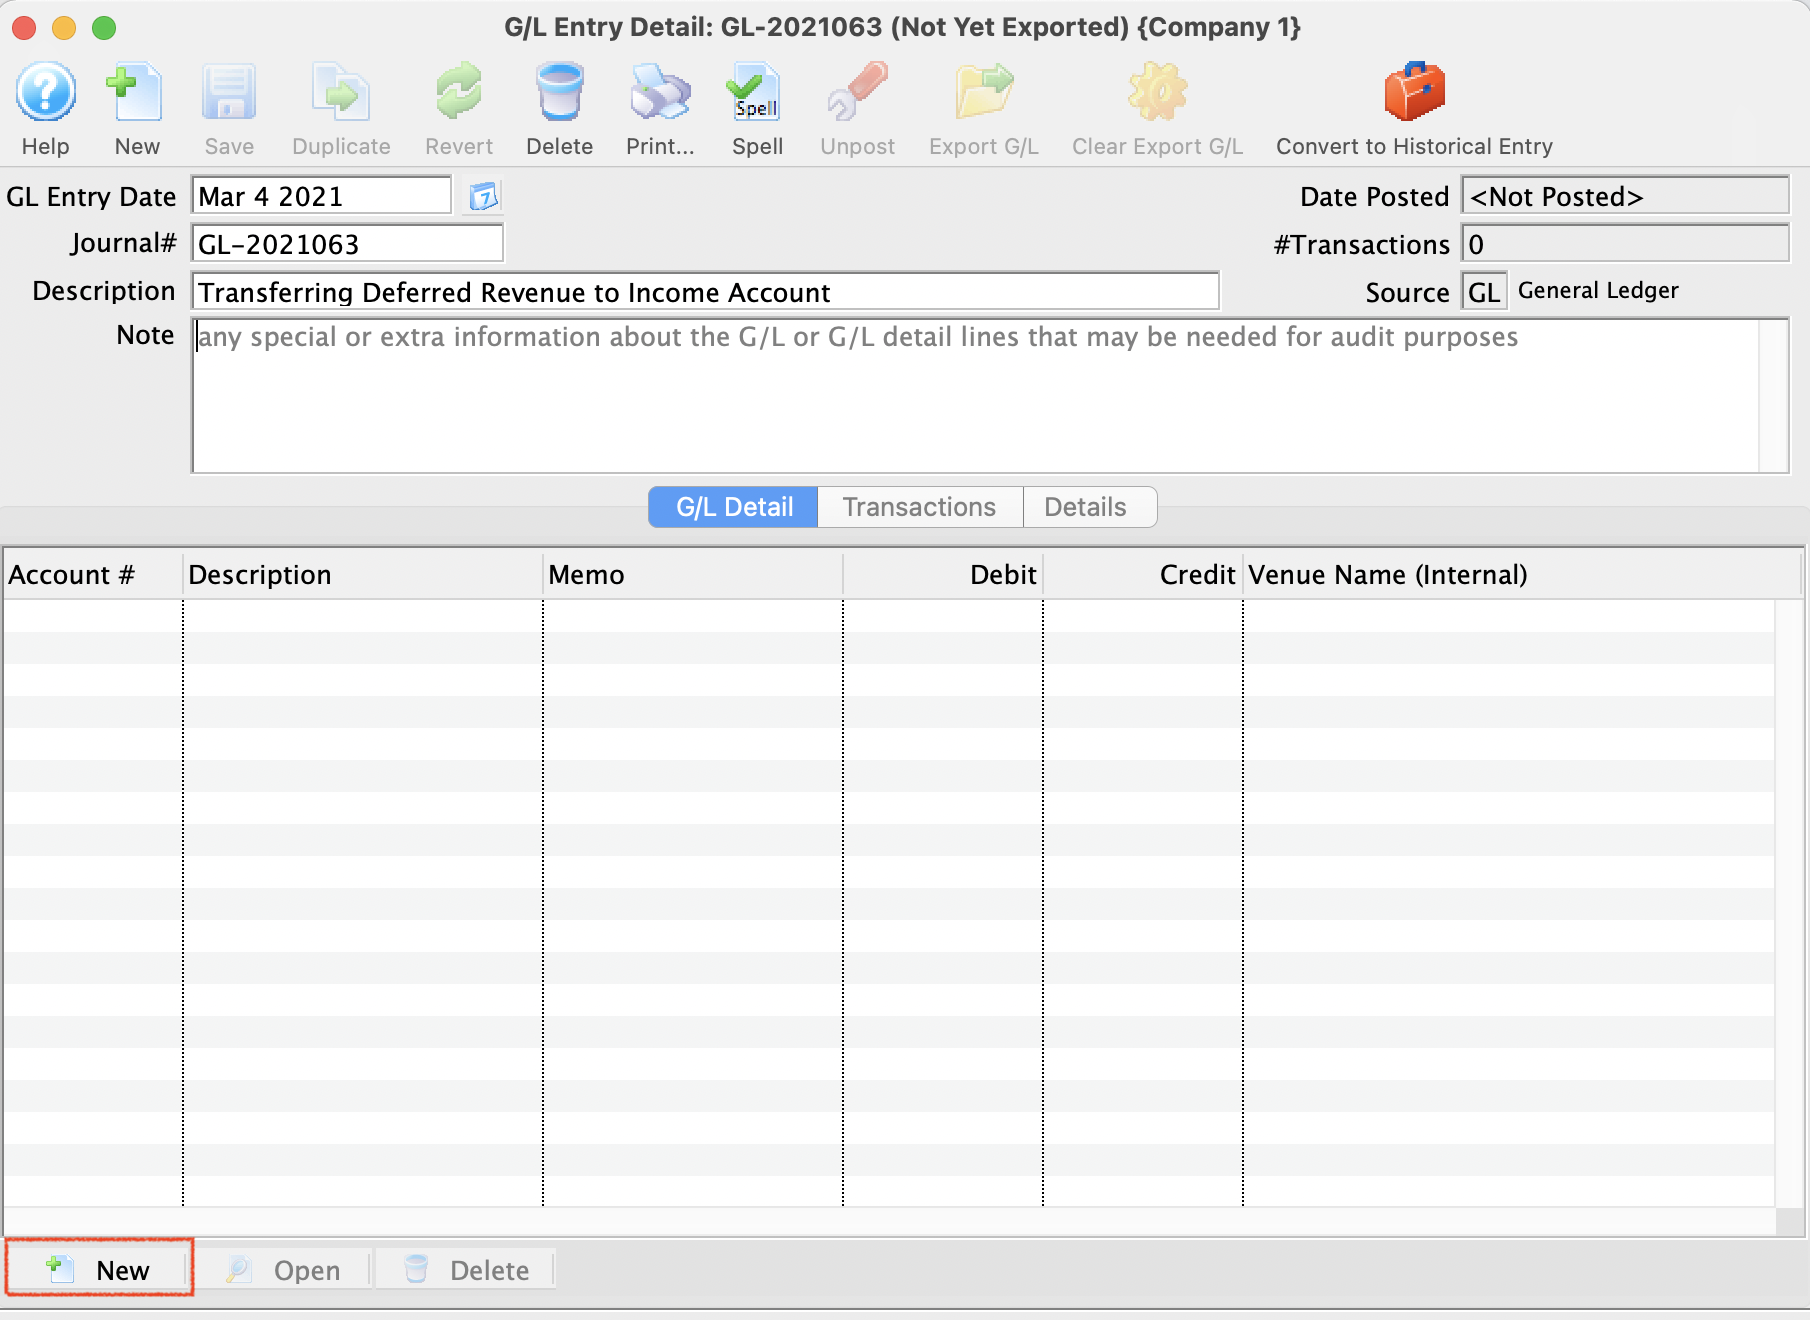
Depending on the date, the entry will be posted the next time the End of Day Wizard is run and the Post to G/L step is taken.
Inserting/Editing A G/L Entry
- The account code it will post to
- A memo code that describes the purpose of the G/L entry
- The amount
- Whether it is a debit or credit to the GL entry
There is also a tab that lets you specifically associate the G/L entry with some items in theatre manager.
For example, if the G/L entry is related to a
- ticket sale - it should have an event code and venue as part of the GL entry for tracking profit/loss by event. This helps in reconciliation of events in the GL tab. No other GL entries should have event or venue
- pass/gift certificate sale or redemption - it should have an entry under the Membership tab, which will be called whatever you names passes or gift certificates. This helps reconciliation on the G/L tab in the setup of the pass/Gift certificate. No other GL entries should have a pass number.
- anything else - should not have anything filled in either of the above fields
General Ledger Entry Detail Window
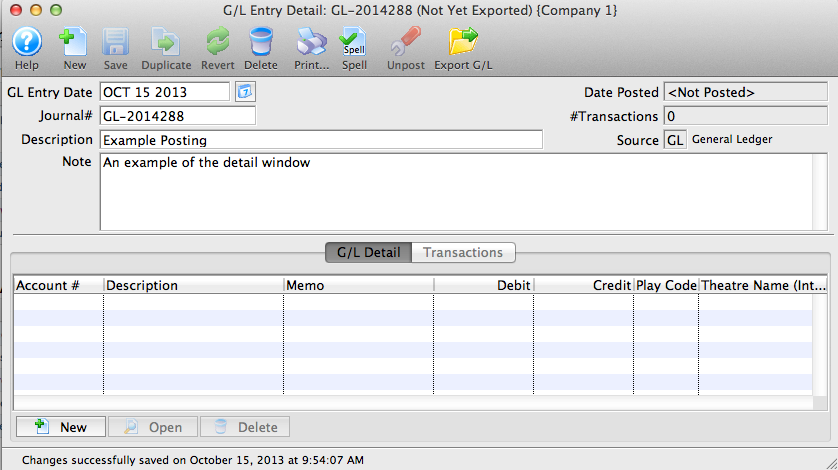
Parts of the G/L Entry Detail Window
 |
Begins the creation of a new general ledger entry. For more information on creating manual entries, click here. |
 |
Saves the general ledger entry. |
 |
Duplicates the general ledger entry. |
 |
Reverts to the last saved version of the general ledger entry. |
 |
Deletes the general ledger entry. |
 |
Prints a copy of the general ledger entry. |
 |
Checks the spelling of all text entry fields. |
 |
Reverses or unposts the currently selected entry. For more information on using the Unpost function, click here. |
 |
Exports the detail of the selected entry. For more information on using the Export G/L function, click here. |
| Convert to Historical Entry | May be used one time only if the Year End Rollover created and End Of Day imbalance |
| G/L Entry Date | The date the entry was created. |
 |
A mini-calendar for the purpose of date lookup. |
| Journal # | The journal entry number for the general ledger entry. |
| Description | A short description of the entry. |
| Note | A more detailed description of the entry. |
| Date Posted | The date the entry was posted to the general ledger. |
| # Transactions | The number of transactions included in the entry. |
| Source | The source of the entry. |
 |
The G/L Detail tab is used for adding the debits and credits to the different general ledger accounts. For more information on the G/L Detail tab, click here. |
 |
The Transactions tab is used to see all transactions that are incorporated into the entry. For more information on the Transactions tab, click here. |
G/L Entry Tab
You use the General Ledger Entry Detail window for creating new G/L entries and examining posted entries.

Parts of the G/L Entry Detail Window's G/L Detail Tab
 |
The Transactions tab is used to see all transactions that are incorporated into the entry. For more information on the Transactions tab, click here. |
| Account # | The account number used in the transaction. |
| Description | A description of the transaction. |
| Memo | The memo associated with the transaction. |
| Debit | The debit amount of the transaction. |
| Credit | The credit amount of the transaction. |
| Event / Play Code | The event / play code associated with the transaction. |
 |
Creates a new G/L transaction. |
 |
Opens the selected G/L transaction. |
 |
Deletes the selected G/L transaction. |
Entry Detail - Transactions Tab
The General Ledger Entry Detail window is used for examining posted entries.
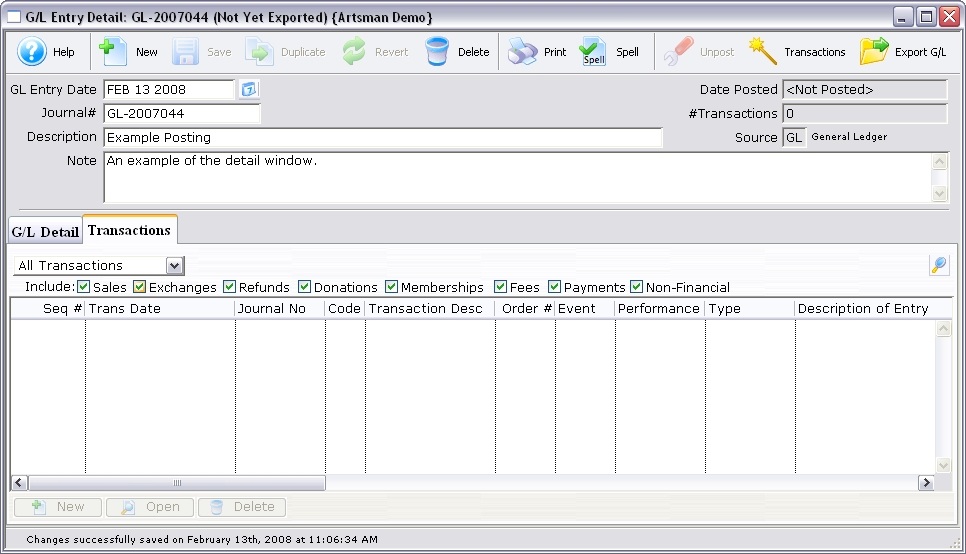
Parts of the G/L Entry Detail Transaction Tab
 |
The G/L Detail tab is used for adding the debits and credits to the different general ledger accounts. For more information on the G/L Detail tab, click here. |
 |
Begins a search of the transactions. |
| Include | The types of transactions to include. To remove a type from the search, uncheck the box next to the item. |
| Seq # | The sequence number of the transaction. |
| Trans Date | The date of the transaction. |
| Journal No | The journal number of the transaction. |
| Code | The transaction code associated with the transaction. |
| Transaction Desc | A description of the transaction. |
| Order # | The order number associated with the transaction. |
| Event / Play | The event / play associated with the transaction. |
| Performance | The performance associated with the transaction. |
| Type | The type of transaction. |
| Description of Entry | A description associated with the entry of the transaction. |
 |
This function is not available in this window. |
 |
Opens the Transaction Detail window. |
 |
This function is not available in this window. |
Creating a General Ledger Sales Entry
The Revenue Date Ending is be the last revenue date orders are to be selected for the sales entry. Orders which have been realized as revenue and have not been journalized will be selected if they are on or prior to this date. Refer to Default Data General Ledger Setup for more information on determining when an order is realized as revenue. The current date will automatically be displayed in the revenue date field.
When balancing is done the day of the sales, the date used will be the current date.
When balancing is done the day after the sales, the date used will be the previous days date -- the date the sales were entered. If correcting ticket orders caused new ticket orders, ticket exchanges, or ticket refunds, then the date used will be the current date -- when this is performed, new ticket sales that have been realized as revenue will be included in the sales entry creation.
It is recommended that if the balancing is performed the day after the ticket sales, then new ticket sales are not entered until the previous days sales are balanced. Creating the sales entry creates a general ledger entry that summarizes the sales revenue. A separate entry is created for each date which sales, exchanges, and refunds were recorded. When the entries are created daily and no corrections are made after posting, only one entry per day is created. When entries are created the day after sales, and corrections caused new orders, exchanges, or refunds to be created, two sales entries will be created for the same revenue date. One entry is created for the date of the original sale and the second entry is for the corrections entered the day after. The two sales entries must be manually combined when balancing to the deposit entry. If several days passed since the last Create Sales Entry was created, several sales entries are created, one for each day ticket activity was recorded.
- Open the Main Menu Accounting >> Create Sales Entry.

The Journal Entry Types window opens.

- Click the New
 button.
A G/L Entry Detail window opens.
- Enter a Description of the entry and a detailed Note highlighting the reason for the entry.
- Click the Save
 button.
The entry is now created.
- The GL Entry window will change to allow you to add lines to the entry.
- Click the
 button at the bottom of the entry to add debits and credits as needed.
A balanced entry will require the debits and the credits to add up to the same value. If the debits and credits do not balance it will cause the End of Day to be out of balance. The entry will need to be corrected before you can Post to the GL.
- Add the details to the G/L Account Detail
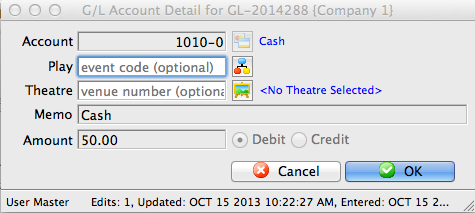
- Account: The GL Account for this Credit or Debit
- Play/Event (Optional): The Play, Event or Game that this entry applies to
- Theatre/Venue (Optional): The Theatre or Venue that this entry applies to
- Memo: A short description of why this entry is being made
- Amount: The credit or debit amount for this entry
- Debit or Credit "radio" buttons: Allows you to choose whether this is a Debit or Credit entry.
- Close the entry to save the changes.
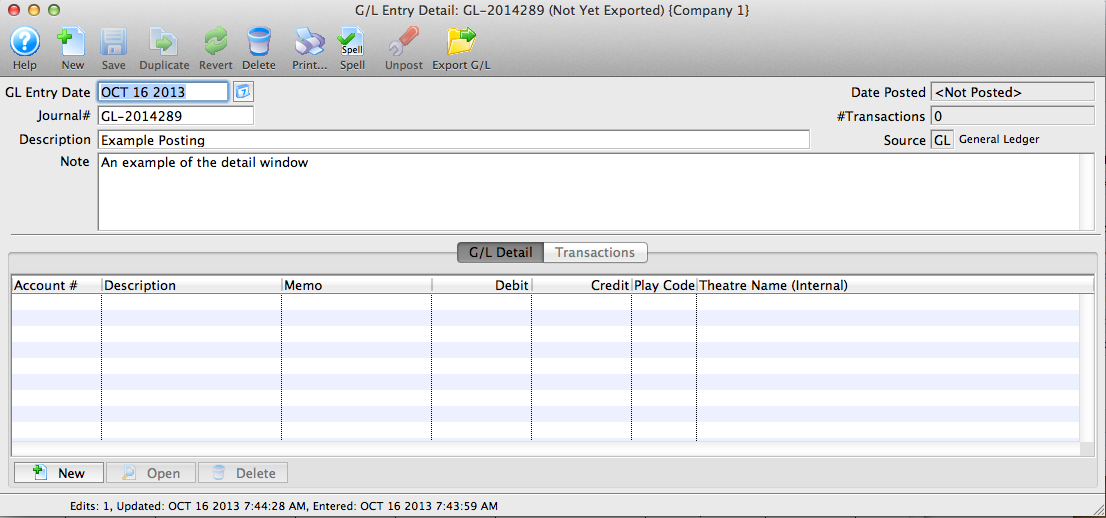
|
Note: By adding the optional Play or Venue values, the GL entry can be tagged to that specific event or venue. Therefore, you can adjust values manually, as well as calculate the revenues by Venue. This could be helpful if you wish to compare how well Venue A does, compared to Venue B. |
During the next End of Day, when the Post to GL step is done the entry will be journalized and posted.
Exporting General Ledger Entries
 |
The General Ledger data can only be exported once. The entry is flagged as being exported when it is done so no one exports it twice by mistake.
If you lose the export file, you'll need to clear the export flag using the Clear Export G/L button in the toolbar prior to exporting the entry again. |
 |
GL Entries can only be exported if they:
|
Exporting General Ledger Entries allows you to take the entries and import them into your accounting software package. They can be exported in one of two places with the same result and the export format is defined in company preferences. You can export:
- selected from the list of general ledger entries window. Only the ones you select can be exported, and only if they are not already exported
- all not-yet-exported GL entries using the export button on the final tab of the End of Day Wizard. This gives an automatic way of picking up all the latest GL entries that have been posted and its the preferred location to do the export
Exporting G/L Entries from the list
- Click the G/L Entries button at the top of the window in Theatre Manager.
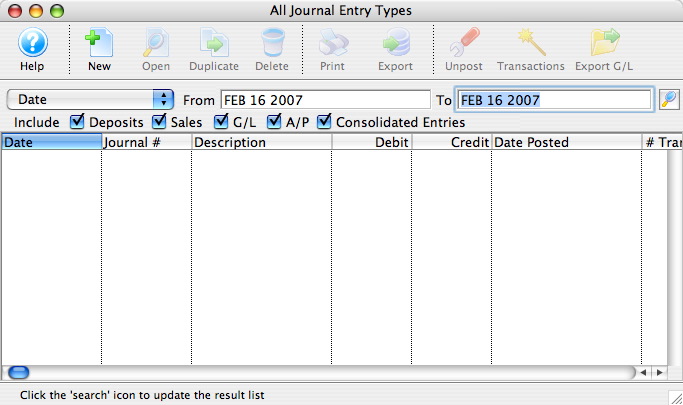
- Set the date in the To and From fields for the transactions to be exported, and click the Search
 button.
- Select the entries to be exported.
- Click the Export G/L
 button.
The user's operating system's Save dialog opens.
- Enter a filename to save the export under and click the OK button.
The file will now be saved in Tab Delimited format for import into another program. Please reference the program's help section for information on importing.

Correcting Transactions in the G/L
The Transaction Detail displays all information pertaining to a specific transaction. To view the detail of a particular transaction, select the transaction tab on a Patron's record and double click on the transaction. For more information on accessing the Patron Transaction tab, click here.
|
|
- Click the Transaction
 Tab in the patron window.
The Transaction History Record opens.

Click the Search
 button to view all transactions.
- Double clicking on the selected transaction opens the Transaction Detail window.
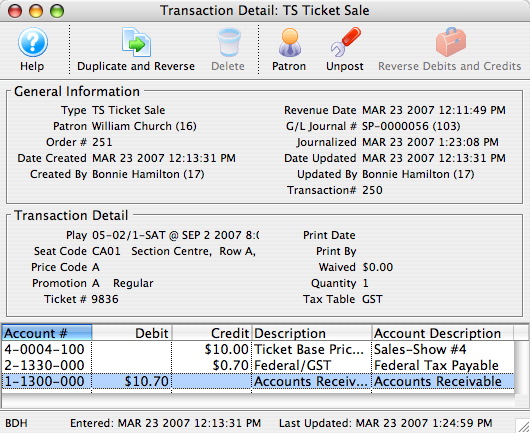
- Click Duplicate and Reverse
 button.
A transaction can be duplicated (and reversed) to make a correction to a transaction that has already been journalized to the General Ledger. The result of duplicating a transaction is an un-posted journal entry which reverses the debit or credit result of the original transaction. This un-posted journal entry will be journalized the next time an End of Day, Create Sales Entry routine is generated.
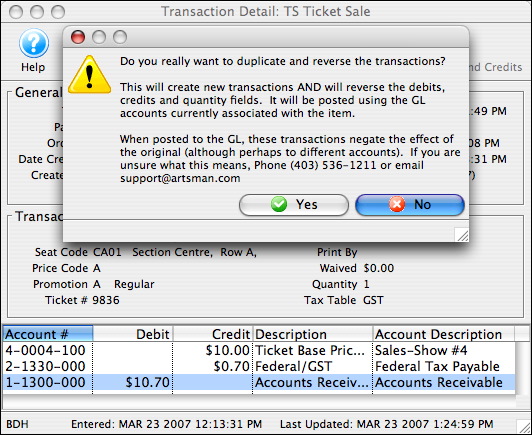
Click the No
 Button to cancel duplicating and reversing the transaction.
 - Click the
 to reverse debit or credit created in error.
You use this to correct a transaction that has been created in error and has not yet been journalized to the General Ledger resulting in a reversal of the debit or credit created by this transaction. It can only be preformed by Arts Management. This is an option rarely used.
Setting up the Chart of Accounts
The following steps are required to setup the General Ledger. If you don not compete the setup procedures, this could cause errors in posting.
- Confirm and update the credit card types in the Code Table setup.
For more information on setting up the Credit Card types, click here.
- Determine the detail required for tracking sales revenue, ticket markups, ticket discounts, ticket exchanges, and ticket refunds.
For more information on the Detail Level, see below.
- Determine the taxes that are applied to ticket sales and set the Default Data Tax controls so they are applied correctly.
For more information on the Tax Table setup, click here.
- Create or update the General Ledger accounts.
For more information on creating a general ledger account, click here.
- Enter the account numbers required for posting into the Default Data general ledger window.
- Determine when receivables are to be recorded in the General Ledger.
For more information on this setting, click here.
- Input the correct revenue account numbers into the setup windows under the Events / Plays.
Determine the General Ledger Revenue Detail Required
The Plays and Dates window has seven general ledger account number fields. These fields are used to enter account numbers from the General Ledger Chart of Accounts to direct the type of revenue received, to a specific account number. Depending on the level of detail your organization requires, you can enter separate General Ledger account numbers in each field, or the same account number could be entered in all the fields.
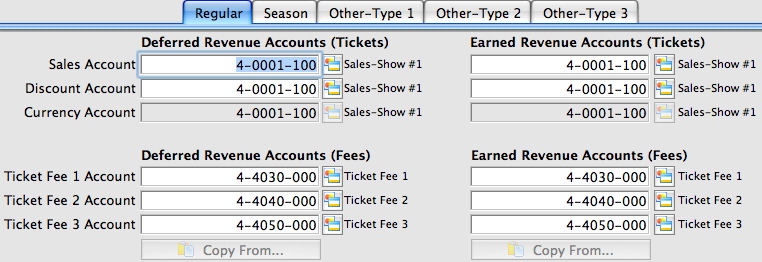
|
The number of General Ledger accounts setup depends on the detail required. |
Detailed Setup |
Simplified Setup |
|
The maximum detail is achieved when each event / play has a separate general ledger account number for sales, refunds, exchanges, markups, discounts, and service charges. The General Ledger would provide detailed information for each account. The general ledger entries created would display each revenue account affected by the transactions journalized in the entry. |
A simplified setup would use the same general ledger account number for sales, refunds, exchanges, markups and discounts. Another general ledger account number would be setup for service charges. The General Ledger Chart of Accounts would have only one revenue account. The general ledger entries created would display only one account number for all the transactions journalized for the event / play, recording all the revenue into one account. |
Chart of Accounts Window
The General Ledger Chart of Accounts contains all the accounts your organization sets up in the G/L. Both the active and inactive accounts can be displayed using the selection field at the bottom of the window.
To open the Chart of Accounts, select the Accounting >> General Ledger >> G/L Accounts menu.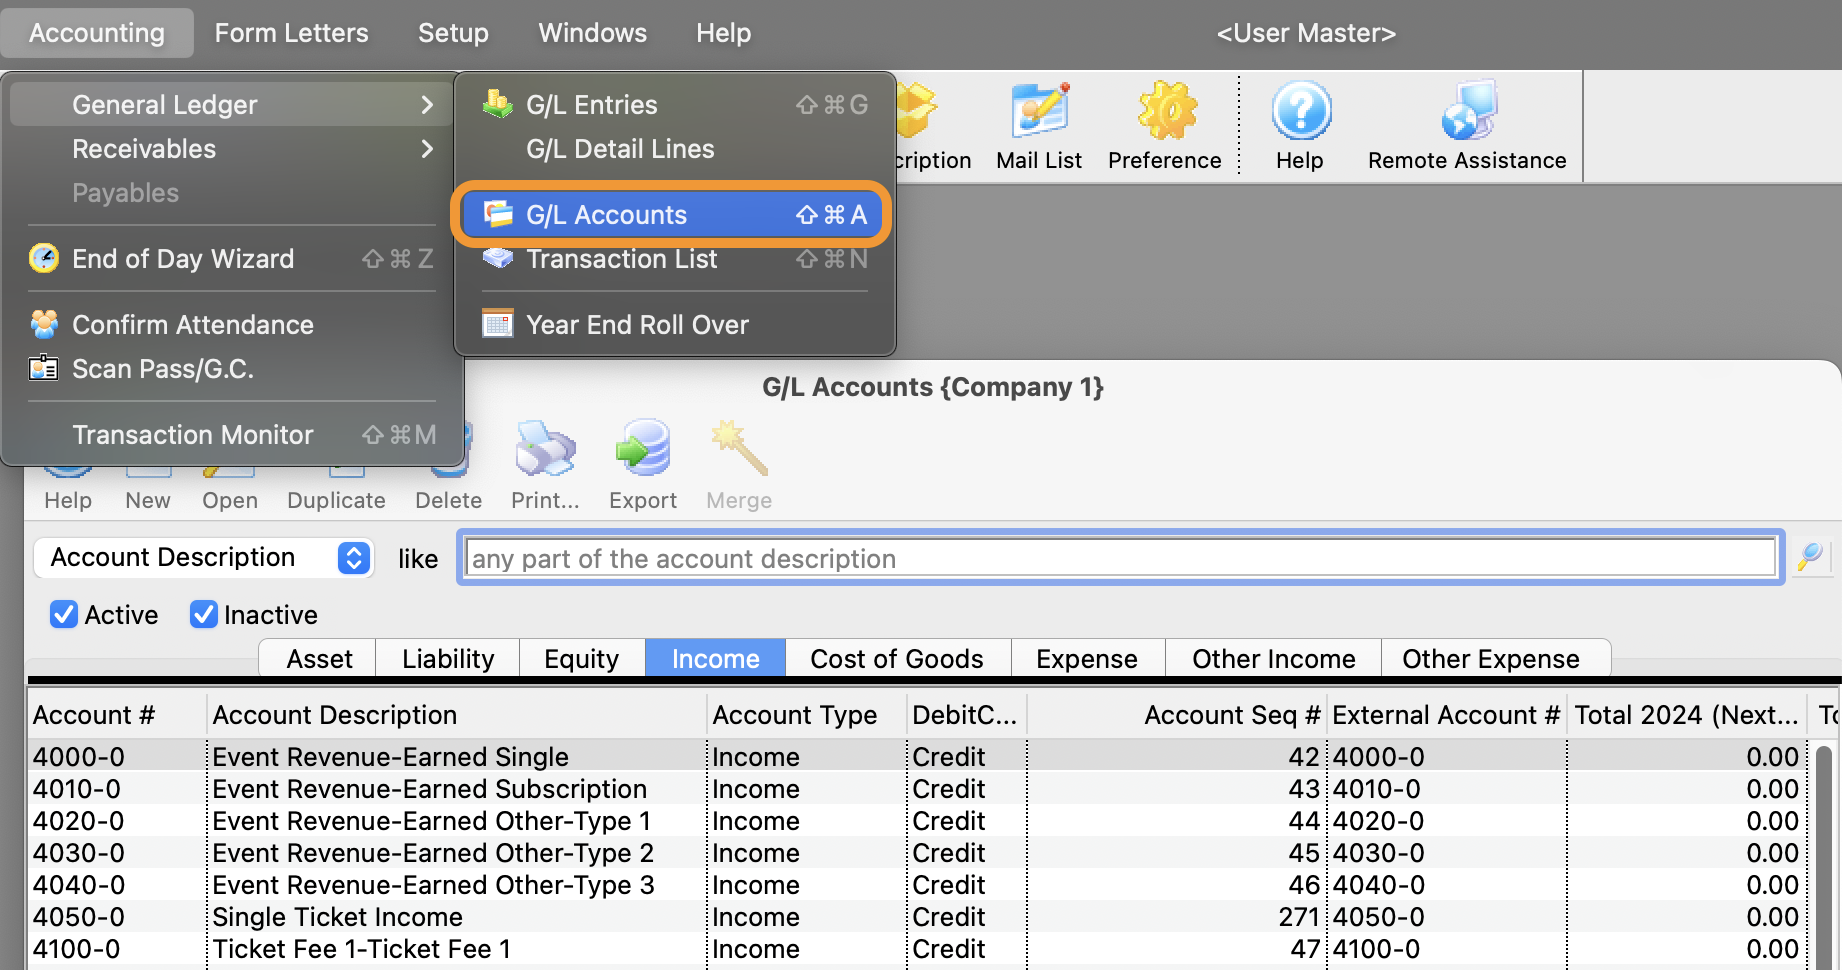
The G/L Chart of Accounts window opens.
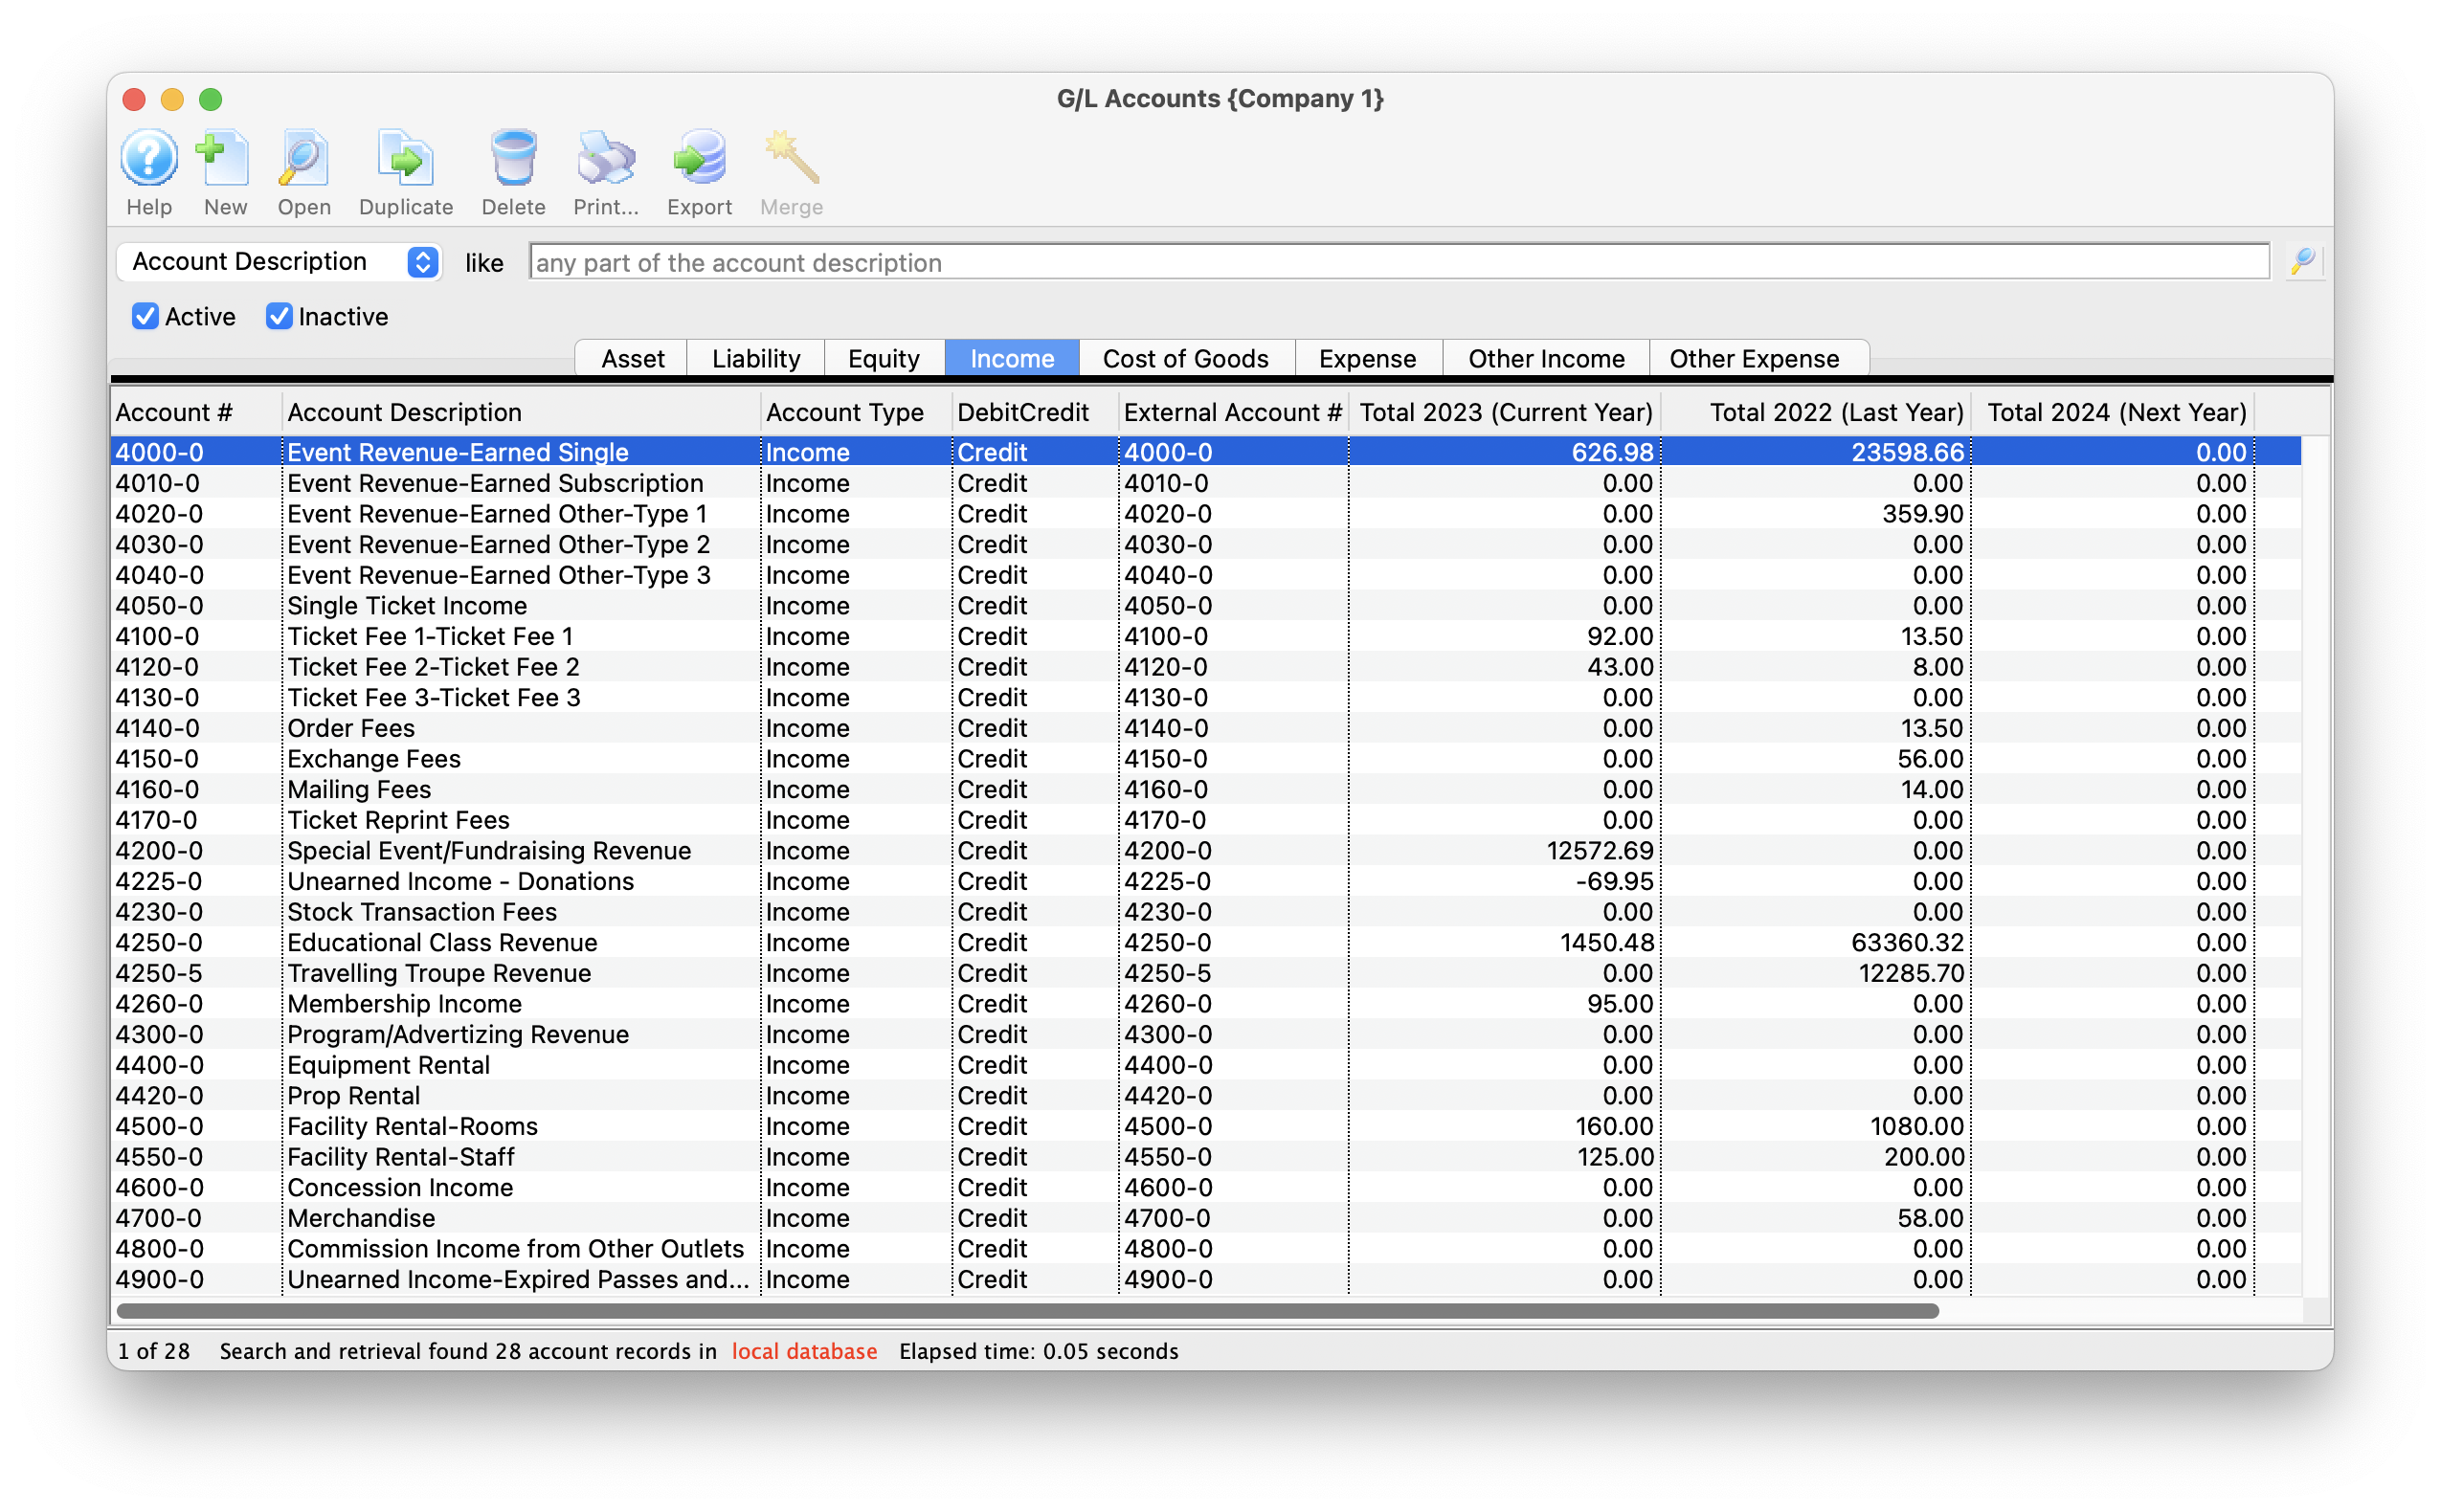
Parts of the GL Account Window
 |
Insert a New G/L Account. |
 |
Open the detail window for a G/L Account. |
 |
Create a copy a G/L Account |
 |
Delete a selected G/L Account. |
 |
Generate a report of the current list of G/L Accounts. |
 |
Export the G/L Account details. |
 |
Merges G/L Accounts (if more than 1 account is selected). |
| Asset | Displays all the accounts which have been setup as Asset Accounts. Click here to view a sample of Asset accounts. |
| Liability | Displays all the accounts which have been setup as Liability Accounts. Click here to view a sample of Liability accounts. |
| Equity | Displays all the accounts which have been setup as Equity Accounts. Click here to view a sample of Equity accounts. |
| Income | Displays all the accounts which have been setup as Income Accounts. Click here to view a sample of Income accounts. |
| Cost/Sales | Displays all the accounts which have been setup as Cost/Sales Accounts. Click here to view a sample of Cost/Sales accounts. |
| Expense | Displays all the accounts which have been setup as Expense Accounts. Click here to view a sample of Expense accounts. |
| Other Income | Displays all the accounts which have been setup as Other Income Accounts. Click here to view a sample of Other Income accounts. |
| Other Expense | Displays all the accounts which have been setup as Other Expense Accounts. |
| Account # | The eight digit account number of the account. |
| Description | The description of the account which is viewed on reports and any general journal entries which involve the account. |
| Level | The report level of the account. This feature is a future enhancement of Theatre Manager meant to represent indenting on the reporting and sub total levels. In other words, if something is at level 1, it is a grand total, Anything that is a 2 and under is accumulated into the grand total. |
| Type | The type of account either Detail or Posting. This is another future enhancement of Theatre Manager used to designate whether the account is a detail account or a posting account when printing summary level reports. |
| Debit/Credit | If the account is a Debit or Credit Account. |
| Posting | If the account is posted to the General Ledger |
| Active | If the account is set as active or inactive. |
G/L Account Detail
The account detail window is accessed by opening the G/L Chart of Accounts and double clicking on an account or when inserting a new account.

Parts of the Account Detail Window
 |
Saves the current general ledger account. |
 |
Creates a duplicate of the current general ledger account. |
 |
Reverts to the last saved version of the general ledger account. |
 |
Deletes the general ledger account. If there are transactions associated with the account, it cannot be deleted. |
 |
Prints the information in the general ledger account. |
 |
Checks the spelling in all text entry fields in the window. |
| Account Type | Designates whether the account is a detail account or a posting account when printing summary level reports. Available for future enhancement. Not used at this time. |
| Account Number | An account consists of numbers and dashes. The dashes are typically a place holder (eg. 0-0000-000). The format of the numbers is controlled within the Accounting tab of Company Preferences. The first digit corresponding to the type of account. For more information on Account Types, see below. |
| External Account | External Account is a 50 character alpha-numeric field that will accommodate systems with longer account numbers or ones which include letters. When printing reports or exporting, the external account number will print or be visible. For use specifically with the Banner financial package and similar. Clients who do not need this longer field can simply duplicate the internal account number here. Information about the different export formats can be found here. |
| Description | Description allows the account to be named. The account number and descriptions are displayed on reports and on any general journal entries that affect the account. The more detail used to explain the account, the more easy reports will be to read. |
| Status | Used to indicate that the account is in use. If accounts are retired, or no longer required, it may be unchecked. |
 |
The Setup tab deals with general information settings for the general ledger account. For more information on the Setup tab, click here. |
 |
The Monthly Totals tab shows a breakdown of the monthly totals for the general ledger account. For more information on the Monthly Totals tab, click here. |
 |
The Yearly Totals tab shows a breakdown of the yearly totals for the general ledger account. For more information on the Yearly Totals tab, click here. |
 |
The G/L Entries tab shows transactions that are associated with the general ledger account. For more information on the G/L Entries tab, click here. |
Account Types
| Type of Account | First Number |
| Asset | 1 |
| Liability | 2 |
| Equity | 3 |
| Income | 4 |
| Cost of Sales | 5 |
| Expenses | 6 |
| Other Income | 8 |
| Other Expenses | 9 |
The next four numbers indicate the account number. The last three digits are for a feature of the account.
Play revenue accounts can be created so that the account number indicates the play and the feature indicates the type of revenue (sales, exchange, refunds, markup or discounts).
Try to harmonize the numbers to match the account numbers used in your existing accounting system.
G/L Account Detail Setup Tab
The account detail window is accessed by opening the G/L Chart of Accounts and double clicking on an account or when inserting a new account.
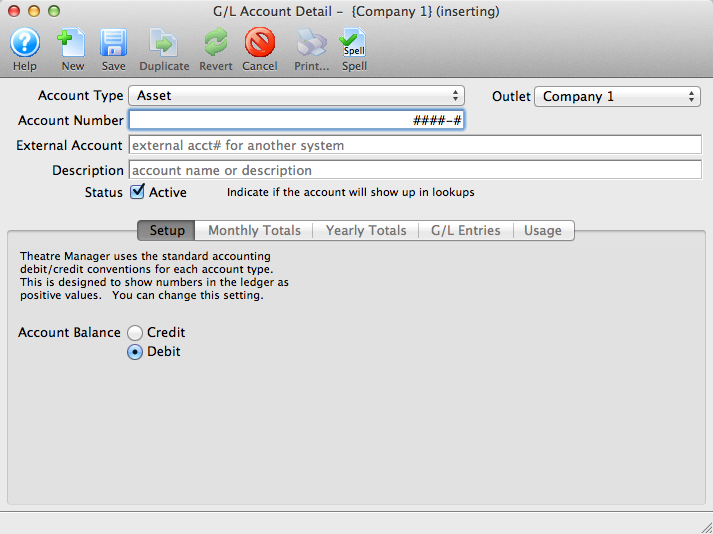
Parts of the Account Detail Setup Tab
- Account Type indicates if the GL account is to be an Asset, Liability, Equity, Income, Cost of Goods Sold, Expense, or Other Income/Other Expense type.
- Account Number is the GL Account Number that will be assigned to this account.
- External Account gives you the opportunity to display a longer GL account number for reporting. This field is alpha-numeric.
- Description is the common name of the GL Account. This, in conjunction with the Account Number will appear on reports.
 |
The Monthly Totals tab shows a breakdown of the monthly totals for the general ledger account. For more information on the Monthly Totals tab, click here. |
 |
The Yearly Totals tab shows a breakdown of the yearly totals for the general ledger account. For more information on the Yearly Totals tab, click here. |
 |
The G/L Entries tab shows transactions that are associated with the general ledger account. For more information on the G/L Entries tab, click here. |
| Account Balance | Depending on the account type selected, Theatre Manager will using standard accounting conventions to determine in the account should be a Credit or a Debit. |
G/L Account Detail Monthly Totals Tab
The account detail window is accessed by opening the G/L Chart of Accounts and double clicking on an account or when inserting a new account.
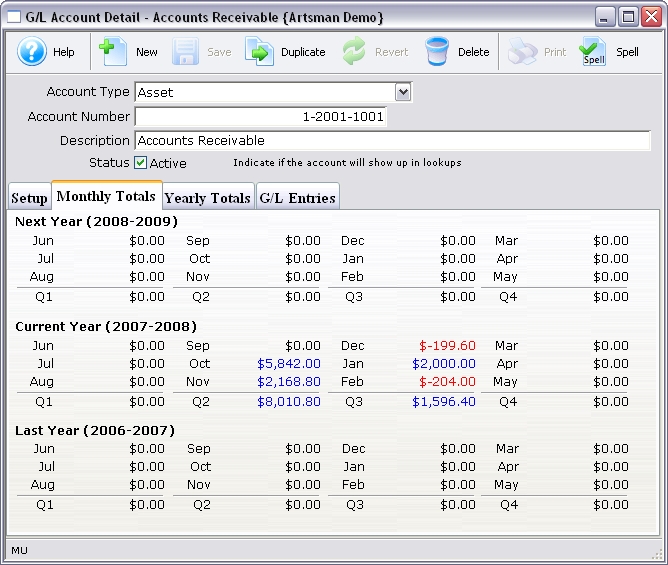
Parts of the Account Detail Monthly Totals Tab
 |
The Setup tab deals with general information settings for the general ledger account. For more information on the Setup tab, click here. |
 |
The Yearly Totals tab shows a breakdown of the yearly totals for the general ledger account. For more information on the Yearly Totals tab, click here. |
 |
The G/L Entries tab shows transactions that are associated with the general ledger account. For more information on the G/L Entries tab, click here. |
| Next Year | This area shows the account details for the Next Year prior to Year End Roll Over. |
| Current Year | This area shows the account detail for the current year divided into four quarters. |
| Prior Year | The same as the current year but the totals are for the prior year. |
G/L Account Yearly Totals Tab
The account detail window is accessed by opening the G/L Chart of Accounts and double clicking on an account or when inserting a new account.
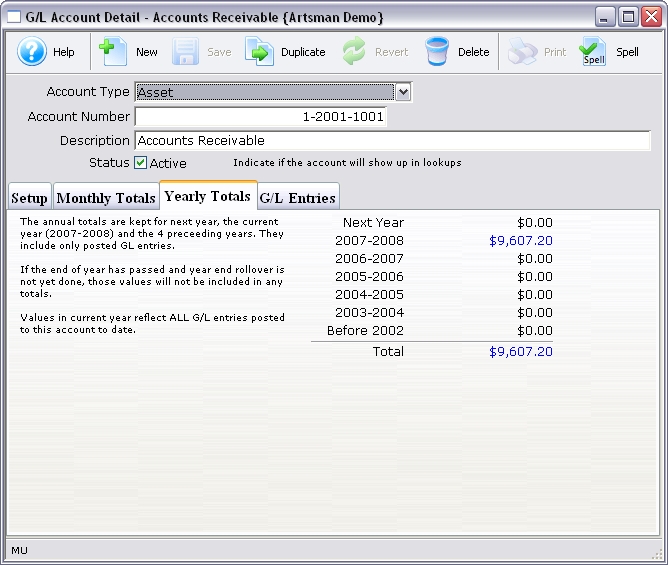
Parts of the Account Detail Yearly Totals Tab
 |
The Setup tab deals with general information settings for the general ledger account. For more information on the Setup tab, click here. |
 |
The Monthly Totals tab shows a breakdown of the monthly totals for the general ledger account. For more information on the Monthly Totals tab, click here. |
 |
The G/L Entries tab shows transactions that are associated with the general ledger account. For more information on the G/L Entries tab, click here. |
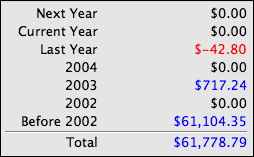 |
A brief summary of the account details for the past five years and the total for those years. |
G/L Account Detail G/L Entries Tab
If you select a number of rows on the GL detail or transaction tabs, Theatre Manager will summarize the totals for you.
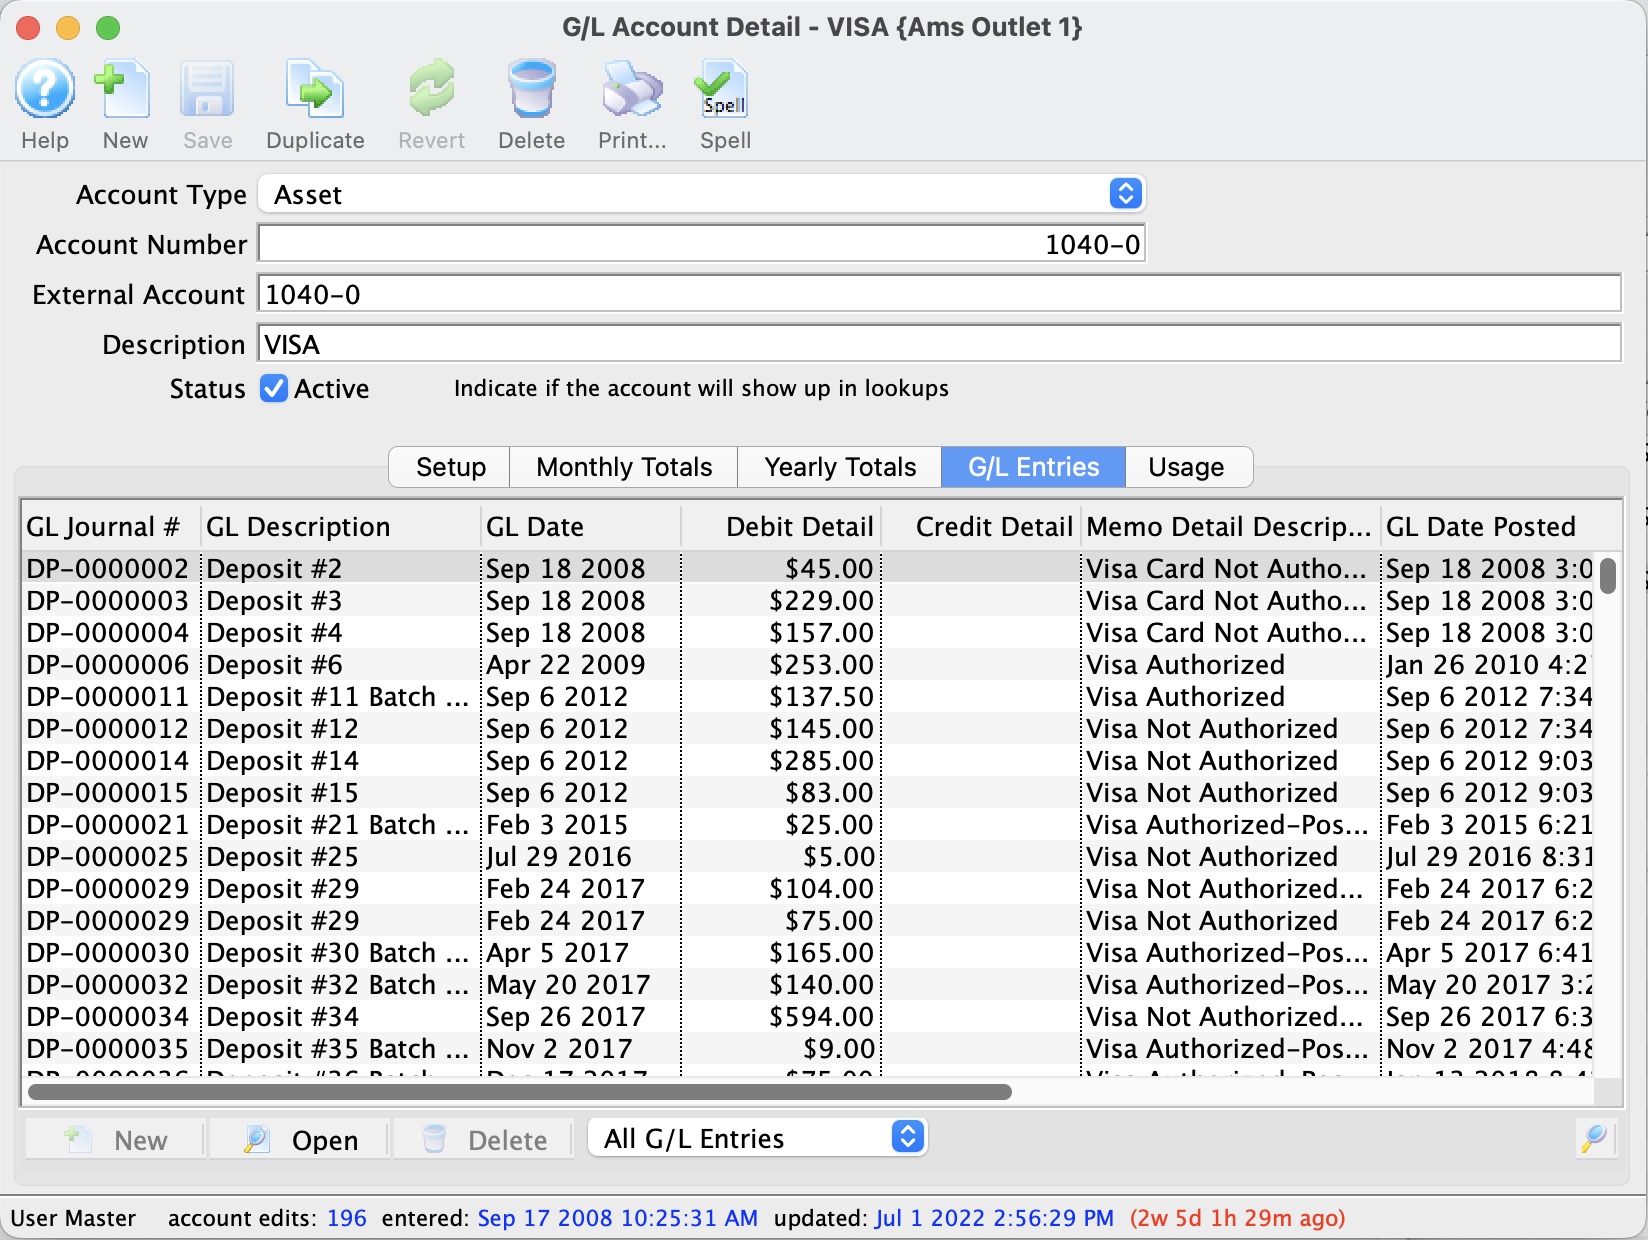
Parts of the Account Detail G/L Entries Tab
 |
The Setup tab deals with general information settings for the general ledger account. For more information on the Setup tab, click here. |
 |
The Monthly Totals tab shows a breakdown of the monthly totals for the general ledger account. For more information on the Monthly Totals tab, click here. |  |
The Yearly Totals tab shows a breakdown of the yearly totals for the general ledger account. For more information on the Yearly Totals tab, click here. |
 |
Choose from the the drop down the type of entries for viewing |
| Journal # | The Journal number generated when the entry was created |
| Description | Brief description outlining the reason for the entry |
| Date | Date the entry was created |
| Debit | Amount debited to the G/L account |
| Credit | Amount credited to the G/L account |
| Memo | Details about the nature of the entry |
G/L Account Usage
- events
- fees
- donation campaigns
- resources
- taxes
- default posting accounts
Double click on any row to see the detail window containing the posting account. The first example shows what one might expect for a normal setup,
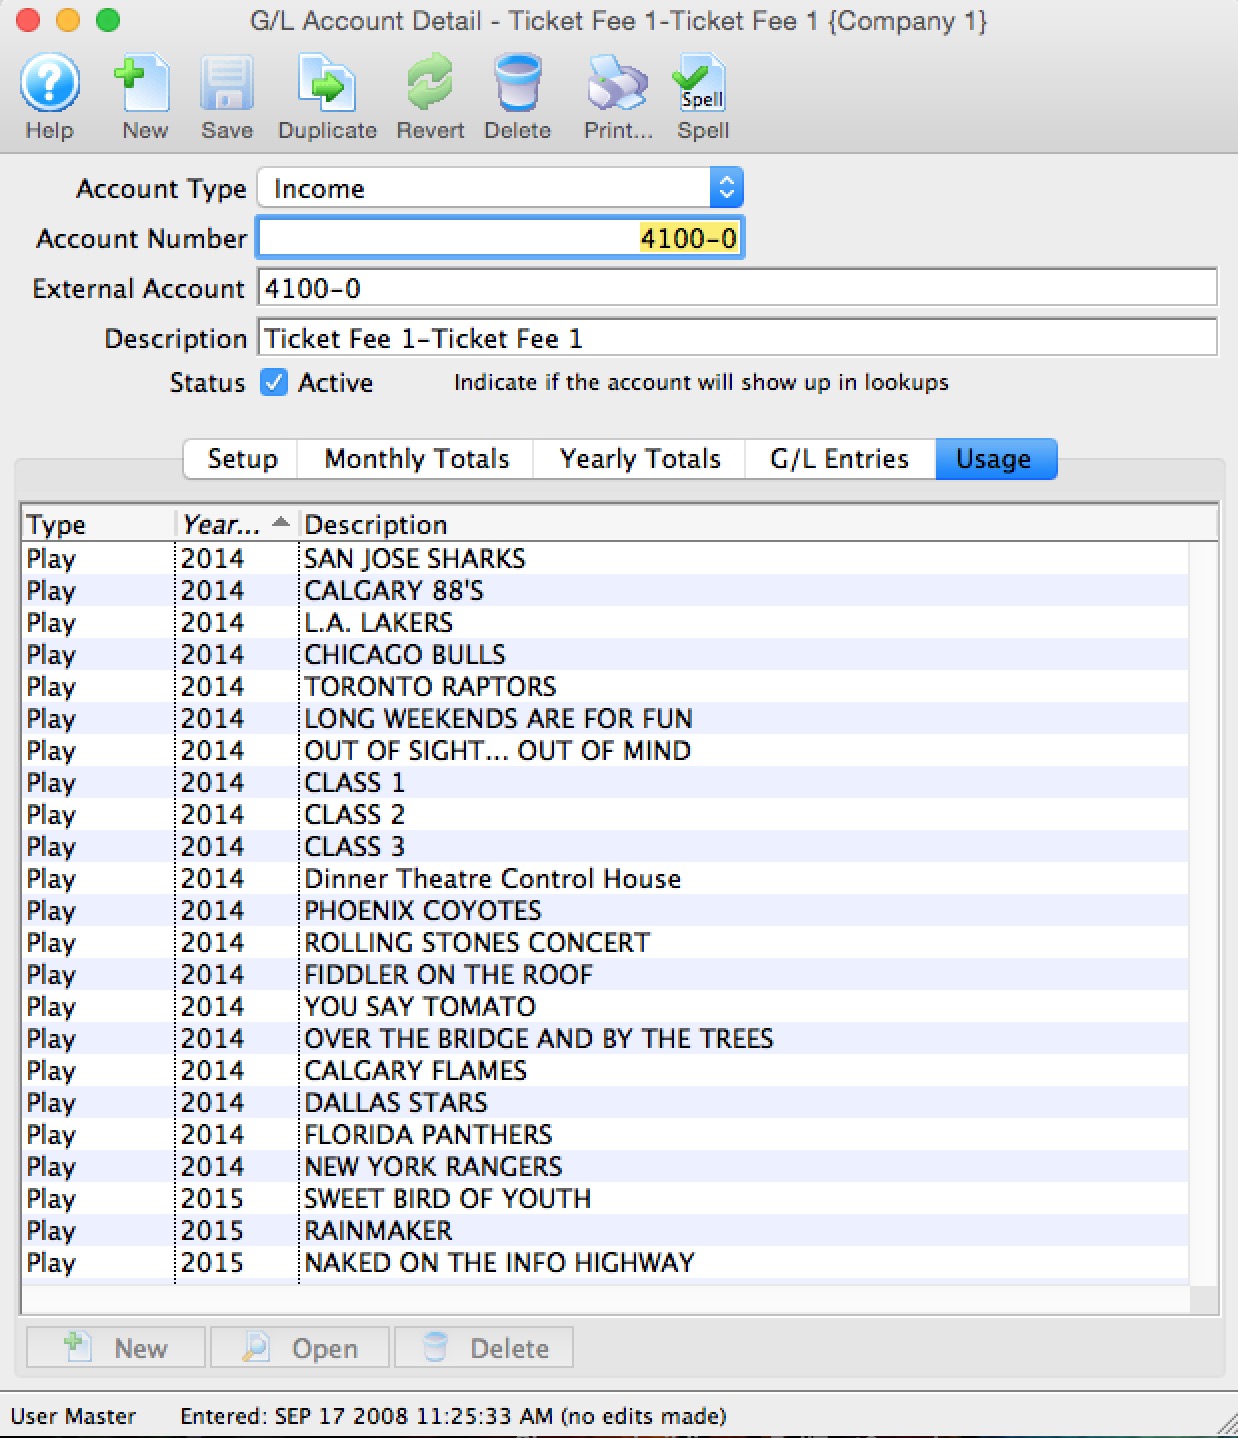
This second example shows that events are being posted to a tax account, which may assist showing why things are getting into an account that you didn't expect.
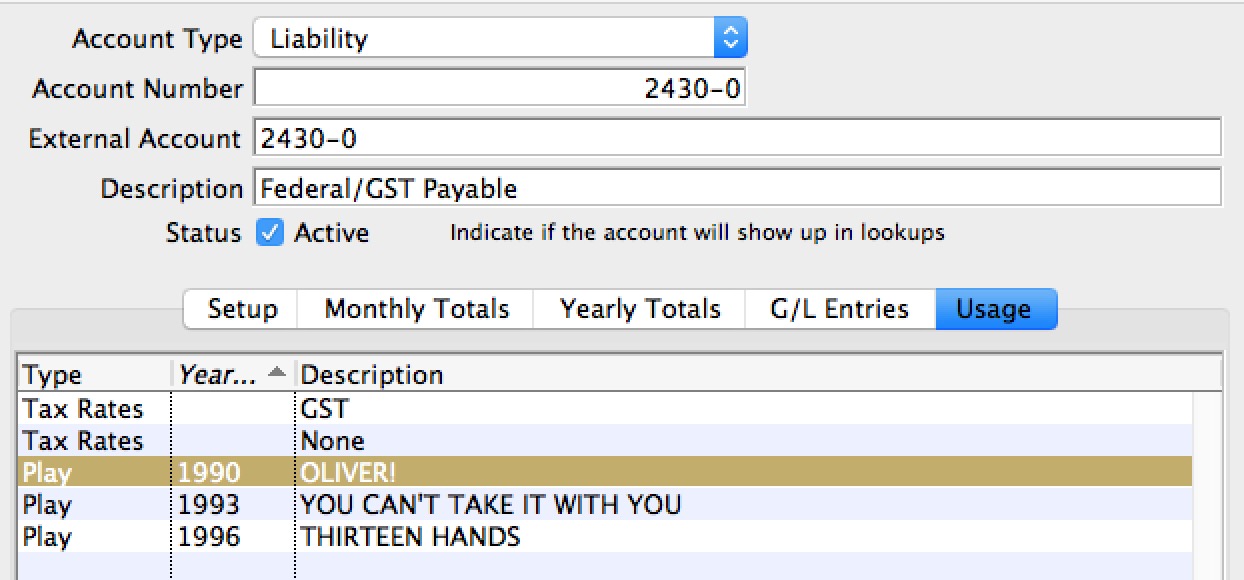
Setting up General Ledger Accounts
- Access to the Chart of Accounts is through the Accounting menu.
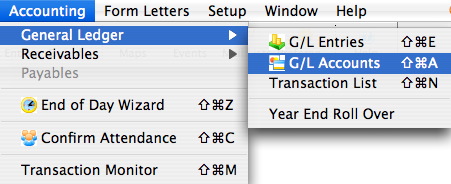
The G/L Accounts window opens.
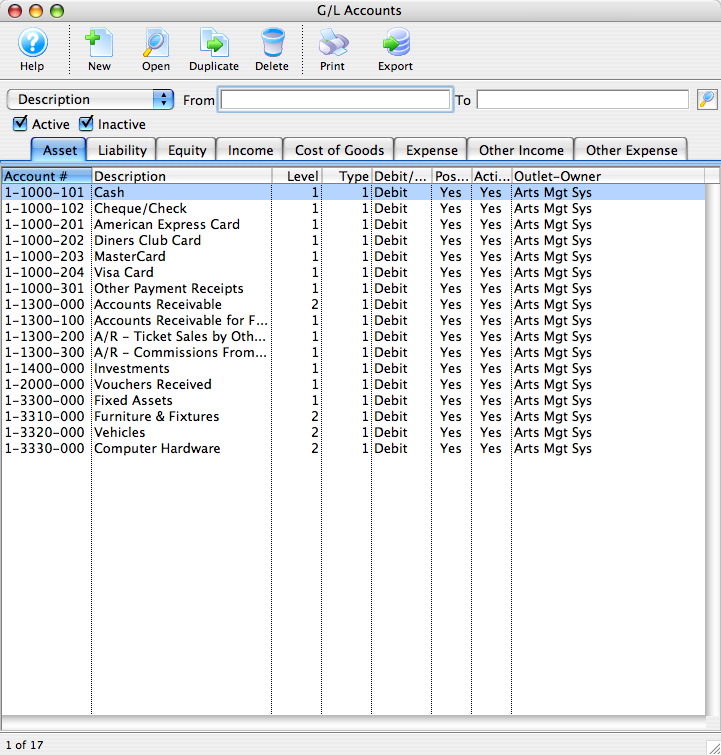
Merging G/L Accounts

- change it to the first account
- Aggregate any totals into the new account
it could take a long time, especially if the account you are merging from has a lot of transactions (eg it was used for a play). Always try to merge into the most used account, and if you need to afterwards, rename/renumber the account you combined things into.
Accounts must be of the same type to merge them. Eg, you can only merge an asset account into an asset account, an income account into an income account, etc. Since is possible to change some account types (eg you can change liability to income). If you wish to merge disparate account types, then change the account type first.
Deleting General Ledger Accounts
|
Only accounts which have not been used in a transaction may be deleted. |
For information on inactivating a G/L Account, click here.
- Find the account to be deleted.
For more information on finding a G/L Account, click here.
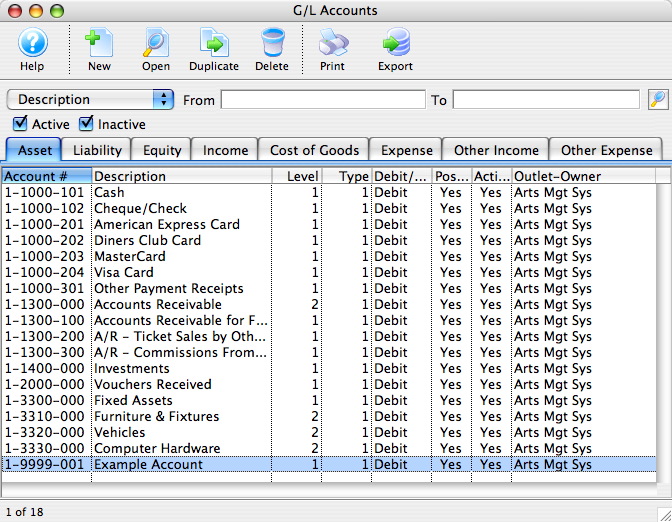
- Click the Delete
 button.
If the account has been used for a transaction the following message will appear.
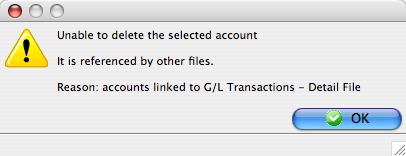
If the account has not been used then the following message will appear.
- Click the
 button to confirm.
The account will be removed and a deletion confirmation will appear at the bottom of the window.
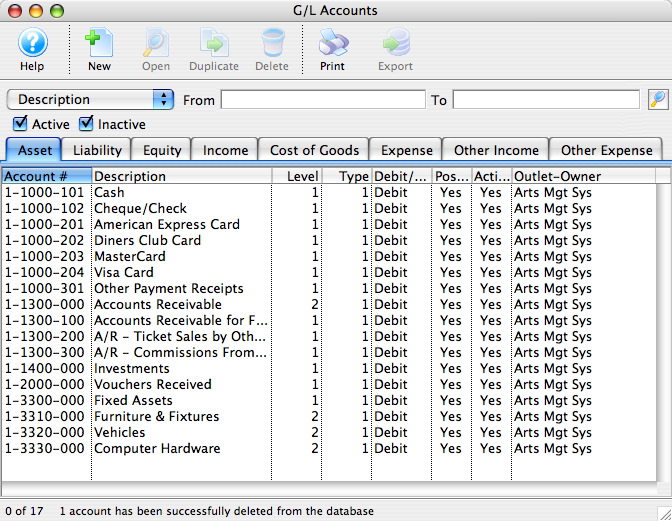
Determine the Chart of Accounts
Creating the Chart of Accounts requires understanding how the General Ledger will be used to generate information. For more information, refer to the sample Chart of Accounts by clicking here.
Minimum General Ledger Accounts
The suggested minimum number of General Ledger Account numbers are outlined in this table. The organization may choose to operate with fewer or more accounts.
|
Minimum General Ledger Accounts |
Type of Account |
|
Cash |
Asset |
|
Check |
Asset |
|
Accepted Credit Cards |
Asset |
|
Vouchers Received |
Asset |
|
Other Payments |
Asset |
|
Accounts Receivable |
Asset |
|
Accounts Receivable - Future Payment |
Asset |
|
Accounts Receivable - Outlet |
Asset |
|
Accounts Payable |
Liability |
|
City/Municipal Tax Payable - If this tax is collected |
Liability |
|
Provincial/State Tax Payable - If this tax is collected |
Liability |
|
Federal Tax Payable - If this tax is collected |
Liability |
|
Prepaid Gift Certificates |
Liability |
|
Deferred Donation |
Liability |
|
Commissions Payable |
Liability |
|
Order Fees |
Revenue |
|
Exchange Fees |
Revenue |
|
Reprint Fees |
Revenue |
|
Mail Fees |
Revenue |
|
Sales Account for Each Event |
Revenue |
|
Cash Over/Under |
Expense |
|
Donation Bank Transfer |
Expense |
|
Bank Service Charges |
Expense |
|
Donations |
Other Income |
Required General Ledger Accounts
- Open the Code Table Window via the Setup >> System Tables >> Code Tables menu.
- Select Payments.
A list of required general ledger accounts is displayed.
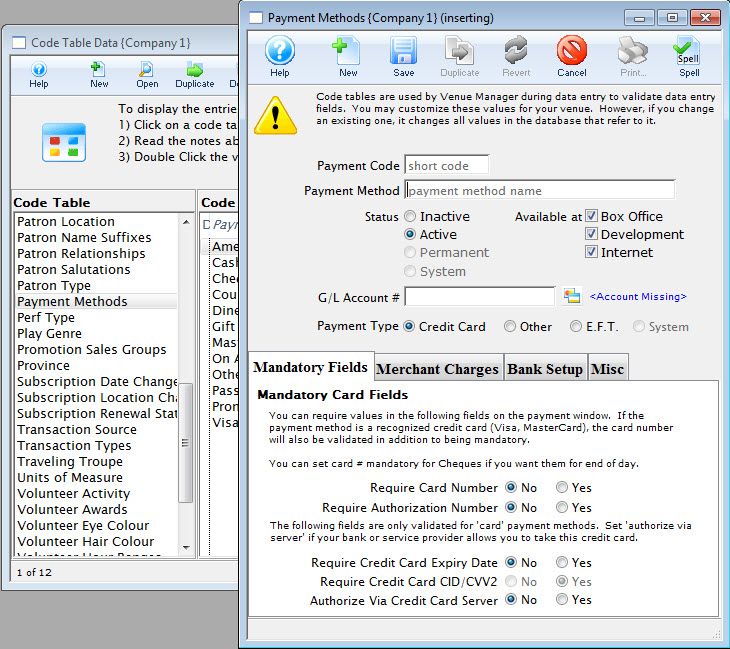
- Select Default Posting Accounts.

The account names that appear in the list are the minimum number of accounts required for the General Ledger to operate and, except the credit card types, are determined by Theatre Manager. The credit card types that appear are determined by the credit card types entered in the Credit Card Category of the Code Table. All additional credit card types to the Code Table requires that Accounting Default Data be updated with a corresponding account number.
The actual general ledger account numbers used depends on the accounts set up in the General Ledger.
All required accounts must have a corresponding account number otherwise Theatre Manager we be unable to create deposits and revenue allocations.
Editing a General Ledger Account
To edit an account, you change some of the account details. Accounts can be changed to debit or credit accounts, active or inactive etc.
- Open the Chart of Accounts.
For more information on accessing the Chart of Accounts, click here.

For a detailed description of this window, click here.
- Find the account to be edited.
For information on finding a G/L account, click here.
- Double click the account to open the Account Detail window.
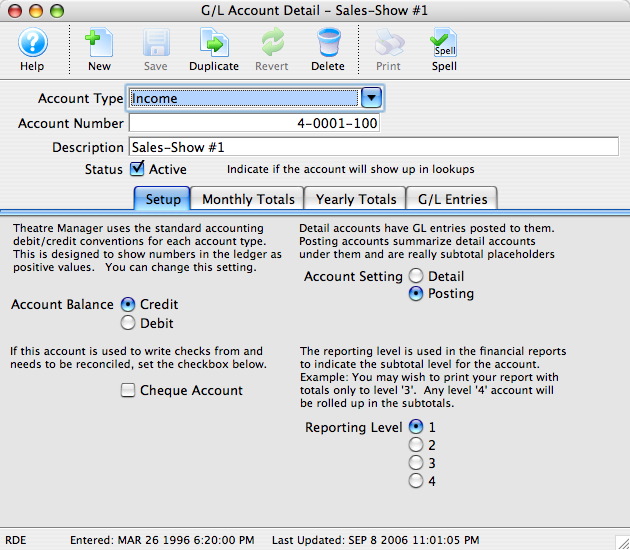
For a detailed description of this window, click here.
- Once the changes have been completed, click the Save
 button.
Setting an Account as Inactive
Over time, accounts in the GL may become obsolete. These accounts cannot be deleted because they still hold financial information. A user with the proper security clearance can set these accounts as inactive. Once an account is set as inactive it can no longer be used unless it it is reactivated.
- Open the Chart of Accounts window.
For more information on accessing the Chart of Accounts, click here.

- Find the account to be set as inactive.
For more information on finding a general ledger account, click here.
- Double click the account to open the Account Detail window.
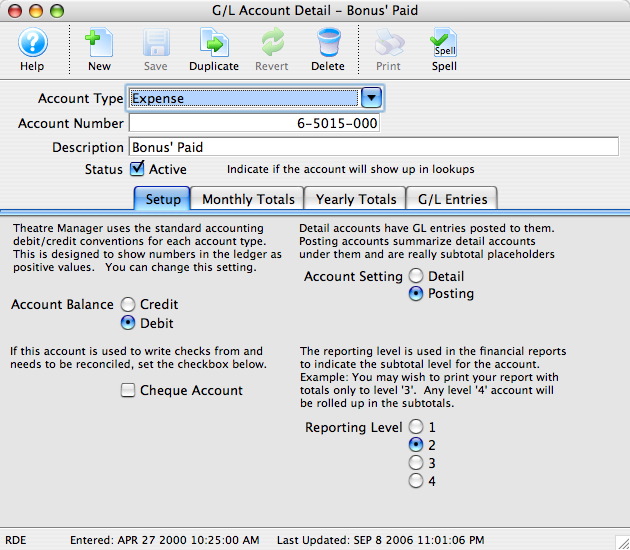
- Uncheck the Status Active
 box.
box.
The account will now be set as inactive and can no longer be used.
Finding General Ledger Accounts
- Open the Chart of Accounts window.
For more information on accessing the Chart of Accounts window, click here.

- Select the type of search to use to find the account.
- Enter the range of accounts to search for in the To and From fields.
- Click the Search
 button.
All matching entries will be displayed.
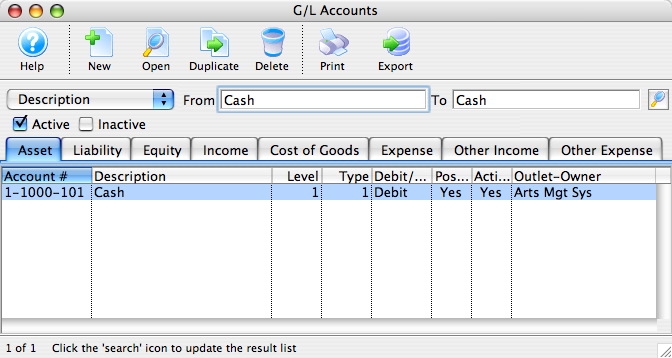
To view the details of an account double click the account.
Sample Chart of Accounts
The number of General Ledger accounts setup depends on the detail required and should reflect the business practices for the organization. To view account details simply double click an account.
Assets
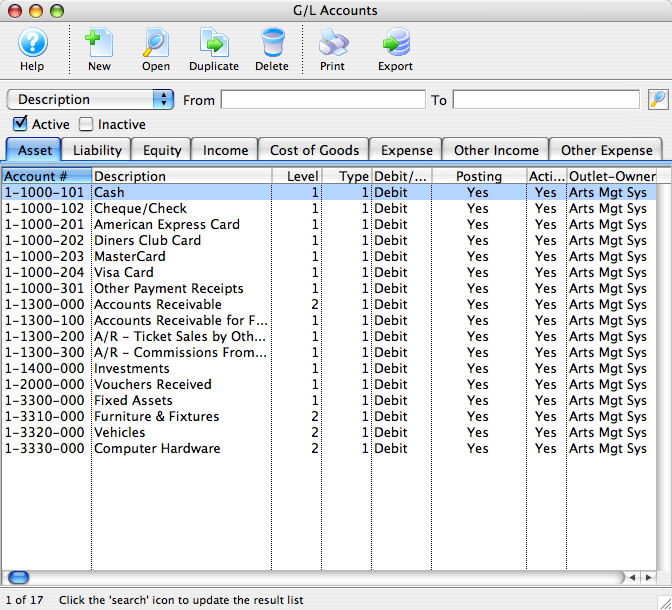
Liability
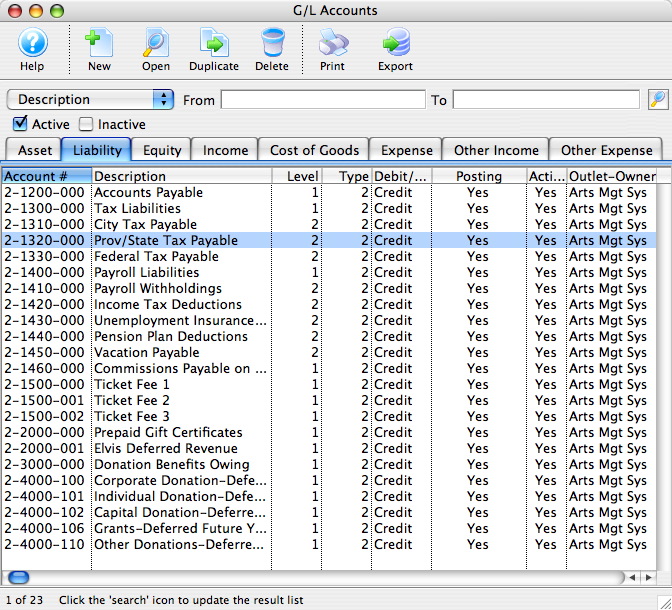
Equity
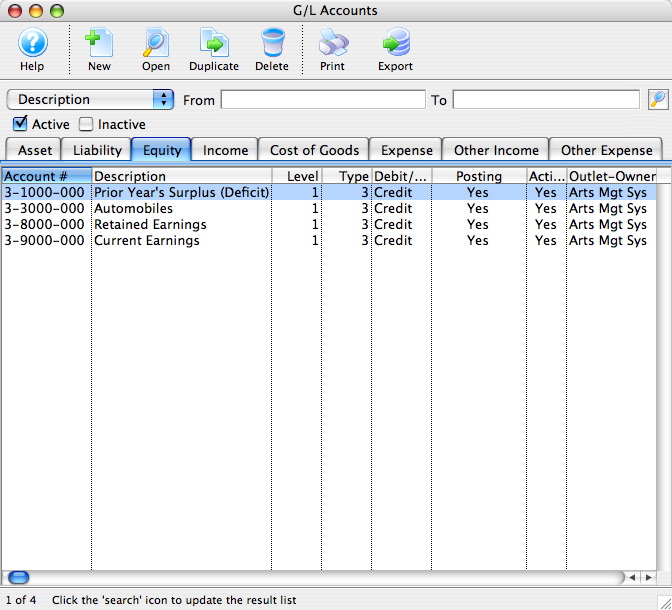
Income
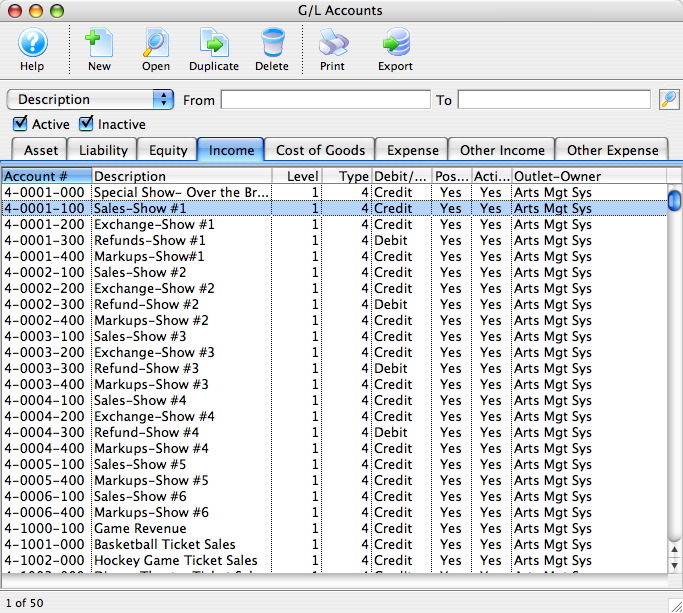
The four digit account number has been used to indicate the play code and the three digit feature code has been used to indicate the type of revenue. However, the three digit feature code could be used to indicate the play code and the four digit account number could be used to indicate the type of revenue.
The refund accounts have a debit balance.
Cost of Goods
Expense
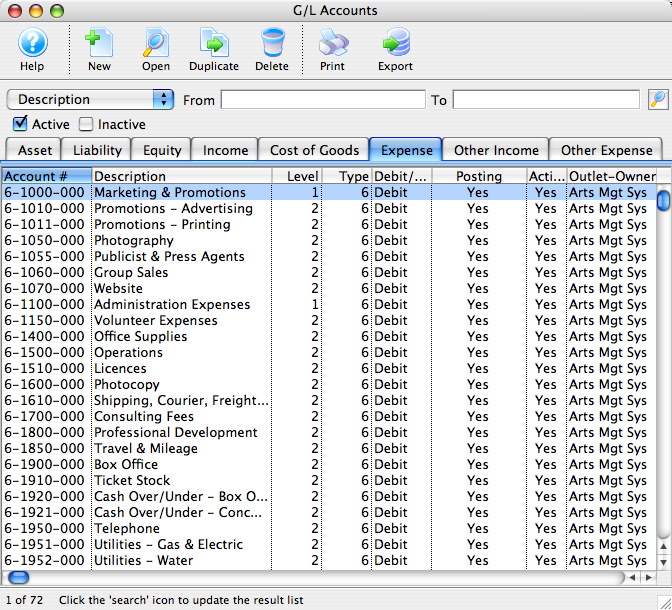
Other Income
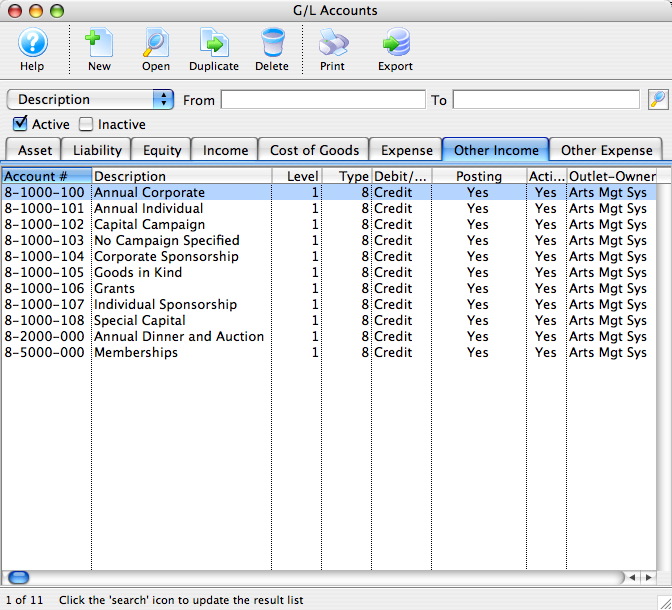
Other Expense
Adding Accounts to the General Ledger
Using the chart of accounts you can edit and add accounts to the GL.
- Open the Chart of Accounts Window.
Click Here to Learn how to access this window.

Click Here for a detailed description of this window.
Clicking on the different tabs will show the accounts setup for corresponding type.
- Select the account type by clicking the corresponding tab.
- Either click the New
 button or right click and select add.
The GL Account Detail Window opens.
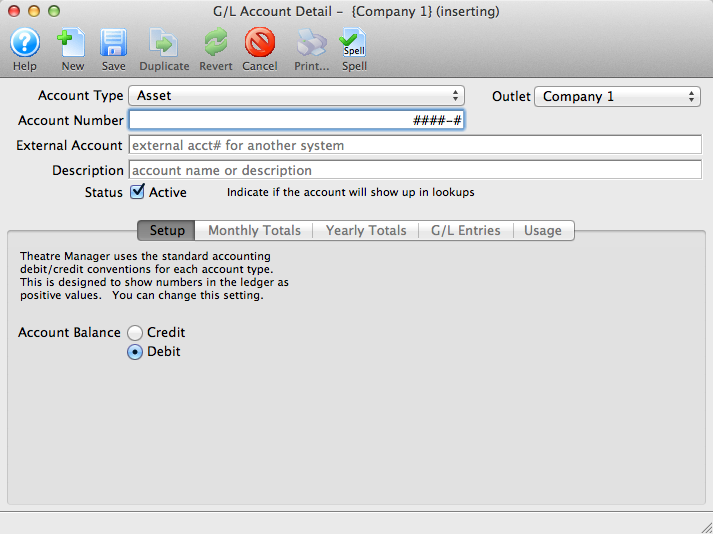
Click Here for a detailed description of this window.
- Enter the account number and description in the top fields.
- Choose the correct account attributes.
Set the account as active if you wish to use it immediately.
- Once you have entered all the information click the Save
 button and close the G/L Account Detail window.
The new account will be added to the Chart of Accounts.

General Ledger - Budgets
This Page is under construction
Preparing for Tax Change
If your organization has set the single ticket or season ticket prices as rounded prices (i.e. $15.00 or $15.50, etc) inclusive of the current tax, when the tax rate changes, the final price of the ticket will no longer be rounded (in most cases). To continue with rounded prices after a tax change, additional adjustments will have to be made to the ticket base prices and/or sales promotion calculations.
We advise each site to start planning for any tax changes as soon as they are aware a change will happen. This way, you can determine the effect a change has on the 'end price' shown to the patron and if any other price changes to the base ticket price or sales promotion are required.
- For example, if the Exchange Fee (or Order Fee, or Mailing Fee) is currently $2.00 per ticket, inclusive of a 6% tax rate. It is likely the exchange fee in System Tables will need to be set to $1.90.
- To maintain a $2.00 exchange fee after a Tax Rate Change Day, you need to change the ticket exchange fee amount from $1.89 to $1.90.
This same example applies if you have any ticket fees setup for your sales promotions. If you have a ticket fee that is setup to become rounded at $1.00 inclusive of the 6% Tax Rate, then in the Sales Promotion, you will need to setup the ticket fee amount from $0.94 to $0.95.
Keep in mind, if a tax rate is being reduced, patrons may expect the ticket prices to drop accordingly. It will be an internal decision within your organization to reset the prices to round to the nearest dollar again, or leave the ticket prices as currently set and have 'non-rounded' ticket values. If your organization chooses to have 'non-rounded' ticket values for the remainder of the current season, then next season, simply go back to having 'rounded' ticket prices again.
You will need to evaluate your patrons' perception, as many patron's expect to see a ticket price drop.
