You are here
Creating a New Donation Campaign
| To review Quick Reference information on Creating a Donation Campaign, You can choose | Cheatsheet |
Screencast |
Creating a Donation Campaign
To Create a new donation campaign, you perform the following steps:
- Open the Donation Campaign List window.
Click here to learn how to access this window.
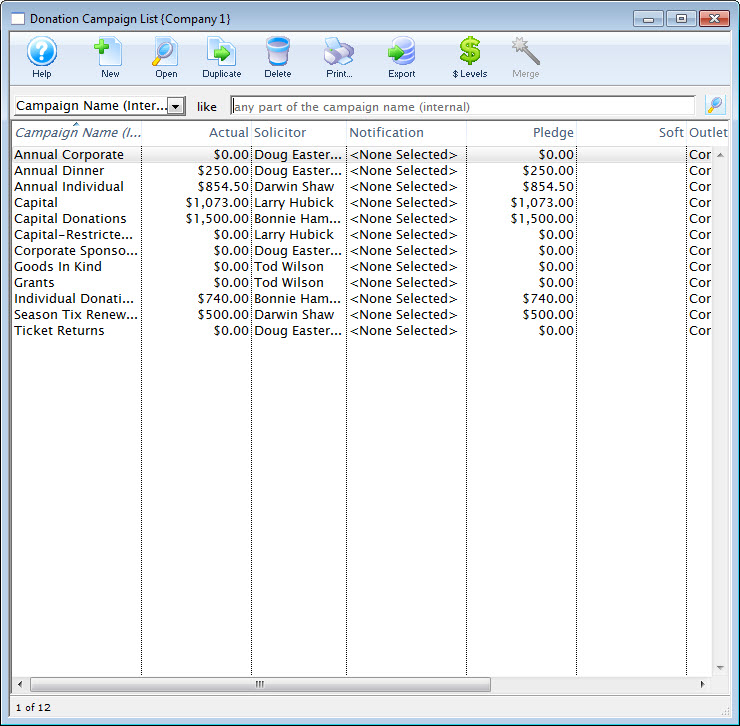
- Click the New
 button.
The Campaign Detail window opens.
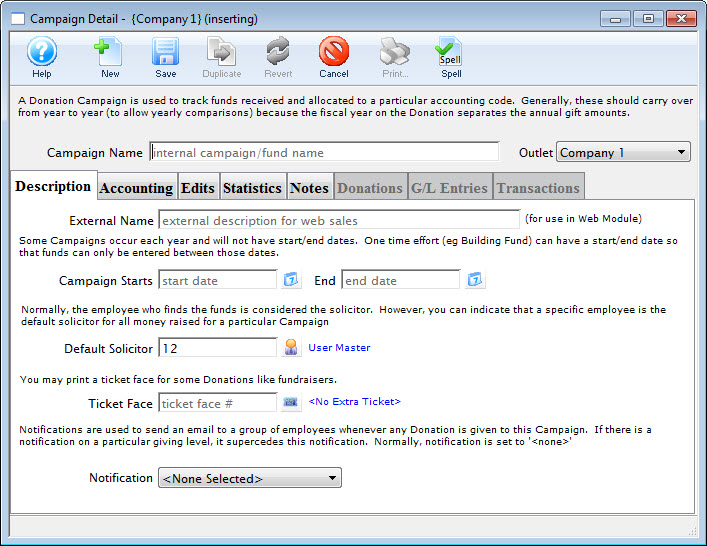
Click here for a detailed description of this window.
- Enter the name of the campaign.
- Enter the time period of the campaign.
- Enter the solicitor for this campaign.
This field is defaulted to the current user. The Employee Lookup
 button
can be used to display a list of all current Employees.
 - Select a ticket face.
This prints an extra ticket for a donation and can only be used by thermal printers.

A ticket face is usually not necessary. Only add one if: - You want to print a specific looking receipt on a ticket printer for box office donations that emulates CRA needs (the tax receipt report should be used instead)
- You like to have a sort of paper audit of donations at the box office to hand to development or finance (there are great reports for that too, meaning this isn't usually required)
- Select the Notification type.
This will send an email to whomever has been setup to receive emails based on this type of Notifications. This does not have to be entered.
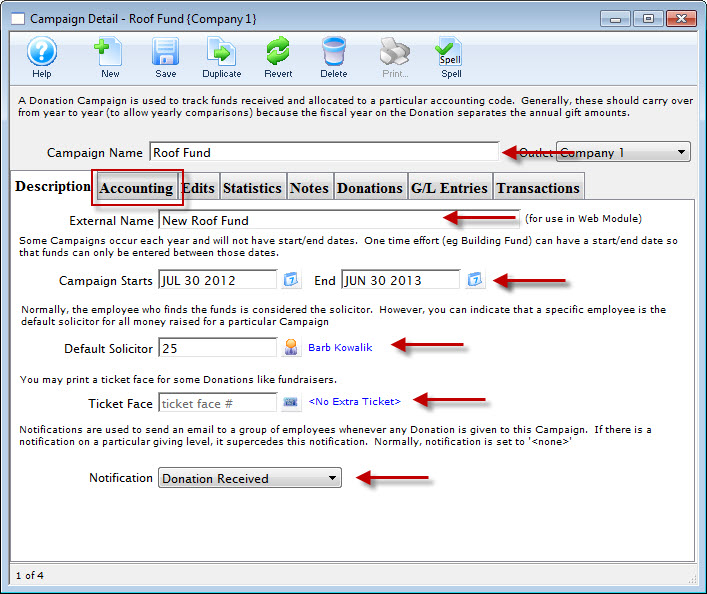
- Click the Accounting
 tab.
tab.
- Enter in the Accounting information for this campaign.
If this is a Restricted Campaign (one which deposits to a bank account OTHER THAN the Operating Account, check the Restricted Campaign box and fill in the appropriate Bank account.
Different G/L Accounts can be selected for prior fiscal years, current fiscal year, and future fiscal years. For more information on creating G/L accounts click here.
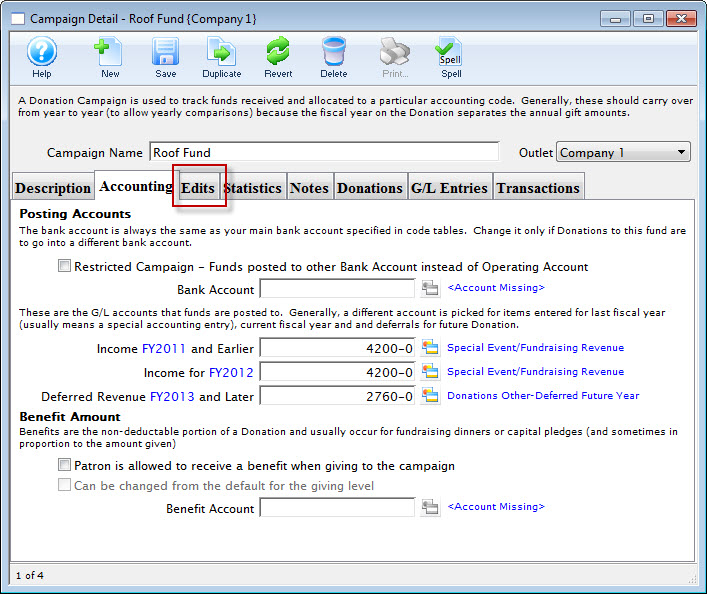
Click here for more information on this window.
- Select the Edits
 tab.
tab.
- Select the giving level matrix to use for the campaign.
Click here to learn how to setup giving levels.
- Select the access to be given to the campaign.
- Determine if a receipts should be printed for this campaign.
- Select the edit controls on the benefit amount.
- Click the Statistics
 tab.
tab.
- Enter the target amount for the campaign.
- Click the Save
 button.
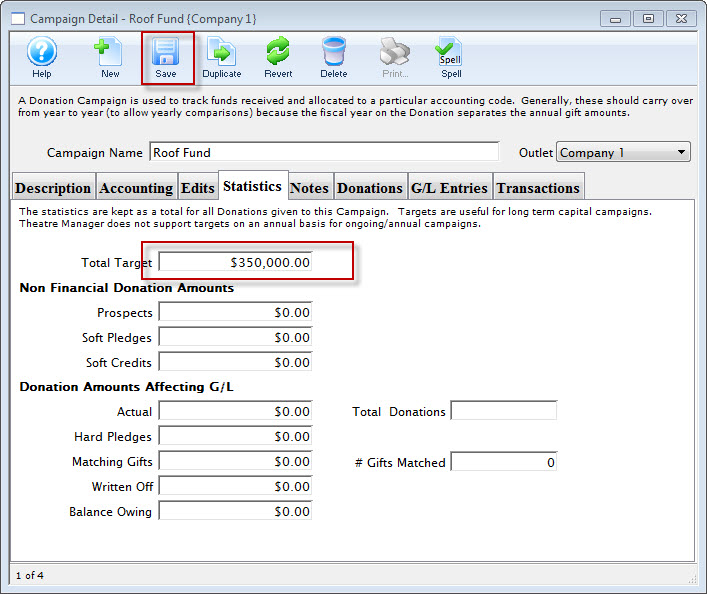
Click here for more information on this window.
- Close the Campaign Detail window.
The campaign will be saved and displayed on the Donation Campaign window.
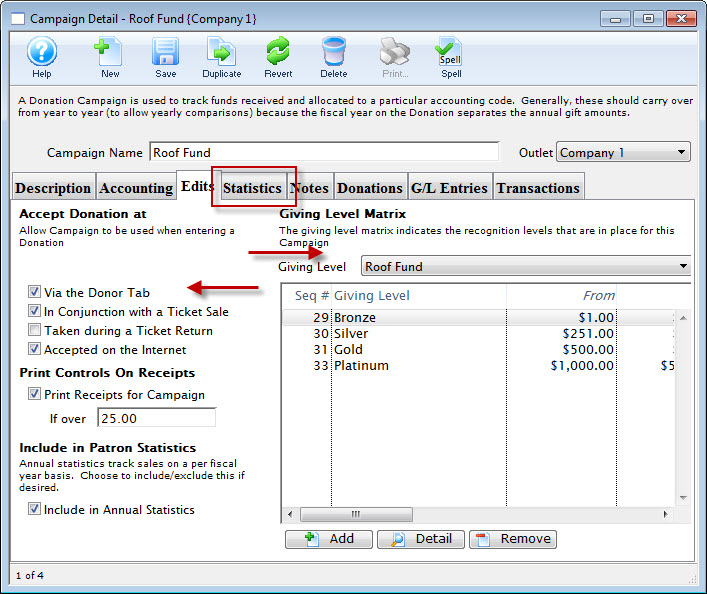
Click here for more information on this window.


