
Main menu
You are here
Creating New Events / Plays
 |
Typical time to program an entire season of 8 or so plays is usually easily done within a morning (including coffee). |
Creating the event (Summary of Steps)
To create an event from scratch, you use the steps that follow. Links are provided to explain each window in detail. The general steps are:
- Name the event
- Set up the Accounting
- Enter the Marketing information and images
- Create the performances (you can do this as many times as you need if your patterns are interesting, or want add performances later)
- Price the tickets for the performances
- Enable any discounting you want on the performances
- and then you are done, ready to sell the tickets
Step by step creating the event
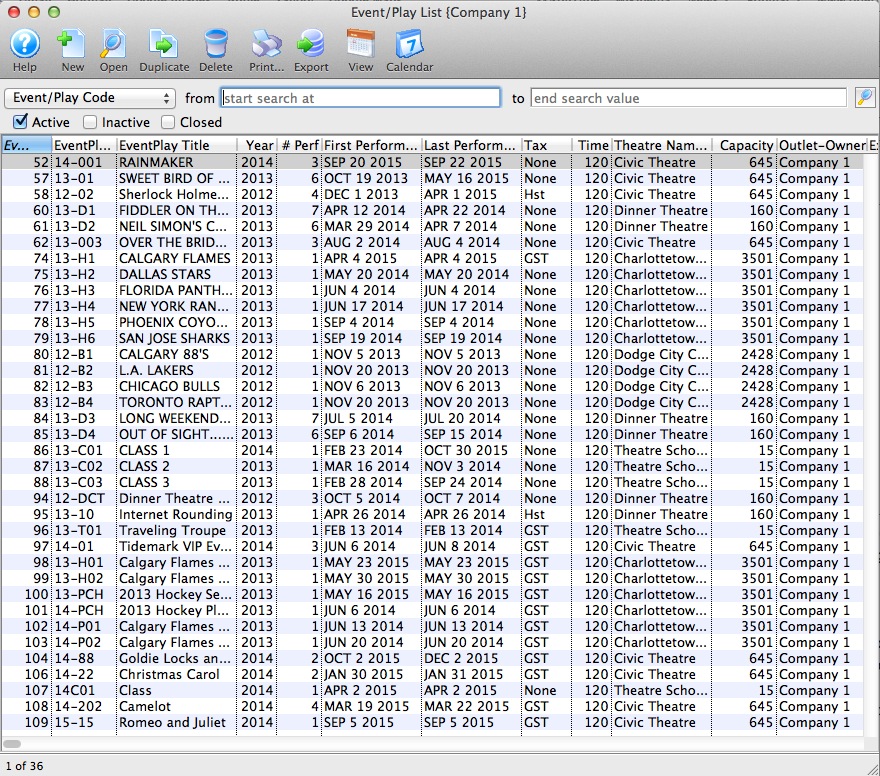
- Open the Event / Play List Window.
Click here to learn how to access this window.
- Click the New
 button.
The fields are blanked to allow you to add new data.

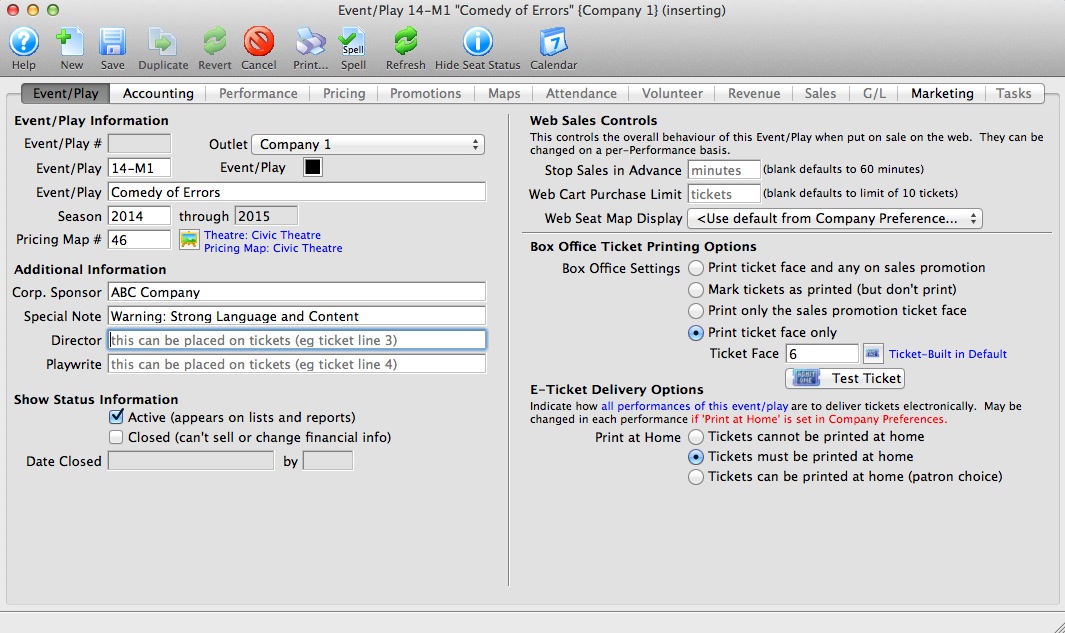
- Enter the Event / Play information.
Click here for more information on Event / Play Information tab.
- Click the Accounting tab.
This is more fully described in Accounting setup. If account codes for events do not vary, it can be easier to simply start by duplicating a prior event and then change the name of the duplicated one.
When accounting is set up, click the Save button to activate the rest of the tabs.
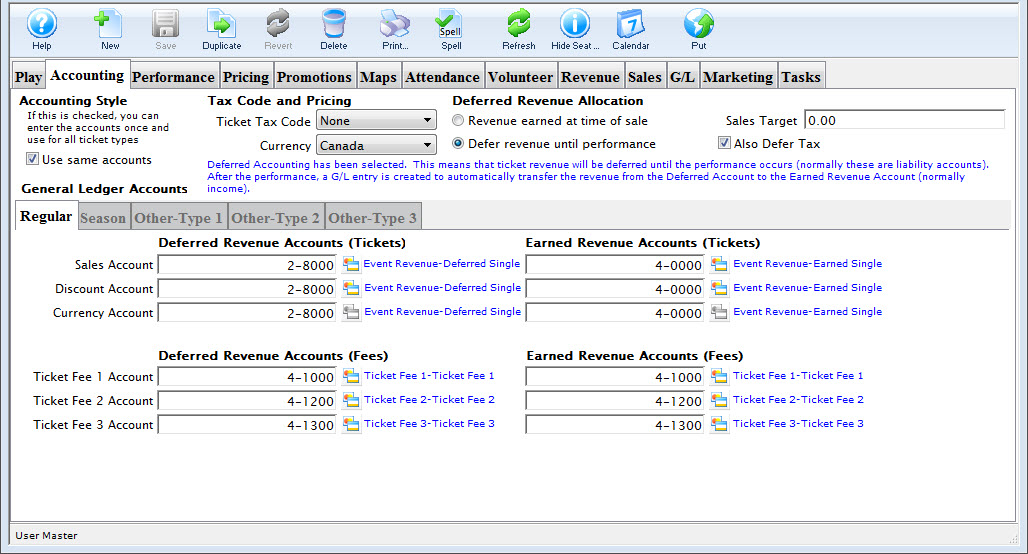
You may want to create some general ledger account number for the new event / play pror to setting up the event. If so, refer to General Ledger Accounts for more information. Venues that do profit/loss by event using class codes, category codes, or job cost code (the name depends on your financial system), often use the same accounts for each event they set up and, instead, rely on the job code in end of day accounting separation in the revenues by event report.
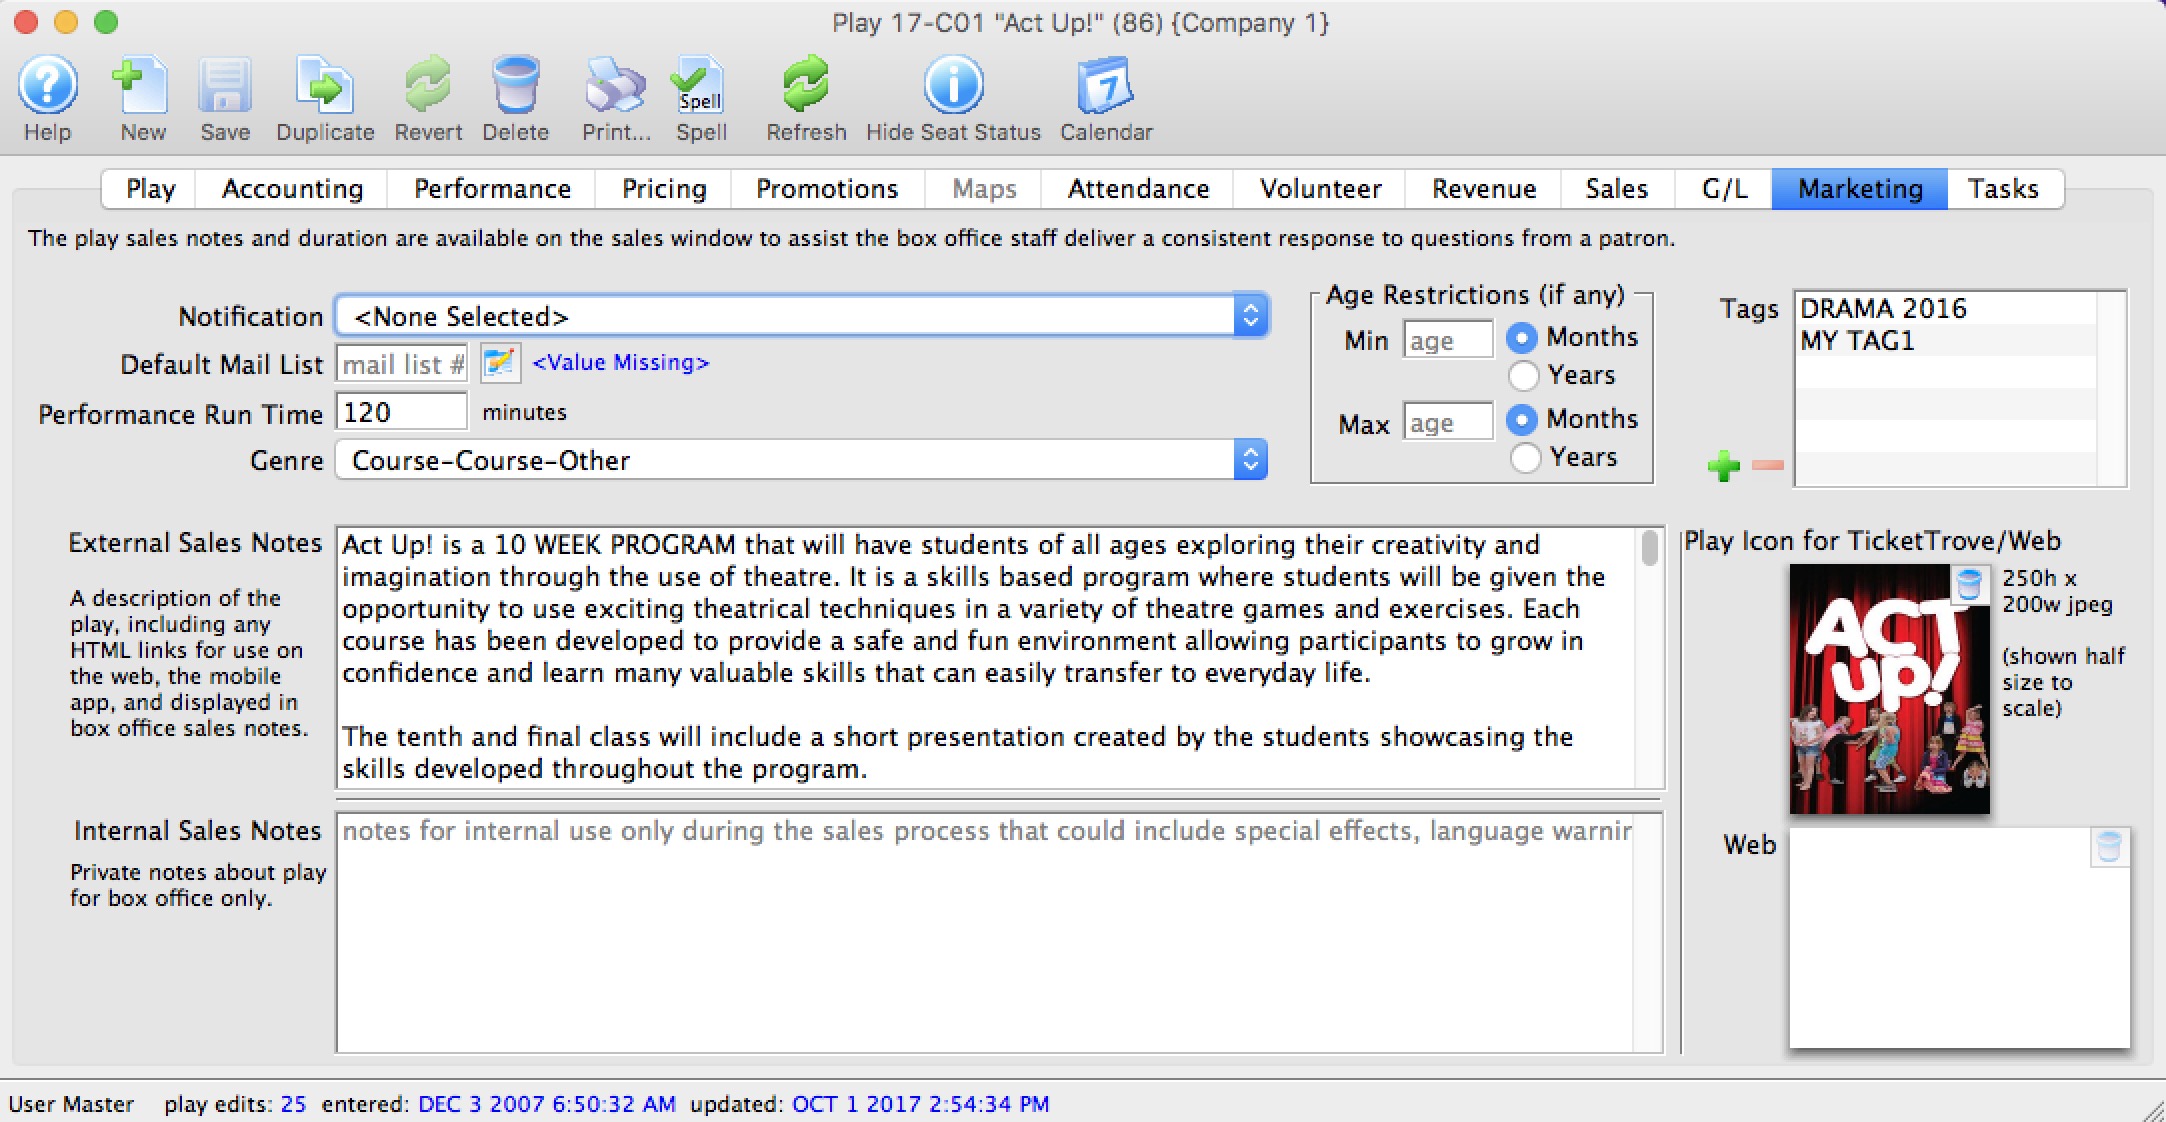
- Click the Marketing tab.
Refer to Marketing Tab for more information. This is where you provide any images, text and genre's that will appear in the online sales module.
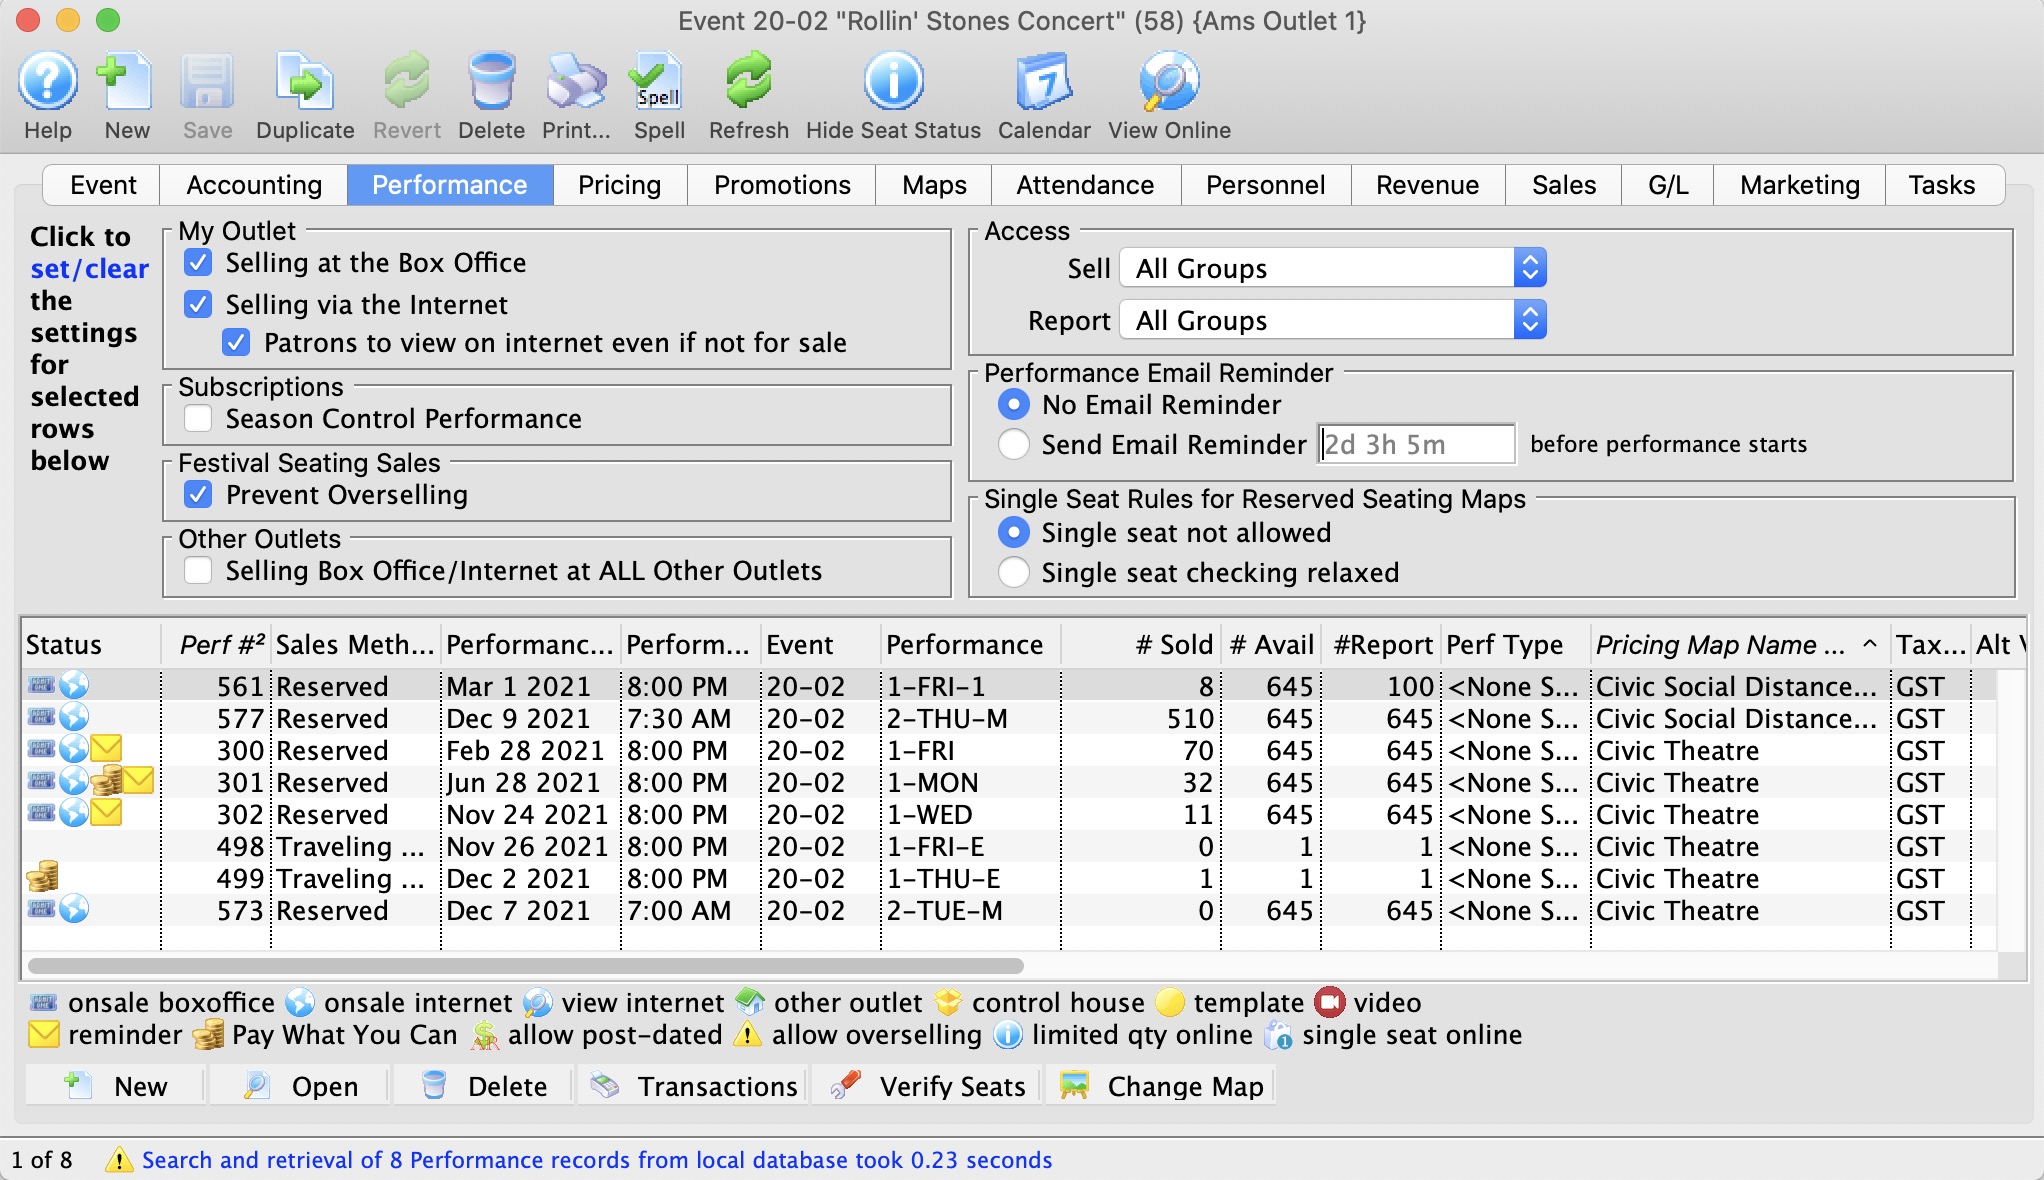
- Click the Performances tab.
This allows you to set up and number of performances using many different sales methods (eg a mixture of reserved, general admission, touring, classes and more, if all are related.
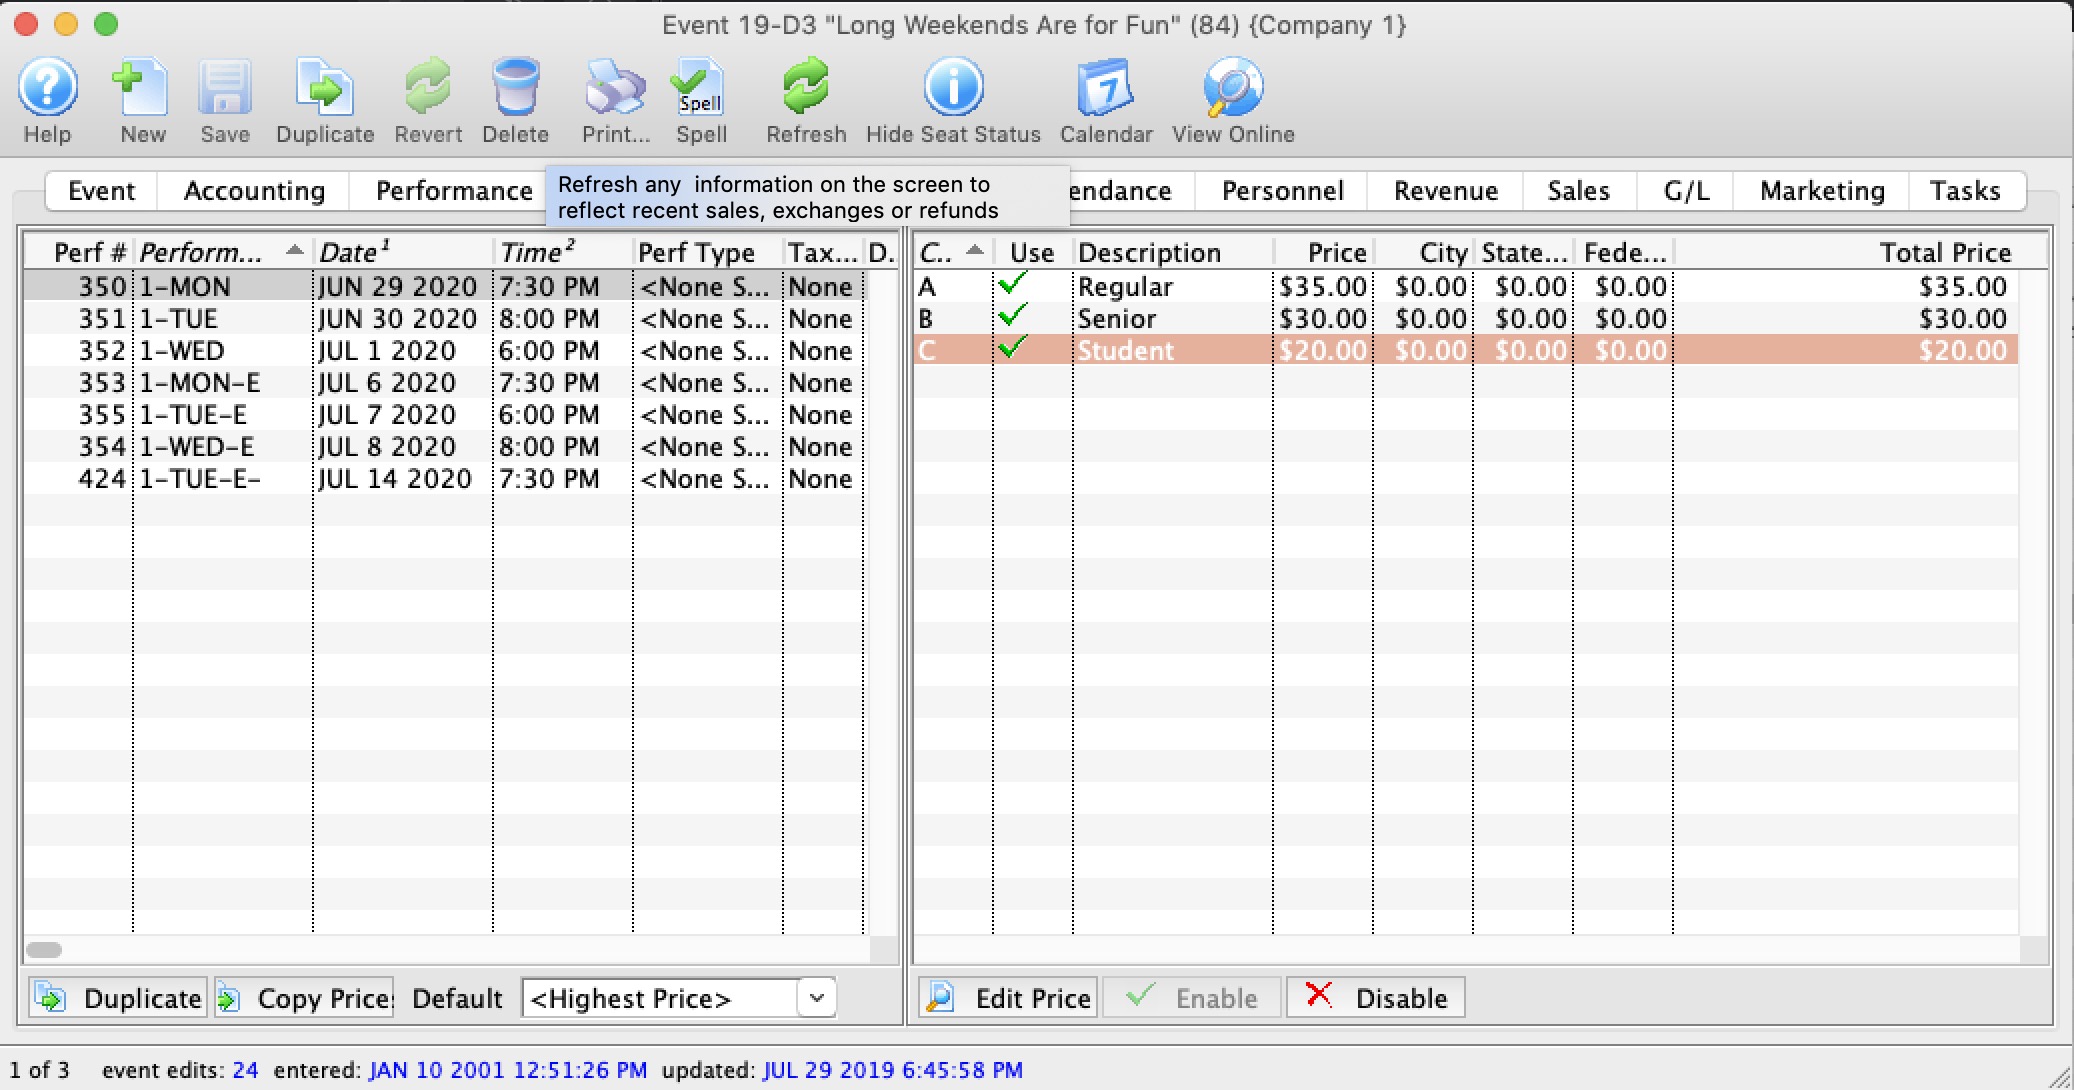
- Click the Pricing tab.
After performances are entered, you need to set the Base prices for each pricing zone you created in your venue. Once you set up one performance, you can copy those prices to the other performances if they are similar.
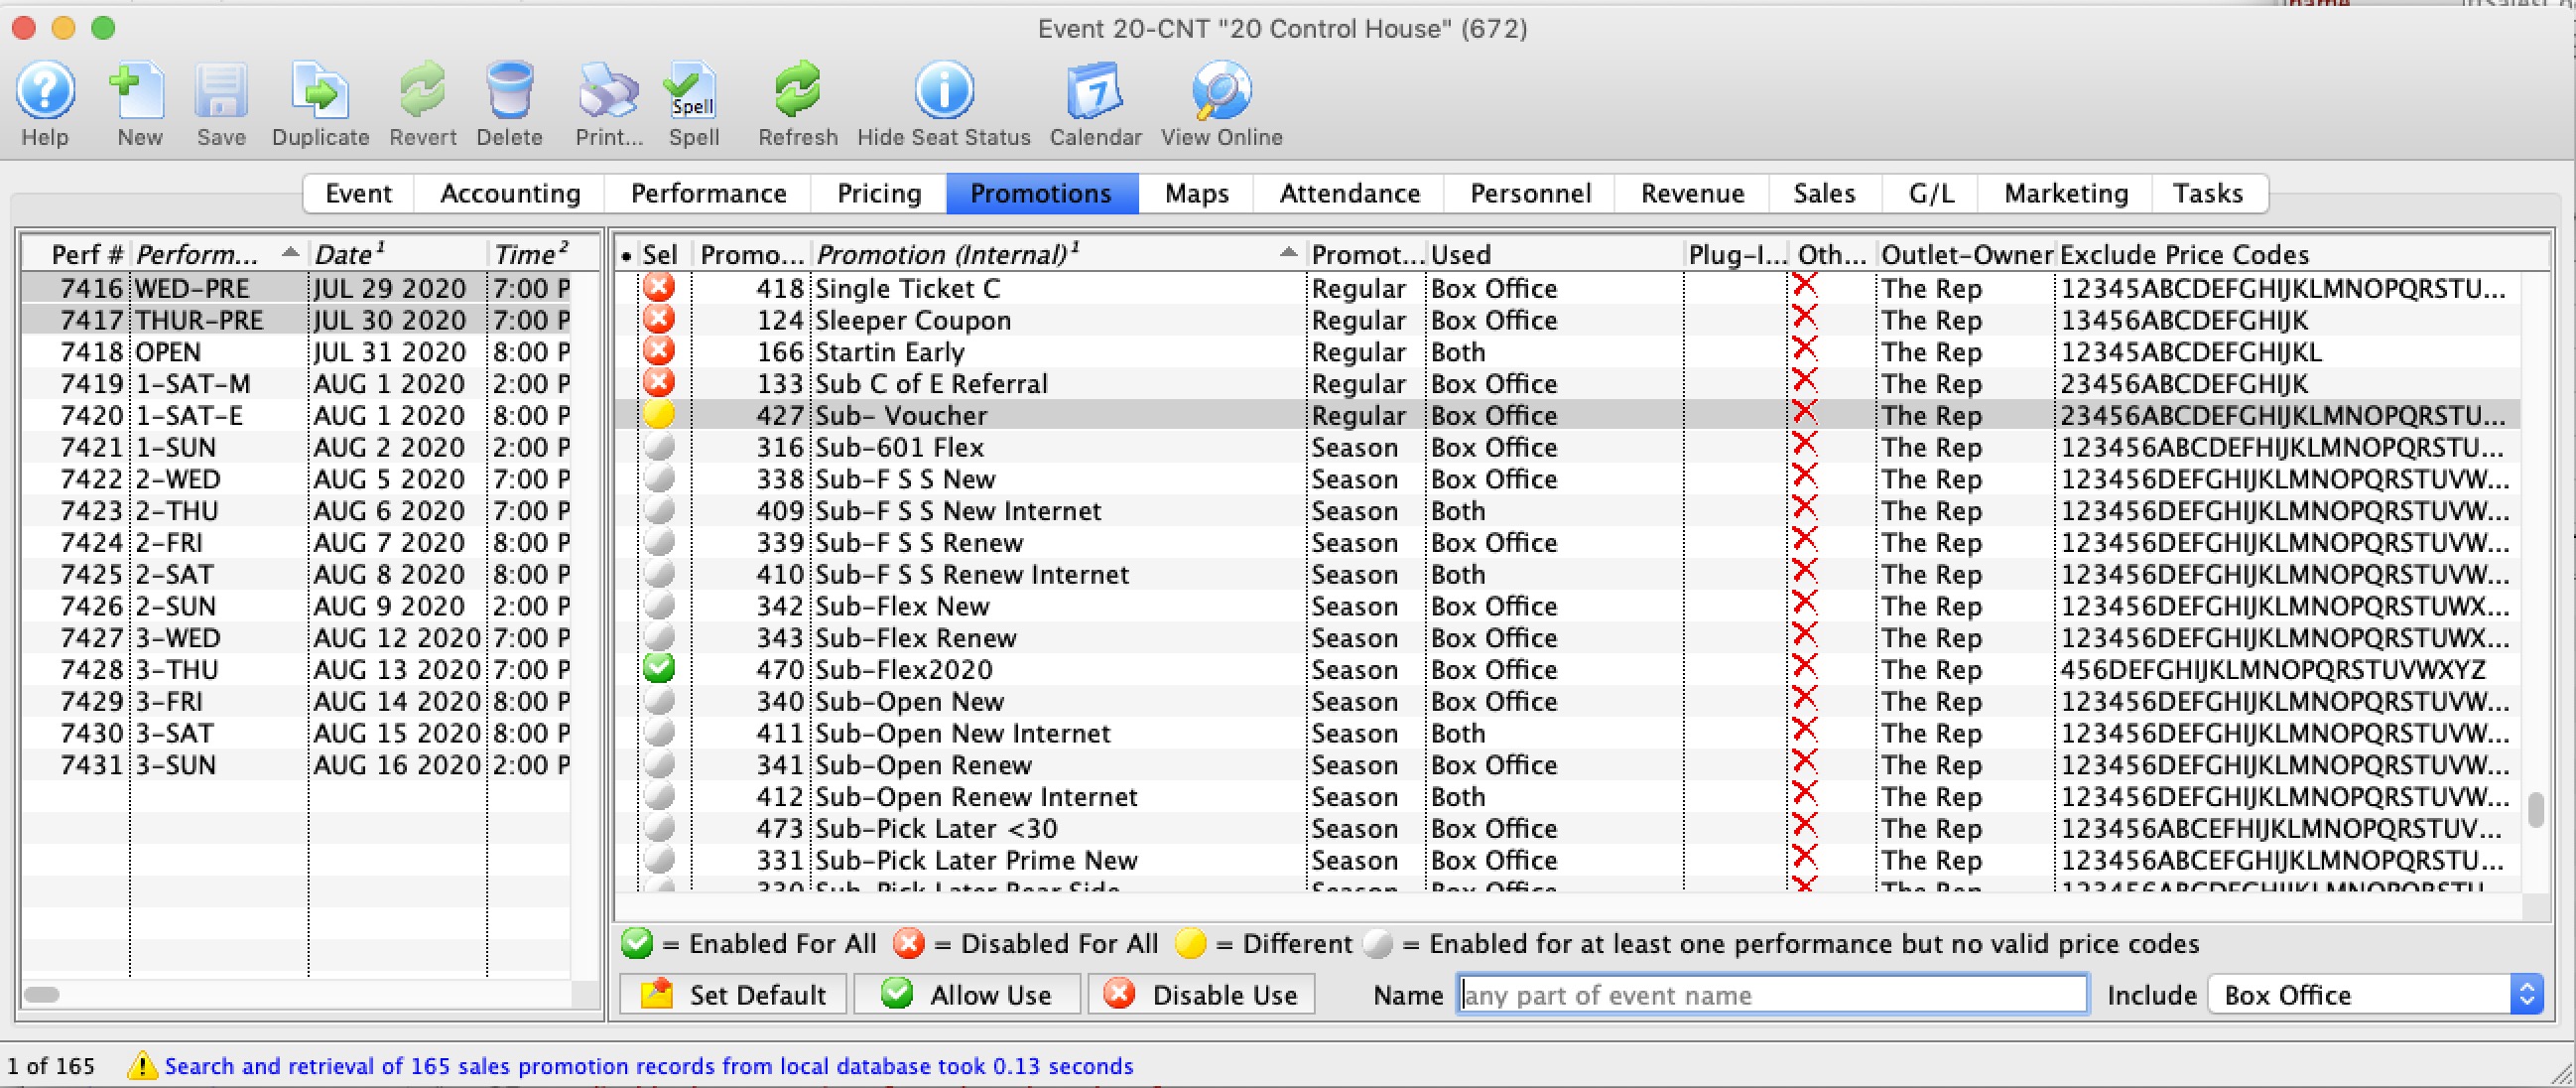
- Click the Promotions tab.
Promotions are a way of setting the valid discounts on tickets for each performance. You typically start with your menu of available promotions and disable the ones you don't want to allow for a performance. For example, you may not want group sales or certain comps on opening night.
- You can now start selling the event
The remaining tabs show information about the current state of sales such as:
- Maps - shows which seats are taken on any reserved seating performance at a glance
- Attendance - shows who is coming to the event
- Personnel - indicates who is working each performance if you are tracking these things for volunteers or facility management
- Revenue - shows total sales for each performance
- Sales - allows various summarizations of WHEN people bought tickets to correlate to marketing events or onsales
- G/L - shows the journal entries showing sales posted to the accounting system via the end of day process
- Tasks - shows any tasks assigned to the event for any purpose. The can be renter related tasks (move in/move out), or technical activities like maintenance and cleaning, or admin activities like backstage tours