
Main menu
You are here
Microcom Ticket Printers
Artsman's Exclusive Thermal Ticket Printer Provider - Microcom
Artsman is proud to partner with Microcom to provide thermal ticket printing solutions, which are optimized for the ticketing market. Their heavy duty metal design and reliable mechanics will provide years of continuous, low maintenance printing. For more information and current pricing, please contact Artsman Sales.First Time Setup For Microcom Printers
 |
Theatre Manager only connects to Microcom Thermal Ticket Printers via an Ethernet cable. This is designed so that all Theatre Manager users can connect to the ticket printer when on the same network. |
|
Microcom printers support QR codes on ticket faces |
| Unbox and Setup Printer |

Unbox and setup the printer as per the steps below. You should only need to:
|
| Connect Ethernet Cable |
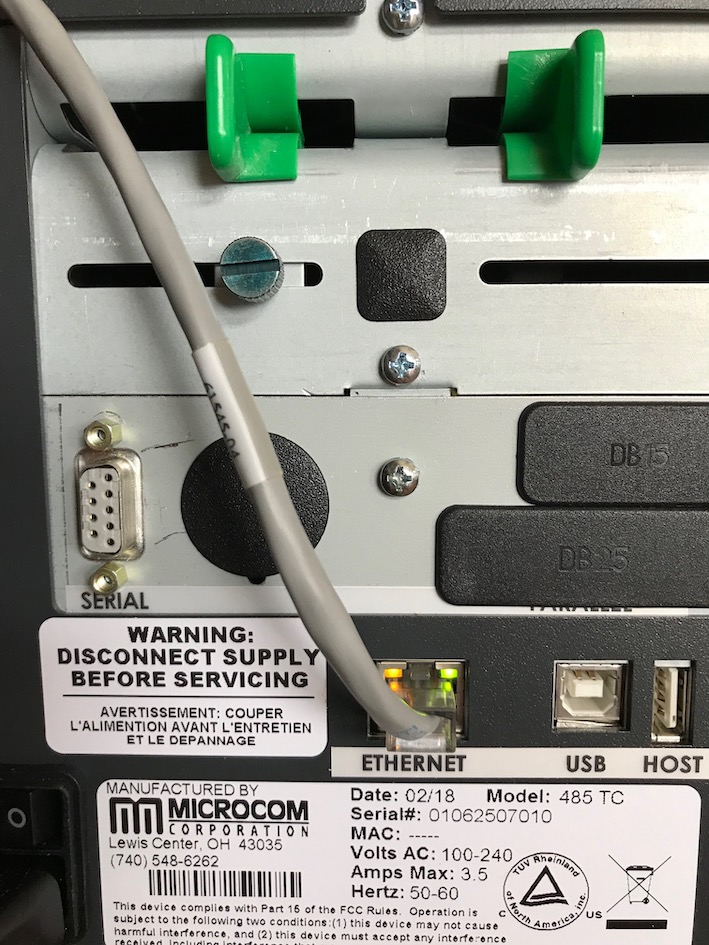
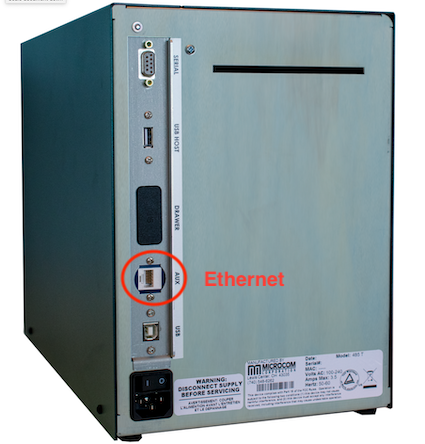 You will need to connect an ethernet cable to the back of your printer as per the diagram to the right.
The port should be labelled Ethernet - but it might be called Aux. Using the other ports like Parallel and Serial shoaled work - and will require support for those ports in your computer. Ethernet is the recommended and supported option. |
| Find Ethernet Address from Test Ticket |
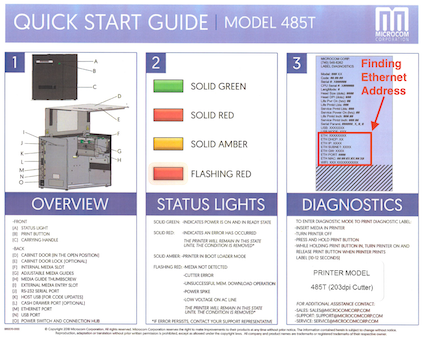 Use the instructions to print a test ticket and determine the printers current ethernet address. It will be required when setting up the device in Theatre Manager.
|
| Enter Device Communication Settings |
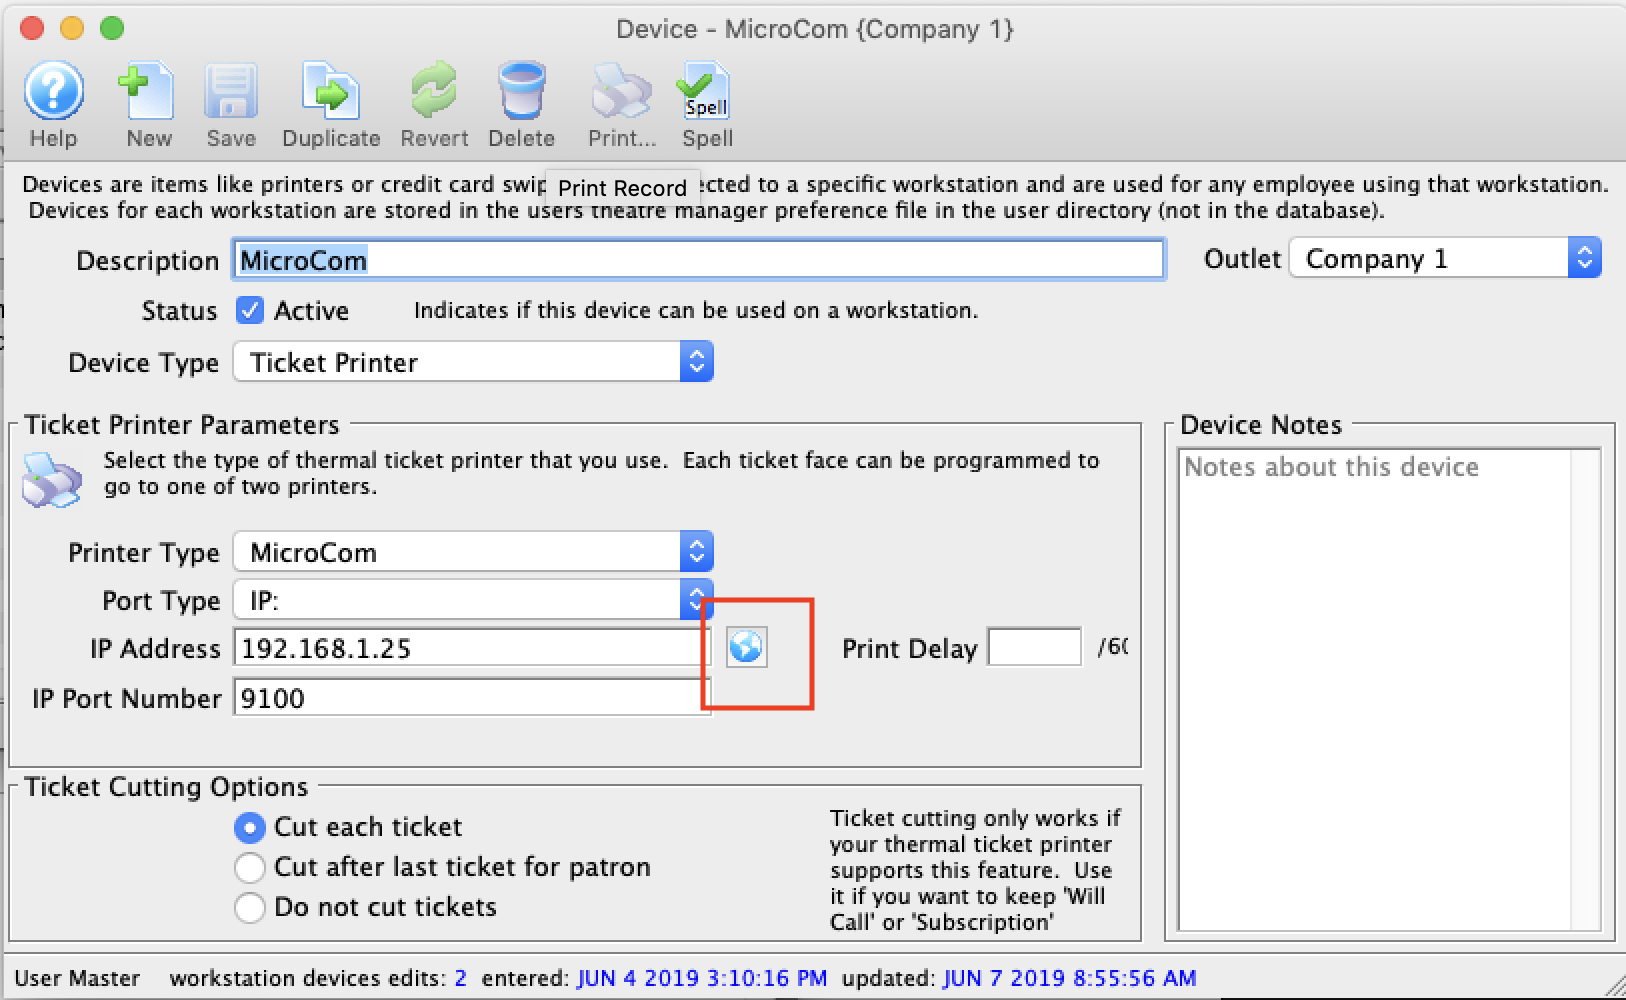 Add the MicroCom printer to the device table using device setup so that is it similar to the image to the right.
You will need to enter the IP address of the printer into this field. If it is not on the same subnet, you might have to make up a mini network and manually assign your computer an address to match the printers subnet in order to continue this process. If using serial or parallel printing, adjust the TM setup accordingly. |
| Connect to the Printer Status Page |
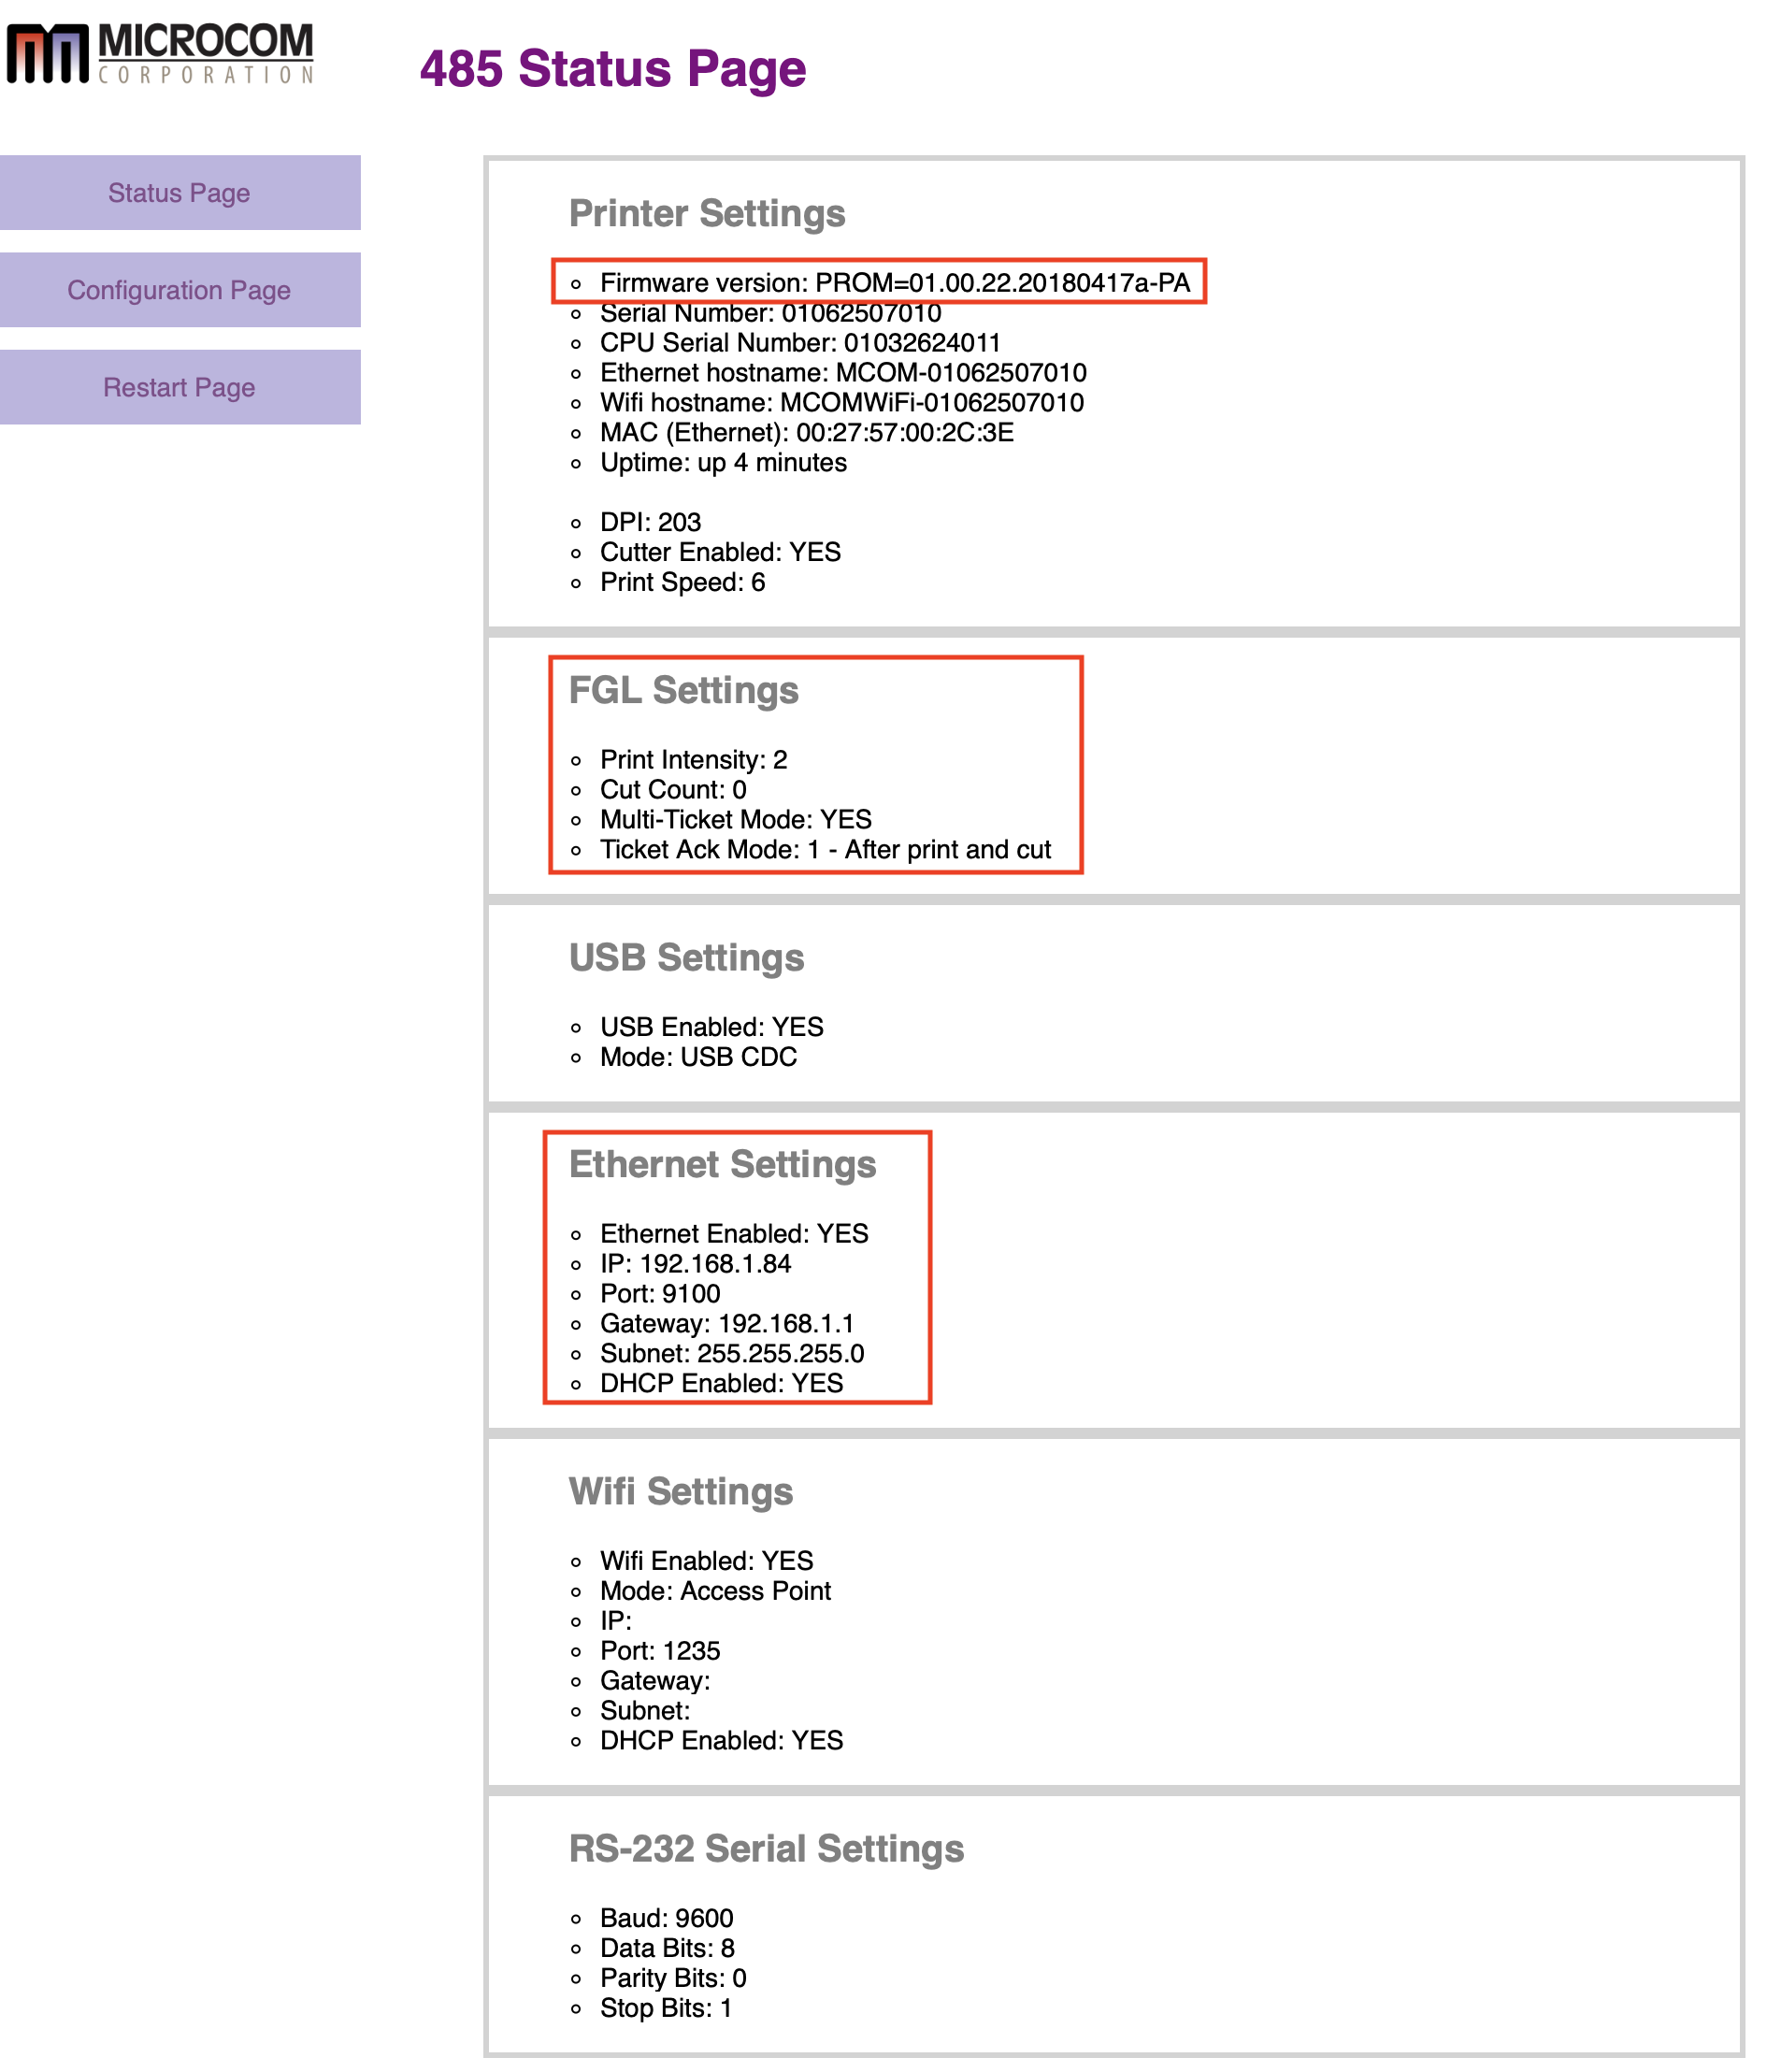 On the set-up page, if you enter an IP address, you can click the 'globe' icon to connect to the printer's status page. If you have the right ethernet address and are on the same subnet, you should see a page similar to the one on the right.
Of particular interest are:
|
| Configure Printer |
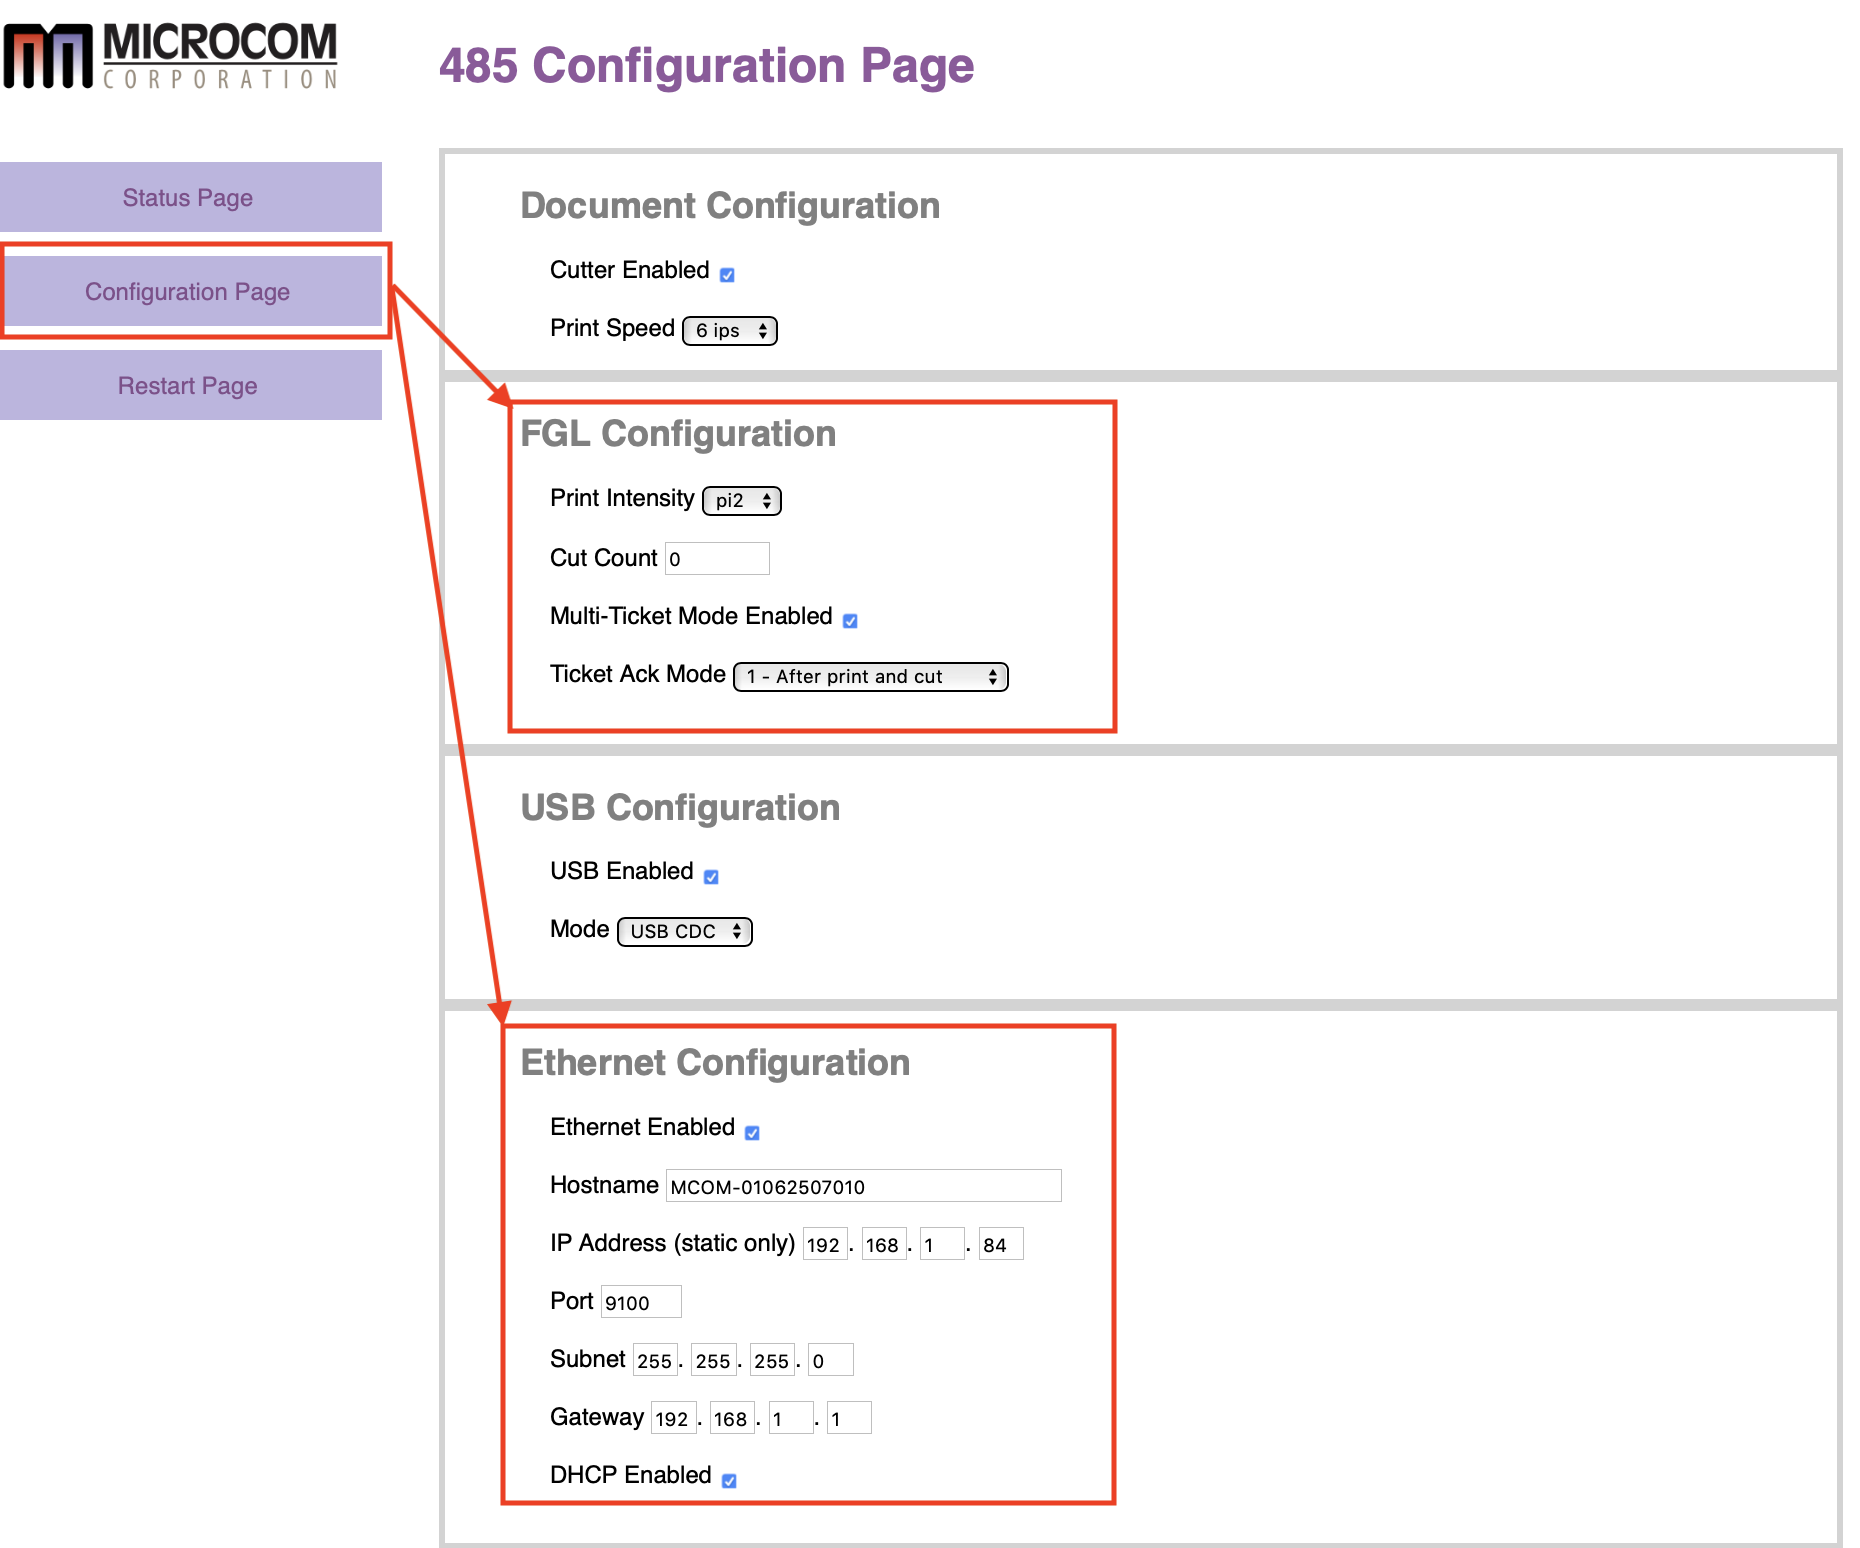 Click the Configuration Page button to change any settings you need for your network or FLG compatibility.
For ethernet setup:
|
| Configure Printer (Wifi) |
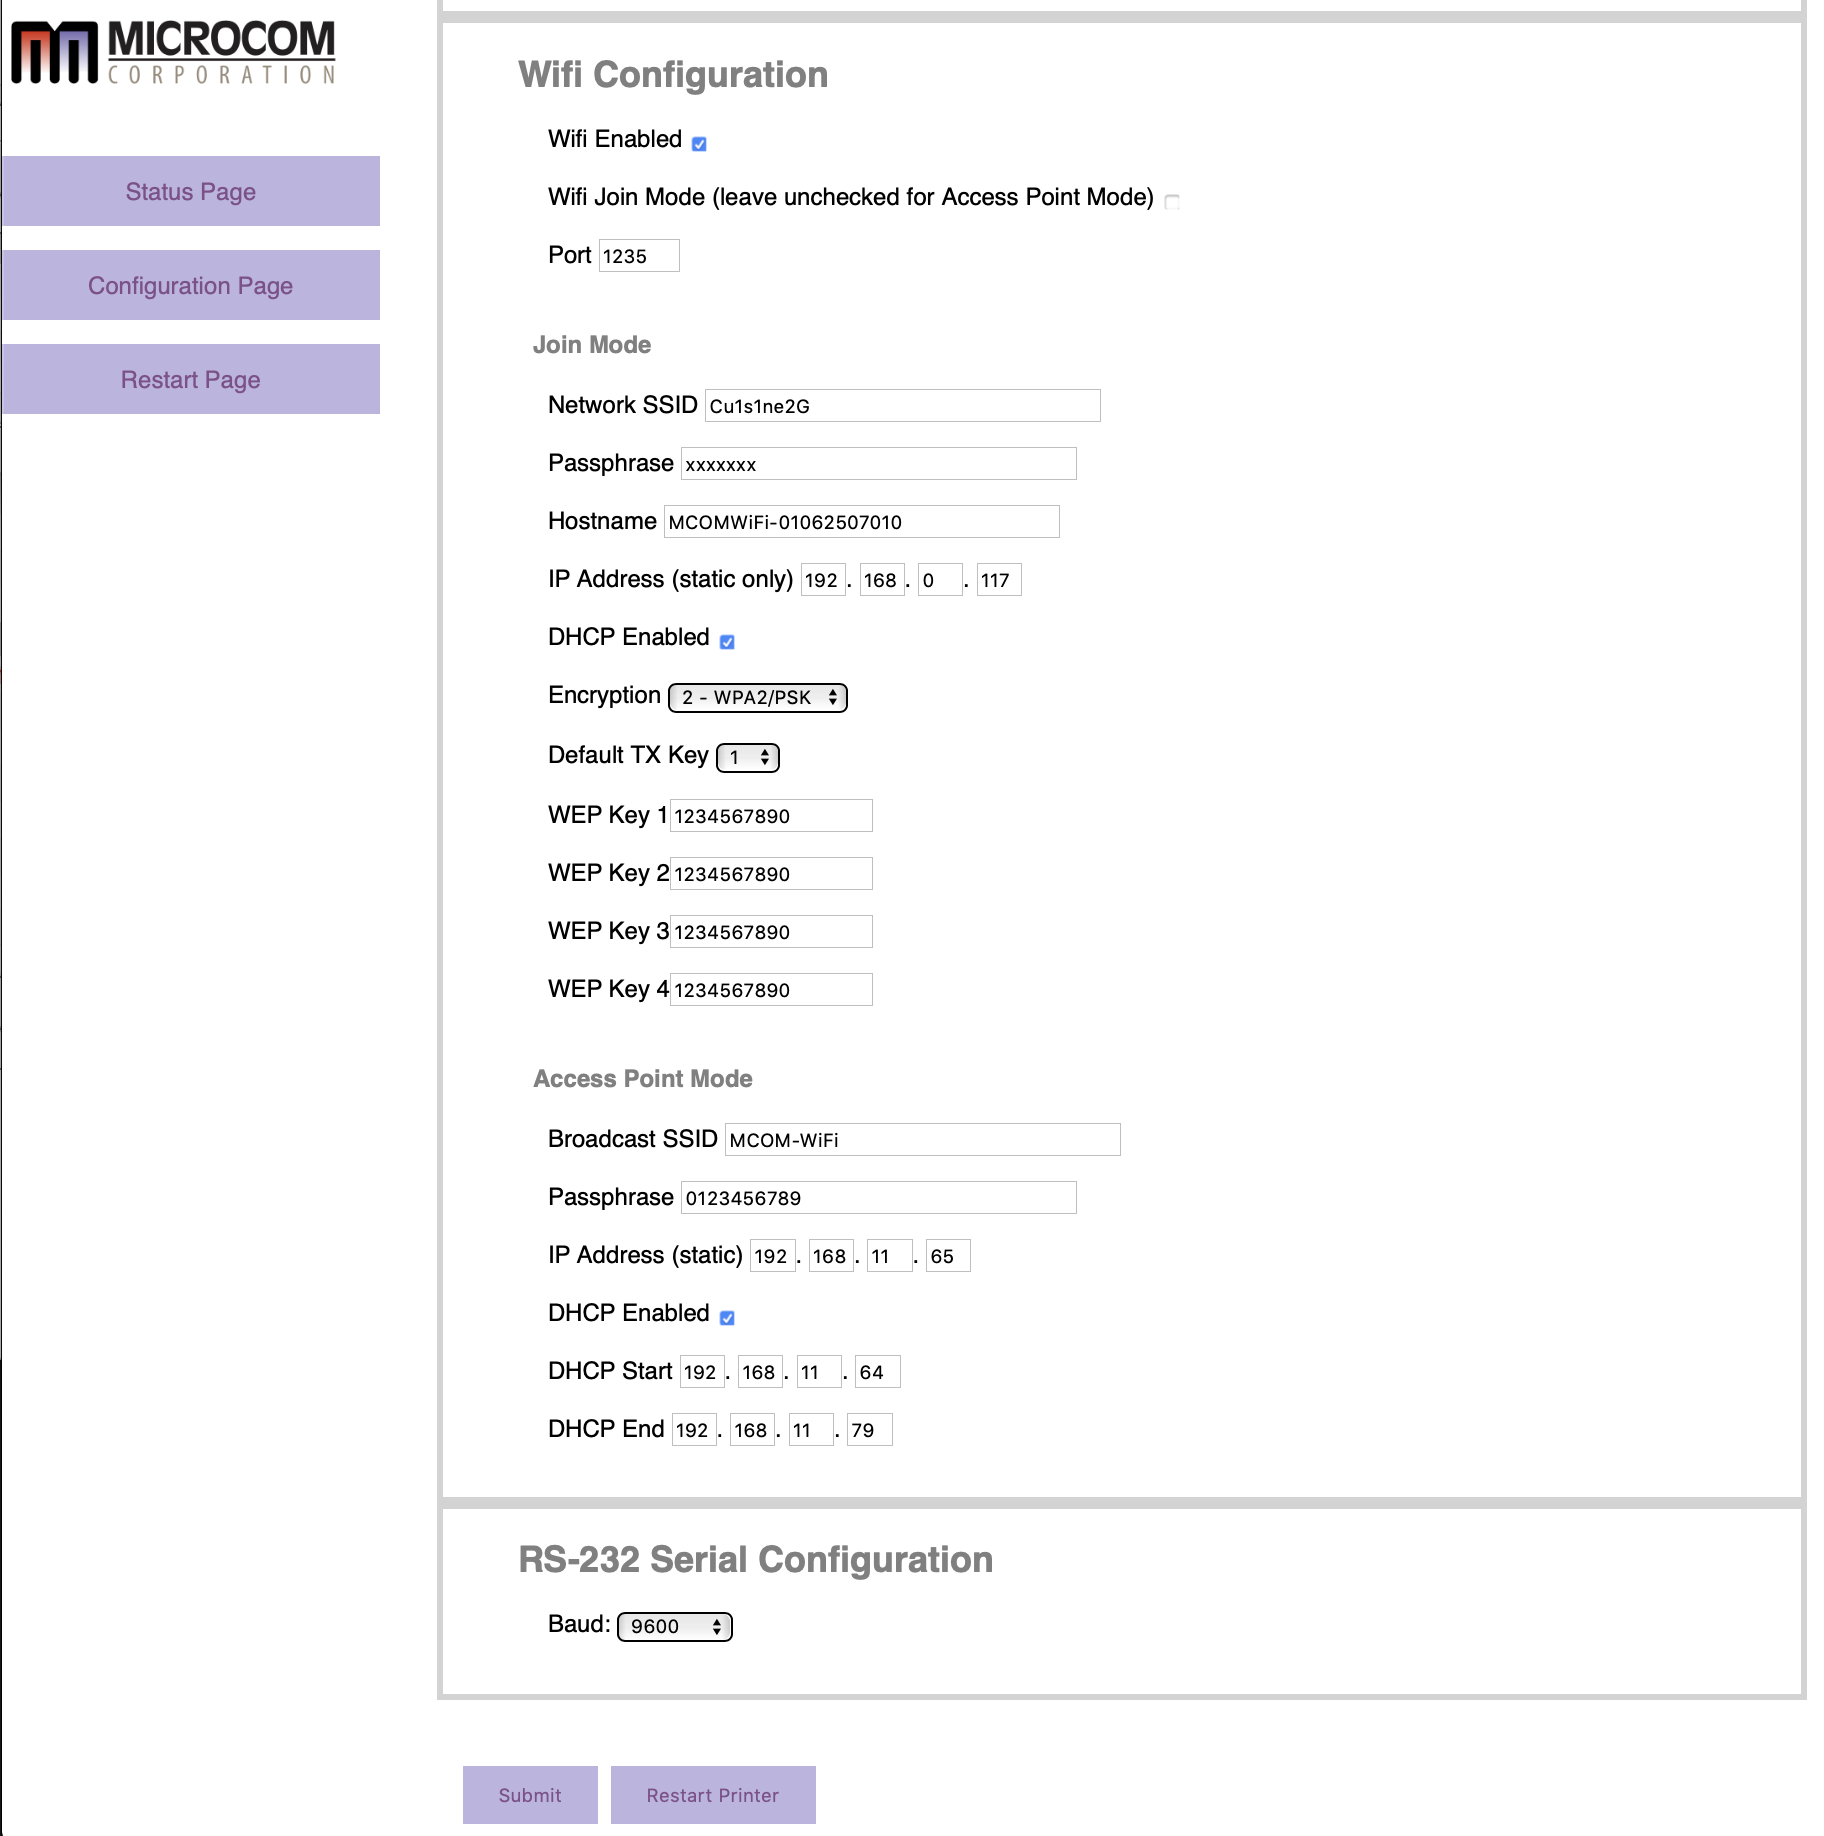 Lower on the Configuration Page are settings for enabling wifi. We generally recommend against wifi on your ticket sales network as that could create an exploitable part within your network and should be documented as per PCI compliance requirements.
If you wish to use wifi for connecting to the ticket printer, you can. It takes two approaches:
|