Microcom Ticket Printers
Artsman's Exclusive Thermal Ticket Printer Provider - Microcom
Artsman is proud to partner with Microcom to provide thermal ticket printing solutions, which are optimized for the ticketing market. Their heavy duty metal design and reliable mechanics will provide years of continuous, low maintenance printing. For more information and current pricing, please contact Artsman Sales.First Time Setup For Microcom Printers
 |
Theatre Manager only connects to Microcom Thermal Ticket Printers via an Ethernet cable. This is designed so that all Theatre Manager users can connect to the ticket printer when on the same network. |
|
Microcom printers support QR codes on ticket faces |
| Unbox and Setup Printer |

Unbox and setup the printer as per the steps below. You should only need to:
|
| Connect Ethernet Cable |
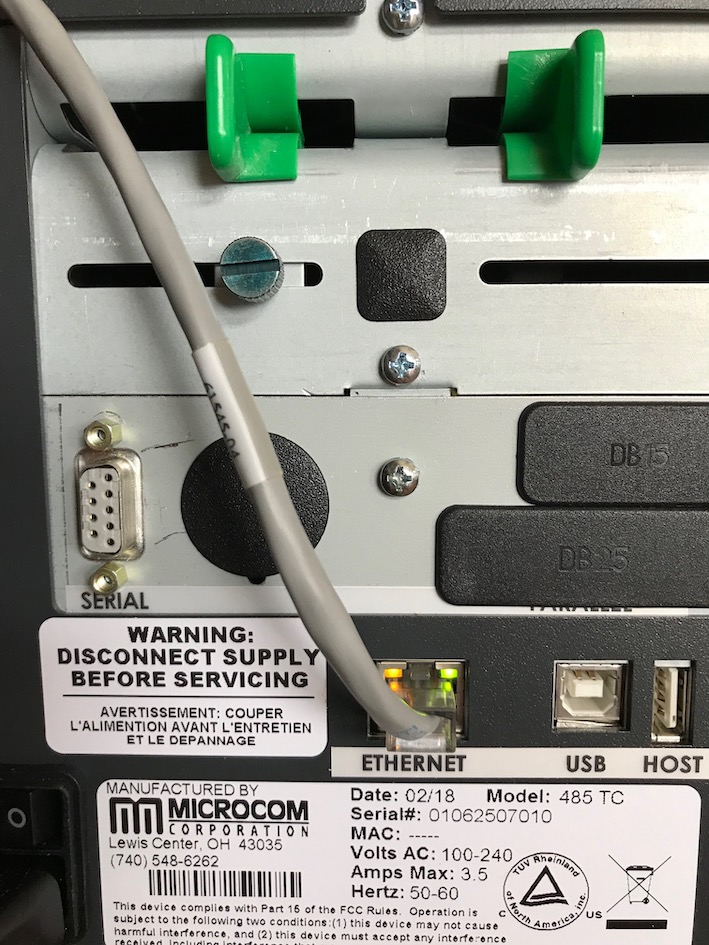
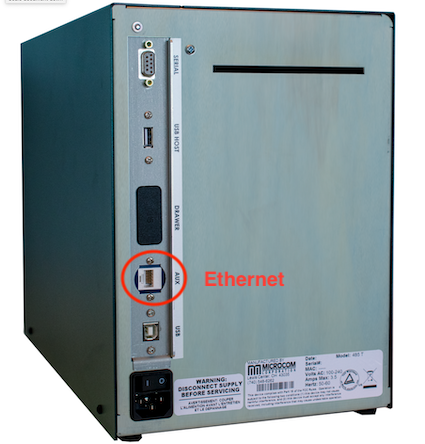 You will need to connect an ethernet cable to the back of your printer as per the diagram to the right.
The port should be labelled Ethernet - but it might be called Aux. Using the other ports like Parallel and Serial shoaled work - and will require support for those ports in your computer. Ethernet is the recommended and supported option. |
| Find Ethernet Address from Test Ticket |
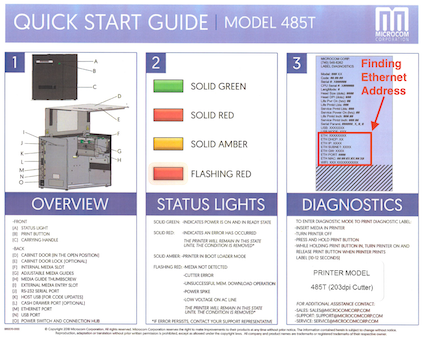 Use the instructions to print a test ticket and determine the printers current ethernet address. It will be required when setting up the device in Theatre Manager.
|
| Enter Device Communication Settings |
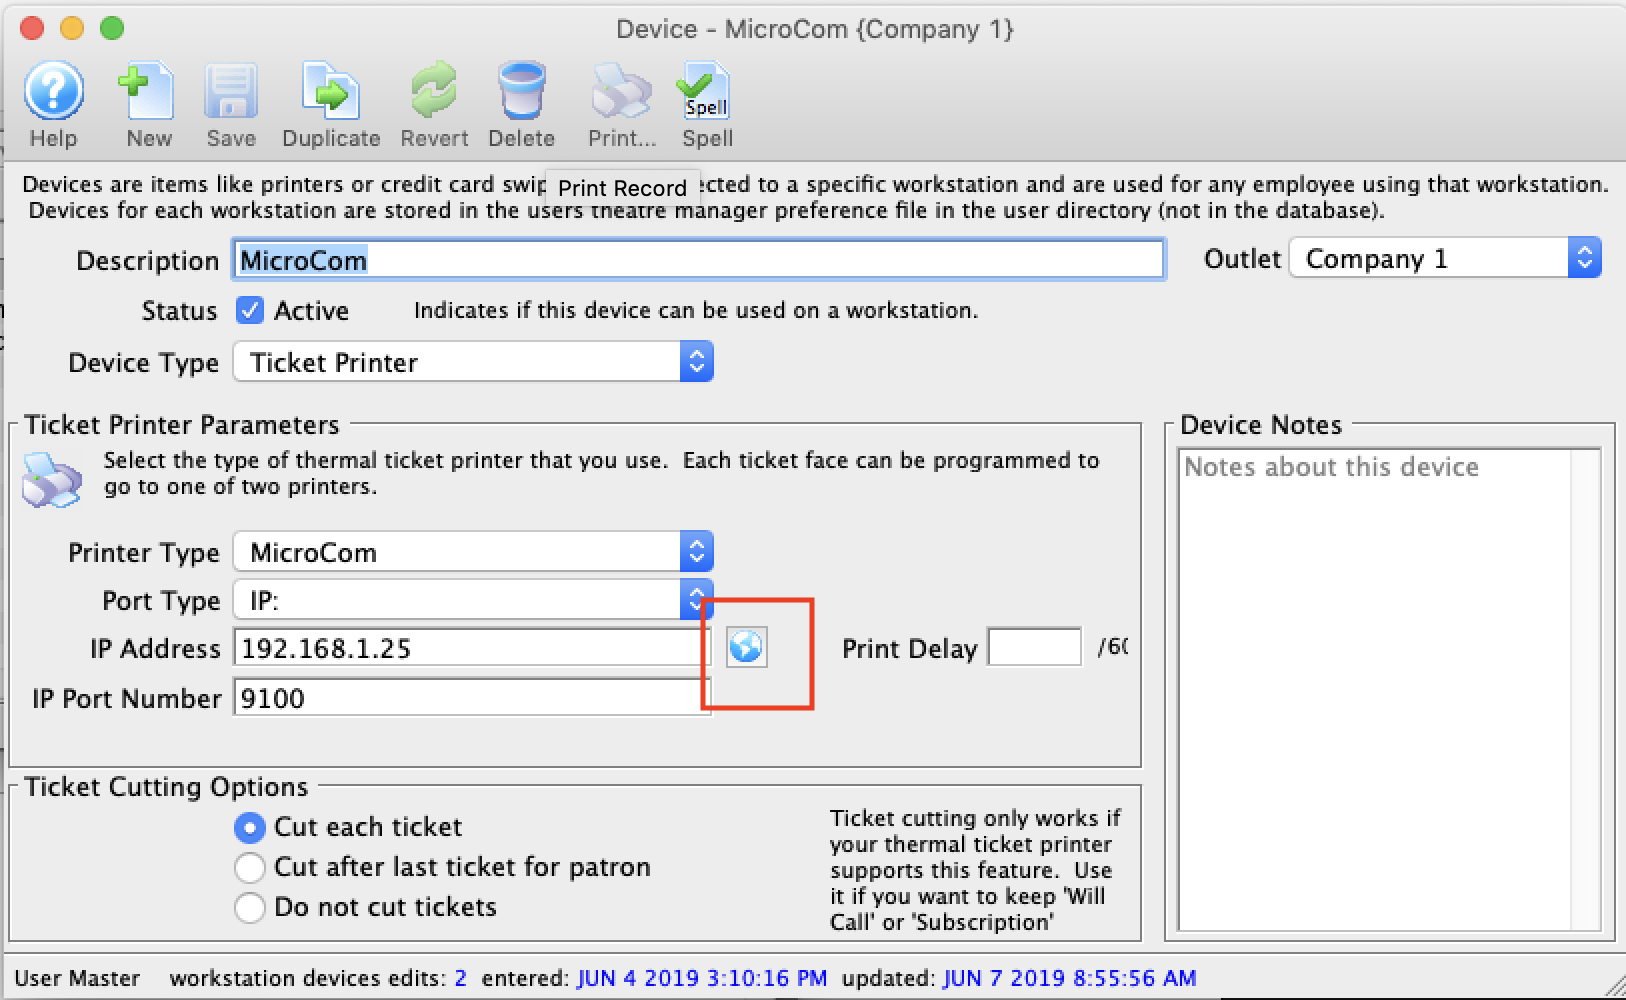 Add the MicroCom printer to the device table using device setup so that is it similar to the image to the right.
You will need to enter the IP address of the printer into this field. If it is not on the same subnet, you might have to make up a mini network and manually assign your computer an address to match the printers subnet in order to continue this process. If using serial or parallel printing, adjust the TM setup accordingly. |
| Connect to the Printer Status Page |
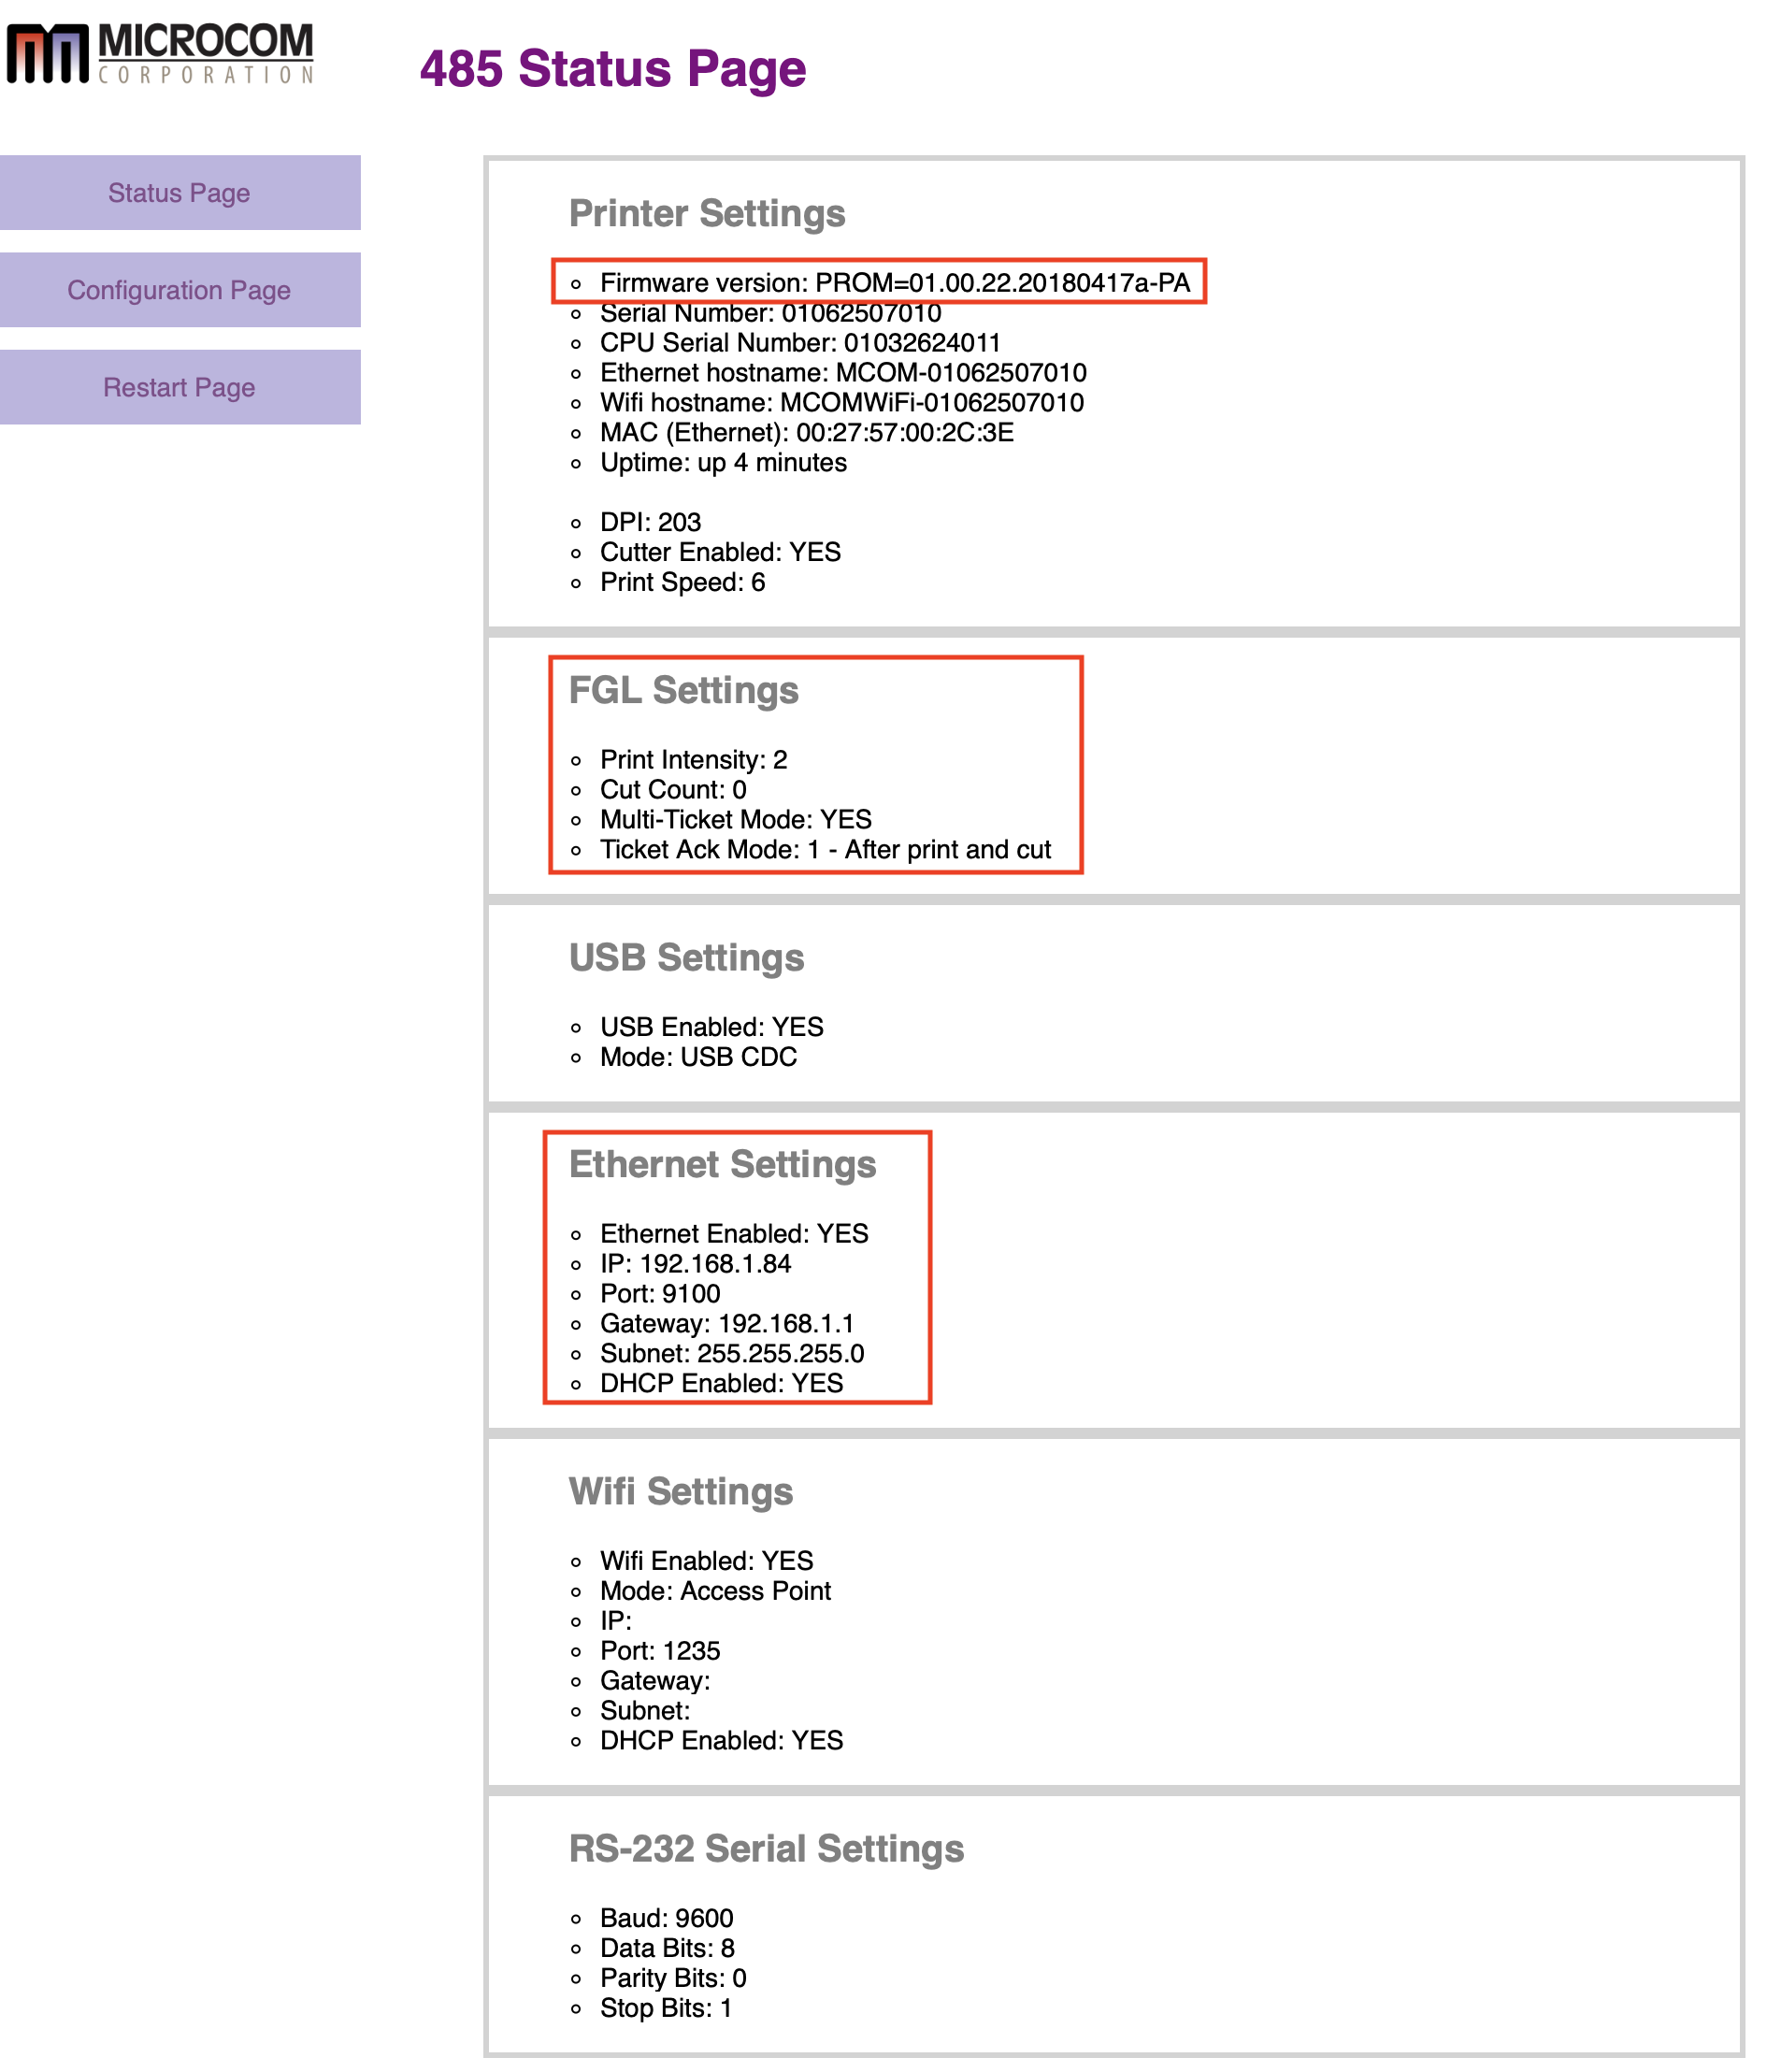 On the set-up page, if you enter an IP address, you can click the 'globe' icon to connect to the printer's status page. If you have the right ethernet address and are on the same subnet, you should see a page similar to the one on the right.
Of particular interest are:
|
| Configure Printer |
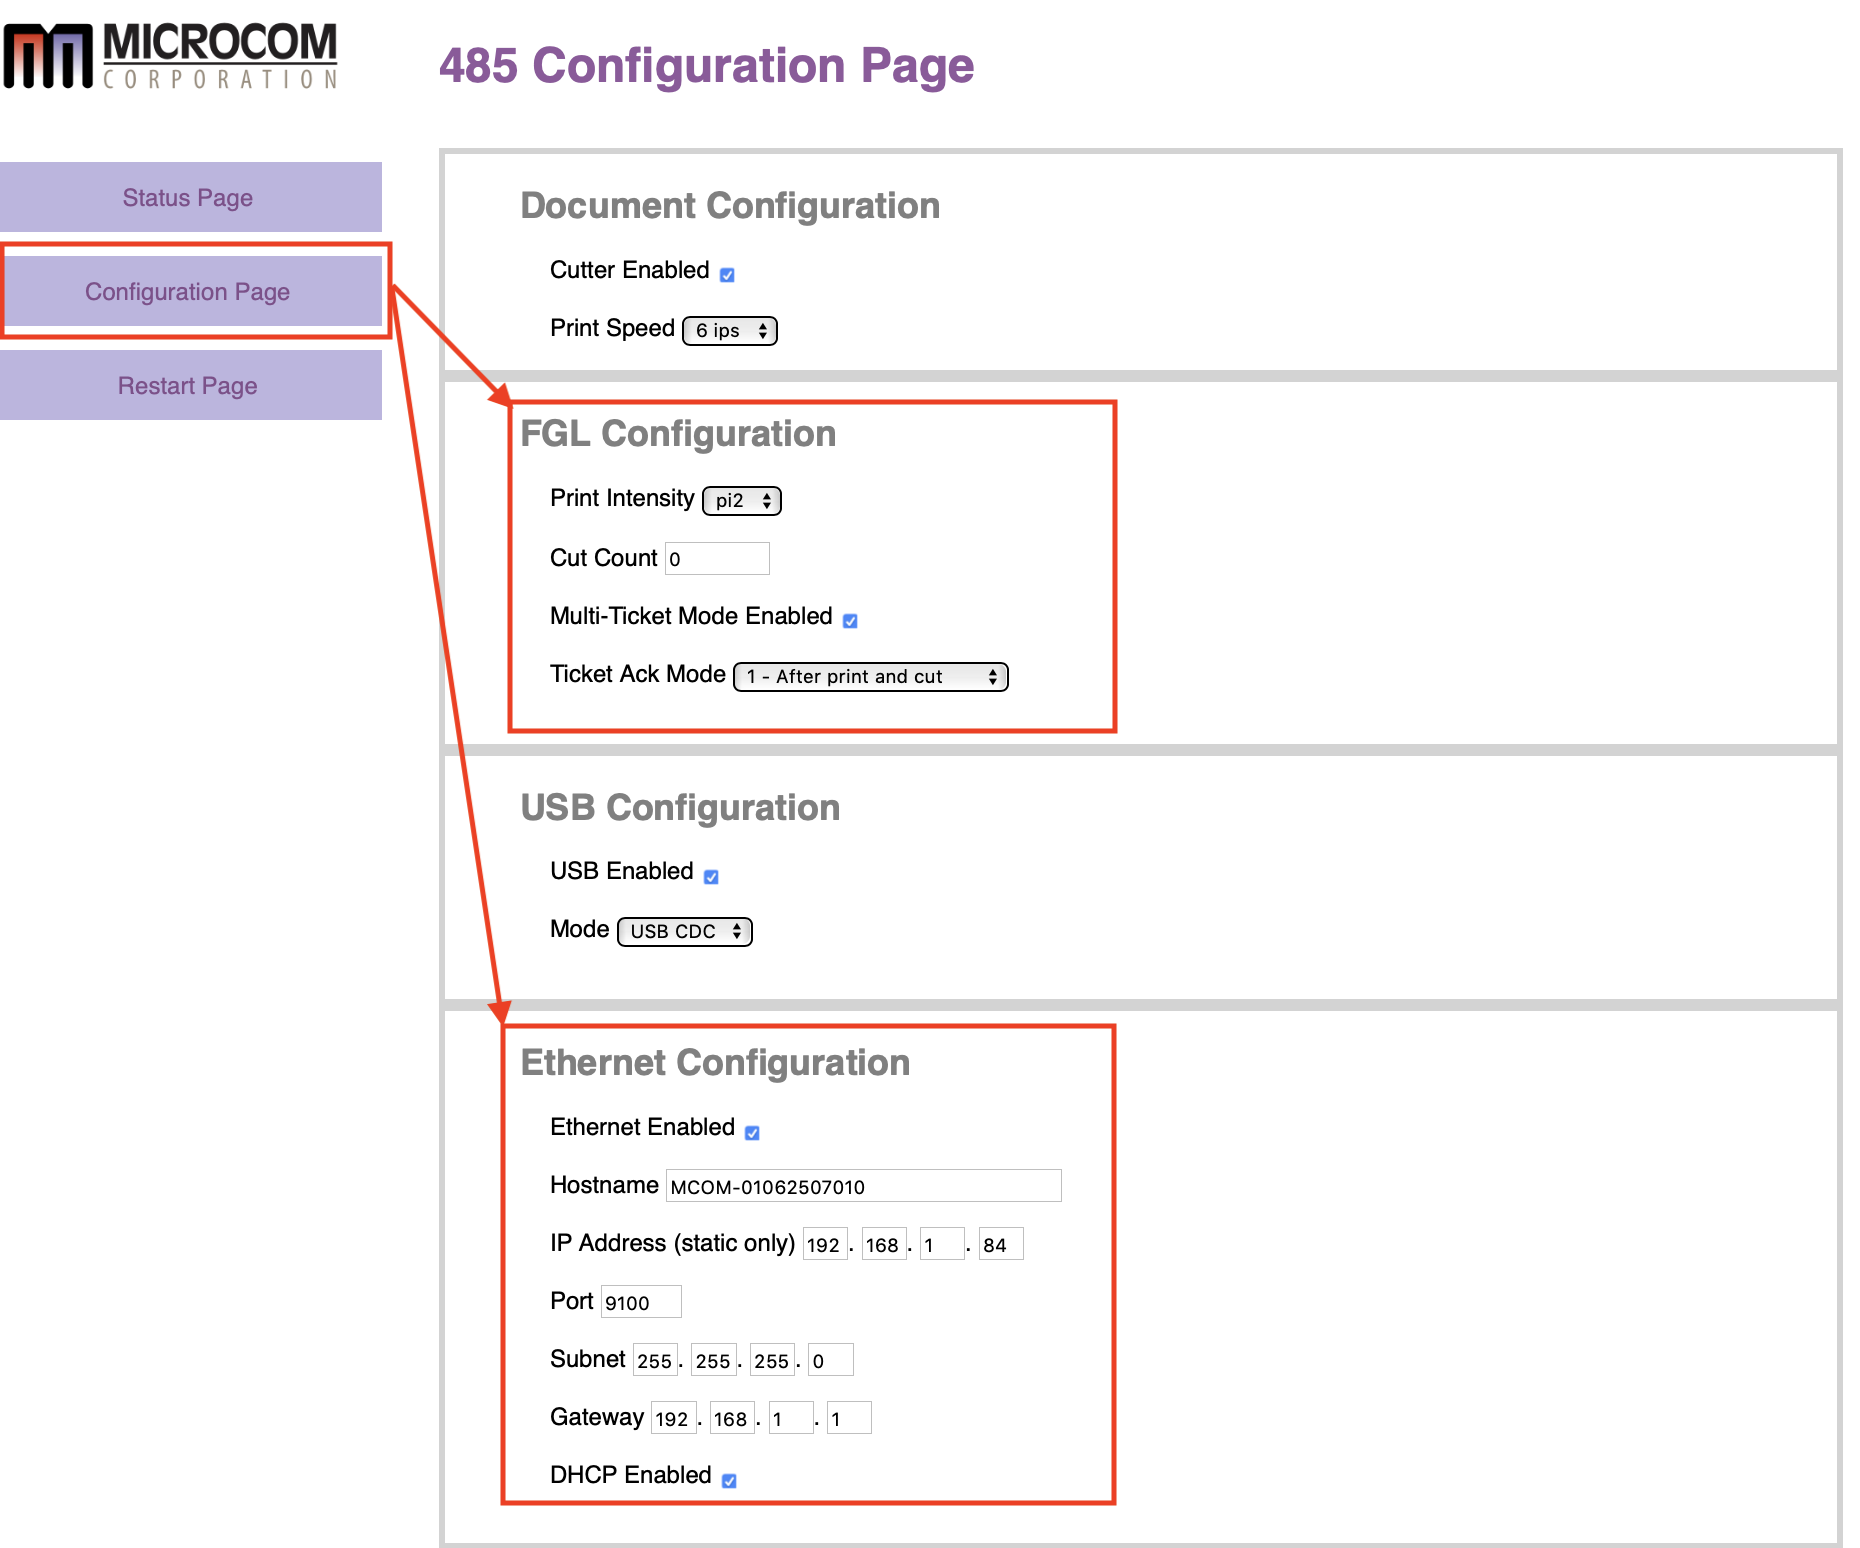 Click the Configuration Page button to change any settings you need for your network or FLG compatibility.
For ethernet setup:
|
| Configure Printer (Wifi) |
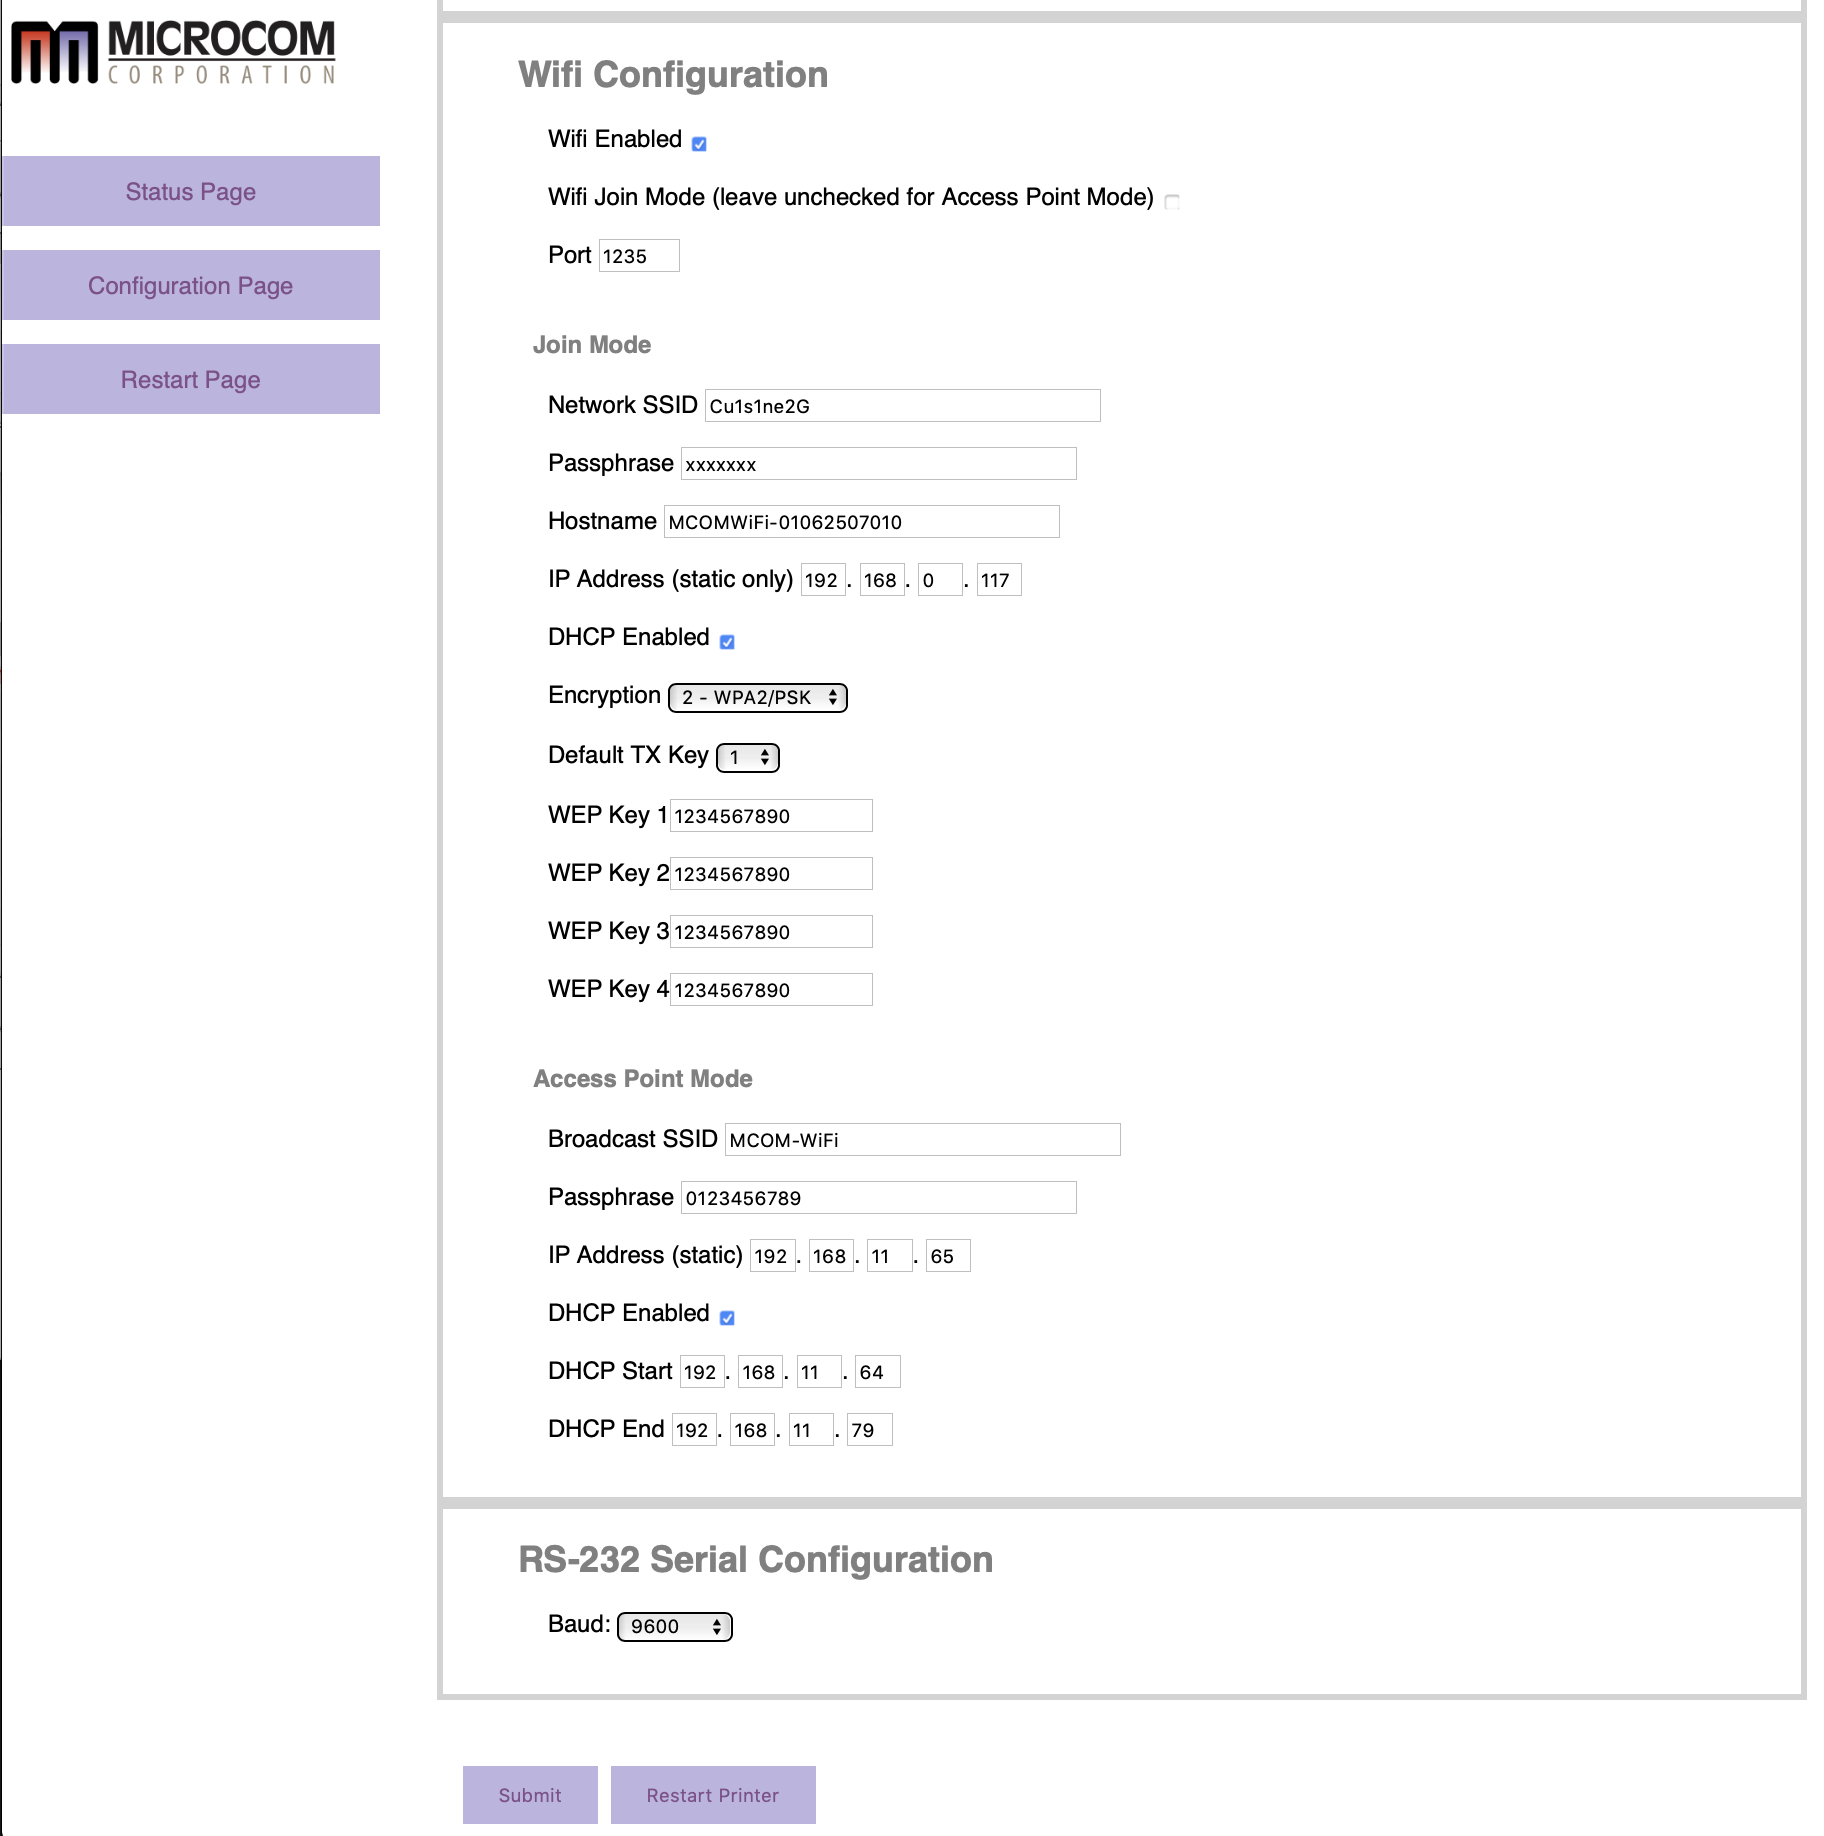 Lower on the Configuration Page are settings for enabling wifi. We generally recommend against wifi on your ticket sales network as that could create an exploitable part within your network and should be documented as per PCI compliance requirements.
If you wish to use wifi for connecting to the ticket printer, you can. It takes two approaches:
|
Microcom Printer Unboxing
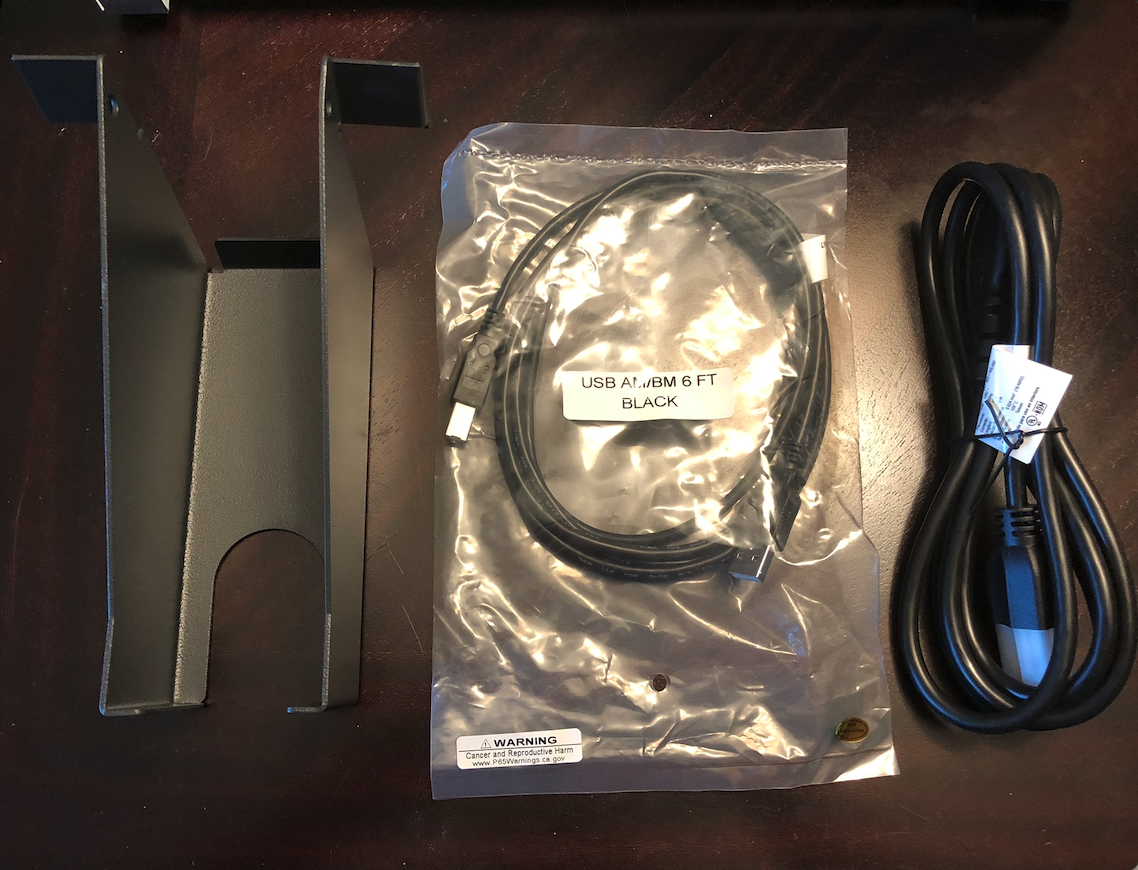
A Microcom printer ships with a print tray and power cable. You will need to supply ticket stock and an ethernet cable or pre-ordered Panda Wi-Fi dongle from Artsman.
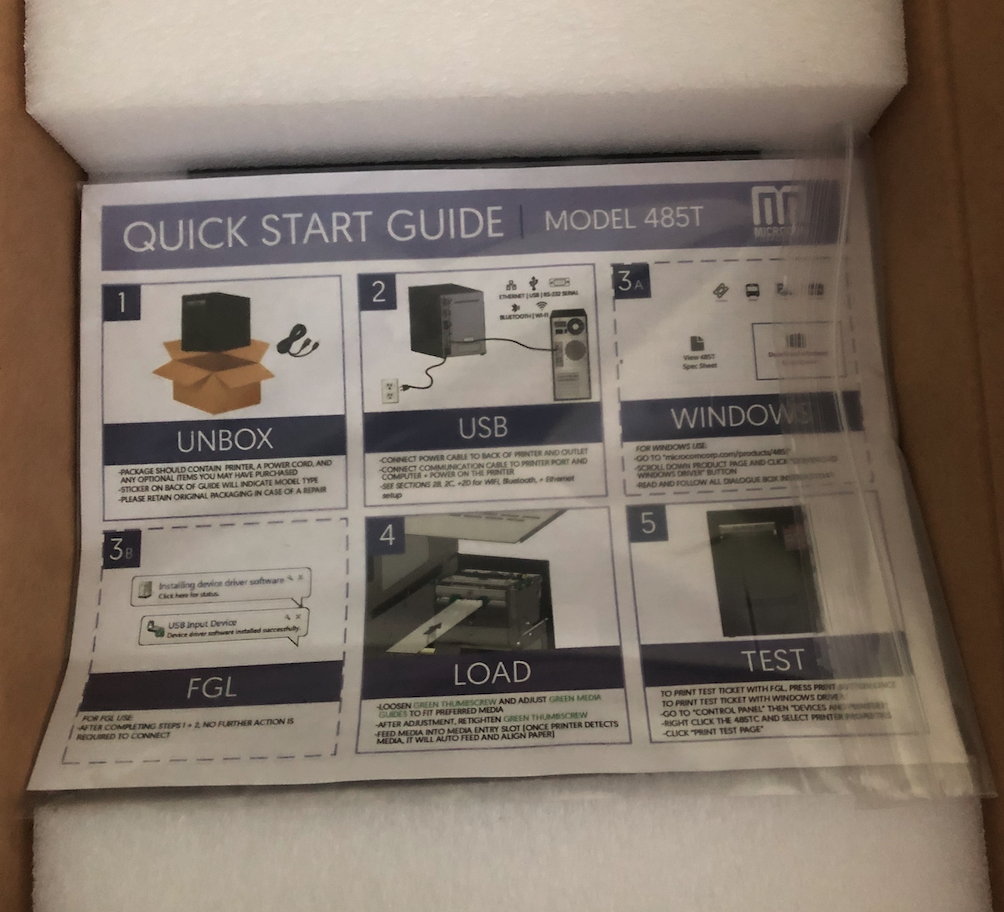
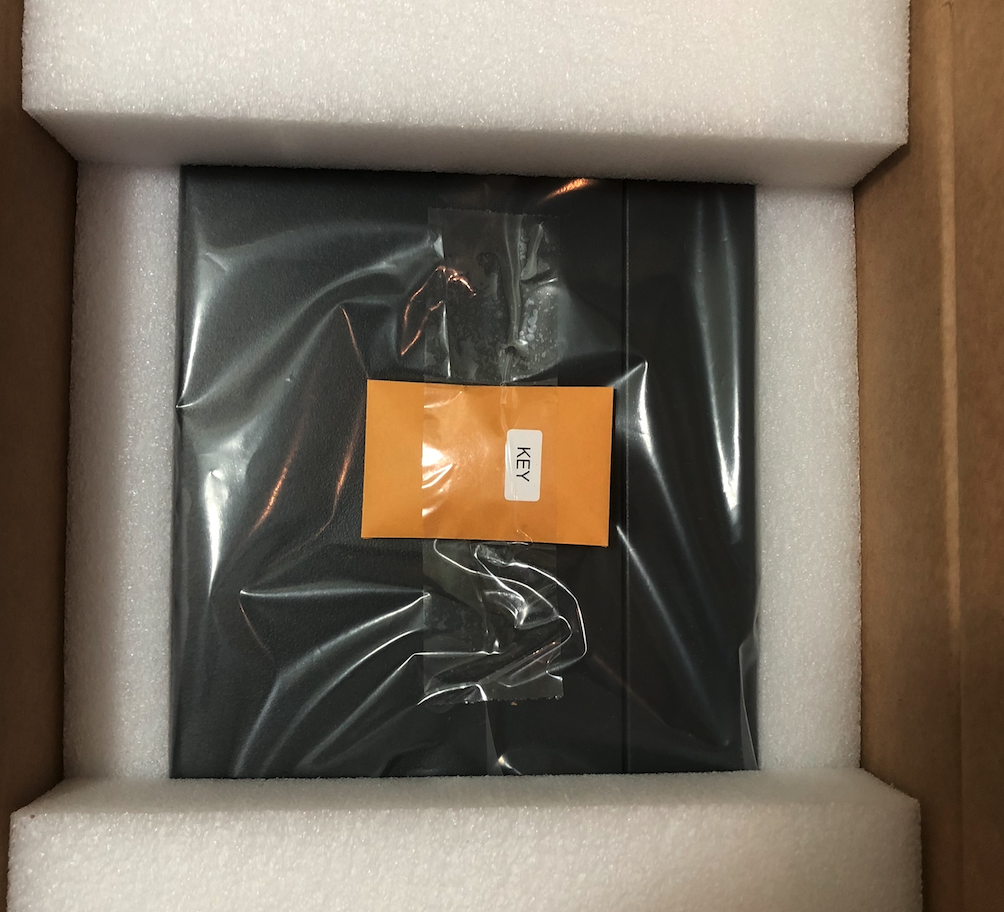
When opening the box you'll find a Quick Start Guide. Set this aside as these steps are not required.
Below the Quick Start Guild will be a yellow envelope containing the Key to open the printer. This envelope is taped to the plastic wrap encompassing the printer. The key will need to be used each time to unlock the side panel before the printer can be opened.
Open the side panel of the print (using the key) to access the Accessories box.
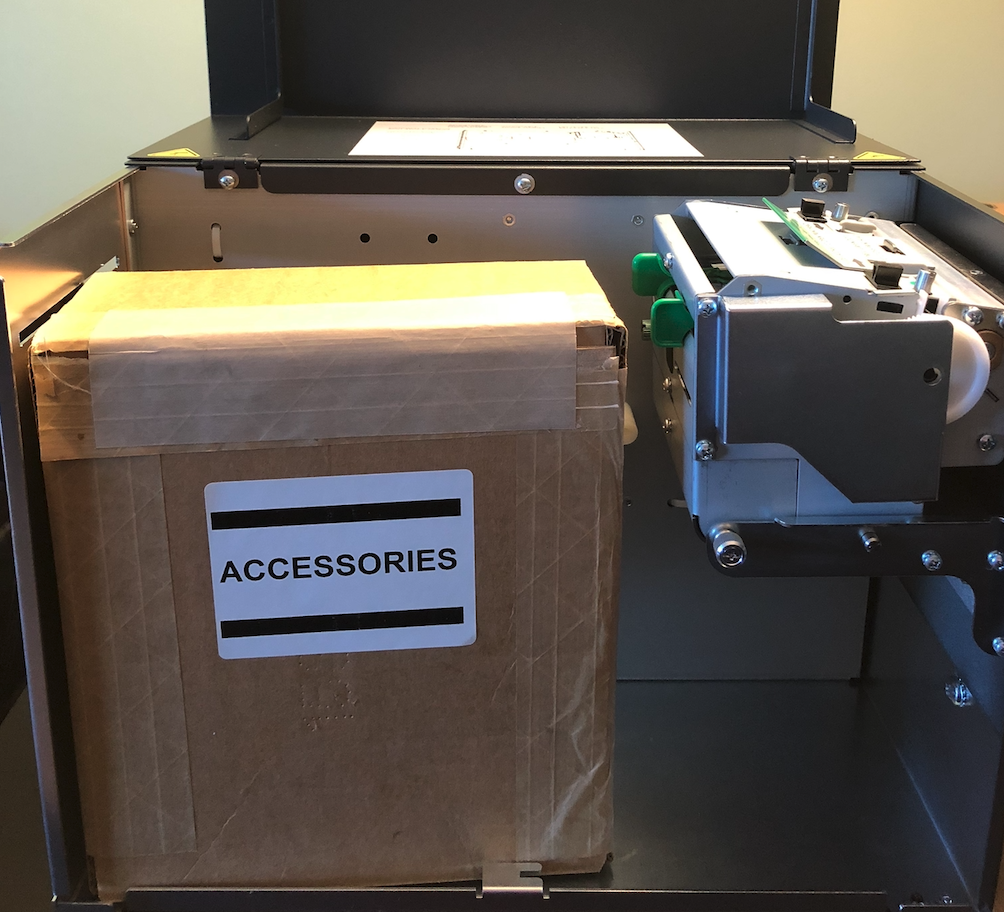
The Accessories box contains the print tray, a USB cable (this will not be used), and the power cable for the printer.
Updating Microcom Printer Firmware
The 485 series printer uses the USB HOST port found on the back of the printer to update the firmware in the printer. A USB flash drive that is greater than 1GB but less than 32GB formatted as a FAT32 file system is used during the update. Follow the instructions below for additional information.
Preparing the USB flash drive to update printer code
- The flash drive must be less than 32GB in size and formatted as a FAT32 file system.
- Connect the USB Flash Drive to a Windows-based PC.
- Open Explorer or type My Computer in the search bar of the task menu.
- Right-click on the flash drive and select Format from the menu that appears.
CAUTION: Verify that you are selecting the flash drive as this will erase the contents of the drive. If you have any doubt, disconnect the flash drive and it should no longer show up under the Devices and Driver section.
- In the Format window displayed, select FAT32 for the file system. Type in a label for the flash drive and then click Start.
- Once complete, the flash drive is ready for the code update files to be copied to it.
Copying Files to the formatted USB Flash Drive
Once formatted for the FAT32 file system on the flash drive, copy the updated file to the flash drive by doing the following.
- Download the code files located at:
Firmware Version 01.01.21 (Jan 2024)
- Unzip the files onto your PC.
- Copy the unzipped files onto the formatted flash drive.
- After the files are copied onto the flash drive, right-click on the drive, select Eject, and remove the drive from the PC.
485 Firmware Update Process
Follow these instructions using a flash drive that contains the code update files. Please make sure that ticket stock is installed in the printer before continuing.
- Turn the printer power OFF.
- Connect the flash drive to the USB HOST port on the back of the printer.
- Turn the printer ON.
- Observe the display on the front of the printer, it should look like this:
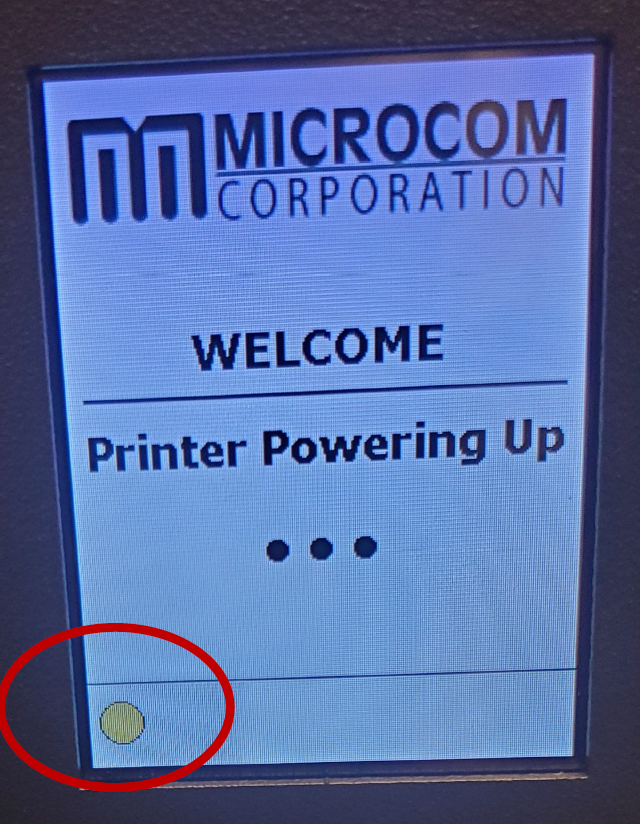
- Once the status light changes GREEN turn the printer off and remove the USB flash drive.
- Turn the printer ON and allow the update to complete. The Display code will now update. Once the light turns Green, the update is complete.
- Verify the code update by going to CONFIG\PRINTER INFO on the display.
Under the Code Ver should report 01.01.21. Led should turn green in color once the update is successful.
Updating Microcom Cutter Settings
There is Windows-based application that allows for connecting to any Micromcom printer currently on the local network. This tool can be used to update the cutter settings that may have been impacted following the installation of Firmware version 01.01.12.
Updating Cutter Settings
- Download the Microcom Confirmation Application from here:
https://www.microcomcorp.com/downloads/x85_configuration_application_for_windows.zip
- Unzip and install the application.
- Run the .exe file to start the configuration application.
- Connection the printer directly to the same PC.
- On the main screen towards the bottom, select the "CONNECT TO PRINTER" button and select the port of the printer that is being used (Enet or CDC USB).
- Select the port number of the connection.
- Select the "READ FROM PRINTER" button to load in the current printers configuration.
- Select the "BASIC CONFIG" on the side menu.
You should now see a CUTTER TYPE, select MICROCOM CUTTER
- Select the "SAVE TO PRINTER" button towards the bottom to send the command to the printer.
- Select "RESTART" to restart the printer and you may now exit the configuration app
- Test the printer once it reboots to verify that it now cuts properly.
Microcom Printer - Cutter Offset
If you are having Microcom Printer issues, in that your Tickets are not cutting at the exact line they should be, you can adjust the Cutter Offset.
|
NOTE: Do not cut right on the perforation. It will dull the cutting blade faster, causing more frequent blade replacement costs. New blade cutters are supplied directly by Microcom and are not covered by warranty. |
Setting Cutter Offset
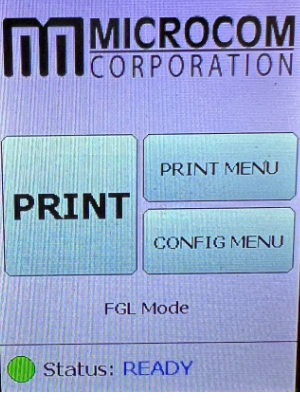
- Press the Print Menu Button
On the Printer itself, click the Print Menu button.
- Click the Next Button Twice
Click the Next button twice to get to the Cutter Offset option.

- Select the Cutter Offset Option
- Select the Offset Measurement
Use the plus + and minus - buttons to set your preferred offset measurement, which are calculated in pixels.
We recommend '-20' as a good starting point.
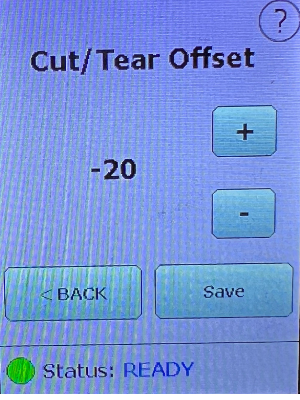
- Click Save
- Print a Test Ticket
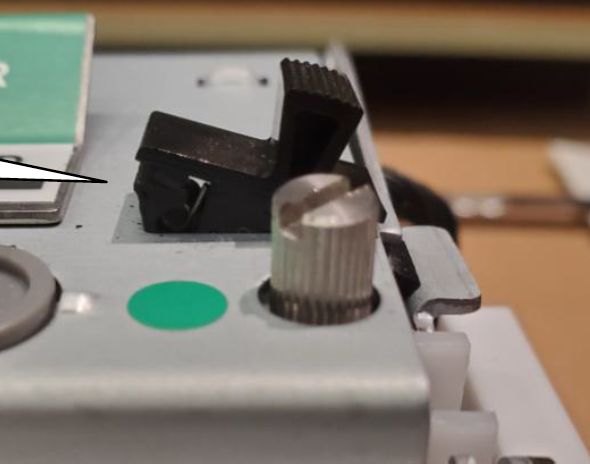
Replacing Latch for Microcom Printer
The latch sits inside the print head assembly. It holds the print head firmly in place ensuring it makes contact with the ticket stock at the time of printing. If the latch fails the head cannot burn content onto the ticket stock. It can look like one side of the printed ticket is "faded" or blank.
The latch has a smooth top with a nub that protrudes for easy movement. Below the flat surface, there are clasps on opposite sides of the latch. These are used to hold the latch in place. One side has a small pressure spring that allows for the clasps to be moved and makes for easy removal.

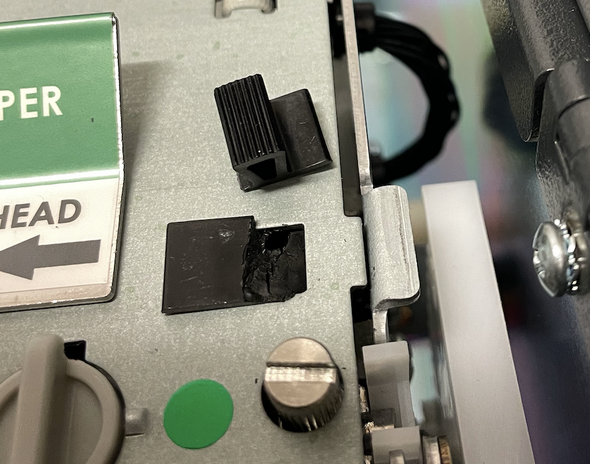
When the latch fails the nub disconnects from the top as seen below.
Removing the clasp
- Push in the spring-loaded side of the clasp with a flat head screwdriver.
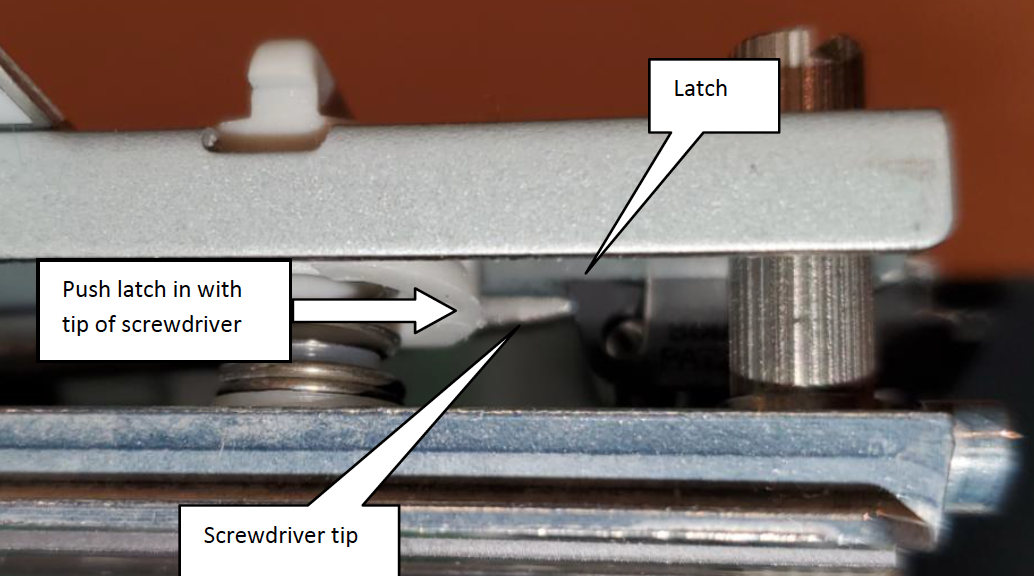
- While pushing in the clasp, pry up on the flat part of the latch on the top of the print head assembly.
- One side of the latch should release allowing for the broken latch to be removed.
Inserting the clasp
- Gently slide the latch in non-spring loaded side first.
- Push the clasp on the spring loaded side in and down till it pops through the hole.
Microcom Printers and Wireless Printing
Microcom printers have the ability to print wirelessly using a Panda Wireless dongle. When the printer is unboxed the dongle can be inserted directly into the USB port and the printer configured to join the network using Wi-Fi.
For security, Wi-Fi printing should be set up on a private, secure network where only administrative staff have access. The speed of ticket printing will largely depend on the network speed. Wi-Fi printing may not be as effective for larger batch printing.
Connecting Microcom Printer to Wi-Fi
- Turn the printer Off using the rear panel power switch.
- Plug the Wi-Fi dongle into the USB port on the back of the printer.
The Wi-Fi dongle will not light up.
- Turn the printer On.
- Press the CONFIG MENU button on the printer display.
- Press Next until you see the OPTIONAL PORTS setting and press.
- Press the OPTIONAL PORTS button, select the WIFI bullet and click SAVE.
- Press Next until you get to the WIFI menu option.
- Press the WIFI button.
- Press the WIFI JOIN button, choose the JOIN setting, and click Save.
Use the Next button to continue navigating through the settings.
- Press WIFI SSID, enter the name of the wireless network to be joined, and click Save.
- Press WIFI PASSPHRASE, enter the wireless network password, and click Save.
- Press WIFI DHCP, select ENABLE, and click Save.
- Press WIFI PORT, enter 9100, and click Save.
- Press WIFI ENCRYPTION, select your Wi-Fi network encryption, and click Save.
The Wi-Fi dongle will light up once it's connected to the network. The printer will take approximately 30 seconds to retrieve a DHCP IP address from the network.
|
If the Microcom printer has previously been connected via an Ethernet cable or an Ethernet cable has been plugged into the printer you will not be able to simply plug the dongle in and configure the Wi-Fi settings. Follow the steps below to complete the wifi setup process.
|

Removing Ethernet Settings Before Using Wi-FI
- Turn the printer Off using the rear panel power switch.
- Unplug the Wi-Fi dongle and/or Ethernet cable from the printer.
- Turn the printer On.
- Press the CONFIG MENU button on the printer display.
- Press Next until you get to the ETHERNET menu option.
- Press the ETHERNET button.
- Press the DHCP button, select the DISABLE bullet, and press Save.
- Click the Next button to advance to the IP ADDRESS menu.
- Click the IP ADDRESS button, change each of the four numbers to 10, and press Save.
This removes the previously configured IP address from the ethernet connection and moves the settings back to default.
- Press EXIT and REBOOT NOW.
- Wait until the printer comes back online and you see the PRINT button.
- Turn the printer Off.
- Plug the Wi-Fi dongle back into the printer.
- Turn the printer On.
The printer will take up to 30 seconds to pull an IP address from the network. Use the Print button on the front of the printer to generate a test ticket. The IP address of the printer will appear on the test ticket. Use the Command prompt (Windows) or Terminal (Mac) to Ping the IP address on the ticket. The printer should respond.
Add the printer as a Device to Theatre Manager and set your Hardware Preferences to use the new printer. You should now be able to print to the printer using the Wi-Fi connection.