
Main menu
You are here
Boca Lemur
To setup a Boca printer, you perform the following steps:
- Power up the printer and connect it to the network via a hub, switch or router.
If a hub, switch, or router is not available, a crossover cable between another computer and the printer will be needed.
- Open the computer's web browser, typically either Internet Explorer, Mozilla Firefox, or Apple Safari.
- In the address bar of the web browser enter the following IP address: http://10.0.0.192 and press the Enter key.
The Boca Systems' Printer Configuration Page opens.
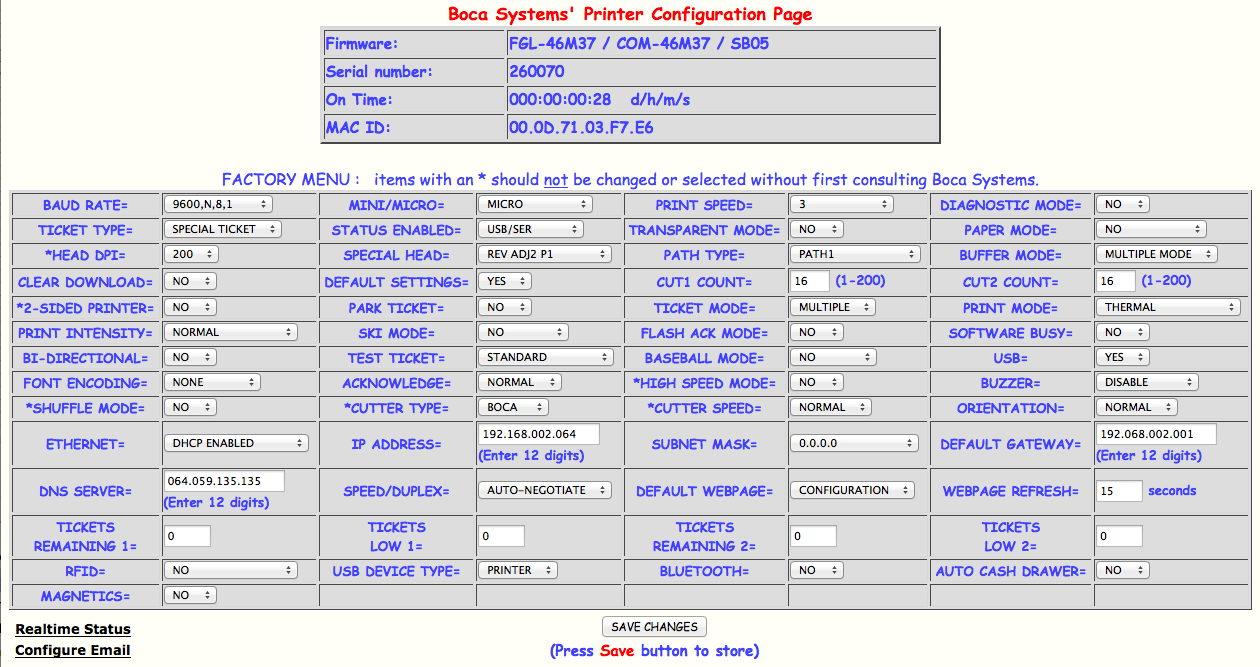
- Near the bottom of the first column of settings, use the drop down menu to change Ethernet from DHCP Enabled to Yes

- At the bottom of the second column of settings, set the IP address for the printer.
Typically leading zeros are not necessary in an IP address, but they are for this setting.

- At the bottom of the third column of settings, adjust the Subnet Mask if necessary.
- At the bottom of the fourth column of settings, set the Default Gateway for the network.
Again, it is necessary to include the leading zeros.

- Click the Save Changes button to finish the process.
The printer should now be able to be pinged at the new IP address. Also, the new IP address will print on a test ticket if the information is needed to be stored somewhere.
For information on connecting a user to the printer via Theatre Manager, click here.