
Main menu
You are here
IP Ticket Printing Setup - Windows
Windows OS
To configure a printer for the Windows operating system, you perform the following steps:
- Connect the printer to the computer using a crossover cable or to the network by connecting through a hub.
- Turn the ticket printer on holding down the [F0] button on the printer.
This prints a ticket with information about the printer and it's IP address. The factory default tends to be 192.168.1.1
- Download the installation file.
The installation file can be found at http://www2.artsman.com/Software/PANetworkUtilityVB-1.1.zip
- Extract the file from the zip archive.
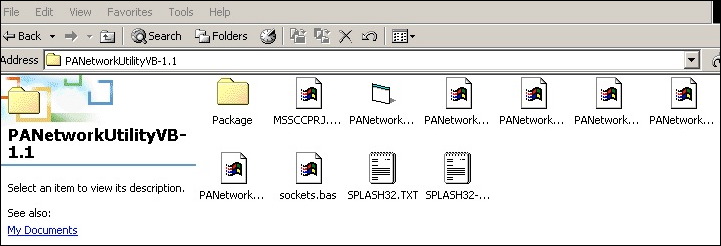
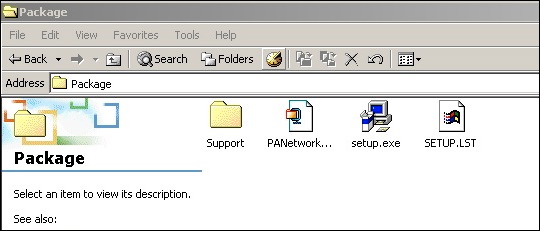
- Open the Package folder and run the Setup.exe file.
Follow the prompts to complete the install.
- Temporarily change the computers IP address to 192.168.1.xx where xx is anything other then 1 (the ticket printer default is 1).
- Open Network Places.
- Right click and select Properties.
- Click Local Area Connection.
- Click Properties.
- Select TCP/IP.
- Click Properties.
- Change the IP Address to 192.168.1.2 (anything other than 192.168.1.1) and the Subnet to 255.255.255.0
- Click OK till the desktop is reached.
- Move back to the previous folder and run the PanNetwork file (Third from
the left).
- Enter the ticket printer IP address at the top of the window.
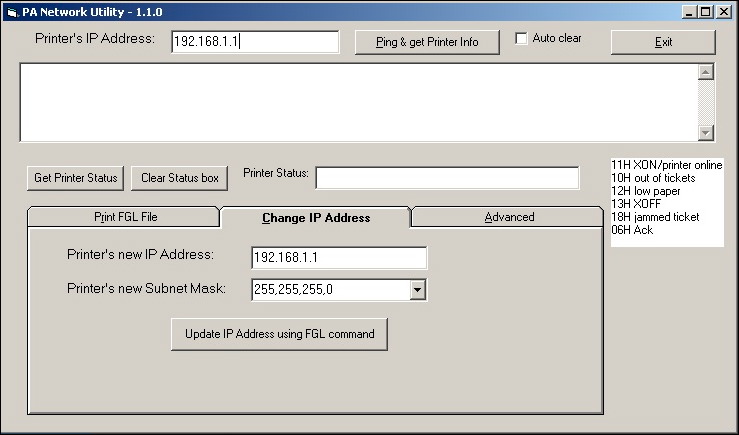
- Click the Change IP Address
 tab.
tab.
- Change the Printer's New IP Address and the Printer's New Subnet Mask.
- Click the Update IP Address Using FGL Command
 button.
- Change the computer IP Address back to it's original setting.
- Turn the ticket printer off and on.
If you disconnected this workstation from the primary network as noted above, reconnect it at this time.
- Login to Theatre Manager.
- Go to Setup->System Tables->Devices and search for a list of all devices you have.
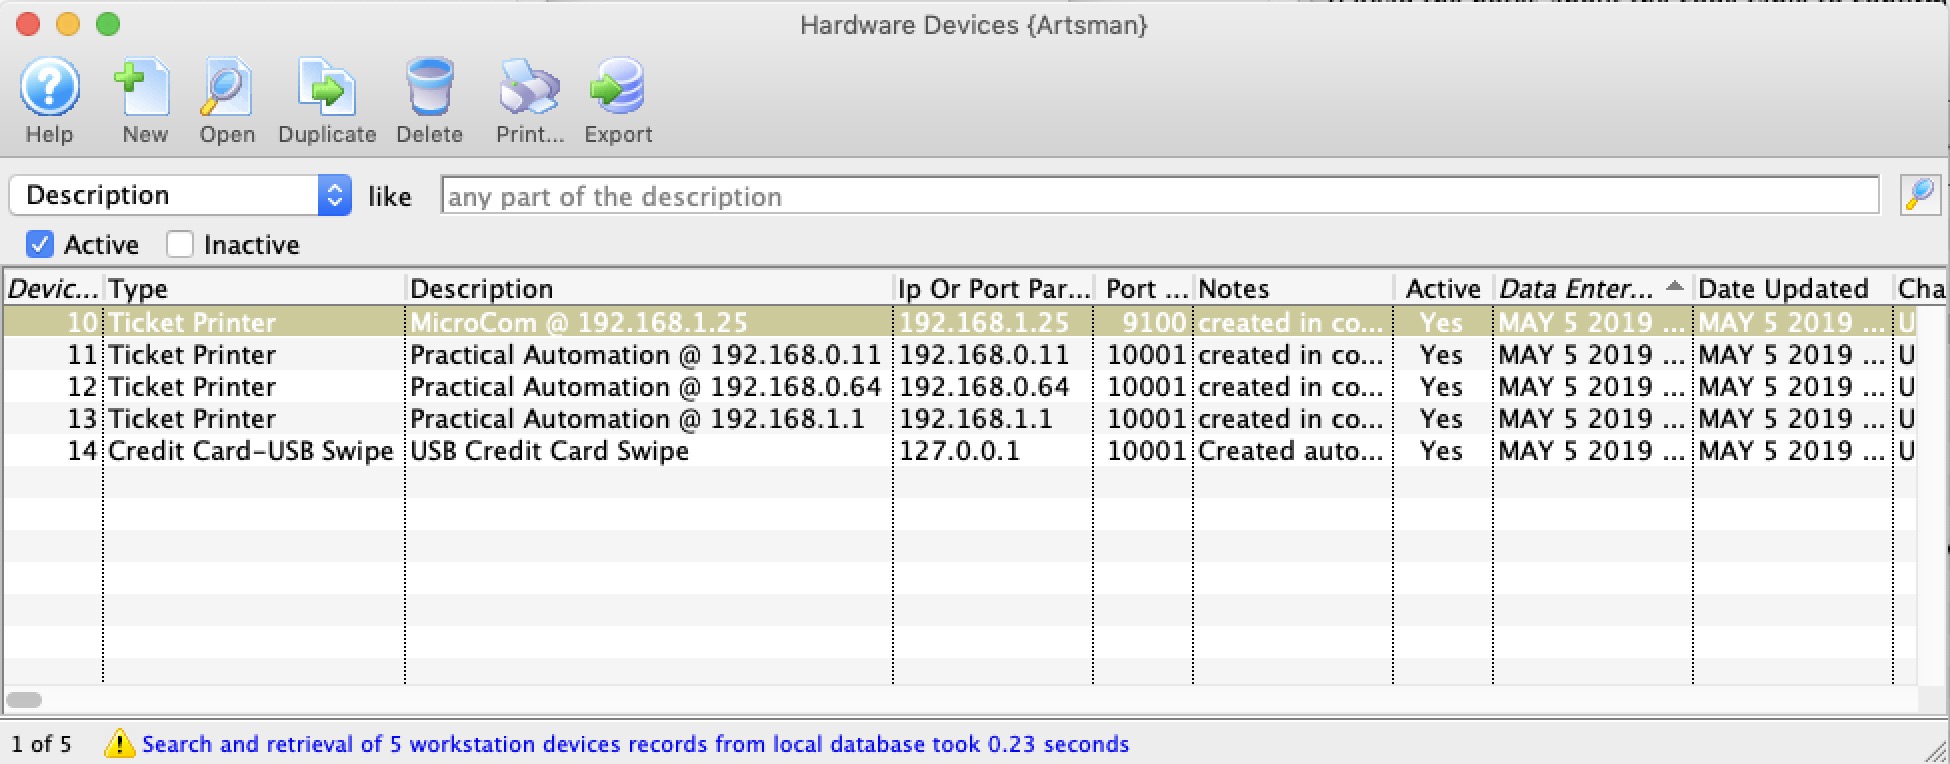
- If this printer is in the list of devices, then edit it. If not, insert a new printer device. Refer to Device setup for more information.
Change the IP address in the appropriate spot
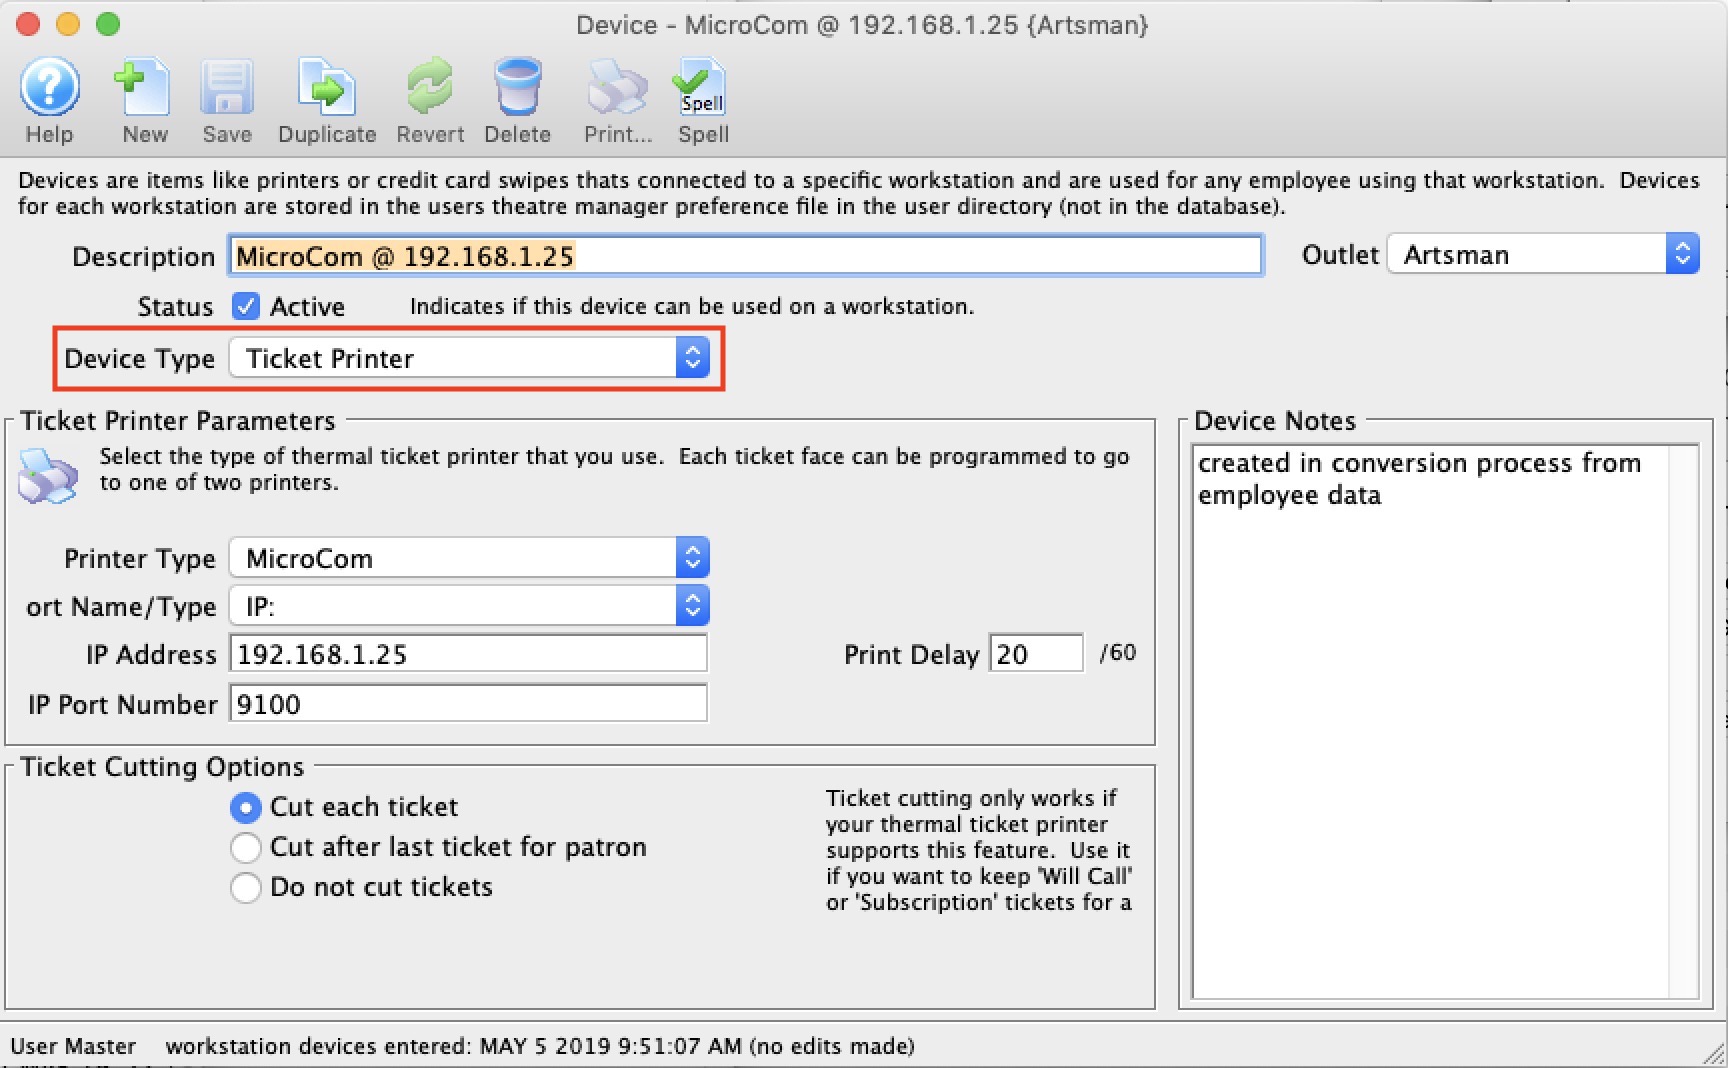
- Any employee using that device in their hardware setup will now use the revised IP address - so it changes it for everybody.
|
If you are connecting through a hub (and not using a crossover cable), it may be necessary to use only the hub between the workstation and the printer - disconnecting the workstation from the primary network. Since the printer comes with a default IP of 192.168.1.1, this IP may already be in use by another router on your network. This will cause an IP conflict and you won't be able to affect the IP address of the printer. Be sure to download the PANetwork Utility prior to disconnecting from the network. |
