
Main menu
You are here
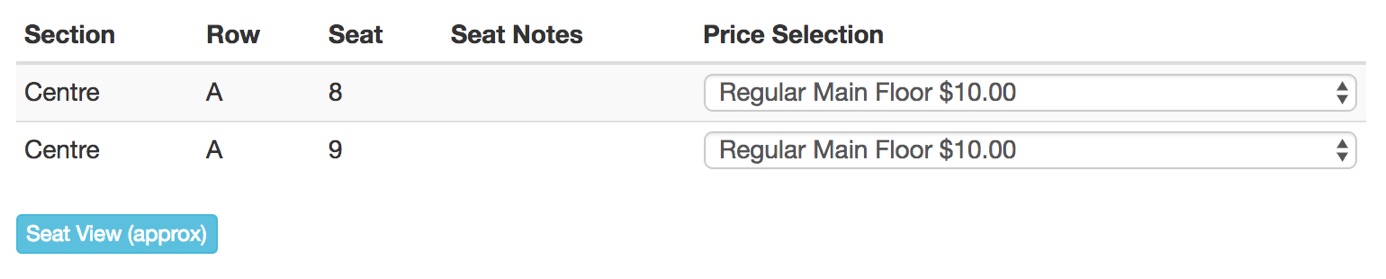
Seat View for Web Sales
When purchasing a ticket online a link can be added offering the patron an opportunity to see the view from their selected seats prior to adding tickets to their cart. This option requires some setup in order to work successfully online.
Once the setup is in place, the seat view button will become available. Clicking the button will open a new tab in the browser displaying the seat view image.
Adding the Seat View Image
- Take a picture from each seat or from one seat that will represent multiple seats inside the venue.
- On the Web Listener computer, create a tmSeatView folder inside the WebPagesEN/tmGifs folder to store the seat view images.
- Place all the seat view images into the tmSeatView folder ensuring the naming convention for each image is clear.
Updating the Theatre Map
- In Theatre Manager, open the Theatre Map.
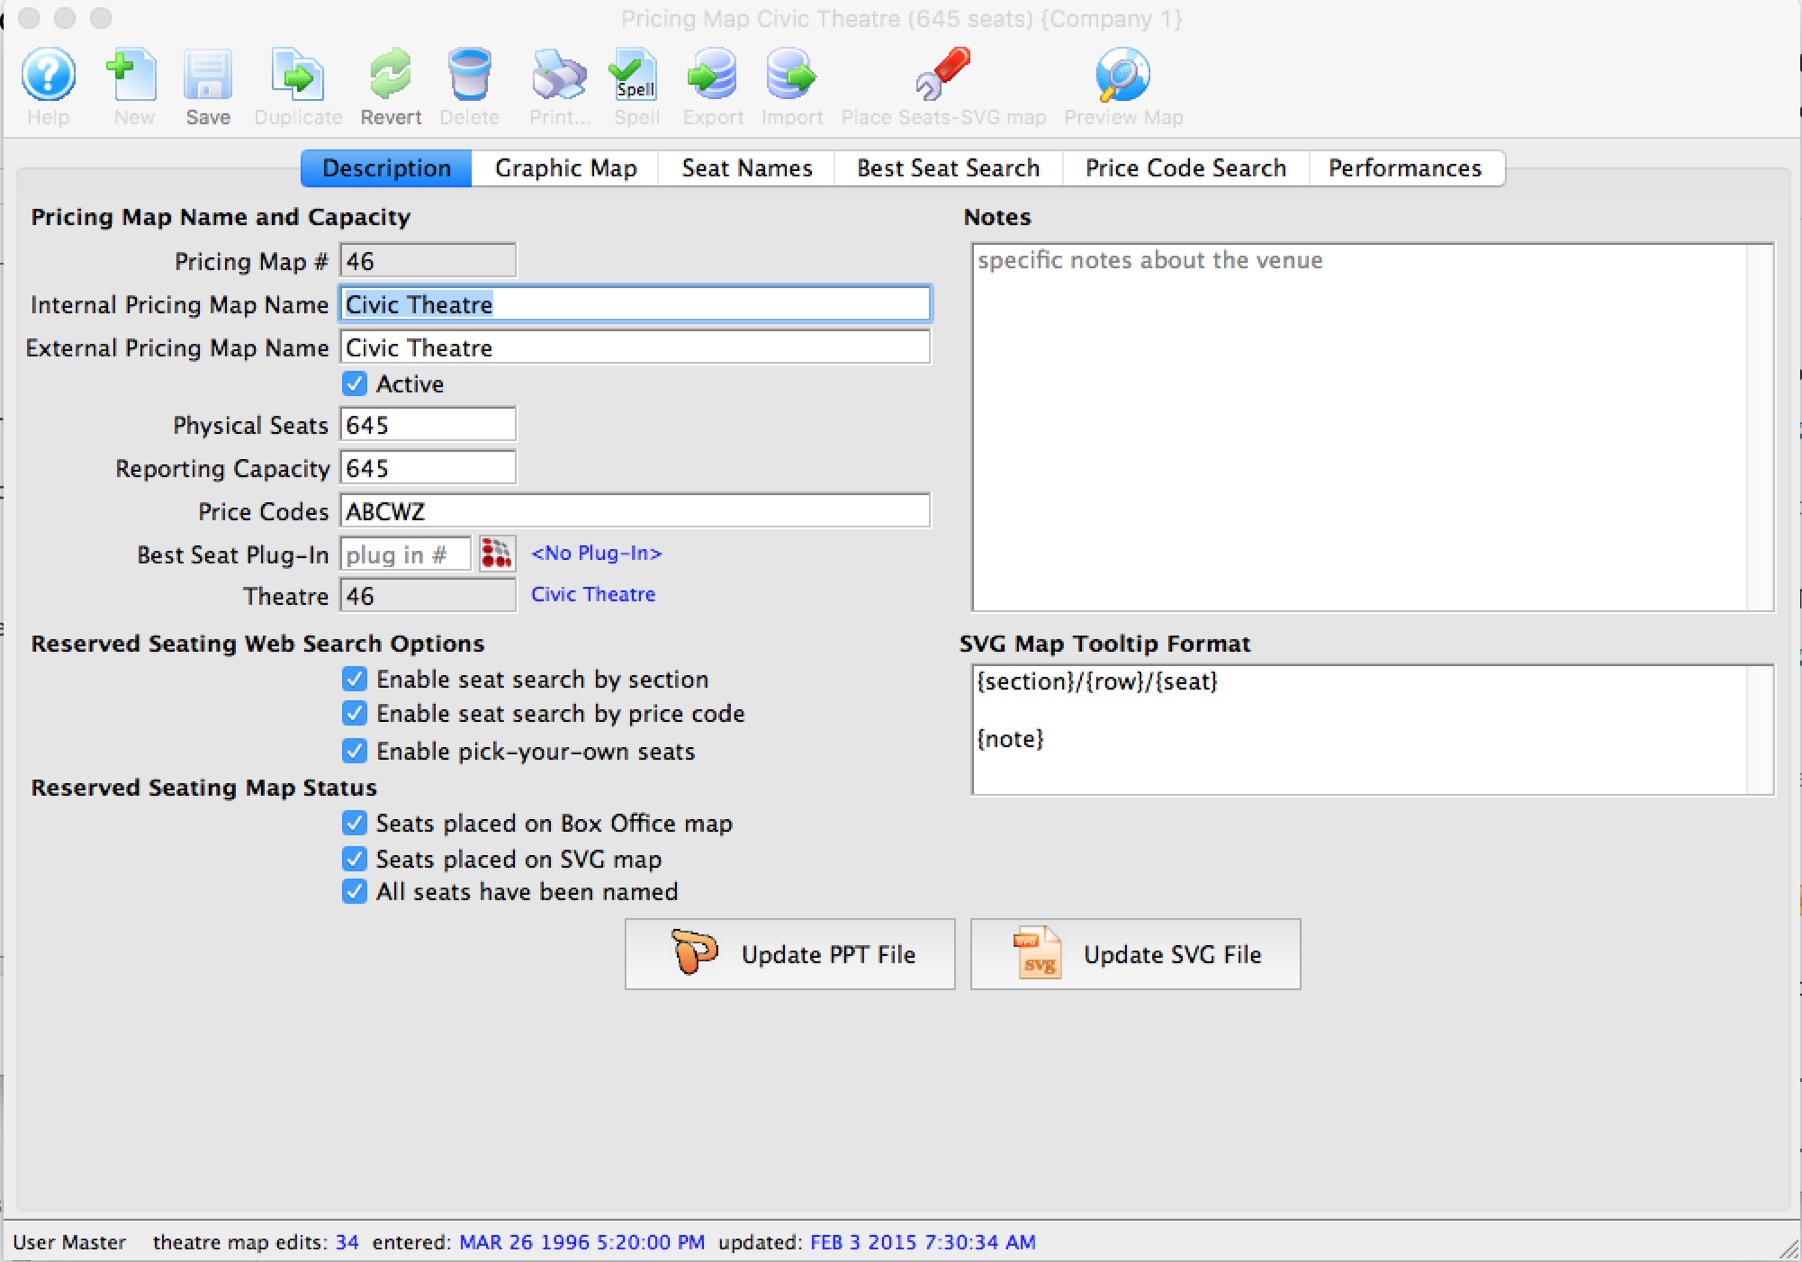
For details on how to access the Theatre Map window, click here.
- Select the Seat Names tab.
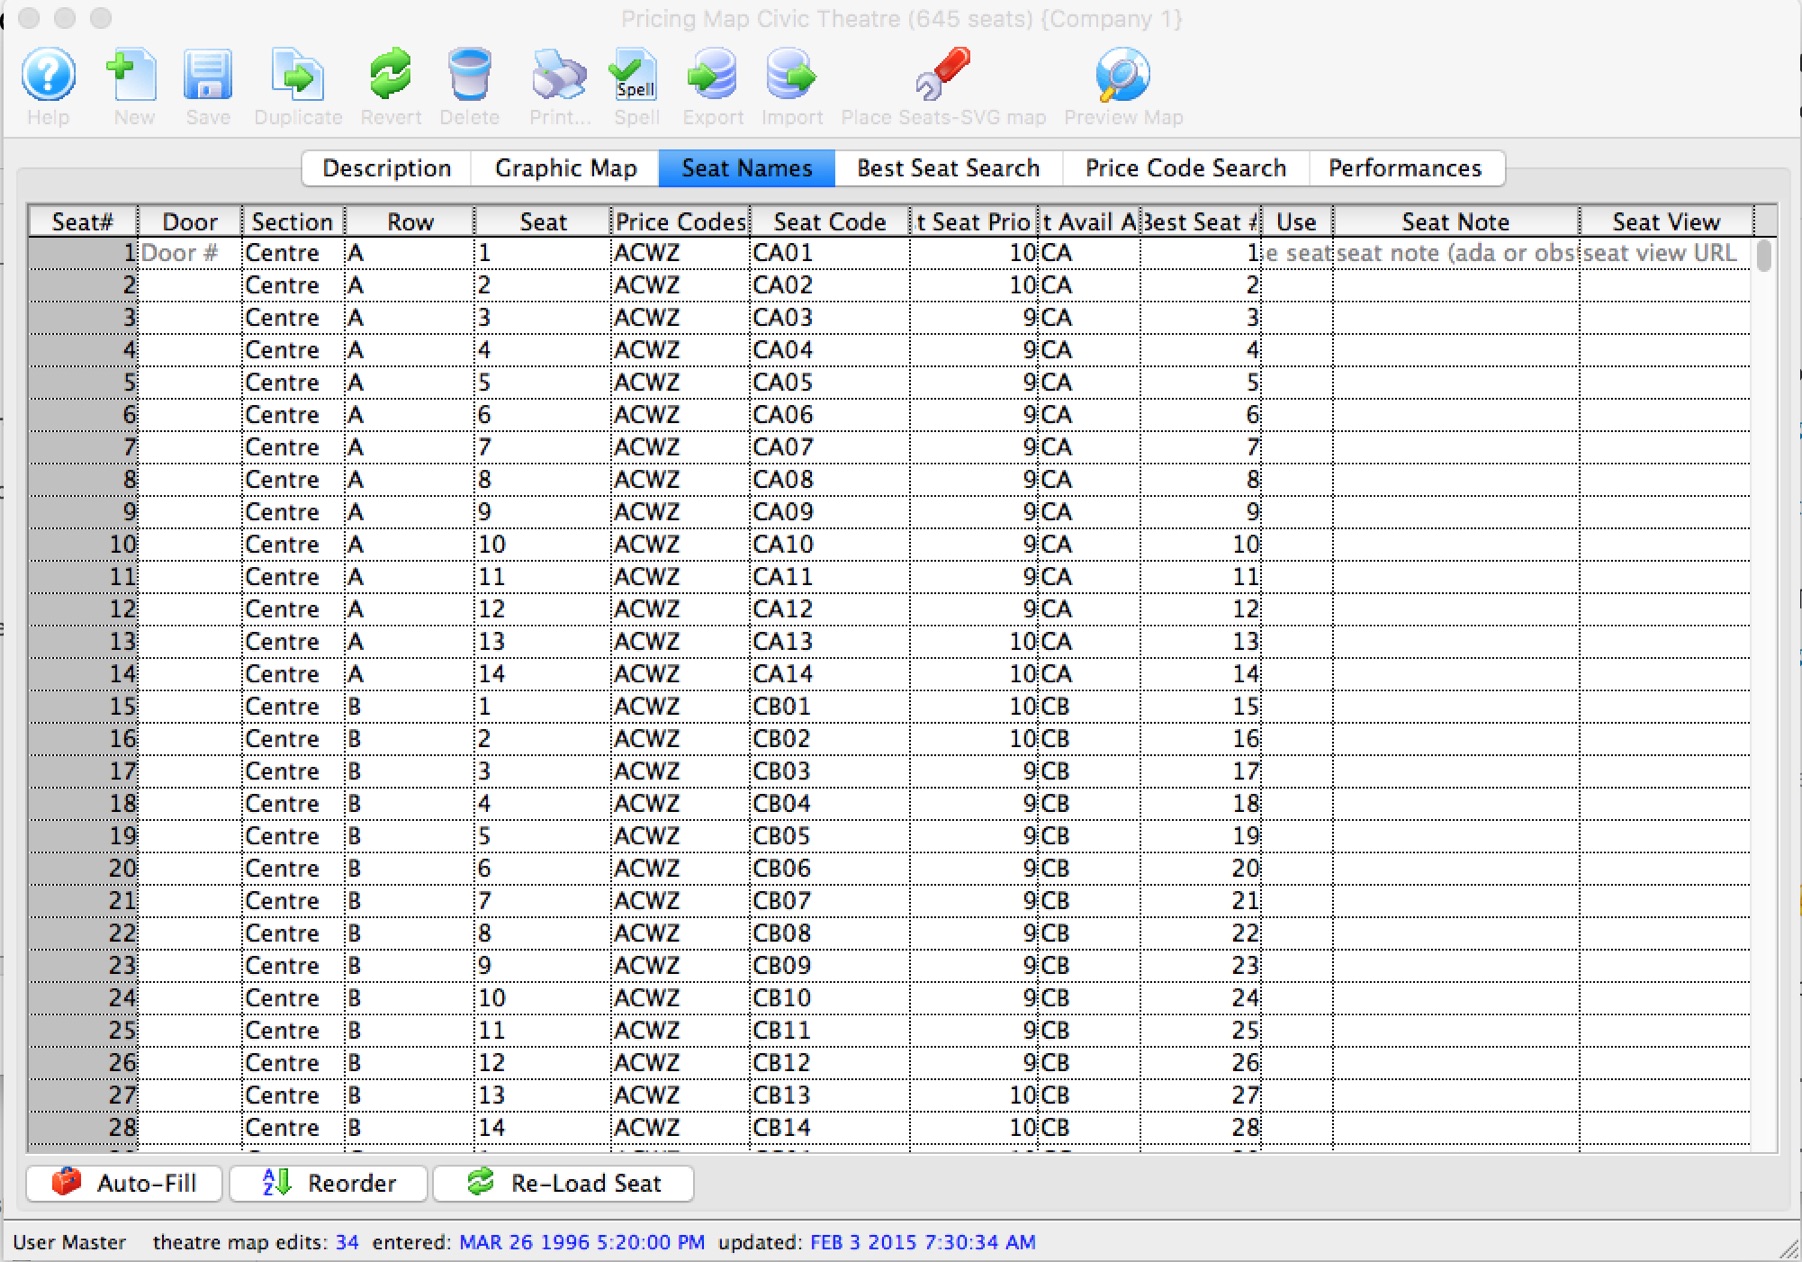
For more information on the Seat Names tab, click here.
- Update the far right Seat View column next to each seat with the name of the seat view image placed in the tmSeatView folder above. The column should contain the full name of the seat view image including the extension. You can use the same image for a row or area of the venue if the seat view doesn't change that much. Examples:
If you:
- use your smart phone or digital camera to take a picture from the middle of row 'H' on the left of the theatre, that image could represent the view from all of row 'H' and perhaps even row 'J' and 'K'.
- Retrieve that image from your camera and reduce its physical file size so that it is about 50 to 75K (at most - since most cameras take at least 4 megabit pictures, and sharply reducing the image size is important for web performance).
- You might rename that file ViewFromRowHJK.jpg so that you know what it is at a glance
- Place that picture into the tmSeatview folder described above
- put the name of the file ViewFromRowHJK.jpg into the Seat View column for all the seats in rows 'H', 'J', and 'K'.
- repeat for the next view from a seat picture you take of the venue
- Save and close the Map.
Editing the Seat View Web Page
- Copy the tmViewFromSeat.html web page into the WebPagesEN/tmMaps folder.
- Edit the tmViewFromSeat.html page using a tool like NotePad++ or BBedit.
- Update Line 8 with the desired text to appears as the link online.
Once the above steps are complete, restart the Web Listener to clear any previously cached web pages.