You are here
Altering the Header and Ad on the Print At Home and PDF Ticket
This web page provides instructions for:
- Changing the default pageHeader or ticketAd for all print at home tickets
- Creating a custom pageHeader or ticketAd for all performances of a single EVENT
- Creating a custom pageHeader or ticketAd for a single PERFORMANCE

Changing the default footer and/or header for ALL print at home tickets
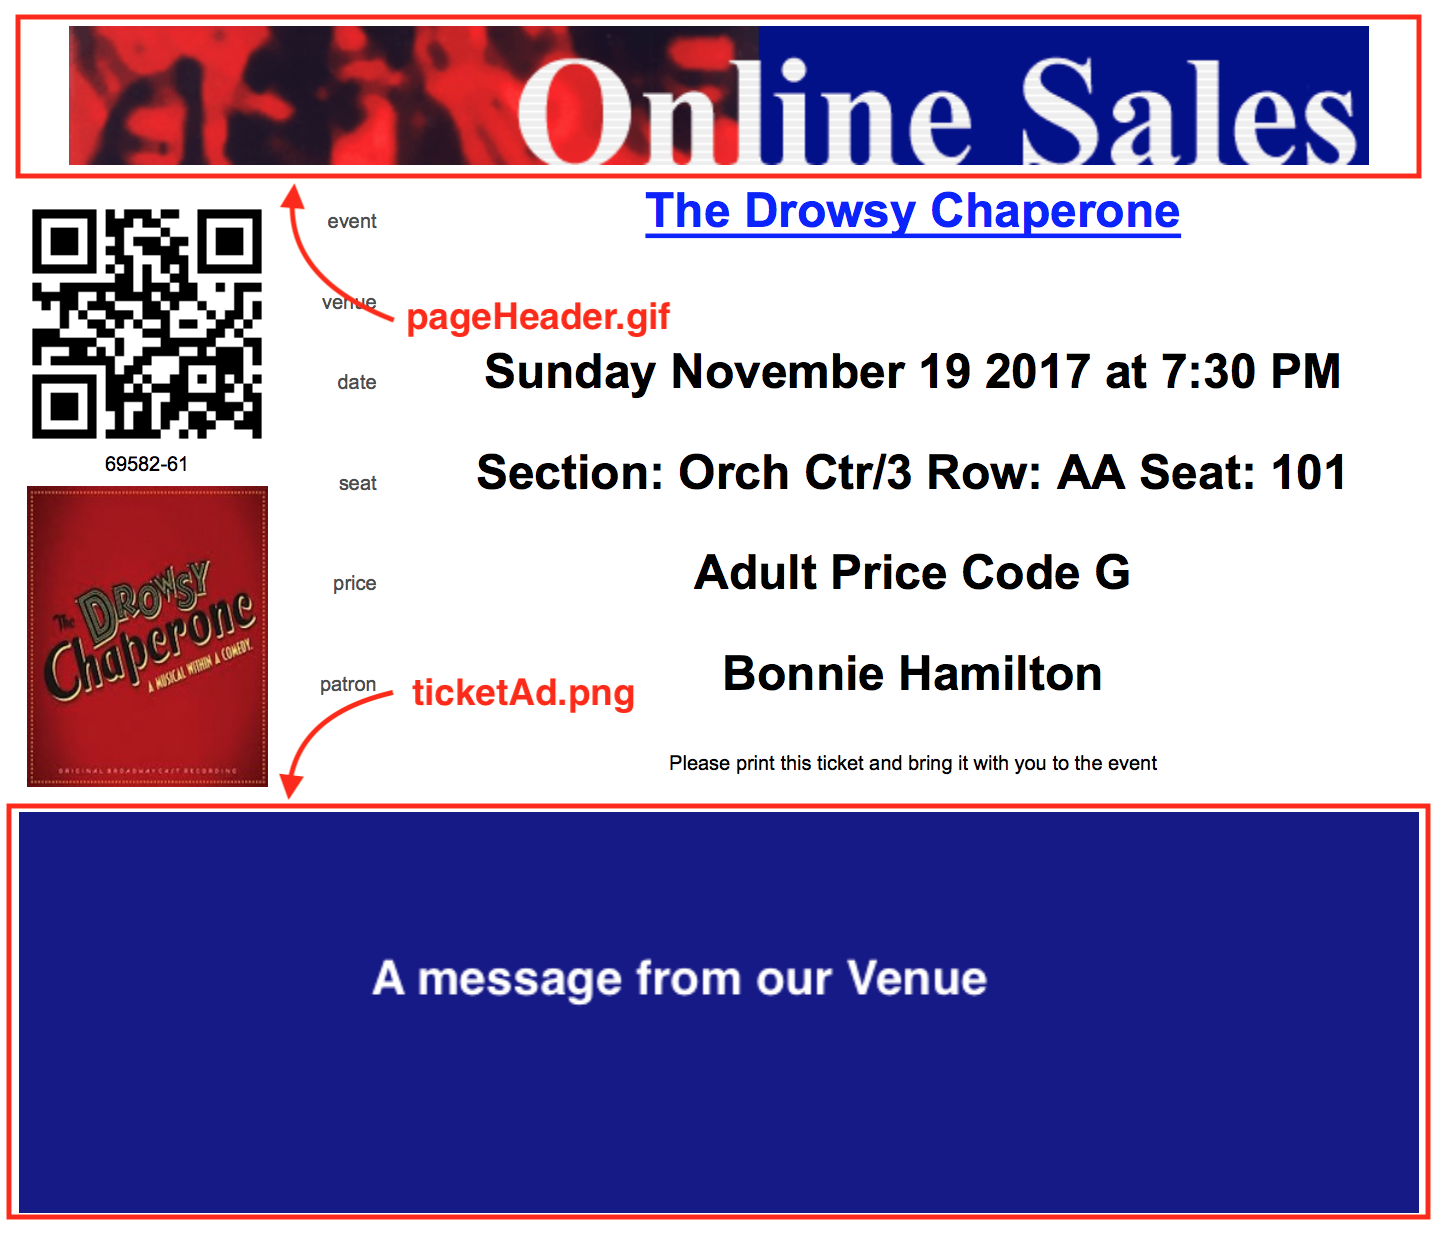
The easiest way to update the header and/or footer for a print at home ticket is to create new files and place them into the WebPagesEN >> tmGifs folder.
- pageHeader.gif - is the name of the page header file. In the example above, it is 75 pixels high and 700 pixels wide.
- ticketAd.png - is the name of the Ad at the bottom of the page. The sample image is 200 pixels high and 700 pixels wide.
In general, the width of each of the images should remain around 700 pixels. The height of the images can vary as long a the total height of both images causes the print at home ticket to remain on one page. You could, for example, make the top image 50 pixels high and use the remaining pixels in the lower area.
The sample pages were crated with conservative heights. You could probably get away with a total of 400 pixels or more in height between the header and footer.
Changing the footer and/or header for a SPECIFIC EVENT
If you want to change the header or footer for a single event, you can create a web page that over-rides the header and/or footer. This allows you to have:
- specific sponsors or instructions in the 'ticketAd.png' for an event or
- a different header for your mainstage, or classes, or inventory or streaming events if you wish.

As an example, let say you want to change the header (and/or) footer for only event 109 (See No Evil).
| Changing the Header |
|
||
| Changing the Footer |
|
Changing the footer and/or header for a SPECIFIC PERFORMANCE
If you want to change the header or footer for a single performance within the event, you can create a web page that overrides the header and/or footer. This allows you to have:
- specific sponsors or instructions in the 'ticketAd.png' for the performance or
- a different header for a performance such as the final performance of a class, or for a touring or streaming performance

As an example, let say you want to change the header (and/or) footer for only event 443.
| Changing the Header |
|
||
| Changing the Footer |
|
 |
Print at home tickets must be enabled in company preferences and for specific events before a patron can print them. |
 |
In the instructions below, the names of images and files are case sensitive. Please make sure they match exactly. |
