
Main menu
You are here
Increasing the Number of Seats
When increasing the number of seats, in a pricing map, it is important to take into consideration two things:
- You are increasing the number of seats by rearranging the existing seats, adding more to the stage or at strategic places in the venue for some events.
or
- You are increasing the size of an existing pricing map because you have physically added extra seats to a venue and all future events will have those extra seats.
|
To change the number of seats, it is first recommended you map a backup of the database. Once the backup is complete, duplicate an existing pricing map and make your changes to the new map.
|

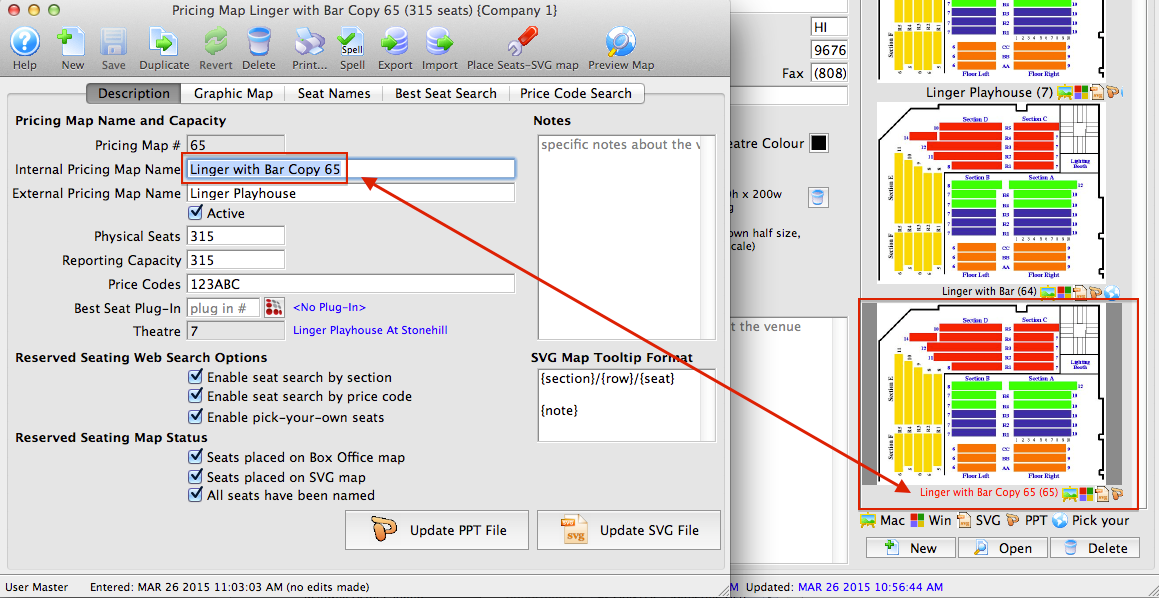
To add movable seats to a map, you first Duplicate the existing price map:
- Open the Venue / Theatre.
Click here to learn how to edit a pricing map.
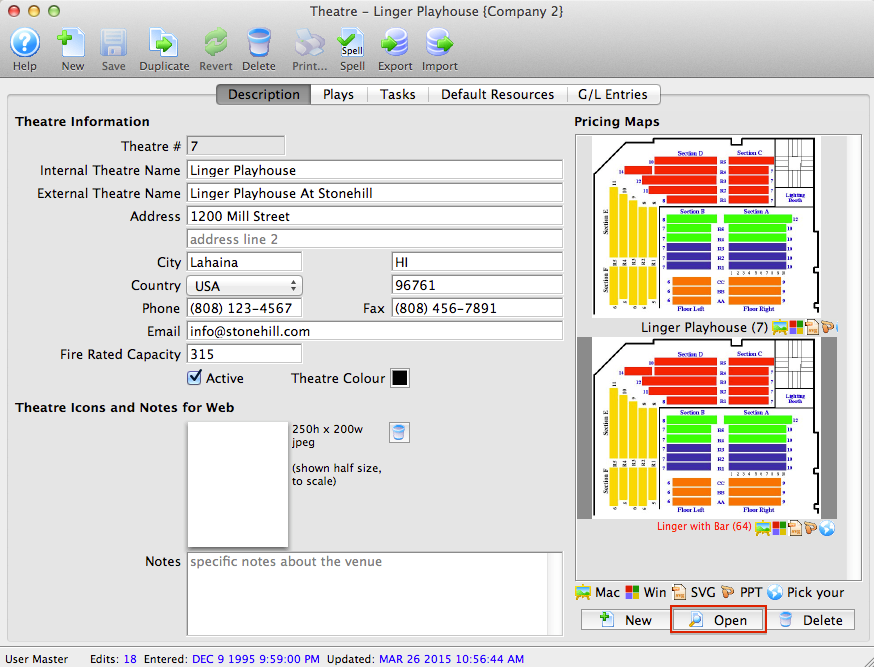
- Select the map you want to add the seats too.
The Pricing Map description window opens.

- Click the
 button.
The selected Map is duplicated and stored with the Name Copy ##.
- Click the Save
 button.
The changes made to the map have now been saved.
If you are permanently increasing the number of seats and all future events will have these seats available, you can add them directly to the existing map.
|
A deployed map cannot have the number of seats decreased. Adding seats to an existing map affects current and future sales. ALL existing events for that venue are taken offline until the you have verified the seats for the event. You will need to follow up on each performance to verify the seats and turn them on for the performances. |

Increase the Number of Seats for the Map
- Increase the value in the Physical Seats field.
By increasing this number Theatre Manager will allow extra seats to be added to the graphic map and will increase the number of seats in the Seat Names tab.
- Increase the value in the Reporting Capacity if required.
The reporting capacity indicates the number of seats sold within the venue. Often it is the same value as the Physical Seats. However, some venues have seats they only sell when the rest of the seats are completely sold. These seats may be standing room or
- Click the
 button.
The Add a Block of Seats dialog opens.
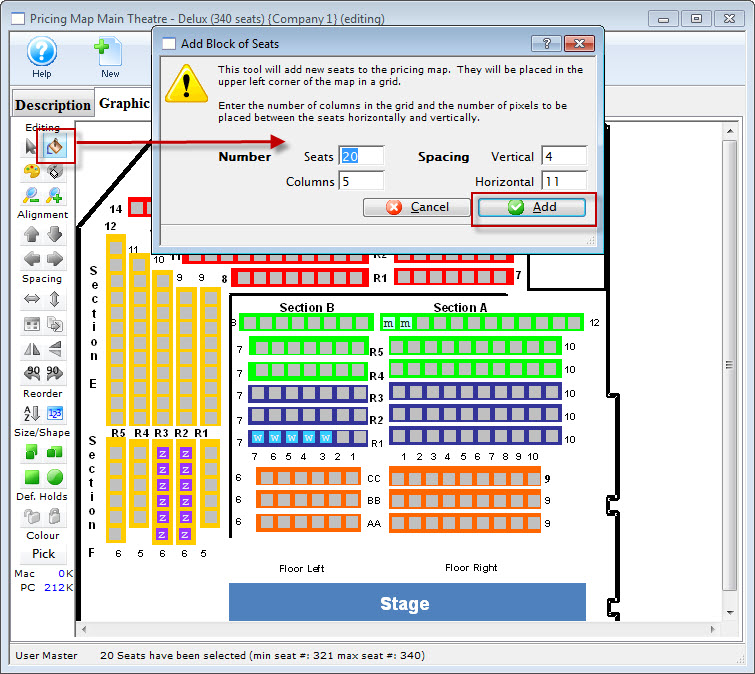
- Enter the appropriate parameters and click the
 button.
- Place the seats where they are to be added.
Click here, for more information on placing seats.
- Click the button.
If you make any errors, you can use the
 button to return to your last save point.
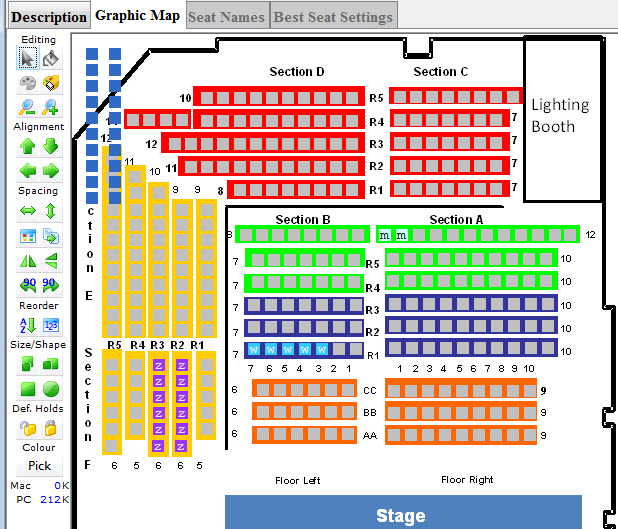
Placing the New Seats
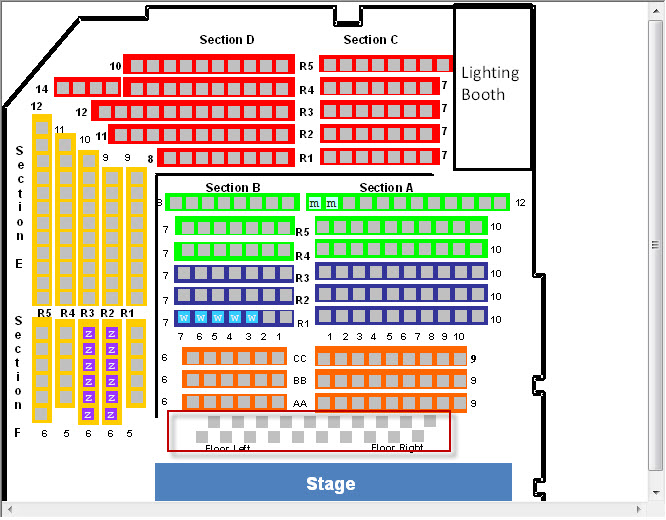
In this example, the seats are being added in front of the stage and the graphic has been updated to accommodate the additional premium seats.
In the Graphic Map tab, add the new seats to the appropriate locations.
Logical Seat Numbers
- Click the
 button.
Notice the seats have been appended to the logical seat numbers.
- Highlight the seats to be re-numbered and click the
 button.
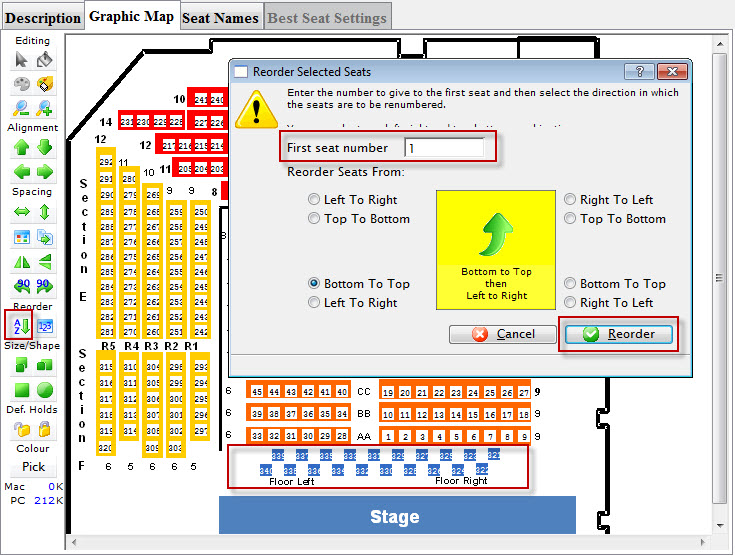
The Reorder Selected Seats dialog opens.
- Make the approriate enties. When complete, click the
 button.
When you are finished reordering the seats, click the
button.
You now need to incorporate the new seats into the existing Logical Seat Numbers. Click here, for more information on logical seat numbers.
Naming the Seats
-
Click here , for more information on renaming the seats.
There are two options for inputting seat names:
- Enter values for Section, Row and Seat Code.
Change the values of these fields to something meaningful to the theatre.
- Indicate which price codes are valid for the seat.
If the seat is in the front row, then a balcony price code would not be valid.
- Enter the Best Available Area and Best Available #.
Theatre Manager will use the area and number to create a sequential order from which to decide what the best available seats are. Have the best seats (or the seats to sell first) in a higher (ie. A-D) alphabetical area. The seat numbers are used for the system to decide on how many seats are available in an area.
If entering names manually in Theatre Manager, the
 button can be used to assign the best seating area, best seat number and the seat code.
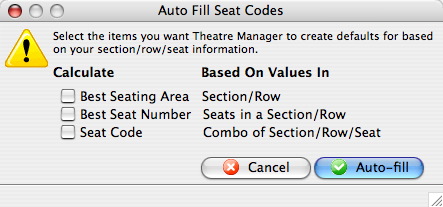
- Repeat the above steps until all data for all the logical seats are entered for the venue.
- Click the
 button.
All seats must be named before the data can be saved.
Return to the Graphic map tab and hold the mouse over seats at random. Double check the seat location is correct and that each seat is named properly.
a) Export the data out of Theatre Manager to a file and open the data in a spreadsheet program such as Microsoft Excel, edit and save the document in a tab-delimited format and import them back into Theatre Manager.
b) Click into each field in Theatre Manager and enter the data manually. Theatre Manager will assist in populating some of the data using predefined equations.