You are here
Building a Control House
Every Season Package requires a Control House. The Control House is a completely separate event from the rest of the season's performances and acts as the place saver for the patrons favorite seats. It is used to track:
- The evening they will be attending.
- Where the patron prefers to sit.
- The price/promotion to use for each seat.
- If the patron renewed their seats (or not).
It is important the accuracy of the Control House be maintained, as the season is booked. By the end of the subscription process (even after partial subscriptions are sold well into the season), sales in the control house must reflect the preferred/favourite seats.
This control house is used by Theatre Manager to allocate seats to patrons for the coming season.
Building a control house is like building any other event with a couple of subtle differences. These are:
- The event cannot be sold on the internet and must be marked as use in a control house (performance tab).
- The price of each ticket is zero (price tab).
- There should only be subscription promotions enabled (promotion tab).
- There should be one control house performance for each night you have in your regular season. For example:
- If there are two weekends for a total of 6 shows
- Friday, Saturday, Sunday and Friday, Saturday, Sunday
- You make the same six performances in the control house
- the performance codes in the control house MUST match those in the rest of the season.
Setting Up a Control House
- Click the Events
 button at the top of the window.
- Click the New
 button in the Event List window.
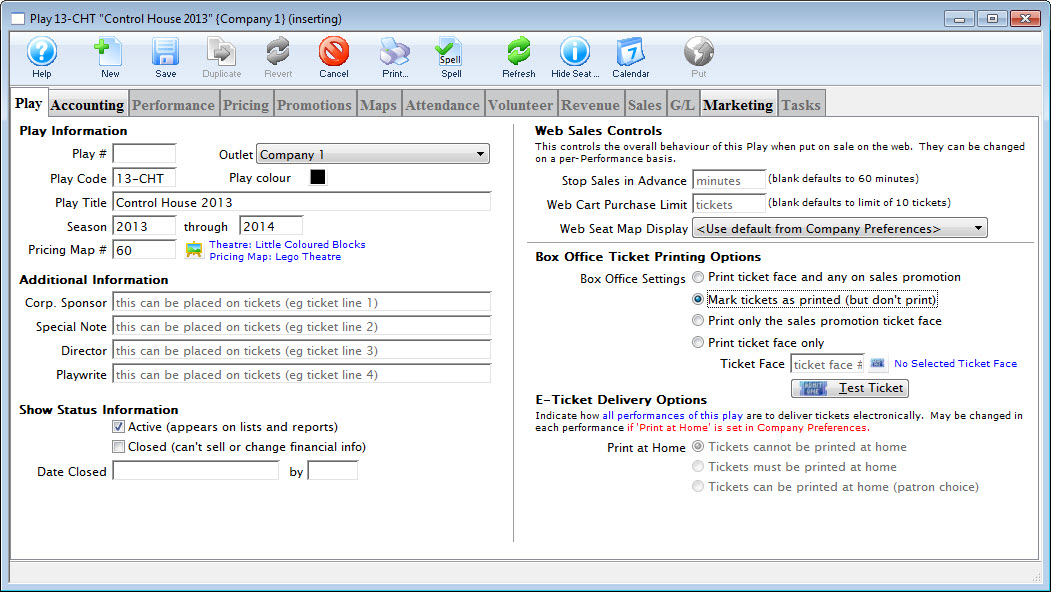
- Enter the desired Event Code, Event Title, Season and Venue Map.
- Change the Ticket Printing Information to Mark Tickets As Printed.
- Select the Accounting
 tab and enter the desired G/L accounts.
No monies should pass through these G/L accounts. The Control House is simply a place save for Favorite Seats.
- Select the Marketing
 tab and enter the desired G/L accounts.
Information must be entered on the Marketing Tab for a new event to be saved.
- Click the Save
 button.
The Performance Tab is now available for selection.
- Select the Performance
 tab, then click the New
  button.
The Add Performance - Step 1 window opens.
- Enter the number of Performances in the Add field.
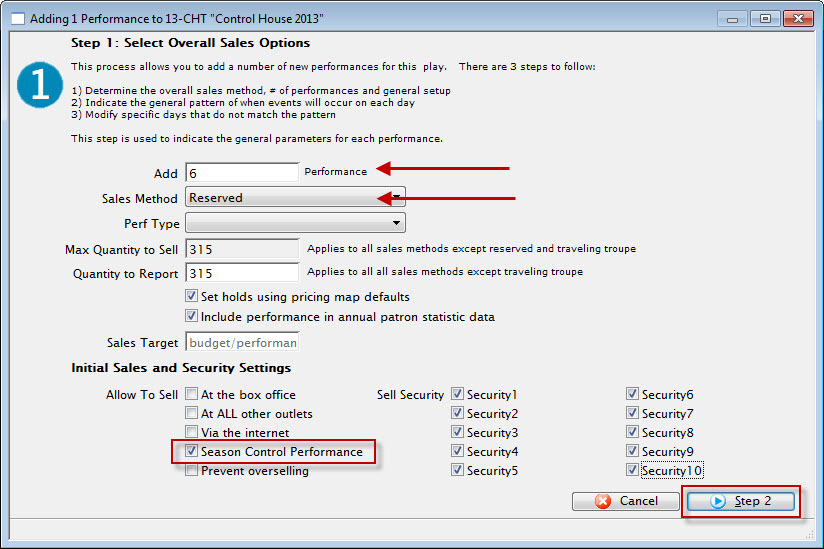
- Select Reserved as the Sales Method and ensure Season Control Performance is selected in the Initial Sales and Security Settings.
- Click the Step 2
 button.
The Step 2 window opens.
- Enter the First Performance Date and the Performance Time.
The First Performance Date should be a date following the coming season. It should fall on the same day the run of the season package generally begins. The Performance Time should match that of the season run.
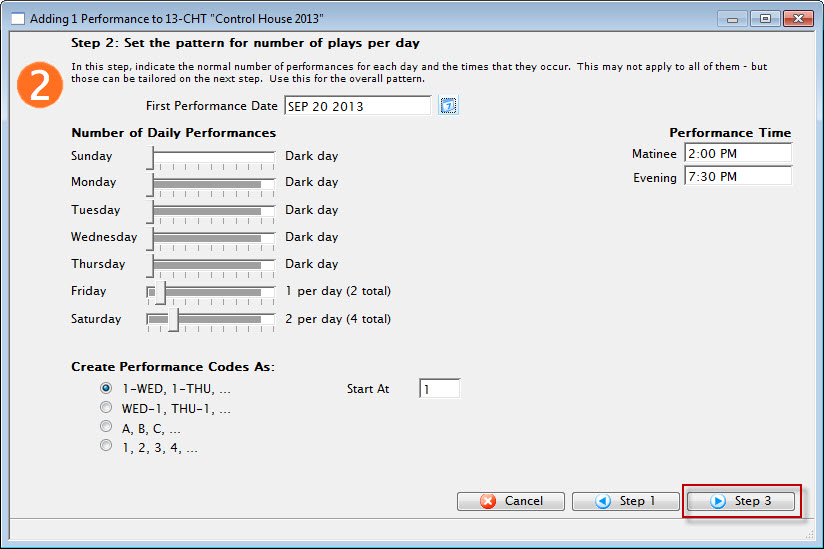
- Move the Number of Daily Performance sliders to match that of the run. Then choose a Create Performance Code As option.
Theatre Manager uses the Performance Code to match the dates the patron will be booked into within the Season. It's imperative the Season Code matches from Event to Event within the season package.
- Click the Step 3
 button. and review the Performance dates and time for accuracy.
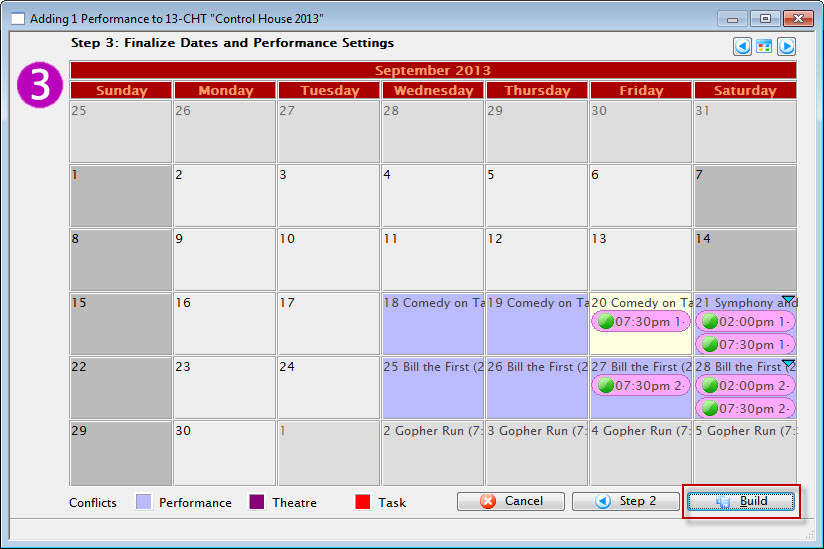
- Click the Build
 button.
The build confirmation opens.
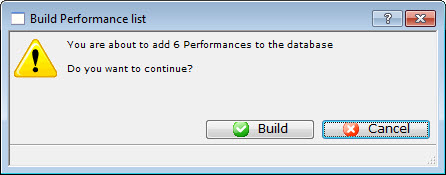
- Click the Build
 button to confirm the creation of the Performances.
- Select the Pricing
 tab. Then select the first Performance in the left column.
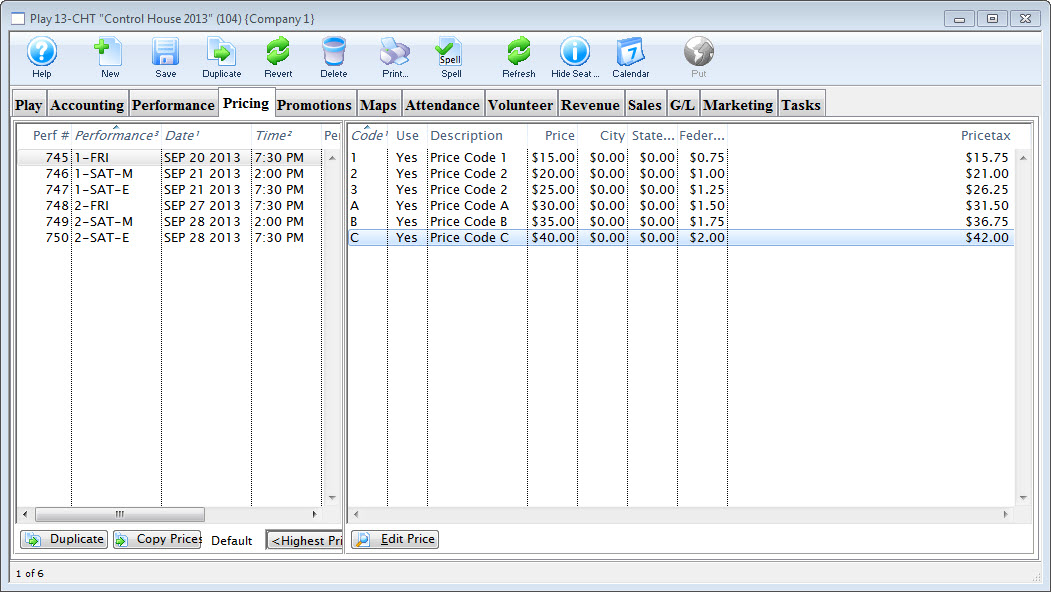
- Review the pricing structure in the right column.
Double click on each price individually to edit it.
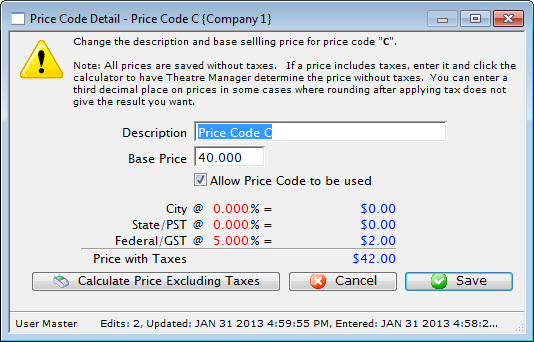
- Change the Description for Price Codes to match those currently in the season.
Do Not add a value in the Base Price field. Leave this field blank.
- Uncheck the Allow Price Code to be Used option for those Prices Codes that do not apply to the Season pricing structure.
Repeat for the remaining Performances in the left column.
- Select the Promotions
 tab. Then choose the first Performance in the left column.
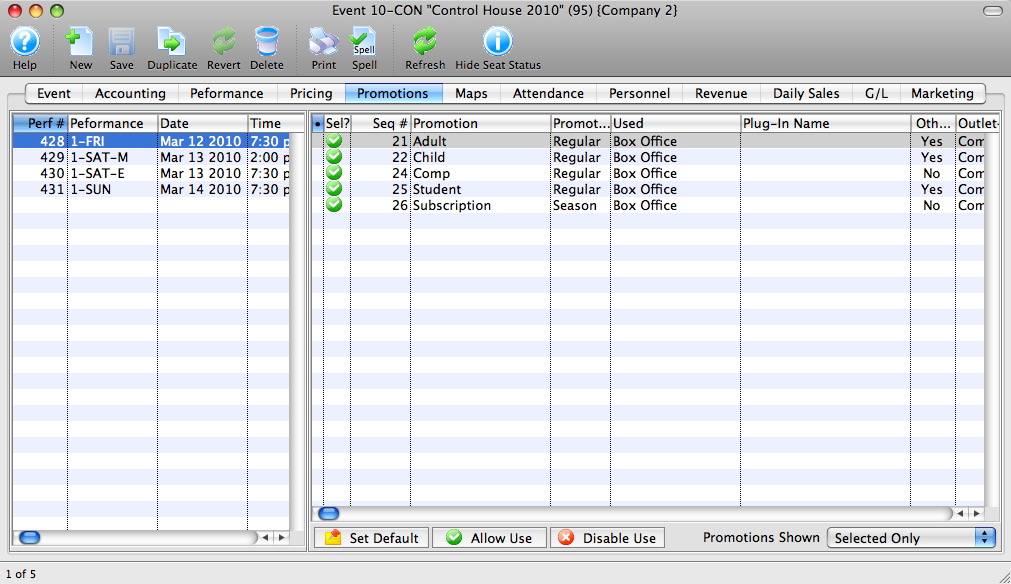
- Highlight all promotions that do not apply to this Performance and all Promotions that are Not Season promotions.
- Click the Disable Use
 button at the bottom of the window.
The Control House is now built and ready to be added to the Season Package. For details steps on how to create a New Season Package, click here. Or for steps on Rolling Over an existing season package, click here.
