
Main menu
You are here
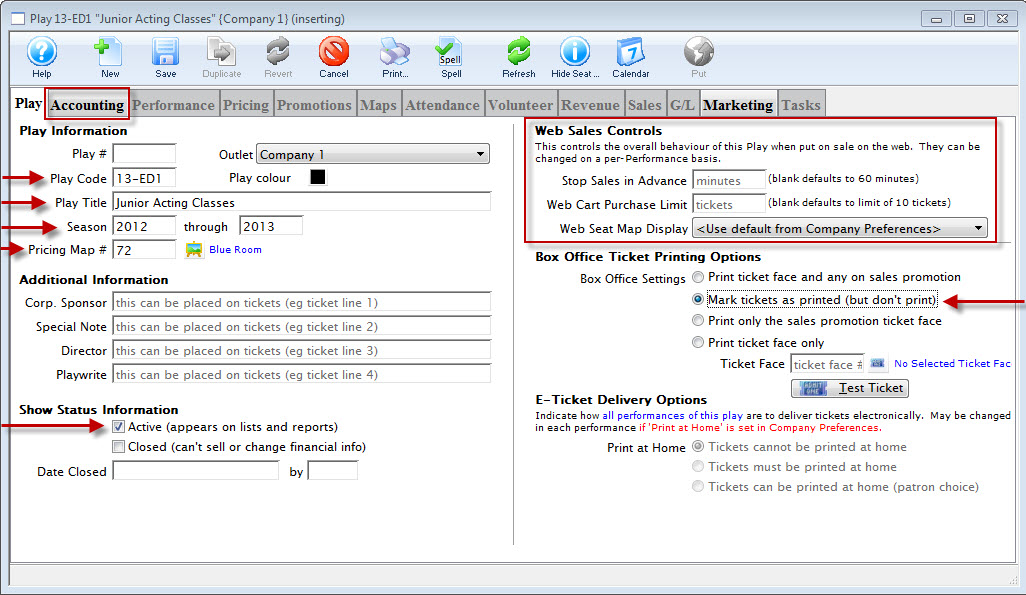
Entering the Course Title Information

To enter course title information, you perform the following steps:
- Enter a Play Code for the Course.
In this the example - 13-ED1
Enter a code that is easy to remember and follows the naming conventions you may already have set at your venue for Play Codes. Play Codes must be unique and cannot be used again for future plays or courses. - Enter a Play Title that corresponds to the title of the Course.
- Enter the season information that corresponds to the timing of the Course.
- Enter a Pricing Map.
If you have not set up a Venue specifically for Courses, you may want to do so. It can be a Festival Seating (or General Admission) map, but one needs to be entered here. Click here for information about setting up a new Pricing Map.
- Ticket information does not have to be entered if no tickets will be printed for the course.
If this is the case, choose "Mark tickets as printed (but don't print)" under Ticket Printing Information.
- Ensure the Active Status box is checked.
This way, the course will show in the Plays List for purchase.
- Enter any Web Sales Controls desired on the top right.
For example:
If Advance sales shut off at a certain time before the start of the class or
If a patron is limited to the number of admissions they may purchase for this specific course (otherwise the program default limit on ticket purchases will apply).
- Make appropriate Ticket Printing selections.
|
You must enter Accounting information in the Accounting tab before you can Save the record. |

Accounting information is discussed on the next page.