You are here
Importing Patron Data
At this time Theatre Manager allows organizations to import patron data only from another program. All other data importing should be handled by the Arts Management staff to ensure the data is properly imported. Before beginning the import process, please click here to read the tips on importing data.
- From the main menu bar, go to File >> Import/Export >> Patron >> Patron.
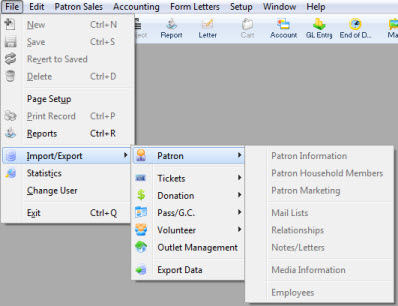
This will open the Import Data window.
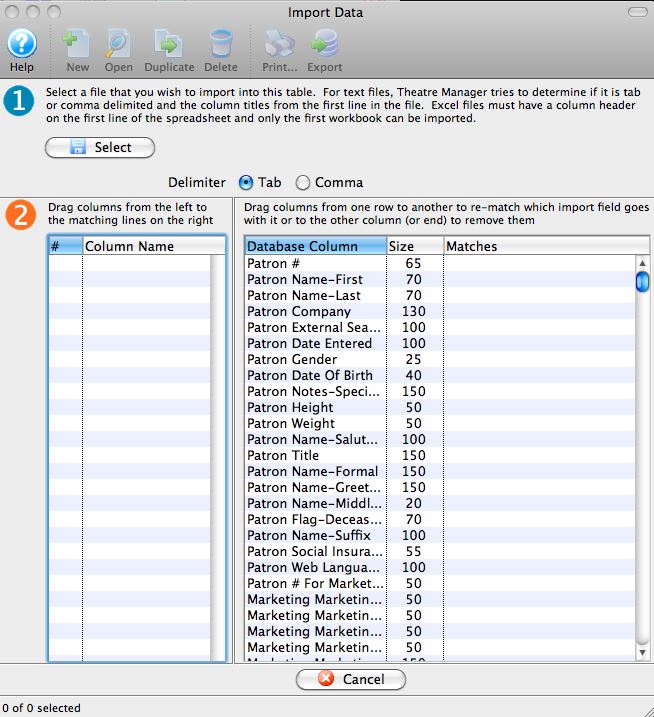
For more information on the Import Data window, click here.
- Set the Delimiter format of the file and use the Select
 button to pick the file that contains the data to be imported.
An Open File dialog for the user's operating system will appear.
Once the file has been selected, the column headers will appear in Step 2 of the window.
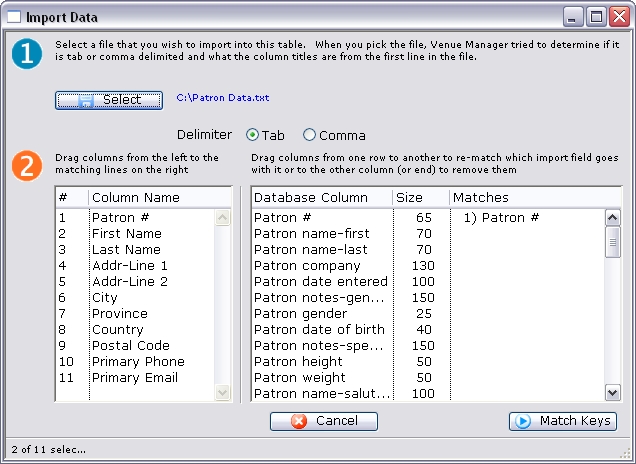
- From the box on the left hand side, match the fields with fields in Theatre Manager.
To match fields, click on a field and drag it to the right hand side to match it.
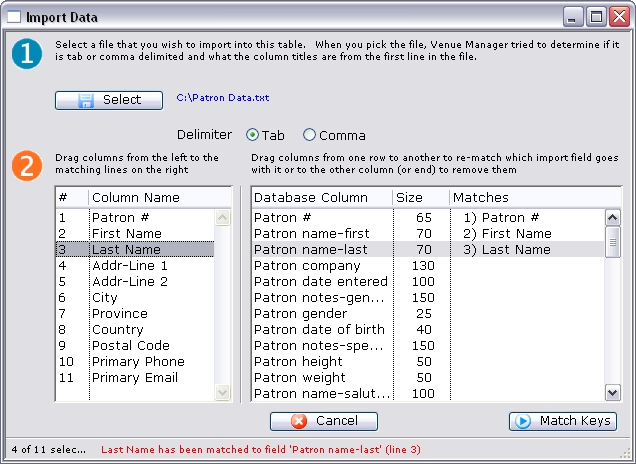
- Once all fields have been matched, click on the Match Keys
 button to move to Step 3.
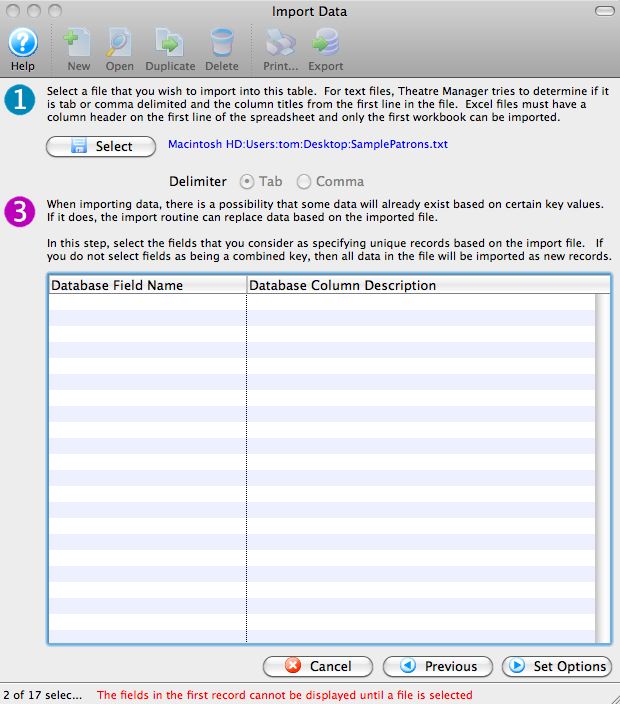
- If the data has any unique keys, they can be established here.
- Click the Set Options
 button to move to Step 4.
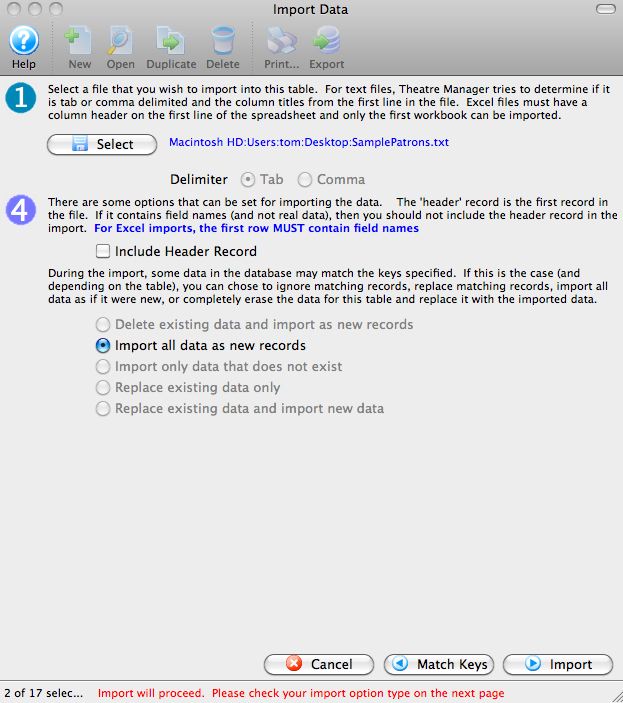
- Set any additional options before beginning the data import.
- Once everything is set, click the Import button to begin the import process.
A warning message will appear.
Ensure that a backup of the database has been done.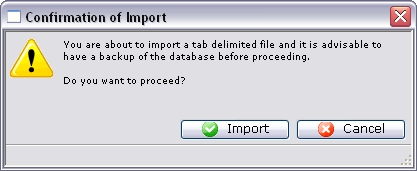
- Click the Import
 button to confirm the importing of data.
At the bottom of the Data Import window, a message will appear to show the import has started.

Depending on how much data is being imported, the import routine can take some time to run.
When the import is complete, a final dialog will appear.
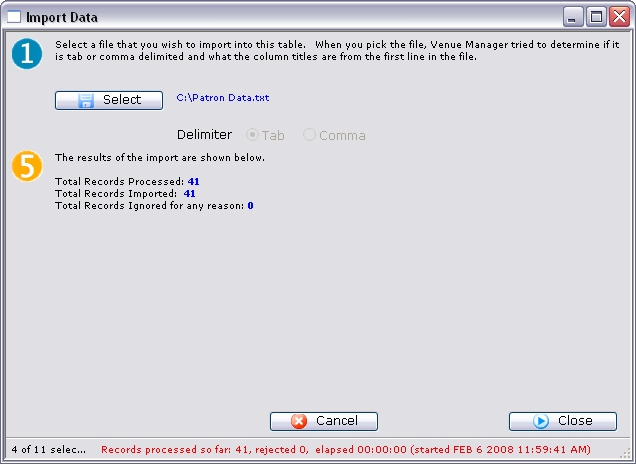
- Review the information on the dialog window, and then click the Close
 button to finish.
