Creating a Payment
- Selecting the Payment
 button in the Order window.
The order window can be accessed through the:
- Orders Tab or
- by Purchasing Tickets.
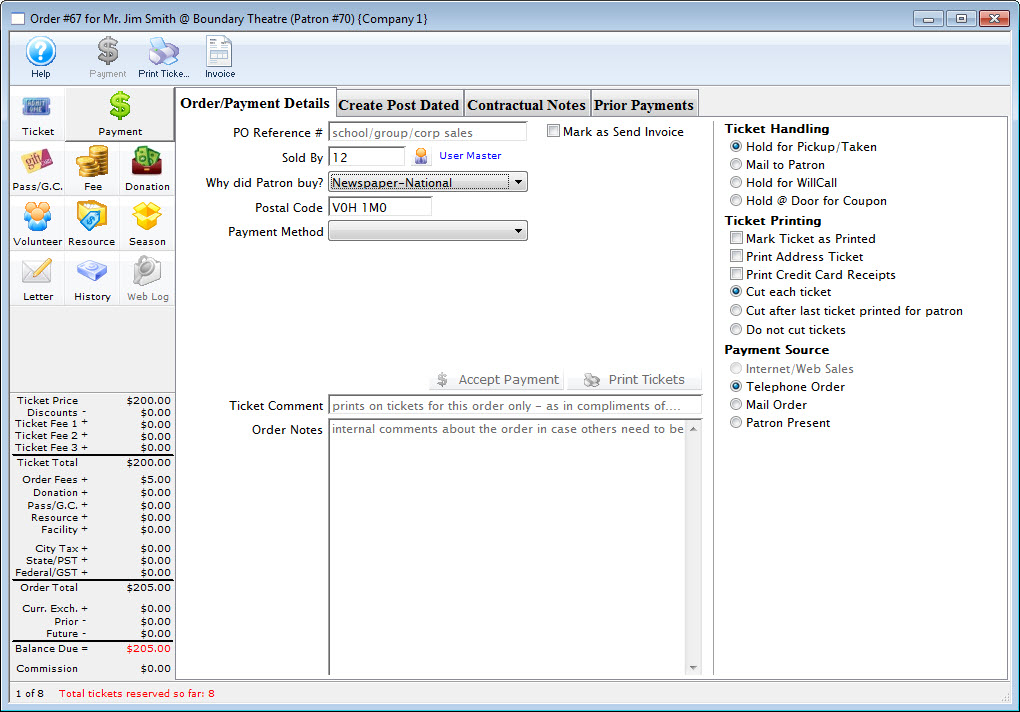
 Click for a detailed description of the Order Window and it's functions.
-
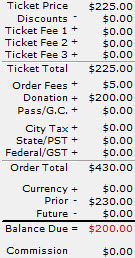
Verify the overall value of the order.
There is a summary of the value of items contained in the order to the lower left of the order window (example to the right). If you wish, you can add, change or remove items from the order by:
- Clicking on the Fees button.
- Passes, Gift Certificates and Memberships items can be changed by clicking on the Memberships button.
- Donations can be added by clicking on the Donation button.
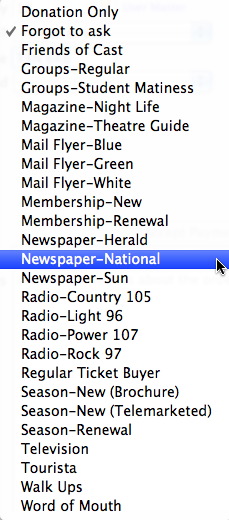 Select the Reason The Patron Bought
"Why did the Patron buy?" is used to record how the patron heard about the performances and why they are purchasing tickets.
This field is useful for analyzing customer purchase behavior. Refer to
- Mandatory Data to make this field mandatory or optional.
- The Reason to Buy section of the Code Tables for defining the reasons and setting default values.
Type the first letter of an item in the list, or scroll to select it. For example, if you type the letter N, the value in the field changes to "Newspapers". Entering a letter will make the first matching value from the list appear. If more than one value matches your entry, you can type enough letters to find the required value.
-
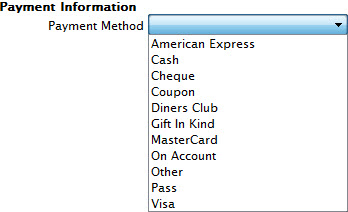
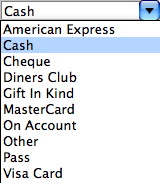
Select the payment or refund method.
Ticket orders may be fully paid, partially paid, or not paid at all. Click in the Payment Method field. A list payment methods opens. Each payment option causes applicable data entry fields to be displayed. 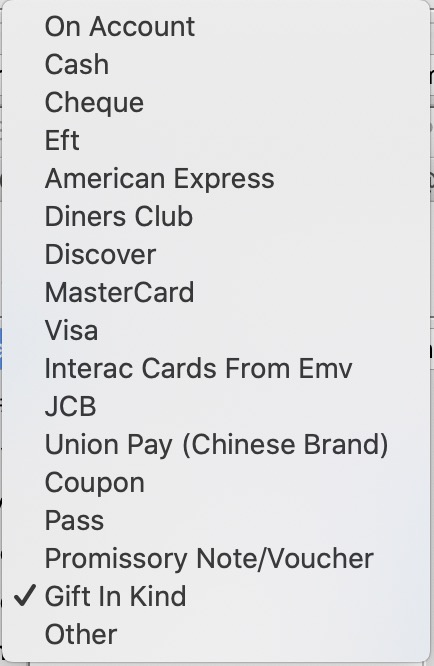

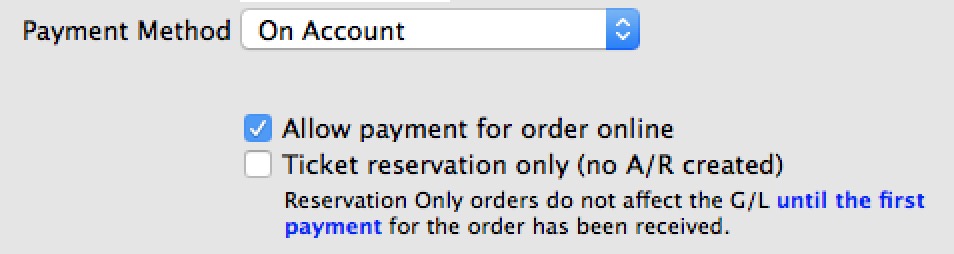
Refer to the Payment Method Variation help topic to see how each payment method affects the central part of the payment window. Payment Types can be changed in the Payment Code Tables. On Account means no payment received at this time. You will need to pay for the order later. - Enter any specific notes about this order
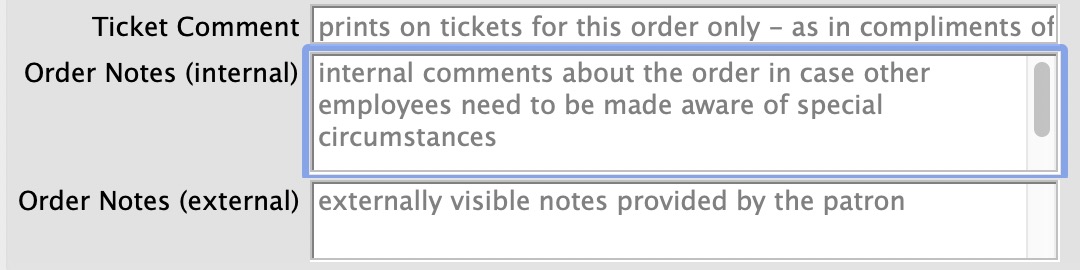
There are 3 comments that you can enter. These are:
- Ticket Comment which is intended to be printed on hard ticket stock. It might be used for things like 'birthday party for ...' if the patron is celebrating something special or 'tickets compliments of
' if the person buying many tickets is intending on giving them away to others and would like a little recognition - Order Notes (internal) which are for anything you want to note about the order for future reference
- Order Notes (external) which can be printed on reports and displayed the web and are purely for customer reference. Customers who enter notes when buying online cause this to be filled in as well.
- Ticket Comment which is intended to be printed on hard ticket stock. It might be used for things like 'birthday party for ...' if the patron is celebrating something special or 'tickets compliments of
- Select Send Invoice, if an invoice is requested to be sent.

- Click Print Tickets
 button to print tickets and receipts or click the Accept
Payment
button to print tickets and receipts or click the Accept
Payment  button to accept the payment without printing tickets.
Payment Method Variations
refer to the following sub windows to see how things changed for some key payment methods
- Cash
- Check or Cheque if in Canada
- Credit Cards
- If typed by hand or using a USB swipe
- If entered using an EMV pin pad. Only Moneris is supported at this time
- Coupons that might be applied to create a discount (like a 50% off coupon)
- Electronic Funds Transfer which helps setup up a special file to send to banks to cause direct deposit.
- Passes, Gift Certificates, or Membership Redemptions. This payment method is used to redeem Passes and Gift Certificates that have been sold to other patrons in the past and have been presented for redemption at the box office (or online).
- Gift In Kind which means that the patron is paying for their order using an item like a desk, advertising, sheep, donuts, lunch credits, etc - anything that the bank will not process
- On account which means no payment method is being taken now - it will be applied later
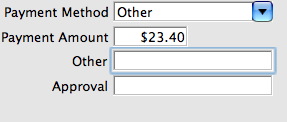
- Other which is representative of
- any of the other 'custom' payment methods you may have created in your payment method code table.
- Promissory Note is used to mark an order with a payment flag indicating that you have received a copy of a voucher promising payment from a customer and may have to refer to that in a future billing. Could be used for concierge orders from hotels
- The word 'other' might be replaced by your choice of words like Purchase Order, Stock Gift, etc

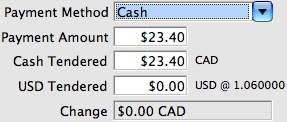
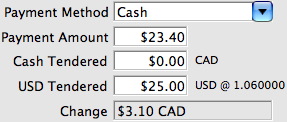
Payment Method Cash
| Payment Method | Description and instructions on use |
| Cash |
|
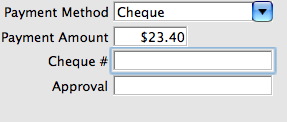
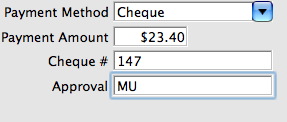
Payment Method Check/Cheque
| Payment Method | Description and instructions on use |
| Cheque |
|
Payment Method Credit Card (EMV Pin Pad)
|
EMV Pin Pads are only valid for Moneris at this time. |
|
You can verify the correct communication steps are occurring with the pin pad device by looking at the web listener log for EMV devices |
|
If you expect to do a lot of manual card entries into the pin pad machine from phone sales, then please make sure your Authorization Timeout is 90 seconds - or at least sufficiently long enough to handle the process of manually putting the card number into the pinpad and getting an authorization. |
|
Moneris does not allow voiding payments taken via a pin pad. Instead, you must create a REFUND payment |
| Payment Method | Description and instructions on use |
| Credit Card (EMV Pin Pad) |
|
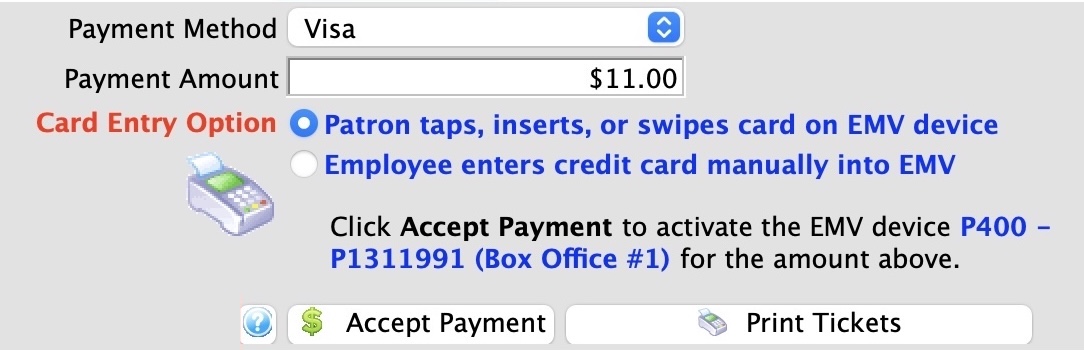
|
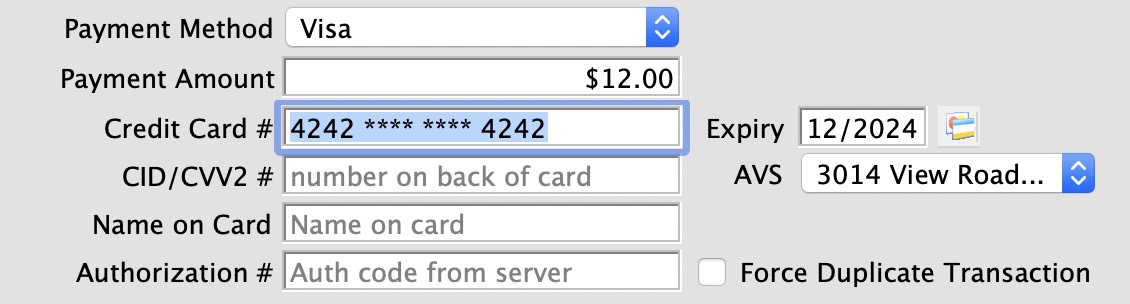
You many see a button on the lower left that says Type Card if you have been given permission to bypass use of the EMV device for manual card entry in employee security setup
This feature allows you to type the card, expiry, cvv2 into Theatre Manager and select a billing address. Payments taken this way allow future linked refunds, yet increase your PCI audit scope to Schedule 'C' or 'D' |
Payment Method Credit Card (USB SWIPE or Manual)
| Payment Method | Description and instructions on use | ||
| Credit Card (manually entered or USB Swipe) |
|


Payment Method EFT (Electronic Funds Transfer)
|
Using EFT for direct deposit on the payment window is described in detail.
You must have set up a merchant account for your EFT details along with creating the payment in the code tables. |
Payment Method Credit Card (Linked Refund)
There are two types of credit refunds:
- Linked Refunds: preferred by credit card providers to avert fraud as it only refunds to the card used on the original order
- Independent Refunds: return money to any card you wish. You may need permission from the credit card provider to use this type
Linked Refunds - Always attempt these First
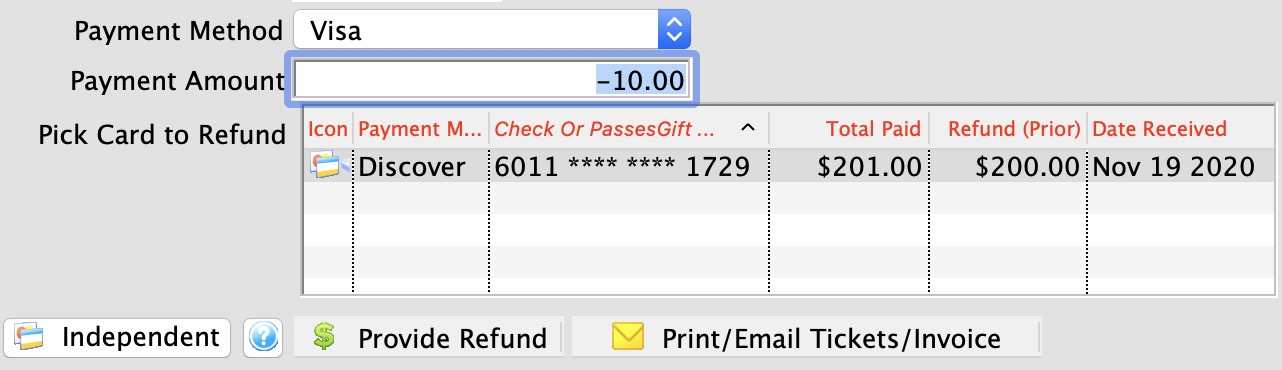
The system assumes that all credit card refunds are linked. The process of doing a refund occurs when the payment amount for a credit card is negative. Theatre Manager:
- displays the list of prior cards showing original authorized amount and refunded amount so far
- allows you to select a card for the refund. The amount you refund should be no more than the original authorization less any prior refunds. For example, if the original authorization is $100 and there are cumulative refunds of $75, then the maximum refund should be $25 for that card
- allows you to pick another card or another authorization to refund if there is more than one card option
Independent Refunds - Attempt Last
What if you need to refund to a completely different card from one in the list? If your merchant provider setup allows independent refunds, then the Independent Refund Button appears.
Click the button, the screen will change, and you will be able to refund to any card that you enter, or if using EMV device, put into the system.
|
Only credit cards authorized within the TIME limit set in your merchant setup will show up in the list.
The time limit should match that given by your credit card provider (typically between 120 and 400 days, depending on provider). Only extend the limit to see older cards after contacting your merchant provider. |
|
If you are working in an outlet situation, you cannot do linked refund to a credit acrd taken at another outlet. You can only refund to credit cards your outlet has taken |
|
If the Refund Payment is disabled, check the error message at the bottom of the window. Likely the card has not been deposited yet. That means you must either:
|
|
If you get a weird message from your merchant provider or still cannot refund after contacting them to adjust the limit, you can:
|
Payment Method On Account
| Payment Method | Description and instructions on use | ||
| On Account |
|
Payment Method Other
| Payment Method | Description and instructions on use |
| Other |
|
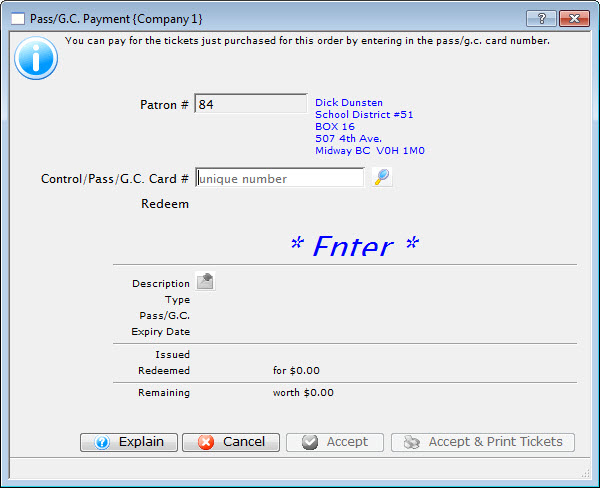
Payment Method Pass/Gift Certificate/Membership
|
Passes, Gift Certificates and membership payments are described in more detail in the section the describes all aspects of selling and redeeming them. |
Payment Method Promissory Note / Voucher
A Promissory Note/Voucher is a payment method used to record a voucher or pass purchased elsewhere, another outlet, another Vendor or sold not using Theatre Manager's Membership/Pass system.
To add a Promissory Note/Voucher payment you would perform the following steps:
- Selecting the Payment button in the Order window.
The order window can be accessed through the Orders Tab or when Purchasing tickets. Click here for a detailed description of this window and it's functions.
- Select Promissory Note/Voucher from the Payment Method drop down list.
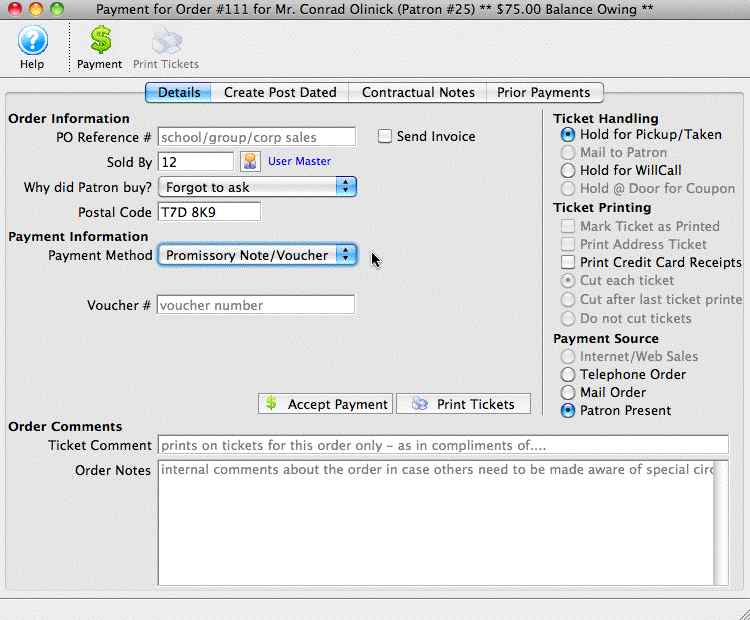
- Fill in the Voucher Number or reference.
This can be a number or text or a combination up to 16 Characters including spaces.
- Fill in an order note to reference the origin of the Promissory Note/ Voucher.
This note is referenced on reports generated based on orders.
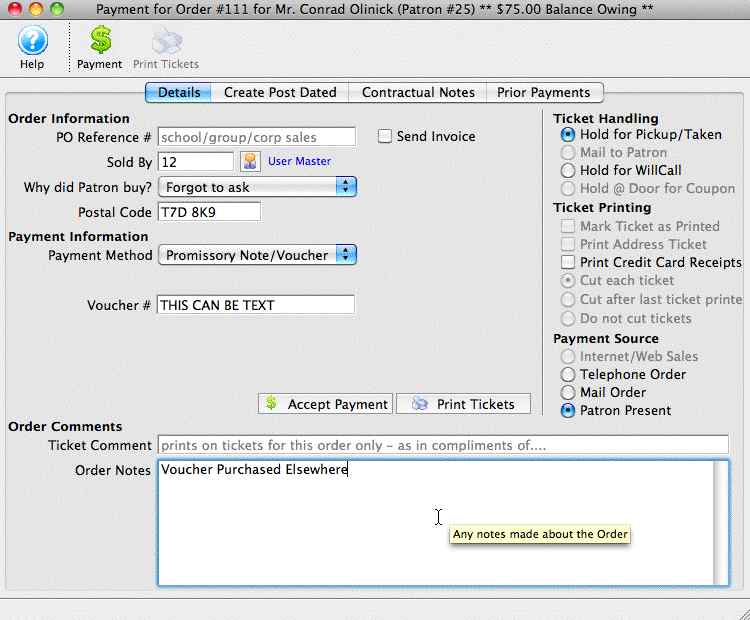
- Click the Accept Payment button to complete the payment.
|
This does not pay for the order, you will be prompted for another payment. Respond No. The order balance will be on account as a receivable. |
Payment Method Gift In Kind
|
Gift In Kind payments have some variations that are described in more detail.
It is especially important to fill all fields the Gift in Kind payment is for a donation since the data prints on tax receipts |
|
A gift in kind payment is used when you receive a material item ( i.e. non cash/card/check payments) like a donated desk, advertising, etc that needs to be allocated to a specific GL account. In all cases, you will need to provide a description, appraiser and address. |
|
A gift in kind payment is a specialty payment method. It ALWAYS exists in the database (like cash or check). if you don't see it in your payment list, please enable it in code tables. It's short code will be ~GIFT. |
| Payment Method | Description and instructions on use |
| Gift In Kind |
|
Gift In Kind Payment
|
A gift in kind payment is used when you receive a material item ( i.e. non cash/card/check payments) like a donated desk, advertising, etc that needs to be allocated to a specific GL account. In all cases, you will need to provide a description, appraiser and address.
If a Gift in Kind payment is used to pay for a donation, it is important to fill out the description and appraiser because they will appear on the tax receipts. Refer to your tax accountant/government rules as to appraiser requirements. Some places allow self appraisal and others only allow that to a certain dollar amount. In some cases cash receipt or internet page showing current price is valid. |
To add a Gift In Kind payment, you perform the following steps:
- Selecting the Payment button in the Order window.
The Order window can be accessed through the Orders Tab or when Purchasing tickets. Click here for a detailed description of this window and it's functions.
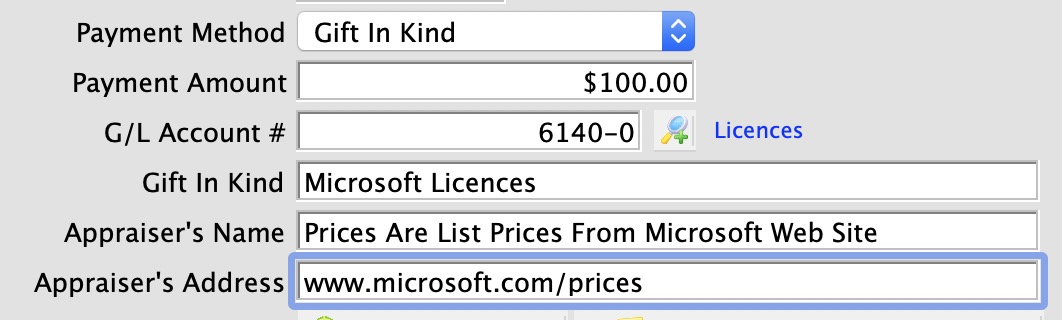
- Select Gift in Kind from the Payment Method pull down menu.
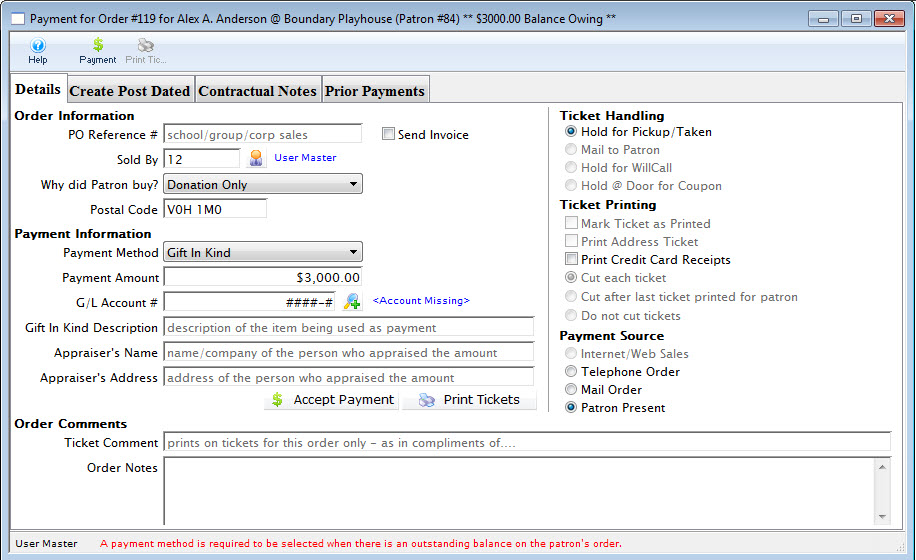
- Fill in the Gift in Kind field with a brief description of what the gift is.
- Select the G/L account you wish to charge the item to.
A G/L number can be typed directly into the field or the Account Lookup
 button to select the account from the list of GL accounts. Double click the account or click the Select
  button to accept the account.
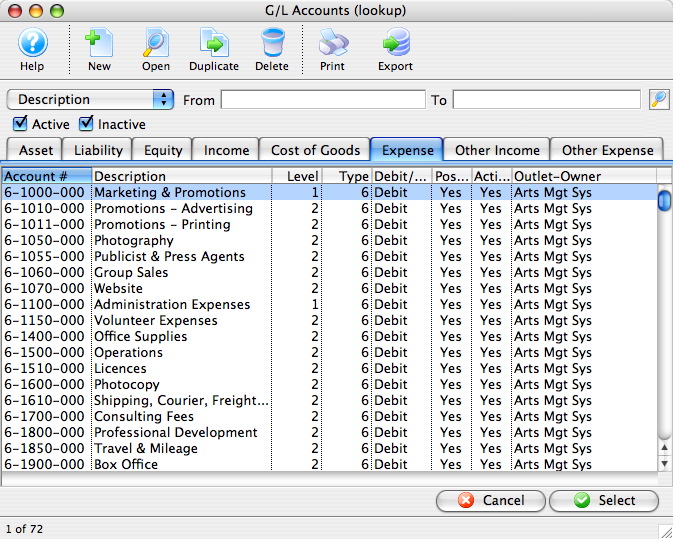
- Fill in the appraiser's name.
This may be required for audit purposes or for printing on tax receipts if the payment is for a donation.
- Click the Accept Payment
 button to complete the payment.
| For Quick Reference Information on Gifts In Kind, You can download a Screencast (online video demonstrations of the functions with narration). |
Flash ScreenCast |
MP4 ScreenCast |


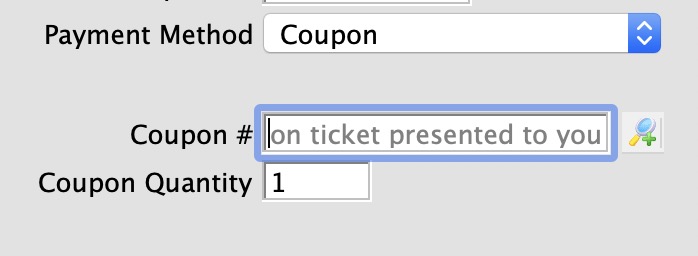
Payment Method Coupon
|
Coupon codes are described in detail in coupon setup.
Please refer that section to see how payments are applied. |
Accepting Multiple Payments
|
Multiple payments can generally be applied in any order that you want. There are a couple of exceptions. Anything that affects the actual price of the ticket must be applied first. For example, use these payment types before accepting any others:
|
- Open the Payment window.
Click here to learn how to access the payment window.
Click here for a detailed description of this window and it's functions.
- Select the payment method
- Enter the amount of this payment method the patron would like to pay into the Payment Amount field.
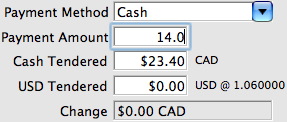
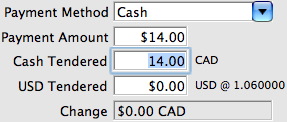
- Enter the amount of payment received into the Cash Tendered field.
Pressing the tab key on the keyboard will display the change owed to the patrons for the amount tendered. A patron may choose to pay with multiple payment methods and still require change for one or more of those methods.
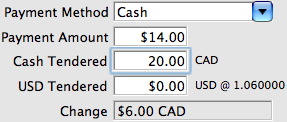
- Fill in any other necessary information and click the Accept Payment button.
A confirmation window opens and asks you to confirm the partial payment.
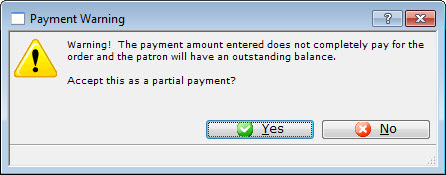
- Click the Yes
 button to accept the partial payment.
The Process Another Payment window opens.
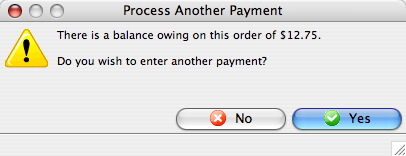
- Click the Yes
 button.
- Select the second payment type.
The remaining balance may be paid for in one or more payments. Repeat steps 2 through 6 above with the remaining payment methods as needed. If the payment is put On Account refer to Later Payments to learn how to add future payment to the order.
Adding Payments later - after the order is complete
Later Payments are used to perform a number of important functions such as:
- Enter payments after the initial sale has been completed
- Enter additional payments for an order
- Enter reversing payments
- Enter post-dated payments
- Add/Edit order and exchange fees
- Open the Patron Order Window by clicking on the Order Tab from the Patron Window.
Click Here for a detailed description of this window and it's functions.
- Select the order you want to add a payment to.

- Click the Payment button
- Change any data as needed.

Click here for a detailed description of this window and it's functions.
Refer to Creating Payments for more information.
- Click the Accept Payment button.
The payment is accepted and added to the order.

Force Duplicate Payment
Having the Force Duplicate option de-activated by default ensures that patrons are not double charged because of errors (either human error, an error between Theatre Manager and the credit card application, or an error between the credit card application and the merchant provider).
If the transaction is legitimate, check the box to have the patron’s credit card charged again for the same amount.
Creating Offsetting Payments to Clear A/R Balance
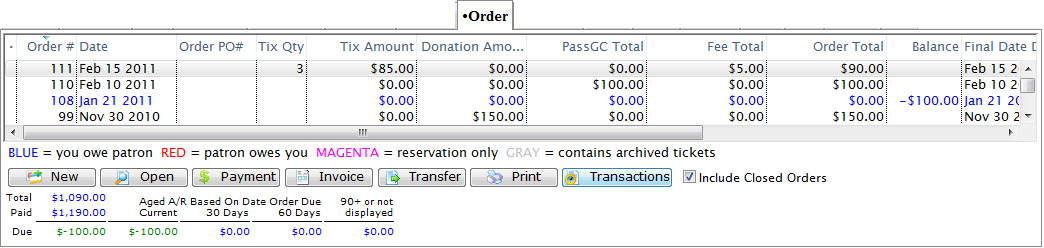
Theatre Manager uses a process called "Invoice Matching" in its accounting. This means each invoice (order) needs to balance to itself.
If you refunded tickets on one order (creating a credit balance to the patron), but purchased tickets in another order (creating a debit balance from the patron), then the orders are unbalanced. The patron account may appear good, but the orders within the patron record are unbalanced. This is why it is important to keep edits to an order within the order itself, and not create a separate order.
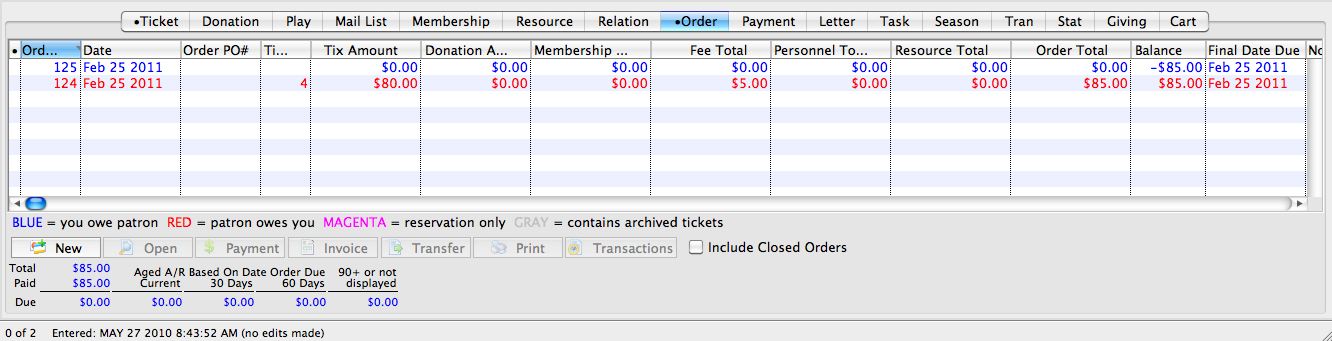
In this example, the patron has two orders. One with a balance due to the patron of $85, and one with a balance owing from the patron for $85. Note the Balance column on the right side of the image below.
To repair this, you need to make a CASH refund to the credit balance order, and a CASH payment to the debit balance order.
To take care of the credit balance, you perform the following steps:
- Return to the patron record, and click the
 tab.
tab.
Select the credit balance order (the one in blue).
- Click the
 button.
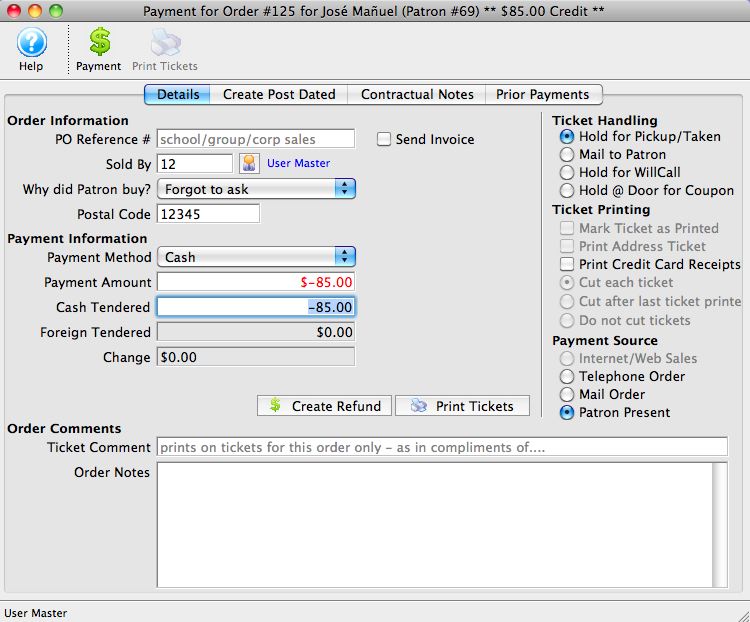
 - In the Payment window, create a REFUND (negative payment) for the full value of the order.
Choose CASH as the payment method.
- Click
 button.
- Return to the patron record, and click on the tab
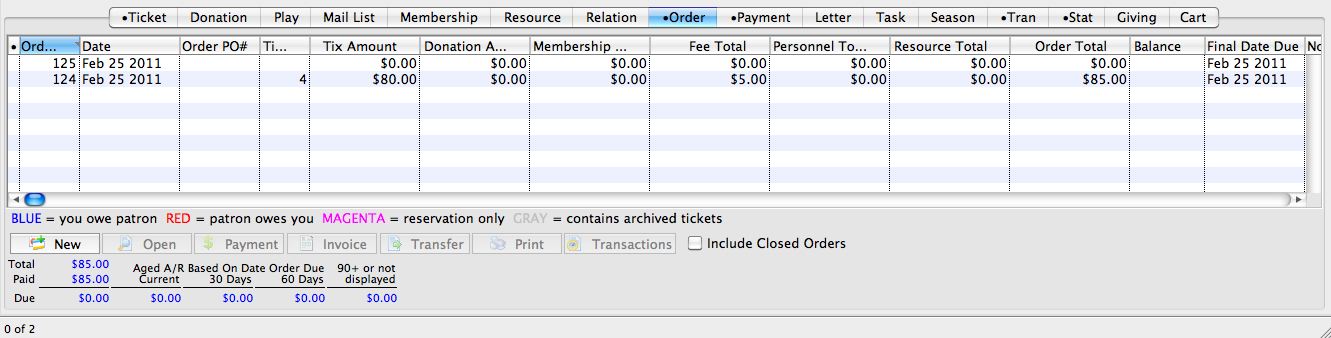
Highlight the debit balance order (the one in red).
- Click the button.
Make a payment for the full value of the order and use CASH as the payment method.
- Click
 button.
|
At your End Of Day, the GL Journal Entry Summary by Account will show a net effect to CASH of $0. The GL Journal Entry DETAIL by Account will show $85 CASH in, and $85 CASH out. |

Partial Payments
- Selecting the Payment button in the Order window.
The order window can be accessed through the Orders Tab or when Purchasing tickets. Click here for a detailed description of this window and it's functions.
- Select the payment method from the drop down list.
- Enter the amount for the payment method in the Payment Amount field.
- Enter the amount of payment received into the Cash Tendered field.
Pressing the tab key on the keyboard will display the change owed to the patrons for the amount tendered. A patron may choose to pay with multiple payment methods and still require change for one or more of those methods.
- Fill in any other necessary information and click the Accept Payment button.
A confirmation dialog opens, asking you to confirm the partial payment.
- Click the Yes button to accept the partial payment.
The Process Another Payment window opens.
- Click the Yes button.
- Select the 'On Account' as the second payment type.
If the payment is put On Account refer to Later Payments to learn how to add future payments to the order.