Merging Letters/Emails
In Theatre Manager there are multiple ways to merge a Form Letter to a Patron. This can be done as a single process or as a batch process. Below are the ways to merge a letter.
Merging a Letter or Email to a single Patron
A letter can be merged from:
- the Letter Tab of the Patron window. Click here for more information.
- the Membership Detail window. Click here for more information.
- the Volunteer Detail window. Click here for more information.
- the Donation window. Click here for more information.
Merging a Letter or Email to multiple Patrons
- A letter can be merged to multiple Patrons at one time. Click here for more information.
- A letter can be merged with an existing Mail List of Patrons. Click here for more information.
Deleting a Merged Letter
- A letter can be deleted from a single Patron record. Click here for more information.
- A batch of letters can be deleted after being merged. Click here for more information.
|
Quick reference information for Merging Form Letters |


Merge Options and Instructions
 |
If you are trying to eblast a group of patrons, and you have created double-opt-in mail lists so that you can confirm to CASL (Canada's Anti-Spam Law), please make sure to include the double opt-in mail list as part of your criteria in any of the search options.
This means you should have at least one criteria that says belongs to mail list is one of [the double opt in mail lists of interest] |
Merging through the Patron Window
When adding a Form Letter or Email to a single Patron's record, it is often easiest to merge using the capabilities of the Patron window.
- Open the Patron's record from the Patron List window.
Click here for more information on this process.
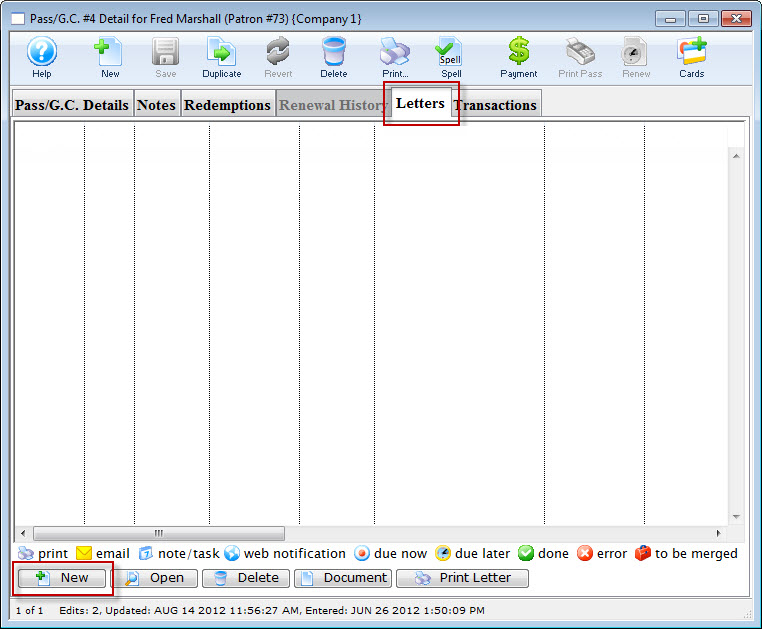
- Click on the Letters
 Tab at the bottom of the Patron window.
- Click the Add
 button and choose whether to add a Letter or an Email.
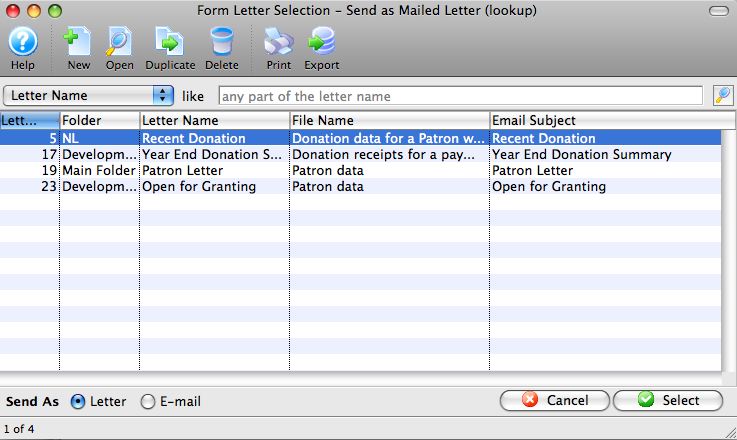
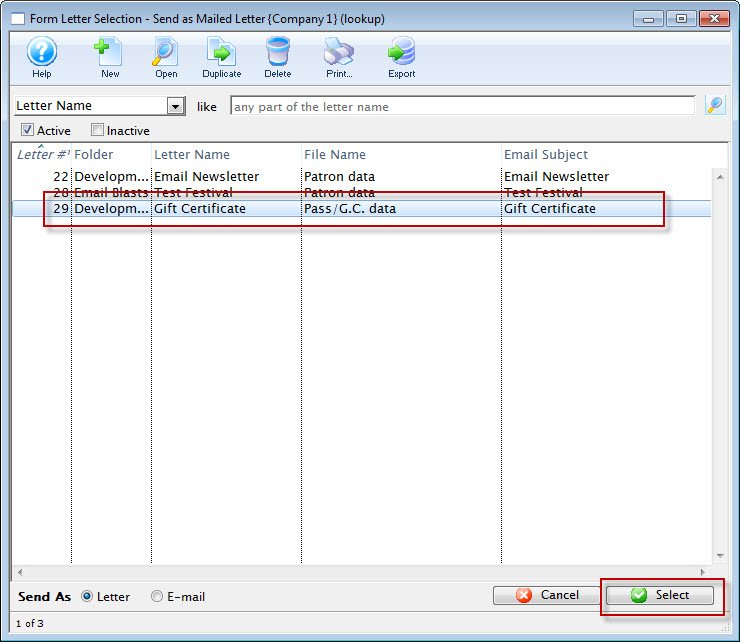
This will open the Form Letter Selection window.
- Enter the search parameters or simply click the Search
 button.
If no search parameters are entered, Theatre Manager will return a list of all form letters.
- Click on the letter(s) to add to the patron to select them.
To select multiple letters, use the OPTION key (Mac) or the CTRL key (Windows).
- Check whether the letter will be sent as a Letter or an Email with the radio buttons in the bottom left of the window (will match the choice you made when you first clicked Add), and click the Select
 button at the bottom right of the window.
An email address and SMTP mail server must be entered into Company Preferences to send emails. Patrons to whom emails are being sent will need an email address entered into the Patron record.
- The Form Letters Selection window will close and the user will be returned
to the Patron window.
The Letter or Email will be added to the Patron's Letter
tab for later
printing.For more information about printing the letter or sending the email, click here.
Merging a Letter through the Membership, Pass G/C Detail Window
When adding a membership to a Patron, it is possible to also add a letter to the Patron. This can be done from the Membership Detail Window. To access this window:
- Open a patron record
- Select the Membership
 tab.
tab. - Select the appropriate membership from the list and click Open

- From the Membership Detail window, click the Letter tab.
Click here to learn how to sell a membership.
- Click the Add
 button and choose whether to add a Letter or an Email. The Form Letter Selection window opens.
- Click on the letter to add to the Patron to select it.
- Click the Select
 button at the bottom of
the window.
button at the bottom of
the window.
An email address and SMTP mail server must be entered into Company Preferences to send emails. Patrons to whom emails are being sent will need email addresses entered into their Patron records.
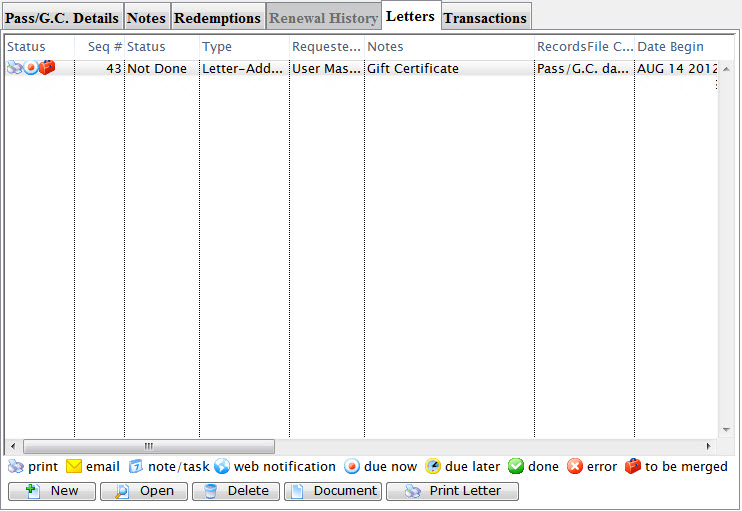
The user is returned to the Membership Detail window and the letter is displayed.
Click here for more information about printing the letter or sending the email.
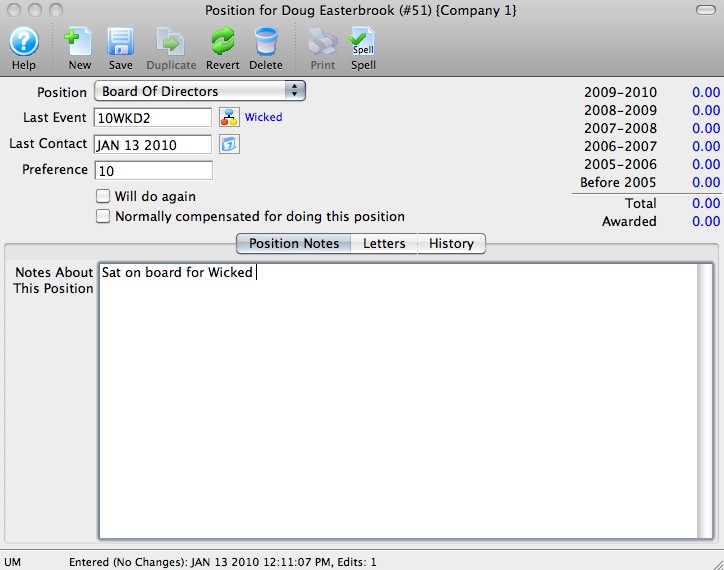
Merging a Form Letter through Volunteer Activity
This method is used to merge a letter with a specific volunteer activity performed by the patron. If the patron has not performed any volunteer activities a letter cannot be merged until an activity is entered.
- Open the Volunteer History window.
Click here to learn how to open the window.

- Under the Position
 tab in the top right, select an Activity from the list.
- Click on the Letters
 tab.
tab.
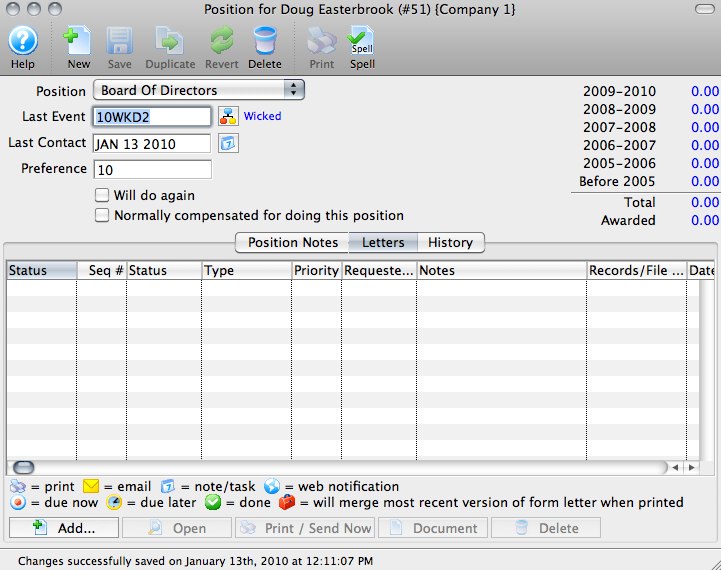
- Click the Add Button button.
The Form Letter Selection window will open.
- Enter search parameters in the From and To fields, or simply click the
Search button.
If the search parameters are left blank, a list of all letters will be displayed.
- Click on the letter to be used.
- Click on the Add Letter button or click on the Add Email button.
An email address and SMTP mail server must be entered into Company Preferences to send emails. Patrons to whom emails are being sent will need email addresses entered into their Patron records.
- The user will be returned to the Volunteer Activity Detail window.
The letter will now appear under the Letters
tab
of this window. The letter will also appear under the Letters tab
of the Patron window.To find out more information about printing this letter, click here.
This will open the Activity History Detail window.
Merging Form Letters with Donations
As you are creating a new donation for a patron Theatre Manager gives you the option to merge the donation with a form letter. This letter could be a Thank You or Invitation to special donor only events. A variety of letters can be easily setup using Theatre Manager to create new letters. For more information on Form Letters click here. If you require to merge letters with many donations or tax receipts refer to Merging Letters & Tax Receipts using reports.
To merging a Form Letter with a Tax Receipt, you perform the following steps:
- Insert the donation.
Click here to learn how to insert donations.
- Selection the Donation in the Patron Donations tab.
- Click the Open
 button.
 - Select the Receipts
 tab.
tab.
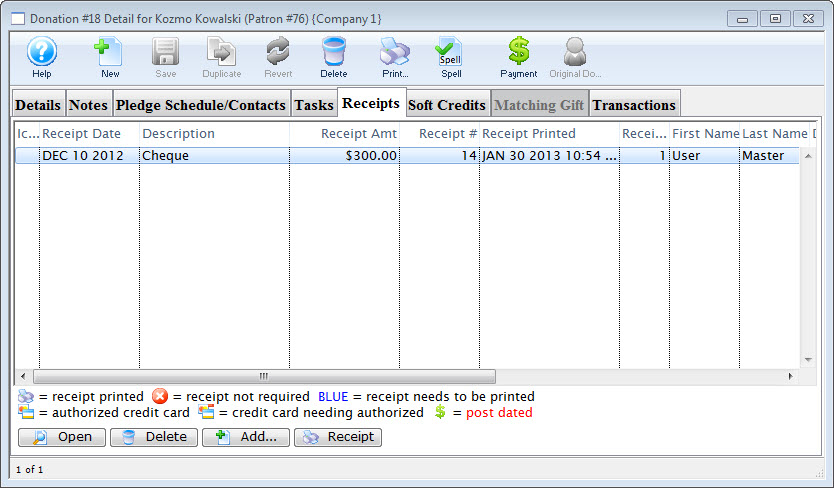
- Select the receipt to merge the letter with.
- Click the Add button.
The Form Letter Selection window will open.
- Click the Search
 button to generate a list of Form Letters.
- Select the Form Letter to add to the donation.
Single click on a letter to select it.
- Click the Select button button.
The selected letter(s) have now been merged with the receipt and will be printed when the Batch Function "Print Charitable Receipts for Donor" function is initiated.
To merge a Form Letter with a Donation
- Insert the donation.
Click here to learn how to insert donations.
- Select the Donation in the Patron Donations tab.
- Click the Open button.
- Click the Pledge Schedule/Contacts
 tab.
tab.
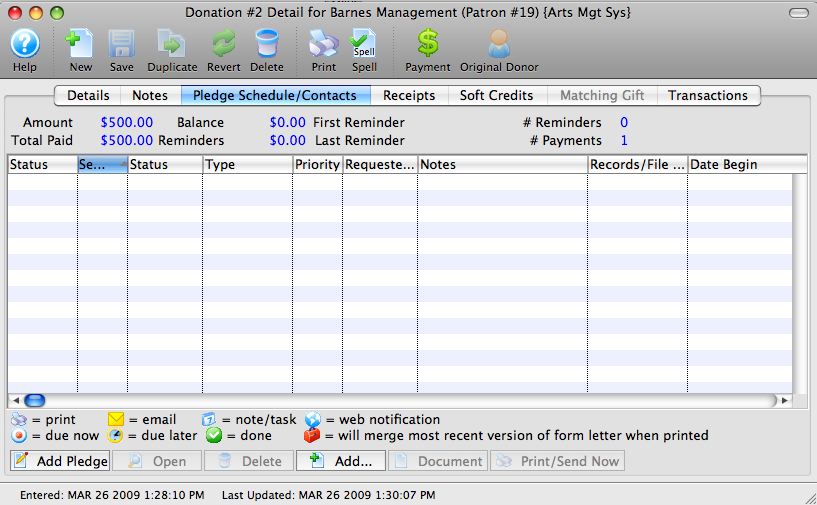
- Click the Add button.
The Form Letter Selection window opens.
- Click the Search button to generate a list of Form Letters.
- Select the Form Letter to add to the donation.
Single click on a letter to select it.
- Click the Add button.
The selected letter(s) have now been merged with the donation and is ready to print. Click here to learn more about printing letters.
Merging a Form Letter to a Batch of Patrons
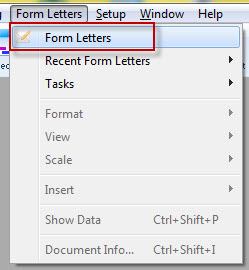
- Click on the Form Letters menu, and go to the Form Letters >> Form Letters menu.
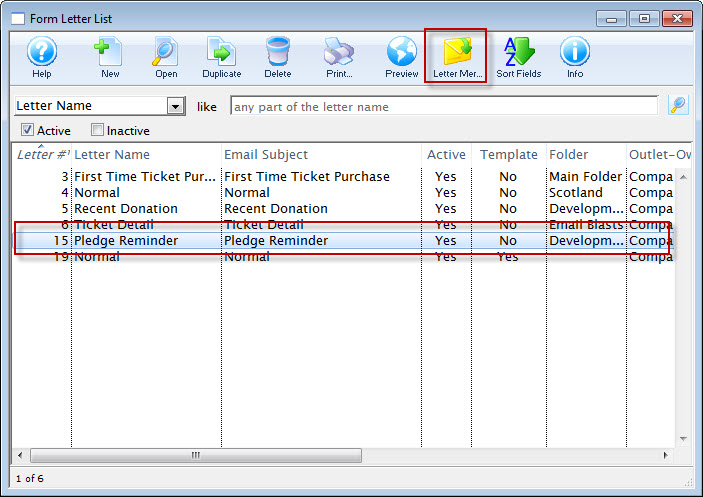
The Form Letter list window opens.
- Click on the letter to be used in the merge.
If there are a large number of letters the search function at the base of the window may need to be used. You can type in part of the letter name to search for and click the Search
 button.
 - Click on the Letter Merge
 button
at the top of the window.
button
at the top of the window.
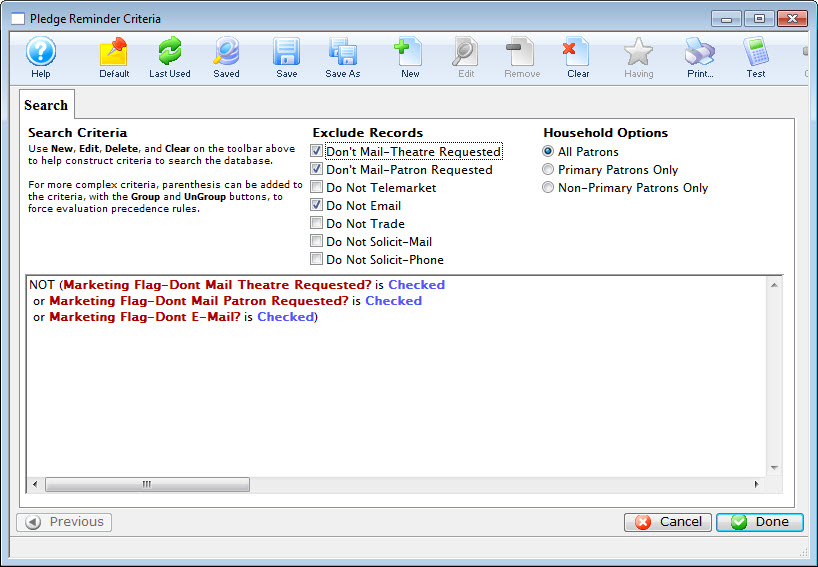
The the Letter Criteria window opens.
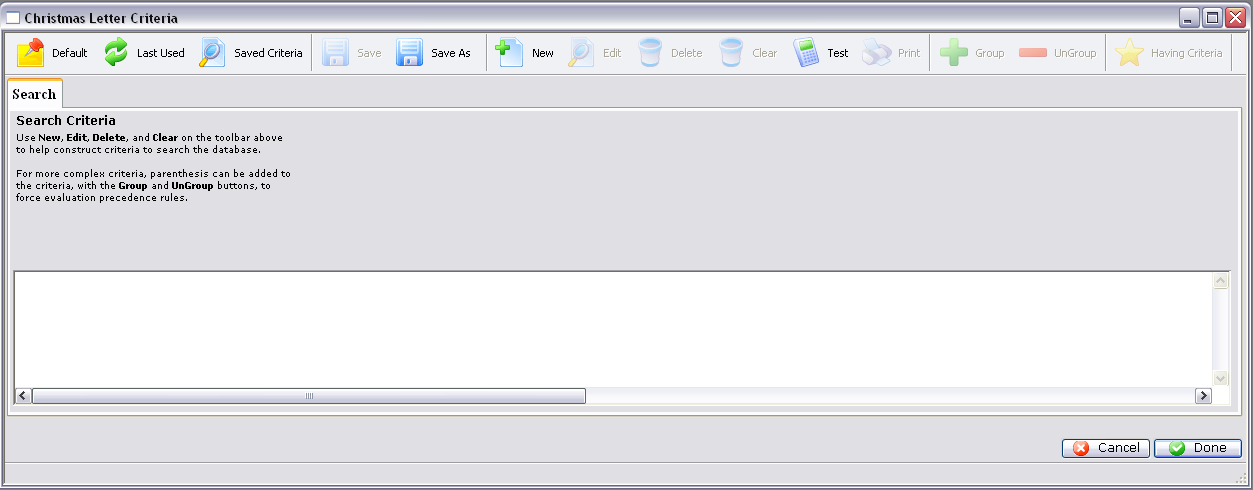
- Click the New
 button in the Letter Criteria window toolbar / ribbon bar, to add criteria.
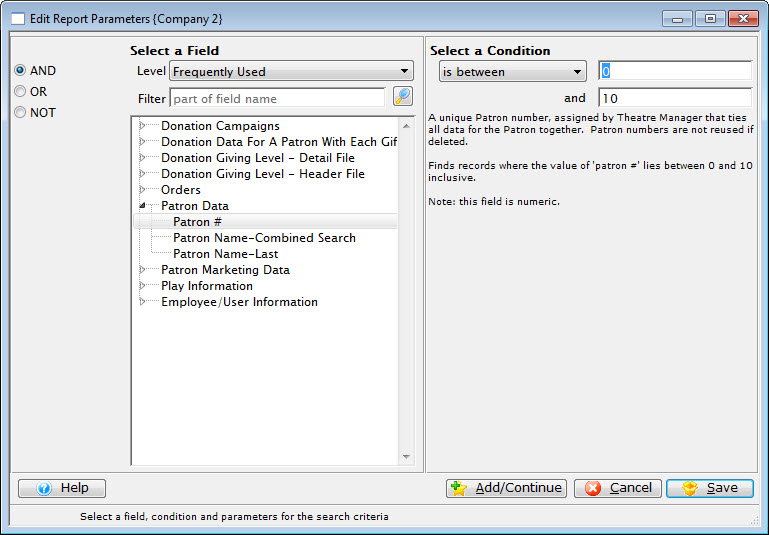
The Add/Edit Parameter window opens.
- Enter the criteria that is to be used in merging the letter.
In this example we will be adding all Patrons who have numbers between 1 and 50. For more information on criteria, click here.
- Click the Add/Continue
 button
to add additional criteria, or click the Save
button
to add additional criteria, or click the Save  button
to save and return to the Letter Criteria window.
button
to save and return to the Letter Criteria window.
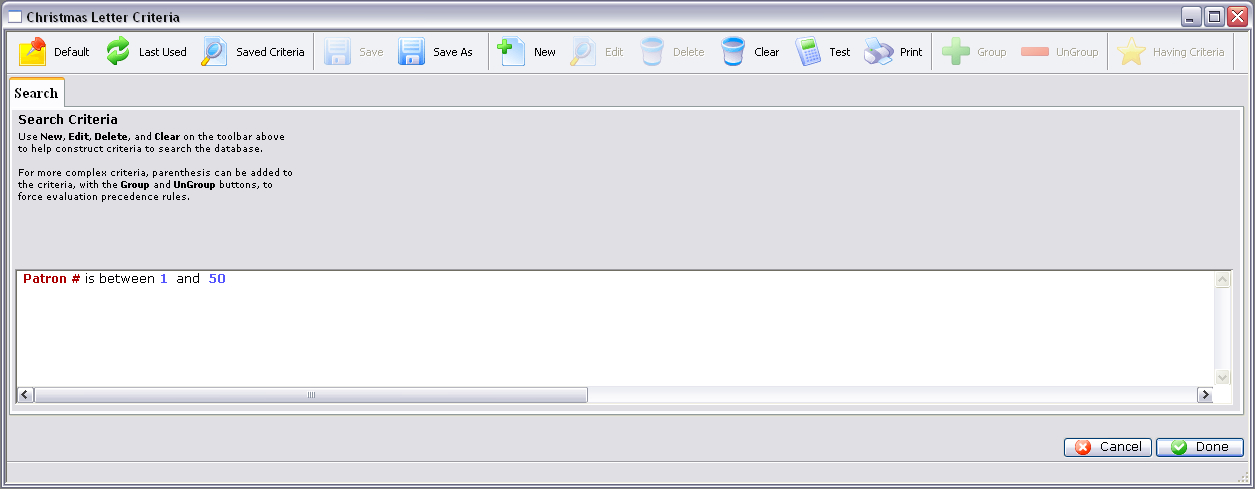
- Click the Done
 button.
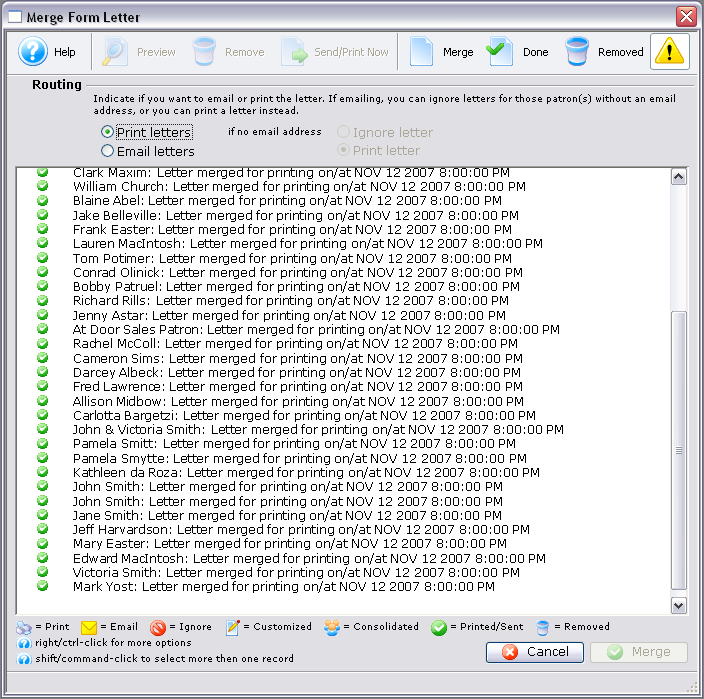
The Merge Form Letter window will now open displaying all of the results based on the criteria.
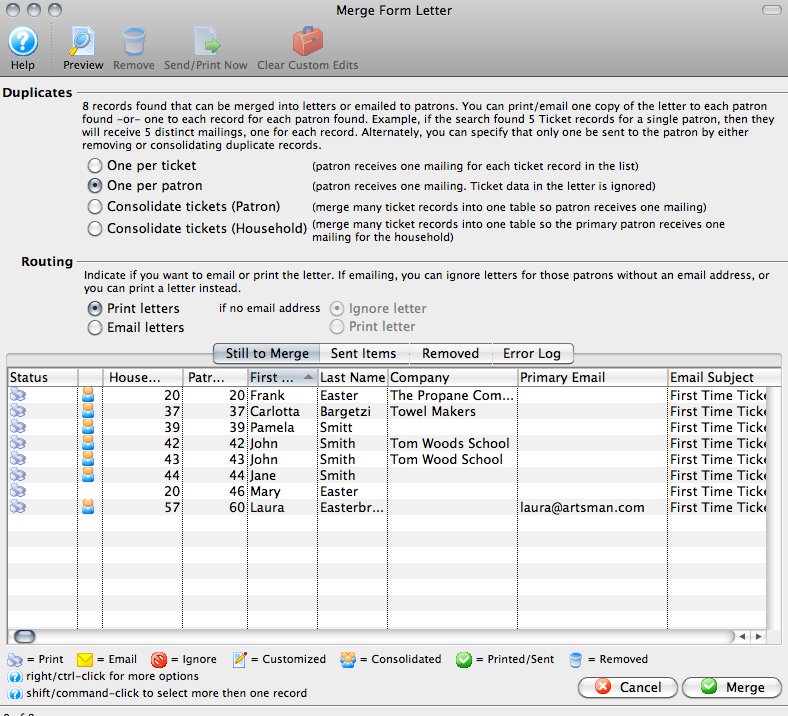
- Make any changes to the letters as needed.
Click here for more information on this window and the actions that can be performed.
- When all actions have been completed, highlight the letters to be merged,
and click the Merge
 button.
To highlight all of the letters, click on any letter and then use OPTION + A (Mac) or CTRL + A (Windows).
This opens the Merge Parameters window.
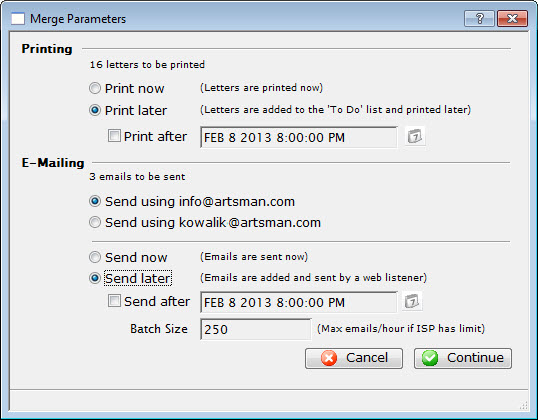
- Adjust the Parameters as necessary.
For more information on this window, click here.
- Click the Continue button to execute the Parameters.
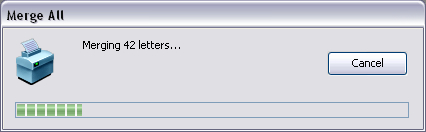
If "Print Now" was selected, then the user's Print Dialog will open. If the "Print Later" option was selected, then the letters will be merged and stored for printing at the set time. Remember that at least one user must be logged in for the letters to print if an after-hours time was selected. If no user is logged in, then the letters will print the next time a user logs in, after the time set has been reached.
For emails, if "Email Now" was selected, then the emails would be merged and immediately sent. If "Send Later" was selected, then the emails would be merged and stored to be sent at the set time. For emails to be sent a Web Sales Listener must be active. The Web Sales Listener handles the sending of all emails, especially if the emails were sent in limited batch amounts.
- When the Merge is completed, the user will be returned to the Merge
Letter window with a report of the merge now displayed.
- The user can now close this window and continue other operations.
Merging a Mail List with a Form Letter
Theatre Manager has a powerful marketing tool for postal mailings or email blasts built right in to the software. One of the most commonly used merge features in the Letters module allows a user to merge a mail list with a form letter both created using information contained in your database. The following few pages describes and illustrates the process of merging a mail list with a letter then either printing the result or sending it via email to the intended recipients.
|
Quick reference information for Merging Form Letters |
Selecting the Letter
- Choose Form Letters >> Form Letters.
Alternatively, select the Letters
 button in the Theatre Manager ribbon bar / toolbar.
 The Form Letter List window opens.
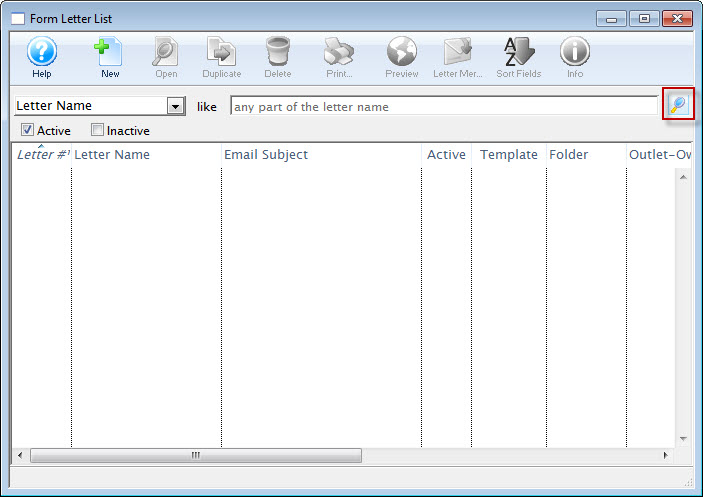
For more information about the Form Letter List Window, click here.
- Click the Search button and select the letter to use in your mail list merge.
- Click the Letter Merge
 button.
The Form Letter Criteria window opens. click here, for more information on creating mail lists.
Attaching the Letter to a Mail List
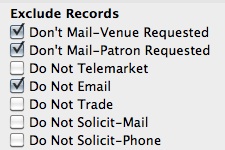
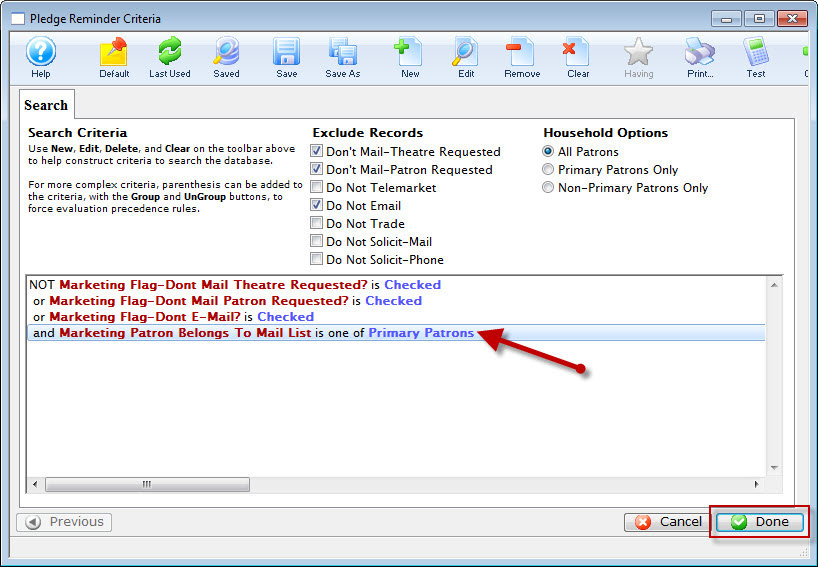
- You can exclude those patrons who have indicated they do not wish to receive mailings, by ensuring the appropriate Exclude Records radio buttons are selected and that the criteria reflects that information.

- To add any new piece of criteria, including a specific Mail List, click the New
 button.
- To initiate a merge based on an existing mail list, select the Criteria category Patron Marketing Data > Marketing Patron Belongs to Mail List.
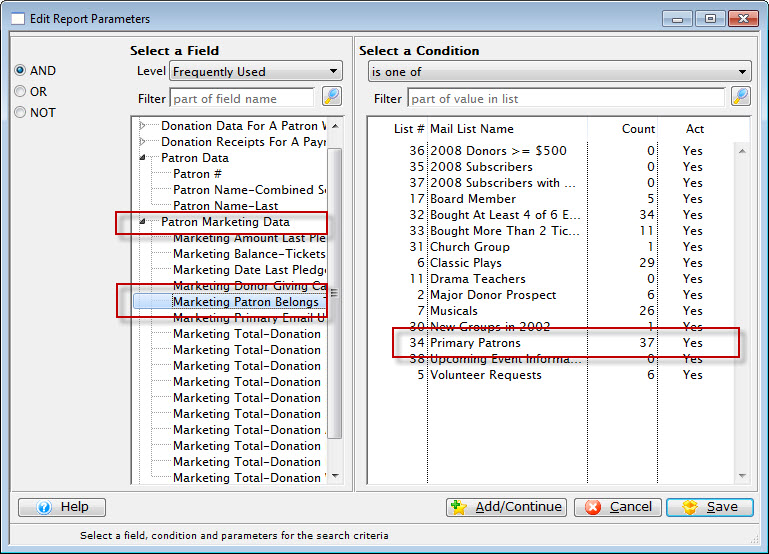
- On the right side, choose the mail list of patrons to whom you'd like to send your letter.
- When you have made your selection from the list of Mail lists, close the criteria window.
The selected mail list is added to the criteria.
If you do not have an existing mail list, you could enter criteria to build a new mail list to use for this mailing.
The process is the same whether you're using an existing one or creating a new one. For more information on creating mail lists, click here. - Click Done in the bottom right to start the merge.
Setting Sending and Routing Options
For more information about the Merge Letter Window, click here.
- Make the following selections appropriate to your needs.
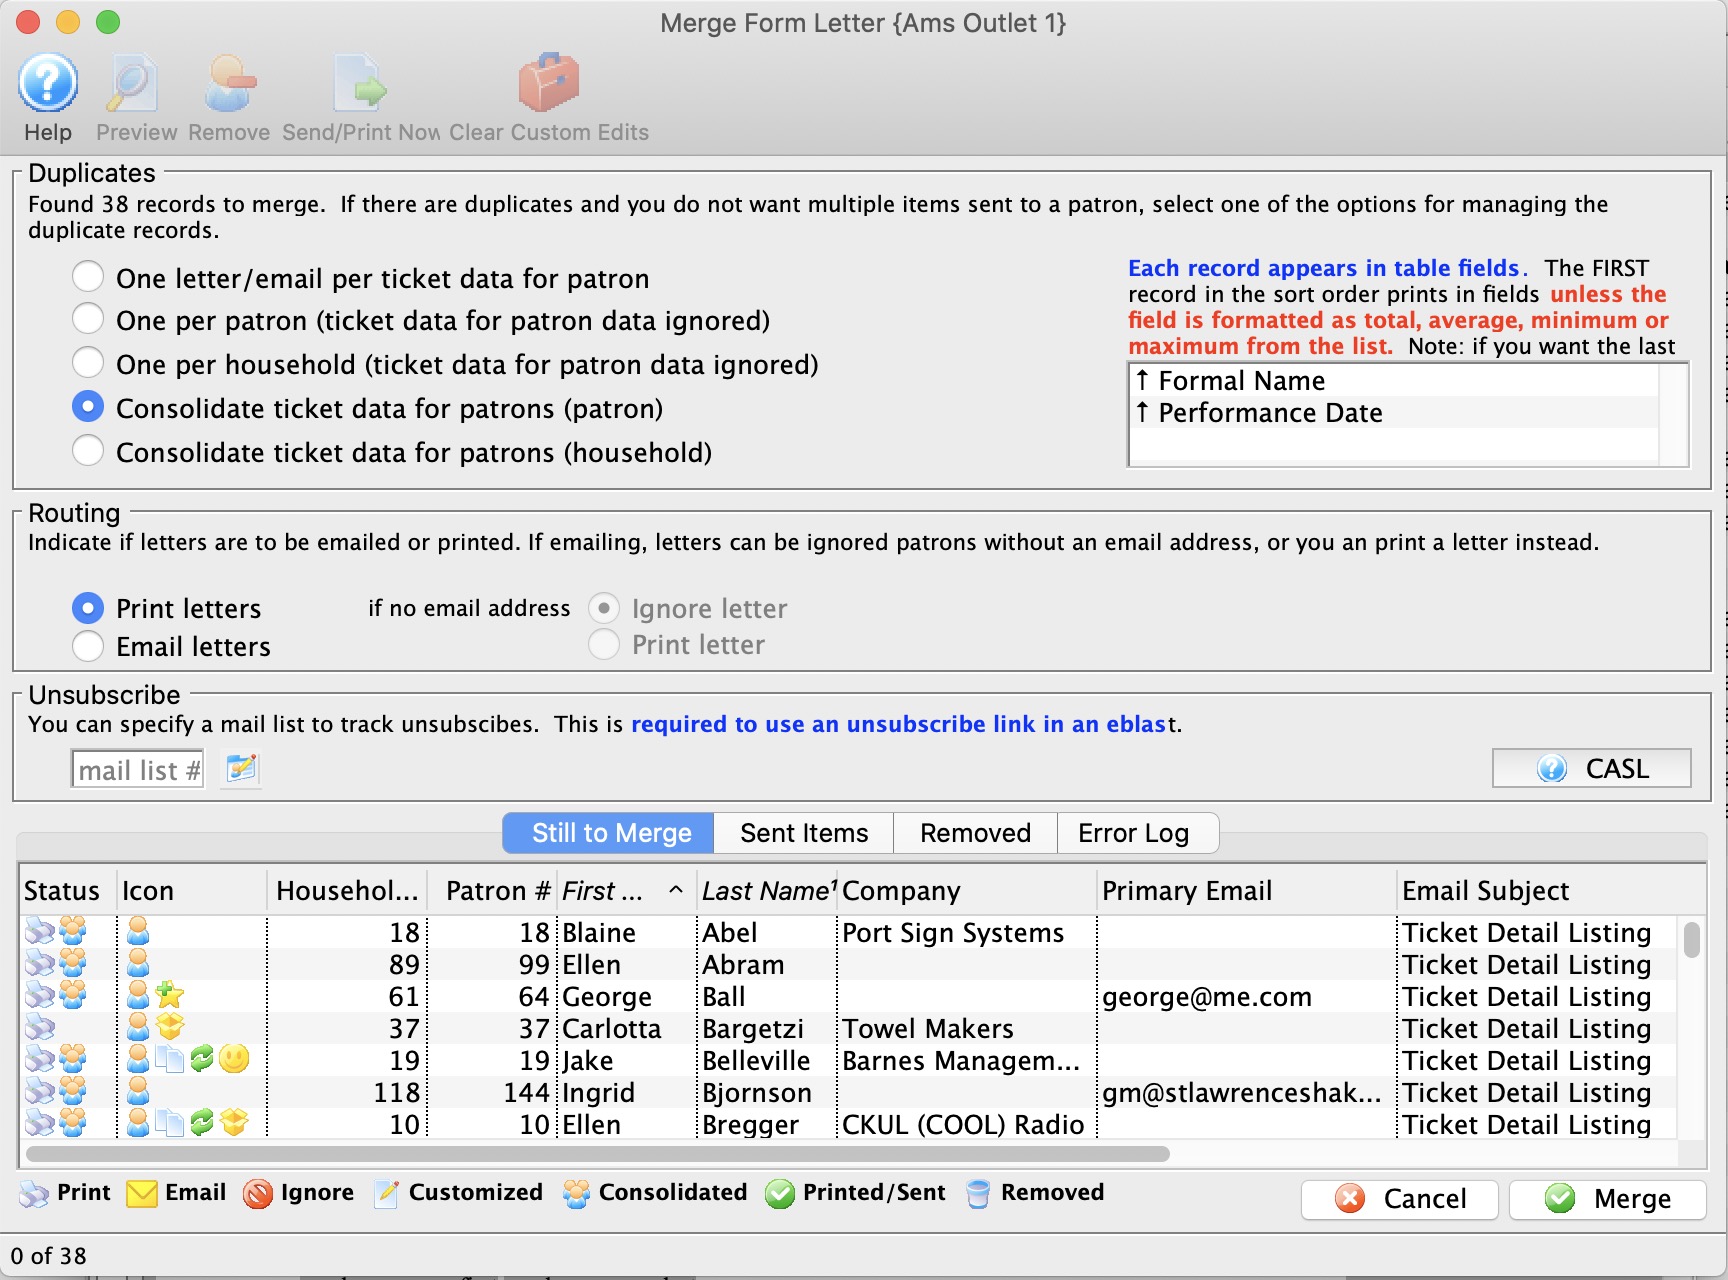
Duplicates Set the radio buttons to reflect the type of letter output you'd like for your mailing. Choices are: - One per receipt - there will be one letter for each receipt in the record.
- One per patron - Patron receives just one mailing and the Receipt data in the letter is ignored. While this will limit the number of letters to a single patron, several patrons in the same household could receive letters.
- Consolidate tickets (Patron) - the receipt data is consolidated into a table (rather than being ignored) and each patron will receive one letter based on that table of receipts. Several patrons in the same household could receive letters.
- Consolidate tickets (Household) - Generates one single letter for the primary household patron. This is the method to ensure one letter or mailing for each household
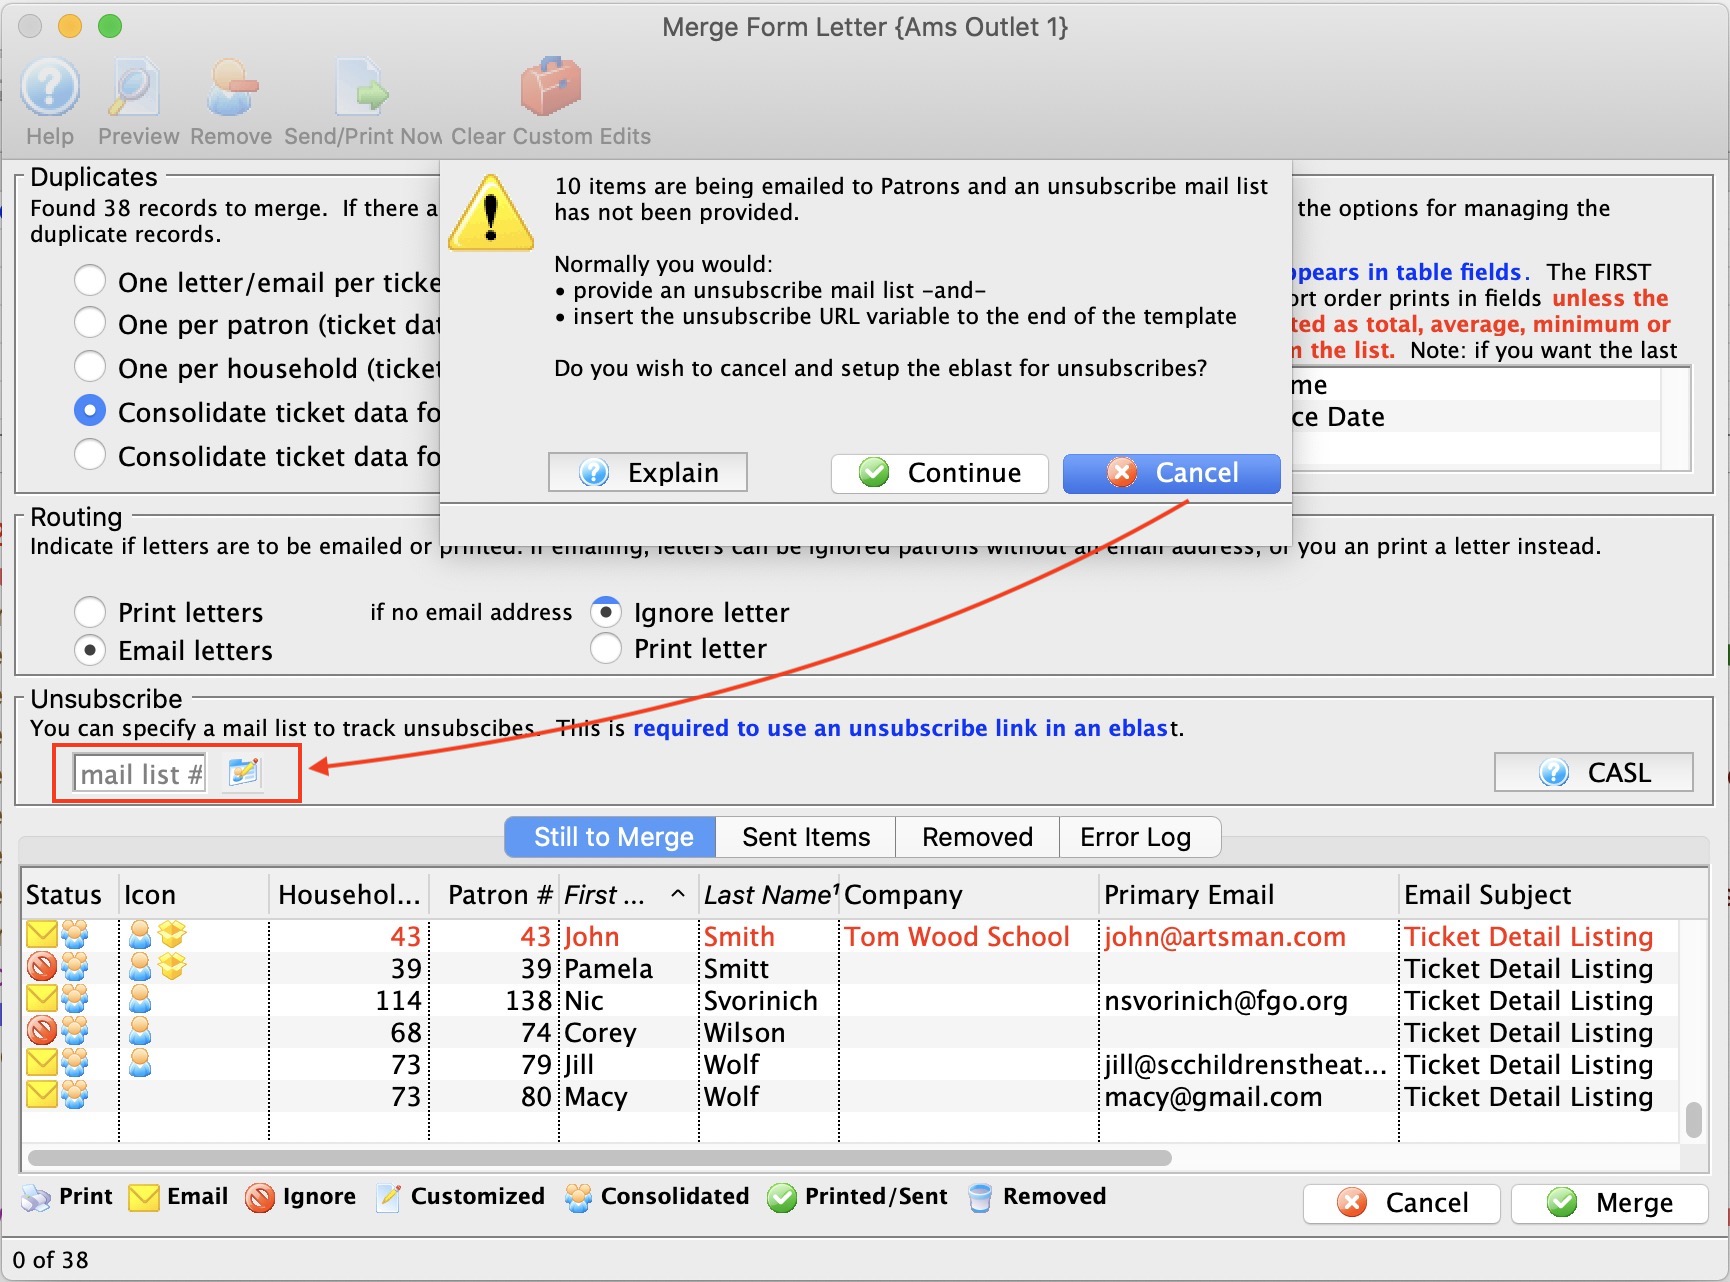
Routing Set the routing for your letter to - Print or Email. If you choose Email, you can then choose "If no email address", then either Ignore or Print the letter. Unsubscribe If you are sending emails to people, you may want to include a mail list that will be used to track unsubscribes. This mail list can be: - the main mail list used to find patrons to send the emails to
- one of your other mail lists whose main function is simply to track unsubscribes. This could be used in the future to eliminate people who have declined receiving emails
- a default mail list specified for the letter - which you can change if to want
You do not have to provide an unsubscribe mail list when e-blasting. For example, you:
- WOULD NOT use an unsubscribe mail list if you were sending out an advisory about the event coming up that people have already purchased tickets for - or a quick eblast to board members.
- WOULD likely use an unsubscribe mail list if it was a marketing newsletter.

You can see all emails associated with this mail list in the email tab on the mail list window - Click the Merge
 button when you see the list has been narrowed down.
Inserting unsubscribe links
 If you want to add an unsubscribe link to your email, there are a few of steps:
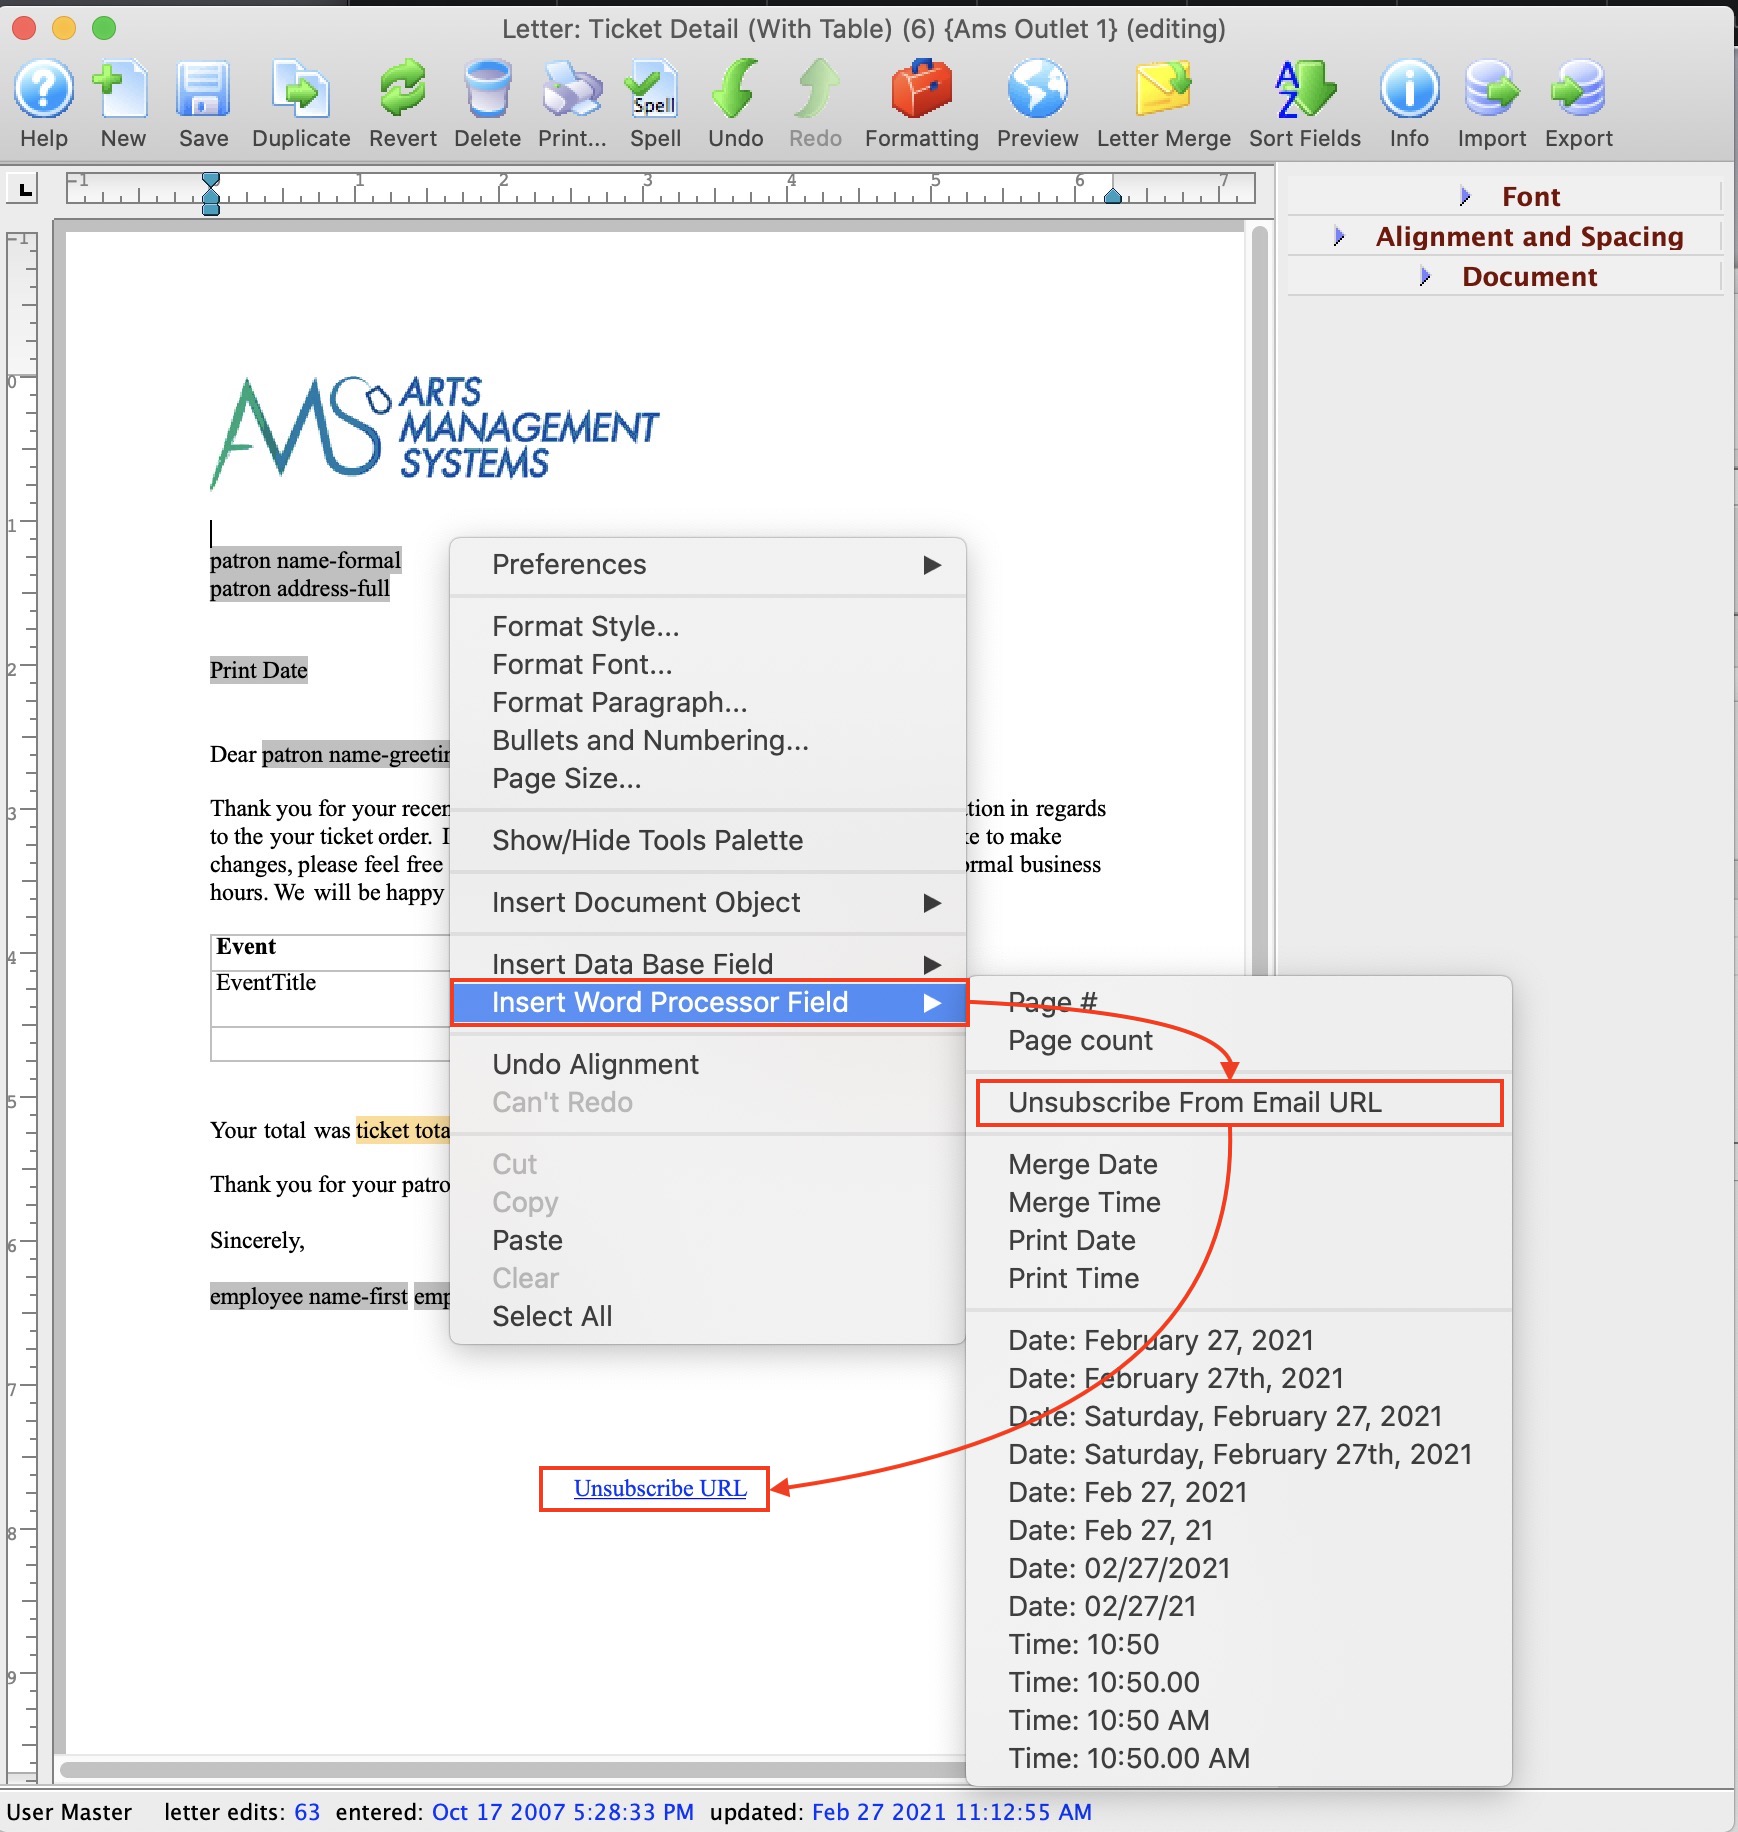
- Open your form letter list and find your email/letter to edit it
- Click your cursor on the place in the letter where you want your unsubscribe link to be. Normally it is near the bottom of the email, so you might need a few extra lines
- Right click to get the main context menu for adding items to the document
- Select Insert Word Processor Field
- From the context menu, select Unsubscribe from Email URL
- The field will be added to the letter and a window will open letting you edit the link name displayed on the letter. See below - changing the name of the link
- After saving the link, you may want to:
- centre the text using a keyboard short cut (cmd-shift-C) -or-
- use the editing tools palette to the right of the word processor
- Adjust the font name, size and/or colour if neccessary
Changing the name of the link
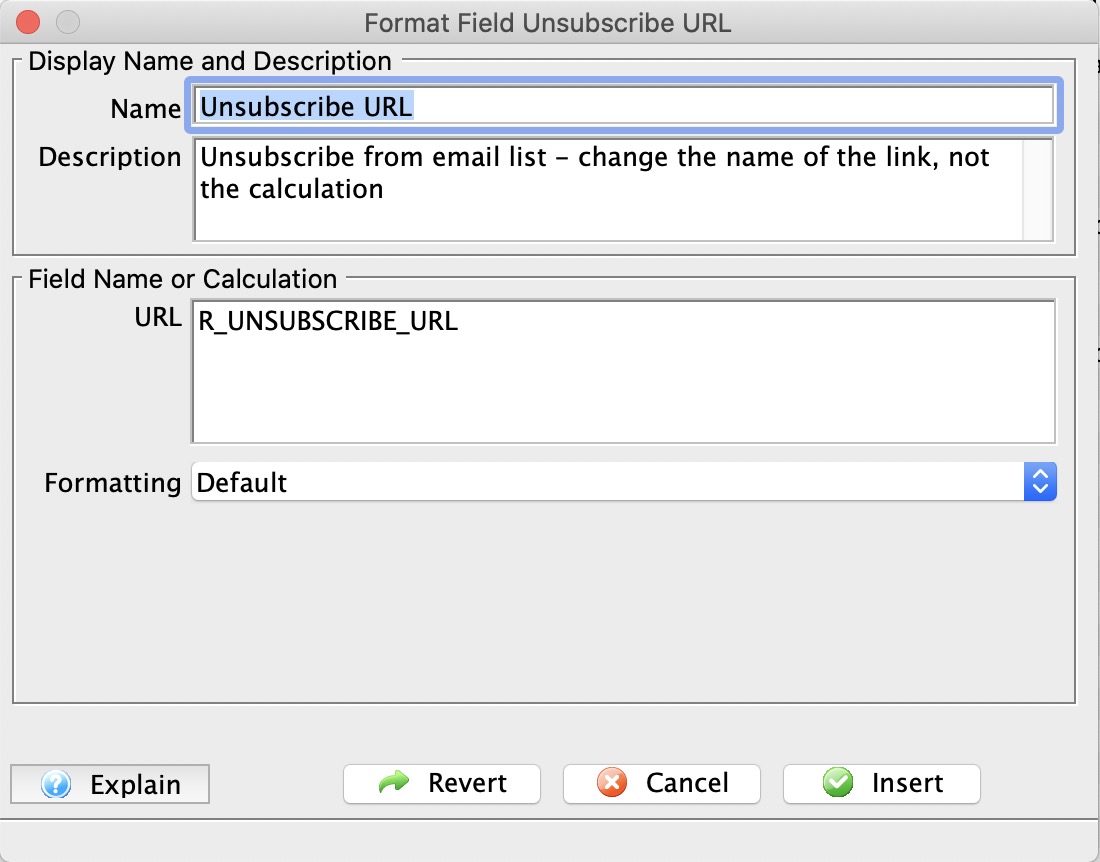
As the unsubscribe link is being added, it opens the window to the right. The text that is displayed on the email defaults to Unsubscribe URL in the name field.
- Name - Change the text in this field to be what you want displayed on the eblast
- URL - DO NOT change the field name.
Setup for Unsubscribe Management
If a mail list is set as default for the form letter, it will appear here automatically. You can:
- Clear it if you do not want to have an unsubscribe link on the eblast
- Change it if you want to use a different mail list to track unsubscribes
- Enter it if there is no default and you want to track unsubscribes for this eblast only
|
You do not need an unsubscribe mail list when emailing. CASL (Canada's Anti Spam Law) generally defines consent as:
|
Requirements for unsubscribe link
There are two requirements to make an eblast unsubscribable:
- Add the unsubscribe field to your email
- Specify the mail list to track the unsubscribe patrons on the merge window (above). It can be set as default for the form letter
|
Note: when the the letter is being printed, the unsubscribe wording does not appear on the form letter |
Complete the Merge and Print or Send
- Set your desired Print and/or Email options and click the Continue
 button.
When the Merge is completed, you are returned to the Merge Letter window with a report of the merge is displayed.
Deleting a Batch of Merged Letters
After completing a merge process, and setting it to print or email later, the user may discover the need to delete the batch.
- Go to Form Letters >> Tasks >> Print Letters/Send Emails.
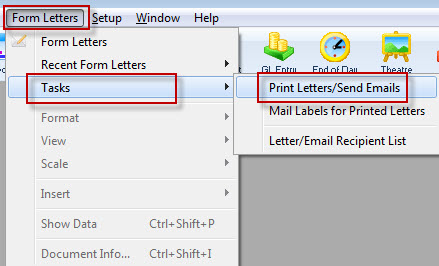
The Print Letters Criteria window opens.
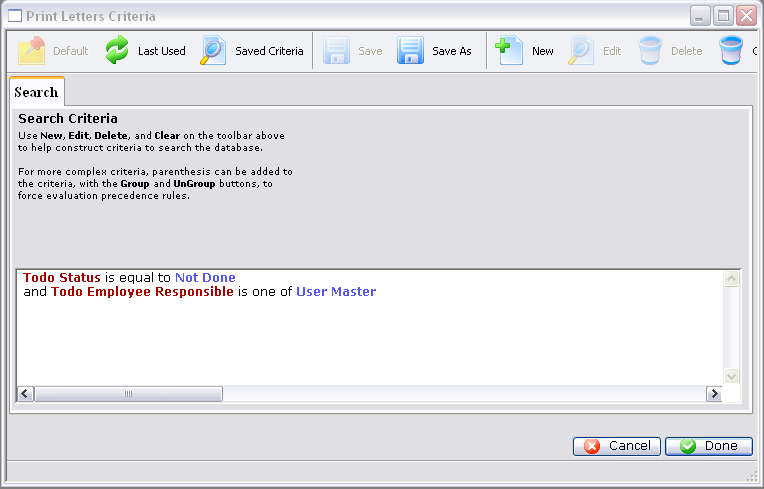
- Adjust the criteria as needed for the employee who created the batch.
To edit a set of criteria, double click on it.
- Click the Done button.
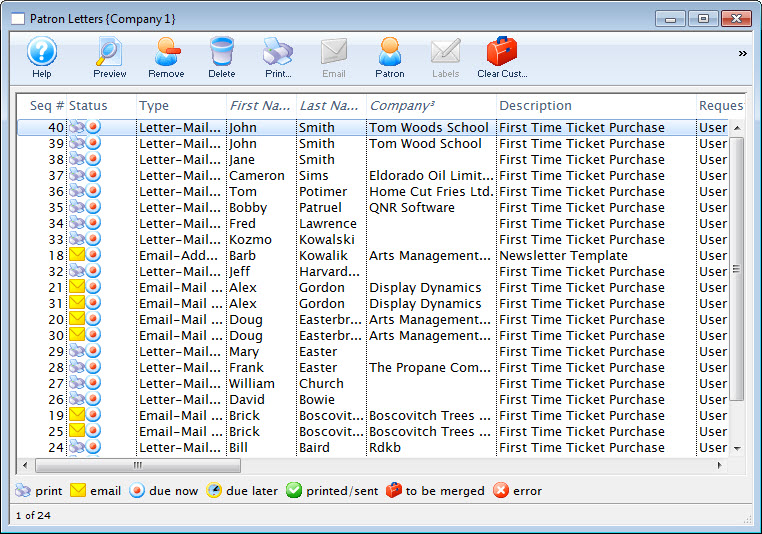
The Patron Letter window opens.
- Select the letters from the batch and click the Delete
 button.
Multiple letters can be selected by using OPTION + click (Mac) or CTRL + click (Windows).
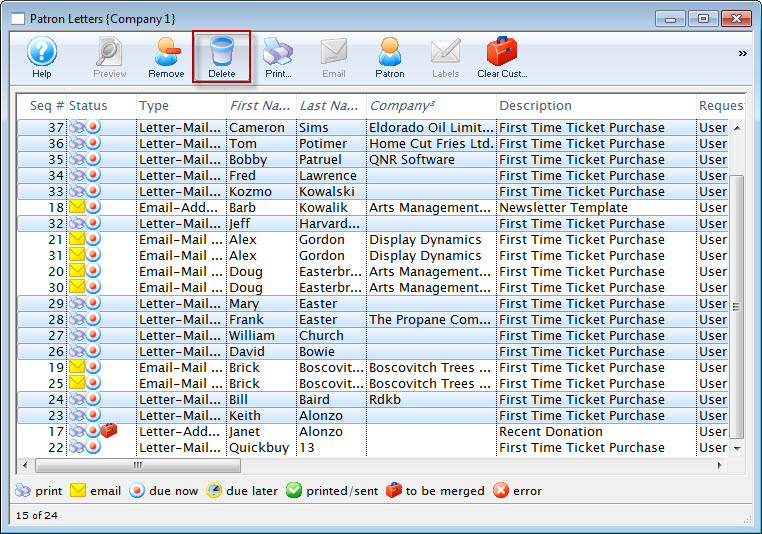
Click here for more information on this window.
A Delete Confirmation opens.
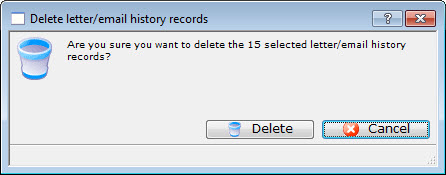
- Click the Delete
 button.
The selected letters/emails are removed from the list.
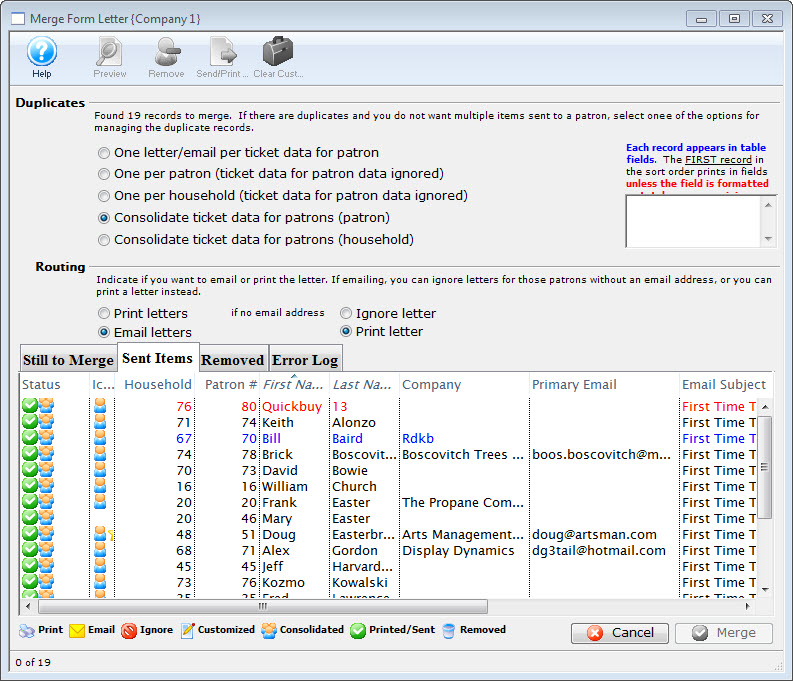
Merge Windows
Merge Letter Window

| Duplicates | |
| One per ticket (or data set selected) | A Patron will receive an email or letter for each line in the list. If there are duplicate names in the list, consider using another option. The merge result will vary, depending on what you select. |
| One per patron - ticket (or selected data set) data ignored | All duplicate names will be removed so only one letter or email is merged.
Data in ticket (or selected data set) is is cleared and appears as blank fields.when using this option to manage duplicates. |
| One per household - ticket (or selected data set) data ignored | All duplicate names will be removed so only one letter or email is merged.
Data in ticket (or selected data set) is is cleared and appears as blank fields.when using this option to manage duplicates. |
| Consolidate tickets (or selected data set) by Patron | Each record appears in table fields. Indicates the order of data records in a table when merged.
|
| Consolidate tickets (or selected data set) by Household | Each record appears in table fields. Indicates the order of data records in a table when merged.
|
| Routing | |
| Print Letters | This radio button when selected marks all letters as to be printed in the status column. |
| Email Letters Using | Allows the selection of a patron email "Type". For example, it allows selecting the "work" email for a specific Form Letter Merge. 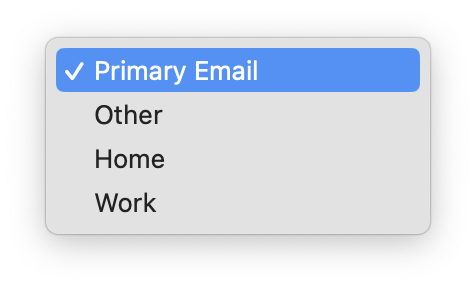 |
| If no email address - Ignore Letters | This radio button becomes active if the "Email Letters" button is chosen. If there is no e-mail address attached to the patron record, then the letter will be ignored. |
| If no email address - Print Letter | This radio button becomes active if the "Email Letters" button is chosen. If there is no e-mail address attached to the patron record, then the letter will be printed. |
| Unsubscribe | |
| Mail List # | Enter a mail list that will be used to track unsubscribes from people receiving the eblast. It is not applicable to printed letters. |
 |
This button will open the selected letter in a preview window so that it can be customized before sending to the patron. This window is similar to the Form Letter window in the features it supports. |
 |
This button will remove the selected letters from the merge process. This can be used if there are patrons who should not be receiving the letter without changing the merge criteria. |
 |
This button will print or email the selected letters immediately based on the setting in the status column. |
| This button will remove any customization or unique characters in the selected recipient letter in the list. This action will only apply to those letters which are highlighted. | |
| Status | An icon of the current status of the letter. There is a legend at the bottom of the window with a description of each icon. |
| Patron # | The patron record number of the patron the letter is being sent to. |
| First Name | The first name of the patron. |
| Last Name | The last name of the patron. |
| Phone/Email/Website | The phone number, email, and website for the patron are displayed here if available. |
| Company | The name of the company associated with the patron if available. |
| Letter Name | The name of the letter currently being sent to the patron. |
| Context Menu | The context menu is opened by right-clicking on a letter in the window. This menu allows a number of actions to be performed. Click here for more information about the Context menu. |
 |
Closes the Merge Letter window without completing the letter merge. This does not apply to any letters that have been sent using the Send/Print Immediately button. |
|
Opens the Merge Parameters window to allow completion of the final step of the Merge process. Click here for more information on the Merge Parameters window. |
|
Note: if you are able to consolidate data on the letter, you can change the sort order of the data within a list in the letter by adding one or more sort options to the letter. |
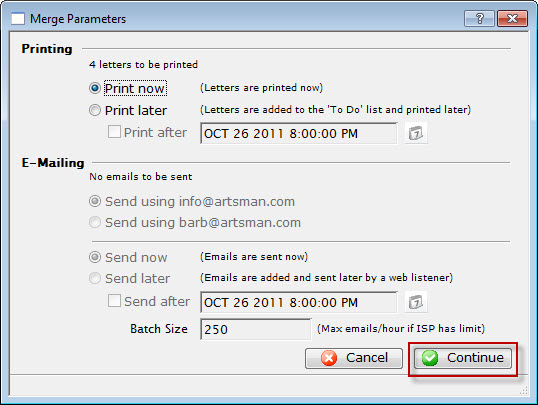
Merge Parameters Window
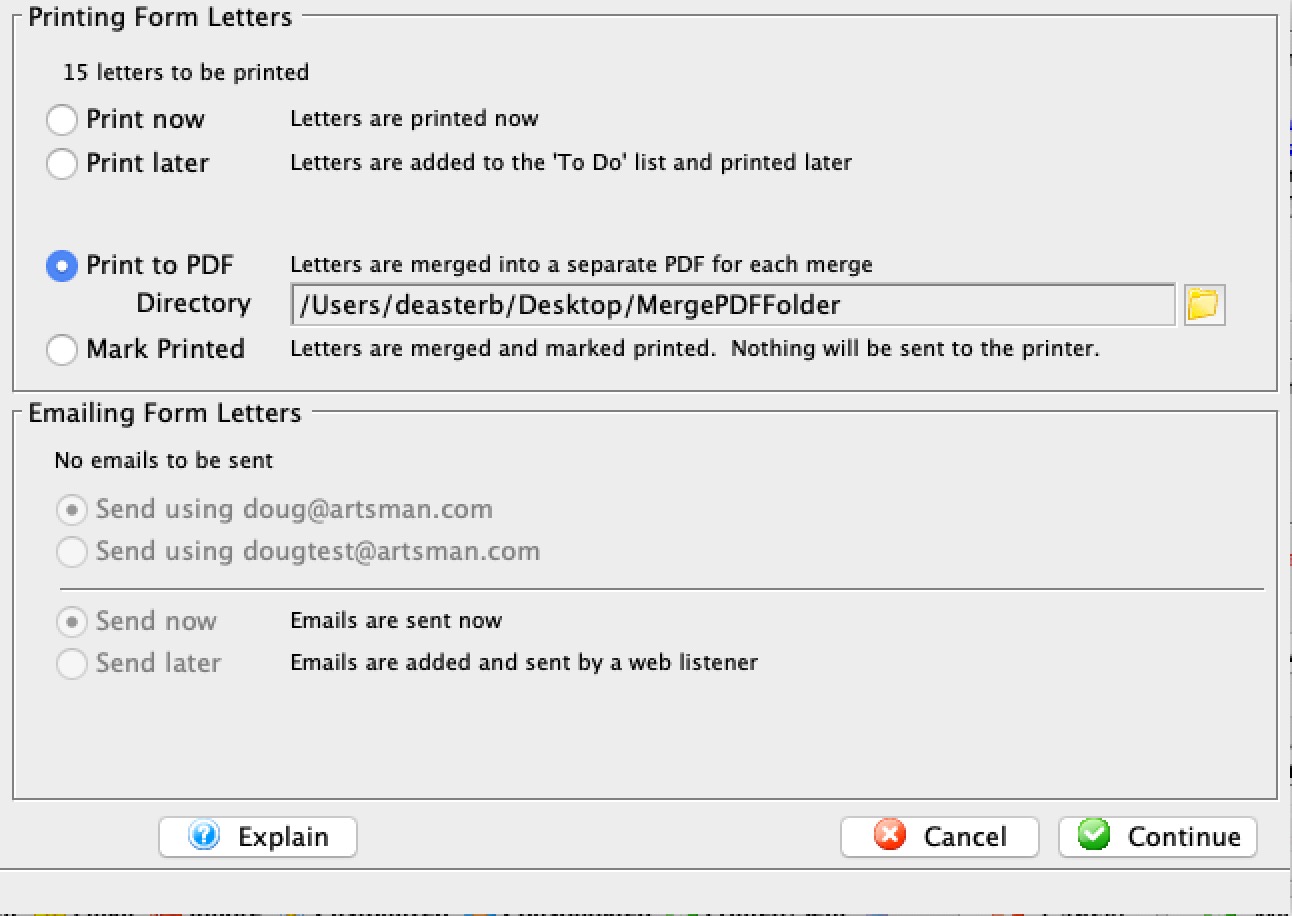
Printing Form Letters |
|
| Print Now | When this radio button is selected, all letters will be printed immediately. |
| Print Later | When this radio button is selected, all letters will be added to the To Do list to be printed later. For more information on printing from the To Do list, click here. |
| Print on/at | When this box is checked, the letters will be printed at the
date and time set in the field. This is for automating the printing process
during a later time such as after-hours. Remember that a user must be logged
in for the letters to print.
If selected, you can specify a date that the letter is due:
|
| Print to PDF | This option will merge each letter into a separate file and place them in a folder of your choice. Use this option if you want a letter - such as a donation receipt letter - for emailing the patron, while also maintaining a file-based copy that you can keep for yourself.
You will need to provide a folder into which the letters will be merged. After the merge, the files will look like the list below. The name of the file consists of:
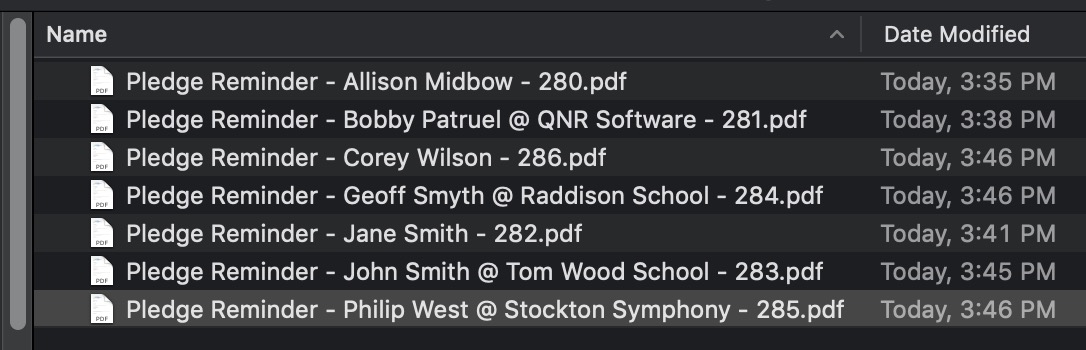
|
| Mark Printed | This is designed to allow the form letter to be added to the patron record for tracking. You might do this if you used a print-house/graphic arts company to print, merge, and mail letters or brochures to patrons in large numbers.
Merging and not printing against the same set of patrons would result in a letter on the patron record that is marked printed, yet it is never actually printed. This can be used for tracking and subsequent building of mail lists for customers that do not respond. |
Emailing Form Letters |
|
| Send using <User> address | This radio button will contain the e-mail address of the user currently creating the batch. When selected, all e-mails will be sent using the user's e-mail address. |
| Send using <Organization> address | This radio button will containt the e-mail address of the company. When selected, all e-mails will be sent using the organization's e-mail address. |
| Send Now | When this radio button is selected, all letters will be emailed immediately. Based on the setting of the Merge Letter window, patrons without e-mail addresses may also begin printing. |
| Send Later | When this radio button is selected, all letters will be added to the To Do list to be emailed later. For more information on emailing from the To Do list, click here. |
| Send on/at | When this box is checked, the letters will be emailed at the date and time set in the field. This is for automating the emailing process during a later time such as after-hours. Remember that a Web Sales Listener must be logged in for the letters to be emailed. |
 |
Opens the mini-calendar for selecting a later date to email the letters. |
| Batch Size | When the Send on/at feature is enabled, a batch size can be set in this field to limit the number of emails sent per hour. This is useful if the organization's ISP has a limit on the number of emails that can be sent per hour. Theatre Manager will take the total eblasts being sent and divide them into 10 minute groups.
You can set a default in Company Preferences->Web Listener tab or you can enter it each time you do an eblast. |
|
Closes the Merge Parameter window without completing the merge. |
 |
Continues the Merge process based on the parameters set. |
Using the Context Menu during a Merge
The Context Menu is available by right-clicking in the Merge Letter window. This menu gives the user access to additional operations that can be performed prior to the merge.
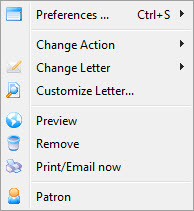
| Preferences | Allows access to window Preference options. |
| Change Action | Allows access to the Action sub-menu. See below for more information on this menu. |
| Change Letter | Will display a sub-menu of all letters available in the system. Allows for changing the letter being sent to the selected patron. |
| Customize Letter | Allows the selected letter to be customized. A letter is customized to an individual patron and will not affect other patrons in the same merge. |
| Preview | Previews the selected letter with all fields filled. The letter can also be customized from this view. |
| Remove | Removes the letter from the merge operation. |
| Print/Email now | Immediately prints or emails the letter based on the icon in the status column of the Merge Letter window. | Patron | Opens the patron record of the selected letter recipient. |
Change Action Menu
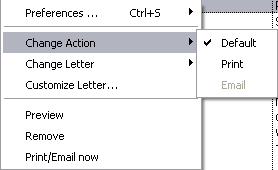
| Default | Leaves the status of the letter as the default action in the Merge Letter window. |
| Changes the status of the letter in the Merge Letter window as marked for printing. | |
| Changes the status of the letter in the Merge Letter window as marked for emailing. |
Previewing a Form Letter
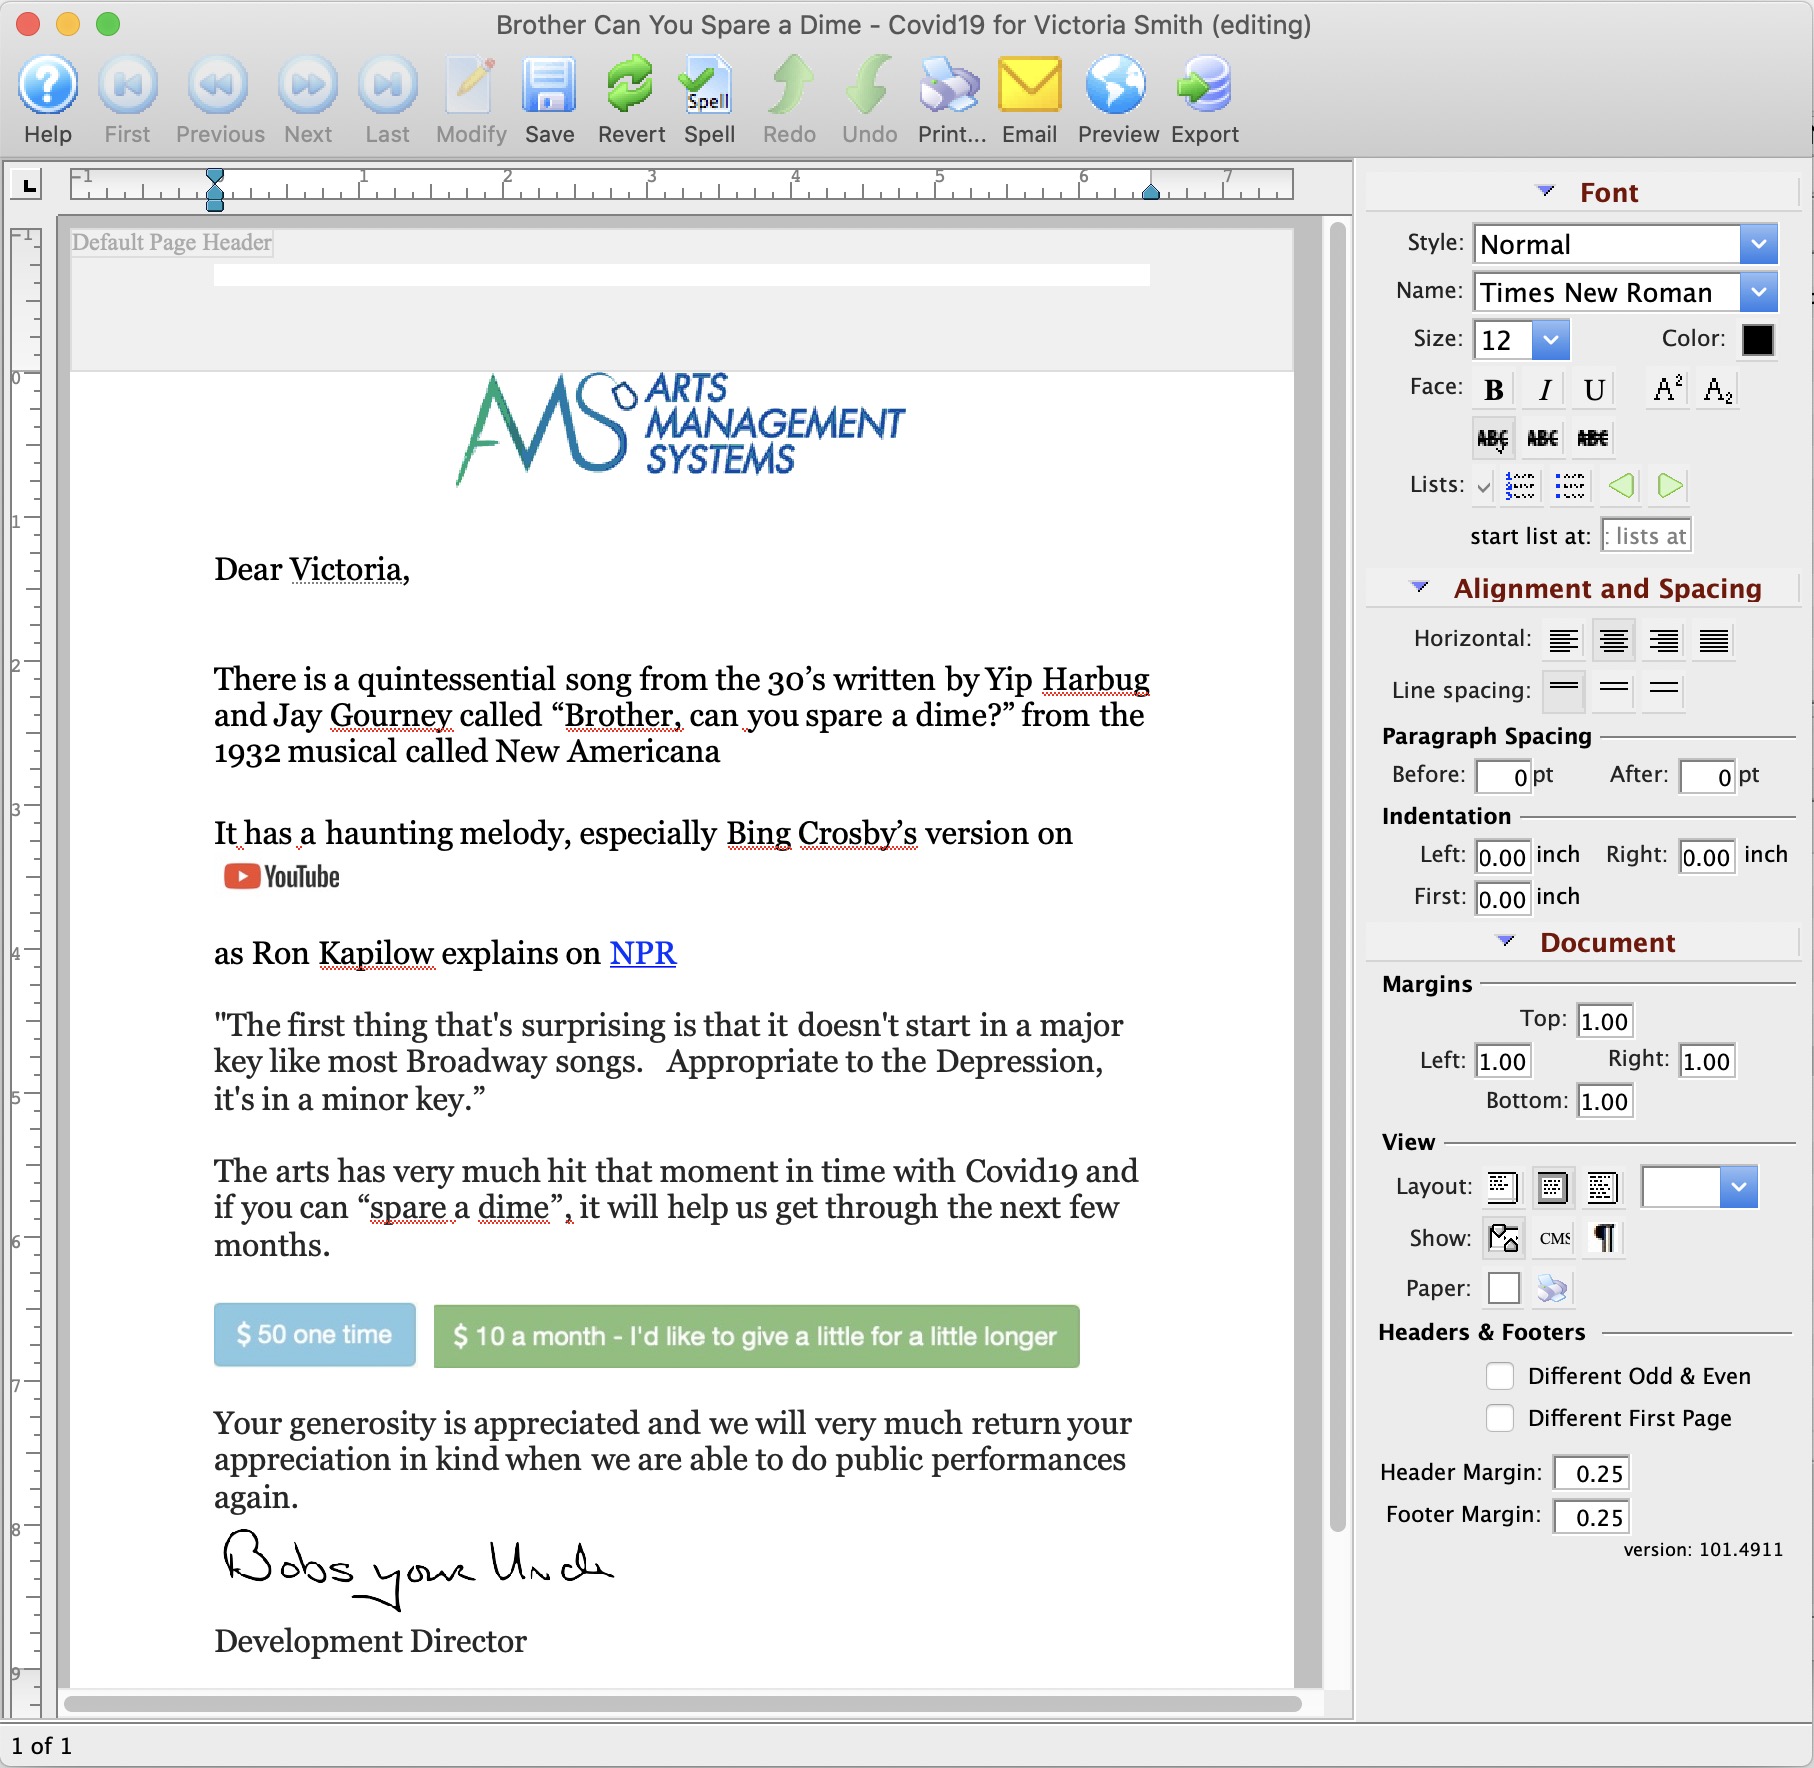
Parts of the Form Letter Preview Window
 |
Saves the custom changes to the merged Form Letter specific to the patron. |
 |
Reverts to the last saved version of the letter. |
 |
Prints the current Form Letter. Click here for more information on printing Form Letters. |
 |
Checks the spelling of the current letter. |
 |
Exports the letter as an RTF document to be opened in another application. Click here for more information on exporting a Form Letter. |
| Formatting Pallette | The fomatting pallette allows easy access to many common word processing functions. For more information on this feature, click here. |
| Context Menu | The Context Menu, also known as the right-click menu allows for adding new fields and making other adjustments to the letter. For more information about using this menu, click here. |
Merging letters but not printing Them
|
If you make a mistake in the merge, instead of setting the status to done, just find the letters as per step 2 and delete them on the same window. |
There are two steps to do so:
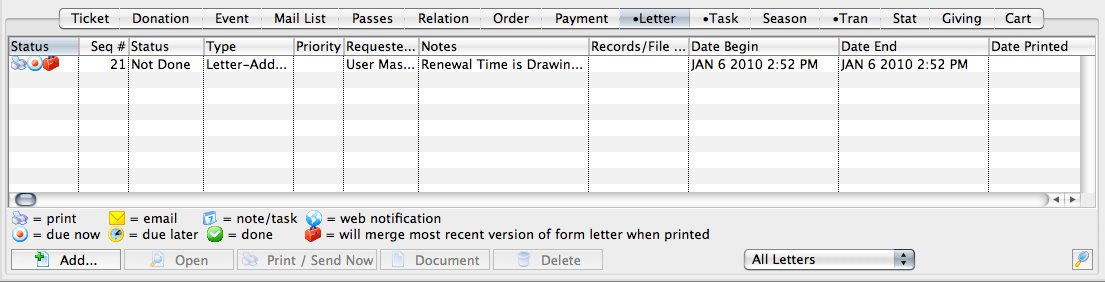
- Merge the letters as you normally would and set the print date to be some time in the future.
We recommend a date that is around the date of printing you want to appear on the patron record, such as a couple of days from the current date.
In the example, it shows a date that is many years away - it is best to choose a date in the next couple of days.
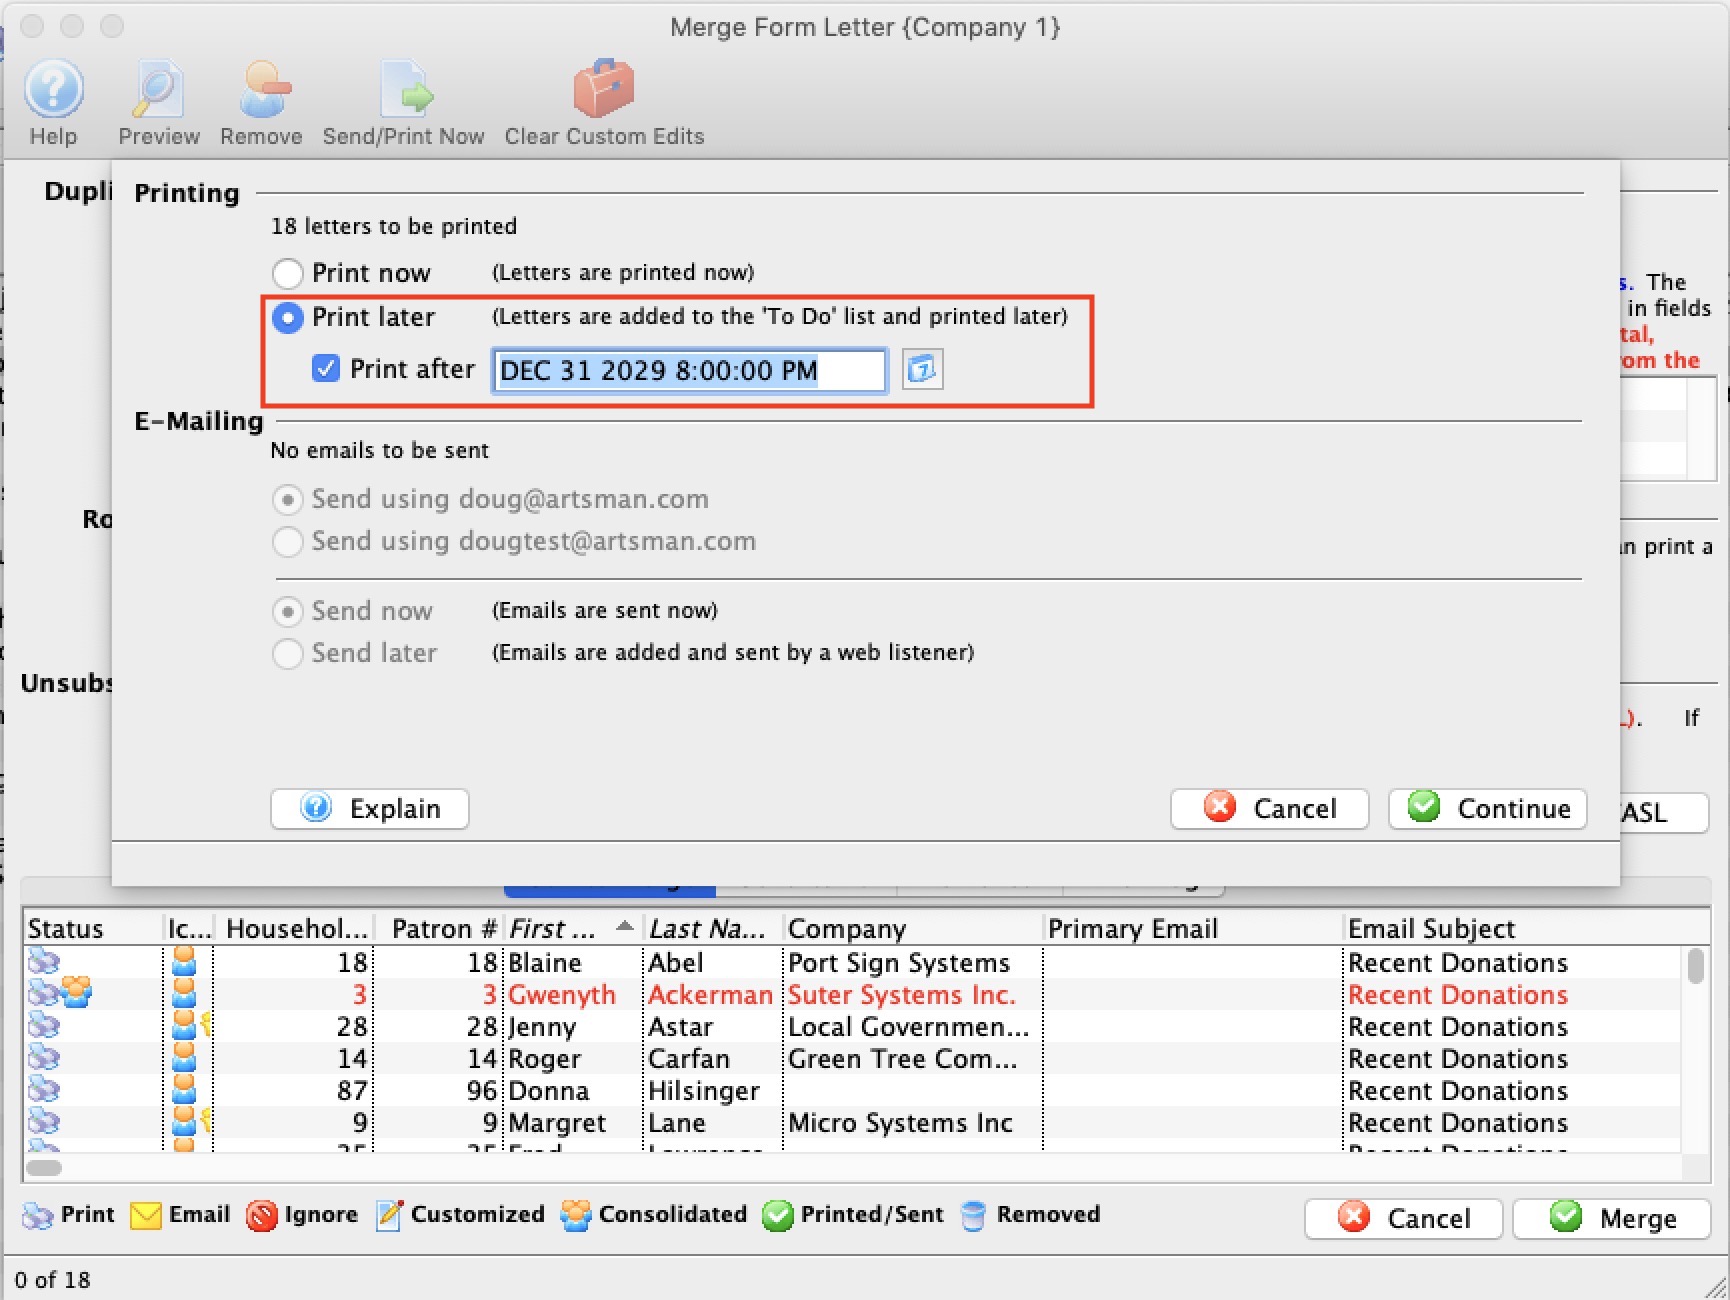
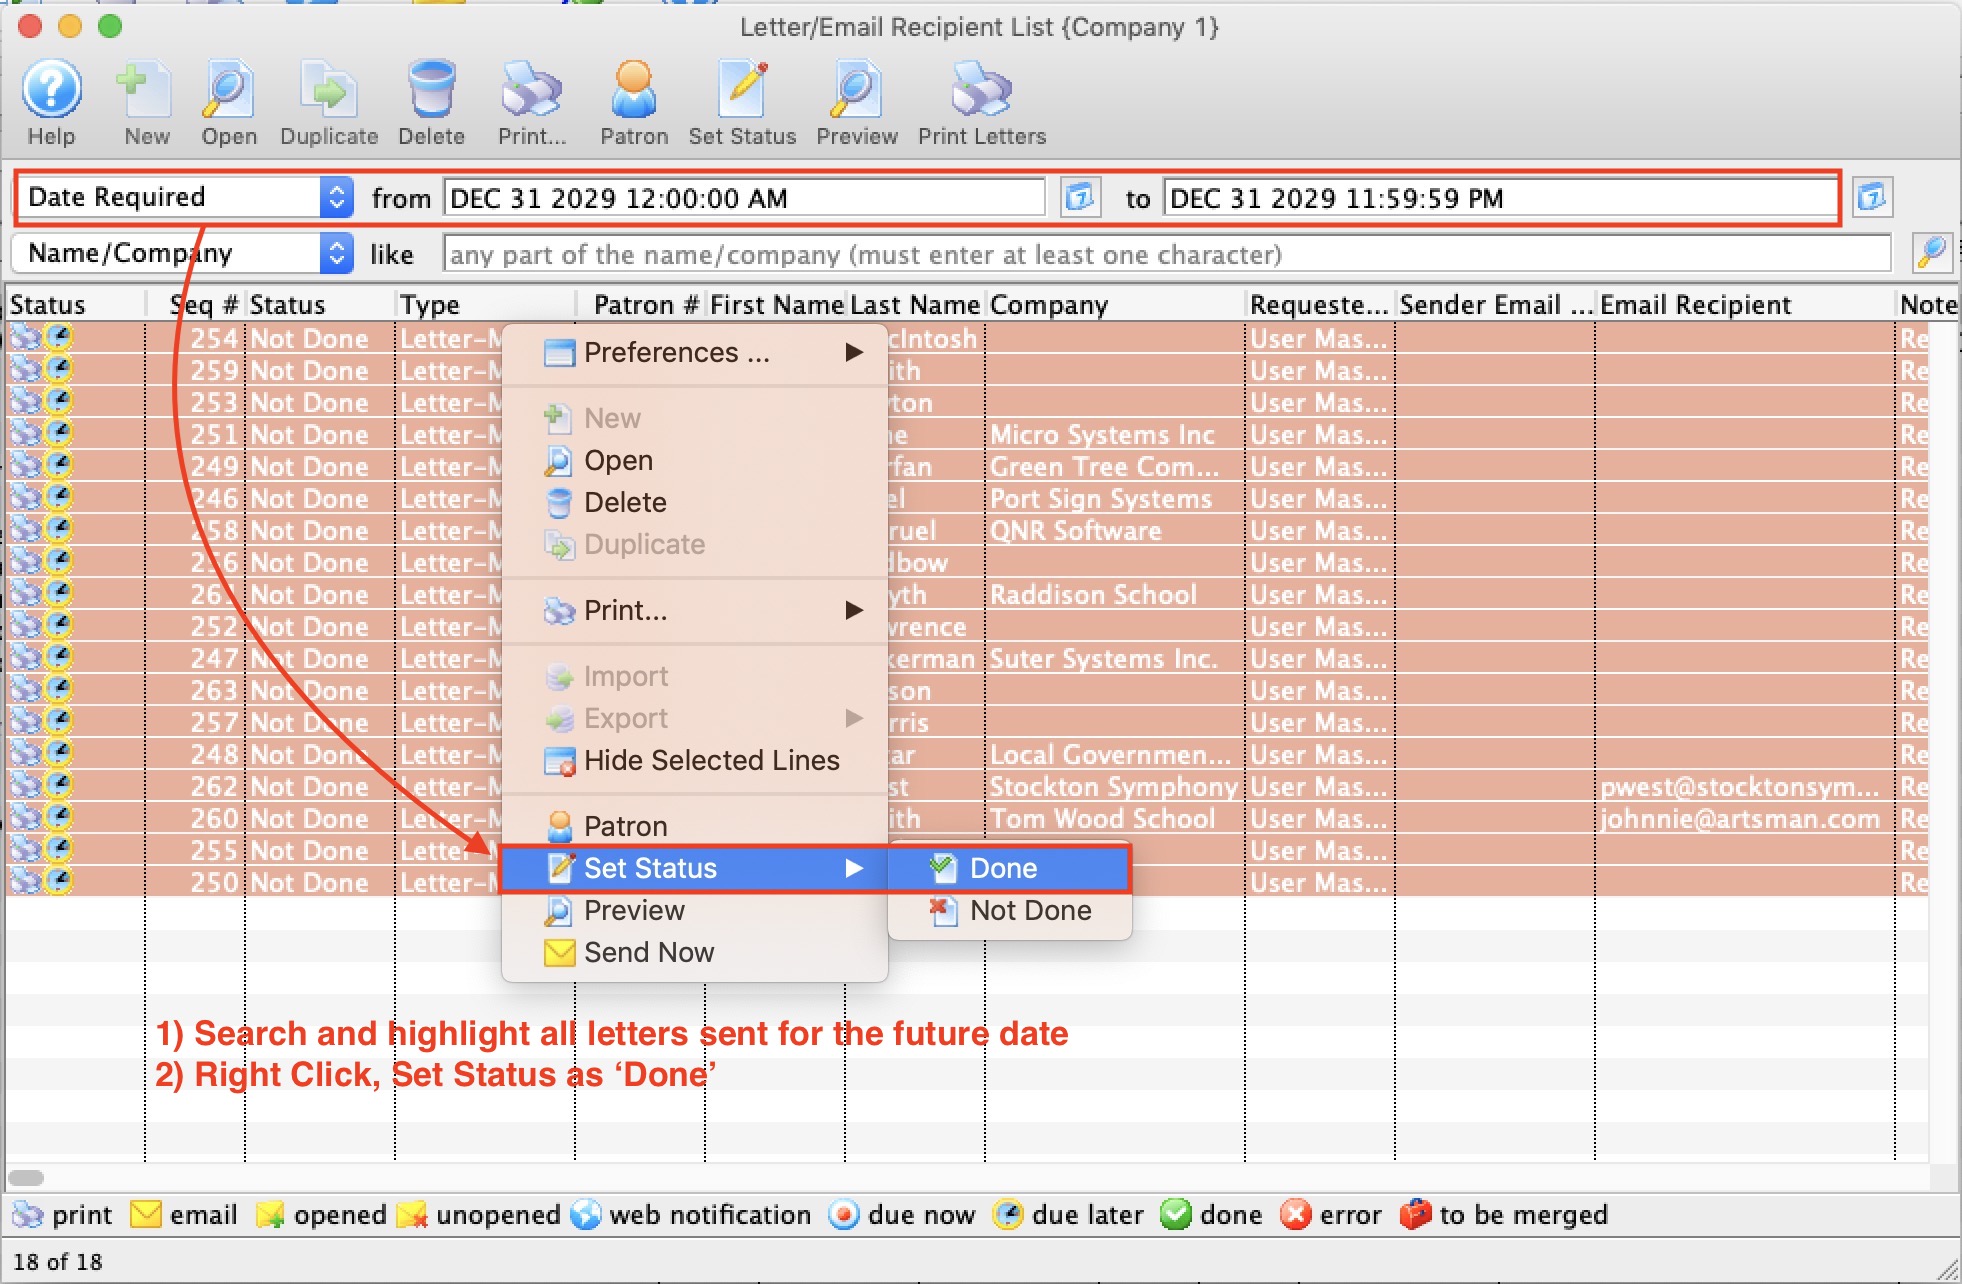
- Then, in the Form Letter->Tasks->Letter/Email Recipient list:
- Find all letters using Date Required with the above date on it.
- Make sure that they are the letters you just merged. Verify the name of the letter, the date and the requestor - so that you don't pick up another employees future letters.
- Select them all
- Right Click, and set the status to done.