Main menu
You are here
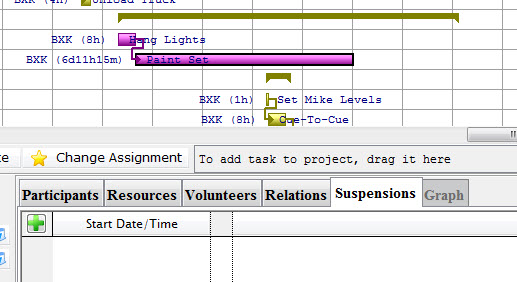
Adding and Deleting Task Suspensions
At this time, you can only have a single suspension of a task. If you need more than that, break the task down into multiple tasks.
To add a suspension to a task, you perform the following steps:
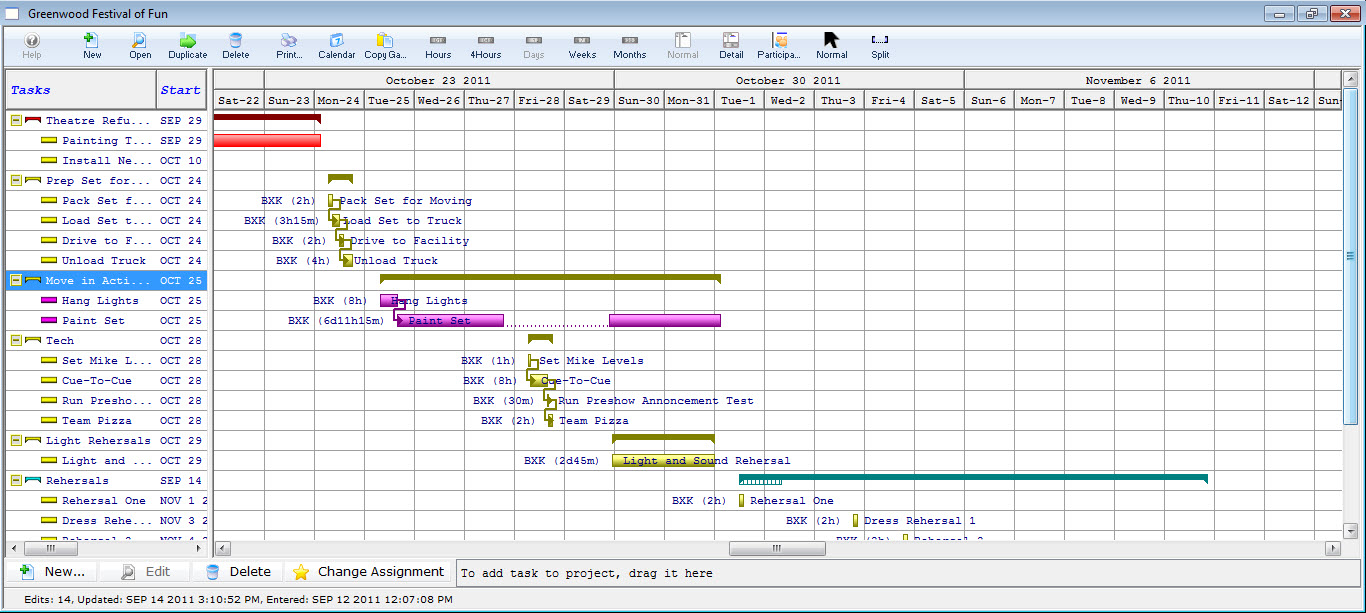
- Open the project by selecting it from the Project list. Then, in the Project window, click the Gantt
 button.
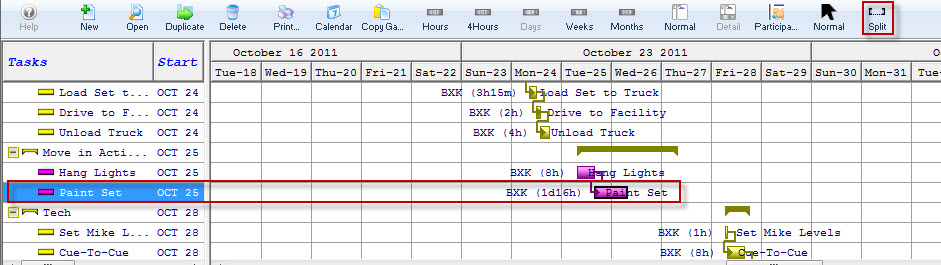
- In the Gantt Chart, highlight the task to be split. Use the right click context menu selection split
 or click the Split
  button on the toolbar / ribbon bar.
The edit details screen opens to the suspension tab.
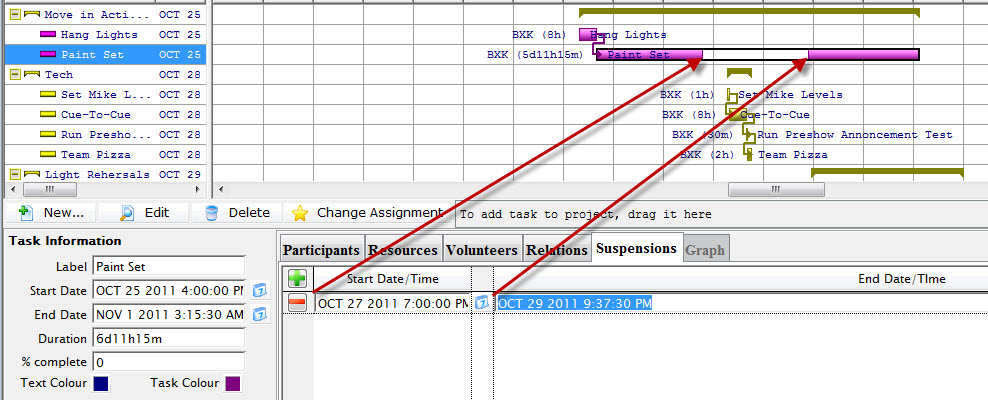
The task information containing the details for the suspension is displayed on the left.
- Make any adjustments.
They are automatically reflected in the Gantt Chart and the date ranges on the left.
You can edit a suspension by editing the date/time for the starting or ending of the suspension or by clicking on the calendar and making your selection. You cannot enter dates/times outside the boundaries of the task itself.
Once a suspension has been created, you can drag the bounds of the suspension from within the Gantt chart.
With any items in this window, as soon as you leave a field or make a selection the information is saved and the screen is updated.
Delete the Suspension
To delete a suspension, you perform the following steps:
- Open the Gantt Chart and click on the suspension you want to delete.
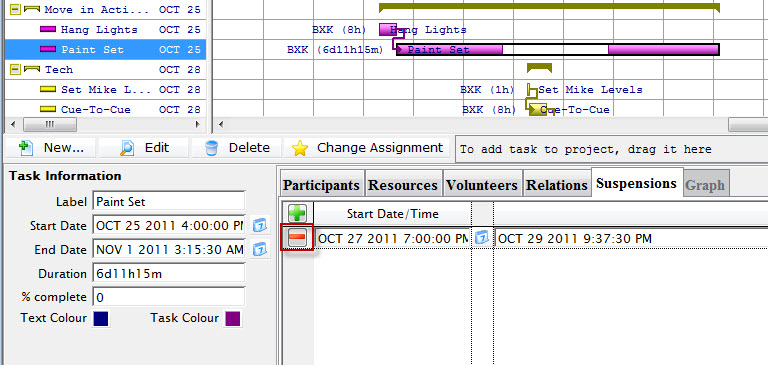
The Detail Editing subwindow opens to the suspension.
- Click the Remove
 button.
A confirmation dialog opens.
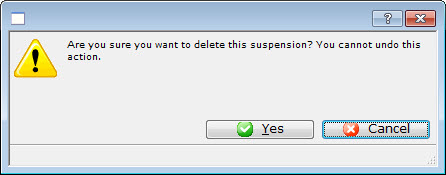
- Click Yes to remiove the suspension.