Theatre Manager Web Services
- A firewall/router which is your connection to the internet (hardware)
- TM Server - configured as a web server. You provide your TLS Certificate to the web server.
- One or more TM Servers configured to provide services, depending on load requirements for sales
 |
You can access the Director to configure services at any time using http://127.0.0.1:3012 on a machine containing TM Server.
Since the director uses javascript, please make sure you have the latest version of your browser installed on your machine or mobile device: Safari, Firefox, Chrome, Opera, IE 11 or Edge browsers are known to be compatible. |
 |
For PCI compliance, if TM Server is configured as a web server, it must be installed in a DMZ and separated from the rest of the network so that card holder data would never be on the same part of the lan as the DMZ. |
 |
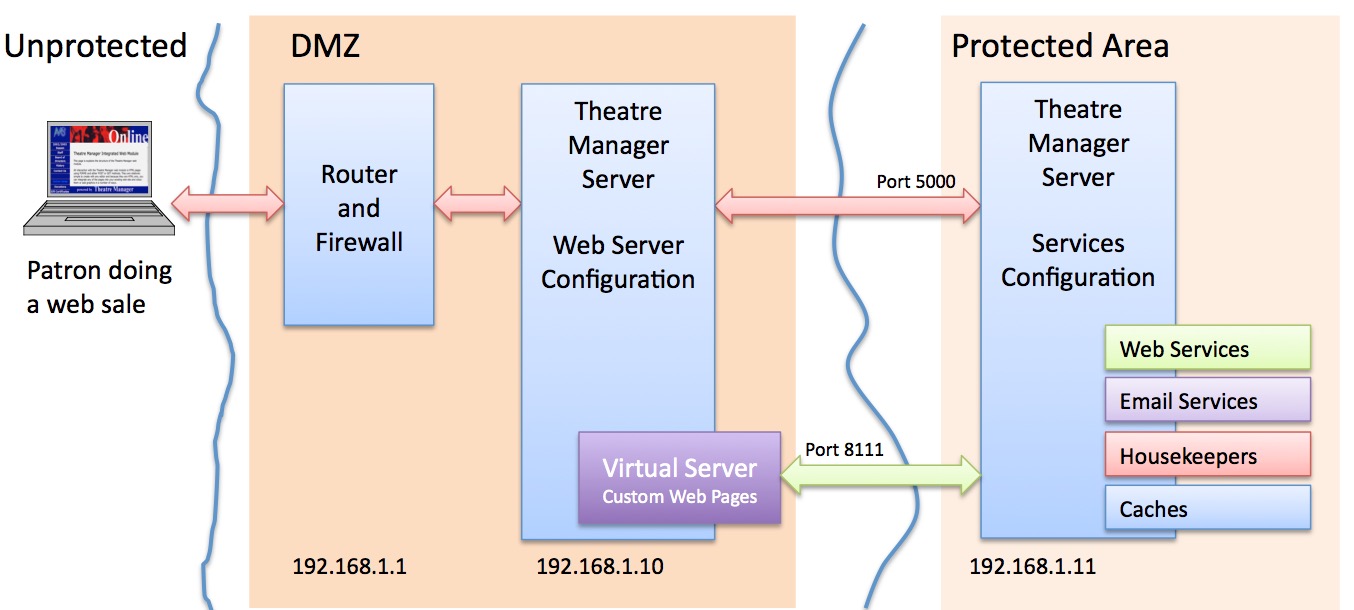
The above diagram illustrates a standard installation. Depending on security and/or performance requirements; other parameters can be altered to affect load balancing across multiple machines. This should only be done under guidance of AMS staff |
- The firewall directs incoming traffic on ports 80 and 443 to the web server from the internet. The web server is configured to elevate all port 80 traffic to use TLS on port 443.
- The web server can be on the same subnet as the firewall (or not, as you wish). This allows:
- web traffic from the internet on ports 80 and 443
- provides dynamic load balancing to a number of Theatre Manager Servers and passes web requests to port 5000 on each of those servers
- A TM Server in Services Configuration receives communication on port 5000 and talks back to the web server on internal port 8111 (a separate virtual server) to retrieve custom web pages for merging
- Some configuration of the services in Company Preferences 'Director Tab'
The actual installation of the is described for Macintosh and Windows. While unsupported by Arts Management, you can use Linux if you know how to use apt-get and install and configure NGINX (we can provide a template nginx.conf file for you.
The diagram refers to 192.168.1.x for the internal network and is used throughout the documentation as a sample lan addresses. Your IP addresses may be different
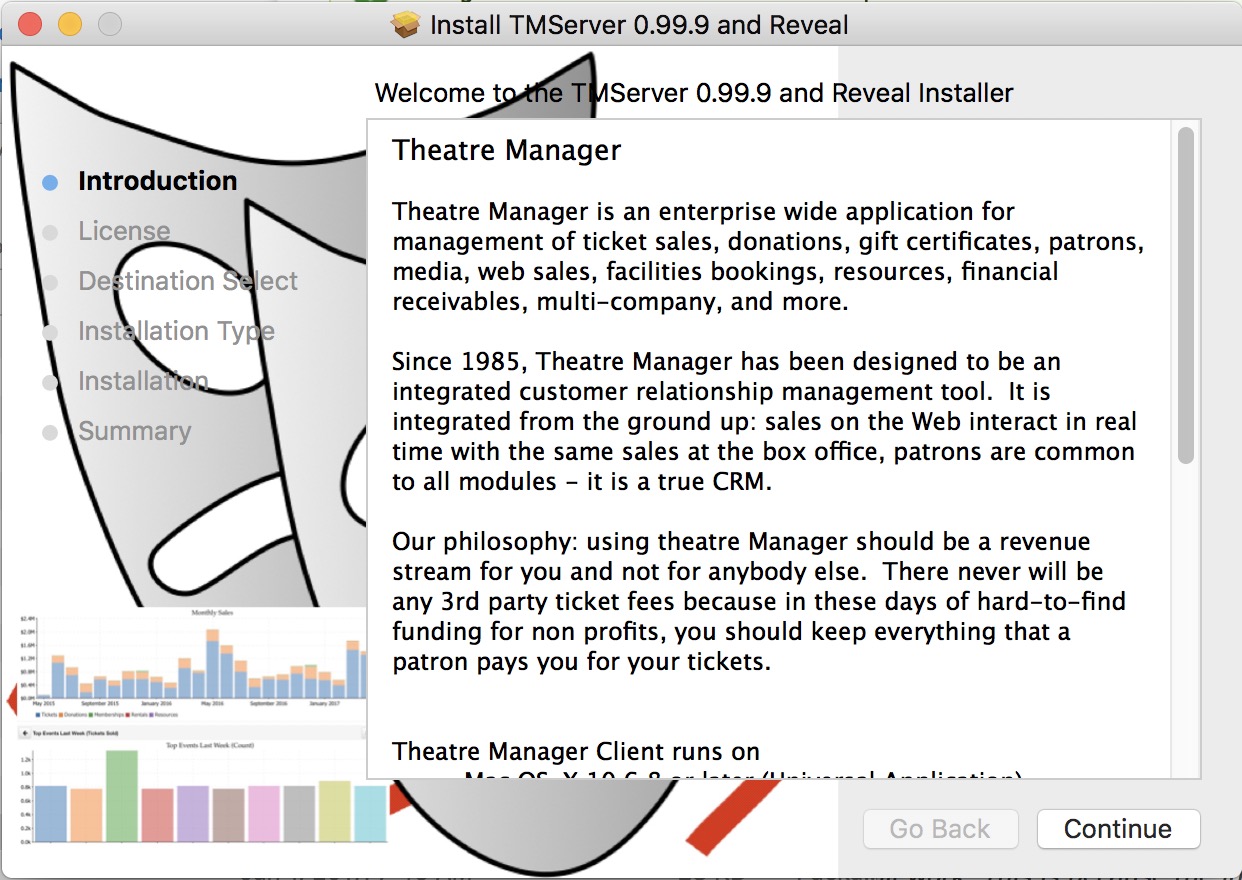
Install Theatre Manager Server
- downloading and installing TM server for Macintosh or Windows
- starting the second generation Theatre Manager server for with purposes on the appropriate platform. Theatre Manager server can be configured later:
- as a web server -or-
- for providing services for web and email
 |
Only install TM Server ONCE on a machine. Once installed, TM Server will auto update itself. |
 |
TM Server should be installed on machines with multiple processors.
For best results, if it is to be used as a:
|

TM Server for OSX
 |
You normally need only install the Theatre Manager server ONCE on a machine per the instructions below. TM server will auto update itself. | |
 |
In recent versions of OSX, you may need to make a temporary change in System Preferences after downloading the installer and before the installer will work. | |
 |
Reinstalling TM Server can be done at any time. Only if you are VERY stuck, you may need to type the following command in terminal prior to re-running the installer.
|
| Step | Action |
| Step 1 | Download and extract the installers for Macintosh. |
| Step 2 |
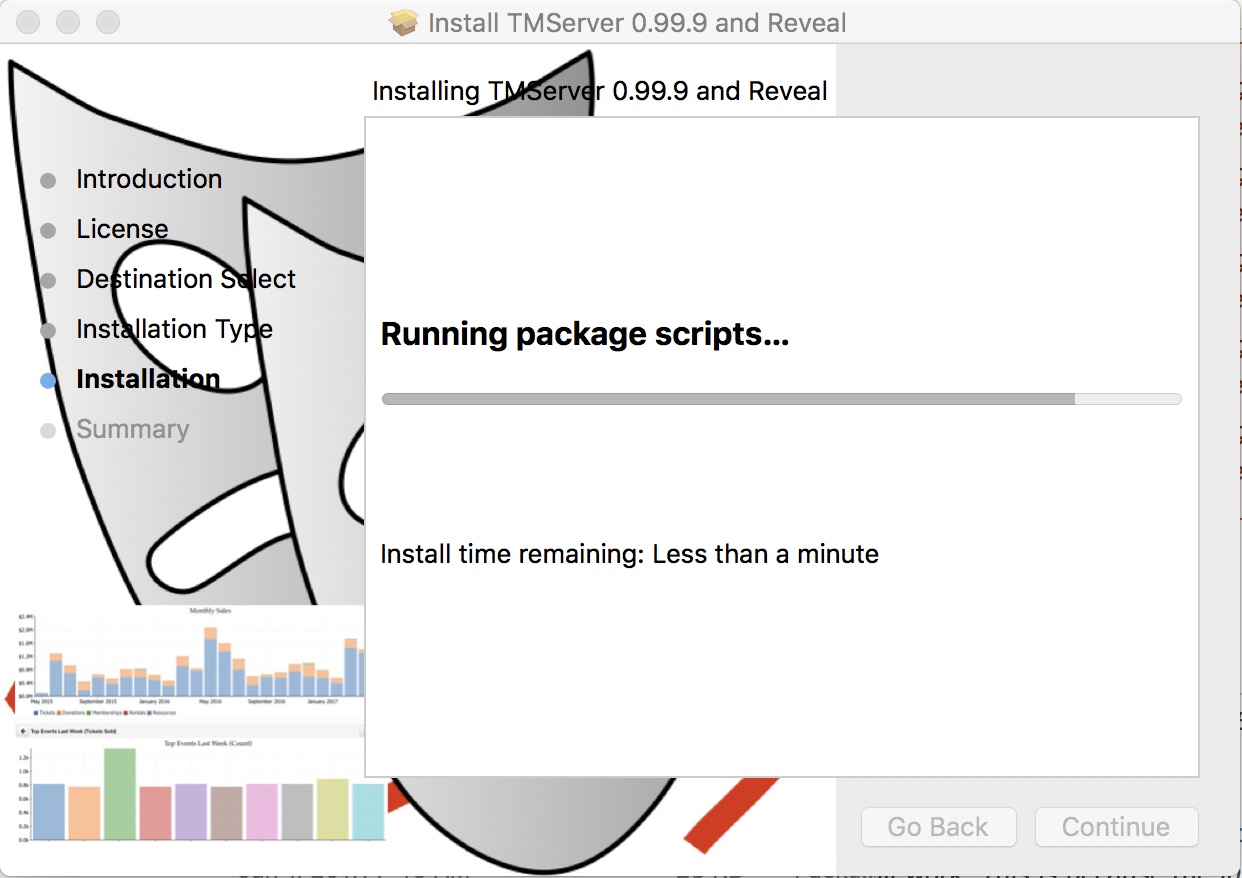
Start the installer and click Continue.
|
| Step 3 |
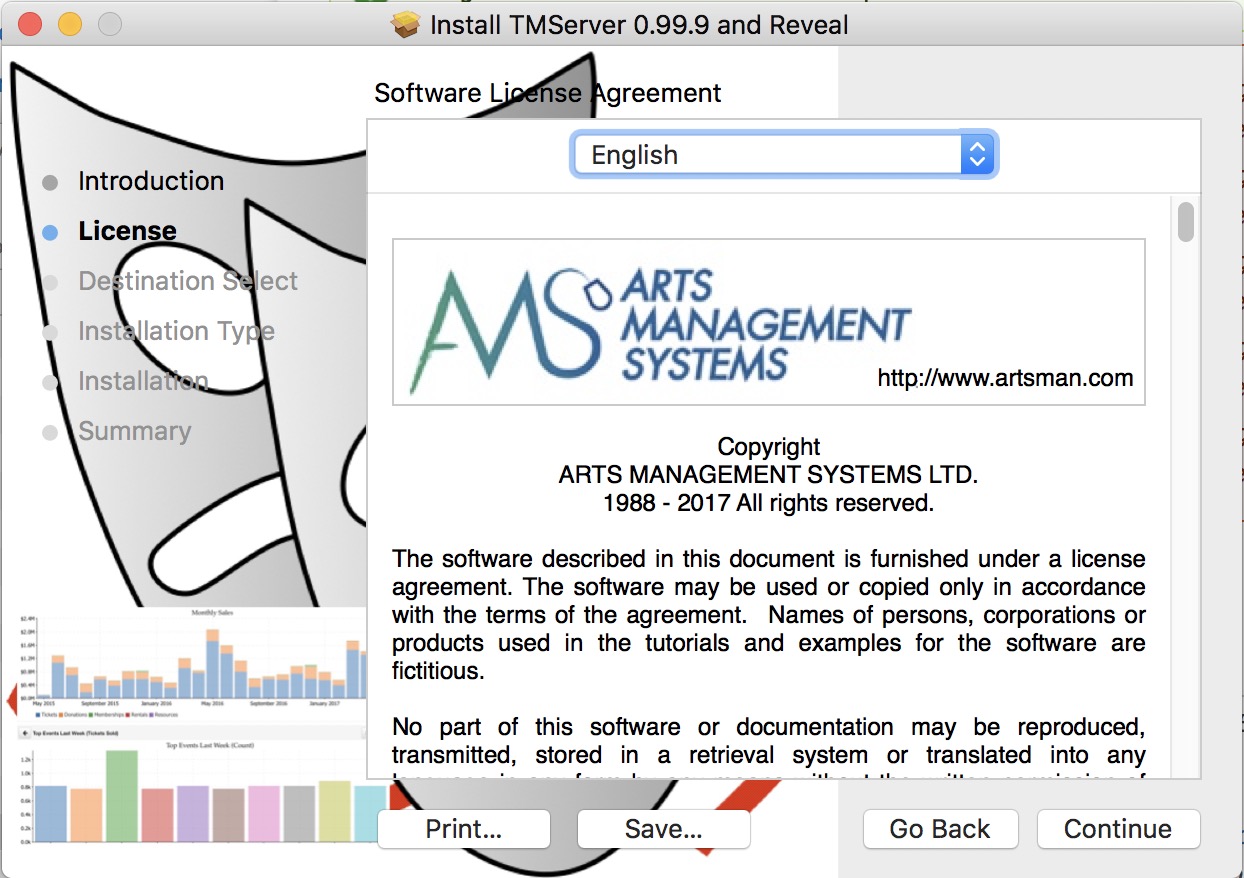
Click Continue
|
| Step 4 |
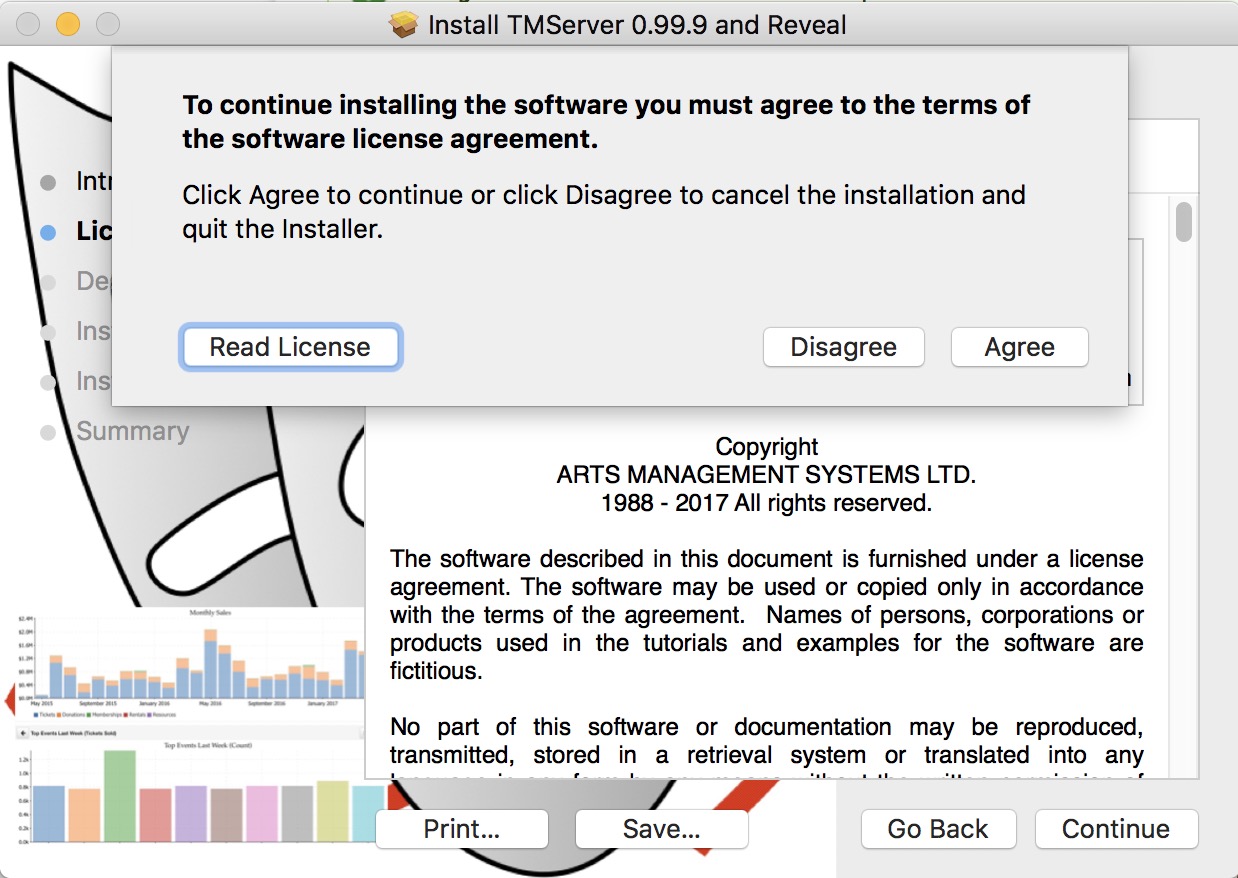
Read the licence and click 'Agree'
|
| Step 5 |
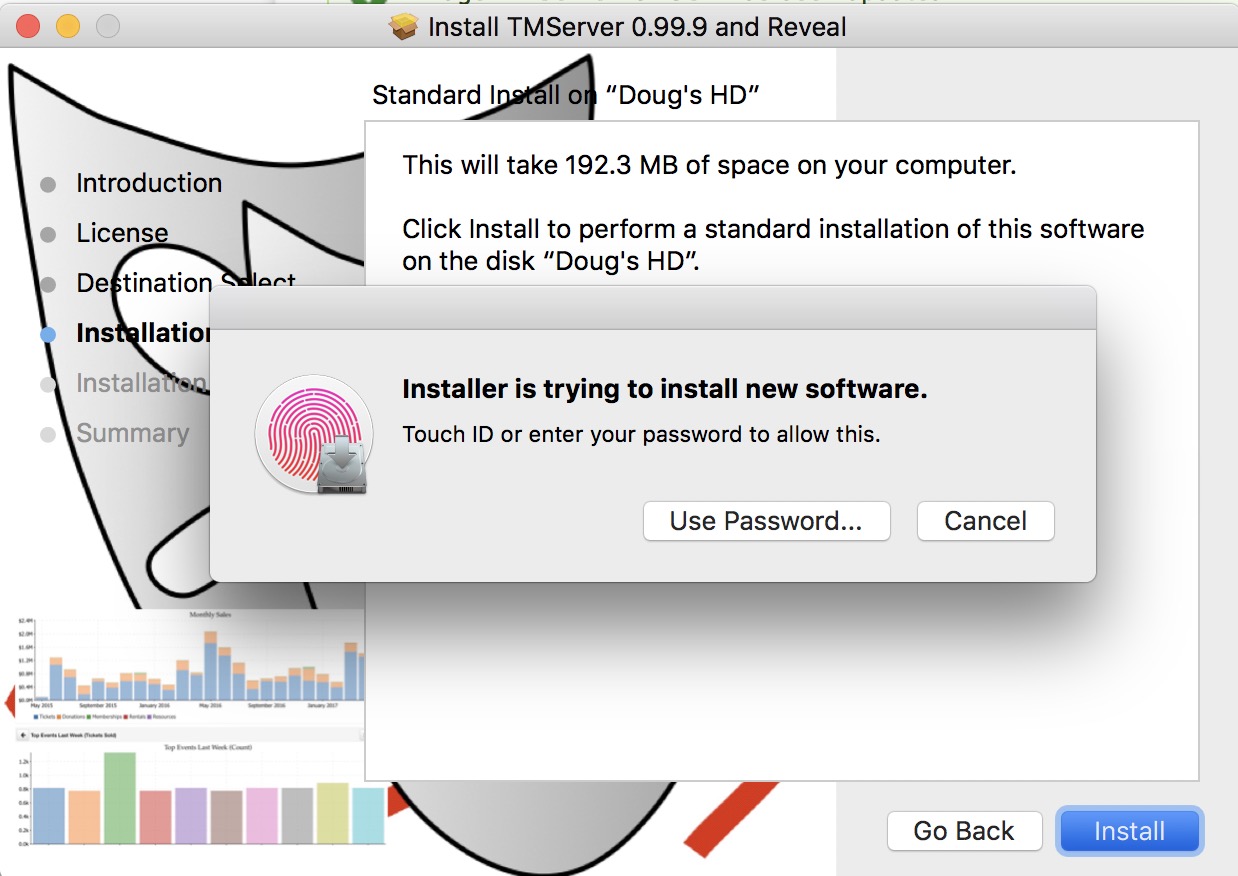
Enter your admin password or use your finger if your machine has 'touch id'
|
| Step 6 |
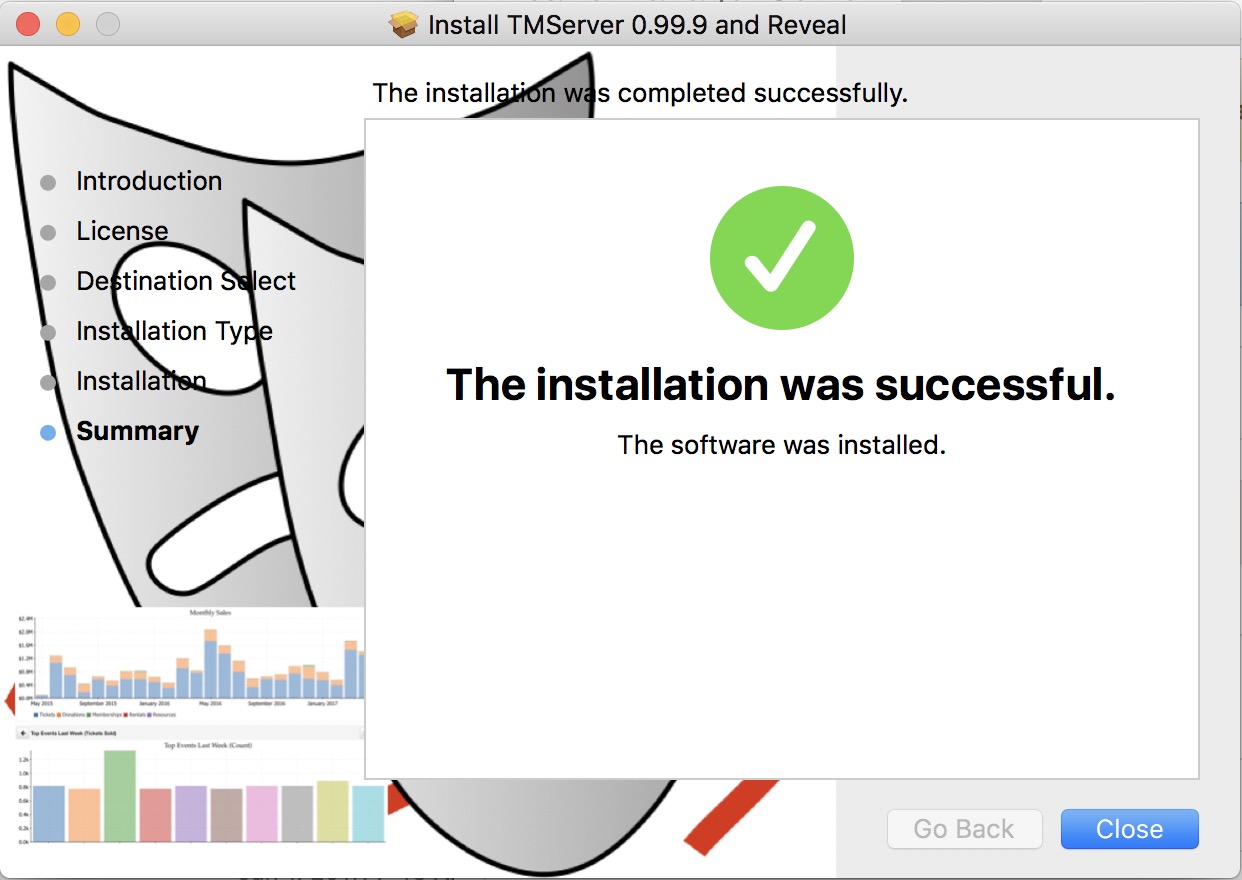
|
| Step 7 |
Click Close
|
| Step 8 | Turn off all power saving and performance degrading features |
| Step 9 | Turn off Airplay Mirroring in since that has a conflict port port 5000 used by Theatre Manager. This problem seems to have begun in Monterey. |
| Step 10 | Proceed to the Steps to configure the server for the purpose you want to use it for |
Starting the NGINX server
| Step | Action | ||
| Step 1 | Open Terminal on your computer | ||
| Step 2 |
To completely stop and restart the server (note: it should have already been stopped during the install process), you will need
|
||
| Step 3 | Use the Director to configure the second generation server for the first time. | ||
| Step 4 | Disable all Power Saving options on OSX so that the server doesn't go to sleep - its not a good idea for it to so so for web sales. In addition, please read the note below.
|
~~~ Troubleshooting
 |
Make sure you have disabled all power saving settings by reviewing the installation steps on power saving managment. |
Note: if you bring up this web page on the nginx server, the links below should work directly by clicking in them. If not, substitute your web server IP address for 127.0.0.1 in all links below.
| Tool | Action |
| Director | Use the Director web page to verify the second generation server management process is running.
You can use the console log to verify errors on start up.
|
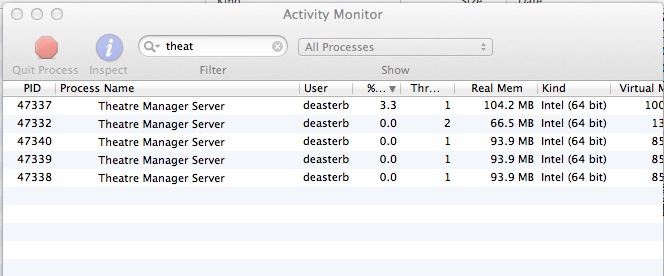
| Activity Monitor | In Activity Monitor, if you view the list of processes, you should see a number that are named 'Theatre Manager Server' if it started properly.
 |
| Virtual Host Test | You can test for a direct response to retrieving a page on the virtual server.. If the Theatre Manager Server is on 127.0.0.1, then the link below should elicit a response that shows a page that has not been merged. If you get Page Not Found or some other error, then the virtual host is not set up correctly. |
| External Probe | If you want to check the general health periodically of the second gen server, then use the following url to ask for the time from the second generation listener. (replace /1/ with your outlet number).
http://127.0.0.1/TheatreManager/1/time If you want to query through the second generation listener to see if a classic listener is running, then add '&force_proxy' to the url. This talks through the second generation to the classic and, in effect, tests both at the same time: |
TM Server for Windows
 |
Do not use Windows 10 or Windows 10 Pro for the TM web services. If at all possible use windows 7, 8, 8.1 or any windows server version. At this time, windows 10 interferes with simple file renaming and affects auto-updating of services. |
 |
You normally need only install the Theatre Manager server ONCE on a machine per the instructions below. TM server will auto update itself. |
 |
make sure to implement the key performance, similar to that of postgres server, especially turning off windows defender on windows 10 pro if you are having issues with auto-updating. |
 |
When installing Theatre Manager Server on a Windows machine, log into the computer as the local administrator. This ensures the proper permissions are assigned to the service. |
 |
You must not install or enable Microsoft's IIS server on the same machine as TM server configured for web services. |
| Step | Action |
| Step 1 | Download and extract the installers for Windows. The installer will automatically determine wether you have a 32 bit or 64 bit operating system and install the correct version. |
| Step 2 |
Start the installer and click 'Next'
|
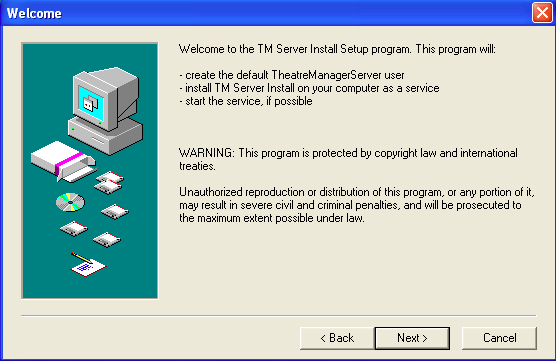
| Step 3 |
Click 'Next'
|
| Step 4 |
Make sure that the right version (32 or 64 bit) is being installed and click 'Yes'.
|
| Step 5 |
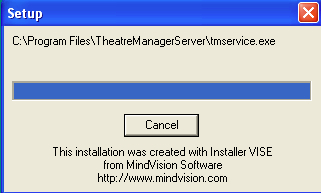
The installer will place the Theatre Manager Server in 'C:\Program Files' or where ever the standard program files directory is located.
|
| Step 6 | Click Done to complete the installation process. By default the Theatre Manager Service will start. |
| Step 7 | Proceed to the Steps on configuring the server |
Starting the Server
| Step | Action |
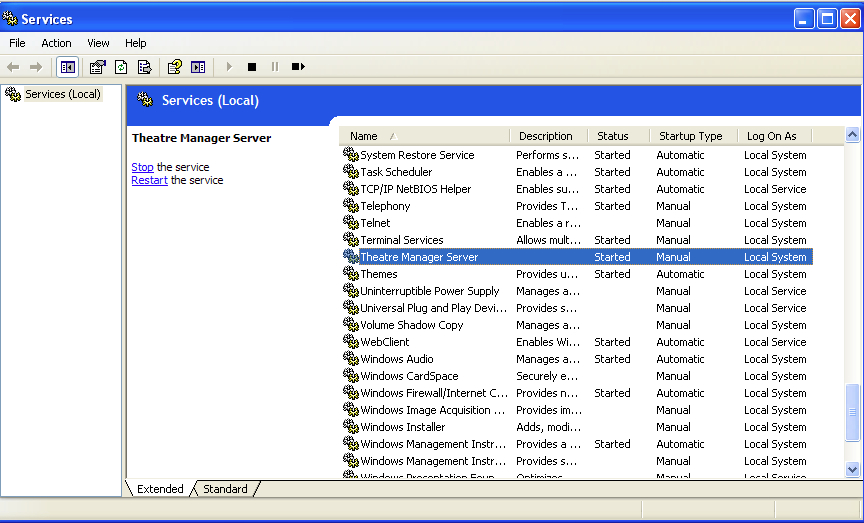
| Step 1 | Open the Services Administrative tool through Start >> Control Panel >> Administrative Tools >> Services. |
| Step 2 | Locate the 'Theatre Manager Server' item in the list.
It should be set as 'Started'. If it is not, please start it.
|
| Step 3 | Double click to edit the service settings to make sure that it will auto-restart. Click on the recovery tab and make it look like the window below. You will need to set the following:
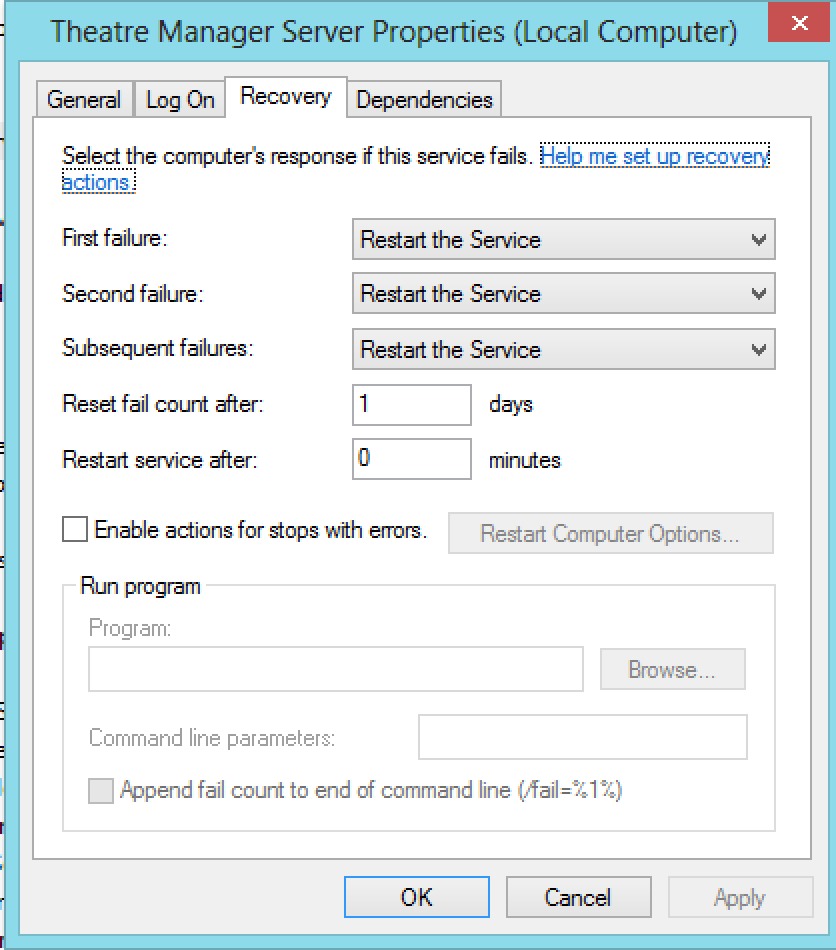 |
| Step 4 |
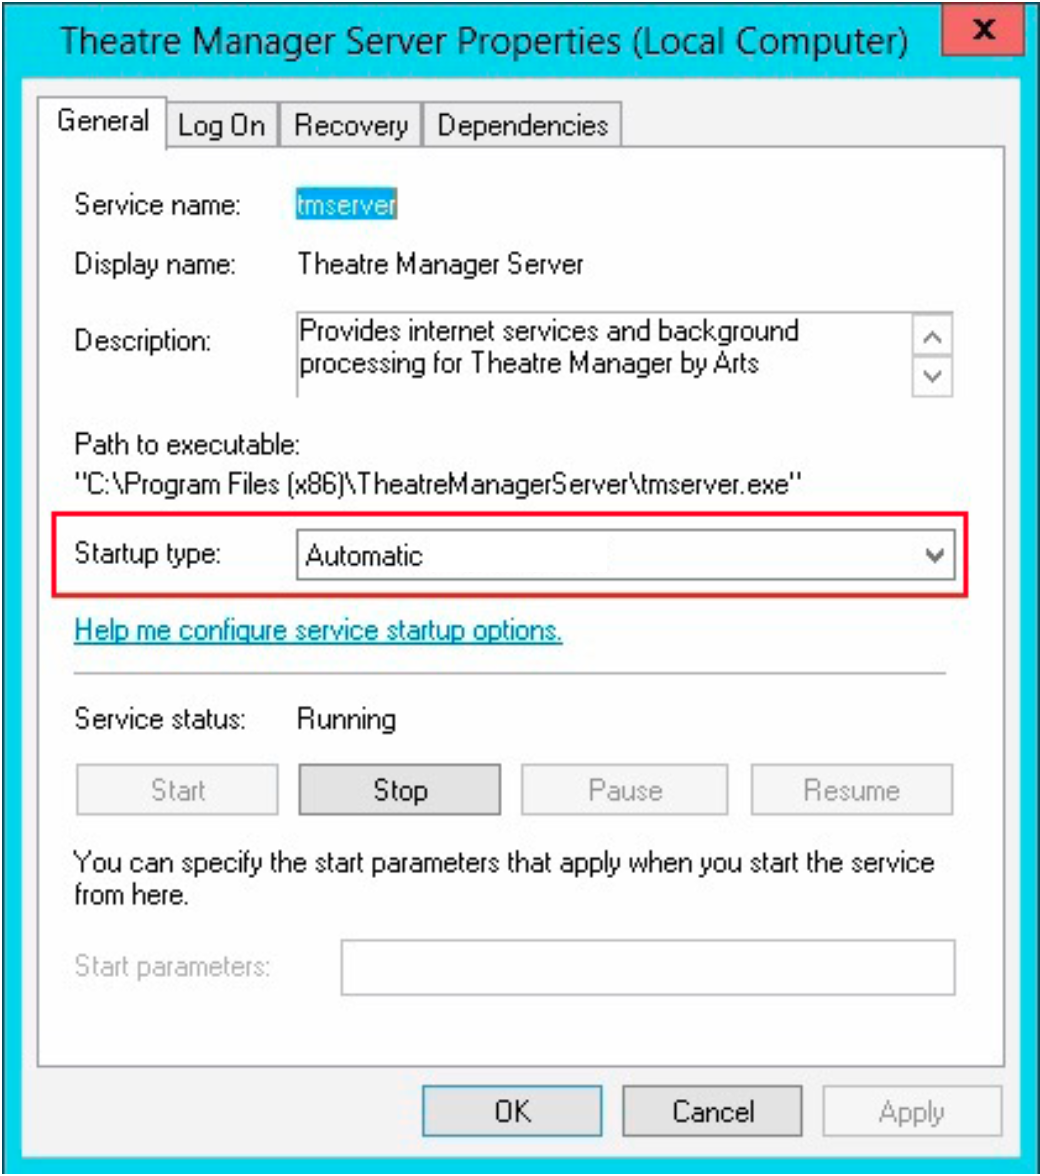
If the database server and the second generation listener are on the same machine, you will need to delay start of the Second Generation listener until a few system services start. This can be done in one of two ways:
Using Delayed StartupMake the startup settings as per the diagram.
Adding Service DependanciesYou may want to add a dependancy to the second generation server so that it will not start up until after Postgres and the event log starts. To do this, you will need to know the name of the postgres service and type a command in at the command prompt. You can find it by looking at the service and examining the service name. It might look something like one of: postgresql-9.5 -or- postgresql-x64-9.5 depending if you are using 32 bit or 64 bit postgres and which version. An example of the command when running on a 64 bit windows server using postgres 9.5 (note there is a space after the depend= which you must include) sc config tmserver depend= eventlog/postgresql-x64-9.5 An example of the command when running on a 32 bit windows server using postgres 9.5 sc config tmserver depend= eventlog/postgresql-9.5 When done, check the dependancy tab on the tmserver service and it should show two lines: event log and postgres |
| Step 5 |
Also, once everything has been verified to run properly, make sure that the service start up type is changed from 'Manual' to 'Automatic' so that it will start each time the machine is rebooted.
|
| Step 6 | Use the Director to configure the second generation server for the first time. |
~~~ Troubleshooting
Note: if you bring up this web page on the apache server, the links below should work directly by clicking in them. If not, substitute your web server IP address for 127.0.0.1 in all links below.
| Tool | Action |
| Task Manager | In Task Manager, if you view the list of processes, you should see a number that are named 'Theatre Manager Server' if it started properly. |
| Director | Use the Director to verify the second generation server management process is running. |
| Event Viewer Test | You can look to see if the services start up properly by looking at the event viewer. If you can stop and start the service and you see that it starts listener services on port 5001, then you are likely ok. |
| Virtual Host Test | You can test for a direct response to retrieving a page on the virtual server.. If the Theatre Manager Server is on 127.0.0.1, then the link below should elicit a response that shows a page that has not been merged. If you get Page Not Found or some other error, then the virtual host is not set up correctly. |
| Preferences | If the second generation listener is having trouble starting and/or keeps stopping, you may want to delete the system profile second gen preferences file and start the configuration process over again |
| External Probe | If you want to check the general health periodically of the second gen server, then use the following url to ask for the time from the second generation listener. (replace /1/ with your outlet number).
http://127.0.0.1/TheatreManager/1/time If you want to query through the second generation listener to see if a classic listener is running, then add '&force_proxy' to the url. This talks through the second generation to the classic and, in effect, tests both at the same time: |
TM Server preference file location
Windows
- Navigate to the directory: C:\Windows\system32\config\systemprofile\AppData\Local\Arts Management Systems\Theatre Manager Server
- Delete the config.json
Macintosh
- Open Terminal and type:
- cd ~/Library/Application Support/Theatre Manager Server
- rm -rf config.json
Special note: for classic listeners run and managed by the TM Server on OSX. There is a temporary file created in /var/root/Library/Caches/Theatre\ Manager\ Server/TheatreManagerRunTime/Libraries that tells the classic listener how to startup. It cannot be edited or changed by a user - it is re-created each time the classic listener starts.
For reference, this link has the location of the Theatre Manager desktop preference file.
Web Server Configuration
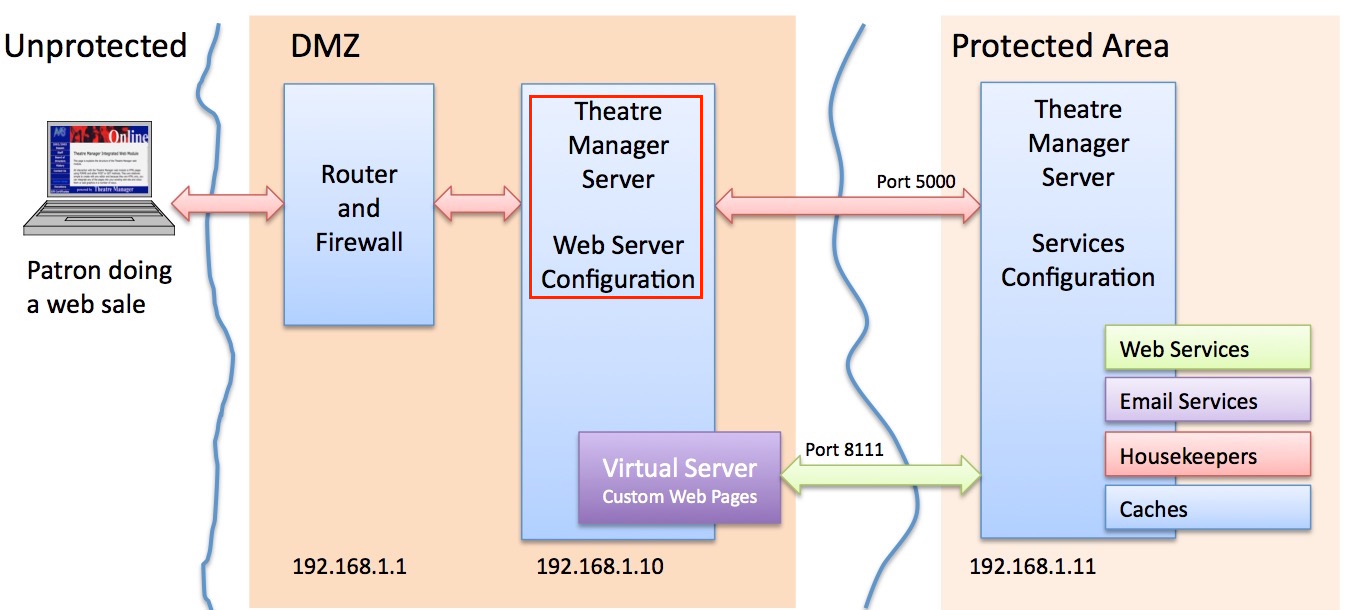
 |
For PCI compliance, the web server configuration must be installed in a DMZ and separated from the rest of the network so that card holder data would never be on the same part of the lan as the DMZ. |
The diagram above shows the flow of data for web sales. The general setup involves:
- A firewall that directs incoming traffic on ports 80 and 443 to the web server from the internet. The web server is configured to elevate all port 80 traffic to use TLS on port 443.
- The web server can be on the same subnet as the firewall (or not, as you wish). This allows:
- web traffic from the internet on ports 80 and 443
- provides dynamic load balancing to a number of Theatre Manager Servers and passes web requests to port 5000 on each of those servers
- A TM Server in Services Configuration receives communication on port 5000 and talks back to the web server on internal port 8111 (a separate virtual server) to retrieve custom web pages for merging
- Some configuration of the services in Company Preferences 'Director Tab'
The actual installation of the is described for Macintosh and Windows. While unsupported by Arts Management, you can use Linux if you know how to use apt-get and install and configure NGINX (we can provide a template nginx.conf file for you.
The diagram refers to 192.168.1.x for the internal network and is used throughout the documentation as a sample lan addresses. Your IP addresses may be different
Director Config for Web Server
 |
If you enter the URL http://127.0.0.1:3012/configure and do not see the 'Director' screen, you may need to:
|
Configuring as a Web Server
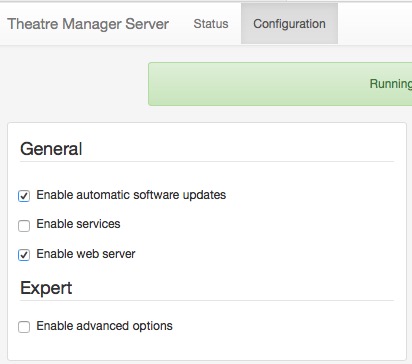 This section describes how to configure the Theatre Manager server as an NGINX web server on a machine in the DMZ. This computer should have at least 4 gigs of ram and a fast dual core processor.
Connect to Theatre Manager server using your browser and enter the URL http://127.0.0.1:3012/configure. You will see a web page like the one to the right. It will help you configure the machine for its appropriate purpose.
Auto Update
Theatre Manager Server is designed to auto update when a new version is released. If you wish to disable the feature, make sure to disable it on all machines. If it is enabled, make sure it is enabled on all machines. Components auto-updated by the server are:
- TM Server
- NGINX web server
- TLS upgrades
- Default Web Pages (customized changes are never touched)
- Theatre Manager
Data stored by Arts Management as part of auto-update
Checking for auto-updates shares some of your information with Arts Management. Data is transmitted securely and SHA-384 checksummed for safety and the values retained by AMS are:
- Theatre Manager version number
- TM Listener version number
- Postgres version number
- NGINX version number
- Timestamp of last backup
- Timestamp of last check for an update
Data retrieved from AMS and stored in your database is: number of user and scanner licences, latest version of Theatre Manager for auto deployment to workstations.
Enable Web Server
Click the 'Enable Web Server Button' to use this machine as an NGINX web server. When clicked, a panel appears allowing you to enter the configuration parameters for the web server.
Enabling Background Report Generation
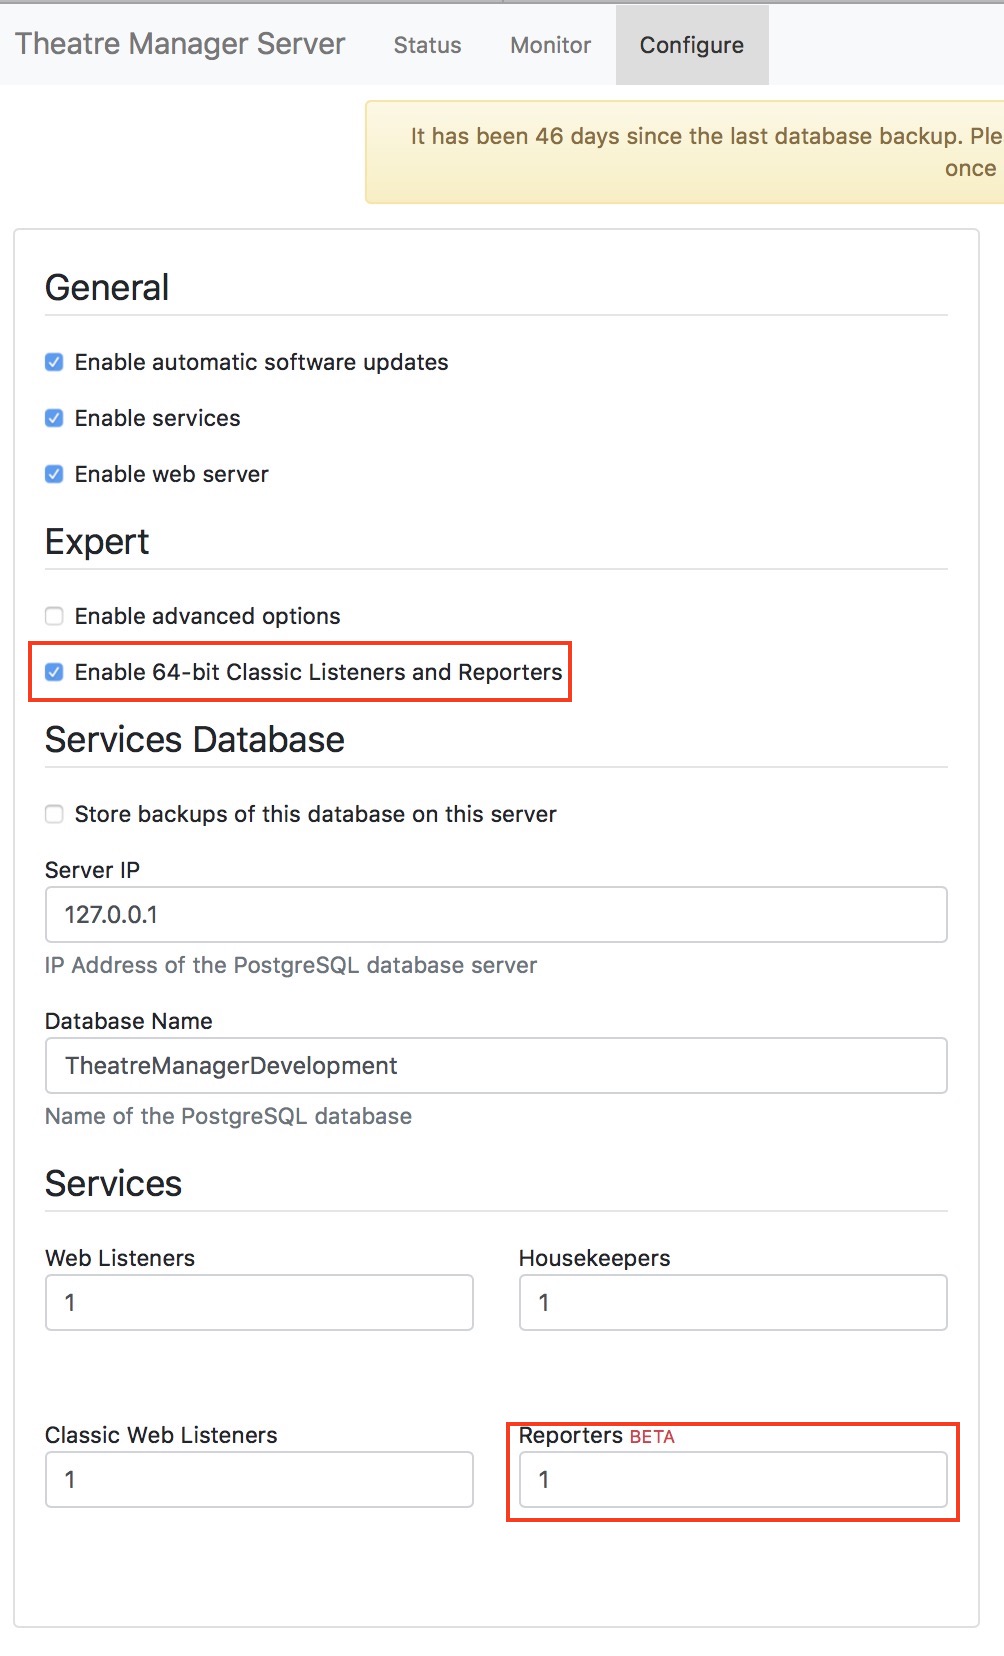
Enabling a TM Server to provide background report generation services requires four steps. You must:
- Be running the TM server on a 64 bit server capable of running the 64 bit version of TM.
- Click the check box Enable 64 bit Classic Listeners and Reporters
- Lower in the page, you must indicate how many reporters you want to run on this machine
- Enable background reporting in System Preferences before the Reporter processes will start up. This last setting enables you to quickly disable background reporting during a large onsales where you'd prefer your listeners to be doing web sales.
Note: if this is not enabled, an employee can still add reports to the queue, they will just need to run them manually when they go for coffee or take an extended break.
- Enabling appropriate employees to use the Report Queue in their employee preferences report tab
Considerations for setting up Reporters
Reporter processes use CPU resources when they are running a report and that may be in conflict with resources required if your venue requires the machines for web sales.
Static Marketing Site
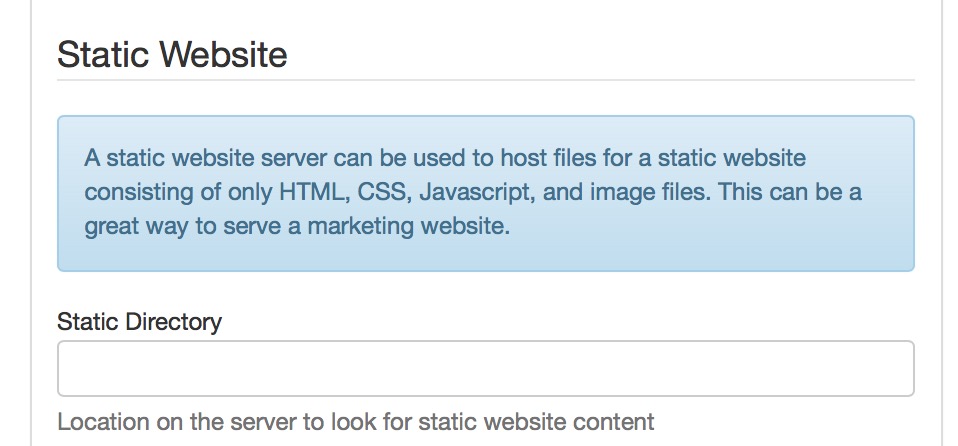
 Most venues host their marketing web site at their ISP.
Under some circumstances, you may wish to host your marketing site internally in addition to the ticketing web site. Such circumstances might be when you:
- have lots of internet bandwidth
- are able to write and maintain your marketing web pages yourself
- can manage all traffic related issues and provide hardware as needed for yours sales cycles
- want different kinds of integration between the main web site and the ticketing site
- want your marketing web site under the same TLS certificate as your ticketing web site
- you do not need some additional server processes (like a database and a content management tool like WordPress or Drupal) to deliver the web pages
- you have a domain that you can point to the server such as:
- tickets.yourdomain.org will be the ticketing web site
- www.yourdomain.org, help.yourdomain.org or something like that will be the internal static URL
Or, if you wish, this feature could be used for something other than your marketing site -- to handle volunteer pages, local static calendaring info, help pages for your patrons on how to use your web site or what have you. Remember, anything placed on the static web site is publicly visible.
What are Static Web Pages for the Marketing Web Site
A static HTML web page is one that does not require server processes to build the page. If you can see a fully functioning page when you place the HTML file on a browser, then it is static. However, if you need a server process like PHP (by choice by the way), a database lie postgres, or some server process to be installed to deliver the web pages, then the page is not static (and this feature should not be used)
Enabling a Static Web Site
On the primary (front facing) NGINX machine that has a Director on it, you would need to:
- Go to the Configure tab of the director
- Click the checkbox Enable Static Website
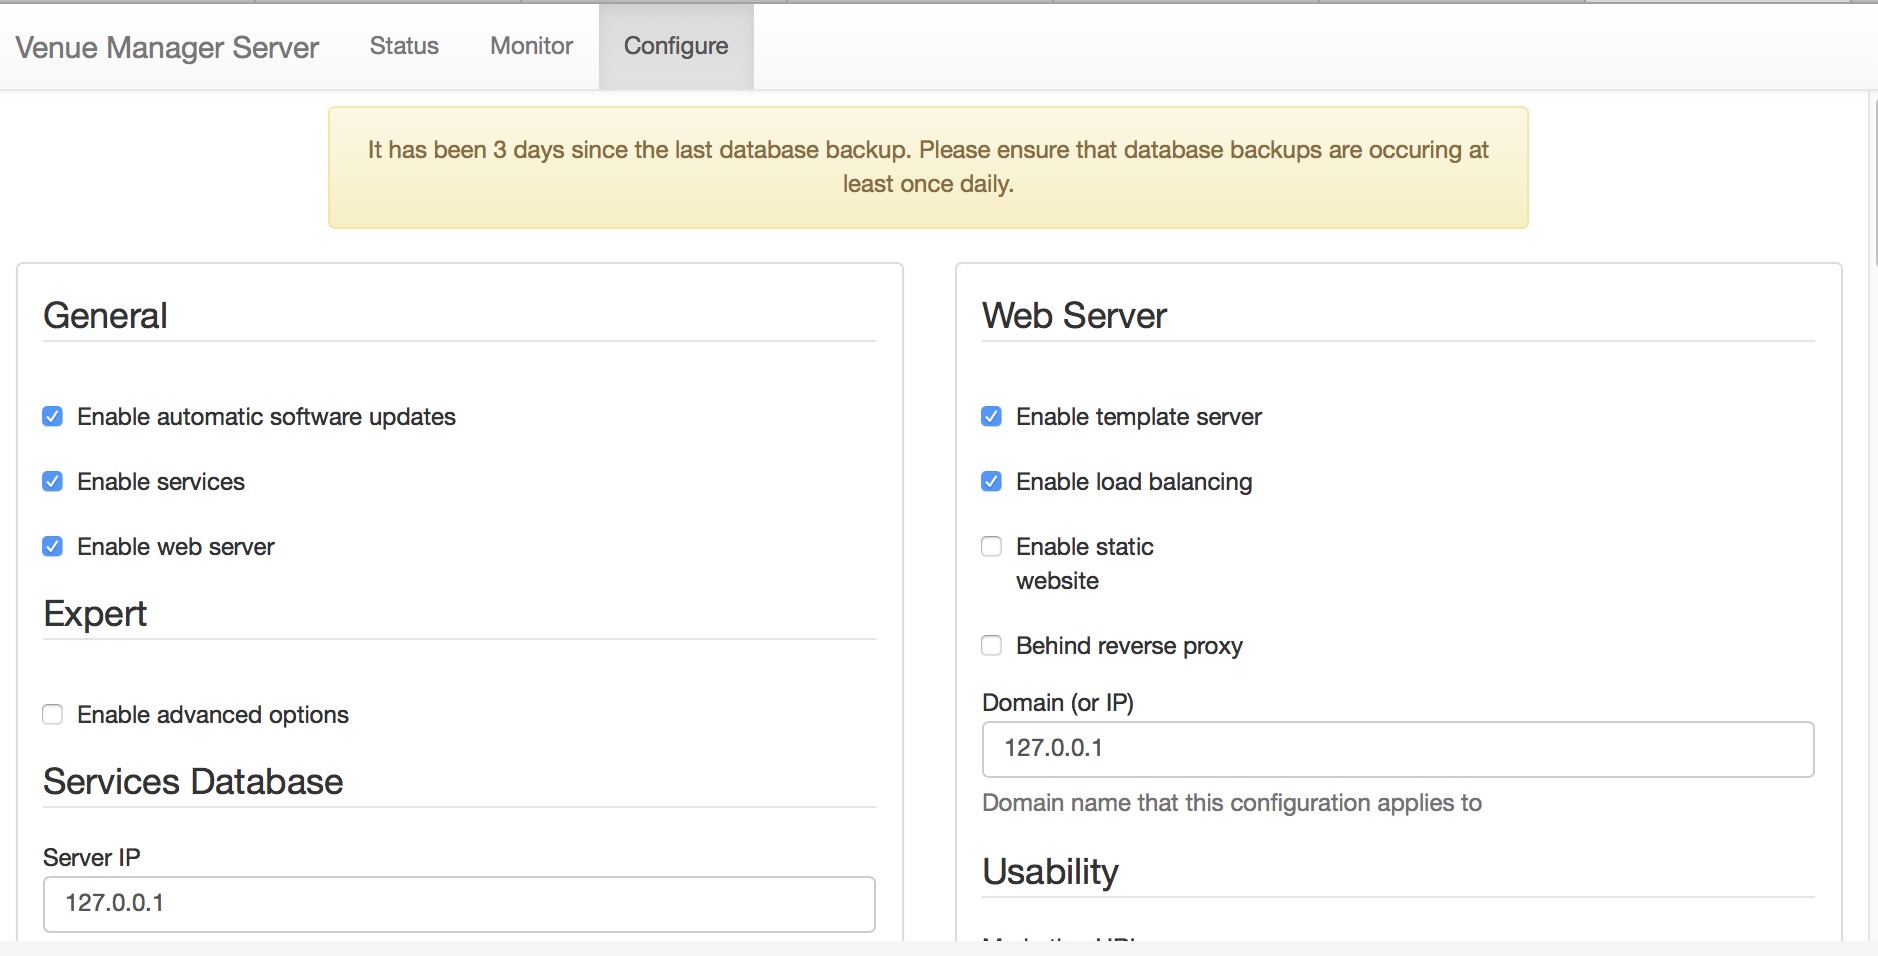
- Scroll down for the parameters for the static website per the picture below
- Type in the directory on the main NGINX machine where you wish to store your static web pages
What changes when you do this?
Since you are now hosting two web sites with the single NGINX server the landing path changes.
Currently:
- any reference to tickets.yourvenue.org
- will send you to tickets.yourvenue.org/TheatreManager/1/login
- any reference to tickets.yourvenue.org
- will NOW send you to tickets.yourvenue.org/index.html which is where your additional URL like www.yourvenue.org/index.html will also take you.
- and you will need to make sure external references to the ticketing site explicitly send you to tickets.yourvenue.org/TheatreManager/1/login
What tools to use to make Static web sites
There are a number of tools that let you make static web sites. We do not have any favourites and do not recommend one over the other (not do we provide any support if you play with them). Some popular ones at the current time are:
- Jekyll: https://jekyllrb.com/
- Hugo: https://gohugo.io/
- Lektor: https://www.getlektor.com/
Web Server Parameters
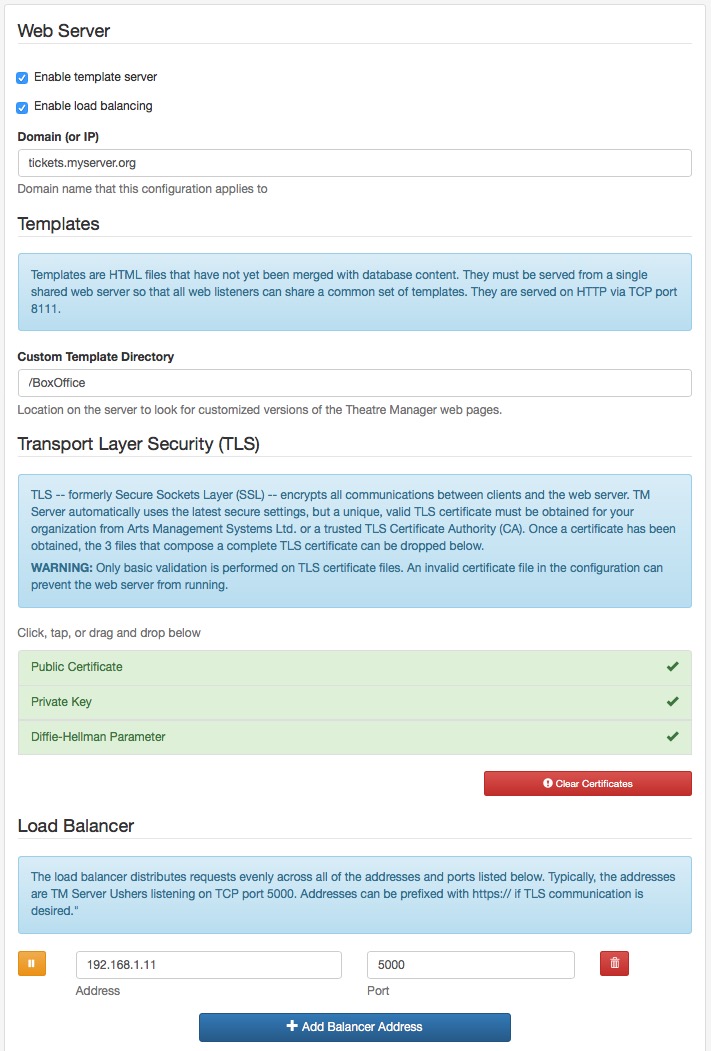
Enable template server
This causes the web server to listen on port 8111 and provide all your custom web pages to all of the web listener services and there should only be one of these enabled for your entire system. The IP address of this machine must match the Custom Template URL specified in the Director Tab in Company Preferences.
On the primary web server, you need to enable this feature. When enabled, you will see the option Custom Template Directory lower on the page. Please fill it in.
Enable Load Balancing
This should always be enabled when you need to tell the web server where each of the web listener machines are (see Load Balancer below)
Domain or IP
Enter the domain name that this web server is for. This will be your tickets.myvenue.org URL that your customers use to access your sales site.
Custom Template Directory
The web services always use the most recent built in web pages to keep your web site current. Since you can customize these web pages, you need to tell the TM server where on the disk that the custom pages are stored so that the web listeners can get those instead of the default pages.
We suggest that they be kept in:
- Macintosh: /BoxOffice/WebPages
- Windows: C:\BoxOffice\WebPages
Transport Layer Security (TLS)
Each domain (eg tickets.myvenue.org) requires what is called a TLS certificate to uniquely encrypt the communication between your customer and your server. It is what turns on the lock in a patrons browser window. TLS certificate has 3 files that are obtained and properly configured for you by Arts Man:
- Your public certificate obtained from your provider
- Your private key which nobody else knows
- The Diffie-Hellman Parameter file used by NGINX as part of the unique cryptographic key generation that is used in the subsequent encryption process.
Installation
To install these files, simply drag them from your desktop on top of the area on your browser. If the area on your browser is green, they are installed. Use the 'Clear Certificates' button to remove any prior certificate files if you do not want them, or simply drag new ones on top to replace them.
Load Balancer
This section is used to indicate the IP addresses where your Web Listeners are located. This will be on a separate machine and in the example setup, the address is 192.168.1.1 and the port is 5000 (which is the load balancer on of the web listeners).
Unless doing an expert setup with the assistance of Arts Management Systems support, the port will always be 5000. Simply add as many IP addresses as you have machines acting as web listeners.
Port 5000 on each web listener acts as a load balancer on the machine to forward requests to port 5001, 5002, etc (one for each second gen listener you have defined.
TLS Certificate
Before you can get an TLS certificate, you will need:
- a static IP address for your router that is obtained from you ISP
- a 'nice' domain name like tickets.yourvenue.org which is set up with an 'A' record on a DNS server and points to your firewall
- to open ports 80 and 443 at the Firewall per PCI requirements
The steps you will need to follow to set up an TLS Certificate and get web pages working are in the following sections.
For Venues hosted on AMS Cloud
 |
AMS provides the static IP for you as part of your setup.
AMS can provide a URL like 'yourname.artsman.com' if you wish, and if so, will also provide our group TLS certificate for your use. If you prefer to use your own domain name, you will need your own TLS that we can obtain and set up. |
Static IP for Your Router
- a static address for your router.
- a 'nice' domain name like 'tickets.yourvenue.org' that points to your firewall. These generally cost about $10 to $20 monthly in addition to your connection fees, unless you have a business internet package - in which case you probably get one included.
Obtaining a Static IP
The static IP must be obtained first and is supplied by your ISP. It will be set up in your firewall/router so that it never changes and means that customers will always be able to find you on the internet. These generally cost about $10 to $20 monthly in addition to your connection fees, unless you have a business internet package - in which case you probably get one included.
If you have a static IP and do not recall it, then open up a browser and type 'whatsmyip.org'. This asks a web site to tell you what the IP address of the outside of your router is. Alternately, you can enter the config mode for your router to determine the static IP address.
For Venues hosted on AMS Cloud
 |
AMS provides the static IP for you as part of your setup. |
External DNS
You can think of this as a 'nice' name by which customers can find you, or if they see it in the URL area of the browser, they will be confident that they are connecting to the right web site.
Call up your ISP (or web site hosting company) and ask them to create a DNS record for 'tickets.myvenue.com' (where myvenue is replaced by your main web site name). As an example, if your main web site is www.artsman.com, then you would like your ISP to create a DNS record for tickets.artsman.com.
Possible DNS names that you may prefer from a marketing perspective are:- tickets.myvenue.org
- boxoffice.myvenue.org
- sales.myvenue.org
- tm.myvenue.org
- secure.myvenue.org
- and if you have a mail server or other services already in your organization, we could use that as well.
Once the DNS record has been created and is propagated to the internet (this usually happens in a few hours but can take as long as 24 hours), the next step is to purchase and install the TLS certificate.
For Venues hosted on AMS Cloud
 |
AMS can provide a URL like 'yourname.artsman.com' if you wish, and if so, will also provide our group TLS certificate for your use. |
Buying the actual TLS Certificate
Purchasing your TLS from Arts Management Systems
Arts Management Systems uses 4096 bit encrypted premium certificates and if you wish to purchase one, please contact the sales office at (888) 536-5244, ext. 2.
When you buy a TLS Certificate from Arts Management Systems, information that we will require from you in order to customize is to your venue are:
- company name (do not abbreviate, provide the full legal company name)
- primary contact's first and last name
- primary contact's title
- primary contact's email address
- primary contact's direct phone number
- venue's legal Address, City, full State/Province name (do not abbreviate the state or province name)
- external DNS that you set up such as tickets.myvenue.org
- the operating system that Apache is running on (OSX, Linux, or Windows)
- we will require an authorized administrator's email address to send the verification to and approve the request. This needs to be an email address you have the ability to check for the incoming emails. Please make sure that the email account has been set up and is available before you provide us the email account to use, or the approval email will not be delivered. With an invalid or non-working email account, the TLS certificate will not be processed. The options for the email address are below: (Select ONE of the following)
- admin @ myvenue.org
- administrator @ myvenue.org
- hostmaster @ myvenue.org
- webmaster @ myvenue.org
- postmaster @ myvenue.org
- An email indicating that a TLS creation request has been started.
- An email requiring you to confirm the information at the specified email address above. Please confirm the email (by clicking on the acceptance link within that email) and accept the TLS request.
- After you have confirmed email #2's acceptance link and the TLS has been processed by GeoTrust, the 3rd final email containing the actual TLS certificate information will be sent to you. Please note that this final email may arrive anywhere from 10 minutes to 12 hours after email #2 was accepted depending upon the next processing cycle.
Self Purchased TLS Certificate
If you purchase your own TLS certificate from another source, you will need to install it yourself following the instructions provided to you during the purchase process and make sure it works. If you have any questions about your Self Purchased TLS certificate, contact the company from whom you purchased it for any and all assistance.
Install and Test the TLS Certificate
Once the firewall rules have been implemented and the TLS certificate installed:
- Open up a browser
- Type 'https://tickets.myvenue.org'
- It should display a web page in the browser and turn on the lock on the browser.
- Use Qualys TLS Certificate Test to test the TLS Certificate.
Make sure to check the option "Don't show the results on the Boards"
This page shows safari with the lock on the upper right turned on

This page shows firefox with the lock on the lower right turned on

Please check for it on your browser as appropriate.
Diffie Hellman Parameter File
What is Diffie-Helman?
Credit: Stack ExchangeDiffie-Helman is a way of generating a shared secret between two people in such a way that the secret can't be seen by observing the communication. That's an important distinction: You're not sharing information during the key exchange, you're creating a key together.
This is particularly useful because you can use this technique to create an encryption key with someone, and then start encrypting your traffic with that key. And even if the traffic is recorded and later analyzed, there's absolutely no way to figure out what the key was, even though the exchanges that created it may have been visible. This is where perfect forward secrecy comes from. Nobody analyzing the traffic at a later date can break in because the key was never saved, never transmitted, and never made visible anywhere.
The way it works is reasonably simple. A lot of the math is the same as you see in public key crypto in that a trapdoor function is used. And while the discrete logarithm problem is traditionally used (the xy mod p business), the general process can be modified to use elliptic curve cryptography as well.
But even though it uses the same underlying principles as public key cryptography, this is not asymmetric cryptography because nothing is ever encrypted or decrypted du ring the exchange. It is, however, an essential building-block, and was in fact the base upon which asymmetric crypto was later built.
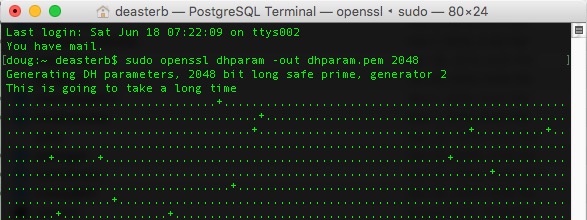
How to create your Diffie Helman parameter file
Since the Diffie-Helman parameter file is a way of creating a shared secret at the start of the cryptographic process, you can change it as often as you want, completely independently of the TLS certificate. It is quite easy to do so.
| Macintosh |
This needs to be done using Terminal:
|
| Windows | Please ask Arts Management support to make one for you or find a Macintosh. |
Testing your Web Sales (the Hosts file)
 |
If your computer in the office cannot see the ticketing web site, the best way is to set up a DNS server inside the network to help all computers see the server.
Only edit the local machines 'host' file if you cannot set up a DNS server. |
Testing your Web Sales Site
You should be able to access your ticketing web site via the URL you used to create the TLS certificate after the:
- TM server is set up as a web server
- firewall adjusted to open the necessary ports and
- web listeners running
Try accessing the ticketing web site from:
- a location outside the office to confirm it works. A cell phone is the ideal way - using the data plan and not while connected to the wifi network.
- one or more computers inside the office to confirm that it works
Troubleshooting access inside the office
If you are having issues connecting to your ticketing web site while inside the office and are receiving timeouts, this is often resolved by:
- adding an internal DNS entry to your DNS server to point to your ticketing web site via an internal path (preferred approach) -or-
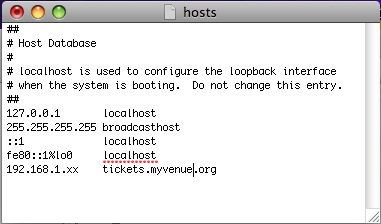
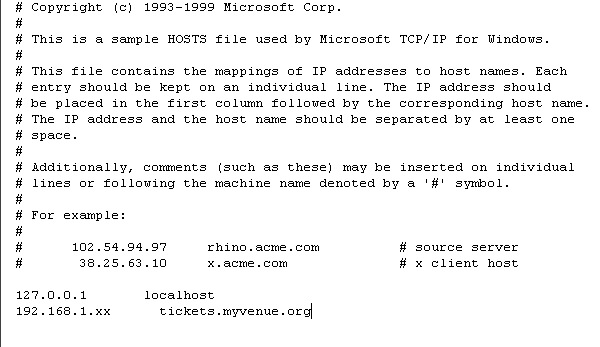
- editing the hosts file on each machine
Mac's are not usually subjected to this issue. PC's inside the office frequently are because they do not always seem to be able to resolve the DNS that goes outside the firewall and back in, so you have to edit the hosts file to tell the PC how to find the web site.
Editing the Host file for Mac
Troubleshooting generally depends on the behavior of the DNS within the firewall and the operating system used. Most Mac's will easily find 'tickets.yourvenue.org' by navigating through the firewall properly. However it may be possible for a machine to not be able to access the online sales domain directly.
The best way of correcting this issue is to put an entry within the internal DNS server to point 'tickets.myserver.org' directly to the IP address of the apache server.
If that is not possible, an entry in the hosts file of each web listener that points to the apache server can be made. This should be done if the DNS does not propagate in the internal network. If the Web Listeners start up and are able to find the 'tickets.myvenue.org', you will not need this step. If they do startup but they seem to be ignored by apache very quickly, then you will need this step.
| # | Description | |
| 1 | Open the 'Terminal' window. | |
| 2 | Type cd /etc. | |
| 3 | Type sudo vi hosts. | |
| 4 | Type the administrator password to the machine. | |
| 5 | Use the arrow keys on the keyboard to scroll down. | |
| 6 | Type 'I' to enter the edit mode. | |
| 7 | Add the IP address of the Apache machine followed by the online sales domain.
| |
| 8 | Click the 'ESC' key on the keyboard. | |
| 9 | Hold the SHIFT key on the keyboard and type Q. | |
| 10 | Type WQ.
This with write the changes to the Host file and close it. |
Editing the Host file for Windows
Troubleshooting generally depends on the behaviour of the DNS within the firewall and the operating system you use. Windows machines sometimes need a helping hand.
The best approach is to put an entry within the internal DNS server to point 'tickets.myserver.org' directly to the internal address of the apache server.
If that is not possible, an entry in the hosts file of each web listener that points to the apache server may be needed. If the Web Listeners start up and are able to find the 'tickets.myvenue.org', this step is not needed. If they do startup but they seem to be ignored by apache very quickly, this step will be needed.
| # | Description |
| 1 | Open My Computer. |
| 2 | Navigate to c:/windows/system32/drivers/etc/ (or where the windows system32 directory is located). |
| 3 | Right click on the Hosts file. |
| 4 | Select Open With... WordPad. |
| 5 | Add the IP address of the Apache machine followed by the online sales domain.
|
| 6 | Click File >> Save. |
| 6 | Close the Host file. |
Services Configuration
- Deliver performance by
- Taking advantage of multiple CPU's on current machines by setting up multiple processes
- Providing background worker processes that automatically take care of longer processes such as email or cart cleanup
- Providing support for the standard Apache or Nginx Load Balancer for multiple servers
- Simplify Setup and Management by
- Handling web services for all outlets in one server while preserving branding for each outlet
- Run as a service that will automatically restart in case of failure or machine restart
- Being aware of system updates and automatically intalling them in the background with no outage.
- Increase Deployment Options by
- Running on OSX and Windows (linux possible in future)
- Providing support for other high performance web servers (currently NGINX)
Installer Download Locations
Steps to Configure the Theatre Manager Server
- Theatre Manager Setup:
- Download and Install the Theatre Manager Server
- Configure the Theatre Manager Server by determining the processes you want to run.
- Test your web pages to make sure the server is working. At this time, we suggest a log in, finding an event, adding it to the cart, and going to the checkout window.
Configuring Theatre Manager Server
- Configure the Theatre Manager Server Processes
- Verify the settings in Company Preferences record and save it.
- Turn off an power saving settings for Macintosh (especially APP NAP) or Windows for any machine running classic listeners or the Theatre Manager Server
- Start the Theatre Manager Server
- Start the Classic Listener
- TEST your web site after the changes
Using the Director to configure Theatre Manager Server
|
On OSX, if you enter the URL http://127.0.0.1:3012 and do not see the 'Director' screen to the right, you may need to start the process (or stop/start the process) using terminal commands.
On Windows, you may need to:
|
|
Make sure you have enough permitted connections in postgresql.conf setup for the postgres database to handle the processes you configure. |
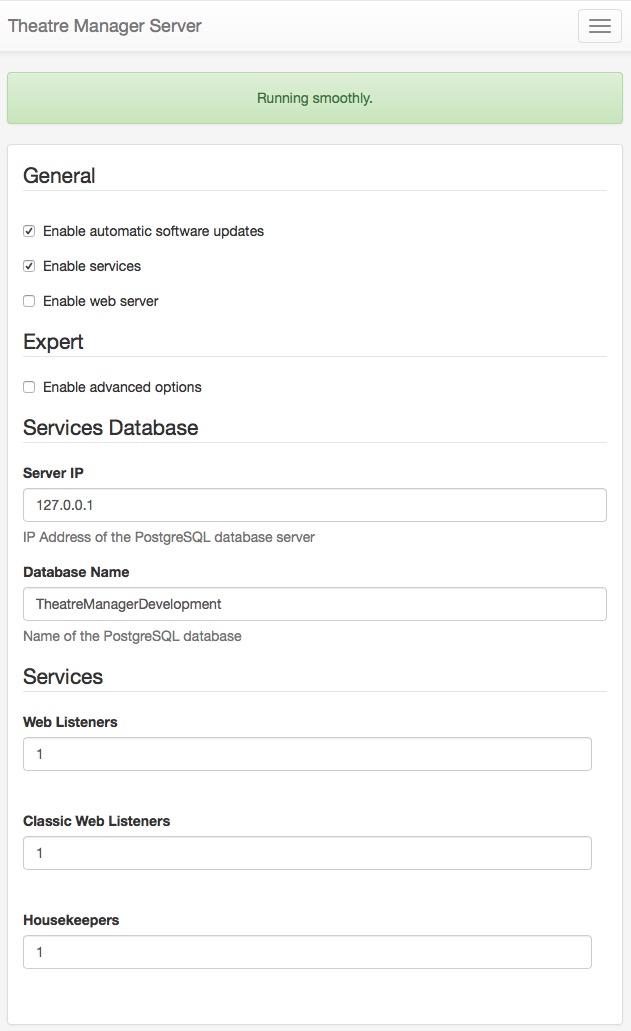
Connect to Theatre Manager server using your browser and entering the URL http://127.0.0.1:3012. You will see a web page like the one to the right. It will help you configure what is best for your machine by making recommendations for number of processes.
General
Enable Automatic Update
Theatre Manager Server is designed to auto update when a new version is released. If you wish to disable the feature, make sure to disable it on all machines. If it is enabled, make sure it is enabled on all machines.
Enable Services
Enable this if you want to set up the online sales and REST api
Enable Web Server
This is enabled if this TM server will be acting as the primary load balancer and/or template server for custom web pages. Normally one of these is enabled - and has extended setup.
Services Database
In the database section, you will need to enter the IP address of the database server and provide the Database Name.
Services
The values that you enter for the processes depend on the number of CPU's, amount of memory and other processes running on the machine. The suggestion provided is for a machine dedicated to Theatre Manager server. It if it also running the database on the same machine, you will need to reduce the number of processes.
Web Listeners
Web Listeners are the actual processes that respond to an online web request from a patron purchasing online or to the REST API.
Typically (assuming a dedicated machine), the second generation server can be set to have one less process than the number of CPU's on the machine. A general rule of thumb is that you need about 1 meg of ram for each process including operating system, so make sure not to start more than you have available memory.. (Note: each process actually only uses about 400Mb, but the operating system and buffers require their own space). For example:
- a 4 core machine with 4 gigs of ram could start 3 processes
- a true 8 core machine could start 7 processes, although you may not need that many.
- a dual 4 core with hyper-threading should only start 3 process. (It is best not to count the hyper-threaded cores as real CPU's)
- a machine with 4 gigs of ram, regardless of the number of cores, should have no more than 3 listeners set up
- a machine with 8 gigs of ram could have 7 processes, if it had enough cores. We would suggest 5 or 6 normally
Classic Listeners
Designate the number of classic listeners that you might need to handle some tasks that the main web listeners cannot do (yet)
- Each Classic process needs about 400 megs of ram for buffers.
- They are used for few processes and for plugins, so generally a ratio of 2 classic listeners for each web listener is reasonable on each machine.
Housekeepers
Housekeepers are used to handle background activity. Typically, this value is always 1. Housekeepers:
- Clean up expired carts on a periodic basis.
- Send out scheduled emails automatically.
- Perform daily database jobs like purging expired web logs, etc
General Note
In general, if you count all your processes, multiply by 500mb each and make sure that is well under the total ram in the computer. It is far better to have two machines for web services than over-commit one machine
TM Server Company Preferences
The key things to note are:
- The web Server URL should have 'https:' and use the URL of your ticketing web site. This is typically 'tickets.xxxx.org'
- The web server port should be blank which means use the standard https: port of 443. This generally never needs changing.
- The template page URL should NOT have 'https:' (it should only be http:) and should refer to the direct internal IP address of the main TM Server containing the web page templates
- The Template Page PORT should be 8111 -- meaning FORWARD any requests for custom pages to the TM Server on port 8111.

TM Server Special URLs
| URL | Purpose |
| http://127.0.0.1:3012 | Director's main web page showing the current status of services |
| http://127.0.0.1:3012/configure | Director's configuration page. This is also available as a link on the Director's status page |
| http://127.0.0.1:3012/nginx.conf | Shows the NGINX configuration file created by the Director for use with NGINX. It may be requested by AMS support for debug purposes on occasion. |
| http://127.0.0.1:3012/access.log | Shows the web pages accessed by users in the past 12 hours. It may be requested by AMS support for debug purposes on occasion. |
| http://127.0.0.1:3012/error.log | Shows the error log generated by the NGINX server in the past 12 hours. It may be requested by AMS support for debug purposes on occasion. |
| http://127.0.0.1:3012/activity.log | Shows the the current day's activity log -- this is all actions done by the server that go to console or event log in that day so you can see what occurred. It may be requested by AMS support for debug purposes on occasion. |
| http://127.0.0.1:3012/backup | Run the backup command on the database. You must have set up the Director for backups and configured the backup process. Results are shown in the backup.log and a blue message appears |
| http://127.0.0.1:3012/backup.log | Shows the the latest backup's activity log -- this shows what the result of the last pg_dump command . |
| http://127.0.0.1:3012/api/v1/users |
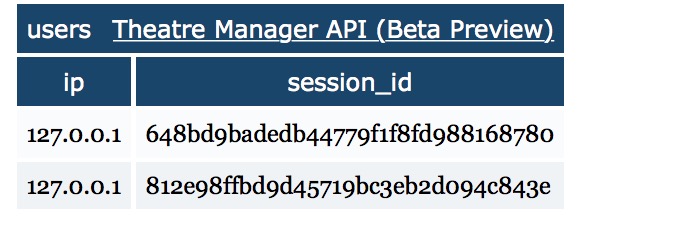 Shows a list of IP addresses and sessions that are monitoring the specific TM server. This lets you know who is observing the status of the server and what they may be watching/monitoring the web activity.
|
| http://127.0.0.1:3012/clear | Clears the setup/config to start over from scratch. None of the configuration is remembered. (remove 'XX' from end of link to actually do it) |
| http://127.0.0.1:5000 | test TM servers to see if they are responding|
| https://127.0.0.1/api/v1 | Access to the REST API internally to the organization - if enabled for the employee |
Monitoring Theatre Manager Services
 |
ArtsMan uses open source software called Nagios to check your 'ticketing' web site every 90 seconds via the top link in the table below (Ubuntu install instructions for technically minded).
The monitoring is a free service. Our support team monitors this tool through out the day and if we notice outages during normal support hours (Monday-Friday 8-5 MST, excluding holidays), we will try to let you know. However, it is not substitute for your own monitoring services. |
Monitoring
| Item | Purpose | Monitoring Tool | Expected Results |
| 1 | Verify entire system is up | https://tickets.yourvenue.org/TheatreManager/1/time?force_proxy
This sends a web request asking for the time from the web services. If you get the results expected, then the database, web server, TM listener and classic listener are all working |
Web page with the text TIME=20 somewhere in it |
| 2 | Verify everything but classic listeners running | https://tickets.yourvenue.org/TheatreManager/1/time If the probe in #1 (above) fails, then sending the same command without '?force_proxy' tests to see if all but classic listeners are runing | Web page with the text TIME=20 somewhere in it |
| 3 | Verify Web Server is up | https://tickets.yourvenue.org
If the probes in #1 and 2 fail, his tests to see if NGINX is up |
The url should generally change to https://tickets.yourvenue.org/TheatreManager/1/login?event=0
It means you should get a re-direct. |
| 4 | Verify Domain or Router | in terminal or dos prompt, type:
NSLOOKUP tickets.yourvenue.org |
you should see the static IP address for the outside your router. If you see that but get no other response to the above, then your web site is there, but perhaps your router is down. |
| 5a | Verify Database Server is Running | Start up Theatre Manager on the database server machine. | You should see the login window with the list of users. If so, skip to #6. If not, check that services are running.
Otherwise refer to starting and stopping the service for the appropriate platform. |
| 5b | Verify Database Server Running | If nothing else seems to be running, you can test to see if the database server is working by remoting into the machine with the database server on it. Look for the program called 'pgadmin' and start it up.
It will have a list of connections. Pick the connection that is localhost or 127.0.0.1 and double click on it. You may need to know the password. |
You should see a list of databases. |
| 6 | Verify NGINX server is running | If you cannot see your web services externally from probe #1, you can test the server internally using: | If you see the message on the web page The stage is set! then the TM server is running, but may not be configured for some services. |
| 7a | Verify TM Web Services are running | Access the Director using http://127.0.0.1:3012
If you do this on each machine that is running the Director, it will tell you which components of the TM server are running on the machine and which are down, stopped, or in error |
The Director web page with with a status showing that listeners, housekeepers, etc are up and running. If you do not see this, it is stopped |
| 7b | Verify TM Web Services are running |
WindowsYou can also look to see if the service 'Theatre Manager Server' is running using the services control panel.
OSX
|
After playing with the service and/or restarting it, go back to '5a' to see if the director is running. |
