Order Window
The Order window displays all information about an Order. The buttons on the left of the window change the view. When a button is clicked the view changes but the order stays the same. This allows for the purchase of tickets, donations and memberships in one order. Once an order is complete it can be opened to view, edit or add payments, purchases, taxes and more.
Parts of the Order Window
 |
Ribbon Bar. The selection icons in the ribbon bar change depending on the button selected on the left side of the order window. See each section for more information on the buttons available. |
 |
Buy, exchange or refund tickets in the order. For more information on the Orders Tickets window, click here. To Add tickets to an existing order, click here. For more information on Ticket Management, click here. |
 |
Makes payments for the balance of the order. For more information on the Payments window, click here. |
 |
Edit any pass or gift certificate in the order. For more information on the Orders Passes G.C. window, click here. | To go to Season Subscription Management, click here.
 |
Edit any fees associated with the order. For more information on the Orders Fees window, click here. To Add fees to an existing order, click here. For more information on the Fees Tables, click here. |
 |
Edit any donation in the order. For more information on the Orders Donation window, click here. To go to Donation Management, click here. |
 |
Allows you to enter the labor portion of any order. |
 |
Edit any resource in the order. Click here for more information on Resources. |
 |
Edit and or book tickets for any subscription packages in the order. For more information on the Orders Season window, click here. To go to Subscription Management, click here. |
 |
View the notes and letters associated with the order. Click here for more information on form letters. |
 |
View any transaction history of the order. Click here for more information on the Transaction History window. |
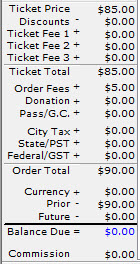 |
Displays the current balance on the order. |
Tickets Window
 |
This section describes the general features of the order window that includes ticket sales. If you would like more specific information about ticketing, please refer to ticket sales/management.
|
- Click the New
 button or the Open
  button in the Orders tab, or
 - The Tickets
 button in the Ticket tab. Clicking the Tickets button opens a flyout menu. Click here for more information.
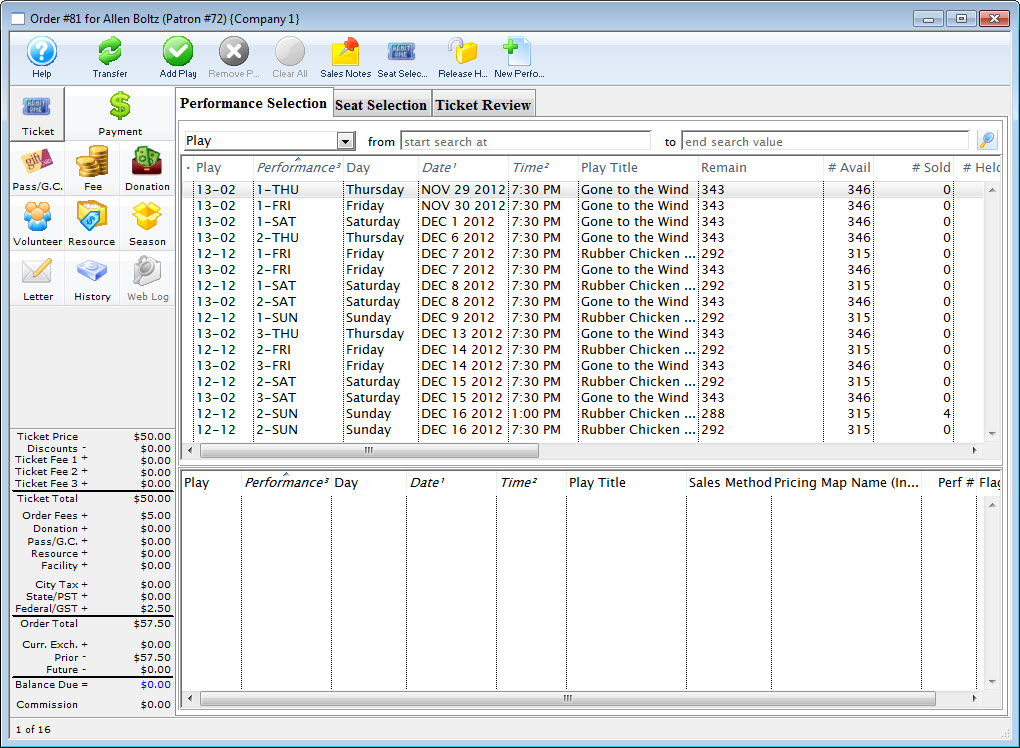
The Order window opens:

Parts of the Order Tickets window are
Ribbon Bar

 |
Switch to Calendar View. |
| Transfer the order to another patron. | |
 |
Adds the currently selected play to the 'buy' list. |
 |
Removes the currently selected play from the 'buy' list. |
| |
Clears all plays from the 'buy' list. |
 |
Shows the sales notes for the currently selected plays. |
 |
Goes to the next phase of reserving tickets for the selected performance. |
 |
Releases all the held tickets on the selected performance. |
 |
Select a performance and then click "New Performance" to create a new performance date. |
Tabs
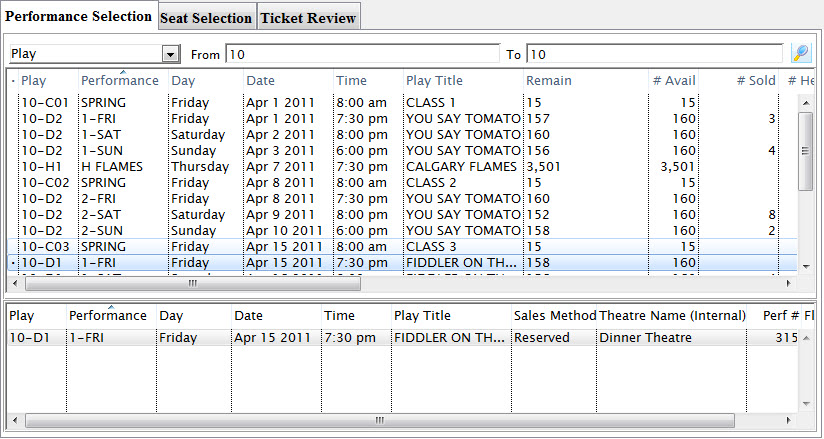
The Tabs portion of the window is where you add or edit tickets. It consists of:
| Performance Selection | Performances are displayed in the Performance Selection tab of the Order window. Once a patron is selected and the buy button clicked, the performances to be purchased can be selected. Once a performance is selected, it appears in the bottom portion of the selection pane. Click here for more information on this tab. |
| Seat Selection | For performances, the seat selection window displays a map of the venue. Click here for more information. For Courses, a different window is displayed. Click here for more information on Courses. |
| Ticket Review | The ticket review tab displays the ticket(s) selected in the seat selection and gives you a number of options. These are: |
 |
This opens the ticket detail window and its functions. Click here for more information. |
| |
Click the button to reset the ticket status back to its original state. |
 |
Allows you to exchange tickets for the patron. Click here for more information. |
 |
This button indicates that the selected ticket(s) will be refunded. |
 |
Clicking this button confirms and processes imediately the indicated ticket sales, excahnges or refunds. |
 |
Exports the higlighted records. |
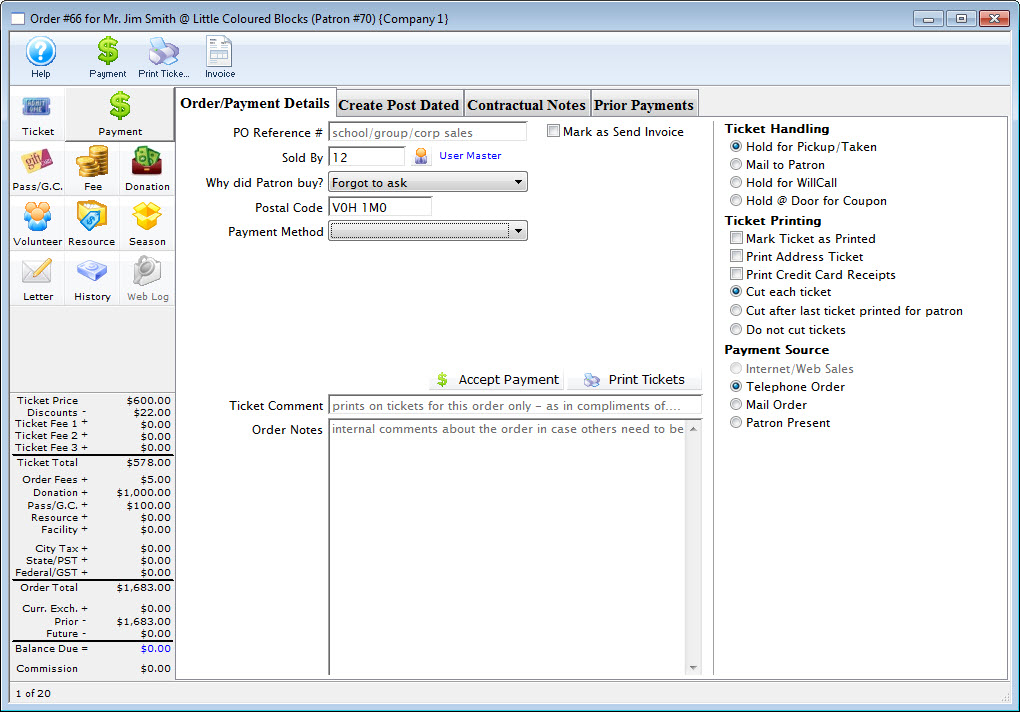
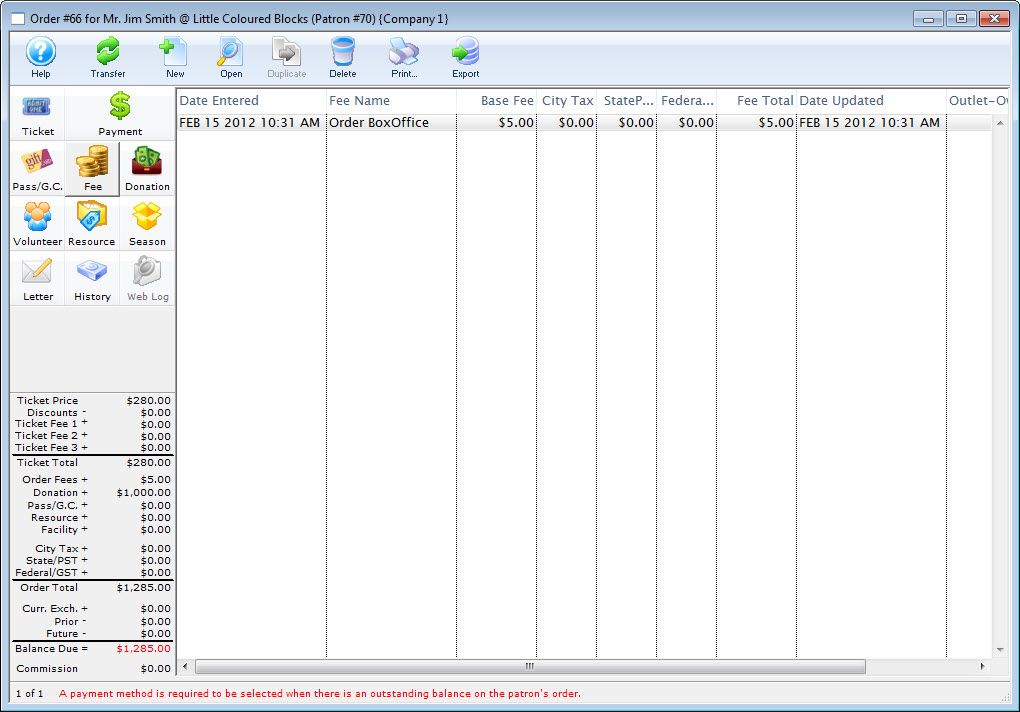
Payment Window
The payment window is used to record the payment method, enter a reason why the patron purchased the tickets, initiate invoicing, print tickets, and record detailed order notes. Each time tickets are sold, a donation is made or a membership purchase a unique Order Number is created. This number is displayed on the title bar of the Payment Window.
- You can make make payments on this window by clicking the Payment Button
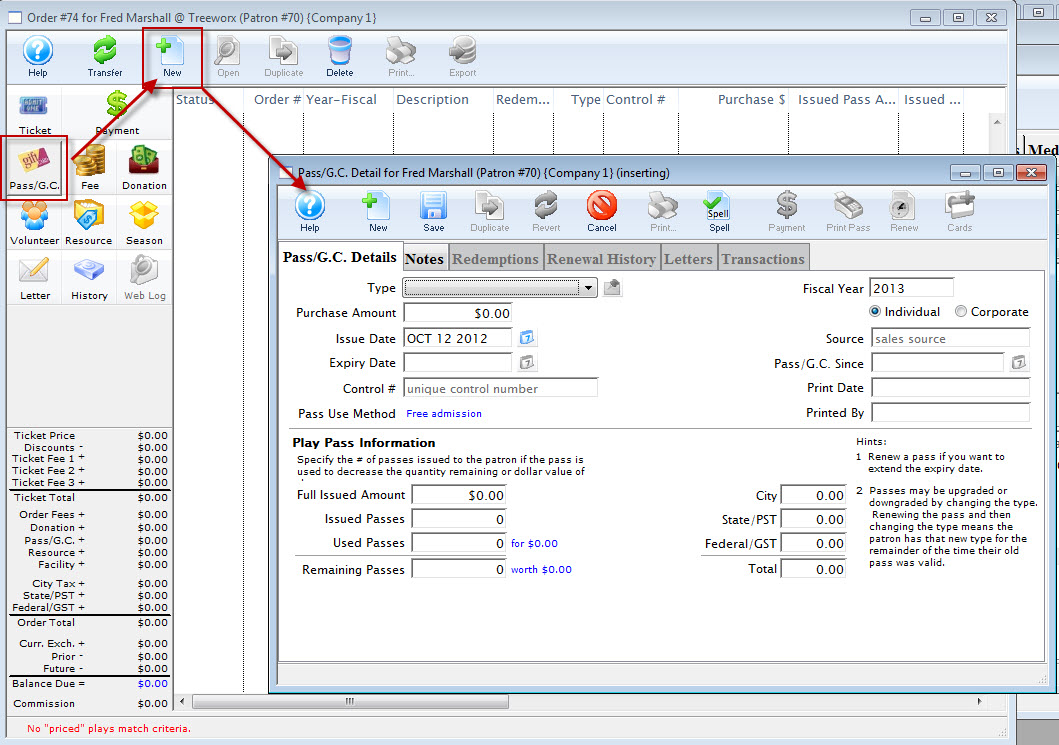
Pass G.C. or Membership Window
|
"Membership" is a broad term meaning "Gift Certificates," "Flex Passes," "Vouchers," "Other Income" or a variety of other forms. Since the name of the field is customizable, some organizations may retain the term "Membership," while others change it to reflect their own terminology such as "GC/Pass," "Gift Certs." or even "Other Income." The nomenclature in your database may be different than "memberships." |

In the order window click the Membership button.
- For more information on setting up Pass, G.C. and Member Types click here.
- For more information on buying Passes, G.C.s and Memberships click here.
- For more information on Passes, G.C.s and Memberships details click here.
- For more information on refunding Passes, G.C.s and Memberships click here.
Parts of the Pass / Gift Certificates Window

 |
Open the online help for Passes. |
| Transfers the order to another Patron. Click here for more information on transferring an order. | |
 |
Adds a new pass to the order. Click here for more information on adding a Pass or Membership to an order. |
|
Opens an existing Pass /G.C. Click here for more information. |
 |
Deletes the selected Pass / G.C. |
 |
Prints the selected Pass / G.C. |
|
Exports the selected Pass /G.C. |
Fee Window
Fees are are extra costs that can be added to (or removed from) each Order in various stages in its lifecycle. There can be 'order', 'exchange'. 'mailing', subscription', etc. fees. Usually fees are in the form of service charges or taxes.
Clicking the Fee button opens the fee page in the Order Window.
- To refund a fee from an order, click here.
- To add a new fees to your fee table or edit the existing in your fees table, click here.
- To add a new fees to an order, click here.
Parts of the Fee Window
| Transfer the order to another patron. | |
|
Opens the Fee Detail dialog to determine how a fee will be calculated or applied to the selected item. To add a new fees to an order, click here. |
| |
Opens the Fee Detail dialog to determine how a fee will be calculated or applied to the selected item. To add a new fees to an order, click here. |
|
Deletes the selected order fee. To delete a fee from an order, click here. |
|
Exports the selected record. |
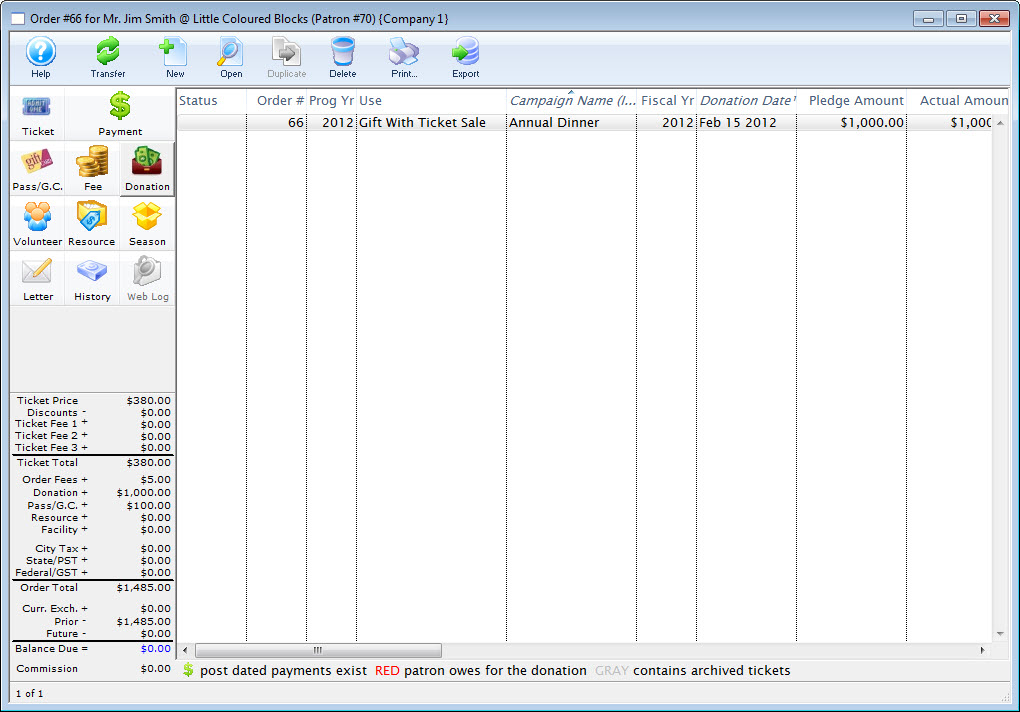
Donation Window
Donations can be added to any order and they can be added, modified or removed depending on the need.
For more information on Theatre Manager's Donation module, click here.
Clicking the Donation button opens the Donation page in the Order Window.
Parts of the Donations Window
|
Open the online help for Donations. |
| Transfers the order to another Patron. Click here for more information on transfering an order. | |
|
Adds a new donation to the order. Click here for more information on adding a Donation to an order. |
|
Opens an existing donation. Click here for more information on Donations. |
 |
Deletes the selected donation. |
 |
Prints the selected Donation. |
 |
Exports the selected donation. |
| You can download the Cheatsheets (1-2 pages) and Screencasts (online video demonstrations of the functions with narration) by clicking on the icon. |
Cheatsheet |
Flash ScreenCast |
MP4 ScreenCast |
| Donations Overview |
| ||
| Add a Donation thru the Order Window |
| ||
| Refund a Ticket to a Donation |
|
| |
| How to Toggle Between Individual & Corporate Donations |
|
|
|
| How to Make a Donation Anonymous |
| ||
| Deleting and Refunding Donations |
|
|


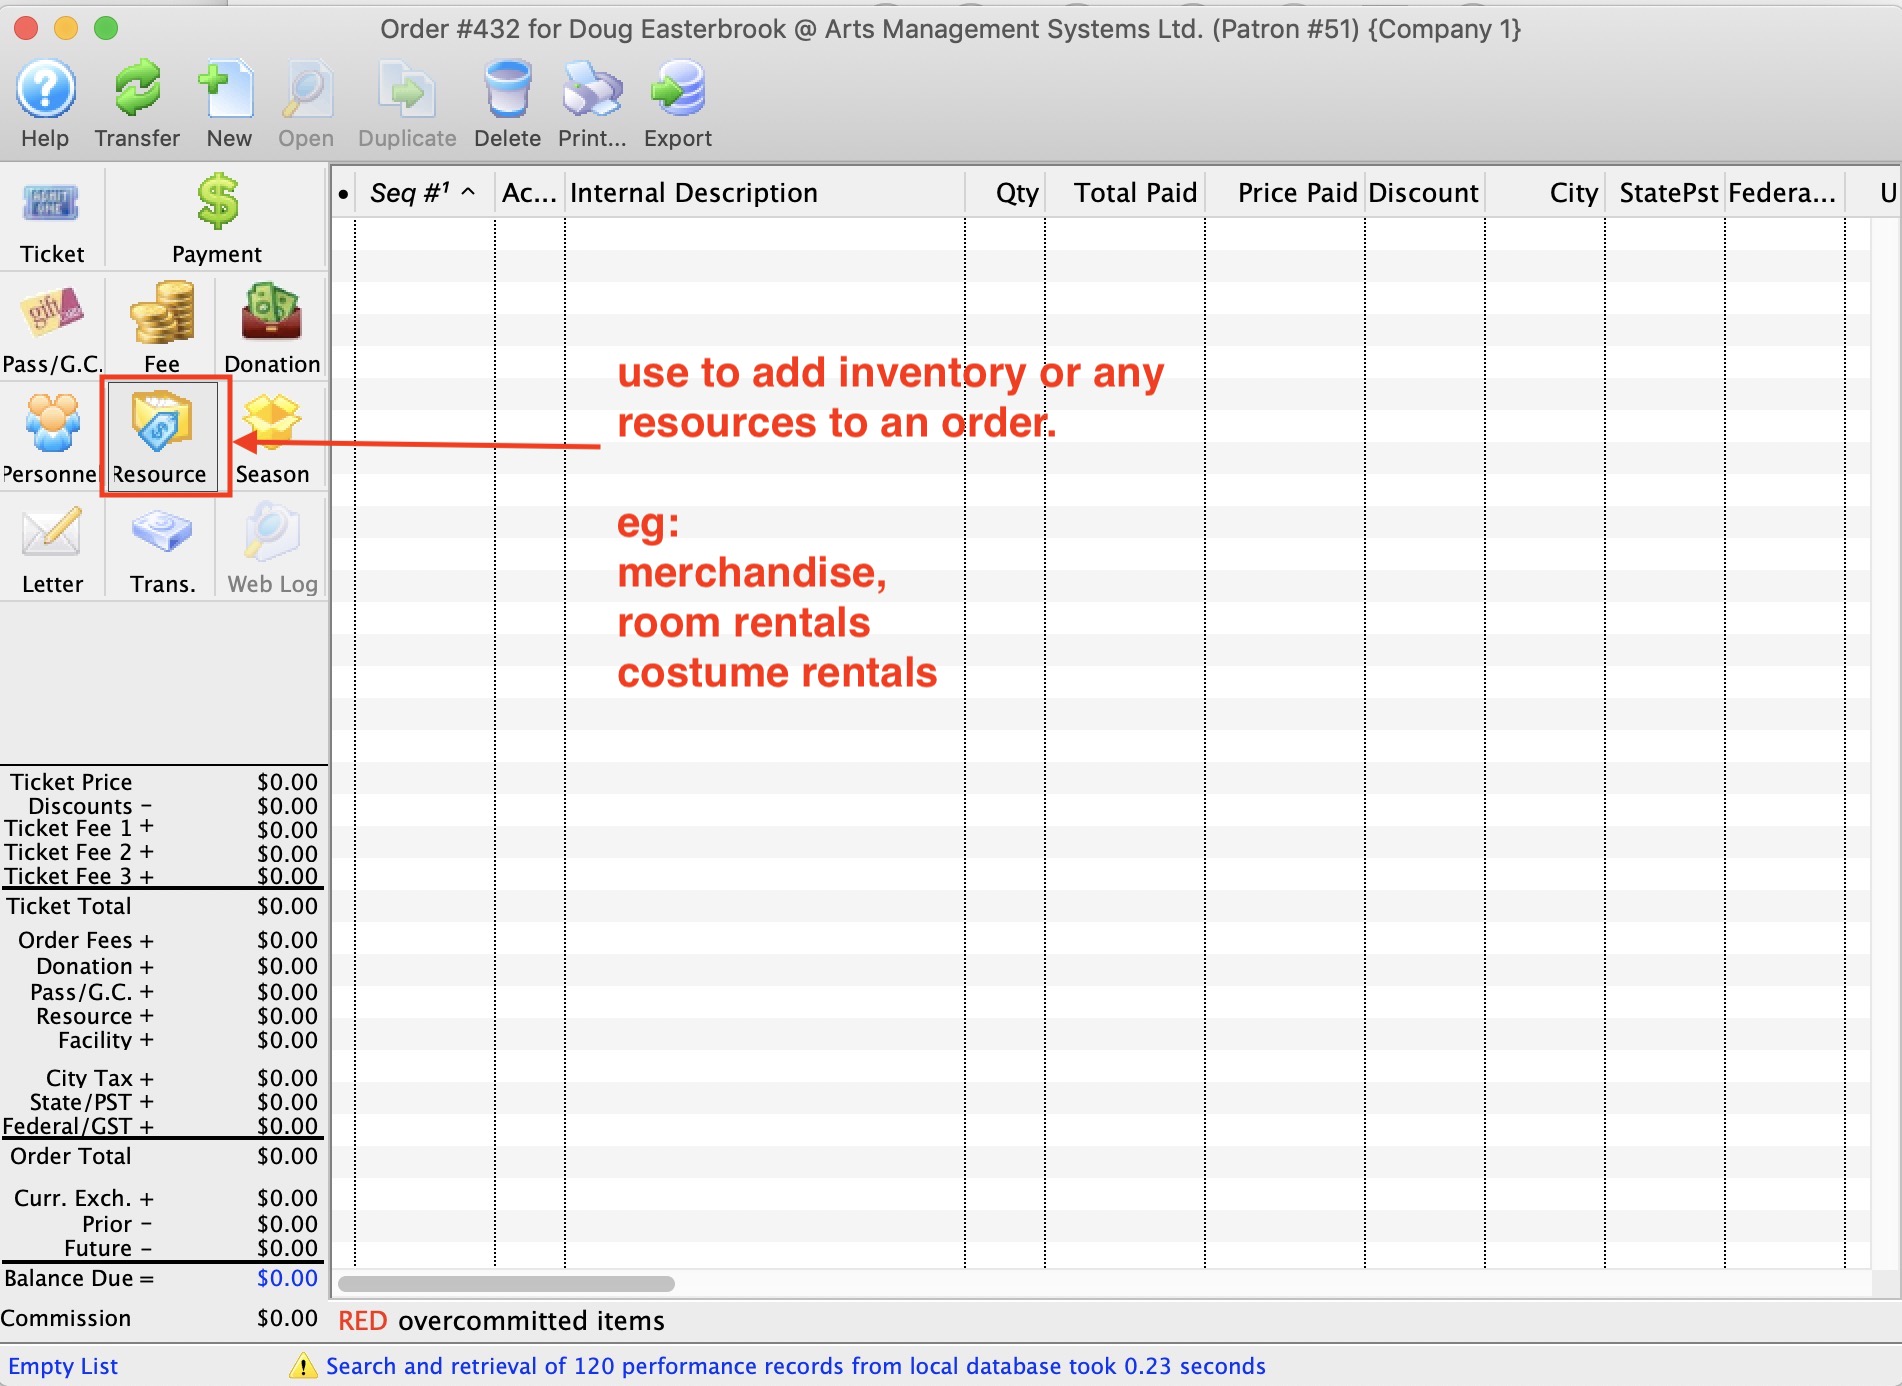
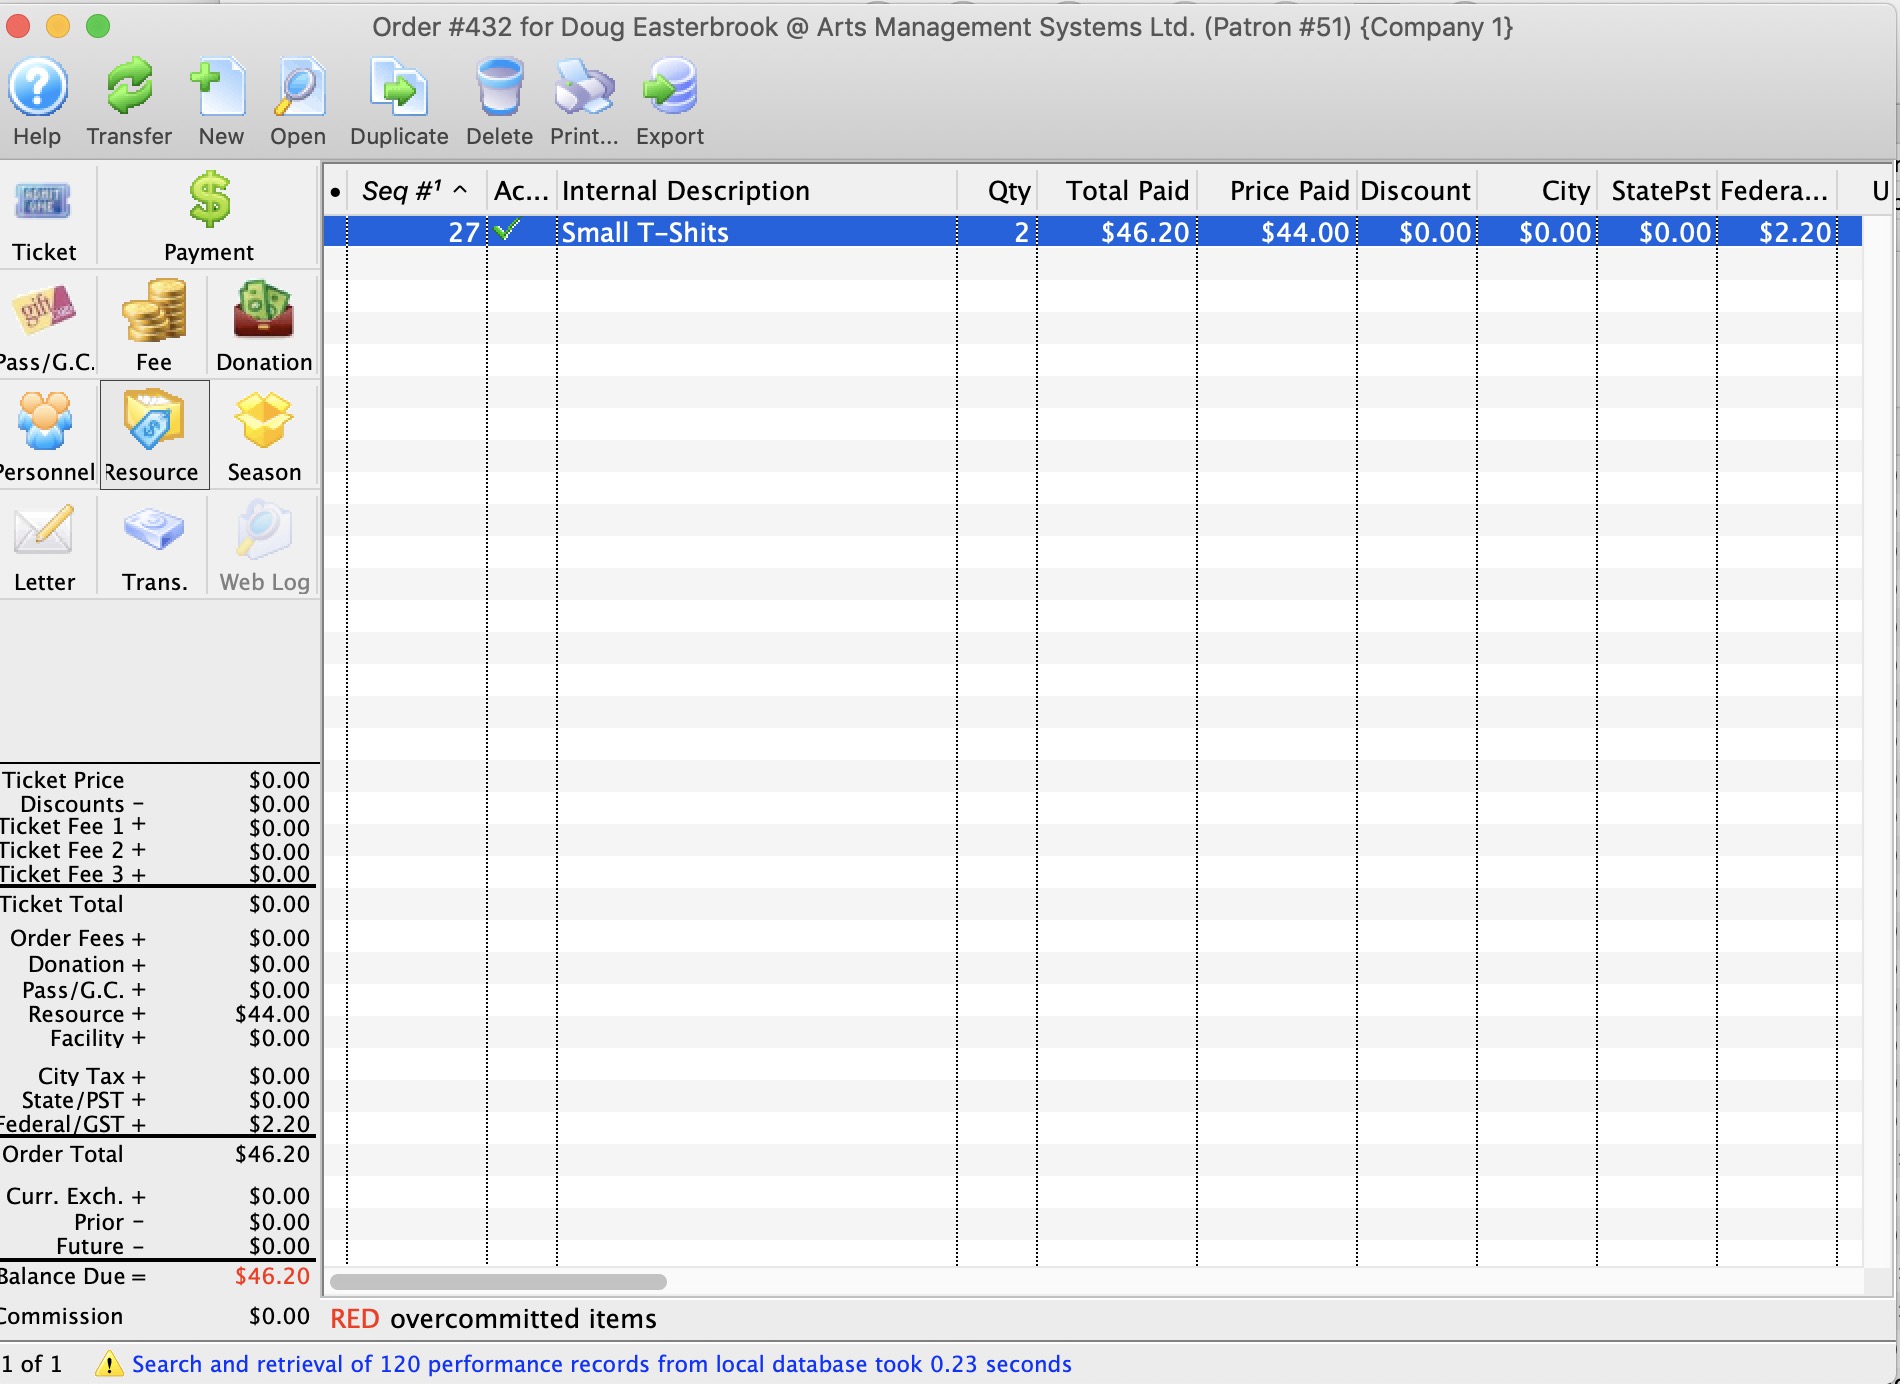
Inventory and Resources Window
This can be:
- merchandise you buy for resale (like t-shirts, CD's etc)
- items that you rent for a time period such as costumes or rooms. If the item is a rental, you'll be asked for the time it will be rented - and TM will check to see that it is available (think old fashioned video rentals)
- etc
Start by clicking on the 'resources' button on the order window. as per the image below
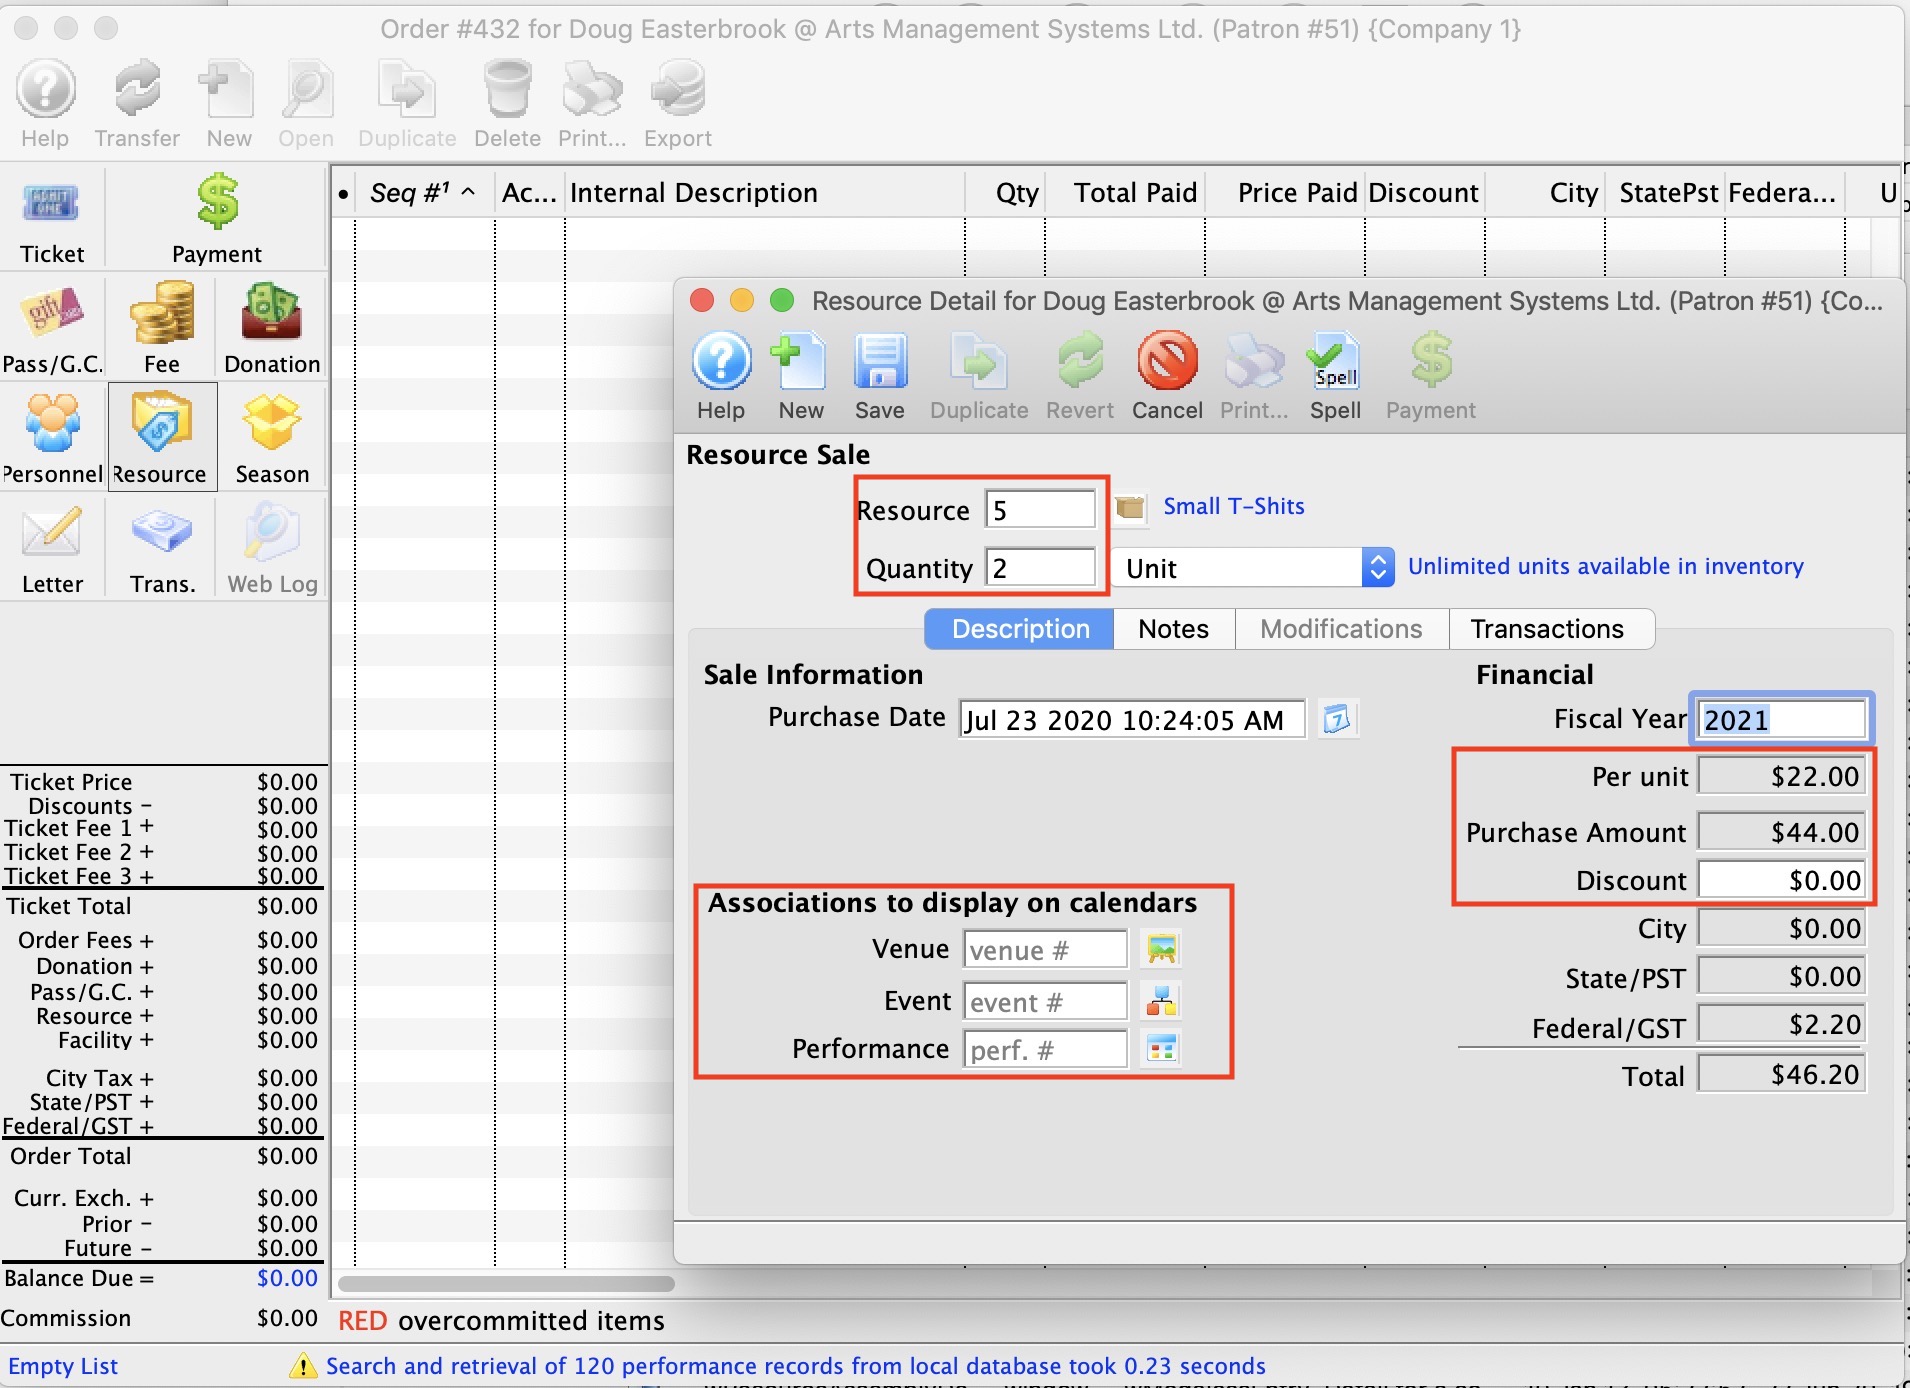
Selling The Item
Click 'New' to add an inventory item to the order. There are 3 parts of the inventory/resource sales detail window.
- Item & Quantity
- Resource enter the resource or merchandise number that you want to sell or rent.
- Quantity Indicate how many of the items you want to sell or rent to the customer
- Financial
- Fiscal year enter a value if you want to for this - it is used to track the totals inventory sales on the patron's sales statistics record for that year - normally, you leave it as is
- Per Unit the price of each item, if you allowed it to be changes on the inventory setup. If not, then this is the fixed price of the item.
- Discount is you want to discount the item prior to sale
- Associations to display on Calendars
For merchandise, you would not enter anything here. if you were renting something that is associated with an event, venue or performance and you want to have this item show up a being used for a certain time frame, you can select the calendars here. For example, if somebody is renting the grand piano, you can enter the venue it will be in.
- Venue the venue that the rental item will be located in
- Event the event that the rental item is associated with
- Performance the actual performacne that the rental item will be used for, if not for an entire event.
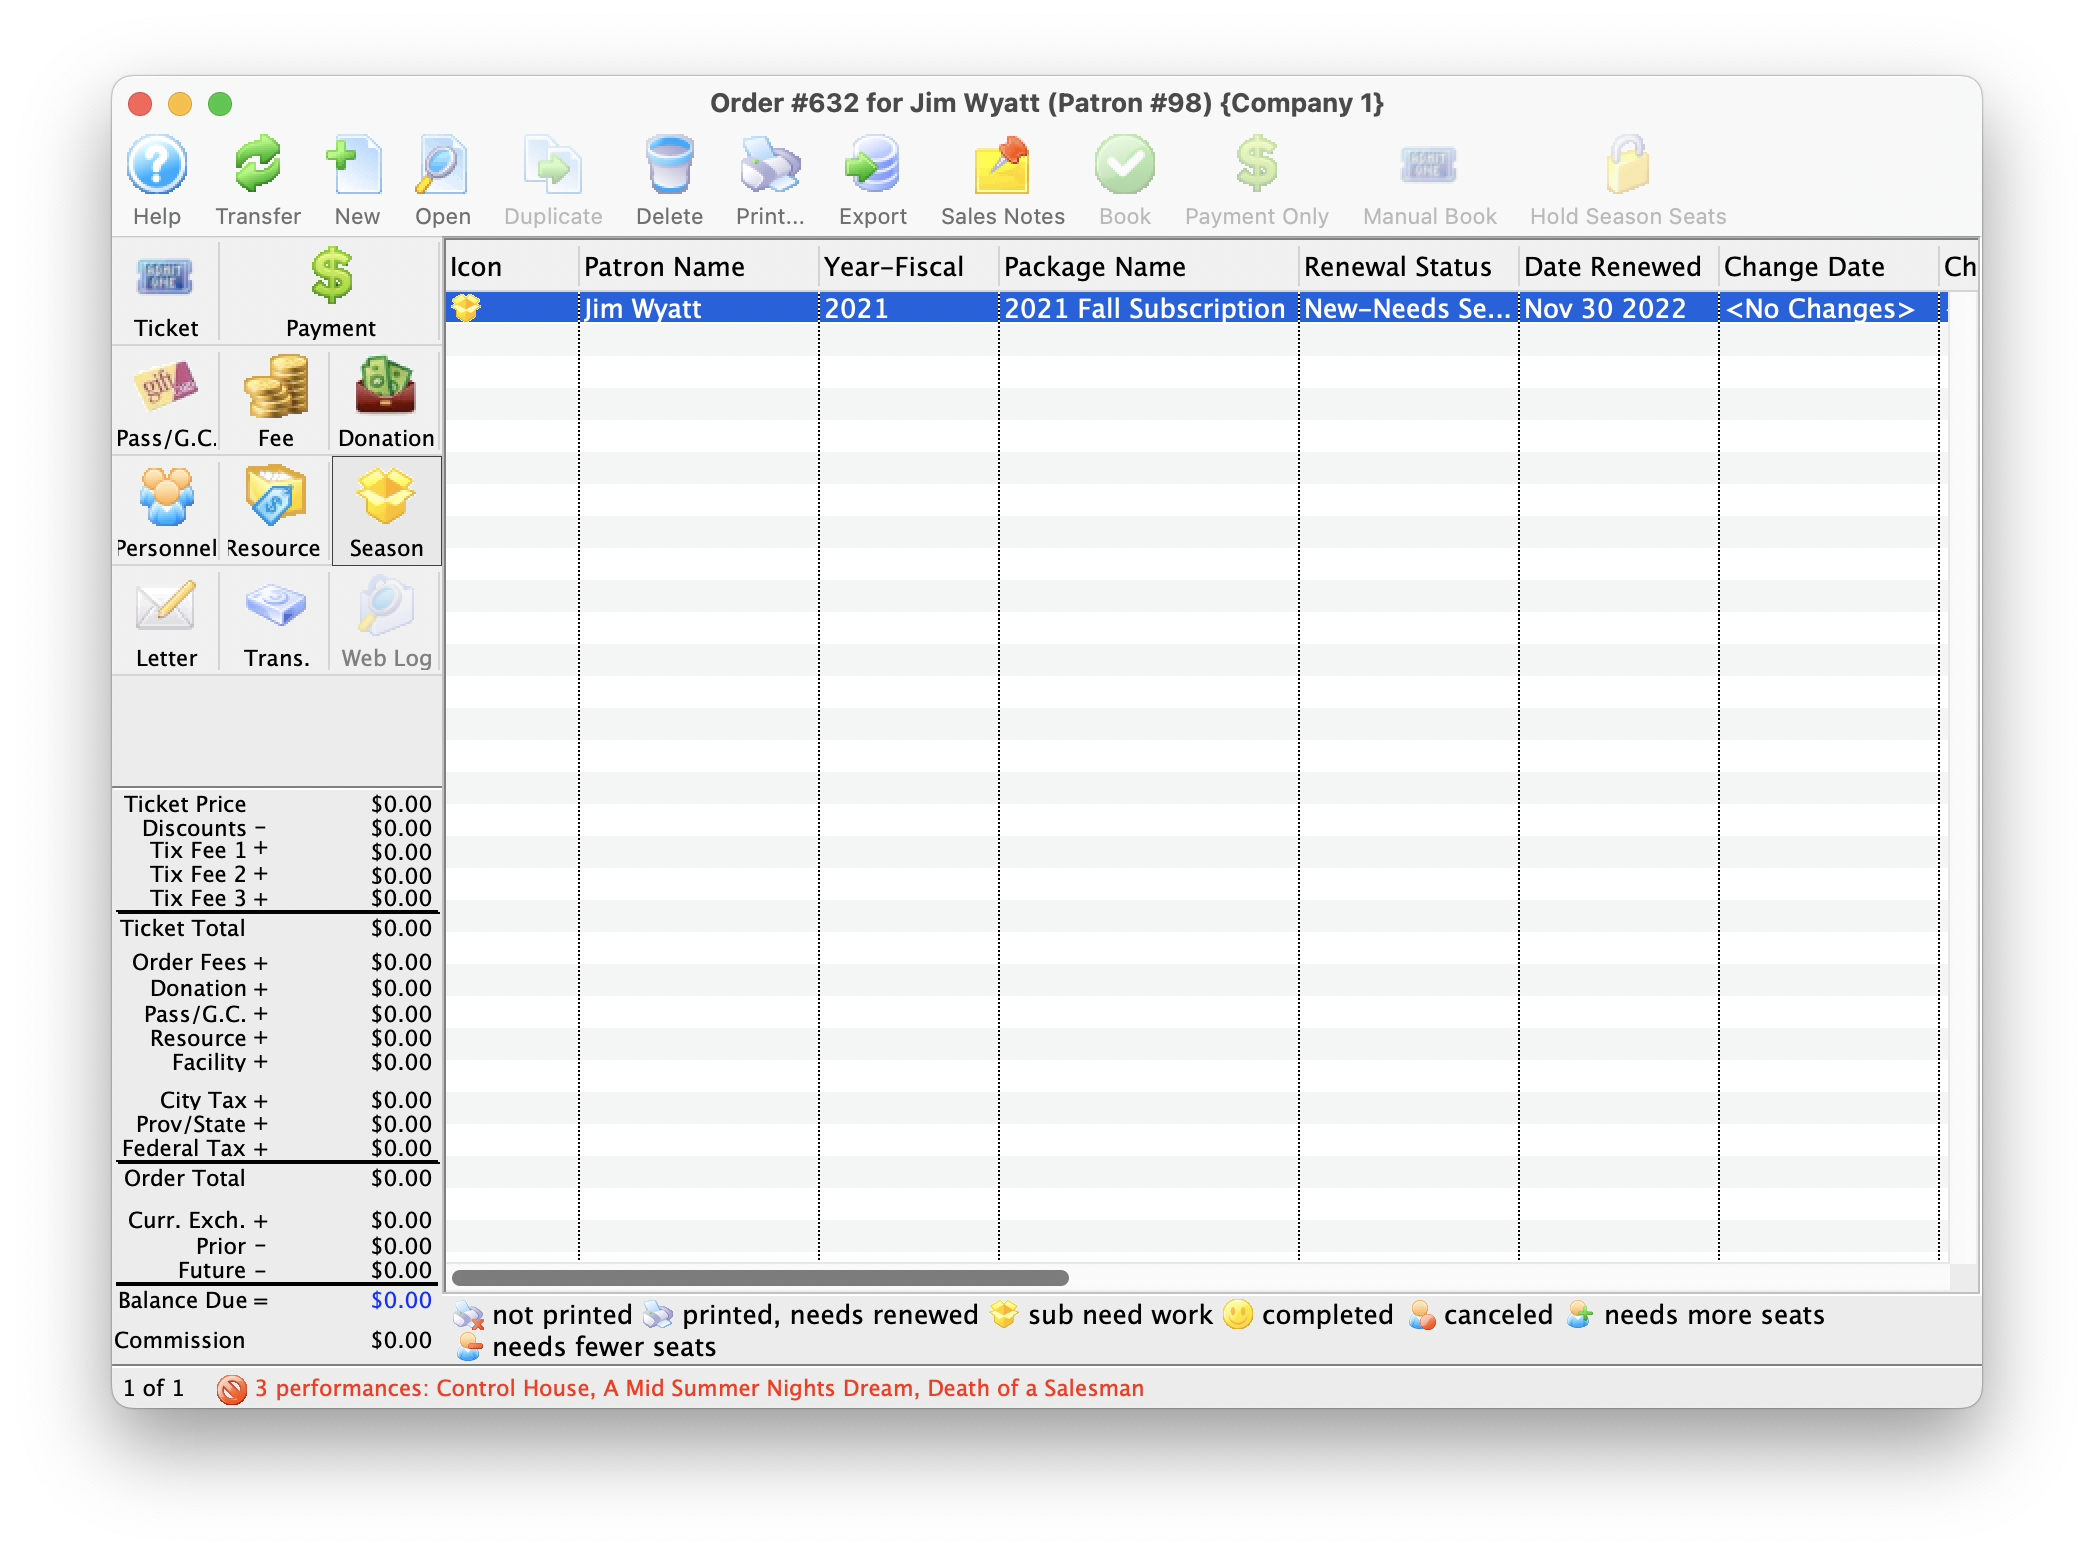
Season Window
When working in the Order window, it is possible to subscribe a patron to a Season Package, and book the seats for the patron on the same order along with other purchases.
Clicking the Season button, opens the Season page in the Order window.
- To subscribe a patron to a season package through the order window, click here.
- For more information on the Subscription Management module, click here.
For Quick Reference Information on buying a Season Subscription from the Order Window, You can download a Quick Reference Guide, Cheatsheets (1-2 pages) and Screencasts (online video demonstrations of the functions with narration) by clicking on the icons.
| Buy a Season Subscription (from the order window) |
Quick Reference Guide |
Cheatsheet |
Flash Screencast |
MP4 Screencast |

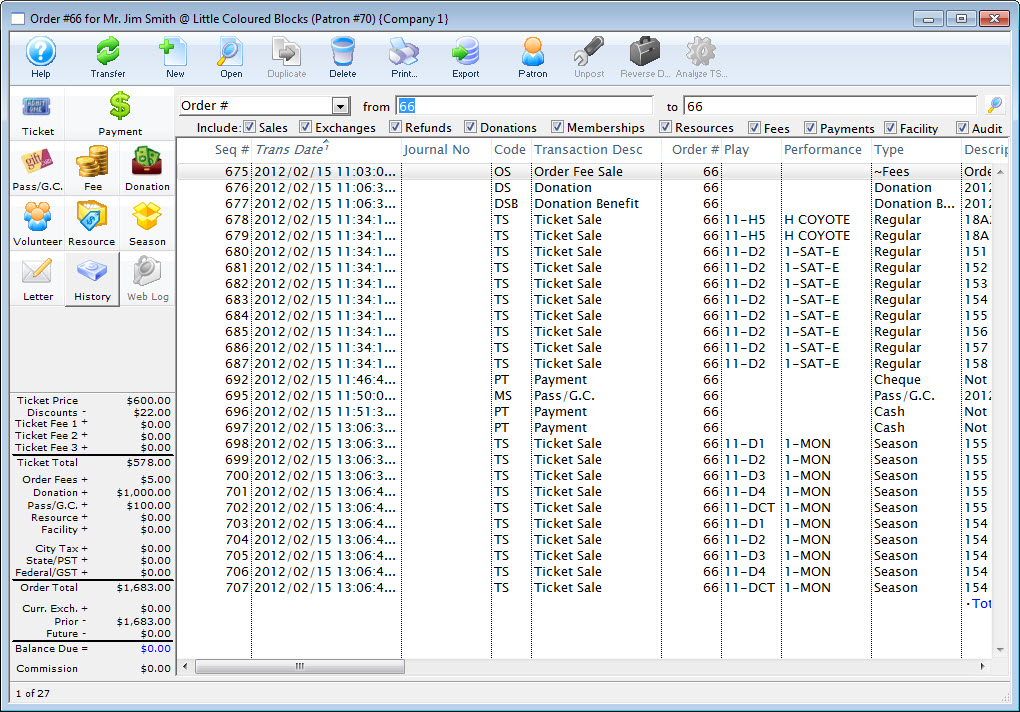
History Tab
The History window displays details of the transactions. These include the date the transaction was create or updated, journal numbers, transaction descriptions and a Theatre Manager code representing the type of transaction.
In the order window click the History  button.
Use the search drop down to specify the type of transactions to display. Uncheck the include boxes to limit the view of the transaction.