Creating a New Event / Play
Creating New Events / Plays
 |
Typical time to program an entire season of 8 or so plays is usually easily done within a morning (including coffee). |
Creating the event (Summary of Steps)
To create an event from scratch, you use the steps that follow. Links are provided to explain each window in detail. The general steps are:
- Name the event
- Set up the Accounting
- Enter the Marketing information and images
- Create the performances (you can do this as many times as you need if your patterns are interesting, or want add performances later)
- Price the tickets for the performances
- Enable any discounting you want on the performances
- and then you are done, ready to sell the tickets
Step by step creating the event
- Open the Event / Play List Window.
Click here to learn how to access this window.
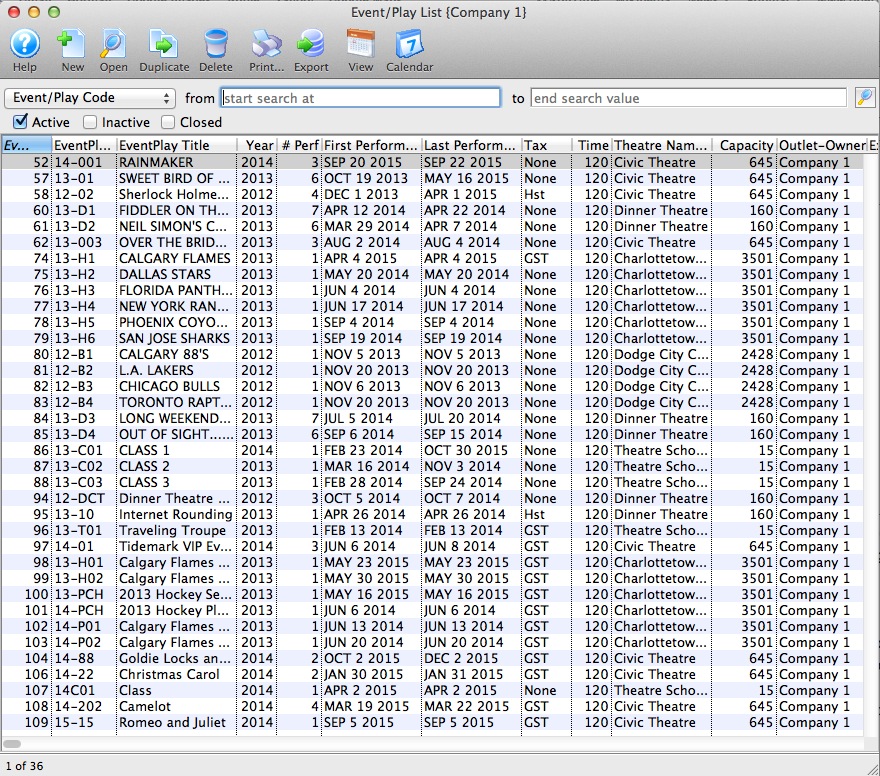
- Click the New
 button.
The fields are blanked to allow you to add new data.
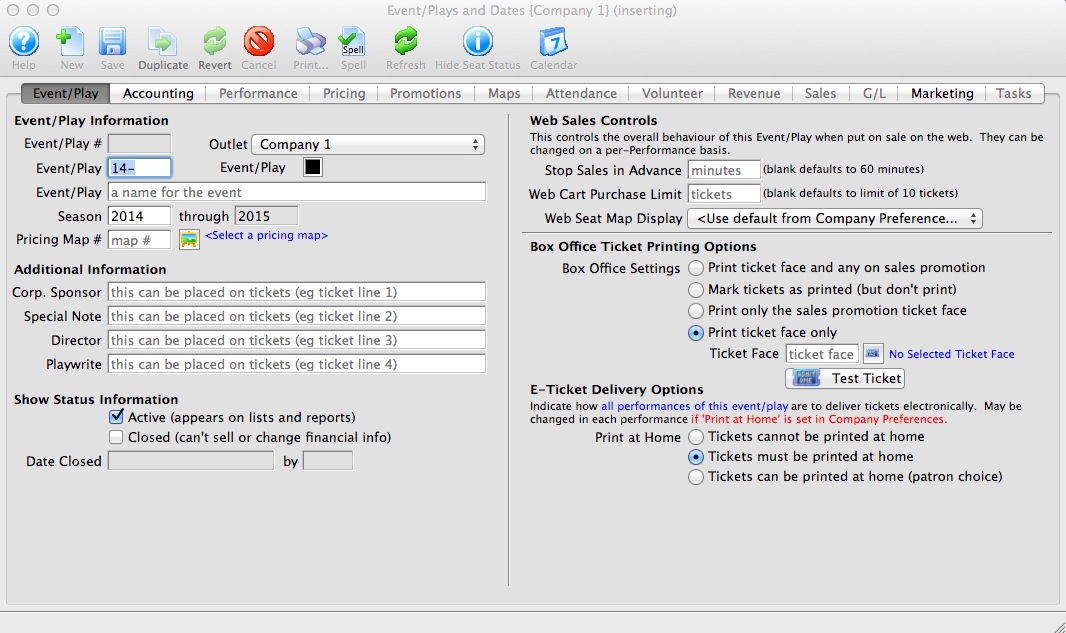
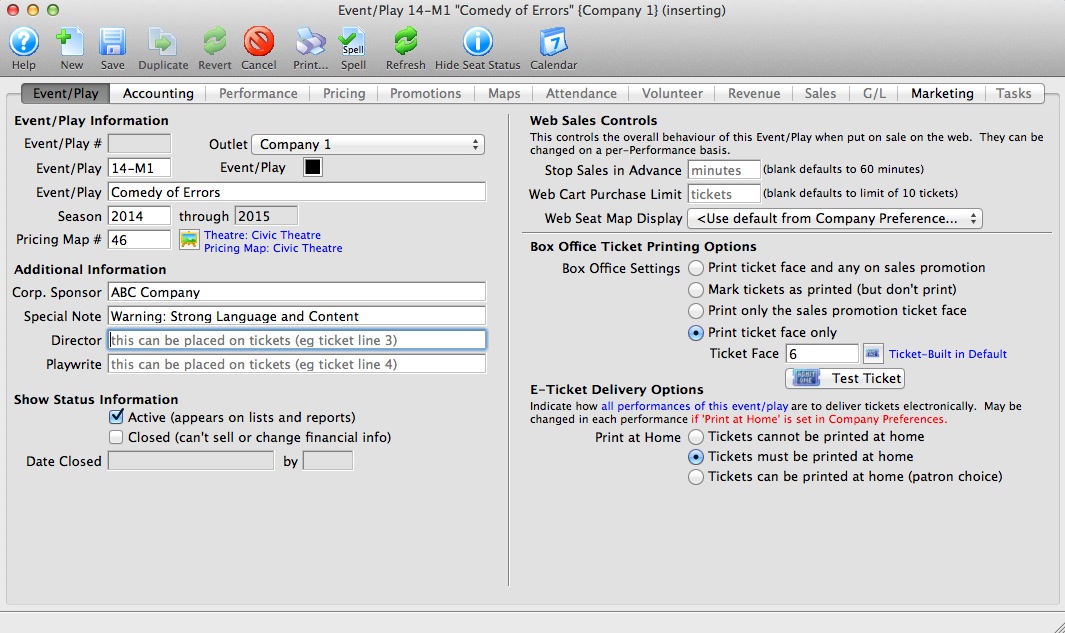
- Enter the Event / Play information.
Click here for more information on Event / Play Information tab.
- Click the Accounting tab.
This is more fully described in Accounting setup. If account codes for events do not vary, it can be easier to simply start by duplicating a prior event and then change the name of the duplicated one.
When accounting is set up, click the Save button to activate the rest of the tabs.
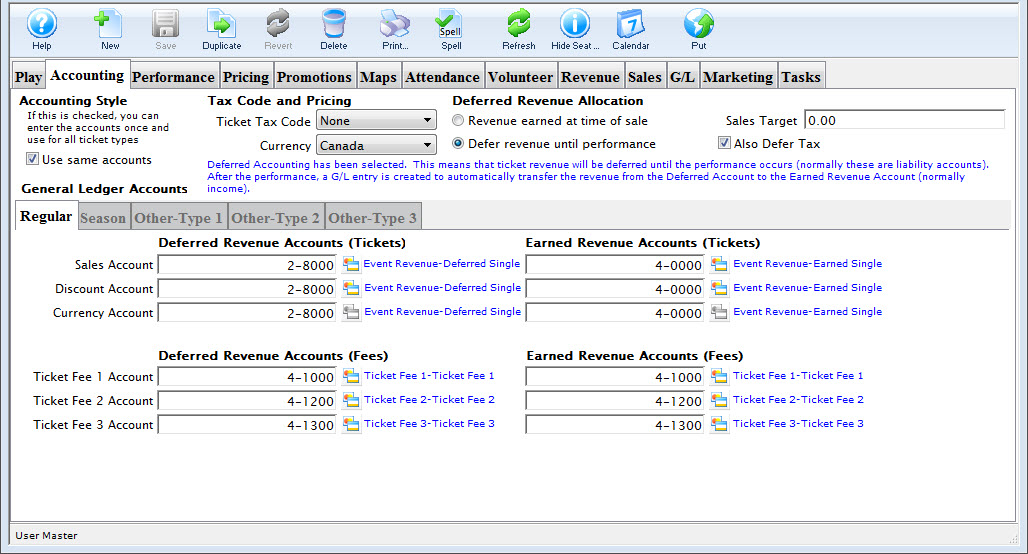

You may want to create some general ledger account number for the new event / play pror to setting up the event. If so, refer to General Ledger Accounts for more information. Venues that do profit/loss by event using class codes, category codes, or job cost code (the name depends on your financial system), often use the same accounts for each event they set up and, instead, rely on the job code in end of day accounting separation in the revenues by event report.
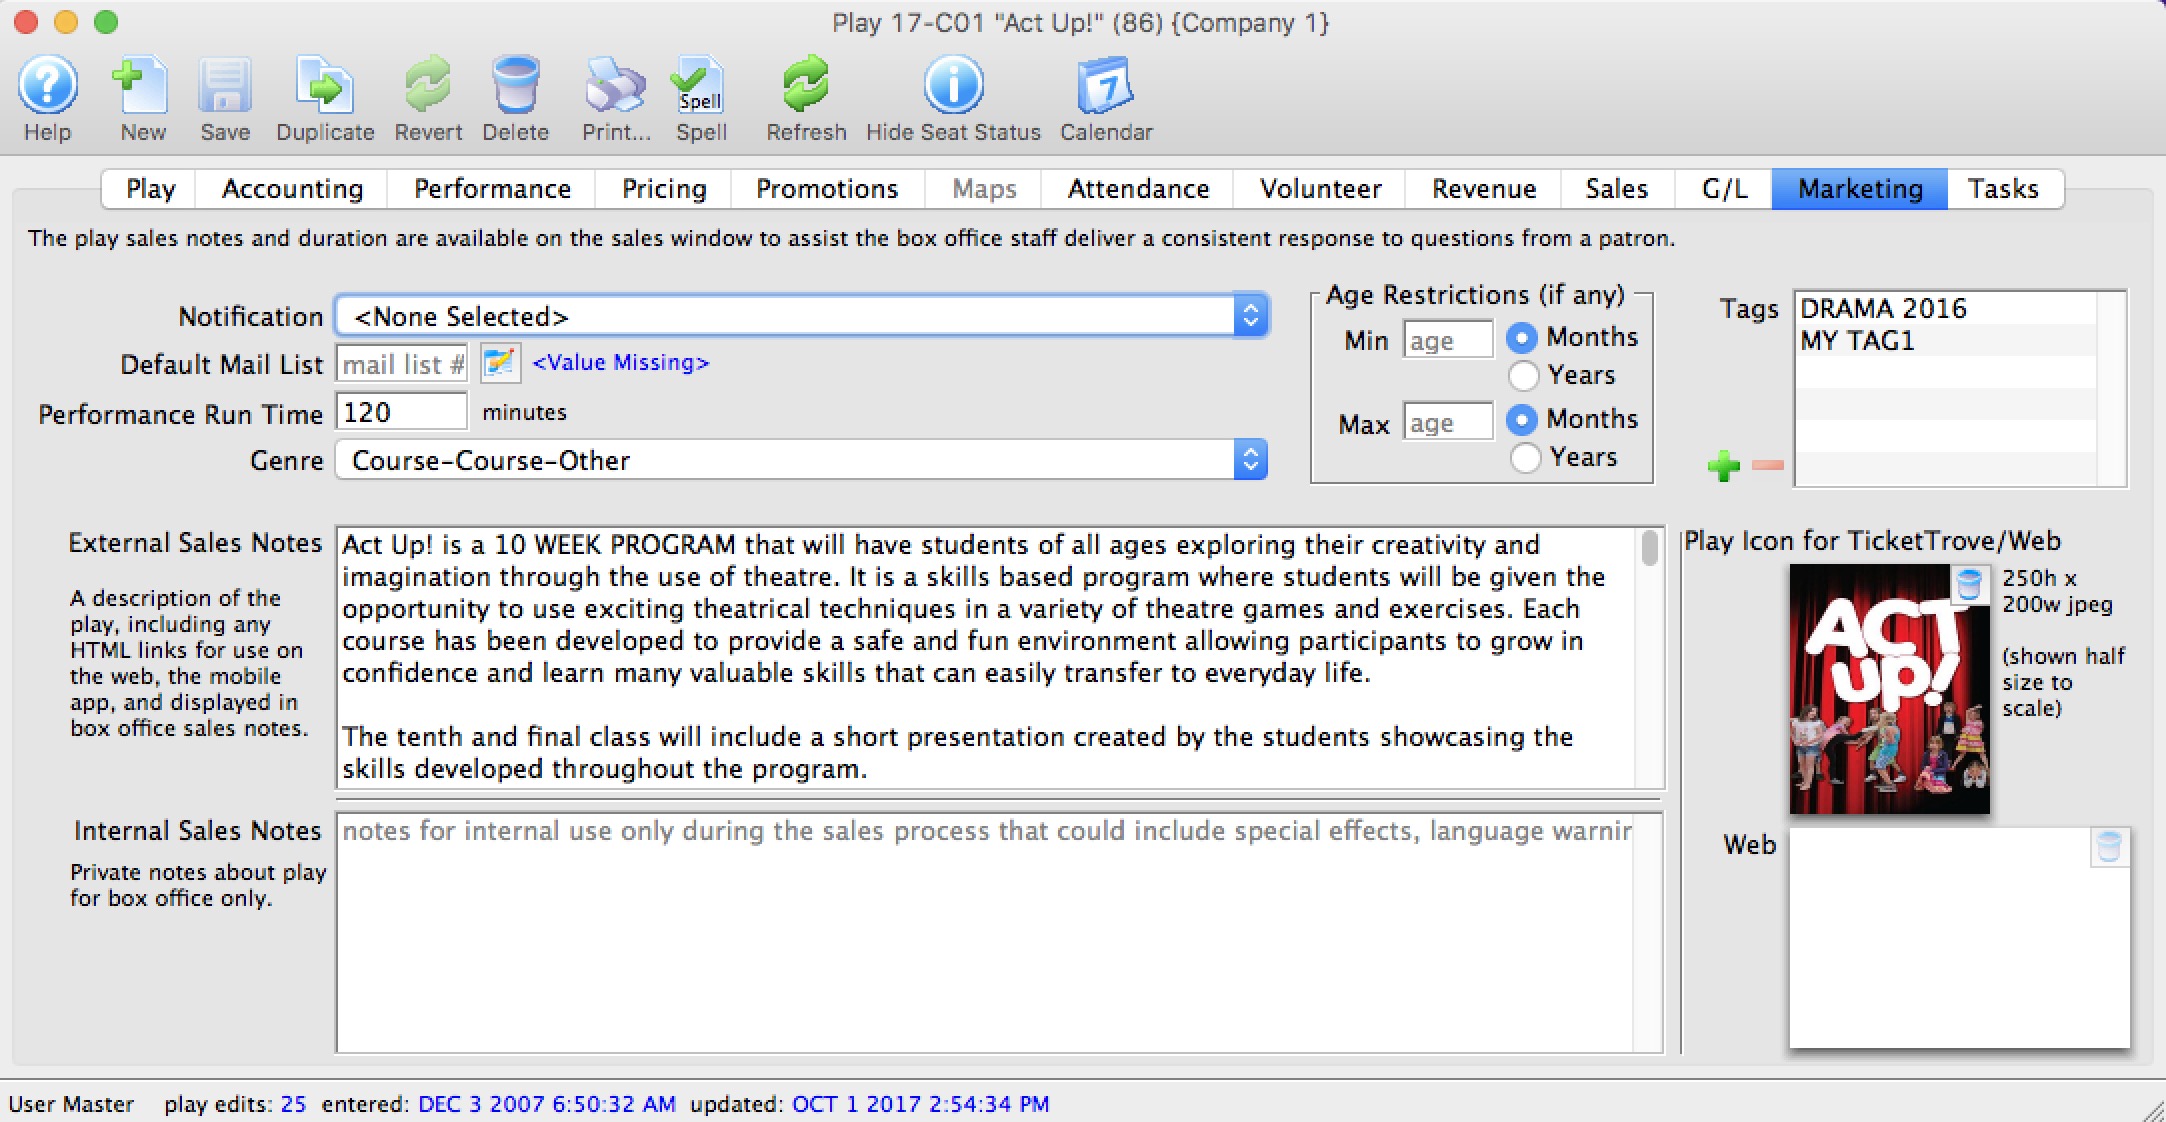
- Click the Marketing tab.
Refer to Marketing Tab for more information. This is where you provide any images, text and genre's that will appear in the online sales module.
- Click the Performances tab.
This allows you to set up and number of performances using many different sales methods (eg a mixture of reserved, general admission, touring, classes and more, if all are related.
- Click the Pricing tab.
After performances are entered, you need to set the Base prices for each pricing zone you created in your venue. Once you set up one performance, you can copy those prices to the other performances if they are similar.
- Click the Promotions tab.
Promotions are a way of setting the valid discounts on tickets for each performance. You typically start with your menu of available promotions and disable the ones you don't want to allow for a performance. For example, you may not want group sales or certain comps on opening night.
- You can now start selling the event
The remaining tabs show information about the current state of sales such as:
- Maps - shows which seats are taken on any reserved seating performance at a glance
- Attendance - shows who is coming to the event
- Personnel - indicates who is working each performance if you are tracking these things for volunteers or facility management
- Revenue - shows total sales for each performance
- Sales - allows various summarizations of WHEN people bought tickets to correlate to marketing events or onsales
- G/L - shows the journal entries showing sales posted to the accounting system via the end of day process
- Tasks - shows any tasks assigned to the event for any purpose. The can be renter related tasks (move in/move out), or technical activities like maintenance and cleaning, or admin activities like backstage tours
Adding Performances
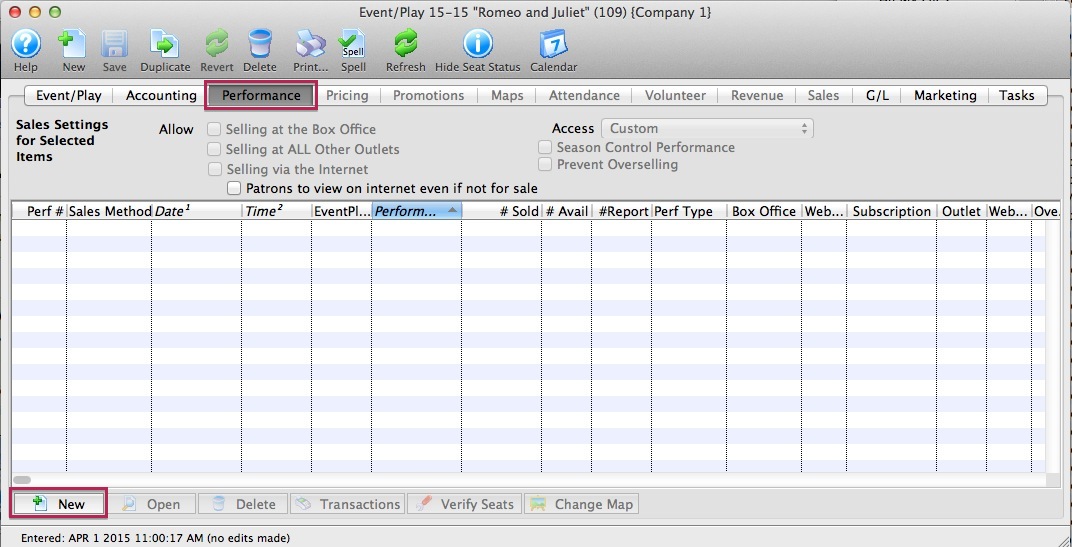 Once you have created an event you can add the performances to sell tickets to.
If you have:
- created your event, refer to the add performance wizard that guides you through the process.
- Click on the New button on the performance tab to start.
- not yet created an event, click to learn how to create an event
There a subtle difference when the actual ticket inventory is created.
Reserved Seating
Tickets are created at the same time as the performance is created. One ticket is created for each seat in the theatre so that tickets always exist for every seat. This ensures that there can never be a double seating issue!
All other sales methods
Tickets are created at time of sale and a ticket can represent an admission of a number of people (e.g. admit 10). If a ticket always represents one admission, the number of tickets created will be similar to reserved seating.
Step 1: Number of Performances
The first step is to identify the primary sales method and the number of tickets that can be sold in each performance. The data required is:
| Number of Performances |
Enter the number of new performances you want to add.
If you have
|
Sales Method and Map Settings | |||||||||||||||||||||||||||||||
| Sales Method |
The sales method indicates to Theatre Manager how you want to manage the sale. The three key methods are General Admission/Festival Seating, Reserved, and Course/Classes.
In the Sales Method drop down list, choose the primary type of seating that will be used in this performance. You can change it later on a per performance basis in the calendar.
|
||||||||||||||||||||||||||||||
| Performance Type | Performance type is a customizable code table field you can use to flag specific performances. You can use it for display on the web. It can also be used for reports to narrow down searching for specific performances in reports. | ||||||||||||||||||||||||||||||
| Prevent Overselling |
This field indicates if you want to prevent sales to occur over the Max Quantity to Sell amount. It might be useful to deselect the option for outdoor events where there is no practical limit to the number of tickets that can be sold.
This only applies to General Admission/Festival Seating. |
||||||||||||||||||||||||||||||
| Set Initial Holds |
On a pricing map, you can set up a standard holds in the venue for house, sound, ushers, artists etc. When you click this optionL
|
||||||||||||||||||||||||||||||
Capacity and Reporting | |
| Max quantity to sell |
For reserved events, this cannot be changed as it is the total seats in the pricing map. For other sales methods, you can restrict the number of sales to this value.
For example, you may normally have 400 seats in your theatre, but the designer has created a set that obstructs 50 seats. You do not want to create another theatre map, or you just don't have access to them. Enter a quantity of 350 seats to sell. That will be your house total for that event. |
| Quantity to report |
Use this setting to indicate when you tell online sales and reports that you are 100% full. It includes all SOLD and HELD seats.
In the prior example, If you have 400 seat house and 50 blocked seats, you can sell 350 seats. If you indicate that the Quantity to Report is 275, then web sales will stop when SOLDS + HOLDS > 275, leaving 75 seats unavailable online. Refer to further description of meaning of Quantity to Report in performance setup This option is not applicable for Traveling Troupe. |
Step 2: Initial Sales Settings for Performances
Initial performance settings let you set up how you would like the event to work. These can be changed:
- individually on the performance detail and
- some can be changed en masse on the performance list
Initial Performance Settings |
|
| Selling at the Box Office | Checking this box allows you to sell the performance at the Box Office. |
| Selling at ALL Other Outlets | Checking this box allows you to sell the performance at other outlets. If you allow a performance to be sold at another outlet, you can now specify which outlets have the capability so that each performance can be sold by different people. |
| Selling via the Internet | Checking this box allows you to sell the performance on the Internet. |
| Allow Patrons To view if not for sale | If checked, then the event can be set to show online as coming up, even if not yet for sale. It allows pre-announcing events without enabling for sale. |
| Set onsale date in advance of performance |
When creating a number of new performances, you may want to stagger when they go on sale online.
If you enter a value for the number of days in advance of the performance, then theatre Manager will automatically calculate the onsale date based on the performance date during initial creation of the performance. For example, you may want to set the onsale date 3 months in advance of a long running show. |
| Season Control House | Checking this box allows the performance to be used in a Control House for subscribers. |
Other |
|
| Sales Target | You can enter the sales target for each performance. All performances will get the same value and is placed on some reports.
If the target is to be different on each performance, you will have to correct it after the fact on the performance window for each performance. The Sales Summary-Quick report can be configured to shows this data in the parameters tab. |
| Perf Flag | A special flag used to denote Performance. This is typically used for a plug-in for Web Sales. |
| Include in Patron Statistics | Include any sales totals for this event in each patron's annual patron statistics tab at the bottom of the patron window. Normally you would want this. |
Access |
|
| Sell | Allows you to control what user access groups have the ability to sell this performance at the box office. |
| Report | Allows you to control what user access groups have the ability to run reports containing this performance. |
Performance Email Reminder | |
| Send Reminder | You can indicate if you want an email reminder sent to patrons who purchase to a performance. This email can be customized to each event or performance by duplicating and editing a web page, or you can use a default one. |
| Reminder in Advance Time |
If you do want an email reminder sent for any performance, then you can indicate how far in advance of the performance it should be sent. This value is typed in weeks, days, hours, and minutes format. Example values are:
Any ticket to the event bought closer to the performance than the email reminder time will receive an immediate reminder. |
Single Seat Rules for Reserved Seating Maps | |
| Single Seats not allowed | Means that a patron selecting tickets online will not be able to make a seat selection anywhere in the map that would leave a single ticket. This option is designed to maximize revenue and is the recommended/default option. |
| Single seat checking disabled/relaxed |
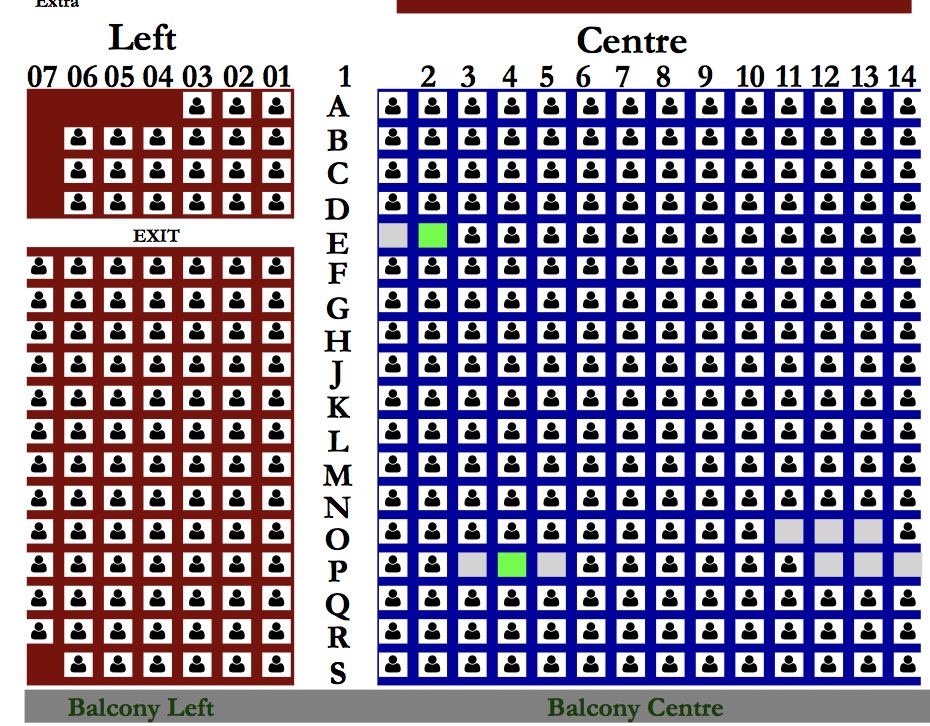 Means that a patron can pick any seat they want and leave single seats on the map. This maximizes patron choice, so the patron could:
|
Step 3: Performance Date Pattern
| Date of First Performance |
Enter the date of the First Performance (if no performances already exist,) or the next Performance (if you are just adding another performance).
The date that is entered here is not written in stone. It can be altered in the calendar by dragging a performance and/or it can be edited after the fact if you want to move a performance. It is meant to be used as a guide in creating all performances for the event. |
Daily Performance Pattern |
|
| Weekdays |
Using the slider for each day, select the maximum number of performances (up to 10) that typically occur on each weekday
If you have multiple performances on a specific day of the week, select that number and additional performance times will appear on the right hand side. The number of performances is to be used as a general pattern when setting up the performances date and times. |
Performance Times |
|
| Time slots | If there is a day of the week that has more then one performance then you may set a matinee time as well as an evening time. These times are to be used as a general guide line when setting up an event. They can be changed at anytime after the performance has been created. |
Performance Series Codes |
|
| Create Codes as | Refer to Performance Codes for more information |
Performance or Series Codes
 |
It is important to know that each performance within the event code MUST be unique. |
 |
Comparable performances in multiple events can have the same series code so that you can manage or sell a subscription. Selling a subscription will sell all events (in the season package) with the same performance/series code. |

If it is important to find a particular performance (1st Friday) for several events at the same time, each series should have the same code. This becomes very usefully when a patron is booking a season subscription and would like to attend the same time every month. Establishing a consistent nomenclature for the Event and Performance codes saves time during the sales process.
The following examples are recommended as an easy way for the sales person to verify that they have the correct performance. Codes should be in a week - day - performance format.
Week Long Performances
The following example would allow for easy comparison of week-long runs of shows.
| 1-SAT | For the performance on the first Saturday. |
| 2-SUN-M | For the matinee performance on the second Sunday . |
| 3-SAT-E | For the evening performance on the third Saturday. |
| 3-SAT-M | For matinee performance on the third Saturday. |
| 3-SAT-A | For morning performance on the third Saturday. |
Single Day Performances
If you do not have multiple performances per day the next example would allow for an easy comparison of the days of the week.
| SAT-1 | For the performance on the first Saturday. |
| SUN-1 | For the performance on the first Sunday . |
| SAT-2 | For the performance on the second Saturday. |
| SUN-2 | For the performance on the second Sunday. |
Multiple Performance Event/Play
If you have multiple performances per day the next example would allow for an easy comparison of the performances per day.
| 1-SAT-1 | For the first performance on the first Saturday. |
| 1-SAT-2 | For the second performance on the first Saturday. |
| 1-SAT-3 | For the third performance on the first Saturday. |
| 1-SAT-4 | For the fourth performance on the first Saturday. |
Single Performance for an Event/Play
If you have an event/play with only one performance, create the performance code as follows.
| SHOW | For the performance of a play where there will be only one performance. |
| CONCERT | For the performance of a Symphony, Band or music. |
| GAME | For the performance of a sporting type event/play. |
| DRAW | For the performance of a curling event/play. |
Step 4: Review Performances on Calendar
After you click the Step 3 button, the Step 3 window - Adding a Performance, opens.
- Review the calendar.
As performances can span months, use the forward - back
 buttons to move through the calendar.
You can use the middle button to switch the view to 2 week, week or daily view. In those views you can drag events to move them to another time slot or day.
You can also change the time of a performance by right clicking on a performance and changing the time. On the popup list, you can only select from a list of times that have already been used for performances.

Possible 'conflicts' will be colour coded and highlighted on the calendar and are broken into 3 parts:
- Performance - which means there is another performance at any time on that day and possibly in another venue
- Venue - which means that there is something else in that venue
- Task - which means that there is some tasks in the venue that may represent conflicts on those days.
- To finish, click the Build
 button.
To go back, push the Step 2
 , or Cancel
  if you do not want to finish setting up the performance.
When you push the Build
 button, the Build Performance list dialog opens.
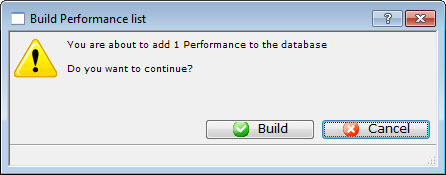
- Click the Build
 button.
The Adding performance verification window opens.

- Close the window and you are returned to the Performance tab of the Play window and the performance you entered is displayed.

Assign Promotions to a Performance
|
By default, ALL promotions are available to the performance when it is created. |
To add a promotion to a performance, you carry out the following steps:
- Open the Event Setup window.
- Click on the Promotions Tab.
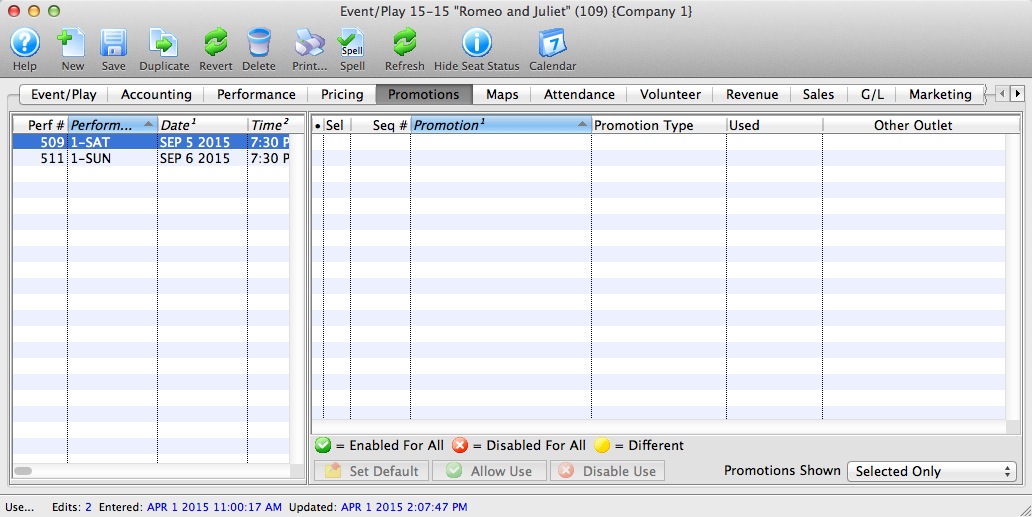
A list of all the performances for the event is displayed on the left side of the window.
- Select the performance you want to add promotions to.
Click a performance to select it. Only one performance may be selected since each may contain different promotion data.
- Select the promotions you want to use.
Click a promotion to select / deselect it.
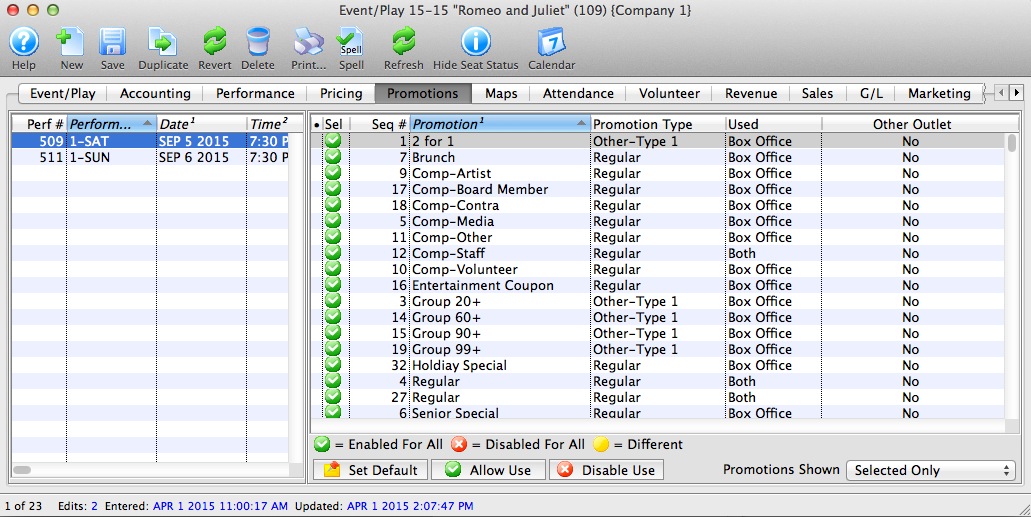
- Click the Allow Use
 button.
 A green check mark in the Sel column shows the promotion is available for the performance. The checked promotions will appear in the buy window when selling tickets to that performance.
Disabling Promotions for a Performance
- Open the Event Setup window.
-
Click on the Promotions Tab.

- Select the performance.
Click a performance to select it. Only one performance may be selected since each may contain different promotion data.

- Select the promotions you want to remove.
Do this by highlighting the promotions you want to clear.
- Click the Disable Use
 button.
 A red X appears in the Sel column shows the promotion. The X'd promotions will now not appear in the buy window when selling tickets to that performance.