You are here
OS X Shared Memory Settings
 |
This step is no longer required if you are using Postgres 9.3 or later. All current installers use Postgres 9.6 or later. |
If you used the Theatre Manager Postgres installer, it will detect if you have more than 2 GB of RAM in your machine and automatically insert these into the /etc/sysctl.conf file for you. After installing Postgres the first time, simply reboot the server - these settings will have been done for you and you need not continue with the steps below.
BEFORE STARTING: Ensure you are in Terminal at your own user, not postgres. This is a fairly technical topic and the reference: http://www.postgresql.org/docs/9.0/interactive/kernel-resources.html
| 1. |
Open Terminal again and type: su - [Your UserName] Type vi /etc/sysctl.confType I to insert data Add the lines: kern.sysv.shmmax=1610612736kern.sysv.shmmin=1 kern.sysv.shmmni=256 kern.sysv.shmseg=64 kern.sysv.shmall=393216 kern.sysv.maxproc=2048 kern.maxprocperuid=512 These settings reflect the maximum size of a shared buffer. These settings assume you are running at least 2GB of RAM. If you have less RAM, these settings may need to be altered. shmmax is the key setting; it is in bytes. If the machine has more memory to use, then this could be increased as well. shmall is the shmmax setting divided by 4. Hit the Esc key Hit Shift Q Type wq Hit Enter Restart OS X after doing this. This is required to apply the changes.
Restart OS X after doing this. This is required to apply the changes. |

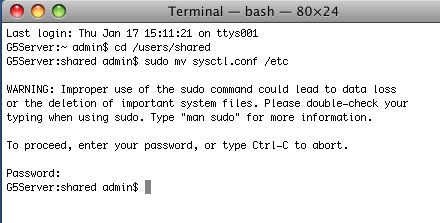
 There is a sample of this file in /users/Shared/ from the install. If your machine has 2GB of RAM or more, you could move it to the right folder instead by: