Web Options Tab
- General settings such as enabling login, how login works and any lockouts.
- The Purchasing process that help decide flow of purchasing tickets, how passes can be used and suggested donations processes
- Carts and Checkout settings for display options, and checkout settings.
- Ticket Delivery Options settings for charging fees on various ticket delivery options

Web Options - General
General Web Sales Options |
|
| Enable Web Sales | Enables sales to occur on the web.
|
| Allow Anonymous Login | Enabling this feature allows patrons to shop and add items to a web sopping cart without identifying themselves first. When the patron is ready to check out and pay, they will need to either:
Optionally, if you also wish to give patrons the option to checkout without creating an account you can enable the limited profile patron option. When the option is enabled and the patron checks out, they will be given 3 options:
|
| Show Count down Timer | When enabled, a timer will appear on the web pages menu bar beside the cart - showing how much time is left before the web listener releases all items in the cart. The timer will appear once there is something in the cart and is reset every time the patron looks at a new web page |
| Login Attempts | The maximum number of login attempts before the patron's account is locked out and they must request their password to continue. |
Coupons and Preacess codes |
|
| Accept active coupons | When selected, patrons will be able to enter a coupon code at checkout. For more about coupons, click here. |
| Enable presale access codes | When selected, patrons will be able to enter a presale access code on the Events list online in order to see shows which are not online for sale to the general public. For more about presale access codes, click here. |
Web Options - Purchasing
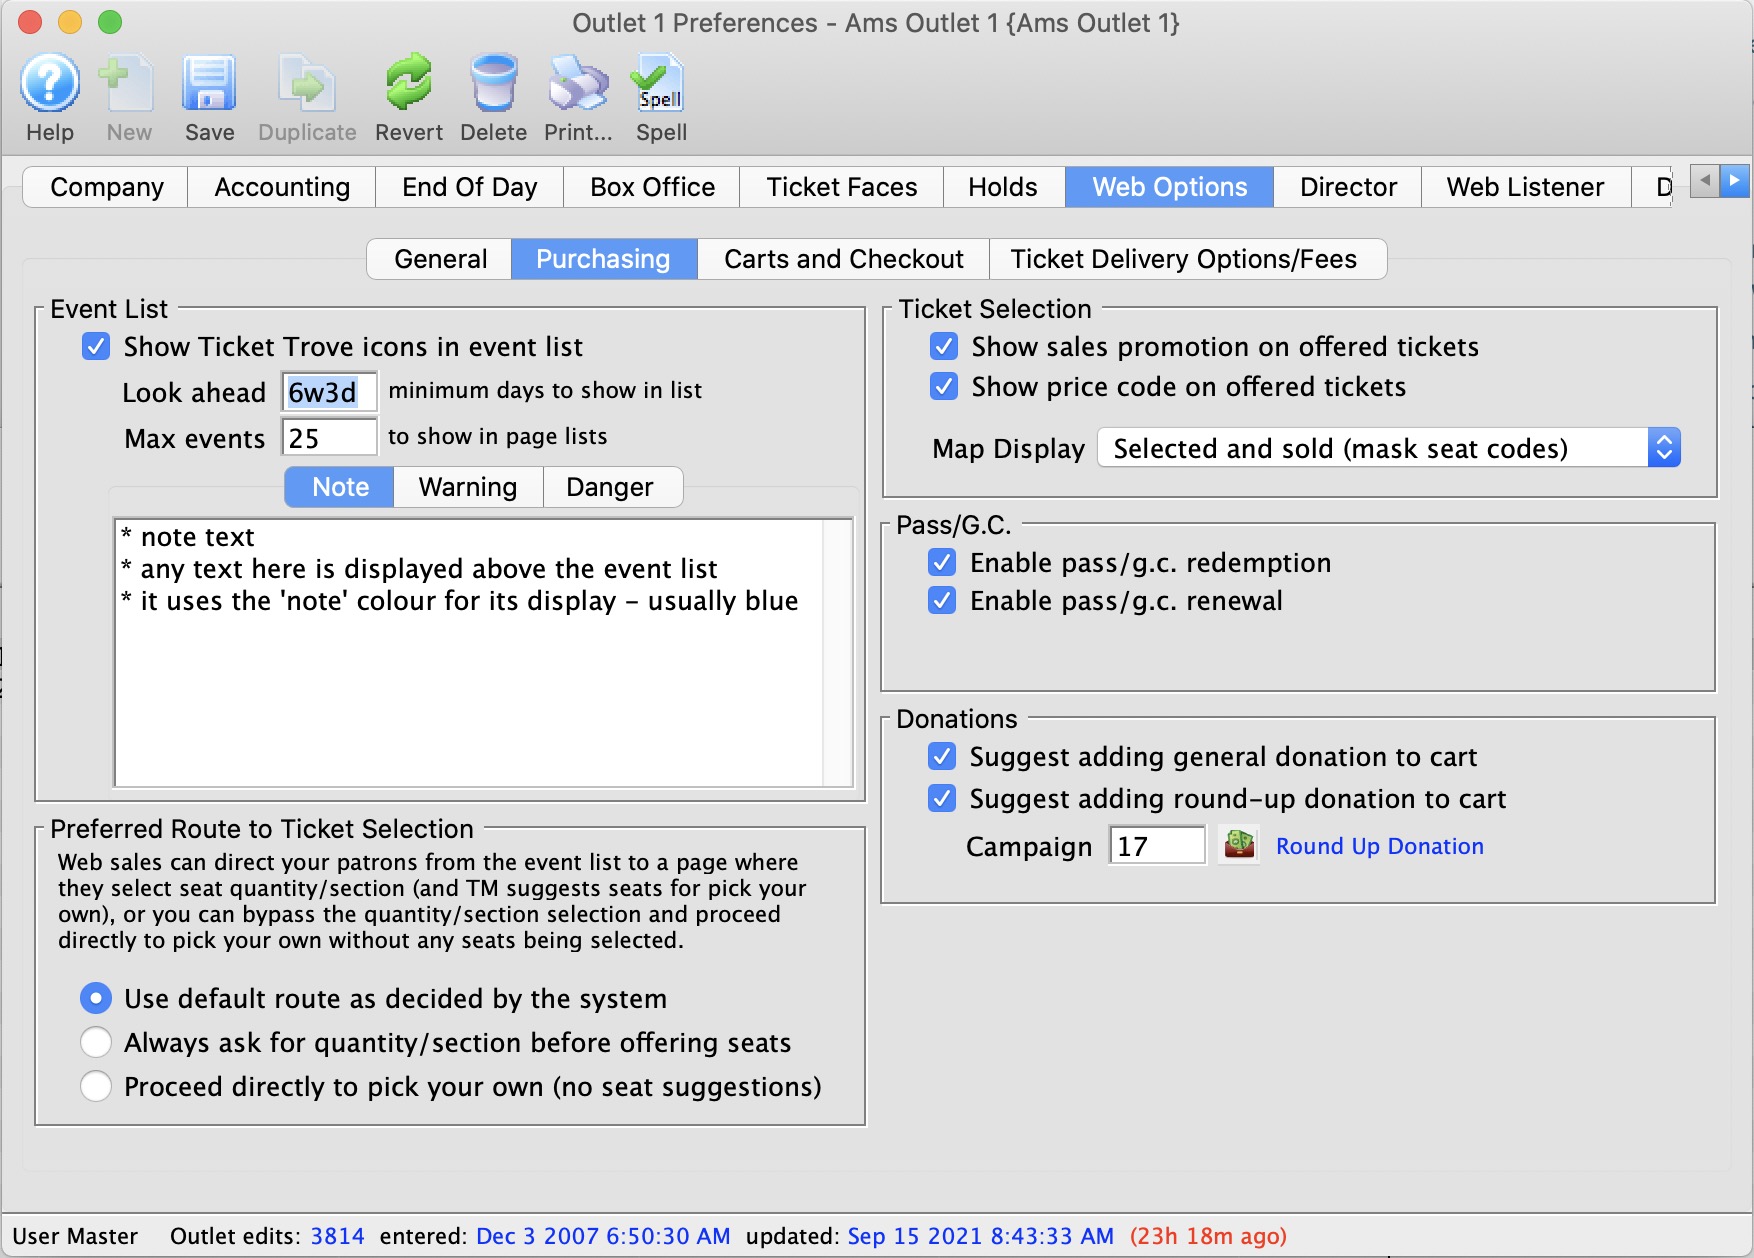
Event List |
|
| Show Ticket Trove icons on play list | Displays the Ticket Trove icon from the Marketing tab in the List of Events for the online sales. |
| Look Ahead | Number of days in advance events should be displayed for. If this is:
|
| Max Events (pagination) | The maximum number of events to be displayed on any one page in the event list. If the patron requests more events than the maximum, the event page becomes paginated and the patron can go forward or backward in pages to see the rest of the events. Using 25 events for pagination is a good balance between performance and amount of data to display.
NOTE: the last page always shows a full list (by design). So, if you have 27 performances found by the current search, then:
|
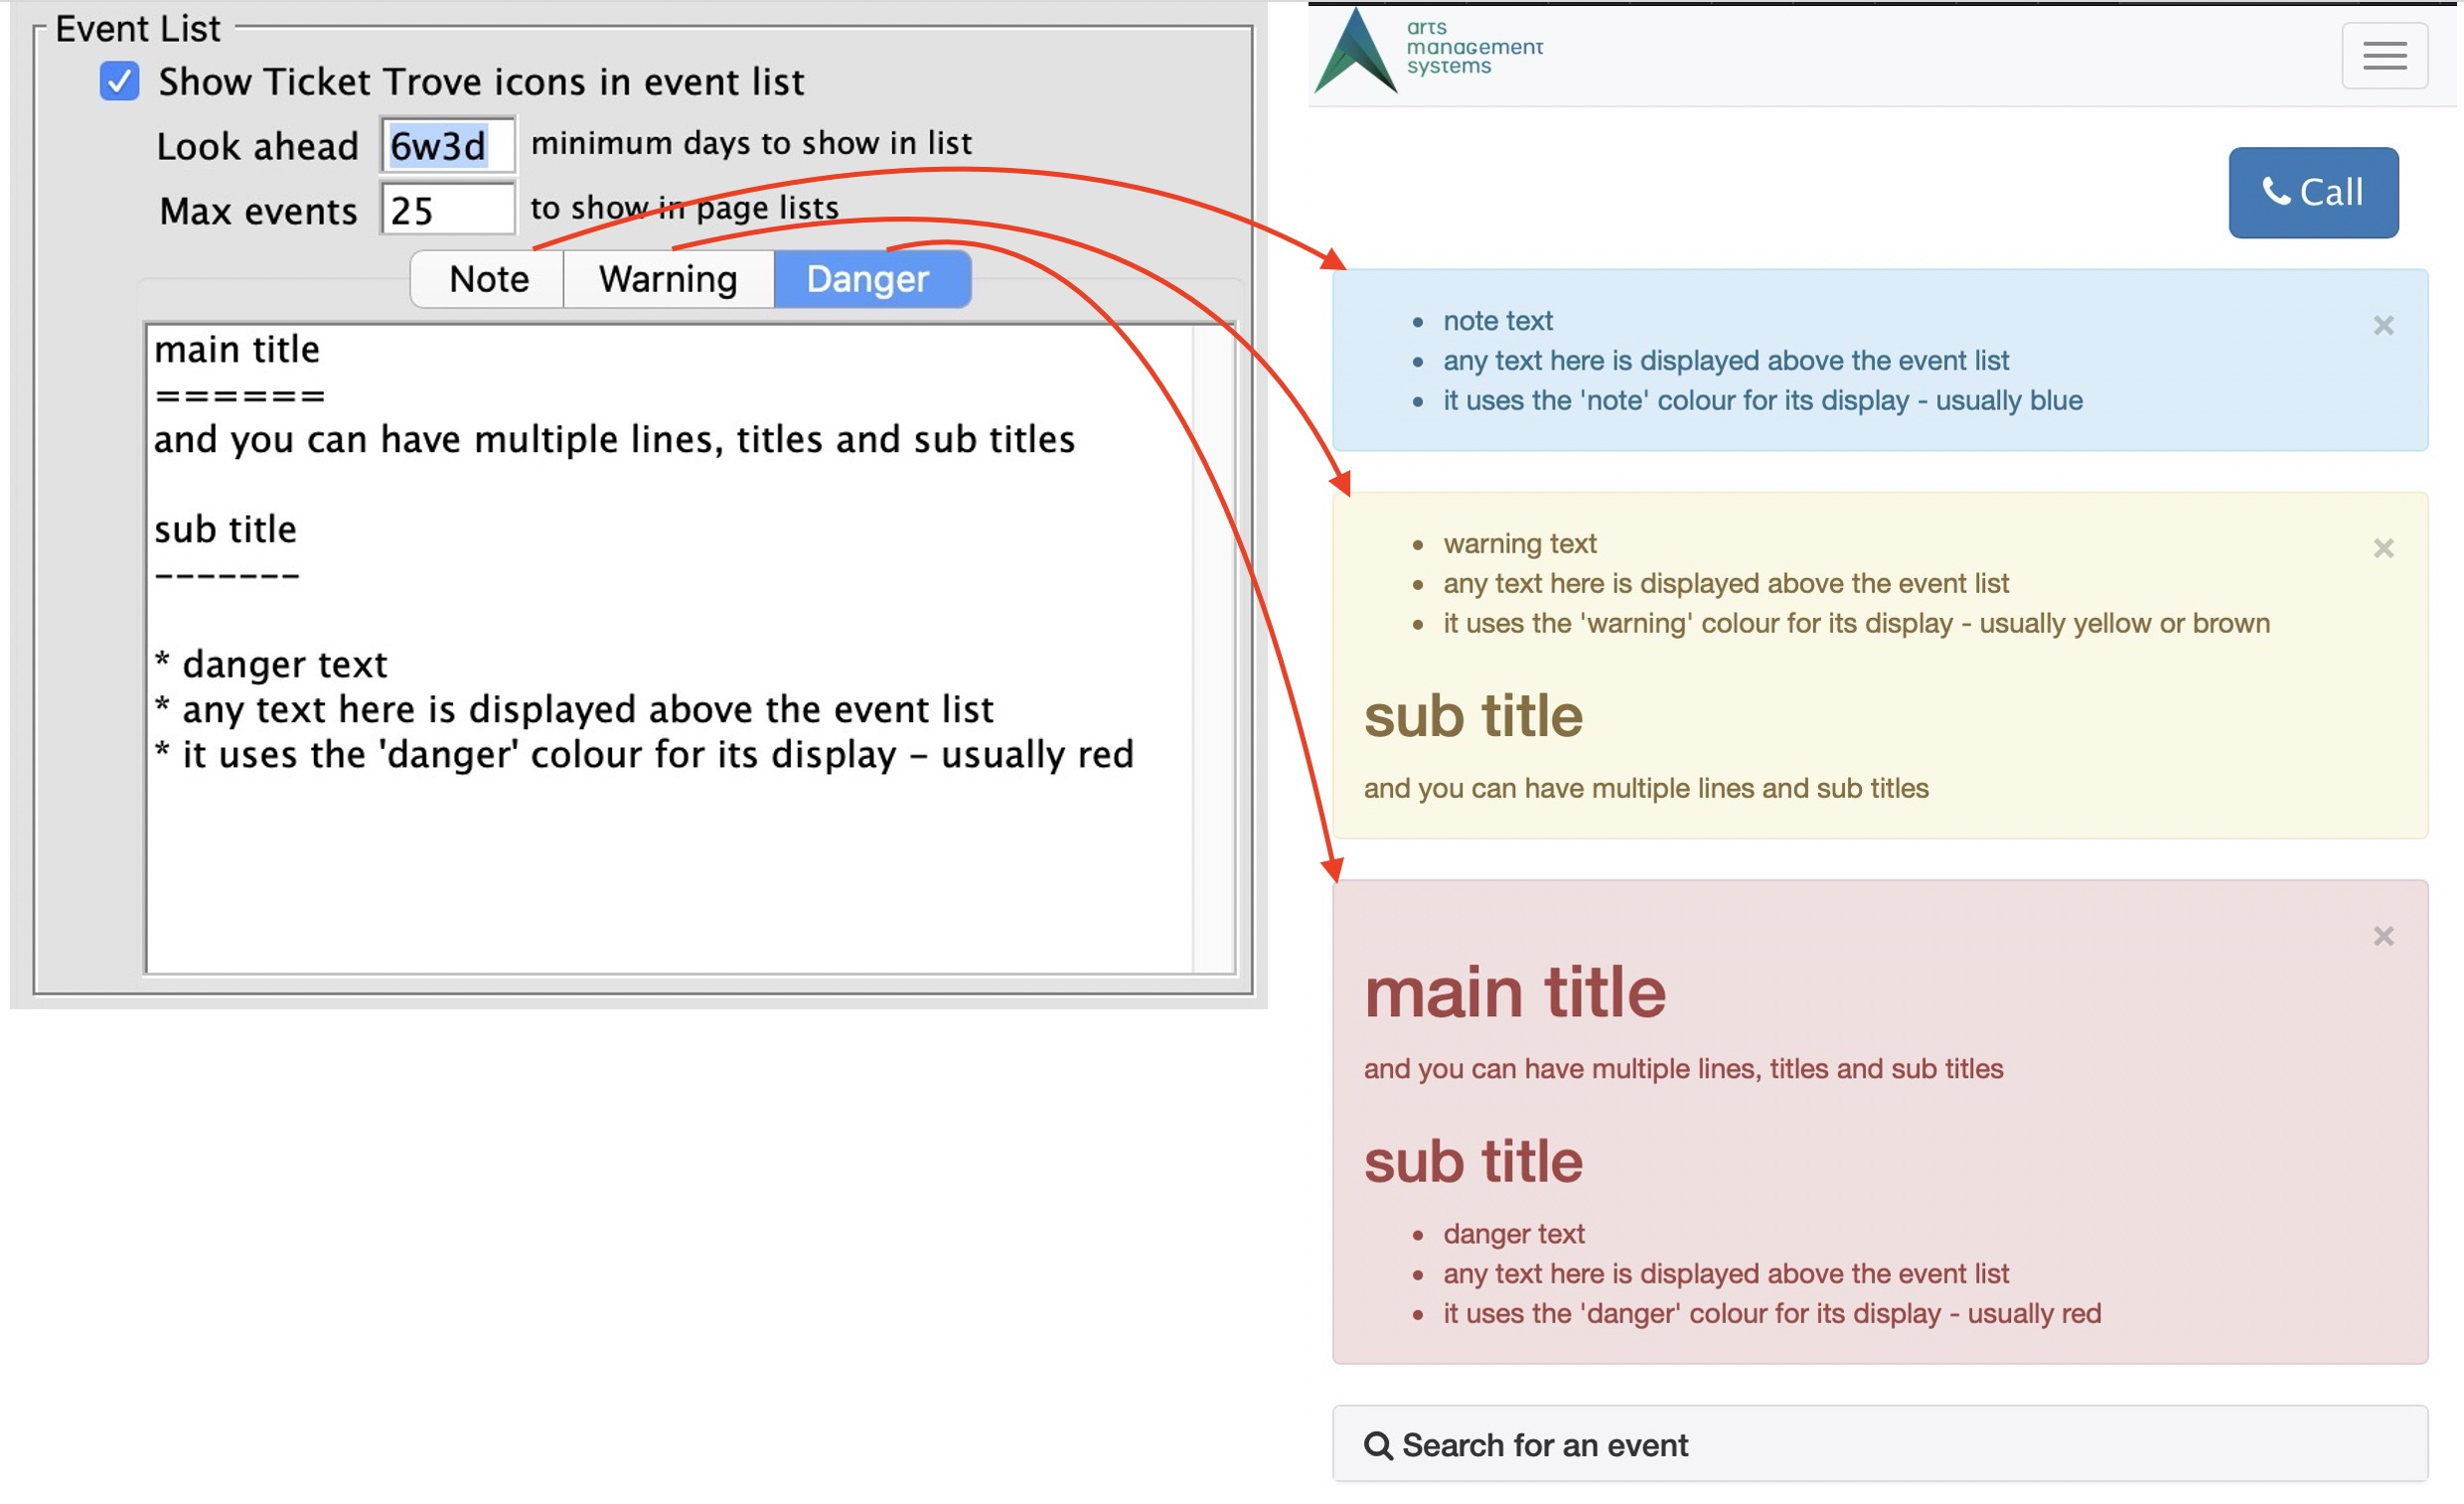
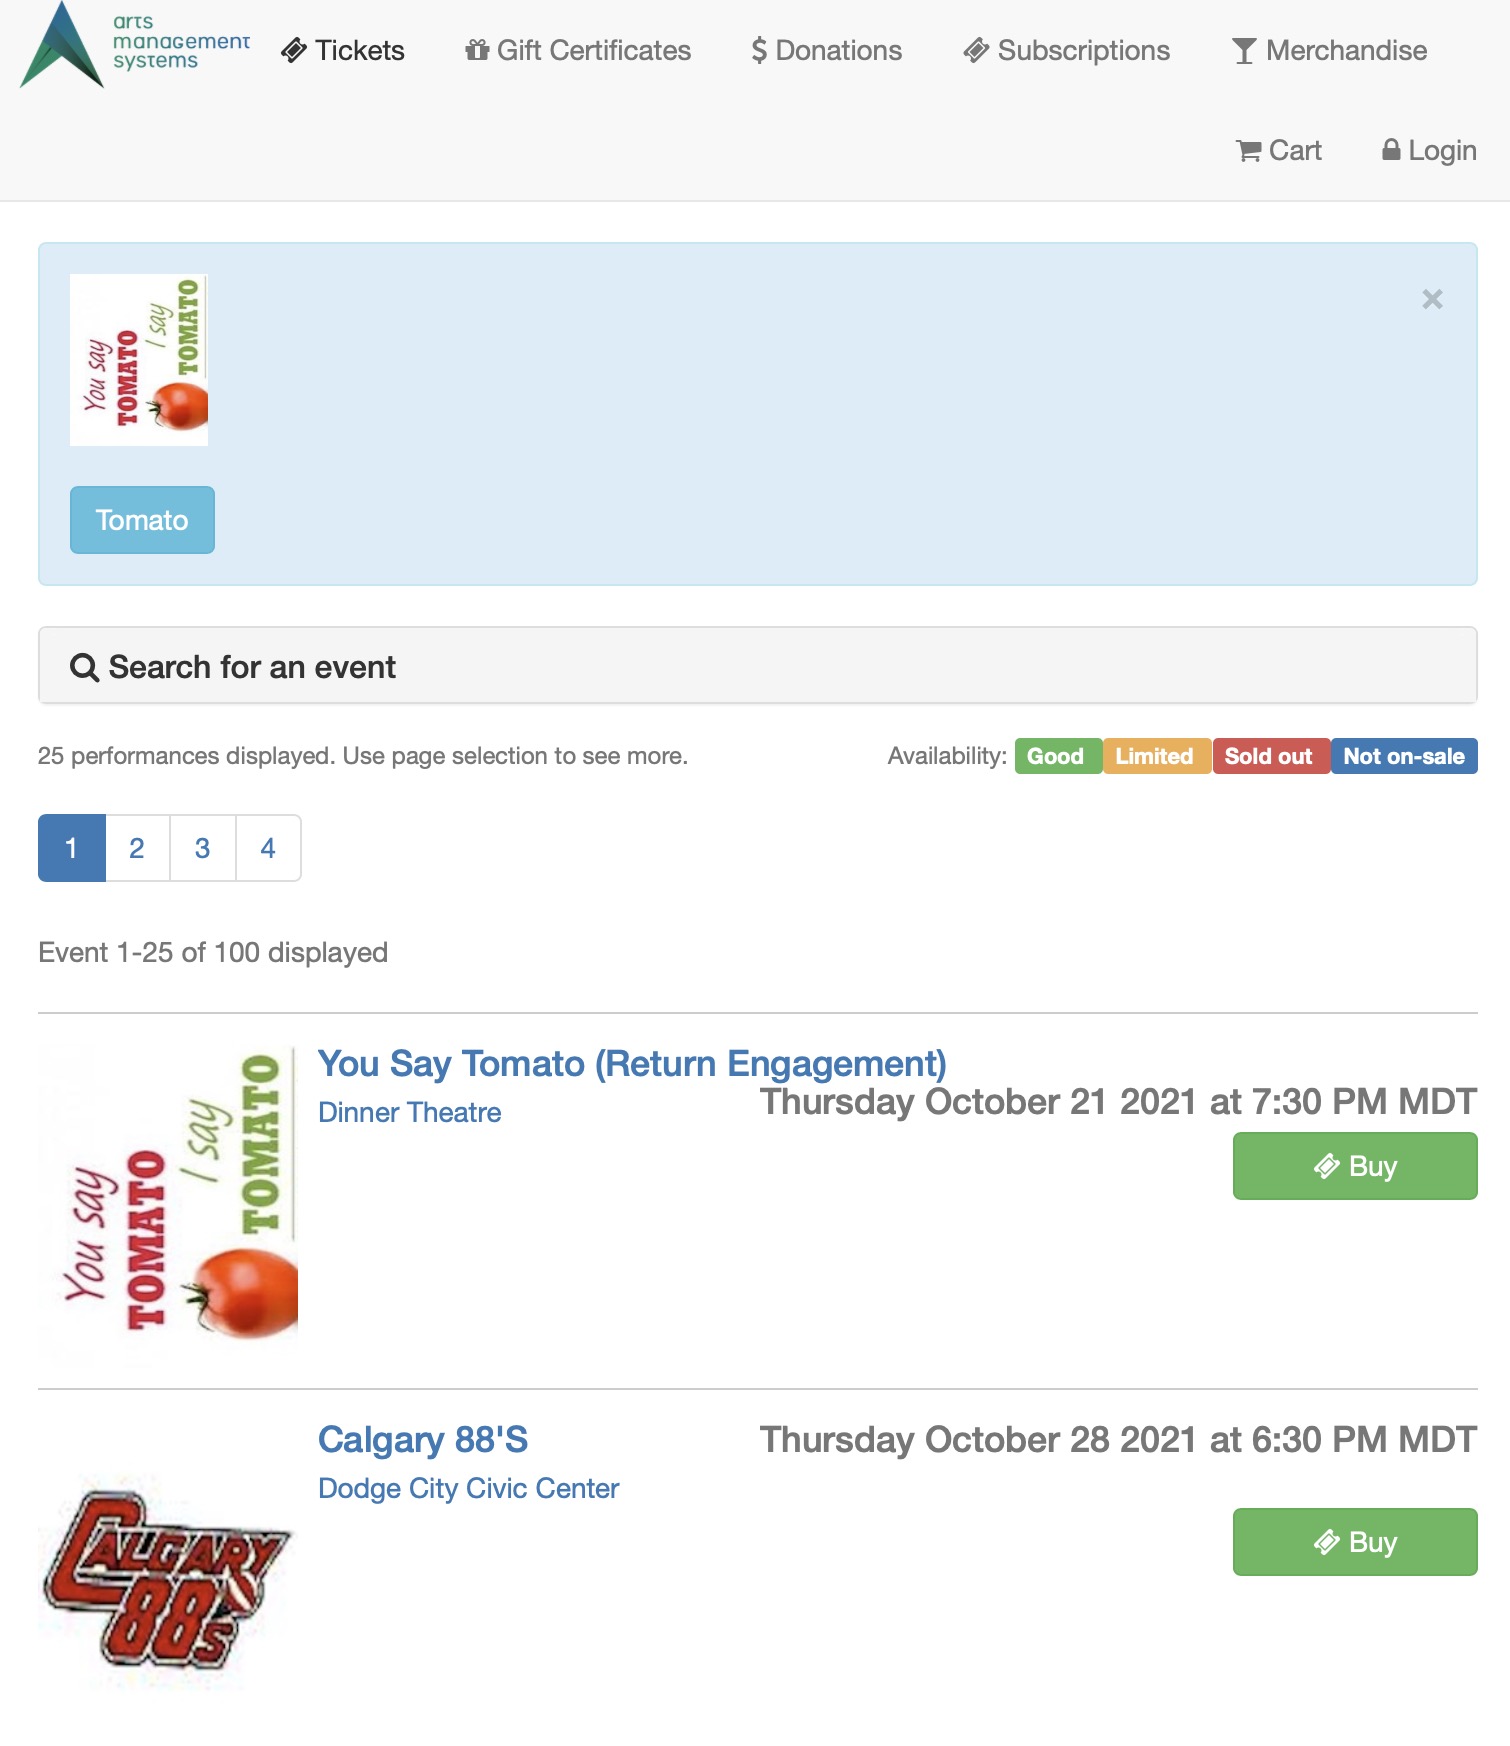
| Note, Warning, Danger Alerts | You can add a Note and/or Warning and/or Danger alert to your event list that will appear at the top of each page. This can be plain text, HTML or Markup. The diagram below shows some examples of using Markup to have all three of the messages appear on the event list.
Possible uses
Example using markup
|
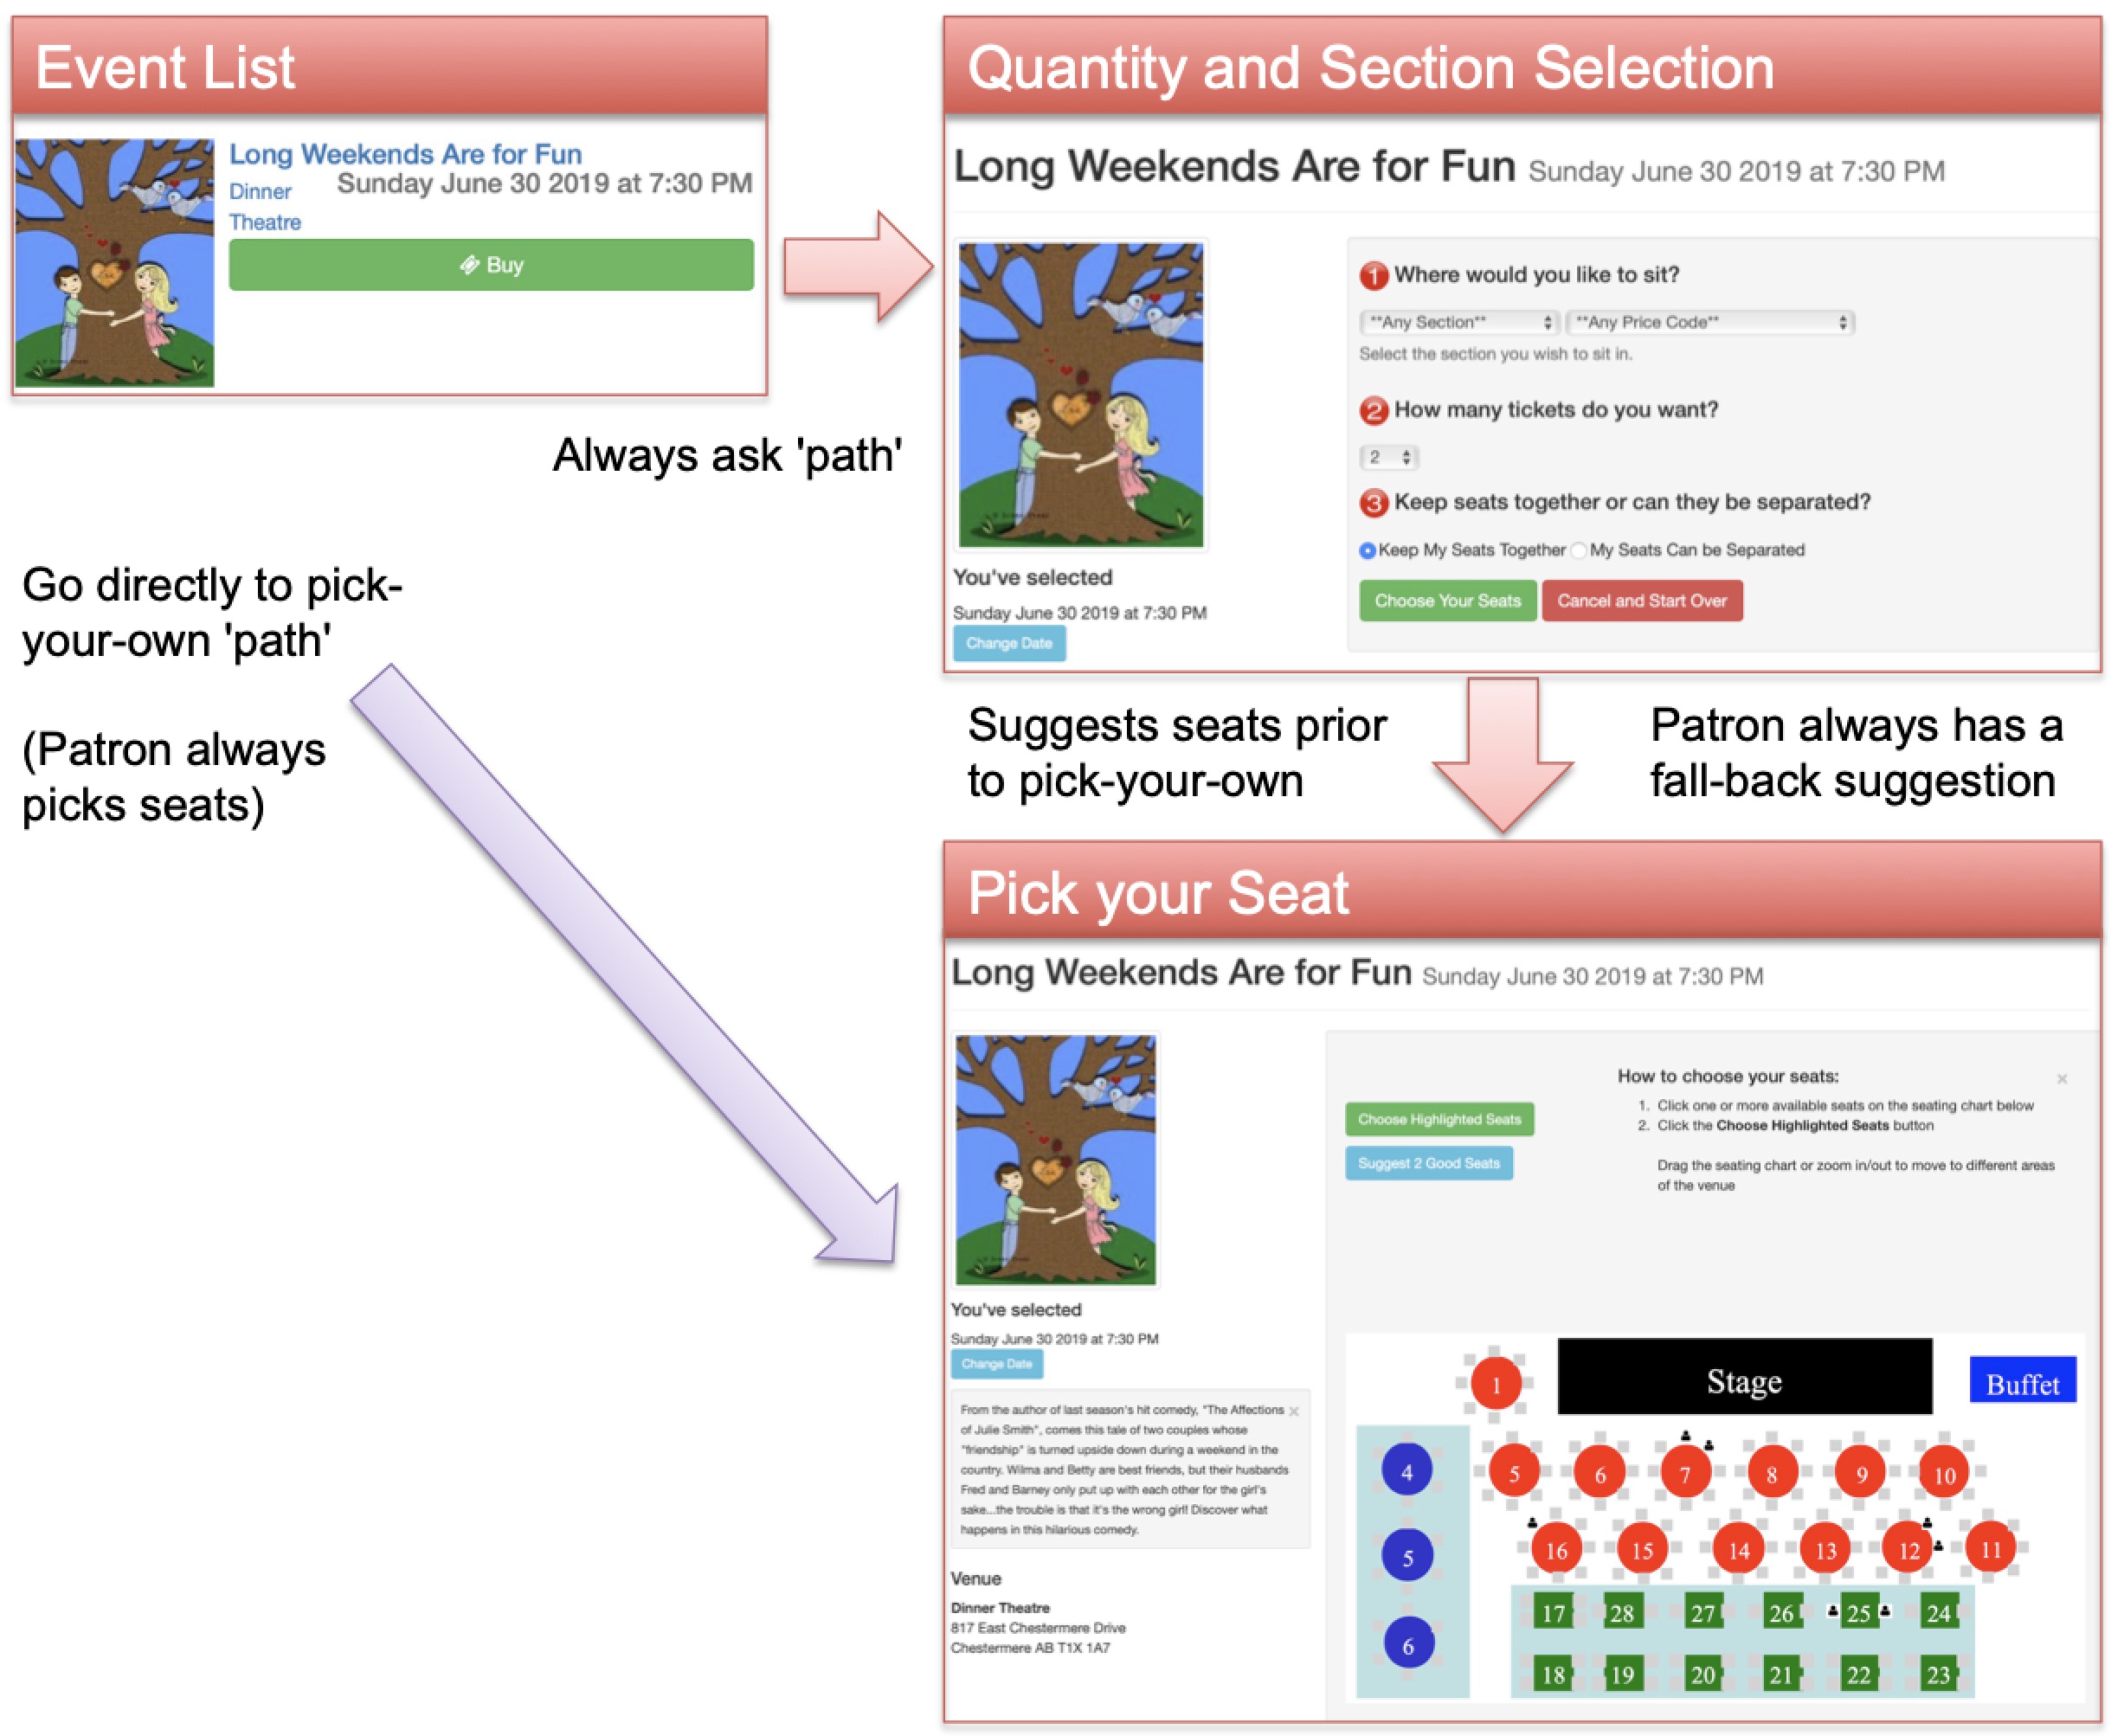
Preferred Route to Ticket Selection |
|||
|
|||
| Use Default Route as decided by the system | This describes the path taken from the event list to the seat selection for reserved seating events. There are two explicit options provided (described below).
Unless explicitly selected below, the web listeners will take the default path to the seat selection window as decided by Arts Man. Currently, the default path is to ask the patron where they want to sit and the number of tickets (first option), but that may change as a result of feedback from venues in accordance with dominant marketing thinking. If you prefer one option over the other, please select it. Note: if not using pick your own seating in a venue, events sold in that venue will always use the ask for quantity/section approach. |
||
| Always ask for quantity/section before offering seats | For this path from the event list to the seat selection window, the user is given an intermediate step that asks for the number of tickets they want and the section they may want to sit in. This adds one page to the selection process and has the advantage that a user will always be guaranteed seats before they start the pick your own process. | ||
| Proceed Directly to Pick your own | This path indicates that the user will be taken directly from the event list to pick your own, with no tickets selected for them. It is one web page click shorter, but seats must be manually selected.
In the case of large onsales, arriving at pick your own with no saved seats may cause frustration for users if they try to pick some and find their selection being taken by others. you can:
|
||
Ticket Selection |
|
| Show sales promotion on offered ticket | When selected, the sales promotion's external description will be visible to patrons online during seat selection. This appears on the seat selection window where tickets are offered to the patron AFTER Theatre Manager has found them. it confirms the external sales promotion name to the patron. |
| Show price code on offered ticket | When selected, the Price Code description will be visible to patrons online during seat selection. This appears on the seat selection window where tickets are offered to the patron AFTER Theatre Manager has found them. It confirms the price code that will be on the ticket. |
| Map Display | This setting indicates how you would like the map to display for web sales. You can show only the seats available to the patron, all others are blank, or you can choose to show all the seats, those that are taken have their codes masked or not, or a generic map of the venue. These setting can be overridden for individual performances, click here for more information. Options are:
|
Passes and Gift Gertificates |
|
| Enable Pass/G.C. Redemption | Allows Pass/G.C.'s to be used as payment online. Only those Pass/G.C.'s that have been set for redemption online in the Pass/GC setup can be used online. |
| Enable Pass/G.C. Renewal | Allows the renewal of Pass/G.C.'s that have been configured to be renewed online in the Pass/GC setup |
Donation Options |
|
| Suggest adding general donation in cart | When selected, patrons will see a reminder at the top of a shopping cart to include a donation with their order at checkout. If clicked, the partron is taken to the donation screen to give to any campaign allowed online. Once a donation is given, the message disappears from the cart window. |
| Suggest adding round-up donation to cart | If round up donation is enabled and a campaign is specified, then a message will appear in the shopping cart window and/or checkout window encouraging the patron to round up their payment to the nearest even dollar (or 5 or 10 - the amount can be easily customized in rowcartdonationroundup). Once the payment amount for the cart is an even dollar, then the message will not appear.
The campaign must be enabled online (and you might not want to make it visible) - and we'd suggest making a separate one that might be named like Round Up My Bill Donations or using your existing annual individual giving campaign. |
Web Options - Carts and Checkout
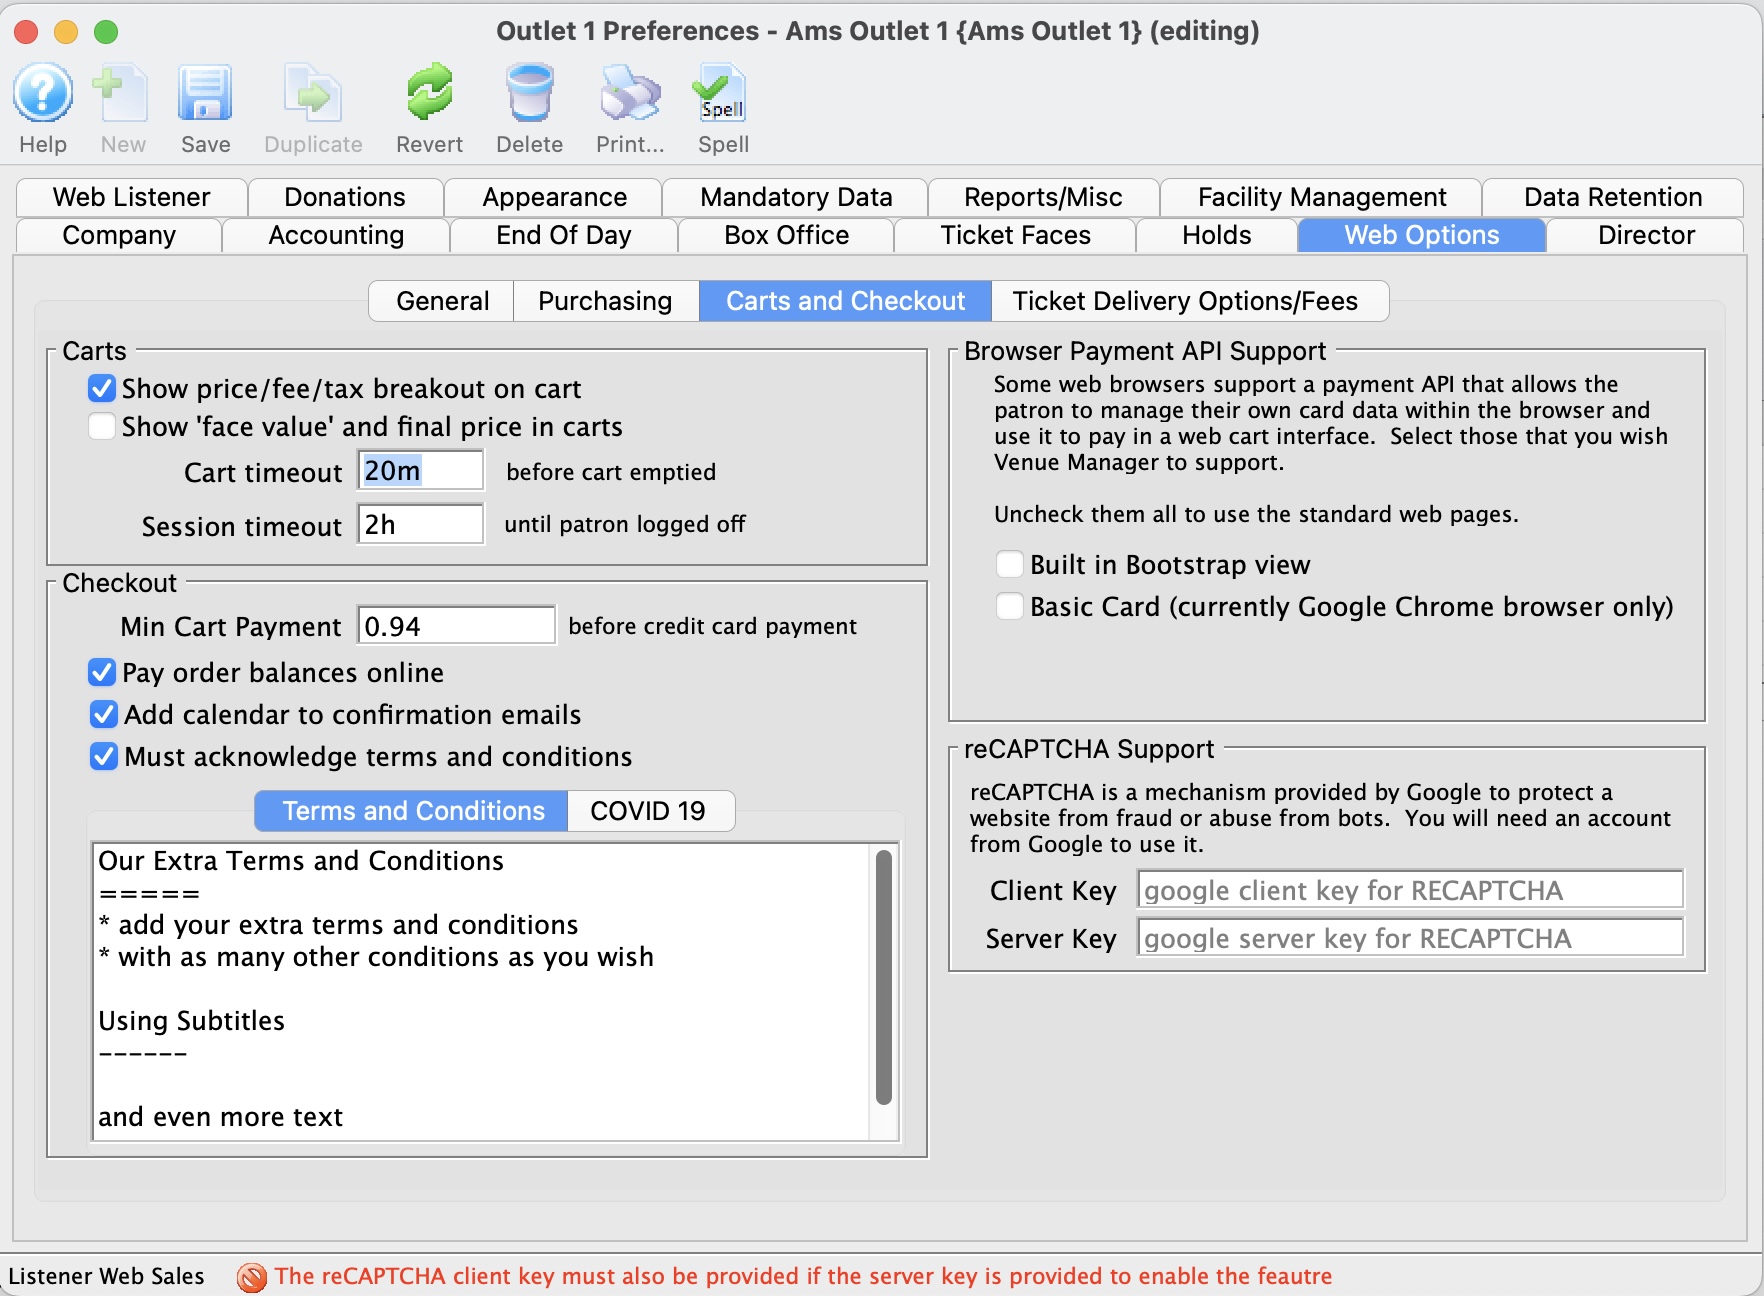
Carts |
|||
| Show price/fee/tax breakout | 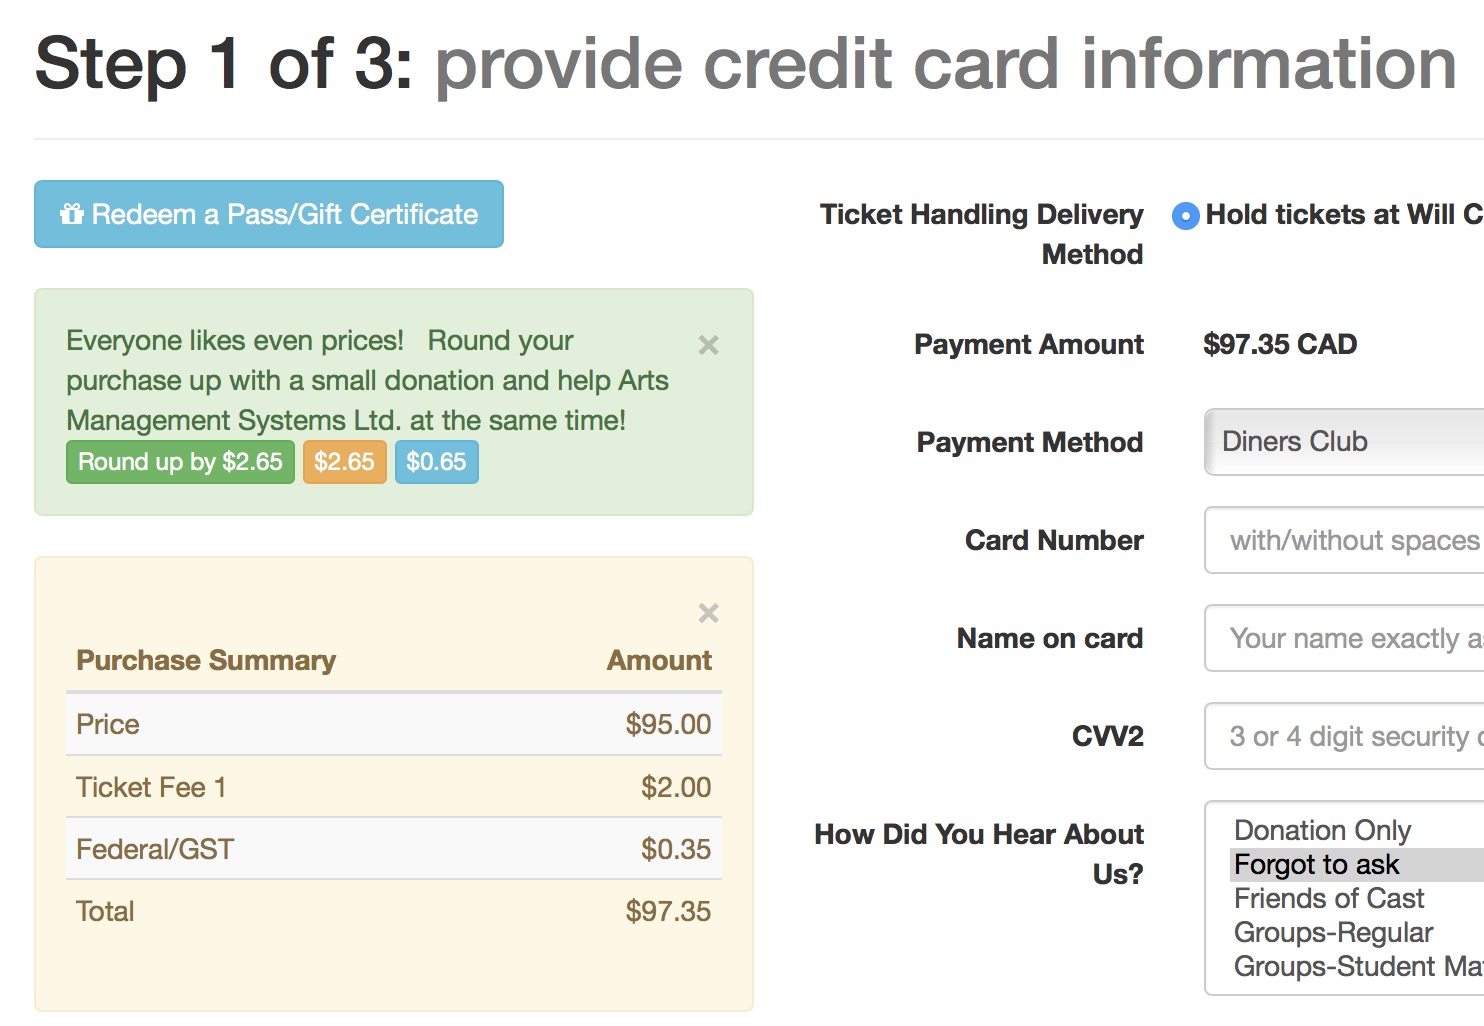 if enabled, shows a breakout of ticket prices, fees, taxes etc on the checkout page as per the image to the right. if enabled, shows a breakout of ticket prices, fees, taxes etc on the checkout page as per the image to the right.
|
||
| Show 'Face Value' price and final price in carts | If enabled, this will show the face value of a ticket (as determined in the Web Options tab) on all online web pages and any e-ticket emailed to a patron. | ||
| Cart Timeout | The number of minutes a patron can do nothing after accessing a page before the cart becomes inactive and the items released. Whenever the patron requests another page to resume shopping, the timer is reset.
|
||
| Session Timeout | The number of minutes a patron can be idle on the web site before they are logged out. This must be the same or larger than the cart timeout.
The difference between session and cart time out:
|
||
Checkout |
|||
| Min Cart Payment | You can specify a value that the cart must be before a credit card checkout would be attempted. This can be used to prevent 'bad guys' using your web site to try verify if stolen credit cards could be accepted.|||
| Pay Order Balances Online | When selected, patrons will be able to pay for any outstanding order balances online if the order is marked as such when putting on account. If this is disabled, then the feature of paying prior order balances is disabled completely.
|
||
| Must Acknowledge Terms and Conditions | When selected, patrons will be required to read/accept the terms and conditions at checkout. You may be able to place certain restrictions in the terms and conditions to cover exchange and refund policies, patron behaviour, age limits, scalping,etc.
Refer to tmtermsandconditions.html for more information. |
||
| Add Calendar to Confirmation Emails | If selected, then a calendar will be attached to the outgoing confirmation email as an ICS file. This can be double clicked by the user to add their purchase dates to their calendar on their own devices. | ||
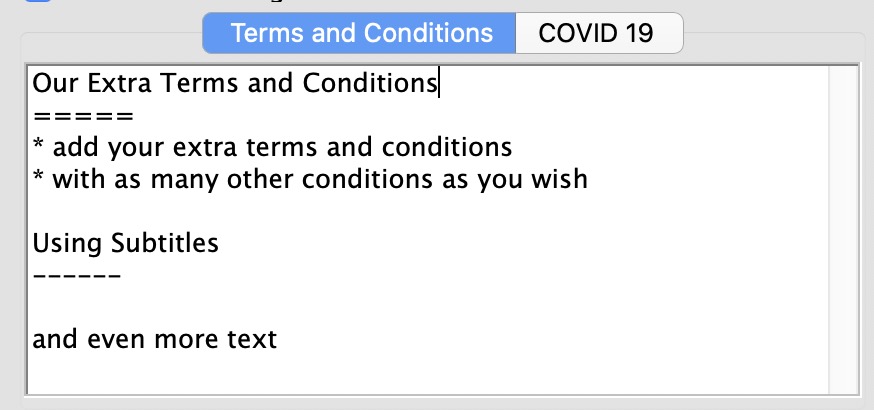
| Terms and Conditions | You can add your extra terms and conditions here that will show when they are requested on the checkout window.
|
||
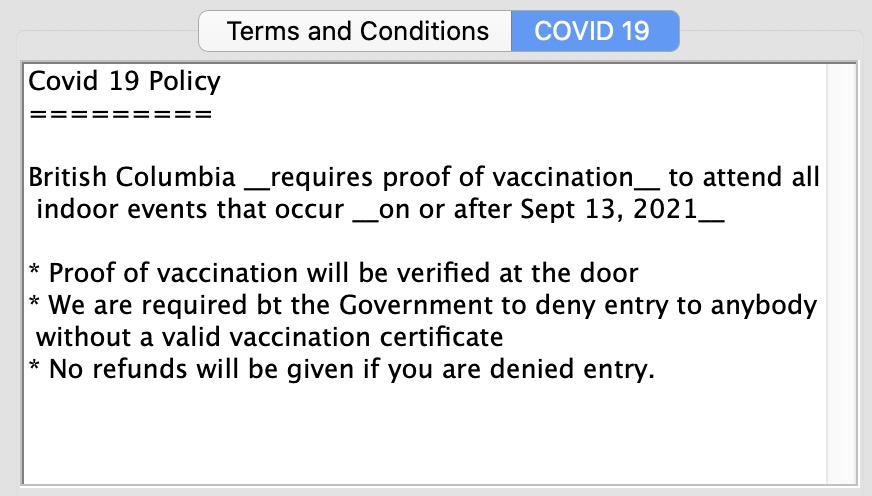
| Covid 19 | You can enter your Covid 19 policy in plain text, HTML or markup language and it will appear in the web site automatically.
Adding words to covid 19 tab also causes the 'accept terms and conditions' checkbox on the web site to say that there are Covid 19 conditions. We recommend using this in conjunction with event list notes so that people will see instructions both before and after ordering.
|
||
| Notification | You can set up a notification which specifies a list of email addresses that will receive a copy of all completed shopping cart emails. This can be used for audit or backup purposes.
If implemented, you will have to clean out the emails from the specified email account yourself and use of this feature is not recommended if you have rate limiters at your ISP (such as google mail) |
||
Browser Payment API SupportSome web browsers support card payment options natively that allows the patron to manage their own card data within the browser and use it to pay in a web cart interface. If selected, Theatre Manager will attempt to use alternate payment screens on checkout to try to simplify the payment interface. If all are unchecked, then Theatre Manager does not try to take advantage of the API's in a browser and uses the existing web page payment screen that is designed to be the same on all browsers. Note: these options currently cannot be used with Acknowledge terms and conditions option (above) |
|
| Built in Bootstrap View | If enabled, Theatre Manager will show a summary of the purchase and credit card input on one modal dialog using bootstrap. This causes other checkout options like delivery options to default. It is meant to use as a quick pay option |
| Basic Card | If enabled and the browser supports it, the browser will use the built in payment screen from the browser. Google chrome is currently the only browser that implements this (since they invented it). If this option is not supported by your browser, then the Built in Bootstrap view will be used (if enabled here) |
reCAPTCHA Support
reCAPTCHA uses an advanced risk analysis engine and adaptive challenges to keep malicious software from engaging in abusive activities on your website. Meanwhile, legitimate users will be able to login, make purchases, view pages, or create accounts and fake users will be blocked. |
|
| Client Key | If enabled, enter the client key that you obtained from the google web site when you signed up for the feature. |
| Server Key | If enabled, enter the server key that you obtained from the google web site when you signed up for the feature. |
 Google has a tool called
 Web Options - Ticket Delivery
- Mailing Tickets - which is generally standard since it costs money to mail tickets
- Hold at Will Call - which seems to be an emerging trend in some locations if the customer is given the choice of print at home and picking up tickets -- a fee such as this might bias the customer to chose to print at home
- Print at Home - which would charge a fee for tickets printed at home. We have not had and venue ask for this yet - but it exists for completeness
 |
Turning off any of these options mean that cannot be selected by the patron on the checkout window, regardless of any settings for each event. |
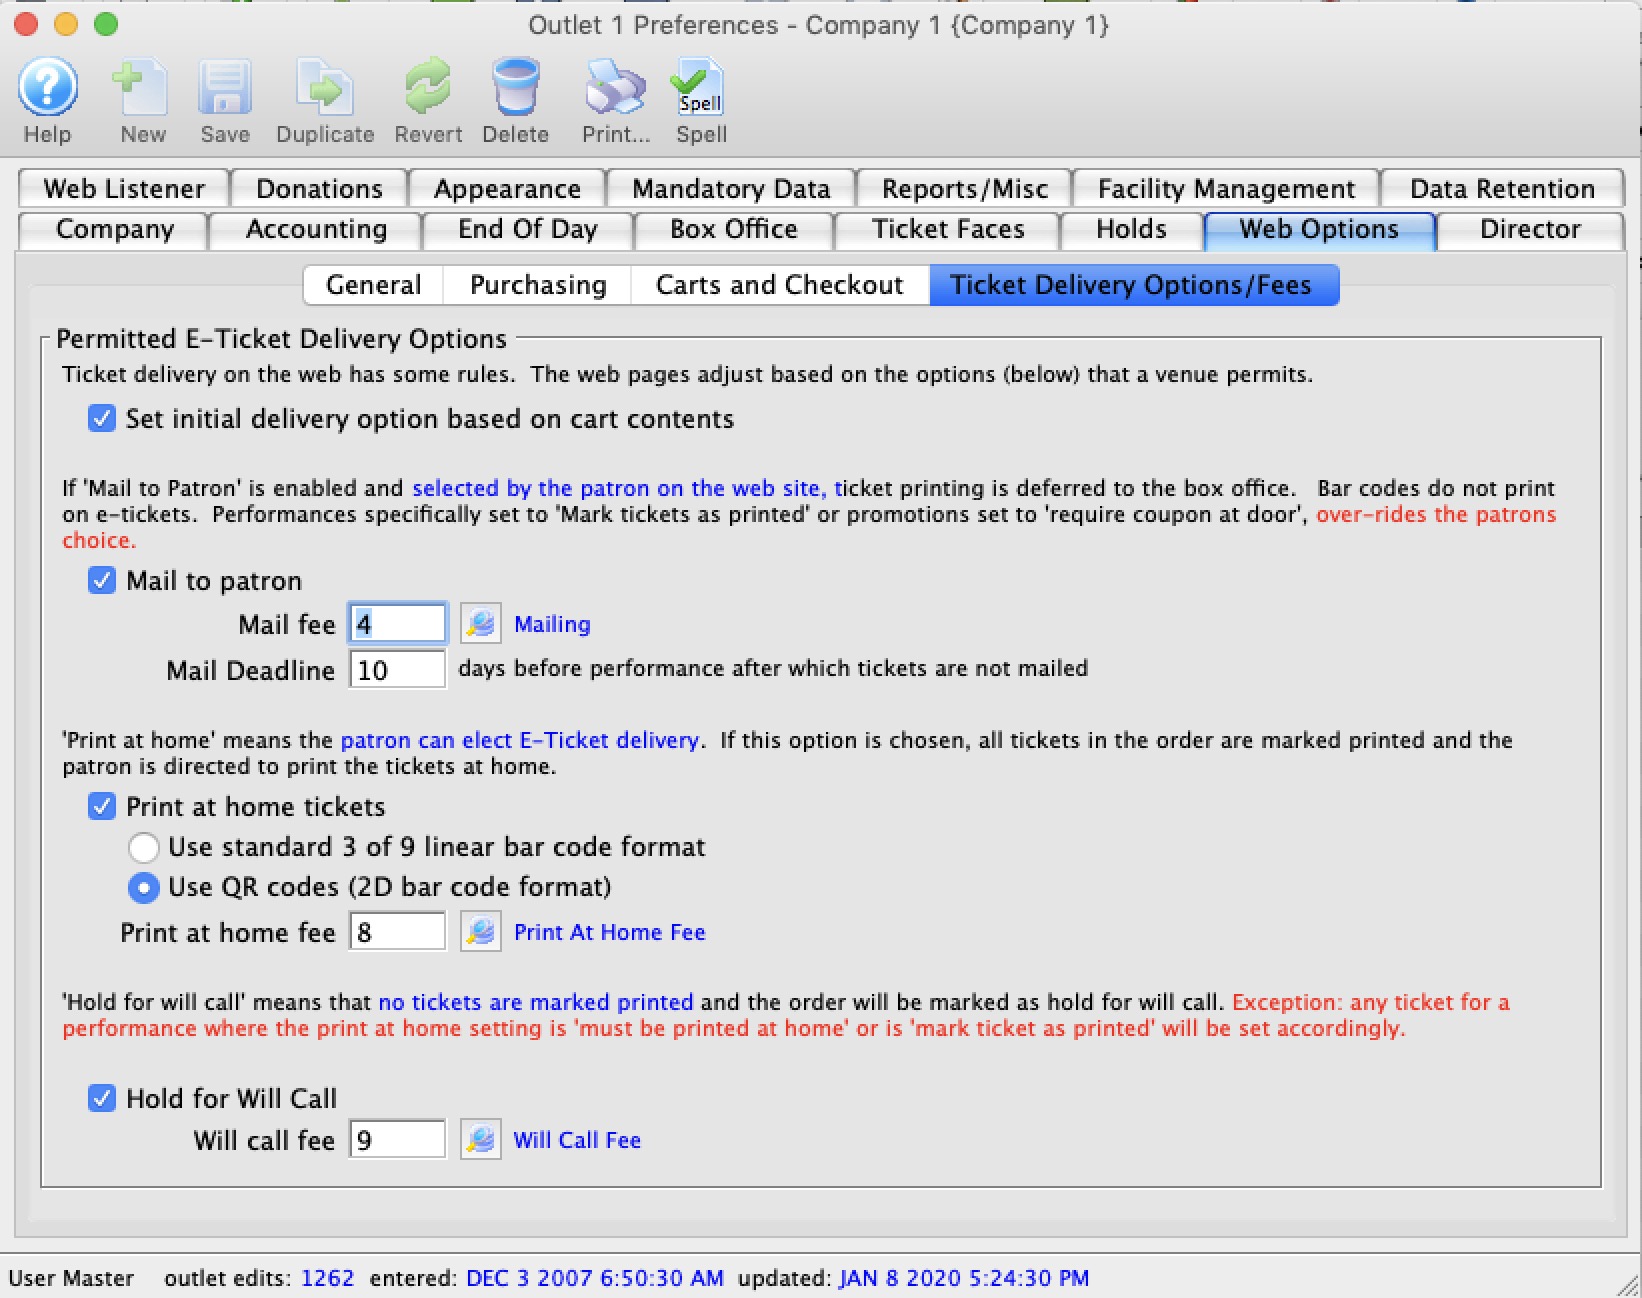
Permitted E-Ticket Delivery Options |
|||
| Set initial delivery option based on cart contents | Tells the web server how to best set the ticket delivery options on the cart checkout page. If
|
||
| Mail to patron | Tickets purchased on the internet are marked for printing and mailing by the box office. A Mail Fee must be entered above in order for this option to be selected. When selected, online patrons are presented with a Mail My Tickets option at checkout. | ||
| Mail Fee | The number of the order fee designated as a Mail Fee in Fee Tables. | ||
| Print At Home Tickets | Tickets purchased on the internet are marked as printed and patrons are presented with the option to print their own bar-coded tickets. Click here for information on turning on Print at Home for a selected event or performance.
If you are printing at home, you can print using one of two types of bar codes.
Additional Action Items: If you enable print at home tickets in company preferences, there are some other things you might also want to:
|
||
| Print at Home Fee | The number of the order fee designated as a Print at home Fee in Fee Tables. This fee will be charged to patrons who print their tickets at home. Leave blank if you don't want a fee for this option. | ||
| Hold for Will Call | When selected, patrons online can select to have the box office print and hold their tickets in Will Call. The exception is, any ticket for a performance where the print at home setting is 'must print at home' or is 'mark ticket as printed' will be set accordingly. | ||
| Will Call Fee | The number of the order fee designated as a Will Call Fee in Fee Tables. This fee will be charged to patrons who elect to have their tickets picked up at the box office. You do not have to have a fee - leave blank if you don't want one. | ||