
Main menu
You are here
Creating a Ticket Face
- Open the Ticket Face List window.
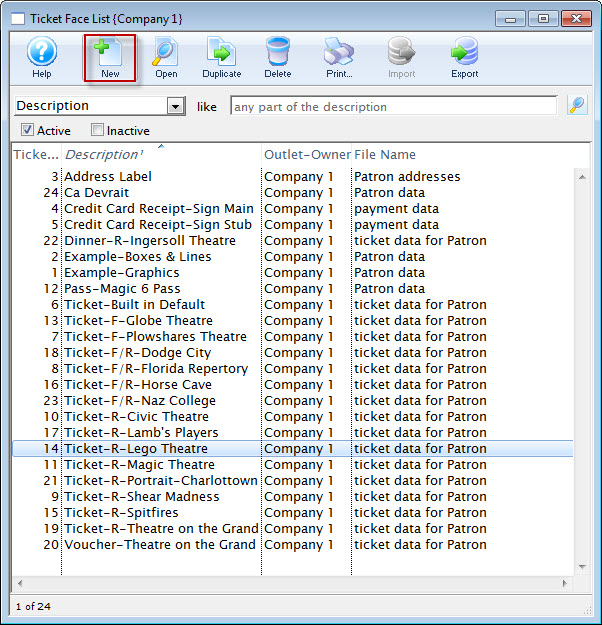
Click here to learn how to access the Ticket Face List window.
- Click the New
 button.
An empty Ticket Face Detail window will open.
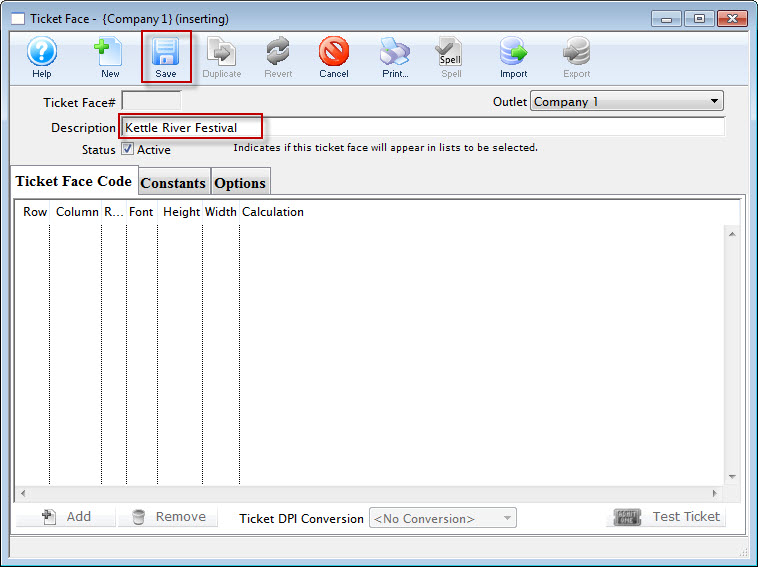
- Enter the name for the ticket face in the description field.
- Click the Save
 button.
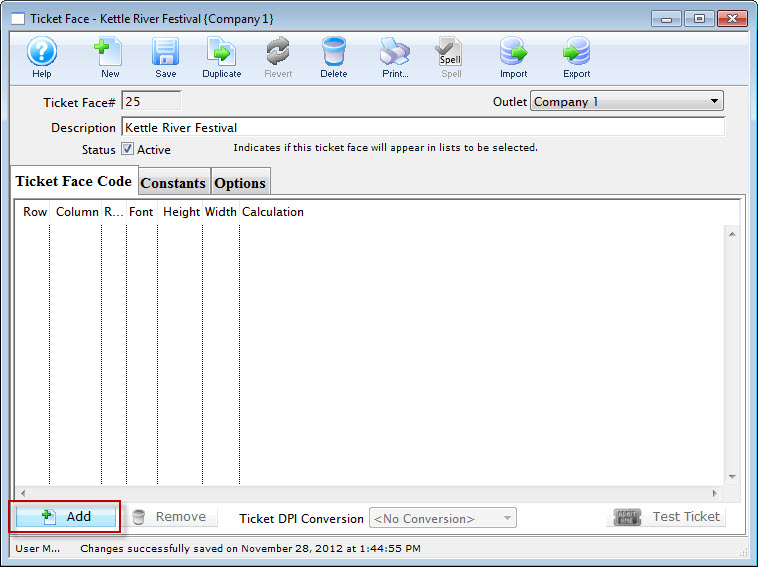
- Click the Add
 button.
The Ticket Face Detail window opens.
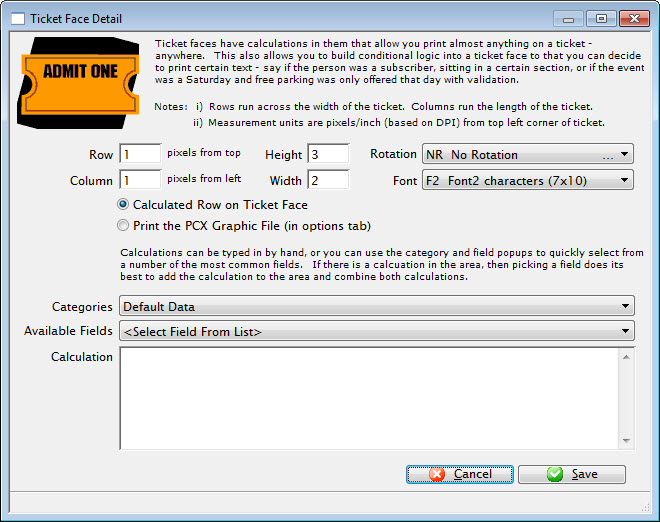
For more information on the Ticket Face Detail window click here.
- Enter a Calculation.
To enter information under 'Calculation', click on 'Category' drop-down list. Select an option and click the 'Available Fields' drop-down. The left column of this pop-up contains the fields to be entered and the right column shows sample information. Select a field (for example, company name). The information that appears in the field calculation (D_COMPANY) instructs the printer to put the company name (found in Company Preferences) in this location on the ticket.
You can type information directly into the field calculation, however, if all event data is typed onto the ticket face, it can not be used for other events. Click here for more information on Calculations.
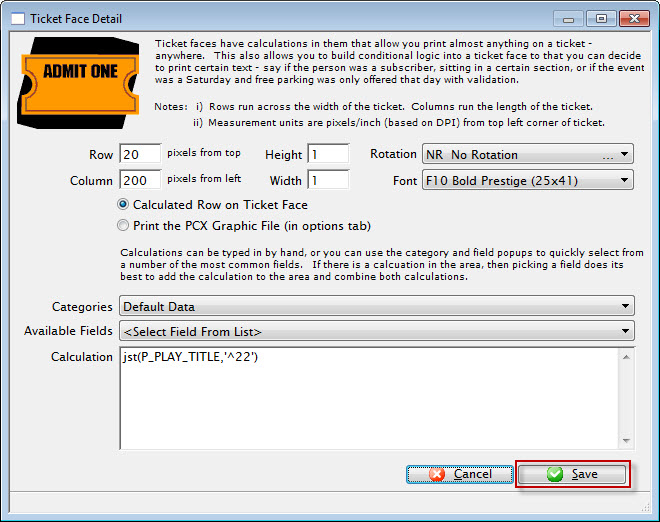
- Click the Save
 button.
The equation is added to the ticket face.
- Click the Constanats
 tab.
tab.
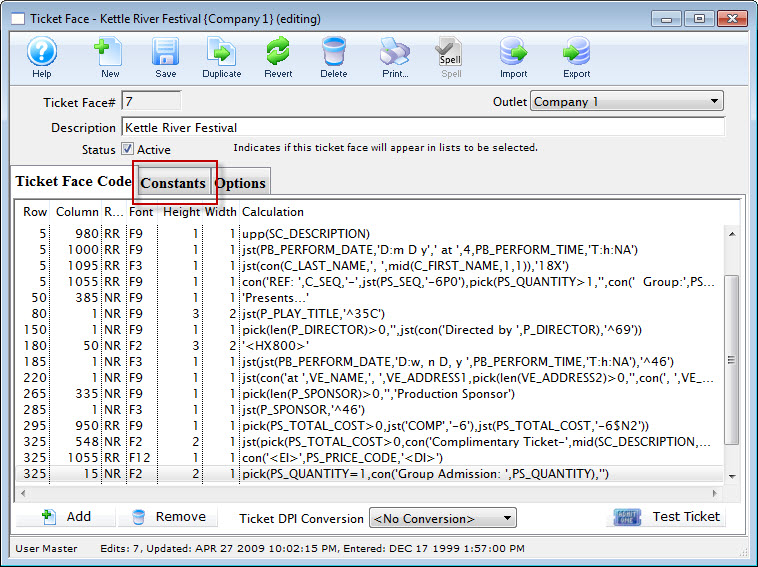
- Enter constants as needed.

- After you have entered your constant, click the Save button.
- Click the Options
 tab.
tab.
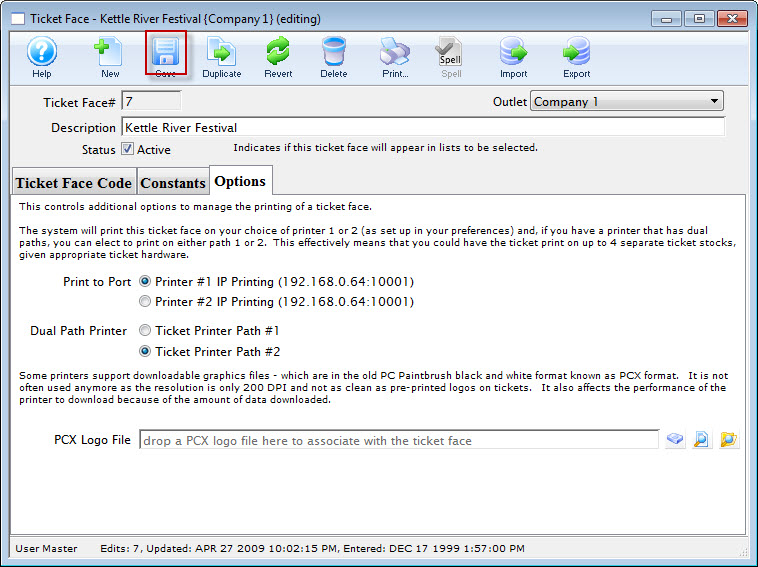
- Select the default printer settings for this ticket face.
For more information on the Options tab click here.
- Click the Ticket Face Code
 tab.
tab.
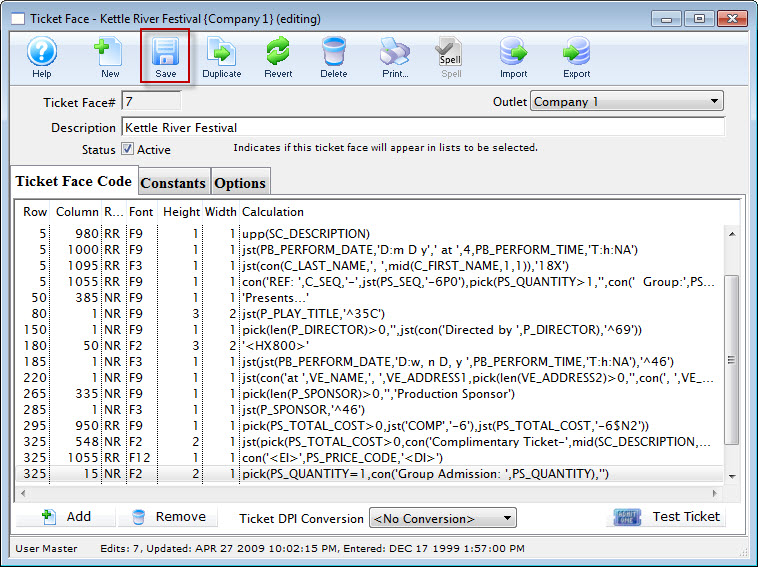
- Click the Save button.
The changes to the ticket face have now been saved. Click the Test Ticket
 button to preview the ticket.
For example, you need to have your ticket face for a single performance ( the second Saturday) not print the price for that night and the pricing is applicable to 3 promotions.
You would enter the Constant PB_SERIES_CODE='2-Sat'+SC_DESCRIPTION='MTP Single Tickets'|SC_DESCRIPTION='Manager Discretion Comp'|SC_DESCRIPTION='Media Comp'
For more information on adding constants click here.