Main menu
You are here
Connecting/Using Reveal
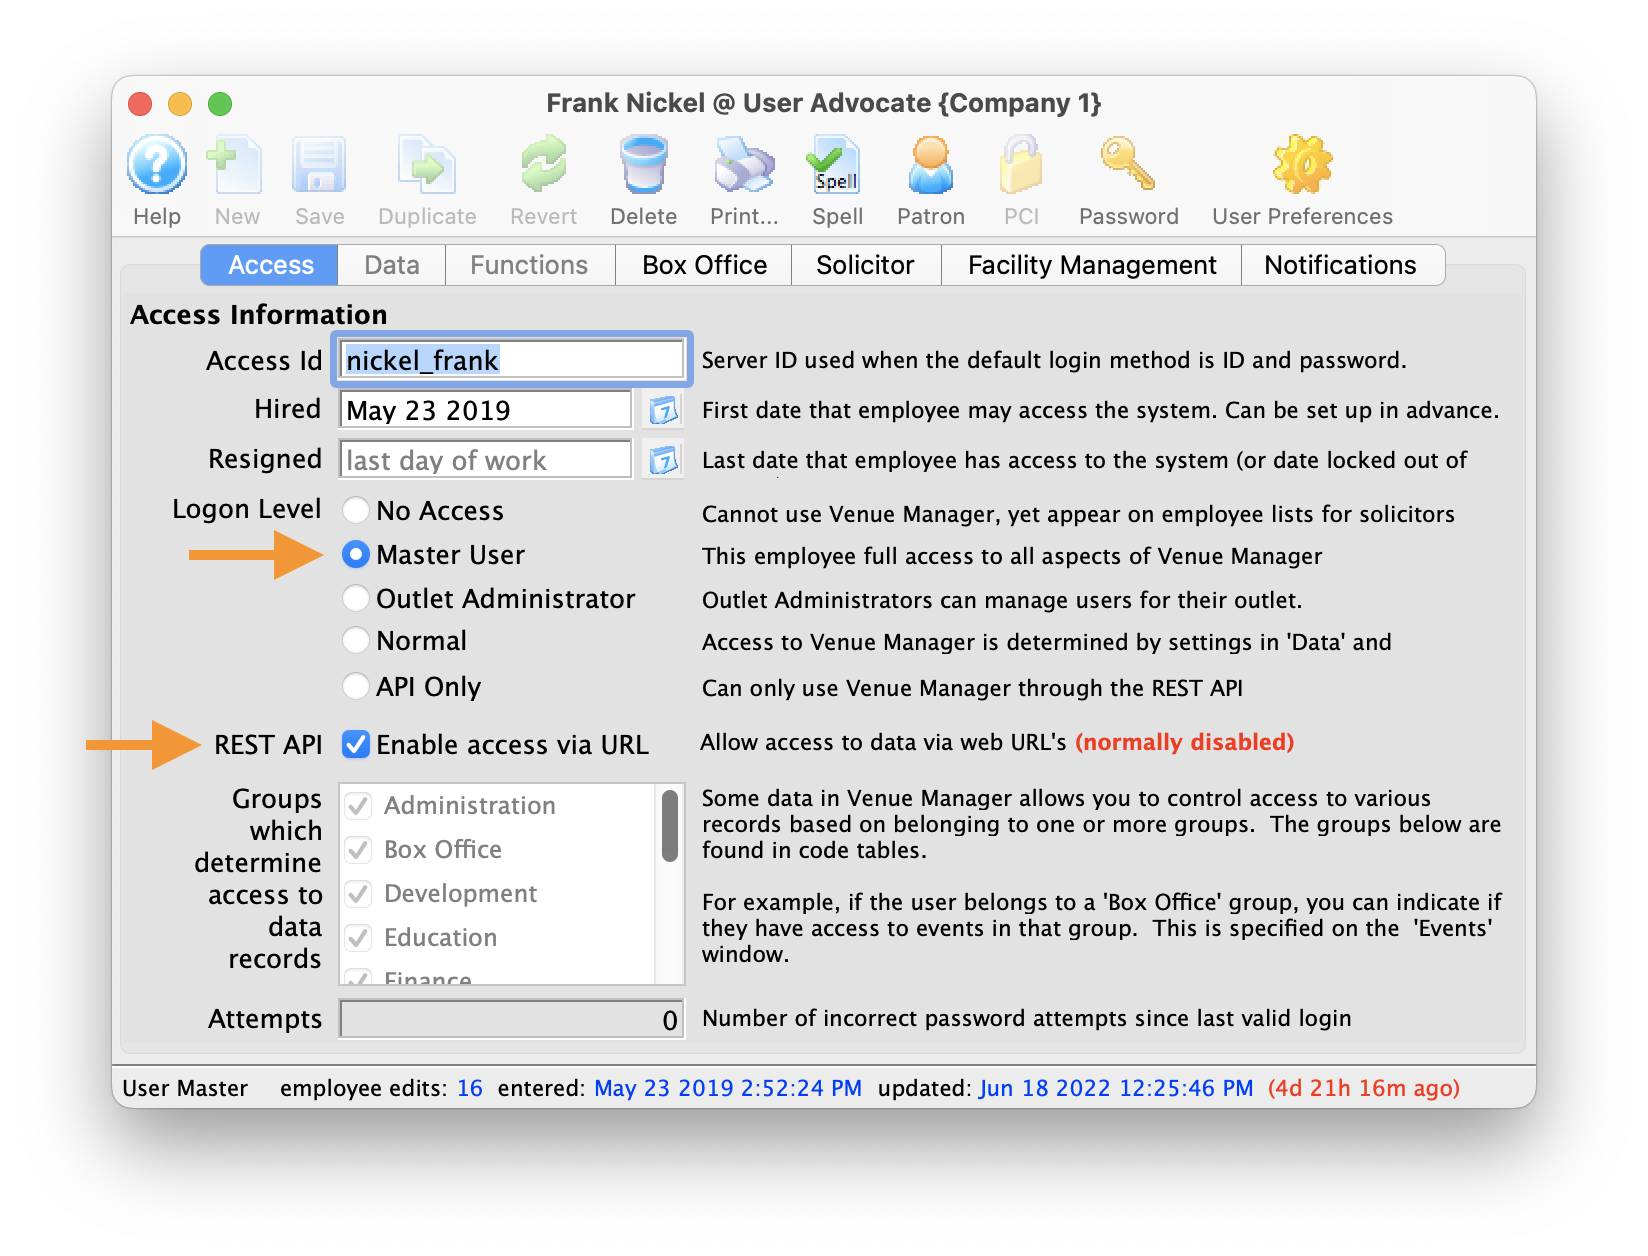 To begin, make sure the Employee Record (Setup -> Users & Access -> Employee List -> Employee) has both Access & Data permissions (or is a Master User), and that the REST API "Enable Access via URL" is enabled."
Connecting and using Reveal is quite easy. All you need to do is:
- Open a browser on any device that meets the minimum browser requirements
- Type in your ticketing url followed by /reveal.
For example: the Artsman demo ticketing web site is tickets.artsman.com, so we would type the following.
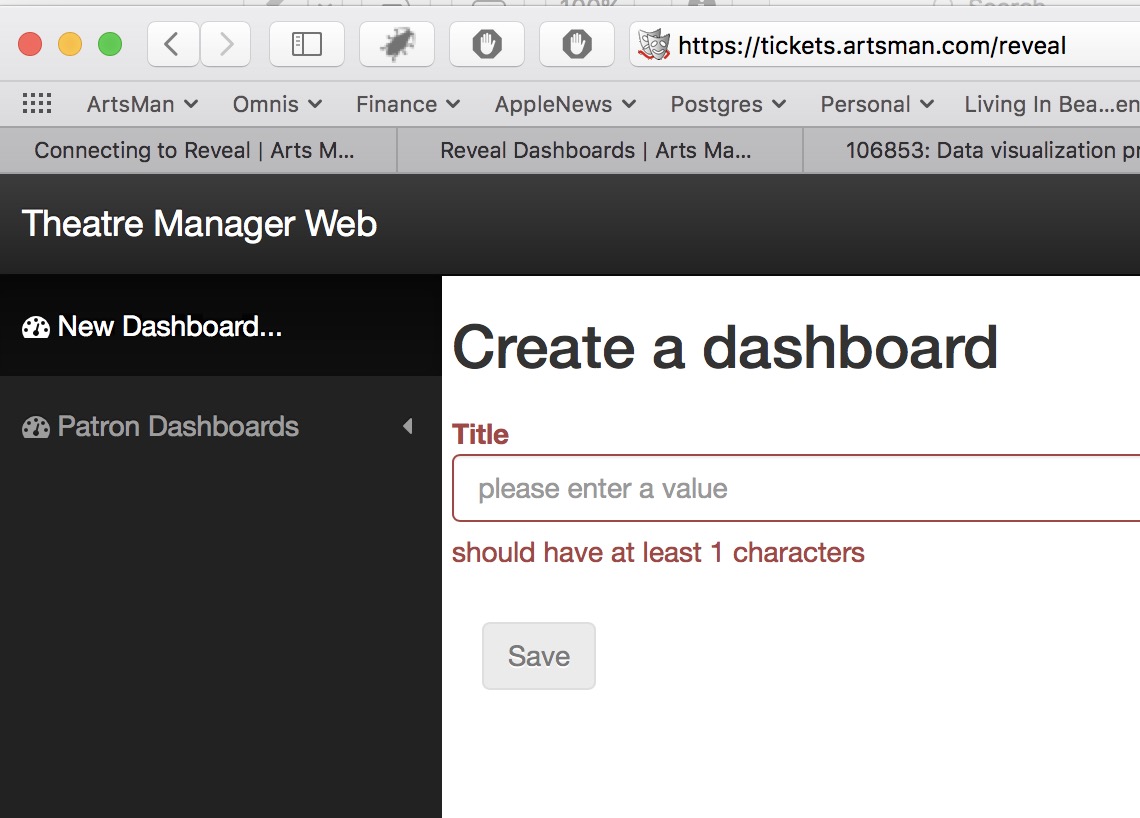
https://tickets.artsman.com/reveal
Your web site is different, so type what takes you to your own ticketing web site.
- You will see a login screen in your browser like the one to the right.
- Enter the same email and password that you use to buy tickets online
- ;patron=xx if you have multiple patrons in your household that share the same email. xx is the patron number you want to log in as.
- ;outlet=yy if you are an employee that can log into multiple outlets. yy is the outlet number you want to run reveal for.
- make sure your email address is NOT shared amongst household members (eg use your company email)
- Have a different email for each outlet login
- After logging in, you will see an empty dashboard like the one below. You can then follow the steps for making dashboard containers
- Bookmark Reveal in your browser for easier access later on
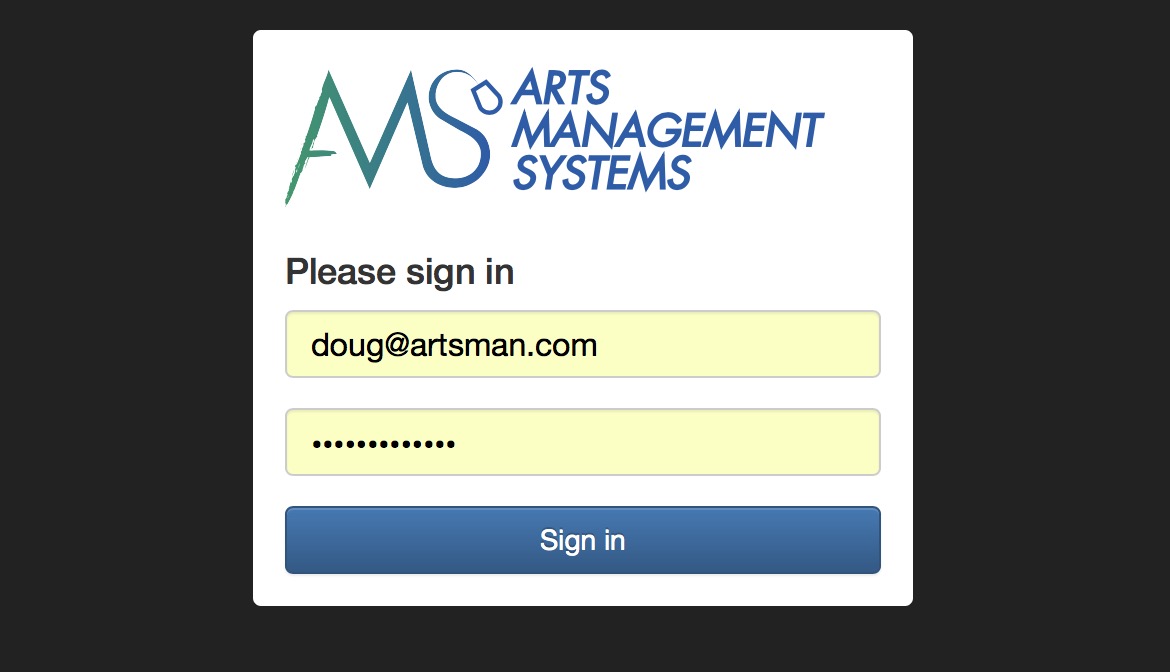
eg: doug@artsman.com
 |
If you are receiving an invalid password message when attempting to log in, make sure that you're using the same login email and password that you use to buy tickets online rather than the Theatre Manager application login password. |
 |
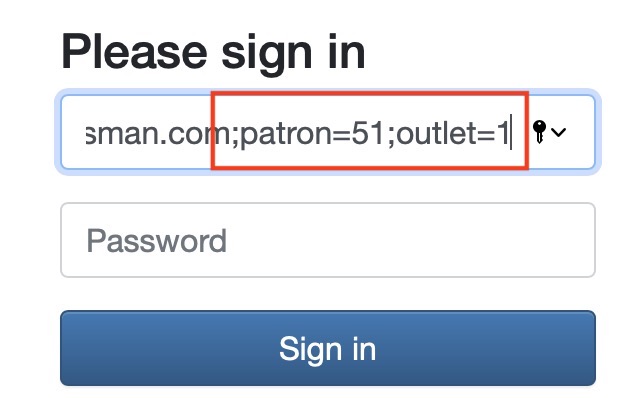 You can normally just enter your email address to login.
However, you may find you need to add one or both parameters below after your email address: doug@artsman.com;patron=xx;outlet=yy |
|
The simplest situation is to:
|
Initial dashboard with no containers