Moneris Pin Pad Setup Steps
Moneris Pin Pad Setup Steps
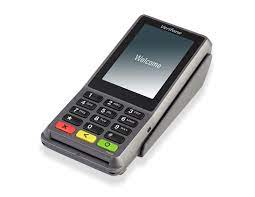 The following is the general list of steps you have to follow to get the Moneris EMV pin pad to work with Theatre Manager at the box office or for other departments.
Theatre Manager is designed that the EMV devices can be shared between workstations. However, you probably want one for each box office window and one for the rest of the office to manually enter cards.
 |
You can use Moneris EMV devices, even if you still want to use your existing provider. You just need to set up an EMV only merchant account in Theatre Manager. |
|
Note: check the firmware version of your pinpad. Version 19.05 works. 19.06 is known to be broken. Contact Moneris if you need to ask them to fix it. |
Pre-Preparation Steps (with Moneris) for CLOUD EMV DEVICES (P400)
You will need a Moneris E-Select+ account. You need to contact Moneris for this - Arts Management cannot arrange one.
- If you DO NOT HAVE an E-Select+ account, contact Moneris. It might involve changing you merchant provider - and you might want to talk to the support team about:
- pro's/con's of changing completely to Moneris and/or
- feature comparison of Moneris to other providers and/or
- OR (if you want), you can keep your existing merchant provider and only use Moneris for EMV pin pad authorizations.
- If you have an E-select+ Account
- Contact your Moneris representative to arrange for the number of P400 cloud connected device you think you need.
- You must tell Moneris that you are using it with Theatre Manger
- Moneris must provision it with their software, so get them to confirm they will do that to work with Theatre Manager
- Theatre Manager can share EMV devices amongst workstations. However, you probably want:
- one for each box office window and
- maybe also one for the rest of the office to manually enter cards.
|
Very Important: DO NOT allow Moneris to settle the EMV devices automatically at a preset time each day. Theatre Manager will settle the devices during end of day to make accounting far more straightforward. |
Theatre Manager Setup Steps (after you have your EMV devices)
Once you have your Moneris information and pin pads, follow these steps in Theatre Manager:
| Step | Item | General Instructions | ||
| 1 | Turn off Power saving |
The pin pad requires a constant connection to the database while the authorization is occurring. there are two things to do:
|
||
| 2 | Plug in the Pin Pad |
Download this abridged version of the Moneris P400 installation instructions and follow it until the steps say come back to this web page to do the remainder of the steps
|
||
| 3 | Moneris Merchant Account |
Make sure you have a Moneris Merchant Account set up in Theatre Manager. I you already have a moneris account for hosted payments or web sales, you likely should use the same one.
On the authorization tab in the pin-pad area of the Theatre Manager merchant setup, please:
|
||
| 4 | Plug in EMV Devices |
Physically plug the EMV devices in, power them up and connect them to your ethernet network.
Place the devices where you think they will be best used for your box office and administration areas. The EMV devices will go through a startup process and should eventually show a screen with a pairing number on them. |
||
| 5 | Create Device Records |
In Theatre Manager, open the Device List. For each pin pad that you have:
If pairing does not occur:
|
||
| 6 | Edit Hardware Preferences |
After pairing all devices in as above, you will need to go to each workstation and decide which EMV device is associated with the workstation.
| ||
| 7 | Payment Receipts | You will need to import a new payment receipt ticket face designed specifically to satisfy Moneris signature & receipt requirements | ||
| 8 | Setting up Payment Methods |
|
||
| 9 | Restart Theatre Manager |
|
||
| 10 | Optional tests |
|
||
| 11 | Debugging |
If you are having trouble with getting pinpad authorization to work, there are some troubleshooting tips:
|