
Main menu
You are here
Placing Seats on a Pricing Map - Step 2
When you use reserved seating, you need to place those seats on the graphic map in Theatre Manager. Prior to placing seats on the Pricing map, a graphic representation of the venue must be placed into the graphic map window. Click here for more detail. If the venue is non-graphical or will be used for festival seating (General Admission) or traveling troupe ticket sales, placing seats on the map is not required.
|
One of the keys to being successful in map building is to save your work frequently. |
- Click Setup >> Venue.
The Venue List window opens.
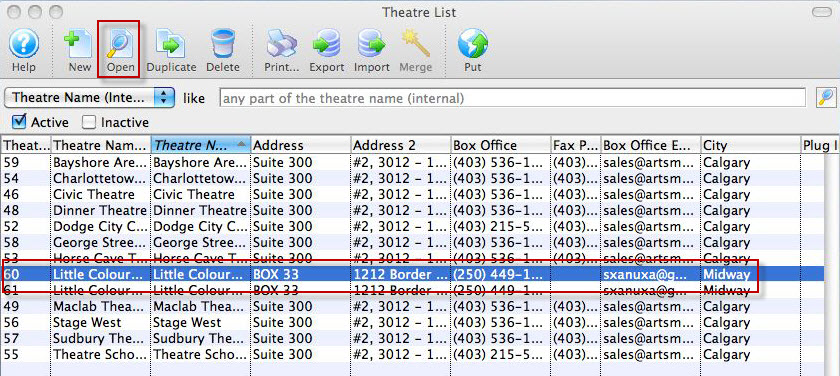
- Select the Venue, and click the Open
 button.
The Theatre window opens.
Click here to learn how to create a map if the map you want has not yet been created.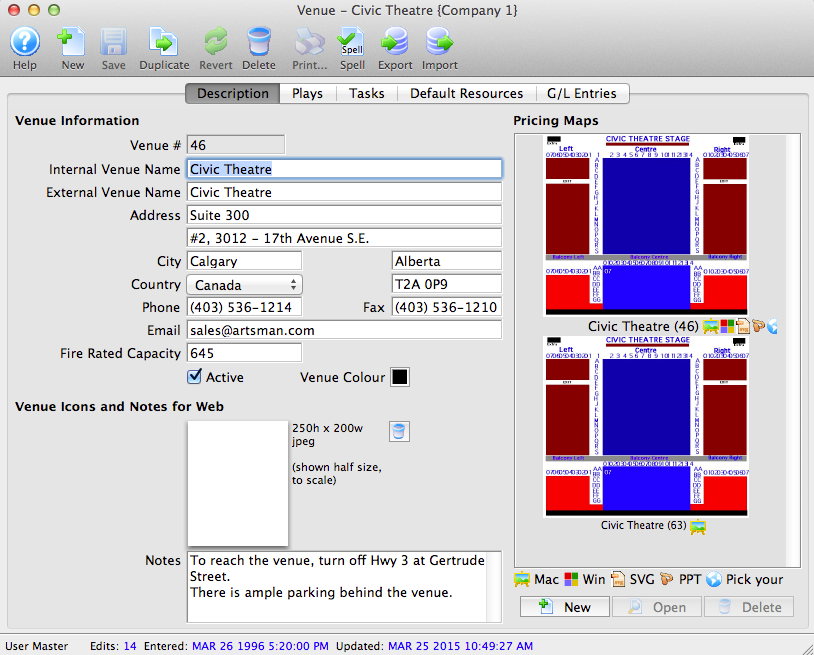
- Choose the Map you want to add the seats to and click the Open
 button.
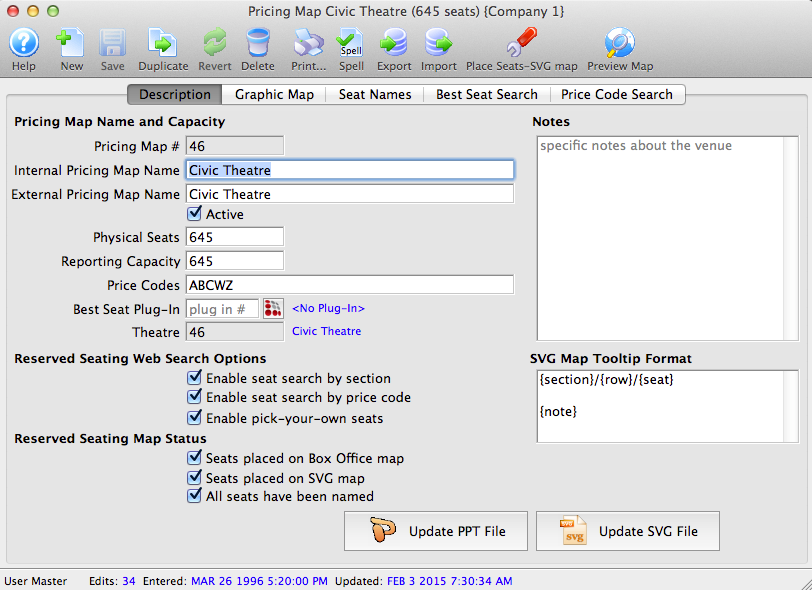
The Pricing Map window opens.
Click Here for a detailed description of this window and it's functions.
- Click the Graphic Map
 tab.
tab.
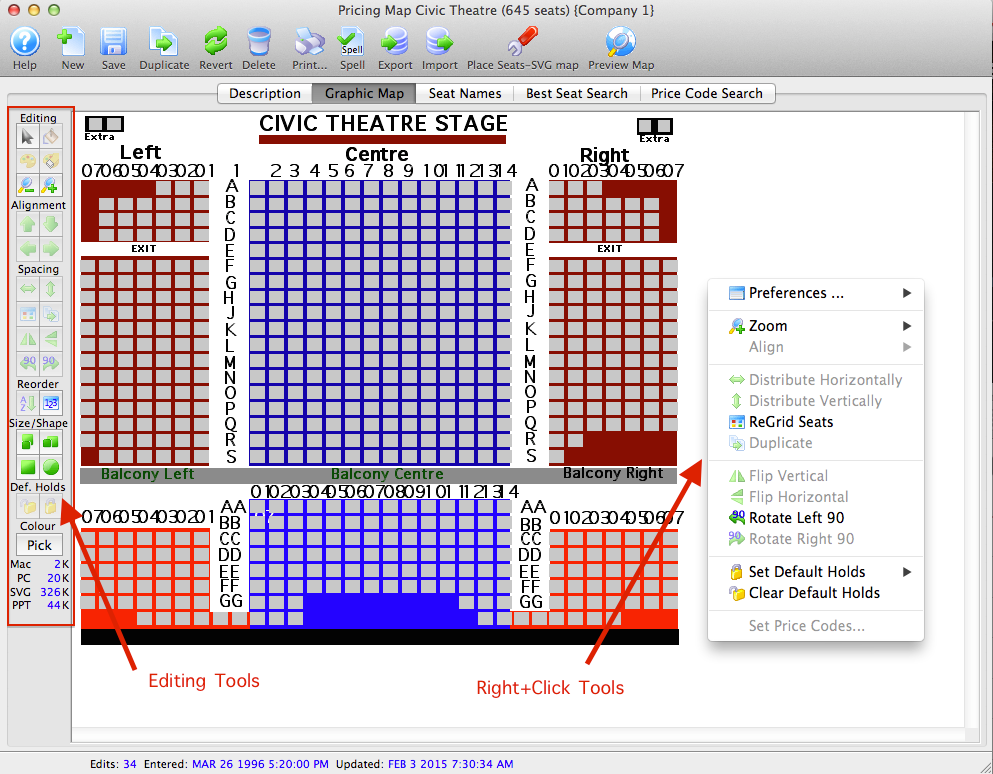
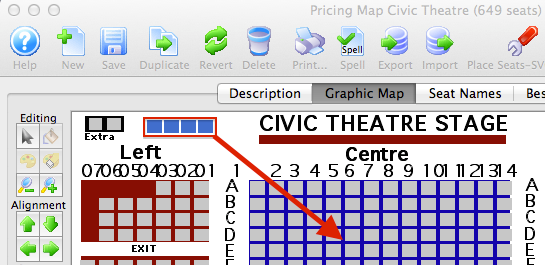
The graphic map window is displayed. You use the editing tools and the right-click menu tools to add your seats to the map.
- Decide if the seats will be square or circular.
Select the appropriate shape button

 .
.Round seats typically indicate "wheelchair" or ADA access seats.
- Click Add Grid of Seats
 button.
This will open the Add Block of Seats window to add a section of seats. The Add Seat
 button adds single seats to the map.
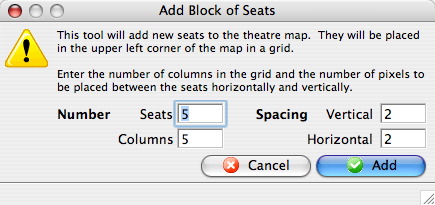
Number of Seats Enter the number of seats to be added. (It will default to the total number of seats remaining to be added to the theatre and will decrease as seats are added). Number of Columns Enter the number of columns (left to right) to place the seats into a grid. Spacing Vertical The number of pixels of vertical spacing (up and down) between the seats. Spacing Horizontal The number of pixels of horizontal spacing (left and right) between the seats. - Click the Add
 button.
This will place a grid (block) of seats in the upper left corner of the theatre map. Click on one of the added seats and drag the grid of seats into the appropriate place on the theatre map. Continue adding seats (grid by grid) until the total number of seats have been placed on the graphic representation.
- Click the Save
 button.
Save frequently while adding seats. If an errors is made the Revert
 button can be used to return to the last saved point.
 - Select a row or column or seats.
Place the mouse above the upper left corner of the first seat to select, click and hold the mouse button and encircle the seats to align. Release the mouse to highlight the seats. To select multiple seats hold the <SHIFT> key and click on each seat.
- Duplicate similar section of the venue as needed.

Duplicates selected seats. 
Flips the selected seats vertically. 
Flips the selected seats horizontally. 
Rotates the selected seats 90 degrees to the left. 
Rotates the selected seats 90 degrees to the right . - Align the seats.
Once all the seats have been placed on the graphic representation, use the alignment buttons to ensure seats are straight within each row and column.

Be careful to not align a group of horizontal seats to the left or right (or vertical seats to the top or bottom) as they will "stack" on top of each other, and then need to be deleted and re-added.

Aligns the selected row with the top most seat in that row. 
Aligns the selected row with the bottom most seat in that row. 
Aligns the selected column to the left most seat in the column. 
Aligns the selected column to the right seat in the column. Ensure seats are evenly spaced and distributed using the functions described below.

Evenly distributes the selected seats horizontally. 
Evenly distributes the selected seats vertically. 
Opens the Distribute Seats Window allowing the selected seats to be distributed both horizontally and vertically. 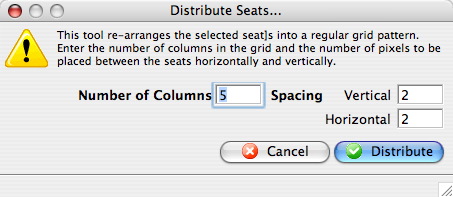
A few handy tricks when placing seats:
- Create a "ruler" out of 6 horizontal seats to use as an alignment guide for vertical columns. Do the same using 6 vertical seats to align rows. This allows you to easily align two seats directly over the last block of seats, two "spaces" representing an aisle, and two more seats directly over the next block of seats. Now you have perfect aisles.
- When placing seats individually in a horizontal line, place the first (and only the first) seat at the correct height. Place all subsequent seats in that row slightly below the correct height. Then use the alignment tool to bring all the subsequent seats up to the level of the first (and only) perfectly placed seat. The same is true for vertical placement (left and right).
- If your rows are offset (Row A has 17 seats, Row B has 18 seats, Row C has 17 seats, etc.), once you have the seats roughly placed, select the first seat in every other row by Control+clicking on them, and aligning them to the left or right. Then redistribute the seats in that row based off the perfectly placed first seat.
- While it may be enticing to place the seats in an arc if your venue is set up this way, because the Box Office will be selecting the seats by drawing a line through them or a box around them, arcs make it difficult to select seats in a single row. The best way to place the seats is always in a straight line.
- If you have side sections that are identical but oddly shaped (each row is a different length), build one section, then highlight it completely and use the duplicate tool, then the flip tool to add the opposing side.
- Click the Save
 button.
When all seats are placed the next step is to arrange the seats in a logical order so Theatre Manager can connect each seat to its name. Click here for information on reordering logical seats.

- Select the seat(s) that you want to hold on the graphic map. Then click on the hold tool, and select a letter code to hold the seat(s) with.
- When you are done, choose the Save Button.