Inventory Ticket Sales
To sell inventory (such as CD's, T-Shirts, mugs, hats) a performance must be created for the sale to be assigned to a patron. Click here for more information on creating a new event.
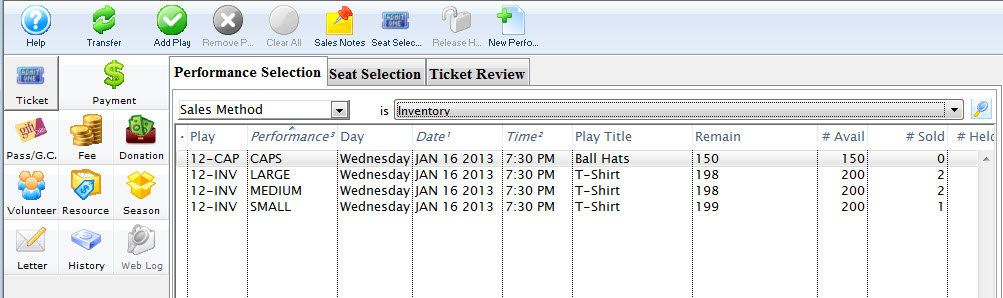
- Open the Select Events(s) Window and search for an inventory
Performance.
Click here for more information on Creating a Buy List.
In some situations, you may wish to limit the list by searching only for inventory items. To do so:
Change the Performance Search drop down to "Sales Method".
Choose "Inventory" from the list.
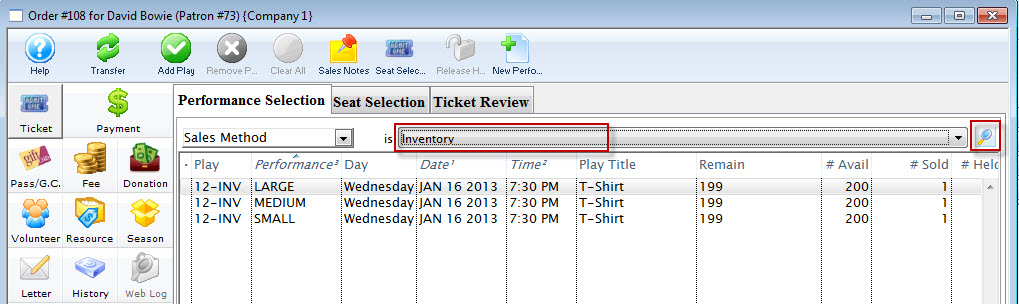
- Click the
 icon.
icon. - Select the inventory item.
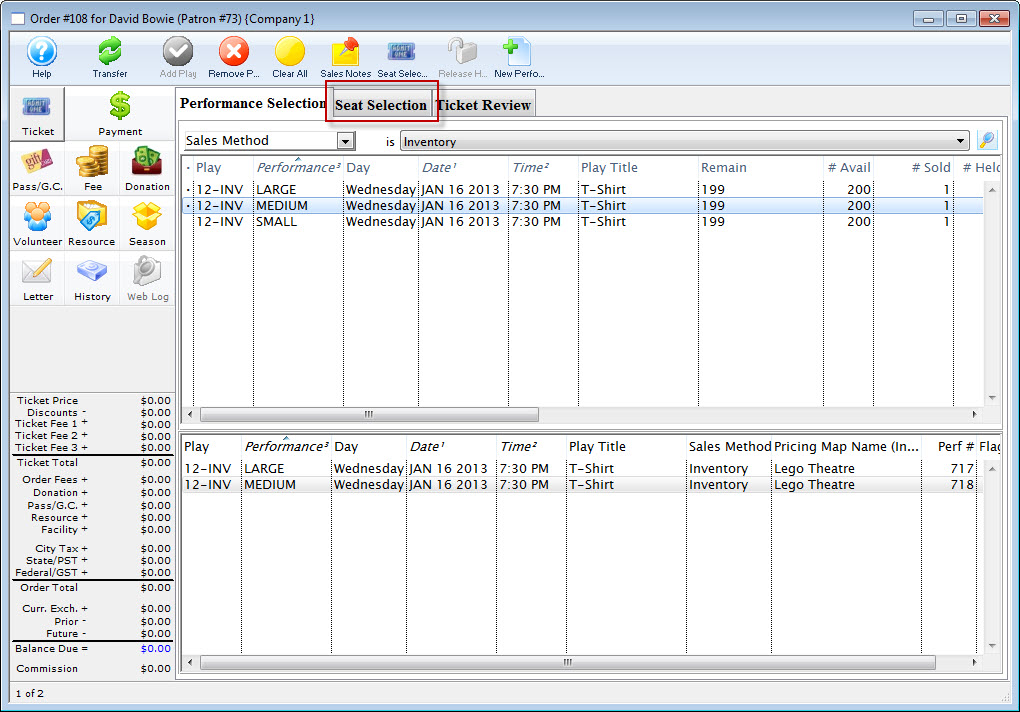
- Click the Seat Selection
 tab.
tab.
The Selection window for Inventory Sales opens.
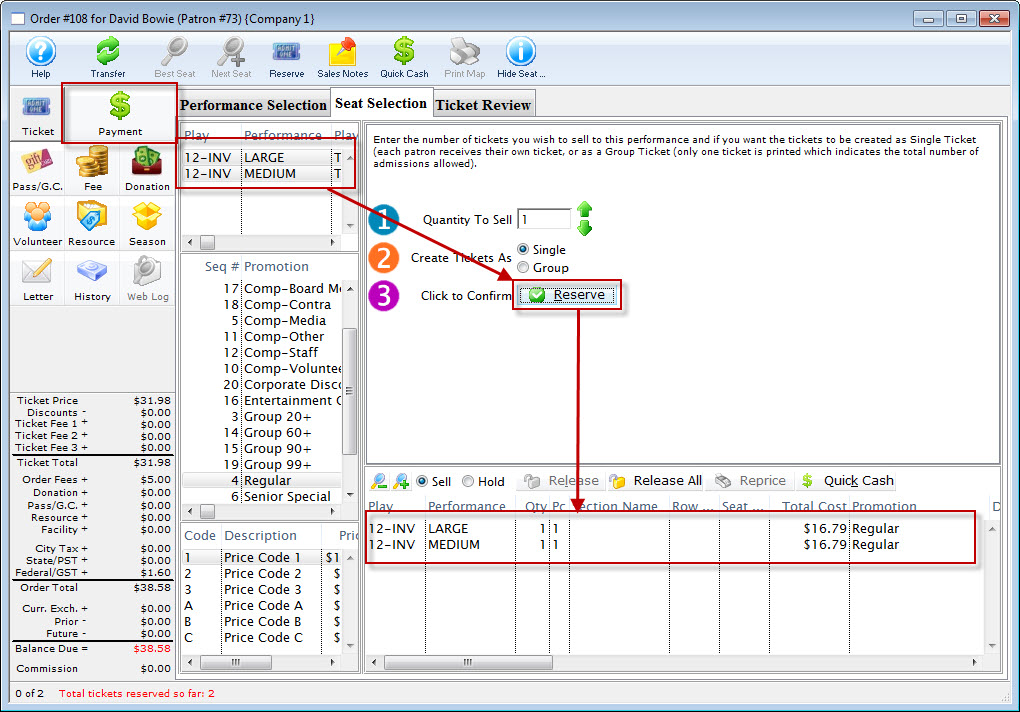
- Indicate how many of the item you wish to sell in
 Quantity To Sell.
 - Click the Reserve
 button.
 - Click the Payment
 button.
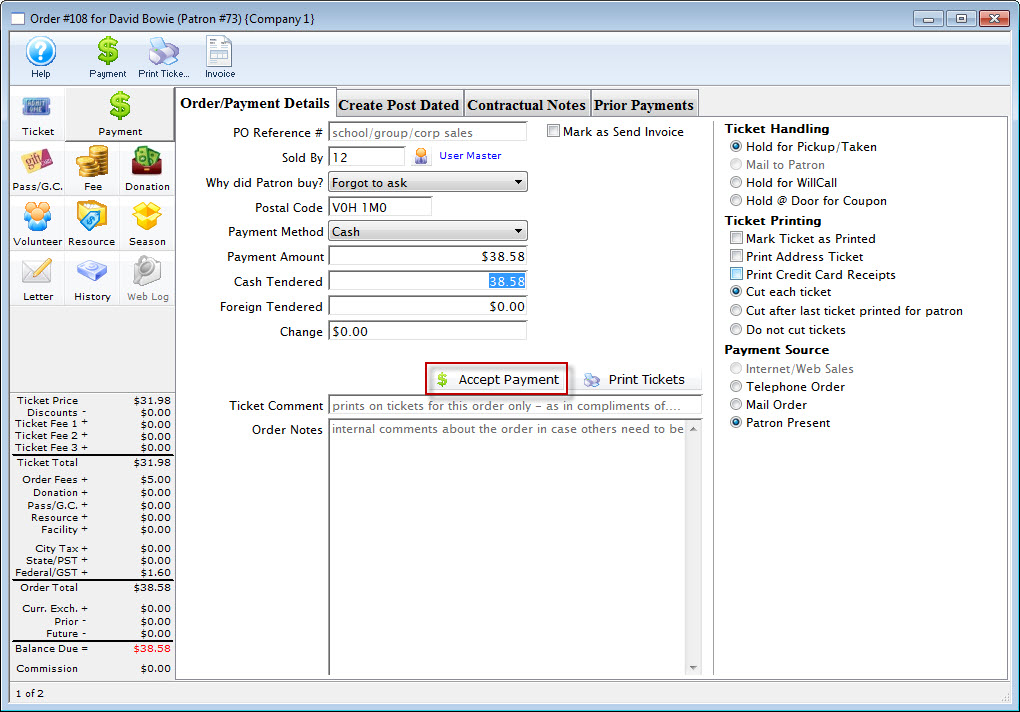
Click here to learn how to accept payments.
| Transfers the sale to the correct patron at the reserve item window or after the items have been sold. Click here to learn how to transfer items to another patron. | |
 |
Opens the Best Seat Available search function. This feature is unavailable in Consignment Sales. |
 |
Find the next Best Seat Available using the previous search criteria. This feature is unavailable in Consignment Sales. |
 |
Reserves the current number of items selected. |
 |
Allows the user to view the Sales Notes that apply to the item. |
 |
Accepts a cash payment for the exact amount owed and completes the sale. The user is returned to the previous window. |
 |
Prints the current seating chart with the current "house dressing." This feature is unavailable in Consignment Sales. |
 |
Turns on/off the tooltip showing the user the status of a seat on the Graphic Map. This feature is unavailable in Consignment Sales. |
 |
The Ticket processing window. This is the window that the user is currently in. |
 |
The Fee processing window. Click here for more information. |
 |
The Donation processing window. Click here for more information. |
 |
The Pass G.C. processing window. Click here for more information. |
 |
The Season processing window. Click here for more information. |
| |
The Payment Processing window. Click here for more information. |
| A record of the transaction. Click here for more information. | |
| Event/Play | The section at the top of the window displays all of the events that are being purchased. |
| Promotion | Select the sales promotion if applicable. The sales promotions determine if there is a discount or markup on the ticket(s) being sold. Click here for more information on setting up sales promotions. |
| Code | Displays all the price codes applicable to the performance. Click here for more information on pricing. |
| Quantity to Sell | The current quantity of items to be sold to the patron for the specified performance. This field is only available when selling Consignment, inventory Items or Festival Seats. |
| Create Tickets As | Select the type of ticket that will be printed. i.e. one ticket for each ticket sold or one ticket that will admit the total number of patrons. |
| Click to Confirm | Reserves the number of items that have been entered above. |
 |
Allows the user to switch between Sell and Hold modes. This feature is unavailable in Consignment Sales. |
|
Releases the selected item(s). Click here for more information. |
 |
Releases all items that are currently reserved in the order. |
 |
Changes the pricing for the selected item(s). Click here for more information. |
| Tickets Selection | The bottom of the window displays the item(s) booked for the current item(s) highlighted in the performance section. |
Creating an Inventory Item
There are a number of different methods to add inventory items to your Theatre Manager Database. In this method, you will see how to add items as Events/Plays.
To add an item to the database, you perform the following steps:
- Open the Event / Play list and click the New
 button.
Click here for more information New Events / Plays.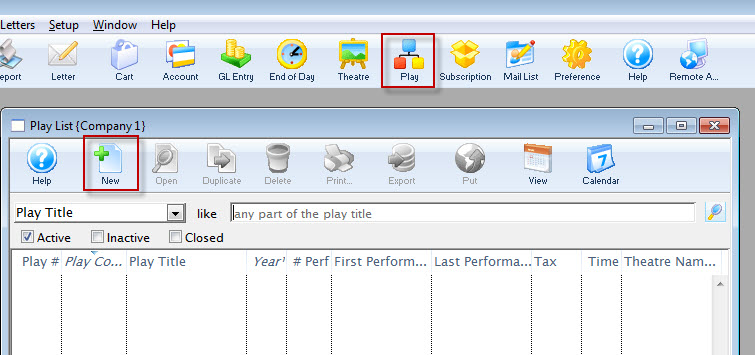
- Enter the basic Event / Play information, replacing it with your item to be added to inventory.
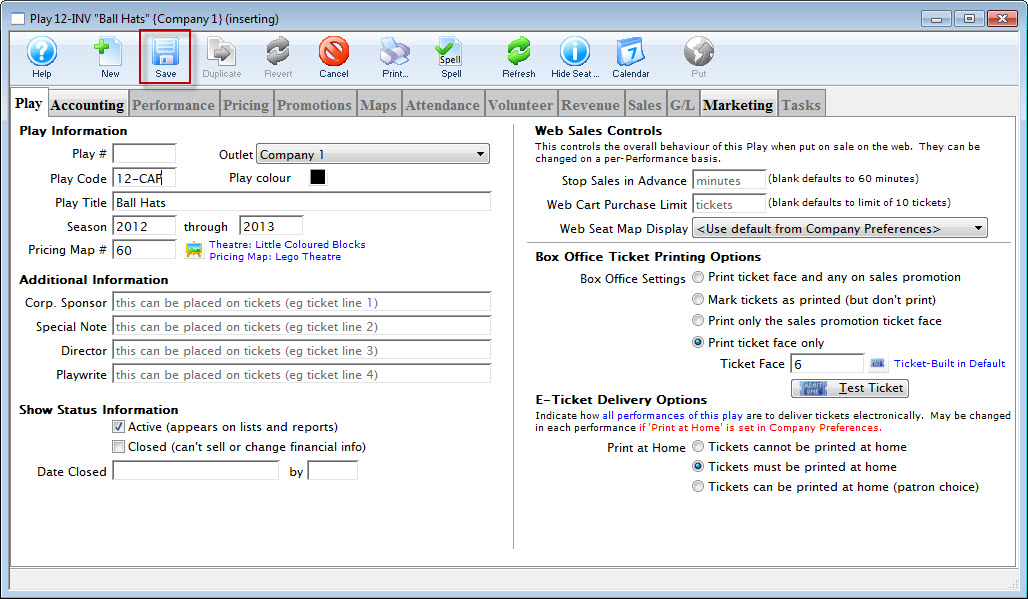
You will need to enter a map.
- Once you have completed entering the basic information, click the Save
 button.
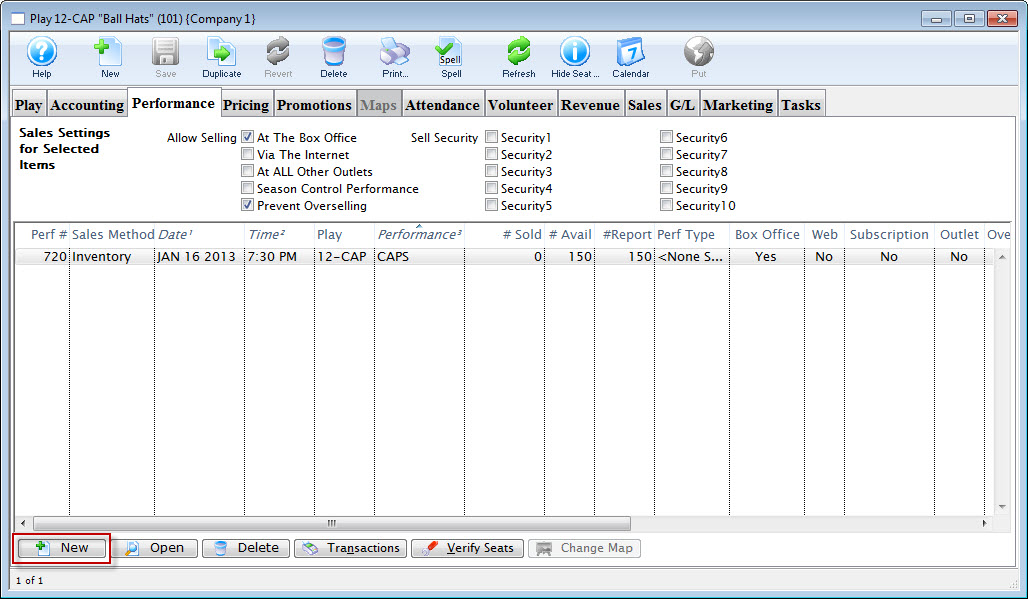
- Open the Performance Tab and click the New
 button.
The Adding Performance Wizard dialog opens.
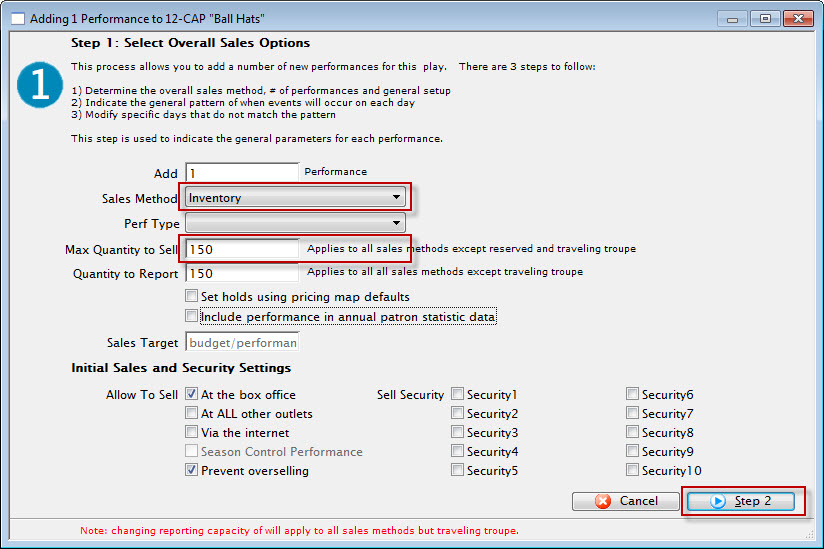
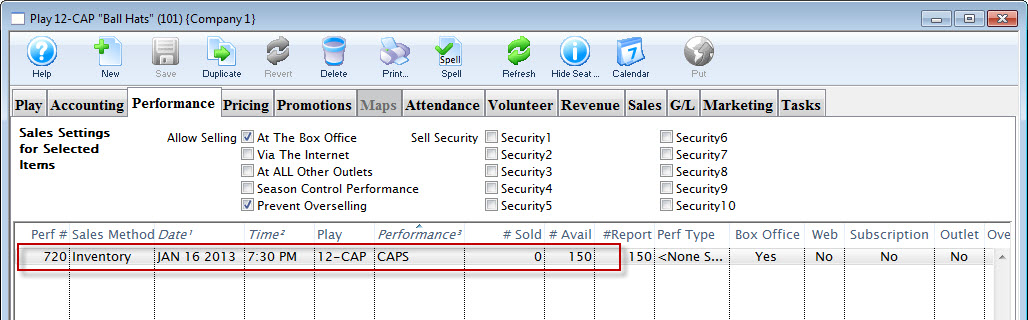
- Enter the Sales Method as Inventory and Enter the Quanity to Sell.
- Click the Step 2 button.
The Pattern of Days dialog opens.
- Click the Step 3 button.
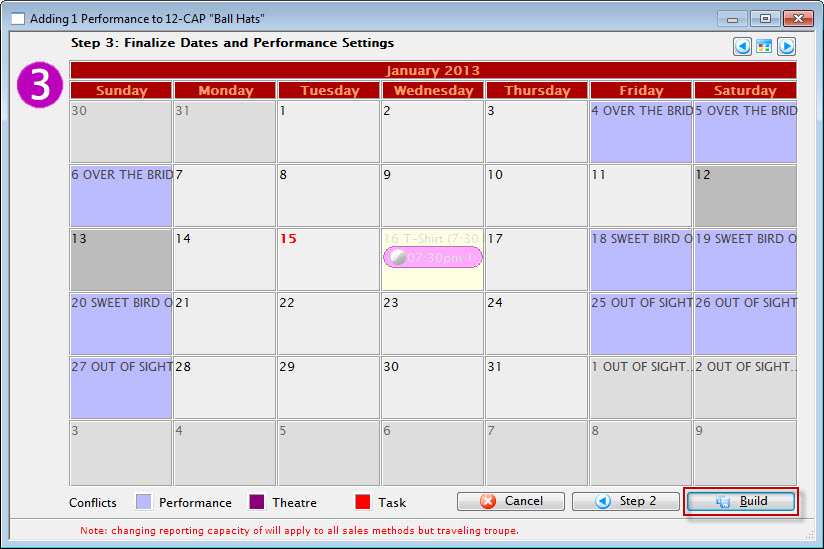
- Click the Build button.
The Confirmation dialog opens.
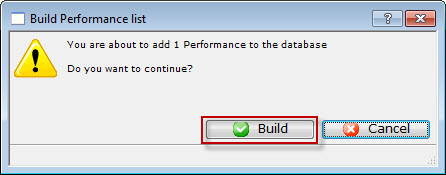
- Click the Build
 button.
You are returned to the Performance tab.
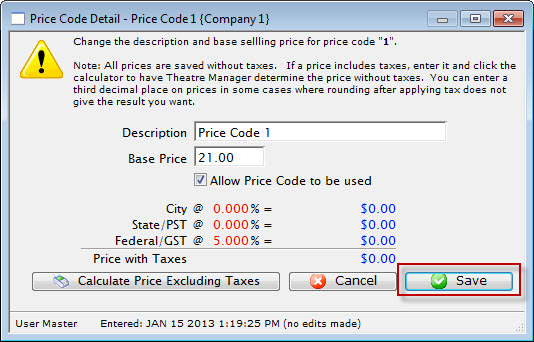
- Click the Pricing tab. Highlight the Price Code to edit and click the Edit Price button.
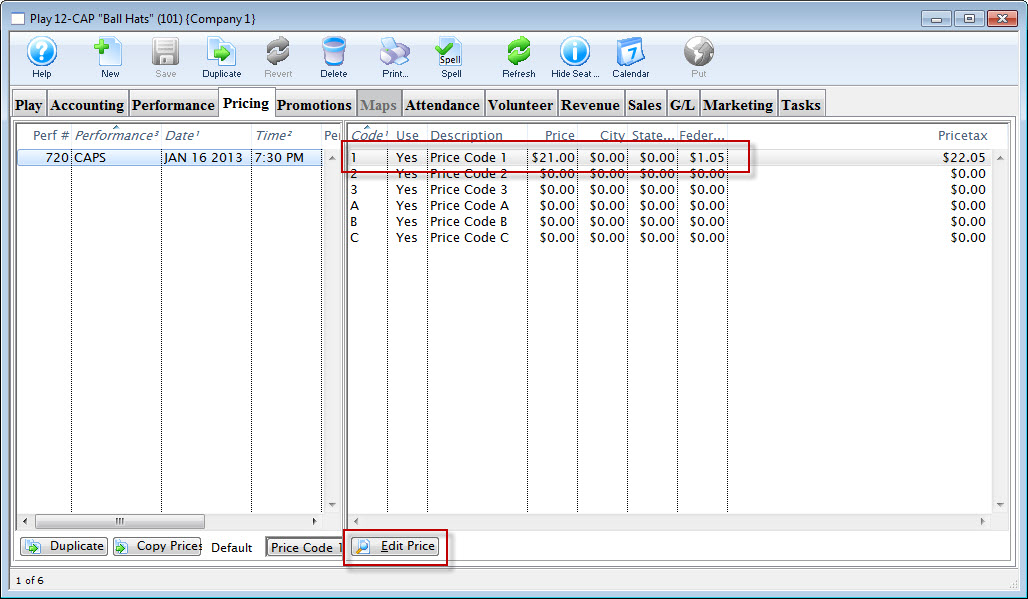
The price code details window opens.
- Make the required edits and click the Save
 button.
- In the Performance tab, double-click to opent the performance details.
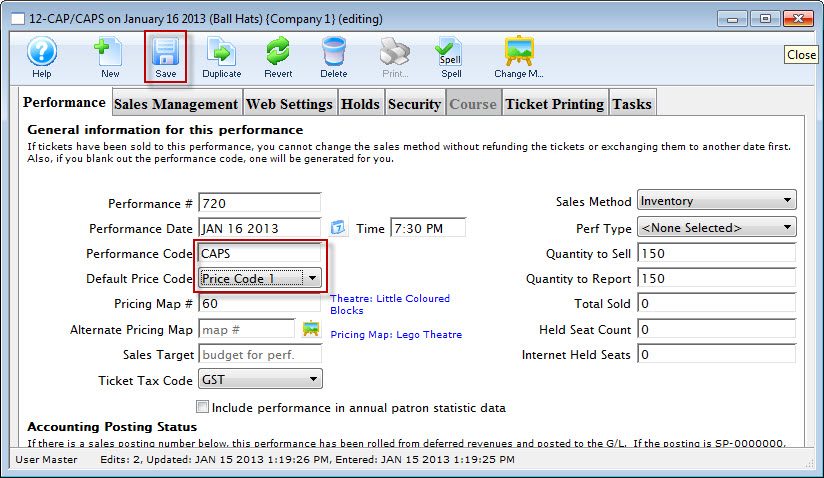
Review and makde changes as necessary. For example, you may want to change the Performance code to one that is more descriptive for an inventory item. In this example, CAPS.
- When you have completed the entery of the the details for your inventory item, click the Save button.
Your inventory item is now available for sale.
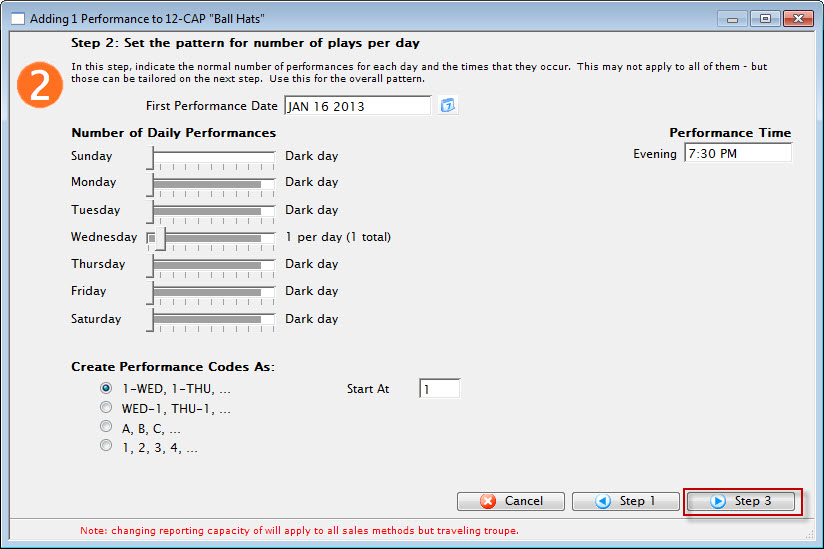
As you are entering an inventory item to be sold, you need to select only one day.