Merging a Mail List with a Form Letter
Theatre Manager has a powerful marketing tool for postal mailings or email blasts built right in to the software. One of the most commonly used merge features in the Letters module allows a user to merge a mail list with a form letter both created using information contained in your database. The following few pages describes and illustrates the process of merging a mail list with a letter then either printing the result or sending it via email to the intended recipients.
|
Quick reference information for Merging Form Letters |


Selecting the Letter
- Choose Form Letters >> Form Letters.
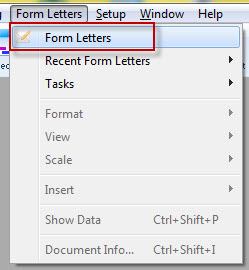
Alternatively, select the Letters
 button in the Theatre Manager ribbon bar / toolbar.
 The Form Letter List window opens.
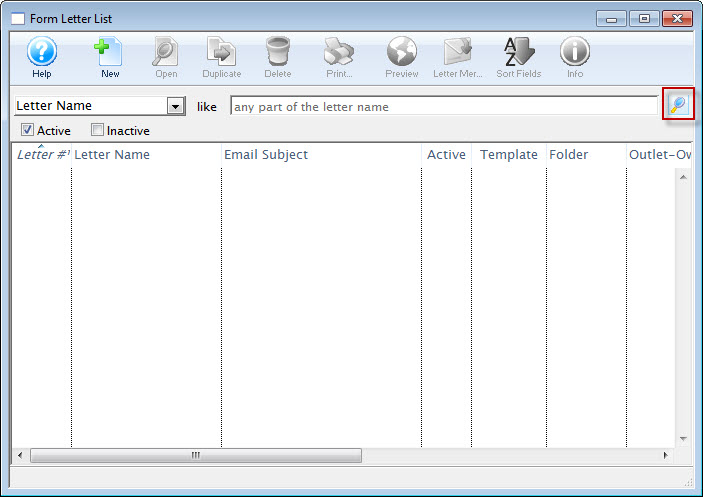
For more information about the Form Letter List Window, click here.
- Click the Search
 button and select the letter to use in your mail list merge.
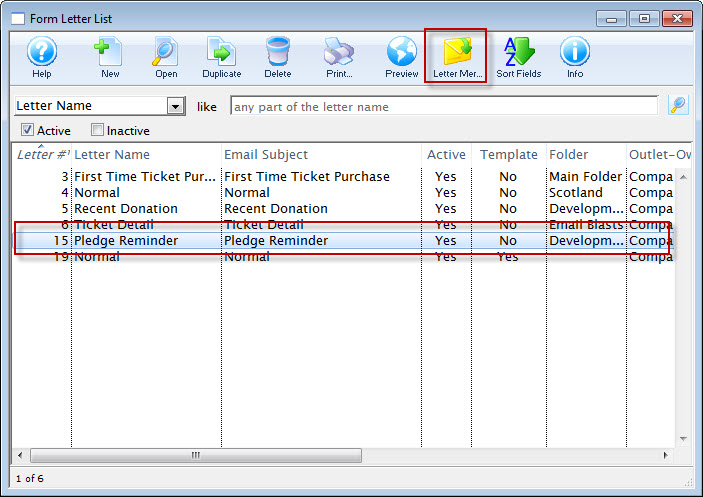
- Click the Letter Merge
 button.
The Form Letter Criteria window opens. click here, for more information on creating mail lists.
Attaching the Letter to a Mail List
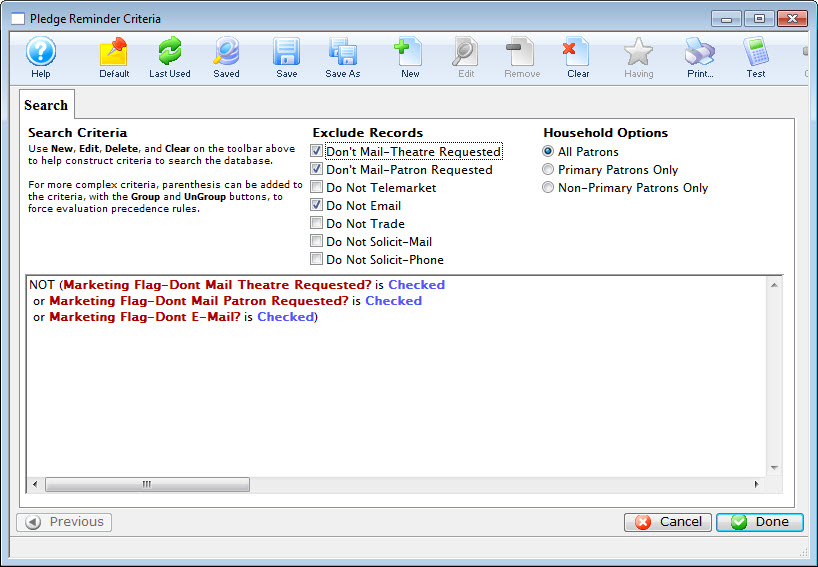
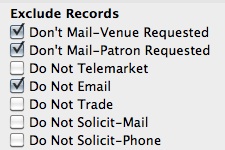
- You can exclude those patrons who have indicated they do not wish to receive mailings, by ensuring the appropriate Exclude Records radio buttons are selected and that the criteria reflects that information.

- To add any new piece of criteria, including a specific Mail List, click the New
 button.
- To initiate a merge based on an existing mail list, select the Criteria category Patron Marketing Data > Marketing Patron Belongs to Mail List.
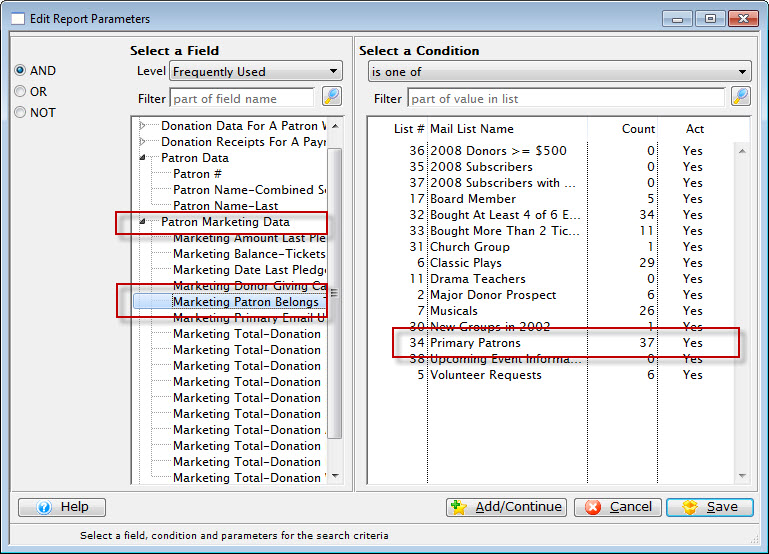
- On the right side, choose the mail list of patrons to whom you'd like to send your letter.
- When you have made your selection from the list of Mail lists, close the criteria window.
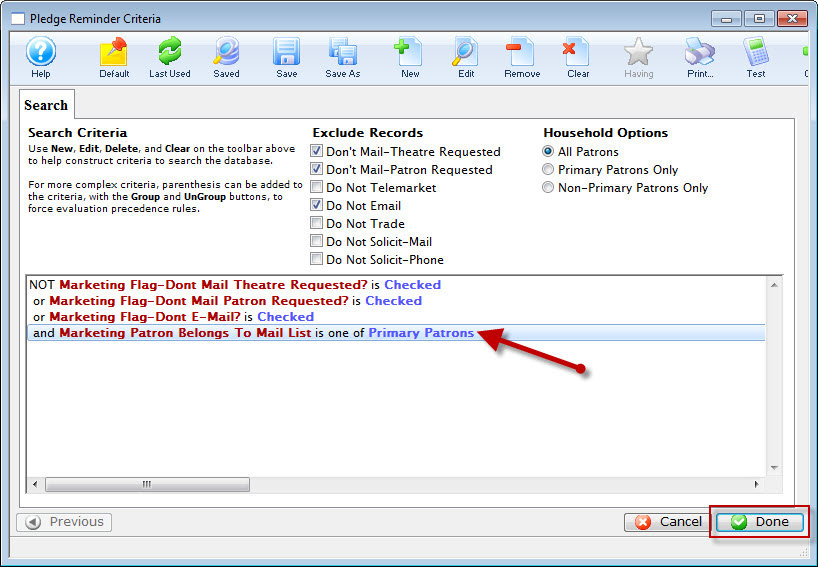
The selected mail list is added to the criteria.
If you do not have an existing mail list, you could enter criteria to build a new mail list to use for this mailing.
The process is the same whether you're using an existing one or creating a new one. For more information on creating mail lists, click here. - Click Done in the bottom right to start the merge.
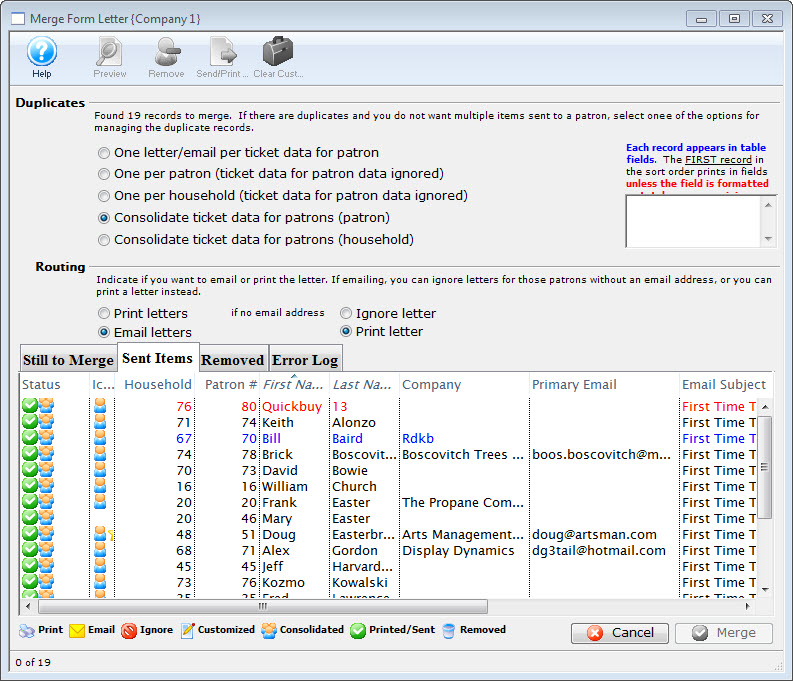
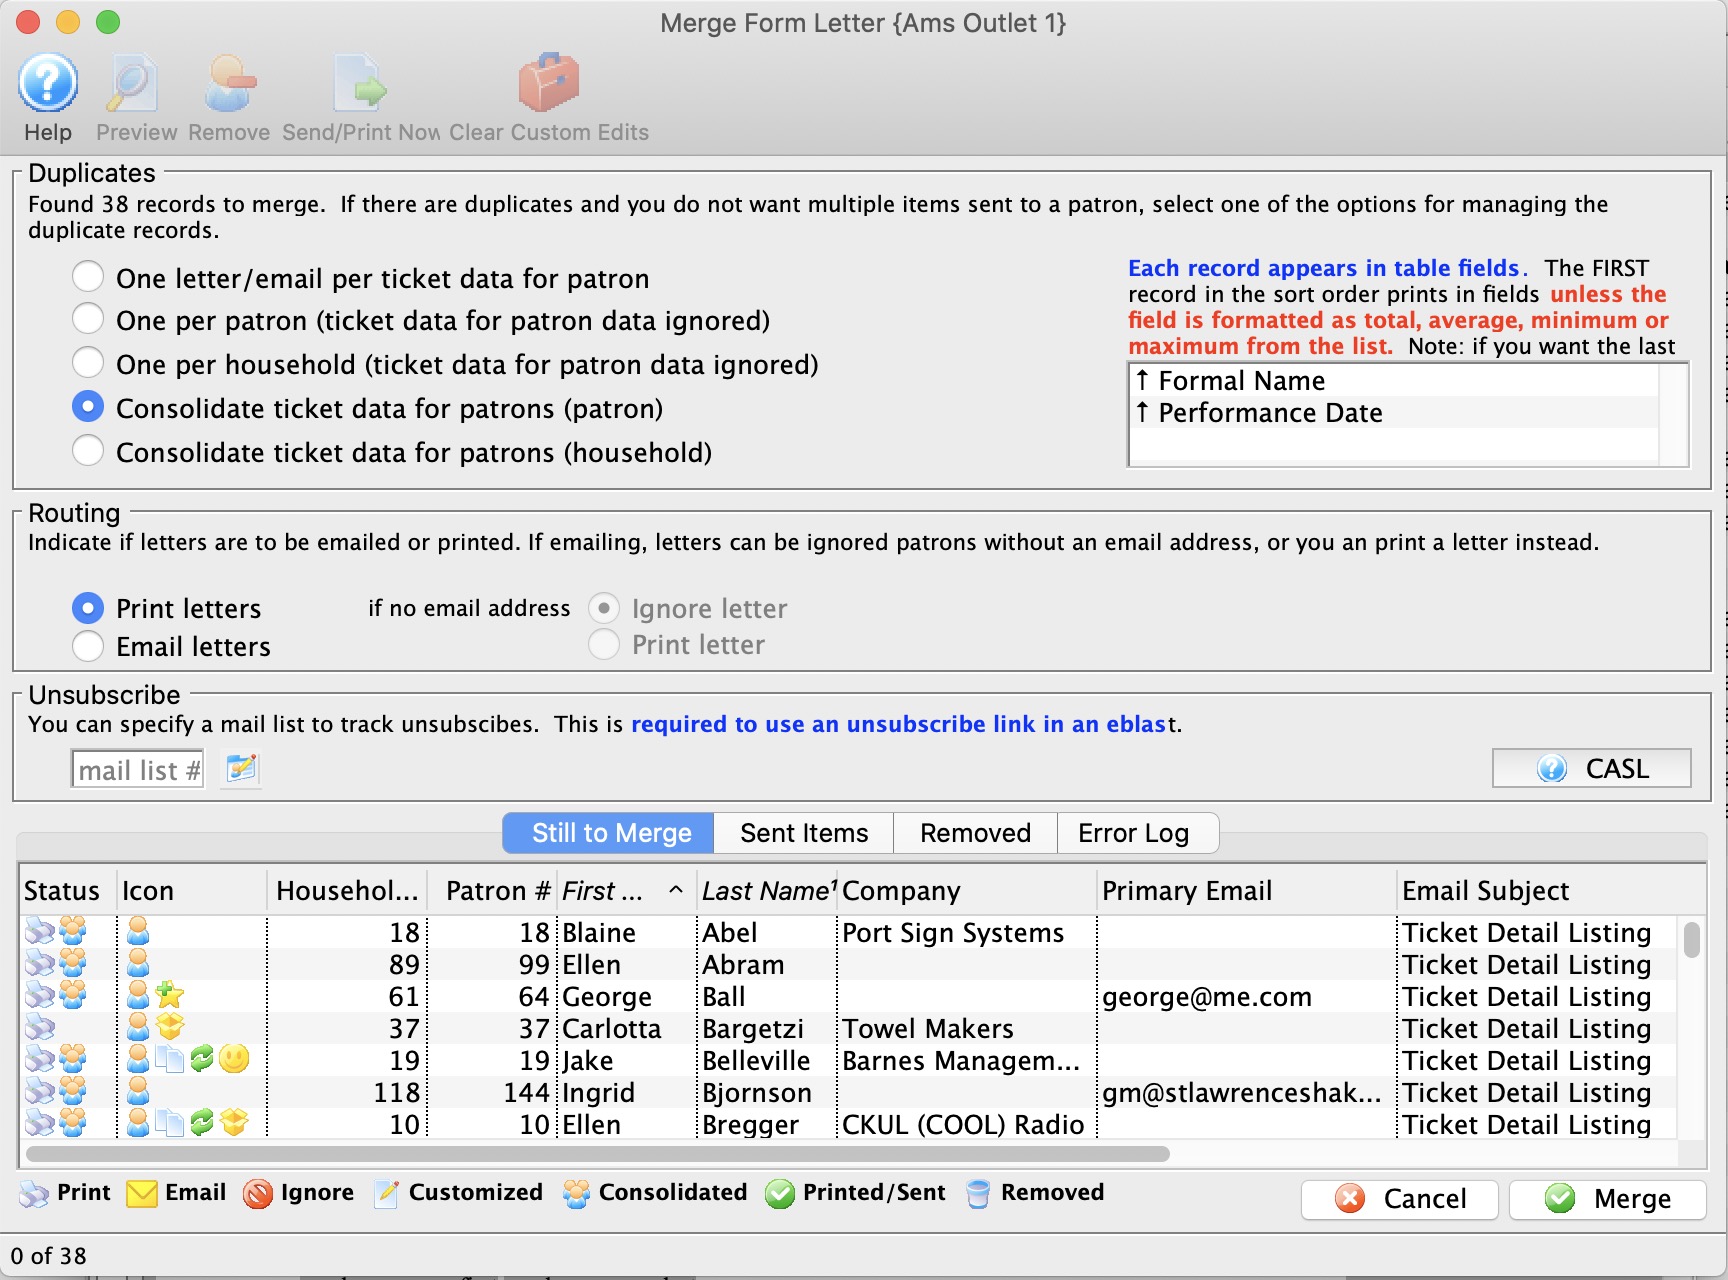
Setting Sending and Routing Options
For more information about the Merge Letter Window, click here.
- Make the following selections appropriate to your needs.
Duplicates Set the radio buttons to reflect the type of letter output you'd like for your mailing. Choices are: - One per receipt - there will be one letter for each receipt in the record.
- One per patron - Patron receives just one mailing and the Receipt data in the letter is ignored. While this will limit the number of letters to a single patron, several patrons in the same household could receive letters.
- Consolidate tickets (Patron) - the receipt data is consolidated into a table (rather than being ignored) and each patron will receive one letter based on that table of receipts. Several patrons in the same household could receive letters.
- Consolidate tickets (Household) - Generates one single letter for the primary household patron. This is the method to ensure one letter or mailing for each household
Routing Set the routing for your letter to - Print or Email. If you choose Email, you can then choose "If no email address", then either Ignore or Print the letter. Unsubscribe If you are sending emails to people, you may want to include a mail list that will be used to track unsubscribes. This mail list can be: - the main mail list used to find patrons to send the emails to
- one of your other mail lists whose main function is simply to track unsubscribes. This could be used in the future to eliminate people who have declined receiving emails
- a default mail list specified for the letter - which you can change if to want
You do not have to provide an unsubscribe mail list when e-blasting. For example, you:
- WOULD NOT use an unsubscribe mail list if you were sending out an advisory about the event coming up that people have already purchased tickets for - or a quick eblast to board members.
- WOULD likely use an unsubscribe mail list if it was a marketing newsletter.

You can see all emails associated with this mail list in the email tab on the mail list window - Click the Merge
 button when you see the list has been narrowed down.
Inserting unsubscribe links
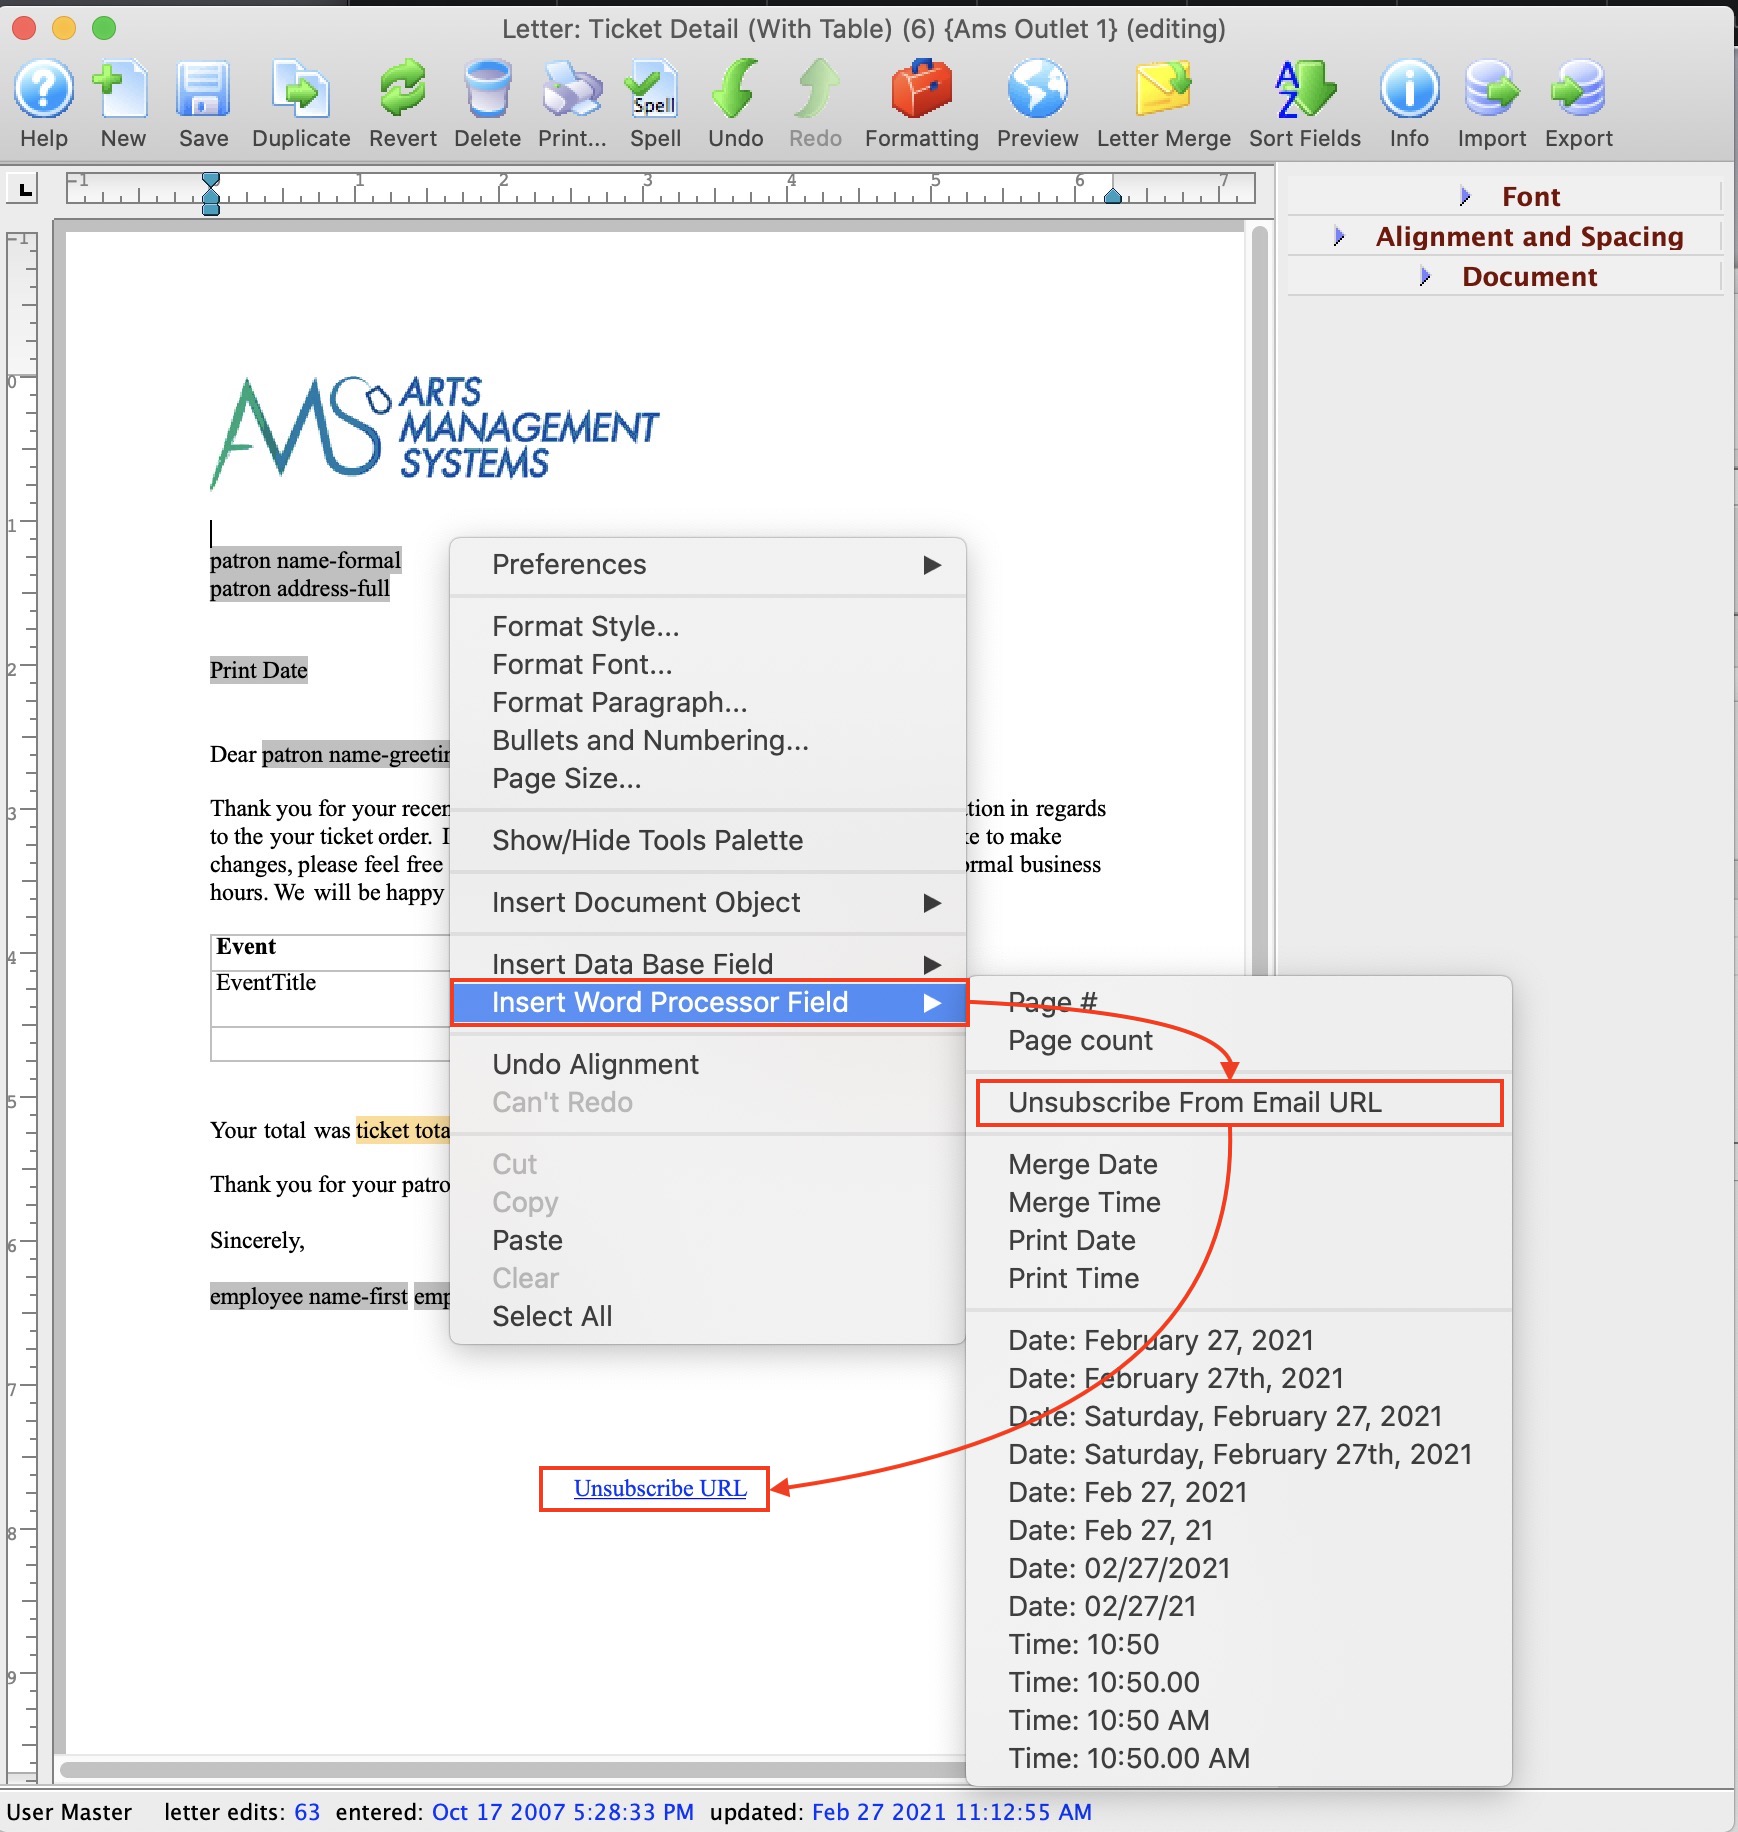 If you want to add an unsubscribe link to your email, there are a few of steps:
- Open your form letter list and find your email/letter to edit it
- Click your cursor on the place in the letter where you want your unsubscribe link to be. Normally it is near the bottom of the email, so you might need a few extra lines
- Right click to get the main context menu for adding items to the document
- Select Insert Word Processor Field
- From the context menu, select Unsubscribe from Email URL
- The field will be added to the letter and a window will open letting you edit the link name displayed on the letter. See below - changing the name of the link
- After saving the link, you may want to:
- centre the text using a keyboard short cut (cmd-shift-C) -or-
- use the editing tools palette to the right of the word processor
- Adjust the font name, size and/or colour if neccessary
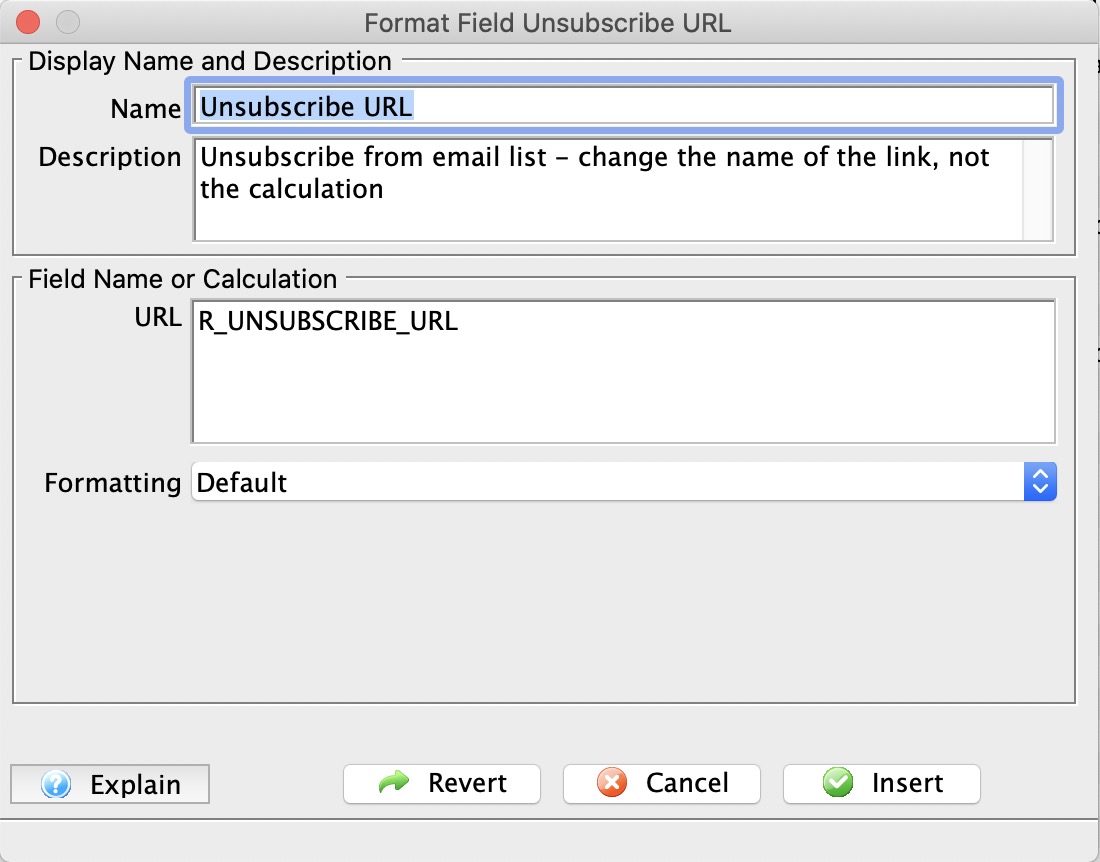
Changing the name of the link
As the unsubscribe link is being added, it opens the window to the right. The text that is displayed on the email defaults to Unsubscribe URL in the name field.
- Name - Change the text in this field to be what you want displayed on the eblast
- URL - DO NOT change the field name.
Setup for Unsubscribe Management
If a mail list is set as default for the form letter, it will appear here automatically. You can:
- Clear it if you do not want to have an unsubscribe link on the eblast
- Change it if you want to use a different mail list to track unsubscribes
- Enter it if there is no default and you want to track unsubscribes for this eblast only
|
You do not need an unsubscribe mail list when emailing. CASL (Canada's Anti Spam Law) generally defines consent as:
|
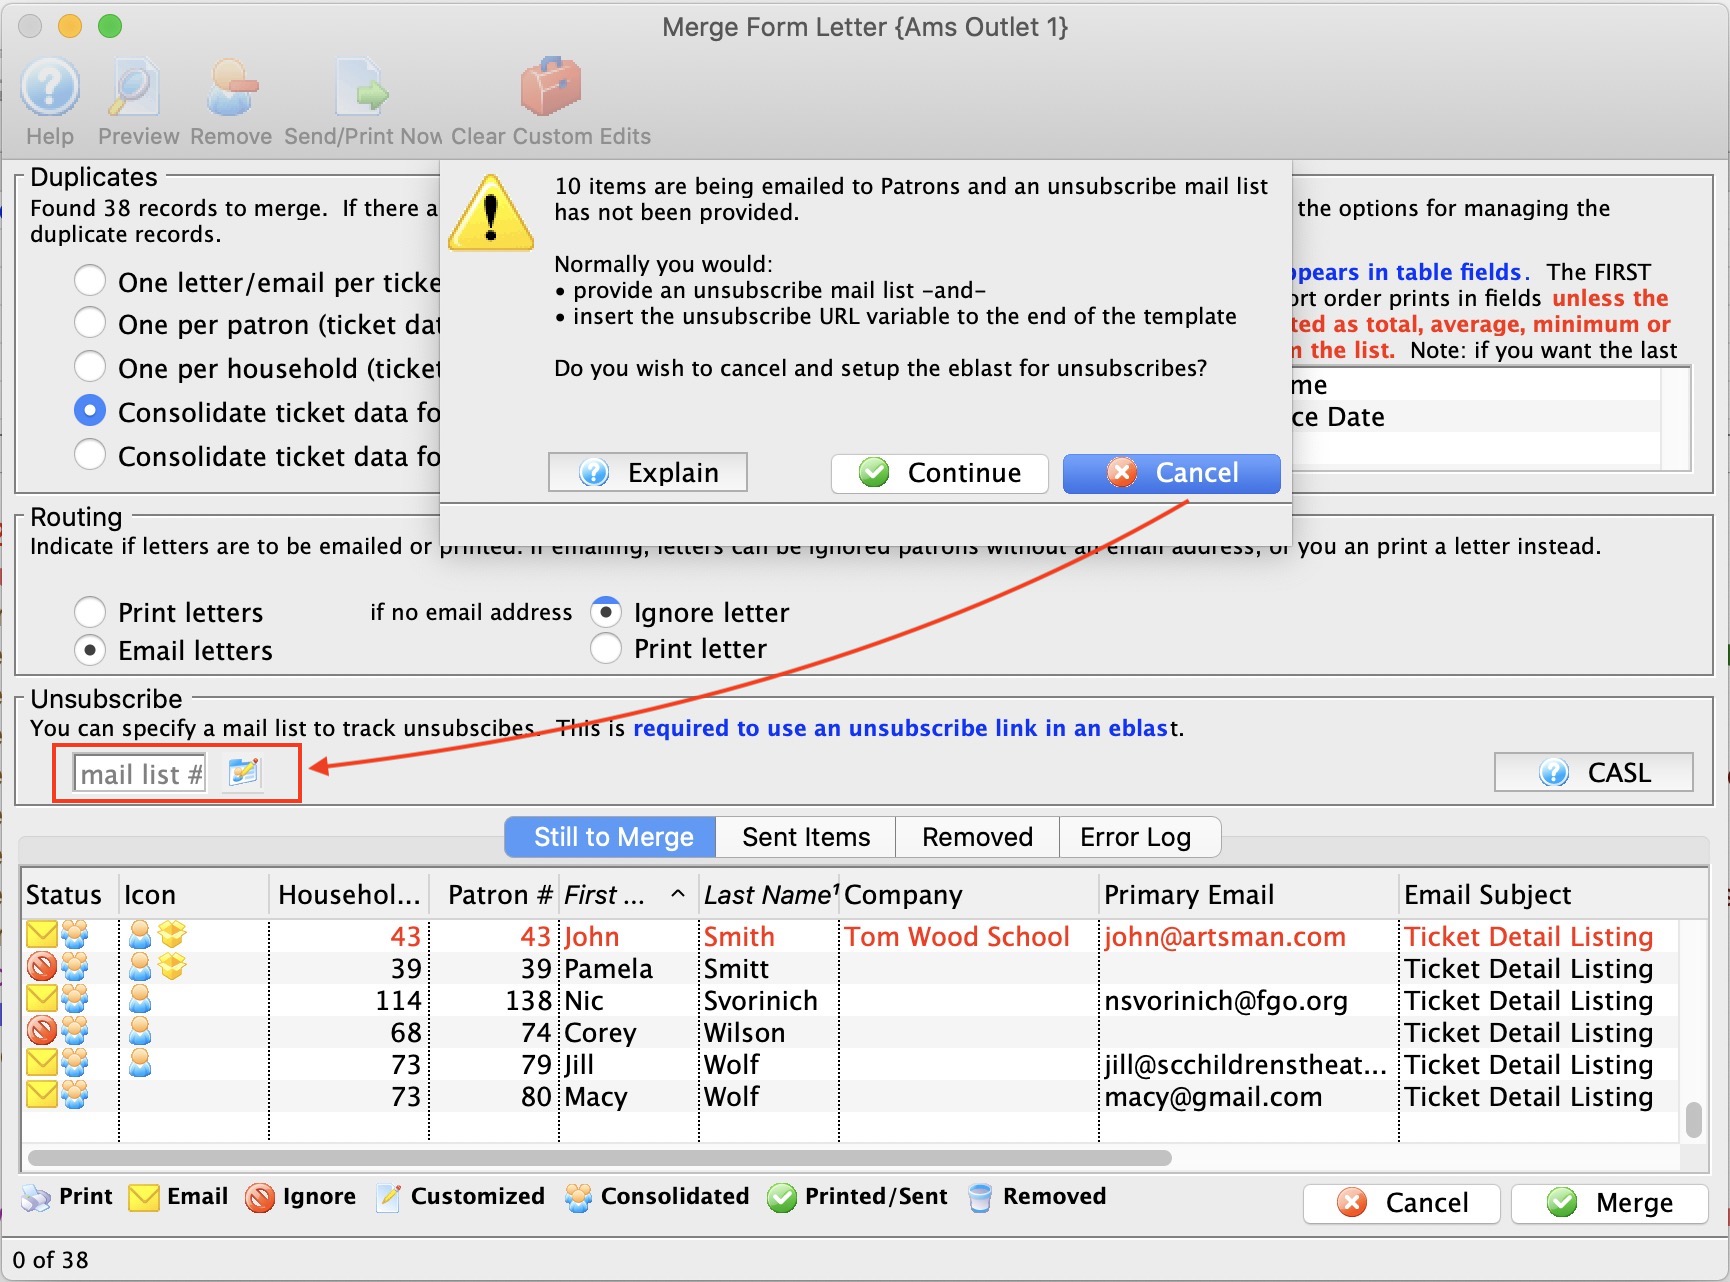
Requirements for unsubscribe link
There are two requirements to make an eblast unsubscribable:
- Add the unsubscribe field to your email
- Specify the mail list to track the unsubscribe patrons on the merge window (above). It can be set as default for the form letter
|
Note: when the the letter is being printed, the unsubscribe wording does not appear on the form letter |
Complete the Merge and Print or Send
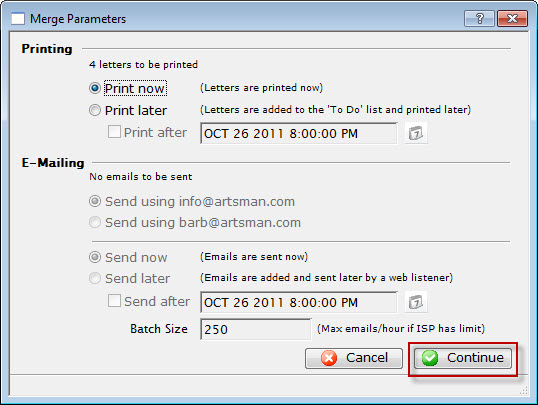
- Set your desired Print and/or Email options and click the Continue
 button.
When the Merge is completed, you are returned to the Merge Letter window with a report of the merge is displayed.