Calendars
The calendar window displays a lot of data in a limited amount of space and has powerful filtering features that make it "Command Central" for managing and viewing tasks, performances, volunteer activities and projects.
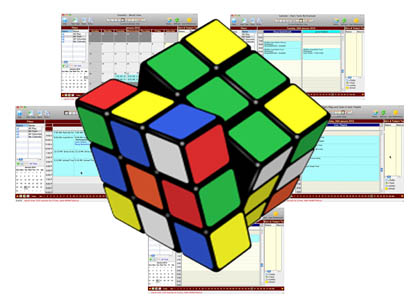
The 'trick' is to get the calendar to display in may ways so that it provides you with the results/information you need - like a Rubik's Cube®, with the sides being:
- date, people, resources, venues
- Week view, month view, people view, venue view
- Not everyones will be the same as it depends on what you want to see.
| Standard Calendar Views
Click here, to see what the calendar looks like in these views. |
|
| Facility Management Calendar View
Click here, to see what the calendar looks like in these views. |
1. Venues- Shows what is going on in the selected venue. |
| 2. Resources - Is a particular resource (e.g. Projector) available | |
| 3. Employees /Personnel - Is the particular employee available (to avoid double booking) | |
| 4. Volunteers - Specific jobs, is a volunteer booked for a required role |
To navigate through the calendars is as simple as clicking a button to change the view. Data carries across calendars and will display if the calendar type supports the task type (for example, a task must have a venue associated with it to appear on a venue calendar).
Standard Calendar Views
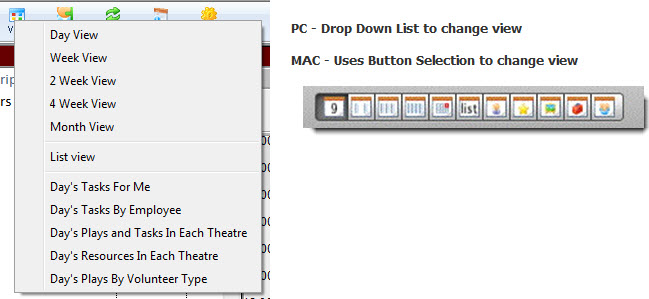
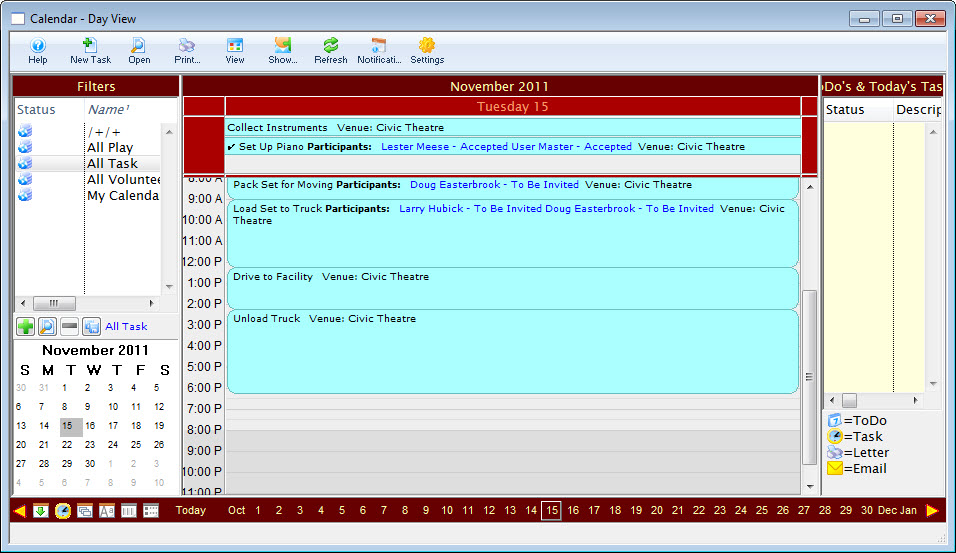
| Standard Calendar Views | Day View
|
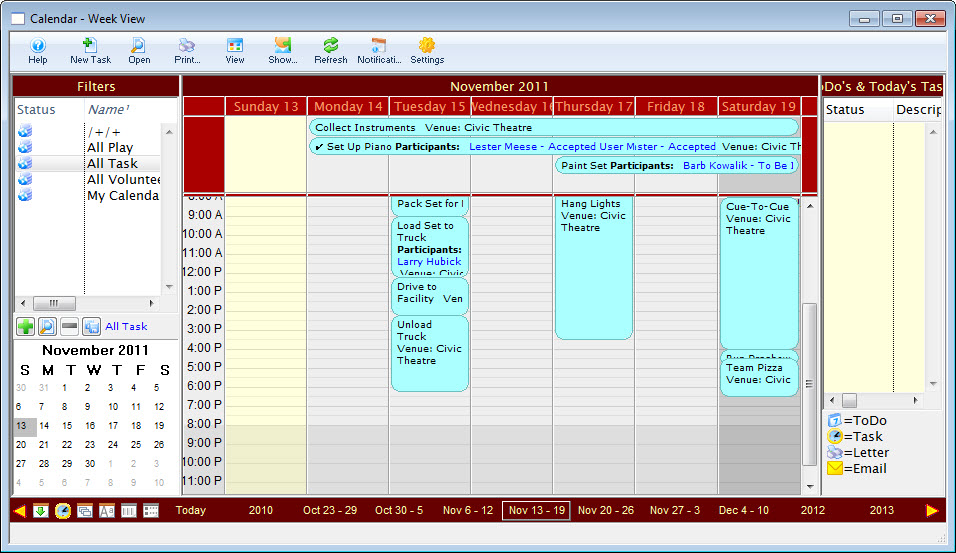
| Week View
| |
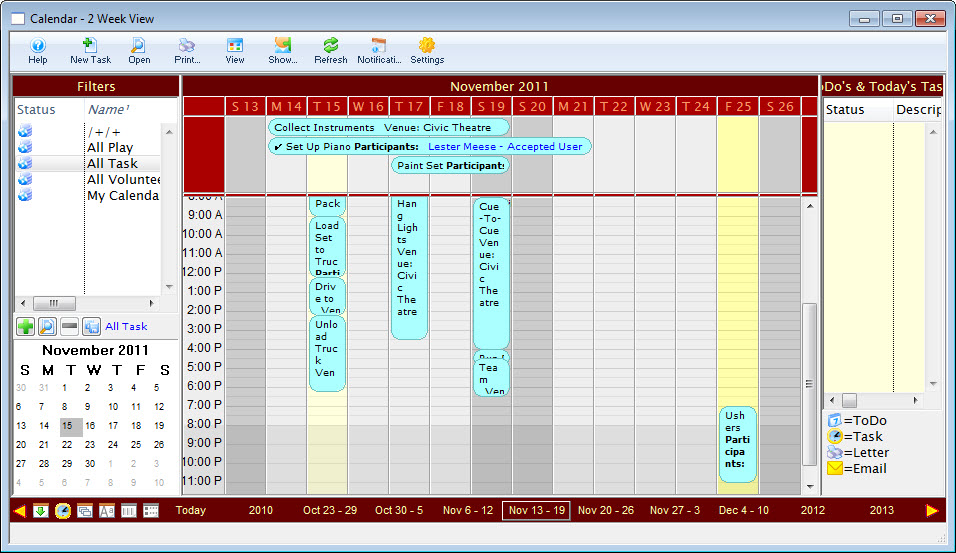
| 2 Week View
| |
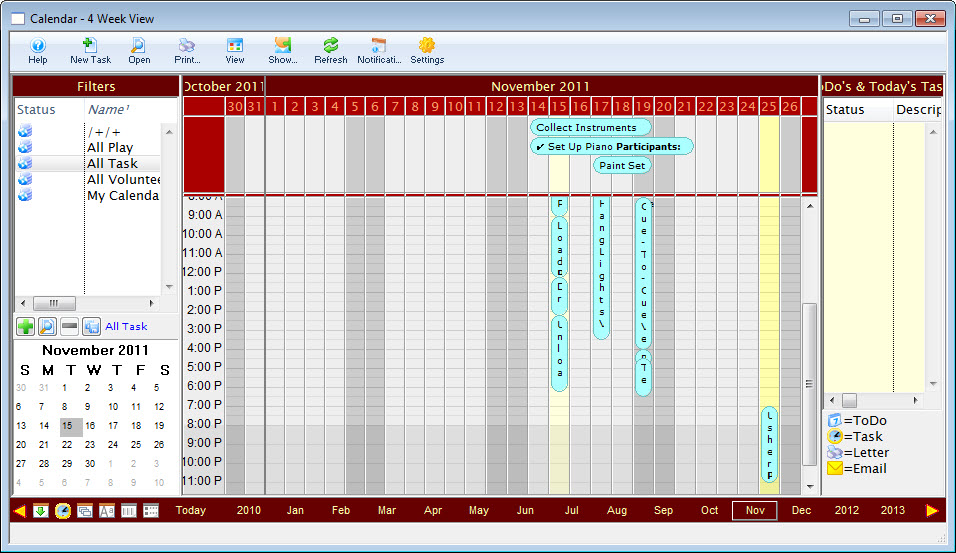
| 4 Week View
| |
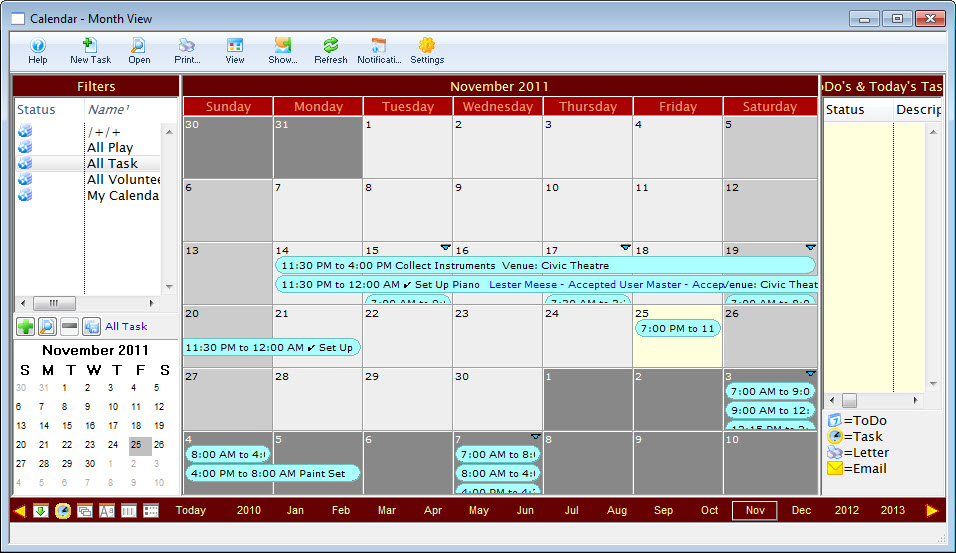
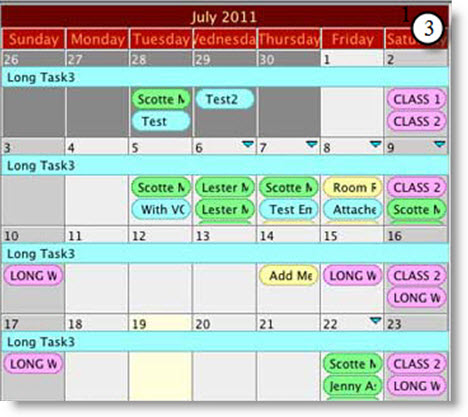
| Month View
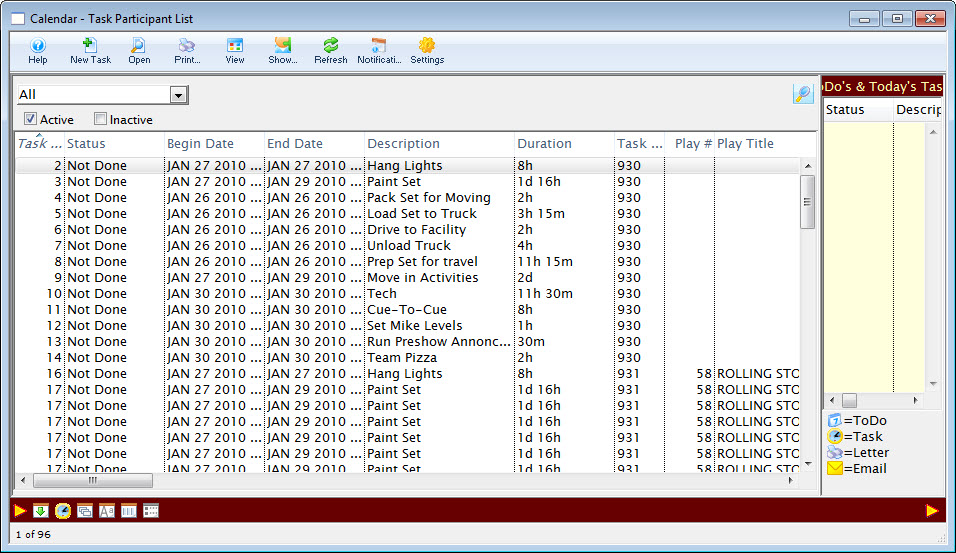
| List View | Displays a task listing
|
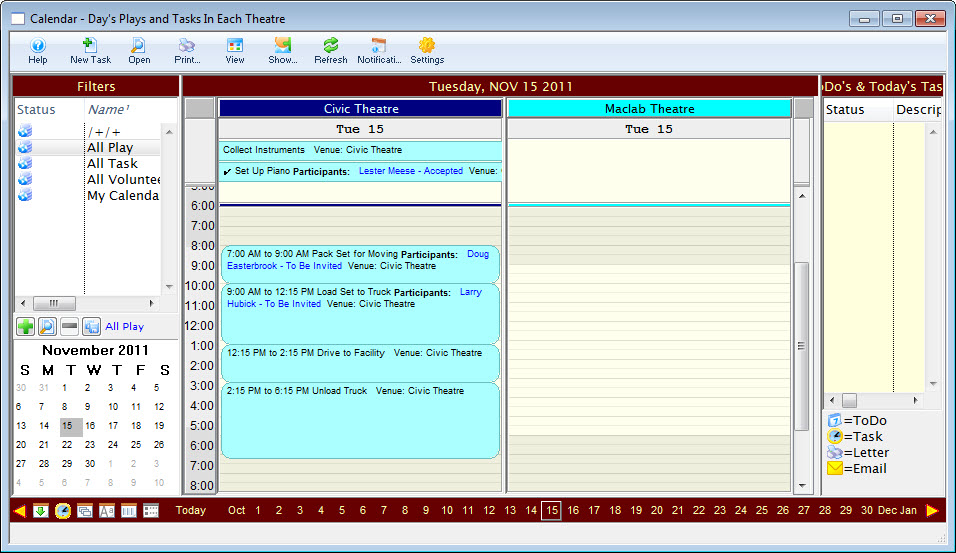
| Facility Management Calendar View | Day's Plays and Tasks in Each Theatre
|
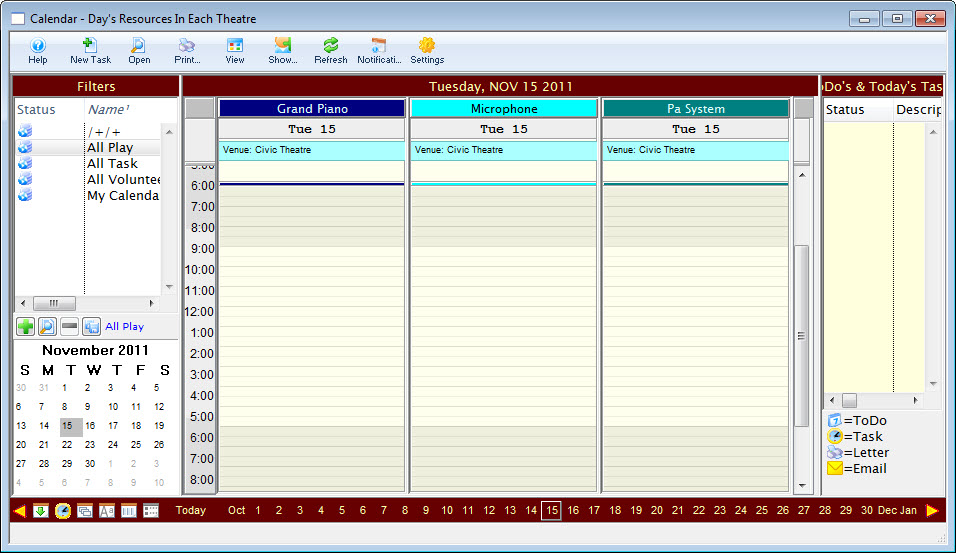
| Day's Resources in Each Theatre
|
|
| Day's Tasks by Employee
|
|
| Day's Plays by Volunteer Type
|
To navigate through the calendars is as simple as clicking a button to change the view. Data carries across calendars and will display if the calendar type supports the task type (for example, a task must have a venue associated with it to appear on a venue calendar).
Other than in Month view, each of the calendars displays the hours down the left side and an All Day portion at the top. Items that are scheduled for all 24 hours of the day, or which overlap from one day to the next will show in the All Day portion at the top.

In each of the views, except Month view, you can click-and-drag in the time range you want to create a task and the Task Detail window will display, with the date and time you selected already filled in. You can also create a new task by right-clicking to bring up the context menu and selecting New Task. In that case, it uses the time you clicked on as both the starting and ending date.
The Calendar Pane
The Calendar pane is in the center of the window and is where most of the data is displayed. It can be viewed as a normal monthly calendar, or in many other views.
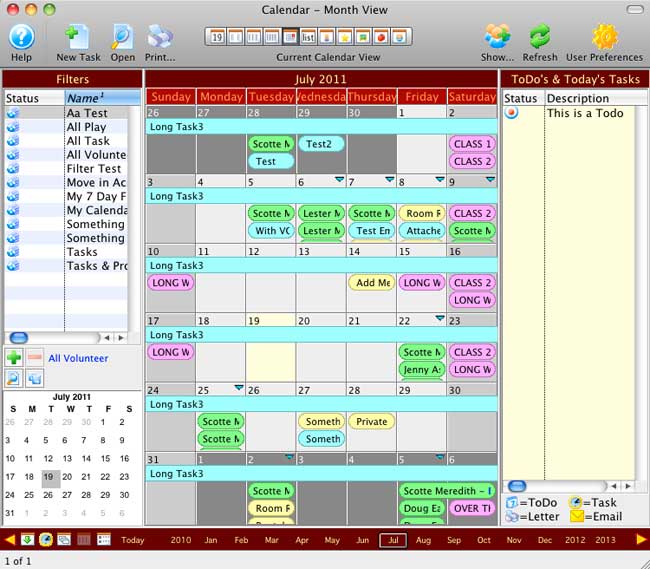
In the Calendar pane, you can view:
- Tasks
- Events (performances)
- Volunteer Activities
- Projects
These four types of data are displayed in different colours so you can tell the difference at a glance. You can change these colours, or any other colours in the Calendar window in Preferences. By default:
- Tasks are pastel blue
- Events are pastel pink
- Volunteer Activities are pastel green
- Tasks that are part of a Project are pastel yellow
These colours can be overridden in several ways.
- A specific task can have its colour overridden in the Detail Task window.
- A specific type of task can have its colour overridden in the Facility Task Types window in Code Table setup.
- A specific project can have the colour of all its tasks overridden in the Project Detail window.
- A specific play can have its colour overridden in the Play Detail window.
- A specific project can have the colour of all plays/tasks associated with it overridden in the Theatre Map window.
- Each item in the calendar takes the colour of the lowest level at which a colour is set.
For example, if a project has had its colour overridden but an individual task within that project has also had its colour overridden, the colour of the task is displayed.
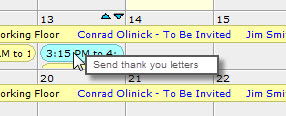
Any of the items displayed on the calendar can be viewed in slightly more detail by hovering over the item and viewing the tooltip. Full details can be viewed by double-clicking on the item.
List View
The List view can be selected by clicking on the individual button on the toolbar for List  (Mac) or by clicking on the View
  button (Windows) and selecting List View.
When in List view, the filters are hidden because they are not applicable.
The List View shows tasks from the database like any other list in Theatre Manager. You can select from the dropdown to search for different kinds of tasks.
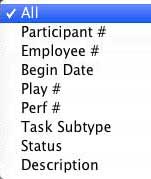
Once you make a selection from the dropdown, click the search button  to populate the list.
List View
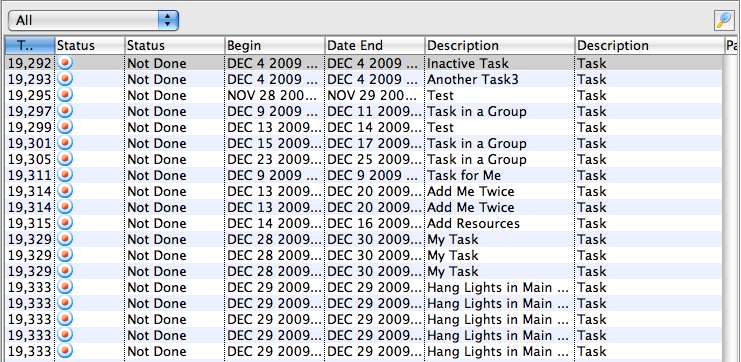
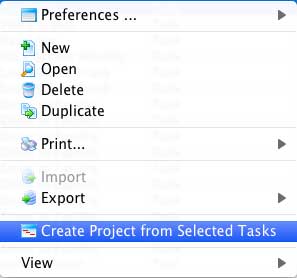
You can also select items in the list and from the context menu add them to a new project, if they are not already part of another project.
Group Calendars
Group calendars provide specific views of the calendar not possible using just the normal calendars. They can also show multiple calendars on the same window.
The group calendars are accessed by clicking on the individual button on the toolbar for the group calendar you want  (Mac) or by clicking on the View button (Windows) and selecting the group calendars in the bottom portion of the list.
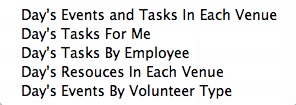
In most group calendars some of the filters will also apply.
Below we'll go through each window in detail.
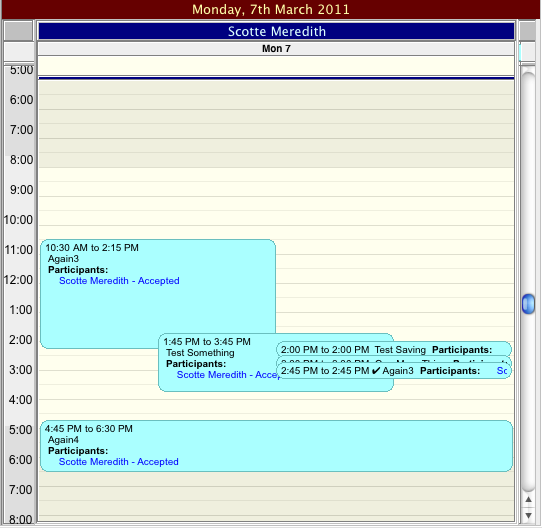
Day's Tasks for Me
In the Day's Tasks for Me group calendar, you can see only your Tasks for the selected day.
Day's Tasks for Me
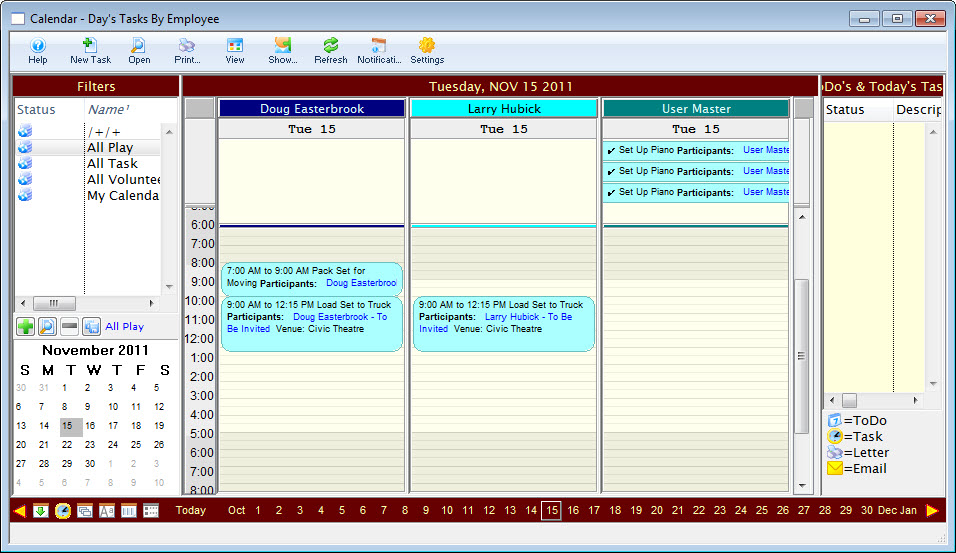
Day's Tasks by Employee
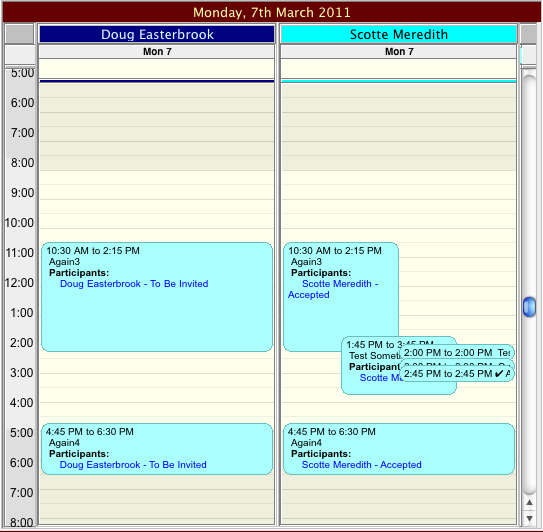
In the Day's Tasks by Employee group calendar, you can see the Tasks for any employee for the selected day.
If you DO NOT specify which employees you want to see in the Filter on the left, the group calendar will display only those employees that have tasks on that day.
If you DO specify which employees you want to see in the Filter on the left, the group calendar will display only those employees you have selected, whether they have tasks associated with them or not.
Day's Tasks by Employee
Day's Events and Tasks in Each Venue
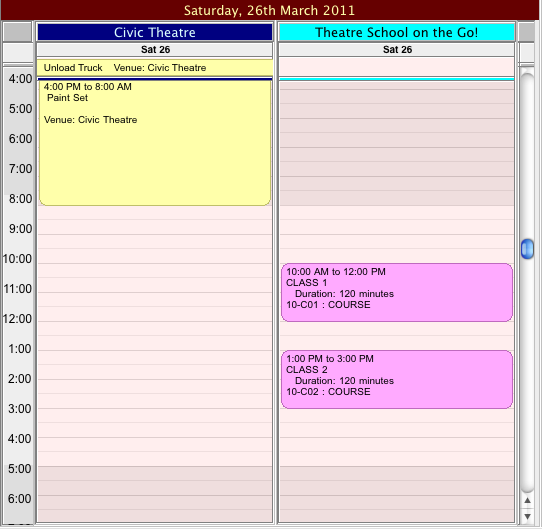
In the Day's Events and Tasks in Each Venue group calendar, you can see the Events and Tasks in each venue for the selected day.
If you DO NOT specify which venues you want to see in the Filter on the left, the group calendar will display only those venues that have events or tasks.
If you DO specify which venues you want to see in the Filter on the left, the group calendar will display only those venues you have selected, whether they have events or tasks associated with them or not.
You can also display only tasks for specific employees by selecting specific employees in the Filter on the left.
Day's Events and Tasks in Each Venue
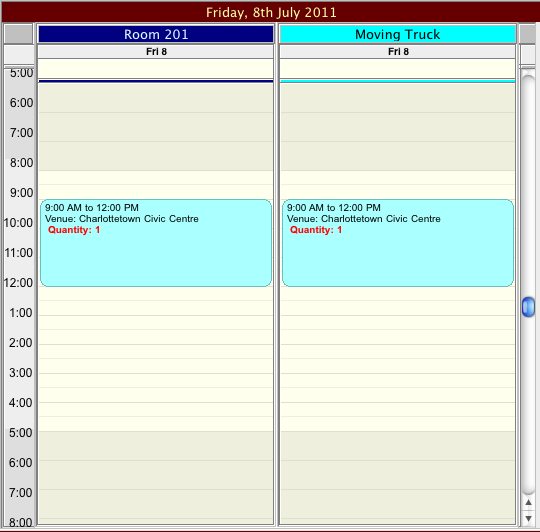
Day's Resources in Each Venue
In the Day's Resources in Each Venue group calendar, you can see the resources needed in each venue for the selected day.
If you DO NOT specify which venues you want to see in the Filter on the left, the group calendar will display only those venues that have resources needed on that day.
If you DO specify which venues you want to see in the Filter on the left, the group calendar will display only those venues you have selected, whether they have resources associated with them or not.
Day's Resources in Each Venue
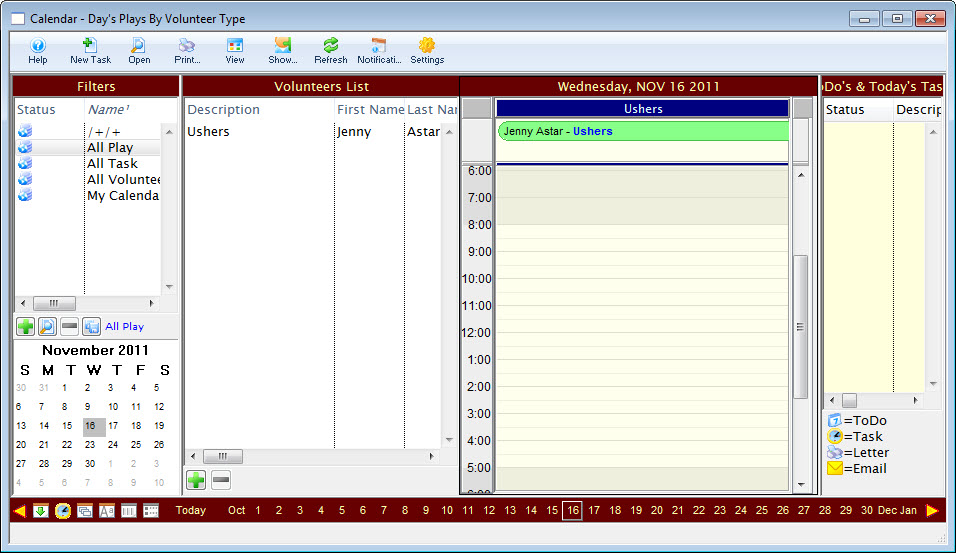
Day's Events by Volunteer Type
The Day's Events by Volunteer Type group calendar is a special kind of calendar. It displays the events for a day and the volunteers associated with that event, by volunteer type. For more information on volunteer management in Theatre Manager, click here .
This group calendar has 2 parts: the list of volunteers for this day on the left, and the individual columns for each volunteer type on the right.
Day's Events by Volunteer Type
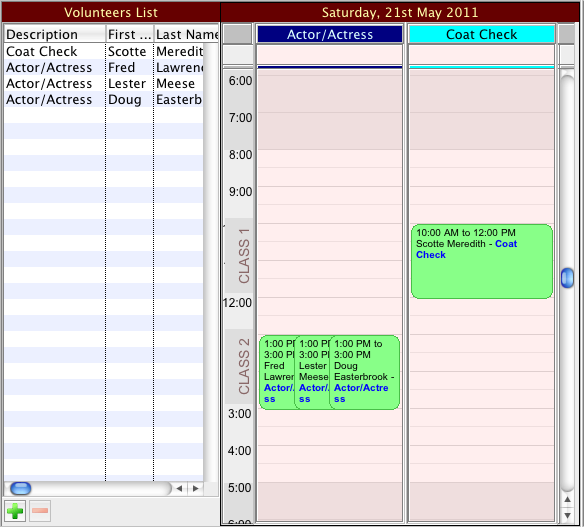
When this window first opens, if there are any volunteers assigned to work on that day, they will be filled into the list of volunteers and a calendar will be created for each volunteer type that has been assigned. On the calendar, overlayed on the time area, the performances on that day are indicated. The time for the performance is indicated by a darker band in the time area. If there are multiple performances in a day, or if the titles of the play are long, there may be some overlap of the text.
If there are no volunteers assigned, the list will be empty and there will be an empty calendar with no volunteer activity type description at the top.
If you DO NOT specify which volunteer activity types you want to see in the Filter on the left, the group calendar will display only those volunteer activity types that have volunteers assigned.
If you DO specify which volunteer activity types you want to see in the Filter on the left, the group calendar will display only those volunteer activity types you have selected, whether they have volunteers assigned to them or not.
This window can be used to schedule volunteers very easily.
To schedule volunteers, click on the Plus button  under the list. This brings up a list from which we can select volunteers. Select Volunteer Code # from the filter dropdown and select the type of volunteer you want to schedule.
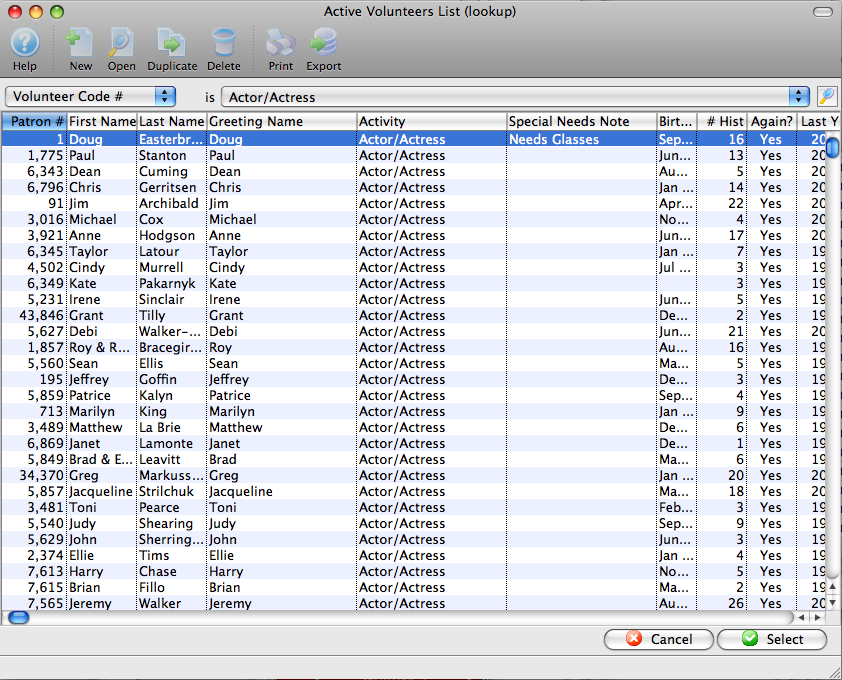
You can now drag volunteers of that type into the list or the calendar. In order to make volunteer scheduling as easy as possible, the window will help you through the scheduling.
If you drag a volunteer onto the list, it first asks which performance this position is for (if there is more than one).

Next, it checks to see if this volunteer activity type is already one of the calendars in the window. If it is, it adds the volunteer to both the list and to that column. If it is not, it asks if you want to add the new column, or if perhaps you dragged this in inadvertently.
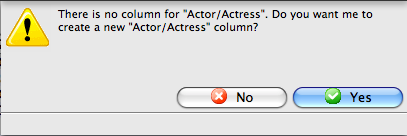
When dragging to the list, the time for the volunteer activity is assigned to be the same as the time spread of the performance
You can also drag the volunteer to a specific column at a specific time. This sets the starting time for the volunteer activity to the time you selected. The ending time is set based on the length of the play or event.
You can change these times later by moving the item on the calendar, or by dragging on its borders to change the length of the activity.
If you should drop a volunteer on a calendar where the activity does not match the type you are dragging, it will ask whether it should put it into the correct column (if one exists) or create a new column (if it does not already exist). If you say No, no record is created.
When you click on any line in the list, the appropriate volunteer activity is also selected in the appropriate calendar. If you click on a volunteer activity in any of the calendar lines, the appropriate volunteer in the list is also selected.
To remove a volunteer, select it in the list and click on the Minus button  .
.
Calendar Pane Features
Adding Items to the Calendar
Items can be added to the calendar in a number of ways.
In any calendar except Month view and the Volunteer Scheduling calendar, you can create a new task by dragging across the time period where you want the task. A task detail window will pop up with your date/time filled in. Depending on which calendar you are doing this in, other fields may be filled in as well.
Items from lists can also be dropped on a calendar when appropriate. Dropping a volunteer onto an empty area of the calendar will create a volunteer history record starting with that time. Dropping a volunteer onto a task will associate the volunteer with that task and use the task starting/ending times as a starting point. Dropping a volunteer onto another volunteer record will ask if you want to replace the volunteer or create a duplicate record using this volunteer; if it is a placeholder volunteer, it will be replaced with the volunteer you dropped. Patrons or employees can also be dropped onto tasks to add them as participants.
You can bring up a list of volunteers, employees, or patrons by clicking on the Show button at the top of the calendar.
Editing a Task
A task or volunteer activity length can be changed in any view except Month view by moving the cursor to the top or bottom of the task or volunteer activity. The cursor will change to a double-headed arrow and you can drag the starting or ending time to whatever you want.
You can also double-click on the item in the calendar and edit the dates and times (or any other information for the task or volunteer activity) by hand. When you save the task or volunteer activity, the calendar is updated.
Moving a Task
A task or volunteer activity can be moved from one day to another or from one time to another by clicking on the task and dragging to the new location on the calendar. Depending on which view the calendar is in, you may get different visual feedback.
Tasks or volunteer activity can also be altered by dragging on the beginning or ending edge of the item in the calendar.
You can also double-click on the item in the calendar and edit the dates and times by hand. When you save the task or volunteer activity the calendar is updated.
You cannot change performances within the calendar. This must be done within the Events Setup window (Setup >> Events) of Theatre Manager, where other controls are in place.
A task or volunteer activity can also be moved to the All Day portion of the window at the top. This will set the starting time to midnight on that date and the ending time to 11:59 PM.
The calendar will not allow you to drag a task or volunteer activity when it is not appropriate. This may be due to permissions, whether you are the owner (or designated editor) for the task, whether the task is in a project and has dependencies, or due to a number of other factors.
Calendar Window
The calendar window displays a lot of data in a limited amount of space and has powerful filtering features that make it "Command Central" for managing and viewing tasks, performances, volunteer activities and projects.
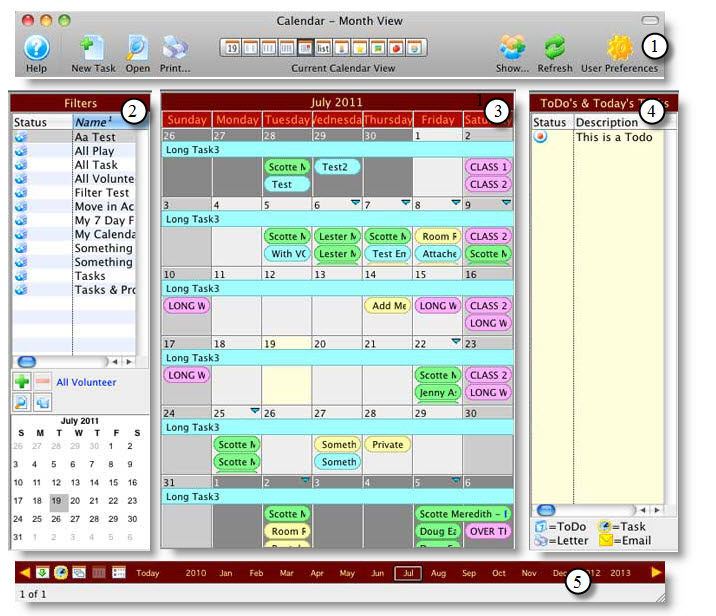
The calendar window consists of:
| 1 | The Calendar Toolbar / Ribbon Bar at the top of the window and
contains the basic functions available in all views.
Click here for a detailled description and its functions. |
| 2 | 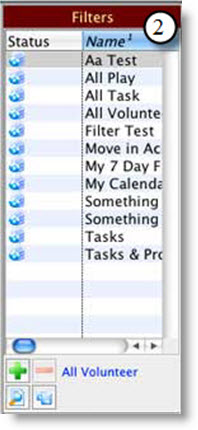 The Filter Pane is on the left side of the window and can be used to show
only certain information on the calendar pane. Filters are stored in the
database and are used to select and display only a portion of the tasks,
performances, volunteer activity and/or projects. The Filter Pane is on the left side of the window and can be used to show
only certain information on the calendar pane. Filters are stored in the
database and are used to select and display only a portion of the tasks,
performances, volunteer activity and/or projects.
Click here, for more information on setting up, editing and removing filters. |
| 3 |
The Calendar Pane is in the center of the window and is where most of the data is displayed. It can be viewed as a normal monthly calendar, or in many other views.
Click here for more information on the different Calendars. |
| 4 |
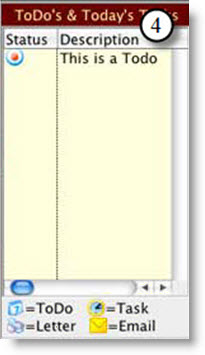 The ToDo Pane defaults to the right side of the window, although you can set a preference to display it on the left side instead. It displays a list of today's tasks, ToDo's that are upcoming and past due, and a "Today" view that always shows an hourly breakdown of tasks, regardless of what view the Calendar pane is currently displaying. Click here for more information on To Dos. |
| 5 |
The Navigation and Settings Tool Bar The display automatically changes depending if the Month, Week or Day view has been selected in the Calendar Toolbar. However, you can navigate through the Months, Days and Hours by clicking on the desired Month, Day or Hour.
Click here for more information on the Navigation and Settings. |
Calendar Toolbar / Ribbon Bar
The Calendar is central to taks and Facility Management. The Calendar can be opened in the following two ways:
- By clicking the Calendar
 button in the Theatre Manager ribbon bar.
or
- Use the Patron Sales menu and clicking on Calendars and Tasks.
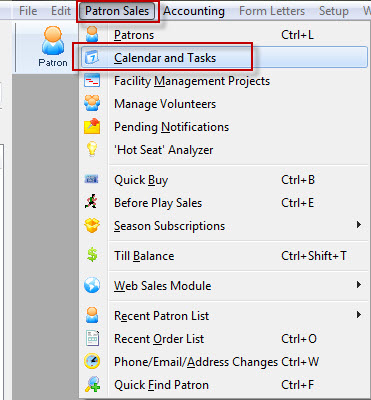

PC Toolbar / Ribbon bar

MAC Toolbar / Ribbon bar
Functions
Click on a link to learn more about the features.
|
|
Opens the Help file for Calendar. Click here to view the Help page. |
|
|
Creates a new task. Click here for more information on Createing a New Task. |
|
|
Opens a selected calendar item to edit. |
|
|
Prints the selected calendar and criteria. Click here for more information on printing calendars. |
|
|
Changes the Calendar View. These can be selected by clicking on the individual button on the ribbon bar for that view |
|
|
Displays a popup menu where you can select the list you wish to display: Volunteers, Employees, or Patrons. This allows you to drag and drop into the appropriate places on the calendar. |
|
|
Refreshes the window with the current filters. This may be used if someone else has entered tasks that you want to see. |
|
|
Opens the Preferences window to change calendar colors and options. Click here for more information on preferences. |
Printing Calendars
Currently, only the 5 main views of the calendar can be printed. The groups calendars will be printable in the future.
Single Calendar Report
Any of the standard calendar views can be printed: Daily, Weekly, 2 Weekly, 4 Weekly, and Monthly.
When you print, you have a few options to format the calendar.
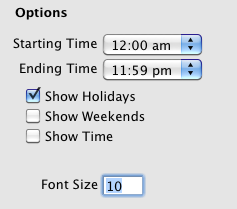
You can selecting the starting and ending time to show on the calendar. If nothing is showing before noon, for example, there is probably no need to display the calendar before noon.
Show Holidays displays holidays on the calendar. Show Weekends shows Saturday and Sunday in a darker colour. Show Time shows the starting/ending time on the various calendar items. Font Size gives you an opportunity to increase or decrease the size of the font that is used in the report.
Calendar Preferences
The Preferences  button in the Calendar toolbar gives you access to the customizable features of the calendar. The Calendar Preferences window gives you the option to change any of the colours of the different parts of the calendar, as well as the colour to use to display the tasks, events, volunteer activities, and projects.
You can also select the default first day of week  and the location of the ToDo pane
  .
.
The colors change on the preferences window so you get immediate feedback on how your selections will look.
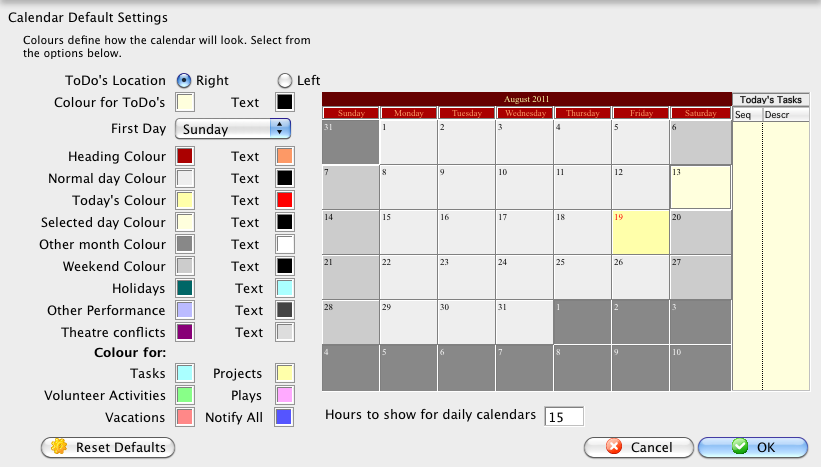
Employee Preferences also effect the ability to edit Calendar items. There you can delgate people who can edit your tasks. Click here for more information on the Emplyee Preferences Facilities tab.
The Filter Pane
Filters are a key part of the calendar.
- You decide what data you want to see on your calendars, that is, you do not see data that does not match the filter.
- There are a standard 4 filters available to all users. These show the maximum amount of data.
- You can change the filter you are using to show you what you need to know.
- You can customize filters for specific positions or staff, that way they don't see data they don't need.
- The starting filter can be customized.
- All Plays
- All Tasks
- All Volunteers
- My Calendar
- Click the Add icon to create a new filter. Click here to learn more about creating a filter.
- Click the Delete icon to delete a filter.
- Click the Edit icon to modify a filter. Click here to learn how to edit an exisiting filter.
- Click the Save Current icon to save the current view and filter as a new filter. This is most often used if you have opened this window from within a Project (or other area where this feature is available) to display all it's tasks in a new calendar. The current view and filter are saved to a new filter.
For example: You only want to see what is happening in the venue. You don't care about who owns it or what needs to be done. You weant to start with the Month, Week or Day view. These custiomizations are just an appearnace. You can view any or all just by changing your filter. Remember the Rubic's Cube®.
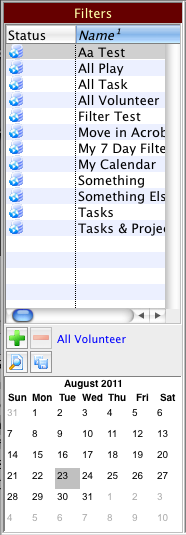 |
The Filter pane is on the left side of the Calendar window and allows you to quickly and easily subset your data by selecting a filter. You can select which data to see and which data not to see.
A filter allows you to select which tasks, performances, volunteer activities, and projects to display. It also allows you to select the visual display for the calendar, such as the view, and whether certain calendar features display or not. All these are stored in the filter. You are able to create an unlimited number of different filtures based on your own specific requirements. When you initially open the calendar window, whatever filter was last selected when the window was closed is restored when the window is reopened. Theatre Manager has 4 standard default filters that cannot be deleted or modified. They are the only filters available to someone without the Facility Management module. If you do not have the Facility Management module, you cannot create any new filters. The 4 standard filters are: |
 |
The filter pane has 4 buttons: Add, Delete, Edit and Save Current.
|
Adding a New Filter
Calendar filters are used to describe how you want a particular calendar to look and the data you want to inlude in the calendar. To add a new filter, you perform the following steps:
- Click the Add
 button, or select Add
  from the right click context menu.
The Edit Filter: (inserting) window opens.
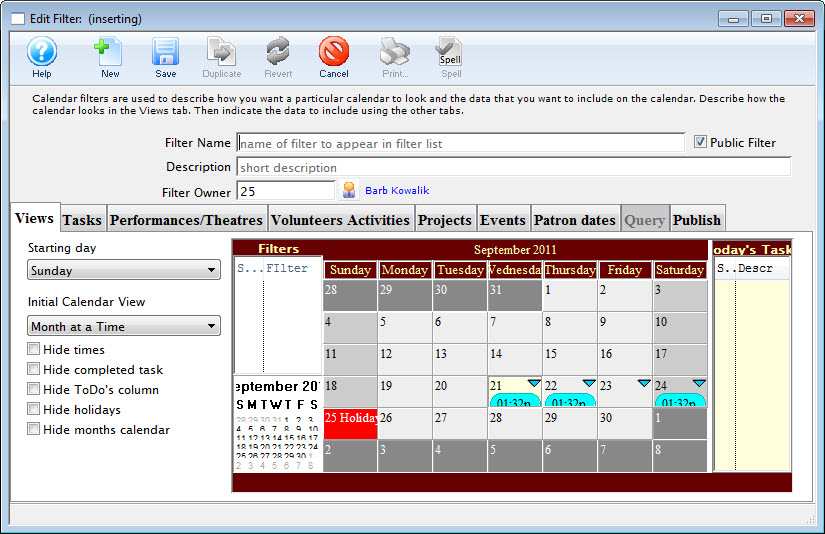
- Enter a Filter Name. Filter Name is a mandatory field.
This is the name of the filter that appears in the filter list.
- Enter a Description. The Description is a mandatory field.
Enter a description that describes in a few words what the filter does. This way others will not create the same filter. You can also choose via the Public Filter checkbox if others can view and use the filter. If you disable the checkbox, the filter will not appear in others' filter lists.
- Only the Filter Owner or Administrators can edit a filter. If you want others to edit it as well, remove the owner; then anyone can edit it.
You can set up the various pieces of the filter in the tabs on the window: Views, Tasks, Theatres, Volunteer Activities, Projects, Plays, and Query (currently unused). The Publish tab lets you set up the filter to be manually (and in the future, automatically) published as a shared calendar to the Internet.
Views Tab

The Views tab is used to select options for the visual display of the various items on the list.
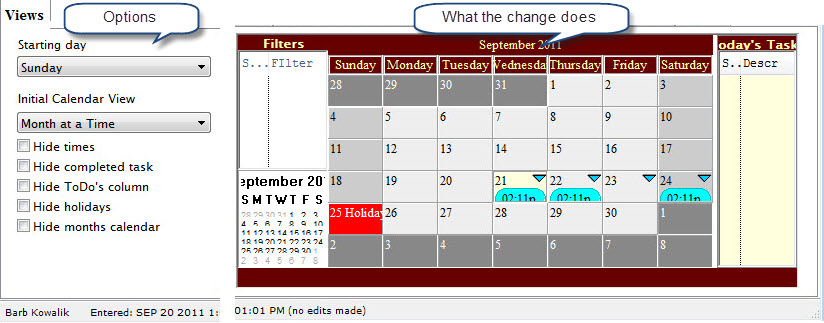
As you make changes to on the Views tab, the mini-calendar on the window changes so you can see what the effects of the changes will be.
Parts of the Views Tab
| Starting Day | 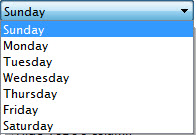 The dropdown list lets you select the starting day for the week. Sunday is the default.
 |
| Initial Calendar View | 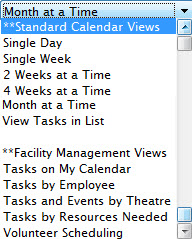 Determines the initial view of the calendar. You can select between typical calendar views and group views that may show more than one calendar column at a time. Determines the initial view of the calendar. You can select between typical calendar views and group views that may show more than one calendar column at a time.
|
| Check Boxes | Hide times - determines if the times will show on the individual calendar items. |
| Hide completed tasks - hides any tasks whose Status is "Done" or "Cancelled". | |
| Hide ToDo's column - hides the Today's Tasks and ToDo's column on the right of the calendar. | |
| Hide holidays - Hides holidays. | |
| Hide month calendar - hides the month calendar in the bottom left of the calendar. |
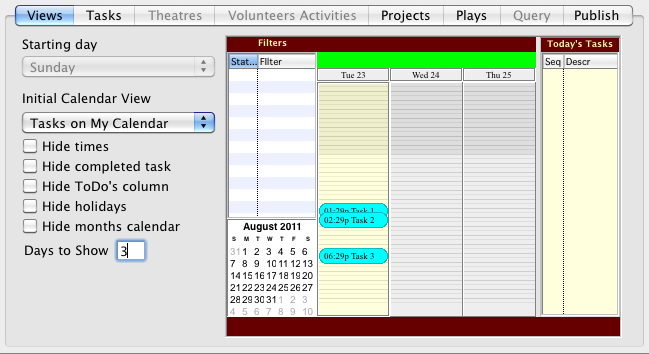
If you have selected an appropriate group calendar, Days to Show will display, enabling you to show more than one day at a time for each calendar column, as you can see in this example:
Tasks Tab

The Tasks tab is used to select whether tasks display for the filter and which ones.
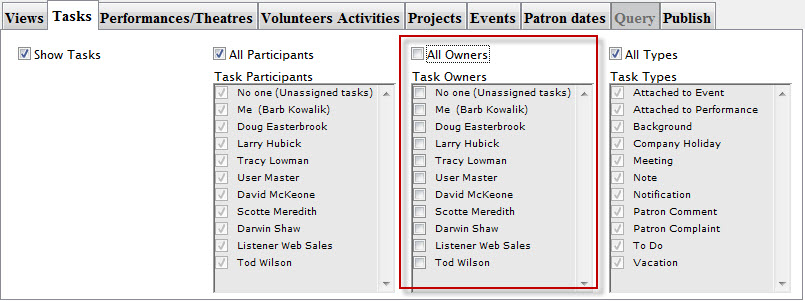
If Show Tasks is selected, tasks will be displayed on the calendar. By default, All Participants, All Owners, and All Types are shown.
If you turn off All Participants, you will be able to select individual task participants (employees only) to show. You also have the special options of "No one", meaning tasks that have no one assigned to them, and "Me", which will show the tasks of whomever you are logged in as.
If you turn off All Owners, (as in the above image) you will be able to select only tasks owned by particular employees. You also have the special options of "No one", meaning tasks that are owned by no one, and "Me", which will show the tasks of owned by whomever you are logged in as.
If you turn off All Tasks, you will be able to select only tasks of certain types that you wish to see.
Performance/Theatres Tab

You use the Performances/Theatres tab to select the venues to display for the filter.
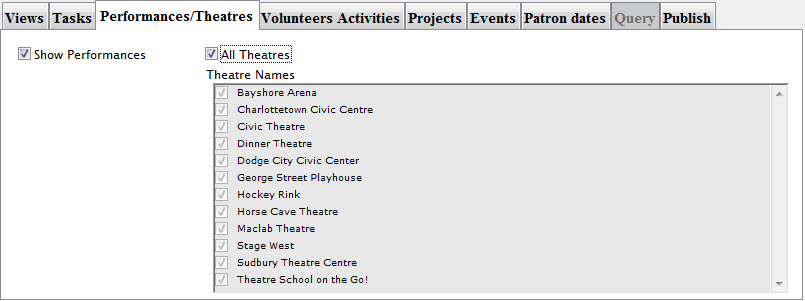
If Show Performances is selected, performances will be displayed on the calendar. By default, All Theatres are shown.
If you turn off All Theatres, you will be able to select individual theatres or venues to display.
Volunteer Activities Tab

The Volunteer Activities tab is used to select whether volunteer activities display for the filter and which ones.
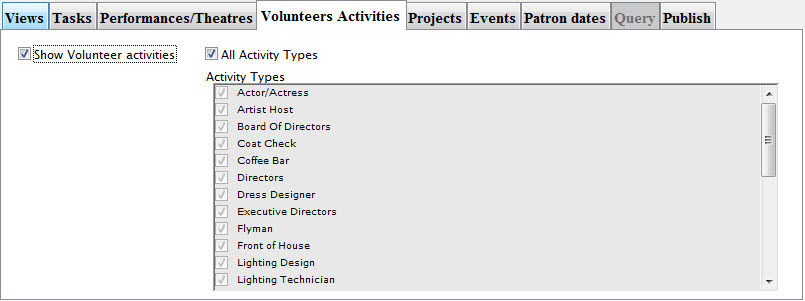
If Show Volunteer activities is selected, volunteer activities will be displayed on the calendar. By default, All Activity Types are shown.
If you turn off All Activity Types, you will be able to select individual activity types to display.
Projects Tab

The Projects tab is used to select whether projects display differently for the filter and which ones.
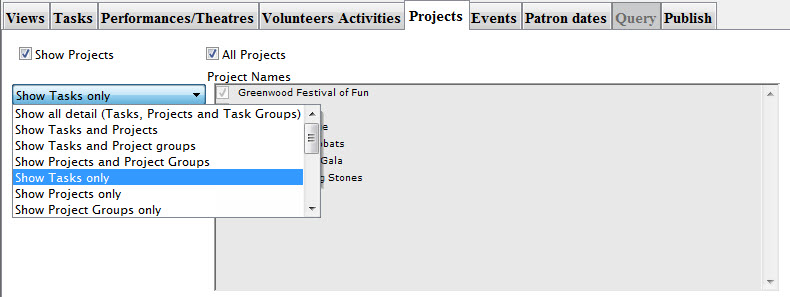
If Show Projects is selected, project tasks will be displayed on the calendar using their default project colour instead of the task colour. By default, All Projects are shown.
Turning off All Projects, you can select individual projects, so that only their tasks are displayed.
|
If you had only selected the Tasks checkbox you would have seen these project tasks as well. When you select Projects, it shows the projects tasks using your default colour (usually yellow), while the non-Project tasks remain in the task default colour (usually blue). |
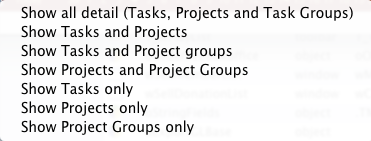
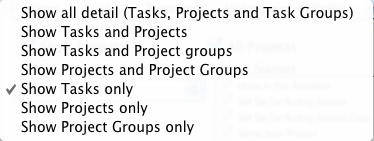
You can also determine the level of detail to show for projects, such as whether the project record or the group records display. The default is for only the tasks that are part of the project to show.
Events / Plays Tab

The Events / Plays tab is an additional filter that can be applied on top of the others. It is used to select whether only tasks, performances, volunteer activities, or projects attached to particular plays/events will be seen in the calendar.
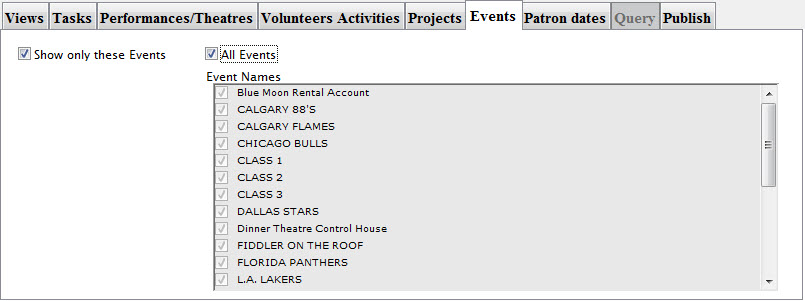
If Show only these Plays is selected, then the additional filtering is applied. By default, All Plays are shown.
If you turn off All Plays, you will be able to select individual plays/events so that only calendar items attached to those plays/events are displayed.
Patron Dates Tab

The Patron Dates tab is used to select whether birthdays, anniversaries and spouse birthdays display on the calendar.
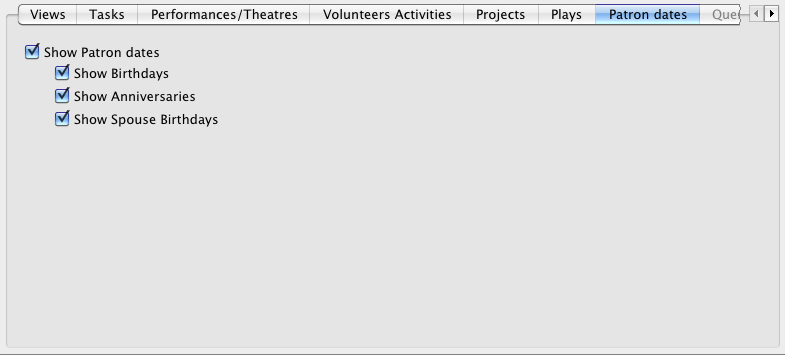
If Show Patron dates is selected, you can choose whether to show birthdays, anniversaries and/or spouse birthdays on the calendar.
Click here for more information on these fields in Patron Data.
|
If the date is on February 29 and the current year is not a leap year, it is shown on February 28 instead. |
Query Tab
The Query tab is unavailable at this time.
Publish tab

You use the Publish tab to upload a shared calendar file to the internet.
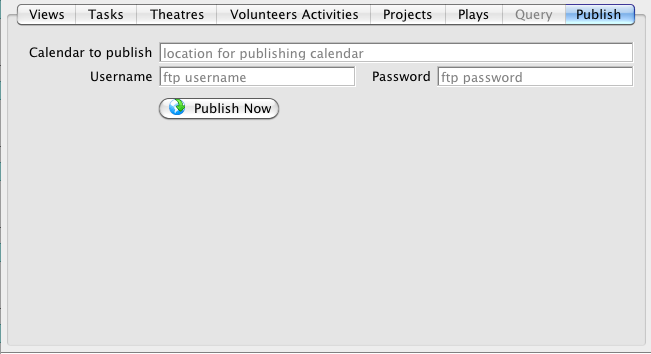
To publish a calendar, you perform the following steps:
- In the Calendar to Publish entry box, enter the web location of the calendar.
The format will resemble:
www.example.com/calendars/public/MyEventsCalendar.ics

This does not have to be any special calendar location, it just needs to be a location where a file can be FTP'd to.
- Enter the Username for the ftp account.
- Enter the Password for the ftp account.
- Click the Publish Now

You will be asked to enter a starting and ending date. All items on the calendar that match the filter criteria and between the starting and ending dates will be packaged up into an industry-standard iCalendar file (.ICS extension) and FTP'd to the location on the web.
If the starting date is omitted, all calendar items into infinity past will be included. If the ending date is omitted, all calendar items into infinity future will be included.
The resulting calendar can be subscribed to from iCal or Outlook by entering the file location in these programs. Or you can supply a link to the calendar in the form:
webcal://www.example.com/calendars.public/MyEventsCalendar.ics
Clicking on the link will open their calendar program and ask if they want to subscribe to the calendar.
This feature can be used to publish a calendar of all performances for the season to your website. Patrons can subscribe to the feed and when you re-publish in the future with new performances, their calendar will be updated with the new performances as well.
It can also be used to publish work schedules for people. If they are subscribed they will also get all the changes in their personal calendars.
|
The subscribers to these calendars DO NOT have to have a copy of Theatre Manager for this to work. |
Editing an Existing Filter
Calendar filters are used to describe how you want a particular calendar to look and the data you want to inlude in the calendar. To edit an existing filter, you perform the following steps:
- In the Filter pane of the Calendar window, highlight the filter you wish to edit.
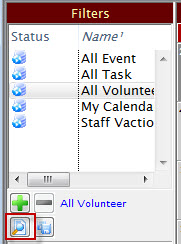
- Click the Edit
 button, or select Open
  from the right click context menu.
The Edit Filter: "Fliter Name" window opens.
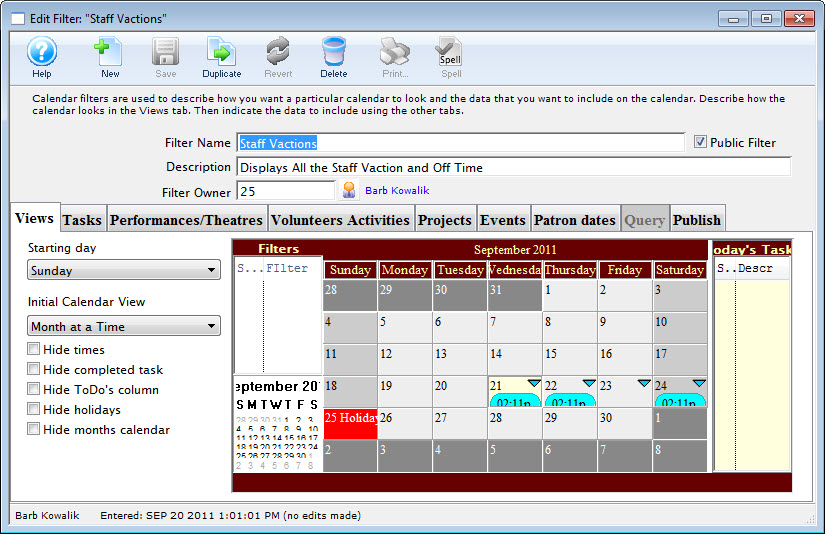
You can now change the filter.
You can also change the various pieces of the filter in the tabs on the window: Views, Tasks, Theatres, Volunteer Activities, Projects, Plays, and Query (currently unused). The Publish tab lets you set up the filter to be manually (and in the future, automatically) published as a shared calendar to the Internet.
Filter Context Menu
To open the context menu, right click when your mouse is in the Filter Pane. The following flyout opens.
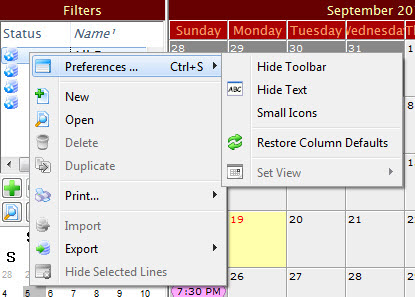
Parts of the Filter Context Menu
| Preferences | Hide Toolbar / Show Toolbar - Toggles between displaying and hiding the Calendar window toolbar.
Hide Text / Show Text - Toggles between showing and hiding the text underneth the icons in the Calendar window toolbar. Small Icons / Normal Icons - Toggles between showing large or small icons in the Calendar window toolbar Restore Column Defaults - If you have moved or changed the width of any colmns in the Filter display, this selection restores them to the default. Set View - Not available in this window. |
| New | Opens the Edit Filter window. Click her for more information. |
| Open | Opens the selected filter for editing. |
| Delete | Deletes the selected filter. You cannot delete the 4 basic filters. |
| Duplicate | Duplicates the selected filter. You cannot duplicate the 4 basic filters. |
| Prints the list of filters as shown. | |
| Import | Not available in this window. |
| Export |
Exports the selected filter in the following formats:
|
Filter Pane Features
The last item in the filter pane is the calendar selector. It provides an easy way to select a date and update the calendar.
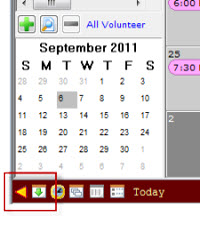
The purpose of this calendar is to to display the current month. This allows you to see the context of where you are, especially helpful when viewing the group or daily calendars.
Additionally, you can change the date by clicking on the date you want.
If there is no calendar pane showing at the bottom of the Filter pane You can show or hide the calendar by using the toggle buttons.
 Click to close the Filter Pane. Click to close the Filter Pane. |
 Click to open the Filter Pane. Click to open the Filter Pane. |
 Click to close the filter Calendar Click to close the filter Calendar |
 Click to open the filter Calendar. Click to open the filter Calendar. |
You can also adjust the size of the panes in the Filter pane by dragging the borders of the different sections, similar to how you can in other Theatre Manager windows.
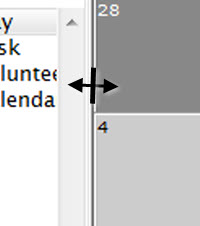
There is a handle between the main calendar and the Filters portions of the window.
Today's Tasks and ToDo's Pane
The Today's Tasks and ToDo's pane displays any tasks for today and any ToDo's that have not been marked as Done.
ToDo's are items, such as grant proposals, that do not need to be done on a certain date, but instead have a deadline by which they must be completed.
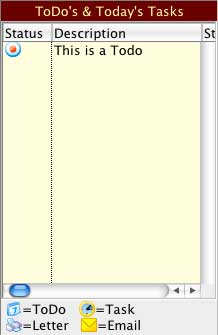
Right-click and select New to create a new ToDo.
Click to close the ToDo Pane. |
Click to open the ToDo Pane. |
You can also adjust the size of the ToDo pane by dragging the borders of the different sections, similar to how you can in other Theatre Manager windows.

There is a handle between the main Calendar and the ToDo portions of the window. This size will become the default for the window the next time it is opened.
Navigation and Settings Toolbar
At the bottom on the calendar is the navigation and settings toolbar. It is context based on the selected calendar view.
The display automatically changes depending if the Month, Week or Day view has been selected in the Calendar Toolbar. However, you can navigate through the Months, Days and Hours by clicking on the desired Month, Day or Hour.

|
You cannot change the view in the Navigation and Settings Toolbar, it auto changes depending on the view selected in the Calendar Toolbar. |
Month

Week

Day

Navigation Buttons
Left to Right
|
Click to close the Filter Pane. Click to open the Filter Pane. |
|
Click to close the filter Calendar Click to open the filter Calendar. |
 |
Hides or displays the starting/ending times on the items in the calendar. |
 |
Indicates the overlap percentage of items sharing the same date/time on the calendar.
|
 |
You use this button to indicate the number of days to see at a time in the group calendars.
|
 |
You use this button to indicate the level of detail to see when displaying calendars that include project tasks.
|
|
Click to close the ToDo Pane. Click to open the ToDo Pane. |
Calendar Context Menu
The Calendar may display a different context menu, depending on which view is showing. Options in the menu may be disabled if they are not available in the current context, or if your security profile does not allow for it. For example, if you have not selected a calendar item, the Open option is not available.
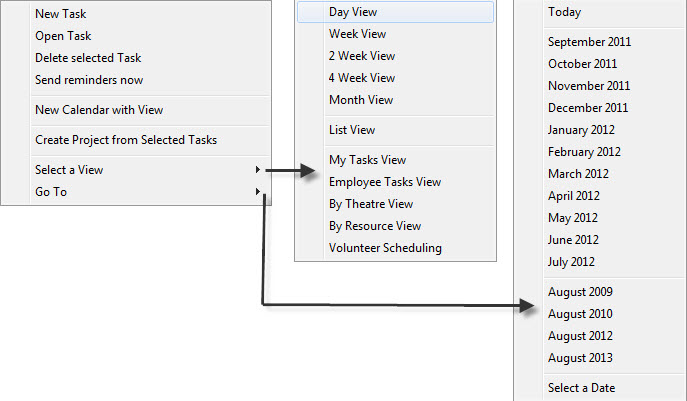
Functions
| New Task | Opens the Task Detail window where you can create a new task. |
| Open Task | Opens the selected task in the task detail window. You can also double-click on any item to open it in its proper window. |
| Delete Selected Task | Deletes the selected task. |
| Send reminders now | Sends task reminders out for the selected task. |
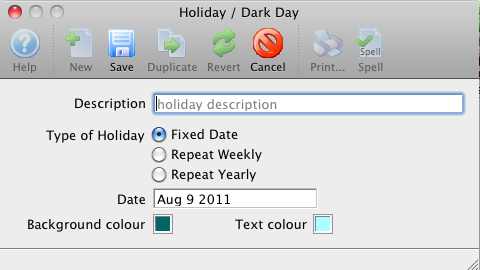
| New Holiday | Creates a new holiday for the selected day.
The description and date are required. You can indicate whether this has a fixed date (is only displayed once), is repeated weekly on the same day (i.e., dark days), or is repeated yearly (i.e., Christmas). You can also indicate a background colour to colour the entire day and the text colour to use. These default to the default calendar settings. Open Holiday will open the detail holiday window where you can edit the holiday details. If there is more than one on the given day, a popup menu asks which you wish to edit. Delete Holiday will delete holiday on the selected day. If there is more than one on the given day, a popup menu asks which you wish to delete. |
| New Calendar with View | Opens a new calendar with the view and options currently selected for this calendar. |
| Create Project from Selected Tasks | Create a new project using the tasks you have selected on the calendar. Hold down the Command or Ctrl key to select multiple tasks. | Select a View | Displays a popup menu to change to a new view. It is no different than selecting the view from the toolbar at the top of the calendar. |
| Go To | Displays a popup menu to select a date based on the most likely ones for your current context. You can also choose Select a date to popup a calendar from which to select a date. |
Group Calendar Context Menu
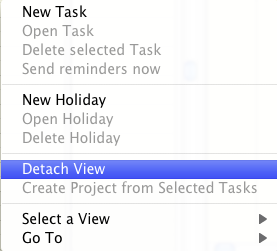
The group calendar context menu has an additional item called Detach View. If there are multiple calendar columns in the group calendar, it will detach that column into a new calendar and remove it from the original calendar. If there is only a single calendar column the effect is to just open a duplicate calendar.
Volunteer Scheduling Context Menu

The volunteer scheduling context menu is a slimmed down view of the other context menus. You can only open the selected volunteer activity, delete the selected volunteer activity, change the view or go to a different date.
Rubik's Cube View of the Calendar
Just like any other electronic calendar, you can set up appointments and meetings. But now you can move the calendar task around in different views and perspectives.
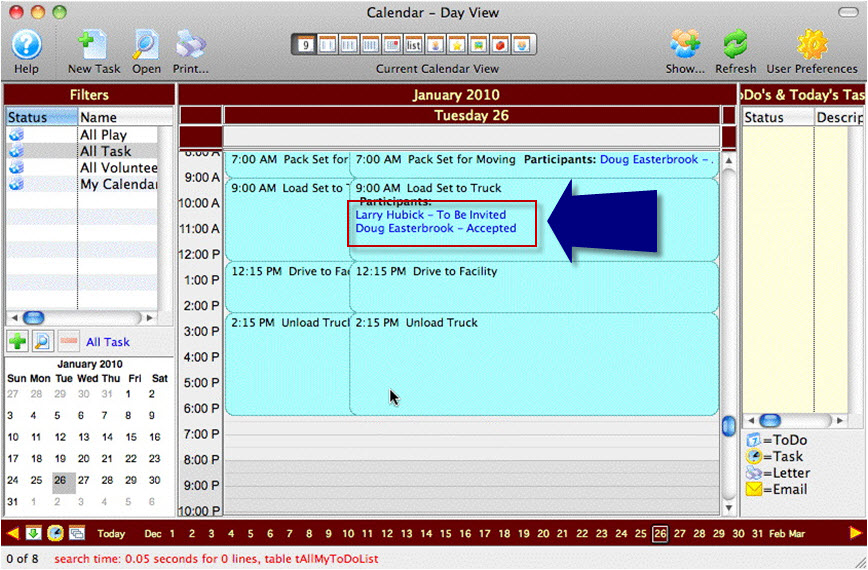
You open the day view and see this calendar item has participants.
- Doug has accepted the task to Load Truck.
- Lary has not yet accepted.
Larry may be internal to the organization or he may not. As long as he is a patron in the Theatre Manager database, he can be invited to participate. When you set him up in the database, you can flag them as having accepted or you can send them an email everytime you send a task notice. Click here, for more information.
Next you want to see what is haoppening in your venues, you choose Day's Plays and Tasks in Each Theatre. Once again it looks like a daily calendar.
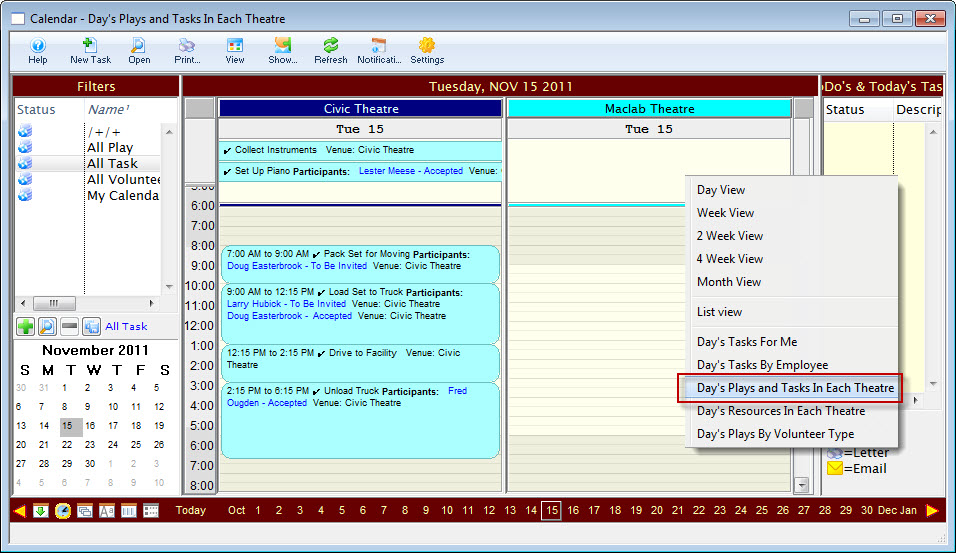
In this view, you can see the different venues you are responsible for and the tasks that take place in each venue. This means you can associate a task to a venue. How many venues can show?
Multiple venues can show across the screen depending on your filter that you define in the view. Each day you can see what is happeing in each venue.
Now you want to see what everybody is doing that day. Where is Doug? What is Larry up to? What time can you expect Fred? You choose the Day's Tasks by Employee view.
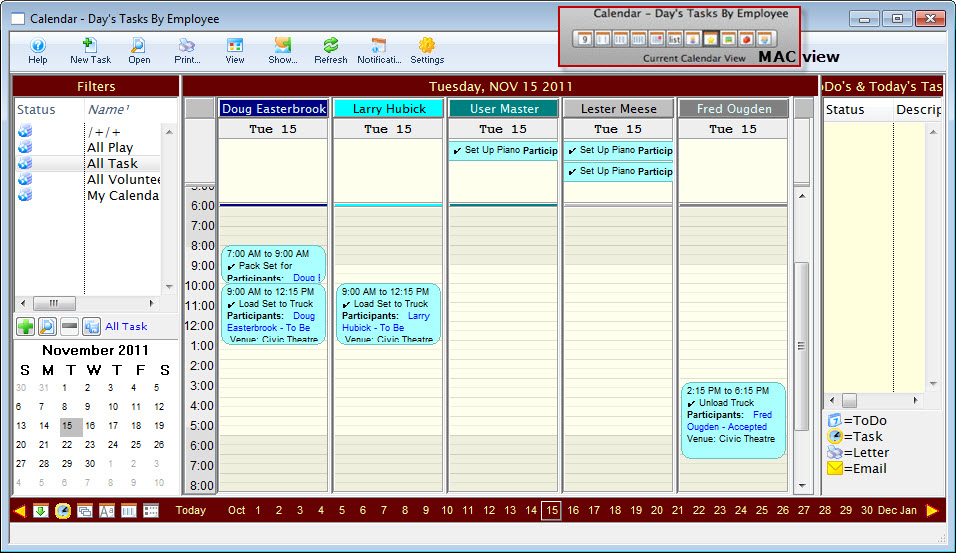
In this view you can see what everybody is supposed to be doing. You did not have to create the the calendar or put it in their calendar, all you had to do was create the calendar event/task and indicate these people are doing it and it is at this venue. One entry seen many different ways.
You can set up these items, even for people who do not have access to Theatre Manager. For example, your ushers. You can plan and schedule other people using this tool, even if they do not work for you.
You use the Volunteer Module. Click here for more information on Volunteer Management.
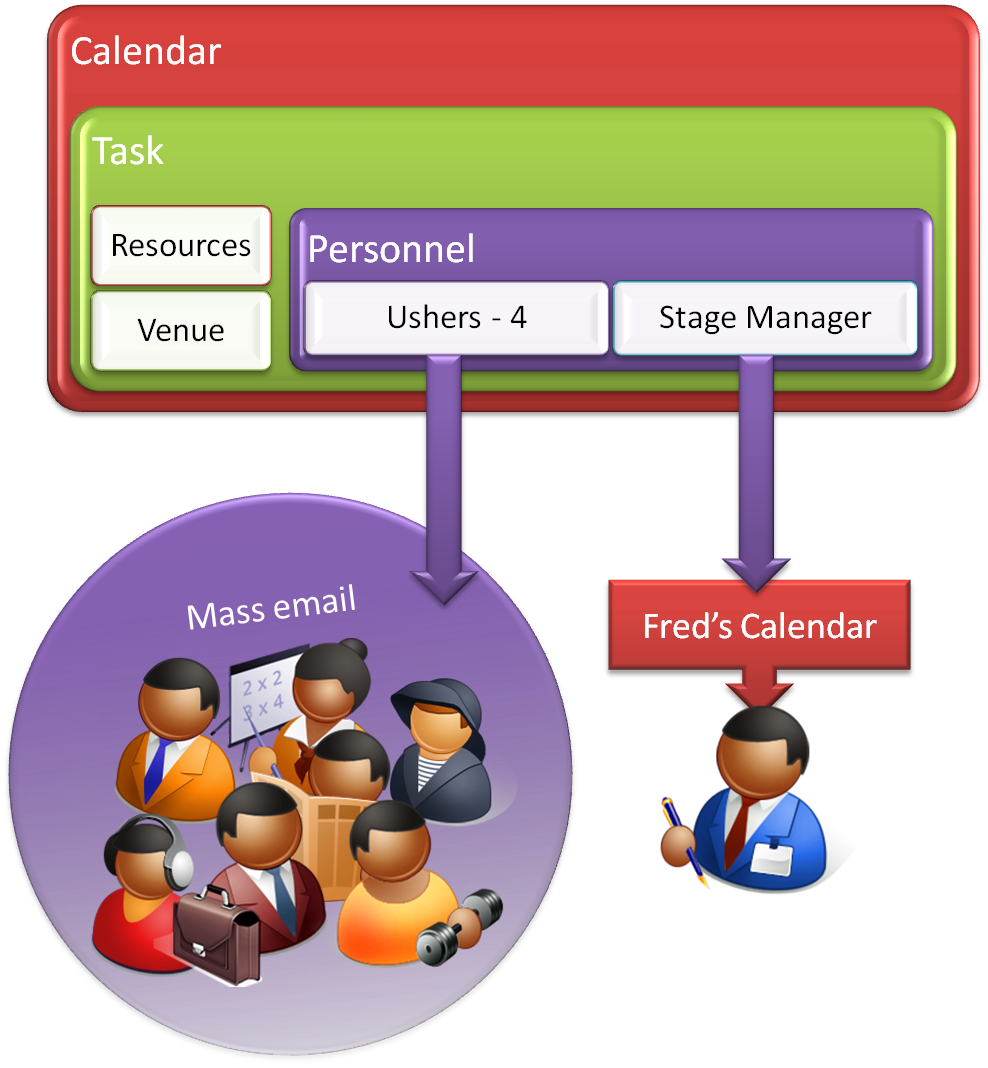
The trick will be to make this work within your existing work flow. You know you need to do stuff. If you have a group of people (say 20) but only need 4, you may still need to do an email blast out to all 20, but then only update the calendar with the 4 people who ended up being assigned the task. (the best 4, or the first 4… it depends) This is a choice of work flow design. Its not a software decision, rather a human decision.
With that in mind, there is a facility in TM that allows you to say I need 4 ushers (un-named), 1 electrician, 1 costume designer, 3 sound techs, 1 bar caption, 2 front of house for this event/project. So when I am duplicating a project for another event, it still carries across the requirements (ushers, electrician, designers, techs) that you can go back and assign as you know them or as people confirm that they are willing to take on that role.
Integrating Tasks and Calendars
The key for optimizing the calendar is the task – everything centers around what you do on this window. Its much like Market Circle’s Daylite, Outlook or iCal – except it does much more and spreads the integration outside your organization
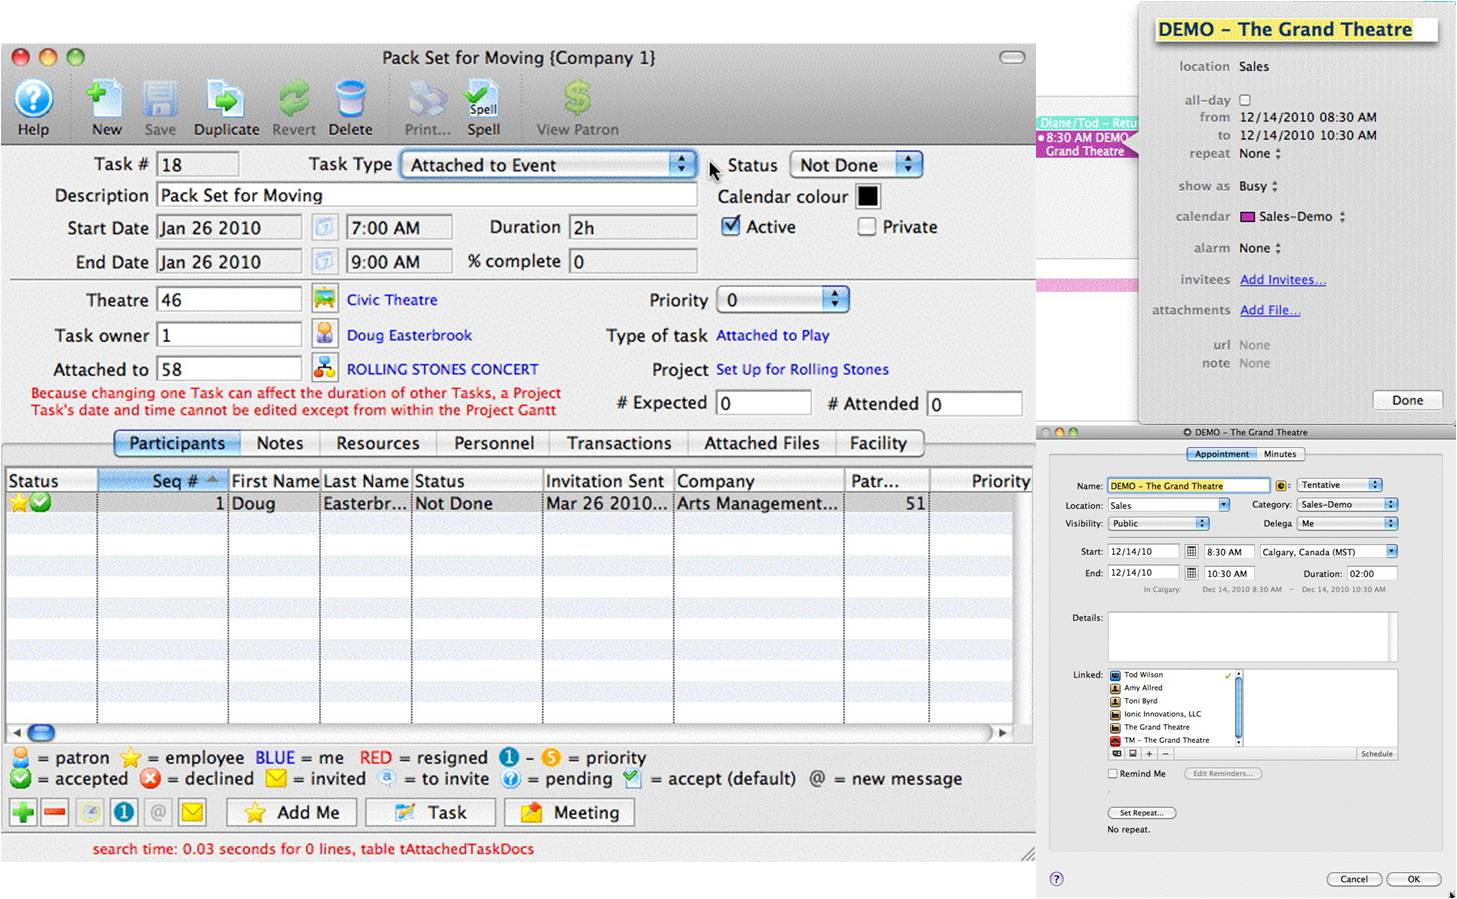
Here we see the Theatre Manager Task window and 2 different Calendars. The common items on all three windows are:
- Date
- Time
- Description
- Colours
In this picture, a Task Type called “Attached to Event” is selected. It is a code table entry defining what type of task this is.
In the database 8 standard types of Calendar Type Tasks have been defined:
- Project
- Task
- Unattached
- Attached to Event
- Attached to Performance
- To Do
- Meeting
- Background
From those standard 8 types, you can create unlimited number of custom named task types to suit your needs. The goal is to allow you to customize the view, colours and edits within that customized task. There is no limit to the number of Task Types you can create. You can easily extend this to create an Usher item. It then becomes a calendar mechanism to allow you to quickly pull out or show only the ‘sound engineer’ tasks/calendar items.
Click here, for more information on entering Task types and associating them to calendars.
