Volunteer Window
Volunteers are an integral part of every organization. Using the Volunteer window, you can keep track of:
- Detailed Notes on your volunteers
- Physical and other information in the Volunteer tab
- Add the Volunteer Positions they have held and the hours worked
- Keep track of the Times they are Available
- Any Awards they have recieved according to the number of hours they have volunteered
- Any Tasks that may have been assigned to them through the Facility module
To access this window, you use the Volunteer  button on the Patron List Toolbar / Ribbon Bar.
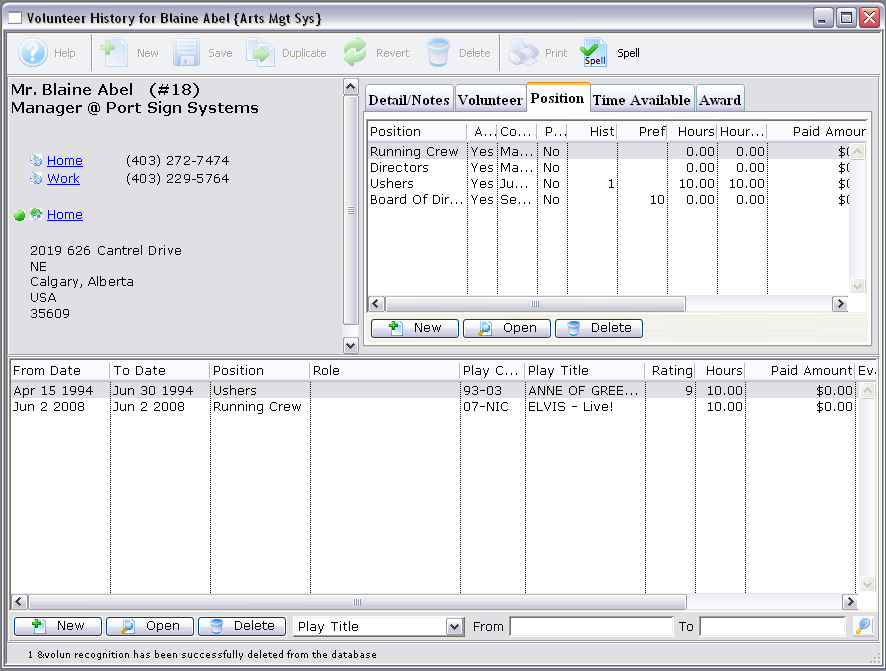
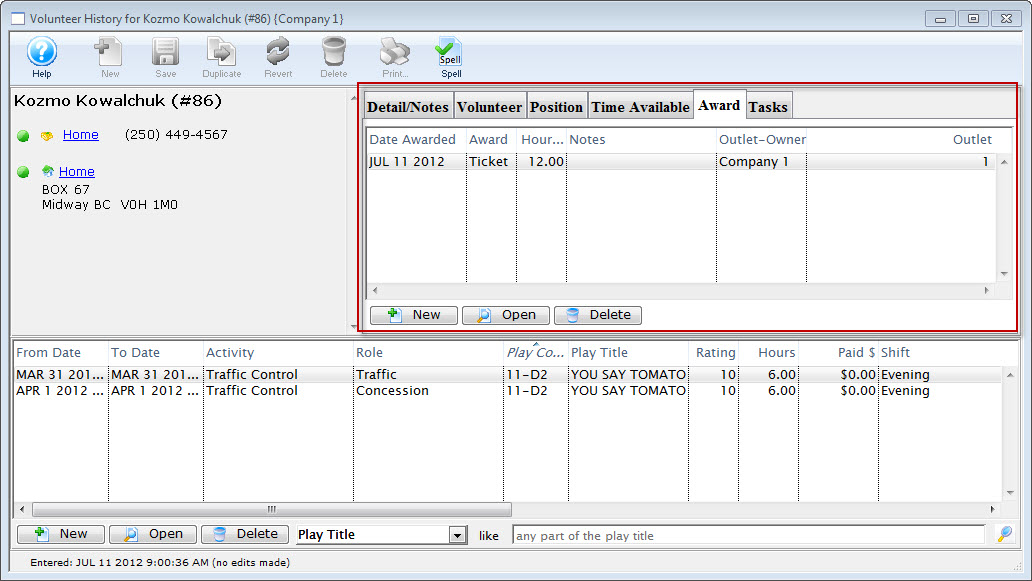
The Volunteer Window opens.

Parts of The Window
Volunteer Information |
This information is contained in the upper portion of the window. All information is taken directly from the patron information you entered. |
| Detail / Notes | This tab allows you to enter more specific information about the volunteer. Click here for more information. |
| Volunteer | This tab has adjustable menus and fields for additional information on the volunteer. Click here for more information. |
| Position | This tab lists positions the volunteer can perform. Click here for more information. |
| Time Availability | This tab allows you to set the times the volunteer is available or unavailable. Click here for more information. |
| Award | This tab allows you to see any awards the volunteer has received. Click here for more information. |
History |
The Activity History / Evaluations is the lower section of the window and contains all of the activities the volunteer has participated in. Click here for more information. |
 |
New - Clicking the New button allows you to add New Activity History for the Volunteer. |
 |
Open - Opens the currently selected history for viewing or edititing |
 |
Delete - Deletes the selected History |
  |
Search - Allows you to search for a Play / Event to associate the history to. |
Detail / Notes Tab
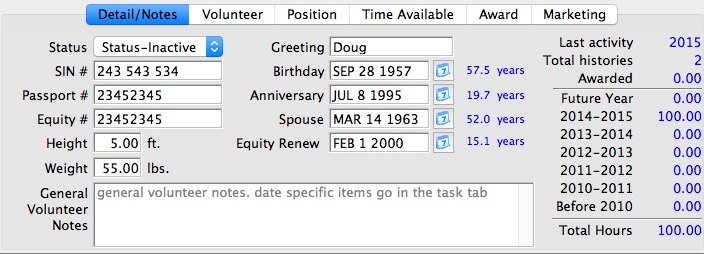
This tab contains detailed information on the volunteer.
Parts of the Detail / Notes Tab
| Greeting | The greeting that the individual prefers. |
| Birthday | The individual's birthday. |
| Age Code | The age code of the individual. The selection can be modified in Code Tables. Click here to learn how to change the age code defaults. |
| Status | If the individual is active and if so when the best times for them to work are. This drop down field can also be edited in code tables. Click here to learn how to change the status code defaults. |
| Height | The height of the individual. |
| Weight | The weight of the individual. |
| SIN # | The individual's Social Insurance Number. |
| Gender | The gender of the individual. |
| Hours Summary | Shows a yearly summary of hours worked for the past five years, and a summary of all years prior. |
| General Volunteer Notes | General notes about the individual. |
Volunteer Tab
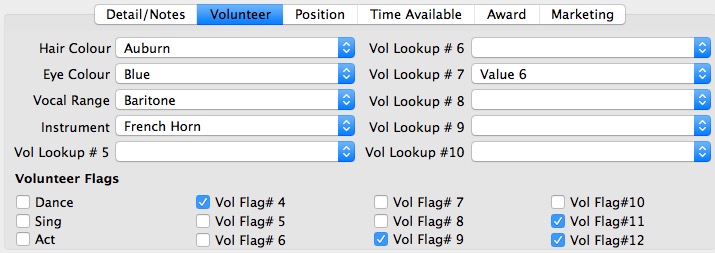
The volunteer tab displays additional criteria that can be tracked about the volunteer.
Parts of the Volunteer Tab
| Hair Colour | The hair colour of the volunteer. The list is adjustable in Code Tables >> Volunteer Hair Colour. Click here for more information on adjusting this table. |
| Eye Colour | The eye colour of the volunteer. The list is adjustable in Code Tables >> Volunteer Eye Colour. Click here for more information on adjusting this table. |
| Vocal Range | The vocal range of the volunteer. The list is adjustable in Code Tables >> Volunteer Vocal Range. Click here for more information on adjusting this table. |
| Instrument | The instrument the volunteer plays. The list is adjustable in Code Tables >> Volunteer Instrument. Click here for more information on adjusting this table. |
| Dance | Check box to denote whether the volunteer dances. |
| Sing | Check box to denote whether the volunteer sings. |
| Act | Check box to denote whether the volunteer acts. |
| Volunteer Flag #4 | Additional assignable flag that can be used for tracking volunteers. |
| Volunteer Flag #5 | Additional assignable flag that can be used for tracking volunteers. |
Position Tab
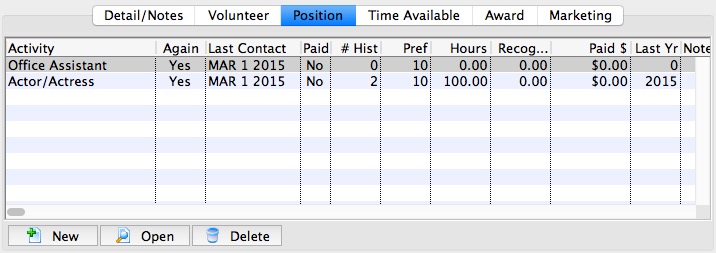
The positions tab is part of the Volunteer Window and displays the positions which the volunteer can perform. Functions of this tab are add a position, edit a position, and delete a position.
Parts of the Positions Tab
| Position | The volunteer code of the position. The codes are setup in Code Tables >> Volunteer Activities. Click here to learn how to set the codes. |
| Again | If the volunteer is still interested in the position. |
| Contacted | The date last contacted. |
| Paid | If the activity was paid. |
| History | If any historical information is available. |
| Preference | The preference rating of the volunteer for the position on a scale of 1-10. |
| Hours | The total number of hours worked in the position. |
| Paid $ | The total amount that was paid for the activity. |
| Last Year | The last year that the volunteer performed the position. |
| Notes | Any notes associated with the position. |
|
Inserts a new position through the Positions For Window. Click here to learn how to insert a new position. |
|
Shows the details for the selected position as well as allowing editing in the Positions For Window. Click here to learn how to edit a current position. |
|
Deletes the selected position. Click here to learn how to delete positions. |
|
For quick reference information on Adding Editting and Deleting Volunteer Postions, click the following link. |

Adding a Volunteer Position
Once a volunteer has worked or expressed interested in a position you should add the position to their data. This is done through the Positions Tab on the Volunteer Window.
- Open the Volunteer Window.
You will see the positions section on the upper right of the screen.
- Click the New button.
The Activity Positions For a Patron window opens.
- Choose the personnel activity position from the list.
The pulldown list is customizable in the Code Tables >> Volunteer Activities.
Note that some selected positions may show some online capabilities for managing events or attendance. These permissions are set per position, so somebody assigned to the position will be provided the capability after logging in to the online web sales. - Select a play using the Lookup
 button.
This opens the Play List window allowing you to search for a play. Click here to learn how to find plays.
- Double click the play to select it.
- Change the last contact date if needed.
- Select "Will do again" or "Normally compensated for doing this position" if applicable.
- Enter any notes about the position.
- You can add any number of tags to the volunteer position.
- When complete, click Save
 .
.
The new position is now shown under the Positions Tab and can be used in new records. Click here for more information on creating volunteer history.
Editing a Personnel Position
You may need to edit a volunteer position to update notes about the position or the last play the volunteer worked. This is done in the Positions Tab on the Volunteer Window.
- Find the Patron Record and open the Volunteer Window.
- Click on the Positions Tab at the upper right of the window.
Click here to learn more about the Positions Tab.
- Click on the position you wish to edit.
- Click the Open button.
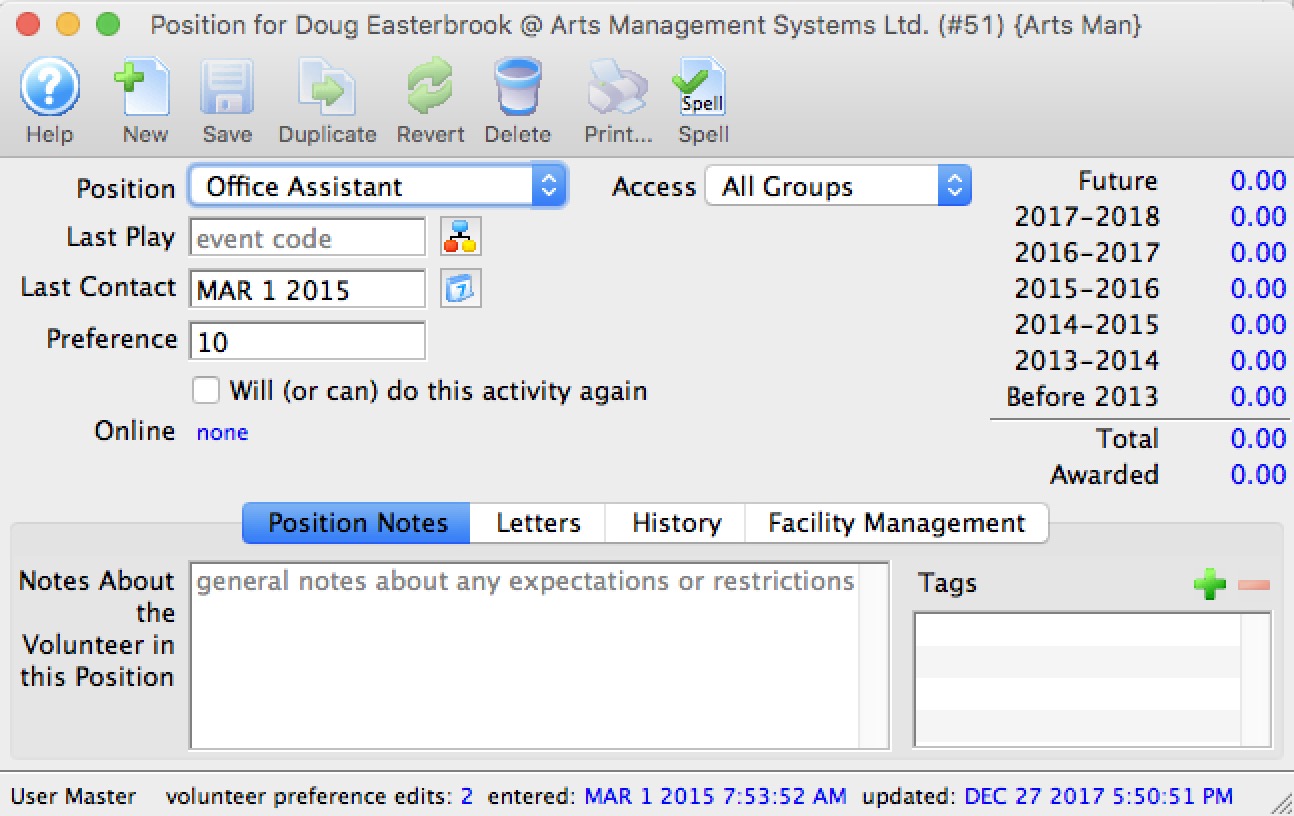
This will open the Position Window for the position.
- Change any data as needed.
- Click the Save button.
You return to the Volunteer Window and any changed data will be saved and displayed under the Position Tab.
Deleting Personnel Positions
You can delete positions which have no activities attached to them. Click here to learn how to delete only specific activities preformed under a position.
- Find the Patron Record and open the Volunteer Window.
- Select the Positions tab at the upper right of the window.
This tab displays all the positions the volunteer has held or expressed an interest in.
- Click on the positionto delete.
- Click the Delete button at the bottom
of the tab.
The Delete a Record dialog opens.
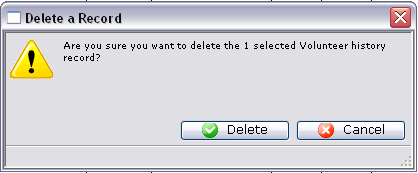
- Click Delete
 to proceed with the delete.
To cancel the position deletion click Cancel
 .
.
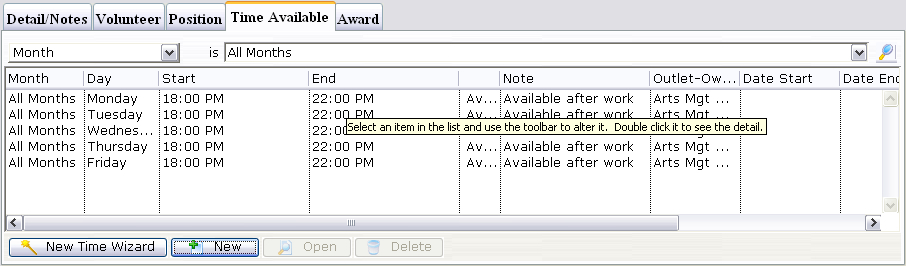
Time Available Tab
This tab displays the times which the volunteer is available and when there may be a conflict with their schedule.
Parts of the Availability Tab
| Month | The month of the entered time. |
| Day | The day of the entered time. |
| Start | The start of the time available or conflict. |
| End | The end of the time available or conflict. |
| Type | The type of time entered i.e. Available or Conflict. |
| Notes | Notes about the time. |
| Outlet | The outlet at which the volunteer works. |
| Date Start | The date that the availability or conflict starts. |
| Date End | The date that the availability or conflict ends. |
| Time Start | The time that the availability or conflict starts. |
| Time End | The time that the availability or conflict ends. |
| Outlet Code | The code for the outlet which the volunteer works at. |
 |
Starts the New Time Wizard. Click here for more information. |
|
Opens the Time For Window through which you can add conflicting or available times. Click here to learn how to add new times. |
|
Opens the Time For Window with the data for the selected time(s) allowing for editing if needed. Click here to learn how to edit times. |
|
Deletes the currently selected time. Click here to learn how to delete times. |
| For Quick Reference Information on Volunteer's Available Times, You can download, the following Quick Reference information. |
Adding, Editing & Deleteting a Volunteer's Available Time
|
Personnel Management - Creating Availability Times
If a volunteer knows what times they will be available. You can set them up under the Time Available Tab.
Creating Times Using the Wizard
- Click the New Time Wizard button.
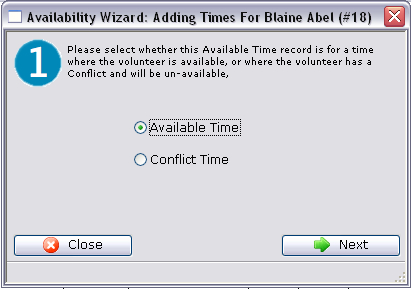
- Select the availability type.
You can choose whether the time being entered is time that the volunteer is available or whether there is a conflict. If it is a conflict time, then a to and from window will appear next.
- Click the Next
 button to proceed.
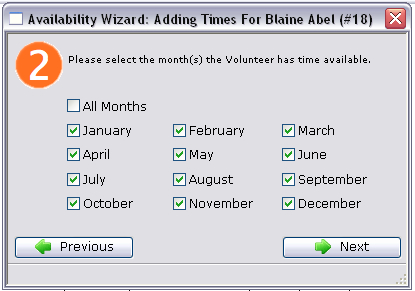
- Select the months which the personnel is available and click the Next button.

- Select the days of the week the personnel is available and click the Next button.
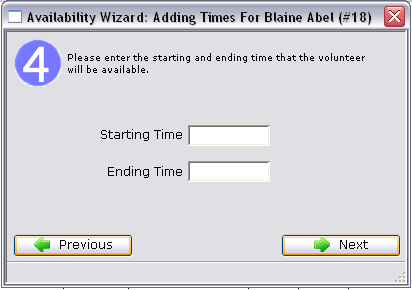
- Enter the Starting and Ending times and click the Next button.
For available times these times will be the time of day. Whereas with conflict dates they will be actual dates i.e. month, day, year.
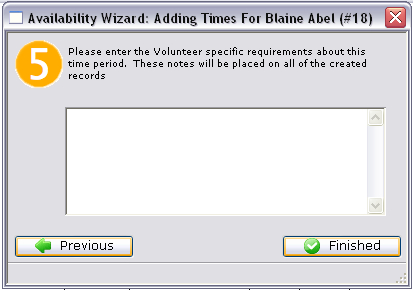
- Enter any notes associated with the time and click the Finished
 button.
The new times will be displayed under the tab.

Creating Times by a Single New Entry
This will allow you to enter a single record of either available or conflicting time.
- Start ny clicking the New
 button on the Times
Available Tab.
button on the Times
Available Tab.
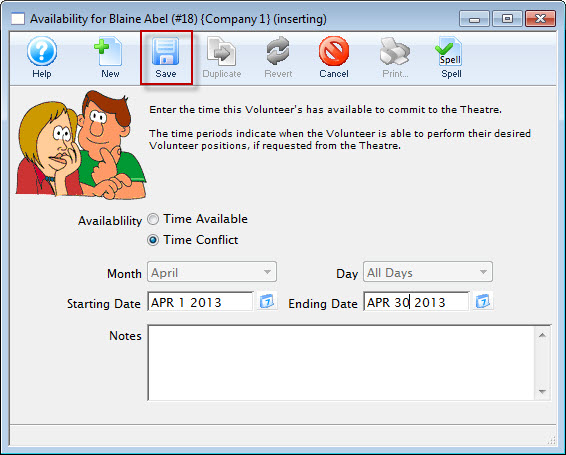
- Choose either "Time Available" or "Time Conflict".
- Select the month and the day of the week for the time.
- Enter the start time and the end time of the time.
- Enter any notes about the time.
- Click the Save button to finish creating
the new record.
Editing Availability Times
If a personnel member has availability or conflict times setup they may eventuallly need to be updated.
- Find the Patron Record and open the Volunteer Window.
- Open the Times Available Tab.
- Select the time you wish to edit.
- Click the Open
 button.
The Time Available Window will open with the data of the selected time.
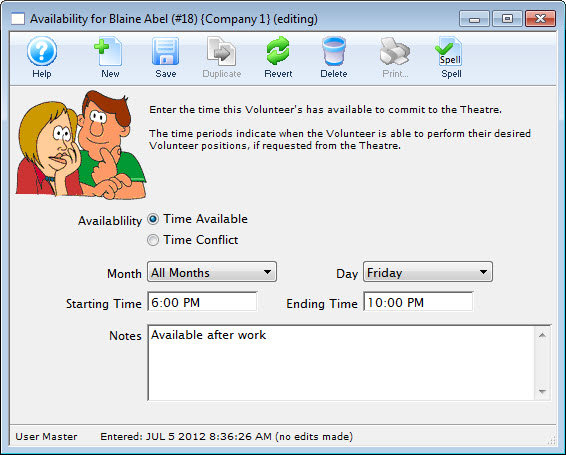
- Make the required changes.
- Click the Save
 button.
The Time Available Window will close and you will return to the Volunteer Window. The time change will appear in the Time Available Tab.
Deleting Available Times
If a volunteer has availability or conflict times setup they may eventually need to be updated.
- Find the Patron Record and open the Volunteer Window.
- Open the Time Available Tab.
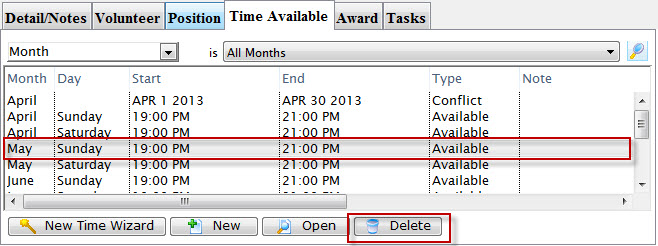
- Select the time to delete.
- Click the Delete
 button.
A Delete confirmation dialog opens.
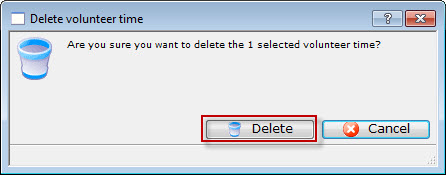
- Click Delete to confirm the deletion.
Clicking Cancel
will abort the deletion.
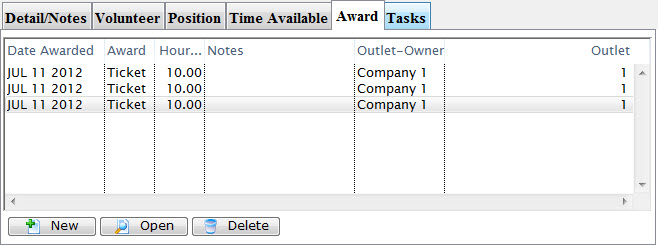
Awards Tab
This tab contains award information on the volunteer. You can also add, edit and delete awards.
When you keep track of your volunteer's hours worked through the Volunteer Module, you can assign those hours towards awards. Personalizing your volunteer recognition component of your program is the best form of showing appreciation for the contribution of volunteers. For example, For every 10 hours a volunteer works, they recieve one ticket. You can use this tab to assign the award and keep track of how many awards they have recieved.
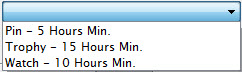
The awards available for selection are defined in the Volunteer Awards Code Table. Click here, for more information.
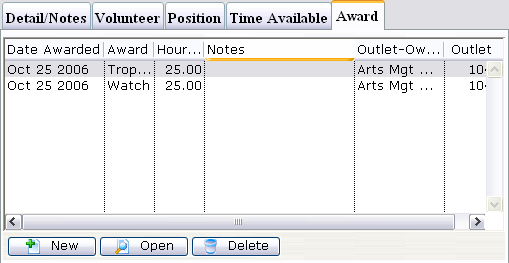
Parts of the Awards Tab
| Date Awarded | The date the award was given. |
| Award | The award that was given. |
| Hours Recognized | The number of hours that were recognized with the award. |
| Notes | Any notes that were entered with the award. |
| Outlet Owner | The main organization name. |
| Outlet | The specific outlet that this volunteer was awarded for working at. |
|
Creates a new award. Click here for more information on creating awards. |
|
Opens the currently selected award. |
|
Deletes the currently selected award. |
Adding Awards
If you want to add an award to a volunteer, you can set them up under the Awards Tab.
- Click the New button.
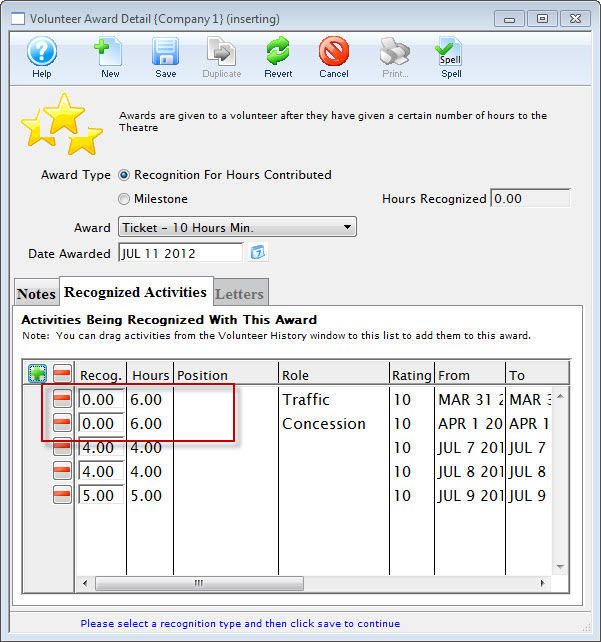
The Volunteer Award Detail Window opens.
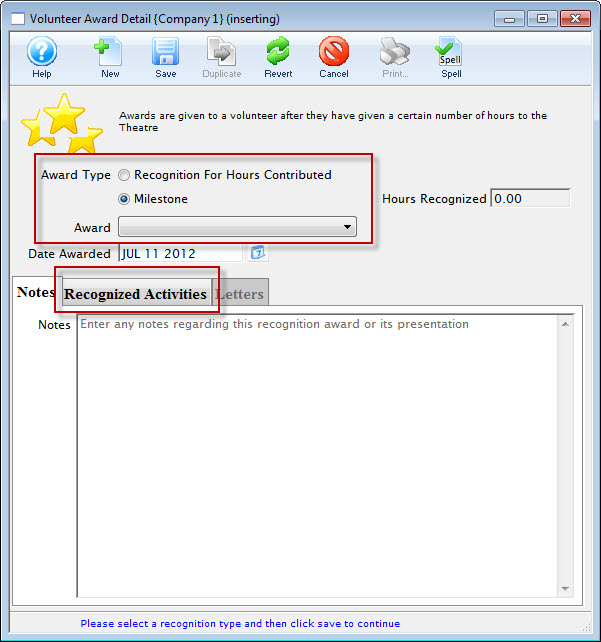
- Select the Award Type you wish to assign.
For a "Recognition For Hours Contributed" type the volunteer must have records of working that number of hours. For a "Milestone" type hours are not required.
- Choose the award from the drop down list.
- The Date Awarded defaults to the current date.
Alter the date as needed.
- Enter any notes about this award.
- Click the Recognized Activities tab to add the Volunteer's hours.
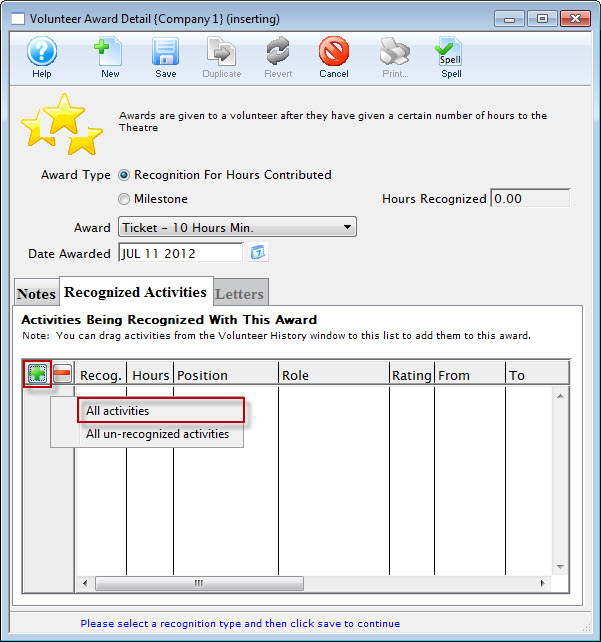
- Click the Plus
 button to add the Volunteer's hours to the Awards.
From the selection flyout, you have the option to add All activities or All un-recognized activities.
 button.
 - Click the Save button in the Awards Toolbar / ribbon bar and close the Awards window.

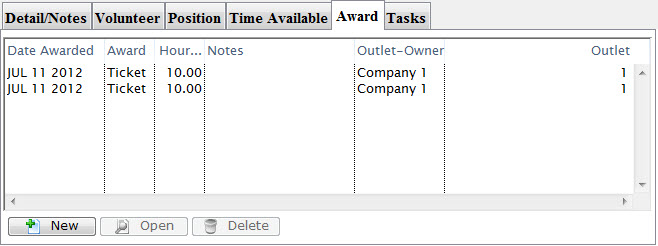
The new awards will be displayed under the tab.
- When adding Awards at a future date, hours already attributed to an Award display as 0.00 in the recognized Activities tab.
Delete an Award
You may want to delete an award, given to a volunteer.
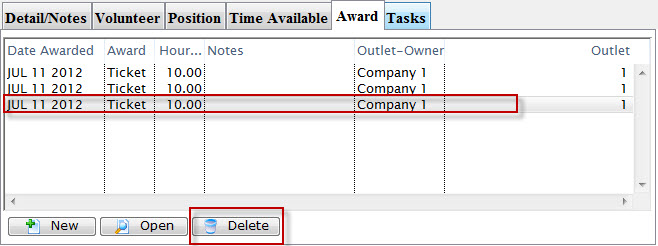
- Select the award to be removed in the Award tab.
- Click the Delete button.
A Delete Confirmation dialog opens.

- Click the Delete button.
The Award is removed from the volunteer's record.
Edit an Award
You want to change an award, given to a volunteer.

You noticed that when you added the Awards more hours were added for each award than was required. You need to go back in and edit the Awards.
- Select the award to be edited in the Award tab.
- Click the Open button.
The Volunteer Award Detail Window opens.

- Make your changes and click the Save button.
Continue through making any edits as necessary.
Volunteer Marketing Tab
