The Search (Criteria) Tab
The Search (Criteria) Tab
- adding criteria to only finds the specific information needed.
- quickly excluding certain patrons based on their marketing flags
- selecting the patron out of the household for mail lists
- or, if the mail merge or report is based on tickets:
- picking the patron based on who holds the ticket.
- This will be either the original purchaser, or in the case of a gifted ticket/course, the patron to whom the ticket is gifted.

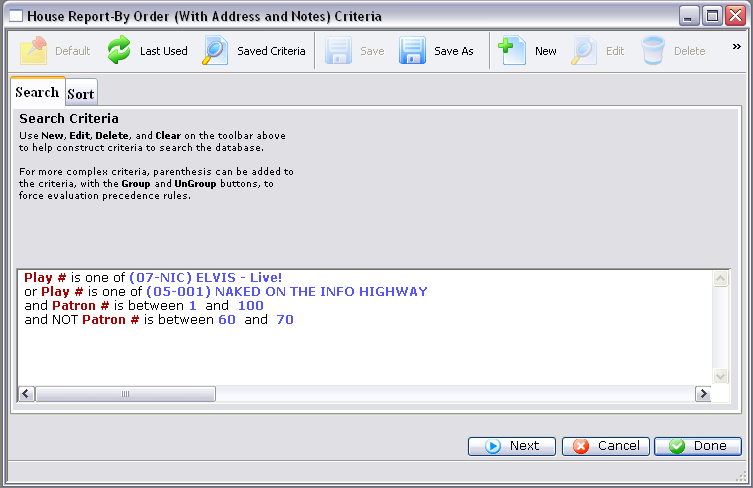
Parts of the Criteria Window
 |
If available, uses the default search criteria for this report. |
 |
If this report has previously been run, this button will add the previous criteria. |
 |
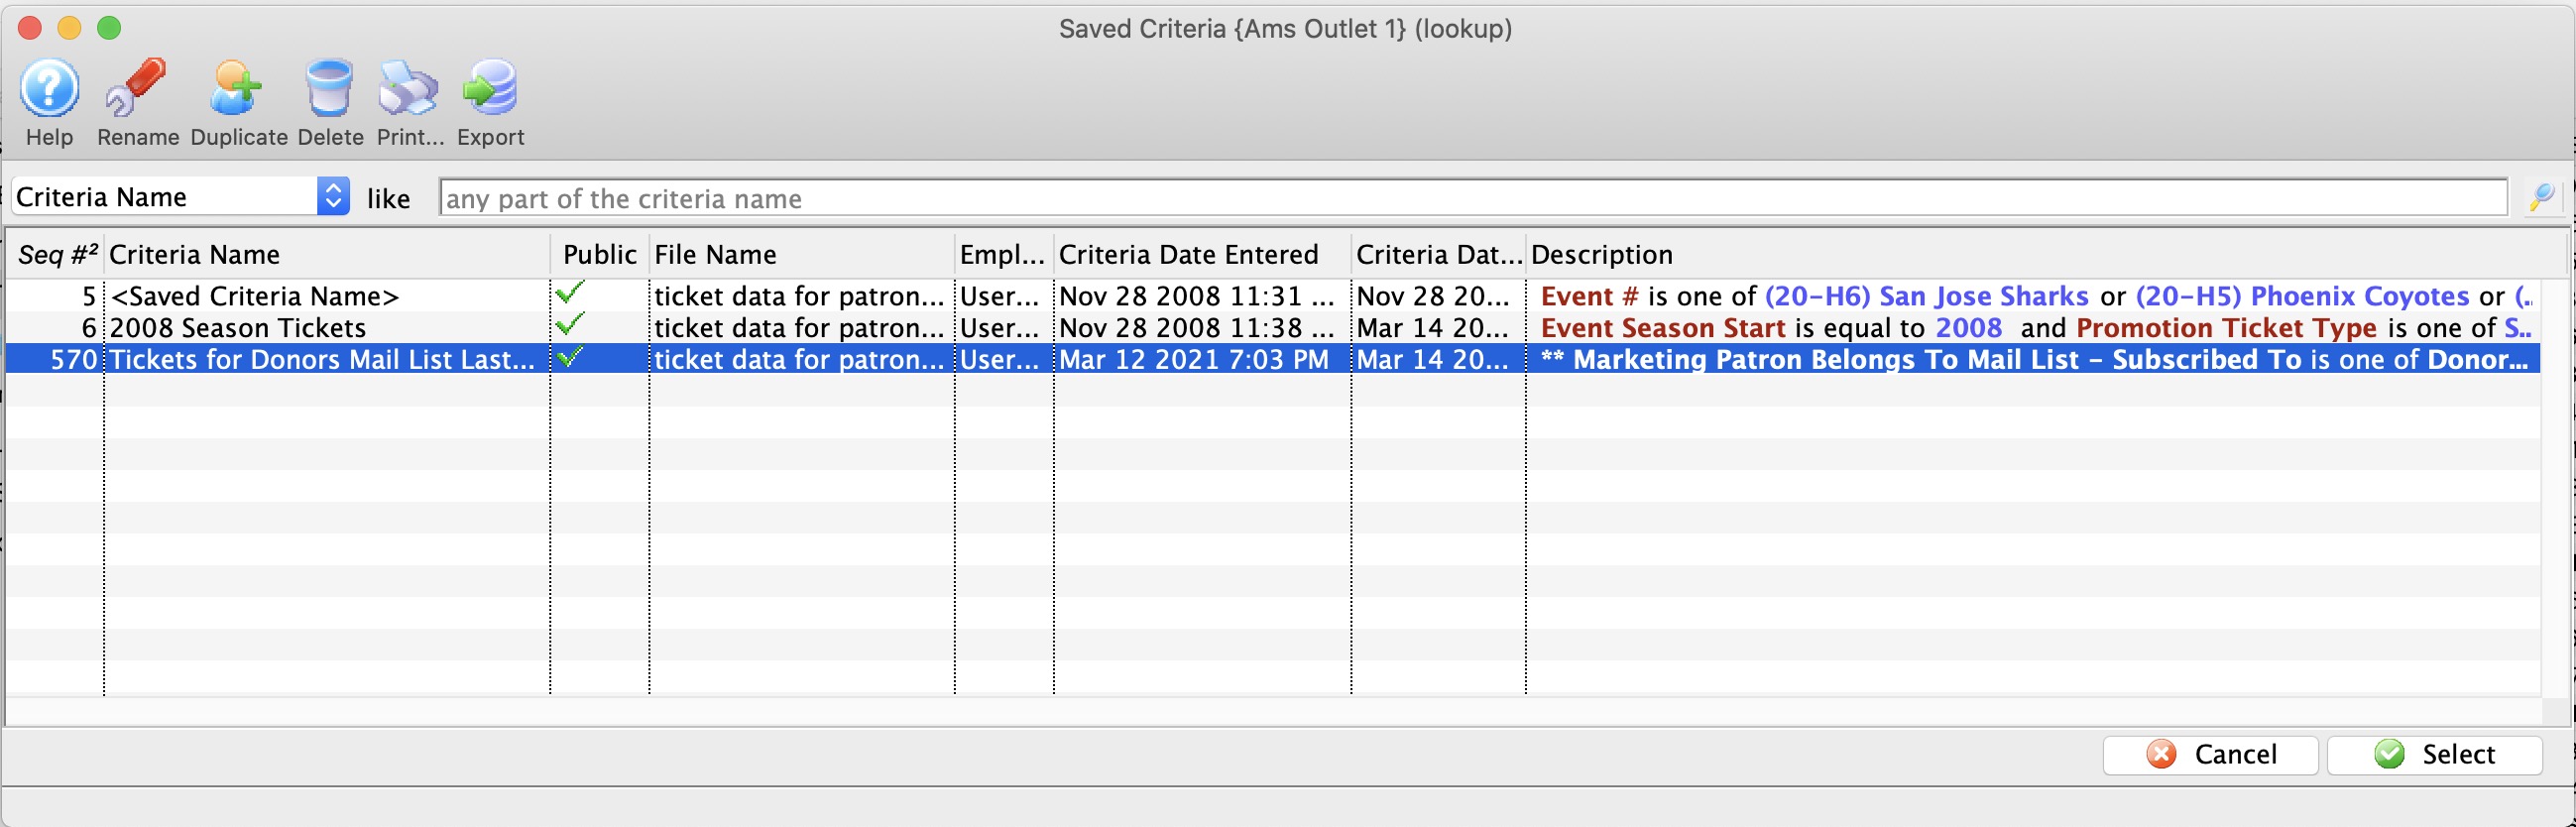
Opens a list of saved criteria that could be valid for this report or mail list or export. |
 |
Saves the current criteria to be used later. |
 |
Saves the current criteria to be used later and opens a dialog to name this criteria. |
 |
Opens the Add/Edit Parameter window to facilitate adding new criteria. Click here for more information on the Add/Edit Parameter window. |
 |
Opens the currently selected criteria in the Add/Edit Parameter window to allow adjustments. |
 |
Deletes the currently selected criteria. |
 |
Deletes all criteria from the Search tab. |

|
Tests the current criteria to see how many records will be returned. A message will appear at the bottom of the window showing the number of records to be returned. |
 |
Prints a listing of the criteria currently in the Search tab. |
 |
Groups the currently selected criteria. This forces the criteria to take precedence in the search. |
 |
Ungroups the currently selected criteria. |
 |
Allows for selection of data bases on applying an aggregation to the data in a mail list. For example, you may want to allow data to be found for patrons 'having a sum of donations > 500' |
 |
Cancels that adding of criteria and returns the user to the Report window. |
 |
If selected, the report will be sent to the background report generator so that you can continue working while the servers generate your reports. Requires some settings to be made:
|
 |
Completes the addition of criteria and the sorting of data, and begins to generate the report. Click here for more information on the Finished Report window. |
 |
Completes the addition of criteria and the sorting of data, and takes you to the next page of information for the selected report. |
|
Quick reference information for Reports Criteria |
MP4 Video |

How to Add Criteria to a Report
How to Add Criteria to a Report
Criteria allow you to refine the information in a report - before generating the report. Criteria can be used to find specific information and using criteria speeds up the process of generating a report.
- To start, click the Reports
 button on the main toolbar. The Reports window opens.
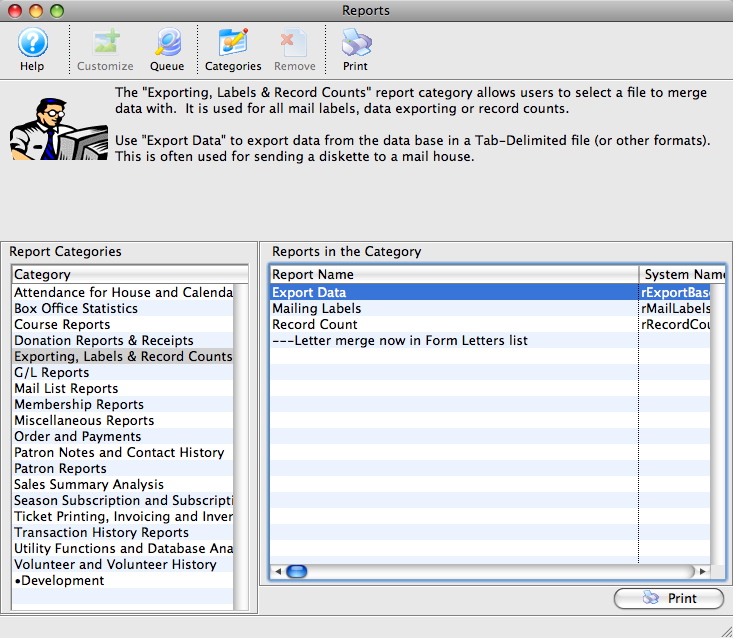
Click here for more information about the Reports window.
- Select the report category, and the report to be used. Click the Print
 button.
For more information on the specific reports, click here for a list of available reports.
The Add Criteria window opens.
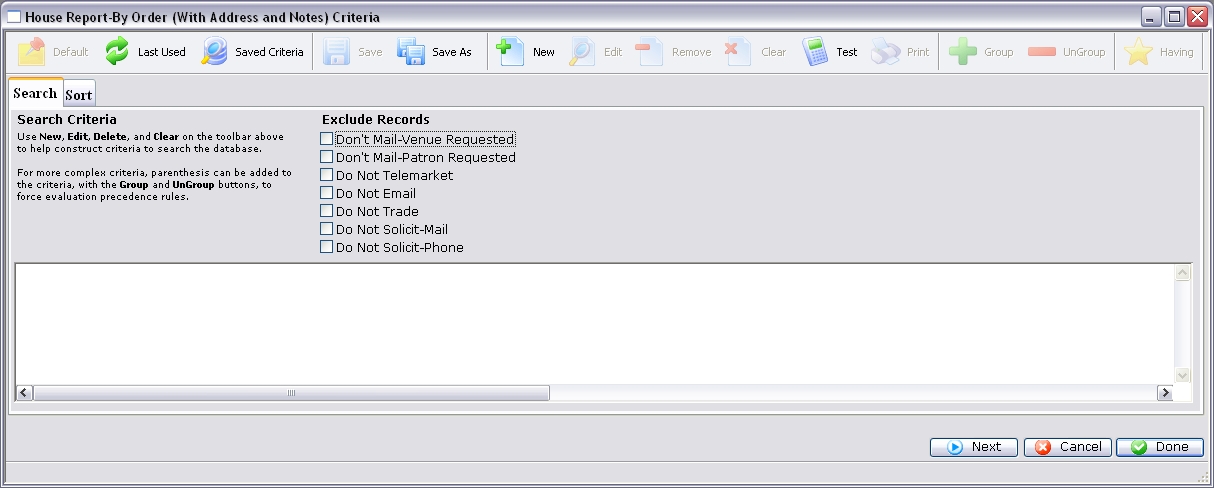
Click here for more information on the Criteria window.
- Click the New button to add the first criteria.
The Add/Edit Parameters window opens.
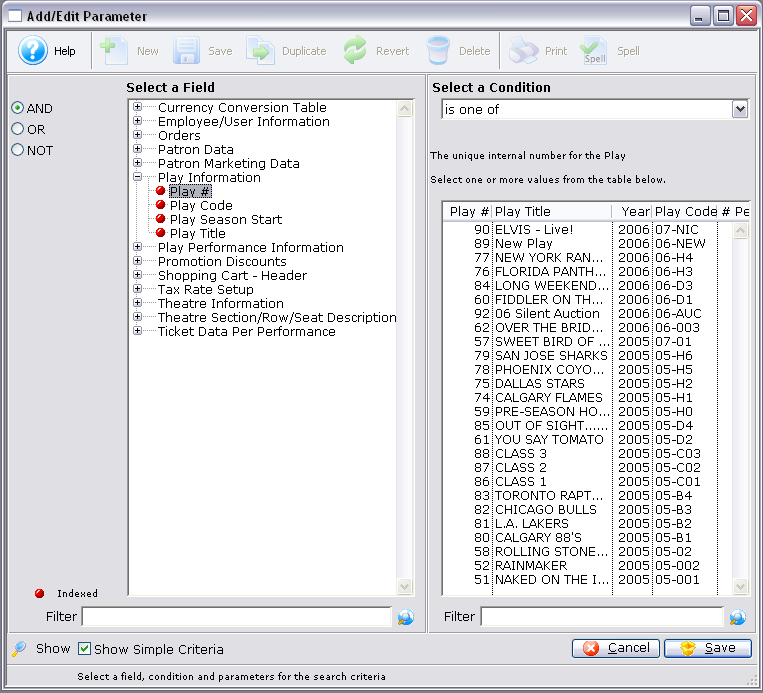
Click here for more information on the Add/Edit Parameter window.
- Select an Operator.
Operators are on the left hand side of the window. They are "AND, OR, NOT."
AND This criteria and all previous criteria will be used in the search. OR This criteria or all previous criteria should be used in the search. NOT All previous criteria but not this criteria will be used in the search. - Select a data field.
Clicking on the plus symbol (+) next to a data category expands it to show a list of fields.
choose indexed fields when possible as Reports generated with indexed fields generate much faster.
- Select a condition.
Conditions determine how the parameters react.
Click here for more information on conditions.
- Set the parameters.
Depending on the data field and condition, the parameters may be a single number, a range of numbers, or a list of items.
If a list of items is shown, multiple items can be selected by using the OPTION key (Mac) or the CTRL key (Windows).
- At the bottom of the window, click the Save
 button.
The Add/Continue
 button may also be used to add this criteria, and select additional criteria without leaving the window.
- Click on the Sort
 tab, if necessary,
and adjust.
- Click the Done button to generate the report.
Click here for more information on the Finished Reports window.
|
Quick reference information for Reports Criteria |
Flash Video |
MP4 Video |

Exclude Records
Exclude Records

One section on the search sub window is called Exclude Records with Following Flags. There are a number of checkboxes in this section that allows you to quickly eliminate patrons from the search in a way that matched the marketing flag selections on the patron window.
Simply click on a checkbox and Theatre Manager will add the criteria for you automatically. Unclick the criteria and it will be removed from the search. In the example below:
- 3 checkboxes were clicked resulting in the last 3 criteria in the list
- The top two criteria were added using the normal criteria selection process.
- You can mix both criteria on any report.

Patron Selection
Patron Selection

 |
This option only applies only to creating a mail list. |
Adding people to a mail list
When Searching for patrons to ADD to a mail list, this set of checkboxes allows you to decide if the patron you get is the:
- Patron that matches the criteria. This means if an item is sold to the primary patron or secondary patron in a household, you will always find the person who the item was sold to.
- Primary patron only. Regardless of who the item was sold to, this will find the primary household member
- Non-Primary patrons only. This will find patrons if the patron connected to the search is not a primary patron. Any primary patrons that are found are discarded
- All Patrons in Household. This will find all patrons in a household, regardless of who purchased an item. e.g. if one person in the household gave a donation, then all members of the household will be selected.
Removing people from a mail list
When Searching for patrons to REMOVE from a mail list, this set of checkboxes allows you to decide if the patron removed is the:
- Patron that matches the criteria. This means if the item is sold to the primary patron or secondary patron in a household, you will always remove the patron who the item was sold to.
- Primary patron only. Regardless of who the item was sold to, this will remove the primary household member.
- Non-Primary patrons only. This will remove only patrons who are not the primary patron. A primary patron should remain on the mail list.
- All Patrons in Household. This will remove all patrons in a household, regardless of who purchased an item. e.g. if one person in the household gave a donation, then all members of the household will be removed if they happen to be on the mail list for some other earlier criteria.
Gifted Patron Selection
Gifted Patron Selection

|
This option only applies to mail merges or reports based on ticket data per performance. This generally means house reports, ticket inventory reports, course attendance, or letters based on tickets |
For any ticket or course is sold to a patron, you can specify a person (other than the purchaser), who will use the ticket by gifting the ticket to this person.
A gifted ticket is always owned by the purchaser. Gifting to other patrons may occur for reasons like:
- A Parent registered for a course for their child
- A Corporation bought 10 tickets to a fundraiser and gave them to specific employees
- A person may have bought a subscription on behalf of their friends and you want to track who has certain tickets
- For social distancing (covid), you might ask who the attendee will be and gift them the ticket
When you run a report or mail merge, this allows two options. Click
- Find Sold To patron if you always want to see the purchasers name on a merge or report.
- Find Gifted To patron if you want to see the patron who the ticket was gifted to on the report or merge. If the ticket is not gifted, the original purchasers name will be shown.
Using Saved Criteria
Using Saved Criteria
When you see a list of criteria, just double click on the one you want to use.
You can also rename the criteria by selecting one in the list and using the rename button.