Work Flow Notification - Introduction
|
You must have purchased the Web Sales Module in order to use Work Flow Notifications. |
Work Flow Notifications enable you to take common situations and have messages emailed to you.
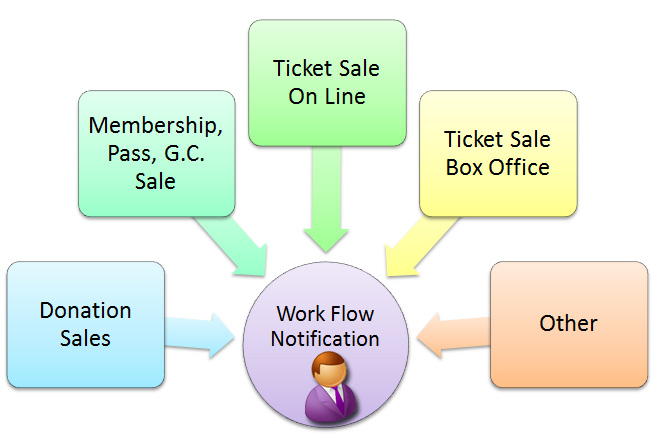
Common notifications, such as, donation sales or membership sales, can be assigned on a per campaign or membership basis. They are assigned in the setup of each:
 |
Notifications are only created/sent when the actual transaction record is created.
Note: Notifications from web sales are deferred. They will actually be sent:
|
There are four steps to creating a workflow notification:
- Step 1 - Write the form letter.
For example - New Donation Notification using the Donation Data for a Patron Data.
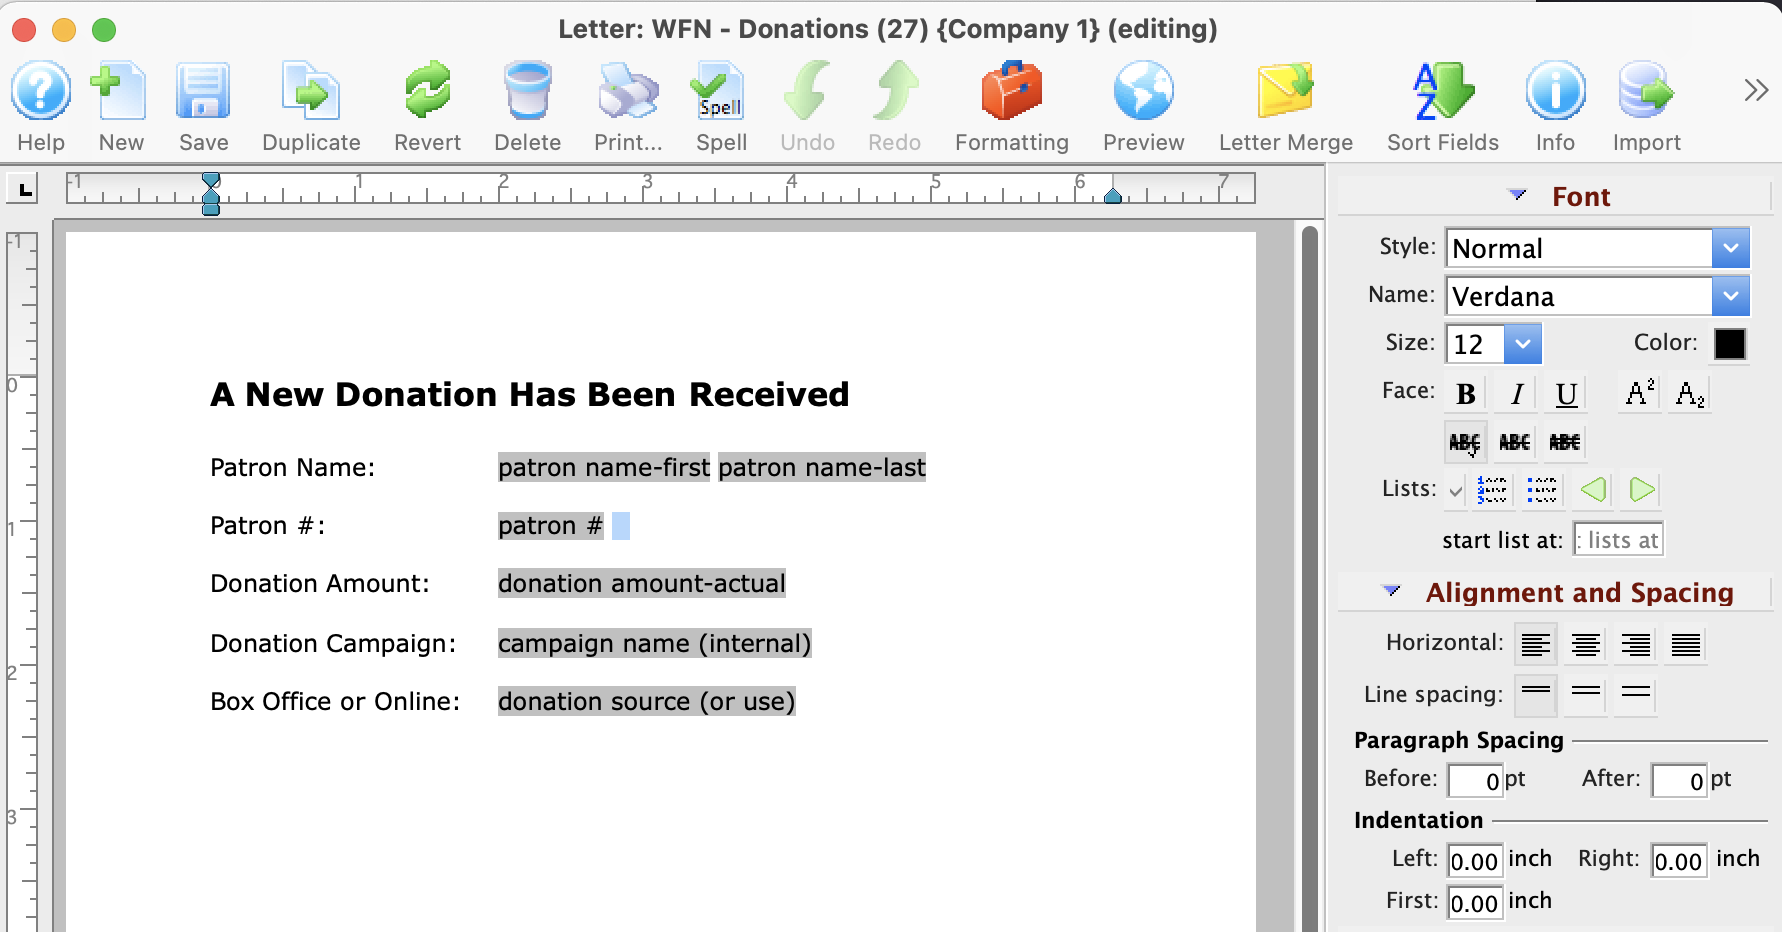
- Click here to follow the steps on creating a form letter.
- Step 2 - Set up the Code table for that workflow notification.
For example - Donation Received.
- Check your Workflow Notifications code table to ensure the type of notification you are creating is there.
The code table entry should reflect the same types of categories available for selection as you choose for Data when you create your form letter.
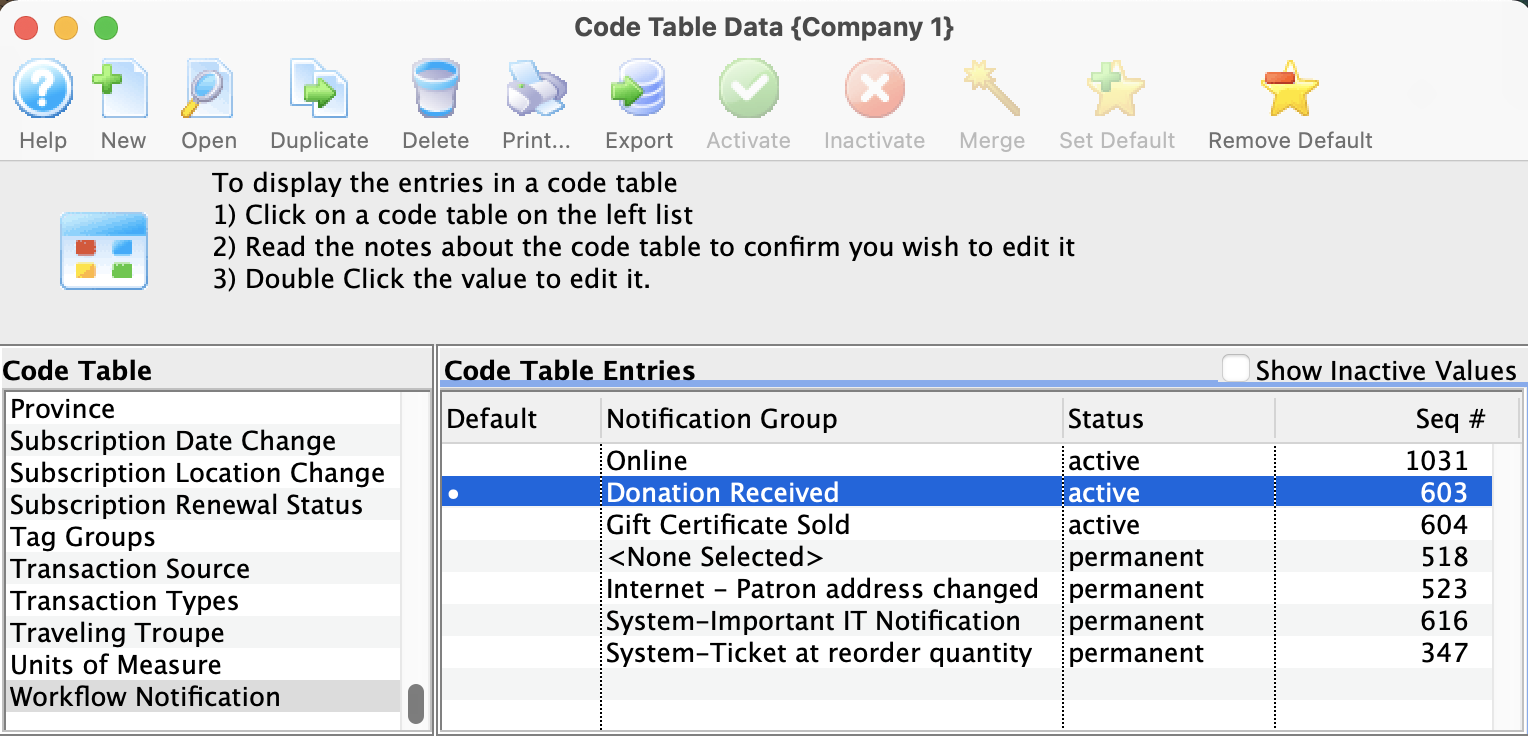
- Check your Workflow Notifications code table to ensure the type of notification you are creating is there.
- Step 3 - Create the Workflow Notification & Assign Recipients.
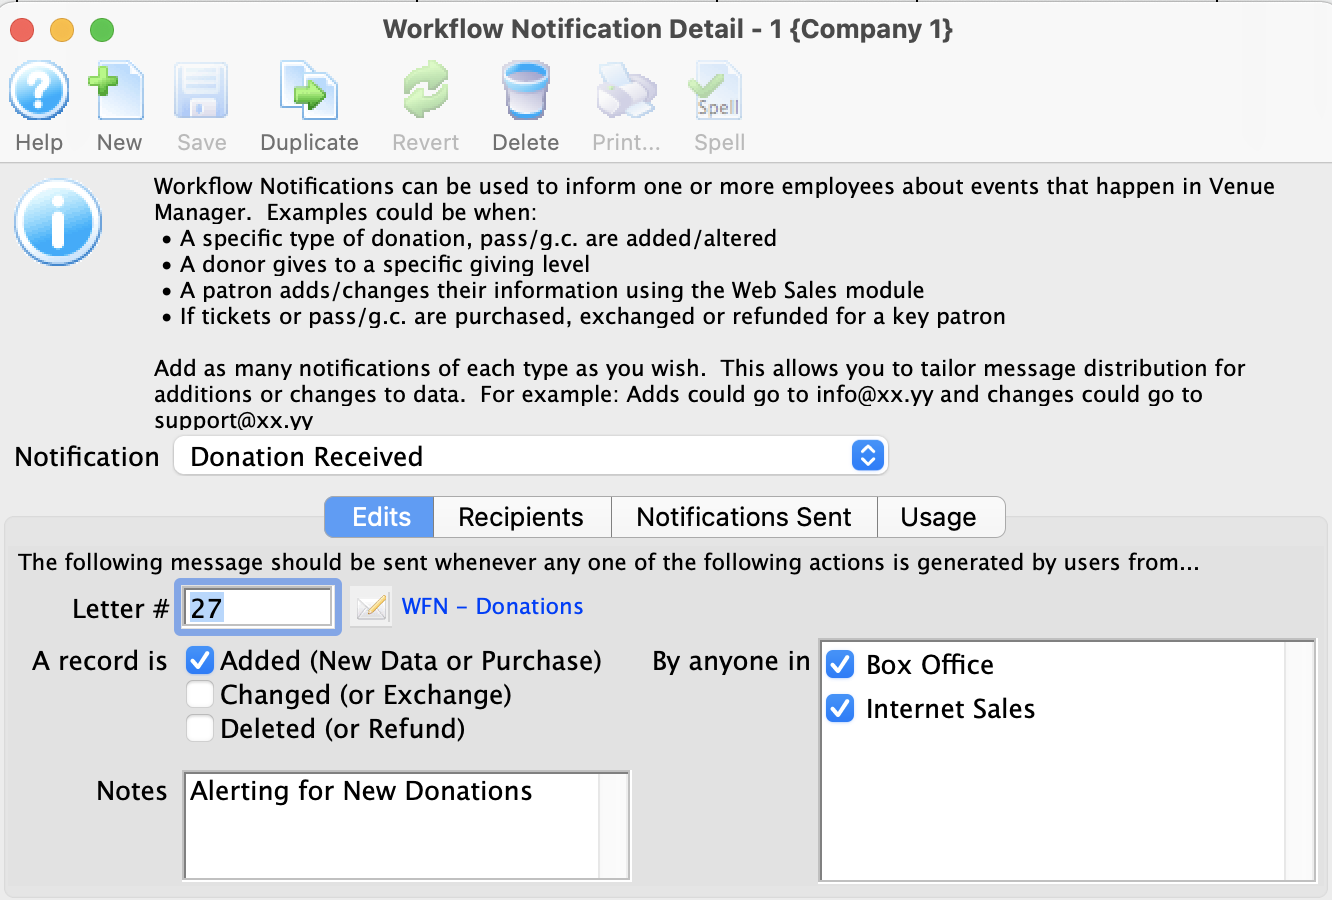
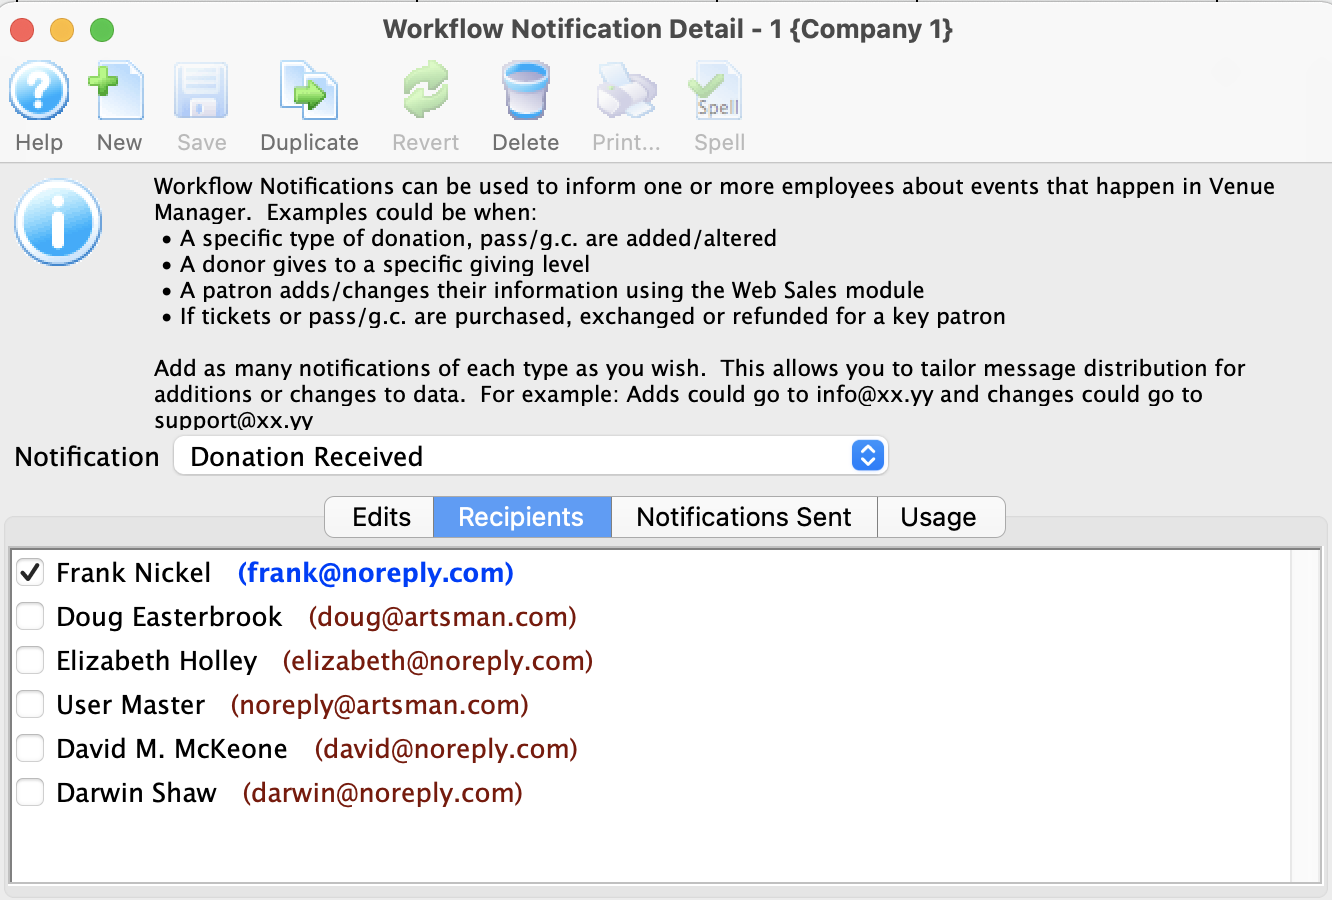
- Click here for the steps on creating a workflow notification.
- Step 4 - The transaction that triggers the notification.
For example - a patron makes a donation. The workflow notification will be sent to the email addresses selected in Step 3.
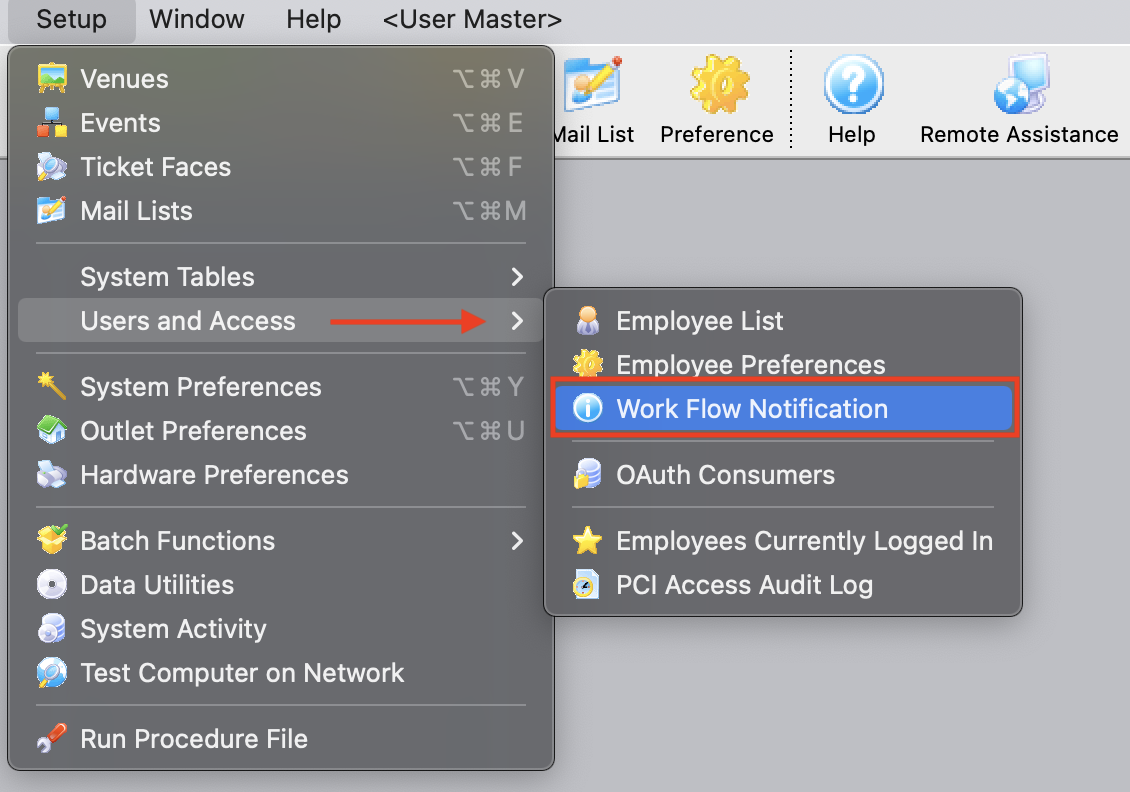
Work Flow notifications are accessed by clicking Setup >> Users and Access >> Work Flow Notification.
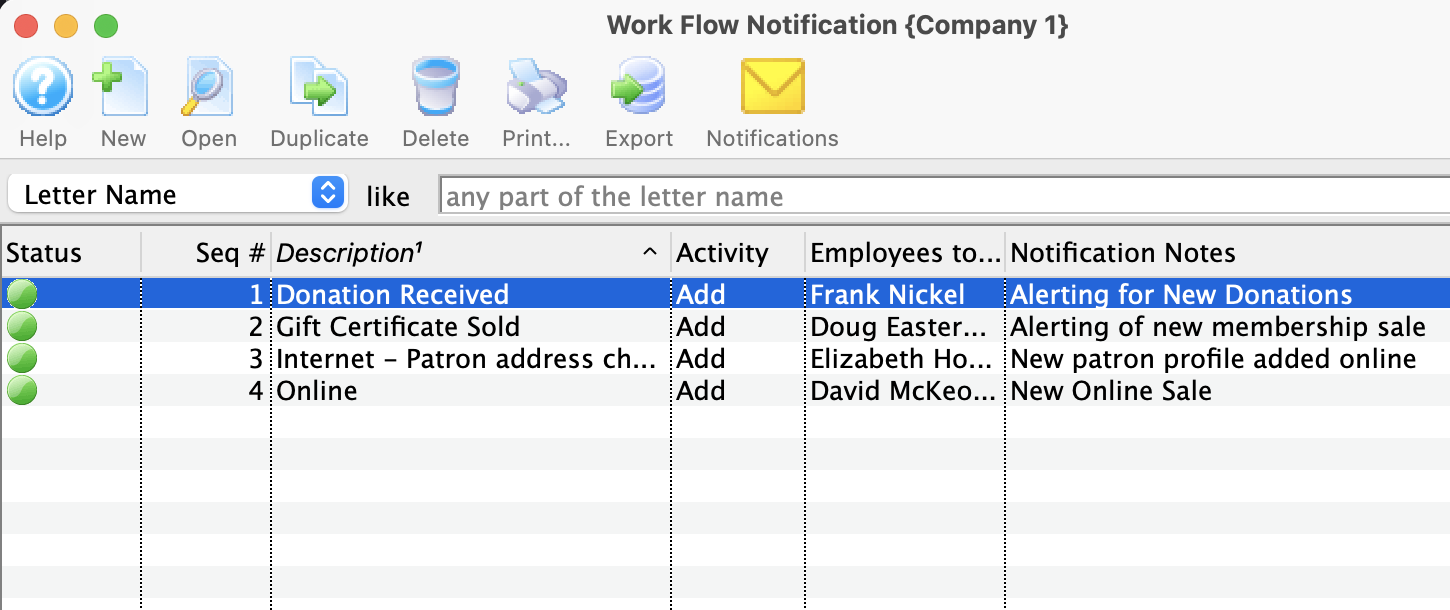
The Work Flow Notification list window opens.
Creating a Notification
|
You must have purchased the Web Sales Module to use Work Flow Notifications. |
Using Work Flow Notifications, you cab take common situations, such as donations being sold or changed, or patrons creating records via the internet, and send notification emails to certain employees who will be responsible for tracking changes to the database.
To create a new workflow notification, you perform the following steps:- Open the Work Flow Notification by choosing Setup >> Users and Access >> Work Flow Notification.

The Workflow notification list window opens.

- Click the New


- Select the Notification Type from the drop down list.
These Notifications are defined in the system table Workflow Notifications. Click here for more information on adding new notification types in code tables. They must exist first before you can use it here.
- Select an Form Letter to use for this notification by clicking the Letter Search button
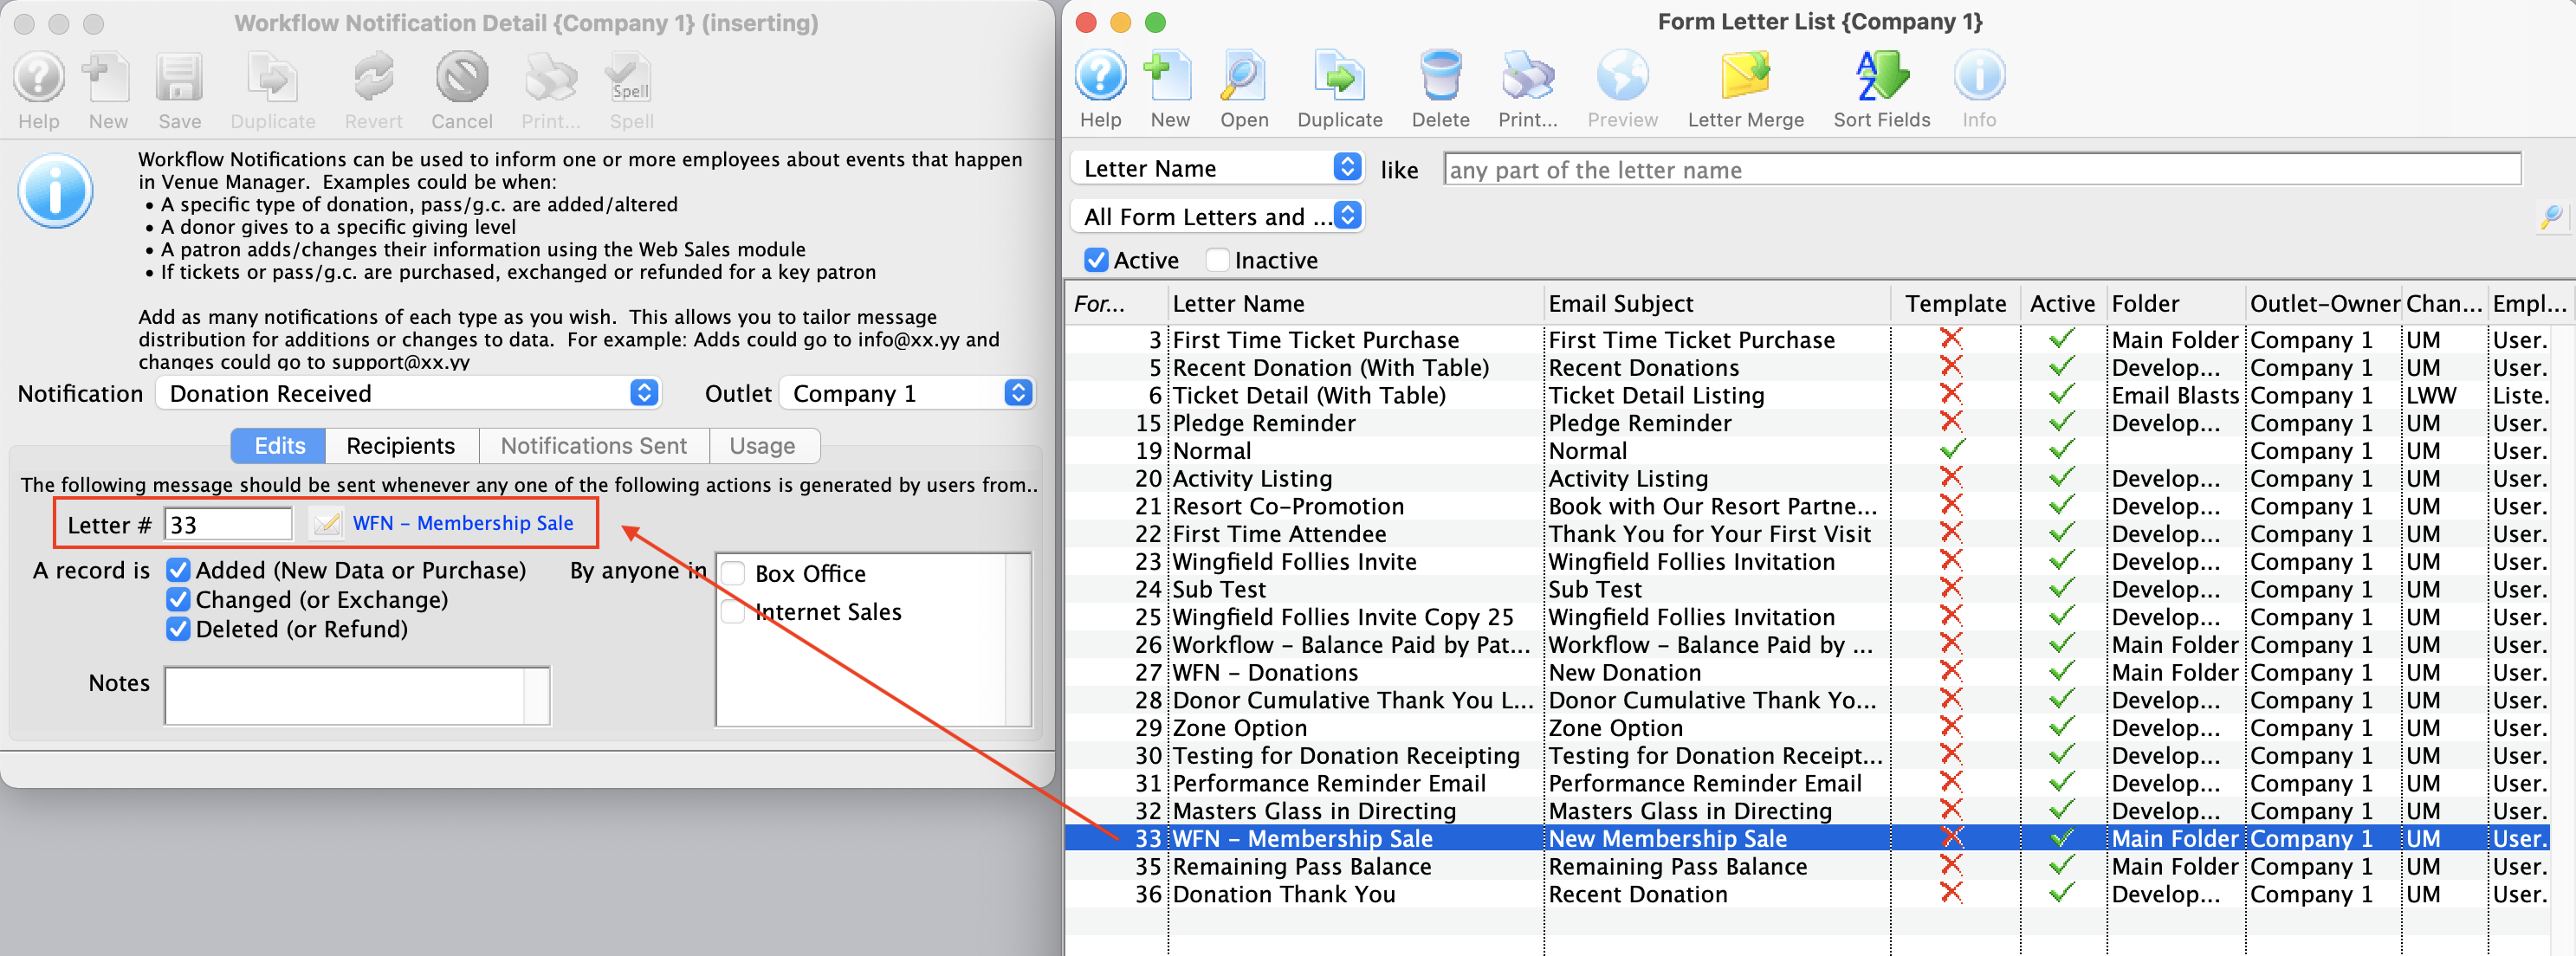
For more information about Form Letters, click here.
- Select the Form Letter that corresponds to the notification that you are setting up.
- Click the Select
 button.
The Letter/email is now attached to the Notification.
- Enable the appropriate check boxes so the notification is sent when the event is added, changed or deleted.
These options allow you to set up and send emails to different employees for different situations. For example, not all employees will need to be notified if a donation is changed, but more will be on the list for donations being added.
- Enter notes to describe what this notification is used for.
- Choose if the notification will be sent for Box Office, Internet Sales, or both.
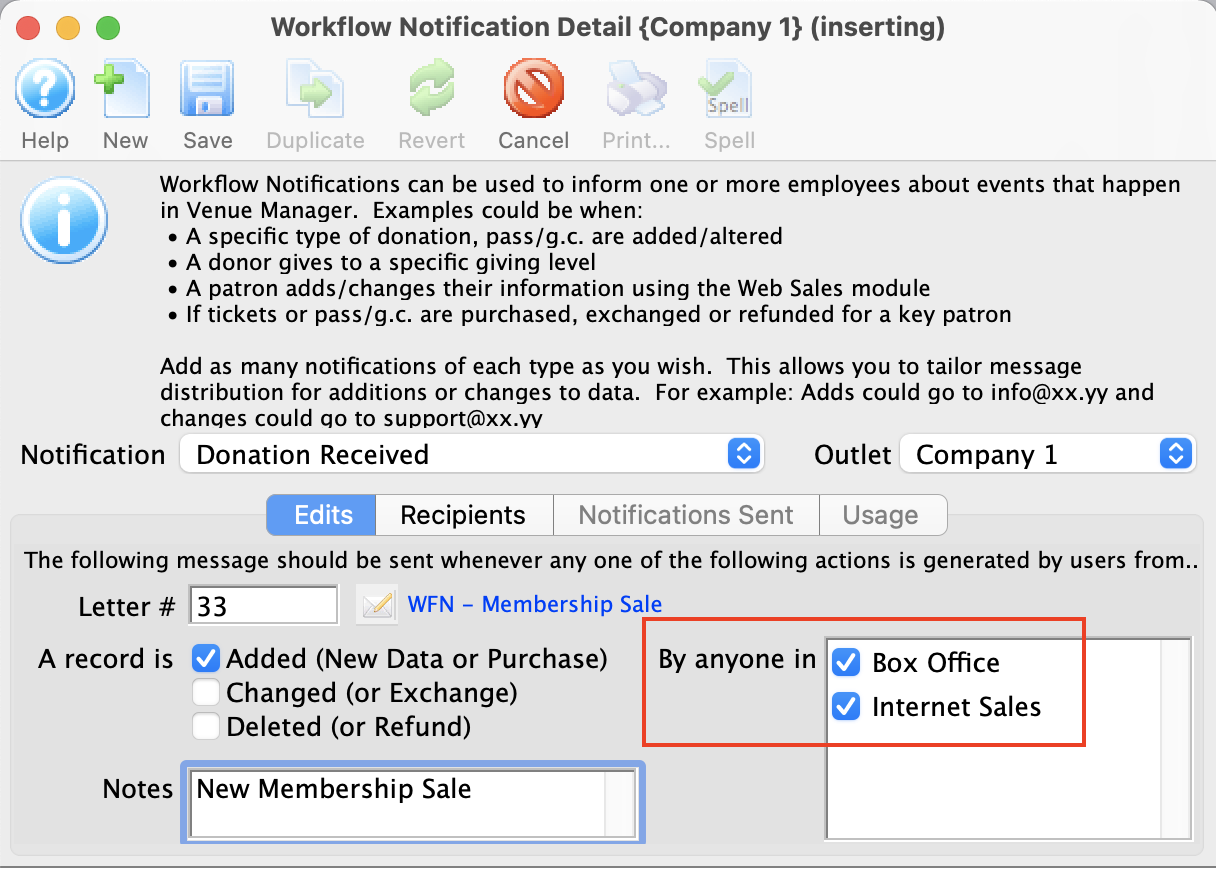
- Click the Recipients tab
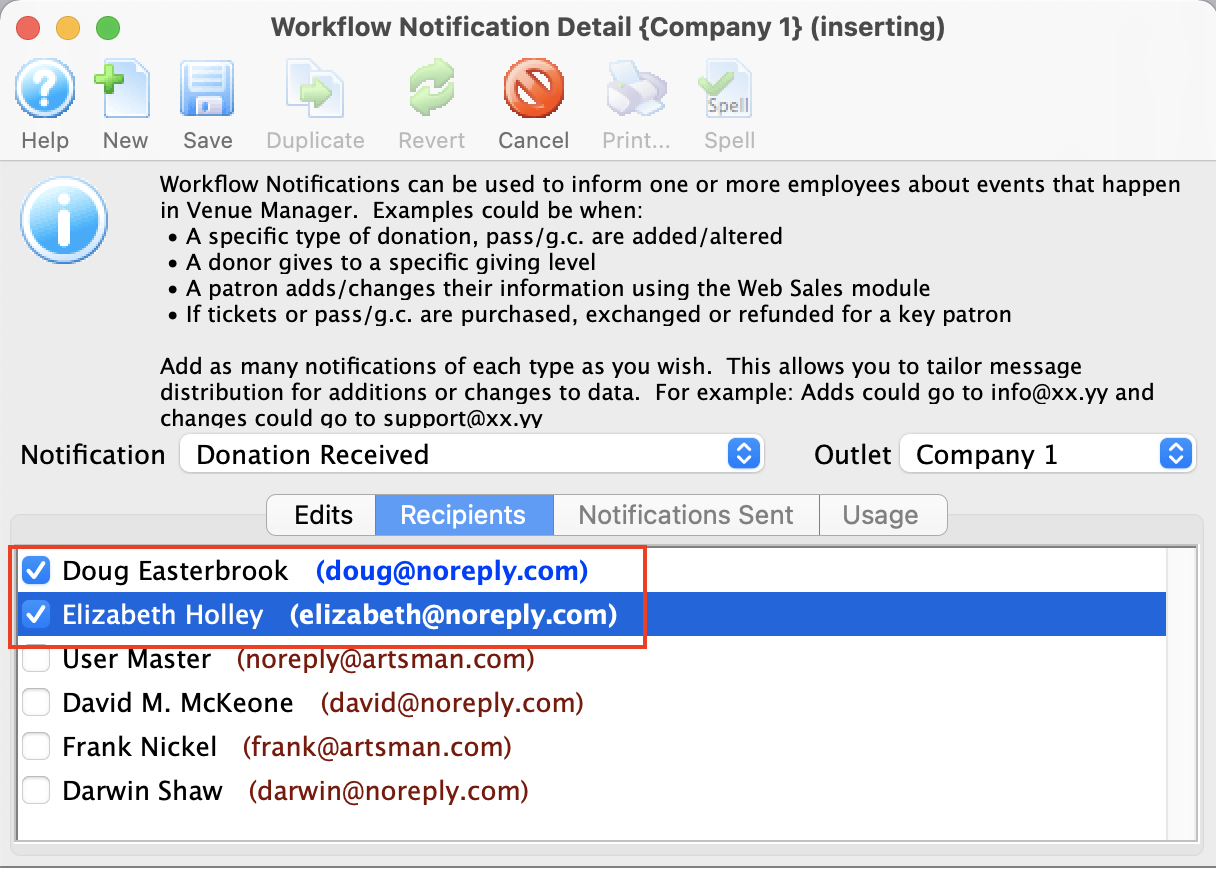
- Choose the employees to receive this notification.
If an employee does not have an email address, you will need to enter one for them to be added to a notification. Click here for Employee Setup.
- Click the Save
 button.
You should now check your notifications are being sent.
To test the notification, set a ticket sale notification to be triggered only at the Box Office. Then sell the ticket/membership in the Box Office, and lastly check your inbox. The notification should be sent by the system within 30 seconds.
If the notification is for online sales only, you have one more step to check. Web transactions will trigger the notification as soon as the online sale or donation has finished the checkout.
|
If the notification is not in the INBOX -- check your junk mail box. |
Editing a Notification
- To Access Work Flow Notification Setup, go into the Setup Menu - Users and Access - Work Flow Notification

This will open the list of all notifications that are setup in your system.
- Double click on the notification you wish to edit.

- Edit any of the fields as required.
- Click the Save
 button.
Deleting a Notification
- To Access Work Flow Notification Setup in order to delete a notification that is no longer necessary, go into the Setup Menu - Users and Access - Work Flow Notification

This will open the list of all notifications that are setup in your system.
- Highlight the notification you wish to delete.
- Click the Delete button.
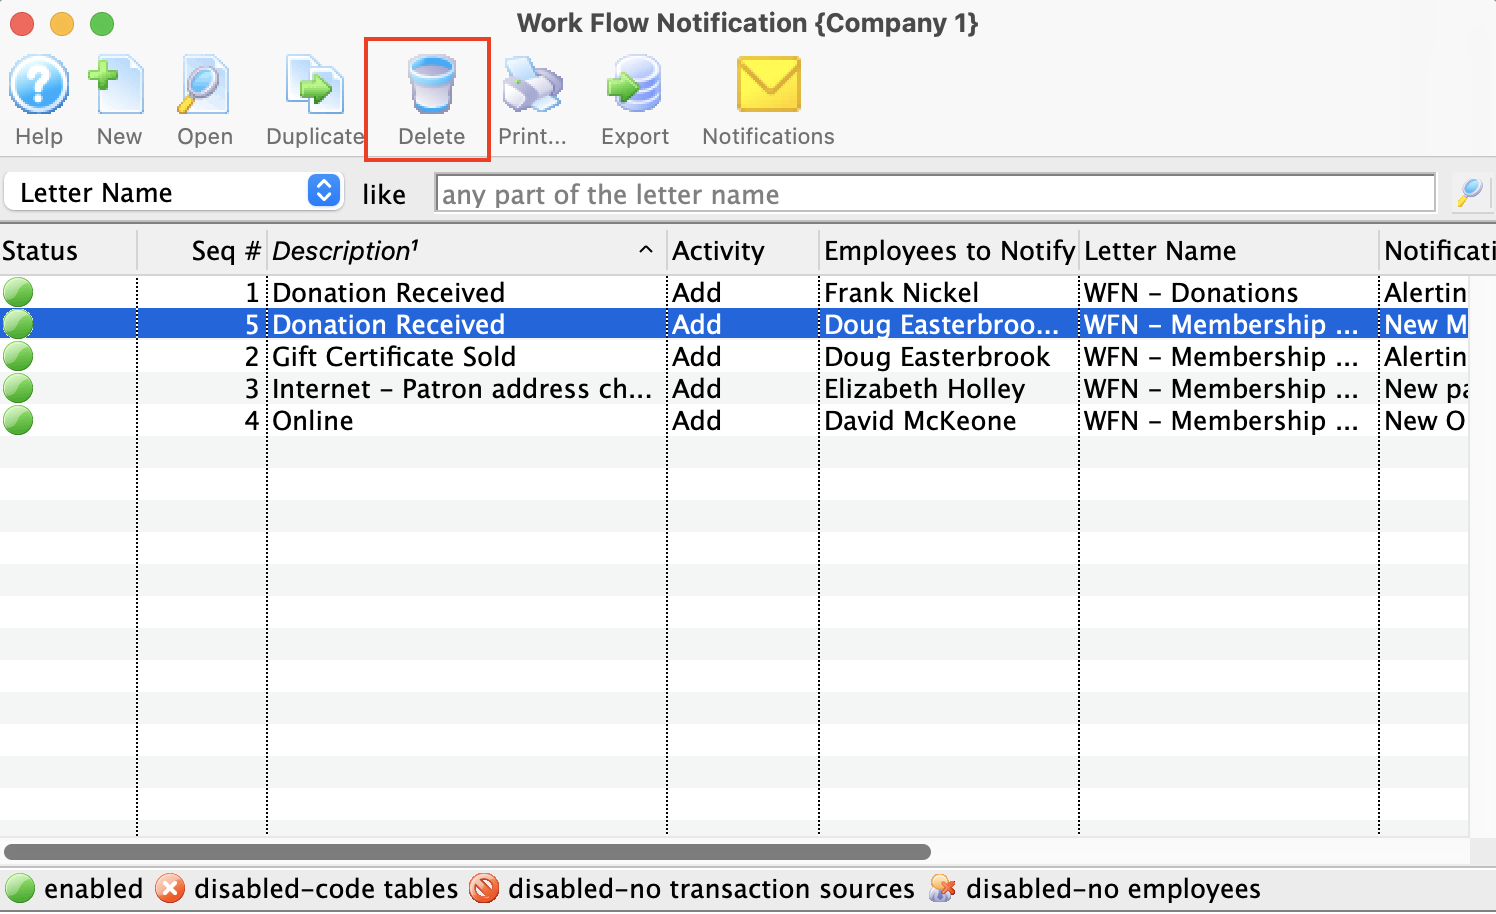
The Delete Record confirmation window will appear.
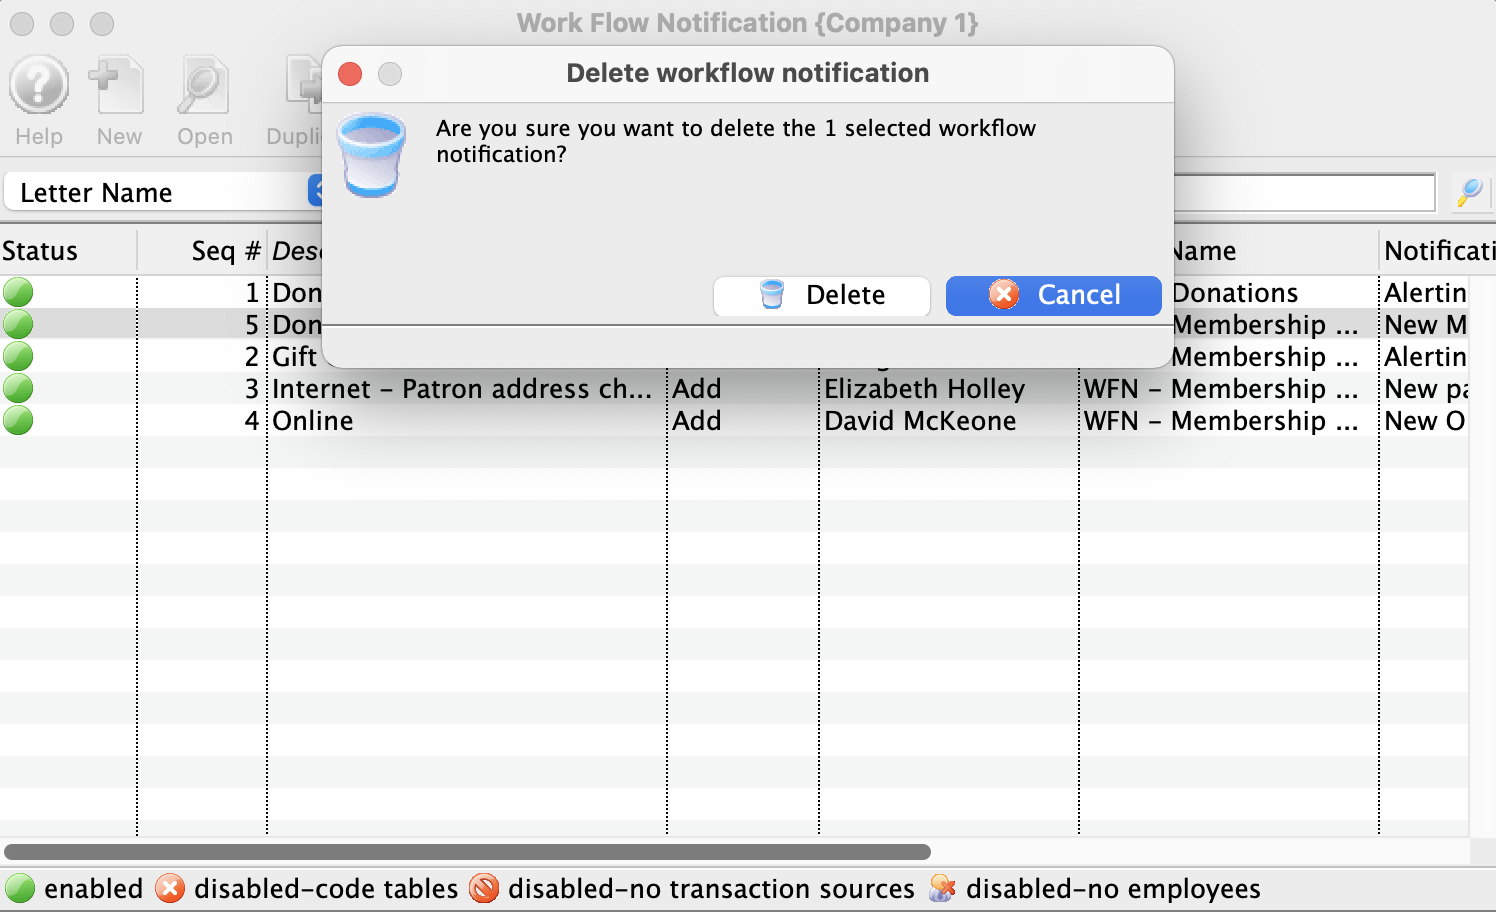
- Click the Delete button.
The notification is now deleted.
