Printing Tickets at Time of Purchase
To print tickets the ticket printer preferences need to be set and the ticket printer configured. Click here for more information on configuring Practical Automation printers and Click here for more information on configuring BOCA ticket printers. Click here for more information on setting Employee Ticket Printer preferences.
- Purchase tickets the patron wants to buy.
Click here for information on buying tickets.
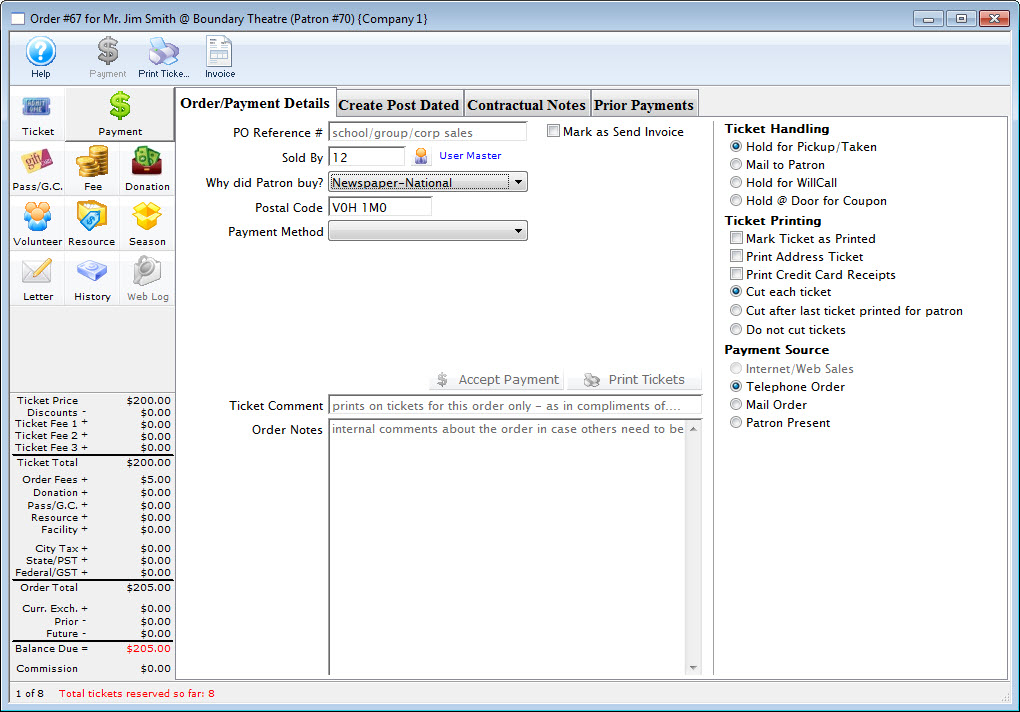
- Enter the method of payment and other required information on the Payment Window.
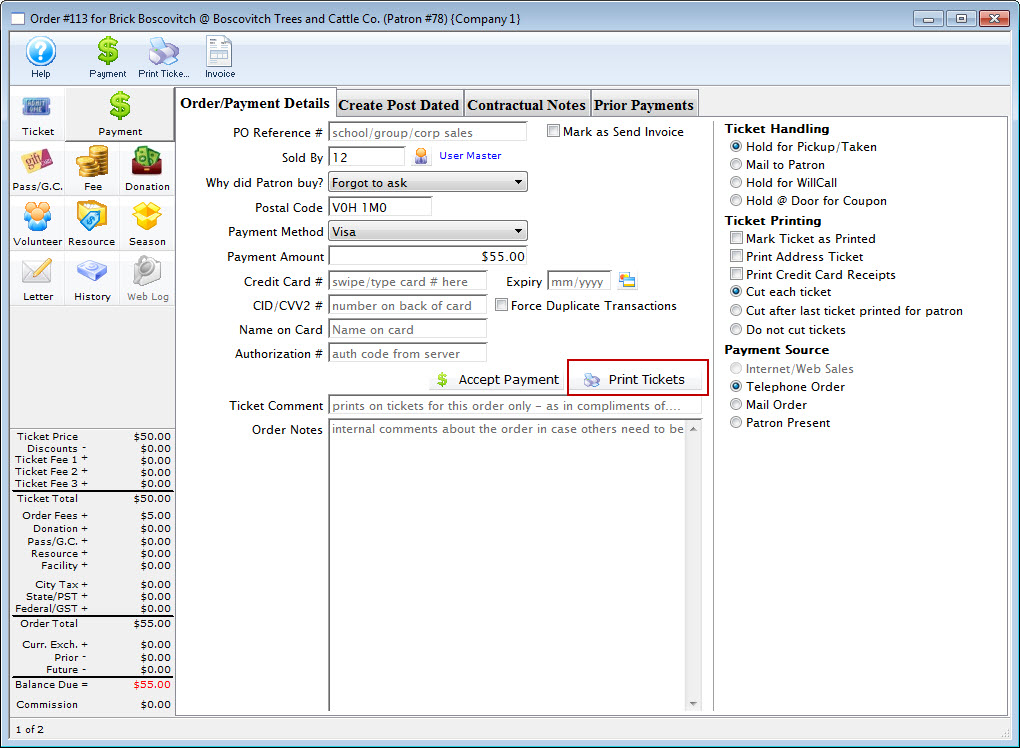

Note the two options on the right. If you select print an address ticket and click print tickets, the address ticket along with the admission tickets will be printed.
Click here for more information on creating a payment method.
- Click the Print Tickets
 button.
Clicking print accepts the payment information, prints the tickets to the specified printer, closes the ticket purchase windows and returns to the Patron Window with the purchased tickets displayed.
Print Ticket Options
During the payment process, there are options for how the tickets will be printed. Some options depend on your Box Office policy, while others depend on the type of printer you may have. Most Practical Automation printers automatically cut after each ticket face is printed.
Box Office policy items include:
- Mark Tickets as Printed
- Print Address Ticket
- Print Credit Card Receipts
These options can be defaulted in Setup->Company Preferences on the Ticket Faces tab.
Printer hardware options include:
- Cut each ticket
- Cut after last ticket printed for patron
- Do not cut tickets
The Ticket Printing options appear on the right hand side of the Payment window.
Options in Ticket Printing
| Mark Tickets as Printed | This option will mark the tickets as printed, but not print them. This is useful when you are simply tracking attendance and do not want to actually print tickets for the event. This setting will apply to all tickets within the order. Optionally, you can set "Mark tickets as Printed (but do not print)" in the Event setup. For more information on this setting in Event setup click here. |
| Print Address Ticket | This option will print an address ticket for the patron to whom the order was sold. The primary address in the patron record will be used. In order to print a credit card receipt, the specific credit card receipt ticket face must be identified in Setup>>Company Preferences on the Ticket Faces tab. For more information on ticket faces click here. For more information on the Ticket Faces tab, click here. |
| Print Credit Card Receipts | This option will print credit card receipts if a credit card (or multiple cards) were used to pay for the order. In order to print a credit card receipt, the specific credit card receipt ticket face must be identified in Setup>>Company Preferences on the Ticket Faces tab. For more information on ticket faces click here. For more information on the Ticket Faces tab, click here. |
| Cut each ticket | If your printer allows tickets to be printed without cutting them, this option instructs the printer to cut after each ticket (standard cutting). |
| Cut after last ticket printed for patron | If your printer allows tickets to be printed without cutting them, this option will cut a group of tickets after each patron's order is complete. When batch printing tickets, this option can be useful to group tickets for a patron together and provide a "fan-fold" ticket set for each patron. |
| Do not cut tickets | If your printer allows ticket to be printed without cutting them, this option will not cut tickets at all. This can be used for Season Subscription tickets so they can be mailed to the patron in a "fan-fold" format. |
Printing From the Plays and Dates Window
- Open the Plays and Dates Window.
Click here to learn how to access this window.
- Find the play to print tickets for.
Click here to learn how to find plays.
- Click the Attendance
 tab.
tab.
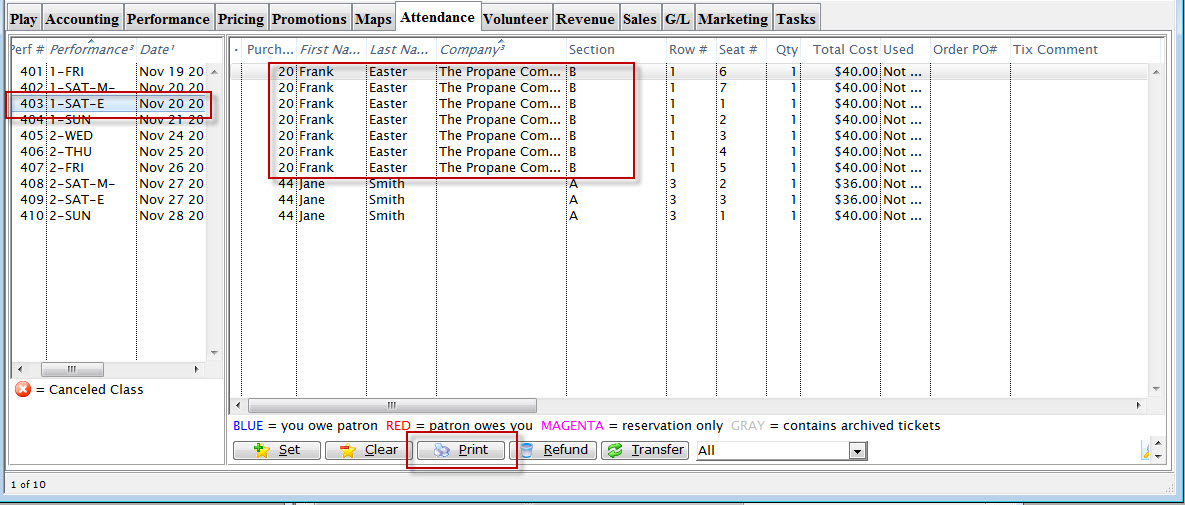
- Select the performance to print tickets for.
Select the performance from the left of the window by single clicking it.
- Select the ticket(s) to print.
- Click the Print Tickets
 button.
- Confirm the printer setup.
Click here for more information.
- Click OK / Print on the printer setup window.
The tickets will print and the user will be returned to the Plays and Dates Window.
Printing Individual Tickets
After purchasing tickets, the tickets will appear in the ticket display area of the Patron Window.
- Find the patron to print tickets for.
Click here to learn how to find patrons.
- Click the Ticket
 tab.
tab.
- Select the ticket(s) to be printed

- Click the Print button.
The tickets will now be printed.
Holding down the <OPTION> key (Mac) or <CTRL> key (PC) when printing tickets will open another window allowing for further ticket printing options.
If the order on which these tickets reside is marked as Reservation Only, when the tickets are printed, the order will be taken off of Reservation Only, and an Accounts Receivable will be created for these tickets.
Reprinting Tickets
There are two options which can be used to reprint tickets either reprint the tickets of an individual patron or reprint an entire batch. Both methods require the user to "Unprint" the tickets then print the again.
Individual Patron Tickets
- Find the patron to reprint tickets for.
Click here to learn how to find patrons.
- Select the tickets to reprint.

- Click the Un-Print
 button.
There are security settings in Theatre Manager to enable the unprinting of tickets. Click here to learn more about security features.
The tickets will be unprinted. Keep the tickets selected.

- Click the Print button.
- Confirm the printer setup and click the Print Button.
The tickets will be reprinted.
Searching for Tickets
- Open the Ticket List Window.
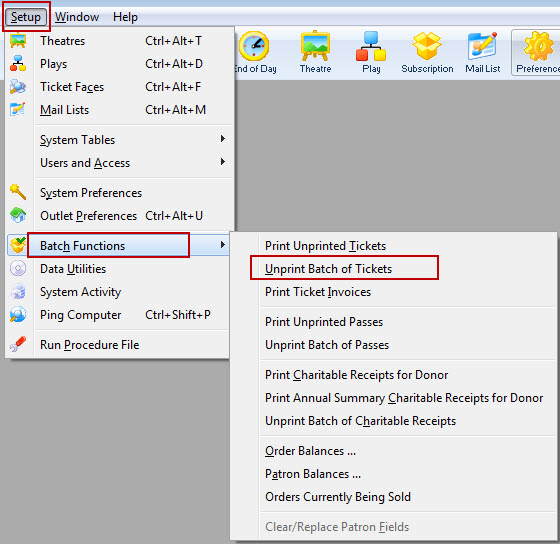
This is done through the Setup >> Batch Functions >> Unprint Batch of Tickets.
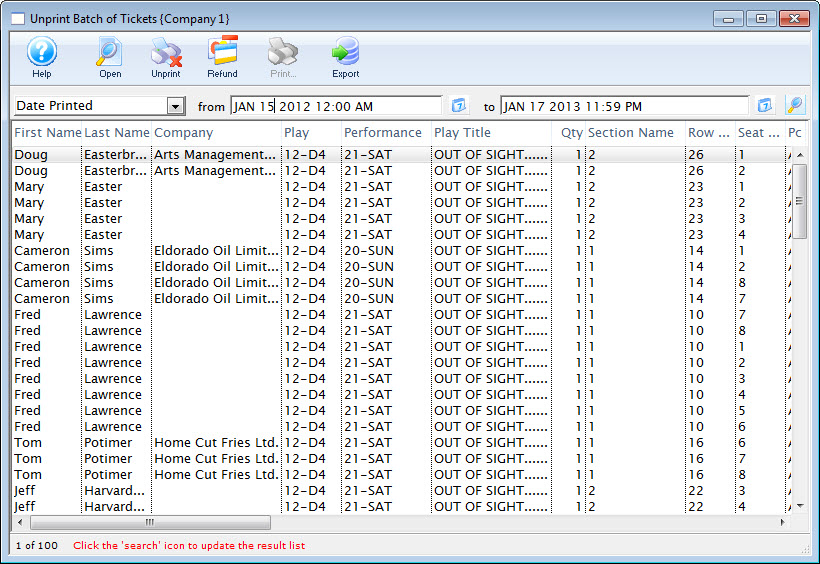
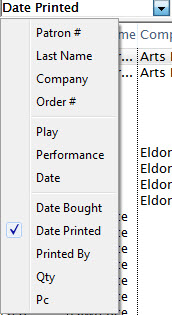
- Select the parameter you would like to search by.
Use the pull up menu in the upper right corner of the window.
- Enter your search criteria in the From and To Fields.

- Click the Search
 button.
All results matching your criteria are displayed in the window.
You can now view the ticket details, unprint, refund, or repost tickets from this window. Click here for more information about unprinting tickets. Click here for more information about refunding tickets.
Unprinting Ticket
Unprinting tickets sets the print status of the selected tickets to not printed.
This is done through the Setup >> Batch Functions >> Unprint Batch of Tickets.
Click here for more information on searching for tickets.
 button.
The tickets are reset to unprinted.