Patron Contact Card
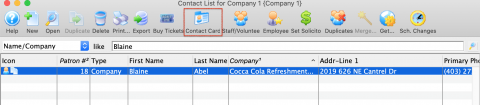
The patron Contact Card is accessible without opening a Patron Record from the Contact List window by clicking on the Contact Card icon in the toolbar. It can also be opened once on the Patron Record by double-clicking on any patron name in the Household Member List window
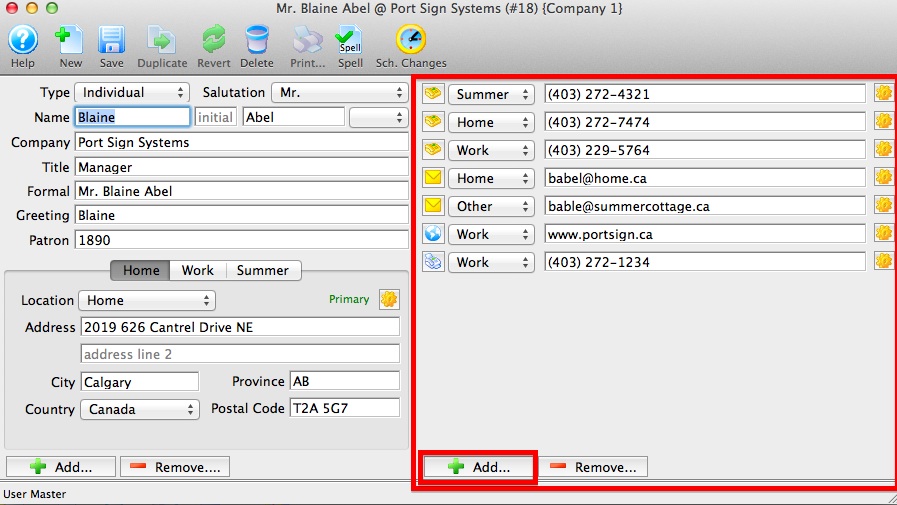
Parts of the Contact Card

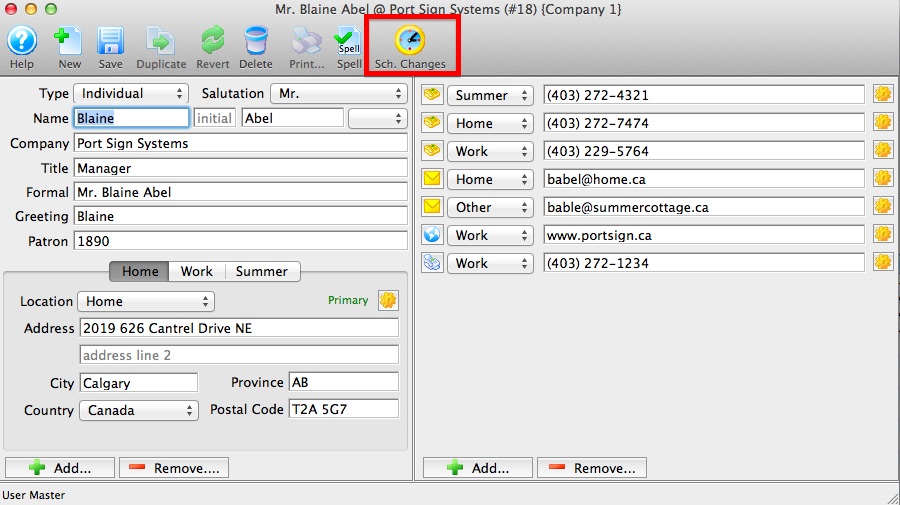
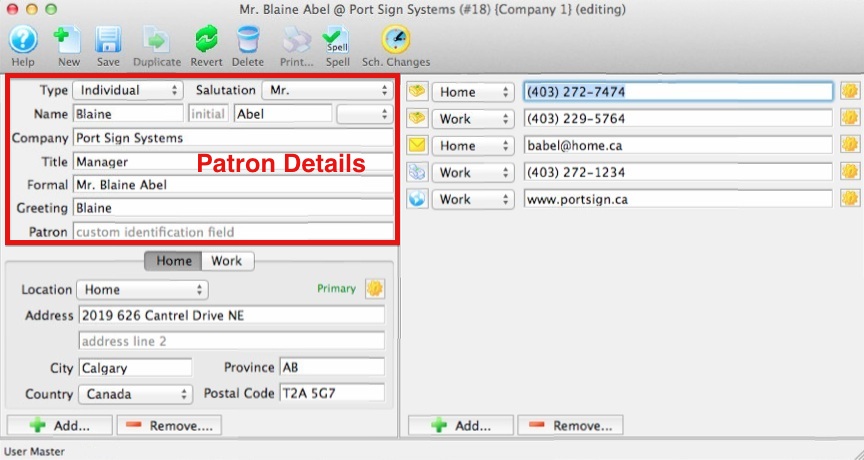
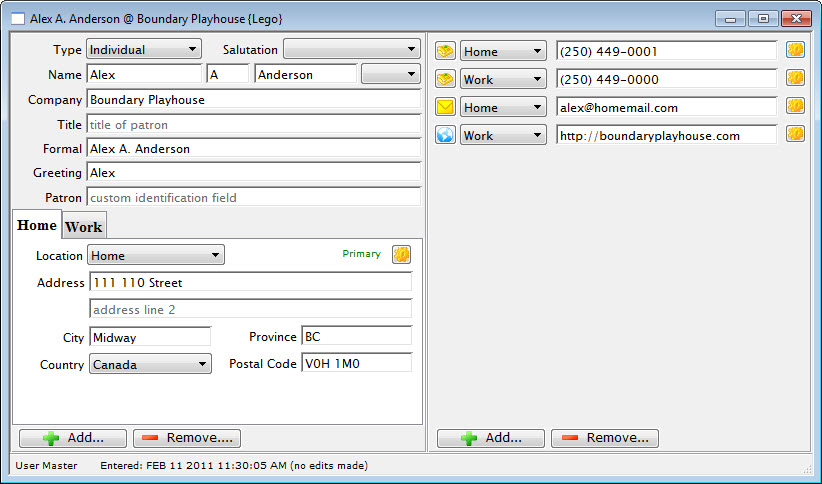
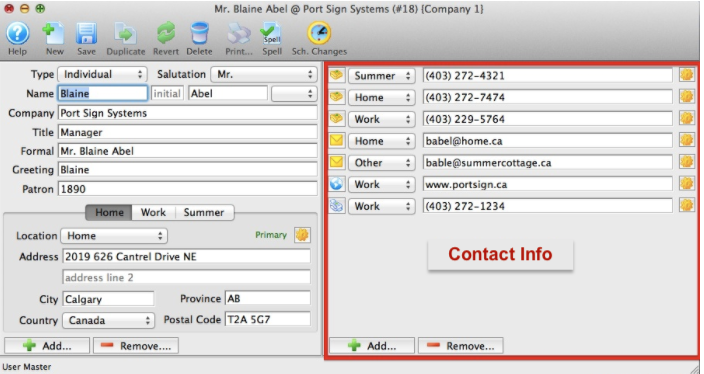
The patron contact card has three parts to it, Patron Details, Address and Contact Info.
The Patron Details area stores information on the Type of patron, their Company and Title, their proper Salutation, Formal and Greeting Names. Some of these fields maybe marked as Mandatory Data Fields and require data to be entered and can not be left blank. Mandatory Data Fields are located in Company Preferences.
The Address area stores patron mailing information; their Address, City, State/Province, Country and Zip/Postal Code. A Patron can have many different addresses stored here as need. Some examples: a patron may have a winter home, summer home and several work addresses. Some of these fields maybe marked as Mandatory Data Fields and require data to be entered and can not be left blank. Mandatory Data Fields are located in Company Preferences.
The Contact Info area stores information on how to reach a patron by Home Phone, Work Phone, Mobile/Cell, Home Fax, Work Fax, Home Email or Work Email. There can be as many lines of contact information as needed.
Patron Contact Card - Tool Bar
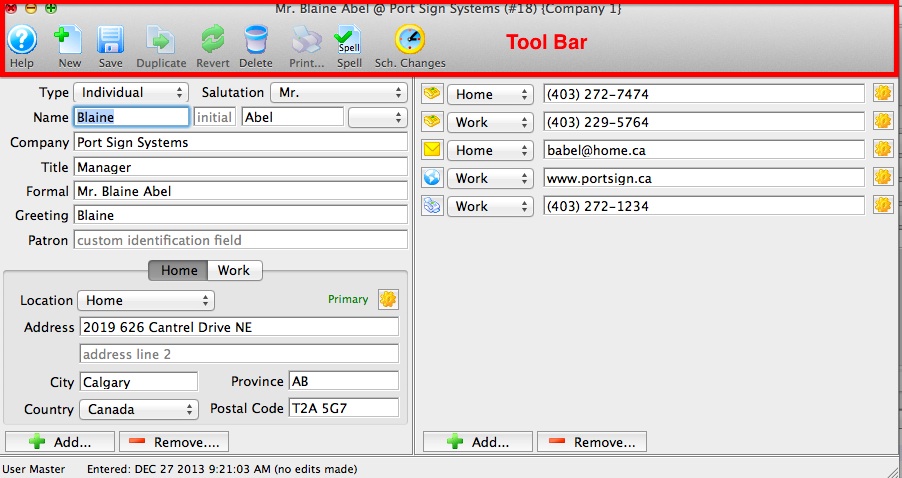
Parts of the Contact Card Tool Bar
The Tool Bar has many helpful function buttons.
 |
Connects to Theatre Manager Online Help for the Patron Contact Card. |
 |
Inserts a New patron contact card for another patron in the same household. |  |
Allows Contact Card to be saved. |
 |
Not applicable. |

|
Returns the content/text back to the saved content/text prior to any recent changes. |

|
Removes the patron record providing there is no financial transactions associated with the patron. |

|
For future development. |

|
Spell check. |

|
Displays a list of the Scheduled Changes for the patron. |
Patron Contact Card - Scheduled Changes
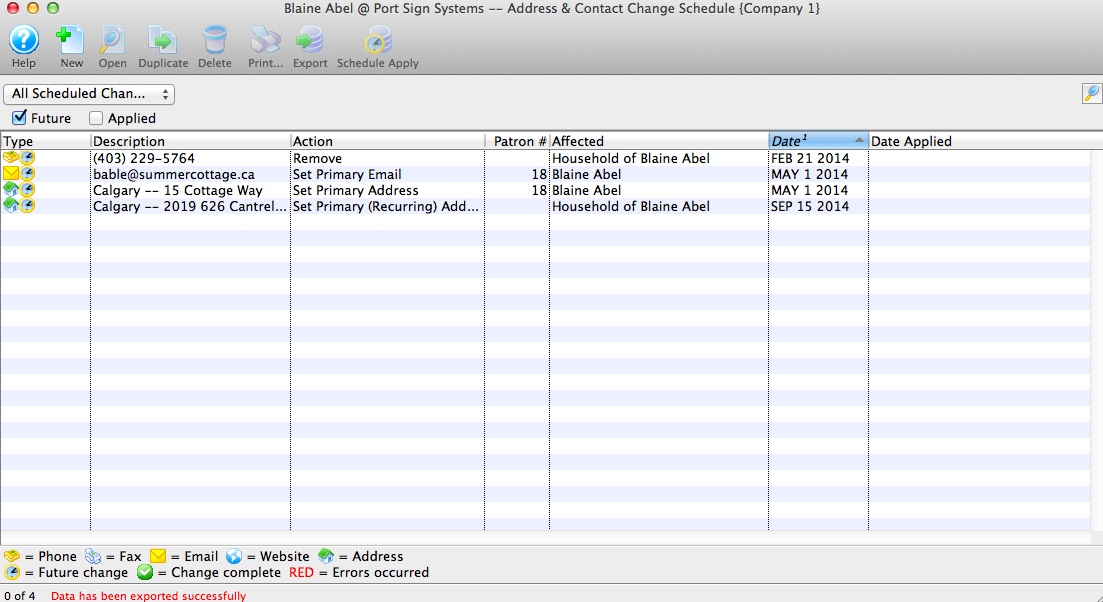
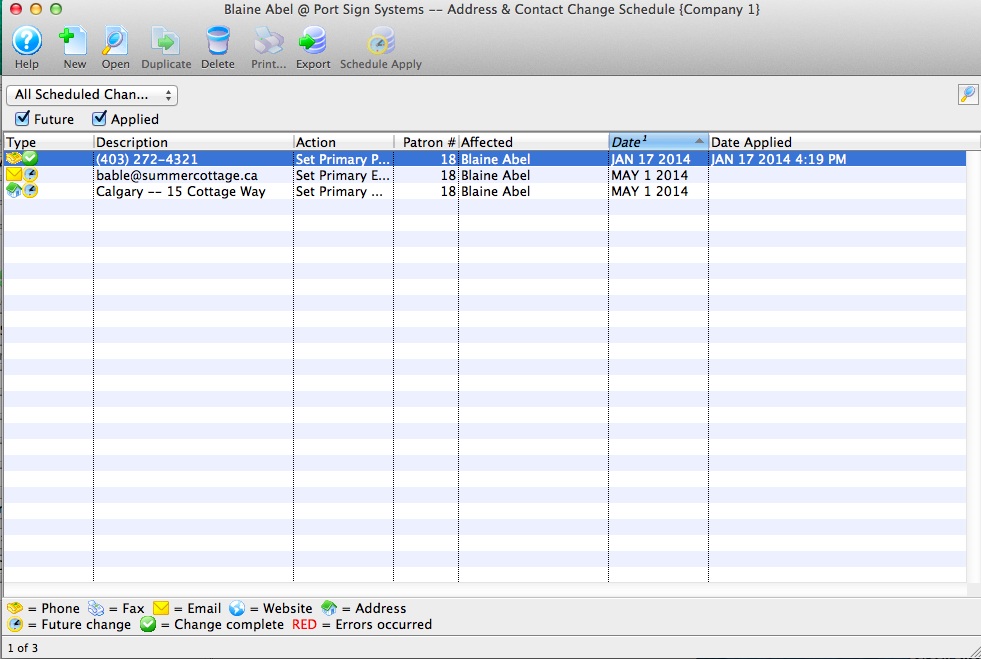
Scheduled Changes Window
This window displays a list of address and contact change schedules. A patron may have more than one address where they reside during different times of the year. For example they may have a summer home and would like to receive mailings at their summer home from June to September. An address can be schedule to change from their permanent to their summer address and then back to their permanent address in September.
Parts of the Scheduled Changes Window
|
Connects to Theatre Manager Online Help for the Scheduled Changes. |
|
Inserts a New address for patron. |  |
Allows an existing scheduled change from the list in the window to be opened for viewing or editing. |
|
For future development. |
|
|
Removes the scheduled change record. |
|
For future development. |
 |
Allows for the list of Scheduled Changes to be exported to a tab delimited or MS Excel workbook file. |

|
Rather than waiting until it's scheduled date, the contact information can be change now. |
|
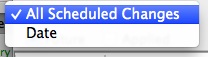
Search criteria for Schedule Change window can be set by Date range, by All Schedule Changes, Future or Applied. |
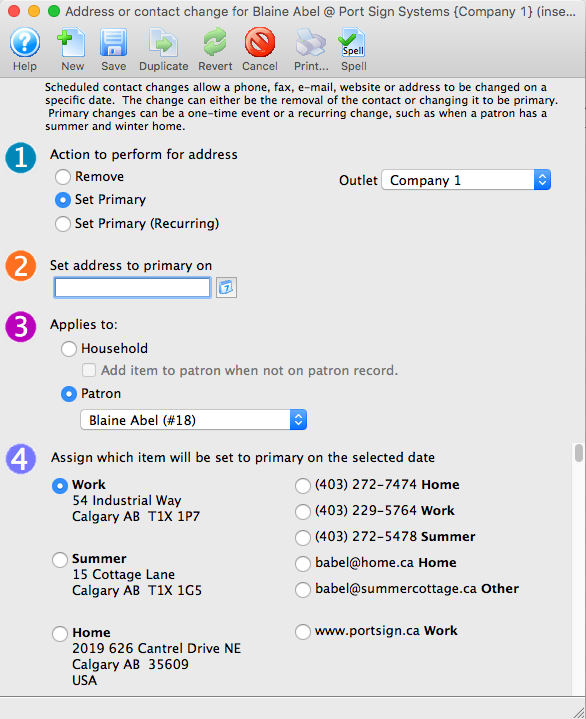
Editing Scheduled Change
When you make a scheduled address or phone change , you likely need yo make TWO scheduled changes. For example:
- If a person is moving in the future, you would set up a ONE-TIME change for:
- The new address and the specific date in the future when you want it to be effective -and-
- some time beyond that (say a couple of months), a scheduled deletion of the old address so that it is no longer in the patron record
- If the patron is a snowbird and is regularly changing addresses, you would indicate a RECURRING change:
- for the month/day that address 1 becomes effective each year
- for the month/day that address 2 should become effective each year
 |
This feature can also be reached by using the "gear" icon next to the contact on the Contact Card |
- Use the Schedule Change button to open the Schedule Change window.
- Double click on a Scheduled Change to the selected line in the display window.
- Address or Contact Change wizard will pop up.
- Make required changes to any step(s)and save.
Note: In each of the 4 steps only one item within each step can be selected for change. If you need to make another change to a different contact information, simply create another New record to schedule the next change.
Apply Schedule Change Now
Rather than waiting until it's scheduled date for an automactic change, the contact information can be manually changed by using the Schedule Apply button from the toolbar.
- Use the Schedule Change button to open the Schedule Change window.
- Highlight the contact information line in the Schedule Change window.
- Click the button.
Clicking Schedule Apply button changes the effective date to be today's date. The 'Set Recurring' function will continue to exist for future scheduled effective dates, even though the contact information has been updated through this process.
Exporting A List of Schedule Changes
Allows for individual or groupings of Scheduled Changes to be exported to a tab delimited or MS Excel workbook file.
- Use the Schedule Change button to open the Schedule Change window.
- Highlight one or all Scheduled Change lines.
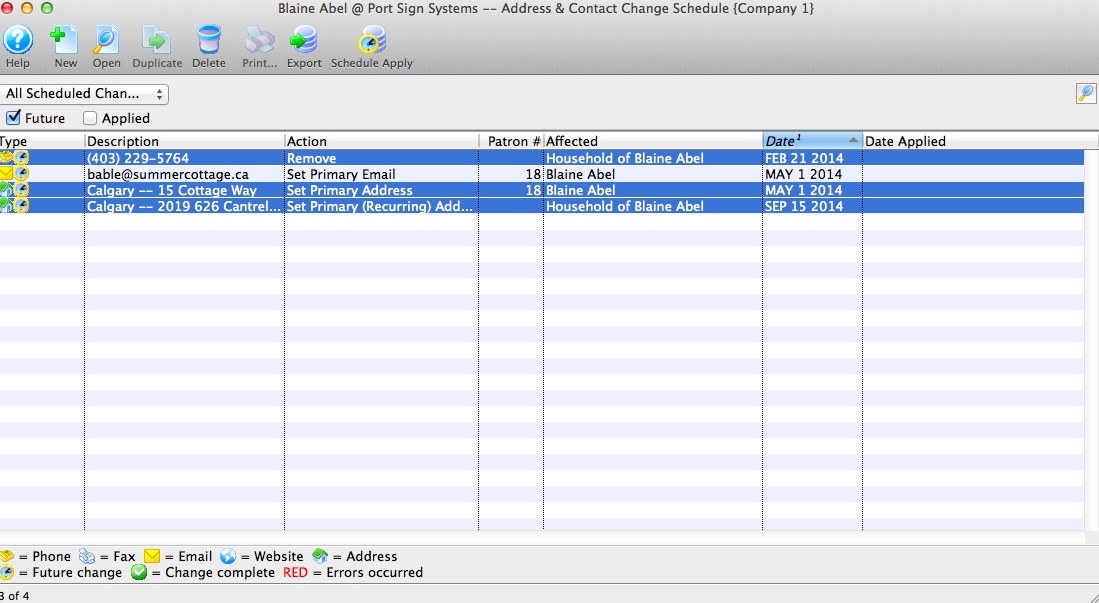
- Click Export button.
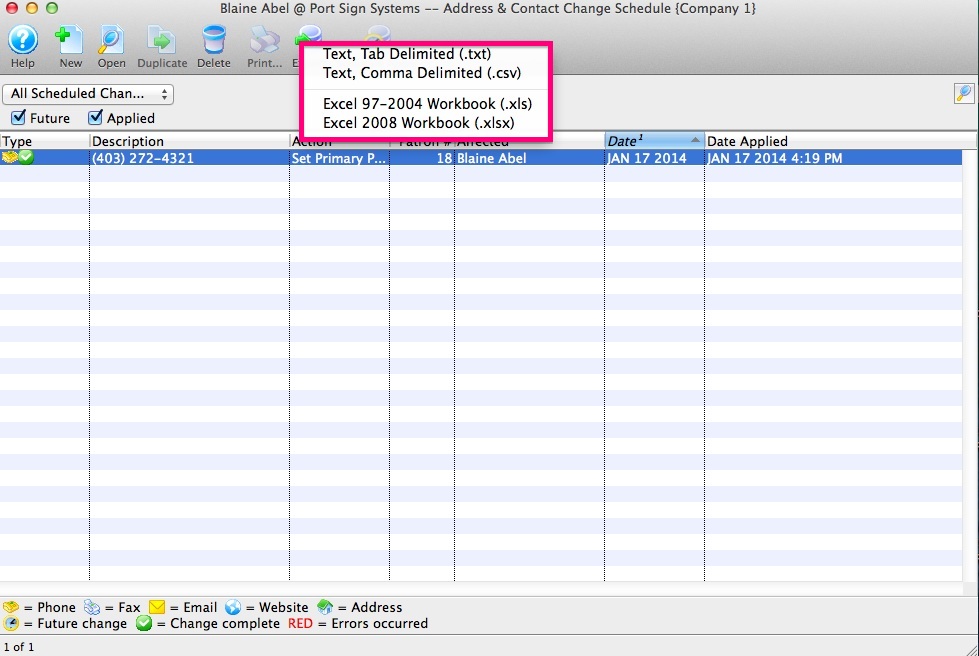
- Select a Tab Delimited or MS Excel workbook file and save.
Patron Contact Card - Details
Patron Details
In this area, some Patron Detail data fields may be marked as Mandatory Data fields within the Company Preferences. These pieces of information must be entered in order to save changes to the contact card.
| Type | The Type of patron record that is being entered. For example: Individual, Company, or School. The Type of patron field is apart of the Code Tables and can be edited and customized. |
| Salutation | Formal Salutation for the patron. The Salutation field is apart of the Code Tables and can be edited and customized. |
| Name First | First Name of the patron. This is a Mandatory Data field. |
| Name Init | Middle Initial of the patron. |
| Name Last | Last Name of the patron. This is a Mandatory Data field. |
| Suffix | Suffix for the patron if applicable. The Suffix field is apart of the Code Tables and can be edited and customized. |
| Company | Company the patron is associated with. This is a Mandatory Data field. |
| Title | Title within the company the patron is associated with. |
| Formal | The Formal Name of the patron (including salutation) usually used for donation requests. This field provides the patron donor name for program listing unless the name is altered in the Publication Name found under the Donor Tab.
The Formal Name is auto populated by the First and Last Name fields. The auto populate can be manually over written by highlighting the text in this field and typing over it. |
| Greeting | A Greeting (or familiar name - such as first name or nickname) for the patron. The Greeting preference is set in System Preferences under the Edits Tab.
The Greeting is auto populated by the First Name field. The auto populate can be manually over written by highlighting the text in this field and typing over it. |
| Patron | A custom 30 character identification field. Designated for an external number for a patron that can also be used to find patron. Possible usage are for student/faculty numbers or a number in any other external system that you may need to communicate with. |
Patron Contact Card - Address
Address
There can be many different address locations for one patron stored within the Address. Some address information may be marked as Mandatory Data within the Company Preferences. If a field is marked as Mandatory Data it must be entered in order to save changes to the contact card.

| Location | Location of the patron's address. The patron Location field is apart of the Code Tables and is used to categorizes addresses, phone numbers, emails and web site addresses. In the Location drop down there are three default options Home, Work and Other available. | ||
| Address | Address of the location. There are two Address lines available
for more complex addresses. When a second address line is used, check formatting when printing address labels and ticket face.
|
||
| City | The City or town for the address provided. To assist in quickly adding a patron, a default City can be displayed when adding new patrons. The default City is set through Mandatory Data in Company Preferences under default values on patron insert. The default City comes from the City field under the Company tab in Company Preferences. | ||
| Province/State | The Province or State where the city is located. The Province or State field is apart of the Code Tables. To assist in
quickly adding a patron, a default province or state can be displayed.
The default Province or State is set through Mandatory Data in Company Preferences under default values on patron insert.
The default Province or State comes from the Province or State field under the Company Tab in Company Preferences.
The screen is able to display either "Province" or "State". The tab name "Province" or "State" may be renamed in the Appearance tab under Company Perfrences. |
||
| Country | The Country where the province or state is located. The Country field is apart of the Code Tables. To assist in quickly adding a patron, a default Country can be displayed. The default Country comes from the Country field under the Company tab in Company Preferences. | ||
| Postal Code/Zip Code | The Postal Code or Zip Code field records the patron's postal identification number. Postal Codes format automatically to capital letters. Zip Codes format automatically to add hyphens when 9 numbers are entered. Edit checks warn if numbers or letters are entered incorrectly. The screen is able to display either 'Postal Code' or 'Zip Code'. The tab name "Postal Code" or "Zip Code" may be renamed in the Appearance tab under the Company Preferences. | ||
 |
Adds another address to the Patron. | ||
 |
Removes a location from the address area. Click here for more information on removing. | ||
 |
Provides several options related a patron's address. For example, you can schedule future address changes. |
Link Another Address
- Open the Patron Window.
Click here for information on opening the Patron Window.
- Click the Address
 in the patron window.
Click the Contact Card
 button.
The contact card window opens.
Click the Add button in the lower left corner.
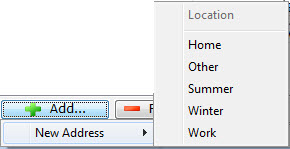
An address location drop opens. Select the new address location.
Enter the new address information.

Close the contact card to save the information ot the patron record.
The new address is now added to the contact card.
Remove Linked Address
- Open the Patron Window.
Click here for information on opening the Patron Window.
- Click the Address in the patron window.
- Click the Contact Card button.
The contact card opens.
- Click the Remove
 button in the lower left corner.
Select the address to remove.

A warning dialog opens.
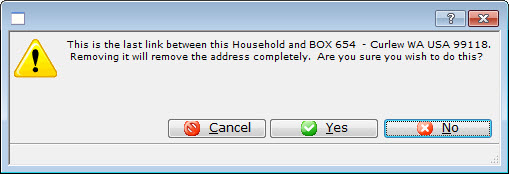
- Click the Yes
 button.
A confirmation dialog opens.
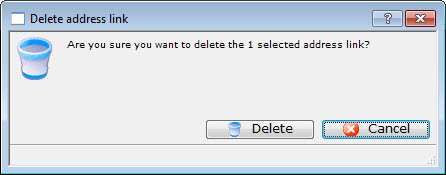
Click the Delete
 button.
The contact information is now removed from the contact card.
Patron Contact Card - Contacts
Contact Info
There can be as many lines of contact information within the contact area as are needed. Location types can be customized to meet needs.
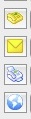
| Type of contact information for the patron. |
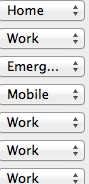 |
Location of the contact. For information on how to edit this drop down field click here. |
| Contact | Contact information for the patron. |
 |
Adds a piece of contact information to the patrons record. Each selection opens another flyout to select. When you make your selection, the patron's Contact Card opens to the field selected. |
|
Removes the highlighted piece of contact information from the patron record. |
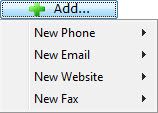
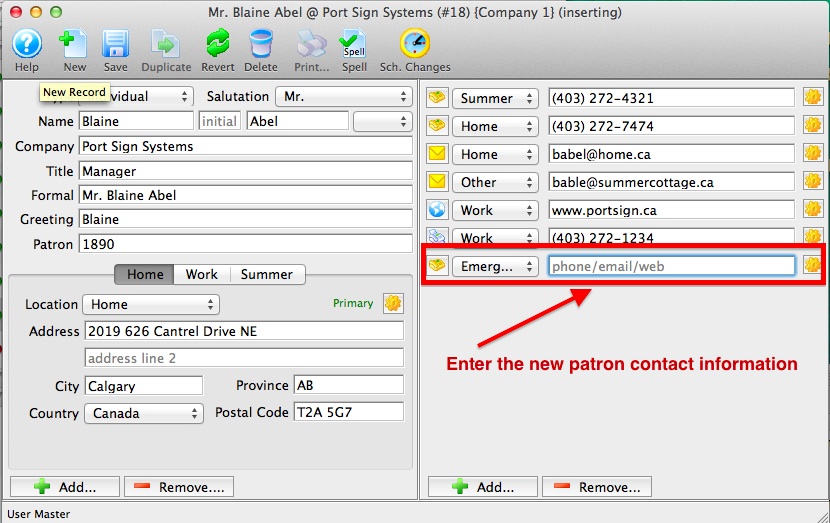
Add Contact Information
A patron may have as many contact types such as phone numbers, email addresses, fax numbers or websites as are needed.
- To Add a new contact type to patron's record, click on the ADD button at the bottom of the the Contact window.
- Select the type of contact to add Phone, Email, Website or Fax. A sub menu will populate off of each of these contact types.
Mouse over or roll over the contact type and end by clicking the contact type and the location in the sub menu.
- Enter the patron contact information in the new line provided and SAVE.
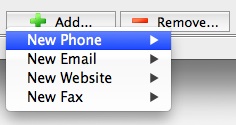
Remove Contact Information
When a patron's contact type(s) changes or becomes no longer valid, the phone number, email address, fax number or website can be remove as long as it NOT the primary contact.
- To Remove a contact type from the patron's record, click on the REMOVE button at the bottom of the Contact window.
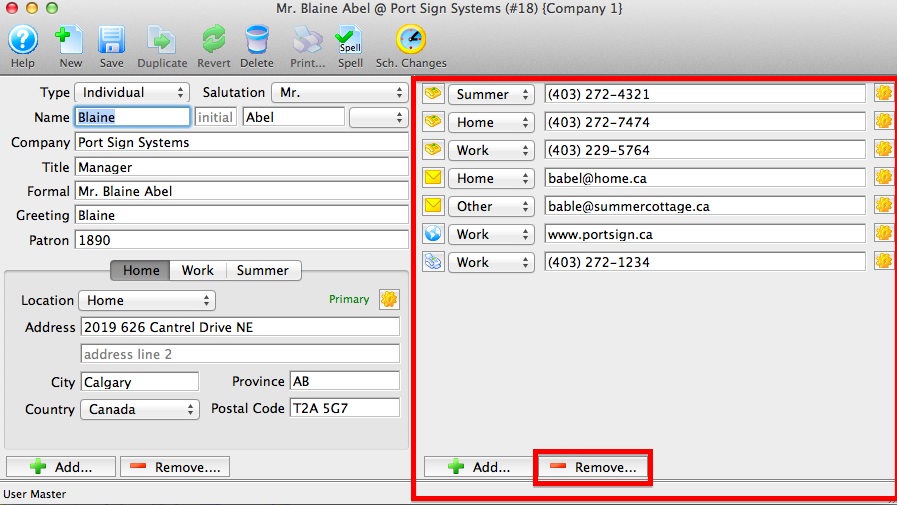
- Select the type of contact to remove Phone, Email, Website or Fax. A sub menu will populate off of each of these contact types.
Mouse over or rollover the contact type and end by clicking the contact type and the location in the sub menu.
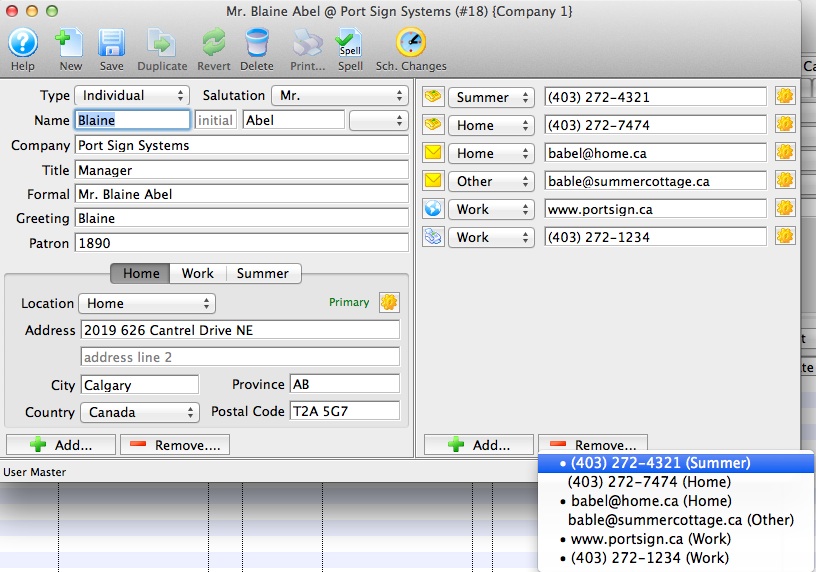
- Confirm the contact to remove.
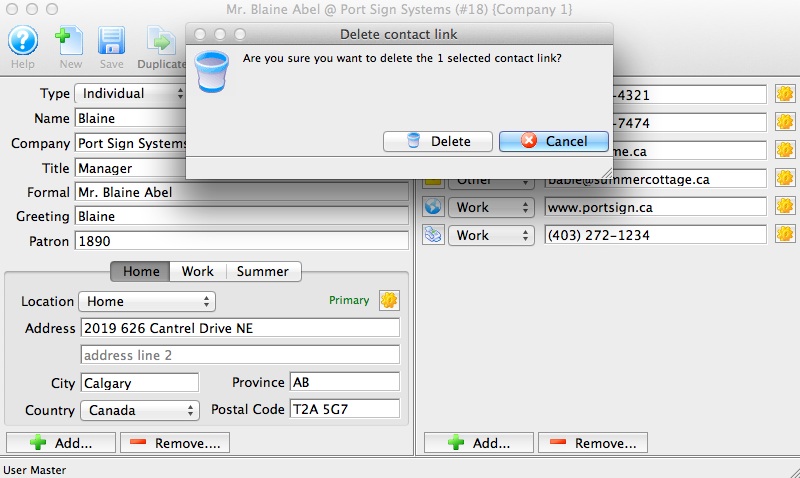
Alternate Way To Remove A Contact
- Click on the "Gear" next to the contact. A sub window appear. Mouse over or rollover the Remove Now and end by clicking.
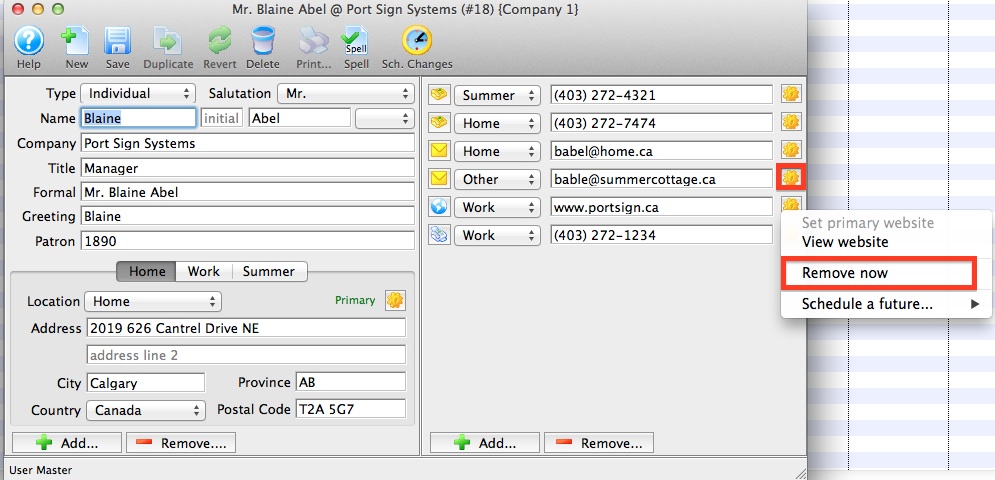
- Confirm the contact to remove.
Using the "Gear" Buttons
 button on the Contact Card can be used for several functions depending on the contact field the gear button is next to. For example, with these buttons you can:
- Schedule the removal of a phone, fax, email, website or address.
- Schedule a change to the primary phone, fax, email, website or address as a one-time occurrence (and then change it back again at a later date).
- Show a map of the patron's address.
- Show the weather at the patron's address.
- Send an email to the patron.
- Reset the web sales password for the patron's account and send a one-time login email.
- If its an email address, then you can ask the system to display a Forgotten Password Reset Log which shows effort around the patron trying to login, forget their password, their success and checkouts
Sending a Patron an online password reset email
If a Patron calls and asks for their online password because they have either forgotten it, or don't know that they have one, you can send them a one-time password reset email so they can reset the password themselves.
|
For security reasons, you cannot send the patron their actual current password.
You can only:
|
- Locate their Patron Record
- Open their Contact Card
- On the Contact Details panel, click the
 next to their email address
 - Choose the option for Reset web sales password and send one-time login email
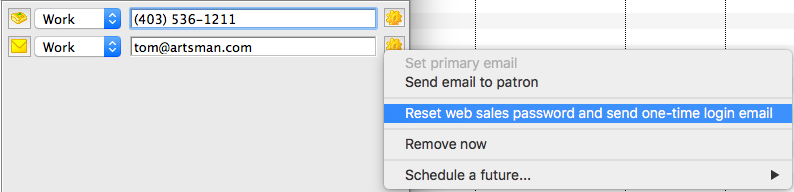
The email will go out immediately. Have the Patron check their inbox for a new email. They can then follow the prompts in the email to change their password.
It is exactly the same email that the patron would receive if they had initiated the password reset themselves online
|
If the email does not appear in the Patron's inbox within a few minutes, it may have gone to their "SPAM" or "Junk" folder. Have them check those folders. If it is there, they should also adjust their Mail Settings so that future emails from you are not also placed there. |
|
An email will not be sent it there are two patrons in separate households with the same email address. If this is the case, you will need to de-dup the email addresses before it can be sent. |