Attendance Tab
- Set the attendance the day of the performance - Setting attendance allows you to track which patrons with tickets actually attended the performance.
- Refund tickets - The refund function is for ease of use if:
- on the day of the performance a patron decides that they would like to refund their ticket you can do so without having to change windows.
- the promoter cancels the show and you want to mass refund of all the tickets back to the system and give patrons their money back, or turn it into a donation or Gift Certificate.
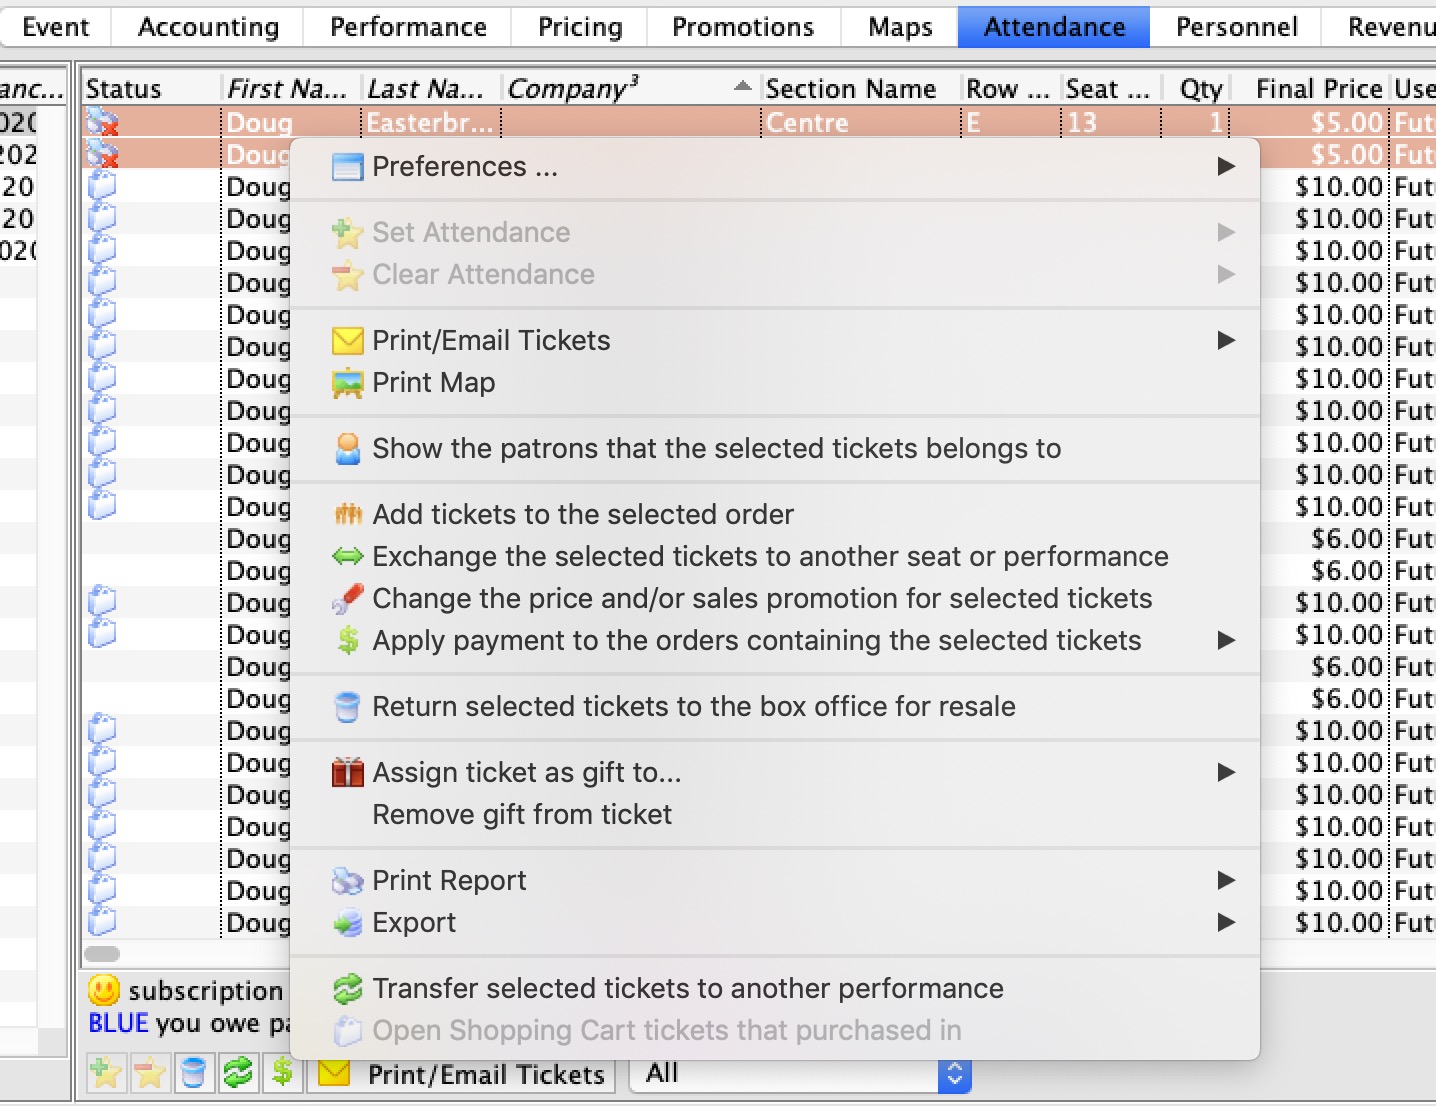
Context Menu Features
Use the context menu to do a lot of things to the orders such as
- Add tickets to an order
- Pay for the order if it has a balance
- Exchange tickets for another event if you are using this for a waitlist event or it is cancelled
- Assign the ticket to another patron if somebody else is picking it up
- Reprice the ticket for a gala so that you can add a donation when the gala ticket is purchased online
- etc.
Parts of the Attendance Tab
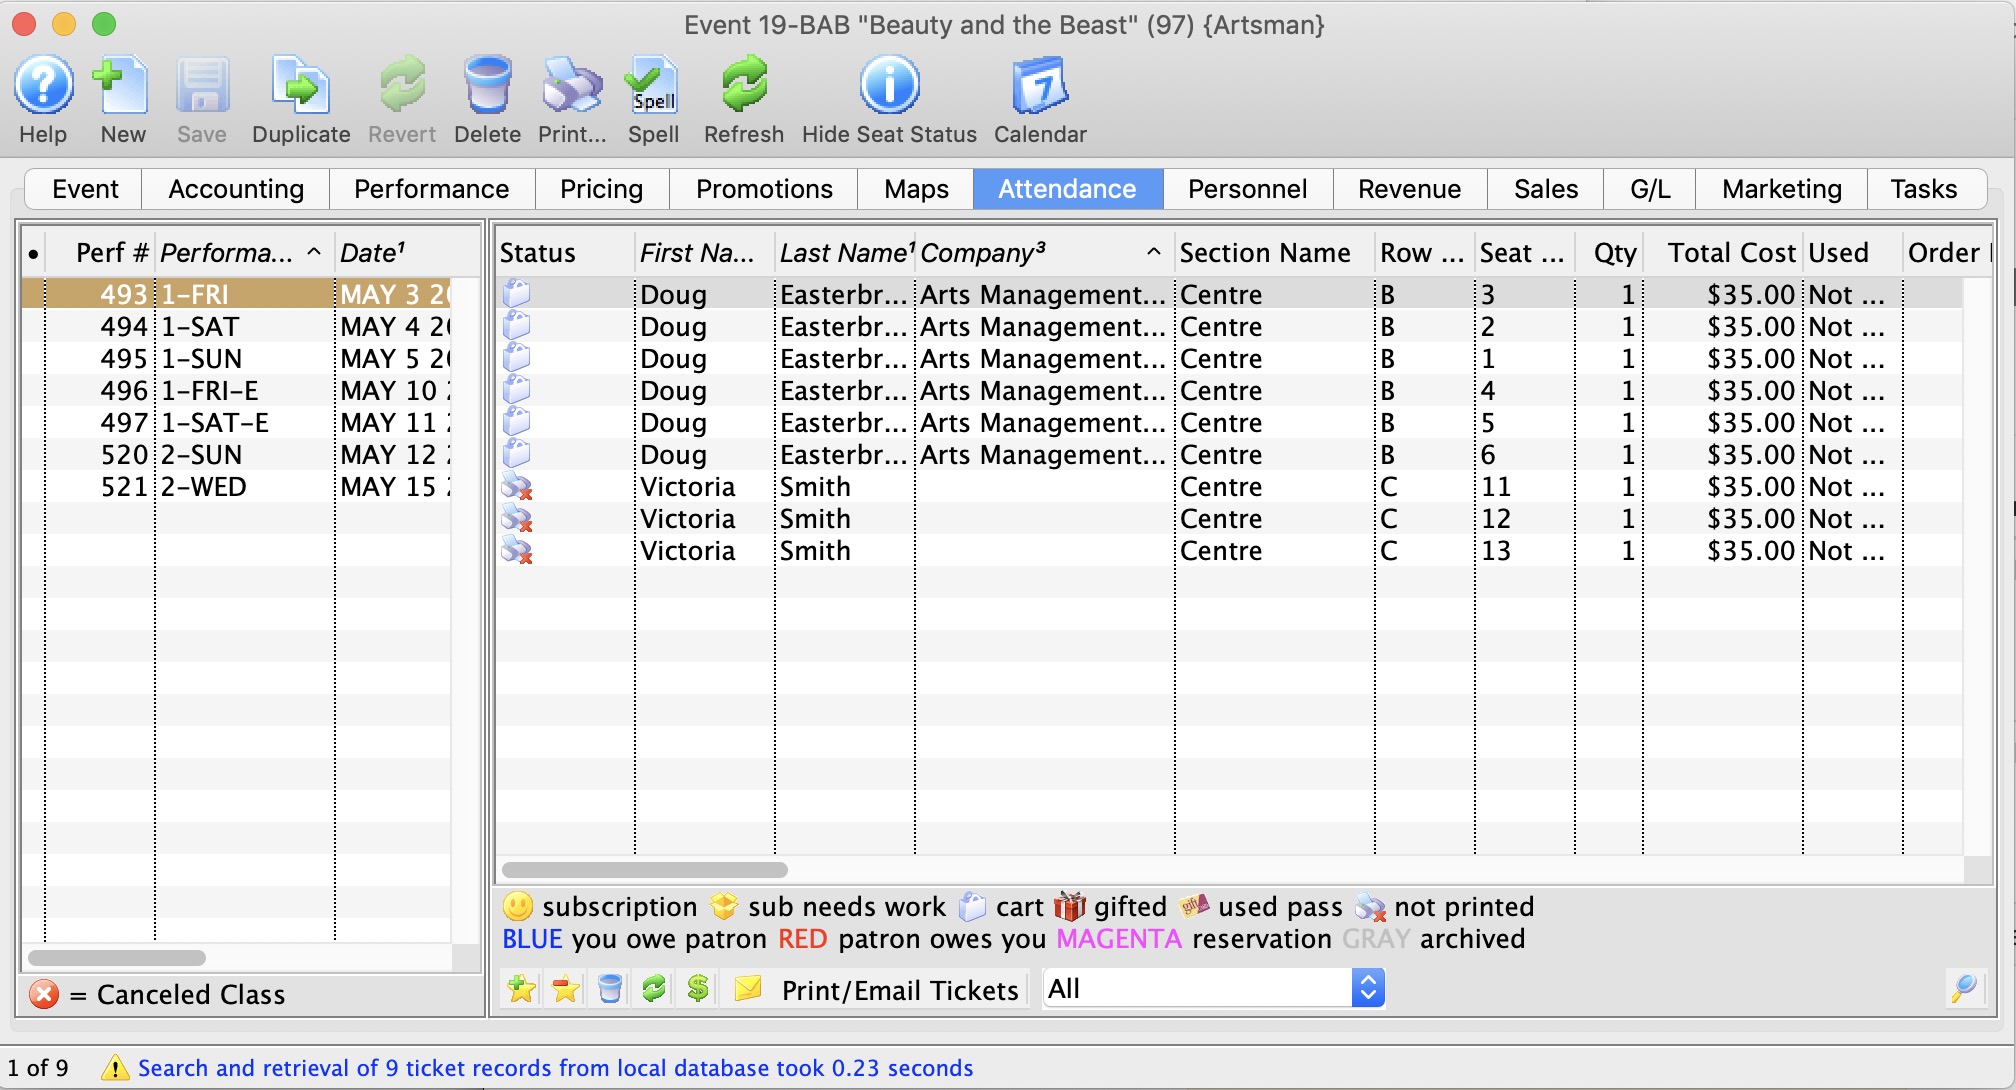
Performance # Number of performance assigned in order of creation. Performance Code Code assigned based on the week and day of the performance. Performance Date The date of the performance. Purchase # Purchase reference number. First Name Patron's first name. Last Name Patron's last name. Company Company the patron works for. Section Section the patron is seated in. Row # Row the patron is seated in. Seat # Seat number the patron is seated in. Quantity Number of admittance per ticket. 
Sets the attendance for the performance. This is only available on the day of the performance or after it has taken place. 
Clears the attendance of the performance. This is only available on the day of the performance or after it has taken place. 
Print the selected tickets for this performance that are not yet printed. 
Does a Mass Refund of the selected tickets back to the patron using the credit card used to pay for the event. 
Transfers the selected ticket(s) to another performance.
Transfer Tickets to Another Performance
Occasionally, you may need to transfer all the tickets from one performance to another. Rather than doing this individually, you can transfer them in a batch by using the wizard on the Attendance tab of the Event setup. This can be helpful when:
- You have cancelled the performance and need to re-seat patrons in another performance
- You want to move a subscription package to another performance
- You need to transfer people into a HOLD or WAIT LIST performance
- Anytime a mass re-seating of patrons is required
- You are considering moving all patrons to a venue with different orientation and capacity instead of simply changing venue.
The transfer function moves all selected tickets by matching seat codes for reserved seating events (festival seating events cannot be transferred in this fashion). Tickets for festival seating events will need to be manually exchanged. Tickets are not re-priced when they are transferred and do not affect order balances.
|
Tickets will not be moved if:
|

To transfer tickets from one performance to another:
- Bring up the Events List in the Setup menu, or by clicking on the
 icon on the main tool ribbon.
- Click the
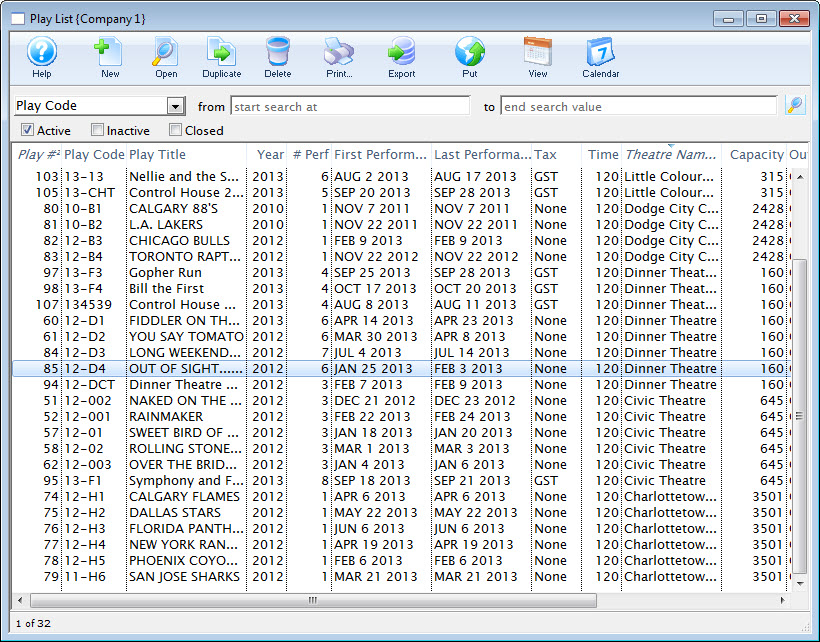
 icon to populate the list with your events.
- Double click on the Event containing the performance you wish to transfer the tickets FROM.
- Click on the
 tab
tab
- Highlight the performance on the left that you are transferring the tickets FROM.
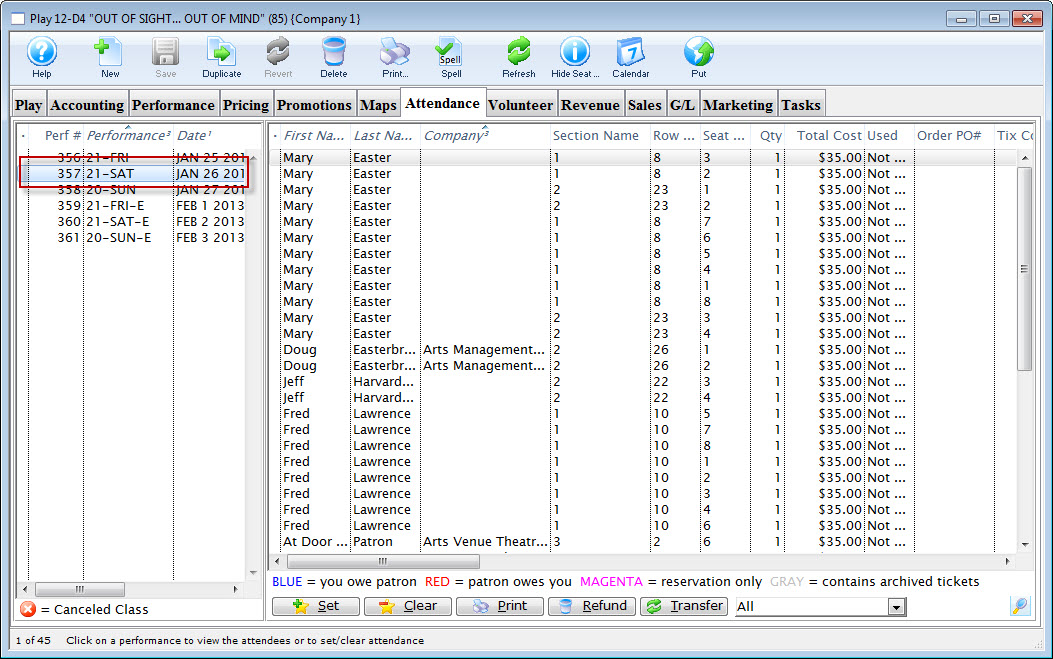
- Highlight the ticket(s) on the right that you wish to transfer.
You can select some or all of the tickets, allowing you to transfer only a sub-group of the total attendance.
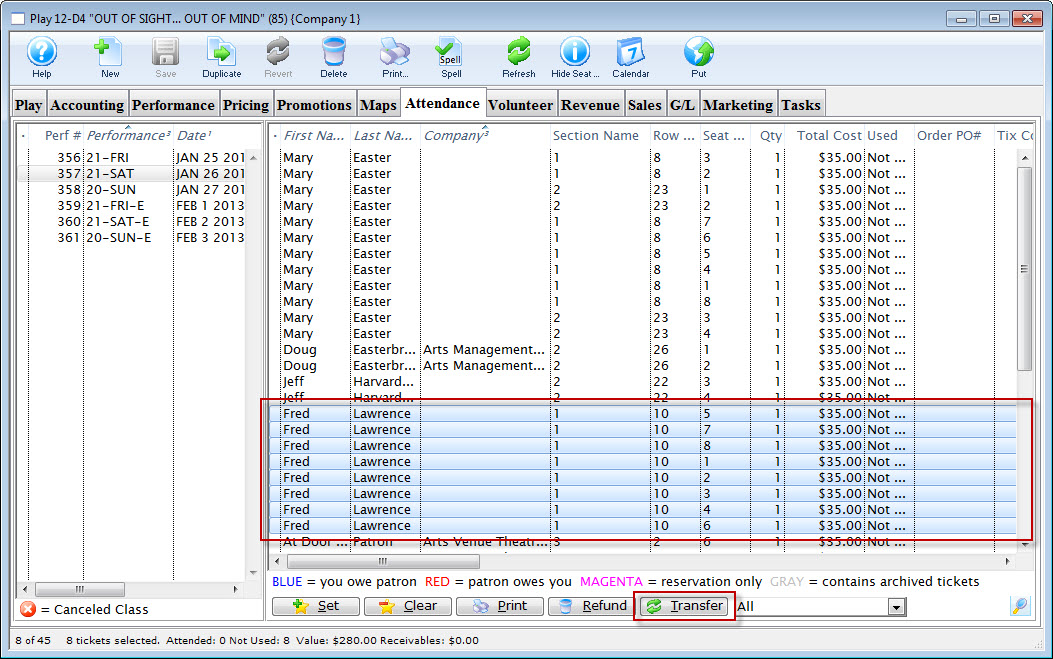
- Click the Transfer
 button at the bottom of the window.

- Enter the performance number you want to transfer the tickets TO.
Alternatively, you can use the
 icon to search for the performance.
 - Select whether you want to transfer:
- Only the selected ticket(s) (in this example, eight tickets), or
- All of the tickets within this performance
- Click the Transfer
 button.
The Transfer Confirmation opens.
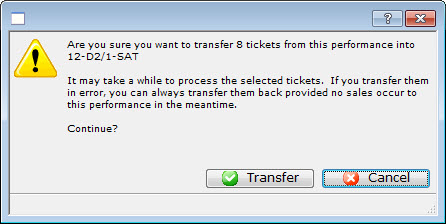
- After you have reviewed the information, click the Transfer
 button.
The valid tickets will be transferred to the new performance.