Main menu
You are here
Hosted Paypage Appearance Configuration
You will need to log into your Moneris Resource Center online account at https://www3.moneris.com/mpg/index.php
Once you are logged into the online account setup, select Admin->Hosted PayPage config option.
Scroll down until you see a section that says Paypage Appearance and click Configure Appearance.

 A new window will open similar to below and the settings you place here control how the hosted payment page will appear to the patron.
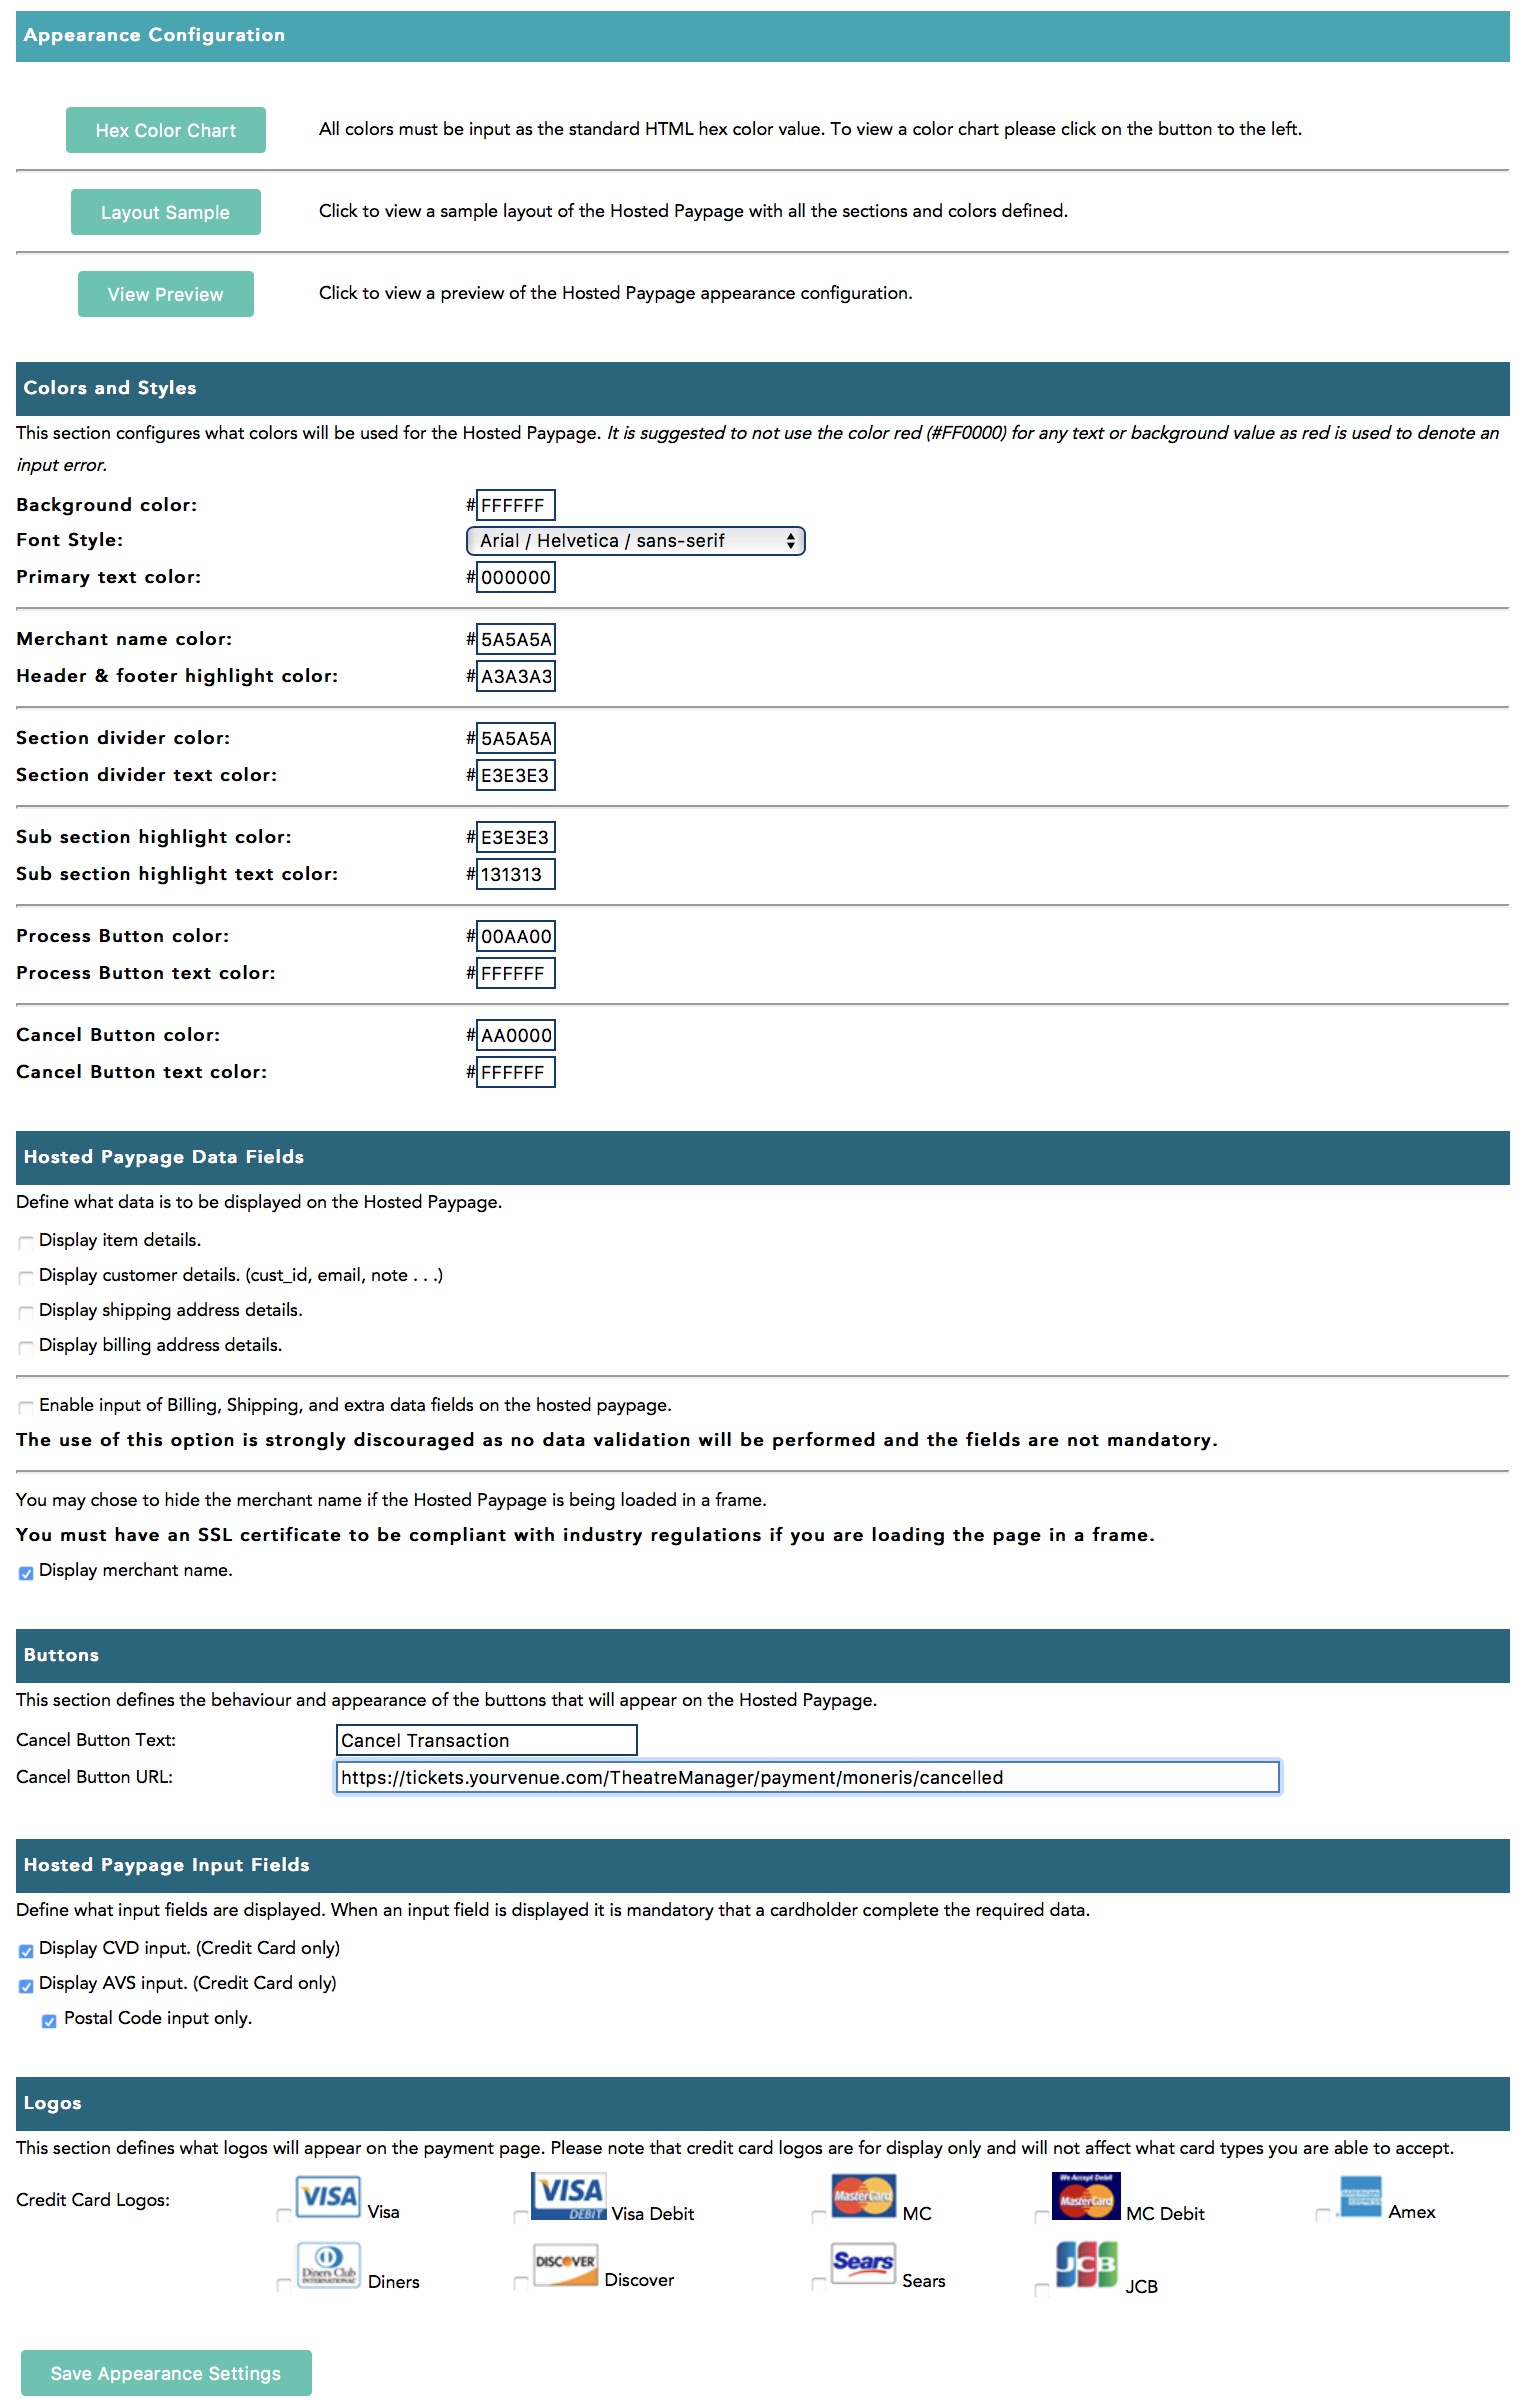
Appearance Configuration
At the top are 3 buttons that are helpers for you:
- Hex Colour Chart - which shows colours that can be placed into the 'Colours and styles' area. They are samples in a numeric format with examples. If you are familiar with setting colours of items on web pages, you can use any colour you wish.
- Layout Sample - shows a picture of the various parts of the payment page that can be displayed
- View Preview - will show what your payment page will look like after altering the settings. Our sample is to the right based on settings below
Colours and Styles
In this section, enter the colours for various parts of the payment page window. Use this to set colours as indicated.
Hosted Paypage Data Fields
Make settings as follows:
- Display Item Details - uncheck. Theatre Manager does not send this information to Moneris
- Display Customer Details - uncheck. Theatre Manager does not send this information to Moneris
- Display Shipping Address Details - uncheck. Theatre Manager does not send this information to Moneris
- Display Billing Address Details - uncheck. Theatre Manager does not send this information to Moneris
- Enable input of Billing, Shipping, and extra fields - uncheck. Theatre Manager does not respond to this data if enabled
- Display Merchant Name - Check this if you wish - it will display your merchant name from elsewhere in the Moneris config
Buttons
There should only be two things to set here:
- Cancel Button Text - enter the words that you want to show to the user should they decide that they do not want to continue with authorization. Could be word like 'Cancel', 'Cancel Transaction','I Give up', 'Go Back to Cart', etc. Make sure and try an authorization so that you like what it says and that it is consistent with the behaviour of the window
- Cancel Button URL - must be https://tickets.yourvenue.org/TheatreManager/payment/moneris/cancelled where tickets.yourvenue.org is the URL to your ticketing web site
Hosted Paypage Input Fields
The settings are:
- Display CVD Input (Credit Card Only) - we suggest checking this to allow input of the number on the back of the card
- Display AVS Input (Credit Card Only) - (optional) check this to allow input of address info for address verification if you wish customers to provide it. It does not go to Theatre Manager
- Postal Code Input Only) - (optional) if you want address verification, this restricts address input to the postal code only. its probably the preferred option for AVS checking
Logos
If you wish, you can click on the credit card logos that you accept. It simply displays the logo on the payment page.