Device Setup
This can include:
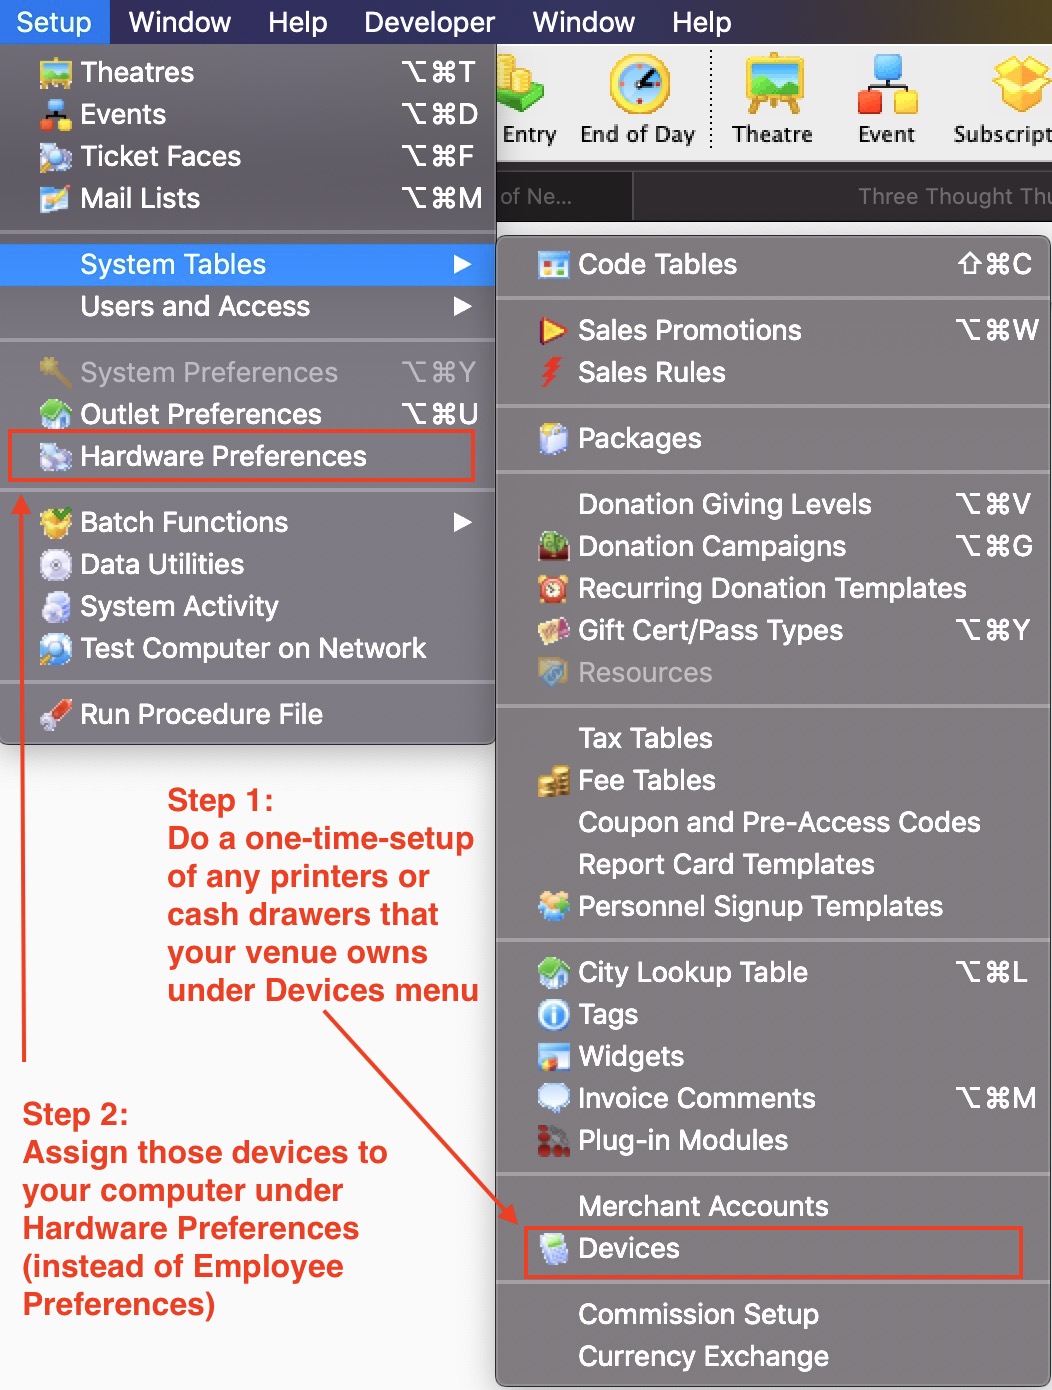
- You can access the list of devices ato edit them or set up some more from the Setup->System Tables->Devices menu item
- Use search to find and select an item to edit and then double click to change it. Use New to create a new device.
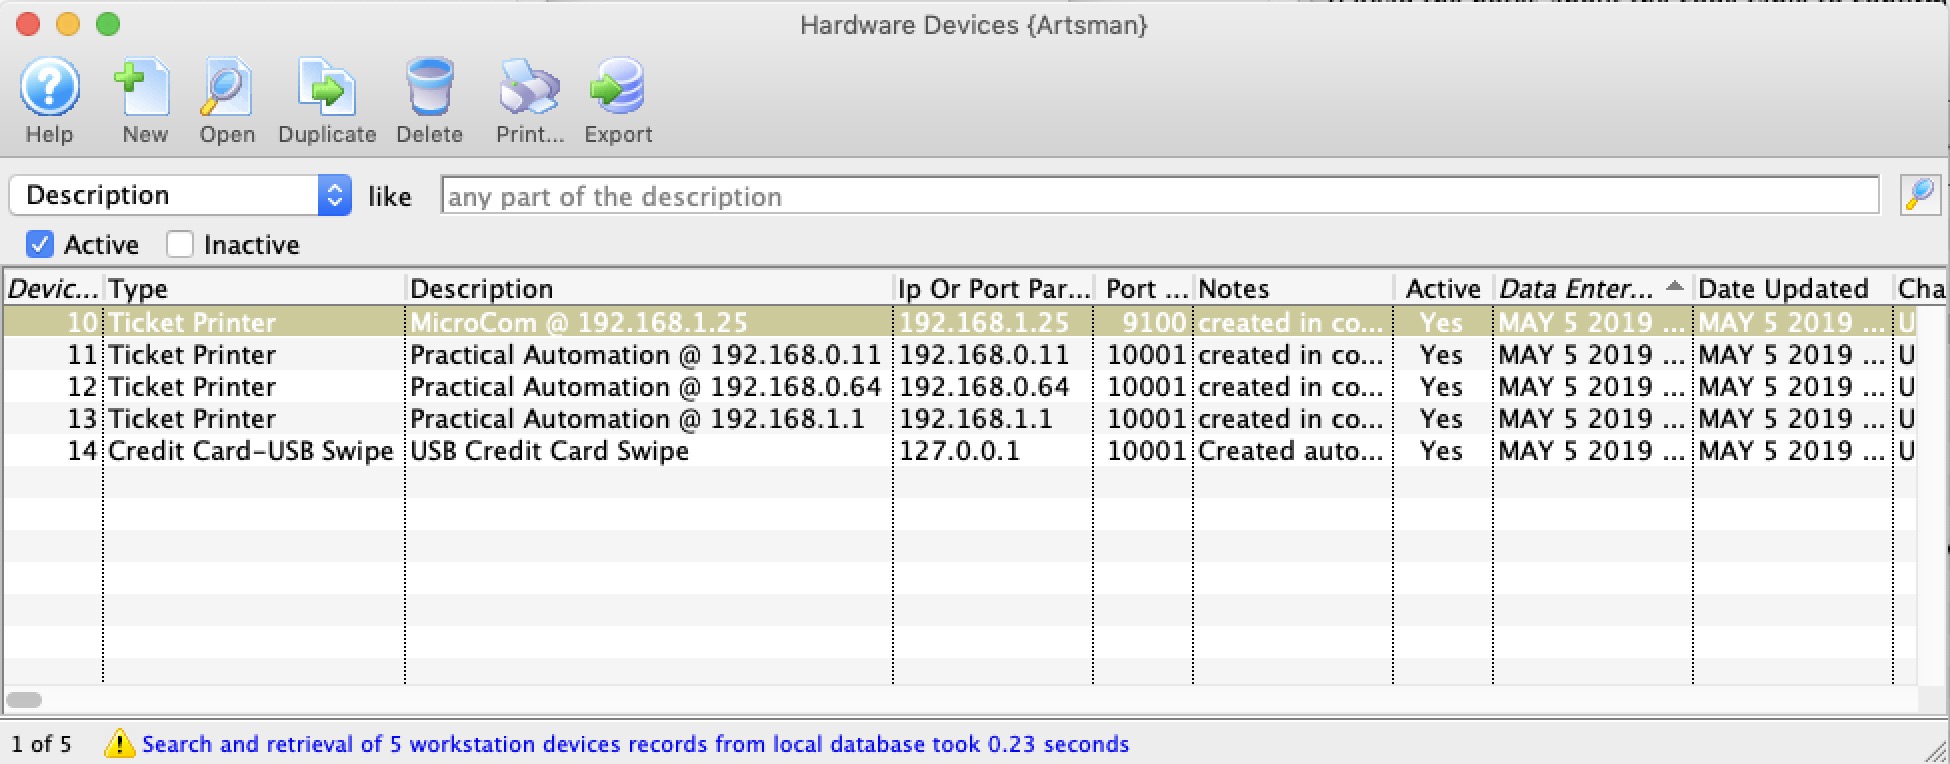
Device List Window
 |
Before they can be used, these devices must be
|
Parts of the Device List Window
 |
Inserts a new device that can be associated with a users workstation. |
 |
Opens the selected device to edit or configure it. |
 |
Creates a copy of the current device. |
 |
Deletes the device |
 |
Generates a report of the devices to the screen. |

|
Exports out a list of the devices. |
| Device # | Unique number assigned to the device, which can then be assigned to a specific workstation |
| Device Type | The type of the device which can include: |
| Description | Description of the device to make it easier to select for a workstattion |
| IP or Port Parameters | The IP address for the device if IP based, or the port parameters if it is a com prt based device (increasingly rare these days) |
| Port | The Port number that the device listens on |
| Notes | Notes about the device, perhasp including serial number, or any history on the device. |
| Active | Indicates if the device can be used. |
| Outlet-Owner | Outlet who owns the Device |
Device Detail

Parts of the Device Detail Window
|
Inserts a new device that can be associated with a users workstation. |
|
Opens the selected device to edit or configure it. |
|
Creates a copy of the current device. |
|
Deletes the device |
|
Generates a report of the devices to the screen. |
|
|
Exports out a list of the devices. |
| Device # | Unique number assigned to the device, which can then be assigned to a specific workstation |
| Description | Description of the device to make it easier to select for a workstattion |
| Active | Indicates if the device can be used. |
| Notes | Notes about the device, perhasp including serial number, or any history on the device. |
| Outlet-Owner | Outlet who owns the Device |
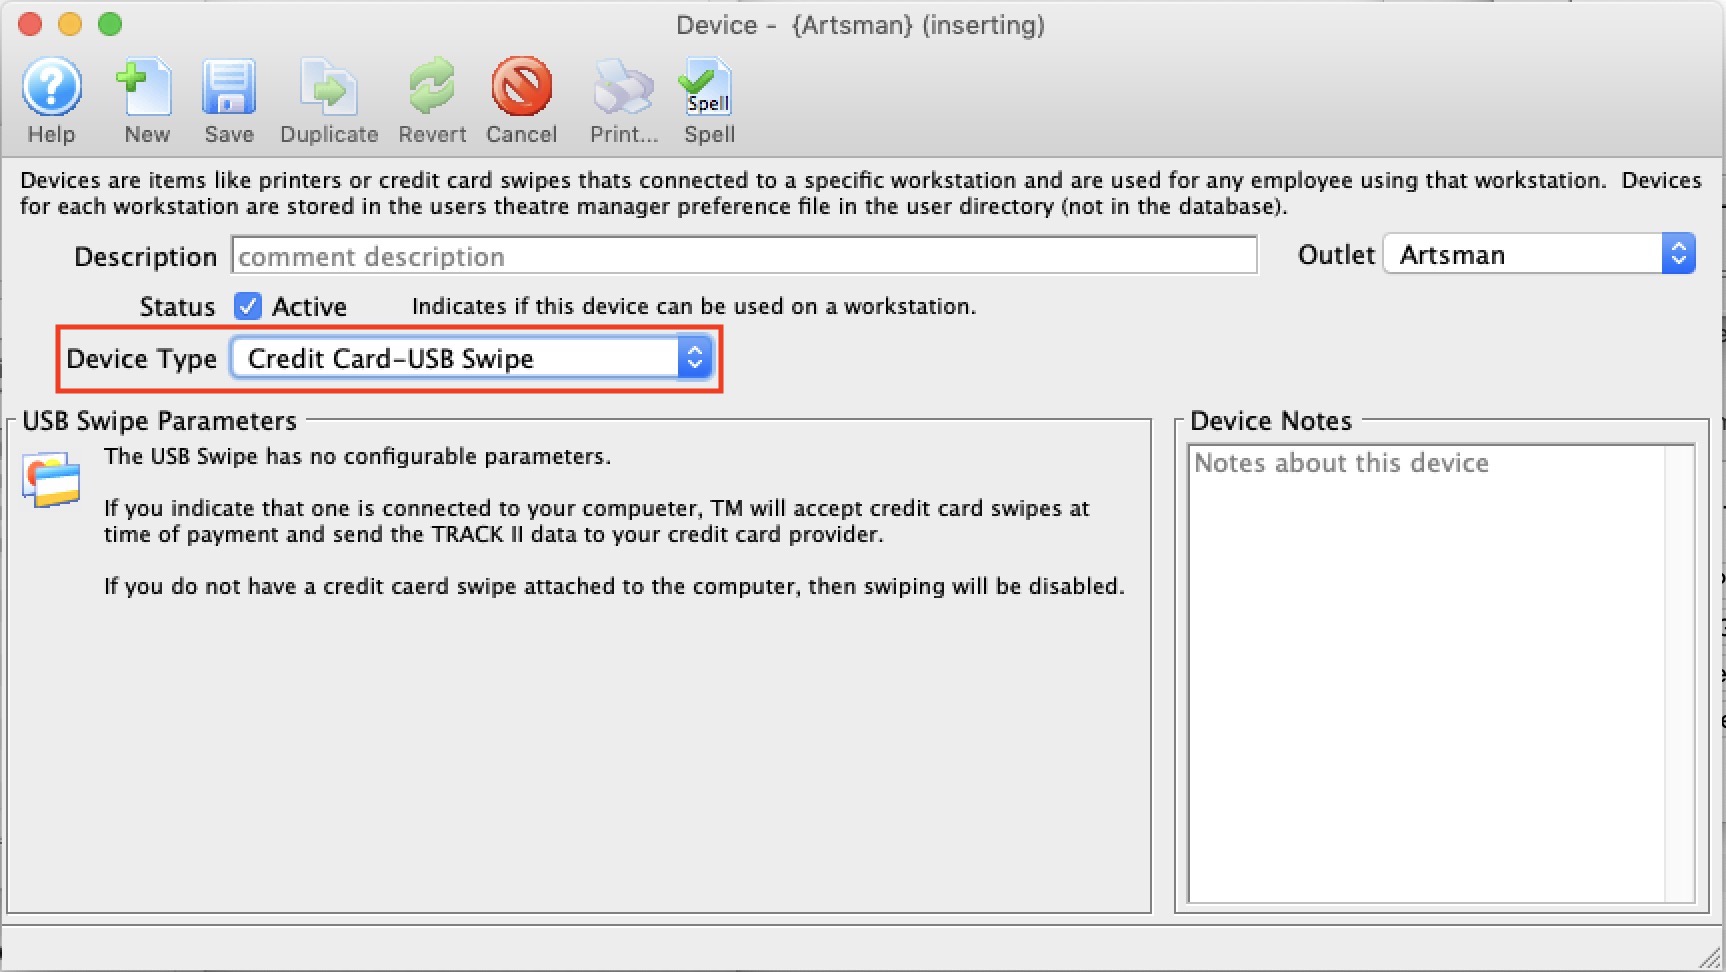
| Device Type | The type of the device. This affects the display in the lower half of the screen which is described on separate help pages. Options include: |
Device-Cash Drawer
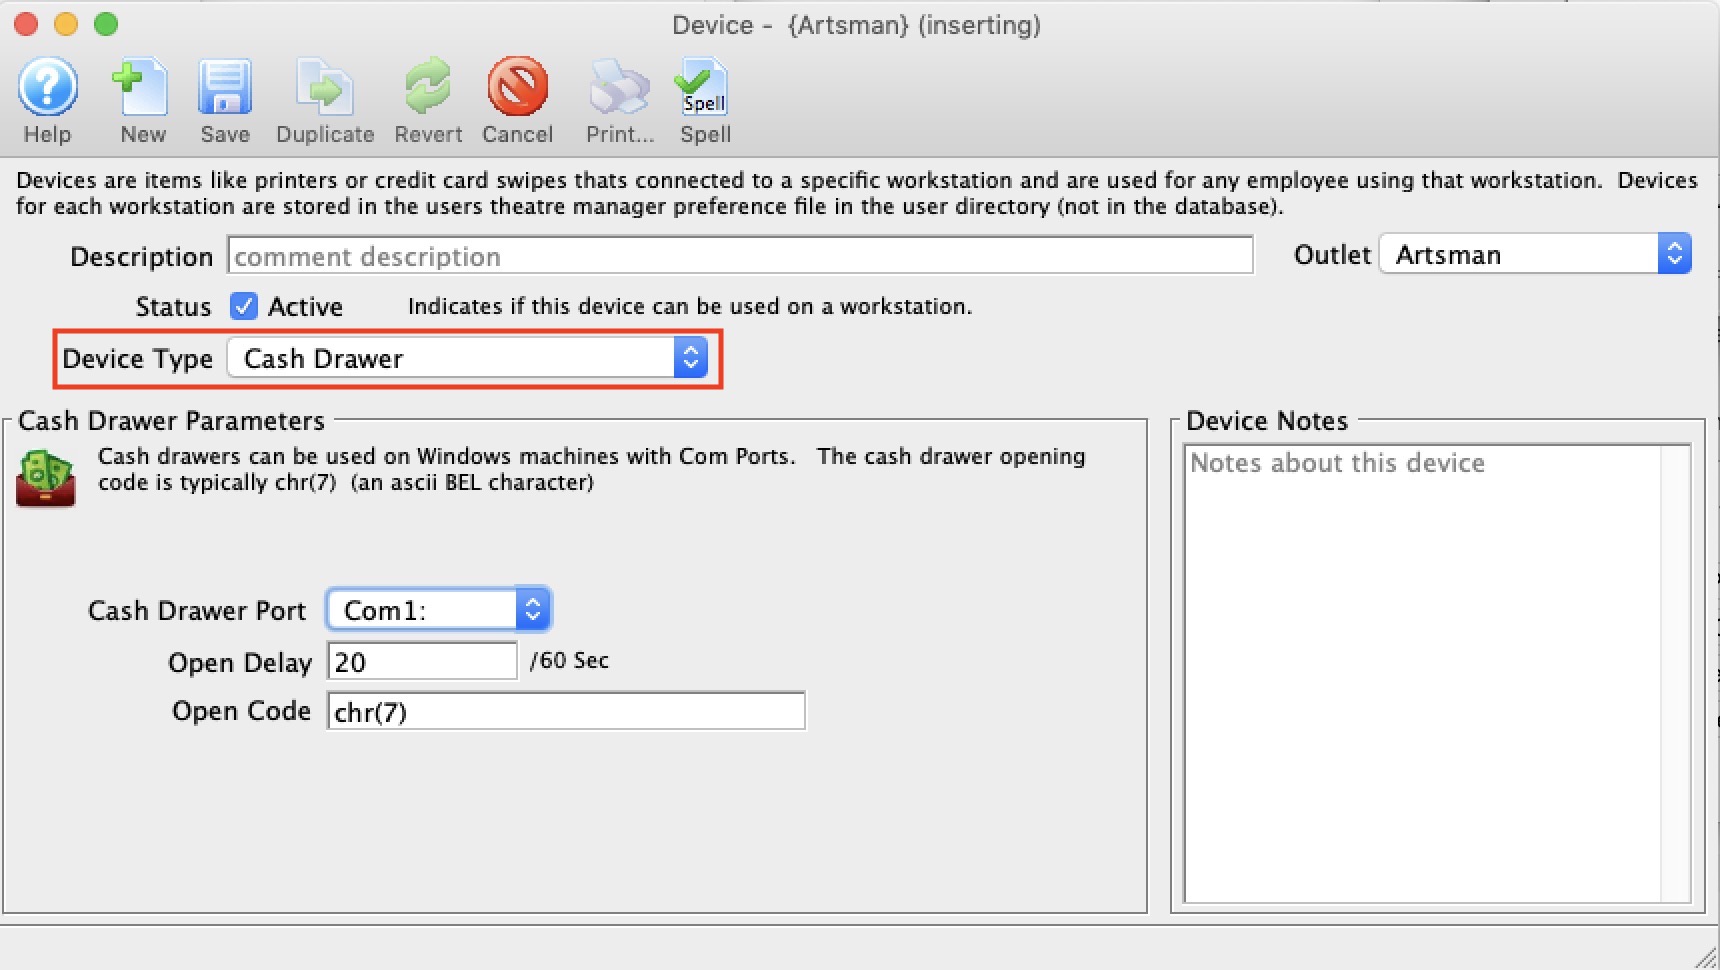
Com Ports For Cash Drawer
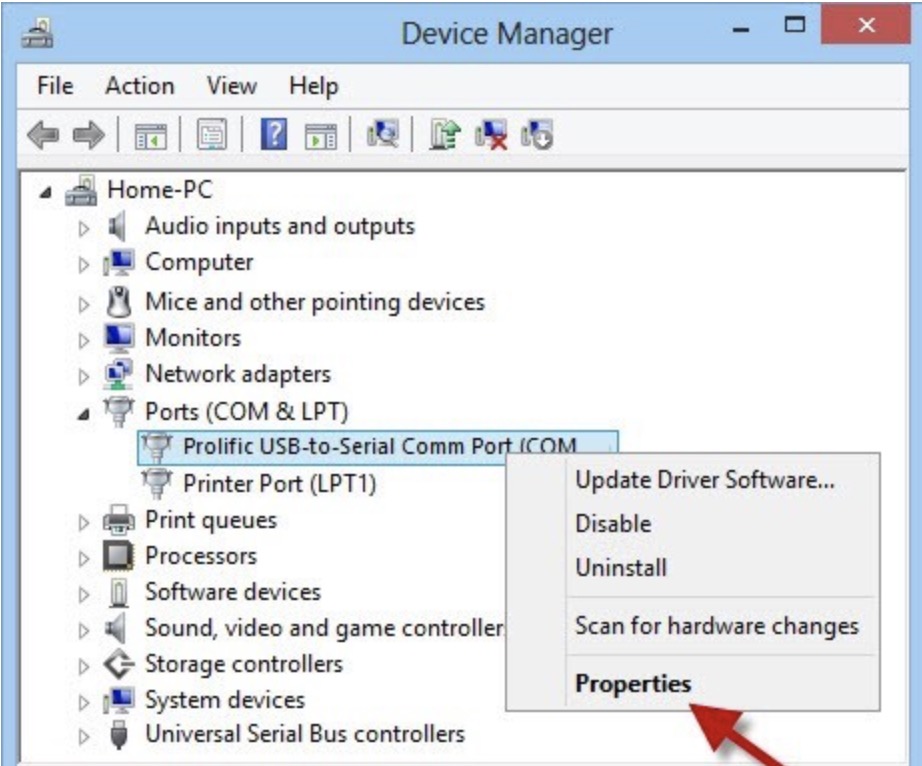
- Device Manager -or-
- devmgmt.msc
- Once you see the drivers as below, right click on the device you want to set the port for and select Properties
-
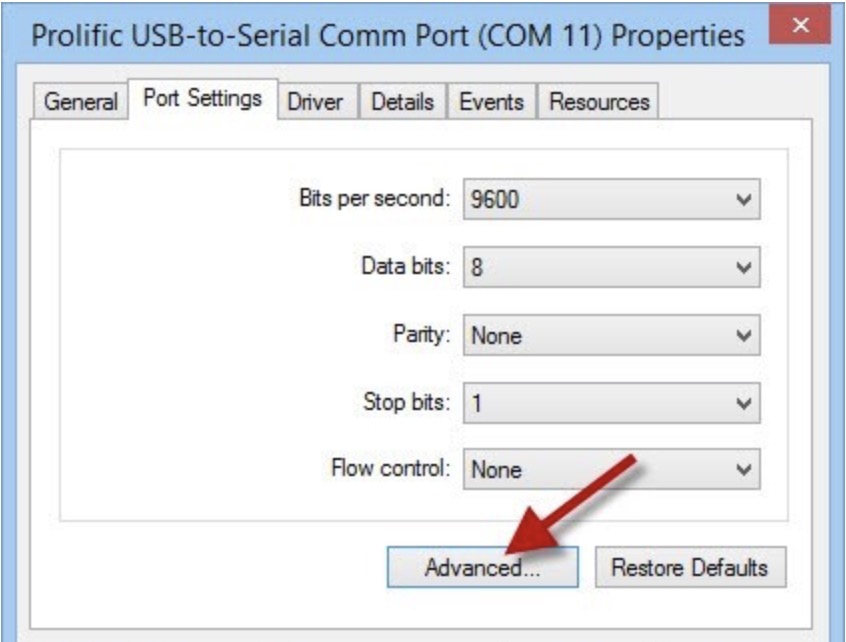
In the ports setting, make sure to set the all fields. Generally, for printers or cash drawers, they are similar to below.
Then click the Advanced button to set the actual port
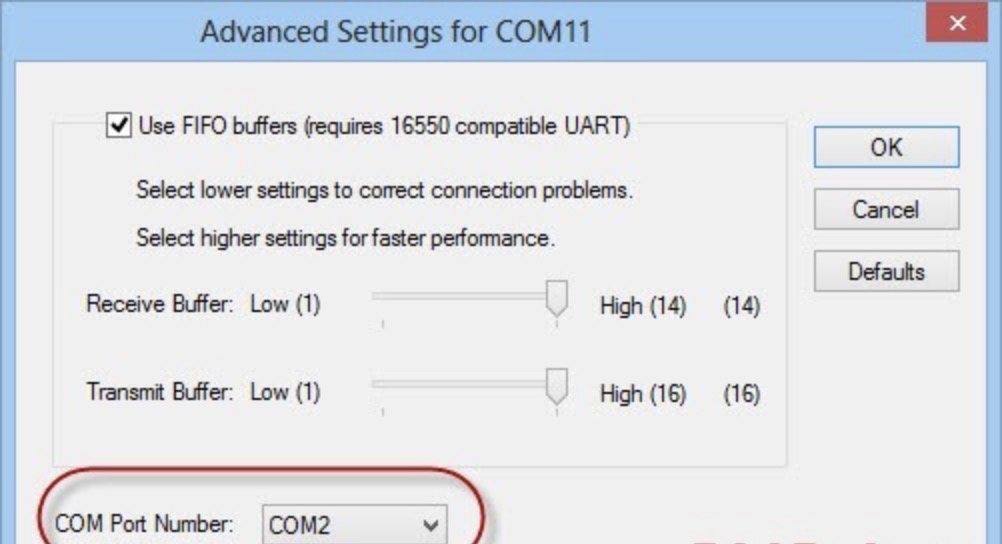
- On the advanced tab, set the com port name so that it matches what you set in Theatre Manager
Device-EMV Credit Card Swipe
Moneris Pinpad Setup

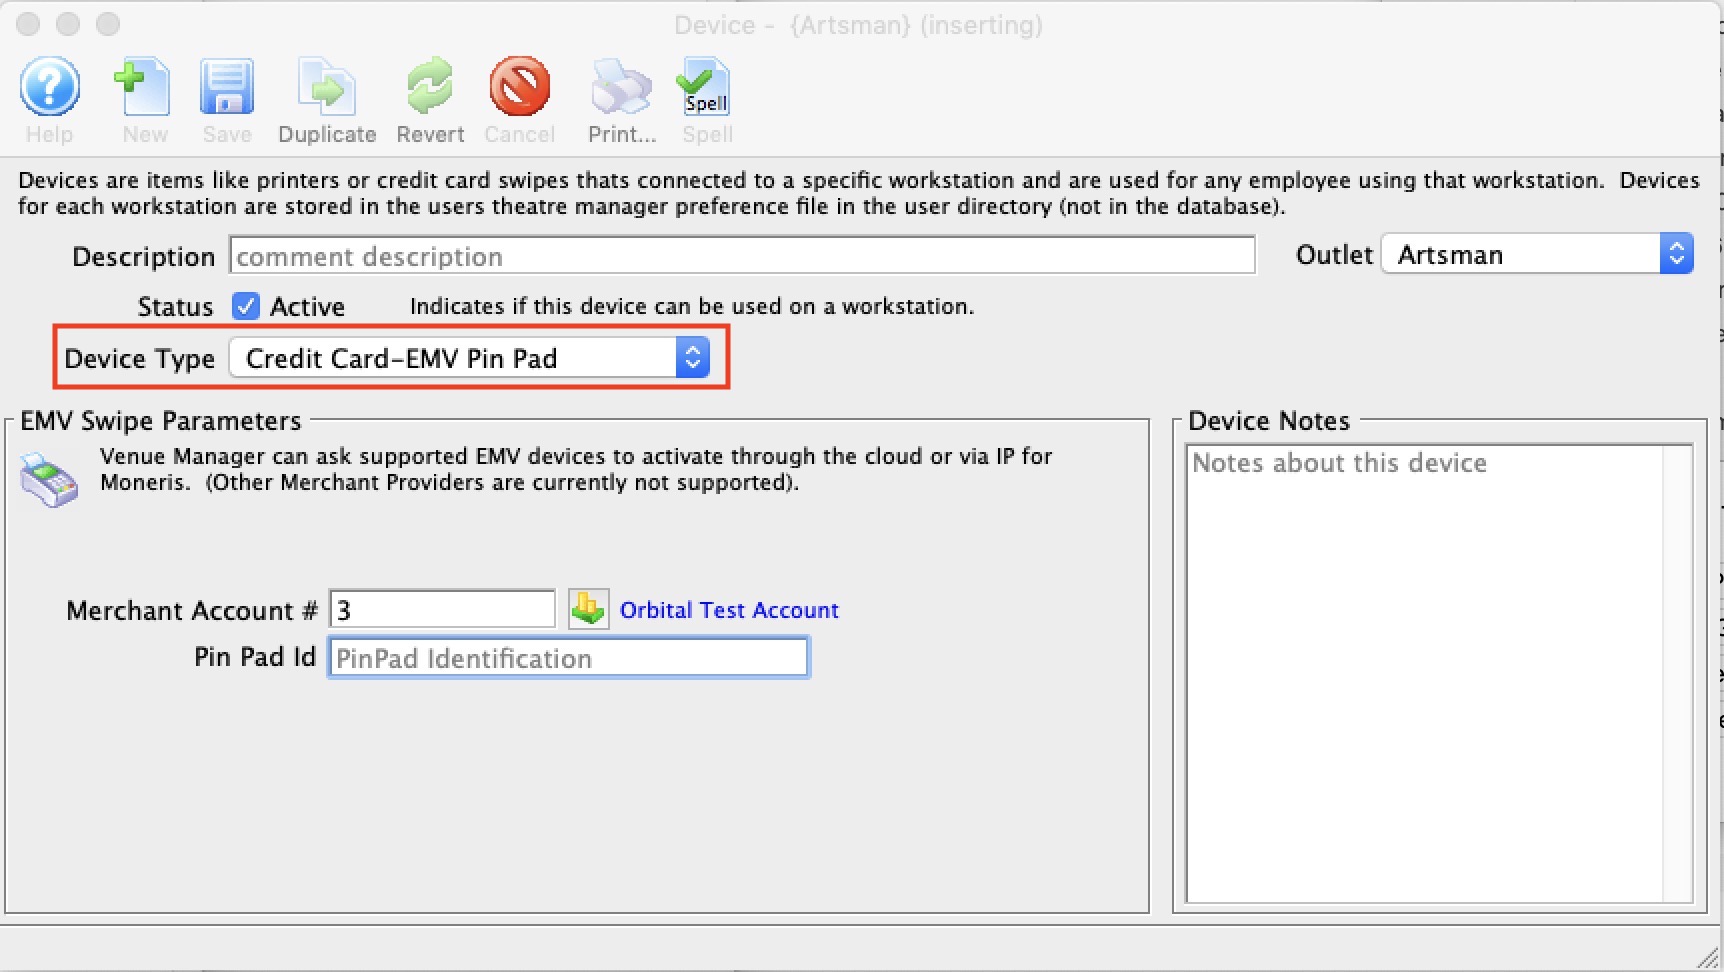
Enter:
- A description. We suggest the pin pad type, ID and location
- The merchant account to associate with this pin pad
- The pin pad number provided by your merchant provider
- Timeout - 30 seconds should be enough
- Pinpad URL is ippos.moneris.com/Terminal
- Port should be 443
Once you save the EMV device record, you can try Pairing with actual the device. You will be asked to enter the pair code that you see on the device to associate it with this record. After pairing, the device should go to a ready mode.
If you cannot pair with the device, contact Moneris to make sure the device is on cloud setting.
|
After the device is set up, you must associate the EMV device to a computers hardware setup |
|
 You will also need to provide some Merchant Settings from Moneris that activate your pinpad machines
If you do not, you may see a message like the one to the right if you try pair the devices. |
|
Only Moneris cloud setup is supported (direct connection is not). This currently means only the P400 pin pad devices on cloud setting can be used. Please contact moneris to see if yours is compatible or needs replaced with a P400. |
|
Pin Pads are settled during end of day. if you receive any message about an imbalance on a pin pad, please refer to the Moneris Pin Pad End Of Day troubleshooting tips. |
PinPad Open Total
- Finding the EMV device record in the list of devices
- Clicking the PinPad 'Batch Totals' button on the window as indicated below
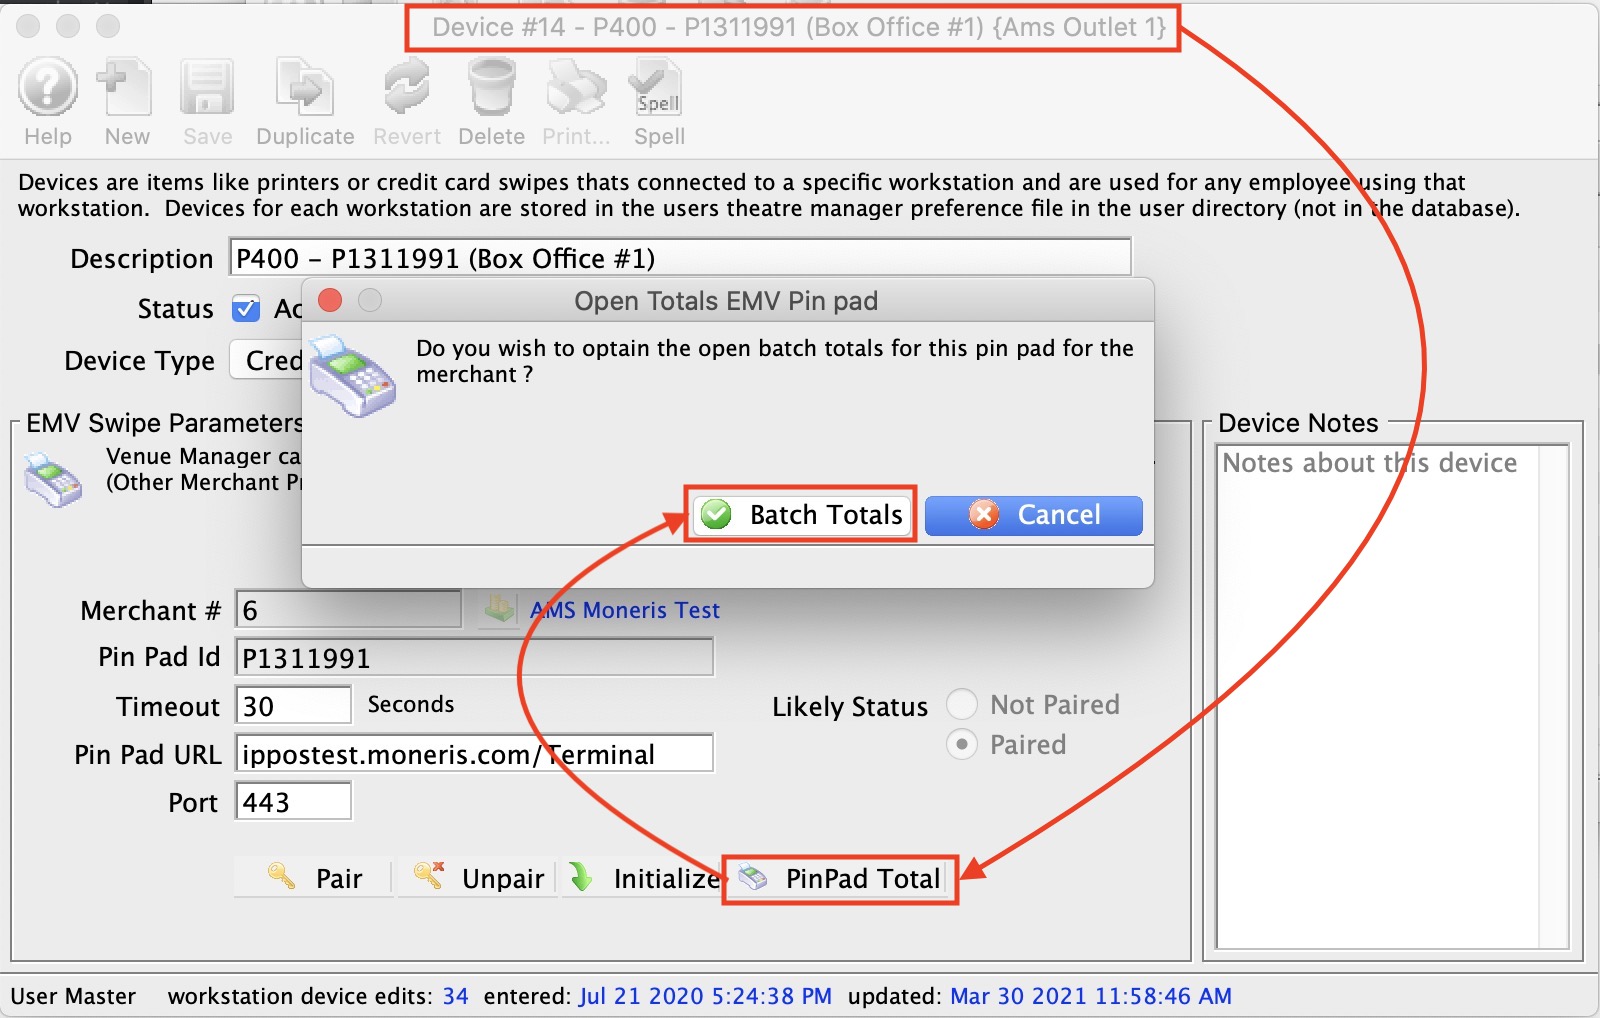
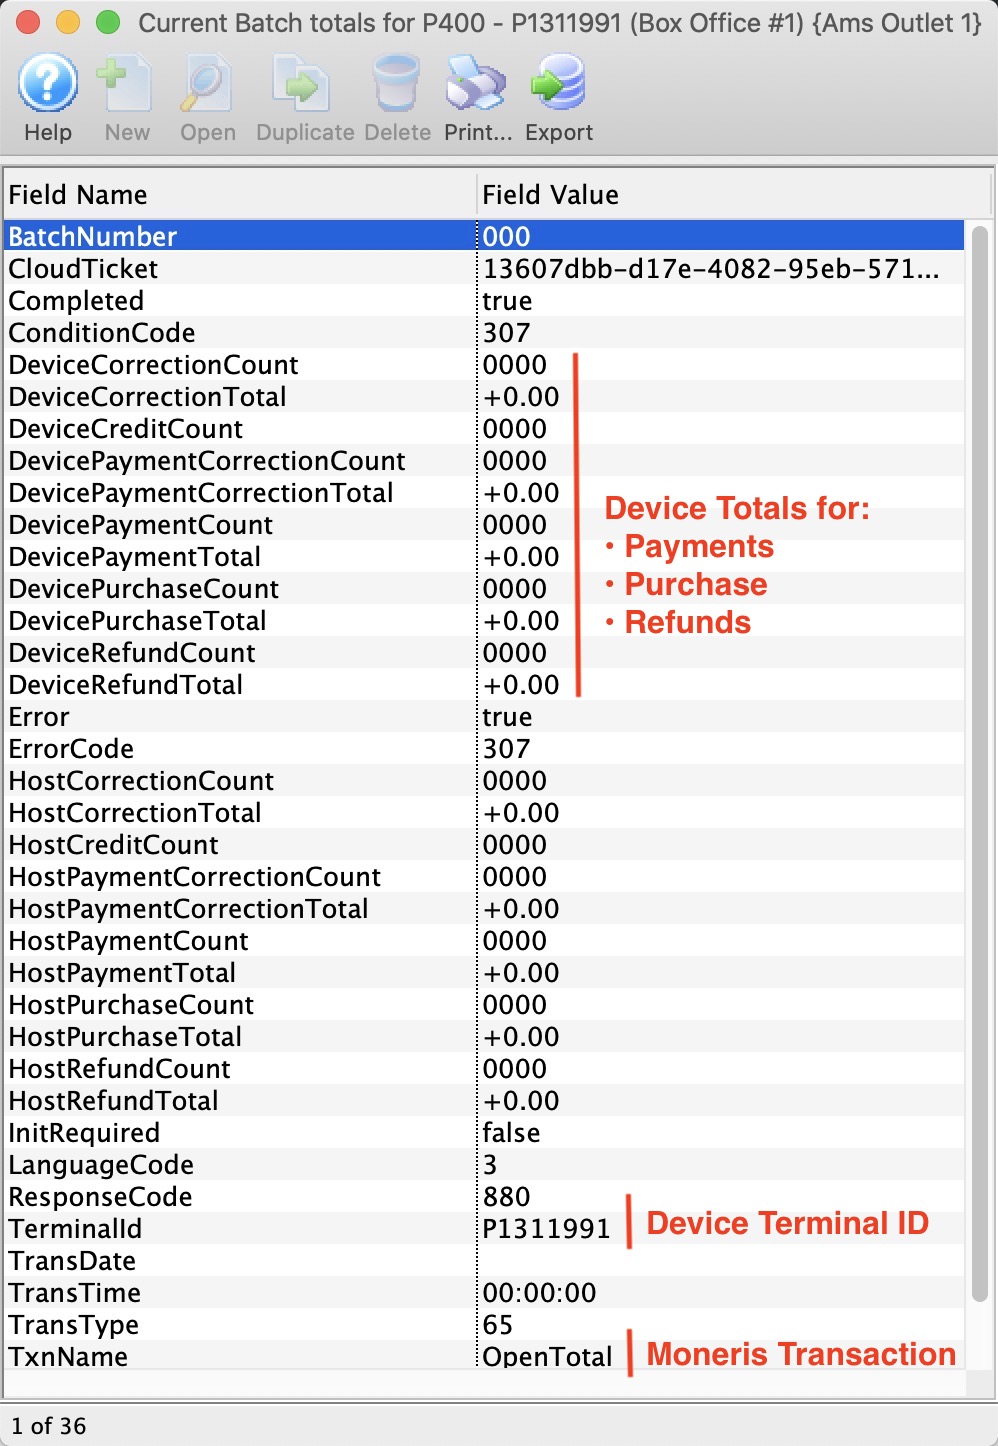
This submits the 'OpenTotal' transaction to Moneris and should come back with a window showing device totals at the top for various transactions, per the image below.
These values can be explained to you by your Moneris representative. In general, they will show things like:
- Transaction counts
- Transaction Totals
|
If you do not see the image below:
|
Device-Ticket Printer
|
NOTE: NEVER install any software printer drivers for any ticket printer.
Theatre Manager does not use them and installing the printer drivers may affect the ability to print tickets and other reports. |
|
Theatre Manager supports several commercial ticket printers. They must have the FGL language installed in them and one of ethernet, serial, or parallel ports. (USB is currently not supported).
|
This preference is used to setup a ticket printer that can be associated with a workstation - meaning you can set difference preferences for each machine you use.
Refer to ticket face setup if you want to print different events to different printers or ticket stock.
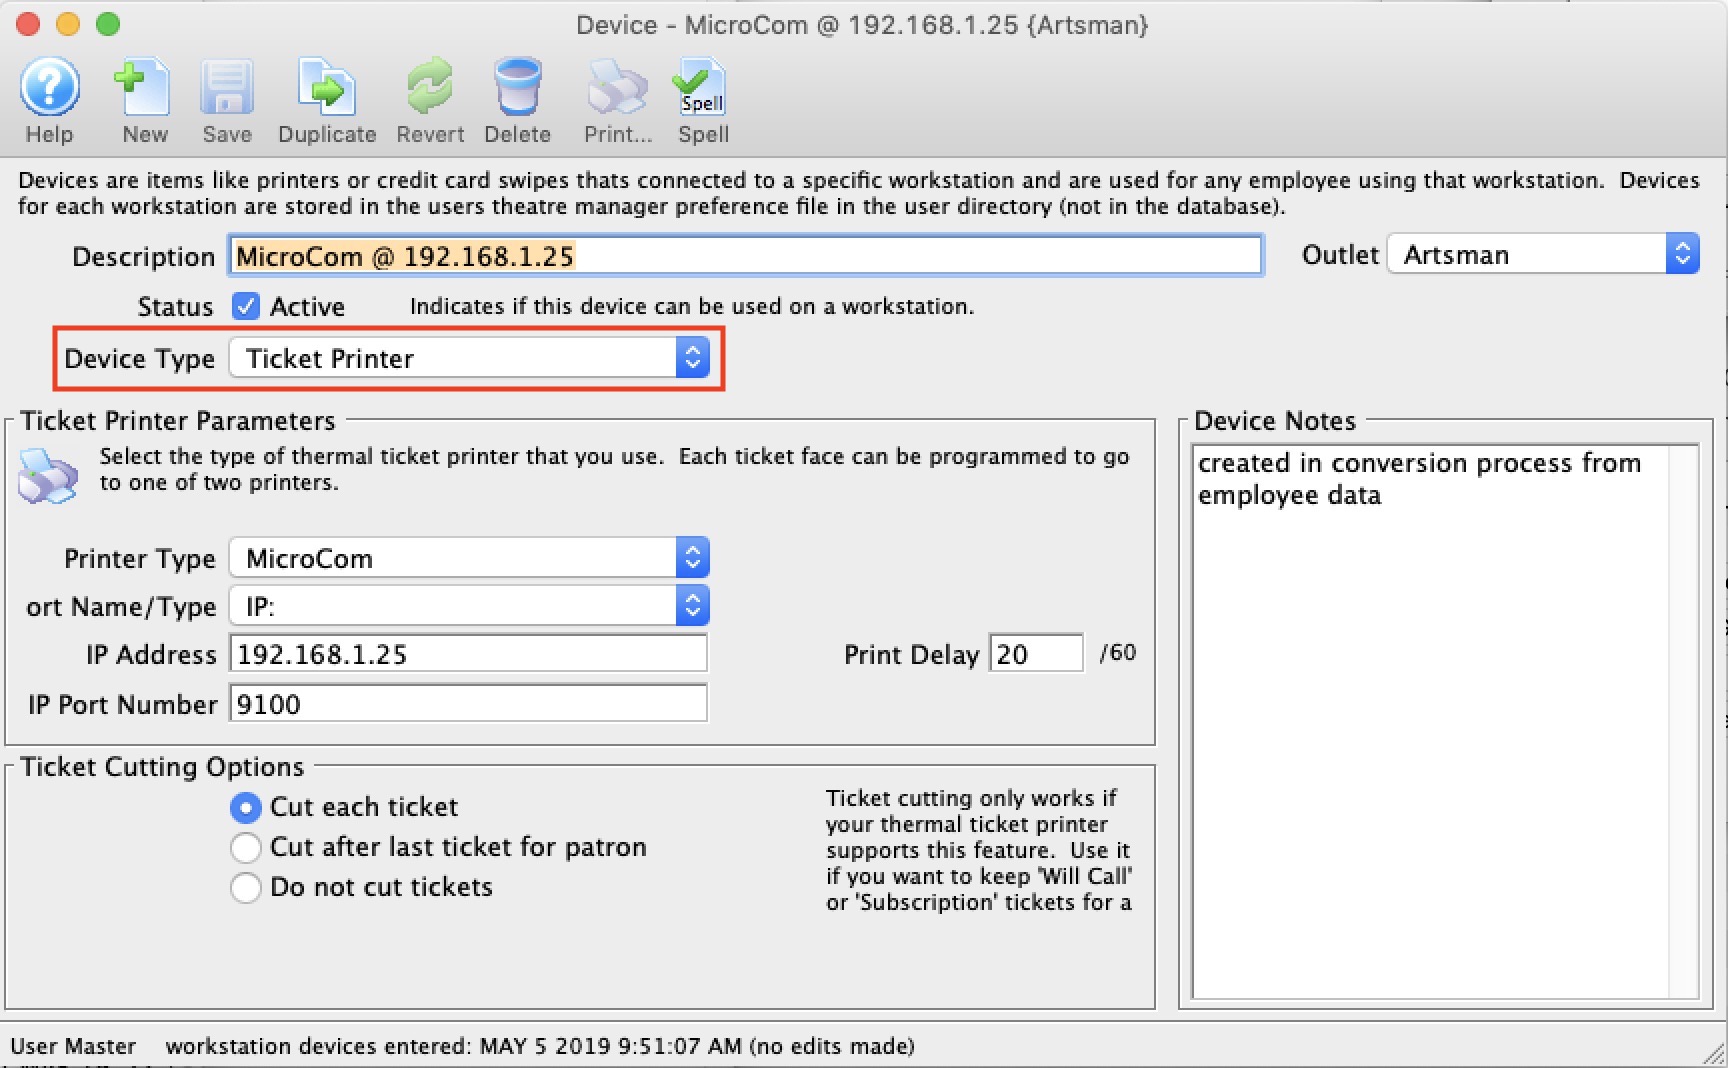
Parts of the Ticket Printers Tab
Ticket Printer Configuration |
|||
| Printer Type | Tickets can be printed to any one of the following printers (as long as it has FGL language support in it):
Note that there are some differences in the ports, handshakes and FGL capabilities in each printer so it is important to select the right one. |
||
| Port Name | The port the primary ticket printer is attached to. Note that there are choices here that affect other fields on the screen. You can select:
|
||
| IP Address | IP address of printer if using ethernet printer. The field is not displayed for Serial or LPT printers.
|
||
| Port Parameters | This field will appear for serial printers. Enter the baud rate and handshake information. Typically it is 9600,n,8,1,X, meaning:
|
||
| IP Port Number | IP port of printer if using ethernet printer . The field is not displayed for LPT or serial printers.
|
||
| Print Delay | Allows for a printer buffer to clear before printing the next ticket. This delay is hardware specific. If tickets are being printed on top of one another, tickets are not printed correctly, or if tickets are skipped during the printing process the print delay should be increased. | ||
| Ticket Cutting Options | If printer supports ticket cutting, there are three options to choose from: Cut each ticket, Cut after last tickets for patron, or Do not cut tickets | ||
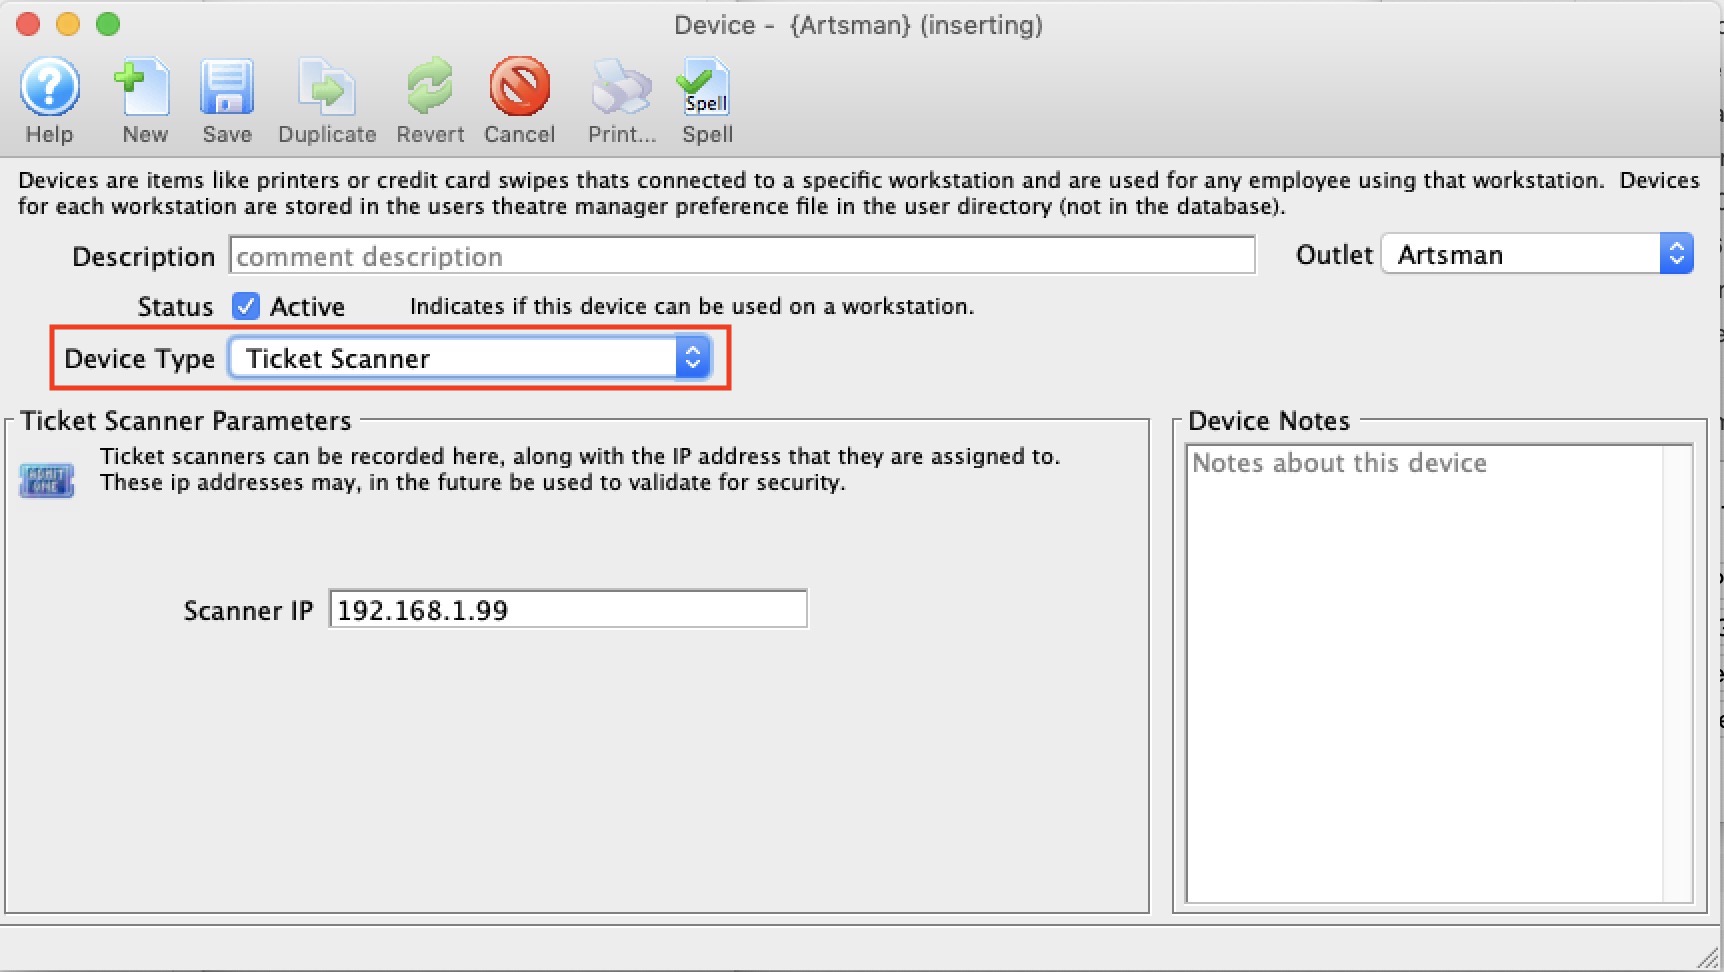
Device-Ticket Scanner
Device-USB Credit Card Swipe