Custom Letter Examples
Creating a "Last Show Patron Bought Tickets to" Letter
Occasionally, you may wish to create a form letter that highlights the last show the patron purchased tickets to. This type of letter (or email) is the same concept as a Donation Thank You Letter. When we create a thank you letter for a donation, you need to attach it directly to the donation you are thanking them for. This is because a Patron can have multiple donations, and if you attach the letter to the Patron Record, Theatre Manager will not know which donation the to pull the merge information from.
The same applies to "last event". While Theatre Manager knows the patron has purchased tickets, it does not know which was the last ticket purchased. For example, a patron has purchased a ticket to the fourth show in a season and then comes back one month later and purchases tickets to the first show of the season, Theatre Manager only know the patron has purchased tickets to both the first and fourth shows and not the order they were purchased in.
To achieve the proper information in the letter, you need to perform several different functions.
- Create a new letter.
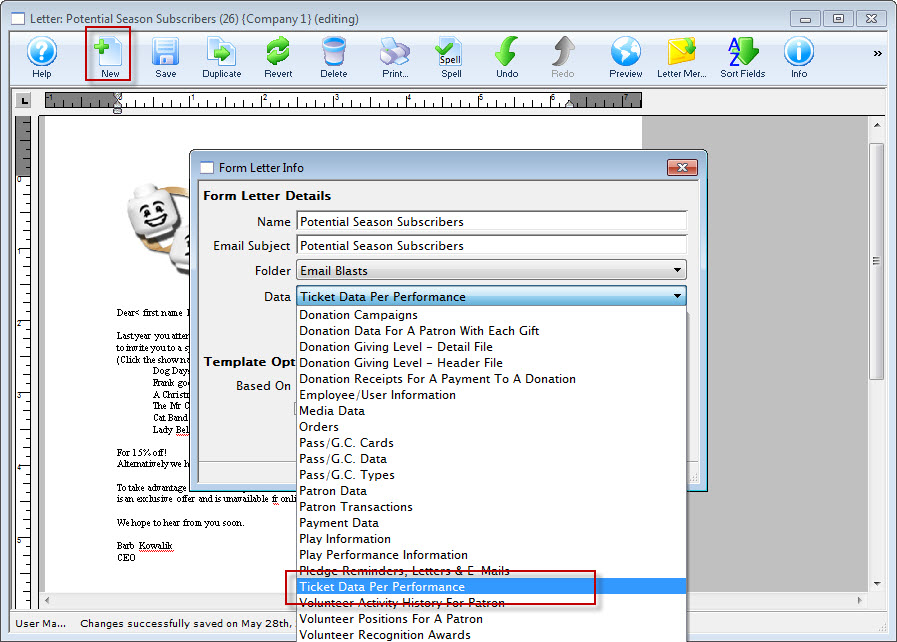
- When choosing the Data file, select Ticket Data per performance.
- Complete the letter.
Click here for more information on creating a form letter. When the fields are in the letter, you may also want to consolidate some fields so you can show totals, averages, etc.
- Click the Save
 button.
- Click the Sort
 button.
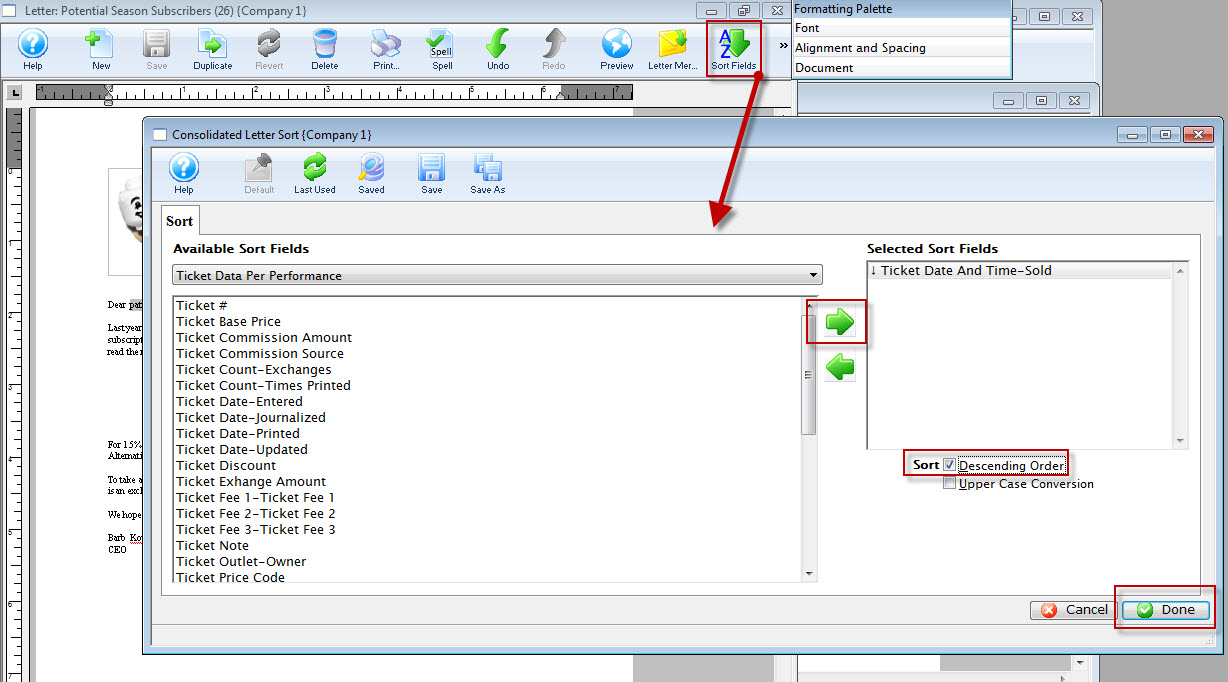
The Consolidated Letter Sort window opens.
To get the required letters, set up a sort order for the letter, so that it is in Date Order (descending) or in Order Number (descending).
- Select the sort order using the left and right arrow keys to added the appropriate sort fields.
- When complete, click the Done
 button.
Merging
- Click the Letter Merge
 button.
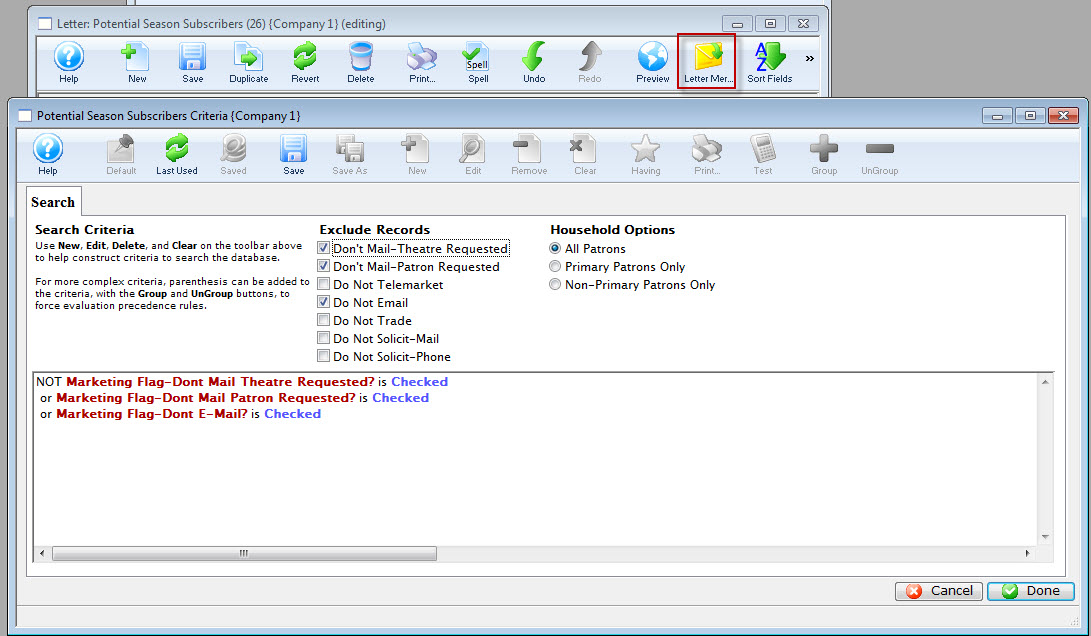
The Search Criteria window for the Form Letter merge opens. Criteria allow you to refine the amount of information - before generating the letter. Criteria can be used to find specific information and using criteria speeds up the process of generating a letter. Click here for more information on the Criteria window.
- Click Last Used
 or Save to enable the toolbar.
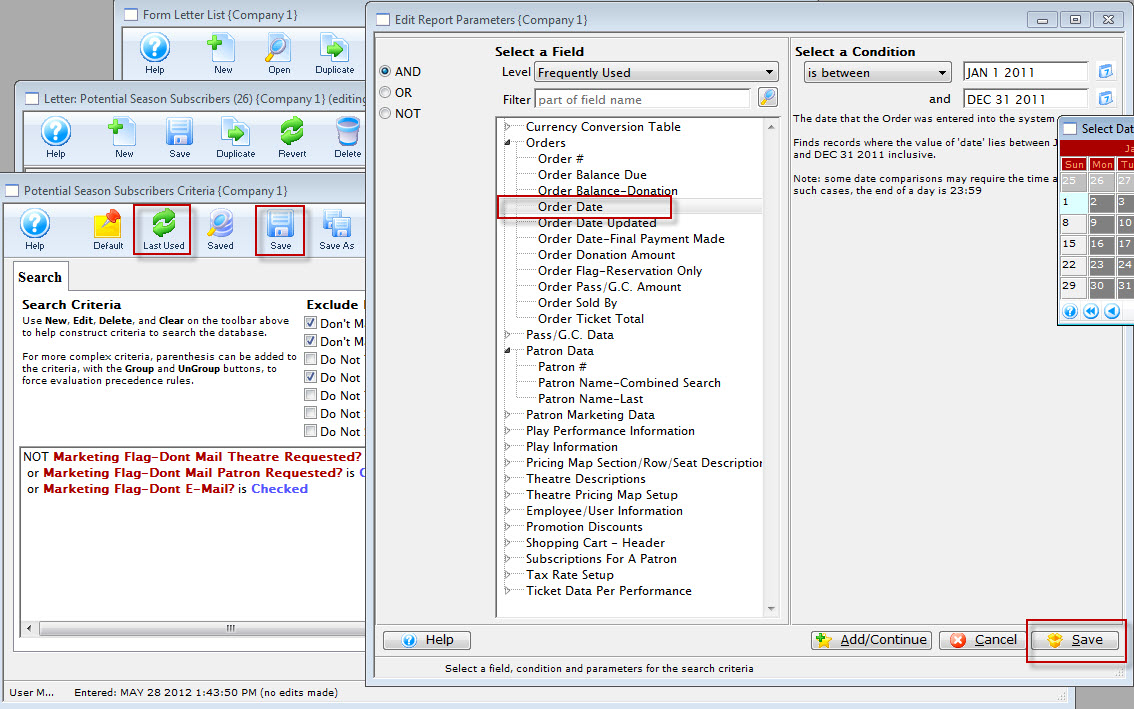
- Click the New
 button to add the first parameter..
The Add/Edit Parameters window opens.
Click here for more information on the Add/Edit Parameter window.
- Select an Operator.
Operators are on the left hand side of the window. They are "AND, OR, NOT."
AND
This criteria and all previous criteria will be used in the search.
OR
This criteria or all previous criteria should be used in the search.
NOT
All previous criteria but not this criteria will be used in the search.
- Select a data field.
Clicking on the plus symbol (+) next to a data category expands it to show a list of fields.
choose indexed fields when possible as Reports generated with indexed fields generate much faster.
- Select a condition.
Conditions determine how the parameters react.
Click here for more information on conditions.
- Set the parameters.
Depending on the data field and condition, the parameters may be a single number, a range of numbers, or a list of items.
If a list of items is shown, multiple items can be selected by using the OPTION key (Mac) or the CTRL key (Windows).
- At the bottom of the window, click the Save
 button.
The Add/Continue
 button may also be used to add this criteria, and select additional criteria without leaving the window.
 - Click the Save
 button to merge the letter.
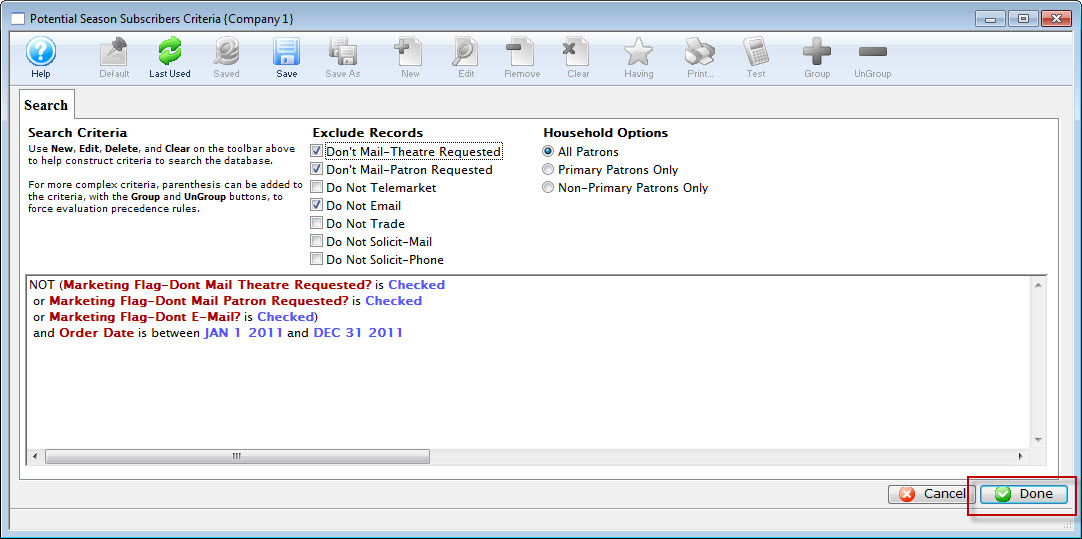
You are returned to the Search Criteria window.
- Review your options and criteria.
To add more criteria, click Last Used
or Save to enable the toolbar. - To create your letters, click the Done button.
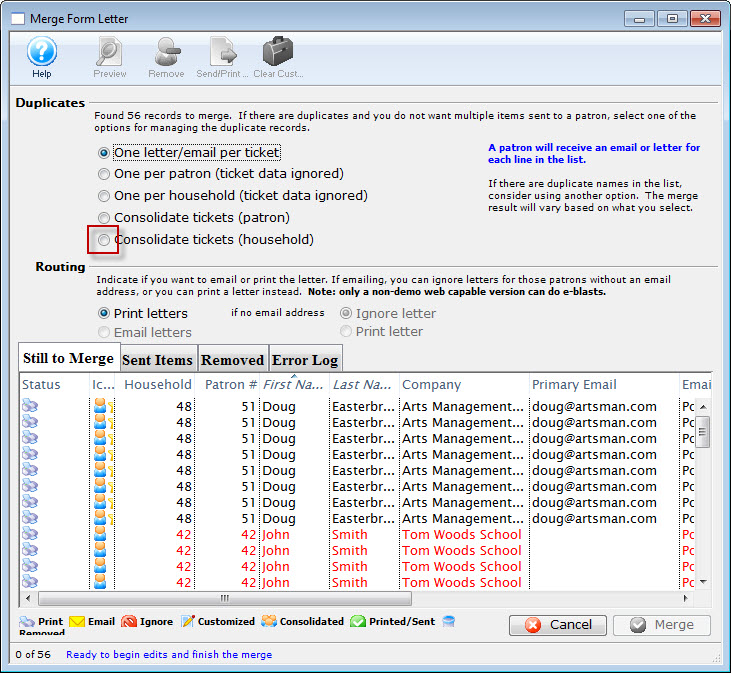
The Merge Form letter window opens.
Click here for more information on the Merge Form Letter window.
Reviewing the Still to merge tab, the list needs to be refined.
- Make a Duplicates selection. In this example, Consolidate tickets (household) has been selected.
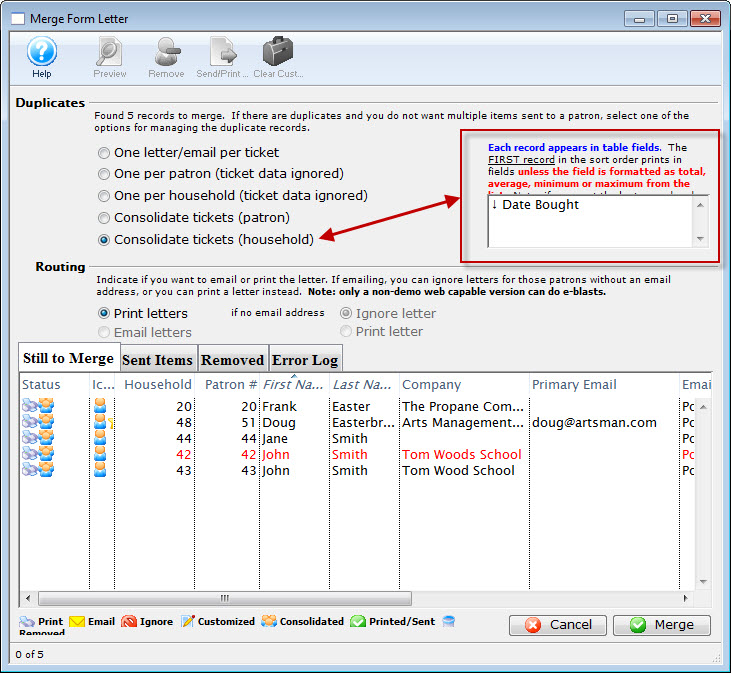
Notice the parameter selected - Date Bought is displayed. This tells you The first record for Date Bought prints in the field.
- Click the Merge
 button.
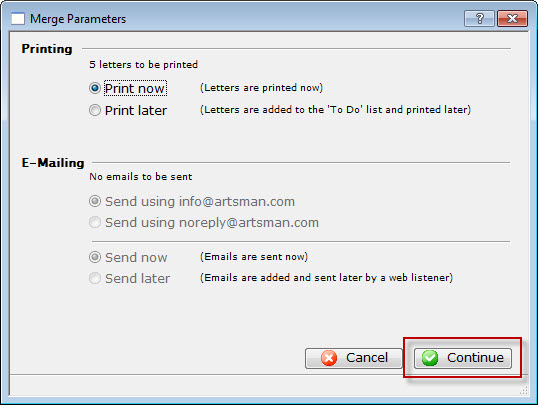
- Click the Continue
 button.
Review your printed letters.
Creating a Ticket Confirmation Form Letter
 If you need to send an email (or printed) confirmation letter to the purchaser, there is an easy invoice function right in the BUY window (and on the patron record). But if you are using it as an internal email notification, you'll need to build a Form Letter.<
/p>
If you need to send an email (or printed) confirmation letter to the purchaser, there is an easy invoice function right in the BUY window (and on the patron record). But if you are using it as an internal email notification, you'll need to build a Form Letter.<
/p>
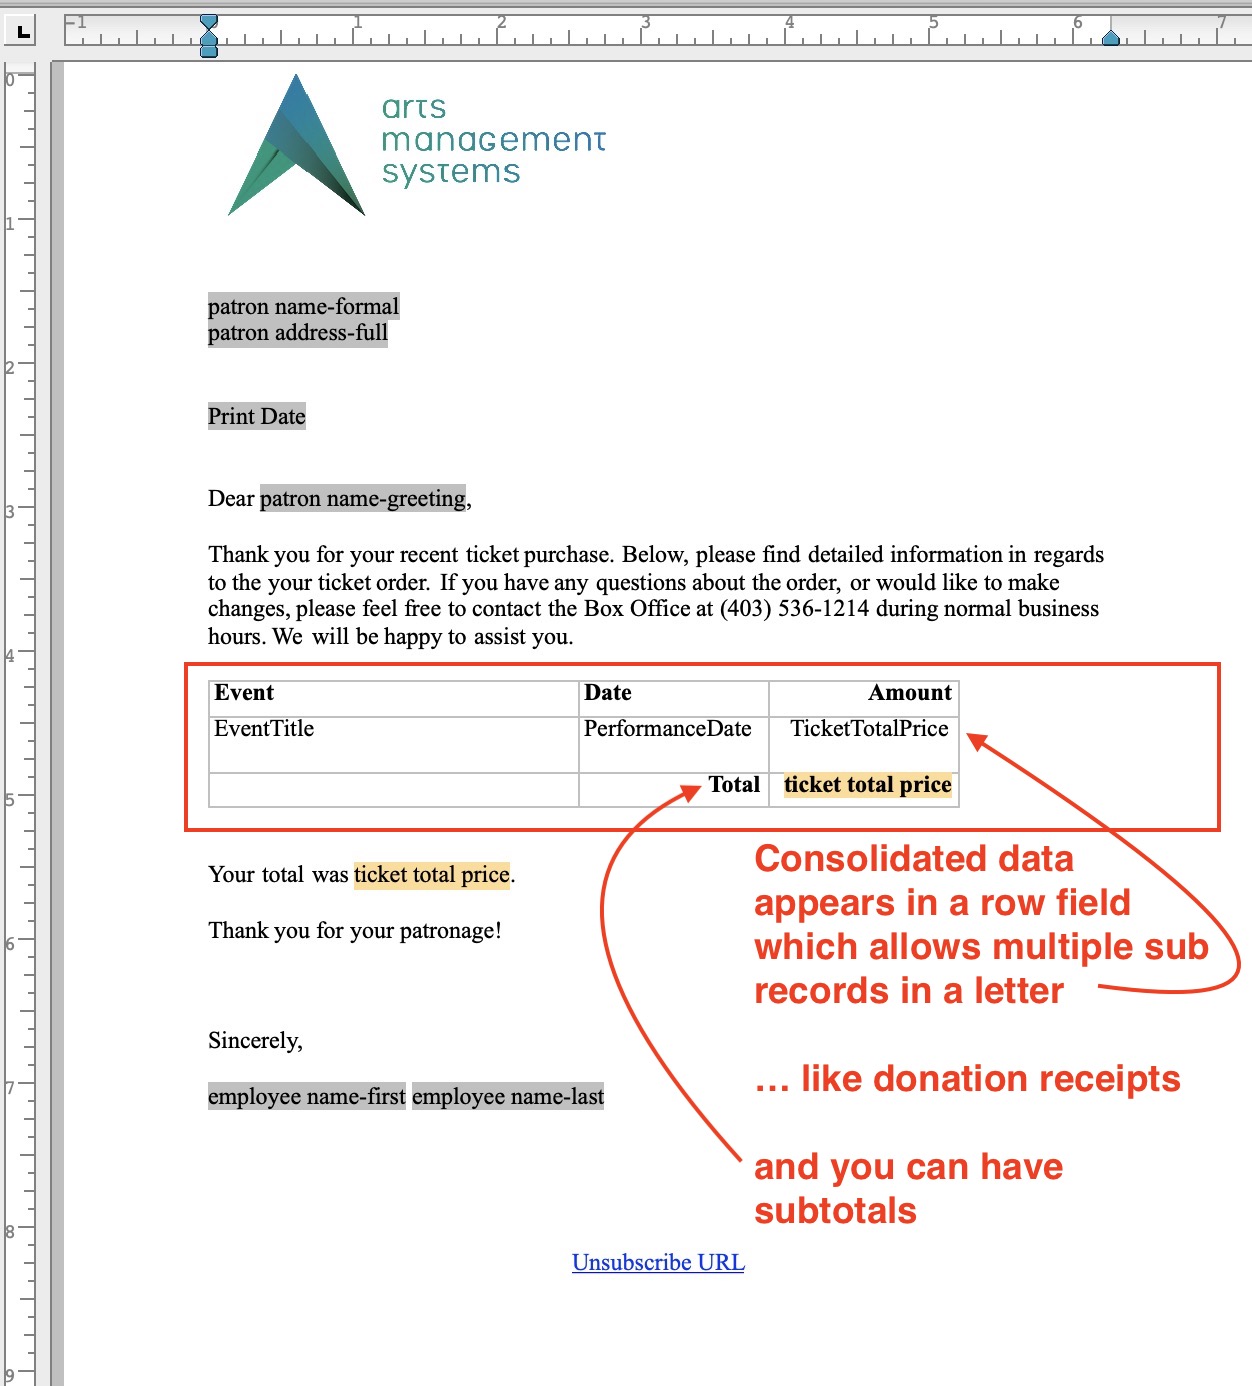
There is an important difference between form letters and Invoices. Form Letters (with Row Field Data) look at several records, so it will list every ticket individually. There is a row for Ticket 1, because it is Seat A-101, then there is a row for Ticket 2, because it is a different seat; Seat A-102. So each ticket will come out as a separate row.
Invoices look at the order as a whole, and can summate the contents of the order in different ways - individual tickets (or donations/Gift Certificates), or grouping them by event, series, promotion and other options.
The two items are different for a reason - you have the best of both worlds. If you want to have a summary of the order, use the Invoice and choose the appropriate summary options when you generate it. If you want a line by line listing of the tickets, use a form letter.
In Form Letters, you can add row field data which will pull data from the database and insert it in your letter "table style."
You can accomplish this by using the following steps.
Build a new Form Letter
- Click on the
 icon, and choose
  from the icon bar in the search window.
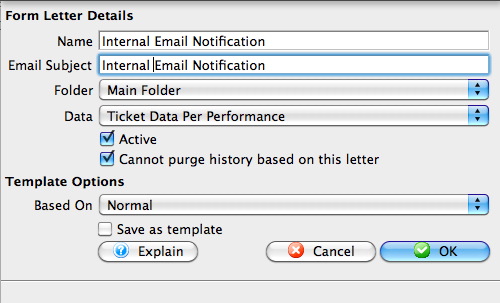
 - Give the letter a name, and a folder.
- Choose Ticket Data Per Performance as the Data file
- Click

You may either copy and paste your letter in here, or begin writing it directly into the word processor.
Add a Row Field Table
- Right click in the location where you want the Row Field table to go
- Click the green hooked-arrow
 on the right side and select the first field you wish to include.
 - Change the Column Header to something appropriate for your table (as you would like it to appear) in the final document.
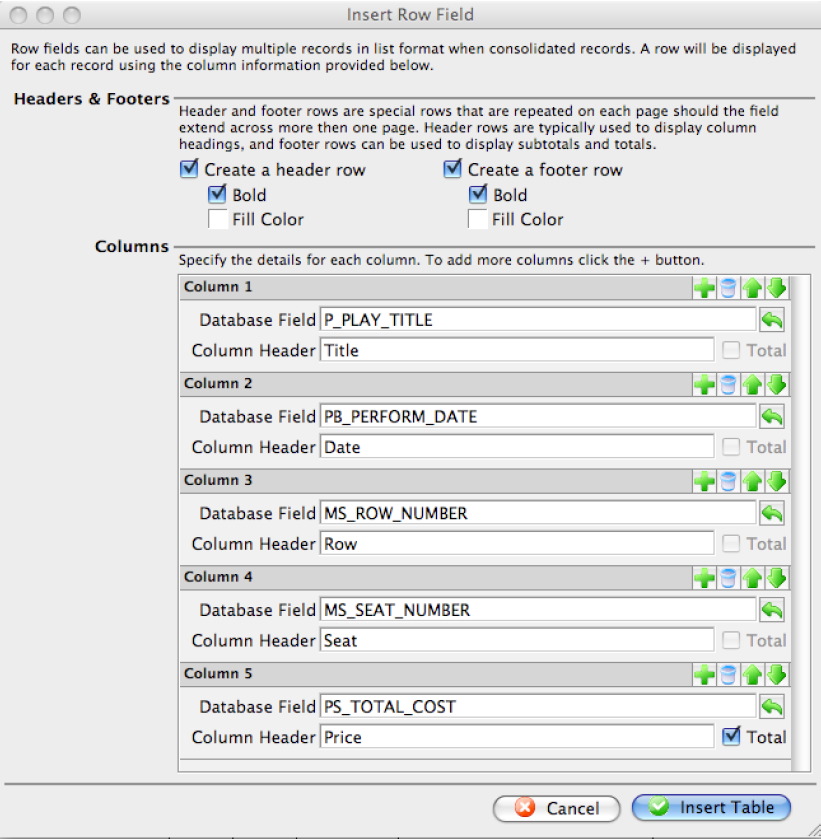
- In the final column (PRICE), click the
 box. This will total this column in your table.
 - Click
 , and the table will appear in your document
Select Insert Document Object>>Row Field
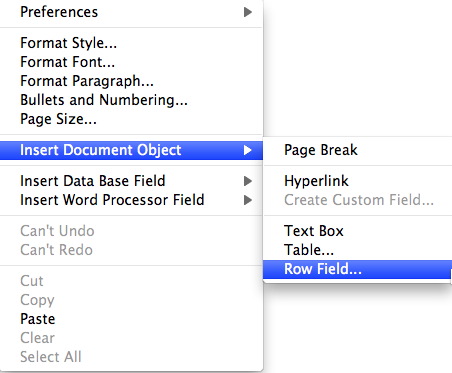
The insert Row Field window will appear.
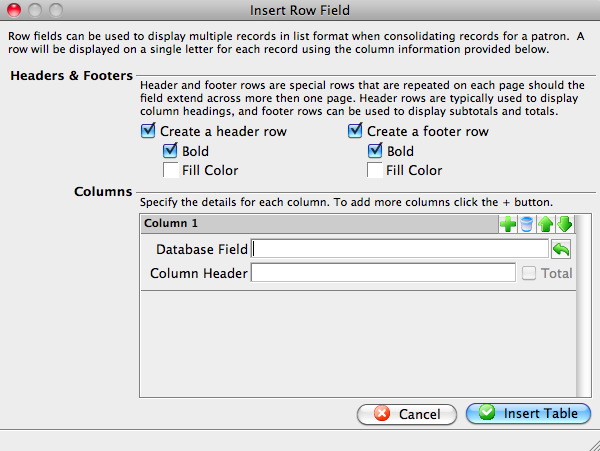
To add additional columns to your table, click on the 
Be sure to edit the Column Header names.
Adjust the column width or height as you would in any word processing program by clicking between the columns and dragging the lines left/right, or up/down. This allows you to allot more space for Event Title, and less for Row and Seat, for example.
To edit the way data is displayed:
- Double click on the Data Cell (for example, TicketTotalPrice)
- Click on the CELL tab
- Click MODIFY
- Edit the Formatting to the desired display. In this case, Currency.
- Click Apply
- Click Apply again on the Row Field Properties window
- You can also edit the format of the table itself.
- Highlight the cells you wish to format
- RIGHT click (Control Click) on the cells
- Select the item you wish to format (Style..., Font...., Paragraph..., etc.)
|
You can also edit the formula for the calculation right here in this window. For example, you may wish to display the ticket price plus fees. Edit the PS_TOTAL_COST like you would a ticket face calculation to (PS_TOTAL_COST+ORD_TIX_ORD_FEE) |

Complete and save your Form Letter