Windows PostgreSQL Server
The server needs to be set up on one machine and the application can be set up on as many machines as you wish.
Follow these steps if you are using the TMPostgresSetup installer program and you may want to bookmark this page in your browser in case you want to refer to these installation steps. If you are only installing a demo, refer to the last column for the required steps.
| task | Description | Full Install | Demo |
| 1 | Download the Postgres installer for Windows | yes | yes |
| 2 | The installation of the PostgreSQL server. Please make sure to read any caveats for the version of Windows you are using. | yes | yes |
| 3 | Installing the demo database and the main Theatre Manager User | optional | yes |
| 4 | Configuration of the server parameters for maximizing performance in a production database | yes | |
| 5 | Creating a daily backup job in TM Server | yes | |
| 6 | Considerations for installing virus protection on the PostgreSQL server - please do not include the Postgres data folder. | yes | |
| 7 | Turn off Microsoft disk indexing on the volume that the database is running on. | yes | |
| 8 | Turn off Microsoft Auto Updates on the database server so that it will not restart in the middle of sales. Applying Microsoft patches and updates should be done on a planned basis -- perhaps bi-weekly or monthly as a practice (or immediately if there is a current threat) | yes |
Notes and Assumptions:
- This install process assumes you have NEVER installed PostgreSQL or Theatre Manager on your computer before. If you have, you may need to refer to Updating PostgreSQL Instructions
- You MUST turn off all virus protection while running the installer (especially Norton if you are using it). Virus software always interferes with proper software installation.
- If this installer is being used to create a demo installation, then you only really need do steps 1, 2 and 3.
- This process assumes that you have never installed Theatre Manager or PostgreSQL on your machine. If you have already installed PostgreSQL:
- you will be asked if you want to un-install PostgreSQL (you may want to do that and then try to re-install after)
- you may need to remove the 'postgres' user from your computer if one exists; unless you know the existing password for the postgres user.
Step 1: Install PostgreSQL Database Server
All Versions of Windows
 |
DO NOT set up the Postgres database server to also act as ACTIVE DIRECTORY or as a DOMAIN CONTROLLER.
While it is possible to do so, the reasons not to are:
|
|
We DO NOT recommend that the database server JOIN a windows DOMAIN CONTROLLER either. There is no need for it. If you wish to join a domain controller, please leave the database server login window pointing to the local machine (instead of the domain). It makes a user logging on for support and updates easier. Note that the machine should always be locked so sign-in is required - per PCI compliance. |
|
We DO NOT recommend installing virus software on the Postgres database server. Since access to the server is under very controlled access via port 5432 from the Theatre Manager application only, it should not be required. If you must install virus software on the database machine, set it to scan the machine daily and void the Postgres DB files. The best defence against any virus software is a backup of the database off machine and, even better, off premises. |
Additional Notes for Specific Versions of Windows
| Windows Small Business Server | For Windows Small Business Server, you MUST turn off 'disk quota management' for all users prior to installing Postgres (and leave it off). Otherwise, you may run out of space for the installer and any databases that get installed. |
| Windows 8 and higher | For Windows 8 and higher, you may need to turn off UAC (user access control) if it is acting as a server. You can run Theatre Manager on other workstations with UAC on. |
| Windows 2012 Server and higher | With Windows Server, you will need to be a local administrator to install Postgres. |
Run Main TMPostgresSetup Installer
When you run the installer for the database, accept all the defaults.
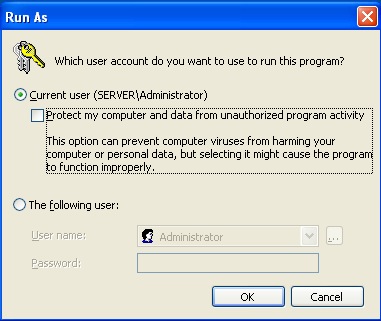
| Click OK | Right click on the TMPostgresSetup.exe application and use Run As to begin the install. Select a LOCAL administrator as the user ID to use for the install. If a checkbox that implies "Protect My Computer" or "Run with Restrictions" is available and enabled, uncheck the box to allow the installer to run with full install privileges.
|
| Click Next |  |
| Click Next | 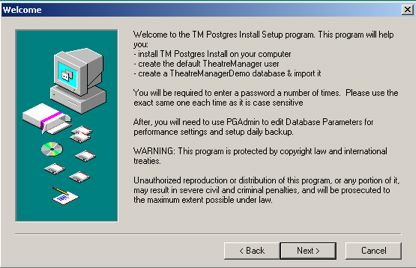 |
| Click Next | 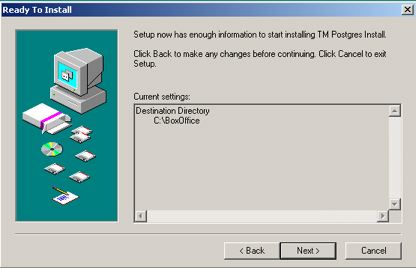 |
| Click Yes | At the end of the TM PostGres installer, you are asked if you want to install the PostGreSQL database in the dialog (as in below).
If you say yes, postgres will install automatically for you and you can SKIP the next section describing how to install it manually and proceed to the step where the installer asks about installing a demo database
Alternatively, you can install them later manually by:
|

Run Postgres Installer
|
Do not do this step if you elected to let the Theatre Manager Postgres installer automatically install Postgres for you. Only reference these instructions if you are running the actual Postgres installer from the Postgres web site manually. |

Accept all the defaults on the screens that follow except the last one that references 'stackbuilder'.
 |
Before starting the install, please check that the computer date and timezone settings are correct. Failure to do so may cause postgres to think it is in a different timezone. | ||||
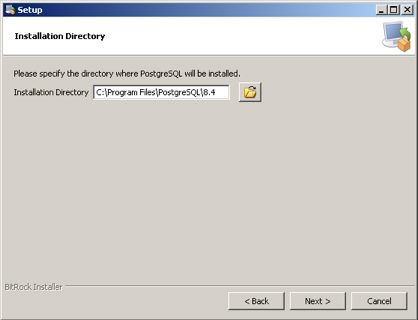
| Click Next |  |
||||
| Click Next |
|
||||
| Click Next |
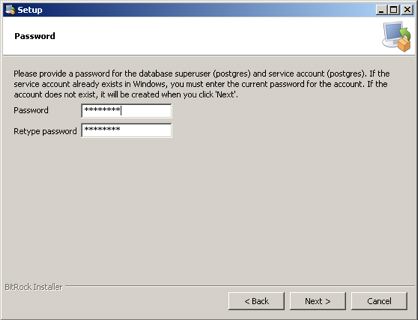
Enter a hardened ' Account Password' for the postgres user. If you do not supply one, we will generate one automatically. However, if this is a demo. In that case, please pick a user password that you remember - we suggest 'Master'.
|
||||
| Click Next |
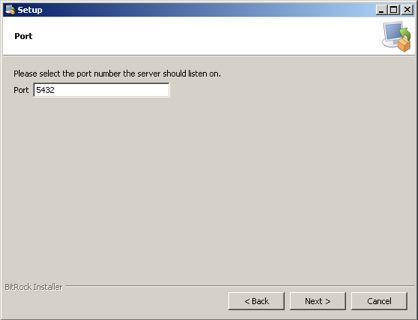
Leave the Port Number as 5432 (if you change the standard port, you will also have to change it in Theatre Manager login window) |
||||
| Click Next |
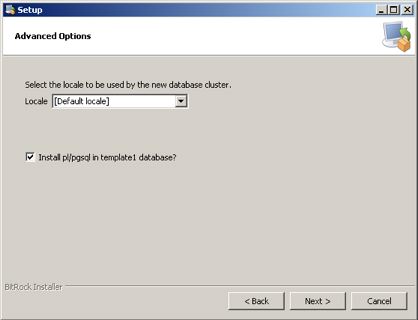
Leave both these settings as shown. |
||||
| Click Next | 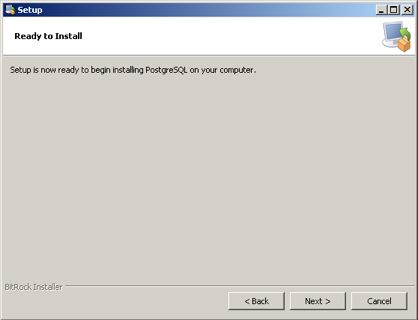 |
||||
| Click Next | You will need to wait for a bit while the database server is installed
|
||||
| Click Finish |
At this time, the database should have installed successfully and should be runnning. 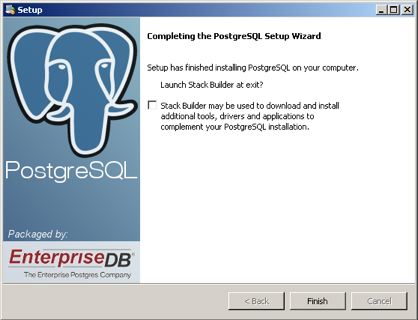 |


Load Demo Database
| Click Yes |  |
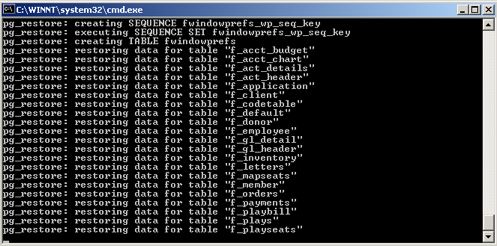
| Wait | Wait while a DOS window pops up and shows the progress of the demo database being imported. Depending on the performance and RAM in your machine, this could take a few minutes to finish.
|
| When the DOS window closes, the database server is installed, and the TheatreManagerDemo database is imported. |
Step 2: Create user and import Database
|
Only perform this step if you did not install the demo database when installing server. |
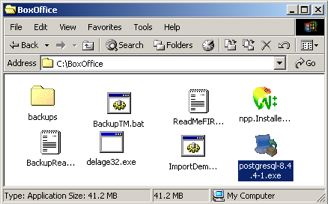
After the database server is installed, You need to create a specific user called TheatreManager and give them privileges. You also want to import a demo database. This step assumes that you have installed into C:\BoxOffice. If you did not, then you will need to edit the .bat files and do this step manually.
| 1. | Go to C:\BoxOffice directory. You will see some files and folders with names similar to below.
|
||
| 2. | Double click on the 'ImportDemo' bat file. This starts a DOS prompt and start the bat file running.
If you have altered the install directory, you will need to change the path name to point to the location that Postgres was installed in. Often, this is just changing the drive letter. |
||
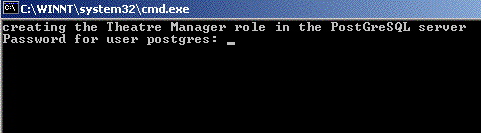
| 3. | You are asked for the password to create the 'TheatreManager' user. Type the password you used for the installation of the database in the preceding section. If this is a demo database install, this may have been 'master' you used when installing the server.
|
||
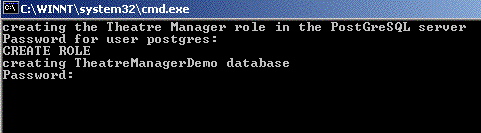
| 4. | You are asked for the password to create a 'TheatreManagerDemo' database. Type the same password used above and elsewhere in the install instructions.
|
||
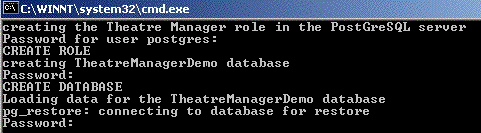
| 5. | You are asked again for the password to import data into the TheatreManagerDemo database. Type the same password again and you will see a lot of lines displayed to you after that point as the demo database is imported.
|
Step 3: Configure PostgreSQL server parameters
Another way to get the key config parameters is to use pgtune and paste the results at the bottom of the postgresql.conf file
| 1. | Configuring postgres entails editing two files in the 'data' folder of the current postgres installation as highlighted below:
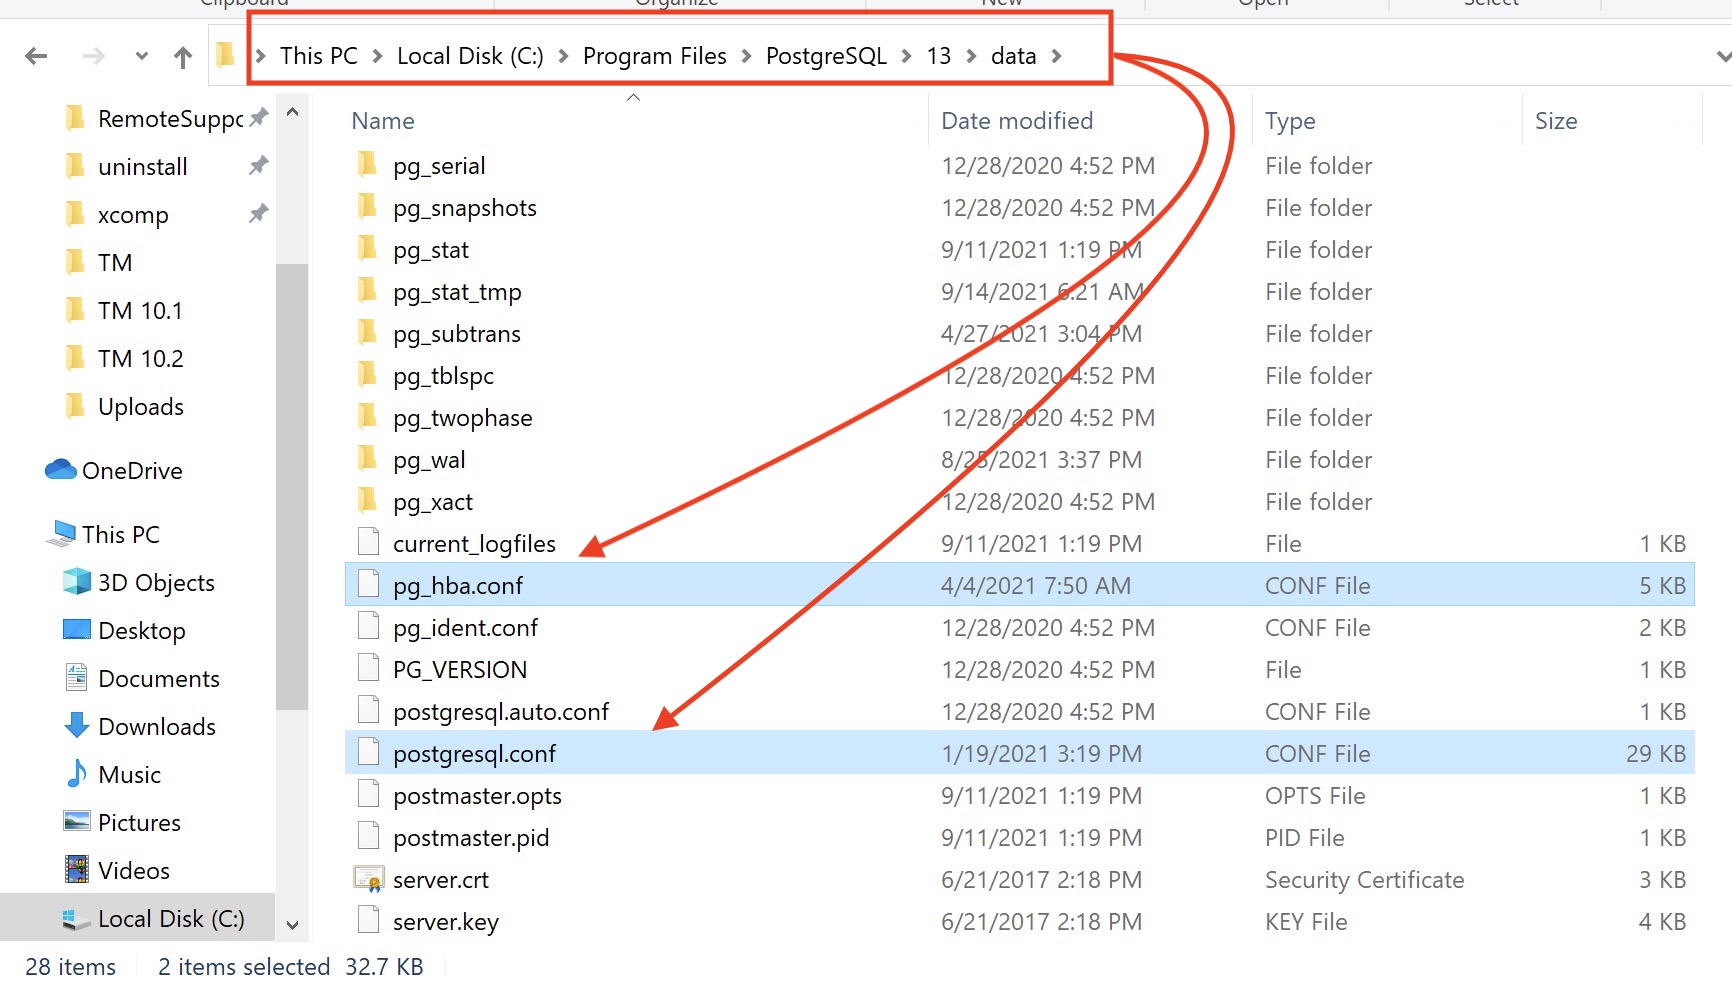
|
||||||||||||||||||||||||||||
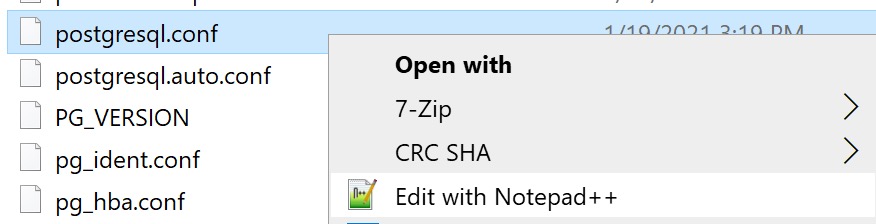
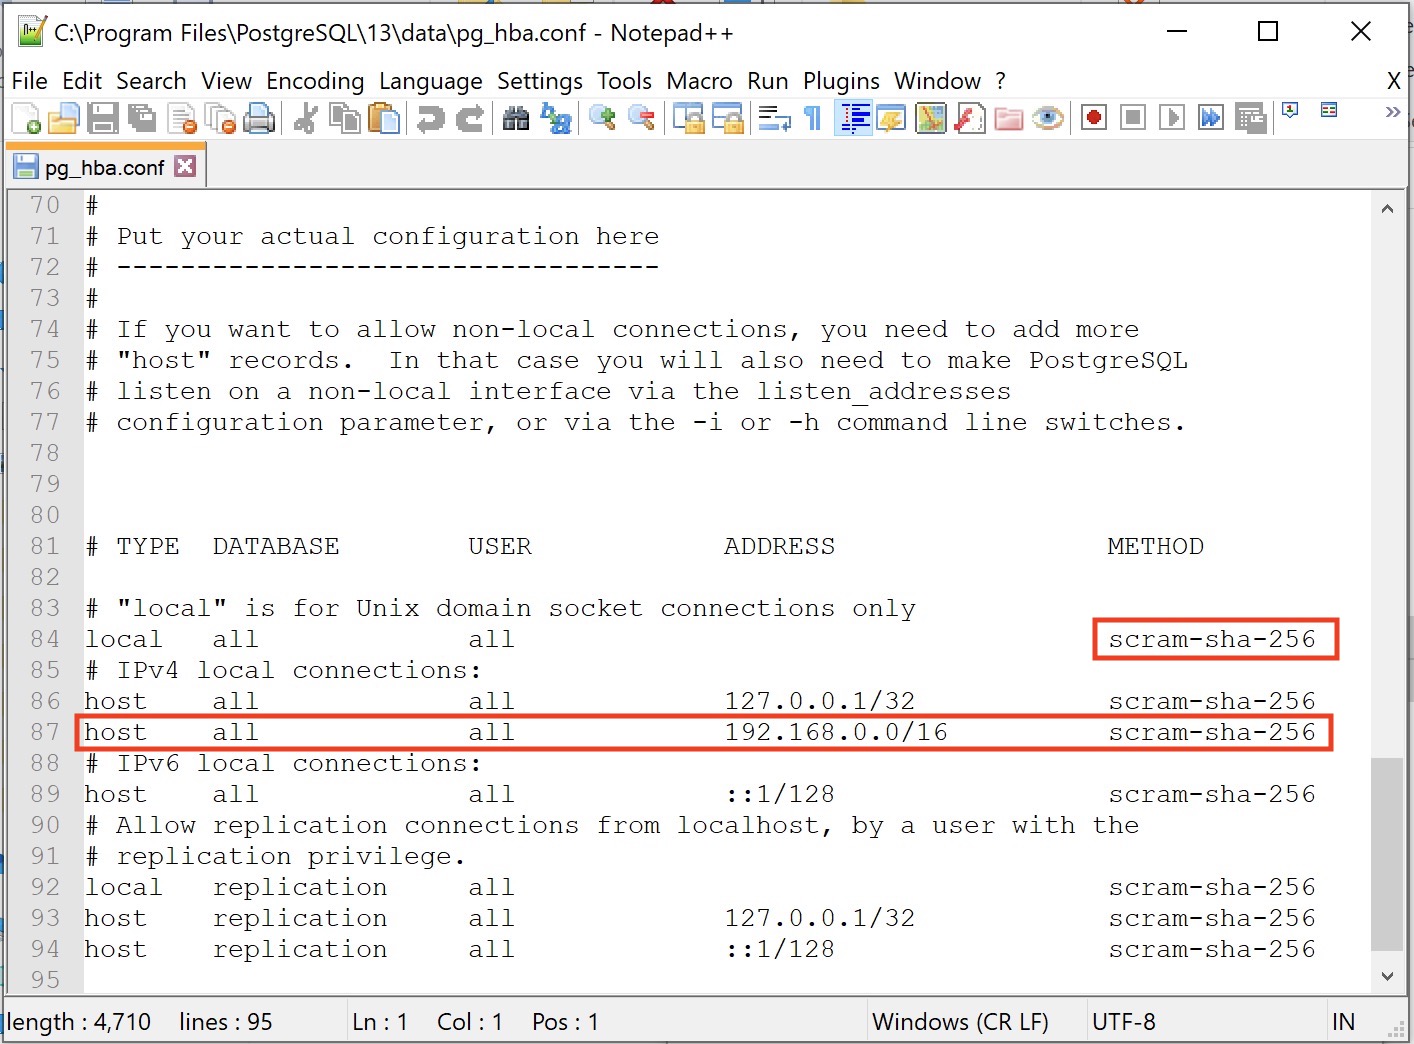
| 2. |  edit the pg_hba.conf file using Notepad++
|
||||||||||||||||||||||||||||
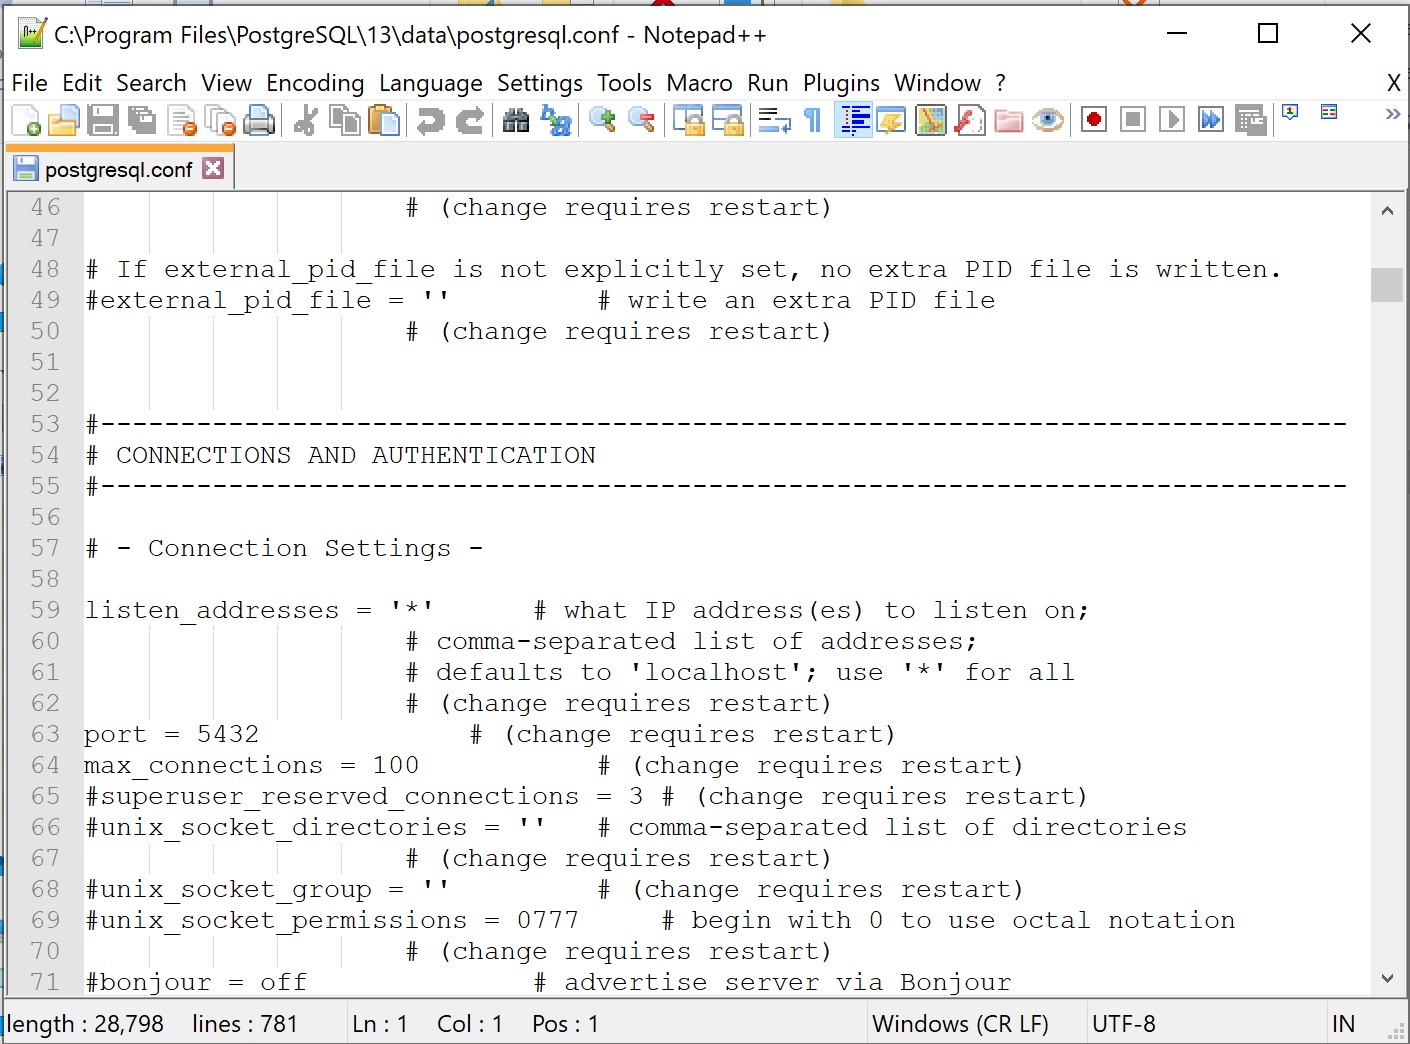
| 3. |
 Edit the postgesql.conf file. Some notes about editing:
|
||||||||||||||||||||||||||||
| 4. |
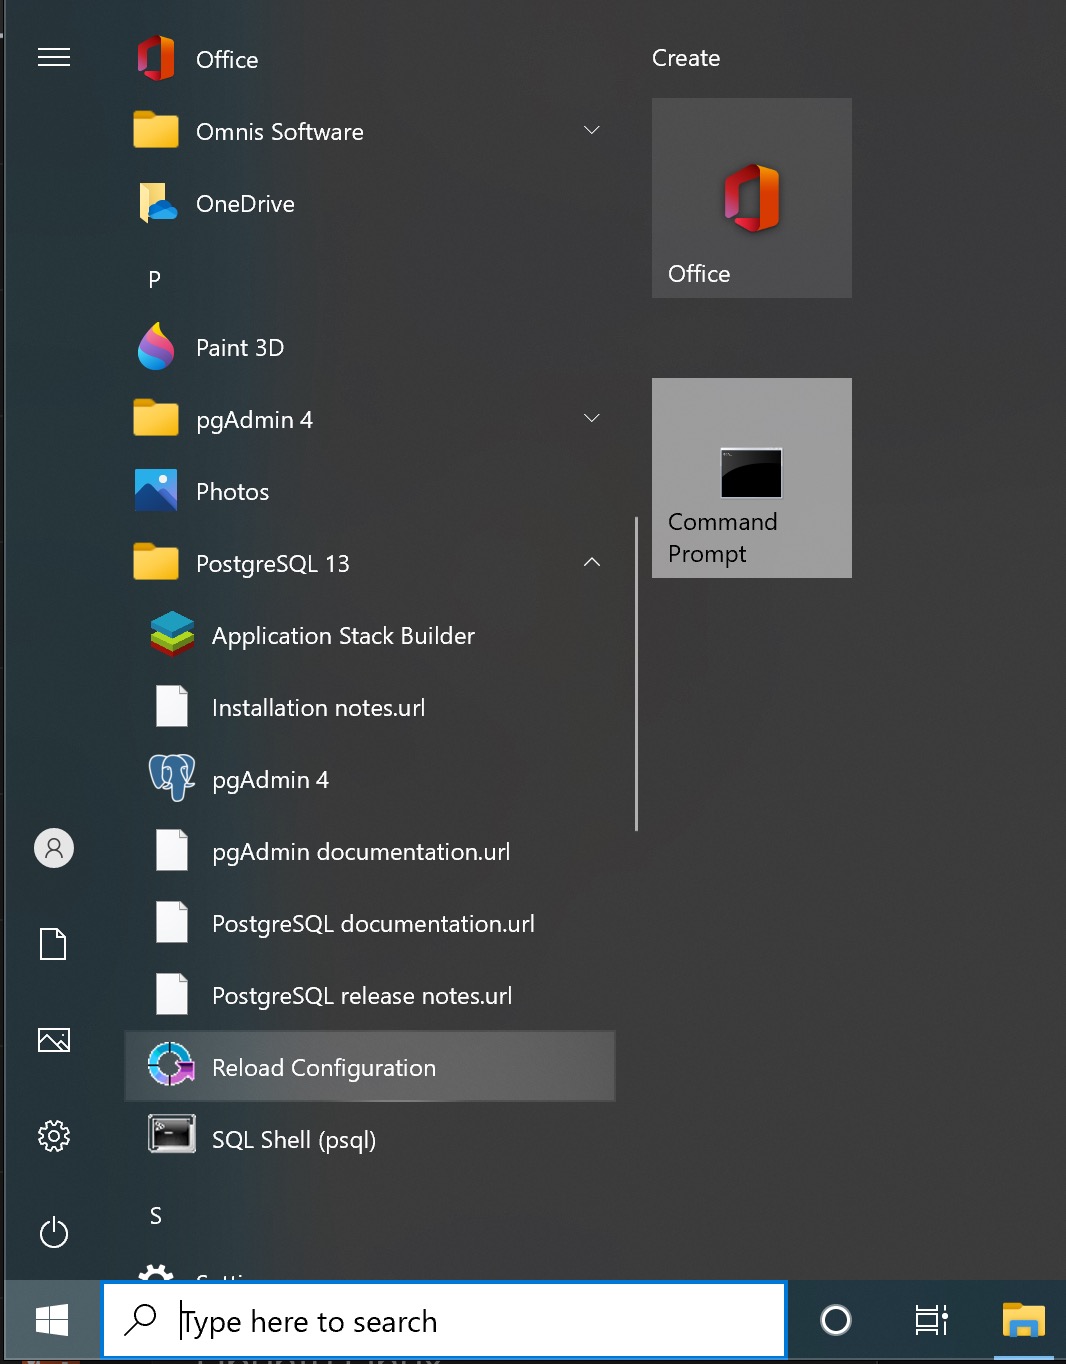 Reload or restart the postgres server to cause the new settings to be used.
All changes to the pg_hba.conf and many changes to postgresql.conf can be reloaded. That put the parameters in place without restarting the server, so any services (like web sales) that are running, continue to run. A reload is done by:
A few changes to the postgresql.conf file will require the postgres server to be completely restarted. This is usually noted in the comments beside the parameter. If this is required, the general steps are below. It is very rare that these parameters are changed after installation - so it might be best to ask support to help you with a complete server restart if you are not familiar:
|
Windows Self Signed TLS Certificate
Making your own Self Signed TLS Certificate
It is generally best to create your own certificate. It takes about 30 seconds to do, and has the advantage that the certificate is unique to your database.
Start a CMD prompt, type the following 3 commands, and then follow the instructions as prompted. You can copy/paste the commands.
|
cd C:\OpenSSL-Win32 cd bin openssl req -newkey rsa:4096 -nodes -keyout server.key -x509 -days 365 -out server.crt |
Answer all the questions you are asked and when done, find the files in the C:\OpenSSL-Win32\bin directory called:
- server.crt
- server.key
Using a supplied self Signed TLS Certificate
We have created a 4094 bit TLS certificate and included it with the installer. While it is better to create your own, if you need one fast to get started, you can use ours and create your own later (per the step above).
Go to the C:\BoxOffice folder and find the files called:
- server.crt
- server.key
Installing the server.crt and server.key Files
- Select both the server.crt and server.key files and right-click to COPY them
- Navigate to the postgres data directory which is C:\Program FIles\Postgres\x\data where 'x' is the version of PostgreSQL you have installed.
- Right-Click and PASTE them into the data directory
- You will need to restart the Postgres server for the changes to take effect
Step 4: Database Backups
|
Venues with databases on the AMS Cloud do not need to set up or manage backups - other than to request a special backup before running year end rollover |
Once the database is set up, you will need to establish a backup frequency that is appropriate for your venue.
There are two steps to configuring the backup:
- Use the System Preferences->Backup to setup the backup frequency within Theatre Manager. The TM Server backup process uses this setup to do the backups
- Configuring a TM Server to do backups and monitor them
From then on, backups occur automatically. If they do not, you will receive a message on login that a backup has not been run for the past 24 hours.
Postgres User Password
- Find the local 'postgres' user on the computer using the Windows Administrative tools an edit the user id. You can change the password the way you would normally change the password for any other user (and is dependant on your version of windows)
- If you change the service password, then you must also open the 'services' control panel and find the postgres service. Change the password there as well. To confirm that you got it right, please stop and start the postgres server. if it stops and starts, its safe to bet that the server will restart on the next reboot of the server.
Increasing Windows Performance
On Windows machines:
- Enable Windows Firewall to allow incoming on port 5432 for the database and turn off other non-essential ports. Alternatively, make sure that your IT personnel have opened the correct ports through the firewall between computers as per these firewall/router rules.
- Turn off auto-updates completely
- Windows Automatic Updates is now found in Services in Windows 10. -and-
- You may have to set the internet connection to metered as per this help page to really tell Microsoft that you don't wan updates, unless you want them.
These are something to be done manually and on a periodic scheduled basis. You do not want servers restarting in the middle of the night, nor do you want downloading to affect performance of your servers.
- Turn off:
- microsoft indexing for all directories and sub directories. by looking at the properties of the drive that database is running on
- And go to Services to find Windows Search and disable that.
- Disable any disk quota management on the disk drive
- turn off any virus scanning for ports and data directories used by postgres
NOTE: if using windows 10 pro, you need to permanently disable windows defender using one of the methods in the link. In win 10 Pro, use gpedit.msc to disable by group policy editor since windows 10 turns it back on later if you only temporarily disable it (Another stupid idea form Microsoft)
- Do not install active directory or join it to a domain. Only local access is required to this machine
- Turn off file sharing or any means that might allow a file to be added to the machine, other than via the postgres engine
- turn off any energy saving options
- do not use the machine for saving snapshots of files by turning off 'use shadow copies' on the appropriate drives. (This is set in the properties of the drive)
- set best performance options to maximize background performances.
Note: turn off any virus scanning against the database directory which is usually
C:\Program Files\PostgreSQL
or
D:\Program Files\PostgreSQL (if there are two drives)
Leaving any of those on will affect performance of the server for the database
Disable Defragmentation
- Click on the drive containing the database server
- Right click to get properties
- Click on the Tools tab
- Click on the 'optimize' button
- Look at the bottom to see if optimization is on (or off)
- The button to turn it on and off is on the lower right
- The current state is on the lower left

Disable Download of Updates and Auto Updating
Windows Automatic Updates is now found in Services in Windows 10.
How to locate:
- Open Control Panel and Administrative Tools
- Select Services
- In the Services window, scroll down to Windows Update and turn off the process.To turn it off, right-click on the process, click on Properties and select Disabled.
- Note: windows 10 sometimes listens to you, most times it does not, despite what you indicate in various settings and you may have to:
- prevent it from downloading updates
- which may involve doing some registry entries which could require you to gain control of some protected registry entries
- Windows 10 isn't pretty - you are better using 2012 R2 or some earlier version of windows like 8.1 if you must
Disable power saving on ethernet
- especially on workstations, and
- especially if you go take an extended coffee break or have a meeting.
We suggest disabling power management on the ethernet card.
- use instructions like this for windows 7 and 8
- Use instructions below for Windows 10 (they are very similar to windows 7)
- Open Control Panel
- select network and Internet
- Pick Network Connections. the screen should look like below
- click the network card
- right click and show properties
- click configure
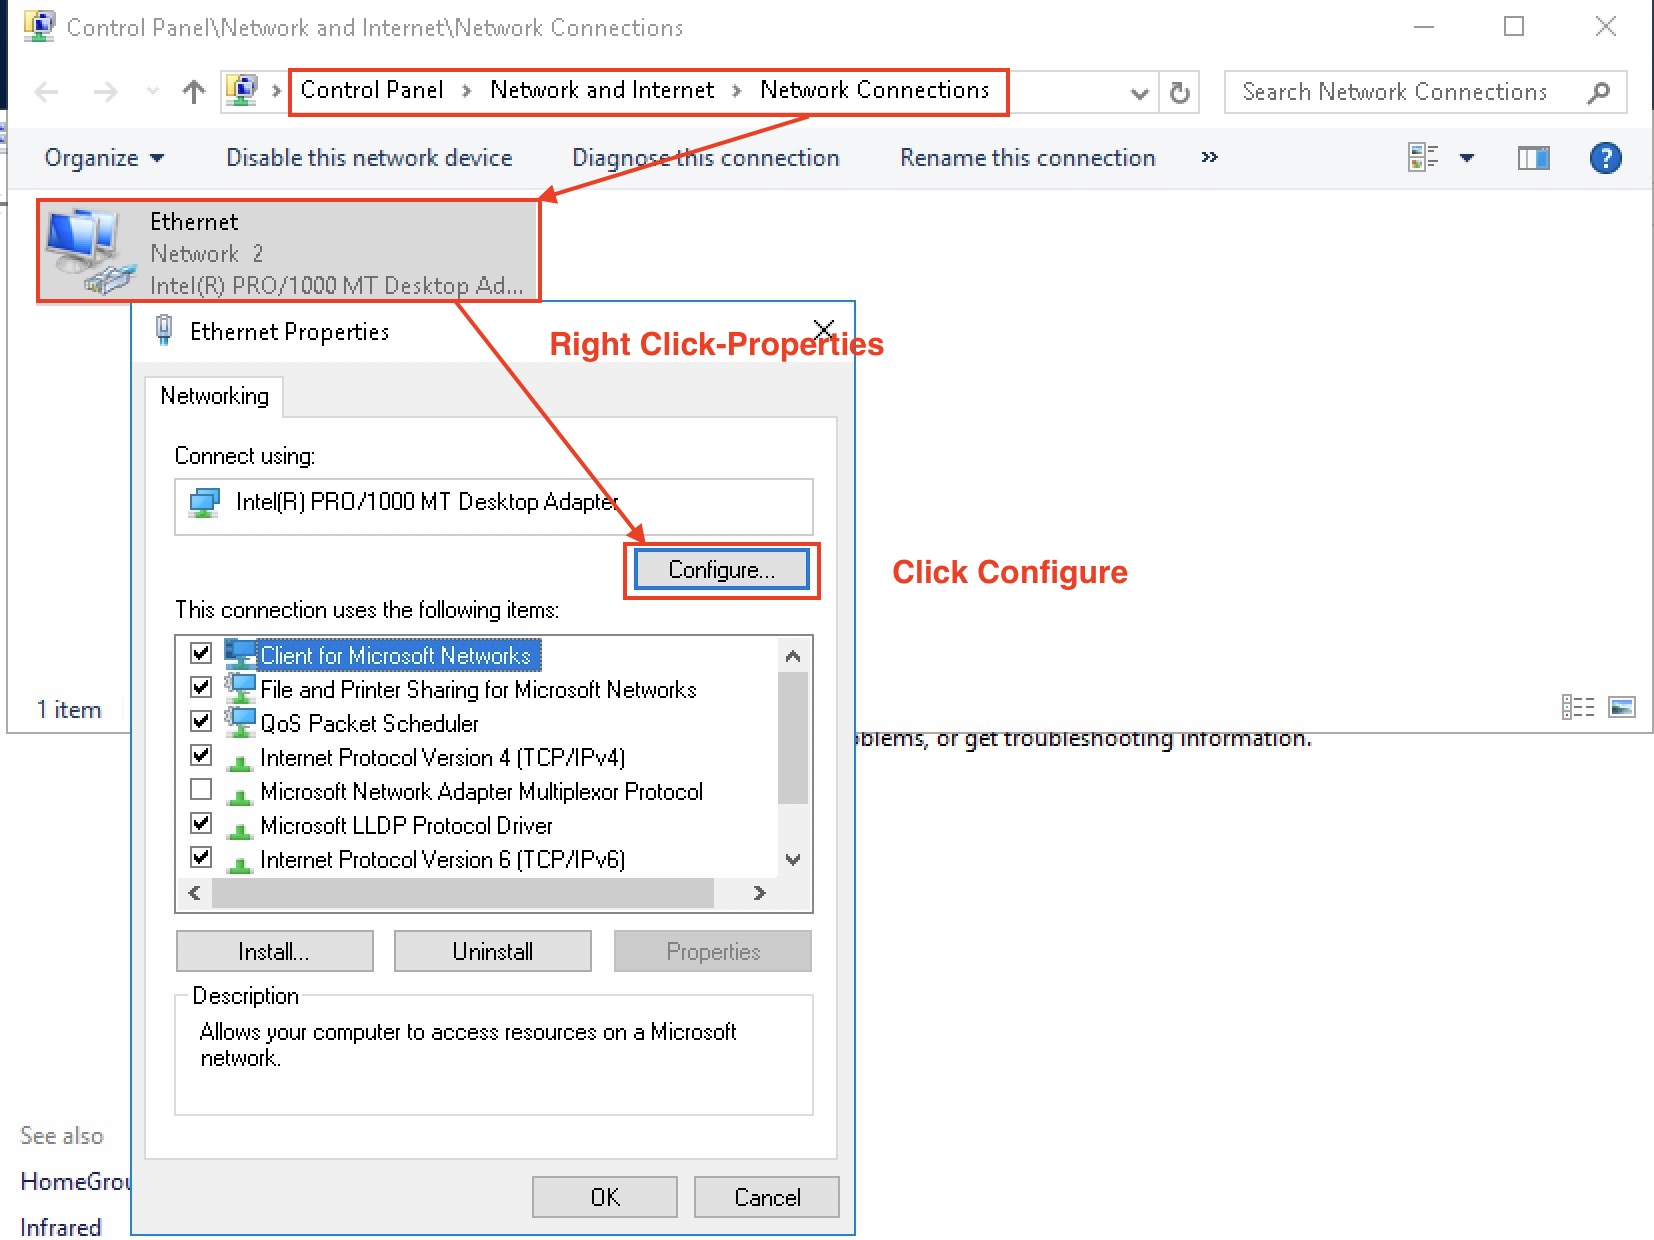
- click power management and uncheck the highlighted item per the image below
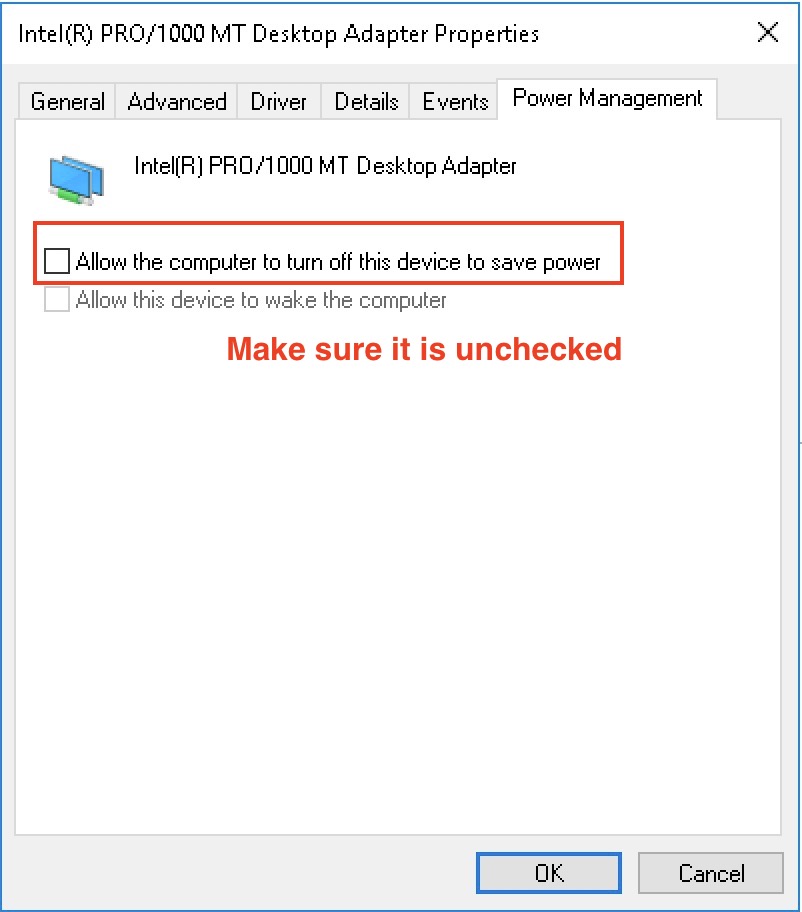
In addition, please make sure to disable power management except for monitors.
Making Windows Defender Manageable
- Using 2012R2 or 2016 server for server processes instead of Windows 10. 2012R2 server does what you tell it with Defender, windows 10 does not - it automatically turns itself back on unless you
- Set windows defender exclusion to all theatre manager folders on that machine -and/or-
- Turning the Defender policy off -or-
- Installing some other AV software that disables Defender and takes over. (we dislike this option - other AV software is much much worse)
- Make sure to turn off DEP on windows 10 for all but essential programs - it might affect TM server from starting on startup
Setting a Custom Power Plan
|
Make sure to also turn off power saving on your ethernet card on all servers and workstations. |
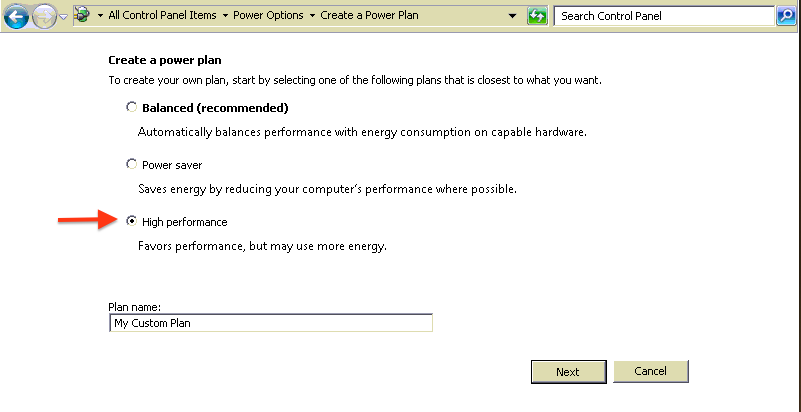
Create a custom Power Plan
- Open the control panel.
- Click Power Options.
- Click the Create a Power Plan option
- Select the bullet next to "High Performance"
- Click Next.
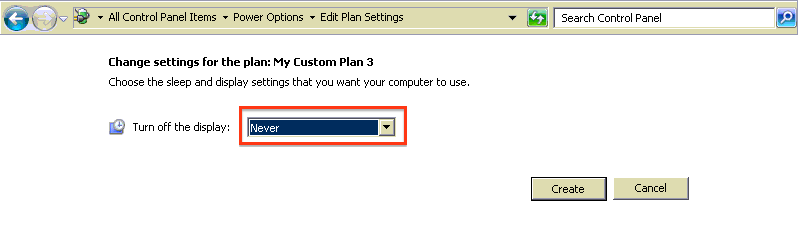
- Change the Display setting to "Never"
- Click Create.
Turning Off Indexing in Windows
Using Control Panel
You can usually turn of most indexing by clicking on the properties of the device. However, it seems windows 10 doesn't fully listen, so it may be best to approach this task via the control panel.
- Open Control Panels
- Look for where things are indexed
- Follow these instructions to disable indexing or something like the intent of the instructions.
Disabling indexing of disk from C drive properties
- Double-click on My Computer (or Computer).
- Right-click on C: drive (or the drive letter that Postgres is installed under).
- Select Properties from the popup context menu.
- Click the General tab.
- Remove the check in the "Allow files on this drive to have contents indexed in addition to file properties" box.
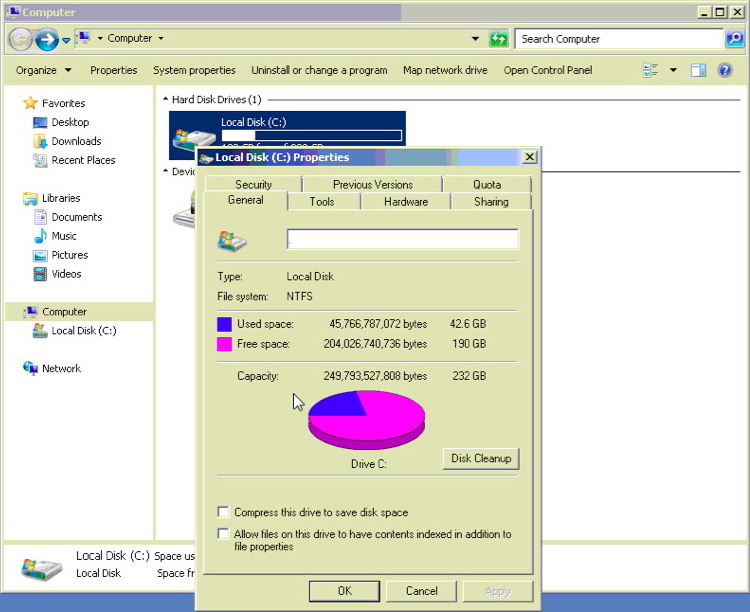
- Click Apply.
It may take several minutes for Indexing to complete. If a message pops up indicating Administrator permissions are required click Ok. If the current user is not the Administrator a prompt for the Administrator password will appear. Enter the password and continue. If a prompt appears indicating select folders cannot be altered it may be they are already open. Click Ignore All and let the process continue.
- Click OK.
- Reboot the computer.
Repeat this setting on the Web Listener computer, and the Apache server as well
Turning Off Disk Quota Management
- Double-click on My Computer (or Computer).
- Right-click on C: drive (or the drive letter that Postgres is installed under).
- Select Properties from the popup context menu.
- Click the Quota tab.
- Remove the check in the "Enable quota management" box.
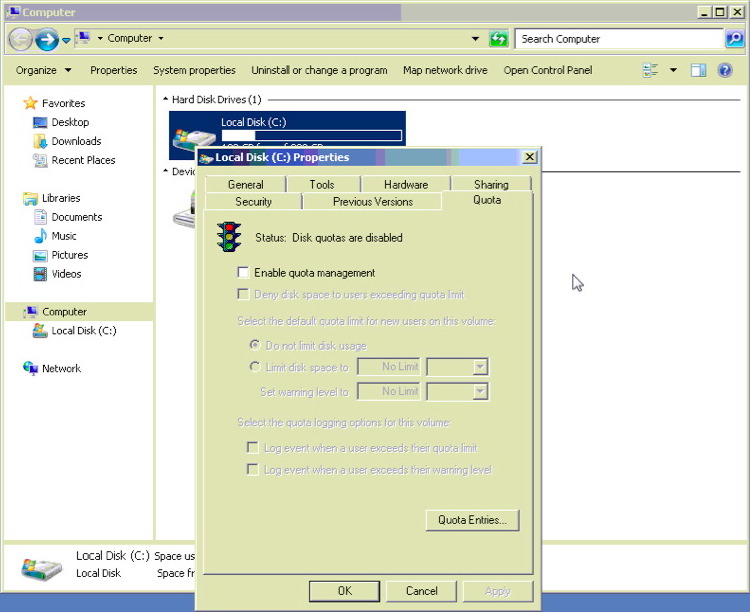
- Click Apply.
- Click OK.
- Reboot the computer.
Turning Off Windows Previous Versions
To check if the setting is turned on:
- Double-click on My Computer (or Computer).
- Right-click on C: drive (or the drive letter that Postgres is installed under).
- Select Properties from the popup context menu.
- Click the Previous Versions tab.
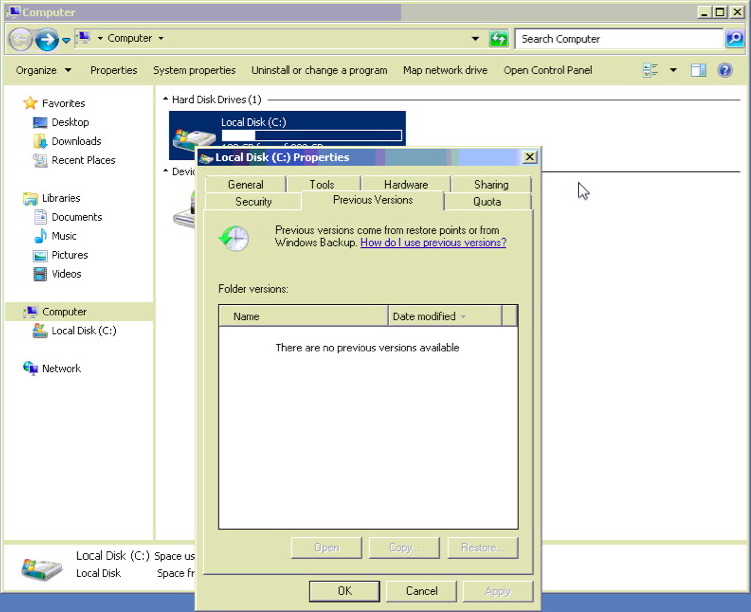
If Folder Versions reads "There are no previous versions available" this option is turned off. However, if backups are listed with date and time stamps, the feature is enabled and needs to be turned off.
- Click Start >> Control Panel.
- Click System in the Control Panel window.
- Click System Protection in the left column.
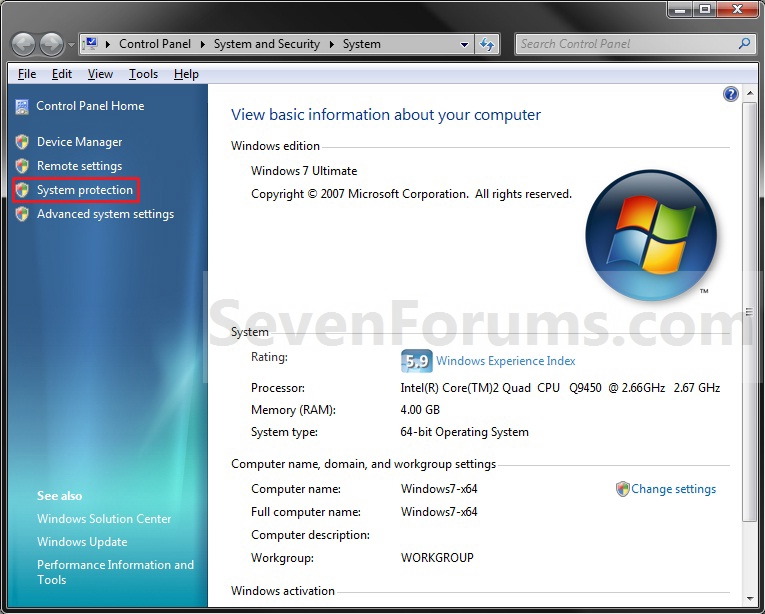
- Select the drive Postgres is installed on.
- Click the Configure button.
- Move the bullet to "Turn off system protection".
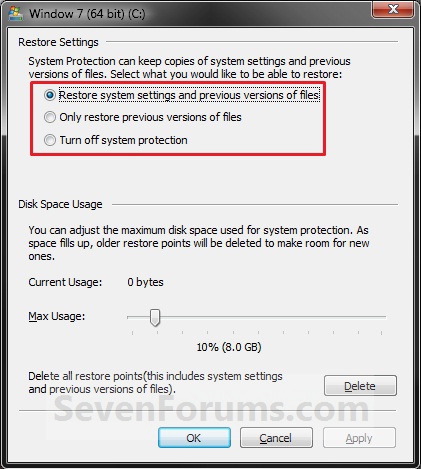
- Click Apply.
- Click OK.
- Reboot the computer.
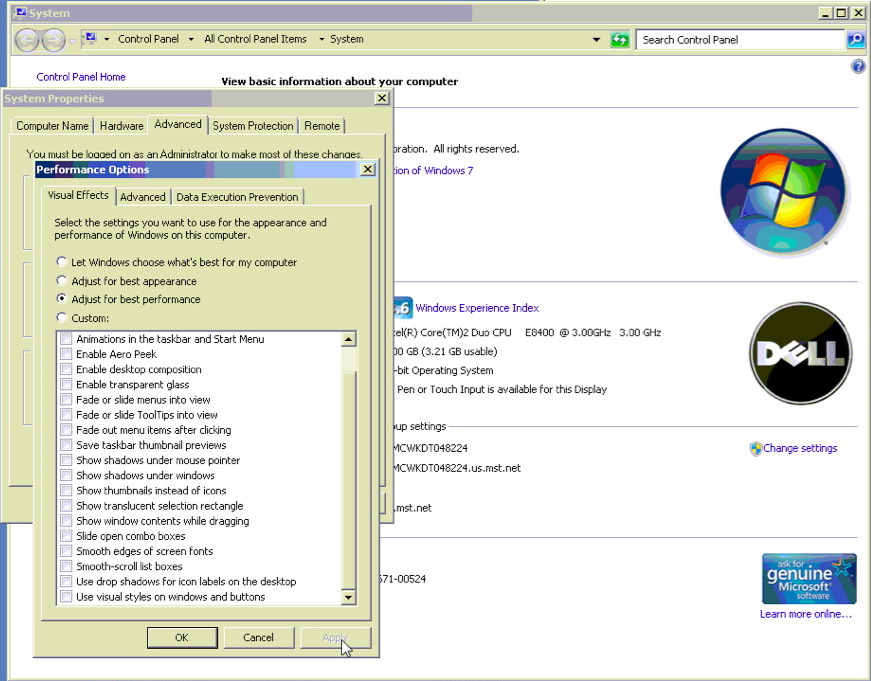
Setting Best Performance Options
- Right-click on My Computer (or Computer).
- Select Properties from the popup context menu.
- Double-click on System Properties in the left column.
- Select the Advanced tab.
- Move the bullet to "Adjust for best performance".
- Click Apply.
- Click OK.
- Reboot the computer.
Turning Off UAC for Windows
- Open the control panel.
- Click User Accounts.
- Click the Change Users Account Control Settings link under Action Center
- Move the slider down to Never notify.
- Click Ok.