Selling a Course (helpful hints)
Courses created as individual events must be bought separately, just like any other event.
| Quick Reference information on buying a Ticket, click on the icon to launch the pdf or screencast. |
Quick Reference Guide |
Cheatsheet |
Flash Screencast |
MP3 Screencast |


To sell a course to a patron, you perform the following steps:
- Click the Patron
 button in the main Theatre Manager toolbar / ribbon bar.
The Contact List window opens.
- Find the patron you are buying the course for in the contact list.
Single Click on the patron in the list to highlight. For more information on finding patrons click here.
- Open the patron window and click the Tickets
 button in the Tickets tab.
The Order Window opens.
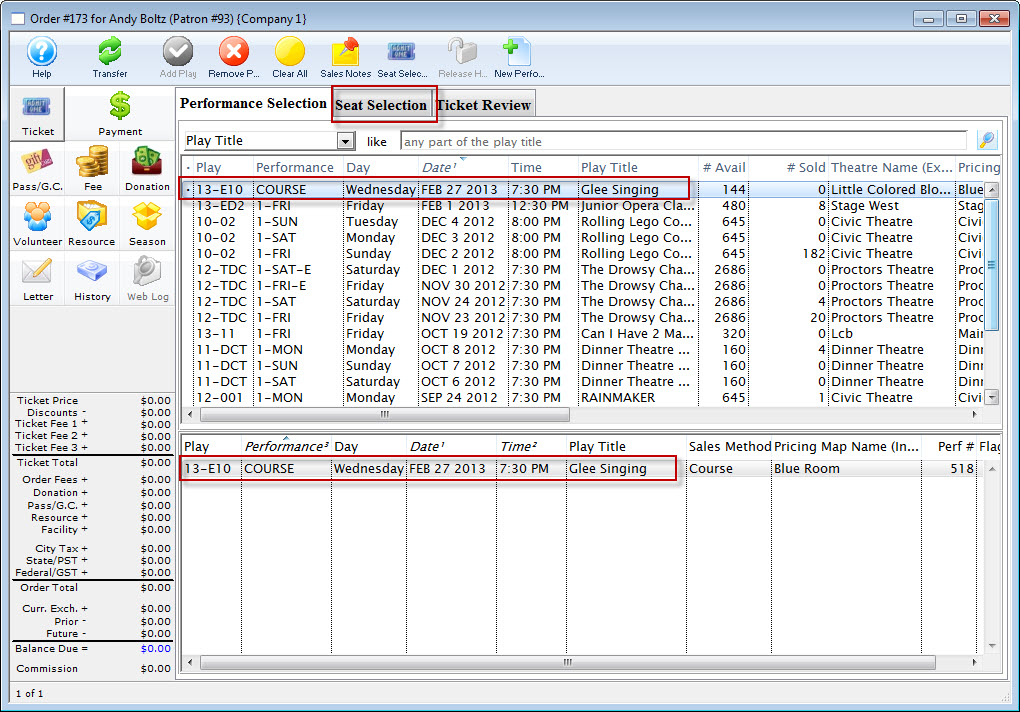
- Select the course(s) the patron would like to buy tickets for.
Click here to learn how to search for performances.
To select a single course double click on it.
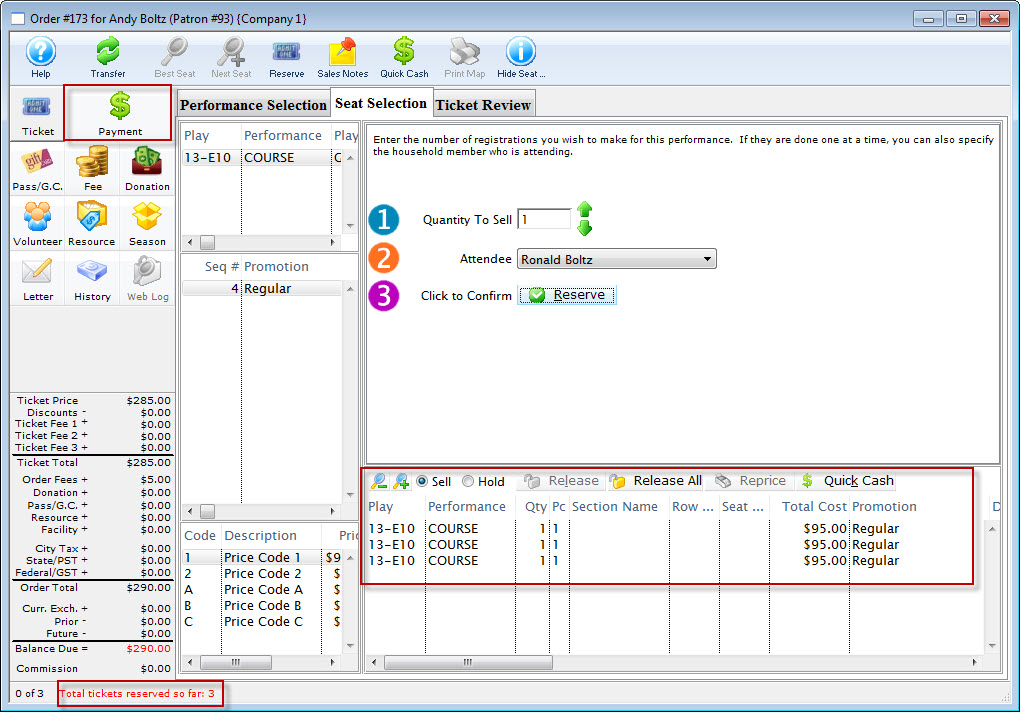
- Click the Seat Selection tab.
The Seat Selection window opens.
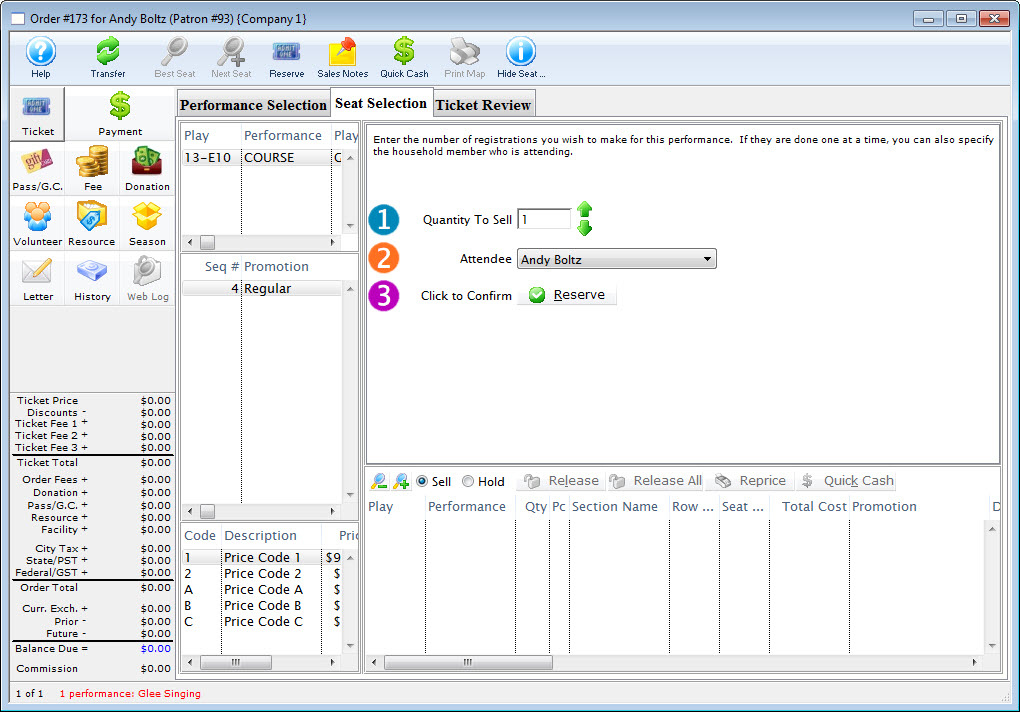
The course registration window to allows selection of any household member as the participant in the course rather than having to sell the course and make the change in the main patron ticket list. In a household with one or more parents and one or more children, this should be a convenient shortcut.
- Enter the Quantity to sell as 1.
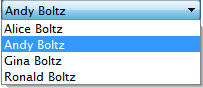
- For Attendee, use the drop down list to select the appropriate attendee.
- Click the Reserve
 button.
To add other Attendees, you:
- Enter the Quantity to sell as 1.
- For Attendee, use the drop down list to select the appropriate attendee.
- Click the Reserve button.
Continue until you have selected all the Attendees.
- When you have completed adding attendees, click the Payment
 button.
The Order Payment window opens.
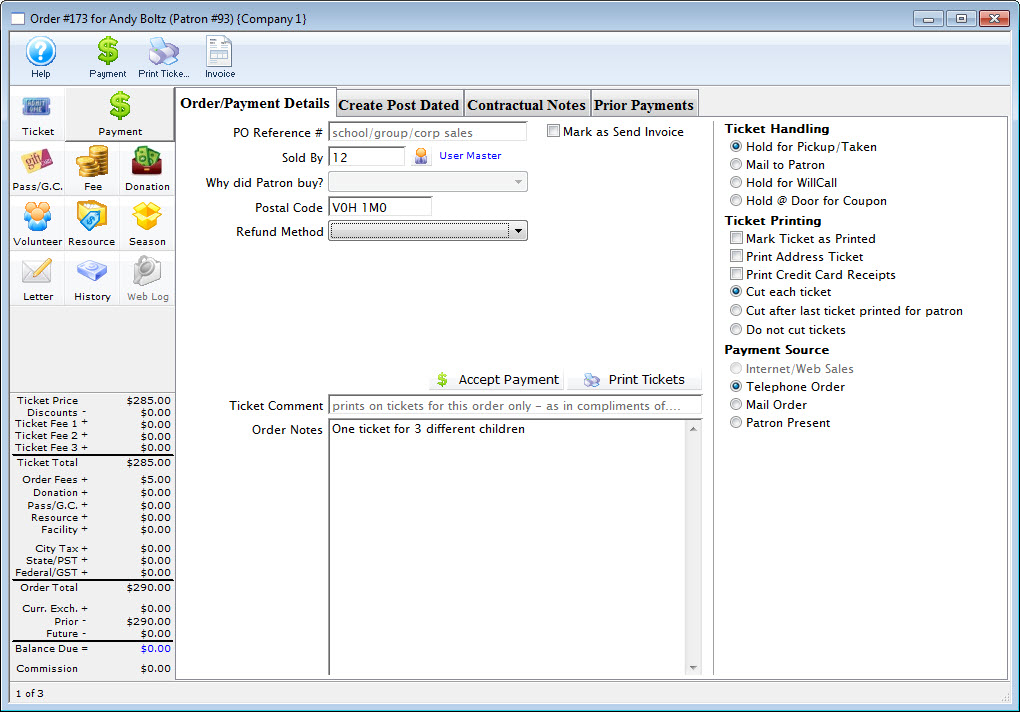
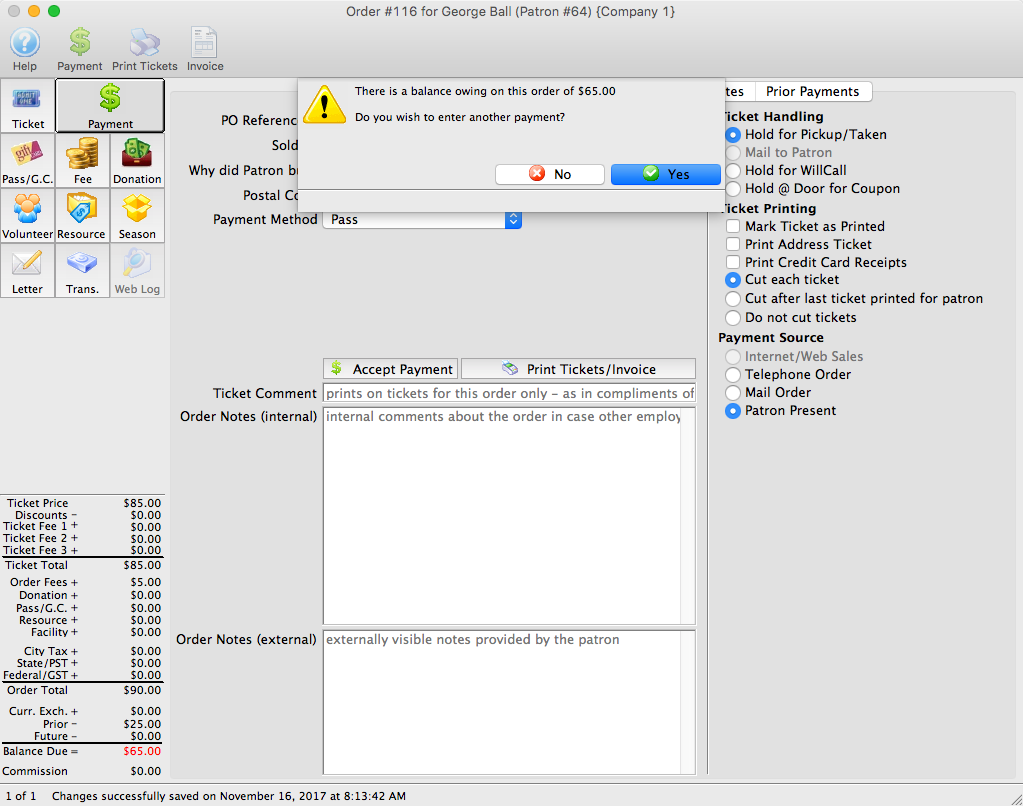
- Make the payment.
The ticket tab of the patron window displays the courses purchased for the household member.

Gifting Tickets and Courses
You can "gift" tickets to other household patrons or to unrelated patrons in Theatre Manager. This is especially useful for courses where parents frequently purchase classes for their child or children to attend.
Financial data remains attached to the purchaser's record, while the ticket is transferred to the receiver's account. The receiver is listed as the attendee to the event.
For more information about gifting tickets, click here.
Refunding a Partial Amount for a Course
- The patron could drop out and want a refund
- You could cancel it midsession because the instructor needed an extended leave
 |
Once the course has commenced, completely refunding it means you lose knowledge that the patron started the course.
Instead, we want to create a way to retain attendance info, yet refund all or part of the tuition. |
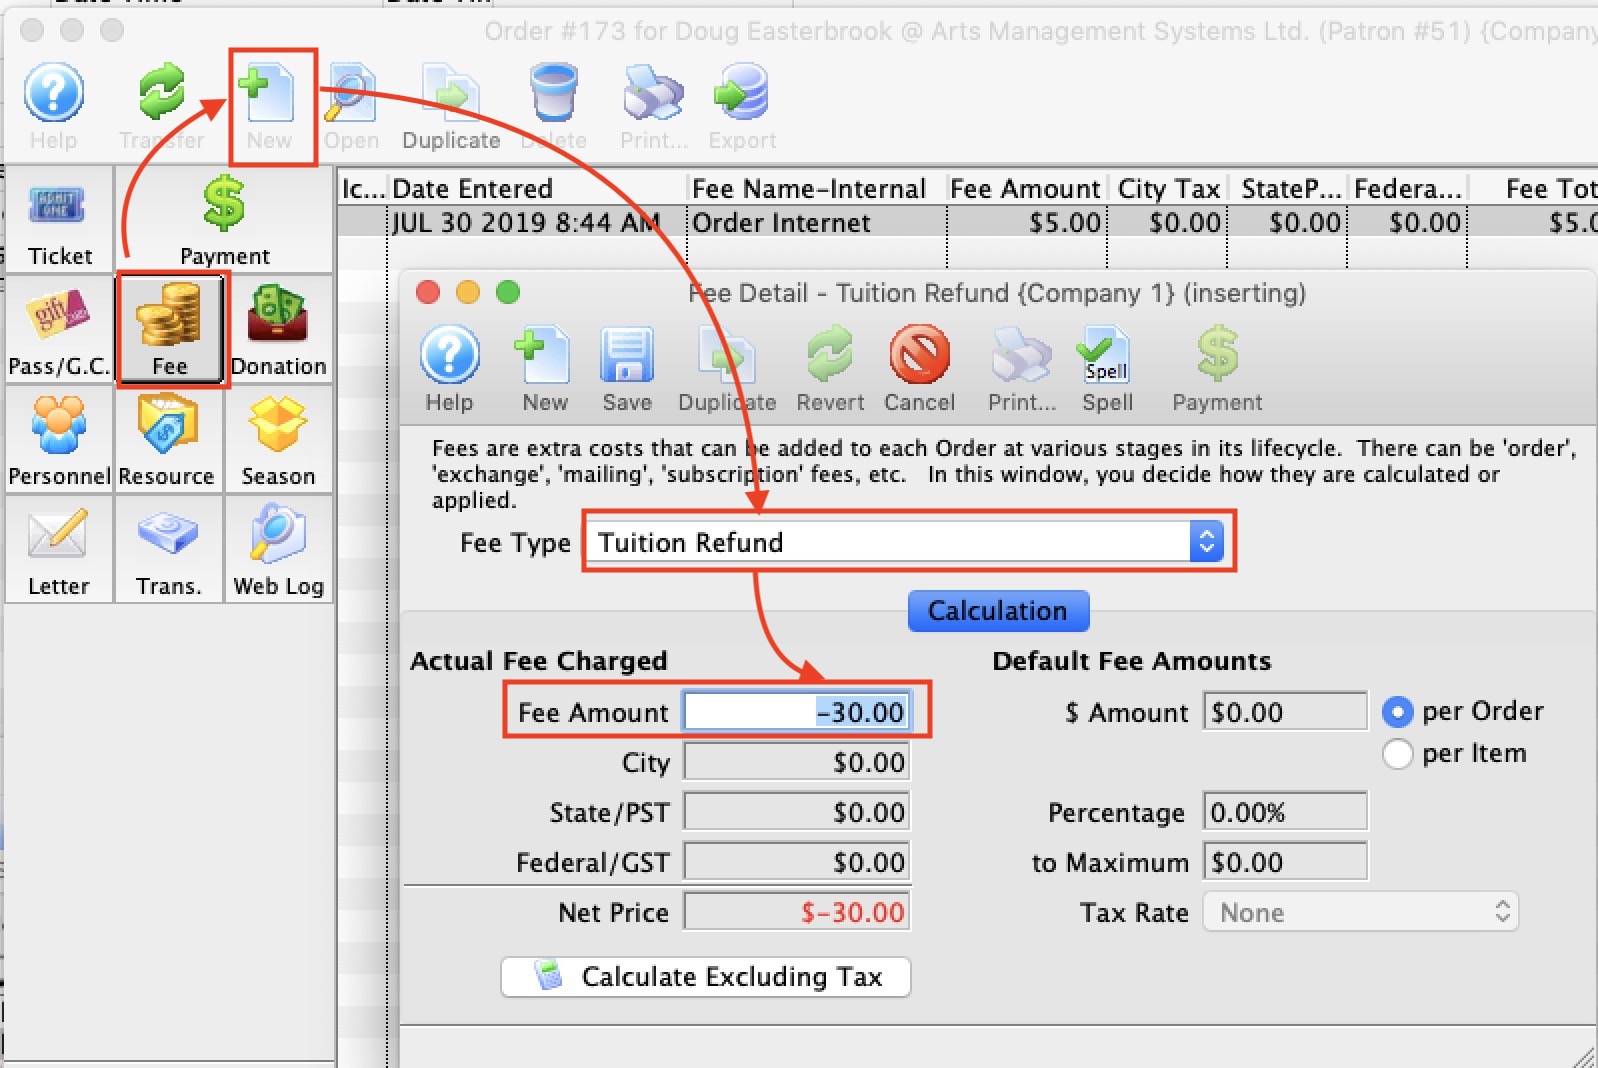
Setup of a Fee to Refunding part of the Tuition
The first step is to create a new ticket fee that accepts negative values and make sure the employee permission is set if the refund amount is variable.
|
Note: when setting up the fee, make sure to talk to your accountant about the proper account for tracking purposes. |
Steps to Refund part of the Course Cost
- Find the ticket for the course you want to refund tuition to
- highlight it in the ticket list
- Click the Tickets button at the bottom left of the patron screen
- Pick Add tickets to order - even though we will not add tickets to the order, this sets us up to merely modify it
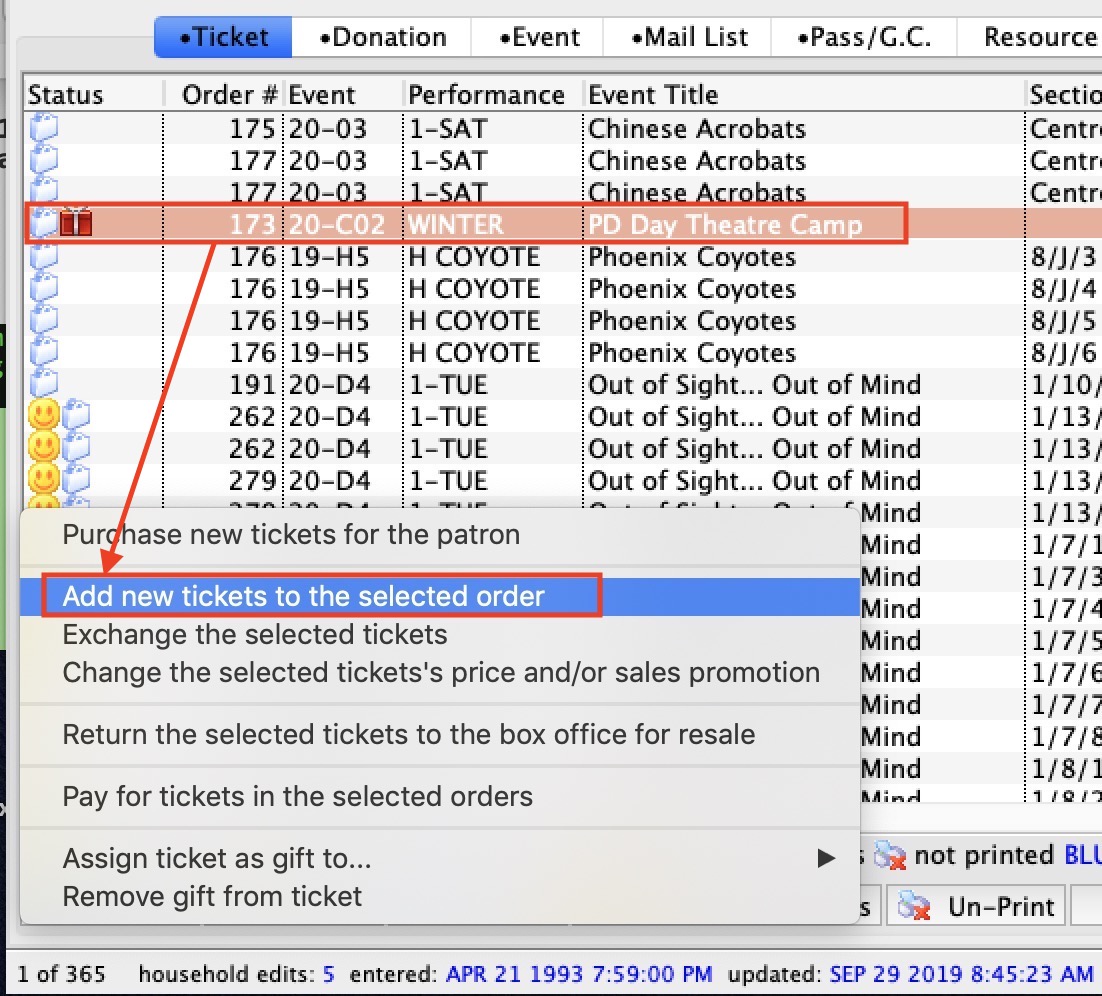
- On the order window
- Click the Fees Button
- Click the New button to add a new fee
- Select the fee called Tuition Refund
- Enter the amount amount you want to refund tuition by
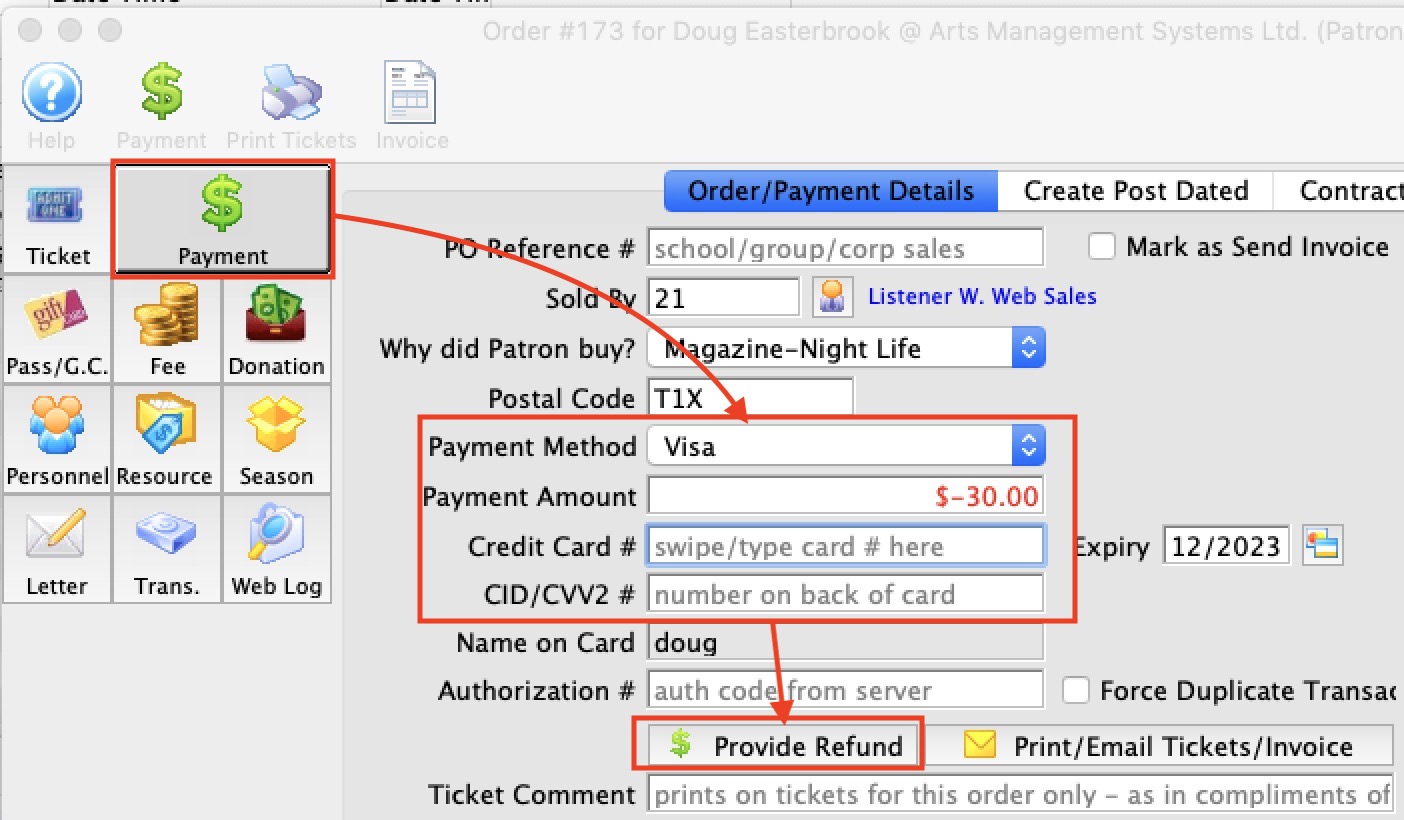
- Click the Payments Button
- Enter the refund method
- The amount to refund should be the same as the negative fee you added
- Enter card details, if refunding by card
- Click Refund Payment
Scholarships for Courses/Classes
|
"Membership" is a broad term meaning "Gift Certificates," "Flex Passes," "Vouchers," "Other Income" or a variety of other forms. Since the name of the field is customizable, some organizations may retain the term "Membership," while others change it to reflect their own terminology such as "GC/Pass," "Gift Certs." or even "Other Income." The nomenclature in your database may be different than "memberships." |
Creating the Scholarship Pass
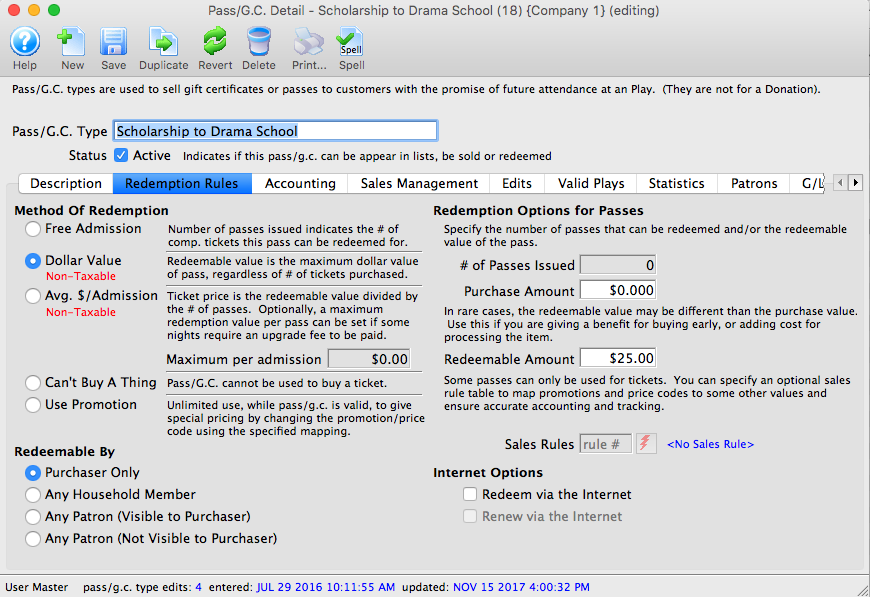
A Scholarship Pass can be created new 'Dollar Value" pass using the following parameters:
- On the Redemption Rules tab:
- Choose "Dollar Value" as the redemption method.
- Make the pass Redeemable by "Purchaser Only"
- Set the Purchase Amount as $0.00
- Set the Redeemable Amount to any value that scholarships are typically offered (this amount can be edited when the scholarship is issued to the student).
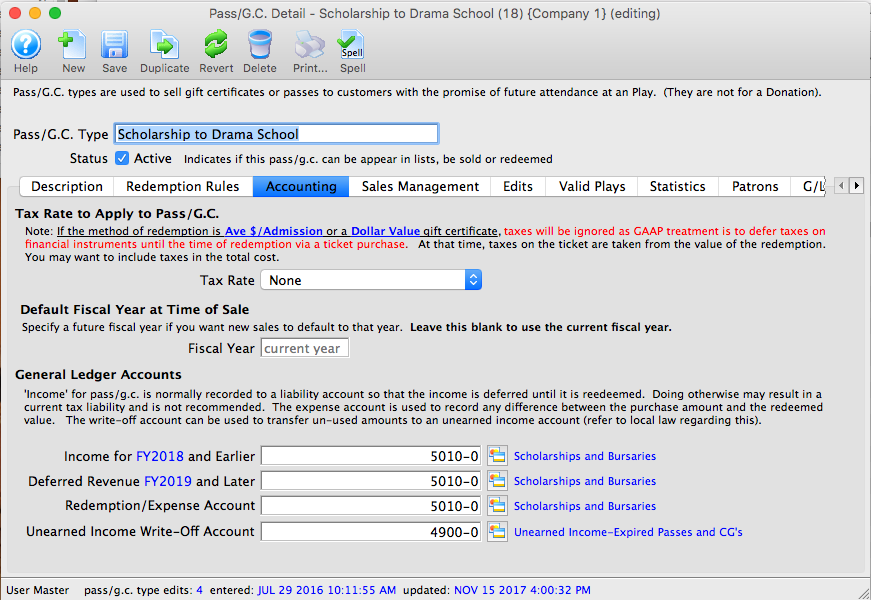
- On the Accounting tab:
- Set the Tax Rate to "None"
- Use a General Ledger Account number that represents an Expense for Scholarships for Income, Deferred Revenue and Redemption/Expense accounts. Use a standard income account for any Unearned Income/Write Off funds.
- On the Sales Management tab:
- In the Allow pass/gc to be Purchased section, check the box for "Via pass/gc tab on patron screen" only.
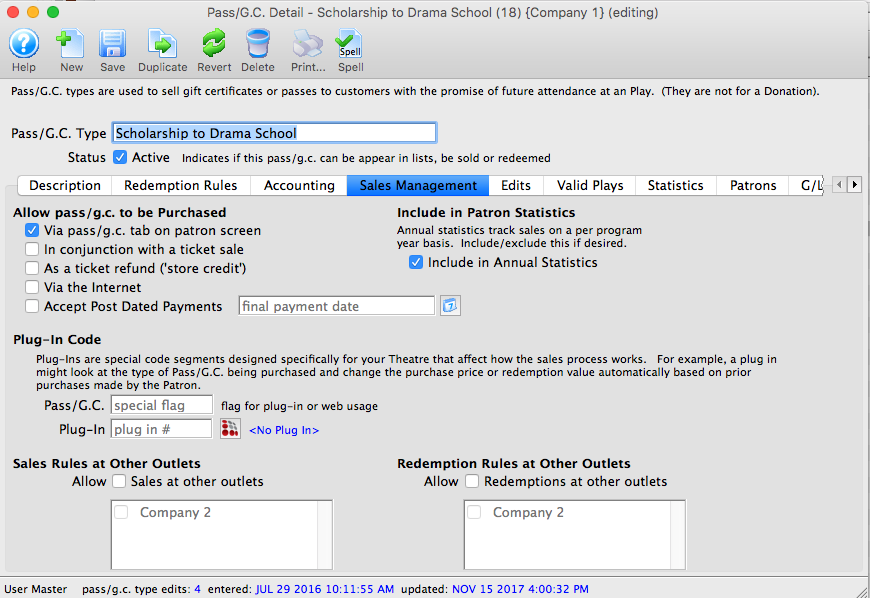
- In the Allow pass/gc to be Purchased section, check the box for "Via pass/gc tab on patron screen" only.
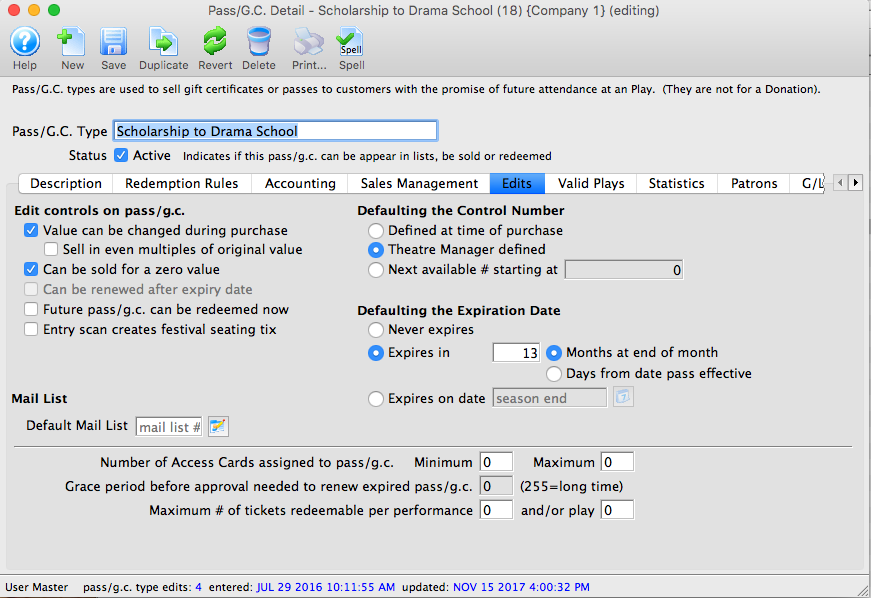
- On the Edits tab:
- Check the box for "Value can be changed during purchase"
- Check the box for "Can be sold for a zero value"
- In the Defaulting the Control Number section, choose "Theatre Manager defined"
- In the Defaulting the Expiration Date, choose "Expires on Date" and use the last date the pass is valid (very likely the end of the class).
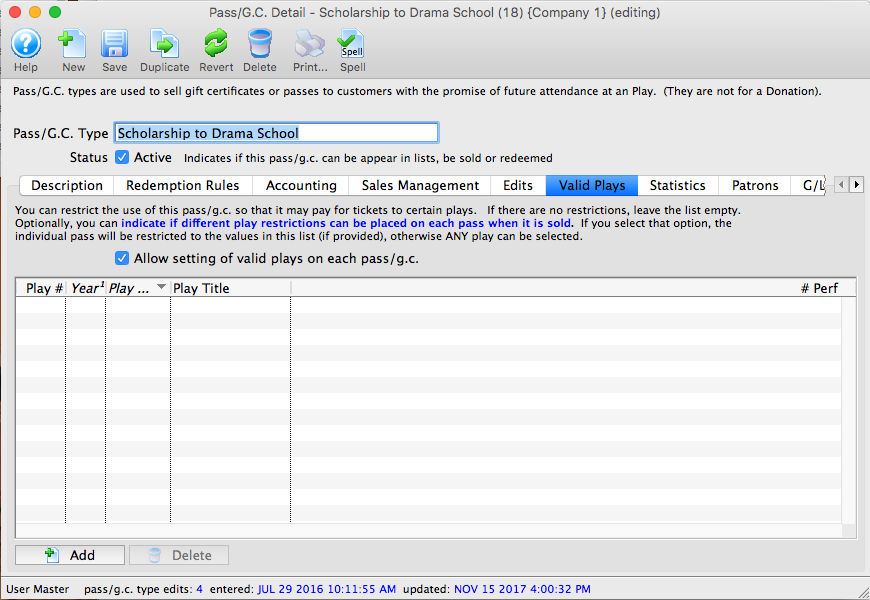
- On the Valid Plays tab:
- Check the box that says "Allow setting of valid plays on each pass/gc"
- Do not add any events to the listing at the bottom of the screen.
Awarding the scholarship to the student
- Locate the Patron Record for the student who is to receive the scholarship
- Select the Pass/GC tab and click the BUY button
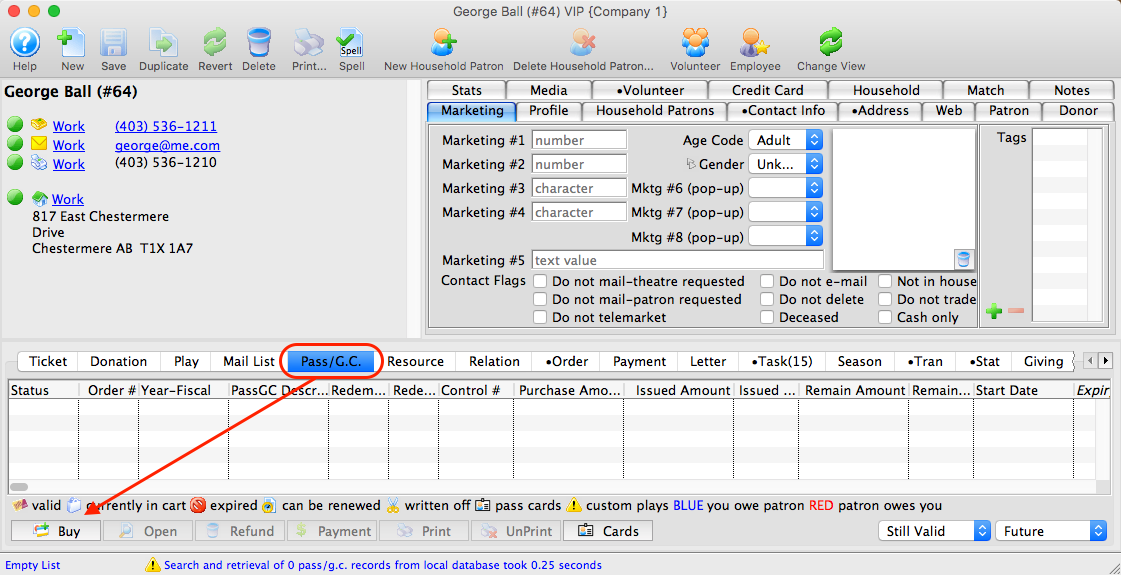
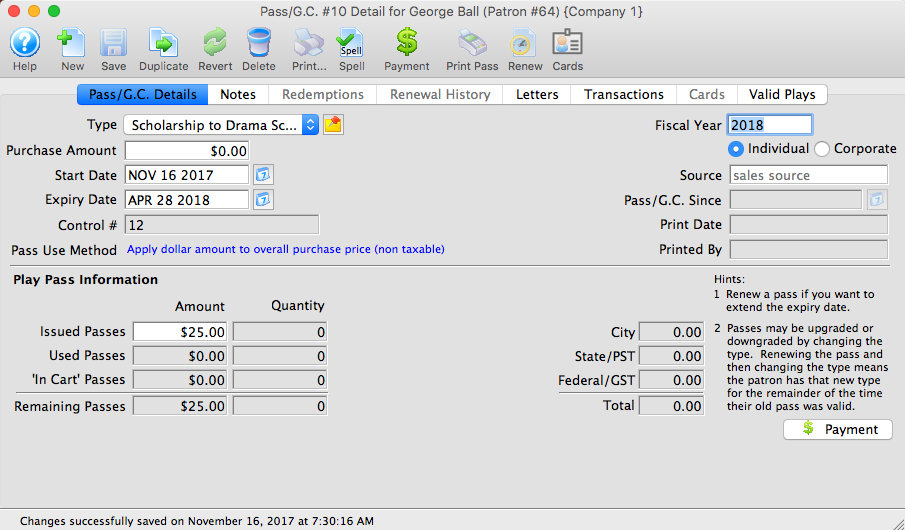
- Sell the student a new Scholarship.
- Leave the Purchase Amount as $0.00
- Edit the Issued Passes Amount to the value of the Scholarship desired
- Click Save
- Select the Valid Plays/Events tab
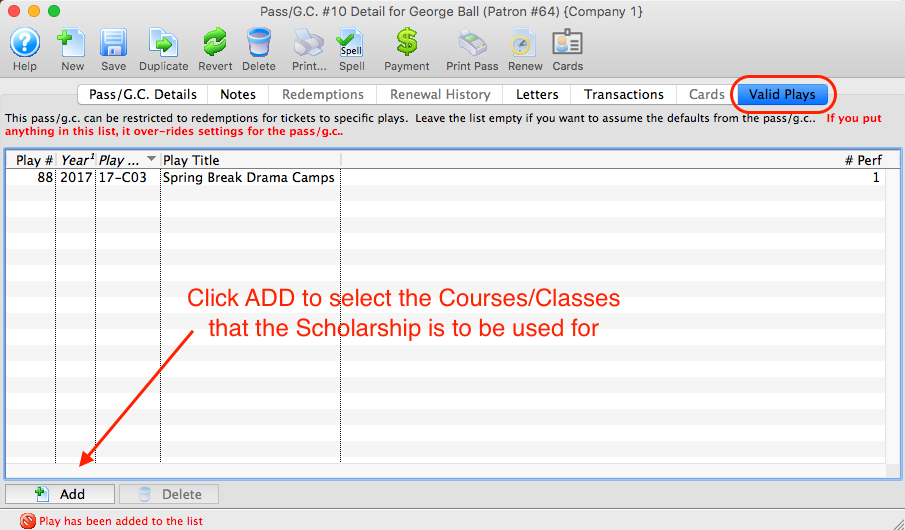
- Click the ADD button
- Select the Class/Course the scholarship is to be awarded for
Applying the scholarship to the class
- Sell the student a class
- When processing the payment for the class, choose PASS as the first payment method
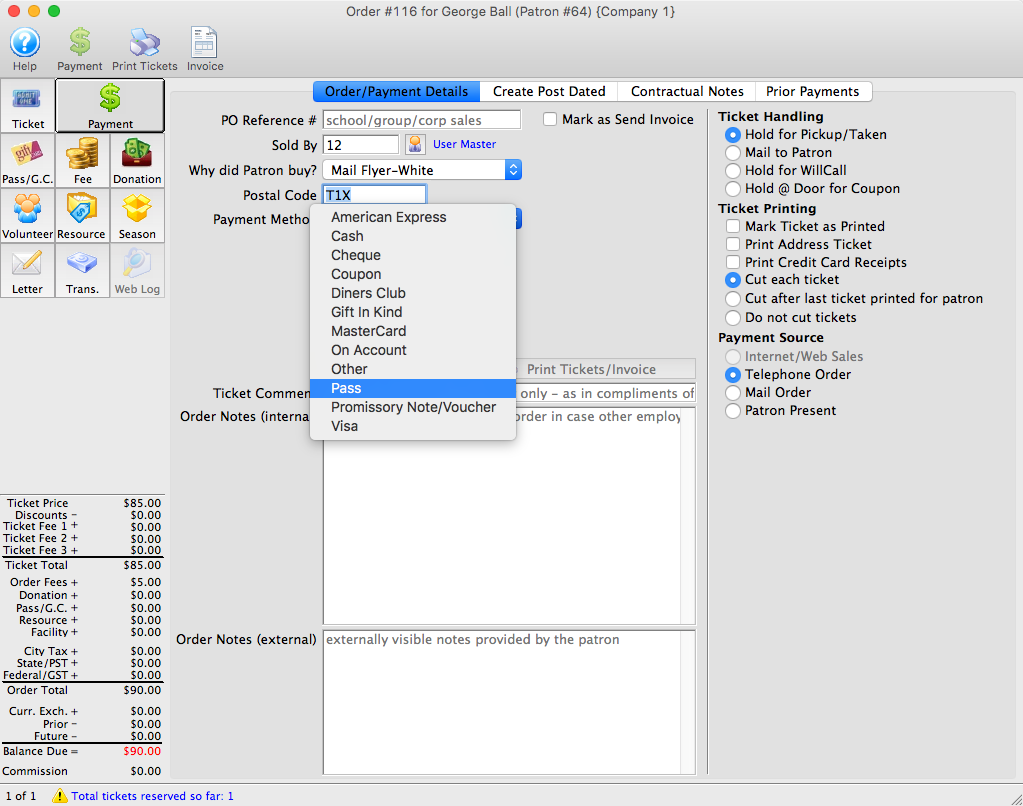
- Locate and apply the Scholarship pass to the Order
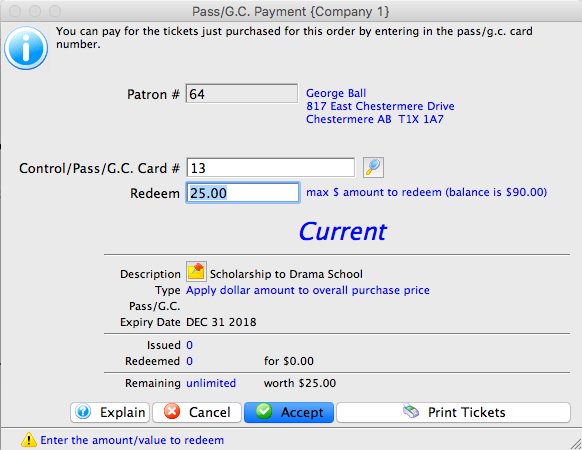
- Pay any remaining balance using the Payment Method tendered by the Purchaser.