Map Differences
Map Differences
The graphic format for Pricing Maps is based on a single SVG map for all platforms. in other words, build the map once on one machine and it can be used everywhere for:
- Macintosh computers
- Windows computers
- Web sales, including pick your own seats
 |
Ancient/historical SVG maps created before 2019 may have visual anomalies. Recreating the map in Theatre Manager may resolve this. |
|
If you see a visual anomoly in the theatre maps, please let us know and we can help show you how to rebuild them or you can follow the instructions provided. |
Adjusting/Fixing the map
Adjusting/Fixing the map
NOTE: This only works on TM 64 bit versions to adjust map size.
|
Adjusting the dimensions of the map's background display only works on 64 bit versions of Theatre Manager that have an SVG map already in place for pick-your-own seats. |
| Step 1 |
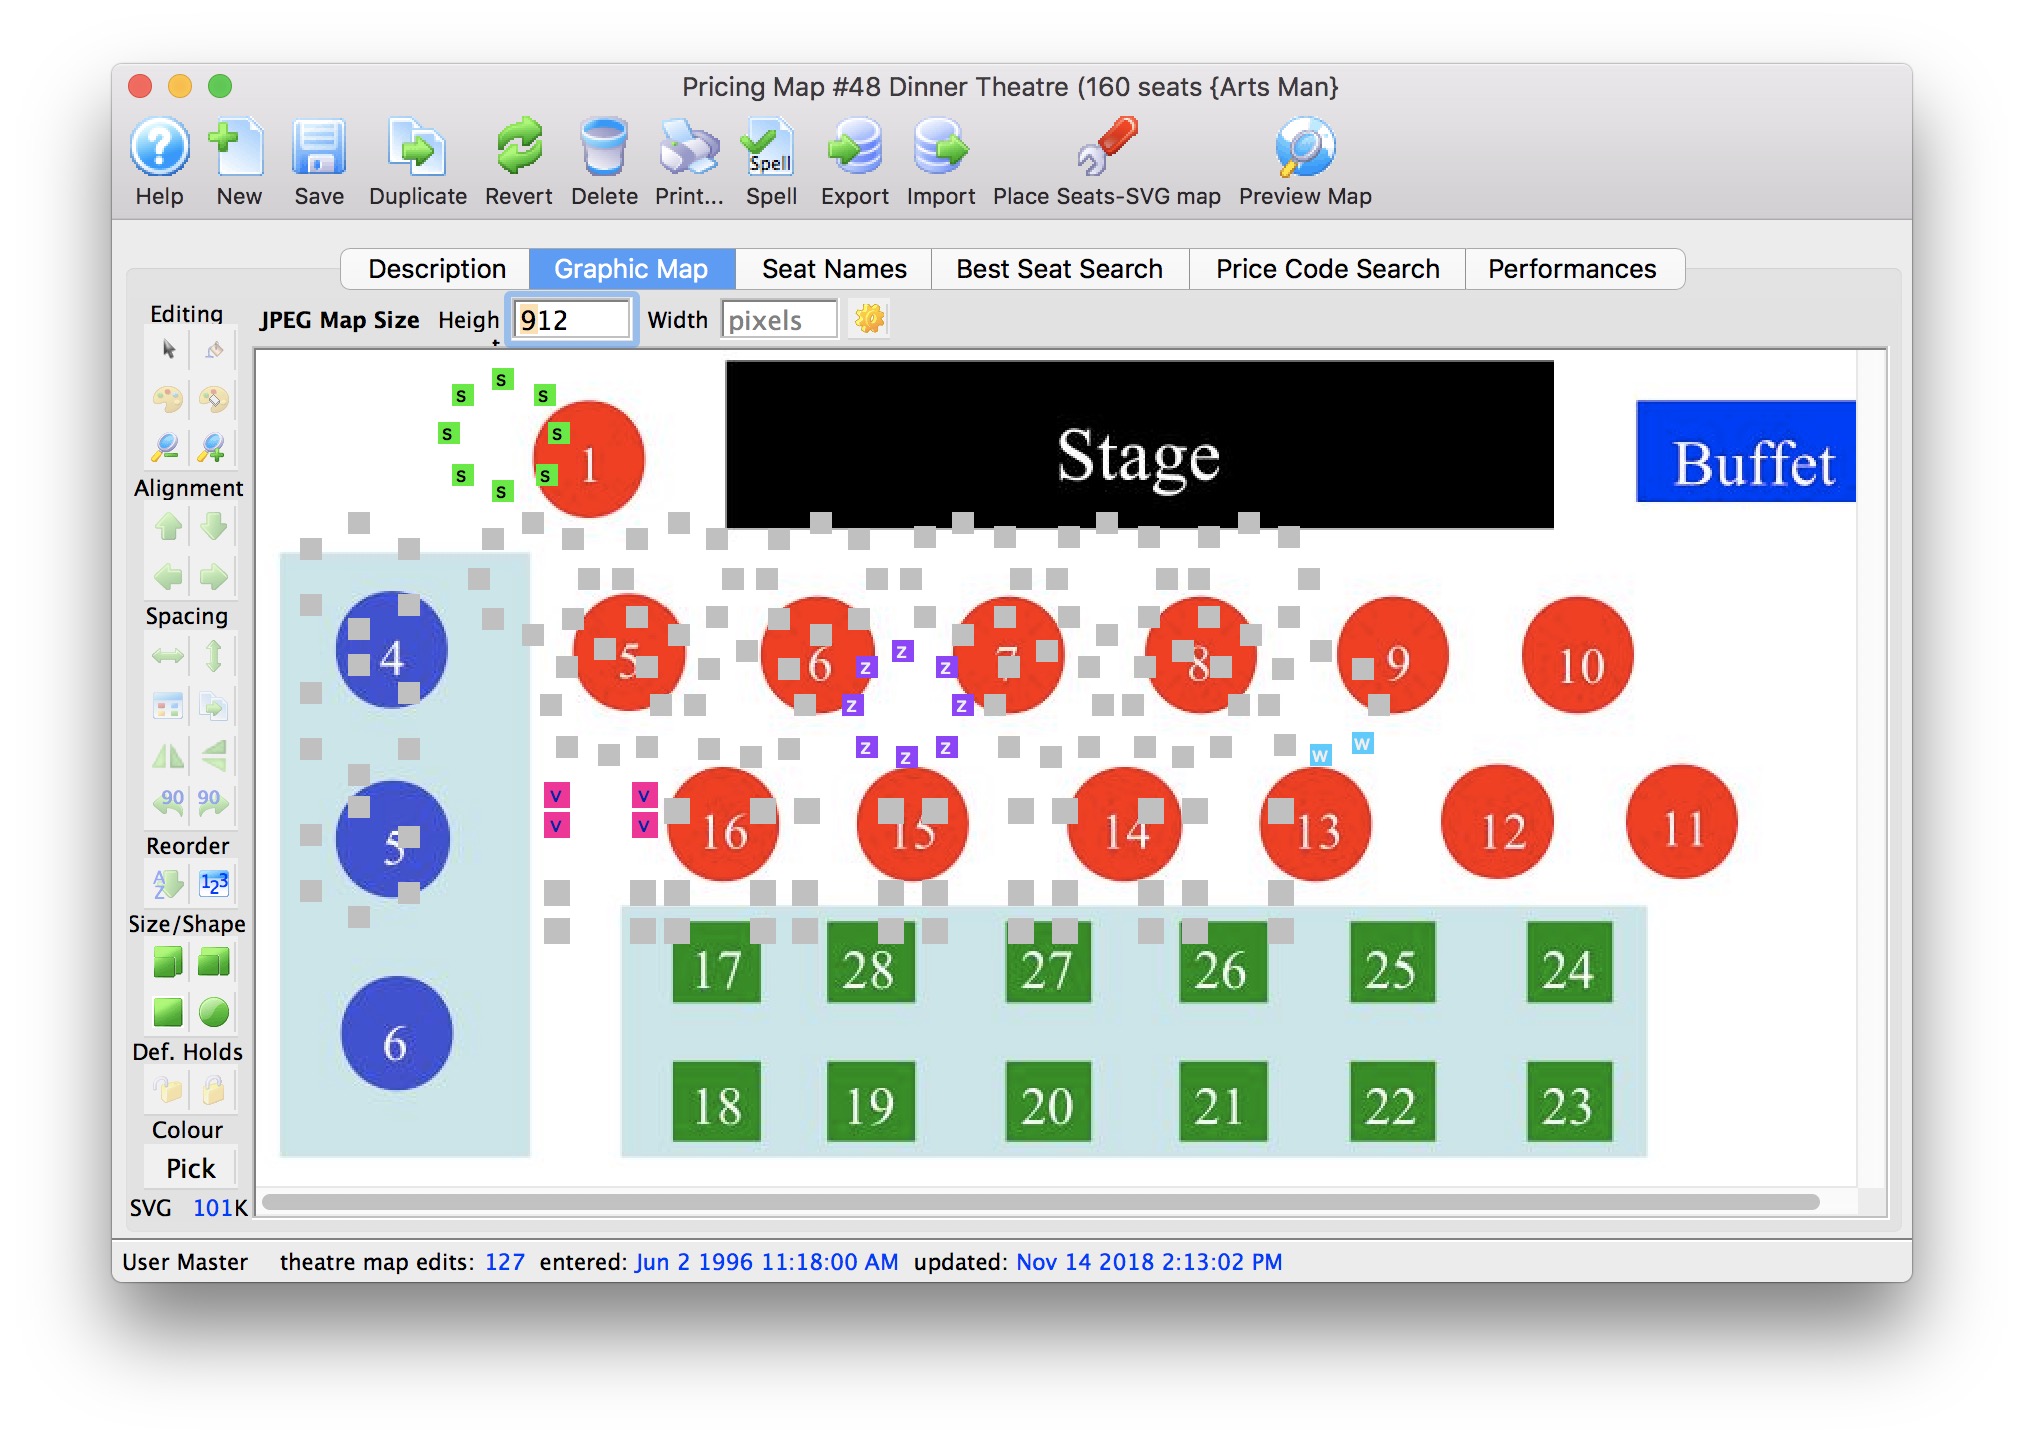 When the maps are showing seats that are offset as per the image to the right, there are five general steps to take as per below. These steps should work if you already have enabled pick your own seats - which means you have previously created the SVG map for this venue. If you see no picture, try step 2 & 3 once. if you still see no picture, then you'll need to drop in your SVG image as if you are making the map from scratch. Click the Graphic Map tab |
| Step 2 | 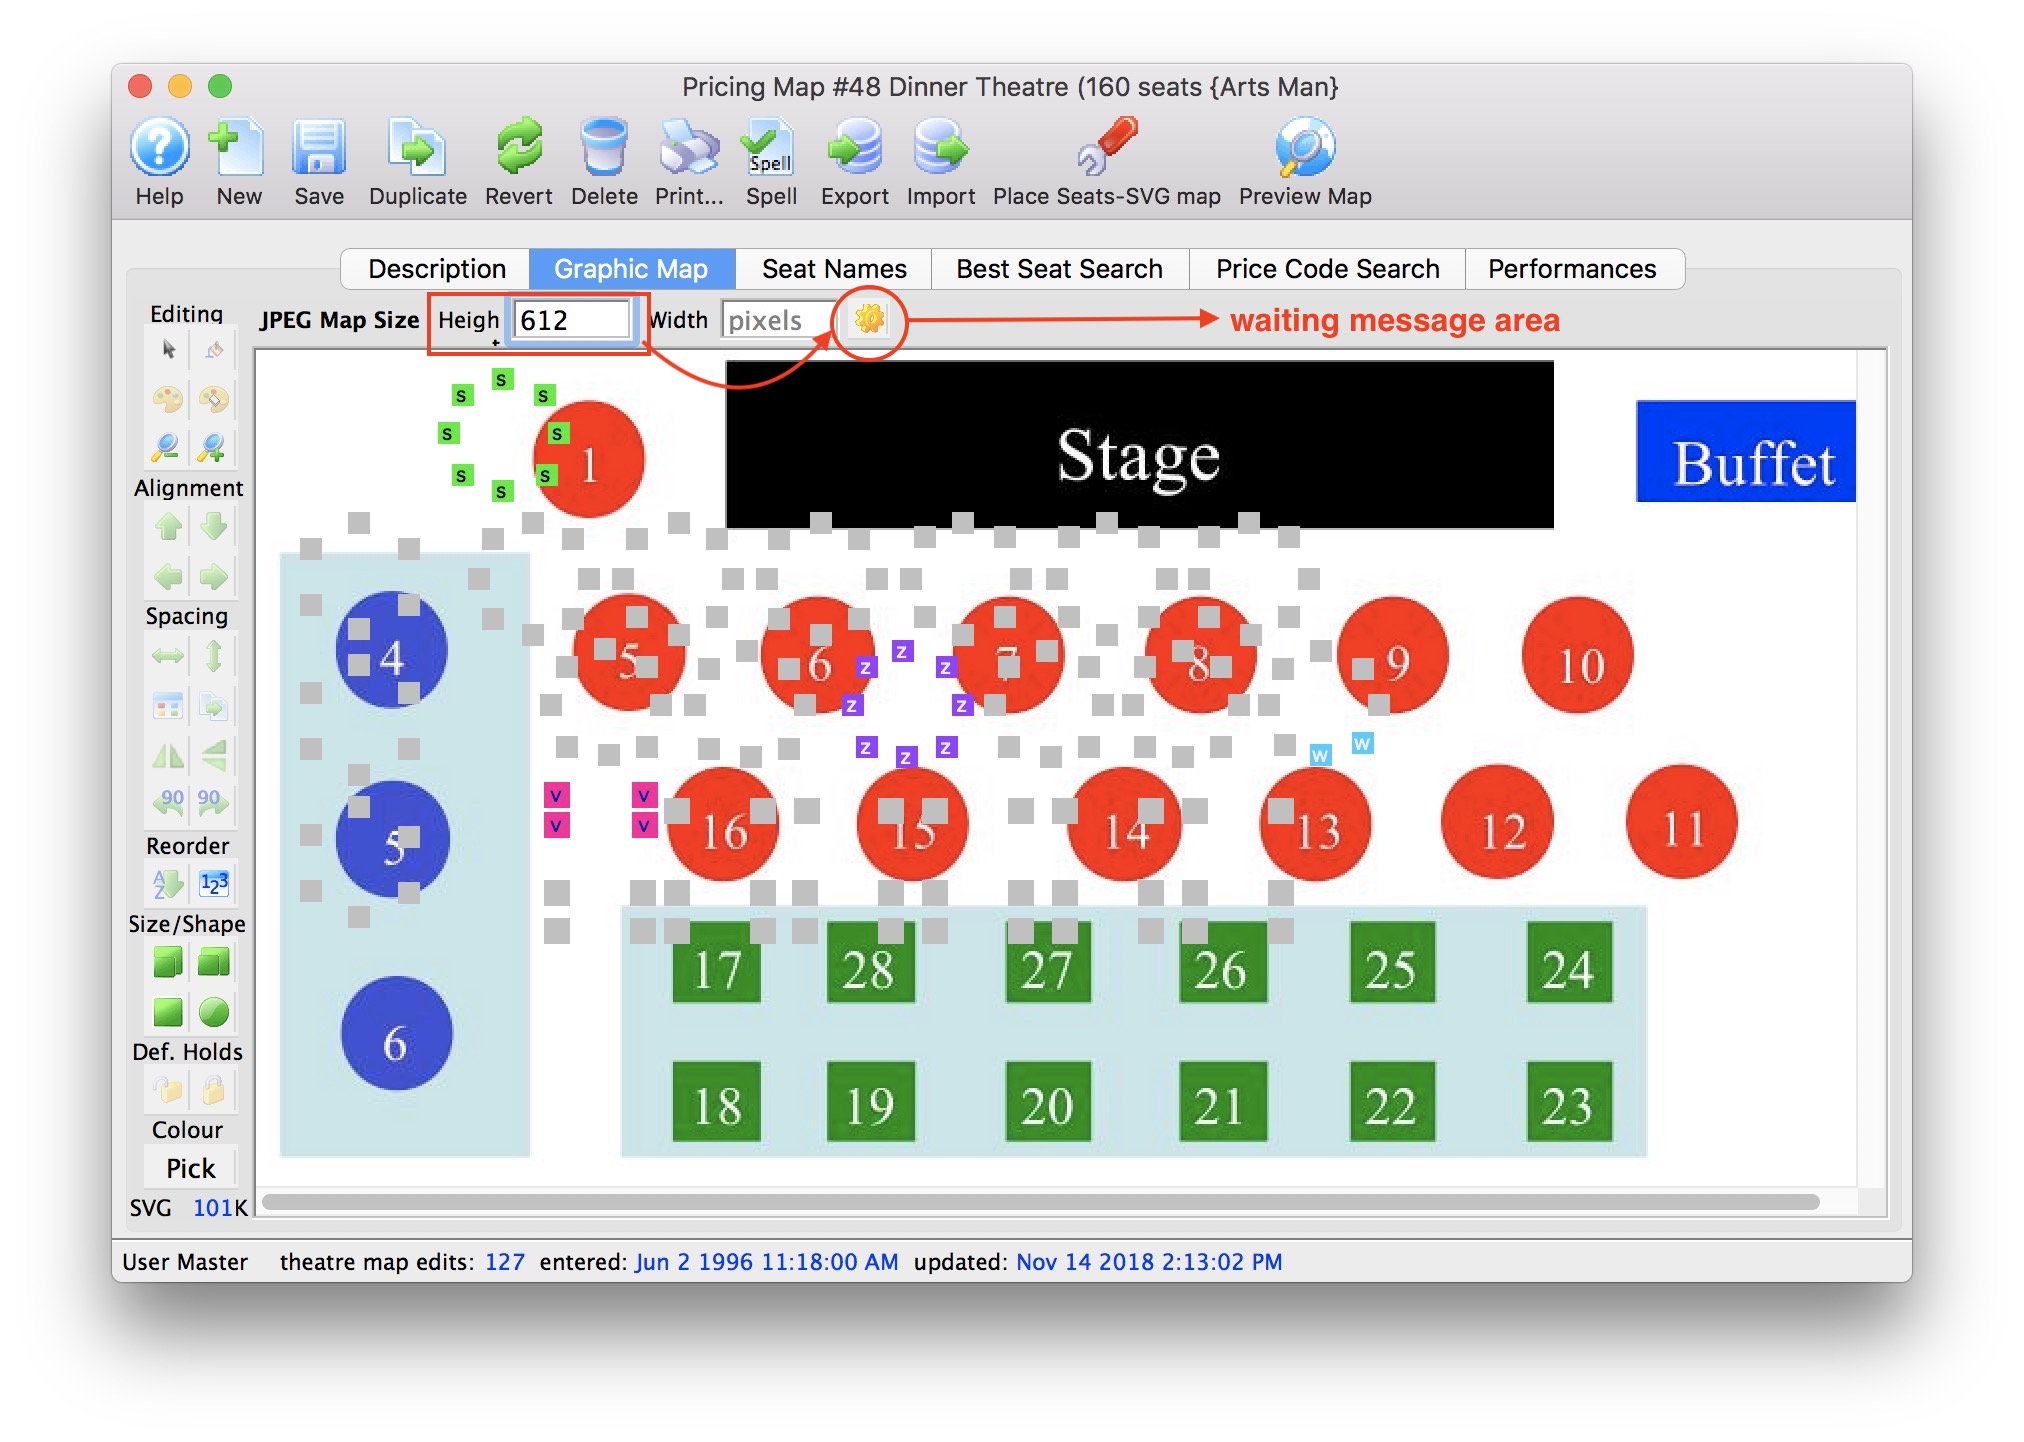 There are three situations that occur:
|
| Step 3 | 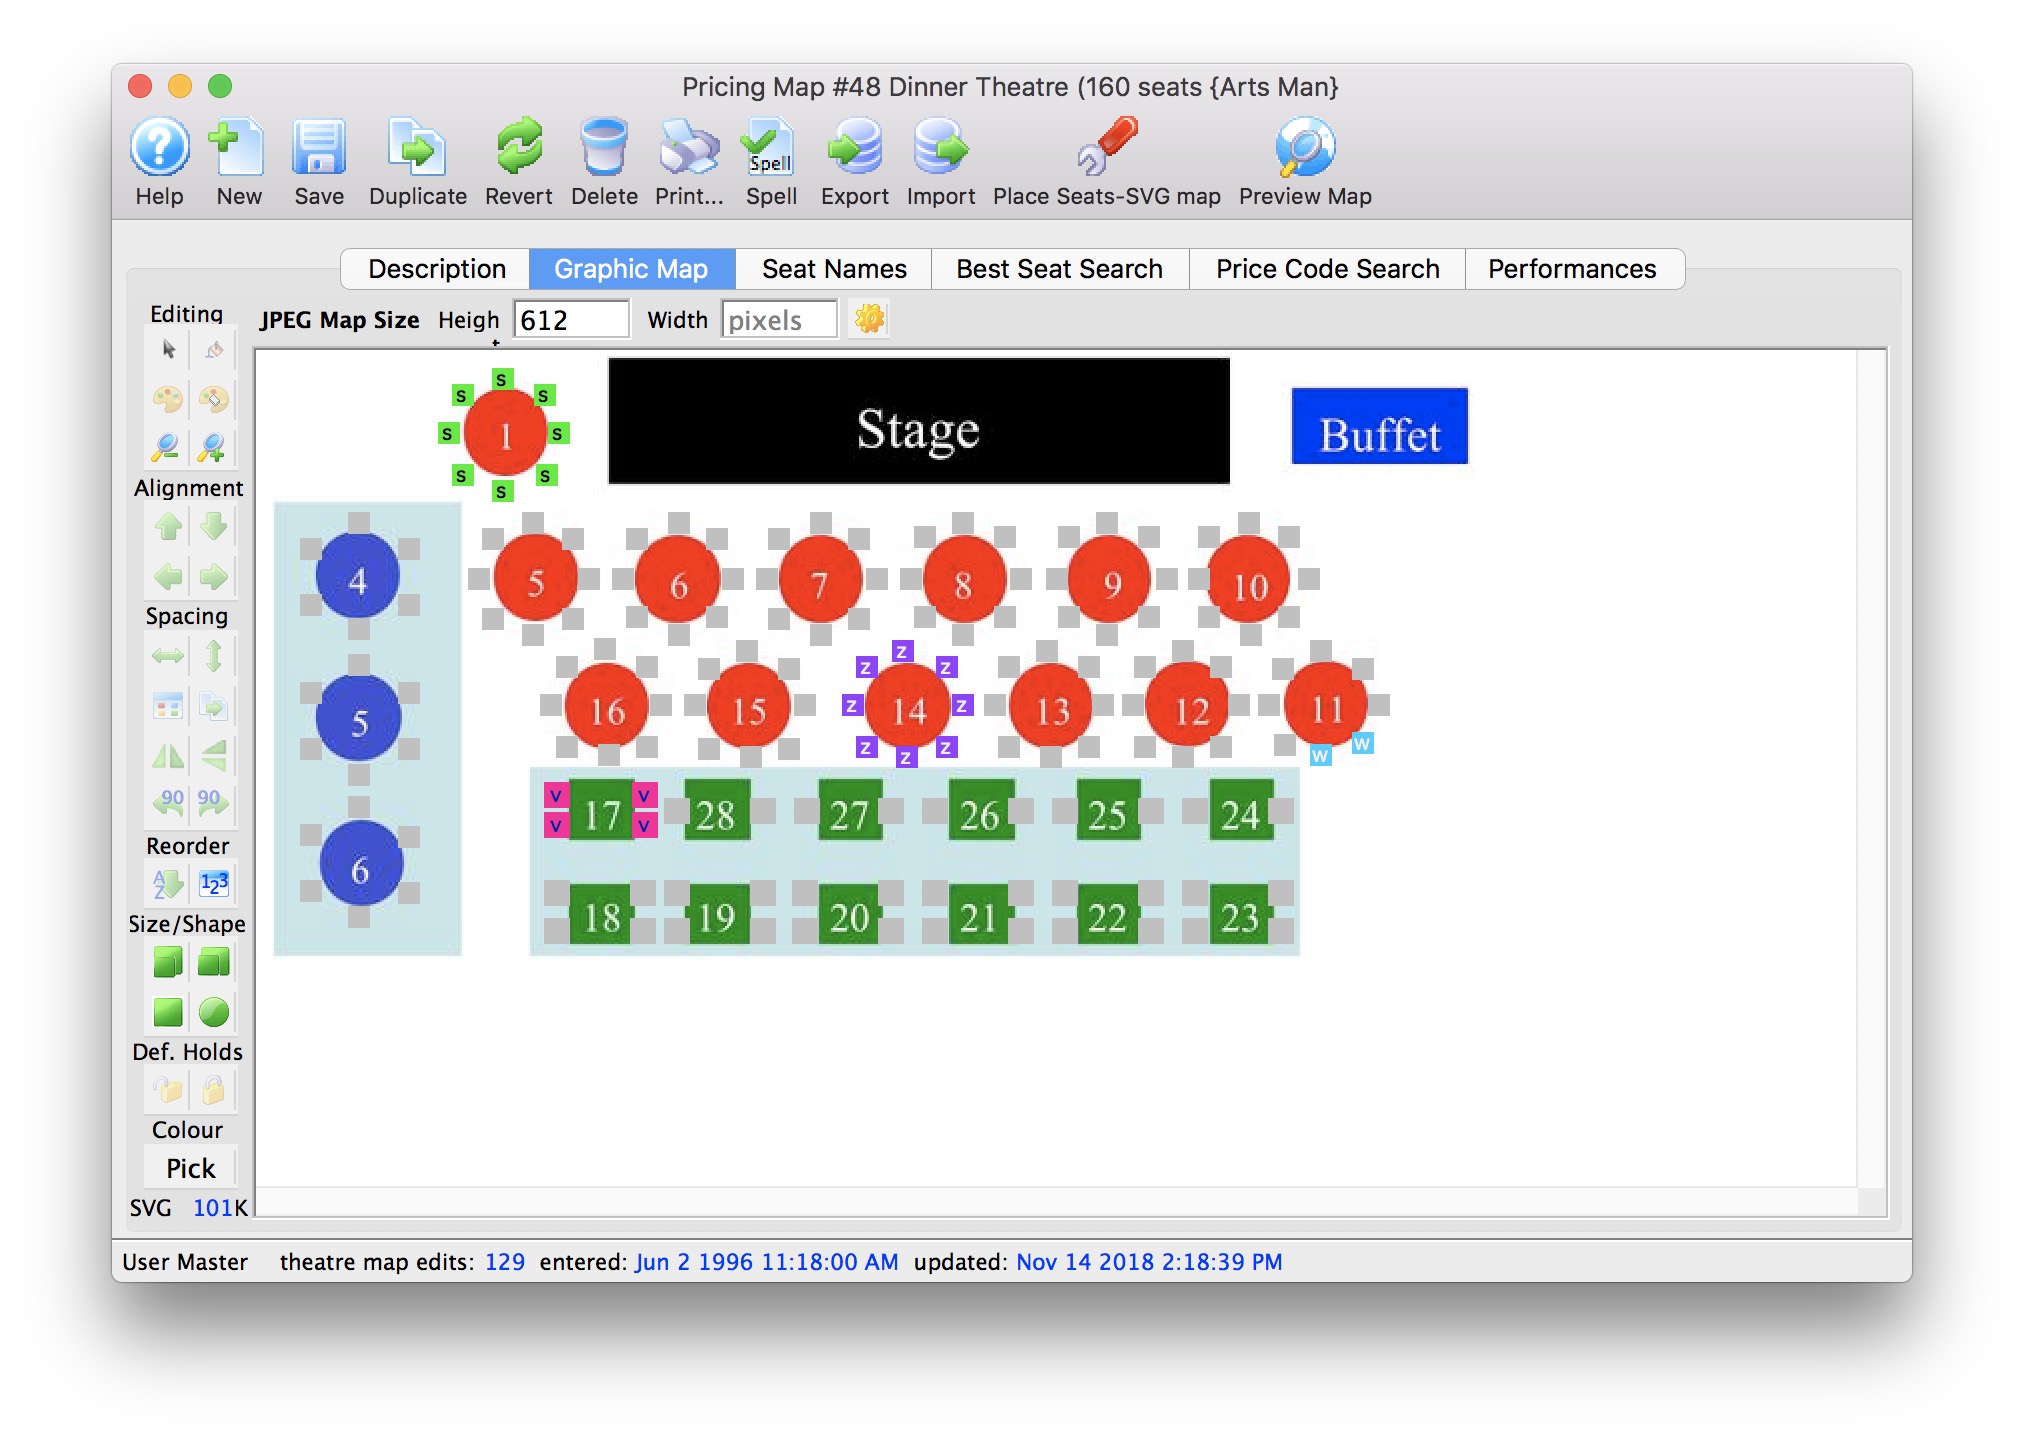 If there are no errors creating the background JPEG, a new image will appear behind the seats.
|
| Step 4 | 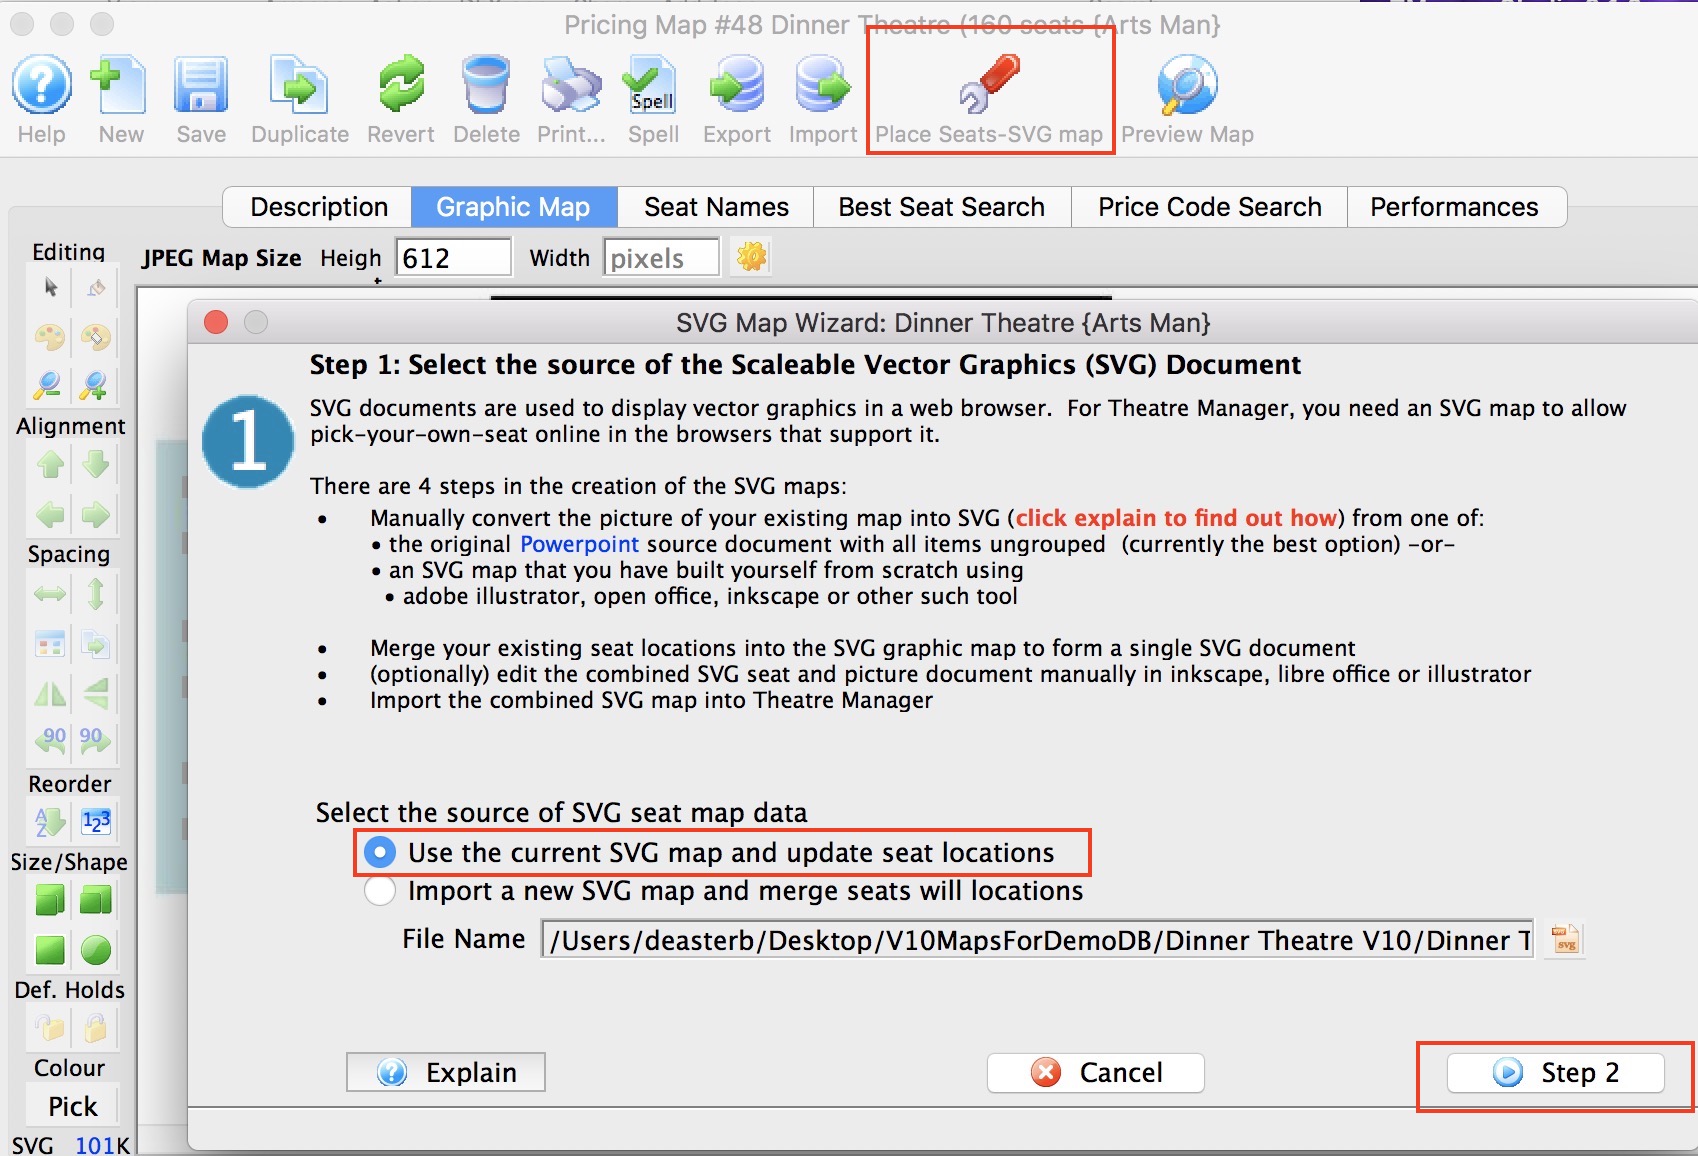 Once seats and background are aligned, you need to rebuild the pick your own seat map.
|
| Step 5 | 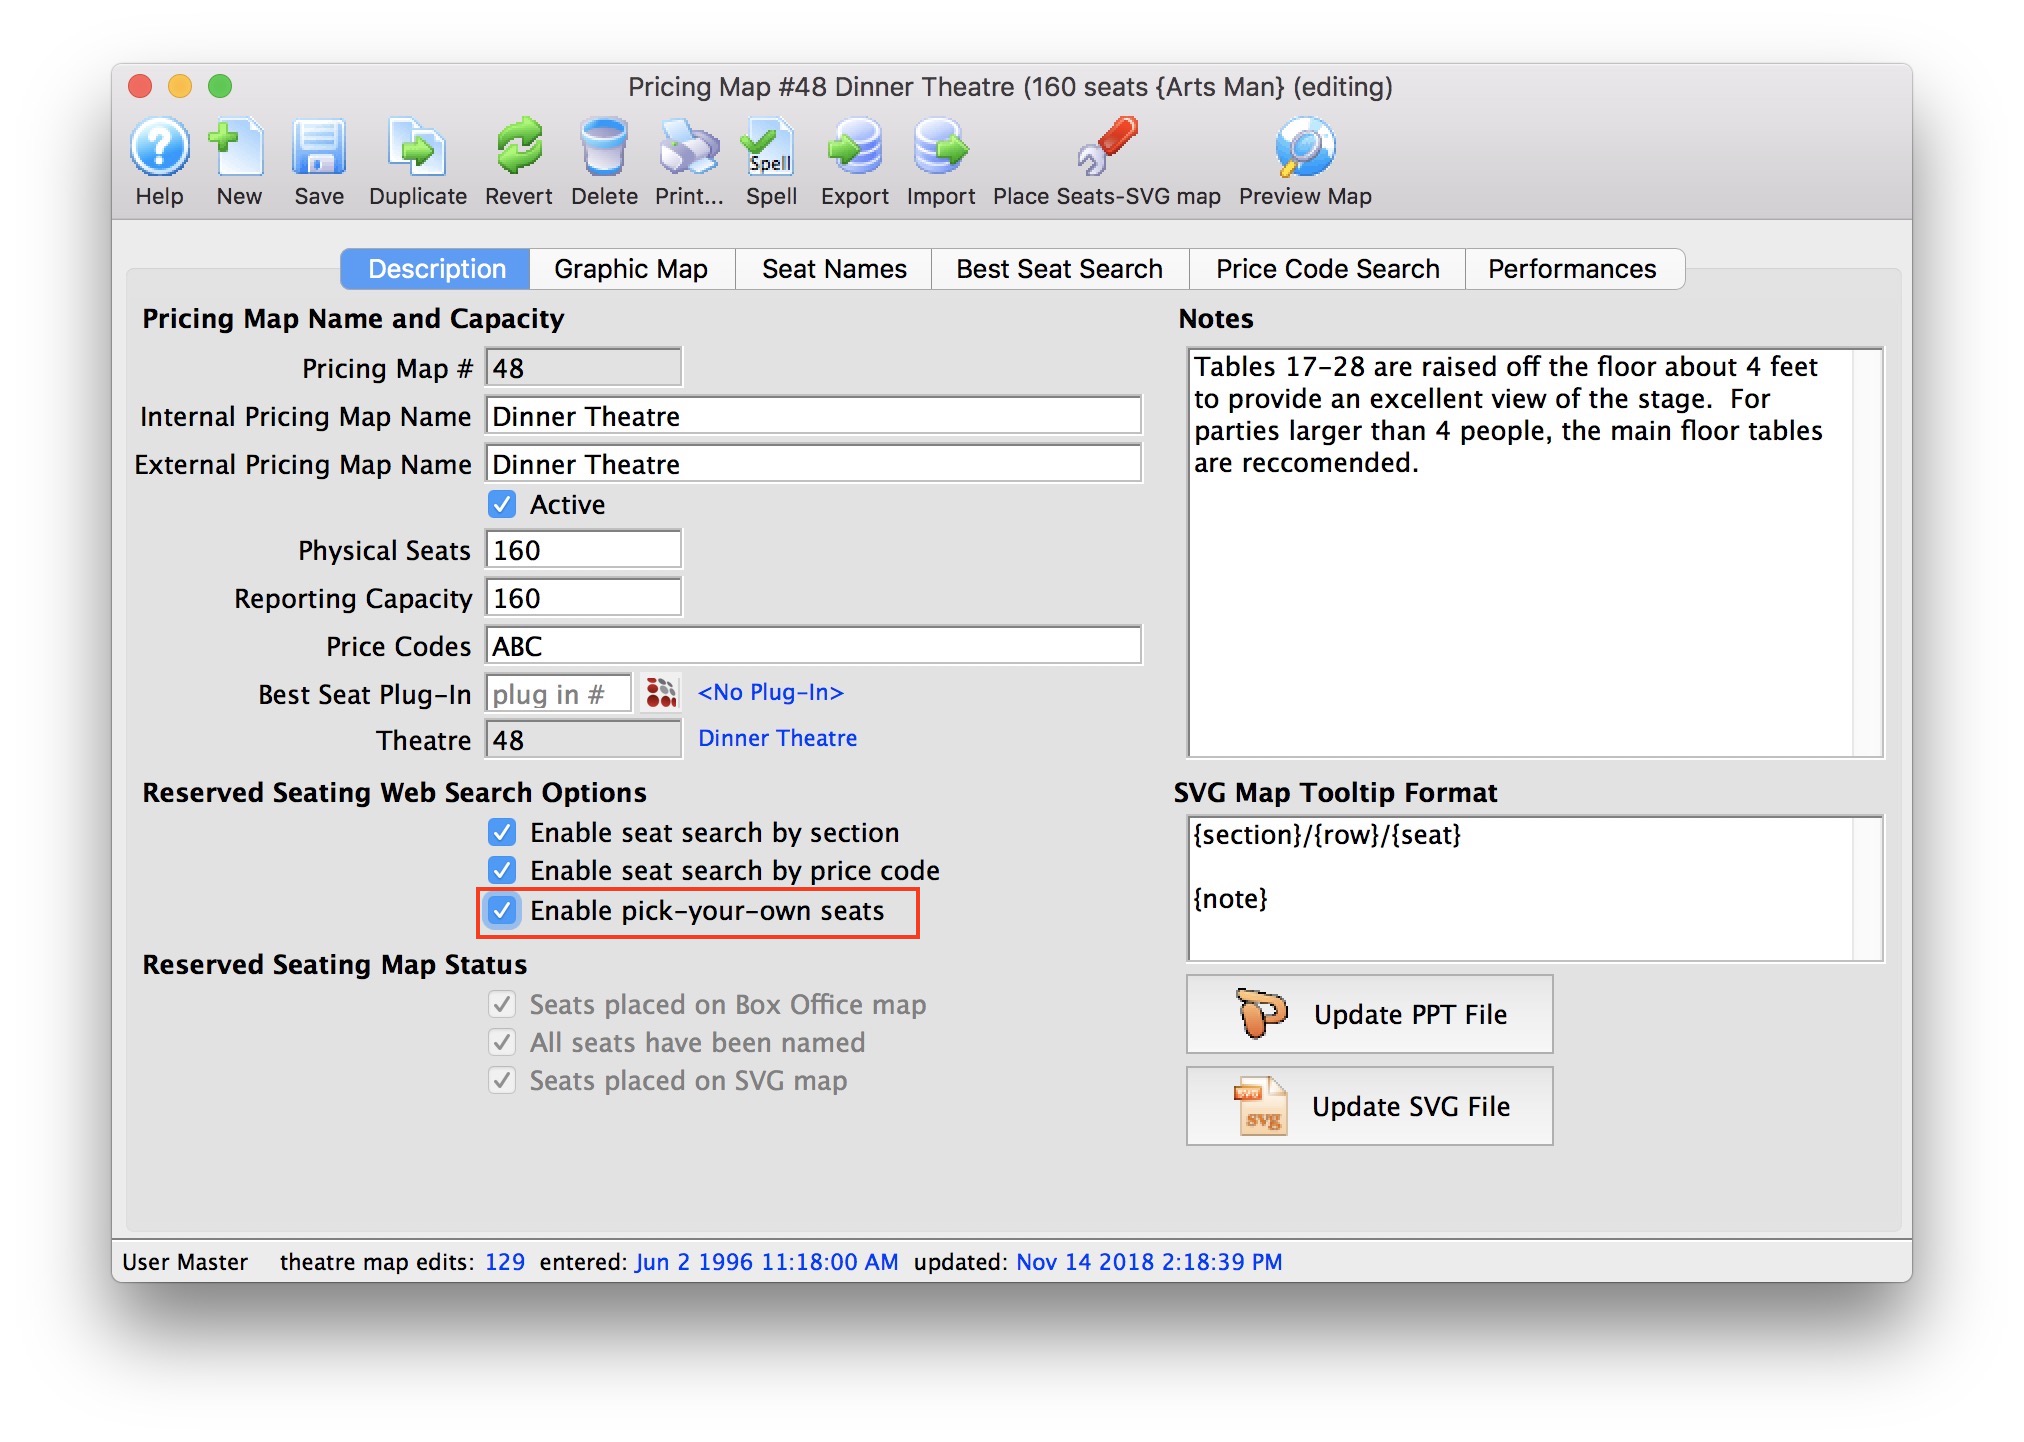 When you are completely satisfied with the look of the map on the Graphic Map tab and the SVG map for pick your own seats.
|
Map Building
Map Building
Only an editable SVG map is required for making maps in 64 bit Theatre Manager. However, not all tools can create proper SVG maps with true vector graphs in them so you may be limited to Adobe Illustrator, Open Office or other tools. You can still use powerpoint if you wish.
The key difference is that you only need the common SVG map to build for Mac, Windows and Pick your seats.
- Create a theatre map in a tool that can make SVG maps that contain proper vector graphs.
- shapes, usually with colours, on it representing seating areas or sections
- individual text areas containing descriptive words for sections & rows, some seats
- a legend as necessary to point out ADA seats and price areas
Optionally, you can still use: - Powerpoint to make the map (or if you have it, export it from the pricing map window)
- convert the powerpoint to SVG using Open Office as before
- Drag the SVG into the graphic map window
- Edit the Theatre Pricing Map window and set a final height for the image
- Drop the SVG Map onto the map image.
- Place seats on the map
- Repeat Steps 1 to 4 as required to create a visually appealing map.
- as a final step, merge the seat names - to enable pick your own capabilities