Moneris Hosted Checkout Page
 |
Hosted Checkout option is used if you want Theatre Manager to use Moneris for online credit card payments with an embedded web page. It is possible to be SAQ A compliant for your web sales since Moneris takes the credit card within an iframe and card data does not enter your network. |
|
|
If you use hosted payments for web sales, you will also need an E-Select plus account for settlement. Box office sales can use this same merchant account and will automatically authorize against the e-select plus account. This means that you only need one merchant account set up even though it is processing via different pathways, one for web and one for box office. | |
|
You may also be able to accept payments like apple-pay online, digital wallets, online interac, verified by visa, multi currency, etc. Make sure to talk to Moneris about what is possible and what you want to accept. | |
|
If you are already using Moneris Hosted Payment Page, refer to the conversion process to Moneris Checkout to see what is involved. | |
|
Note: using Moneris Checkout disables use of online post dated payments since card data is not provided by Moneris and, therefore, cannot be saved. Recurring Payments initiated by the box office will still work. | |
Setup Process
The best process to configure this option is:
- Obtain your online portal connection information from Moneris
- Configure all the settings within the online portal
- Use the Theatre Manager Merchant Account Setup for Moneris Hosted Checkout Page
- Verify all credit card types you want to take in payment method code tables
- If you are already using Moneris hosted payments or box office payments, you may not need to do anything
- If you plan on taking advantage of other credit card types online (that you may not want to accept in the box office), you will need to add them to the payment types.
- It is very important that card types you set up online are in the payment code tables.
- Test:
- Authorizations through the TM Web services
- Attempted Authorizations but Cancel through the TM Web services by going online to buy something (use test cards)
- Verify the display on the web to see that it matches what ou picked in the online portal setup and shows your name and settings you wish
- Voids from Theatre Manager
- End of Day Settlement
Online Portal Setup
You will need to log into your Moneris Resource Center online account
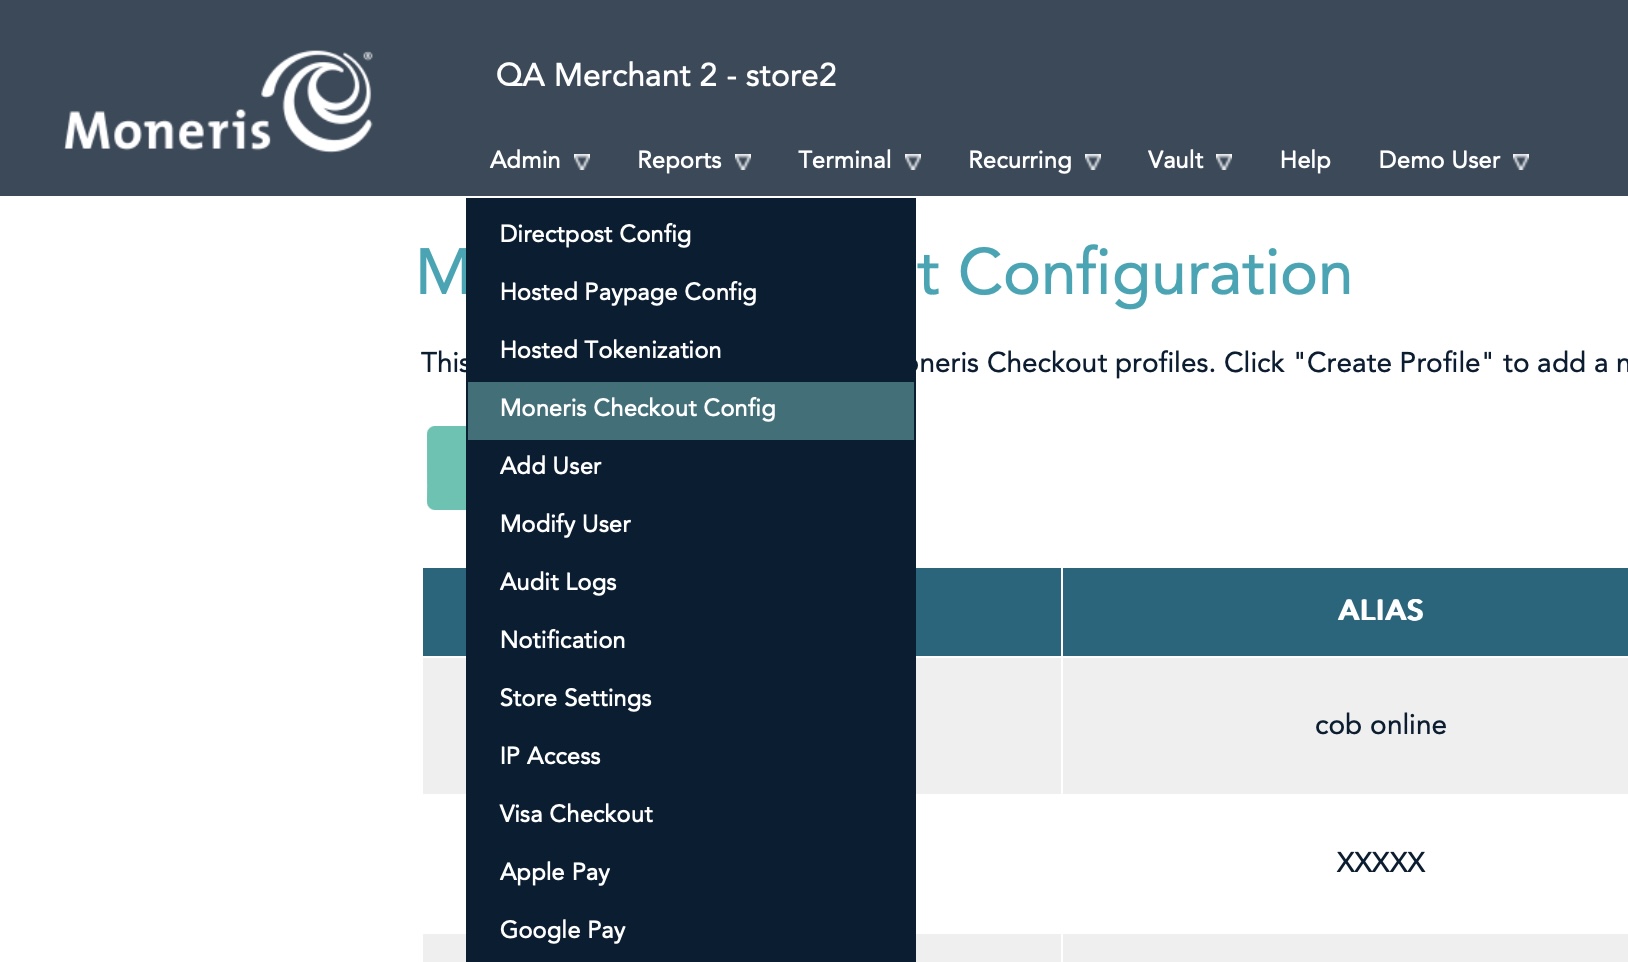
Once you are logged into the online account setup, select Admin->Hosted Checkout config option per the image to the right.
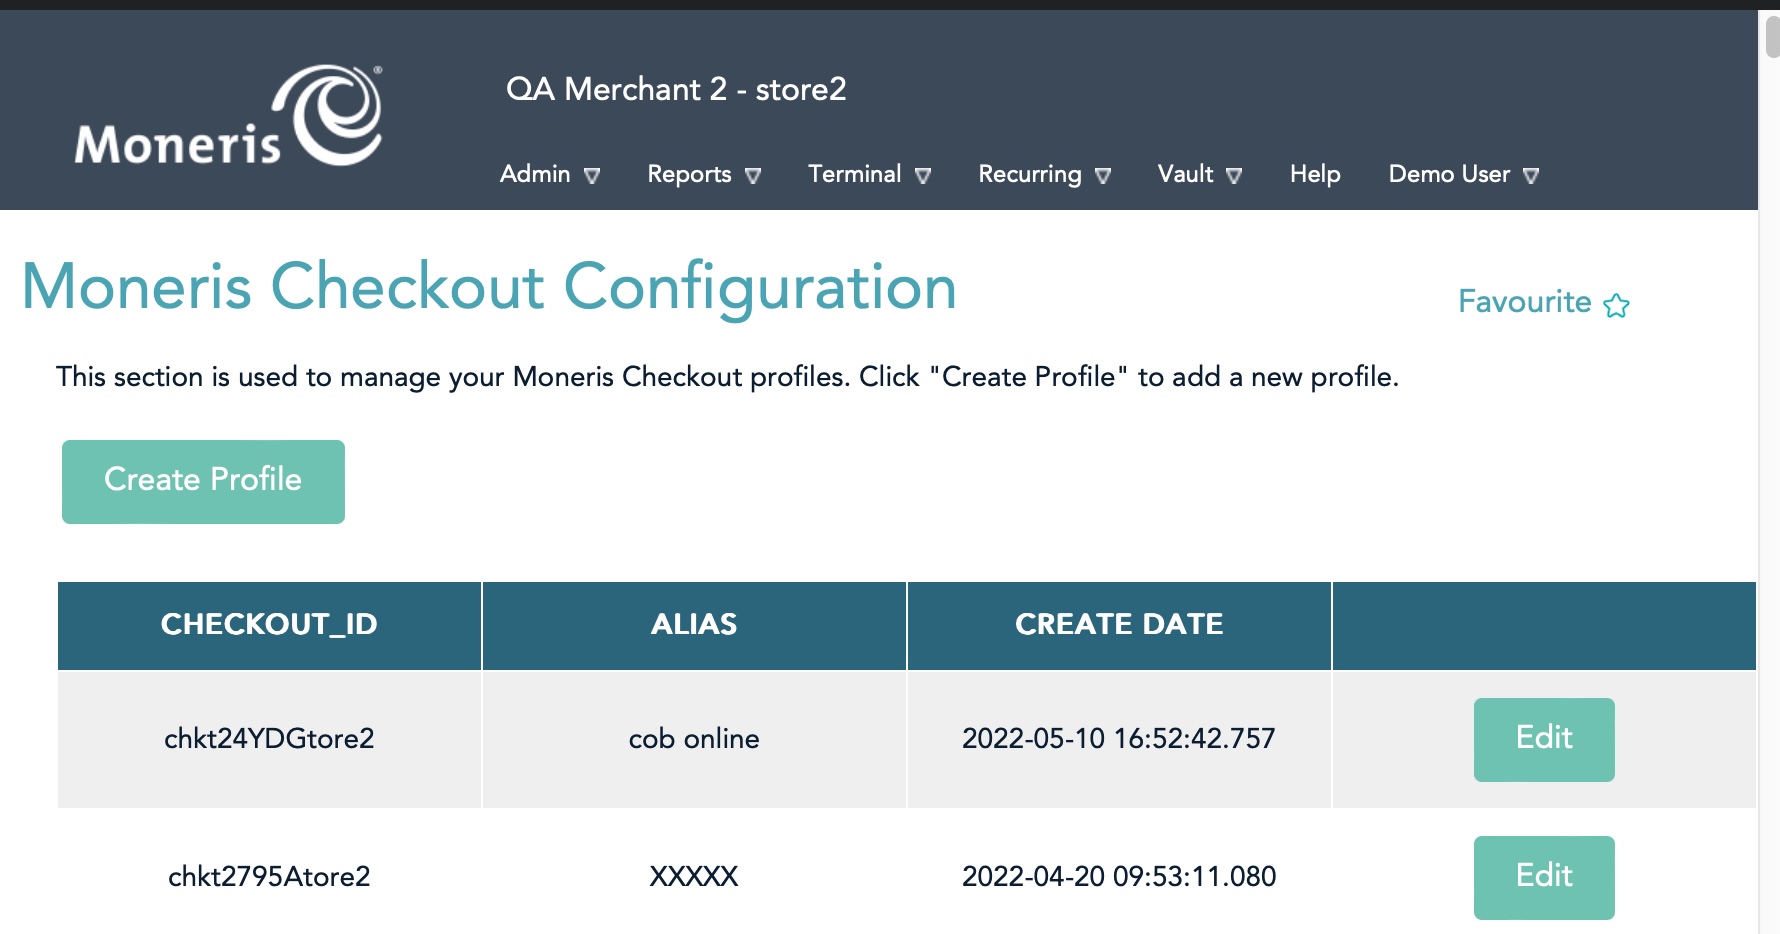
You will see a screen similar to the bottom of the web page that lists all the configurations you have made. You can have many of them, and all you need to do is enter the Checkout_ID in Theatre Manager merchant setup to use the one you prefer.
Creating a New Profile
- If you see no lines in the list, click the Create Profile to make the following for Theatre Manager:
- CHECKOUT_ID
- ALIAS
- You will be asked to confirm that you want to create a new profile.
Click OK
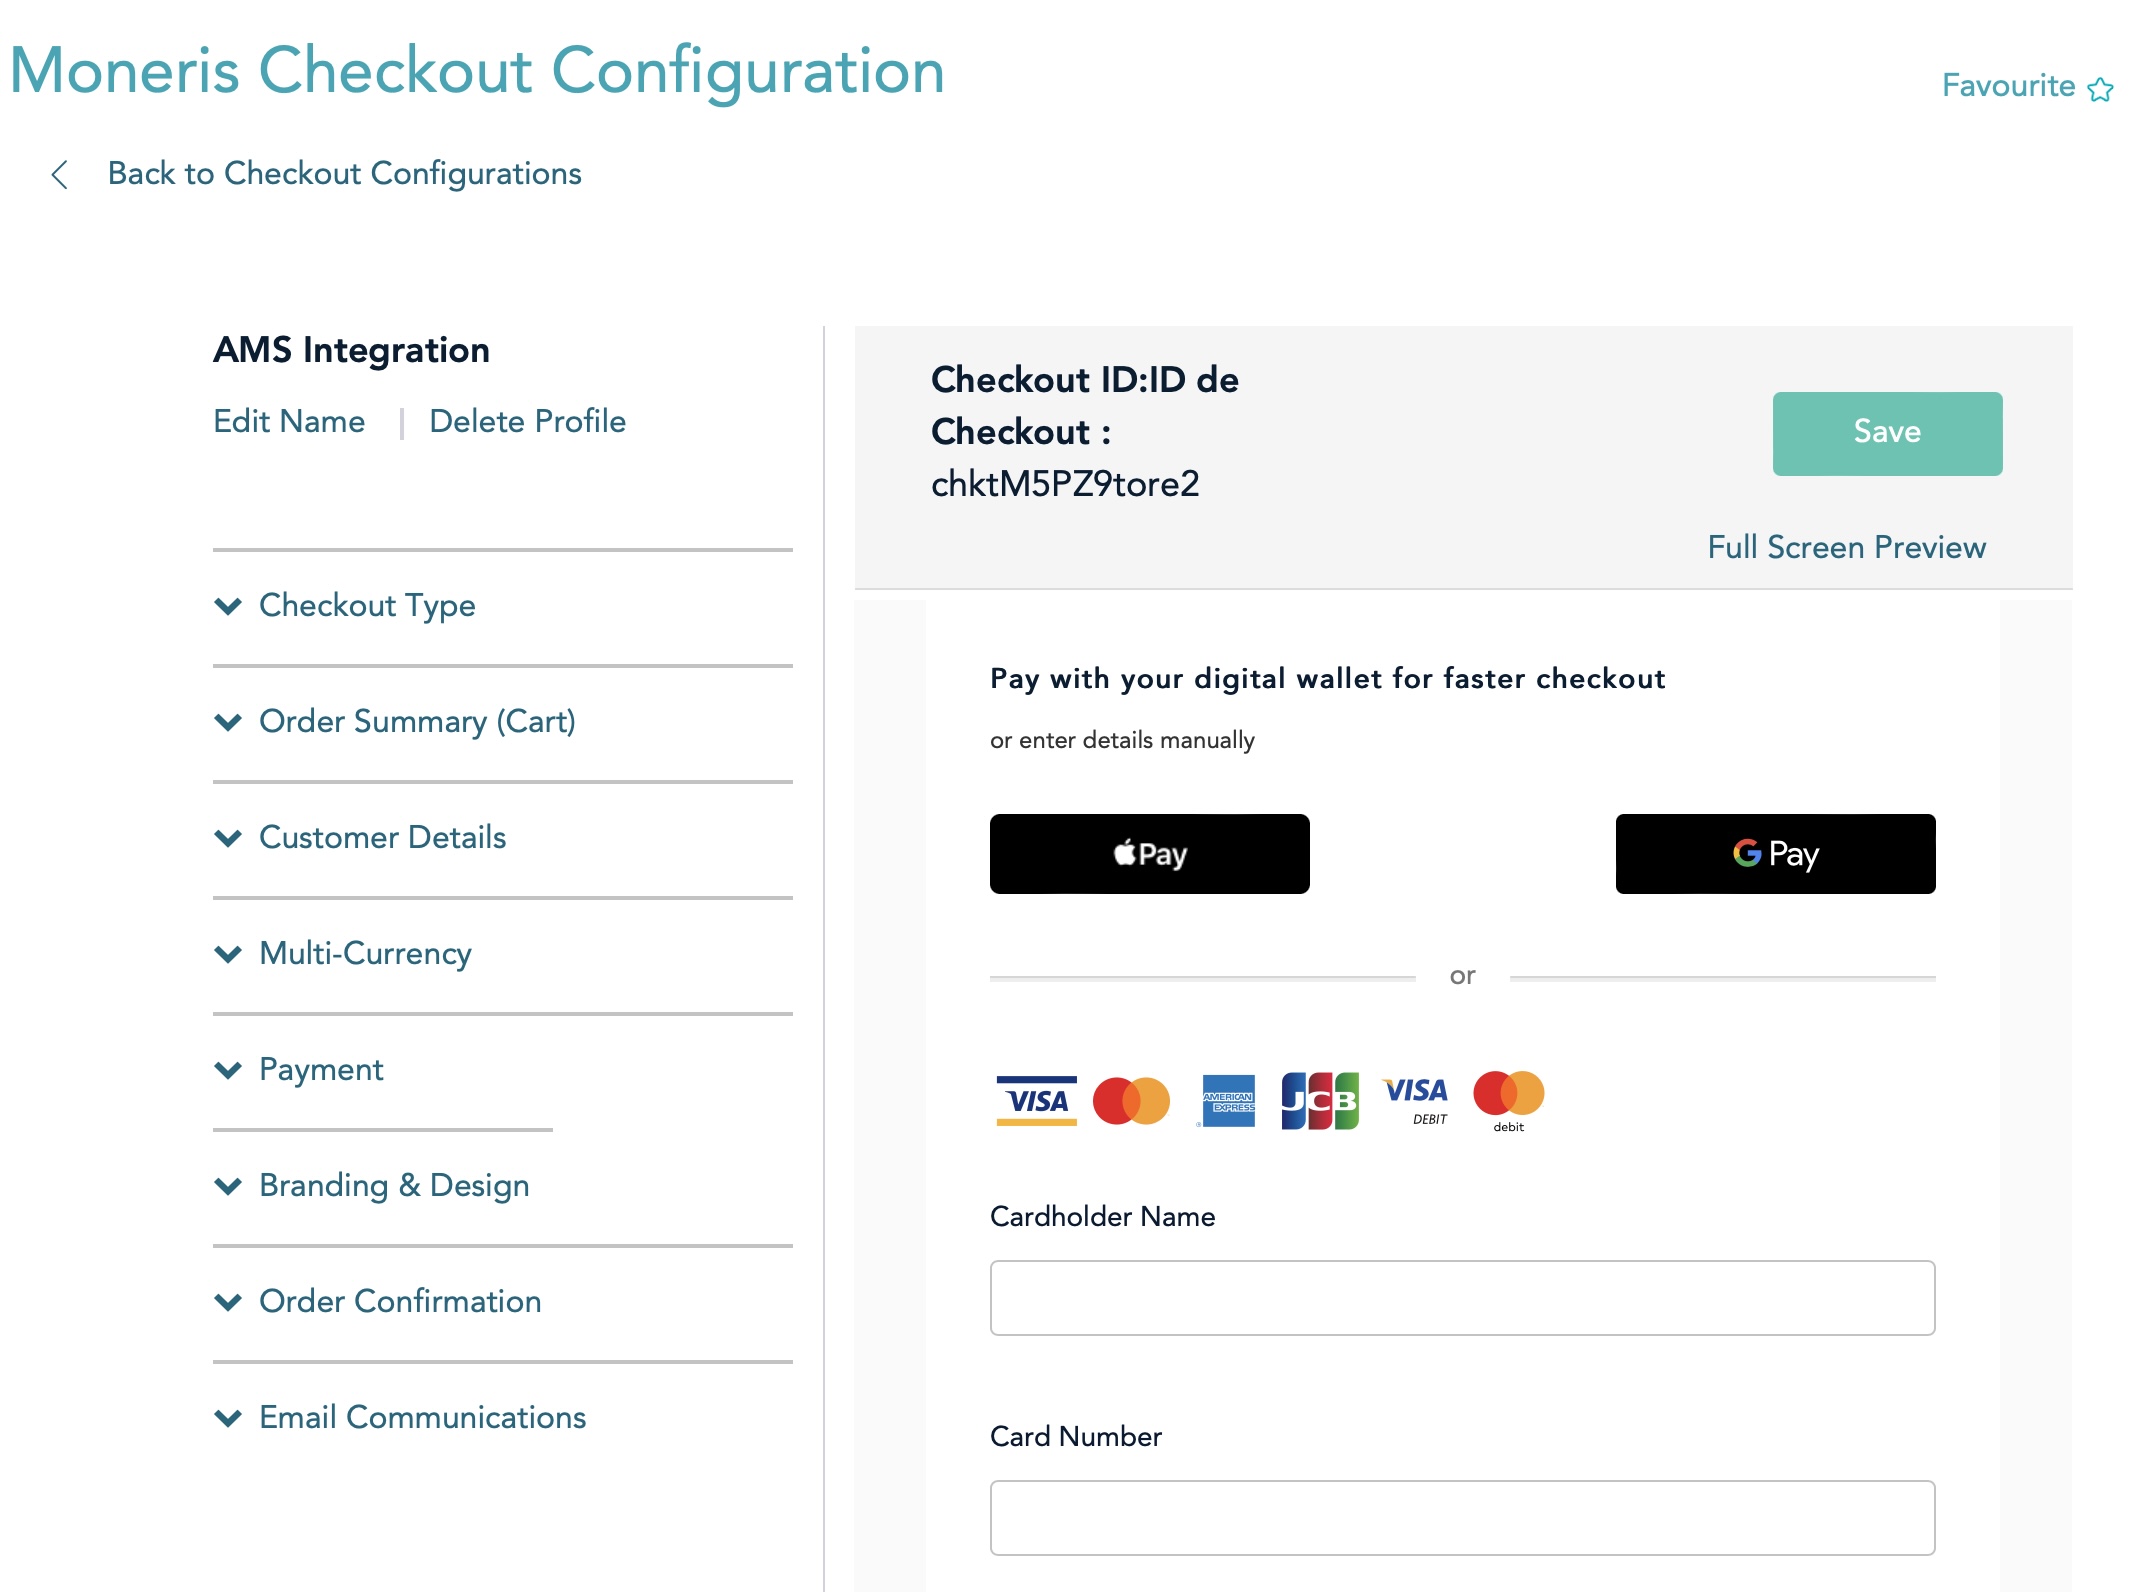
- Click the Edit Name on the upper left and you will see the window below
Enter in an alias like 'Theatre Manager'
.

Edit an existing Configuration
If you see the Checkout_id that you want to change in the list below, you can Edit by clicking the edit button. Then process to the next pages for more information about the setup.
Checkout Type
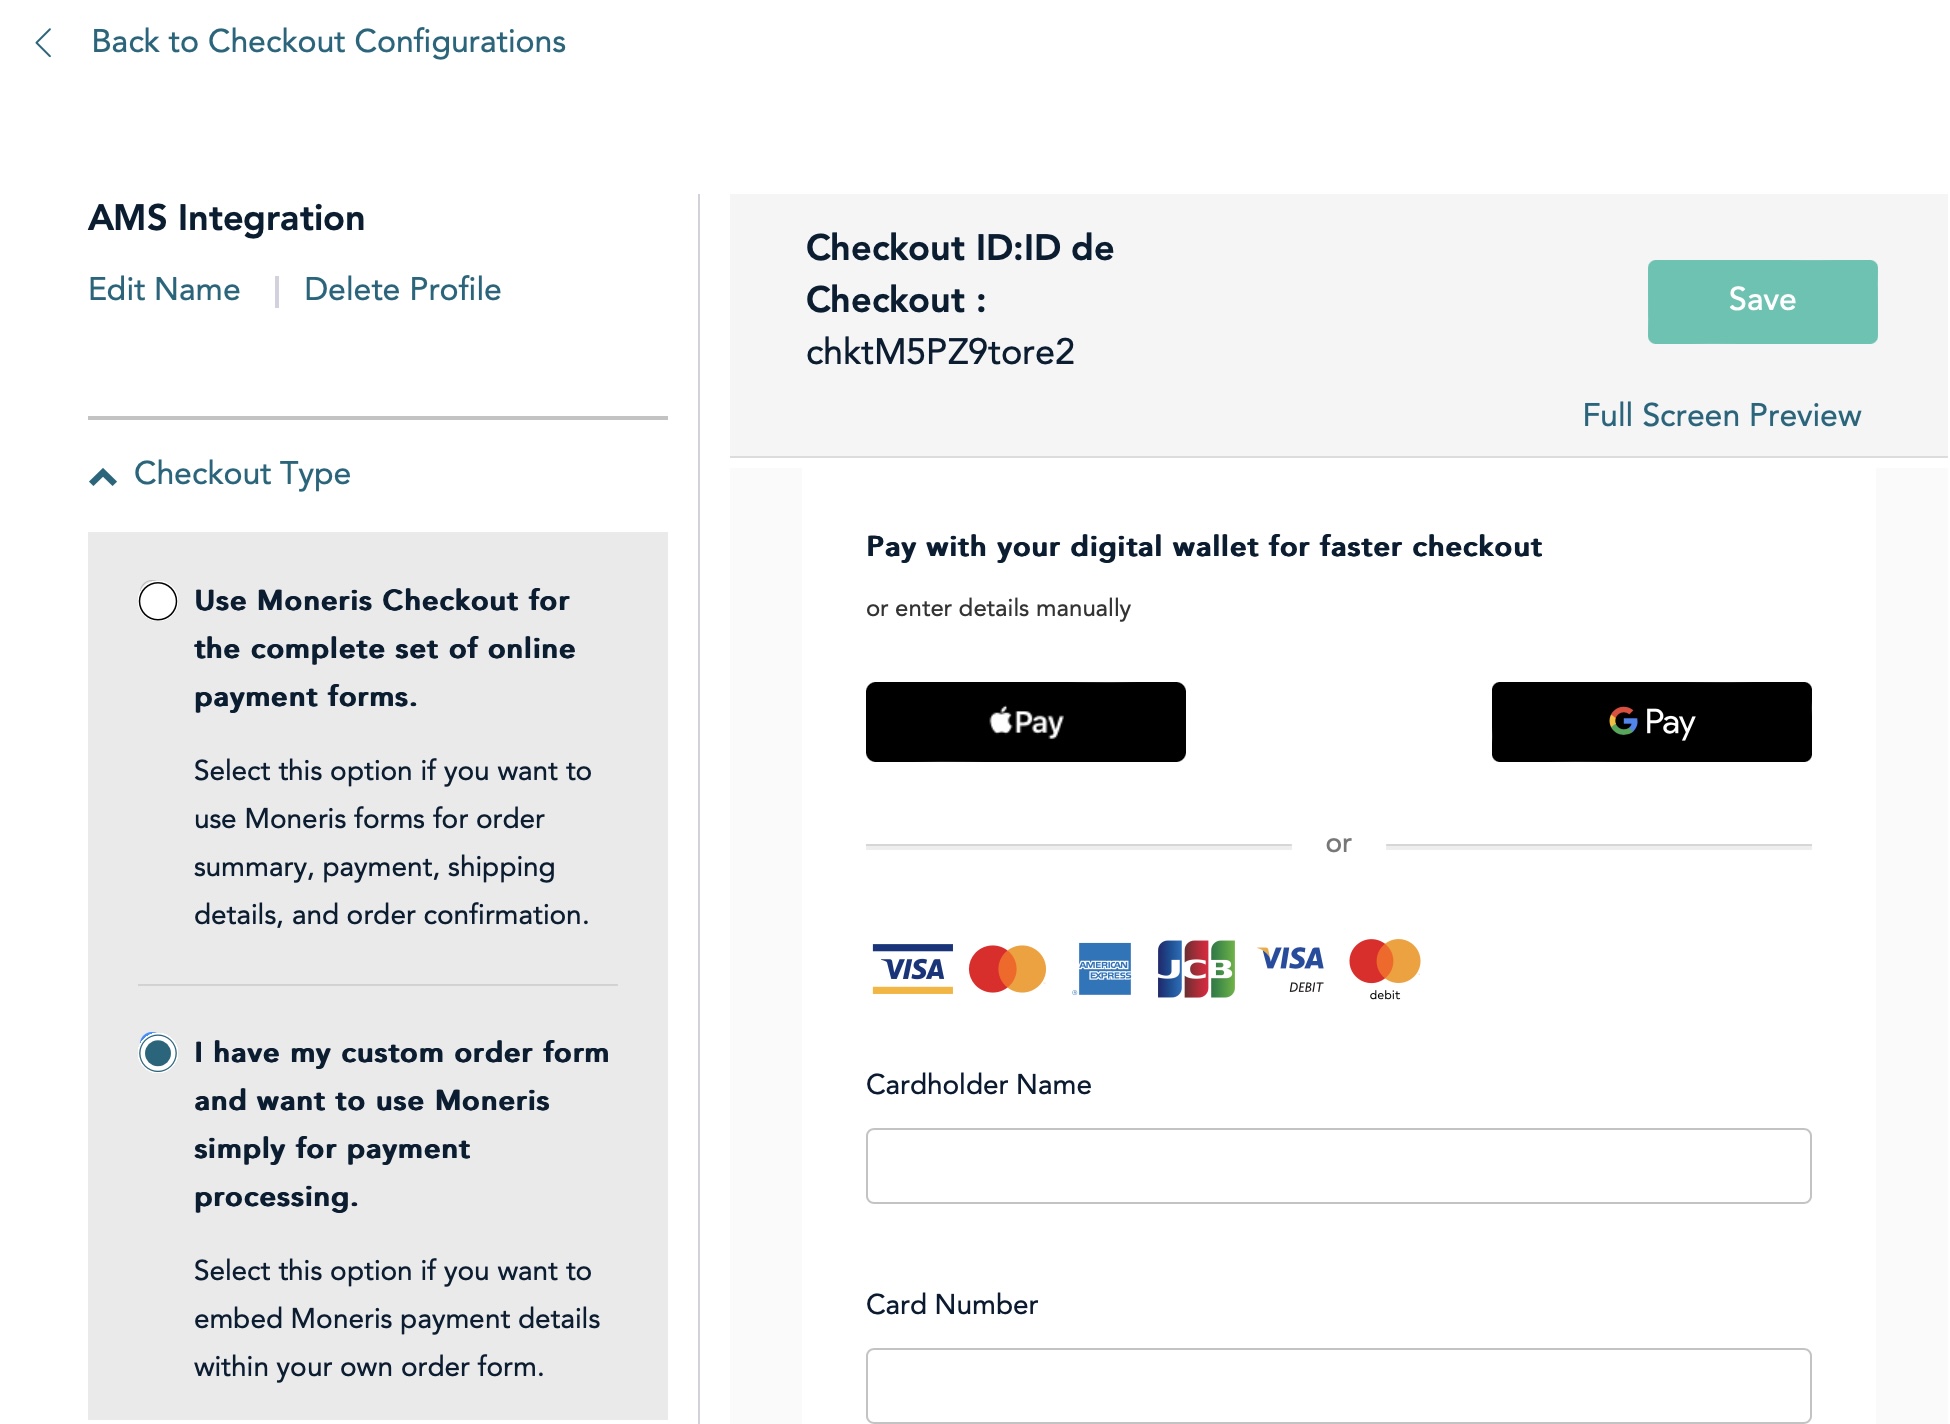
Set the checkout Type
- Click the section that says Checkout Type
- Click the option I have my custom order form and want to use Moneris simply for payment processing.
- Click 'Checkout Type' to collapse it
Order Summary (cart)
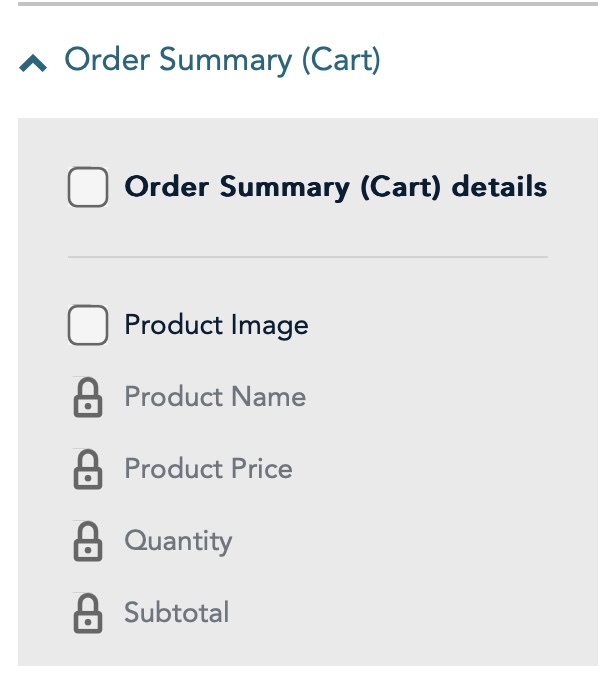 There is nothing to select on the Order Summary Cart since you have your own custom form as part of Theatre Manager.
Make sure the options look like the image to the right.
Customer Details
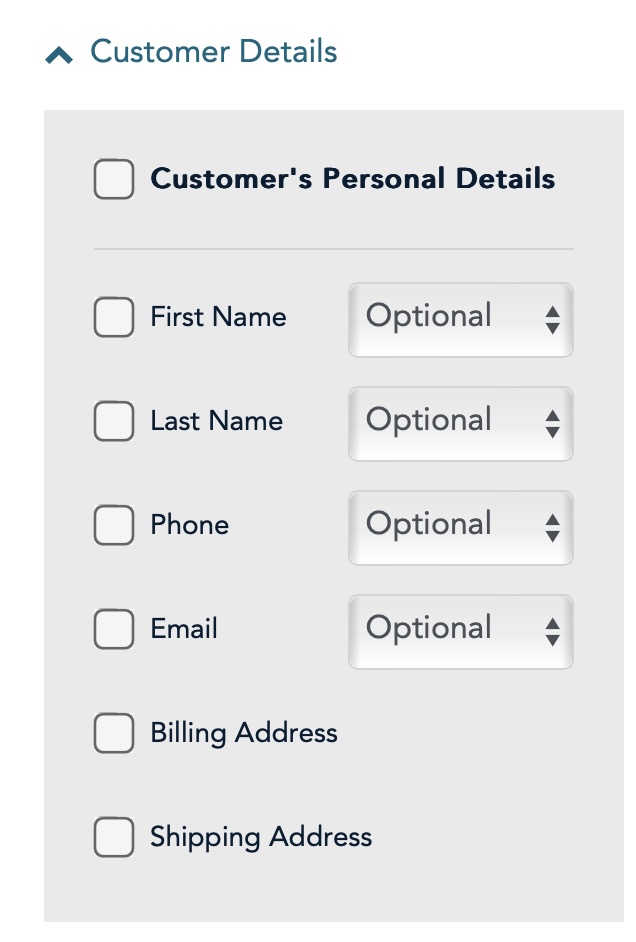 There is nothing to select on the Customer Details since you have your own custom web site as part of Theatre Manager.
Make sure the options look like the image to the right.
Multi Currency
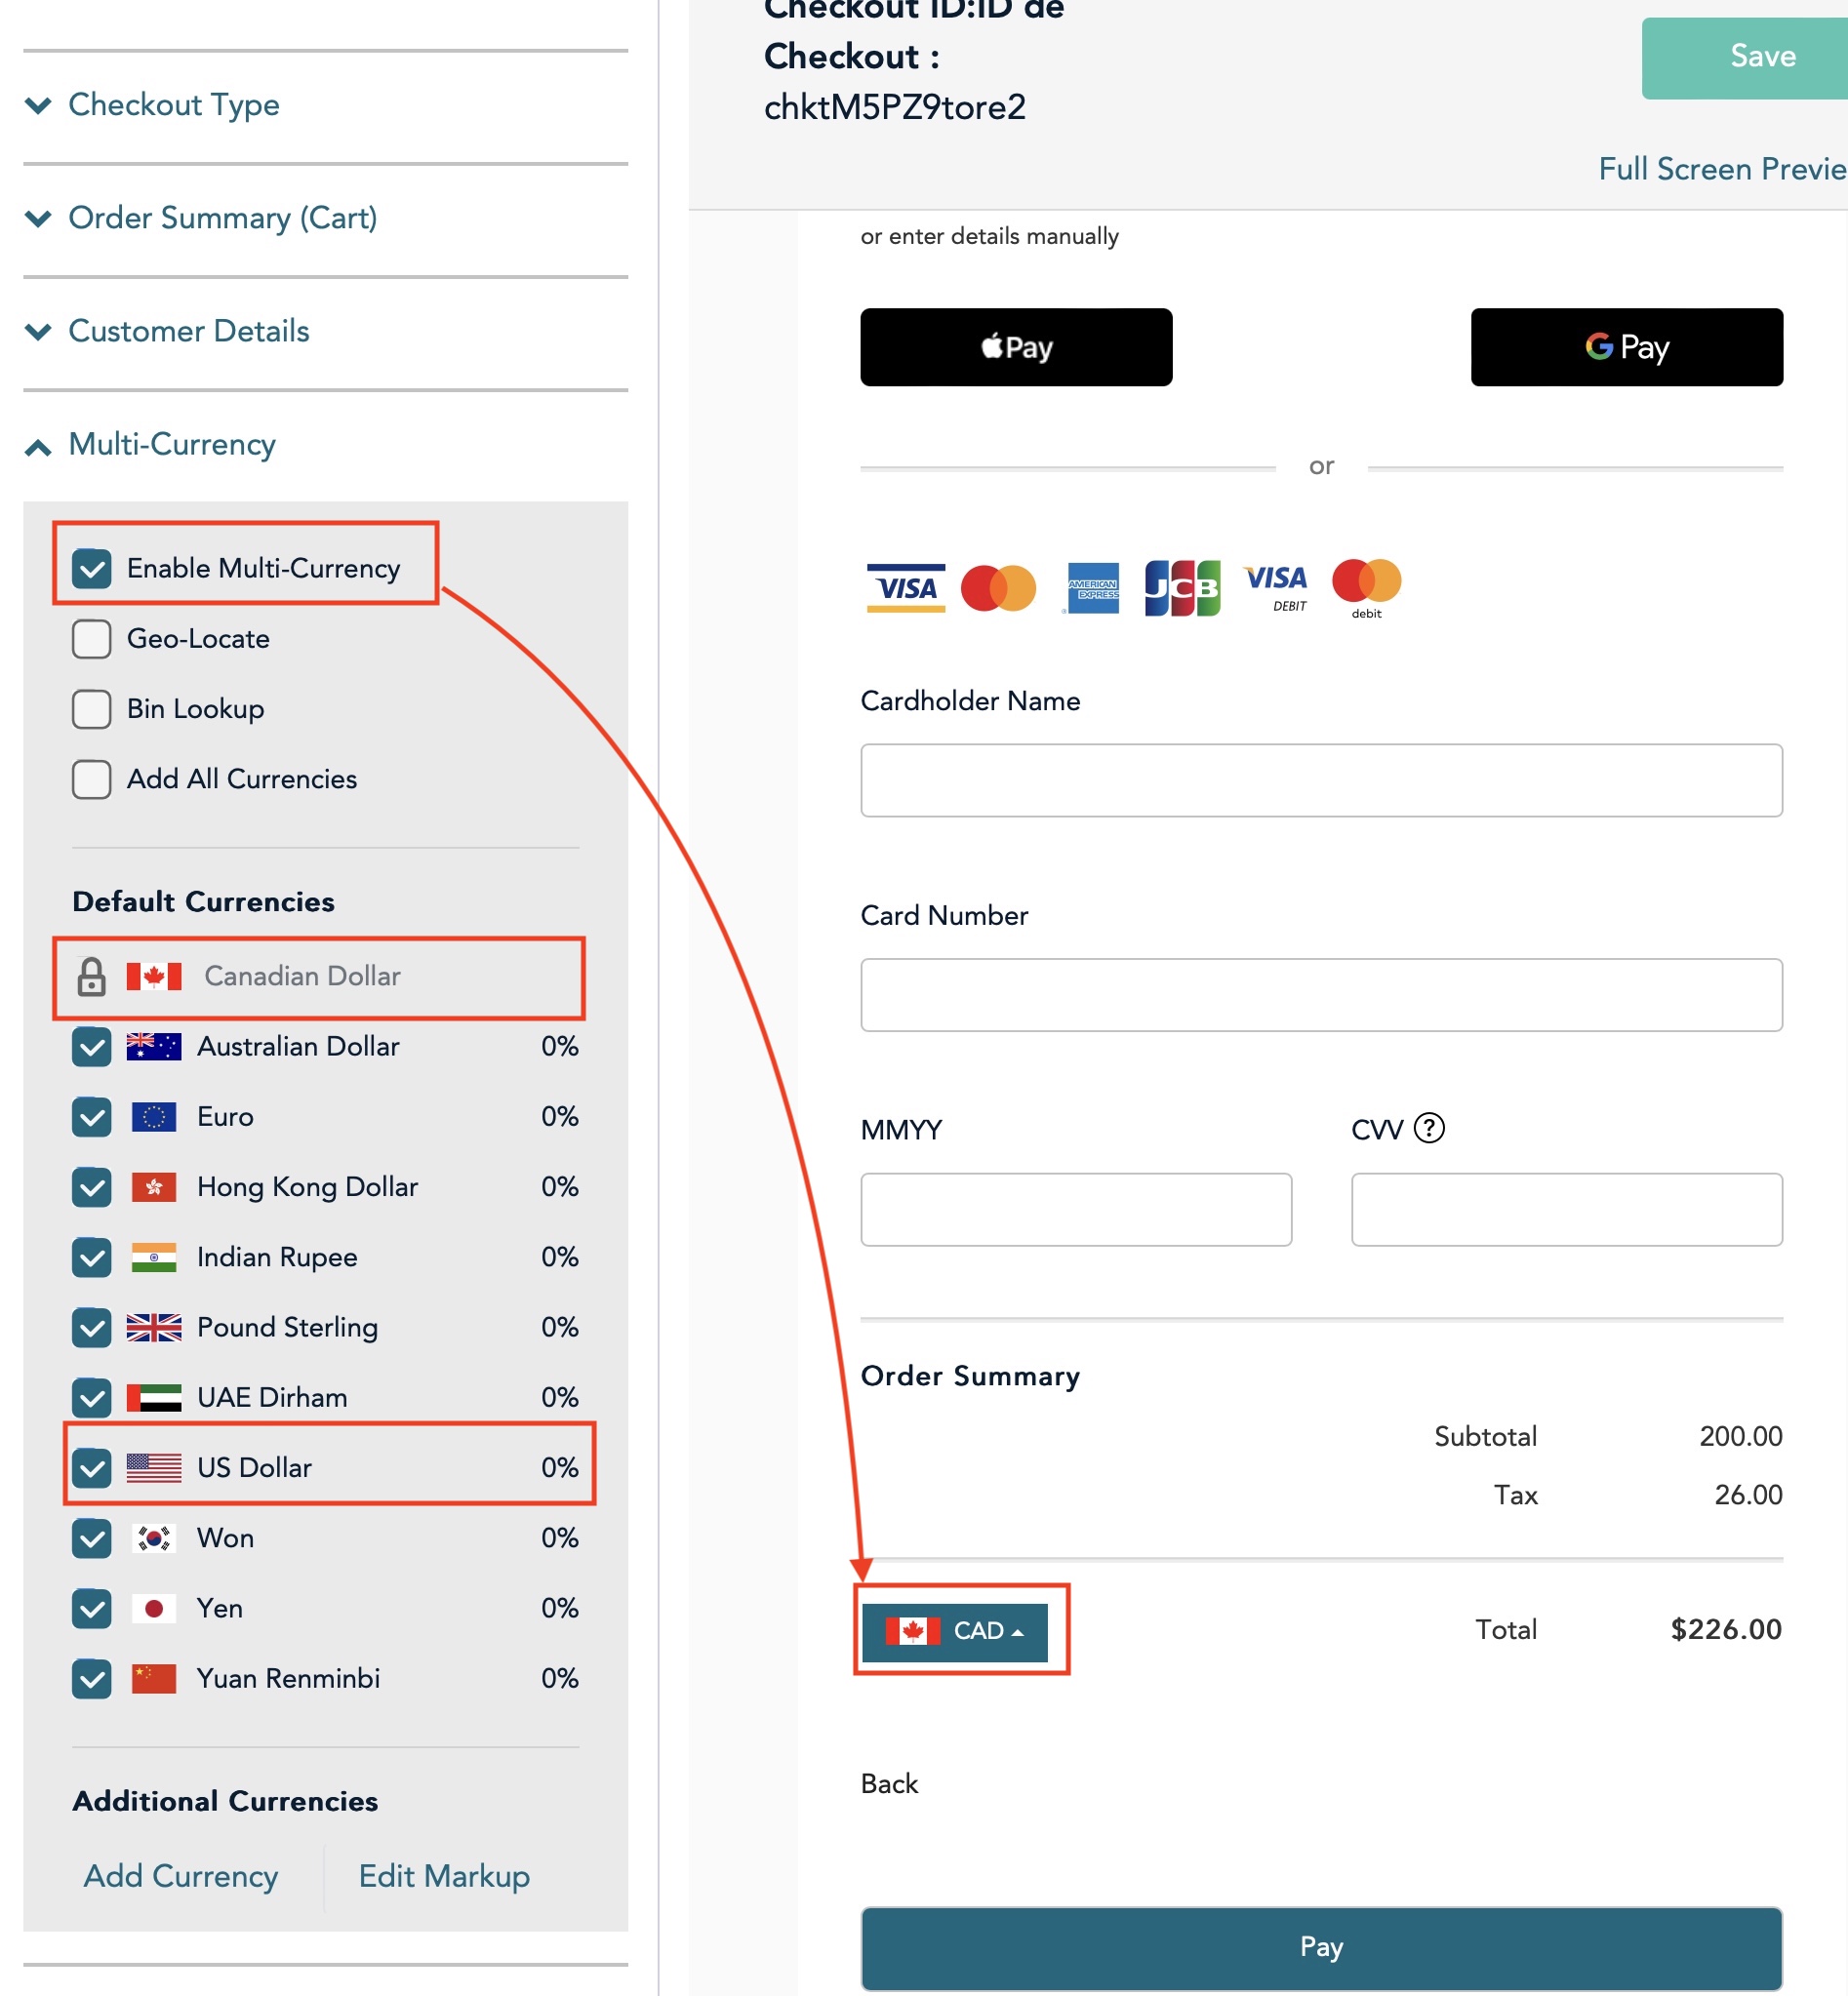 Most likely, you will NOT need to accept multiple currencies.
Since that is the case, UNCHECK the enable multi-currency button. that will cause the currency choices to disappear from the the area indicated on the checkout form
If, however, you do want to take some selected currencies (such as USD, or where ever your main customers come from, then CHECK the enable multi-currency button.
If you do that, you will also need to check and uncheck the currencies that you wish to accept.
We understand that all currencies are converted to CAD and so you will receive CAD in your bank account.
Payment Options
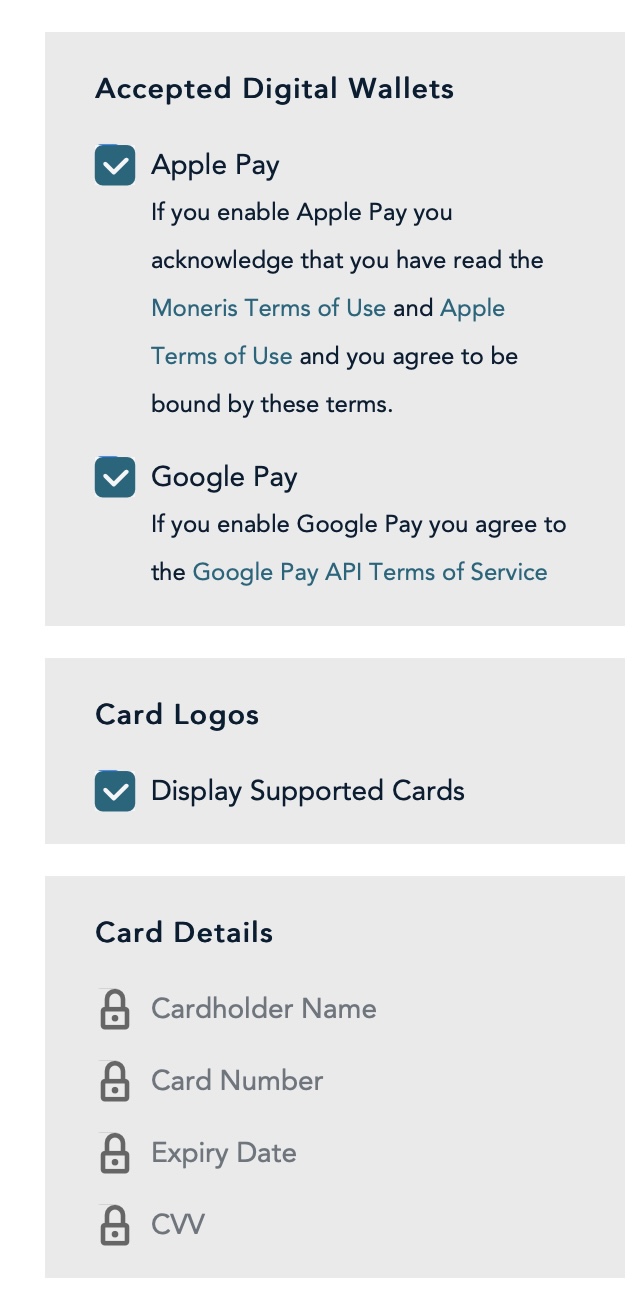 Indicate what digital wallets you want to accept. There are two main ones at time of writing
- Apple Pay
- Google Pay
Click the Display Supported Cards checkbox to show miniature logos of the cards you accept on your web site.
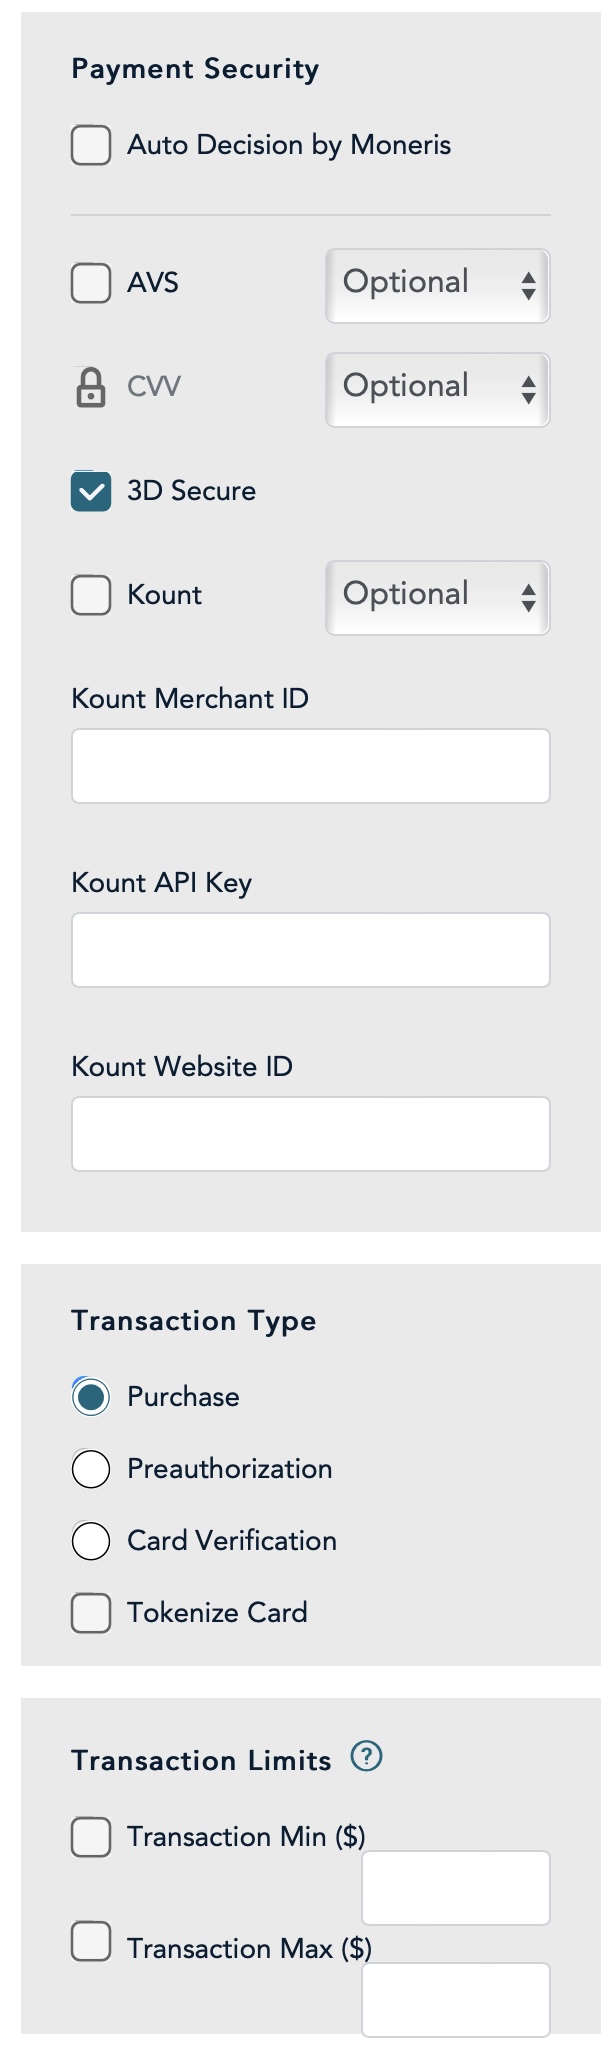
There are more options that you should make the same as the image to the right.
You MUST select Transaction Type as Purchase
Branding and Design
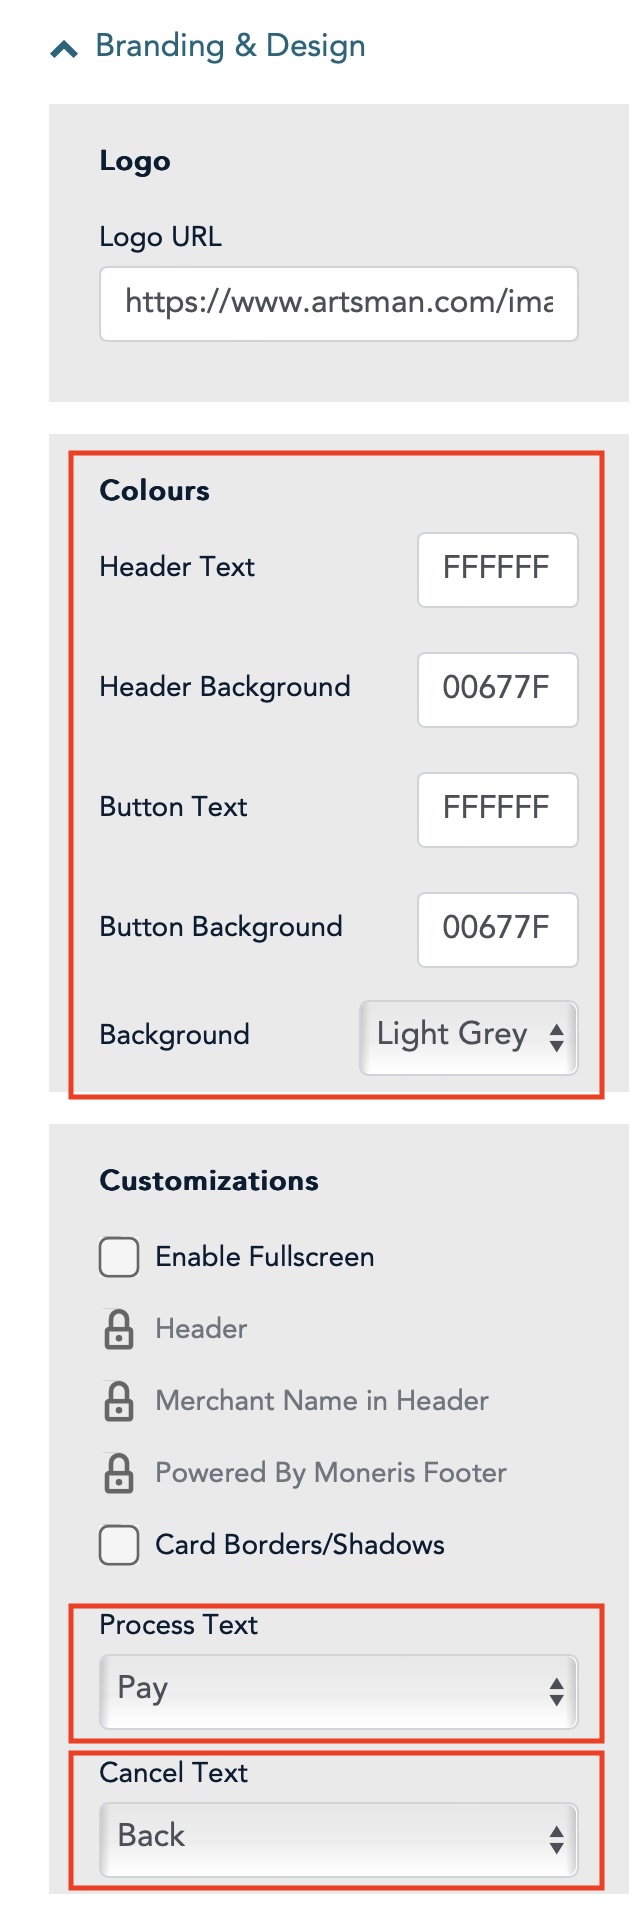 There are three areas that are highlighted that we think you may want to change:
- Colours -these are colours that the web page will be displayed in. They use the internet RGB hex colours and you can change these to suit your web site theme.
- Process Text - this is the text that will display on the button to accept the patrons credit card and to process it. You may select what you wish. We suggest Pay
- Cancel Text - this is the text that will display on he screen to allow the use to use the 'Back' button. You may select what you wish. We suggest Back
Order Confirmation
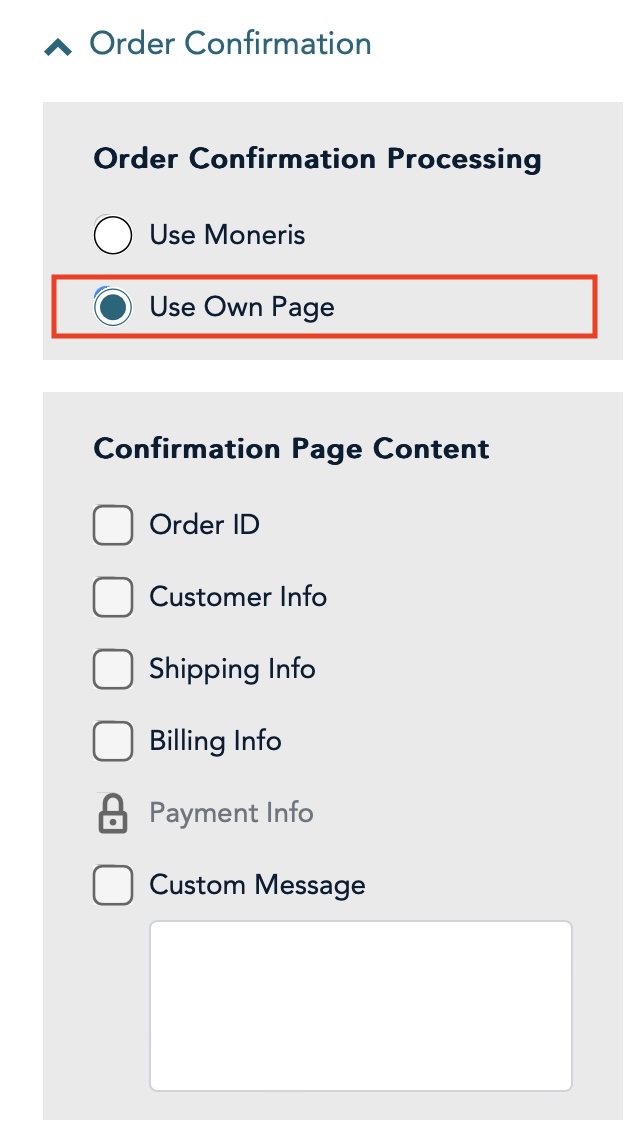 For this section, you must select Use Own Page and nothing else. This is because Theatre Manager must receive the confirmation Moneris that the card was accepted or rejected before it will process the shopping carts.
Email Communications
 Uncheck all of the options to the right, if any are checked
Theatre Manager Setup
Once the Moneris account has been activated and all the information in the following list has been obtained, the Merchant Account in Theatre Manager can be set up on each of the tabs that follow:
- Server Software - Moneris (setting selected in TM)
- Merchant Provider - Moneris Checkout Page (setting selected in TM)
- Main Store Id - xxxxxxxxxx (provided by Moneris merchant services and used to login to Moneris online portal)
- Hosted Store ID - xxxxxx (generated in Moneris online portal)
- Checkout ID - xxxxxx (generated in Moneris online portal)
- Primary URL for LIVE authorizations - set automatically
- ECR Number - 66xxxx (provided by Moneris on the setup information)
- api_token - obtained from the Moneris online portal
Tabs with specific setup info are described in the following help pages. Other tabs like the Employees and Cards tabs are populated the same as described here.
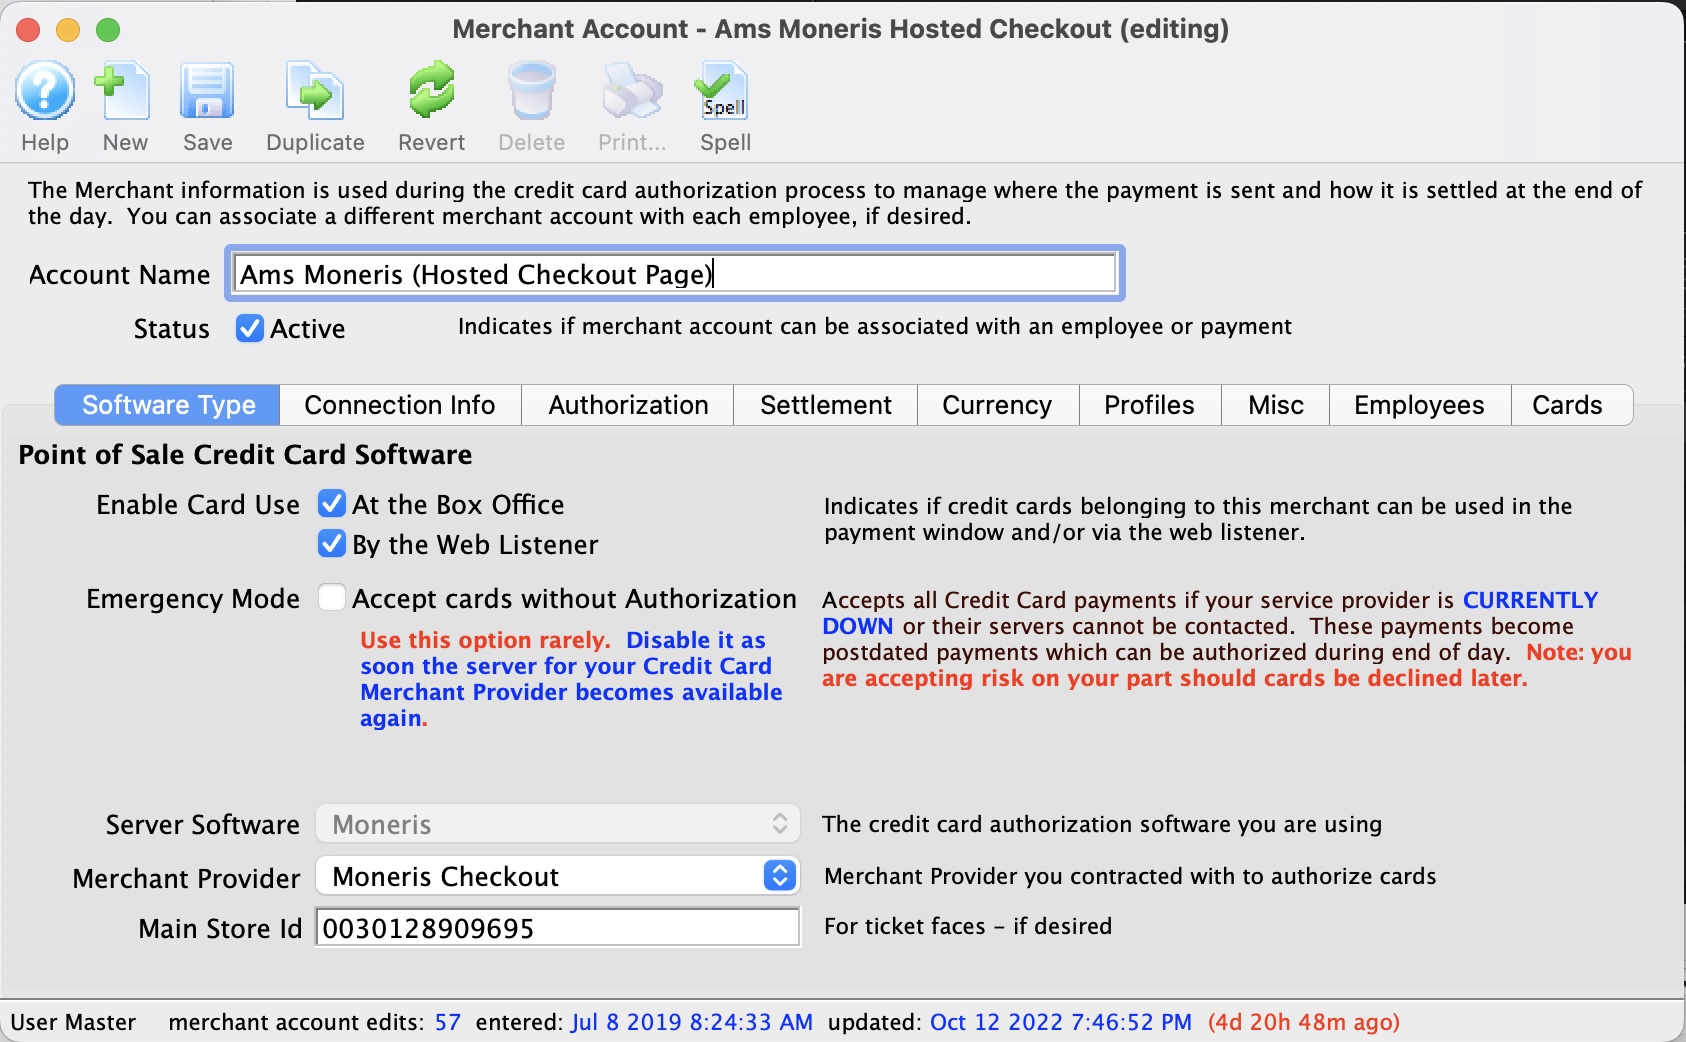
Moneris Hosted Checkout Software Type
- Account Name - enter a description indicating that the purpose of this account is for Hosted Payments
- Status - click to make it active, if not already
- Enable Card Use by Web Listener - click to make it active, if not already. Hosted Checkout Page can be used for online sales to try to be PCI Schedule A compliant
- Server Software - Moneris (setting selected in TM)
- Merchant Provider - Moneris Checkout (setting selected in TM)
- Main Store Id - xxxxxxxxxx (This is your Moneris Store # provided by Moneris. It should be a combination of letters and numbers. This is NOT your Merchant # OR ps_store_id. If the Moneris Store # is incorrect, Theatre Manager will NOT be able to close the credit card batch on the gateway server.)
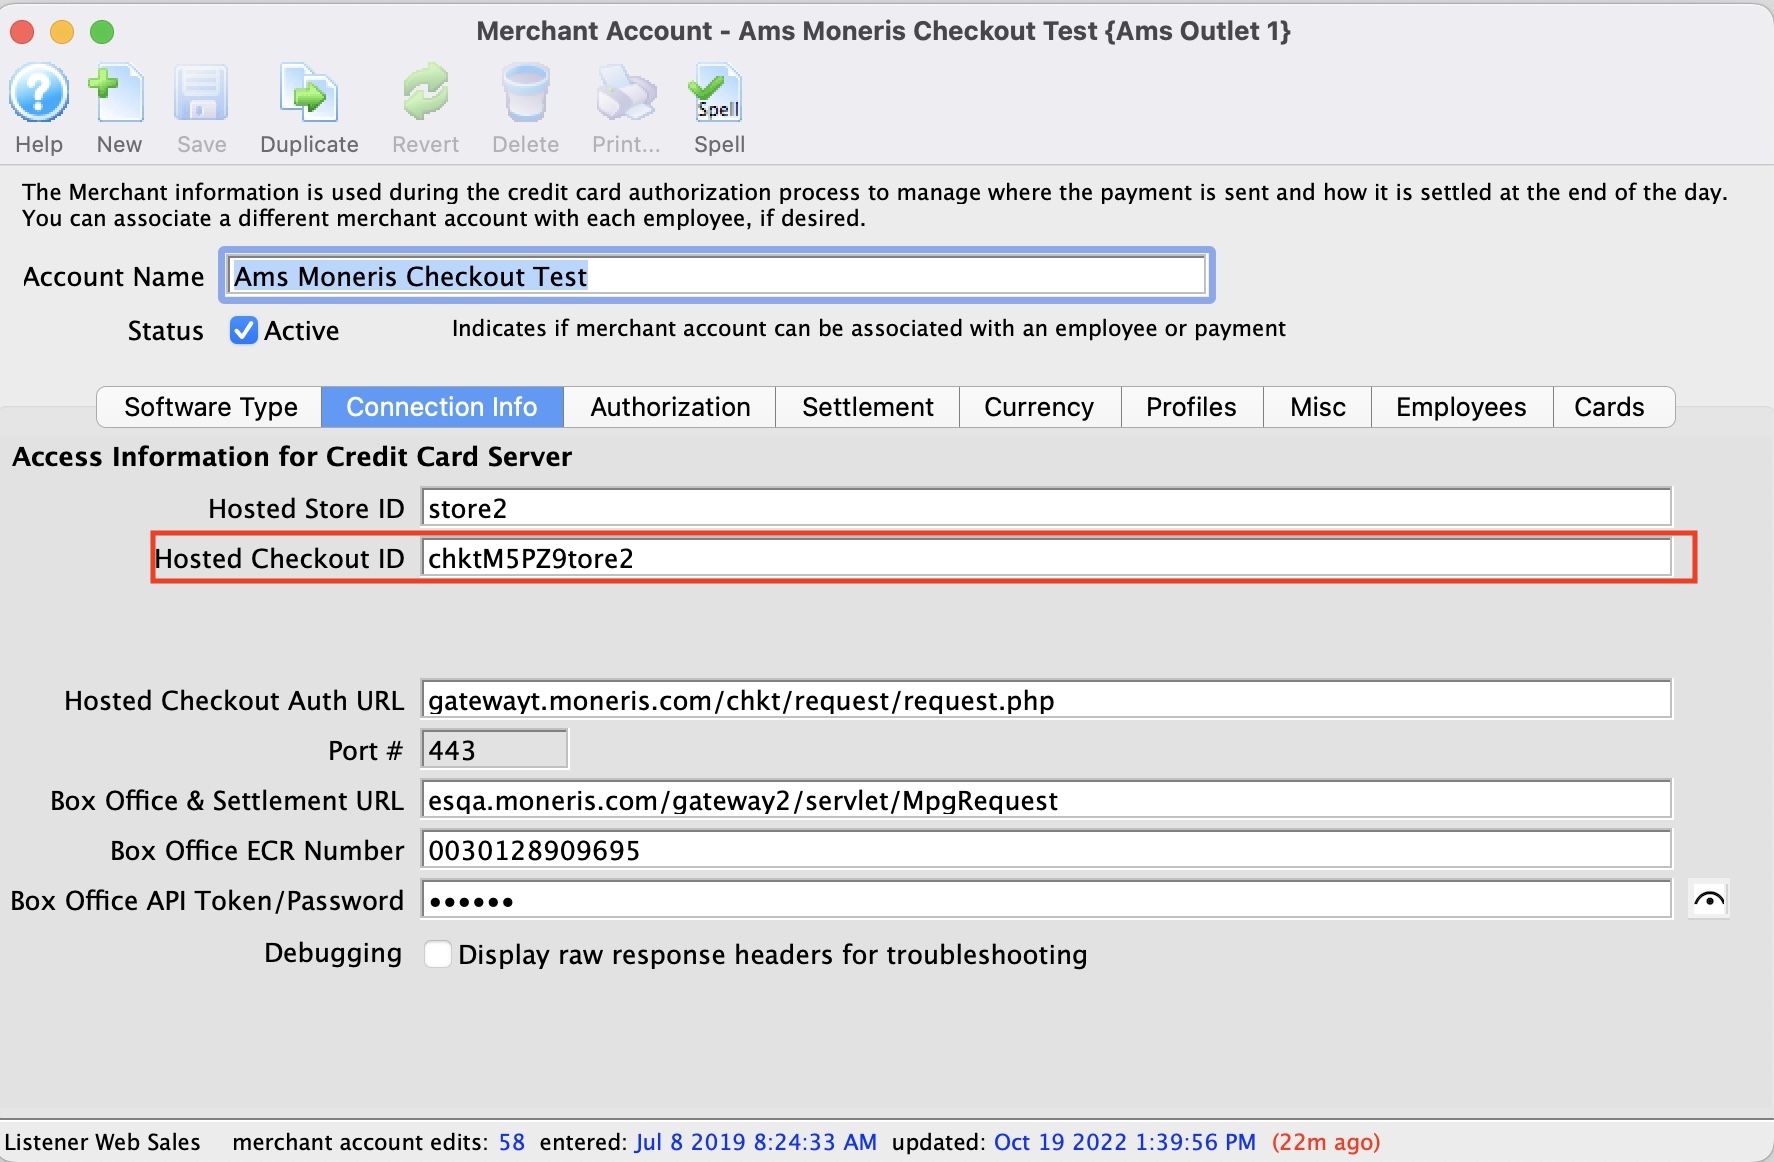
Hosted Checkout Connection Info
- ps_store_id - xxxxxx (generated in Moneris online portal)
- Hosted Checkout ID - xxxxxx (generated in Moneris online portal)
- Authorization URL - automatically set for you
- Settlement URL - automatically set for you
- Port - must be 443
- ECR Number - 66xxxx (provided by Moneris on the setup information)
- api_token - obtained from the Moneris online portal
The Web Experience
|
It is very important to note that the credit card is being entered from the user's browser directly into the Moneris web site. This allows a venue to have:
|
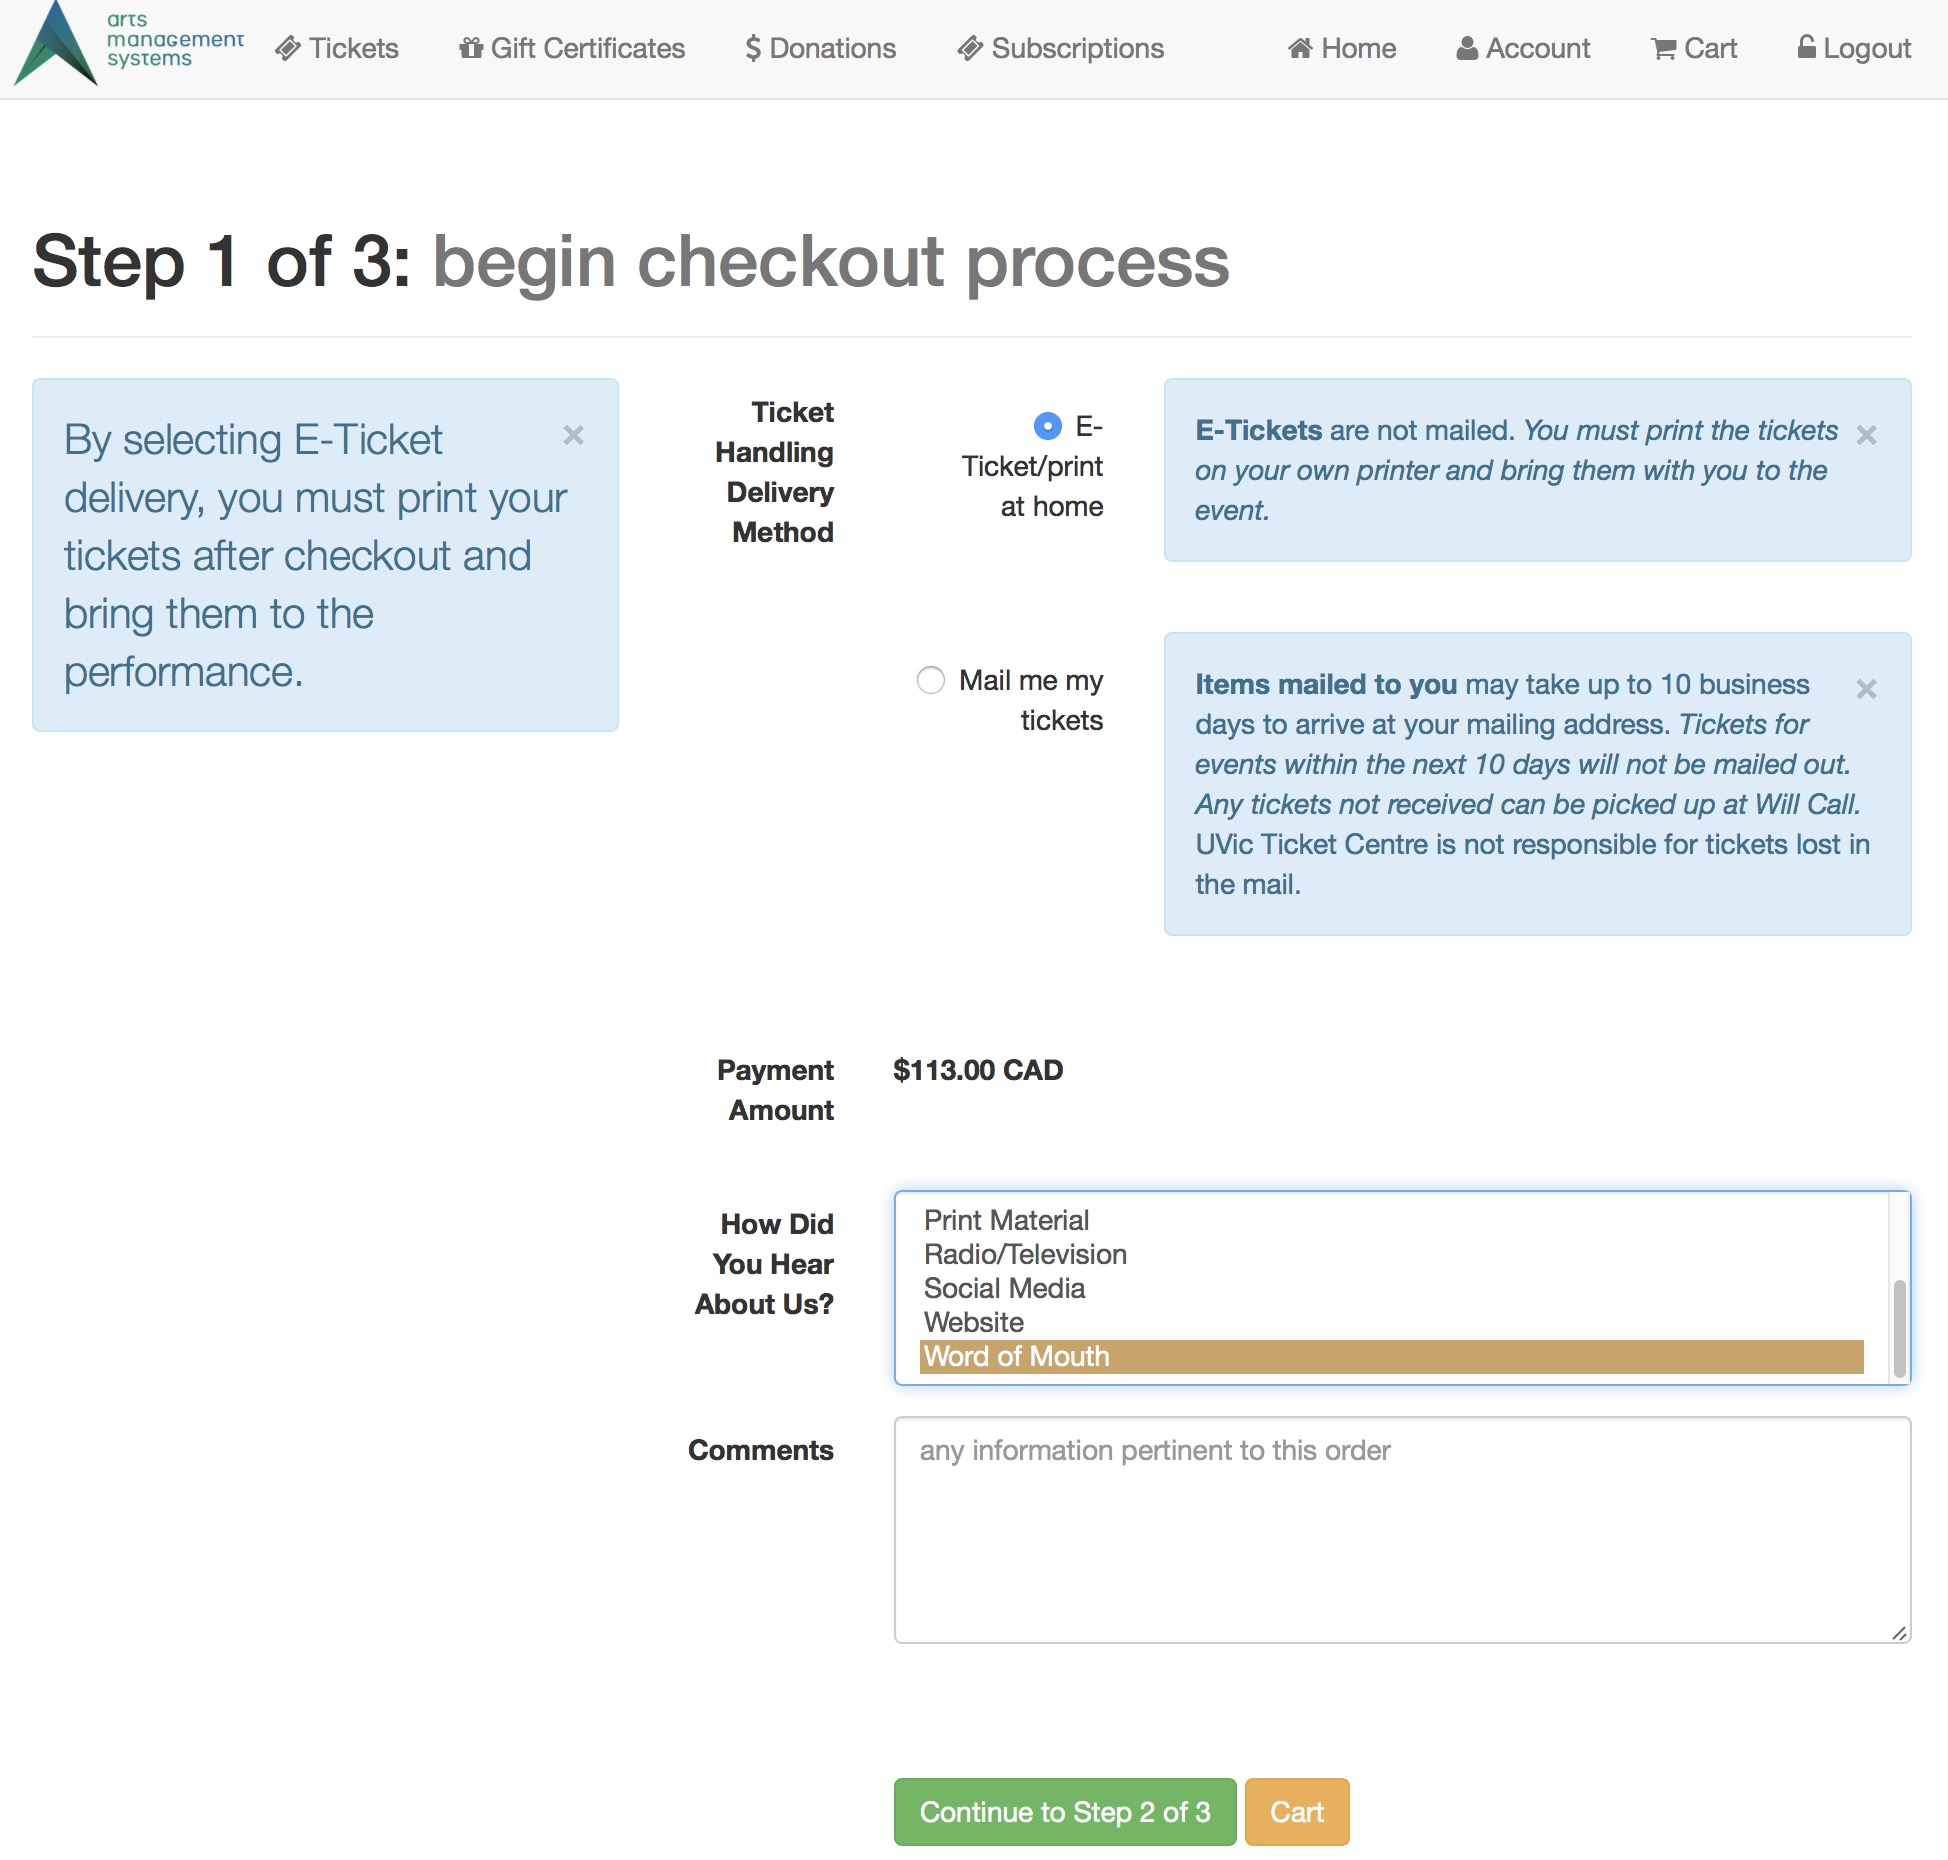 Step 1 of the checkout process illustrates that most of the checkout window appears the same.
The singular difference is that the credit card entry data is missing. Card entry shows up on step 3. |
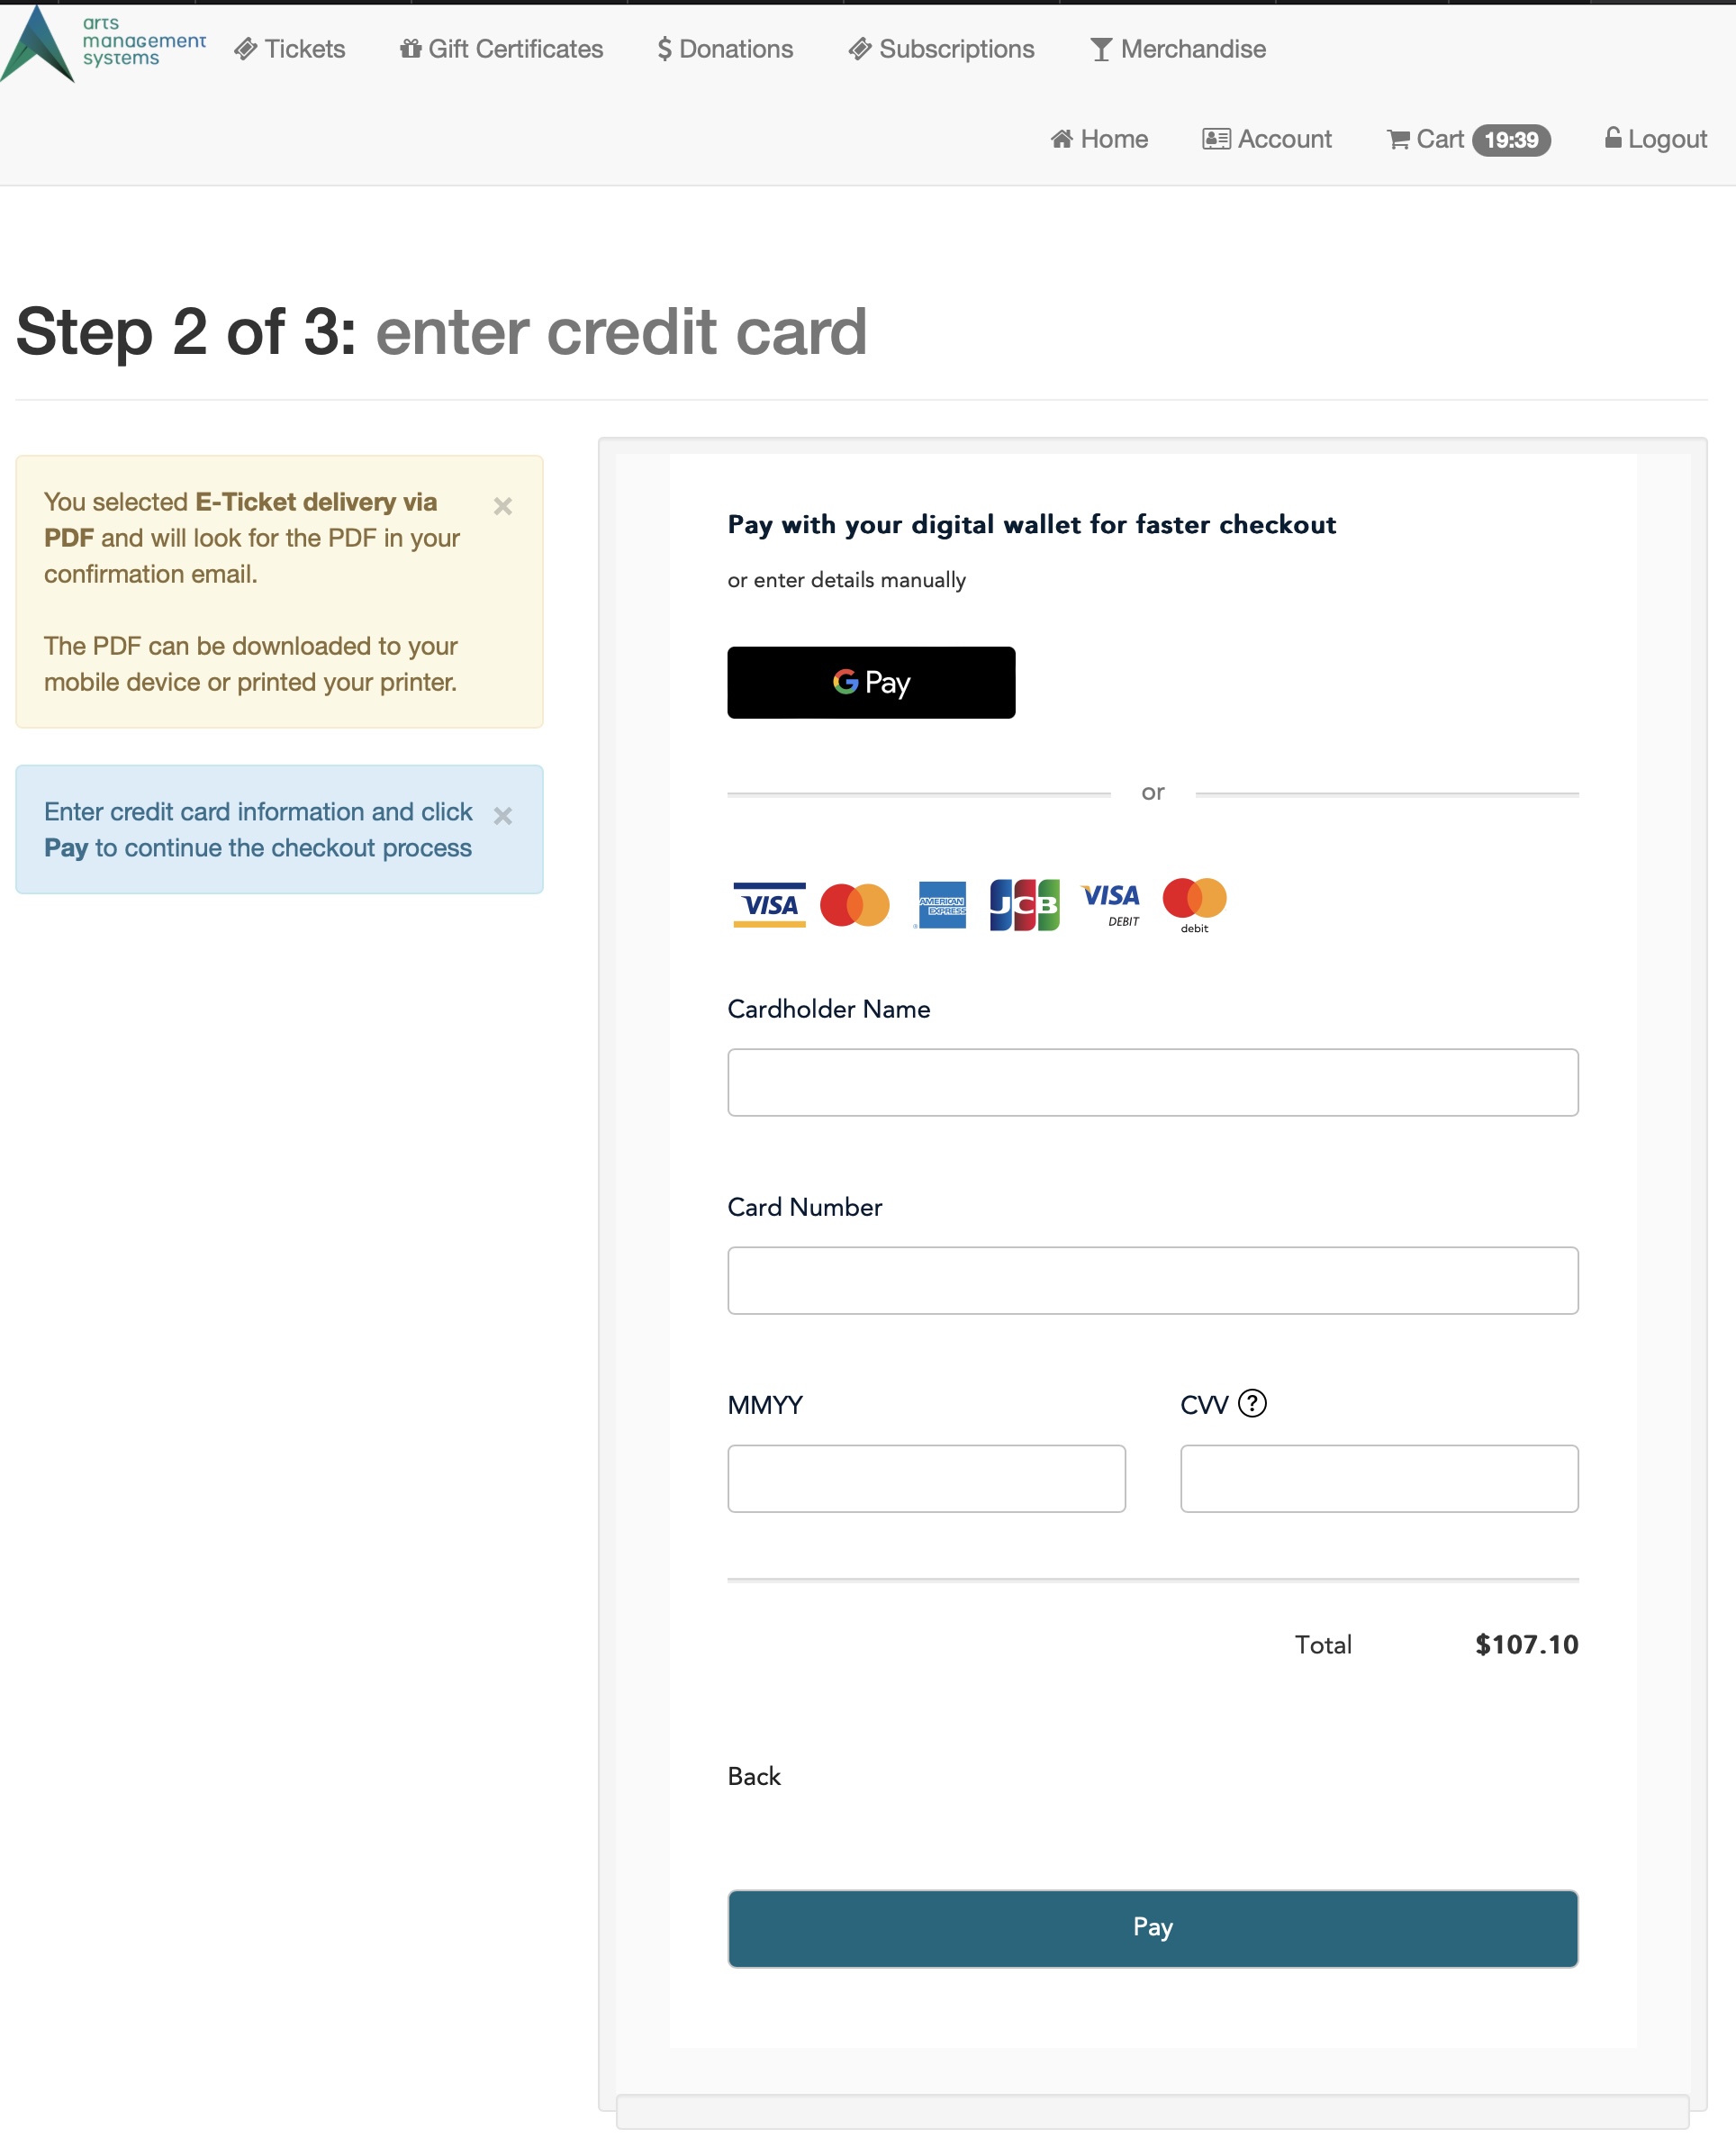 Step 2 shows an example of the actual hosted payment page.
From step 1, the user's browser is directed to the Moneris web site where they enter:
|
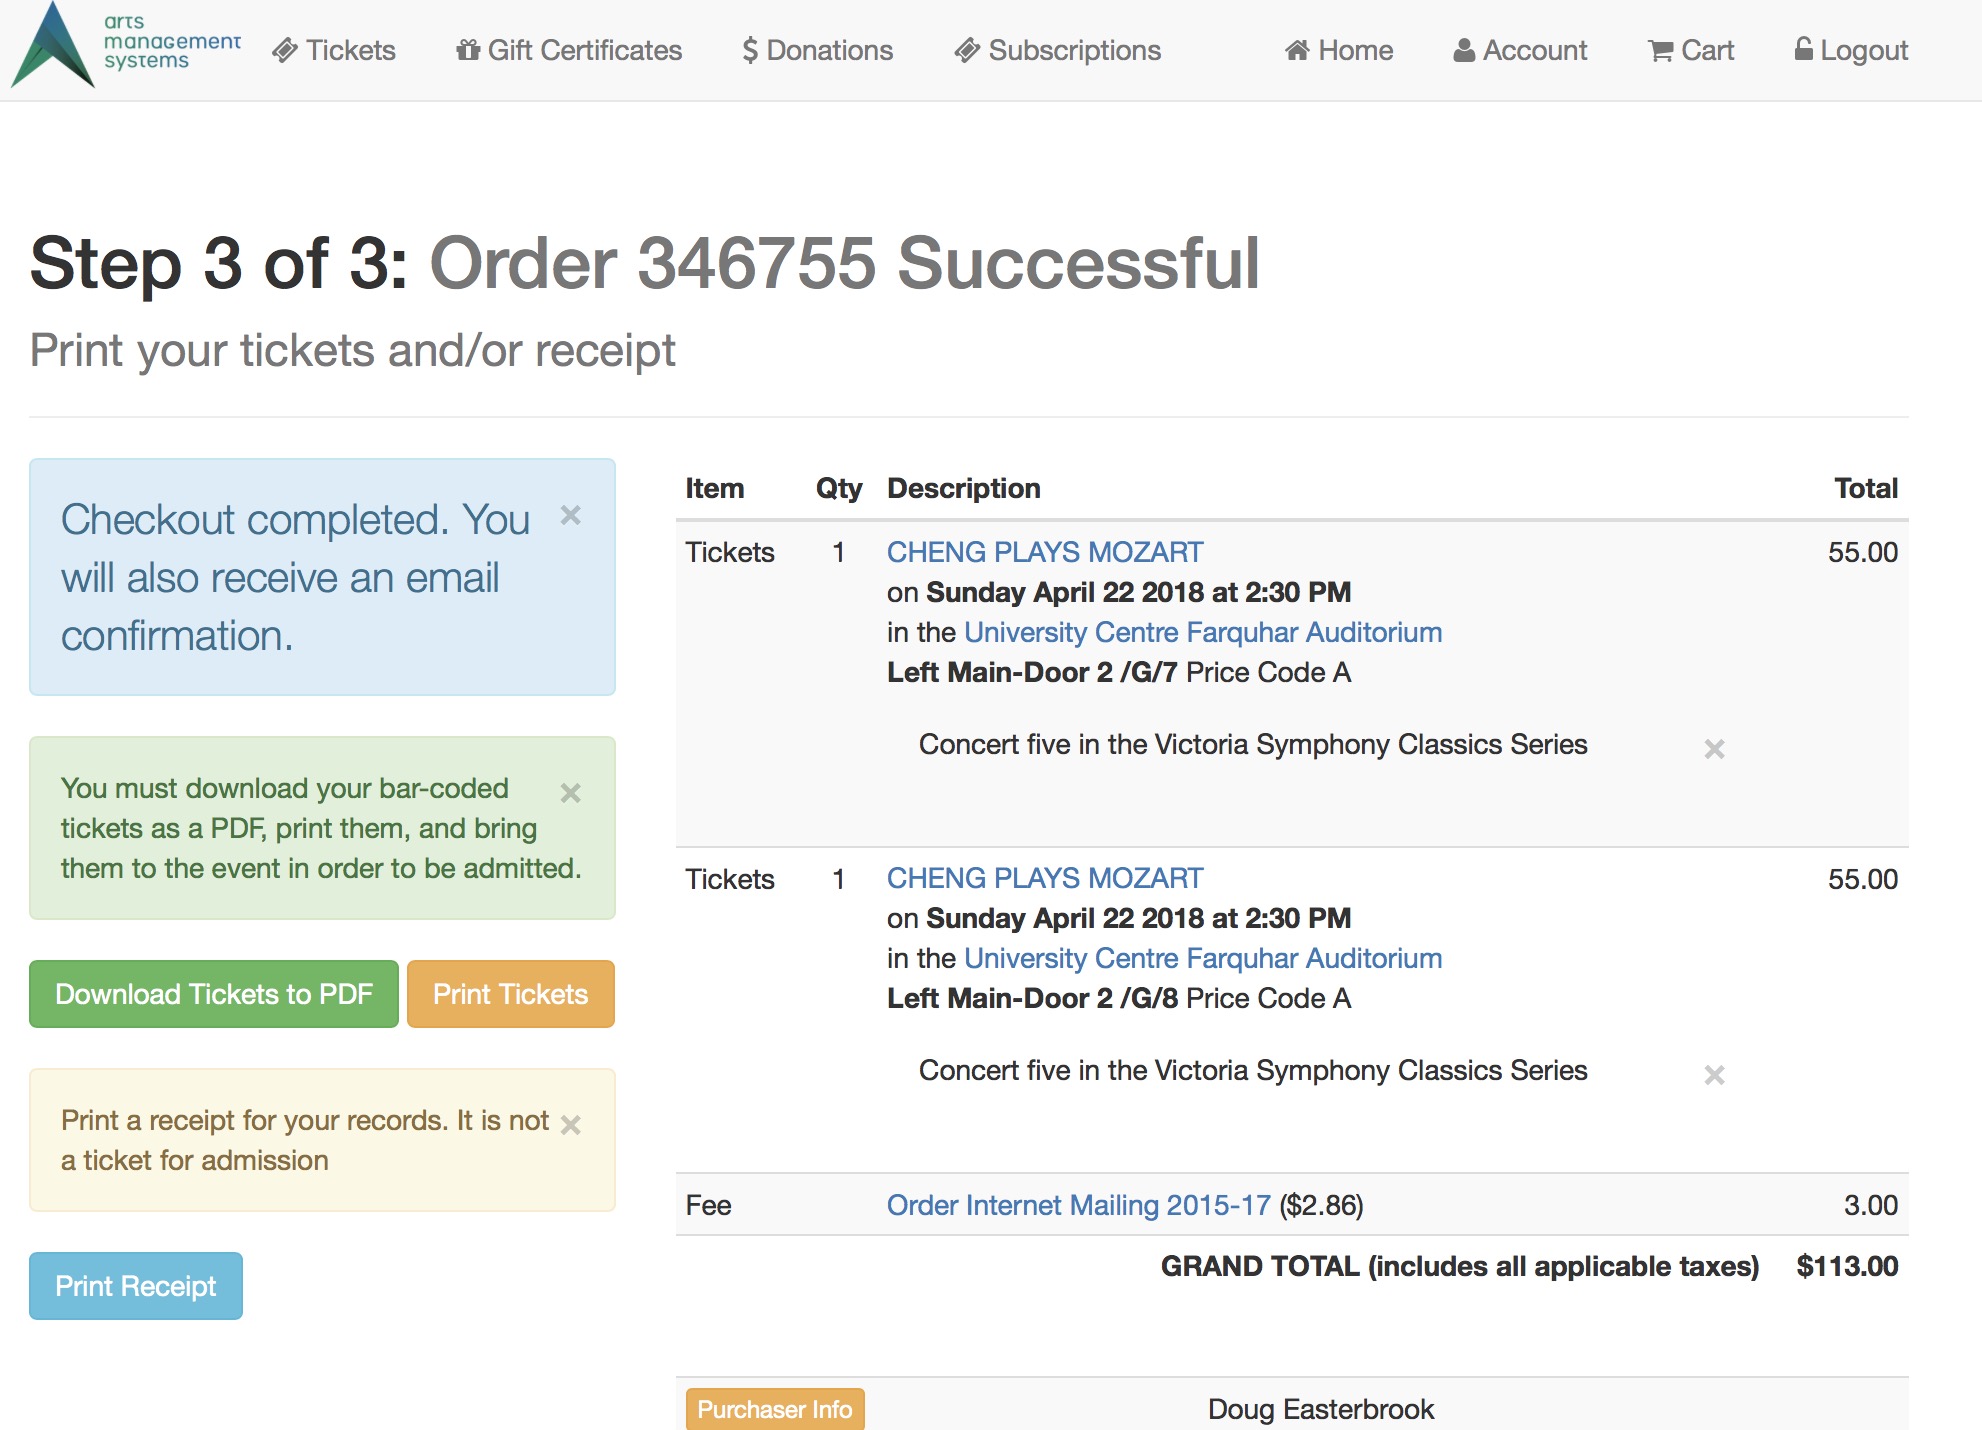 Step 3 remains the same.
This shows the confirmation page where the user can use the print at home feature if enabled. |