EFT Setup
Setup Preperation for Accepting EFT Payments
- Create a Merchant Provider for the Financial Institution where your bank account resides.
- Create an EFT Payment Method linked to the Merchant Provider.
- Set Employee Security - Functions for those employees who can create the EFT File for Submission to the financial instituation.
Merchant Provider Setup

Parts of the Merchant Account - Software Type Window
| Account Name | Name of the merchant account. |
| Status | Active status of the merchant account. |
EFT Merchant Provider Setup
- Create a new merchant account.
- Select Electronic Funds Transfer (EFT) Service as the Server Software.
- Select the Financial Instituation for the Bank Account accepting the funds as the Merchant Provider type.
- Enter the Merchant Number provided to you from your bank.
- Enter the Connection Information provided to you from your bank.
 |
A separate merchant provider will need to be created for each designated bank account that will receive EFT payments. For example, if your organization deposits monthly donors into Account A, and Government Grants into Account B, and you want to enable EFT Payments for both Accounts A & B, you will need to setup 2 Merchant Providers for each designated bank account. |
Software Type
Parts of the Merchant Account - Software Type
| Server Software | The EFT authorization software you are using. Choose Electronic Funds Transfer (EFT) Service. |
| Merchant Provider | Name of the Merchant Provider contracted to accept the EFT File for submission processing. |
| Merchant Number | Merchant or client ID number issued by the merchant provider and is placed on payment receipts. |
EFT Merchant Provider Setup
- Select Electronic Funds Transfer (EFT) Service as the Server Software.
- Select the Financial Instituation for the Bank Account accepting the funds as the Merchant Provider type.
- Enter the Merchant Number provided to you from your bank.
Connection Info
Parts of the Merchant Account - Connection Info (Canada)
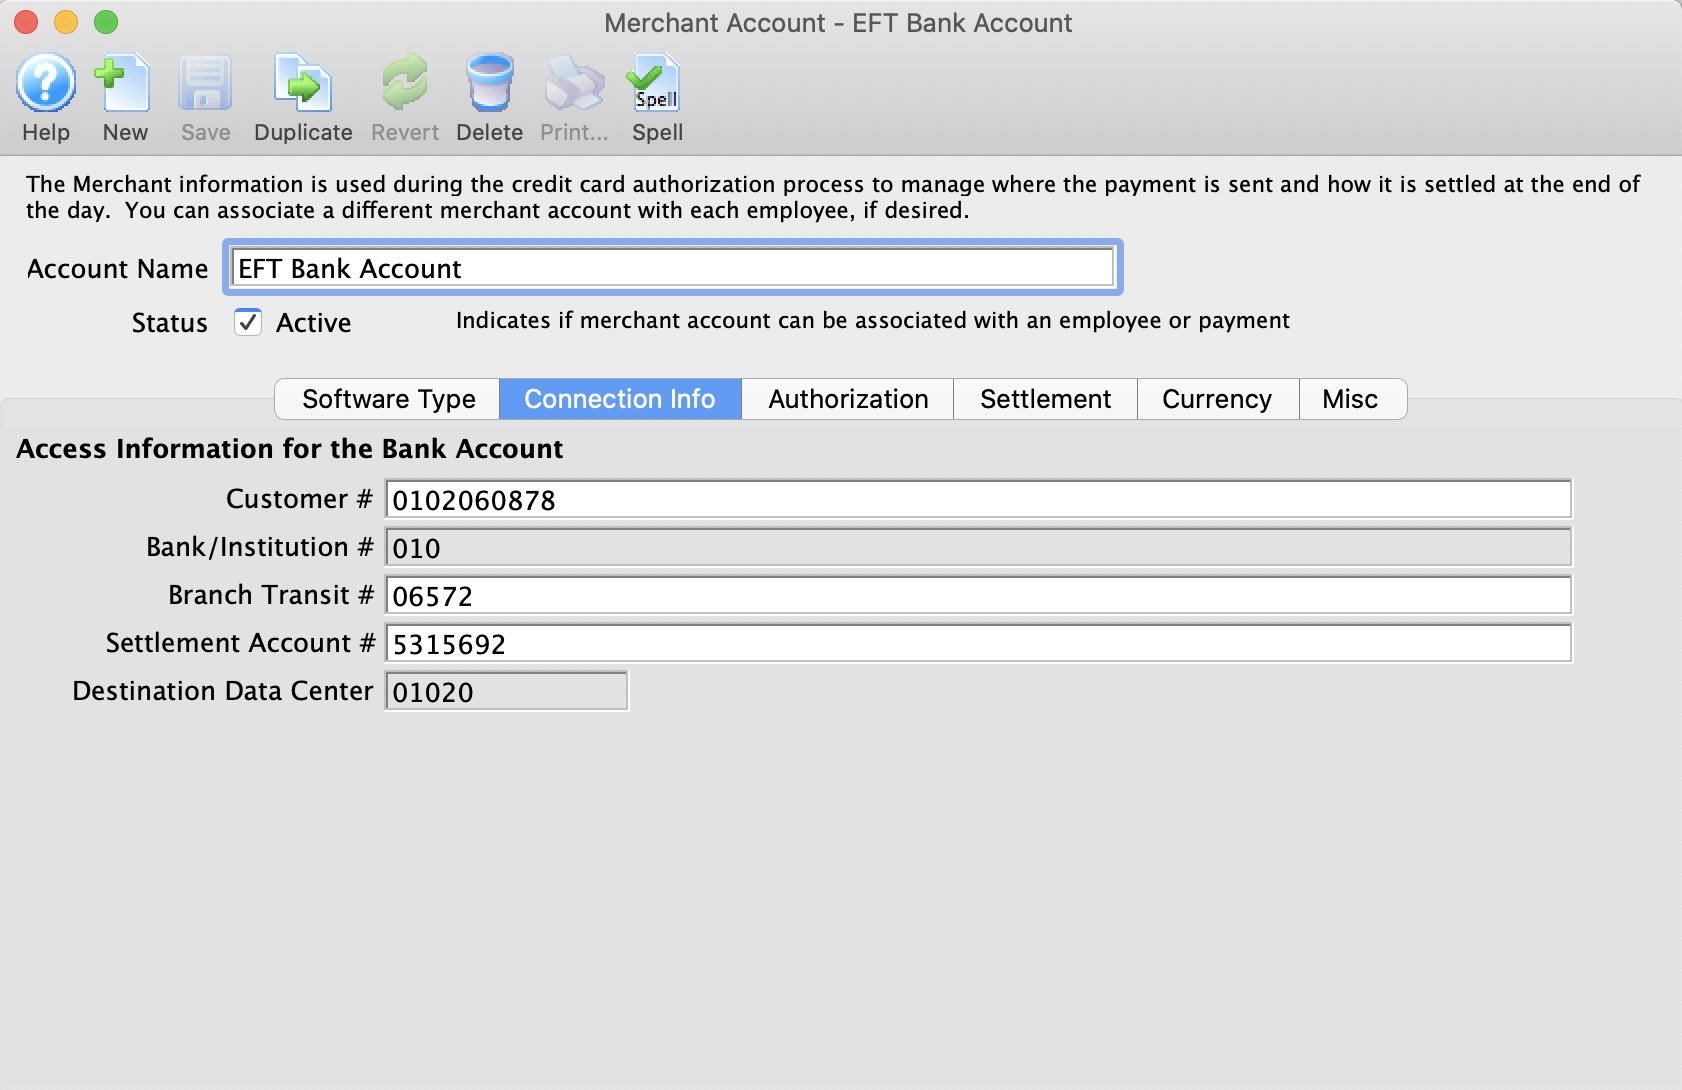
| Customer # | An unique customer number assigned by the financial institution to identify the sender of the EFT file. |
| Bank/Instituation # | The bank/institution number assigned to the financial instituation |
| Branch Transit # | The bank/institution branch number assigned to the financial instituation. |
| Settlement Account # | The account number provided to you by the bank/institution. |
| Destination Data Center | Destination Data Centre where the EFT file is to be processed. |
Parts of the Merchant Account - Connection Info Window (USA)
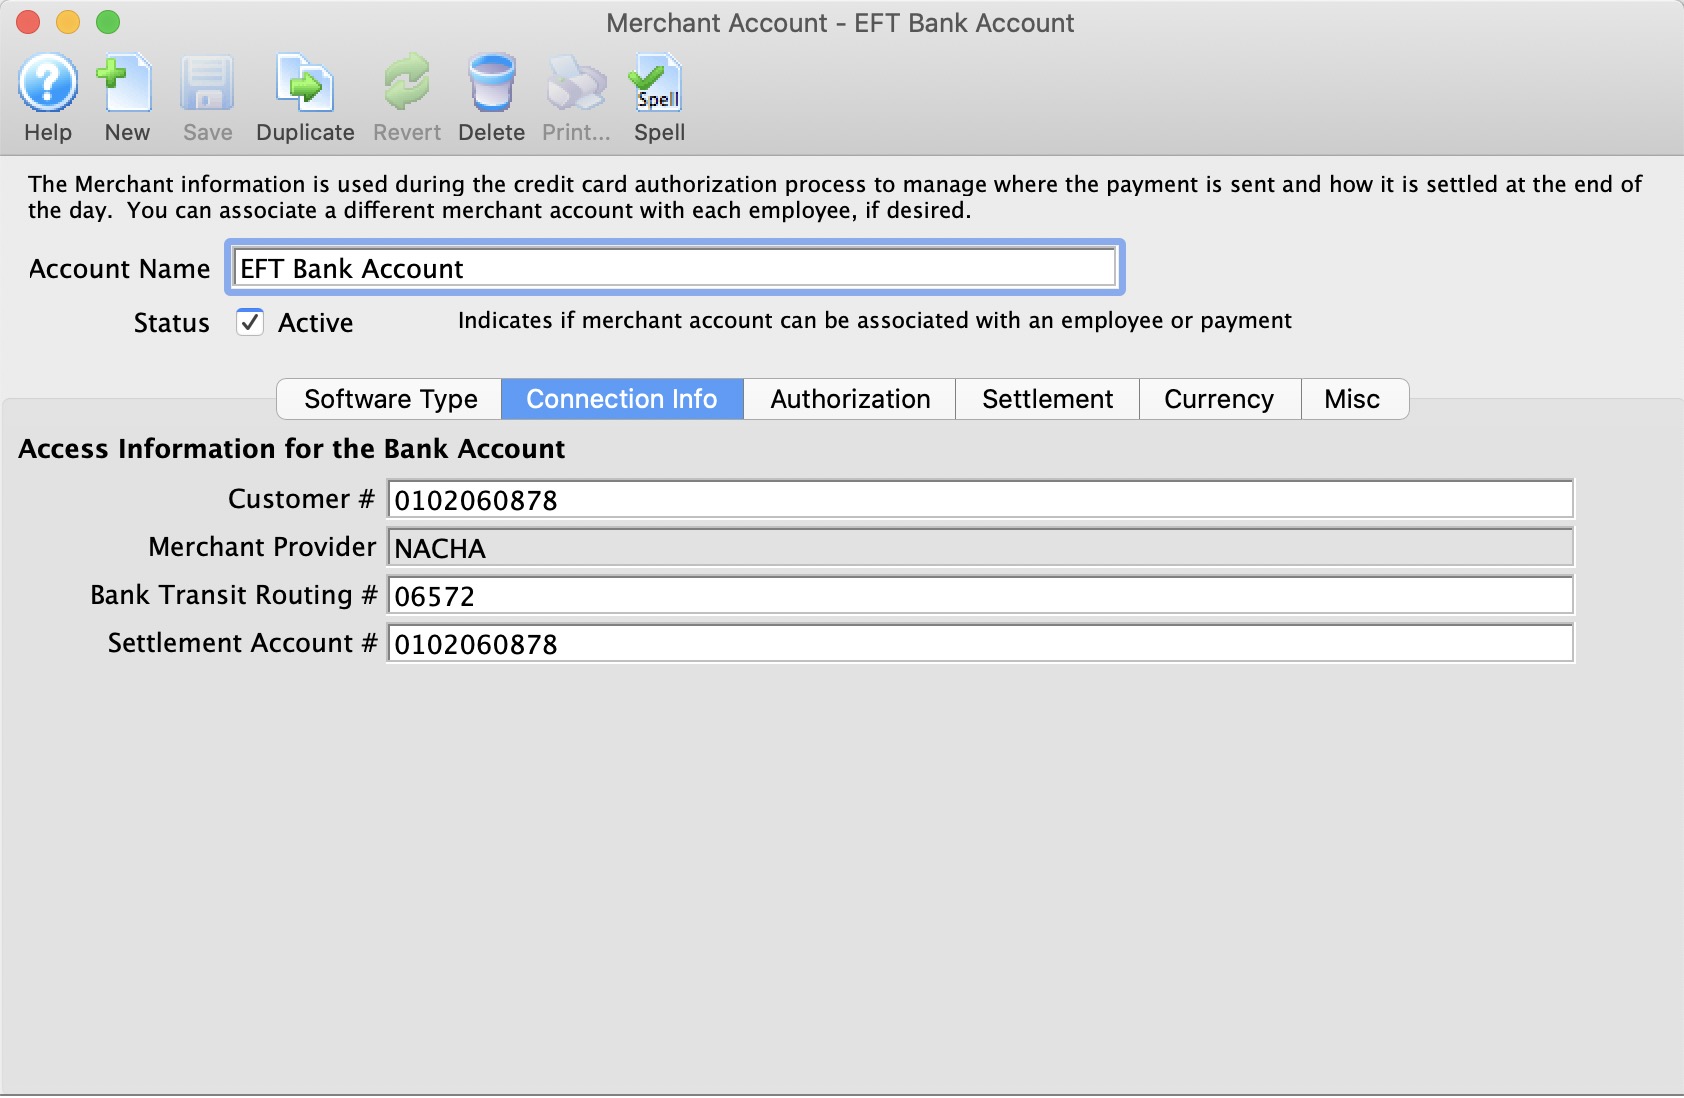
| Customer # | An unique customer number assigned by the financial institution to identify the sender of the EFT file. |
| Merchant Provider | The bank/institution number assigned to the financial instituation. Always will be NACHA. |
| Bank Transit Routing # | The bank/institution branch number assigned to the financial instituation. |
| Settlement Account # | The account number provided to you by the bank/institution. |
Authorization
Parts of the Merchant Account - Authorization
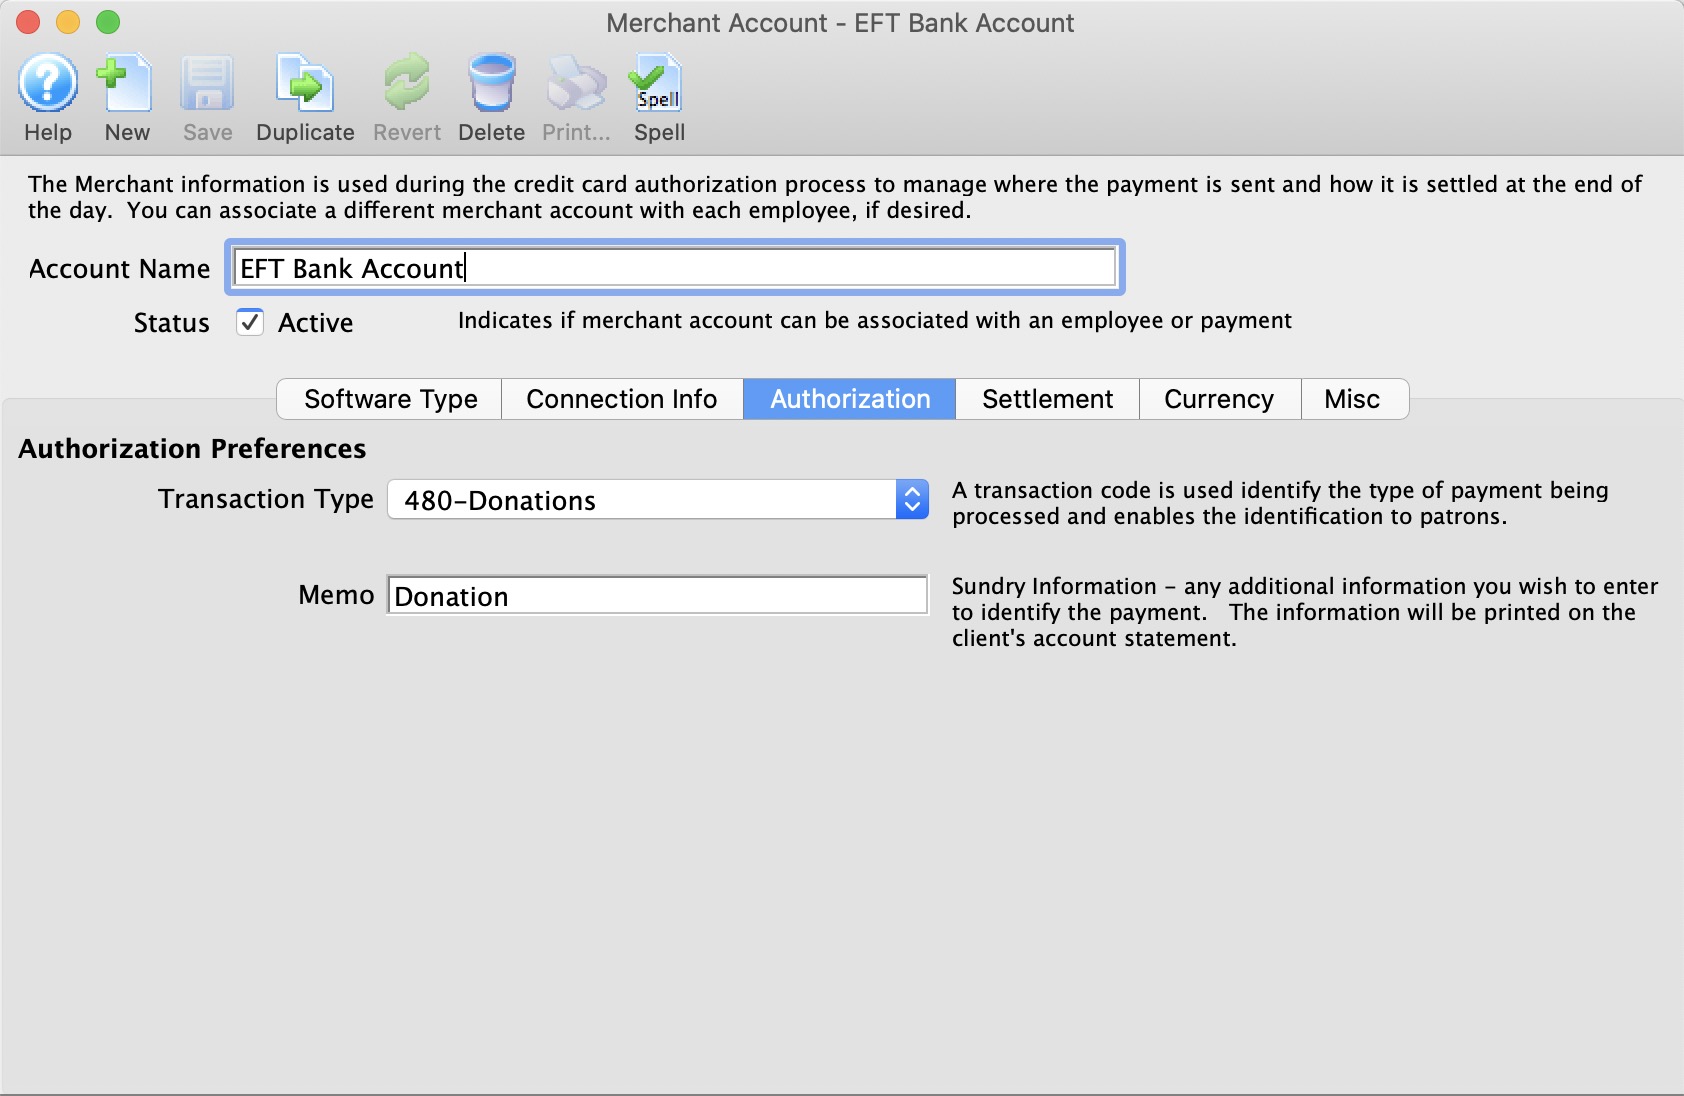
| Transaction Type | A transaction code is used identify the type of payment being processed and enables the identification to the patron. This code may appear on patron's bank statements. |
| Memo | Additional information to identify the EFT payment. This information may appear on patron's bank statements. |
Settlement
Parts of the Merchant Account - Settlement
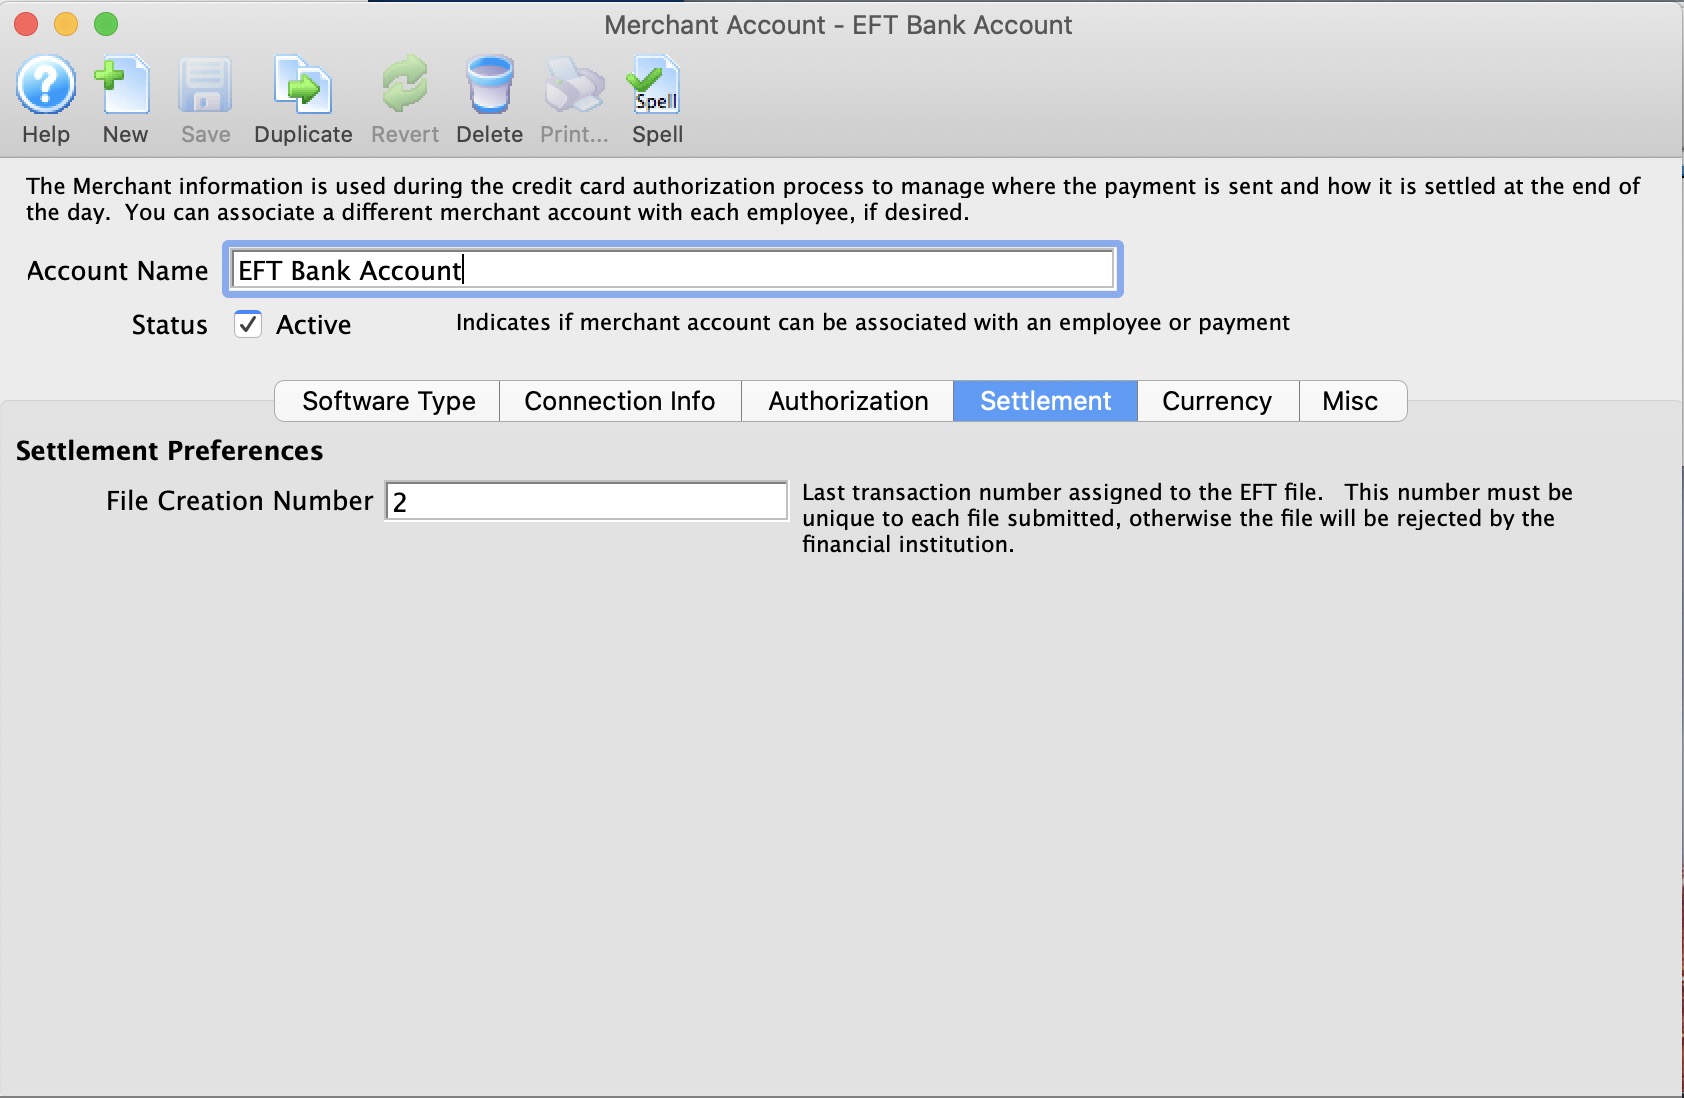
| File Creation Number | Last transaction number assigned to the EFT file. This number must be unique to each file submitted, otherwise the file will be rejected by the financial institution. |
File Creation Number Requirements:
- This number must begin at 0001 for all new accounts. This implies, leave the field empty when the merchant account is created or when you're ready to do your first EFT File creation.
- If a file creation number is skipped for any reason, your bank may reject the entire EFT file from processing.
- A file creation number can never be repeated.
- When the file creation number gets to 9999, the next number will be 0001. (I know, this breaks the rule above, but as we know, all rules are meant to be broken in special situations)
Currency
Normally, EFT accounts are in the same currency for the country you reside in. If you are able to process EFT Payments in another currency, then you need to know what that is. And it needs to be in your currency exchange table. When an EFT Payment is processed Theatre manager will:
Setup on this tab is particularly important if you are accepting foreign currencies in your box office. Click here for more information.
For more information about setting up Currency Exchange details and rates, click here.
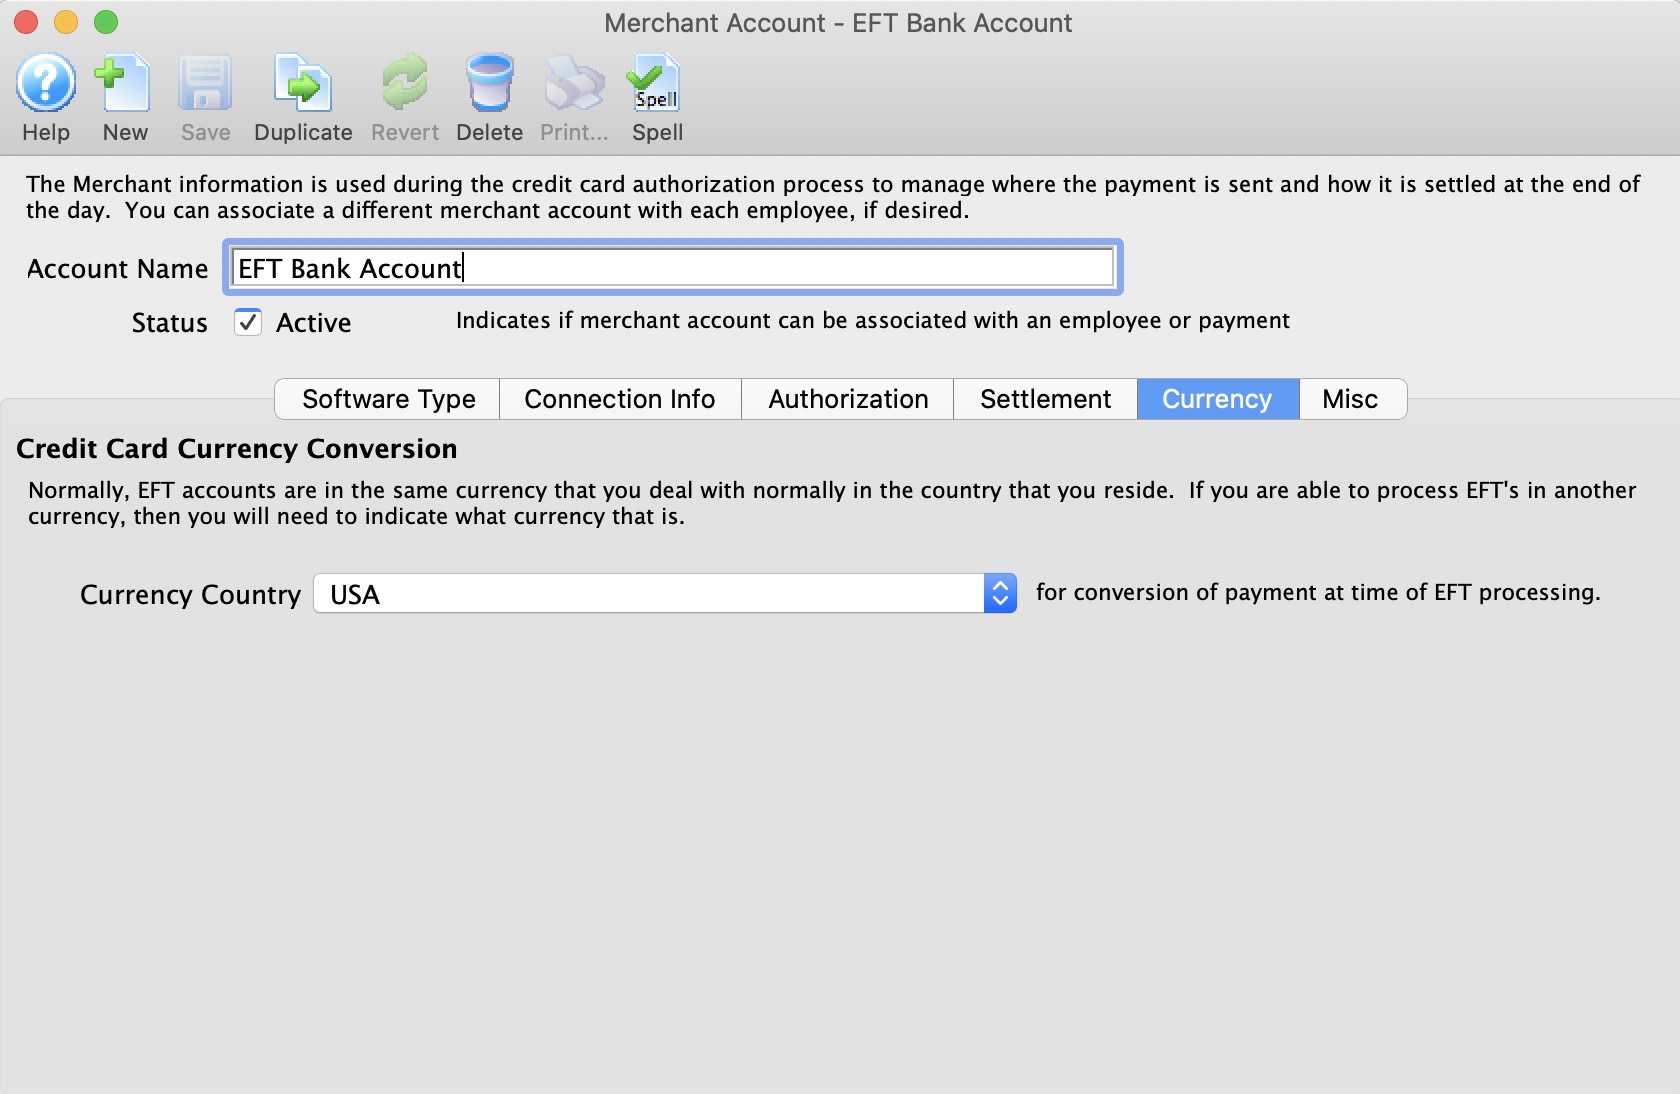
Parts of the Merchant Account - Currency
Currency Country |
Select the desired country from the Currency Country drop down. |
Miscellaneous
Parts of the Merchant Setup - Miscellaneous
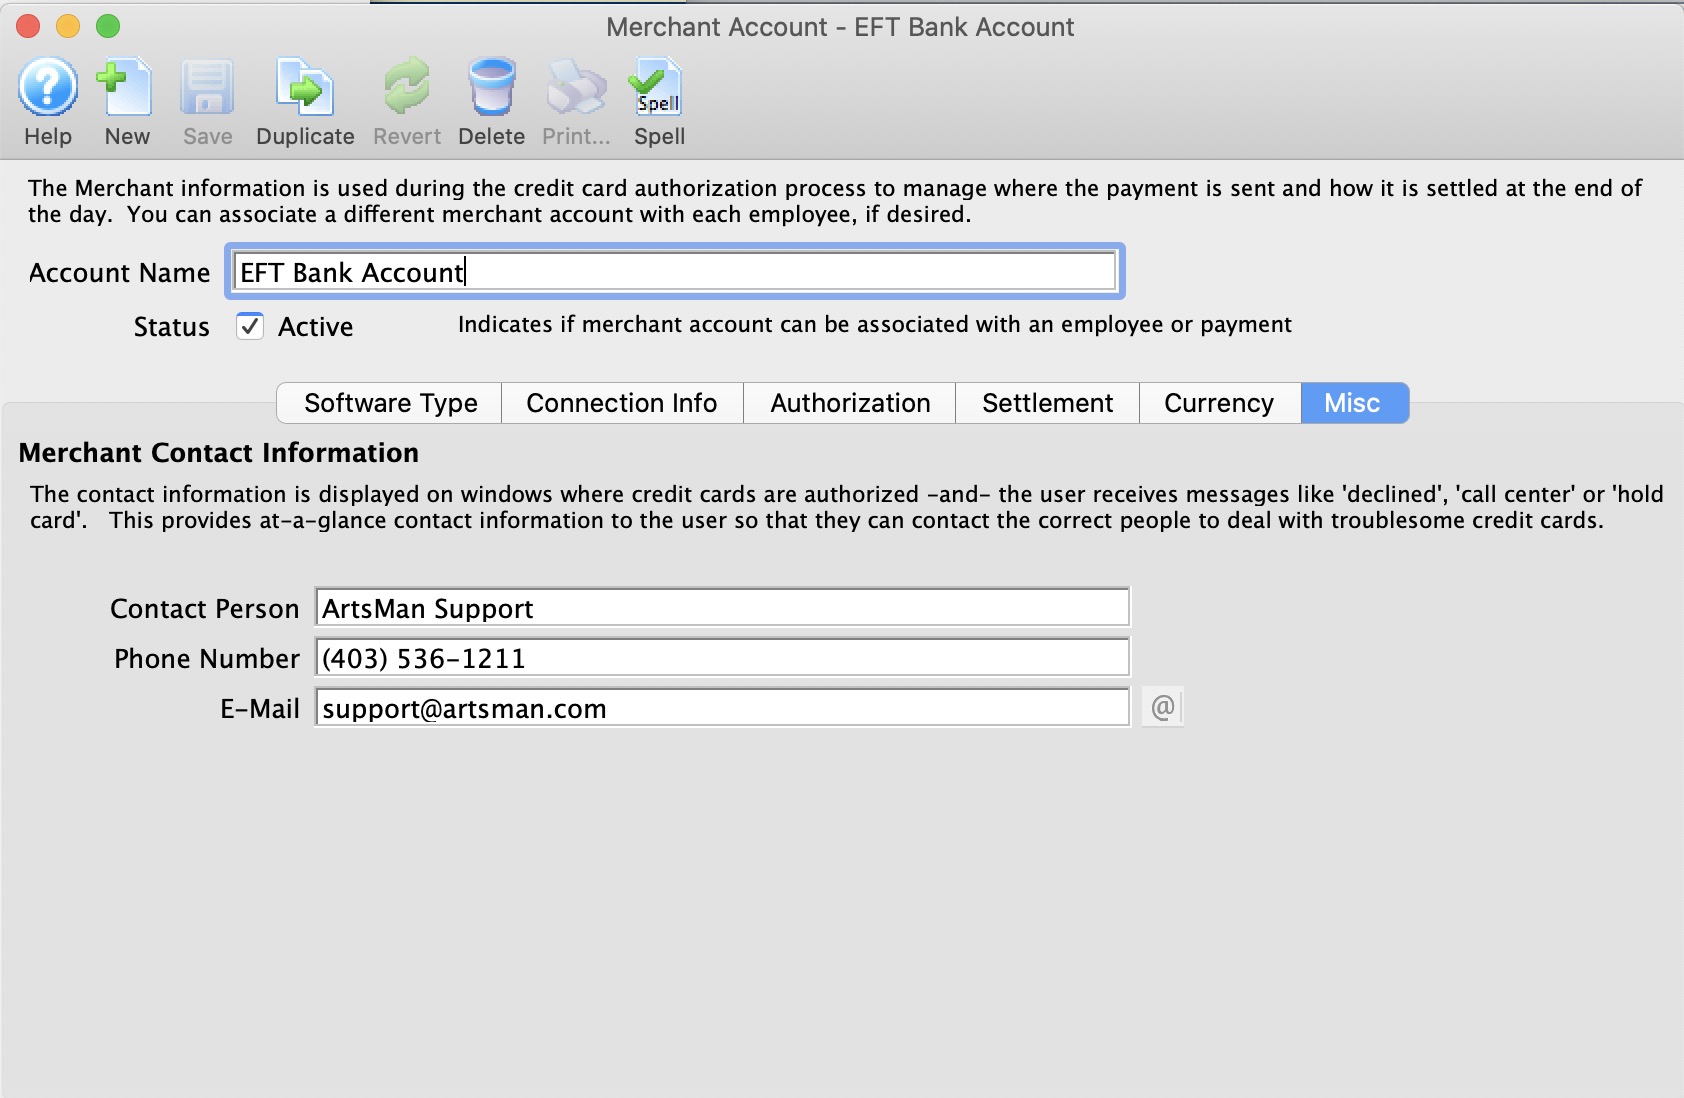
The miscellaneous tab is used to provide contact information for your merchant provider or bank representative. Please put information into these fields so that your staff will know who to contact in case of error messages from the merchant provider.
Contact Person |
Enter the name of the Merchant Contact person when an error occurs with the EFT file submission to the bank. |
Phone Number |
Enter the phone number of the contact person |
Enter the e-mail address of the Contact person |
|
Opens an email to be sent to the address listed |

Payment Method Setup for EFT
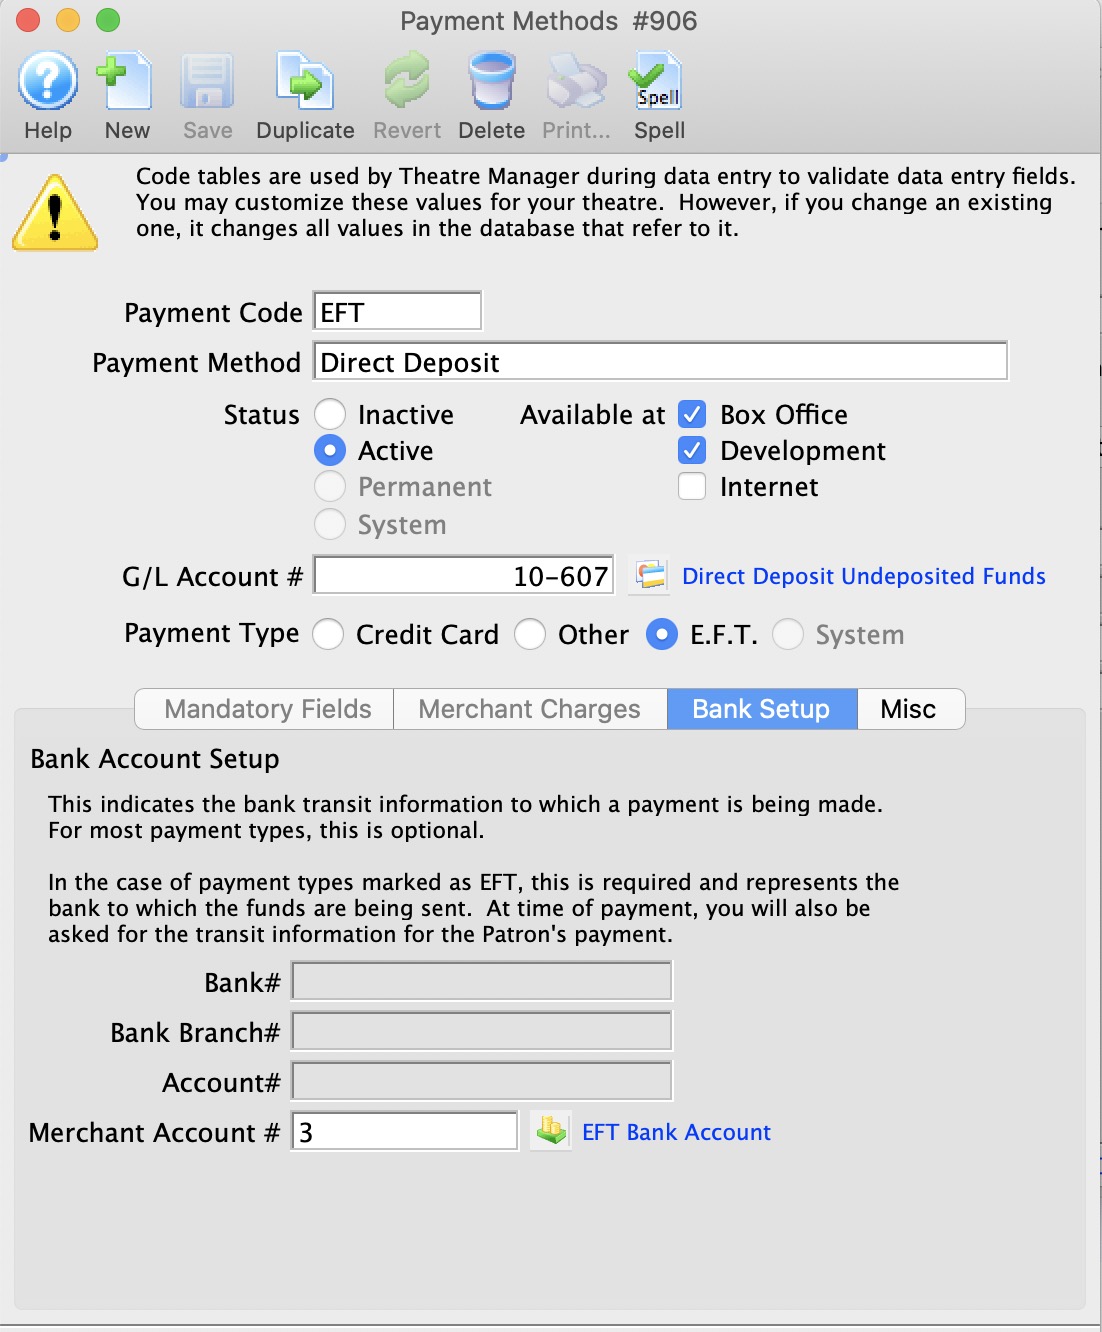
EFT Payment Method Setup
- Create a new Payment Method in the Payment Methods Code Table.
- Set the Payment Type as E.F.T.
- Set the Merchant Account # to be the merchant account created as the Server Software type Electronic Funds Transfer (EFT) Service.
 |
EFT Payment methods are available at the Box Office and Development only. |
|
You may want to change the GL Account # associated with the EFT payment method from using the standard “Bank Account-Chequing” (the assumption that it made it into the bank on the same day), change it to have its own account number based on a Clearing Account, or "A/R-EFT Clearing from Bank”. This way, if you want to ensure that GL account for “Bank Account-Chequing” is only updated when the $$ actually processed by the bank, you can monitor the bank statements, and manually create a GL Entry moving the funds from the clearing account to the “Bank Account-Chequing” when the bank has transferred over the funds. |
Employee Setup for EFT
EFT Employee Function Setup
- Edit the Employee(s) who will create the EFT File from Theatre Manager.
- Enable Create EFT bank transmission file in the functions tab under the Accounting options area for those employees who will be allowed to create the EFT File from Theatre Manager.
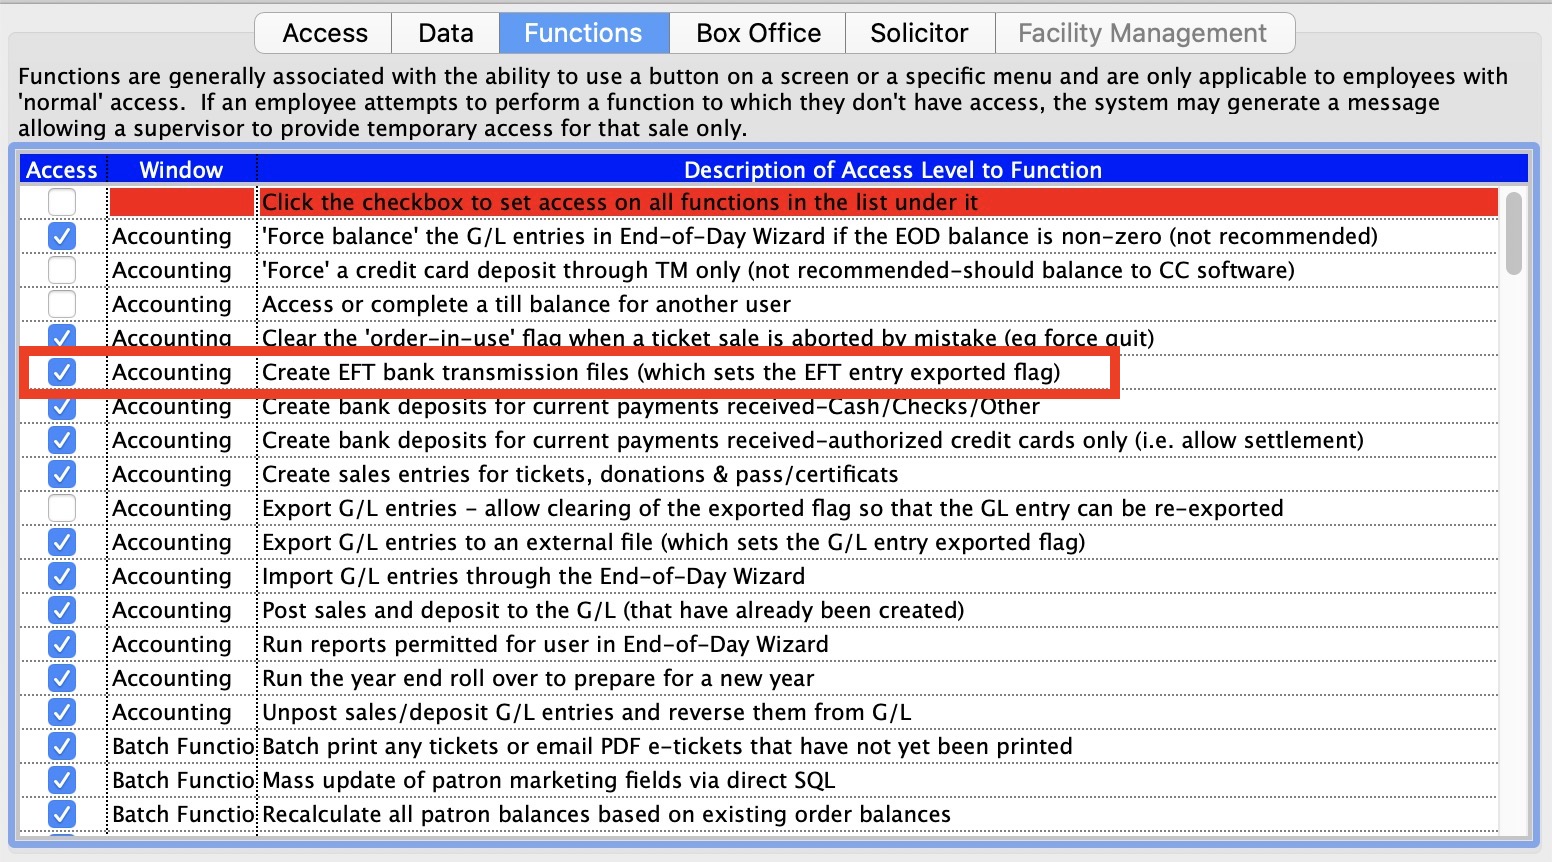
|
The employee who is able to create the EFT bank transmission files can be a different person from who may actually submit the file for processing with the bank. This allows the box office to prepare the file and someone else (i.e. the accountant or box office manager) to submit the file to the bank for processing. |