Create SVG map for Pricing Map
 |
To make an SVG map, please find your original Powerpoint document, or if you've imported it into TM for safekeeping, you can export it to get the original file.
You must also have completed the steps to set up the graphic map under the Graphic Map tab for box office sales. |
Making an SVG Map from the Powerpoint document
The best way we have found to create a very useable SVG map will closely match your existing box office maps is to use Open Office (free) and your original PPT document. NOTE: Users must use the older Power Point file format of .ppt. The newer, default format of .pptx, can cause issues when being converted to .SVG.
- If you have not done so, export your PPT map from the database or find the original source document
- Tidy up your PPT document using Powerpoint before converting it to SVG.
- Use one of the following software options to convert a PPT into SVG format
- Open Office 4.1.4 (Recommended - free) or later which can be obtained from www.openoffice.org
- Adobe Illustrator CS6 (paid) - this can be found online for downloads - which we know some customers use. We have not tried the Adobe Illustrator Creative Cloud CC product (since it locks you into a subscription).
Note: after you have created an SVG document that is to your liking, you can use OpenOffice to make your PPT map edits from that point forward if you feel comfortable using it as an editing tool as well as a graphics format conversion tool.
Exporting the Original PPT Map
|
After making your final changes to the graphic map, you should save it to the database so that you can retrieve it later on - should you want to alter and aspect of the map or use it to make another pricing map for dynamic pricing.. |
Saving the original (Powerpoint) copy of the Map into the Database
Saving the original file that was used to create the maps:
- Select the Description tab on the Pricing Map editing window.
- Click on your powerpoint document
- Drag it on top of the button that will be labelled 'Import PPT File' or 'Update PPT File' as indicated below
- Release the mouse
- If the message at the bottom of the screen indicates 'Source PPT document imported', you are done.

Exporting the Original PPT Map from the Database
If you have saved the original source drawing/map in the database as recommended, you can export it out again. Traditionally, we have used Powerpoint to create maps, but it has always been possible to use other drawing tools like OpenOffice.
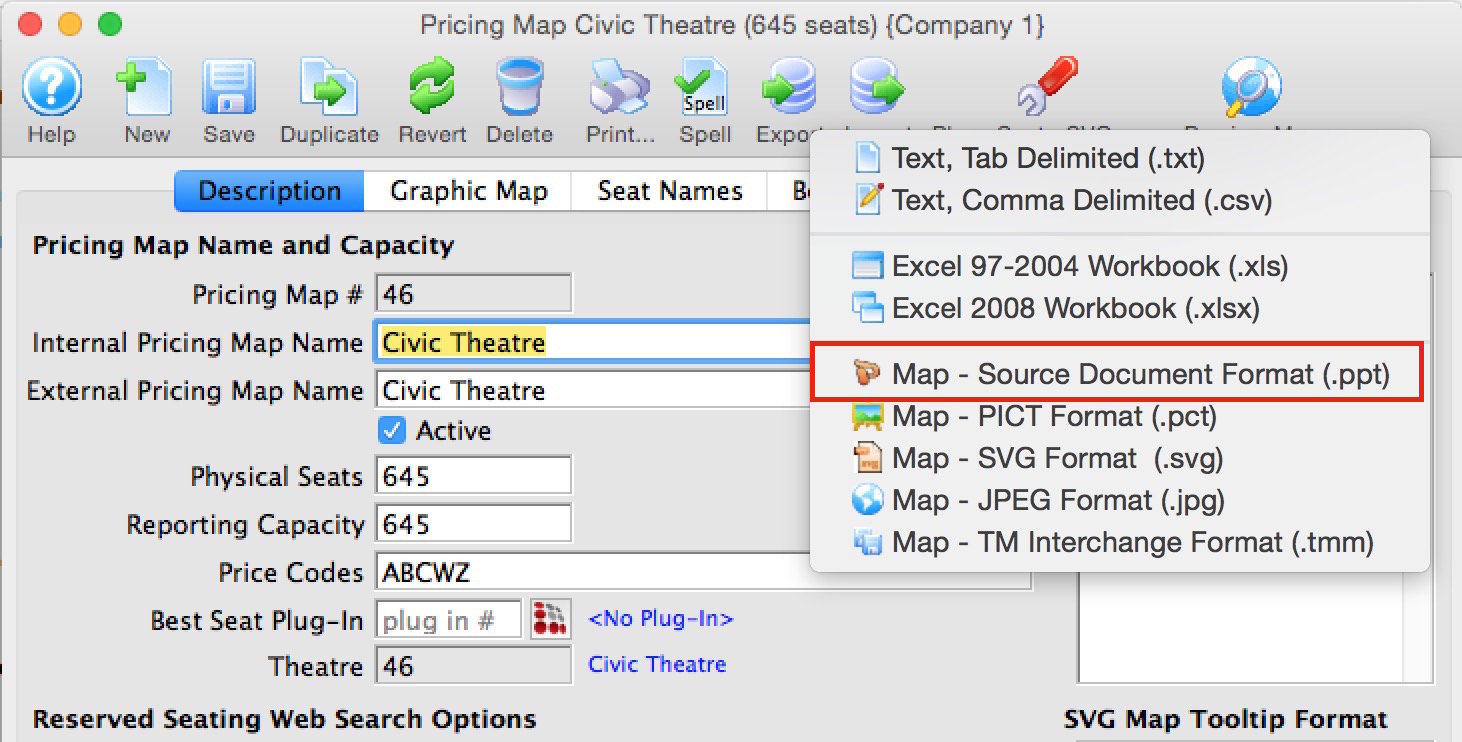
- Click on the Description Tab
- Click on the Export toolbar icon at the top of the screen
- Select Map - Source Document Format (.ppt)
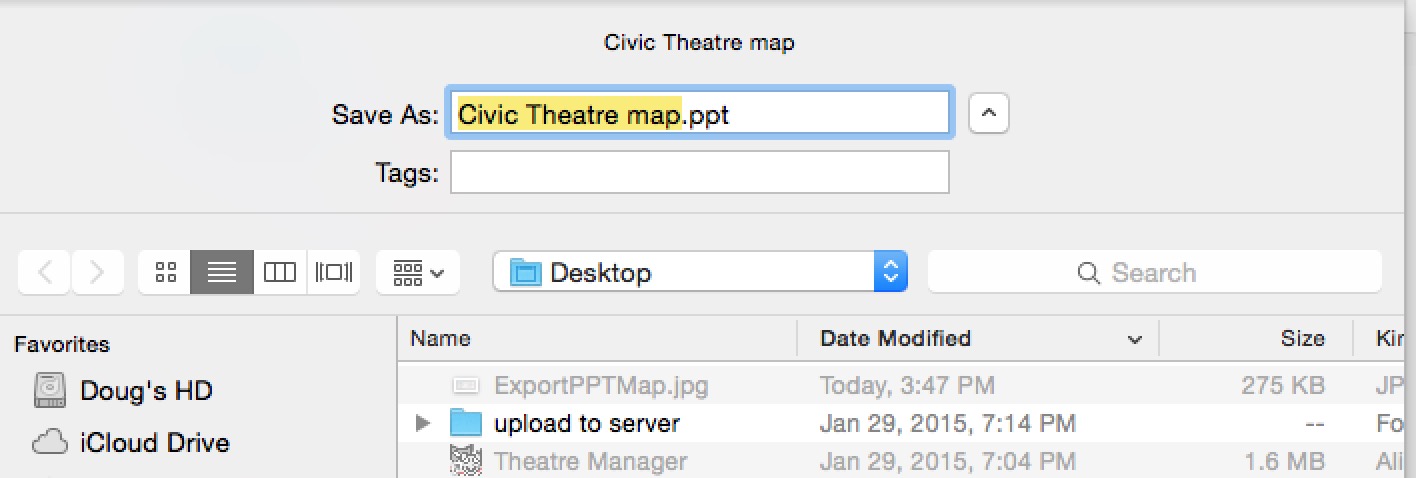
- Select the location to save the file- the desktop is a good place for working with it. It will default to a name that matches your pricing map name.
Prepare the PPT Document the First Time
 If this is the first time you are converting the pricing map PPT document to SVG to prepare it for pick-your-own seats, there are a few steps that will help in the process. Once you are happy with the map and it converts nicely to SVG, you should not have to do this step again.
- Open the document in Powerpoint (any version should work - these steps were tested with office 2008 for mac)
-
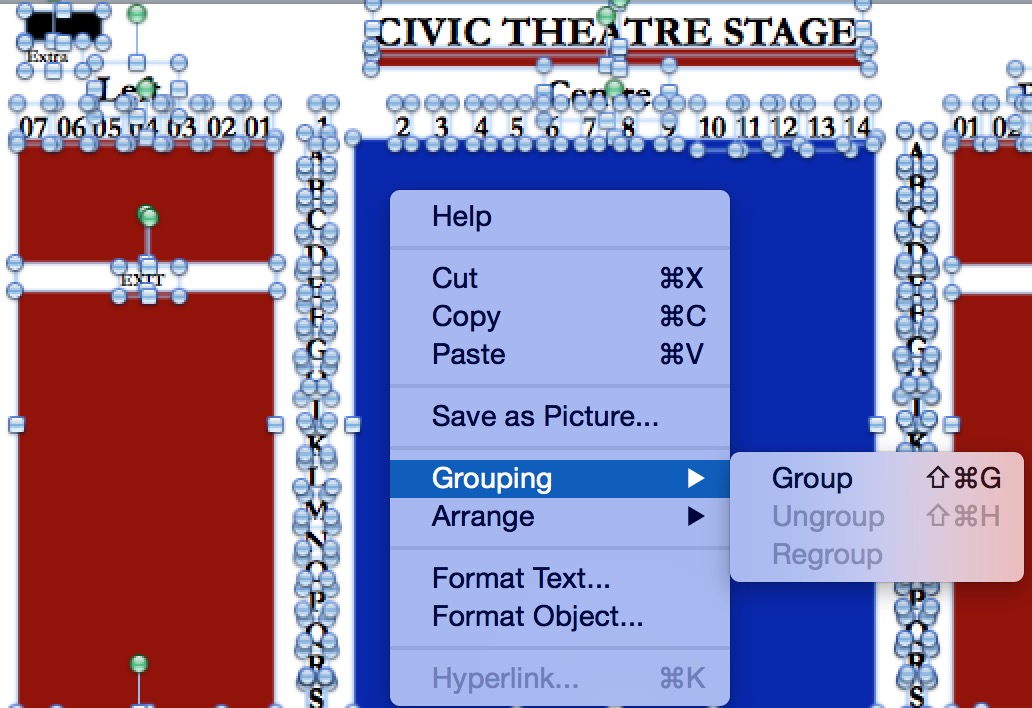
UNGROUP all objects:
- Select ALL of the objects on the drawing and UNGROUP them.
- Repeat the above steps until you can no longer ungroup any items on the picture
 Fix any row or seat # text that used spaces to separate text and turn each row or seat # into individual objects. To do this:
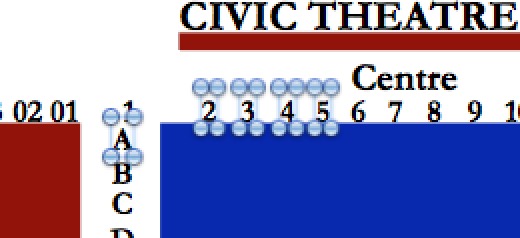
- Look for the names of rows and/or seat numbers (as per the diagram)
- Make sure seat or row number is its own object. If not, re-do them so that they are and put things in the same position
- Each item must also be either vertical or horizontal. They cannot be rotated.
- Remove any large empty objects that contribute nothing to the map. Some maps seem to have a large white background object that is extraneous.
- We recommend that if you have a lot of white space at one end of your map or at the bottom that you crop the white space to make it look better online. You can do this by:
- Saving a copy of the PPT document before starting
- Select ALL objects on the Map
- If there is a lot of white space at the top or left of the document, dragging all objects the map up and to left to provide what you think is an acceptable margin
- Note the approximate amount of space you may wish to remove from right and bottom to make the map have a balanced margin
- Cut ALL the objects from the Map so that the map is empty.
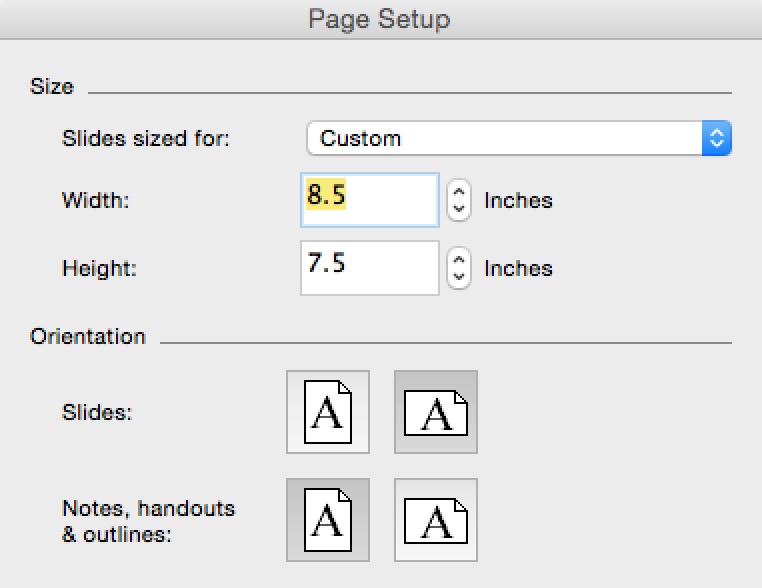 Go to Page Setup
- Write down the width and height measurements
- Subtract the amount of whitespace from the width and height. For example, if the document looks to have 2 inches of white space on the right, then make the width 2 inches smaller
- PASTE the objects back in to the document.
- If there is too much (or not enough) white space, then CUT all items, change the page size dimensions and PASTE again.
- Repeat until you like the look of the picture
|
If you make changes to the location of the background objects while tidying things up or altering the page size, please remember to update the box office sales map:
|
Convert PPT to SVG (using OpenOffice)
- Open Office is free. Use Version 4.1.4 or later from the link above.
- Some venues have used Adobe Illustrator CS6 effectively.
This page describes using then for its picture conversion capabilities (eg PPT to SVG).
- Open the PPT document Open Office. You can do this by using the File->Open menu after starting OpenOffice or you can drag your PPT document onto the empty window
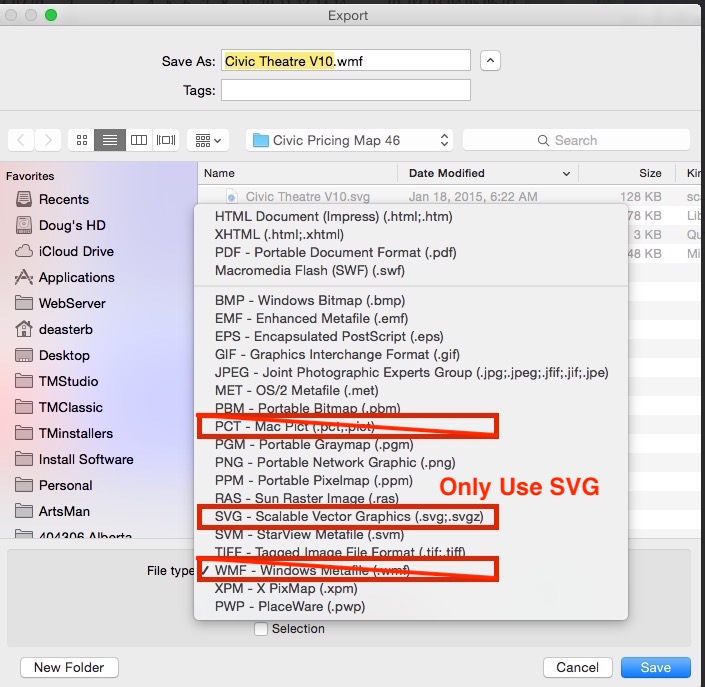
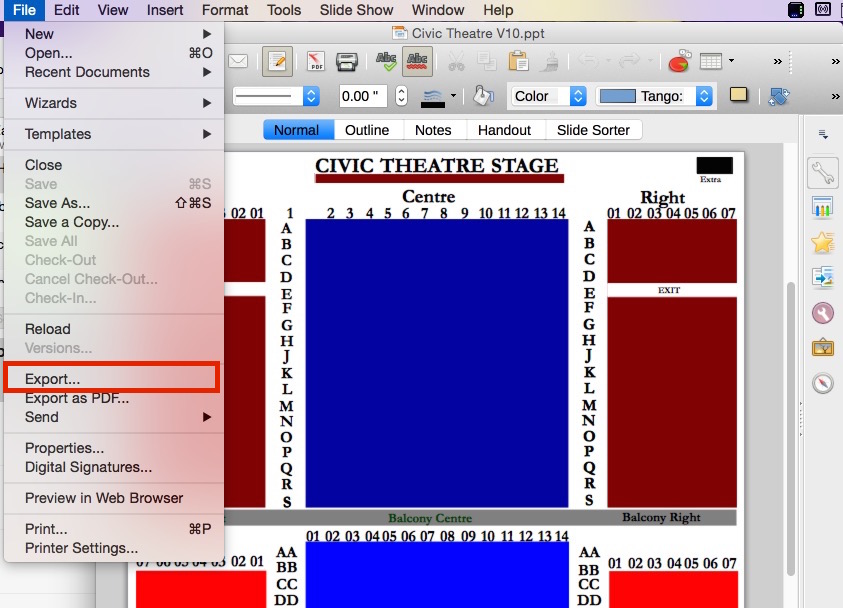
- Select File->Export option as per the picture below:
- When the File dialog opens, click the file type option and pick the export file type. There are a number of options but the ONE of interest is:
- SVG - Scaleable Vector Graphics - which is the one we will pick to get the SVG file