Macintosh PostgreSQL Server
The server needs to be set up on one machine and the application can be set up on as many machines as you wish.
Follow these steps if you are using the Theatre Manager TMPostgresSetup installer program; you may want to bookmark this page in your browser in case you want to refer to these installation steps. If you are only installing a demo, refer to the last column for required steps.
| task | Description | Full Install | Demo |
| 1 | download the PostgreSQL installer for Mac | yes | yes |
| 2 | the installation of the PostgreSQL SQL server | yes | yes |
| 3 | configuration of the server parameters for maximizing performance in a production database | yes | no |
| 4 | creating a daily backup job using TM Server | yes | no |
| 5 | Turn off energy saving, airport and other energy saving features | yes | no |
| 6 | (Optional) Implement hot database standby server depending on load and other considerations. | no | no |
Notes and Assumptions:
- This install process will install or update PostgreSQL. If you are updating across versions, you may need to refer to Updating PostgreSQL Instructions
- You MUST turn off all virus protection while running the installer (especially Norton if you are using it). Virus software always interferes with proper software installation.
- If this installer is being used to create a demo installation, then you only really need do steps 1 and 2.
Step 1: Install PostgreSQL database server
The actual Postgres install process is part of the install process. If you cancel the setup of Postgres, you can always start it again by repeating the process from the start.
Installing PostgreSQL on a Macintosh
 |
Before starting the install, please check that the computer date and timezone settings are correct. Failure to do so may cause Postgres to think it is in a different timezone. |
|
If you are unable to install, you might need to use the following commands in terminal before running the installer More info is under disable power saving settings - Step 1:
sudo spctl --master-disable
|
| 1. |
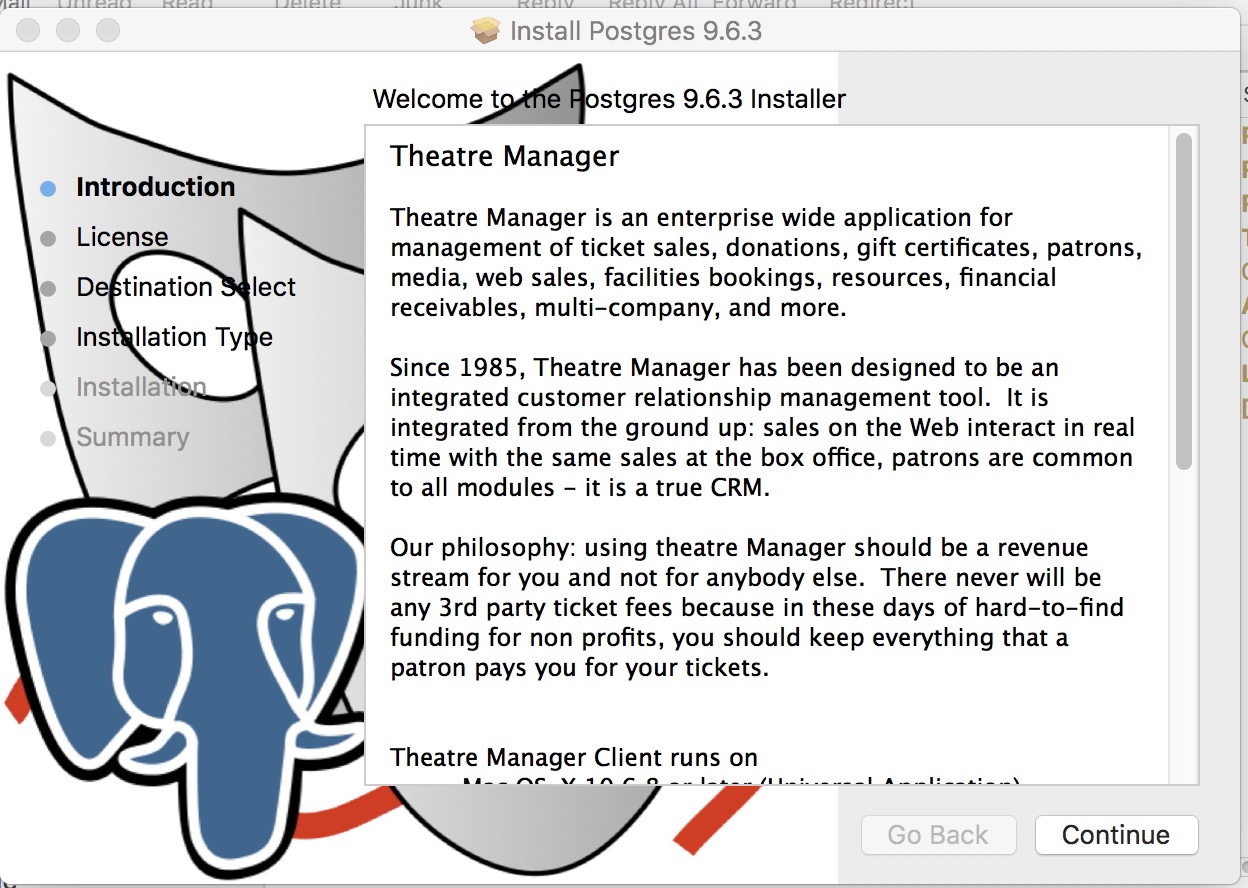
|
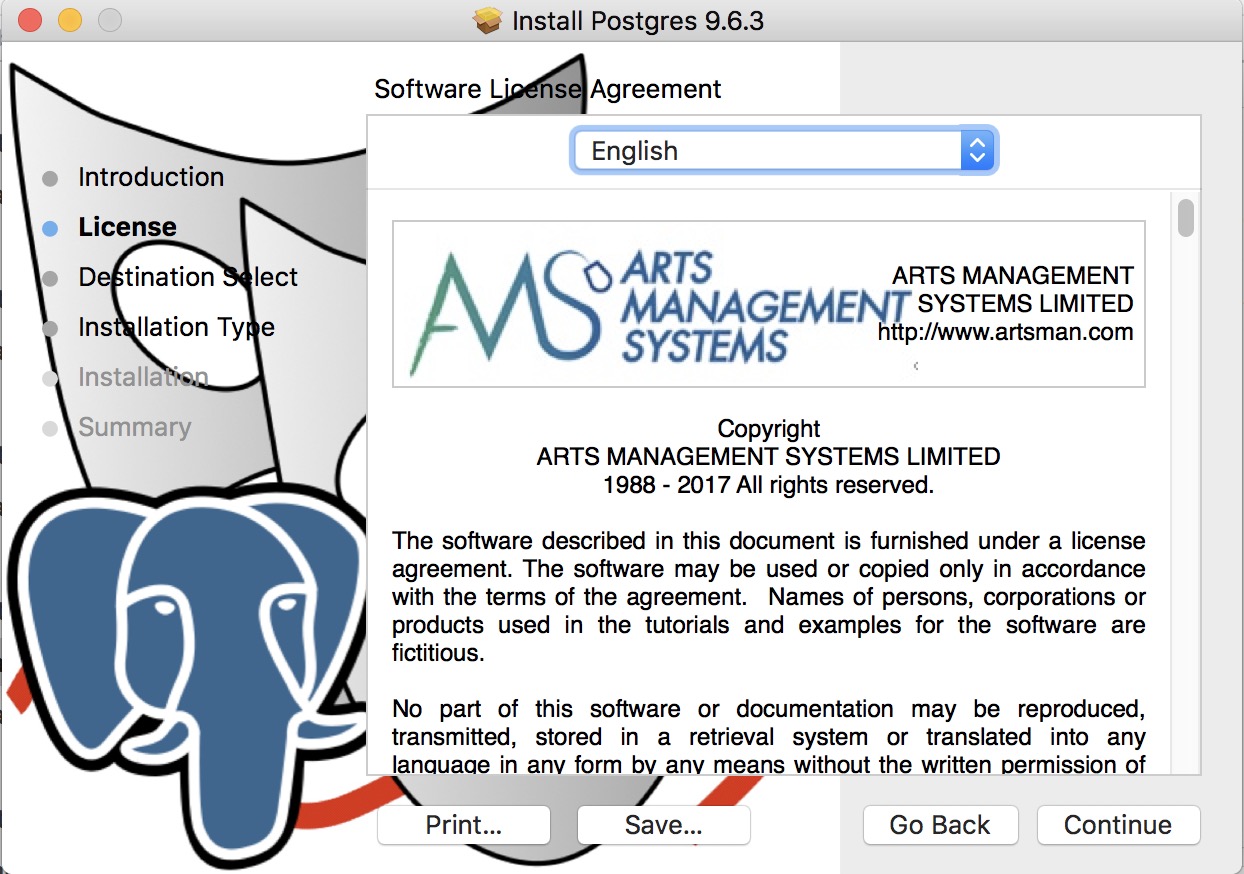
| 2. |
Click Continue on the Licence Agreement screen after reading it.
|
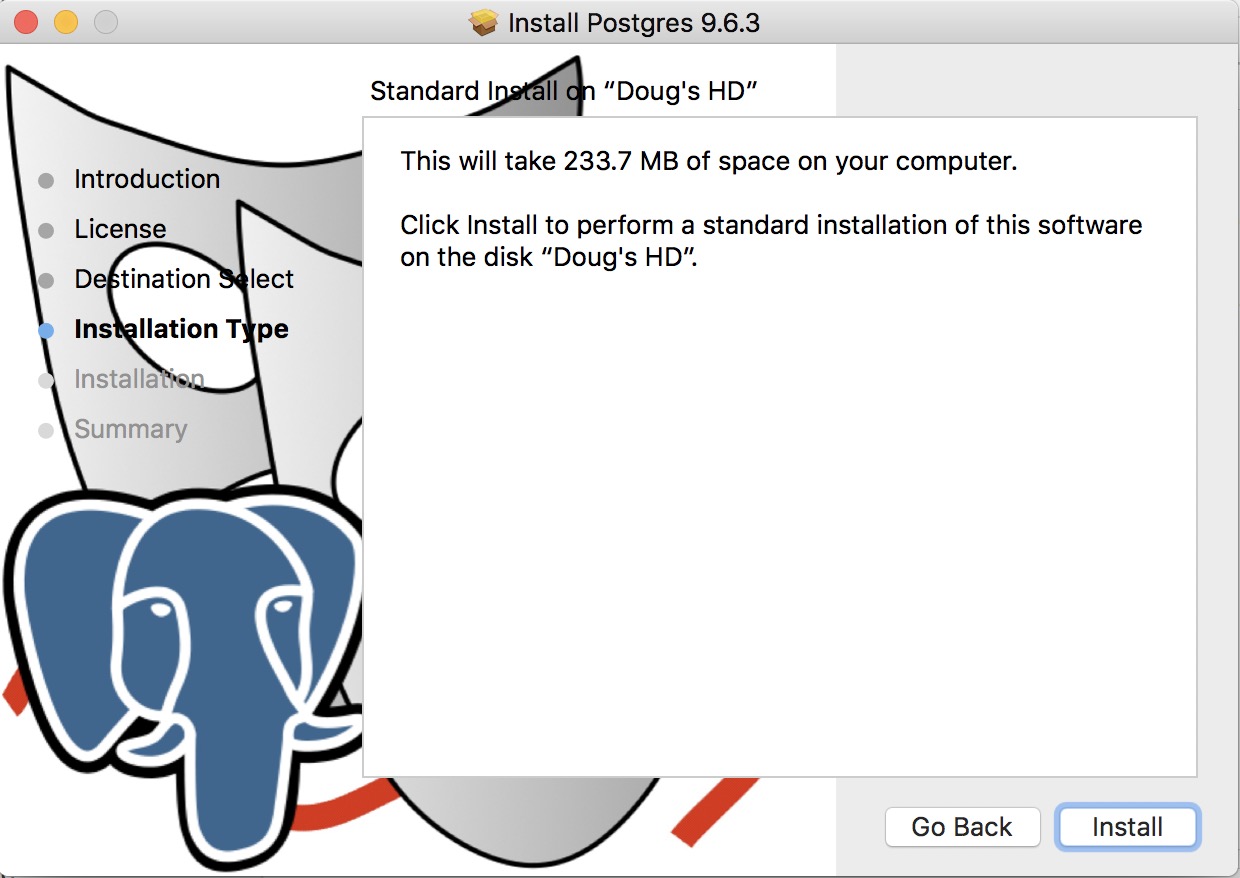
| 3. |
Click Install to begin the actual install.
|
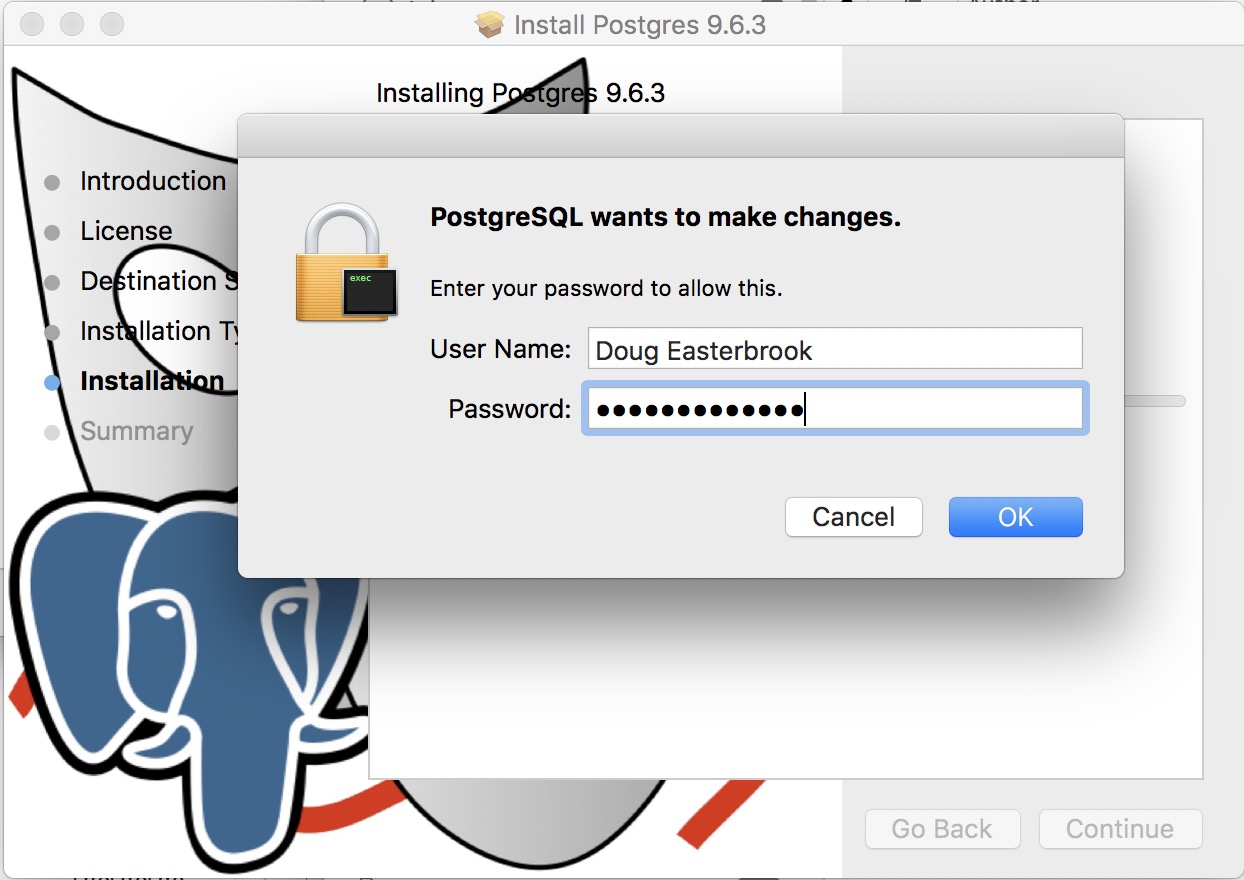
| 4. |
You will need to enter an administrator user ID and password to continue
|
| 5. |
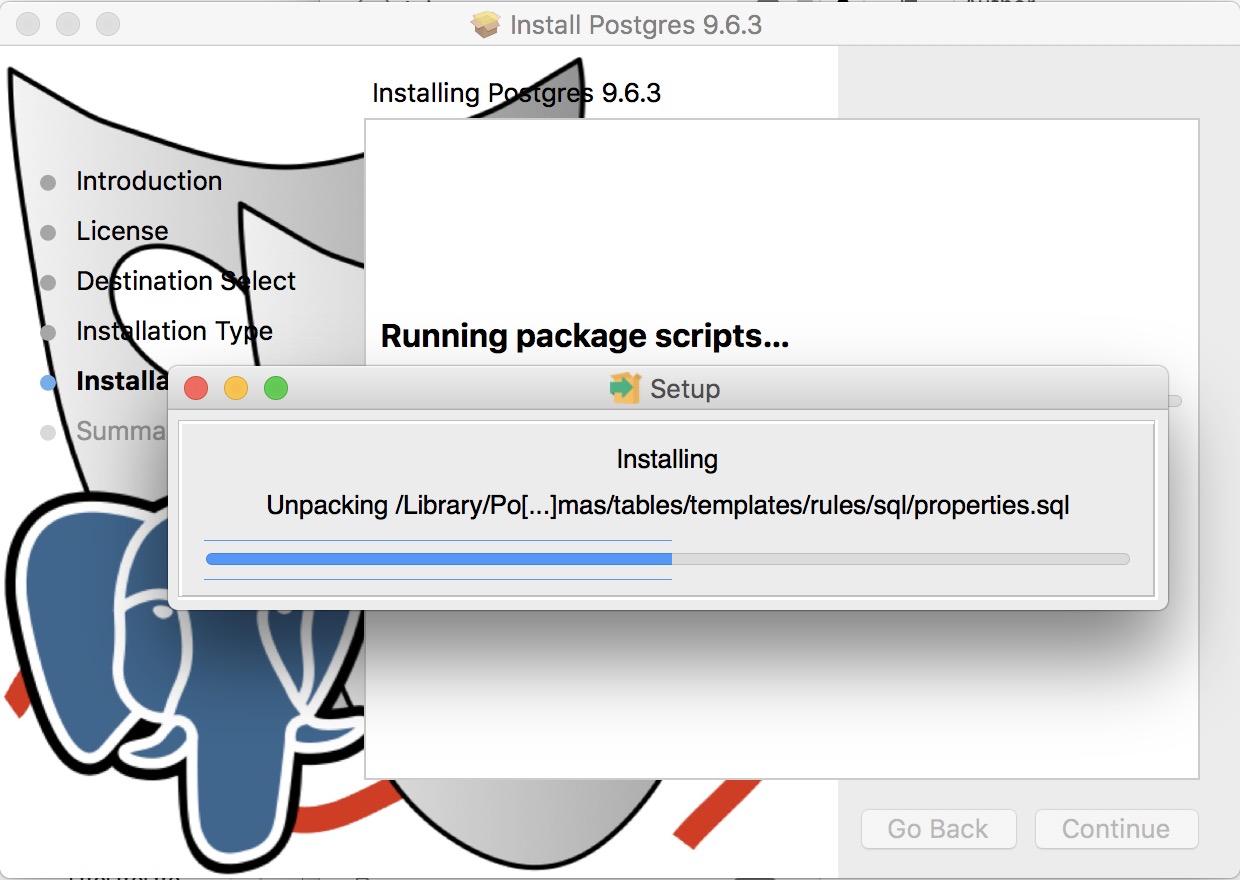
You will see the installation progress as the Postgres database engine is installed
|
| 5. |
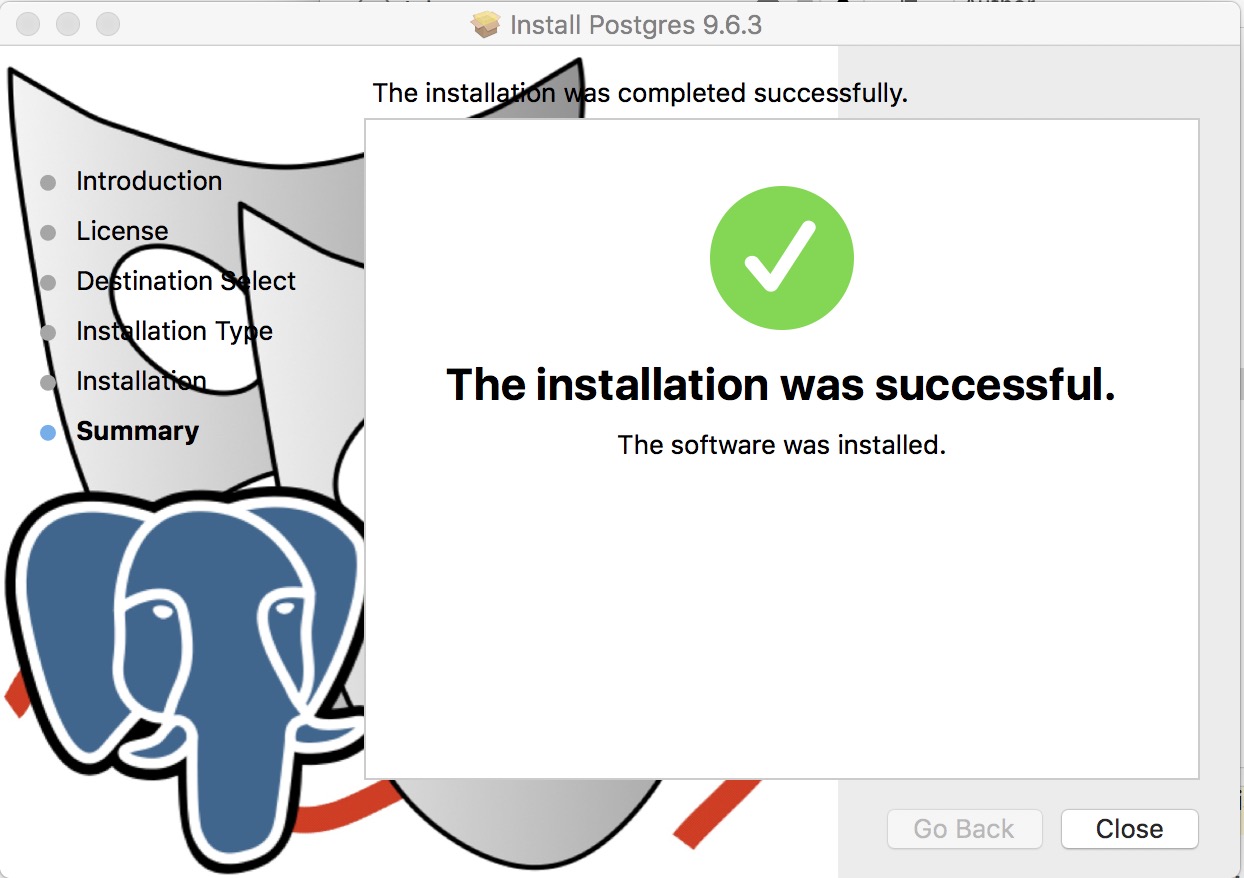
When the isntaller is finished successfully, click the Close button
|
Step 2: Configure the PostgreSQL server parameters
The general steps are:
- Edit the pg_hba.conf file to indicate which IP addresses may talk to the database server
- Edit the postgresql.conf file to adjust some memory settings for performance
|
An easy way to determine key config parameters is to use pgtune and paste the results at the bottom of the postgresql.conf file (don't forget to add ssl=on and Bonjour=on to the results). |
PG_HBA.conf file
In order for clients to connect to the server, their IP address must be in the allowed list of users. The two common authentication methods that you will see being used for Theatre Manager clients are MD5 and trust.
- MD5 does md5 password authentication and should be used for just about all entries to this file.
- Trust allows clients to connect without password authentication; the only 'trust' entry should should be for the local server machine and/or localhost.
| 1. |
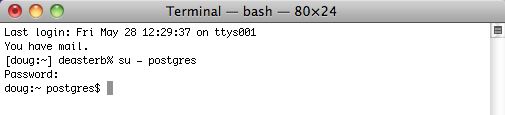
The first changes to make involve the pg_hba.conf file and the postgres.conf file. To do so, you'll need to use VI (a text editor) and be the postgres user in Terminal. To do this, start Terminal and type
su - postgres enter the password
|
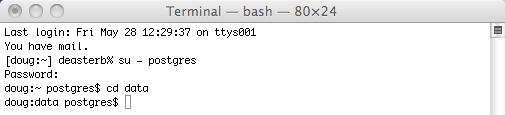
| 2. | Go to the postgres data directory by typing
cd data
|
| 3. | Edit the postgres pg_hba.conf file that contains the addresses to listen on. Type
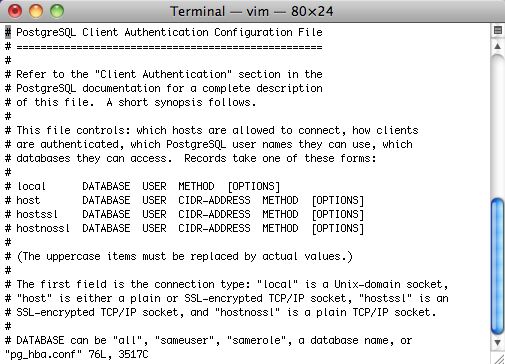
VI pg_hba.conf (full pathname is /Library/Postgresql/[version]/data/pg_hba.conf) You should see a page of information. If you do not, then type 'Shift Q' and then just a 'q', after which you can start the process over. If you see the list of text similar to the right, then: Use the down arrow on your keyboard to go to the very end of the file.
|
| 4. | 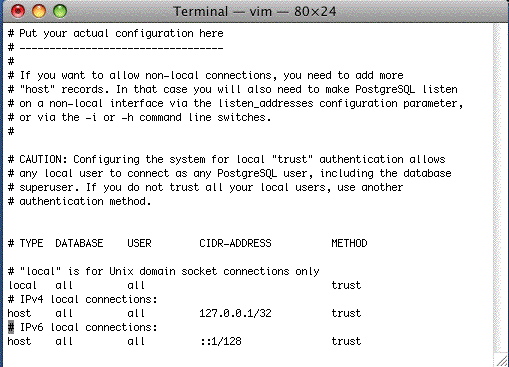
When you are at the end of the file, use the up arrow on your keyboard so that you are right after the first line in the IPv4 settings, where it says 'host all all 127.0.0.1/32 trust'. In the example the cursor is on the '#' on the line after. type the
key and the message at the bottom will change to Insert. |
| 5. |
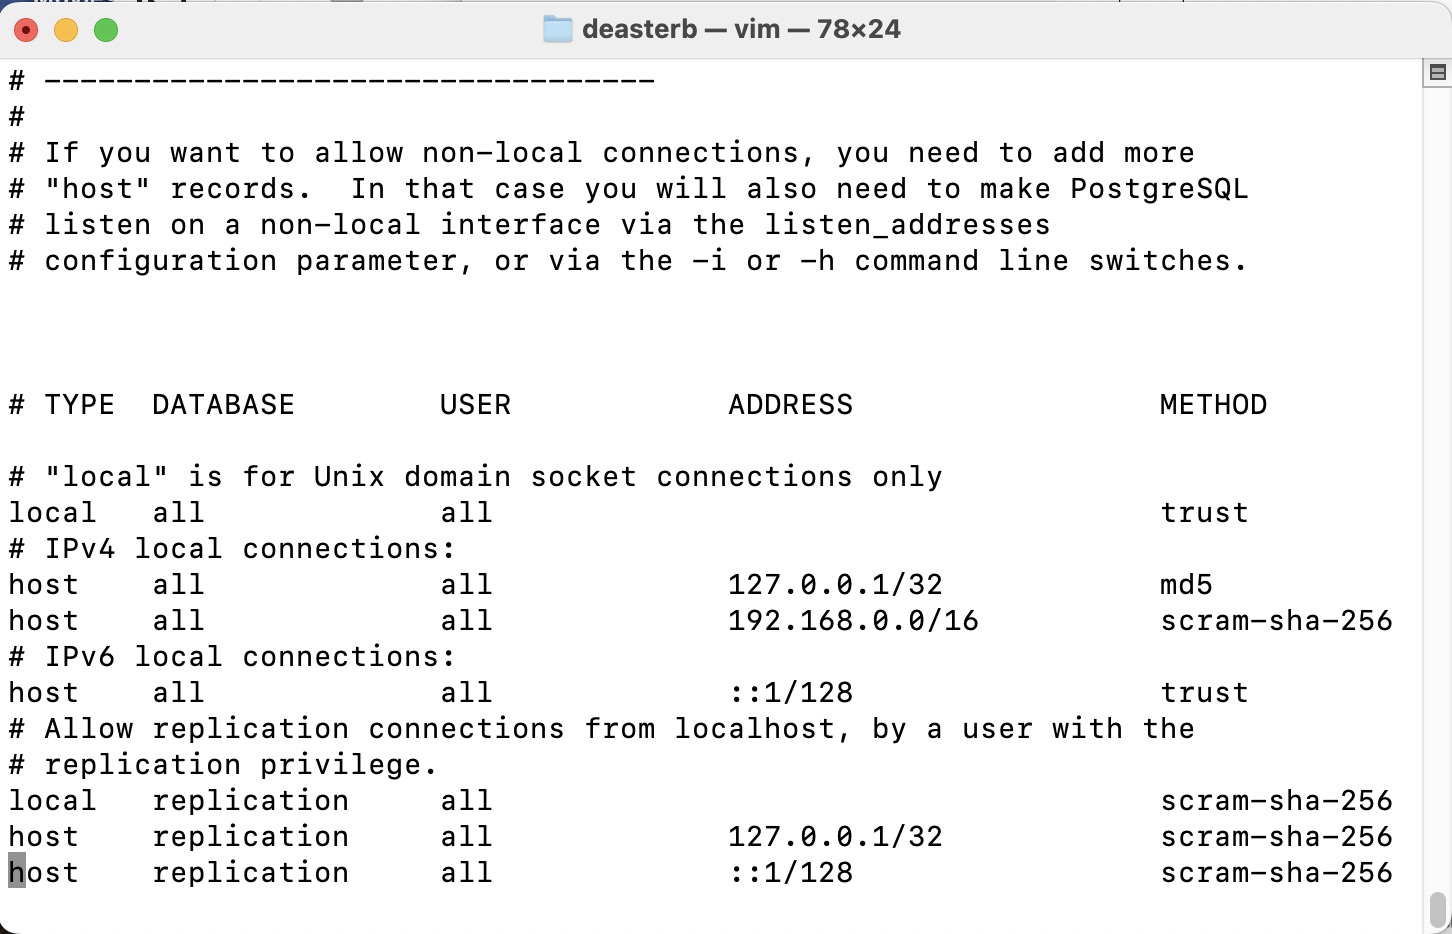
Edit the pg_hba.conf so that its final settings are similar to the window on the right. Type directly into Terminal so the data looks like the window above. Use the Delete key to get rid of characters. You will likely end up typing the following lines where the first one is your subnet. This is the most typical example we've seen at venues NOTE: For the 127.0.0.1/32 option, edit the handshaking to be MD5 at the end of the line to allow backups to run unaided. NOTE: If your machine uses IPv6 (the new internet IP setting standard), you may also need to set ::1/128 to be TRUST instead of md5. If so, edit that line to look like:
NOTE: You may also need to edit the local all all line from md5 to TRUST. This can be determined if the backup script will not run without a password after changing the settings above for 127.0.0.1 and ::1/128. The line you added (or need to add) are for:
At the end of the subnet, the /24 refers to a complete subnet when you want any machine on the subnet to access the database as per CIDR rules. This is what is used most often. The /32 refers to a particular machine. If you use this option, you will need to provide the exact computer IP that you want to allow to access the database. |
| 6. | 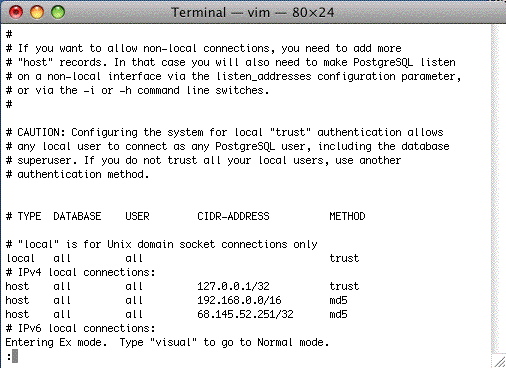
At the end, type, in this order: hit the esc key (the insert mode will dissappear) Shift Q (the window will show the 'Entering Ex mode' message) wq and the window will clear.
Reference for settings in the pg hba.conf file https://www.postgresql.org/docs/current/auth-pg-hba-conf.html |
| 7. |
In the command line, type the following to reload the configuration:
pg_ctl reload Terminal will say 'server signalled' |
POSTGRESQL.conf file
Note: you can also use pgadmin as described in the Windows setup to make these changes if you prefer.
Another was to get the key config parameters is to use pgtune and paste the results at the bottom of the postgresql.conf file (don't forget to add ssl=on and Bonjour=on to the results).
| 1. |
You will need to start by changing to the postgres user in Terminal. To do this, start Terminal and type
su - postgres enter the password
|
||||||||||||||||||
| 2. | Go to the Postgres data directory by typing
cd data
|
||||||||||||||||||
| 3. |
This will use VI to edit it. Type when the list appears, type to go into insert mode and use the up and down arrows to find the options below
Find and edit the parameters in the list below and change them to the suggested values, if they are not already set to that value.
For any setting that is about disk space or memory, you can type 1GB, 1000MB, or 1000000KB - they are all equivalent. Do not leave a space between the number and the memory amount at the GB, MB or KB; otherwise, Postgres will not start. |
||||||||||||||||||
| 4. |
use pgtune to get some optimized parameters for your machine and replace the values below. It is probably better to append the results from pgtune at the end and filling any missing settings at the bottom.
Reference for postgres.conf file parameters https://www.postgresql.org/docs/current/static/runtime-config.html |
||||||||||||||||||
| 5. | Once the changes are made, type, in this order:
hit the '' key (the insert mode will disappear) (the window will show the 'Entering EX mode' message) and the window will clear and you will be back at terminal |
OSX Self Signed TLS Certificate
Making your own Self Signed TLS Certificate
It is generally best to create your own certificate. It takes about 30 seconds to do, and has the advantage that the certificate is unique to your database.
Start a terminal session, type the following 2 commands, and then follow the instructions as prompted. You can copy/paste the command.
|
cd /Users/Shared openssl req -newkey rsa:4096 -nodes -keyout server.key -x509 -days 365 -out server.crt |
Answer all the questions you are asked and when done, find the files in the /Users/Shared directory called:
- server.crt
- server.key
Using a supplied self Signed TLS Certificate
We have created a 4094 bit TLS certificate and included it with the installer. While it is better to create your own, if you need one fast to get started, you can use ours and create your own later (per the step above).
Go to the /Users/Shared folder and find the files called:
- server.crt
- server.key
Installing the server.crt and server.key Files
You will need to copy the files to the Postgres User directory as the postgres user. Do the following commands in Terminal:
|
su - postgres (and enter the password when asked)
cd data pwd |
|
Make sure the results of the pwd command says that the directory is /Library/PostgreSQL/x/data where 'x' is the version of PostgreSQL you have installed. It if does not, do not go any further. and call for assistance. |
|
cp /Users/Shared/server.crt server.crt cp /Users/Shared/server.key server.key chown postgres:daemon server.* chmod 600 server.* ls -la |
In the listing, the two files should now be in the postgres data directory and all that needs to occur is to stop and restart the database.
|
pg_ctl stop -m fast pg_ctl start |
Step 3: PostgreSQL server backups
|
Venues with databases on the AMS Cloud do not need to set up or manage backups - other than to request a special backup before running year end rollover |
Once the database is set up, you will need to establish a back up frequency that is appropriate for your venue.
There are two steps to configuring the backup:
- Use the System Preferences->Backup to setup the backup frequency within Theatre Manager. The TM Server backup process uses this setup to do the backups
- Configuring a TM Server to do backups and monitor them
From then on, backups occur automatically. If they do not, you will receive a message on login that a backup has not been run for the past 24 hours.
Disable Power Saving Settings on Server
Additional Setup Considerations
|
Update to the latest version of macOS (macOS 12 Monterey or later).
It's free. The highest version you can update to will depend on how old your machine is. |
The following settings should be made on all servers (Postgres, Apache and web listeners) that are installed on Macintosh.
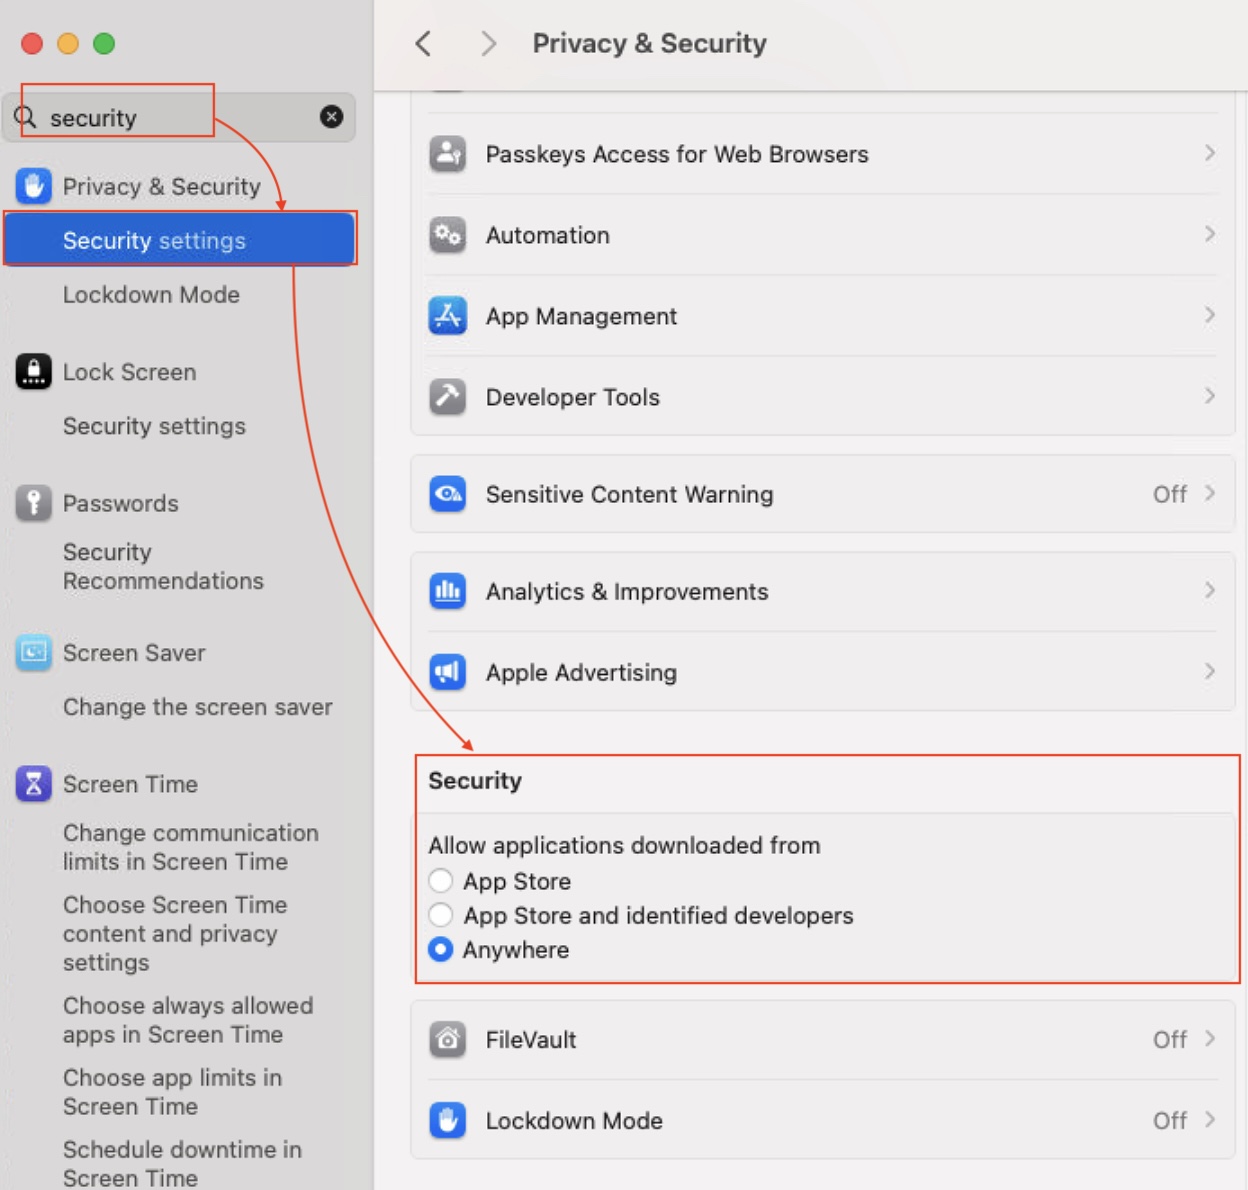
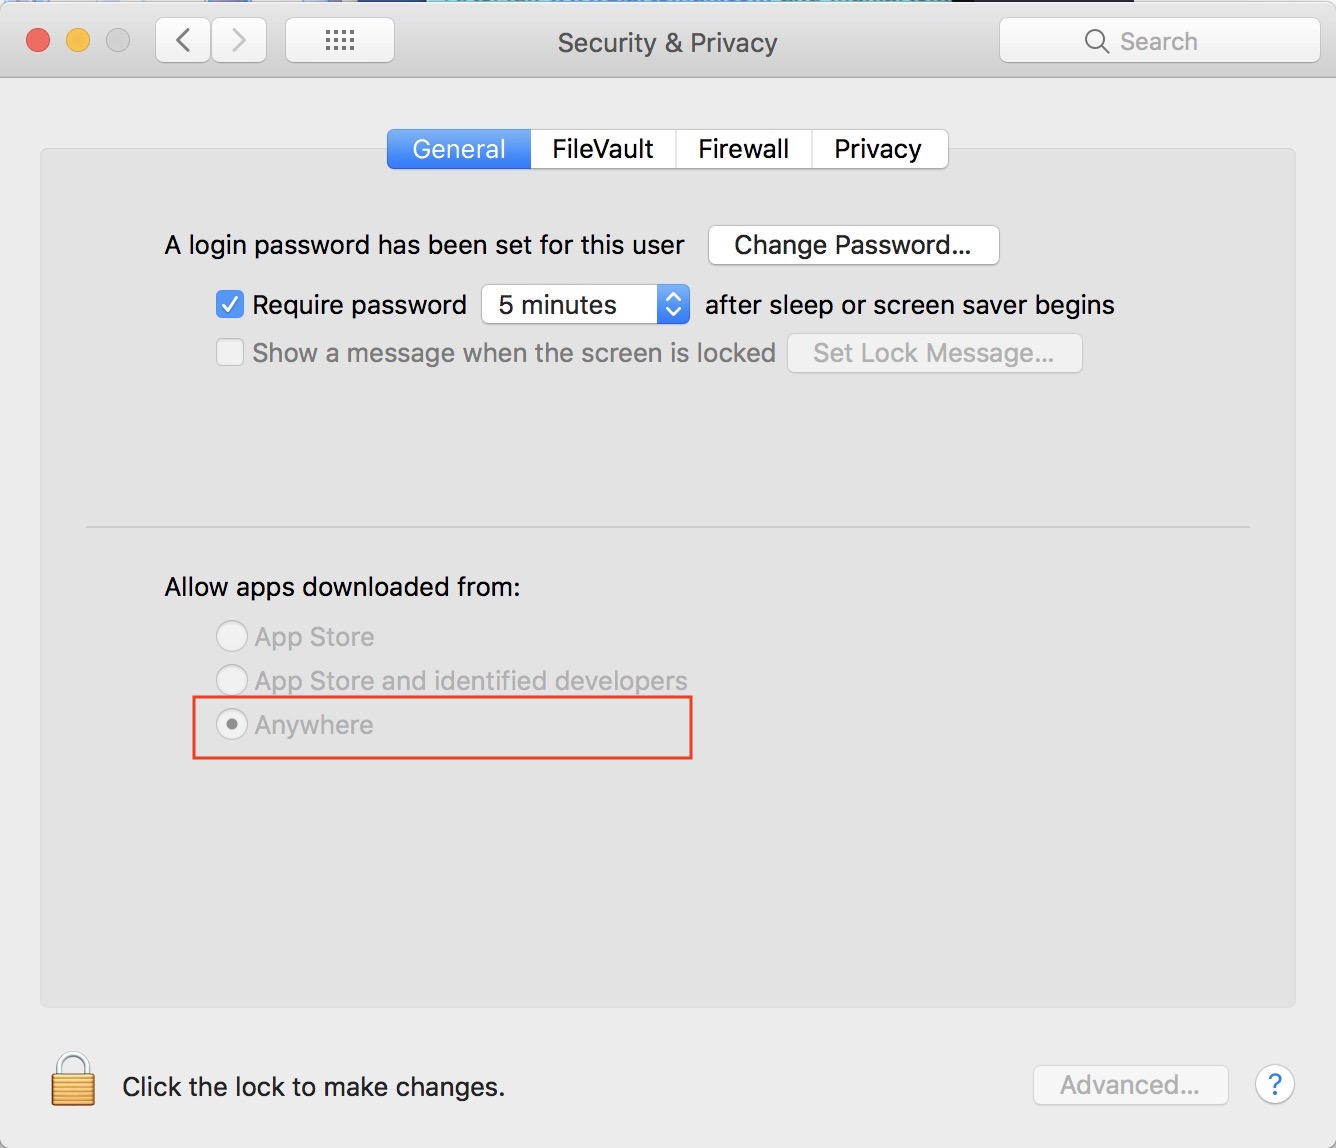
| 1 | If the Security and Privacy System Preference in MacOS does not show 'Anywhere' which allows applications to run from 'Anywhere', open Terminal and copy/paste the following two commands:
You may have to close System Preferences and open it again in order to see the change. If Anywhere is not selected, please select it - as it should allow TM to run when the user is not an administrator. Installers from TM should make this option visible in system preferences per the image below. if not, run the above command.
Big Sur/Sonoma and later
Earlier versions of MacOS
|
| 2 |
 Make sure to
|
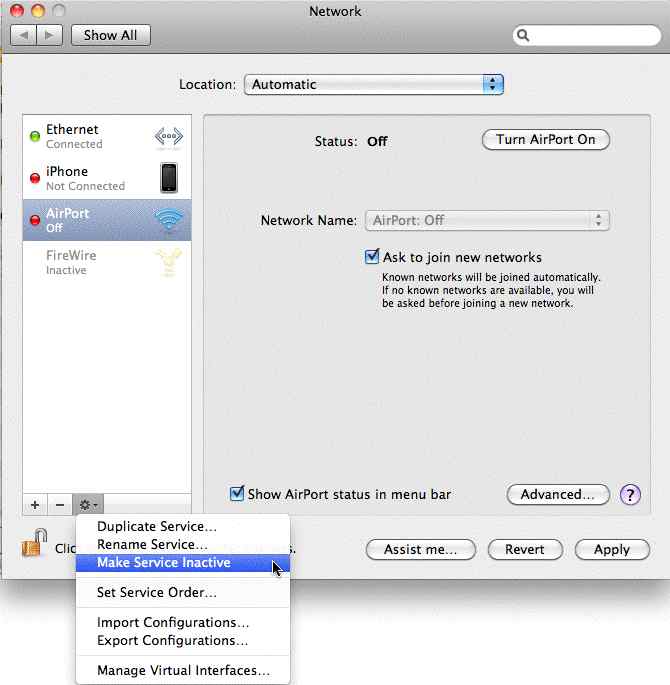
| 3 | Make sure to turn Airport OFF if the Mac comes with it. Airport will cause the Mac to temporarily freeze while it looks for a network to connect to - and will lock out sales while it does that.
This is done by opening the control panel, clicking on the Airport interface, and then clicking on the 'gear' at the bottom to select the option 'make service inactive'. Doing this will change the status from 'off' to 'inactive'.
|
| 4 | Make sure to force the Mac Mini to use the built-in Graphics Processor Unit (GPU) when displaying screen shots instead of CPU. This prevents remote access from using up a CPU core to display the screen. You can do one of the following:
Disconnecting a monitor from the Mac will cause the computer to unnecessarily waste CPU cycles on display - when it should use the GPU. |
| 5 | Turn off Spotlight Indexing (mdsworker) using Terminal and typing sudo mdutil -a -i off On Lion and later, also use the following command sudo launchctl unload -w /System/Library/LaunchDaemons/com.apple.metadata.mds.plist This will prevent the operating system from doing unnecessary work while serving web pages. To recognize if Spotlight is running on a server, look for an 'mds' application running. It can use a lot of CPU resources. If you receive Operation not permitted while System Integrity Protection is engaged while doing this, you may wish to disable System Integrity Protection note: If any mdworker messages are in the console logs (or if mdworker pops up in activity logs), then Spotlight is not turned off. |
| 6 | Using Terminal, disable Time Machine for the database folder (optionally, completely disable and local Time Machine files)
Alternatively, you can disable Time Machine through System Preferences. If you must use time machine on the database server, see the next step for options |
| 7 | Do not use Time Machine for the Postgres backups. Use the backup script and move the backups to another machine. If Time Machine must be used on the database server machine:
sudo defaults write /System/Library/LaunchDaemons/com.apple.backupd-auto StartInterval -int 43200
|
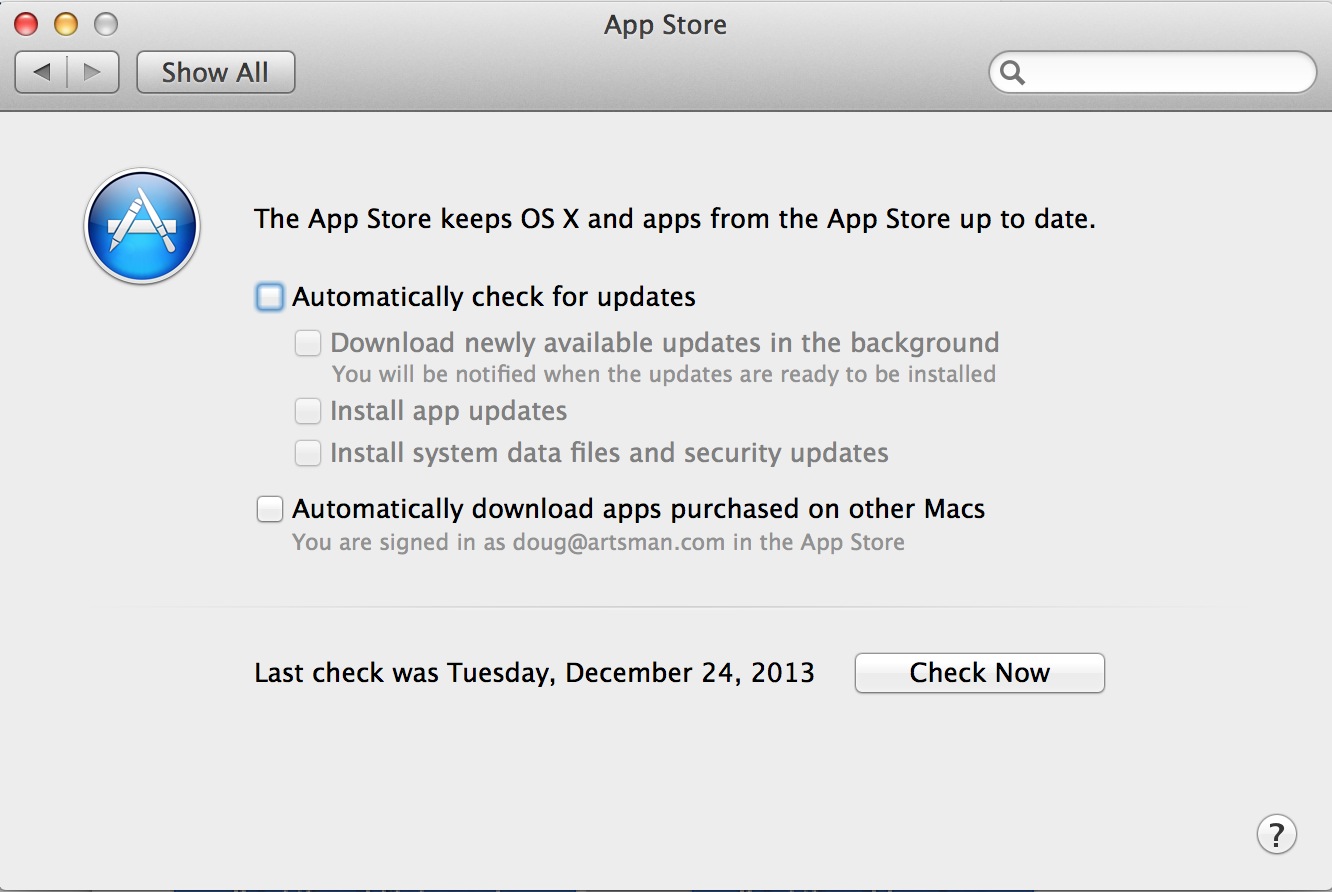
| 8 | Completely turn off any automatic Software Updates in the Mac's System Preferences. This is a database machine and should be manually updated on a periodic basis under controlled circumstances.
It may be either under 'Software Update' or 'App Store', depending on the version of macOS you have.
|
| 9 | Completely disable App Nap on the computer running the Classic Listener using the Terminal command below:
defaults write NSGlobalDomain NSAppSleepDisabled -bool YES |
| 10 | Update to the latest version of macOS. It is free. |
| 11 | Disable 'handoff' in general system preferences as well as disconnect from iCloud.
Handoff disabled in same place as airplay receiver (below) in later versions of Mac OS |
| 12 | Disable Air Play Receiver on MacOS 11 Monterey in System Preferences->sharing setup.
Big Sur and more recent versions of Mac OS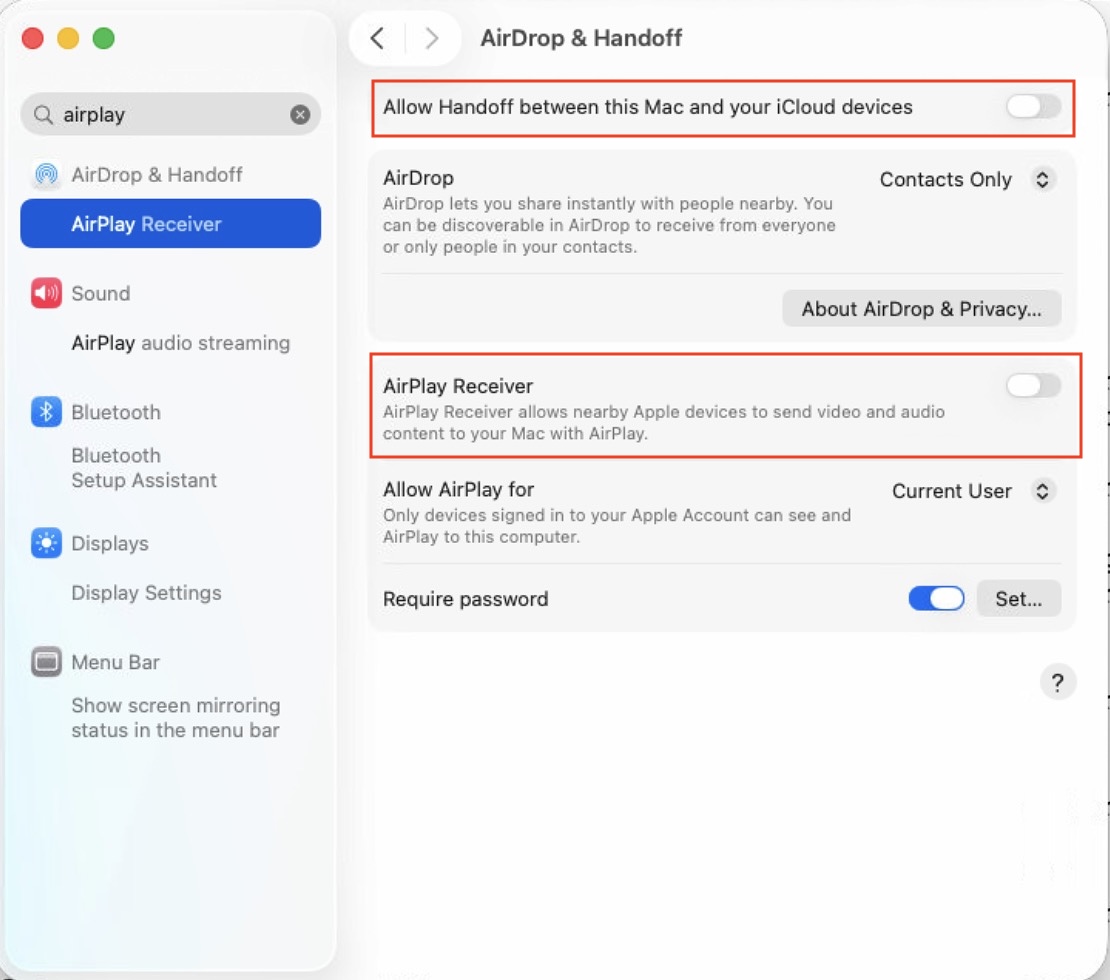
|