Form Letter Instructions
This page contains links to information relating to the composition, editing, and removal of form letters.
Quick Reference information (Quick Reference Guides, Cheatsheets and Videos) is available for some Form letter functionalty. Click here to access the Form Letter specific links.
Creating a New Form Letter
Form letters can be created for many different purposes. They can be used to send information to patrons, donors, volunteers, employees, and members of the media. A new form letter can be created from the Form Letter List Window.
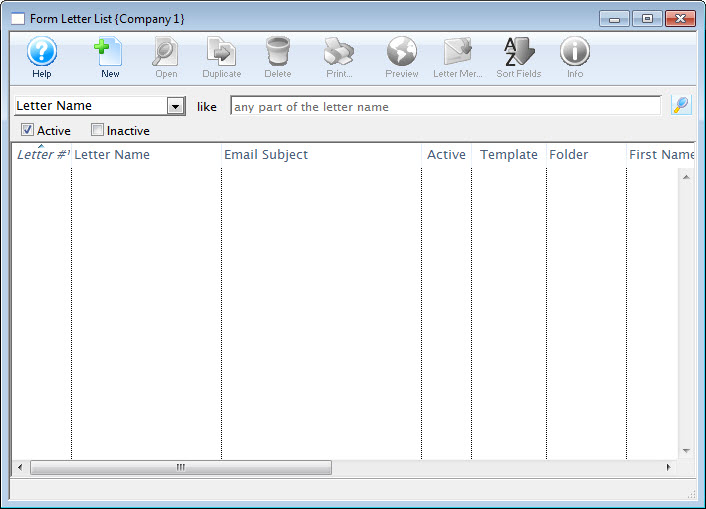
- From the Form Letter List window, click the New
 button.
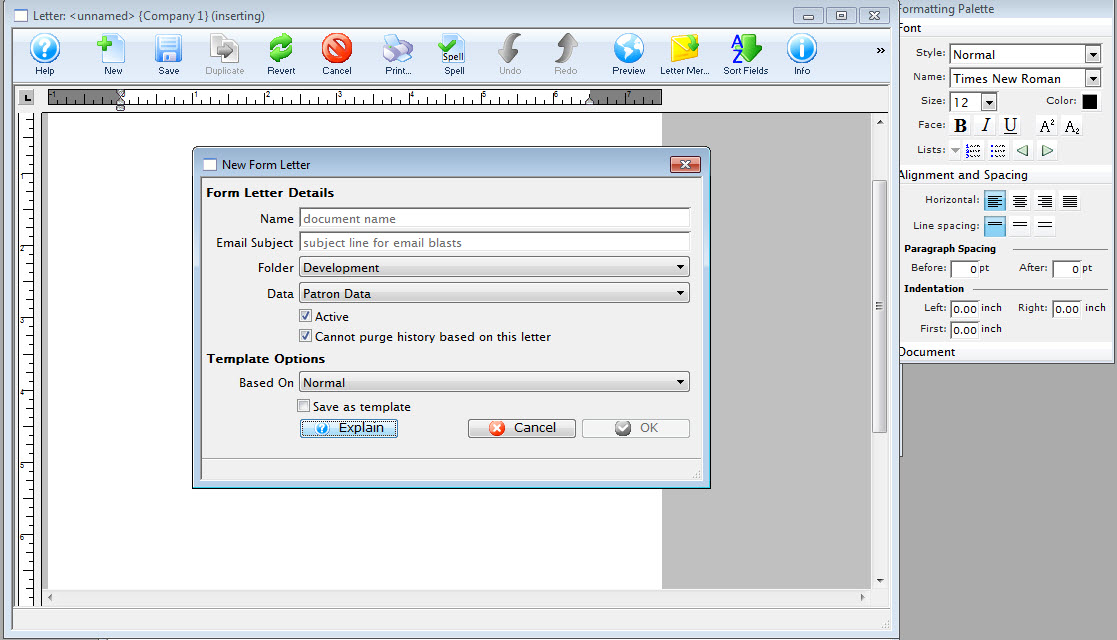
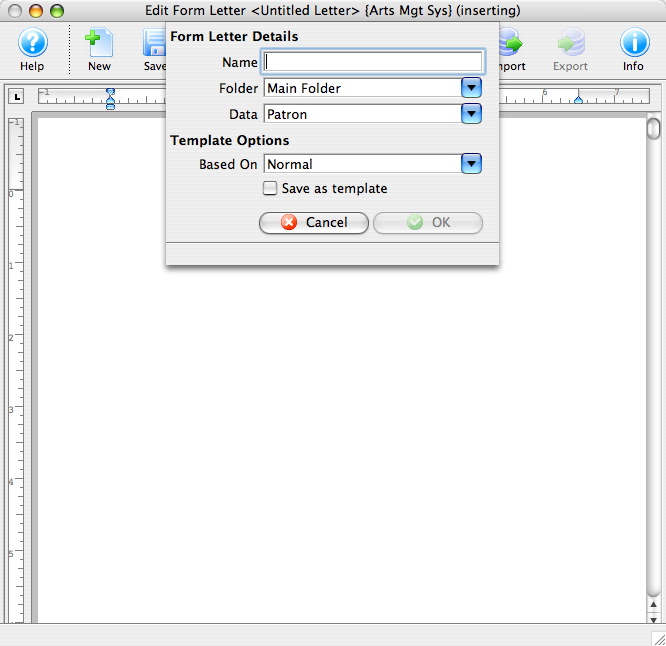
The New Form Letter window and the Word Processor with a new blank page open.
Click here for more information on the Form Letter List window.
Click here for more information on the Version 8 Word Processor.
- Enter the Form Letter Name and the Subject line for email blasts and chose a folder to store the letter.
- Choose the merge data for this letter.
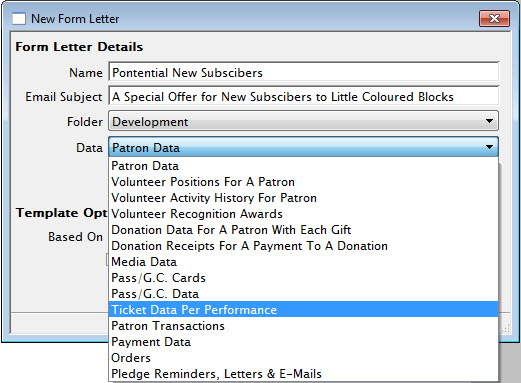
Patron data is a parent for most other files. If other merge criteria is selected the patron record details will also be available as criteria. Due to the relationship of data within Theatre Manager some items can not be merged together.
Click here for more information on the Form Letter Window.
- Select the Template for use in this letter. The Normal Template is the default template.
- Click the Ok
 button.
- Click the Save
 button.
You have now saved the base parameters for the new letter.
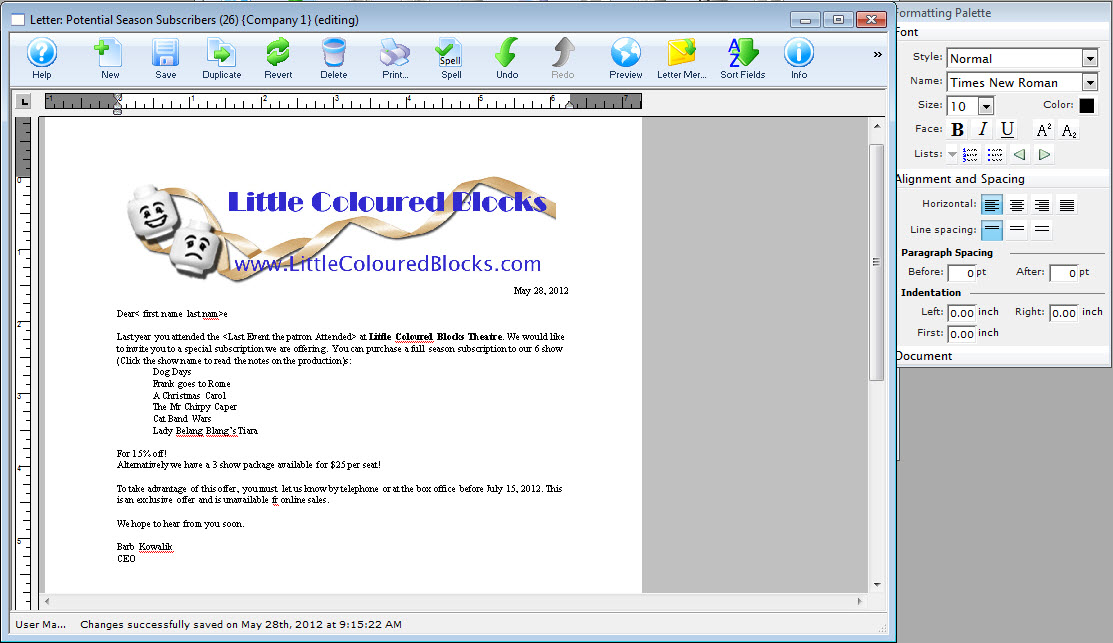
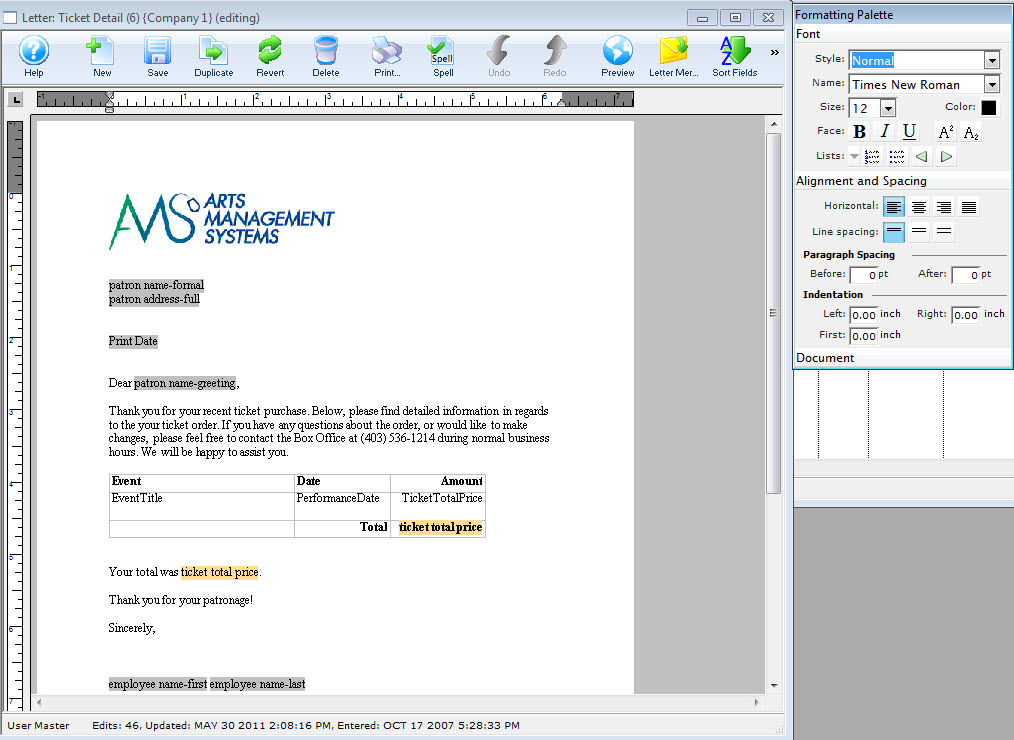
- Enter the text for the base letter.
- Using the right-click context menu, add merge fields to the Form Letter.
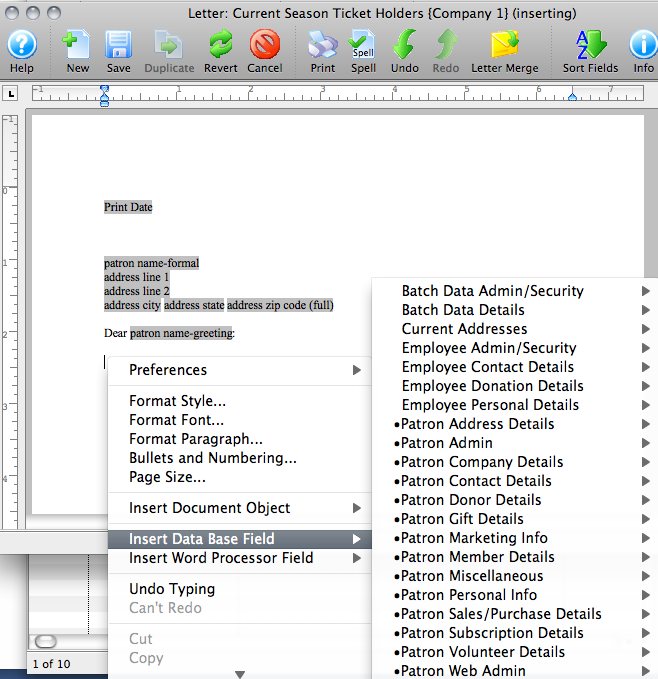
To enter a merge field, right-click (or control-click on a Mac) in the area of your document you'd like the field to appear, then simply find and select the field you'd like to use in the context menu (fields with patron data and details are in Data Base Fields). Click here for more information on adding merge fields to the letter.
- Click the Save button to finalize the Form Letter.
Click here to learn how to do a mail merge with the Form Letter.
| You can download quick reference information on Creating Form Letters by clicking on the icon. |
Cheatsheet |
Flash |
Mp4 |


Editing an Existing Form Letter
When editing the form letter, you are editing the same form letter that is used by all employees. This is not a unique copy of the form letter for just a single patron. Any changes made and saved will effect all associations with the letter. If you wish to make changes to the letter to suit your requirements first duplicate the letter then make the modifications. Click here for more information on duplicating a Form Letter.
- Search for the Form Letter to edit.
Click here to learn how to find existing Form Letters.
- Click on the Form Letter to edit.
- Click the Open
 button.
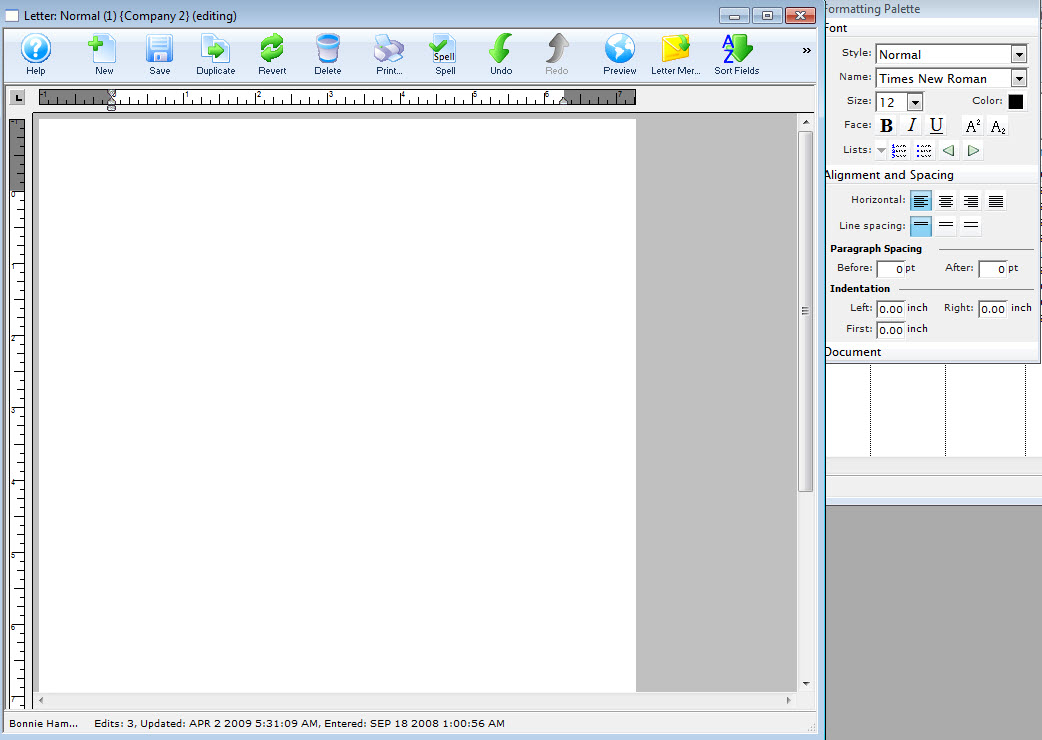
The Form Letter Window will open and load the form letter. Click here for more information on this window.
- Make any necessary changes.
- Click Save
button.
Importing a Letter
Letters can be imported from another application to use in Theatre Manager. However, the document must be in RTF, HTML, TXT, or TMD format. The TMD format is a Theatre Manager format that allows for the importing of letters created in Theatre Manager.
- From the Form Letter List window, click the New button.
Click here for more information on the Form Letter List window.
The Word Processor opens to a new blank page.
- Enter the Form Letter details.
Click here for more information on the Form Letter Info Window. Click here for more information on the Form Letter Window.
Enter a name of the letter, then select a folder to save the letter. Choose the merge data for this letter. Patron data is a parent for most other files. If other merge criteria is selected the patron record details will also be available as criteria. Due to the relationship of data within Theatre Manager some items can not be merged together.
Select the Template for use in this letter. The Normal Template is the default template.
- Click the Ok button.
- Click the Save button.
- Click the Import
 button.
The Open File dialog for your operating system appears.
- Locate and select the file (letter) you want to import.
The file format type may need to be changed--to locate the appropiate file--depending on your operating system.
- Press the Open button.
The file will imported into Theatre Manager as text.
- Using the right-click context menu, add merge fields to the Form Letter.
Click here for more information on adding merge fields to the Form Letter.
- Click the Save button to finalize the Form Letter.
| To review Quick Reference information on Importing a Form Letter, click the following: |
Screencast |
Exporting a Form Letter to Another Application
A Form Letter can be exported to be used in another application. This can be used to edit the letter in another application and then import it back in to Theatre Manager. Letters can be exported as an RTF, HTML, or TXT document.
|
All merge fields will be lost when exporting a letter in these formats. To retain all merge field properties, use the Theatre Manager file format TMD. |

- Search for the Form Letter to export.
- Click on the Form Letter to export.
- Click the Open button.
The Form Letter Window will open and load the form letter. Click here for more information on this window.
- Click on the Export
 button.
 - Select the file format for the letter to be exported as.
The Save As dialog for the user's operating system opens.
- Select the location to save the exported leter and click the save button.
The document is placed in the selected directory in the selected format.
Click here to learn how to find existing Form Letters.
|
Flash |
MP4 |
Adding a Graphic to a Form Letter
Unlike plain text, adding graphics and color to your form letters, newsletters and email adds impact to your content. In the form letter functions of Theatre Manager, you can easily add graphics. These can range from your logo to photographs to clipart.

There are 3 different methods to add graphics to a form letter:
- Drag and Drop the image into a form letter.
- The menu option Edit >> Paste From File.
- Copy and Paste.
| You can download the Cheatsheet (1-2 pages) of adding a Graphic to a Form Letter. |
|
Add URL to a Graphic
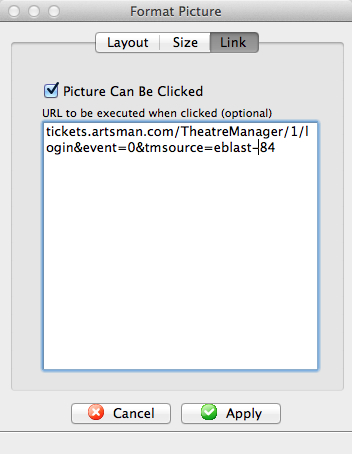
There are two selections to make.
| Item | Values |
| Picture can be clicked | If this is enabled (clicked), then when the picture is placed in an email, the user will be able to click on it and activate the URL. If this is disabled, entering the URL will have no effect |
| URL |
The URL is the link that you want execute if the user clicks on the picture. You can enter email addresses, actual URL's to any web site, or feeds.
The link should contain an accepted web prefix like https://, mailto:, or tel: (being explicit is better). If the link does not have a prefix, the patrons email client may try to interpret what it should be based on content. This can be a link to your ticketing web site, in which case we recommend the use the tmsource= parameter to know which eblast resulted in a sale. Examples of URL's are:
|
Copy Paste
Copy and Paste is a phrase that implies copying material from one page to another. Material may include text, an entire page, symbols, characters, photographs, files or folders. This can be accomplished by using the left and right buttons of your mouse or by using your mouse and the keyboard of your computer.
- Open the letter you want to add the graphic to.
Click here for more information on opening an existing form letter.
The selected letter opens.
- Open the document you want to copy the graphic from.
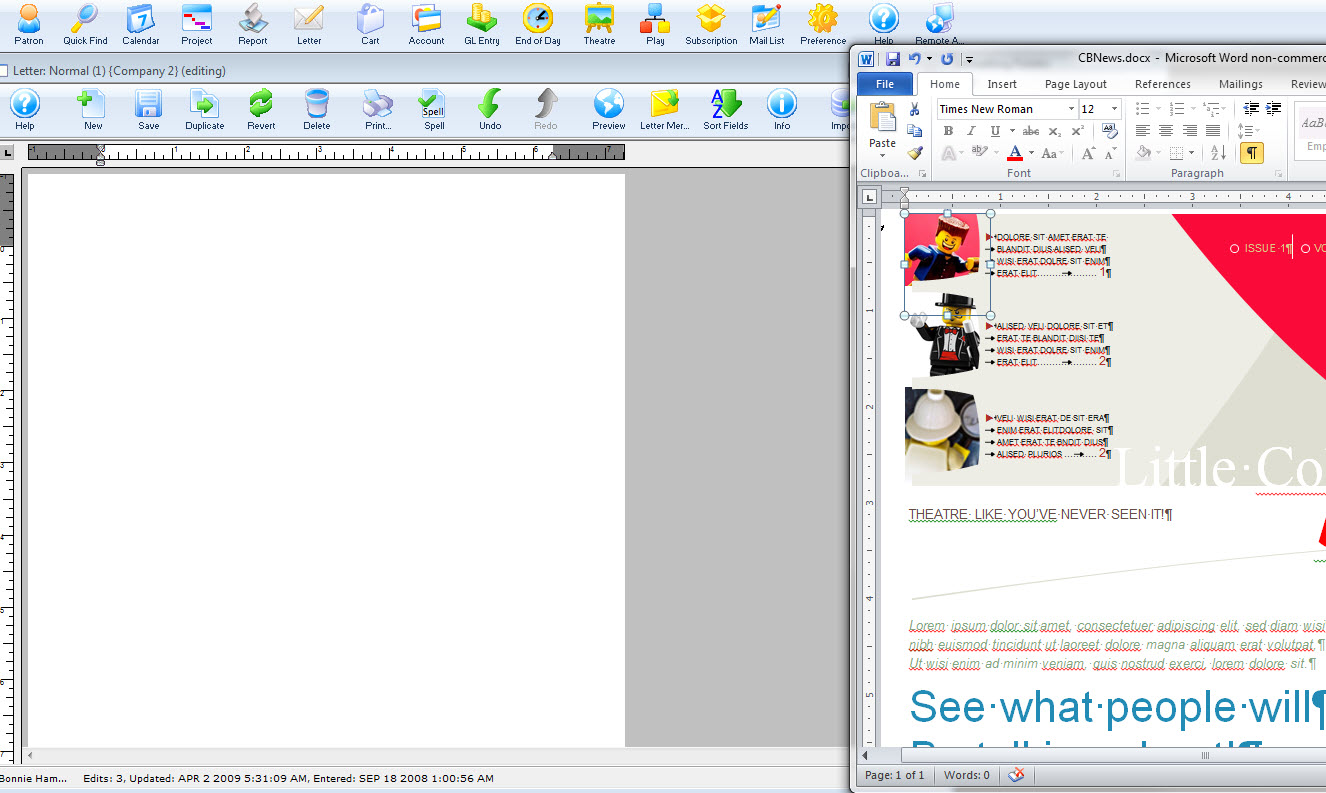
Mouse Method
- Highlight by holding down the left button of your mouse and dragging across the material you wish to copy.
Release your hold from the left button of the mouse.
- Right click the highlighted material. The right click commands menu opens.
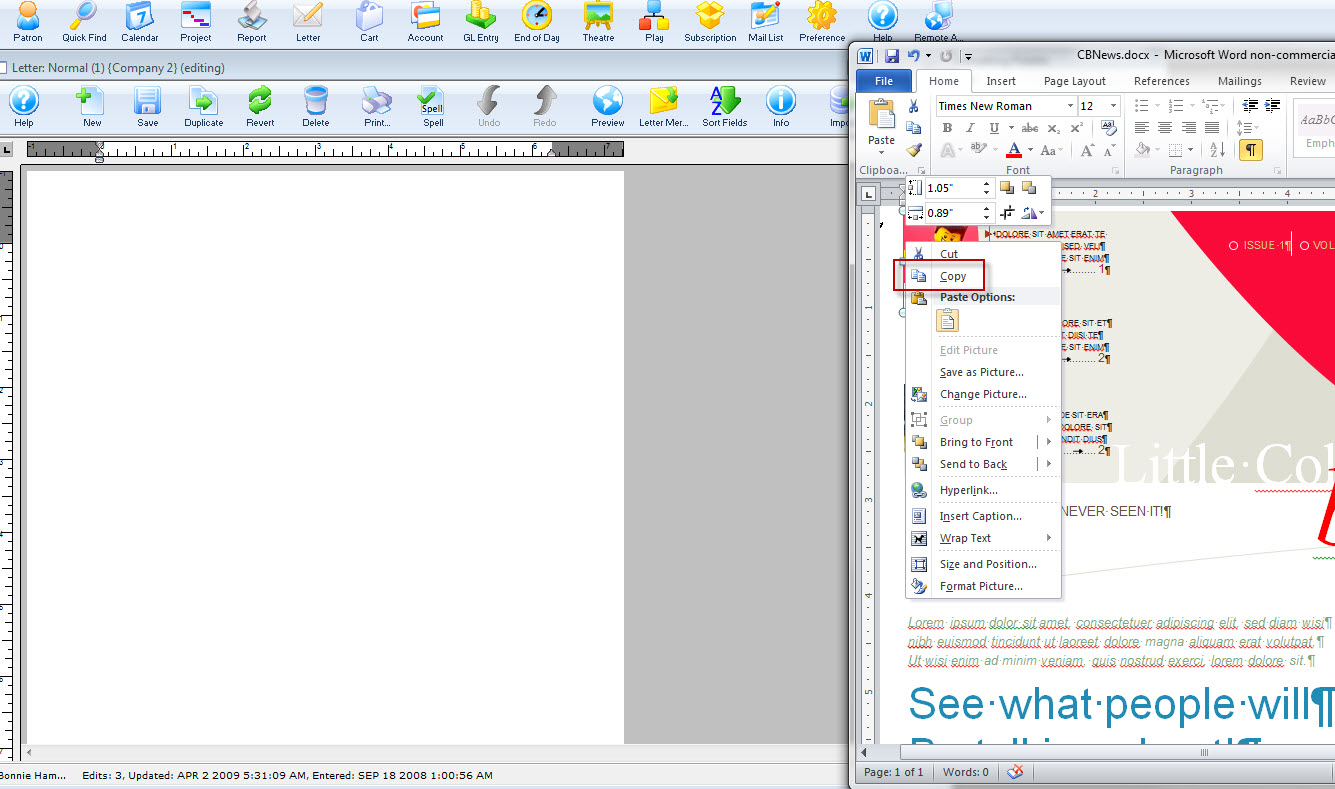
- Left click on Copy, to copy the highlighted material.
Proceed to your new page where you would like to place the copy.
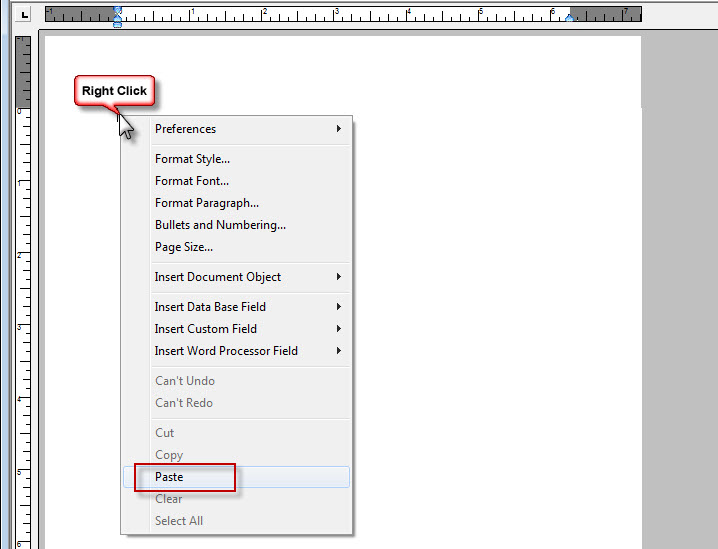
- Place the cursor and right click over the area that needs the copied material. The right click menu opens.
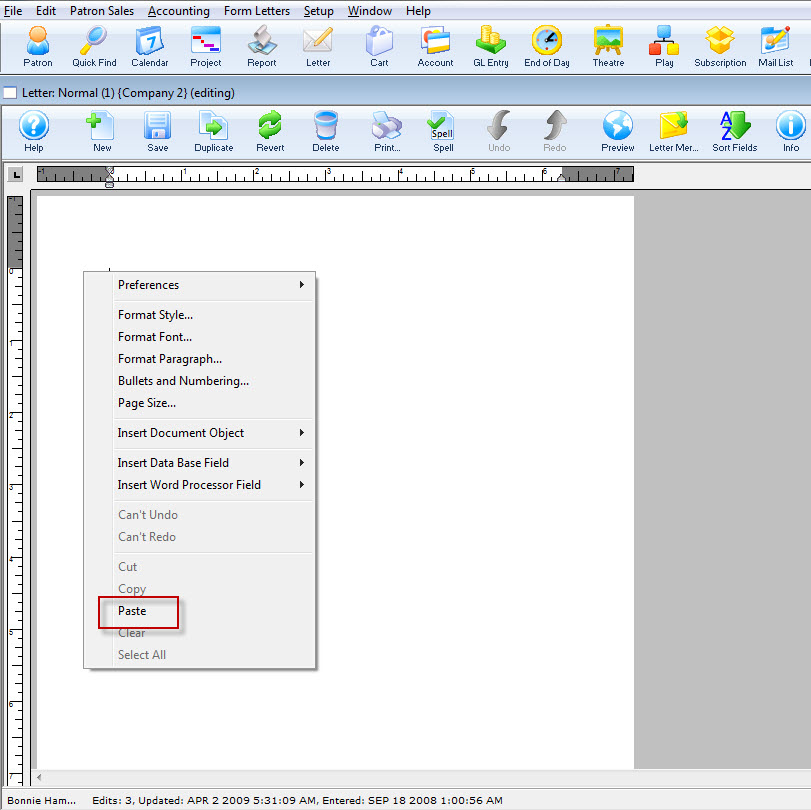
- Left click on Paste. The copied material is placed at the new location.
Mouse and Keyboard Method
- Highlight by holding down the left button of your mouse and dragging across the material you wish to copy and release the mouse button.
- Hold down the Ctrl key on your keyboard, while pressing the C key at the same time, to copy the highlighted material.
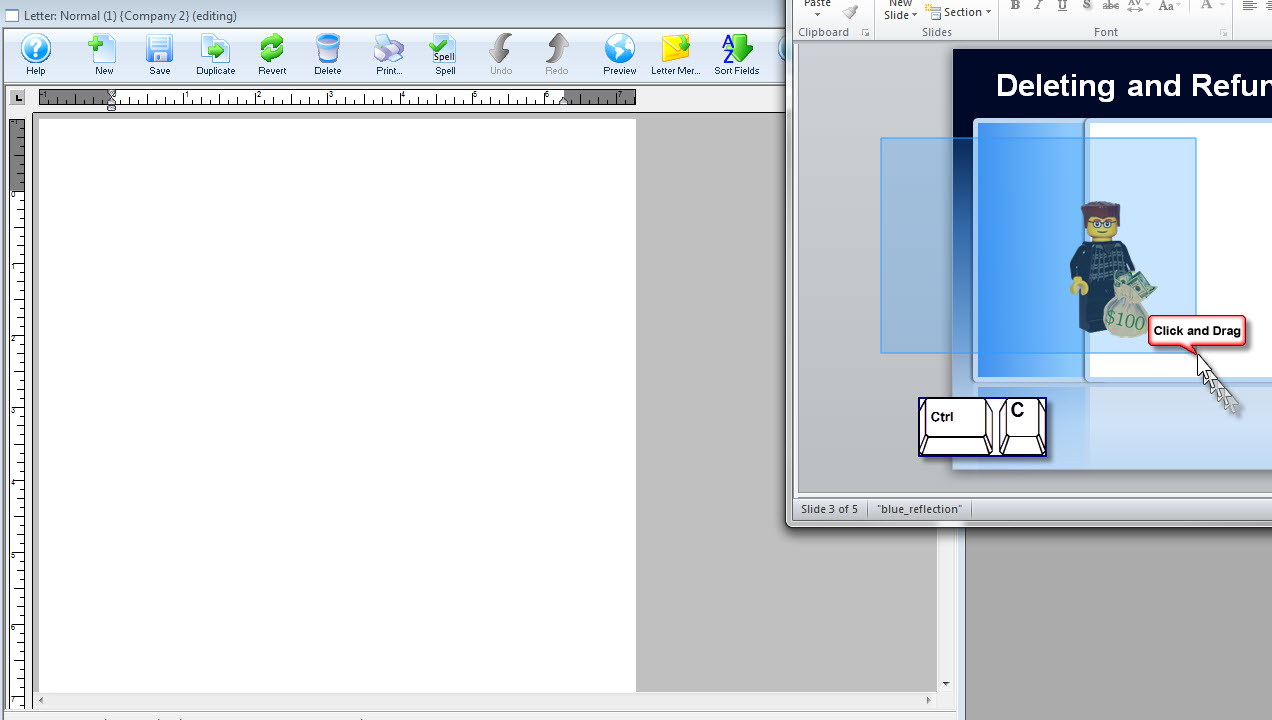
Proceed to your new page where you would like to place the copy.
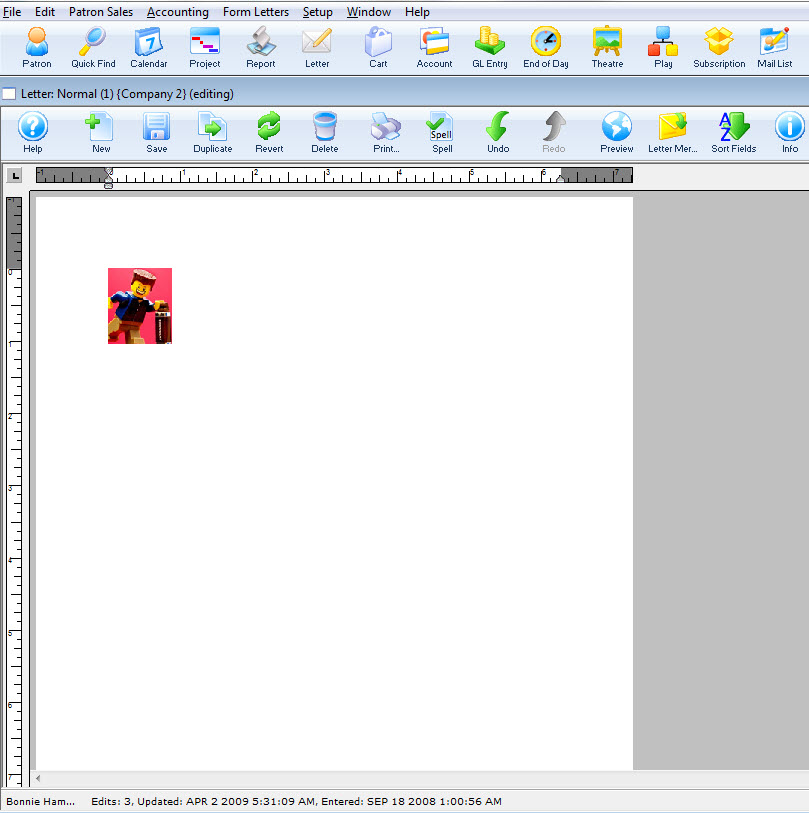
- Put the cursor where you would like the copied material and hold down the Ctrl key on your keyboard, while pressing the V key at the same time.
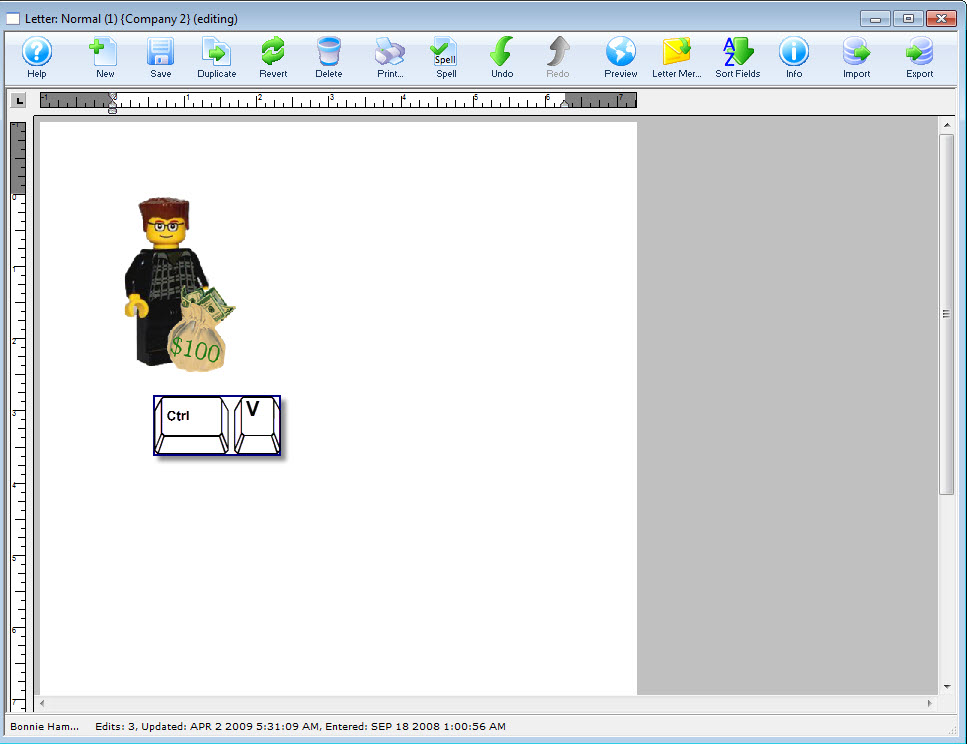
Your picture is now pasted in the document.
Drag and Drop to add a Graphic
To Drag and Drop a graphic into your form letter, you perform the following steps:
- Open the letter you want to add the graphic to.
Click here for more information on opening an existing form letter.
The selected letter opens.
- Highlight the existing Graphic, if there is no graphic, place your cursor at the beginning of the line for your insertion point and now drag and drop the graphic into place.
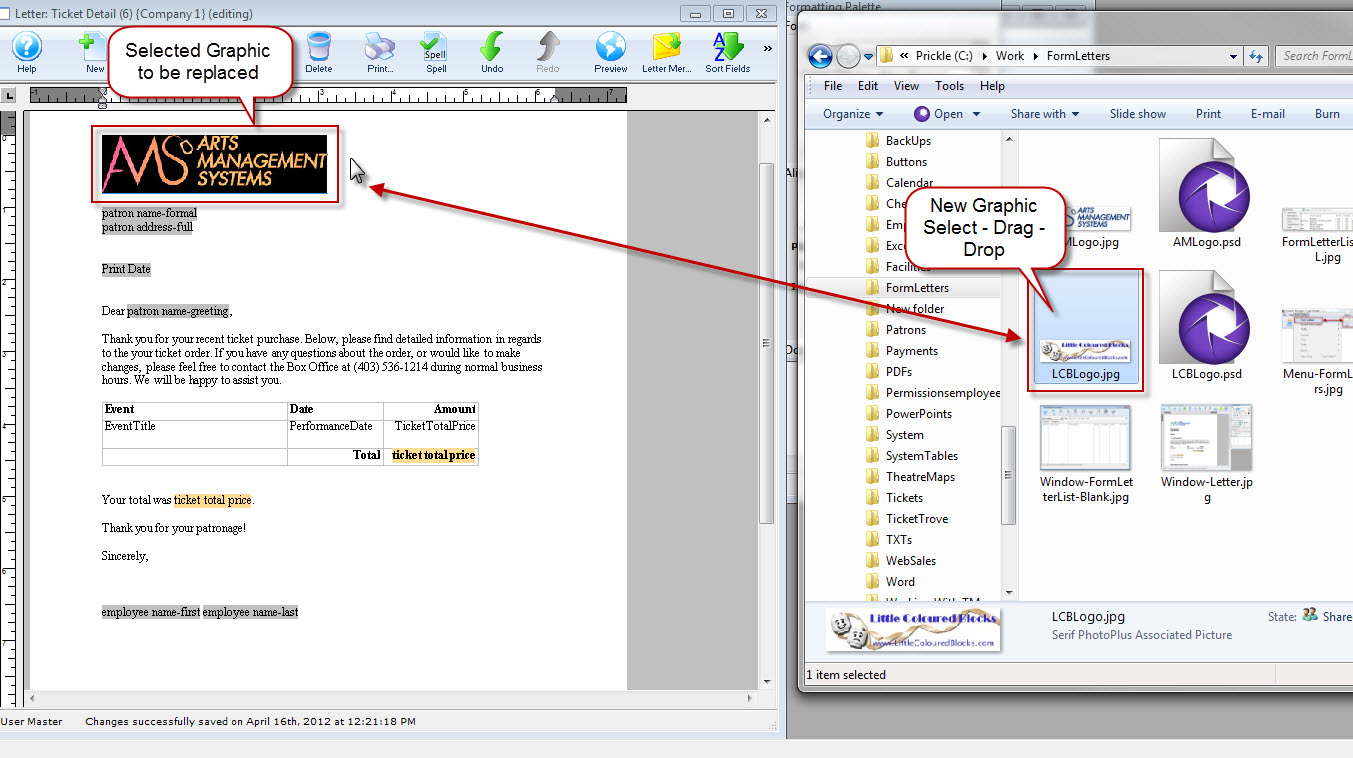
A confirmation dialog opens.
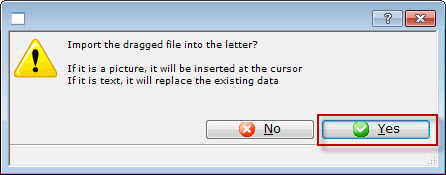
- Click the Yes
 button.
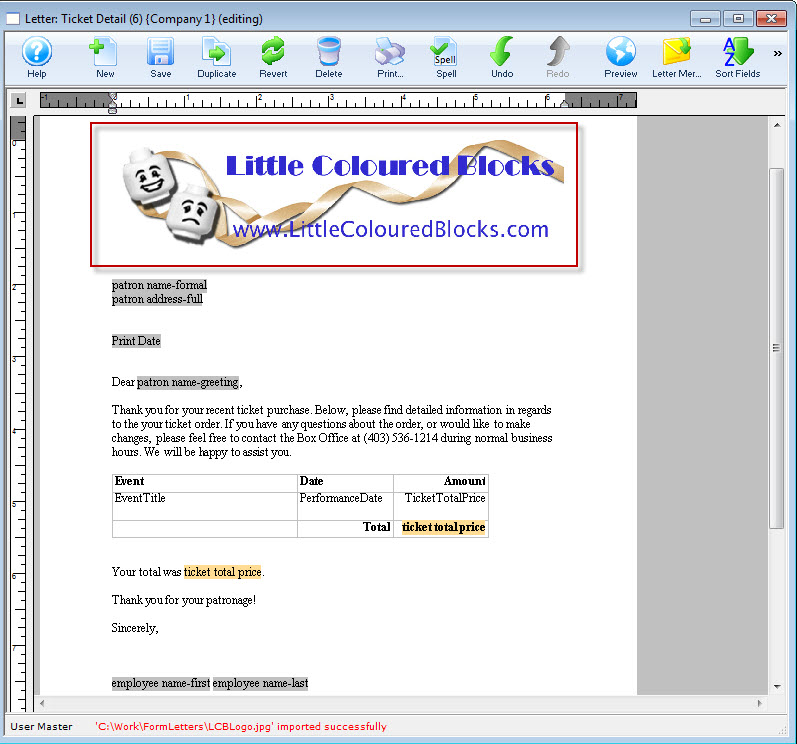
Your graphic has been added to the form letter using drag and drop.
To change the graphic size or location, use the right - click menu.
Float Image with Text wrapped
 If an image is added to a form letter, the default positioning is that the image is inline with the text. That means that as you add more text before the image, the image will float down the page because of the expanded text.
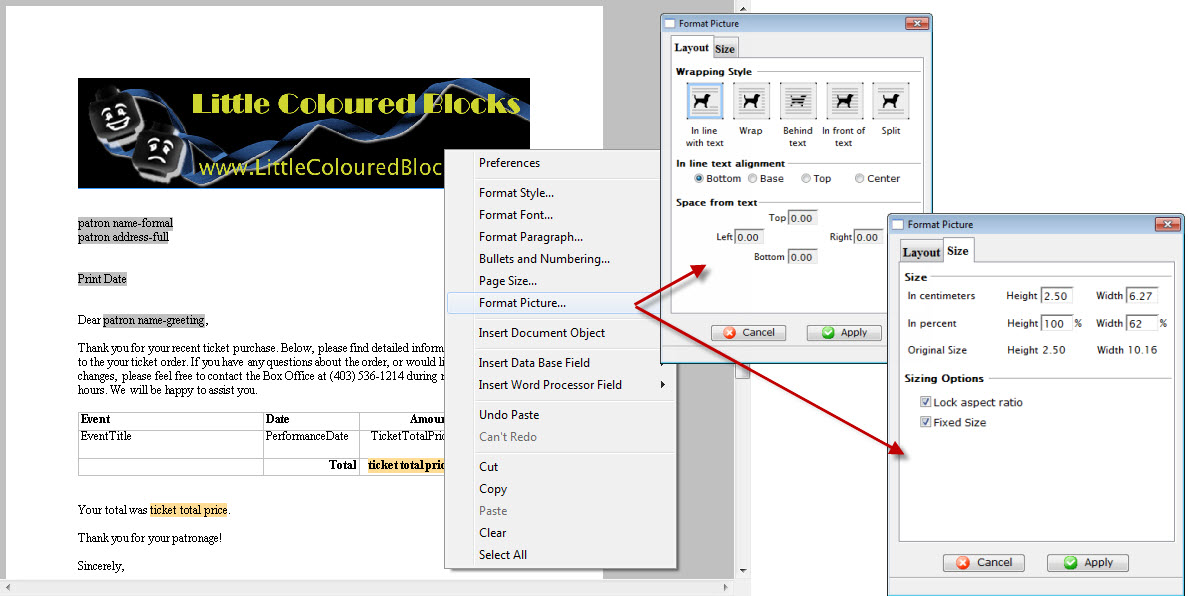
When creating a newsletter or eblast, it can be advantageous to fix the position of the image on the page and allow the text to wrap around it. To do this:
- Drag the image onto the form letter approximately where it should be placed
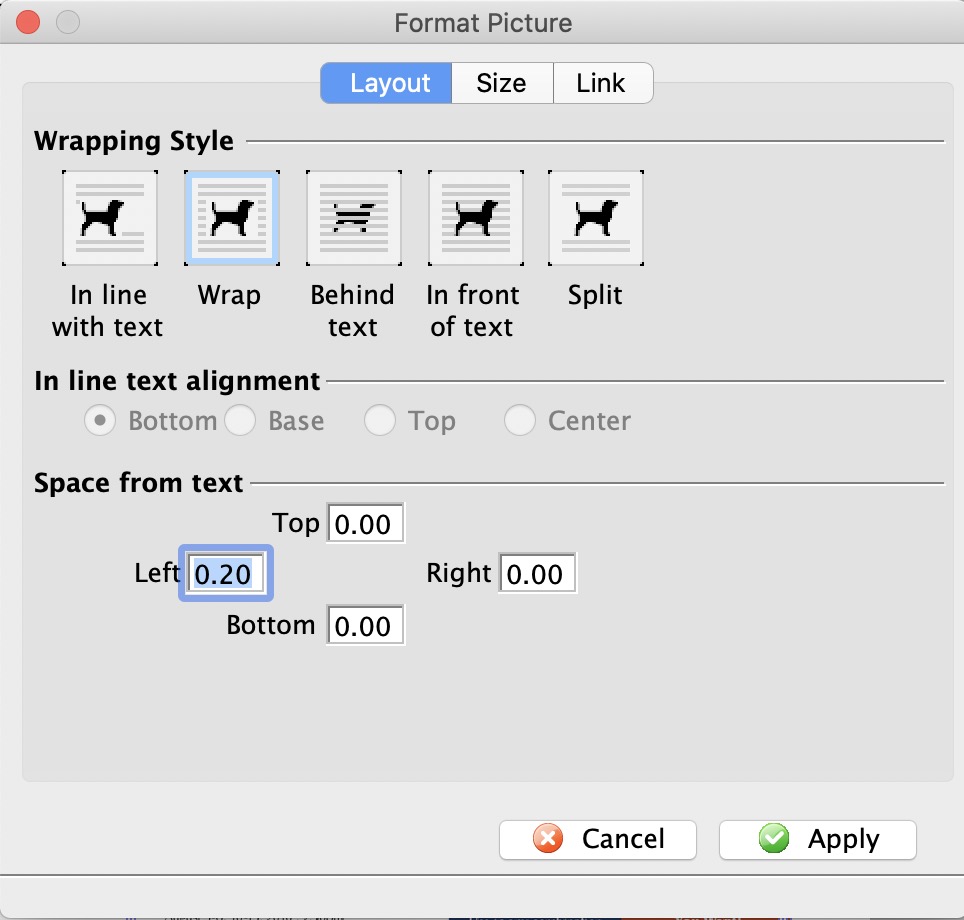
- Double click on the image. The formatting window, similar to the image on the right, will appear.
- Change the formatting to be Wrap
- (optionally) set the space from text:
- This is the white space that the form letter will leave around the image
- You can set values for one or more of the left, right, top or bottom of the image
- In the example, white space will be created only at Left border of the image for 0.2
- Close the Format Picture window. The text is now wrapped around the image
- Click on the image and drag it to the desired location in the document and the text will format automatically.
An Example is shown below:
The example shows placement of one image on a form letter. This can be repeat this as many times as needed in order to move images around on the page when creating a letter or email.
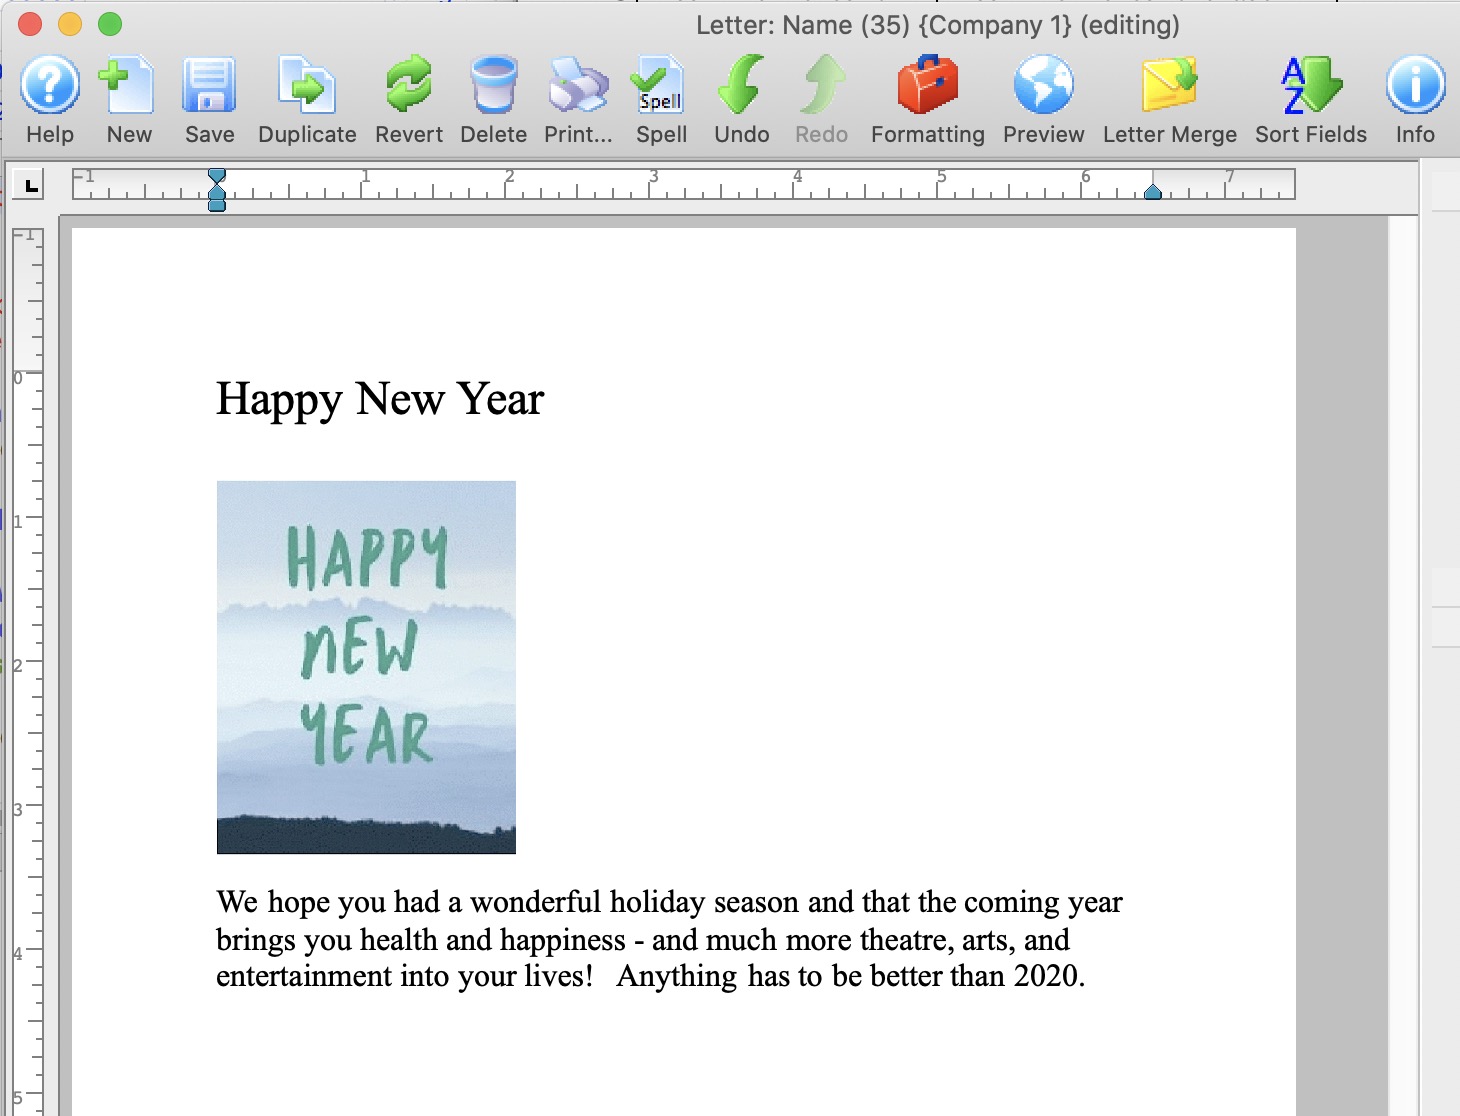
- The image for happy New Year is dragged onto the document and landed between text
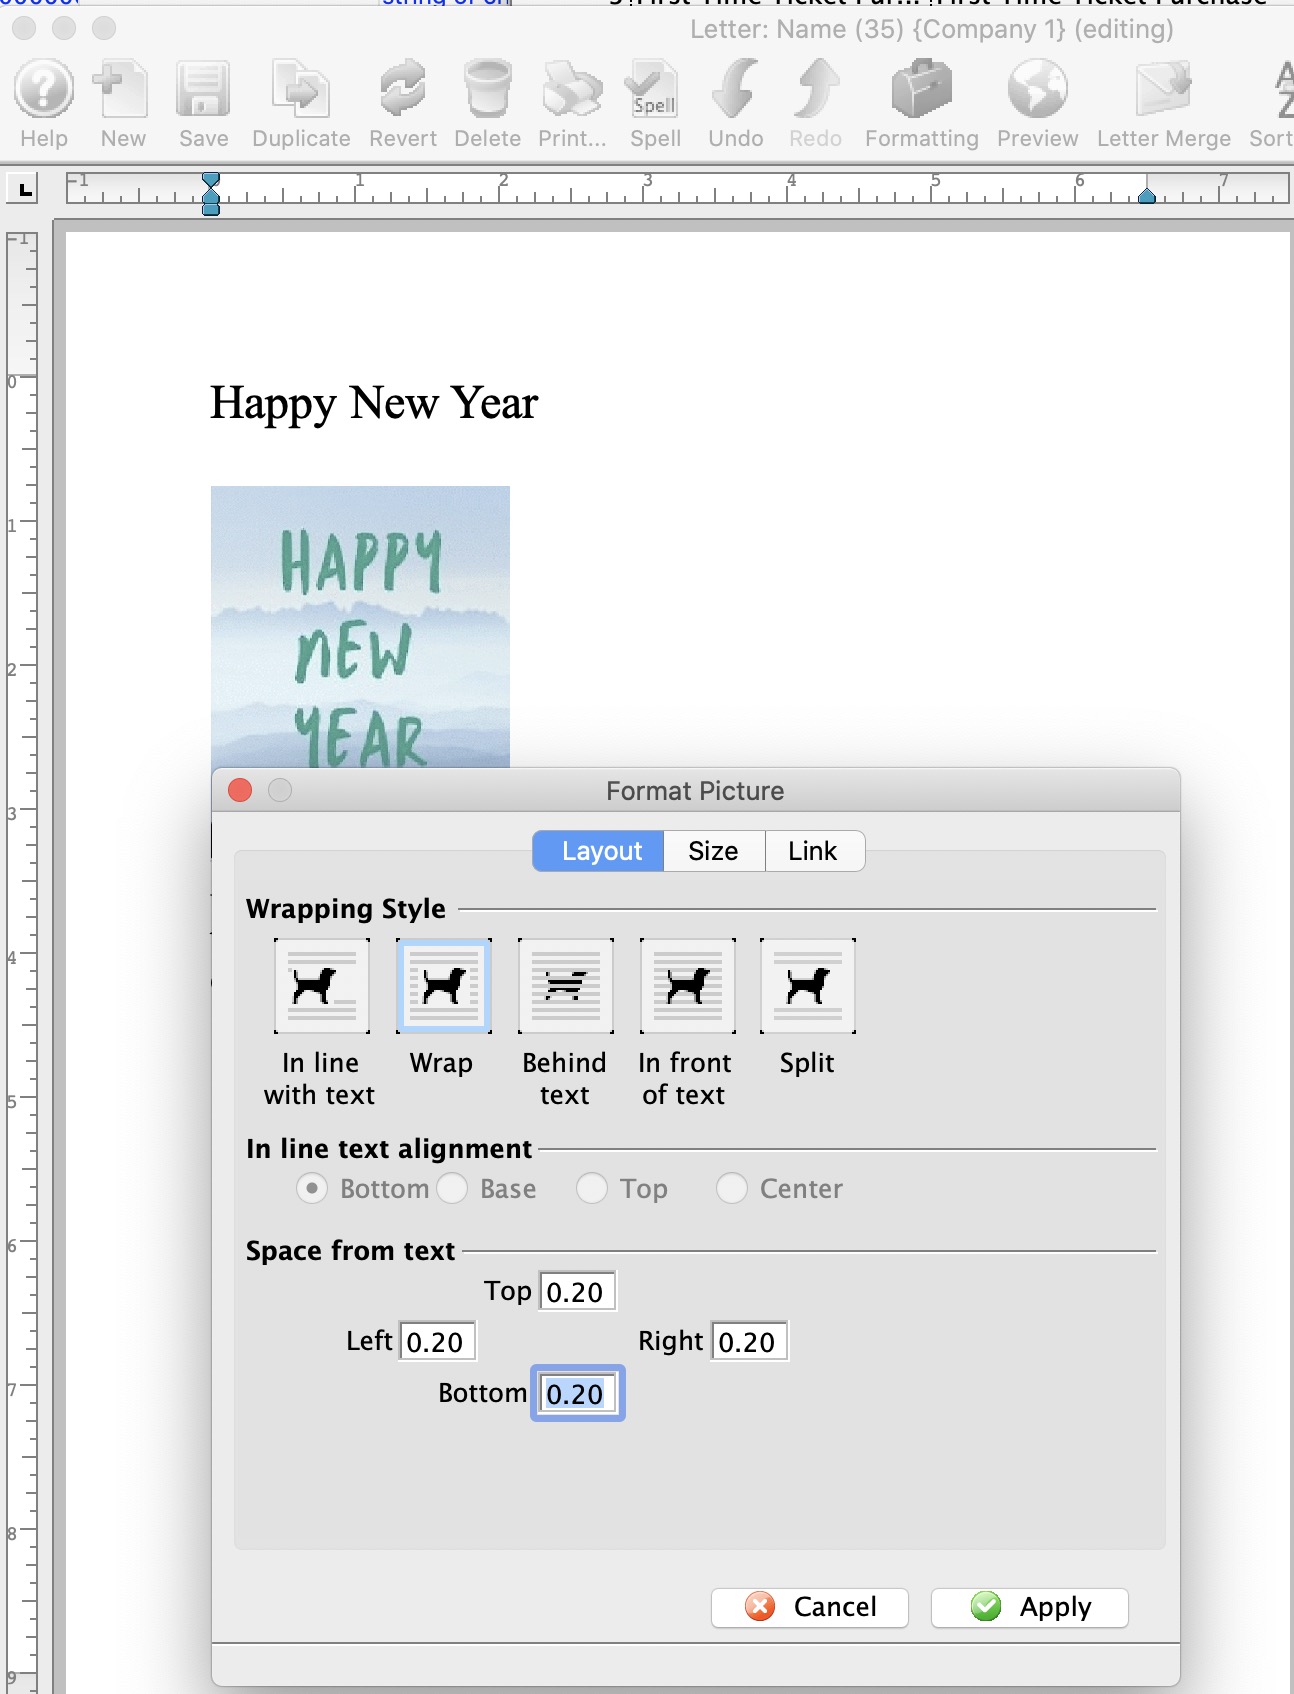
- By double clicking on the image the parameters for wrapping and space around the image can be set
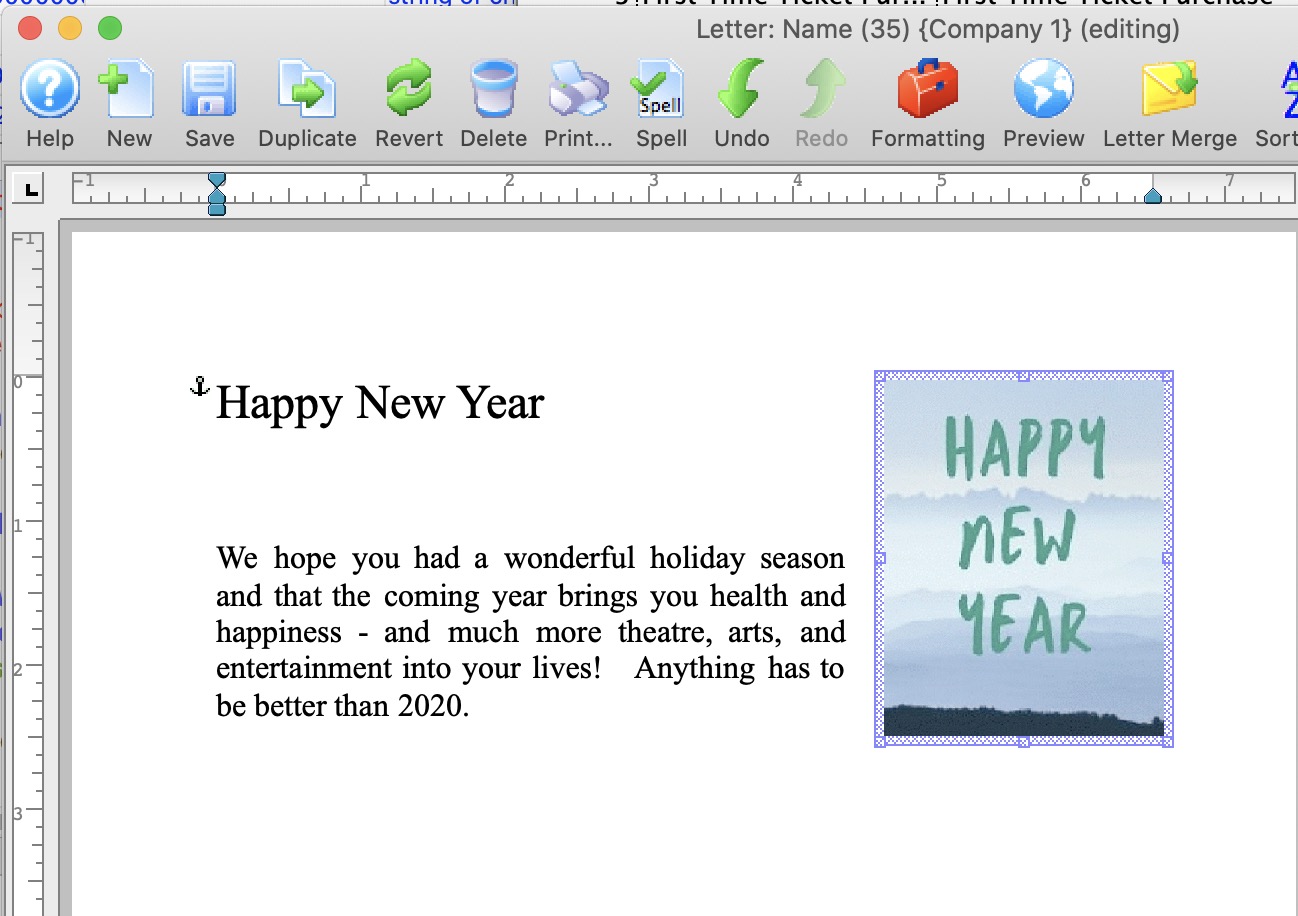
- Click on the image and drag it to the desired location in the document. In this case, the image is dragged to the right and the text formates nicely around it.
Paste From File
To add a graphic to a Form Letter by using paste from file, you perform the following steps:
- Open the letter you want to add the graphic to.
Click here for more information on opening an existing form letter.
The selected letter opens.
- With your cursor, locate the beginning of the linewhere you would like the graphic to appear.
- Chose the Main Menu item Edit >> Paste from File.
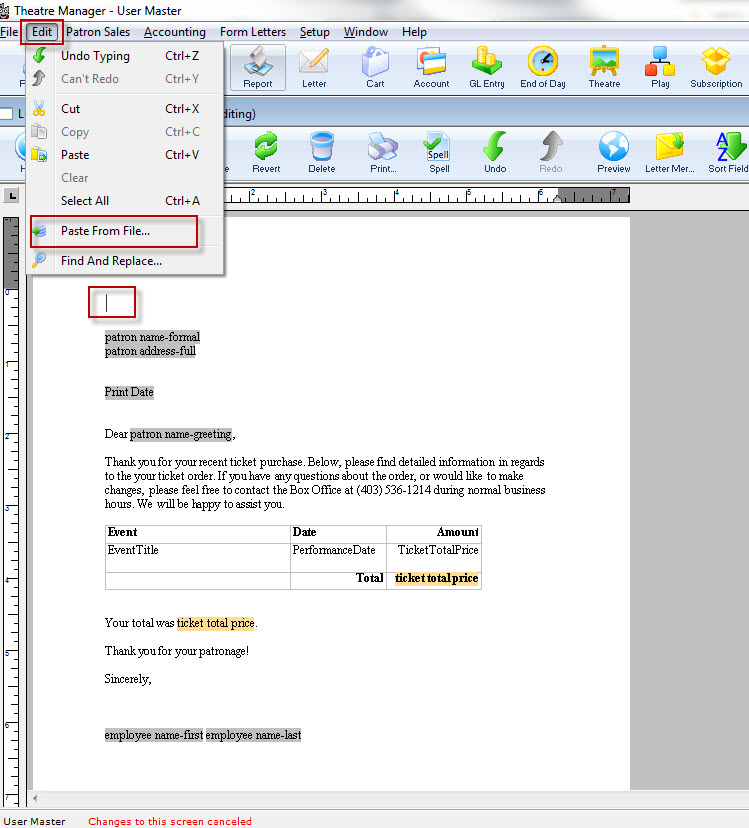
The file dialog for your operating system opens.
- Find the graphic file you want to insert into your form letter. You may have to use the drop down selection to choose the appropriate file type.
- Click the Open
 button.
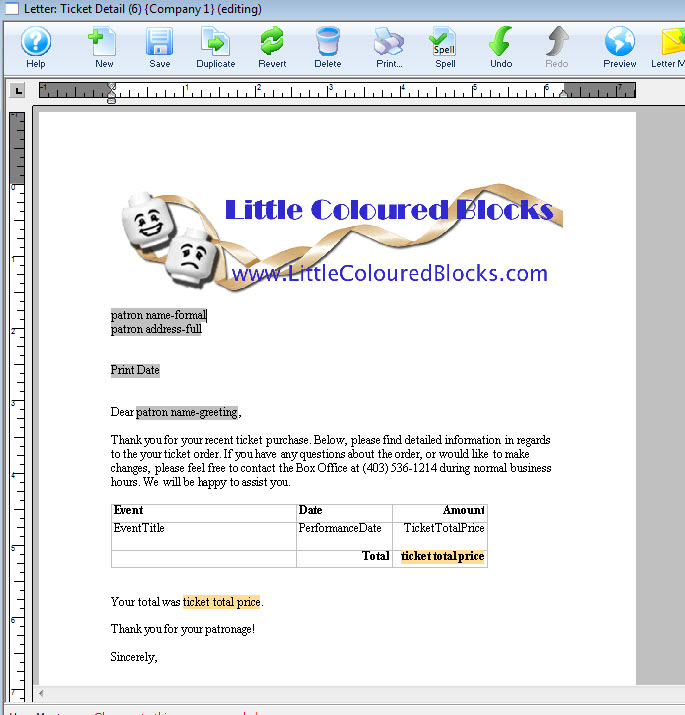
The graphic is pasted into the Form Letter.
Create an HTML eblast
Unlike a plain text email, an HTML email incorporates fonts, color and graphical content. Individuals often choose to use such emails for marketing and email newsletters (popularly called "ezines"). Sending emails of this sort to multiple recipients is traditionally referred to as an eblast (email blast). Incorporating HTML eblasts into your online marketing technique might increase your site's visitor count and be a successful method for promotion.
Creating an html email is as simple as importing the html code into the form letter.
You can create your html email in a text editor or HTML editor. To do this, you perform the following steps:
- Open a new text document or HTML editor and create an HTML email.
Use basic HTML code, such as "<B>" for bold text and "<I>" for italicized text. If you are incorporating graphical content, upload them to your marketing web site rather than attaching them to the document.
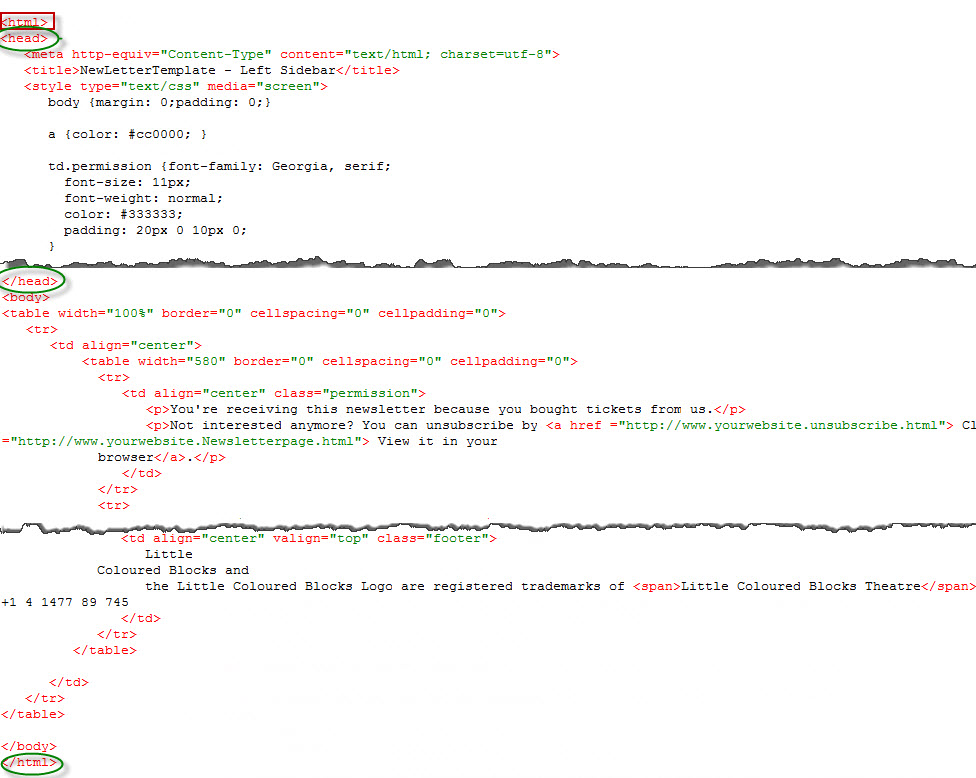
Ensure you have the HEAD tags open and closed and HTML at the beginning and the end of the document.
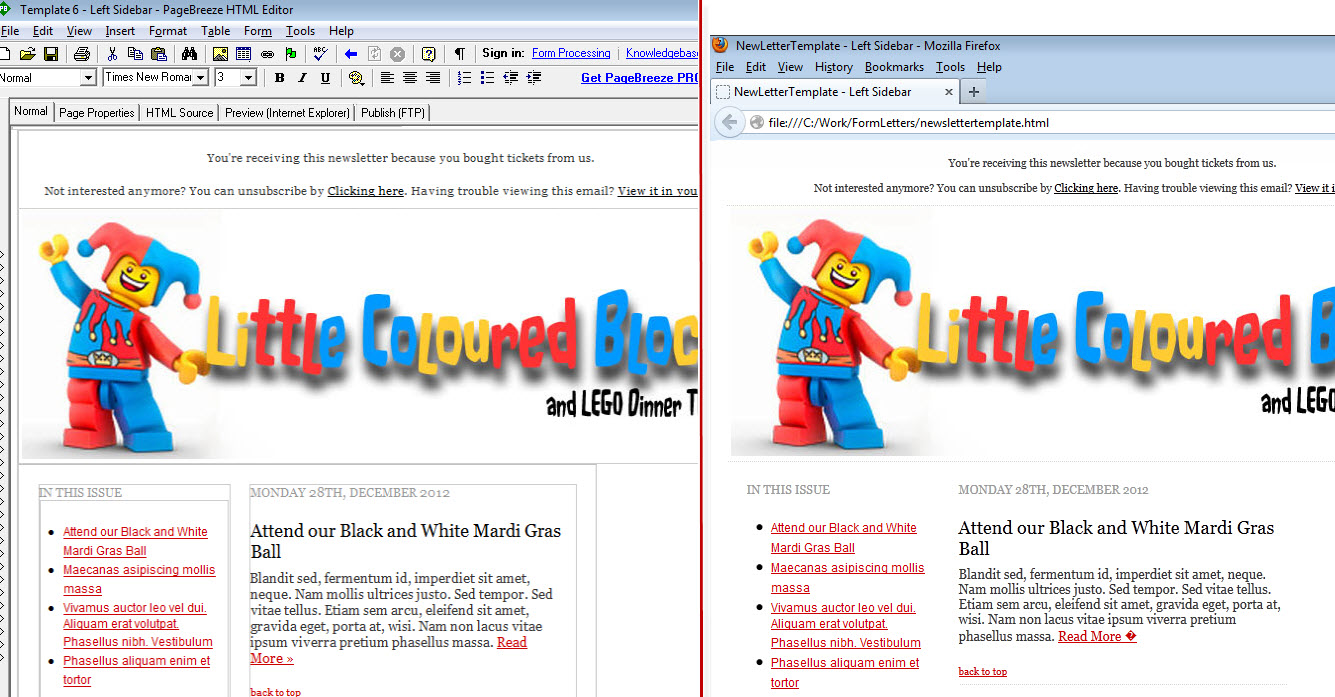
- If you are using a WYSIWYG (what you see is what you get) HTML editor, review your final email. Otherwise, open the filename.html in a web browser.
- Select and copy the HTML email draft letter.
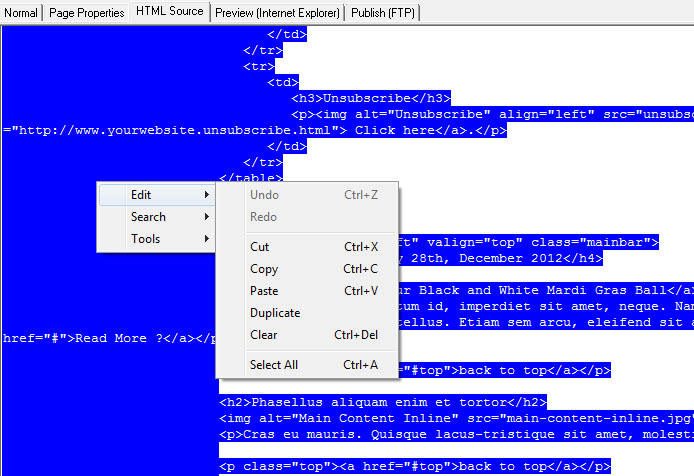
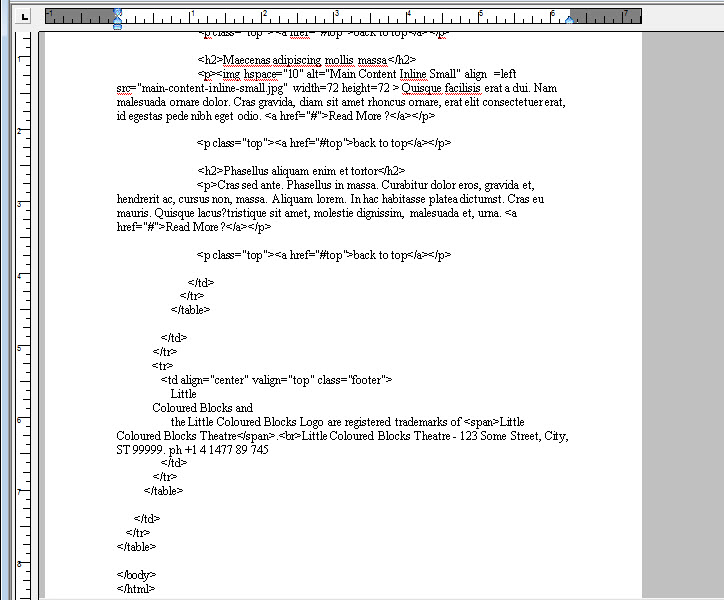
- In the open form letter, paste the copied HTML.
- Click the Save button.
The form letter/eblast now contains the html code.
You can now add any Database or Custom fields.
Deleting an Existing Form Letter
A Form Letter can be deleted when it is has not been linked to any patron files. To make a letter is no longer available for use that has been linked to patron files, make it inactive.
- Search for the Form Letter to delete.
Click here to learn how to find existing Form Letters.
- Click on the Form Letter to delete.
- Click the Delete
 button.
The letter can also be opened and deleted from the Form Letter Window.
| You can download quick reference information on Deleting a Form Letter by clicking on the icon. |
Flash |
MP4 |
Duplicating an Existing Form Letter
To modify a Form Letter without affecting all users, create a duplicate of the letter.
- Search for the Form Letter to duplicate.
Click here to learn how to find existing Form Letters.
- Click on the Form Letter to duplicate.
- Click the Duplicate
 button.
A copy of the letter will be placed in the same folder and will appear in the list window. The letter can also be opened and duplicated from the Form Letter Window.
| You can download quick reference information on Duplicating a Form Letter by clicking on the icon. |
Flash |
Finding an Existing Form Letter
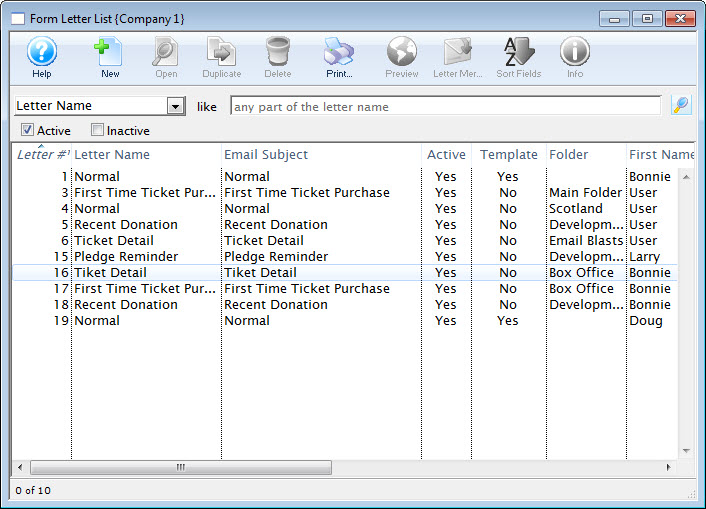
- Select the main menu Form Letters >> Form letters or click the form letter icon on the Theatre Manager Toolbar / Ribbon Bar.
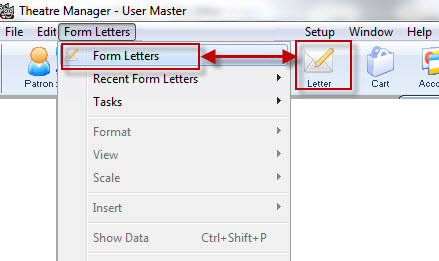
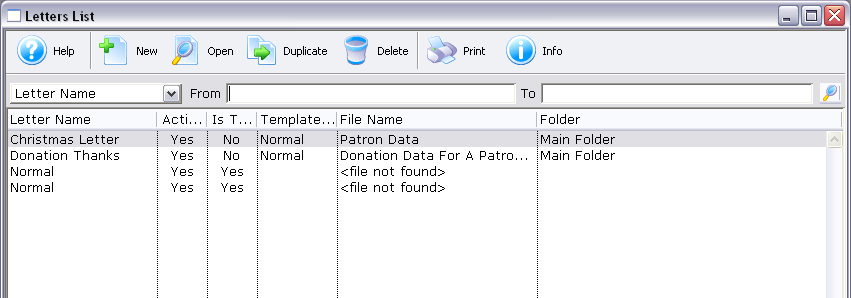
The Form Letter List window opens.
Click here for more information about this window.
- Select your criteria from the Drop Down List Menu and enter criteria for a specific search, or click the Search
 button to find all letters.
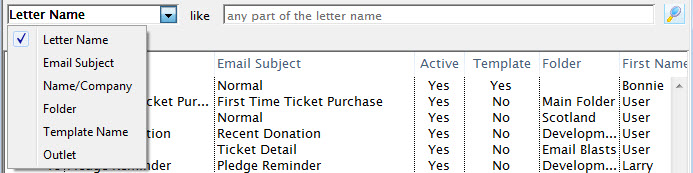
The letters are displayed in the window.
| To view the screencast on Finding a Form Letter, click the following: |
Flash |
MP4 |
Deleting a Letter from a Patron Record
After adding a letter to a Patron record, it may become necessary to delete the letter.
- Open the Patron's record from the Patron List window.
Click here for more information on this process.
- Click on the Letters
 Tab at the bottom of the Patron window.
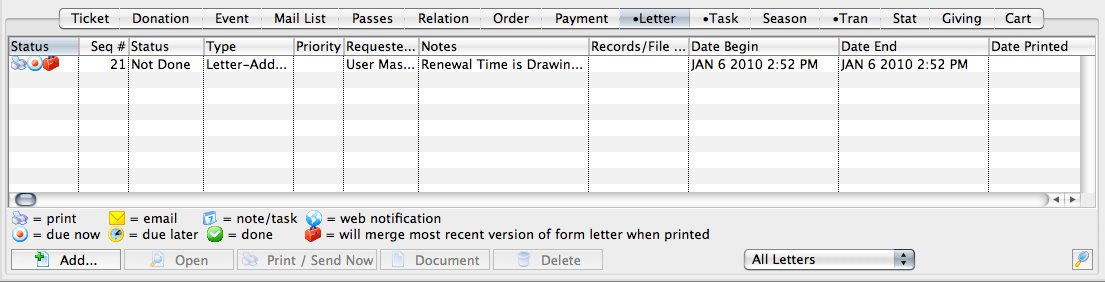
- Click on the letter to be deleted.
- Click the Delete
 button.
A warning message will appear.
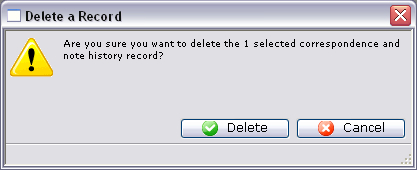
- Click the Delete
 button.
The letter will now be removed from the patron's record.