Online Event/Course Management

You can allow course instructors to manage some aspects of the student's attendance or front of house staff to manage guest arrival to an event via the online, depending on settings in code tables
 This can include:
- Setting Attendance for the students in each class of the course
- Setting Attendance for the guests arrival for an event
- Adding new patron to the class if you have previously been their instructor. This also means that a first time attendee must be added at the box office - to provide some control over student/teacher setup process
- refund patron and remove them from the class or event
- Reschedule the class in entirety
- add an extra class
What can this be used for?
This feature was intended to support various things like:
- Instructors taking attendance at the beginning of the class via a tablet and immediately tracking it in the database. eg did the ballet dancers or swimmers in a course come to the class. Or, did the conference participant attend a session?
- Instructors adding late registrants to a course they are teaching (if they taught them before)
- Instructors of personalized sports/fitness sessions being able to add registrants and use passes to pay for the session (if they have thought them before)
- Instructors being able to reschedule the class or add an additional one
- This feature is not just for instructors of courses or classes. It can be used to manage events to check in guests to a gala/special event, seminars, small member, or donor events where a guest list is used to greet guests as they arrive.
Adding A Student to a Class
- The class must have already been set up and in the future
- The instructor must have already taught the student in the past
Steps for adding a student online
-
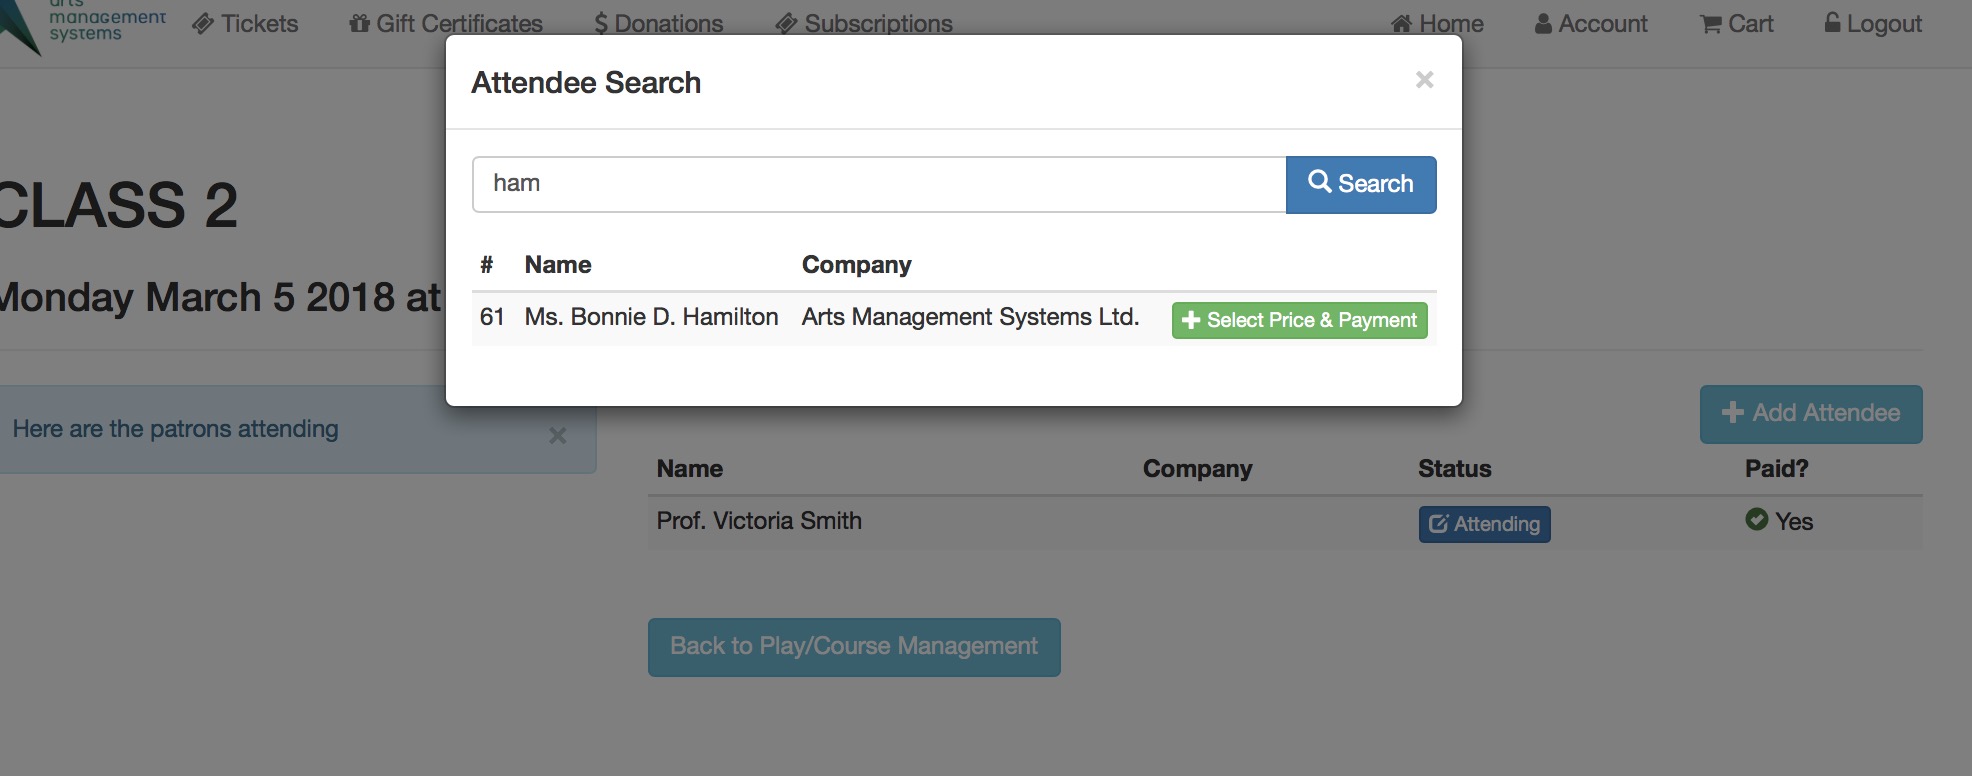
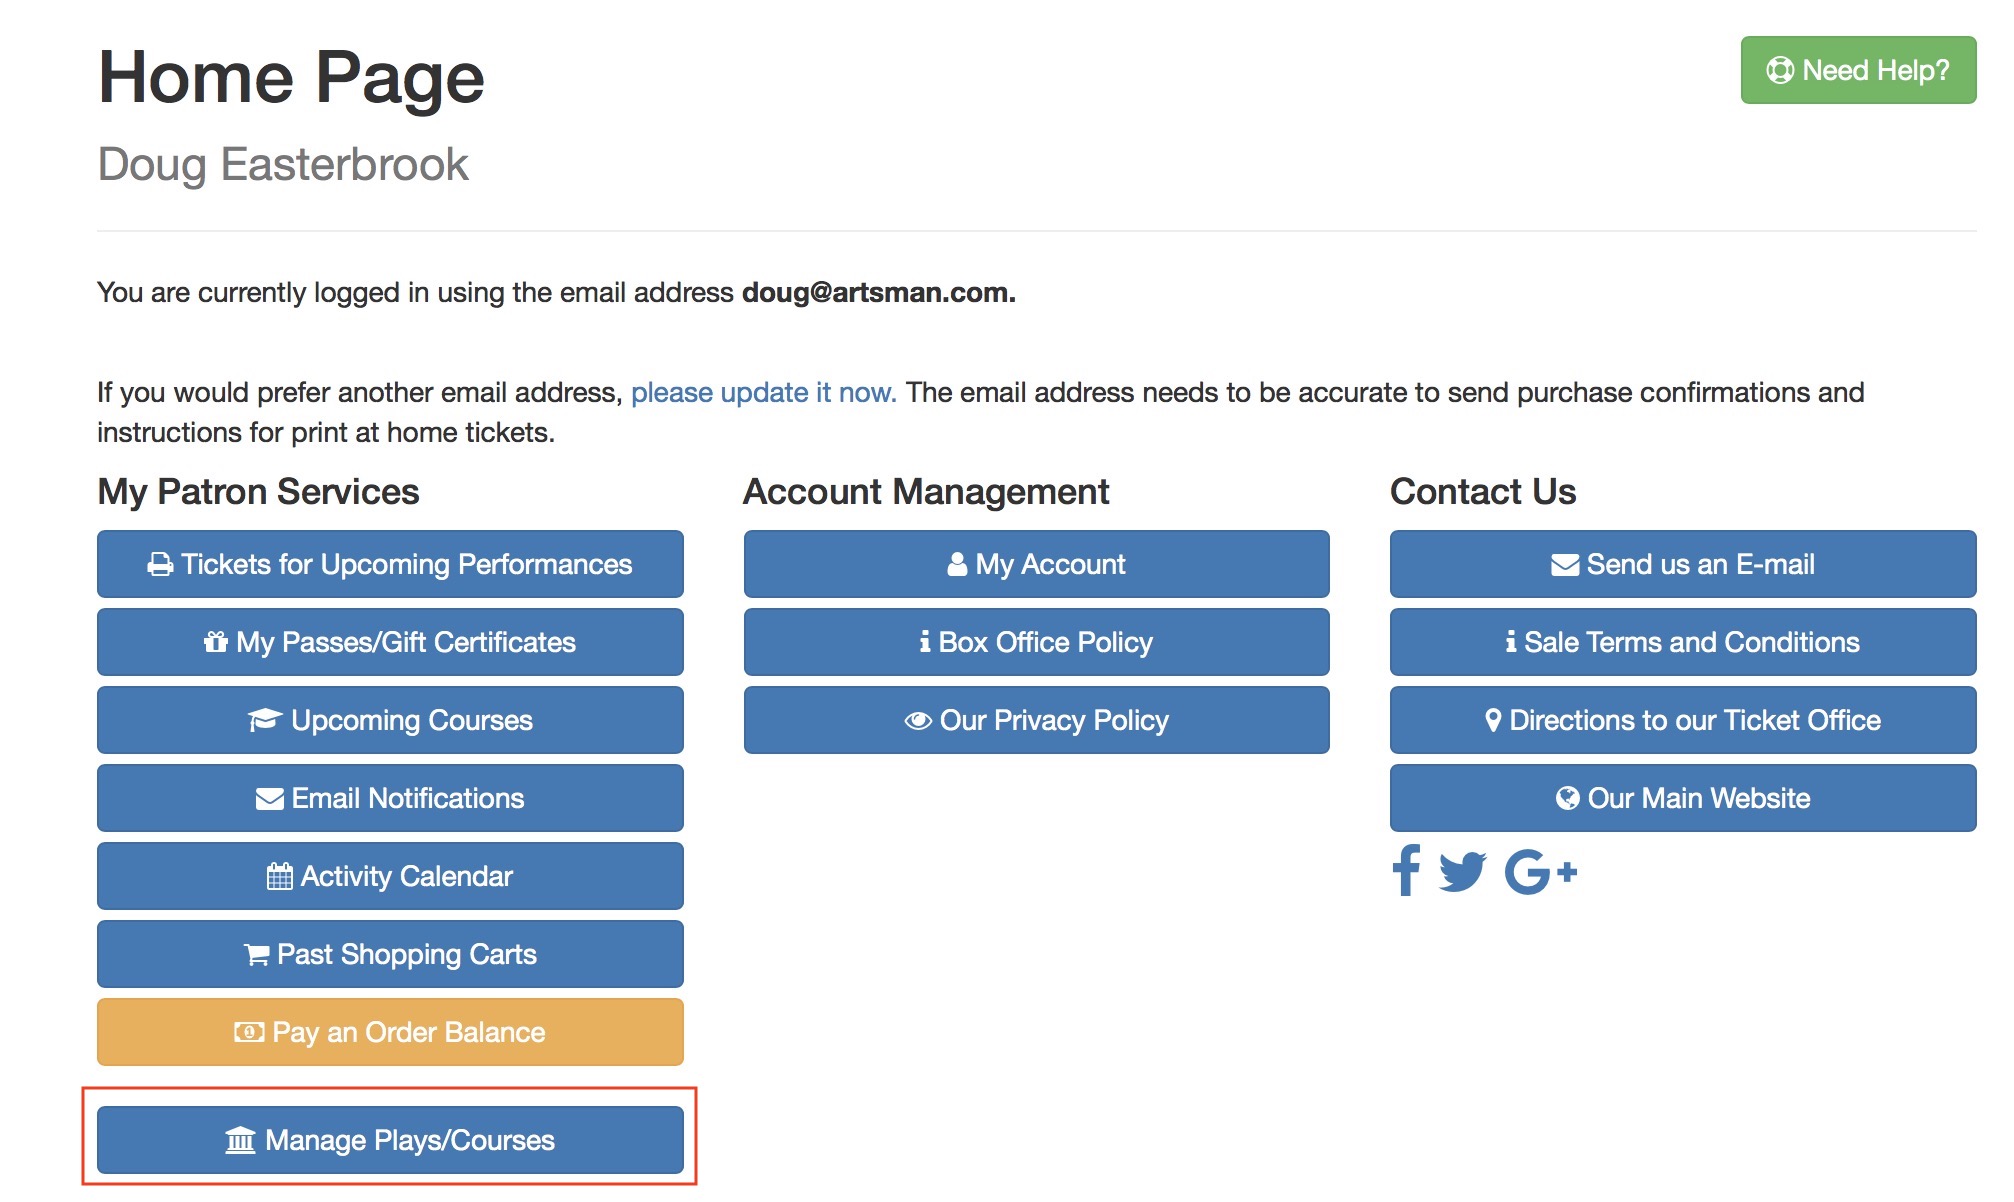
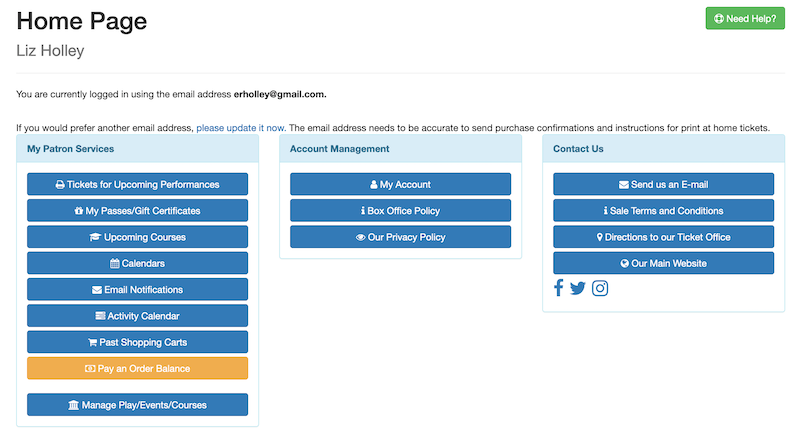
The instructor must log in to the online portal and ho to the home page. If they are allowed to manage classes, they will see Manage Play/Courses in their Patron Services area.
It is permissible to bookmark the link to manage performances - and it may involve a login to proceed.
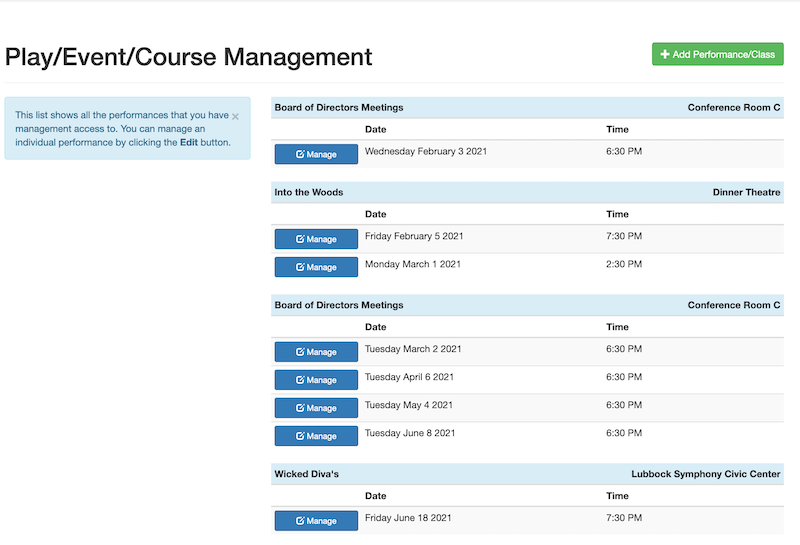
- This will show a list of upcoming courses that they are allowed to manage as an instructor. They can select the course that they want to Manage and add a student to.
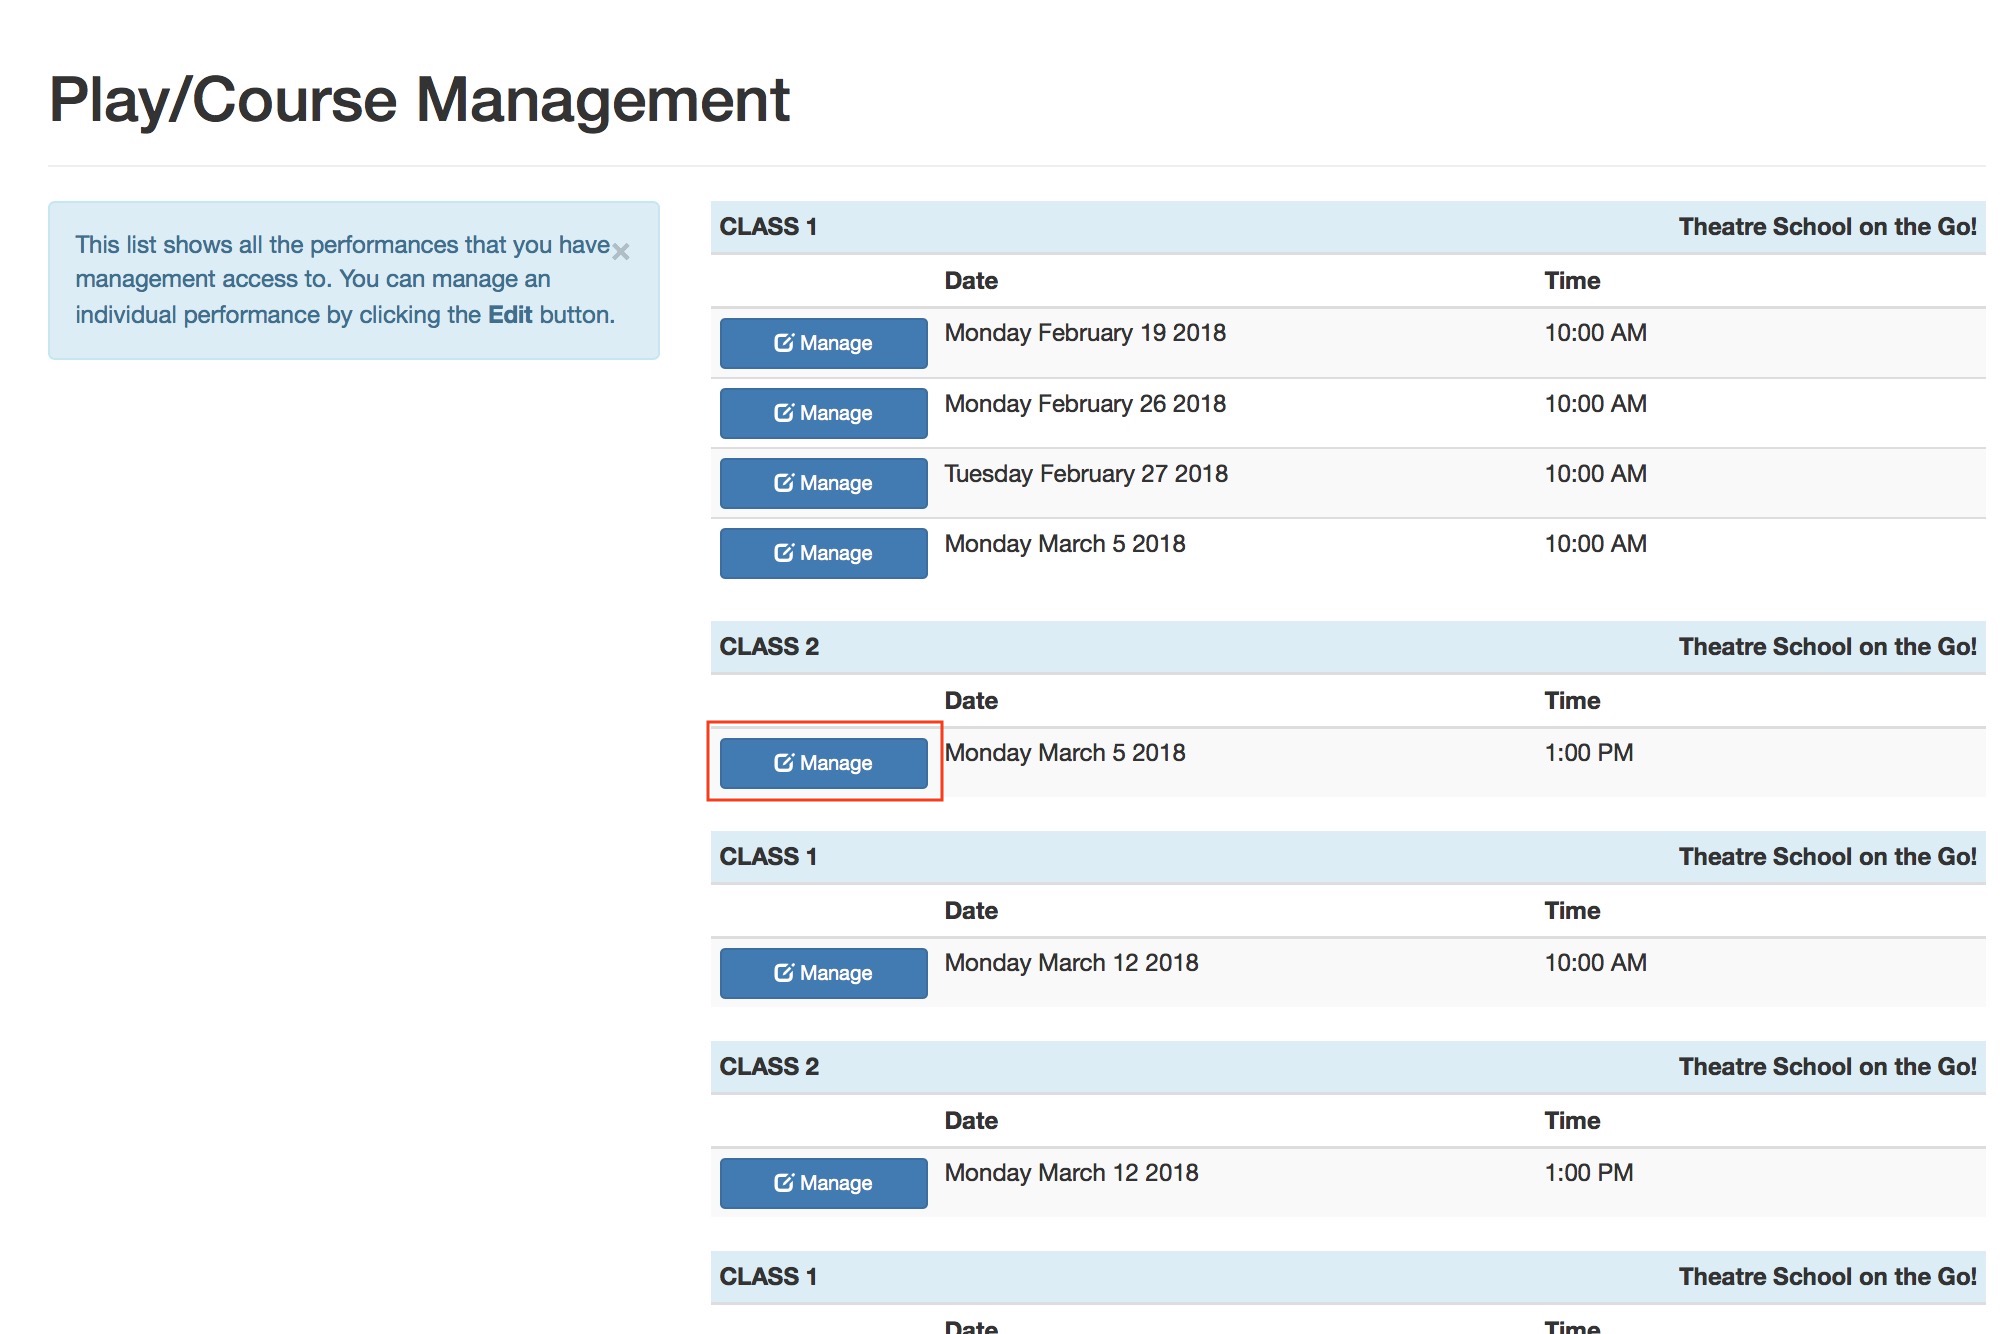
- To add a new student, click the Add Attendee button.
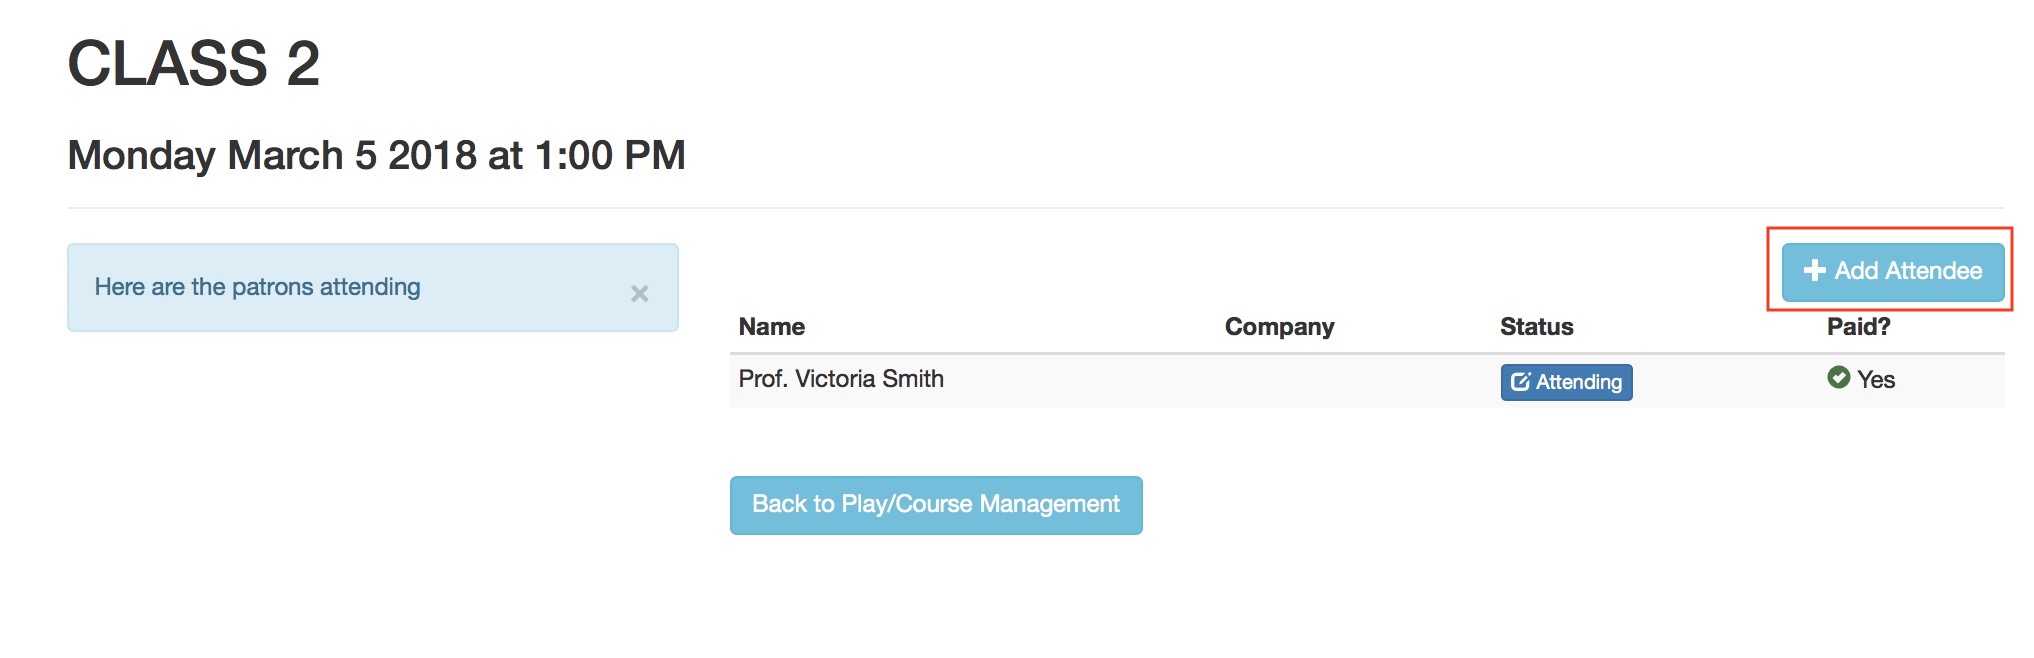
- A search window will appear. The instructor will need to:
- type some portion of the students name to find the patron in the database
- click the search button, and
- select the person from the list of those previously taught and click Select Price and Payment
-
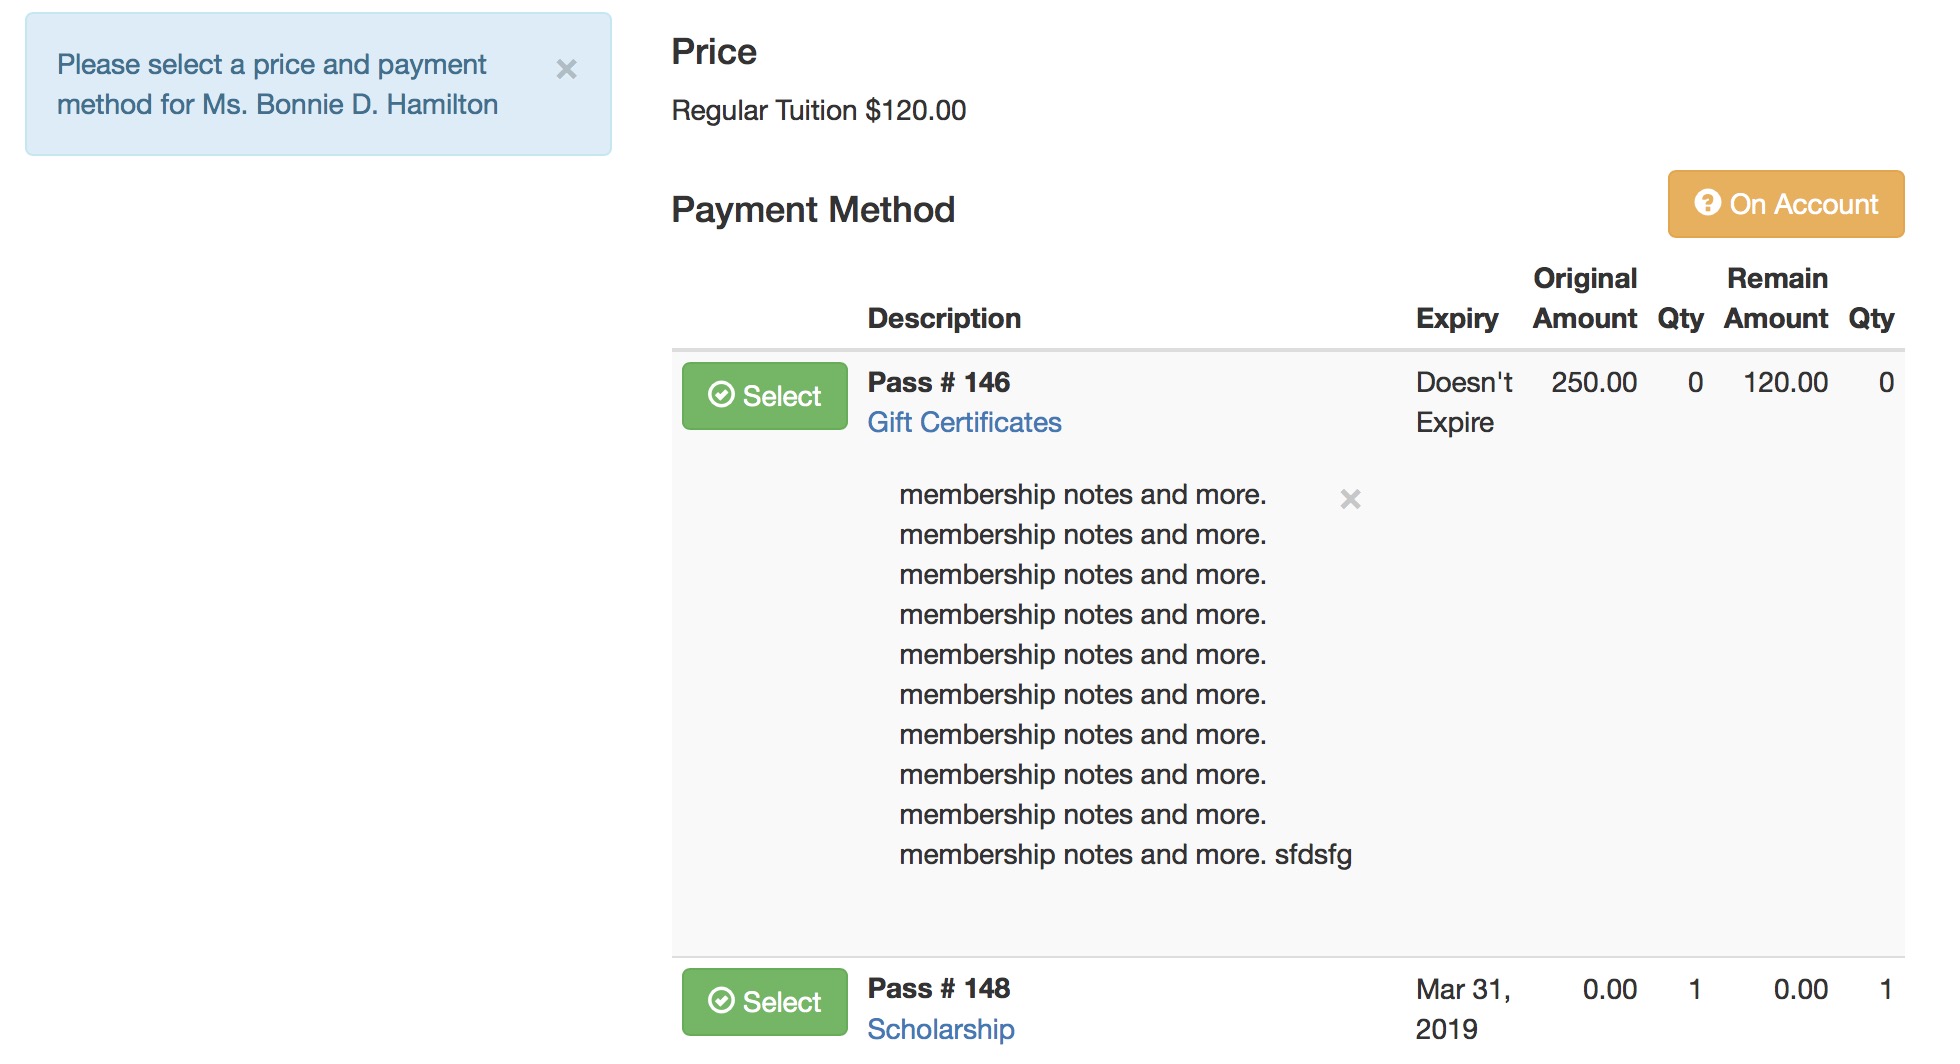
The instructor will be asked to Select a pass/gift certificate that will pay for the registration. The passes must be valid and belong to the patron. There is an option to place the registration On Account
- for the Box Office to apply a payment to the order later -or-
- the patron to deal with by paying for the order online.
Note that any notes particular to the pass type are shown - which means you can place some rules for the instructor if you wish.
-
After picking the pass to pay for the registration, the Instructor will need to confirm via the Pay With Pass ... button
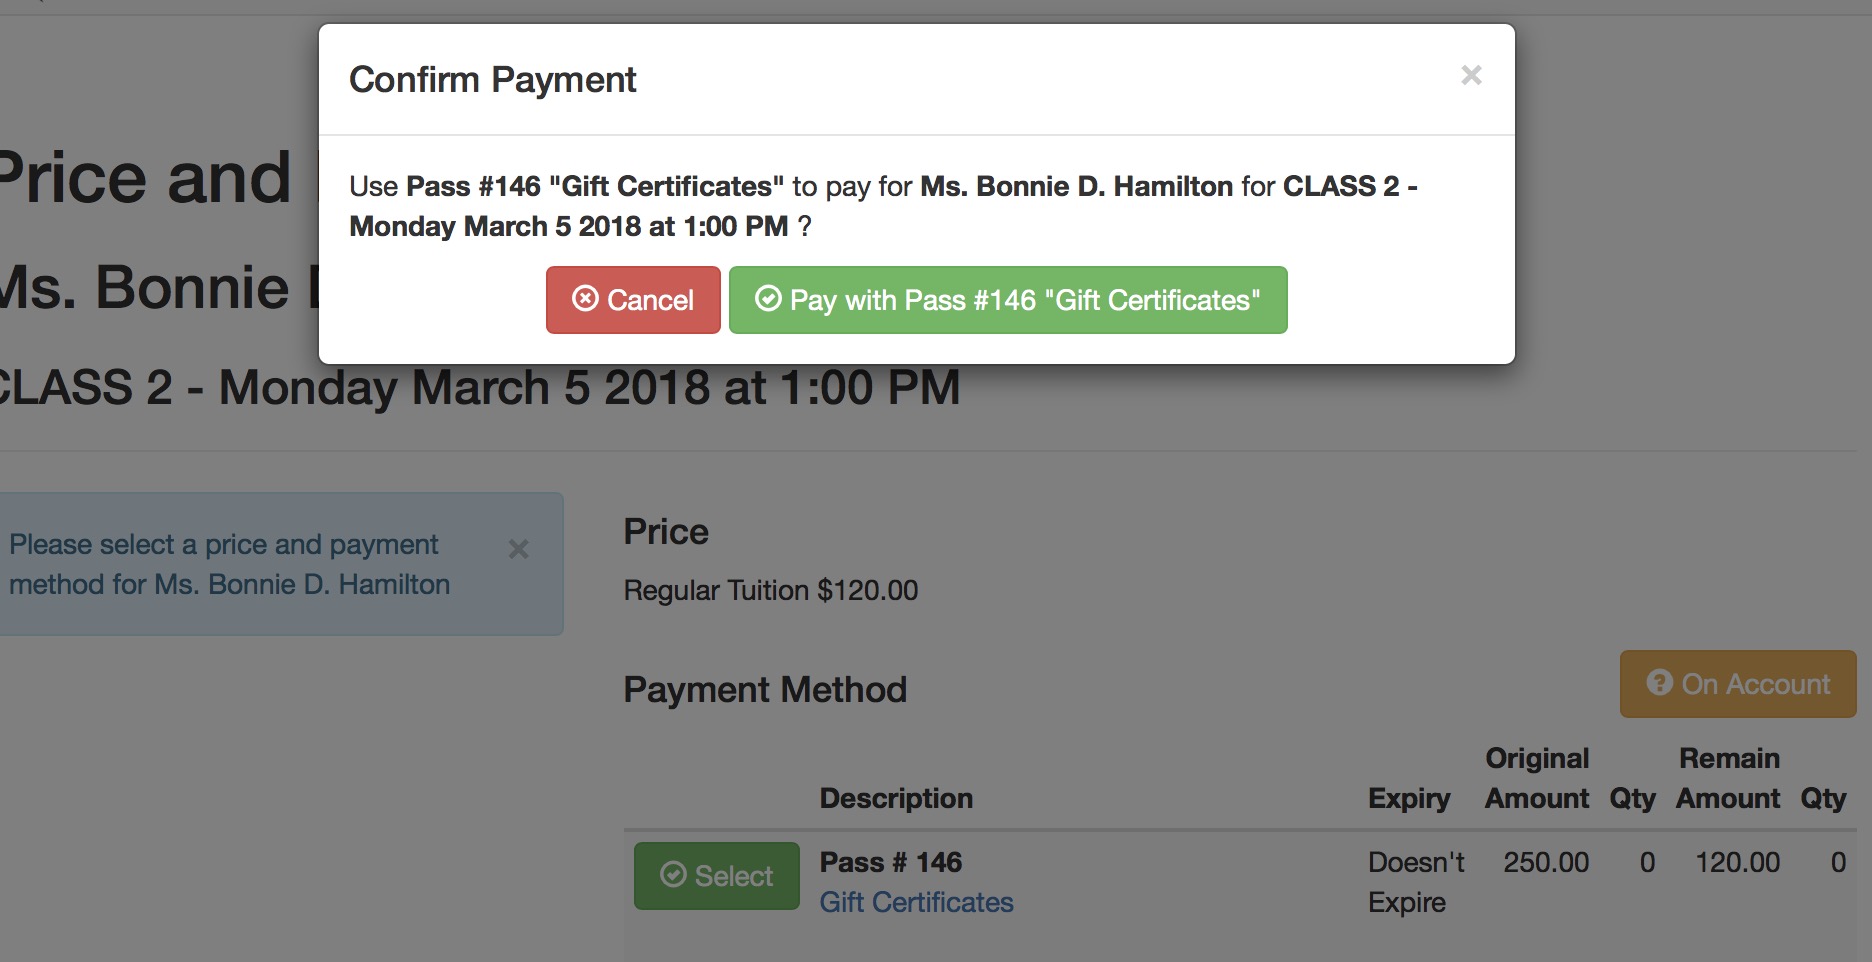
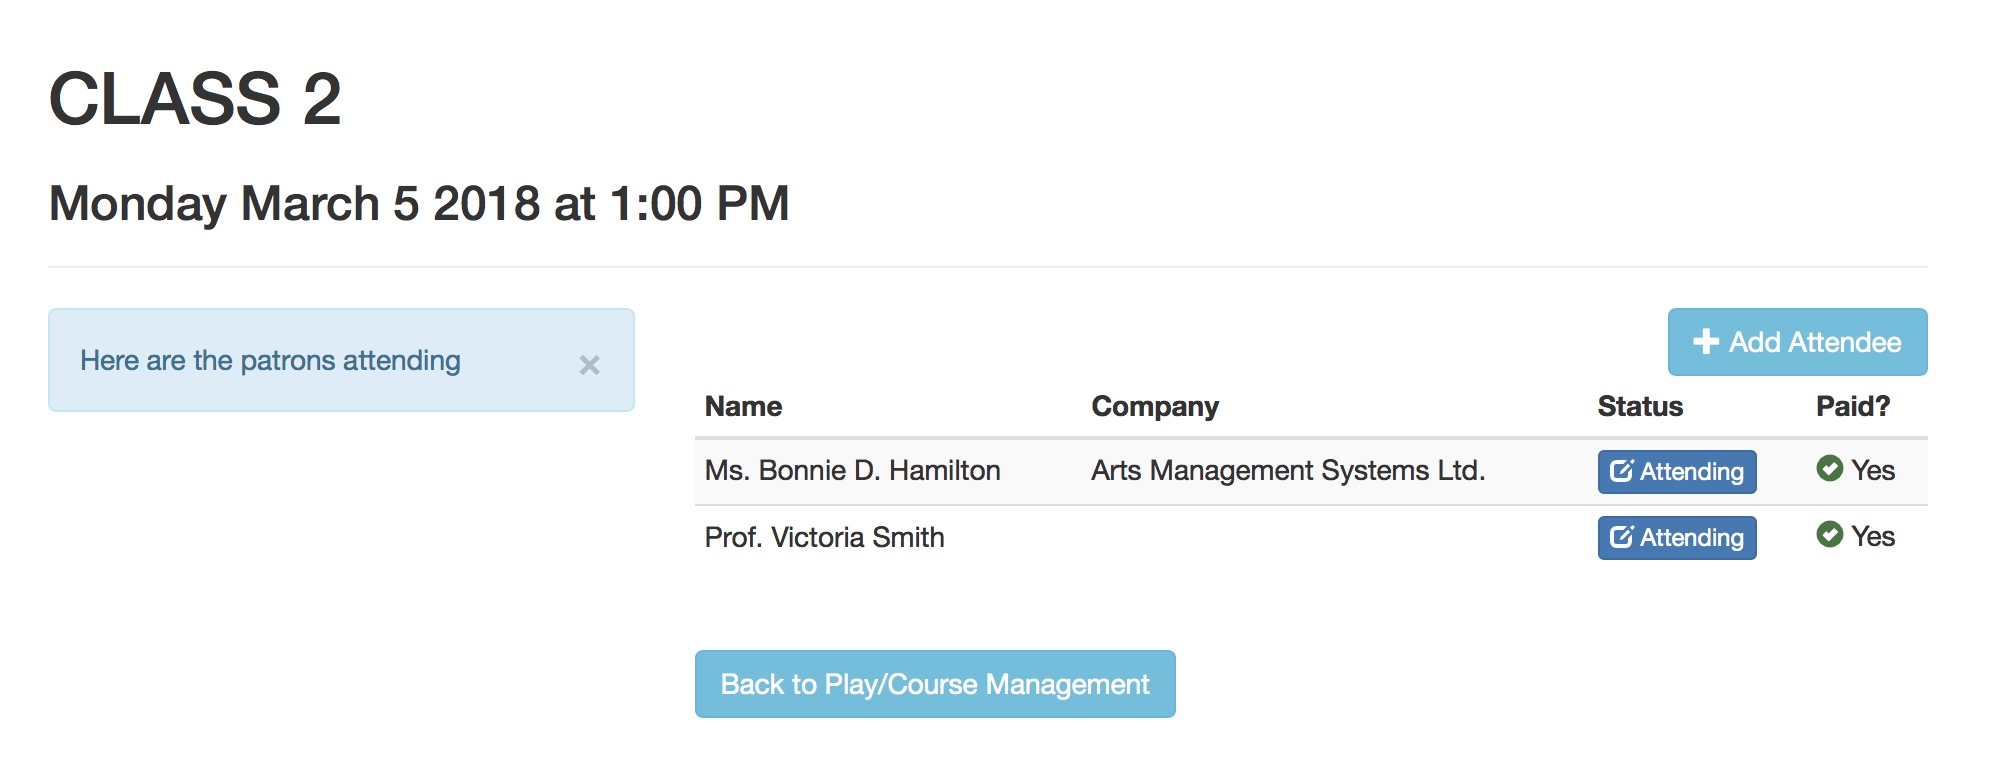
- After confirming payment, the Instructor will then see the student as part of the class roster - and they can take attendance if they wish - using the active attendance reasons in code tables
Manage Attendance in a Course
 |
Taking attendance for a course requires some prior setup/permissions before it can be done via a tablet or computer |
|
The list of absence reasons are defined in the attendance reasons code table. |
Steps for Managing Attendance
-
The instructor must log in to the the ticketing site (tickets.yourvenuename.org) and go to the home page. If they are allowed to manage classes, they will see Manage Play/Courses in their Patron Services area.
It is permissible to bookmark the link to manage performances - and it may involve a login to proceed.
-
This will show a list of upcoming courses that they are allowed to manage as an instructor. They can select the course that they want to Manage and set the attendance for.

-
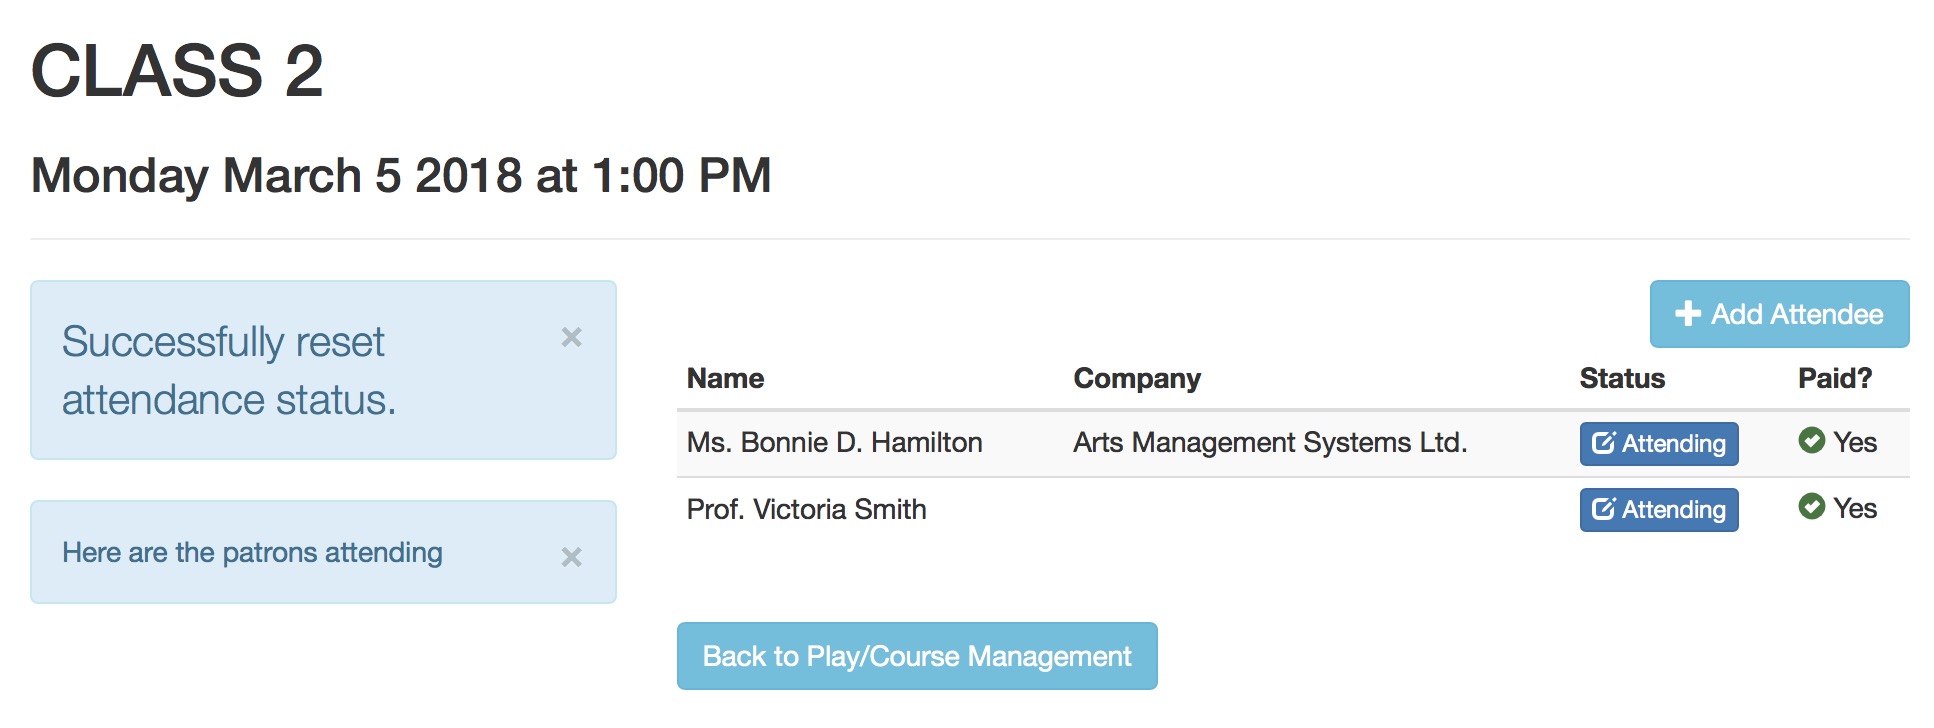
The instructor will see a list of attendees. To change the attendance status of the student, click the Attending button beside their name.
-
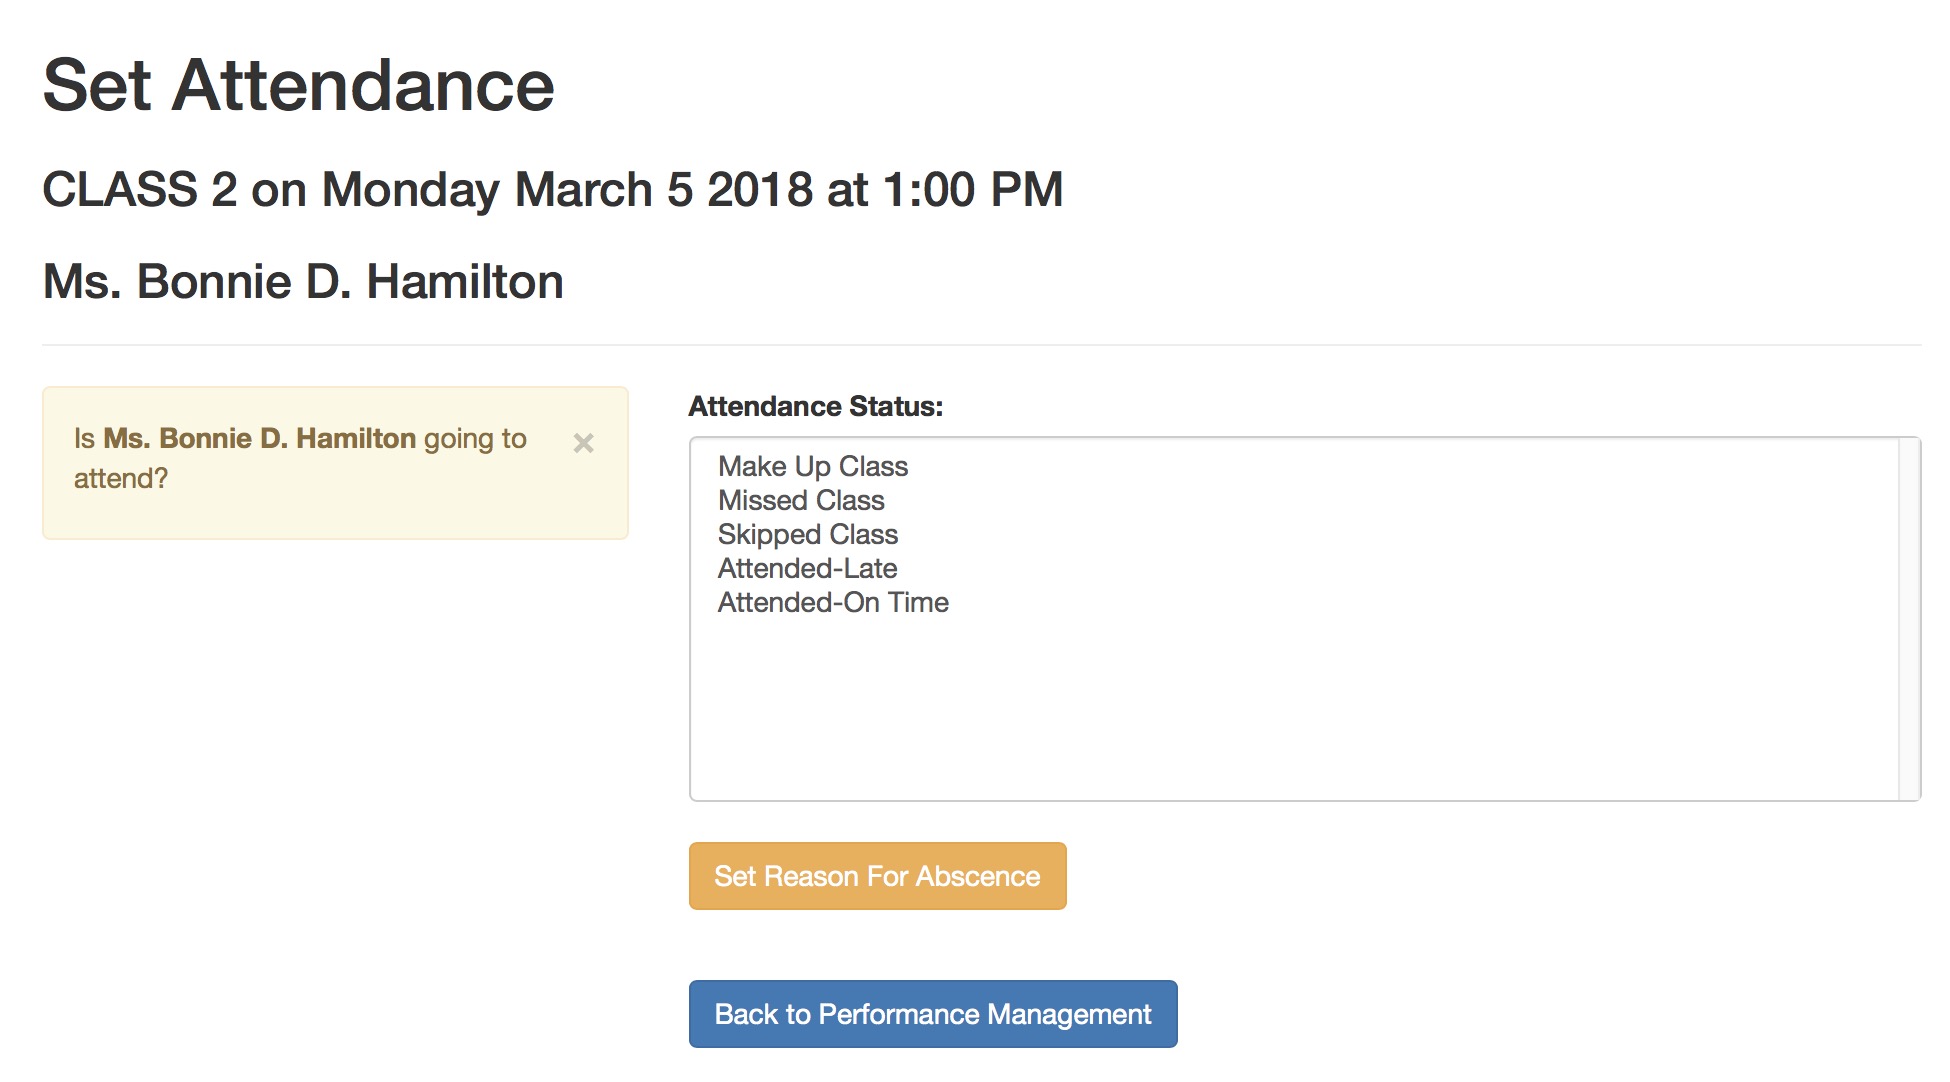
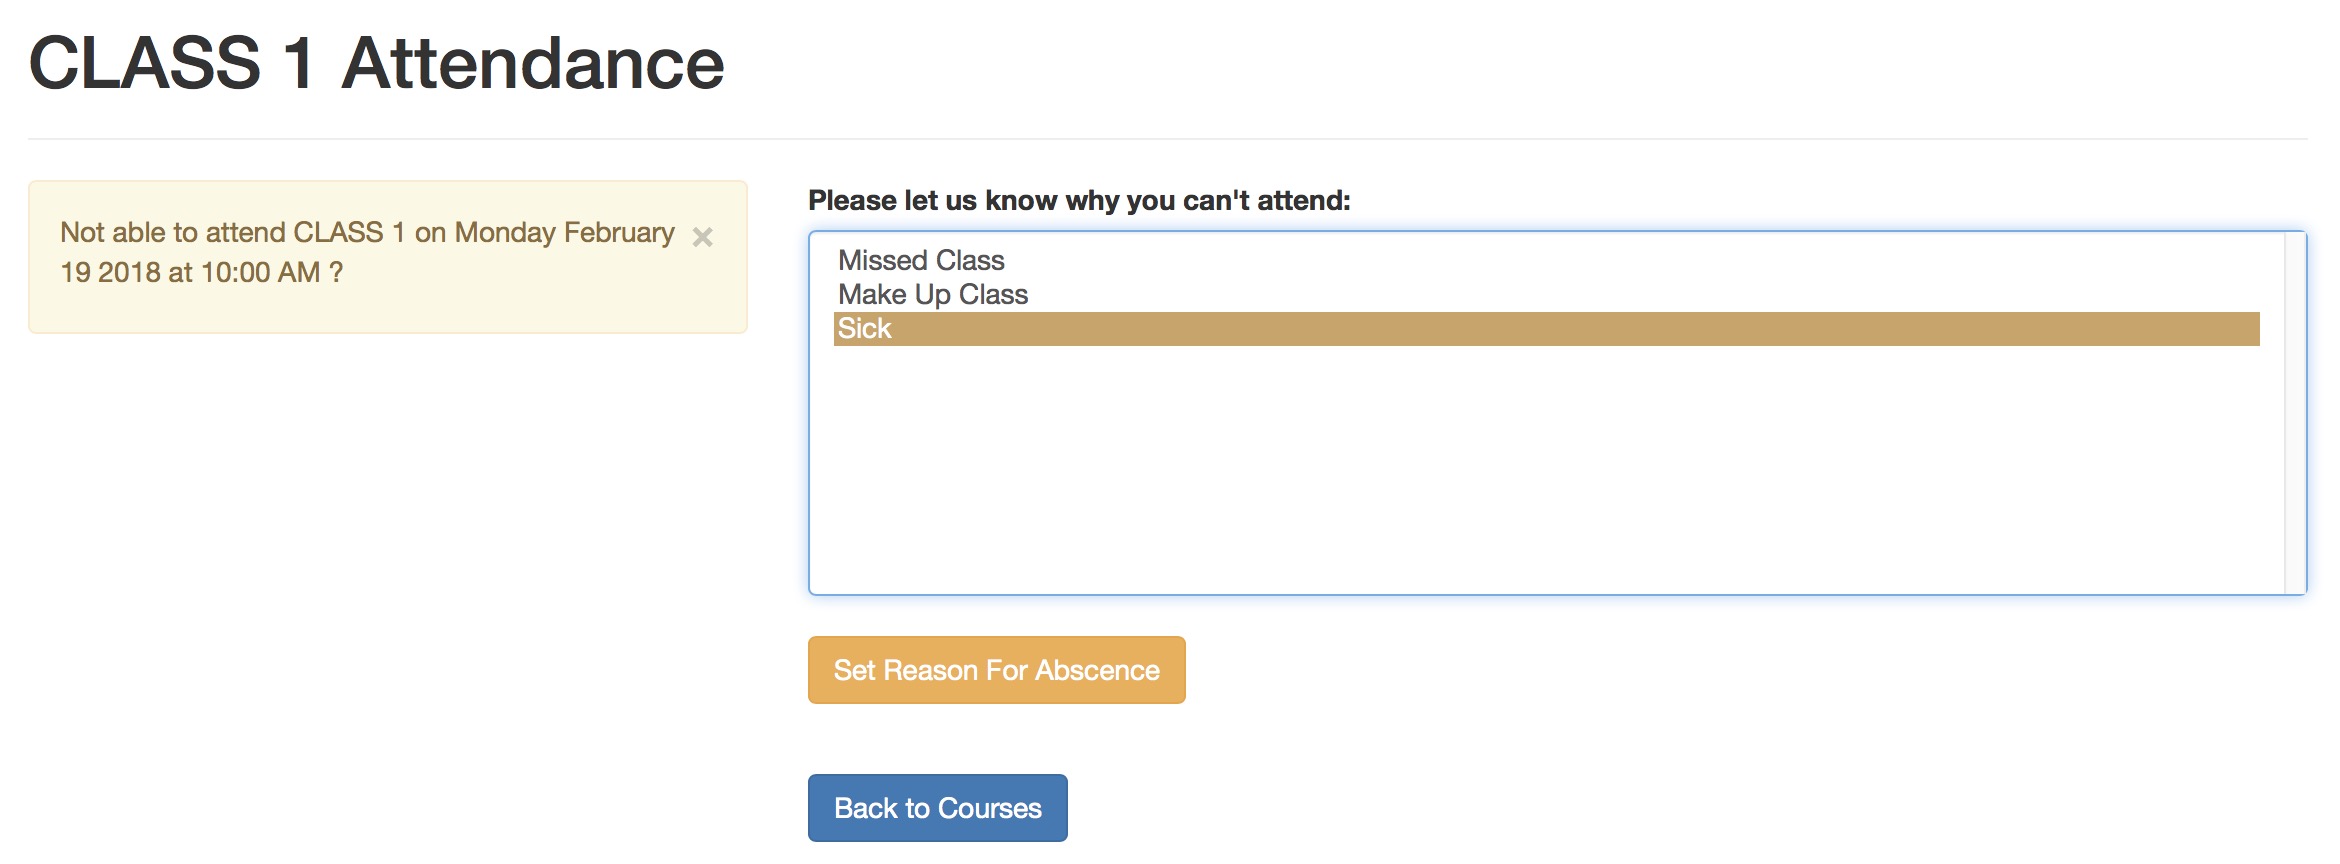
The Instructor
- will see a list of absence reasons, and
- can select one as the reason for missing the class, and
- click the Set Reason for Absence to mark the student absent
If a student is marked absent and they should be present, you can use these steps to clear the absence reason.
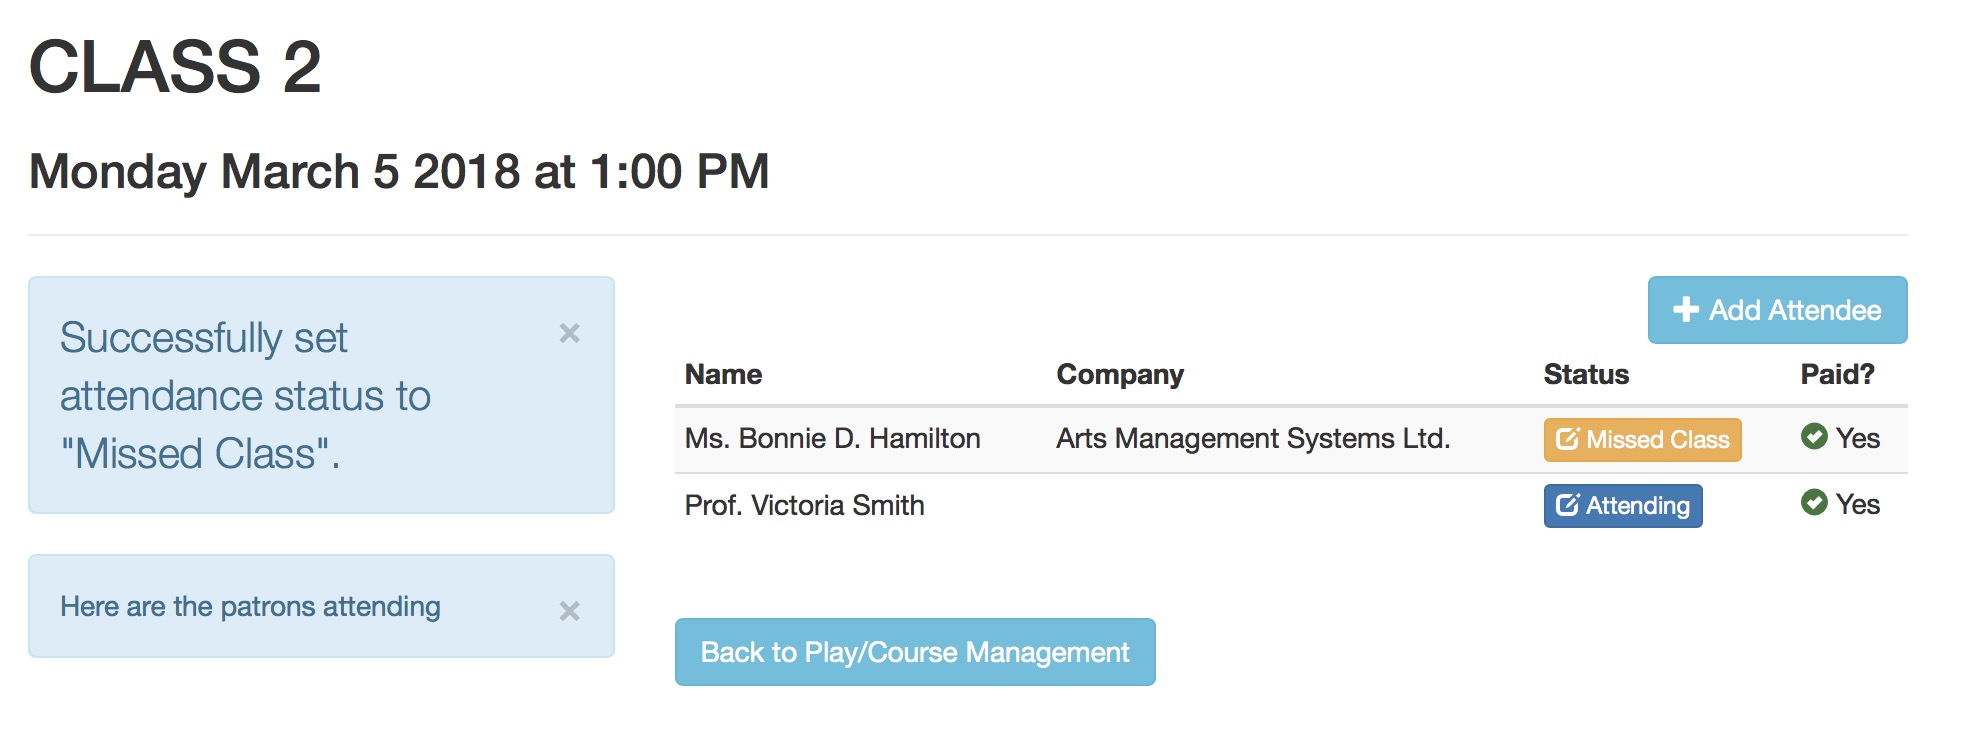
- After adding the attendance reason, the list of registrants will change to show why the Student is not able to attend.
Clearing or Changing an Absence Reason
-
If a student was set absent by mistake, or arrives late and you want to change the attendance reason, all you need to is:
- start at the class roster
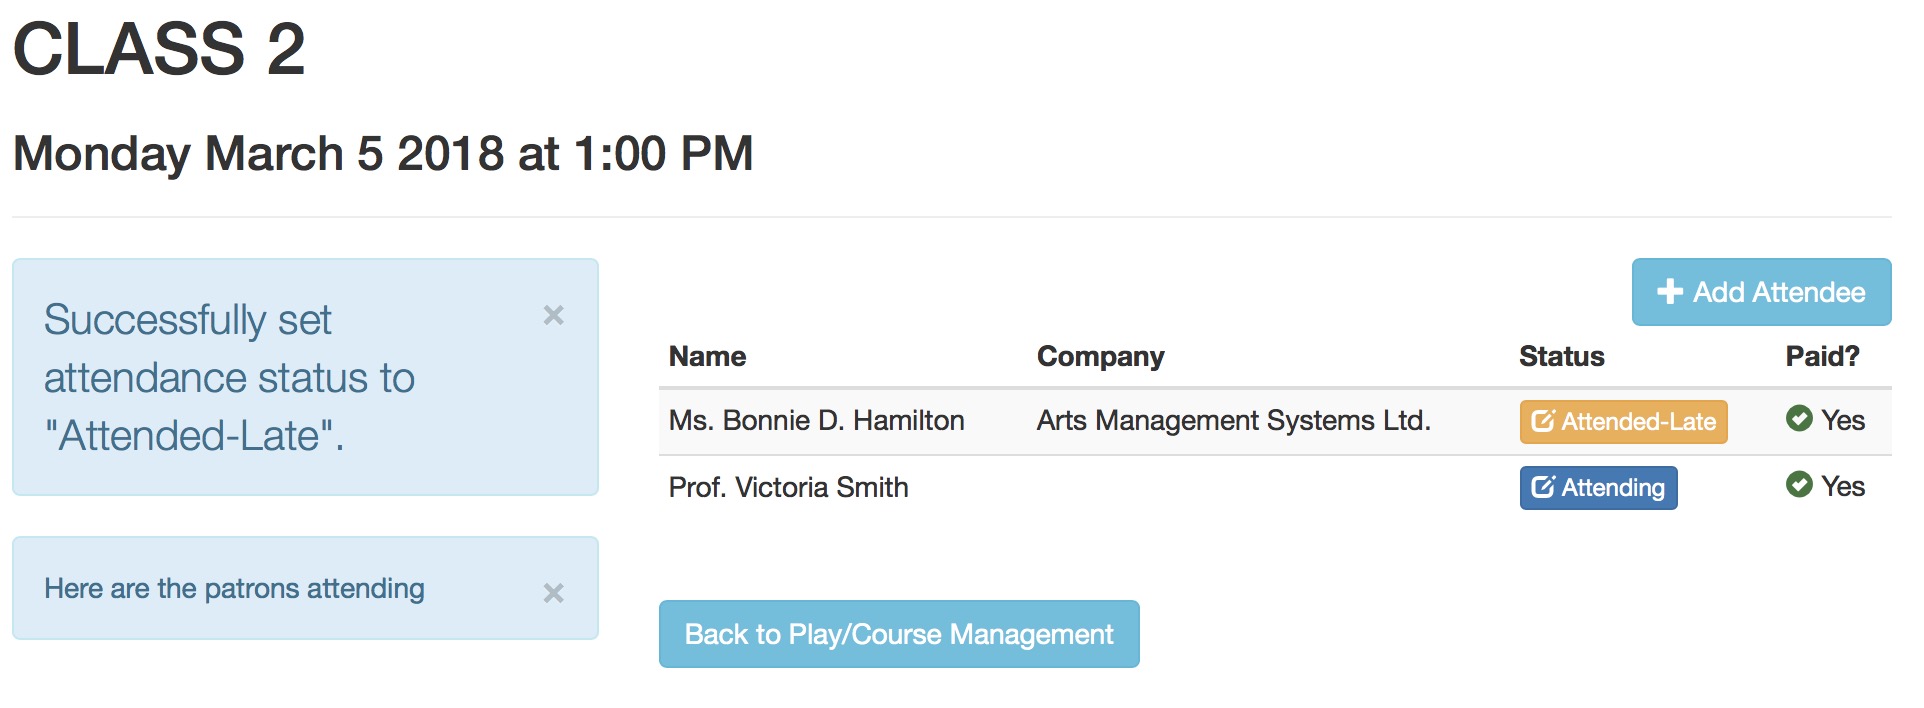
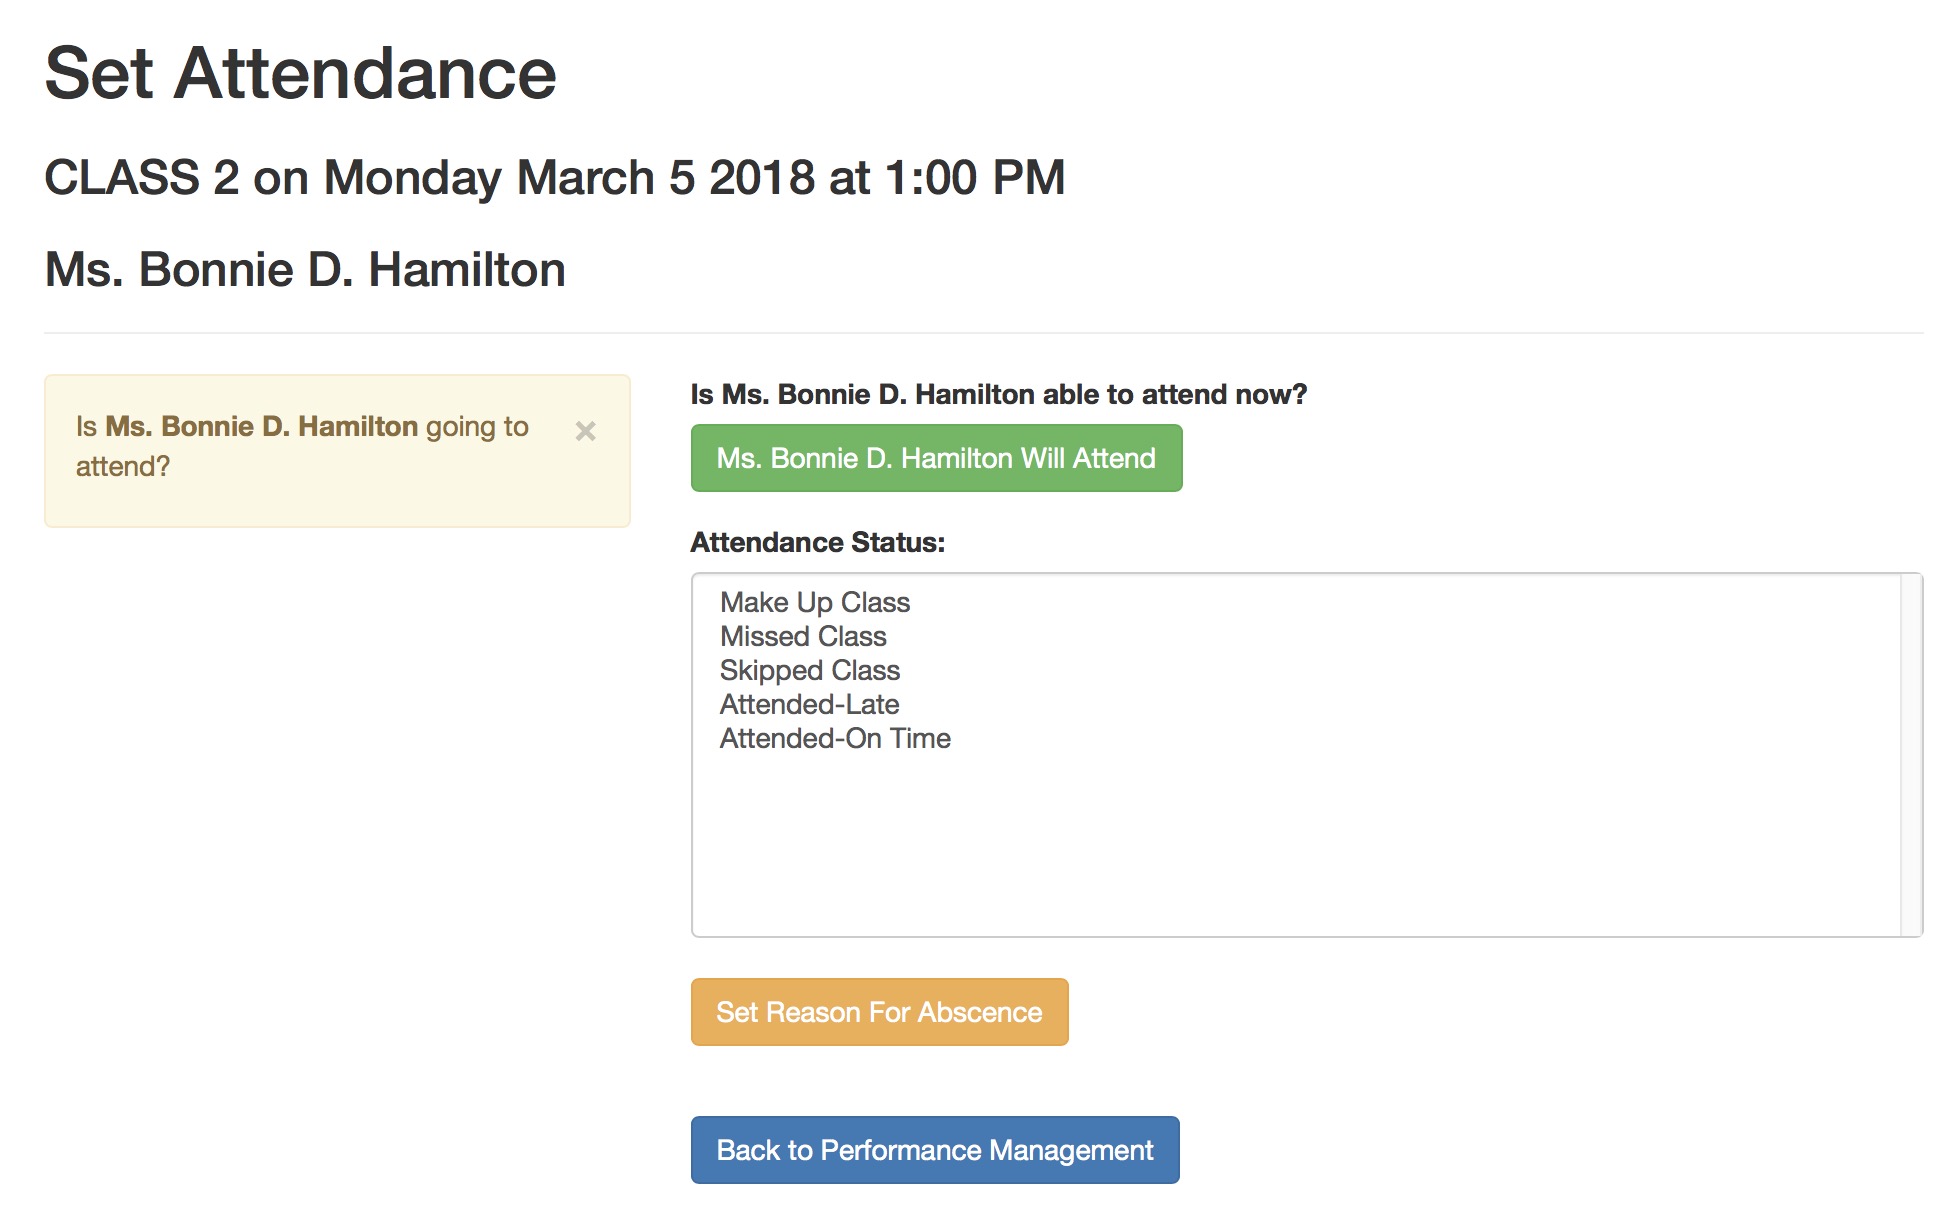
- Click on the absence reason button that is beside the patron name. This example says Attended-Late and is shown in orange (the typical bootstrap danger colour)
-
The attendance screen is shown. You will have two options:
- Clicking the button that says {Student Name] will attend, which clears the absence and sets the Student Attended
- Selecting a different absence reason and then clicking Set Reason For Absence
- Clicking the Back to Performance Management to make no changes to the data
- When back on the attendance list, the revised attendance status will be shown beside the student's name
![]()
Personnel Setup for taking Attendance on tablets
- The class or performance must have already been set up and in the future
- There must be a Volunteer or Personnel activity set up in code tables that allows the Set Attendance option.
- Typically that Activity code might be called 'Instructor' or 'Attendance Taker'. It could even be 'Usher' if desired.
- The staff member or volunteer must be permitted to do the activity code that has ticket scanning capability
- The staff member or volunteer with an activity code that allows scanning must be assigned to the performance you want them to scan attendance for in one of the three ways below:
- the volunteer/staff event activities window
- the volunteer detail window
- The personnel tab on the task window
Manage Attendance in a Event
|
Taking attendance for an event requires some prior setup/permissions before it can be done via a tablet or computer |
Steps for Managing Attendance
-
The front of house staff must log in to your ticketing site (tickets.yourvenuename.org) and go to the home page. If they are allowed to manage events, they will see Manage Play/Courses in their Patron Services area.
It is permissible to bookmark the link to manage performances - and it may involve a login to proceed.
-
This will show a list of upcoming events that they are allowed to manage as a front of house staff. They can select the event that they want to Manage and set the attendance for.
-
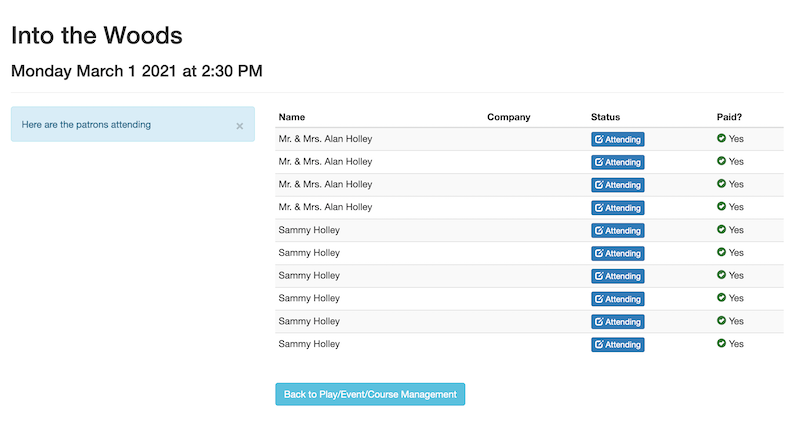
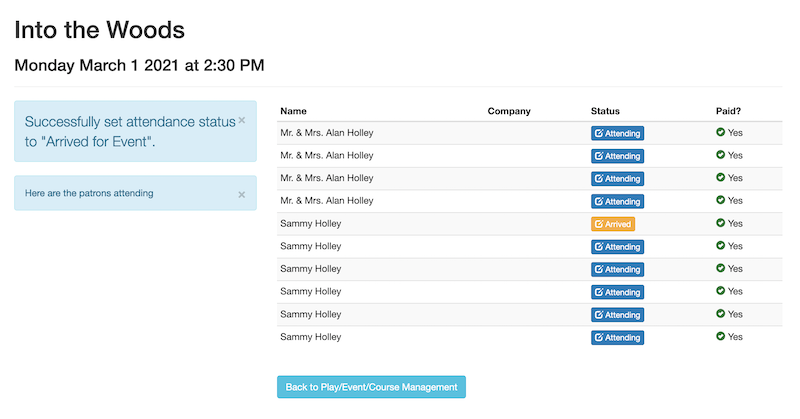
The front of house staff will see a list of attendees. To change the attendance status of a patron, click the Attending button beside their name.
-
Front of House Staff
- will see a list of Attendance Status
- can select the attending status to mark the patrons arrival for the event
- click the Set Reason for Absence to set the status
Patrons can be marked as a 'no show' at performance time. Should they arrive late, you can use these steps to clear the absence reason.
The list of absence or attendance reasons are defined in the attendance reasons code table.

- After adding the attendance status, the list of patrons will change to show who is checked in for the event.
Customers Paying their Own Balances
- Via the Upcoming Courses button on the home page, which also allows the patron to indicate if they will be absent at the course
- Using the Pay an Order Balance button that can be accessed from the home page or the shopping cart window
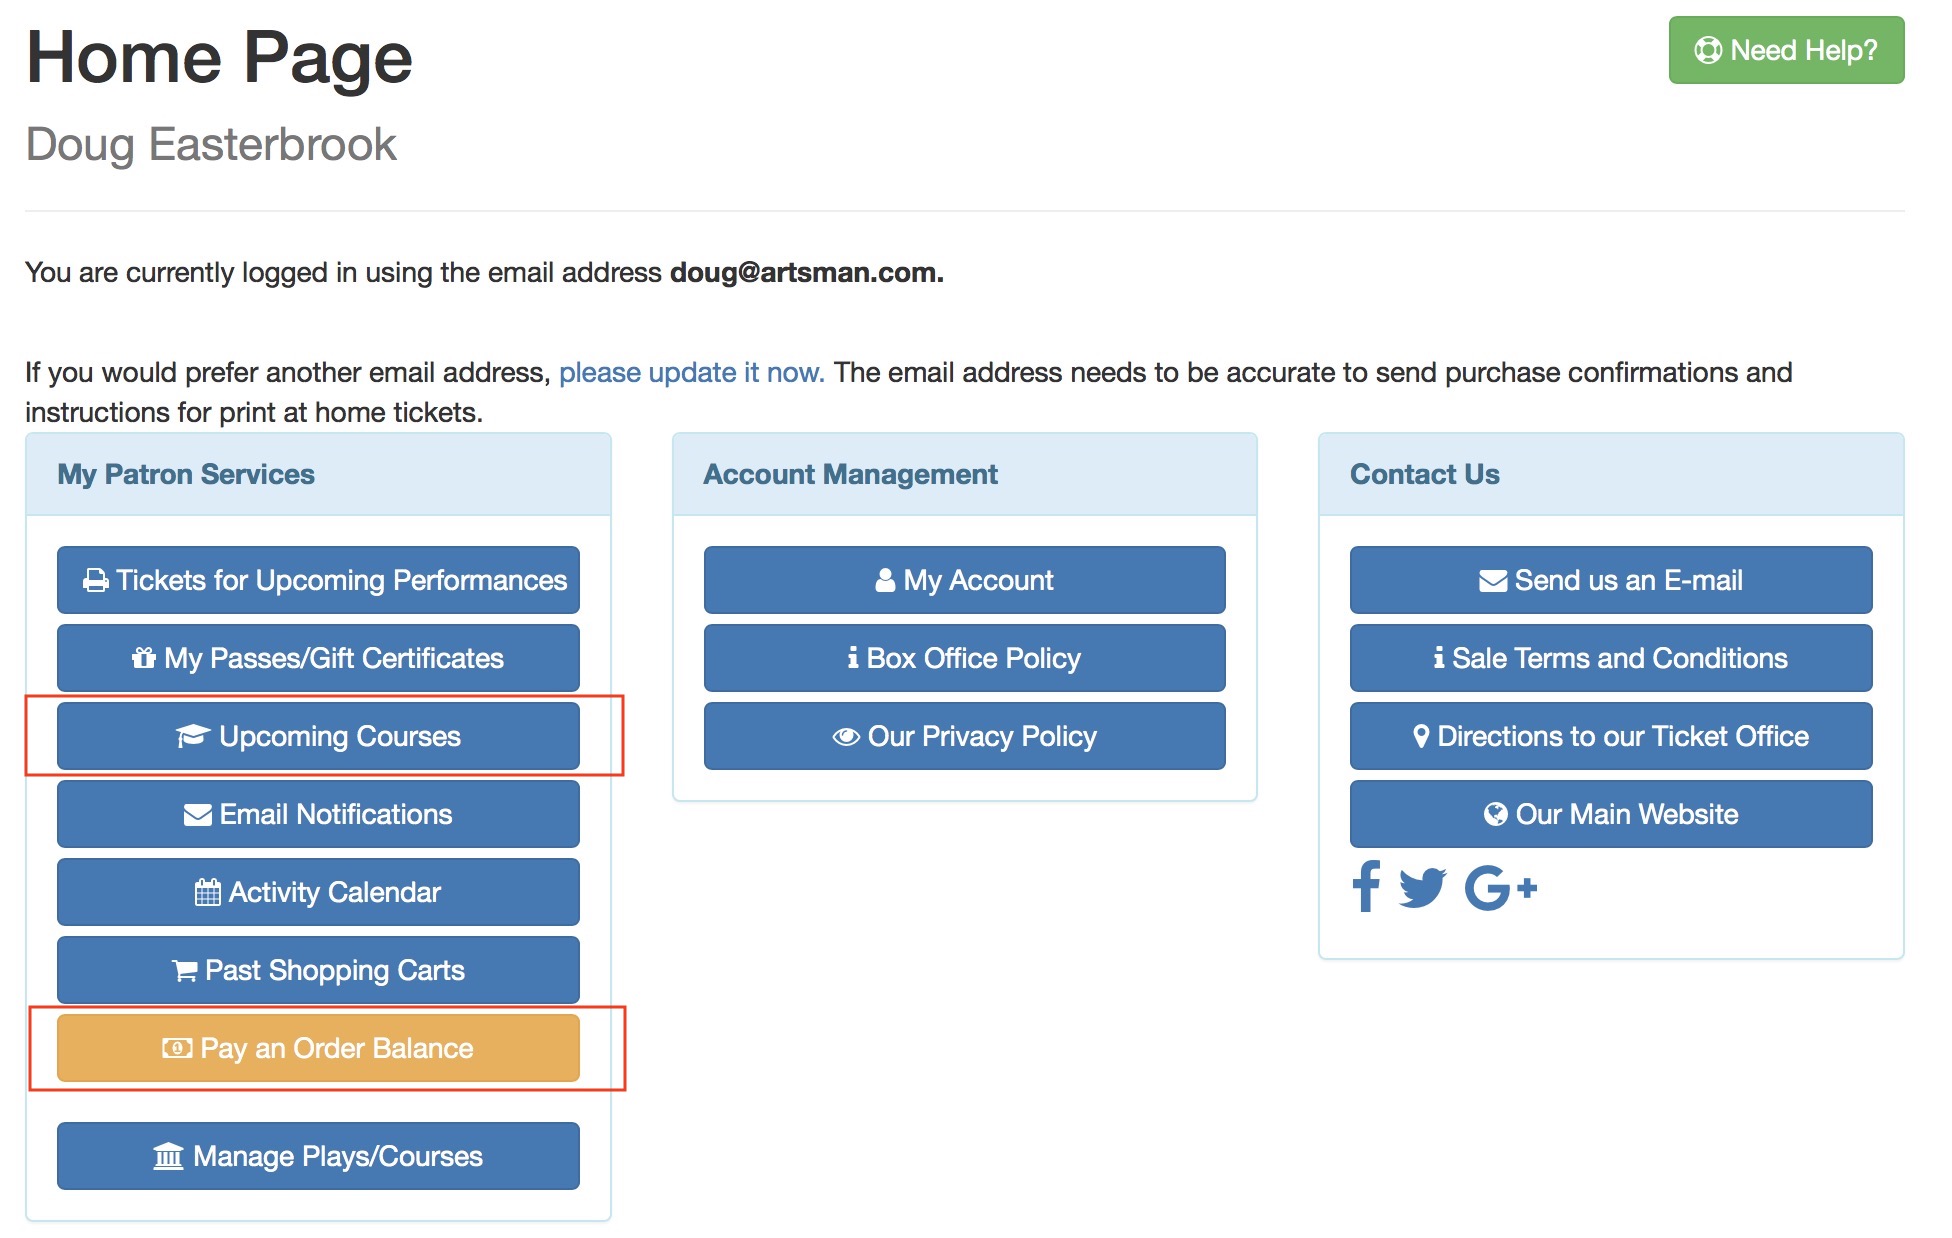
Manage Course or Pay Balance via Home Page
- Pay any balances on courses
- Indicate if they will be attending a class or not
Viewing Upcoming Courses
-
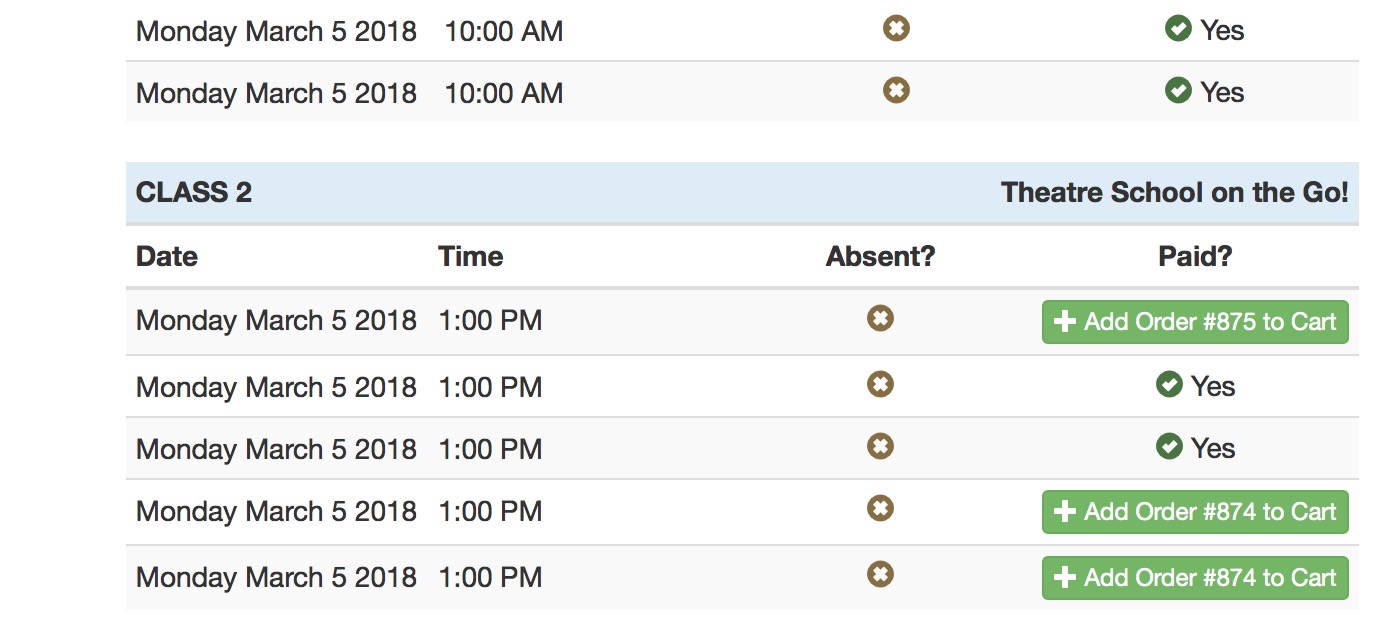
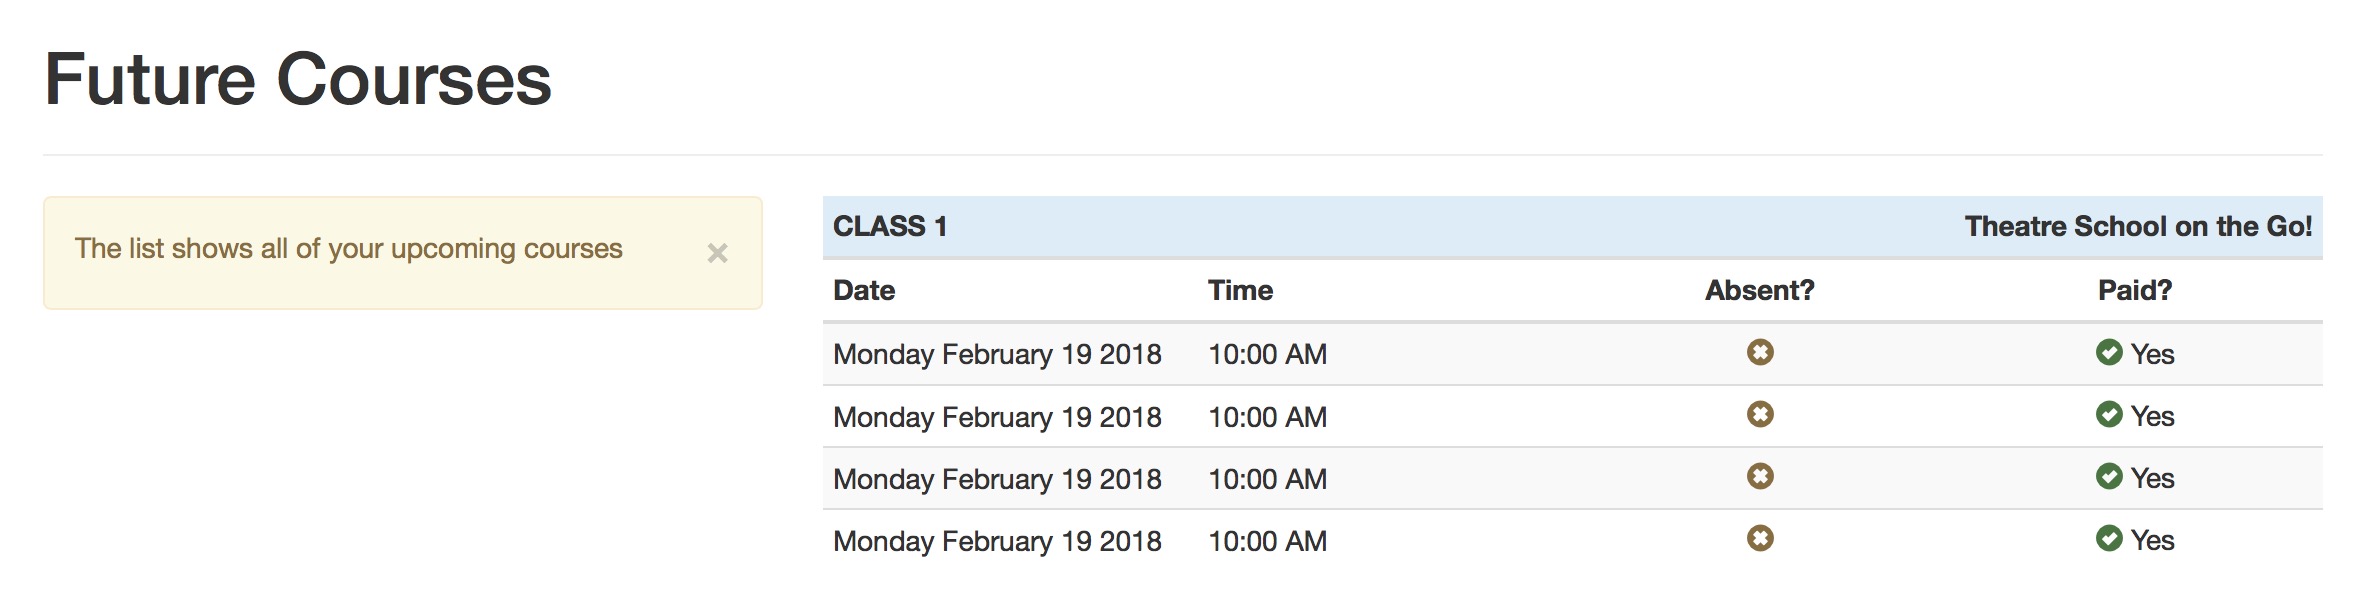
After clicking Upcoming Courses, the patron will see a list of courses/classes that they are enrolled in. In the example below, there is an outstanding balance on some registrations.
These are indicated with a button that says Add Order #xxx to Cart on the class that money is owed for.
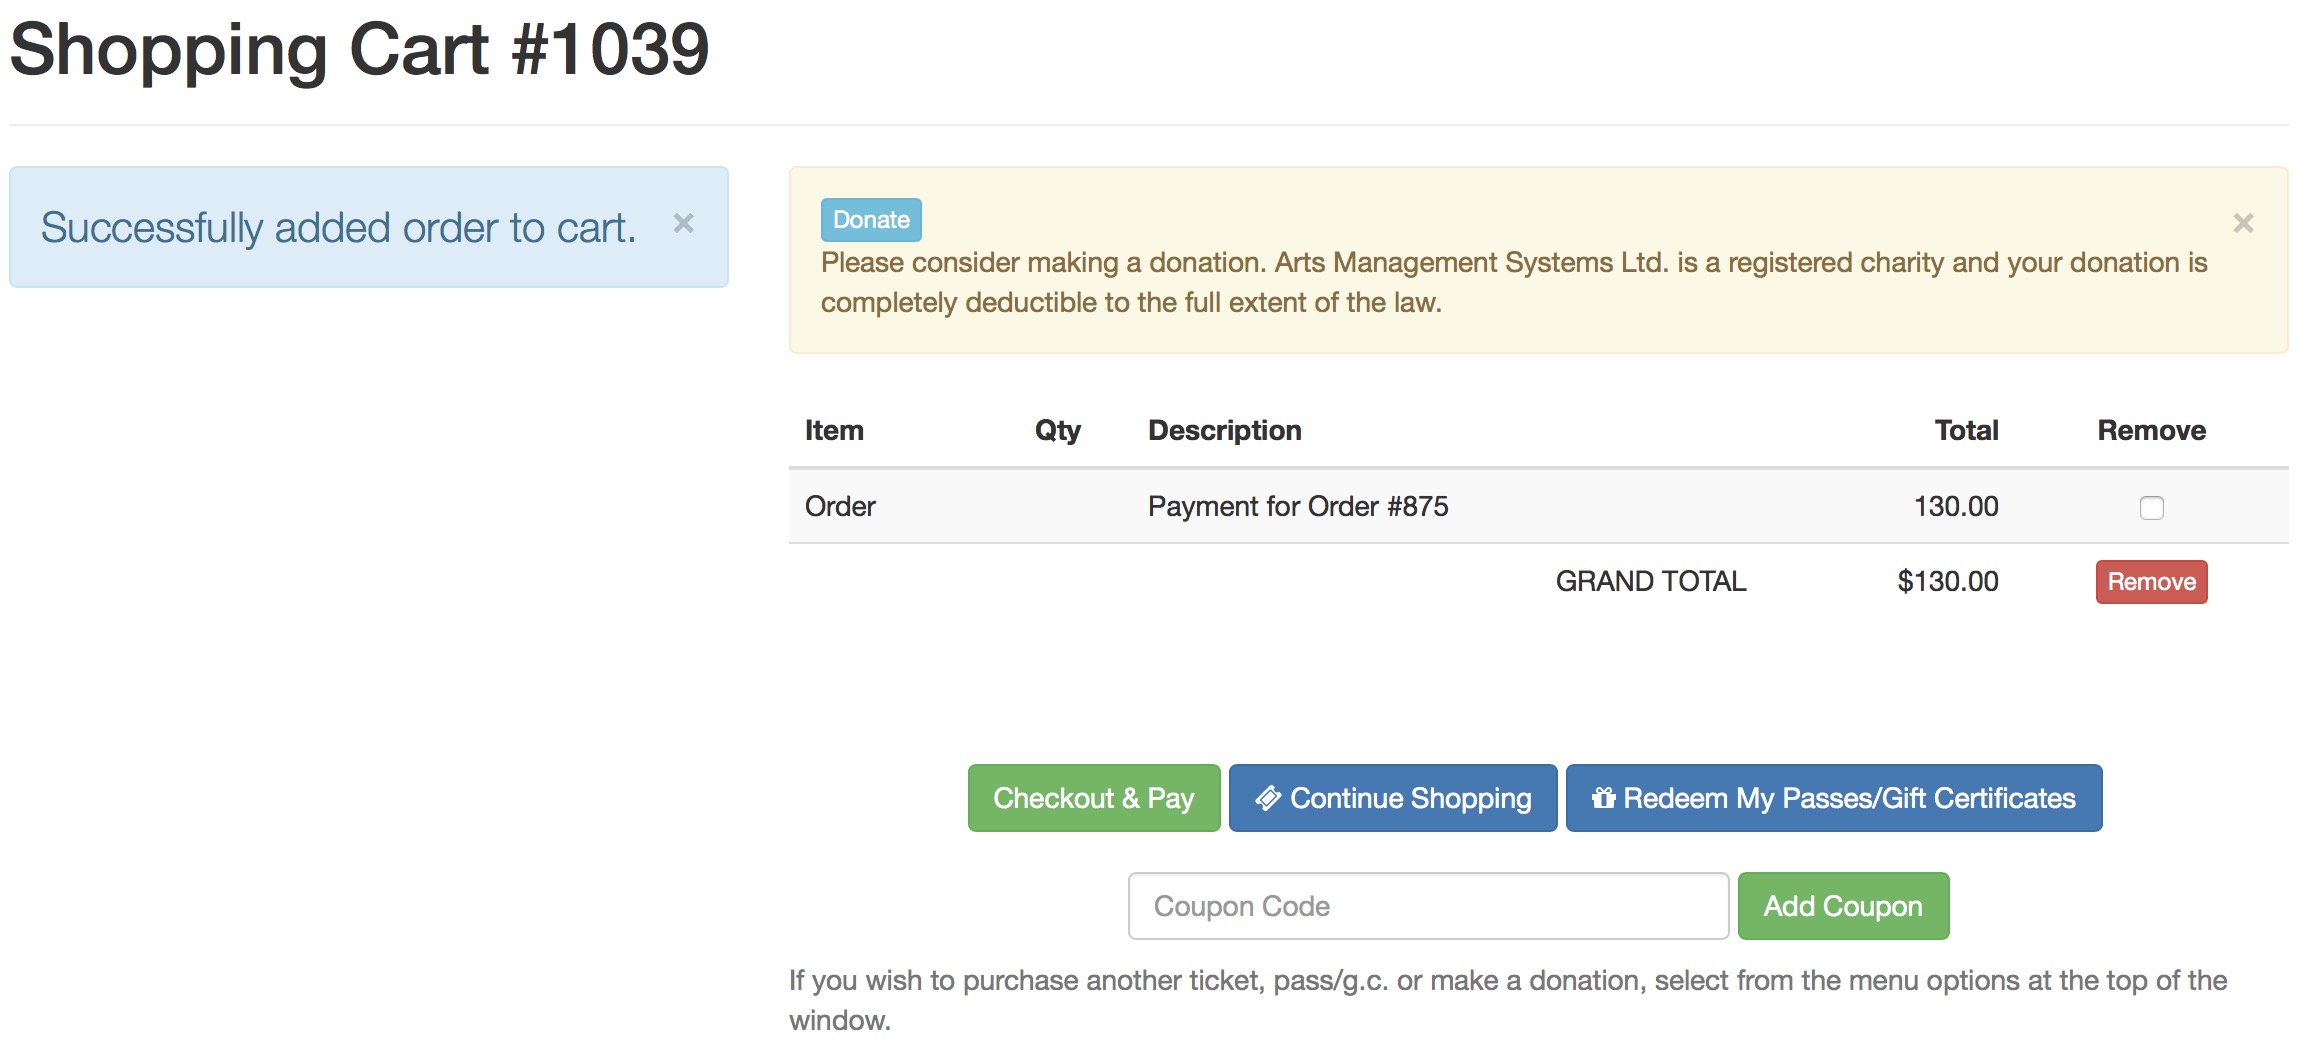
- If the order is added to cart by the patron, the next page that is shown is the shopping cart containing the order (as shown below)
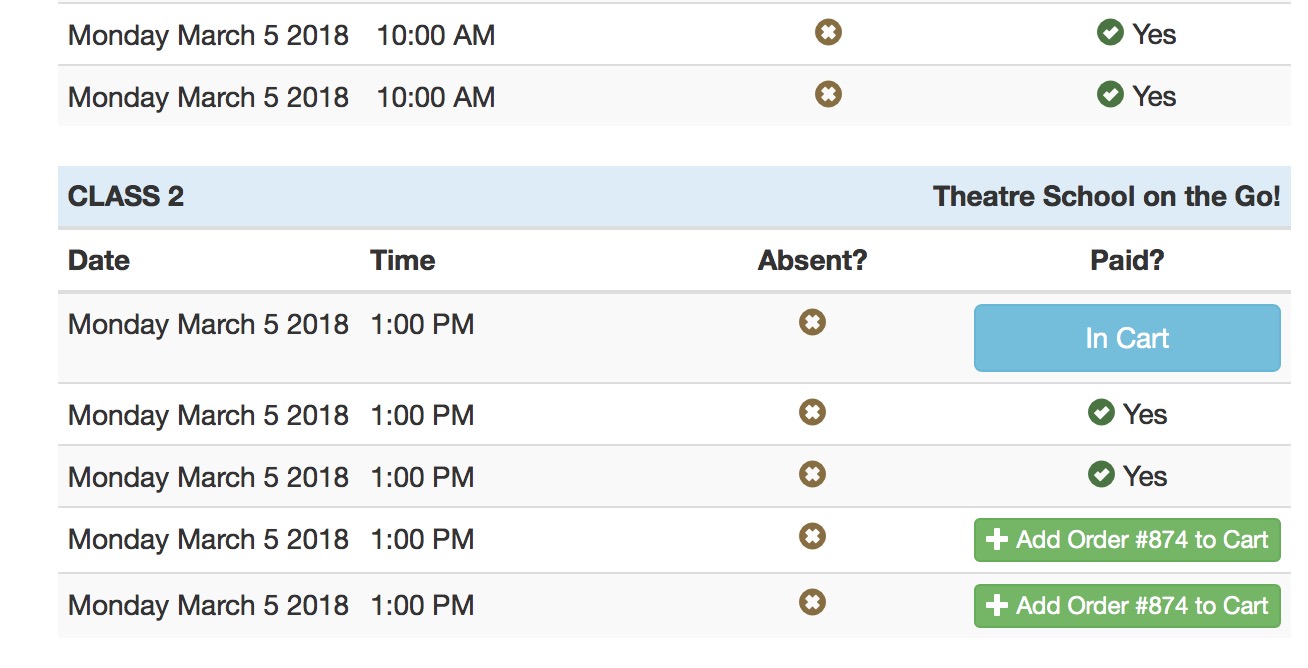
- Should the student end back up at the course list, if the button says In Cart, it means that the order has been added to the cart already and all the Student needs to do is checkout and pay.
Student Indicates reason for being absent
- From the Home page, they select Upcoming Courses which will provide a list of dates for the classes they are registered in.
-
In the column called Absent?, if they click the X inside the brown circle, they will see a list of absence reasons they can select from. This list contains only those from code tables that are patron usable.
- After picking the absence reason, the student will see their current attendance history in the Absent? column. The student can clear or change any absence reason that is a button in that column. Any reason that is text is one that is set by the Instructor and is not patron changeable.

Pay order balances online (in general)
|
A payment for prior orders online follows the rules of applying a single payment for multiple orders |
|
The feature is enabled in company preferences-->Web Options-->Carts & Checkout under the checkout grouping of orders |
|
If you enable the feature, we suggest entering a useful comment in the order's external notes when you put the order on account. |
-
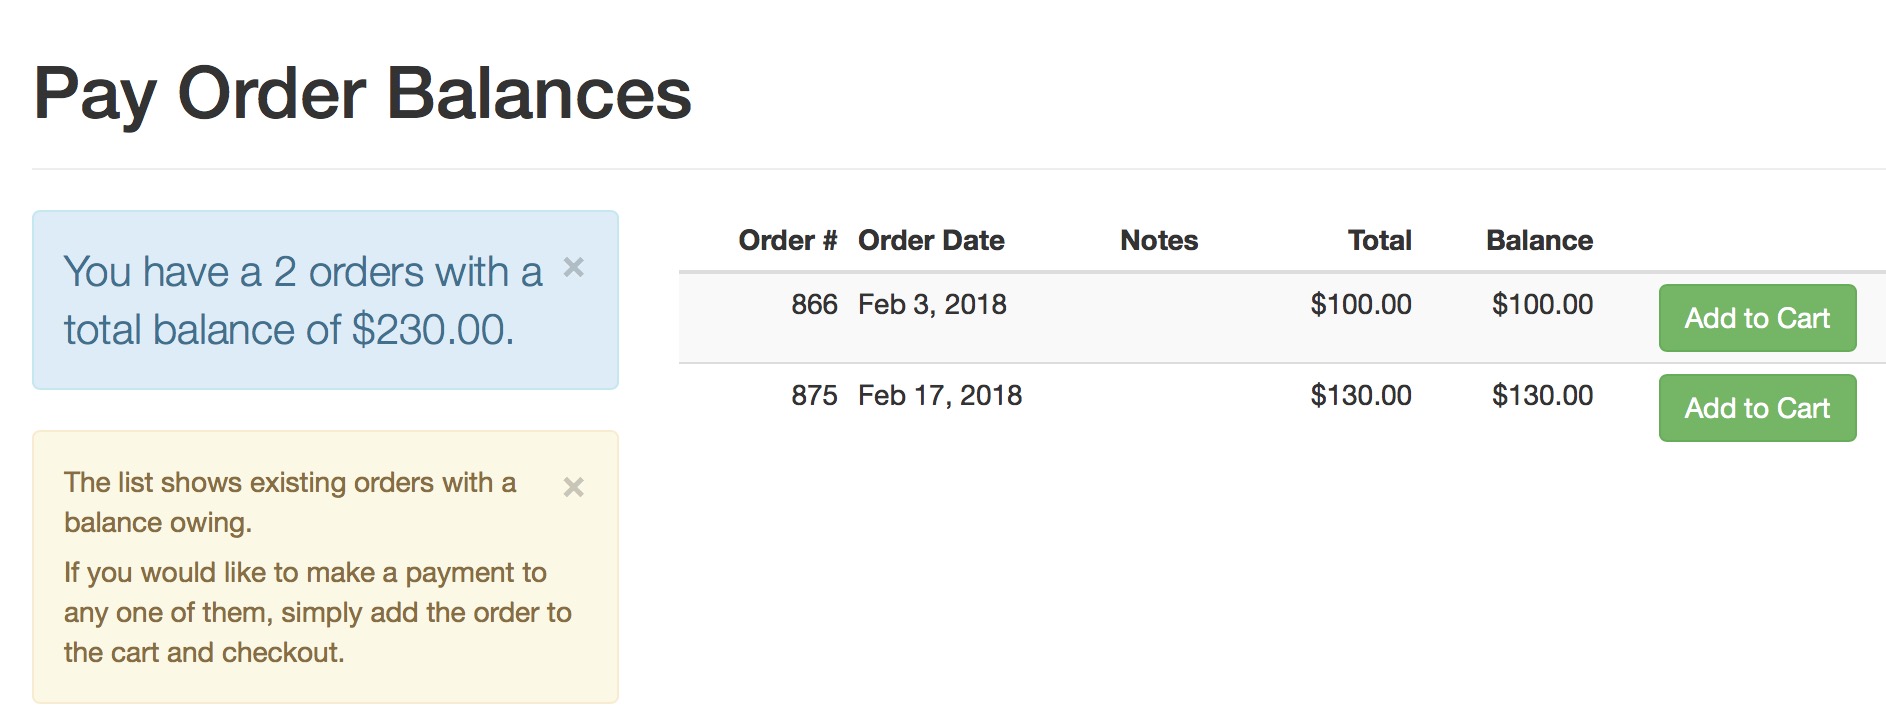
The outstanding balance list shows all the orders containing receivables that the patron will eventually pay for at some time. The patron can pick one and Add to Cart.
There are two conditions under which an order could appear on this window.
- If the student was registered by an instructor online and they put the order on account
- If the box office took a phone in or walk up order and put it on account -AND- indicated that the order balance could be paid online (refer to On Account payment on this page).
- When they do that, they will end up at the shopping cart, ready to continue shopping or to pay for the balance.